For the next commission build I will be replicating a 1922 Ford Model T Touring for a close friend whose father recently passed away. The car was his pride and joy as he spent many years restoring it. The problem is there are no 1922 Model T Touring kits available. So after doing some research I found two kits that I can “kit bash” most of the parts and sections to replicate most of the vehicle and then scratch build any other specific parts for the 1922 Ford. I have multiple photos of the actual vehicle so this should be easy to replicate. The term “Kit Bash” is a modeling term where multiple parts from multiple kits are used to make a specific model. This will be the first time I will be using the kit bash method so this should be another interesting build. Side note – I started this late in the week as I was busy packing the previous commission and shipping it out to the client.
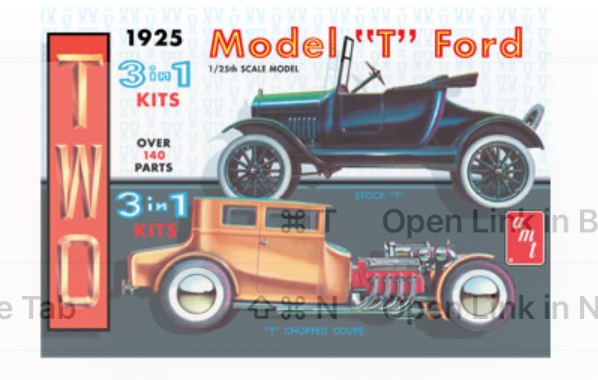
After researching the available models I ended up purchasing the AMT 1/25 scale ’23 T Depot Hack and the AMT 1/25 Vintage Police Car. The ‘23T has the correct fenders, front end, wheels, and frame. The Vintage Police Car has a similar body and roof. The police car is a 1927 T touring car. The doors, the area in front of the windshield, and the engine cowl are incorrect for a 1922. I started off by cutting the front section off the body. Using the reference photos I measured the correct size of the front end. I thought I could just shorten the front but then realized the engine cowl was smaller so the angle from windshield to cowl was different as well. I used the measurements of the correct cowl and scratch built the firewall. I then built a small frame to hold the firewall and some thin sheet styrene to scratch build the body panels. Due to the angle I ended up making three separate panels to form the angle and curves. These were then covered with a thin coat of putty. Once sanded and shaped will match the reference photos correctly.
As for the doors I will make the door edges with wire and then use a thicker wire for the hinges. I will sand off the kit door edges and then install the formed wires. The rear doors need to be reshaped and have the hinges move to the other side of the rear doors as they are hinged from the rear side of the door.
The plan is to complete the body this coming week then assemble the frame and suspension.
You can see all the photos and details from start in the build log at: 1/25 1922 Model T Touring


5 Likes
Good Times! I am currently working on a TT dump truck conversion!!
LOTS of accuracy and warping problems with these kits.
3 Likes
Very nice job detailing this model! It must have been a challenge, I recall building this kit when I was a kid (I’m 76!). There is a real satisfaction in taking an older kit and turning it into a finely detailed model. Well done!
1 Like
The third week of the Model T Touring I installed the body to the chassis. This took some time to get it to sit correctly on the chassis. The fenders are separate pieces so getting them to sit on the chassis and lined up took some time. The interior was painted and front seat was installed. I then scratch built the front windshield using styrene rods and a clear styrene sheet. The side mirrors were made using styrene rod and some photo etch for the mounts.
The display case arrived this week from Grandpa’s Cabinets. I went with a red oak stained base that had a channel in it to hold the clear cover. I had this made a little larger as I will be mounting a small photo frame for the memorial photo and a brass etched name plate.
Next I started the other details like the steering wheel was assembled and painted. The dashboard was painted and the gauges were detailed. The canvass top was modified to have three rectangle windows to match the reference photos and then the top was painted with satin black. The actual car has two accessory lights on the front mounted on the body just behind the hood and two mounted on the chassis in the rear. These lights are to make the car street legal. To replicate these I started with styrene rods and made the light bezels out of wire.
One thing to note is the gold and chrome paint pens take 24 hours to dry so I have been bouncing around different areas. I started on the spare tire assembly. I need to make the mount for the rear of the car then make the license plate frames with another brake light. The actual car uses a legal antique license plate as well as a replica plate from 1922. There are a lot more details that requiring scratch building like the FORD logo on the radiator, Radiator cap, front license plates, a horn for the driver side door, and the support linkage for the top.
You can see all the photos and details from start in the build log at: 1/25 1922 Model T Touring


4 Likes
The fourth week of the Model T Touring I started assembling the car. The steering wheel and pedals were installed. I then installed the windshield assembly and the top. One of the details in the reference photos was an old style horn mounted on the driver side door edge. I scratch built this using different size wires and a styrene rod. The rod was placed in a drill and I used a rat tail file to shape the rod into the front of the horn. I used a candle to melt the end of another piece of rod to form the squeeze bulb of the horn.
The next thing I needed to replicate were the license plates for the front and back. I used the reference photos to make decals of the plates. I even added the registration sticker to the rear plate. These were then applied to the frames and mounted on the front and back of the car. On the radiator face was a “FORD” nameplate. This was replicated by printing the Ford logo on a piece of clear acetate in black then painting the black letters with the fine gold paint pen. I also used the gold paint pens to paint the step plates on the running boards.
With the car nearly assembled I just have a few more things to add like the linkage for the top and scratch build the auxiliary lights that mount just in front of the windshield. Then I can mount the car onto the display base and the other items that will go inside the case. Stay tuned for the final week of this memorable build.
You can see all the photos and details from start in the build log at: 1/25 1922 Model T Touring


3 Likes
The fifth week of the 1/25 scale 1922 Model T Touring I finished the project! To start with I mounted the car to the display base by running a wire thru the tires and into holes I drilled in the base. I then used some epoxy to secure the wires into the base. I purchased a small photo frame for the photo and then applied the nameplate. It was then delivered to the family.
The finished project came out great! This was the first time I kit bashed two models to make one replica. The AMT kits themselves gave me all the parts I needed and a little scratch building completed the finer details. The family was extremely happy with the final results.
You can see all the photos, details, and a video of the completed project in the build log at: 1/25 1922 Model T Touring


6 Likes
Beautiful Model T. Very well done.
Jim
Congratulations on a great looking car. The important part is that the client is happy.
very nice looking build. great presentation too!!
Joe


