This is my second ZM kit ever. Their 1/32 Bf109 went together splendidly until I started putting the wing-roots on. If I recall there were 9 parts to just the wing roots, and they did not fit without gaps/seams. I managed to make it acceptable with some putty and a significant bit of sanding which was hard due to all surfaces being curved. Then during the painting phase I dropped the thing onto a concrete floor and broke it.
I only mention it because I think the fit is relevant here too, but also to say I’ve only built two of these and am yet to finish one. The relevancy here is my theory that their engineering it too precise. A few months ago I would not have thought that or imagined myself thinking that way. I love precision and a high level of engineering and detail. Am willing to pay 2x-3x more for a high quality kit. However, in these two (limited perspective) cases the tight tolerances put you in a corner later in the build.
In both cases, and with most aircraft you build the cockpit and engine (if there is one) separately, attach them to the fuselage, then attach wings. These are essentially the same idea, but you add hydraulic lines, control rods, exhaust pipes, oil/water coolers with tubing, engine braces and all sorts of detail that will never be seen. I’m still onboard with that idea, however many of these bits are assembled in the dark. Meaning there’s no way to know if it is perfect until you start adding more stuff. So having the engine glued to the engine mount that is off by 1 degree of rotation, or not seated by 0.5mm your eyes cannot see the issue. You’ll find out days later with dried glue that it is off by a tad. They need to provide a jig or similar to enable such construction methods. Or maybe I just need more skill.
Enough words, let me try to illustrate.
This picture shows the panels in front of the fuel tank and behind the engine firewall. The large gap on the sides is supposed to be there, but not the gap on the top. You can see my parts are flush with the (bright green) firewall, so something internal is off by about a millimeter.
The lower panel that is barely visible here with the cooling scoop fit perfectly against the cowl flaps, while the upper part sticks out. But the rear portion of the lower panel does have a 0.75mm gap to the leading edge of the wings. I mentioned in the previous post that I could use force to close that gap, but I decided that I could not make it work with brute force.
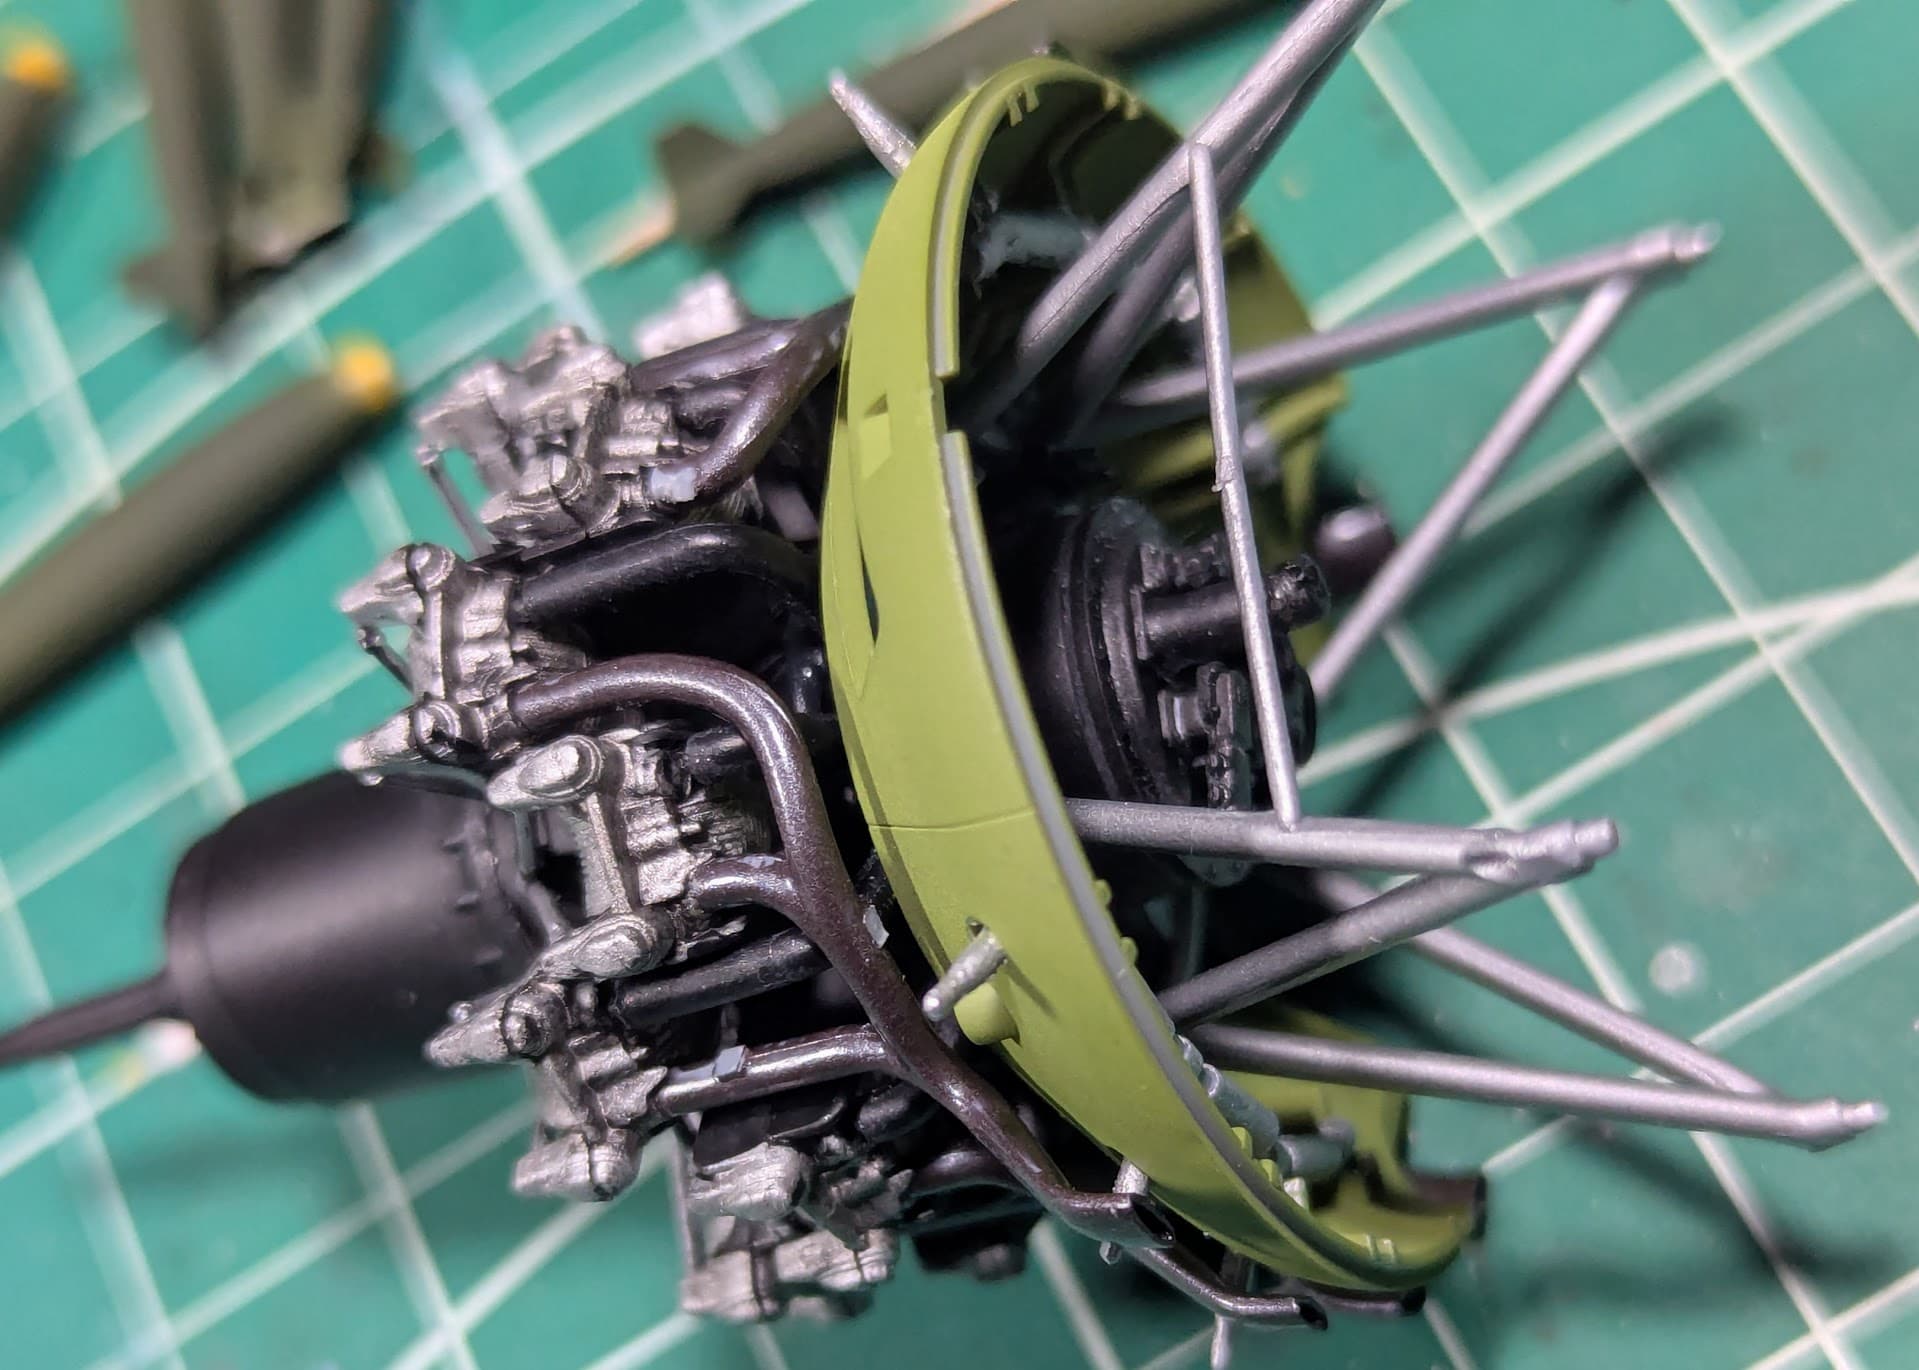
Inside the nose is more exquisite detail that will never be seen, I was hoping that it was the cause for my gap, so I was willing to snip a mm or so from each mount that ties to the cylinder heads.
That did not solve my issue, you can see the air-gap here, those posts that extend rearward from the bulkhead assembly. The contact point is at the transmission, also visible above.
By removing the entire internal assembly I am able to make the nose fit. Disregard that cooling fan hanging there, it will fit into the gap just fine. But I will have to give up on my hope of leaving the cowl unglued so that it can be removeable to show details.
I’m not giving up on this, I intend to power through and make the best of it. Same with the 109, once I can handle it without wanting to cry. I will finish it too as best I can. Here’s the link to that build thread.
But I do think I’ll take a break on Zoukei Mura for a while. Since I love high-detail and am willing to pay, I am considering the P40 from Great Wall Hobby. I also have the Kotare Spitfire in my stash. Hoping these fitment issues are unique quirks of ZM and do not reflect on my lack of skill.