Absolutely incredible build, Los. I’ve never seen anybody weather as you go, but your results speak for themselves. A fantastic model and spectacular work.
1 Like
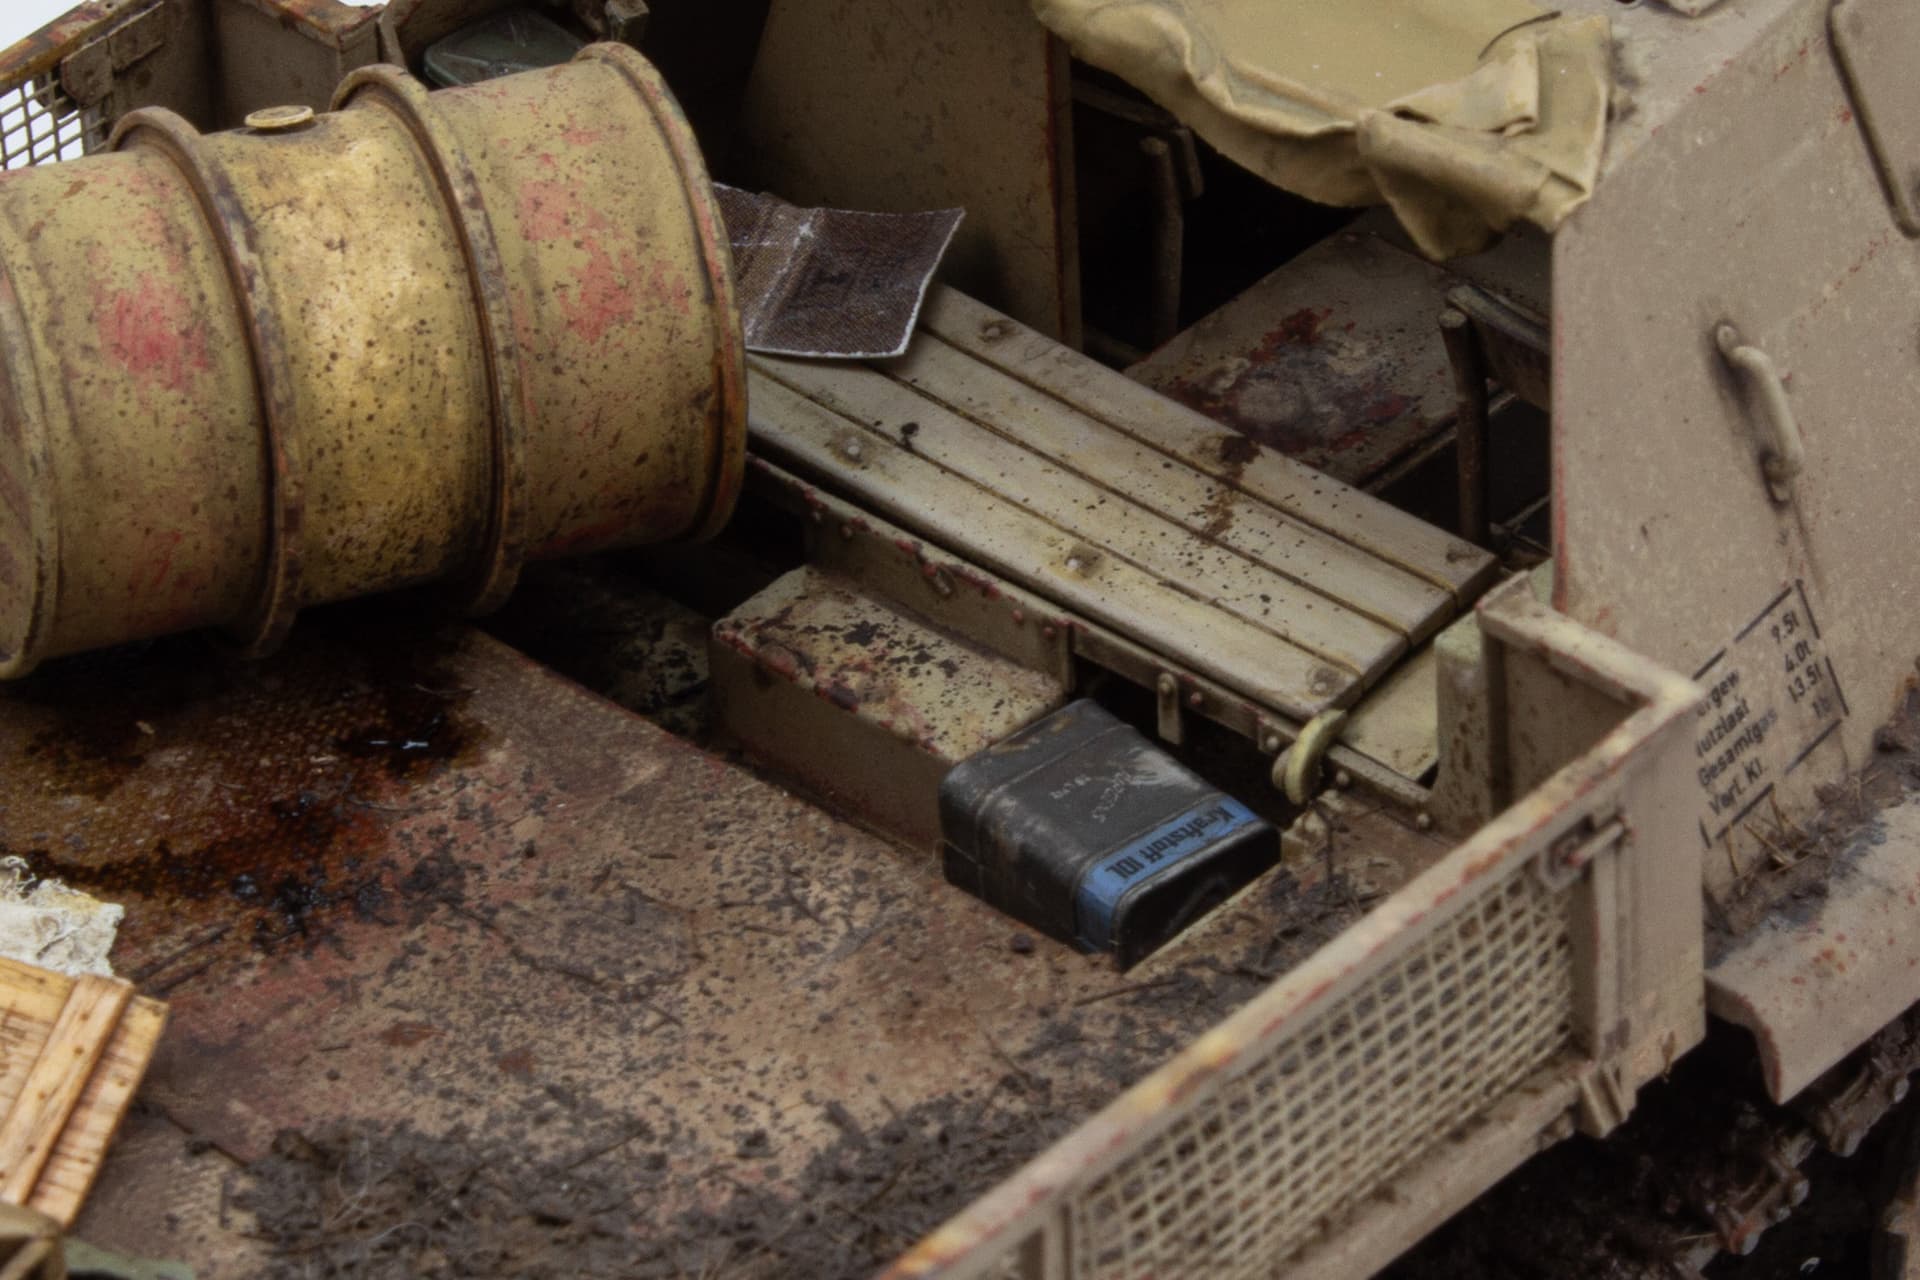
I have started adding some volume to the scratches and scuffs to the cab metalwork and the load bed. Vallejo acrylic black-brown was carefully painted into the centres of the exposed primer with a fine brush and enamel rust effects were spotted on with a brush and then blended out. Graphite will be added to edges to complete the worn look in the final steps.
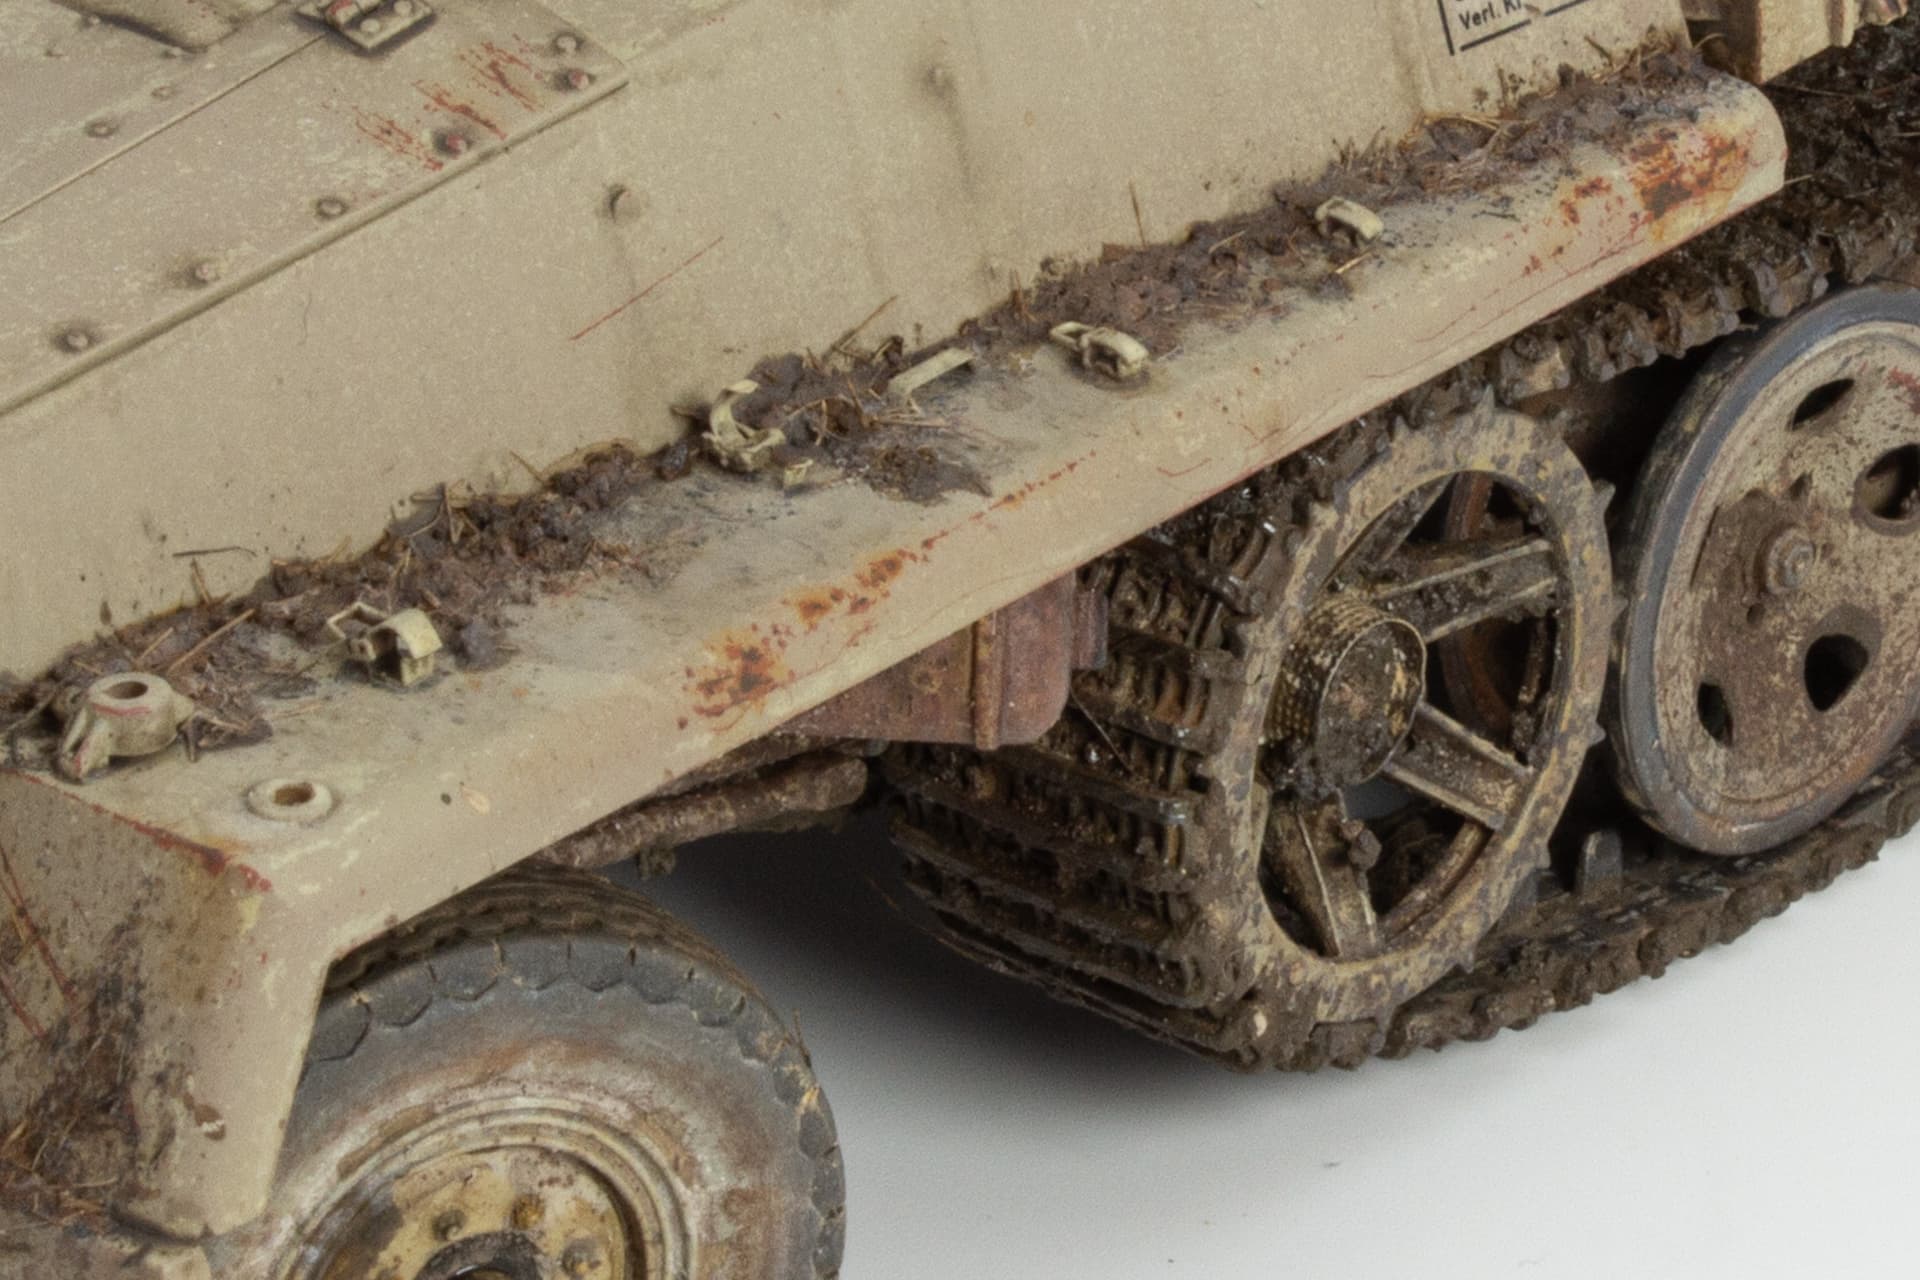
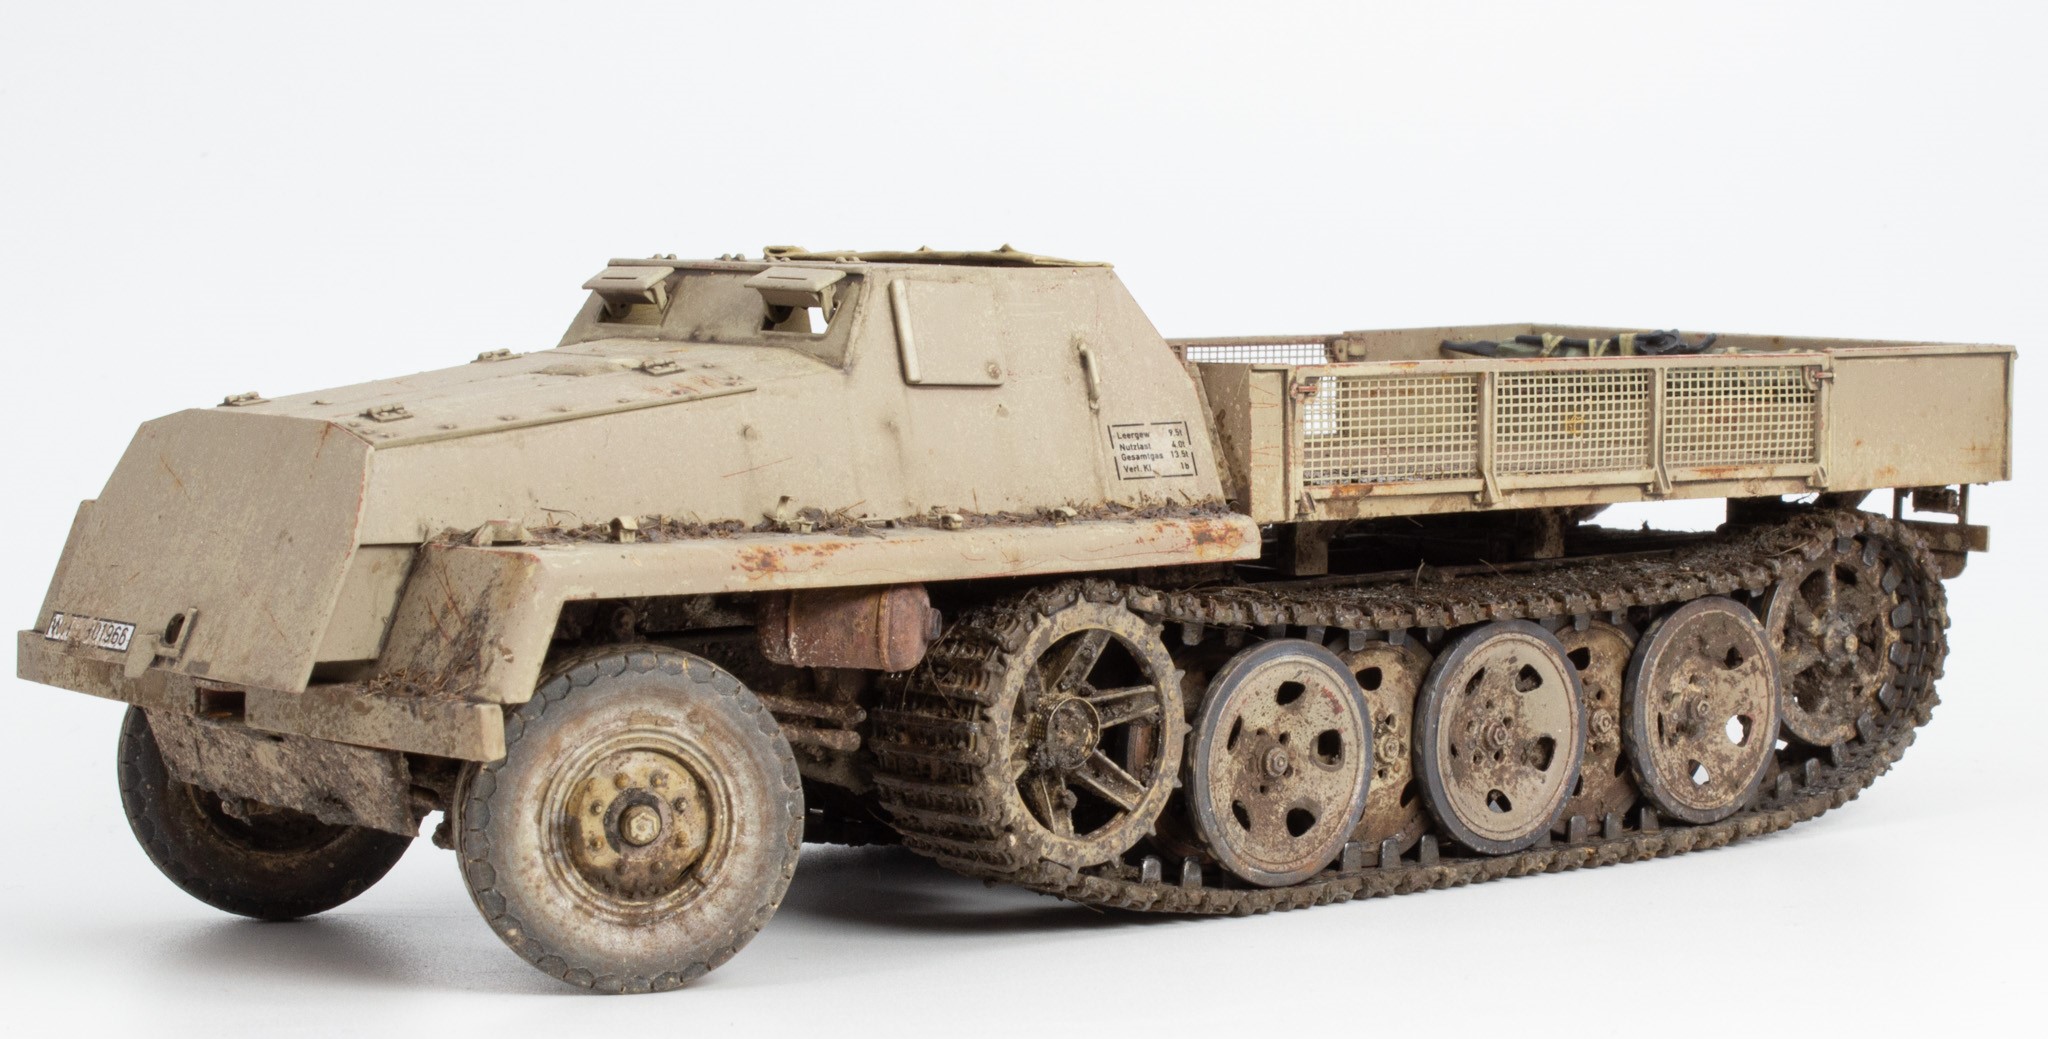
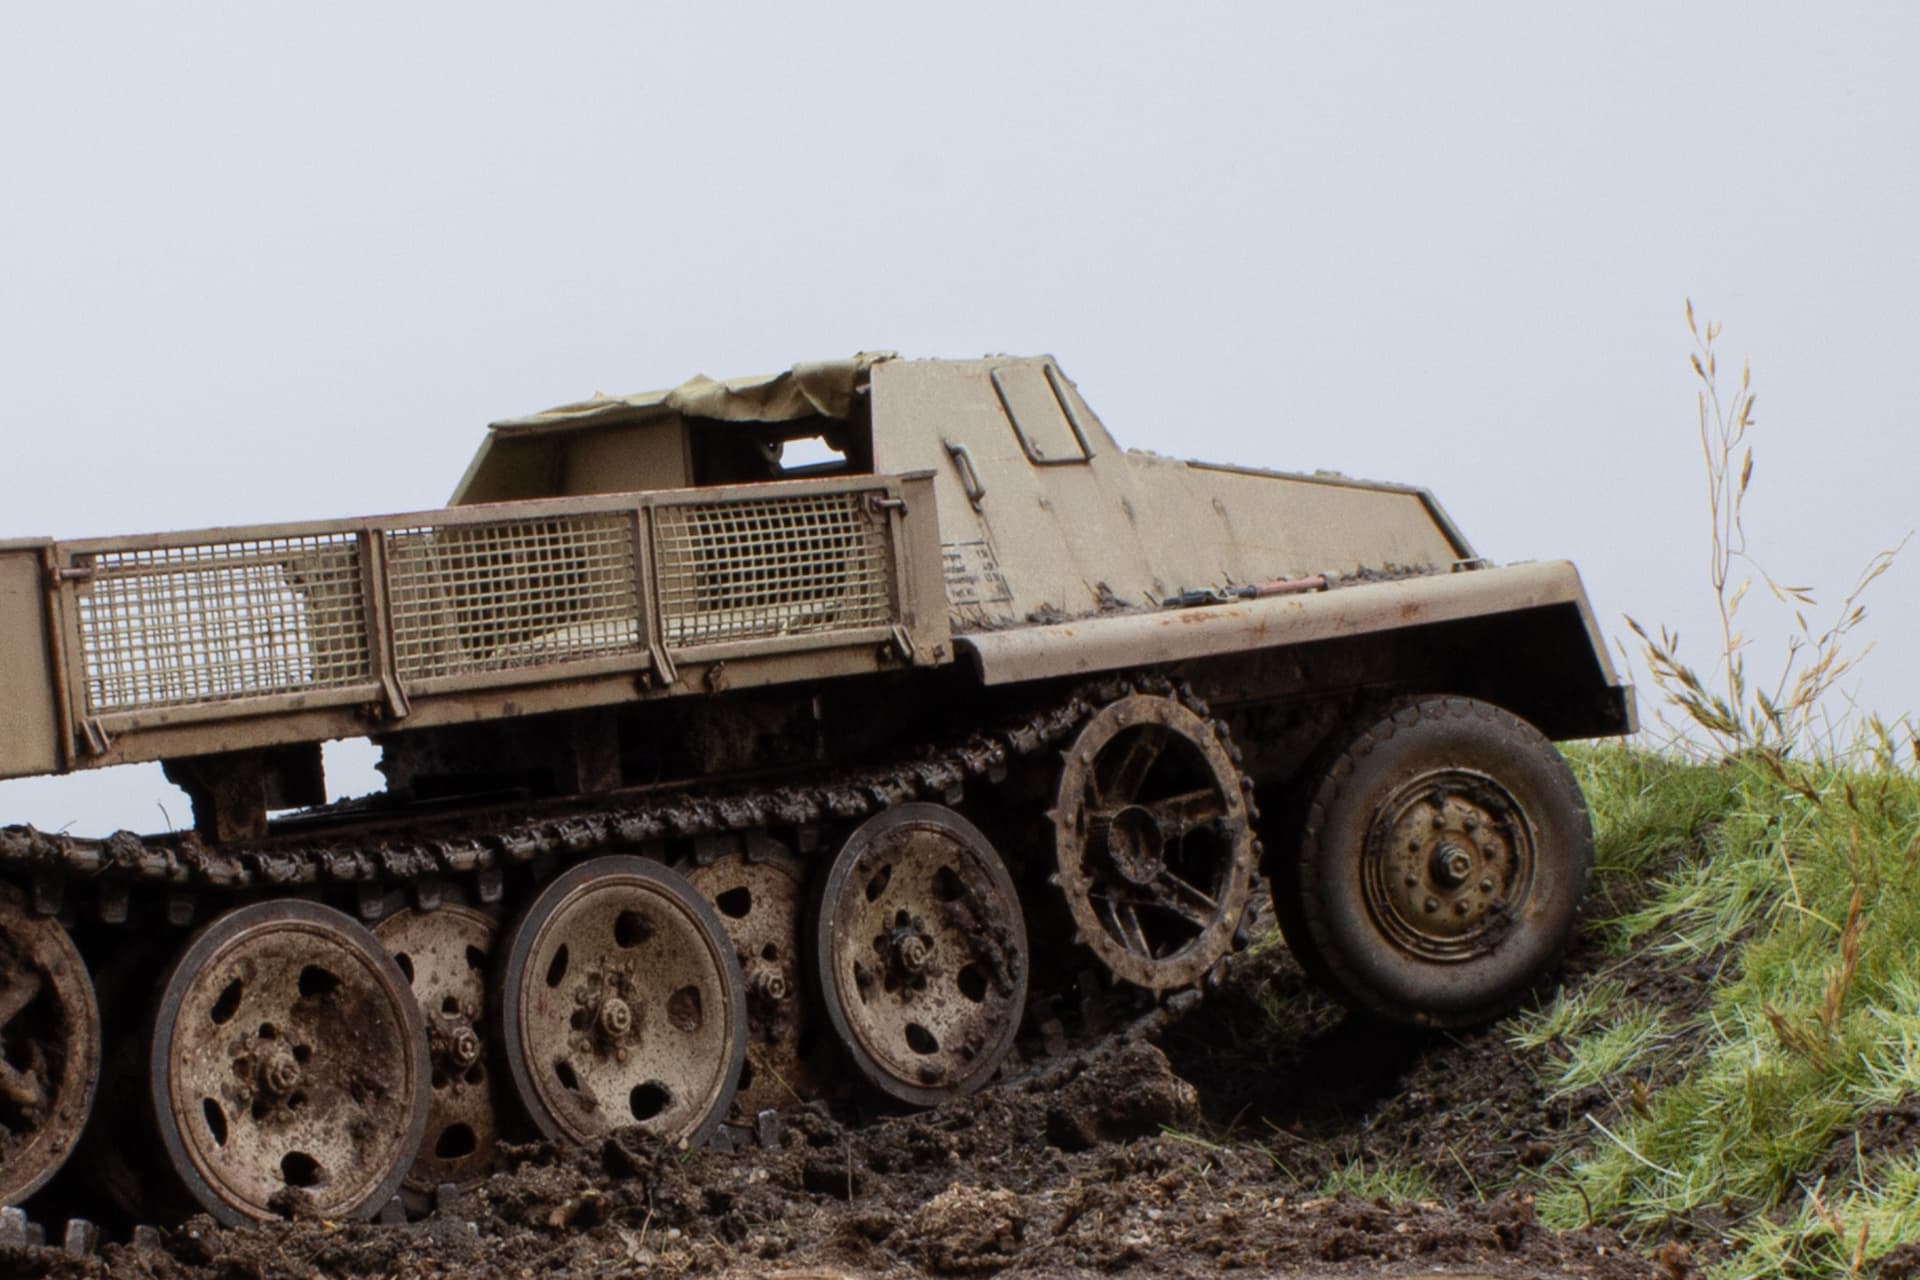
For the overall application of mud, dust and dirt on the sWS I had been working off a few abandoned after the battle images. Although they were in B & W it showed the weathering on the running gear was wet and damp, but the upper body had started to dry out. This should make for a visually appealing finish.
For the accumulation of debris on the horizontal surfaces I would ‘fix a mix’ in place. A mixture of some dried and crushed soil from the garden, some cut sea grass, and some dried earth toned pigments was created. This was fixed in place with VMS Ballast freeze
Using a mini spatula, I selectively added a little more of the dried dust mix only this time I used Tamiya thinners to fix it. Although it did not solidify the mix as much as the fixer it does not leave any tidelines. Once left overnight a light airbrushed coat of VMS matt varnish fixed everything permanently. Further blending into the metalwork of these effect is still needed but that will come in future steps.
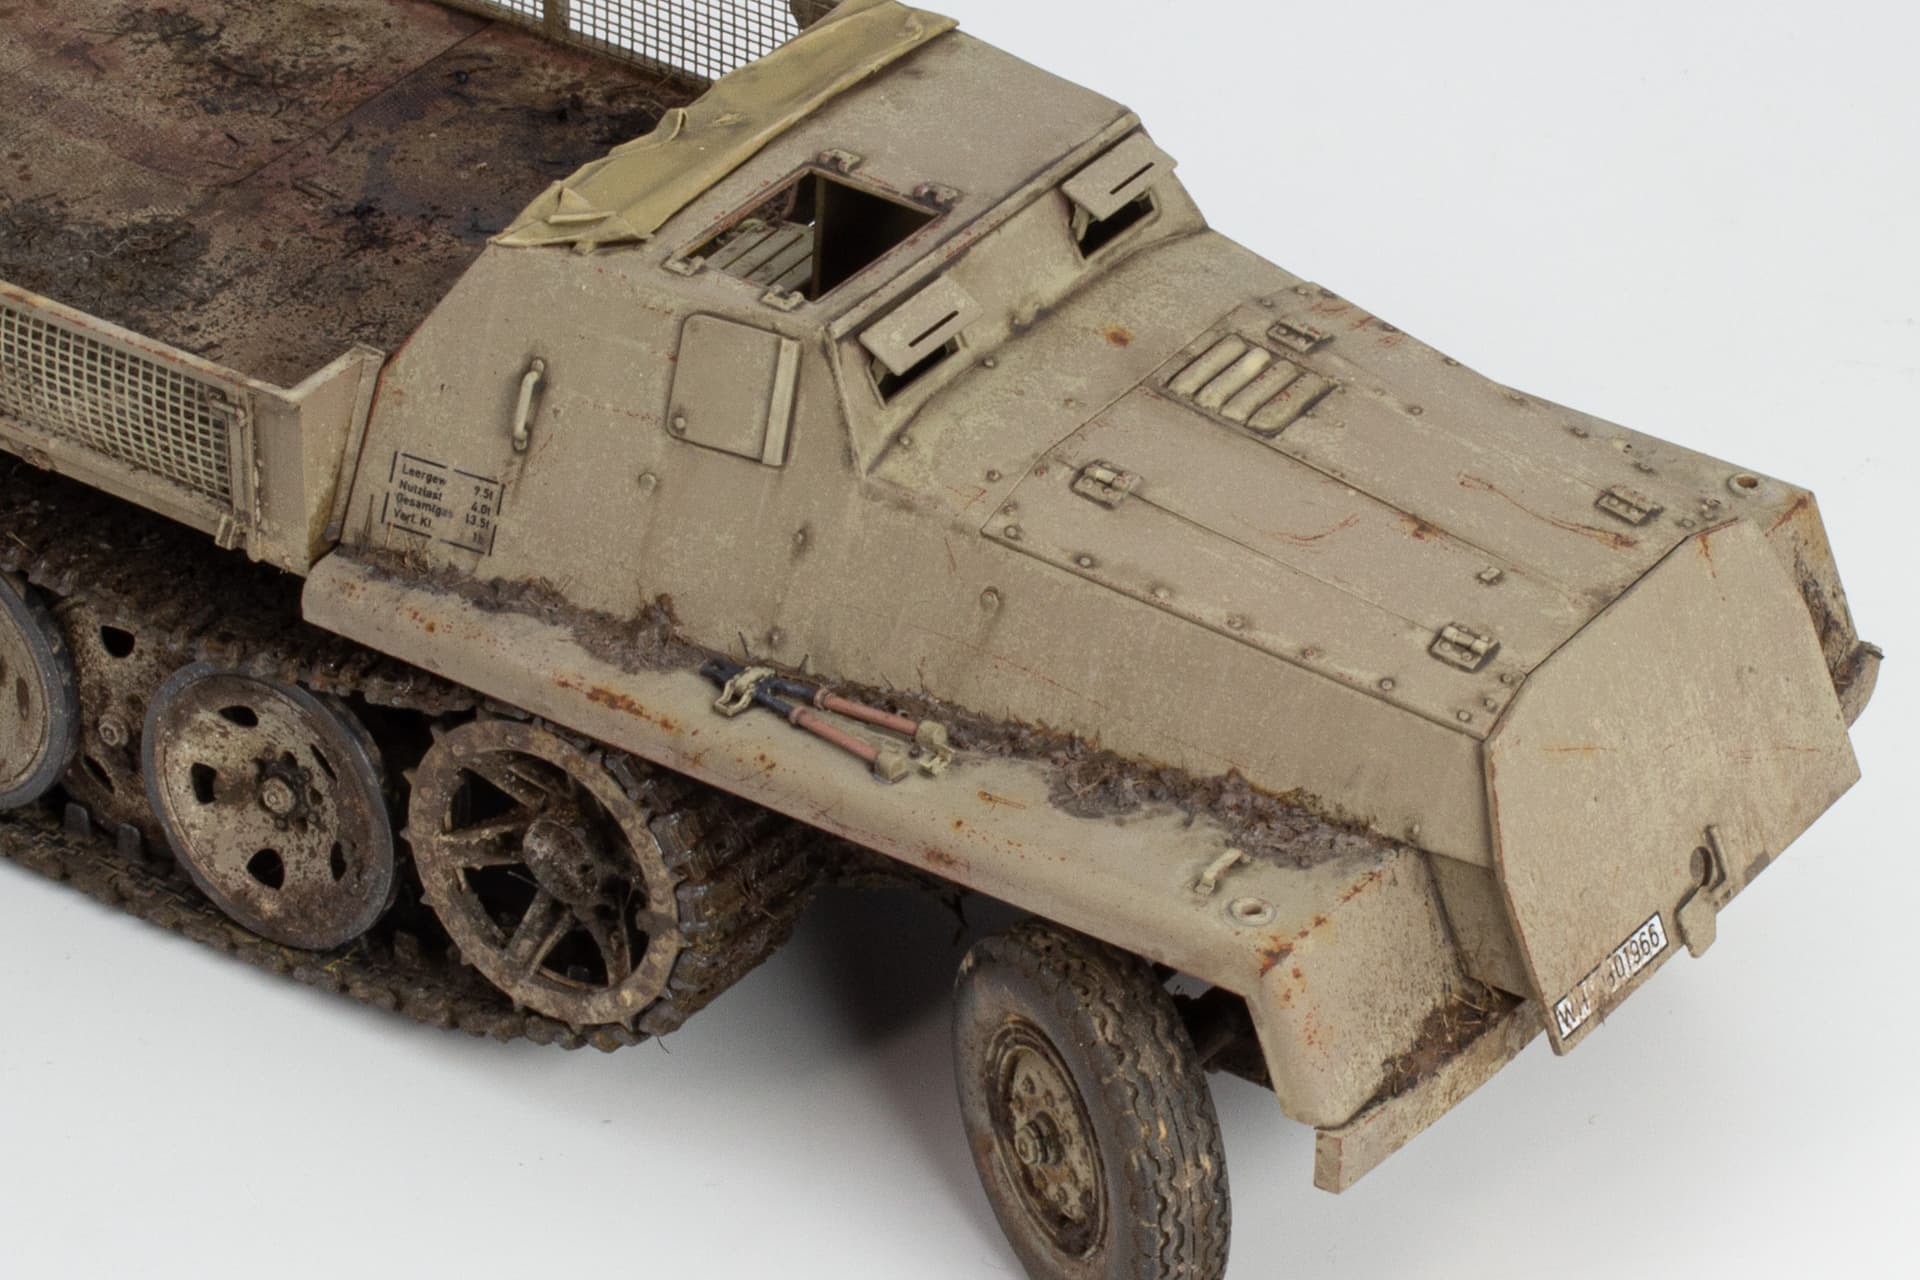
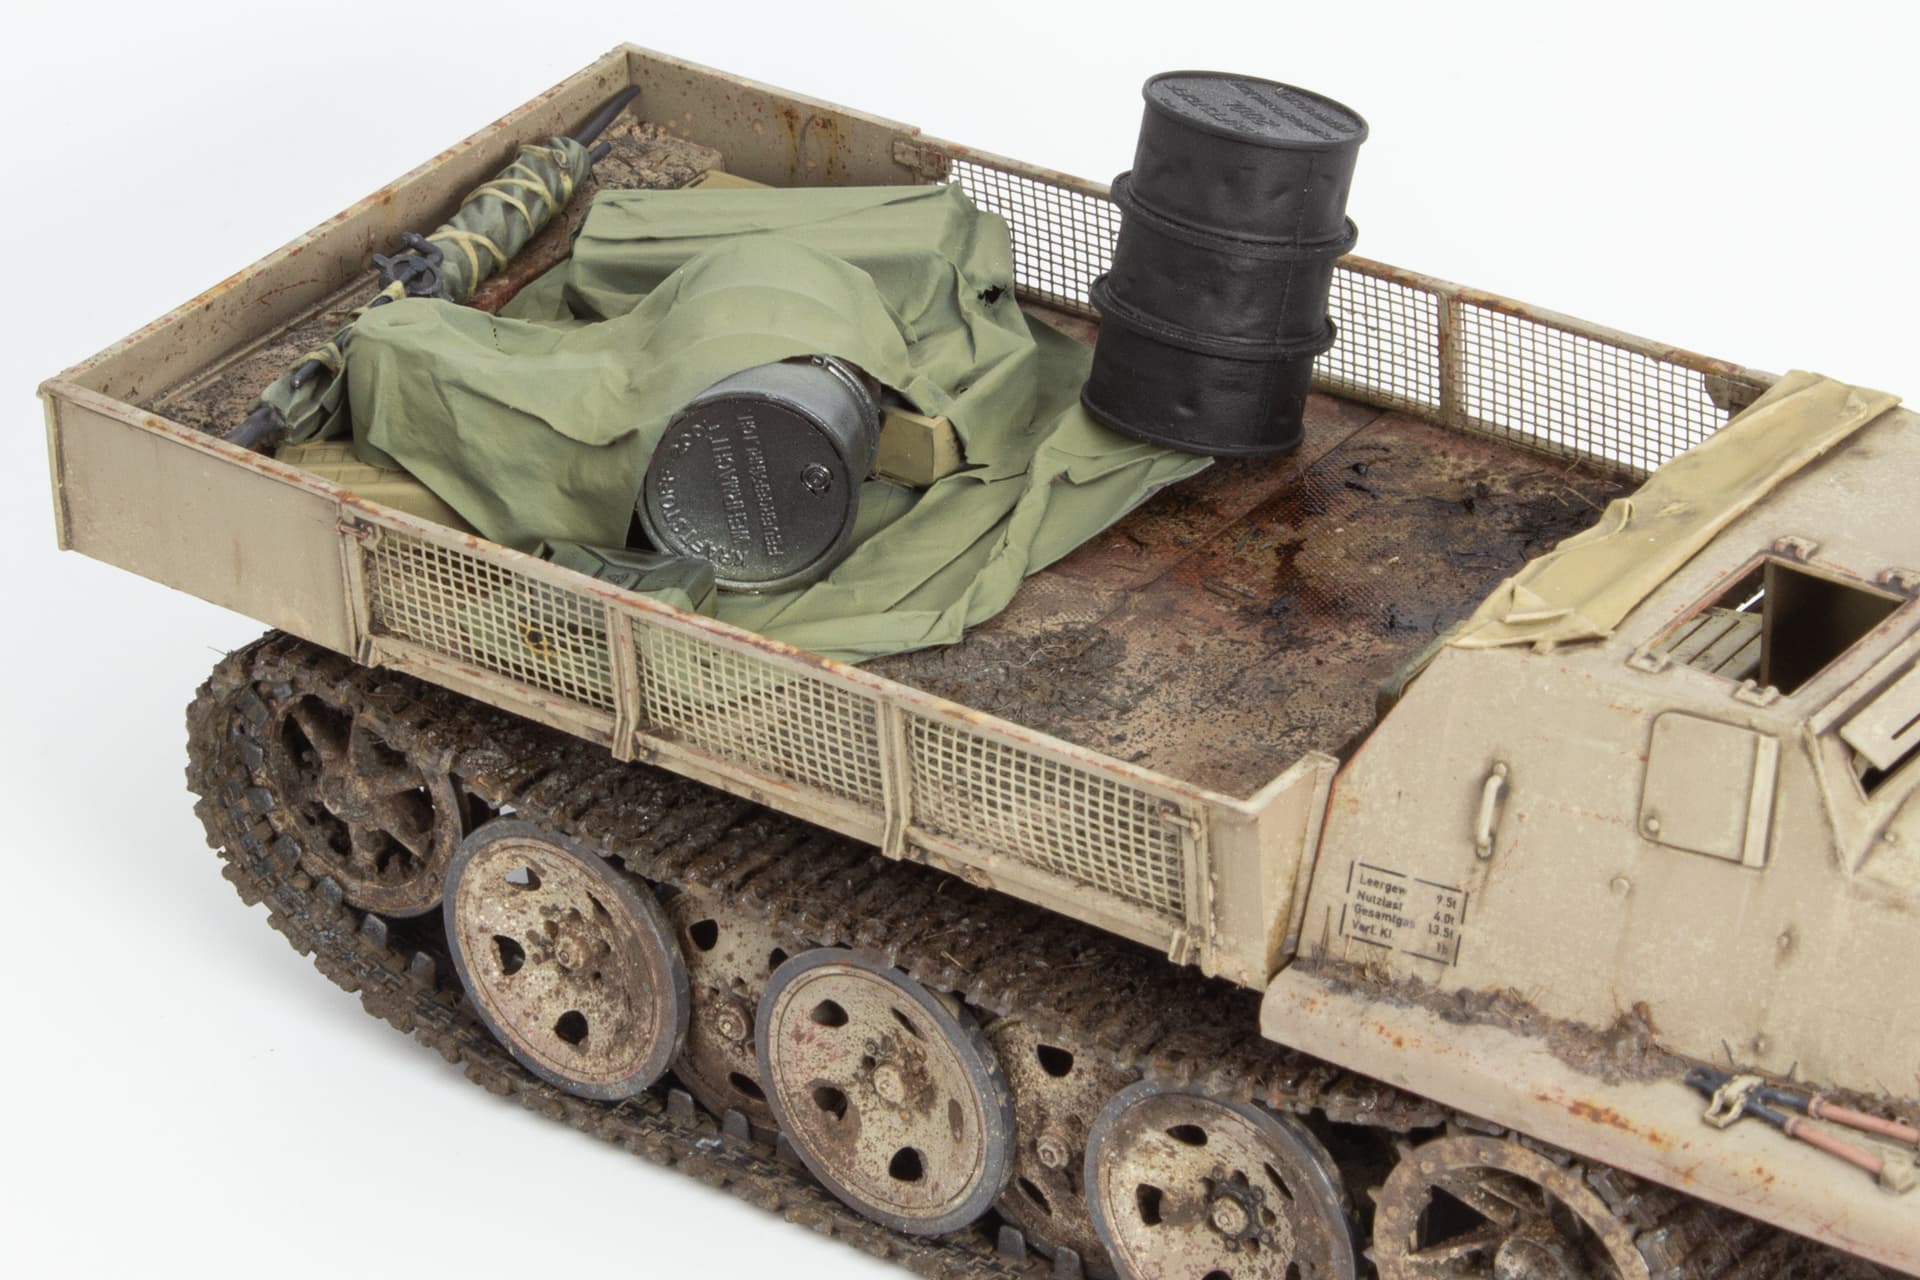
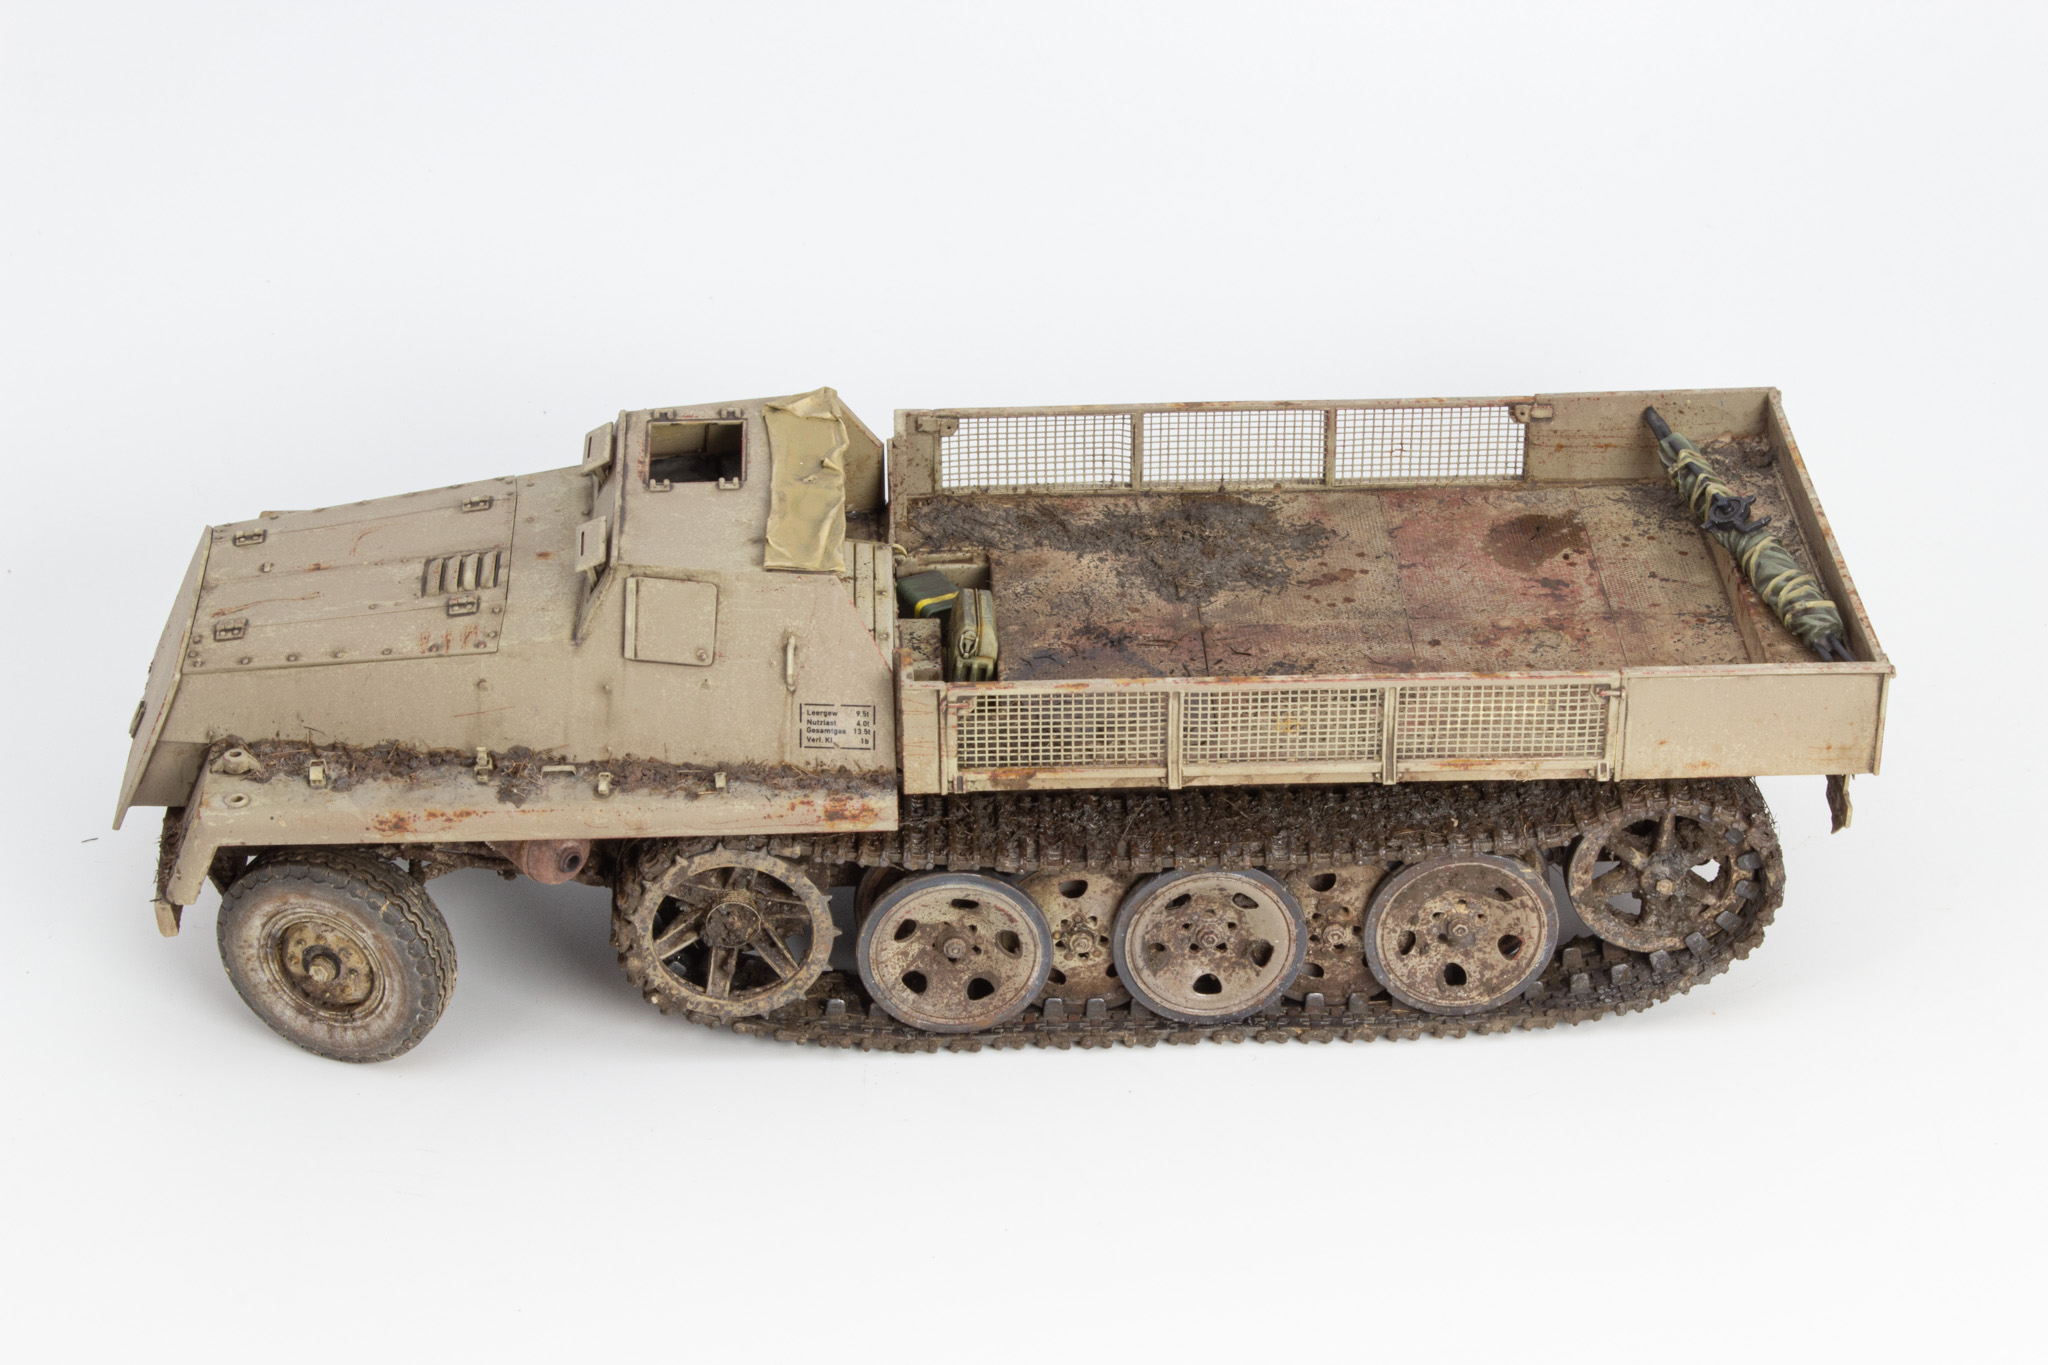
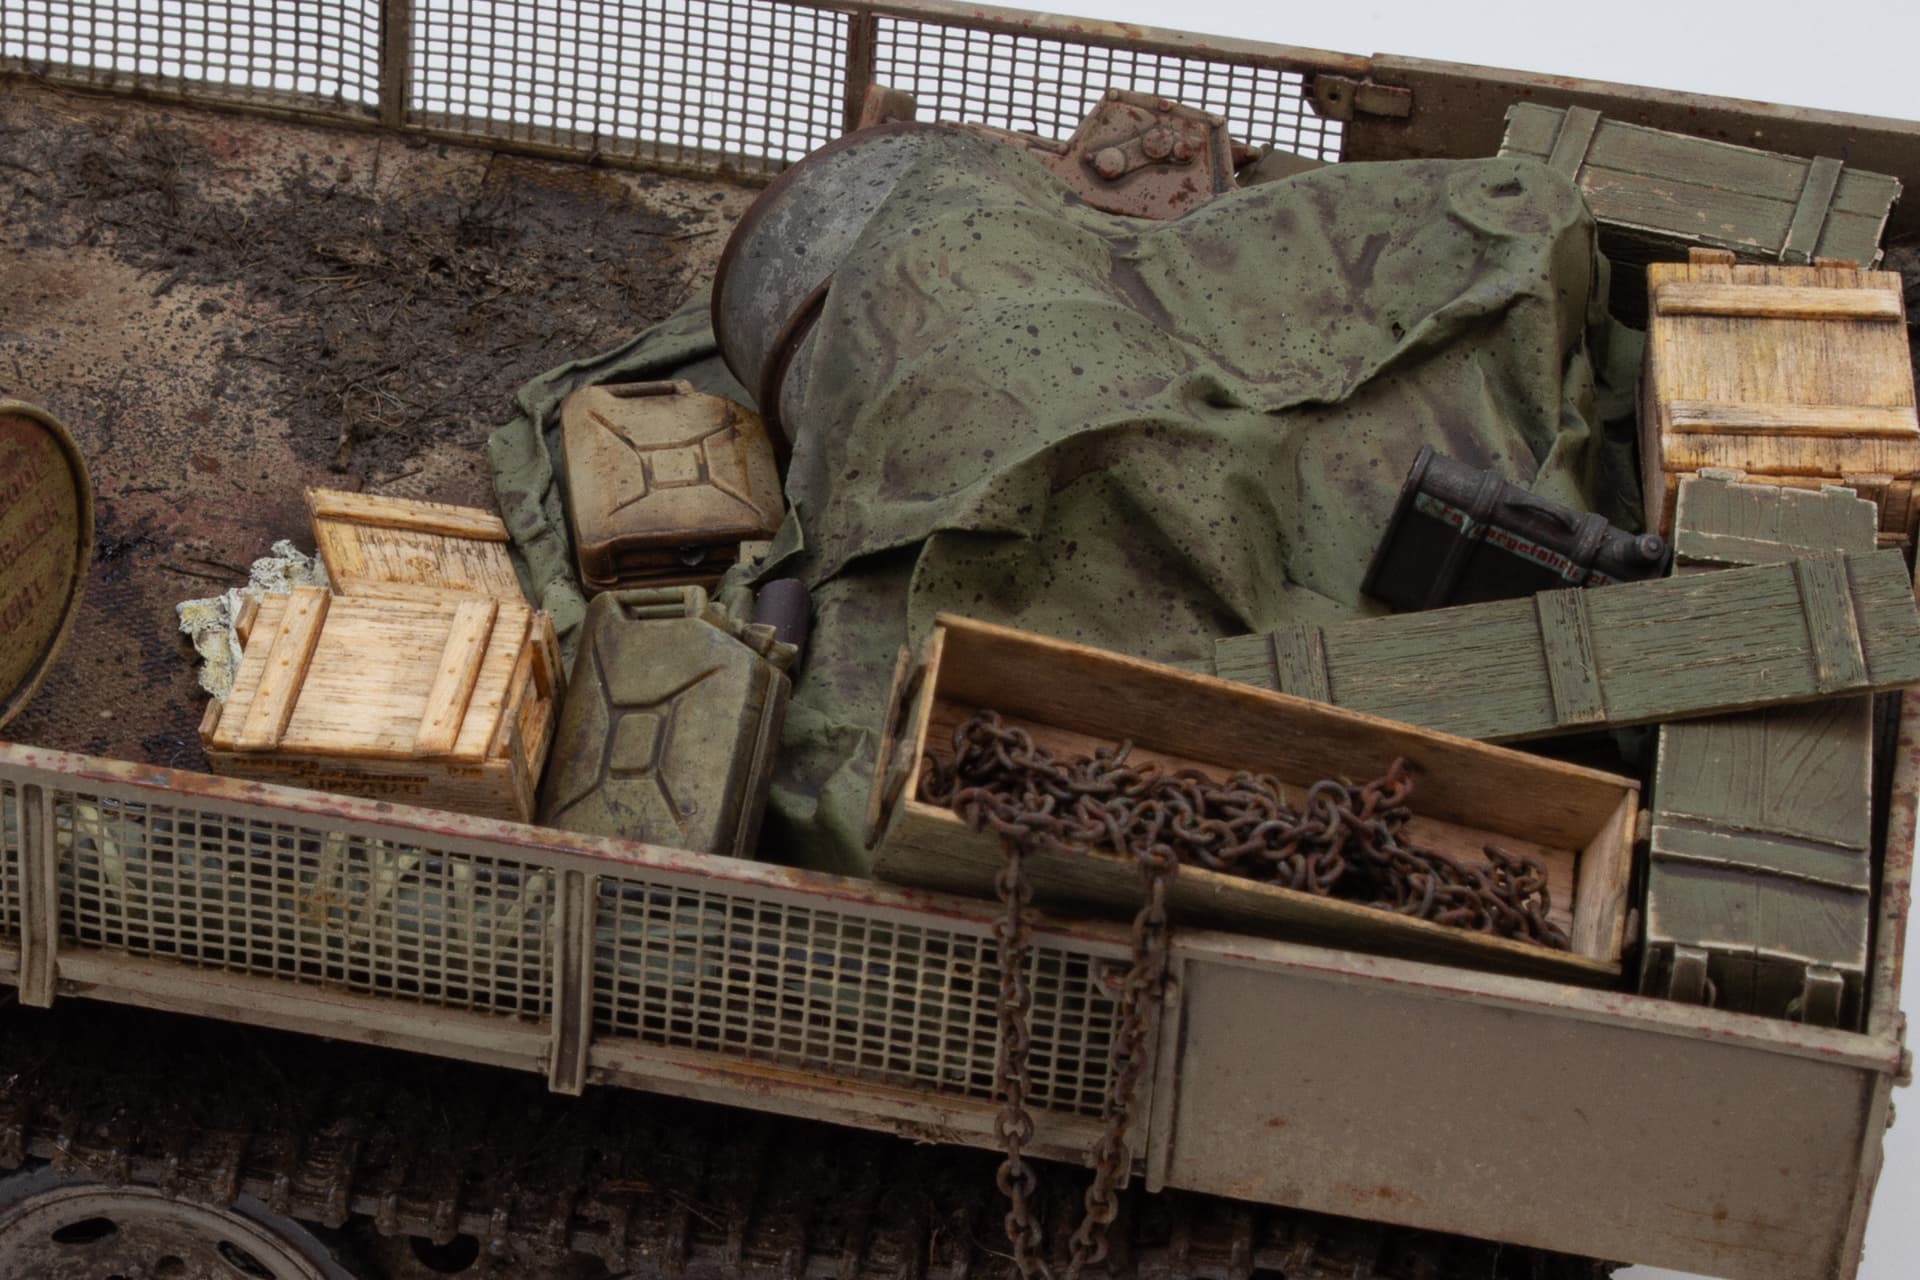
The upper surfaces of the load bed were treated in the same way and any previous oil effects enhanced. The folding wooden crew seat was kept seperate to paint as this would be displayed open. It was painted in lighter tones as was the interior of the small stowage area underneath.

Base coat painting of the stowage items has started and I am playing about with placement of some of the loose items
Front and rear panels
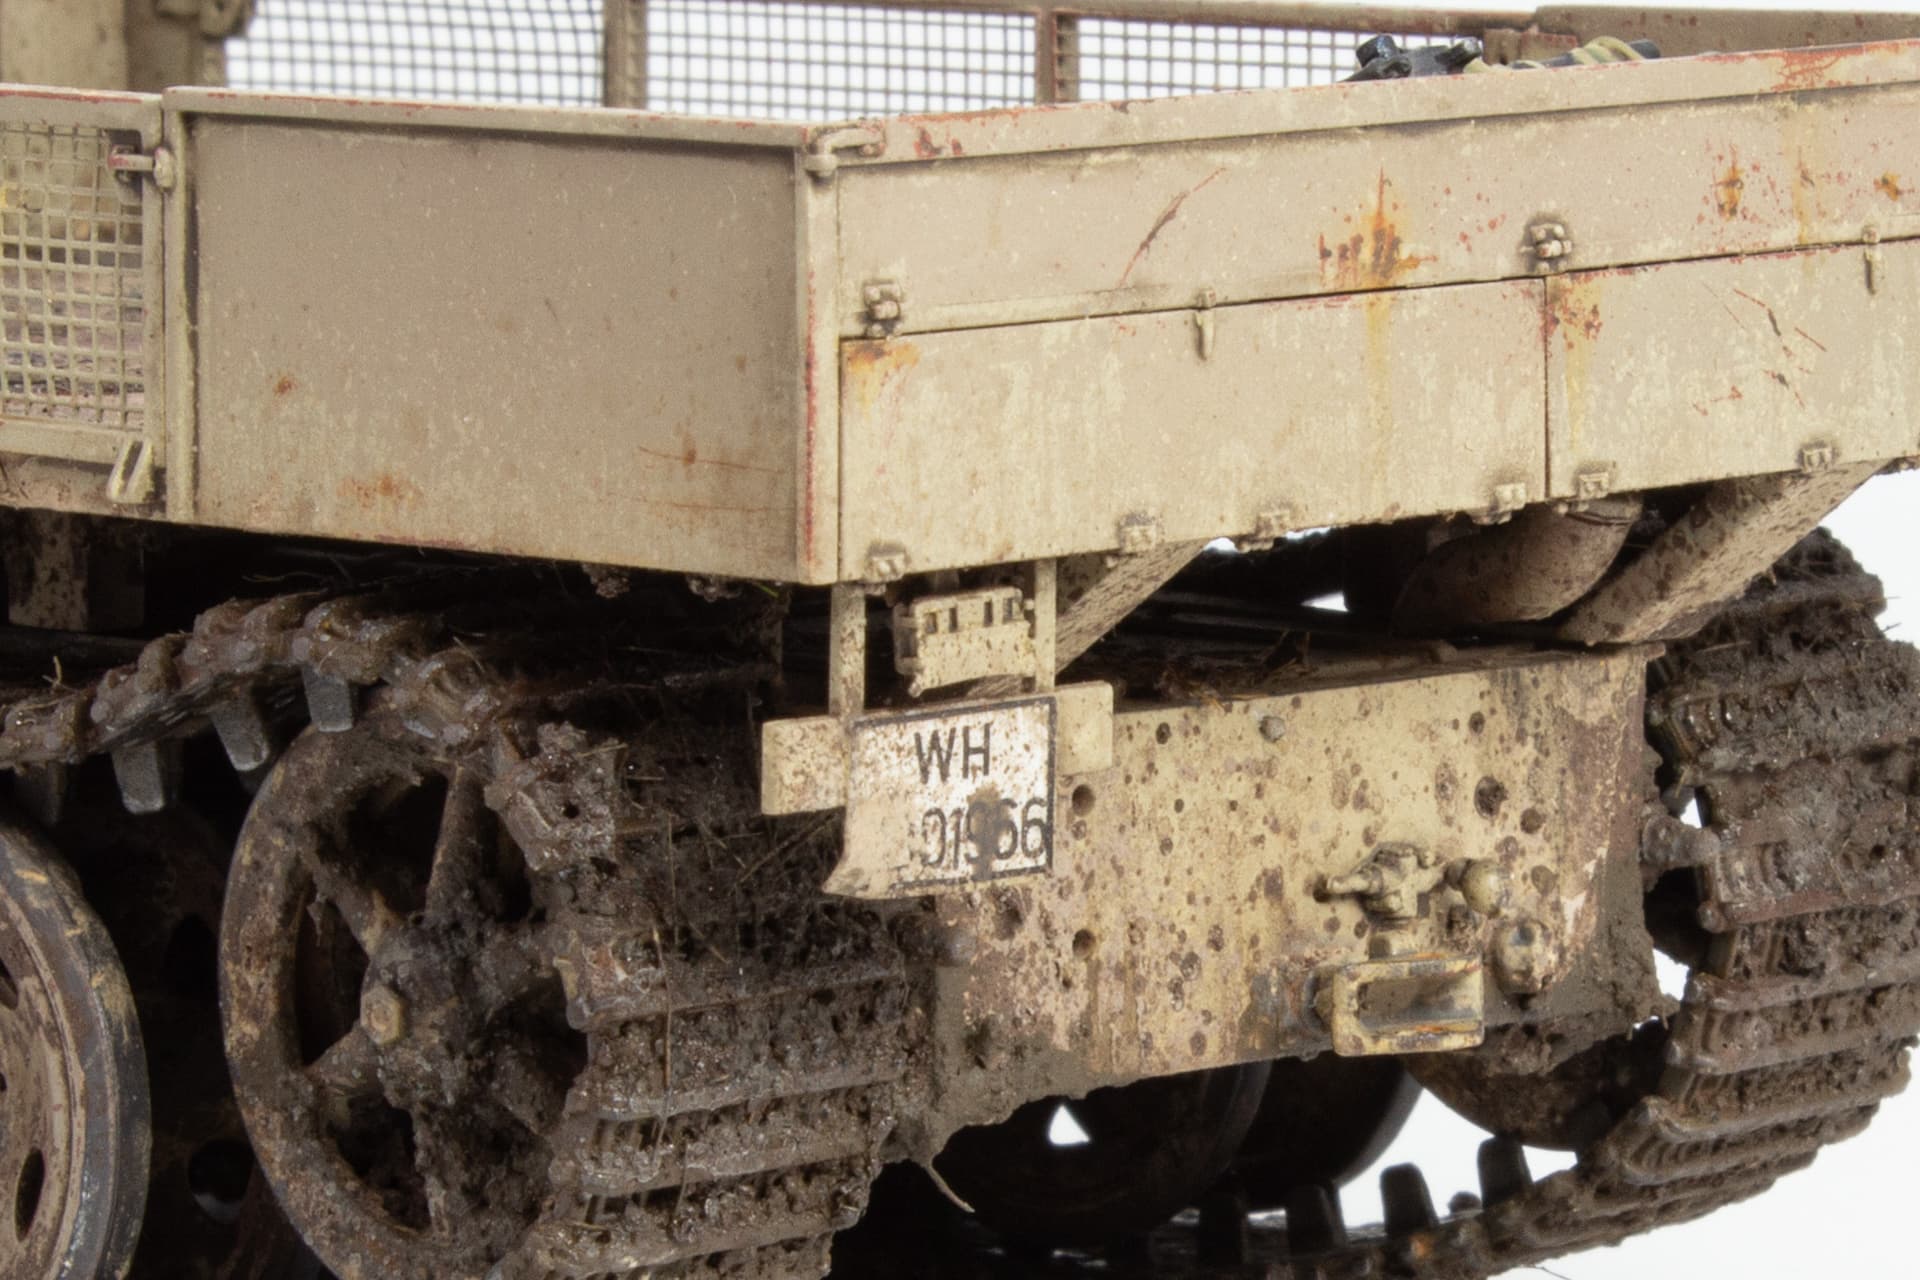
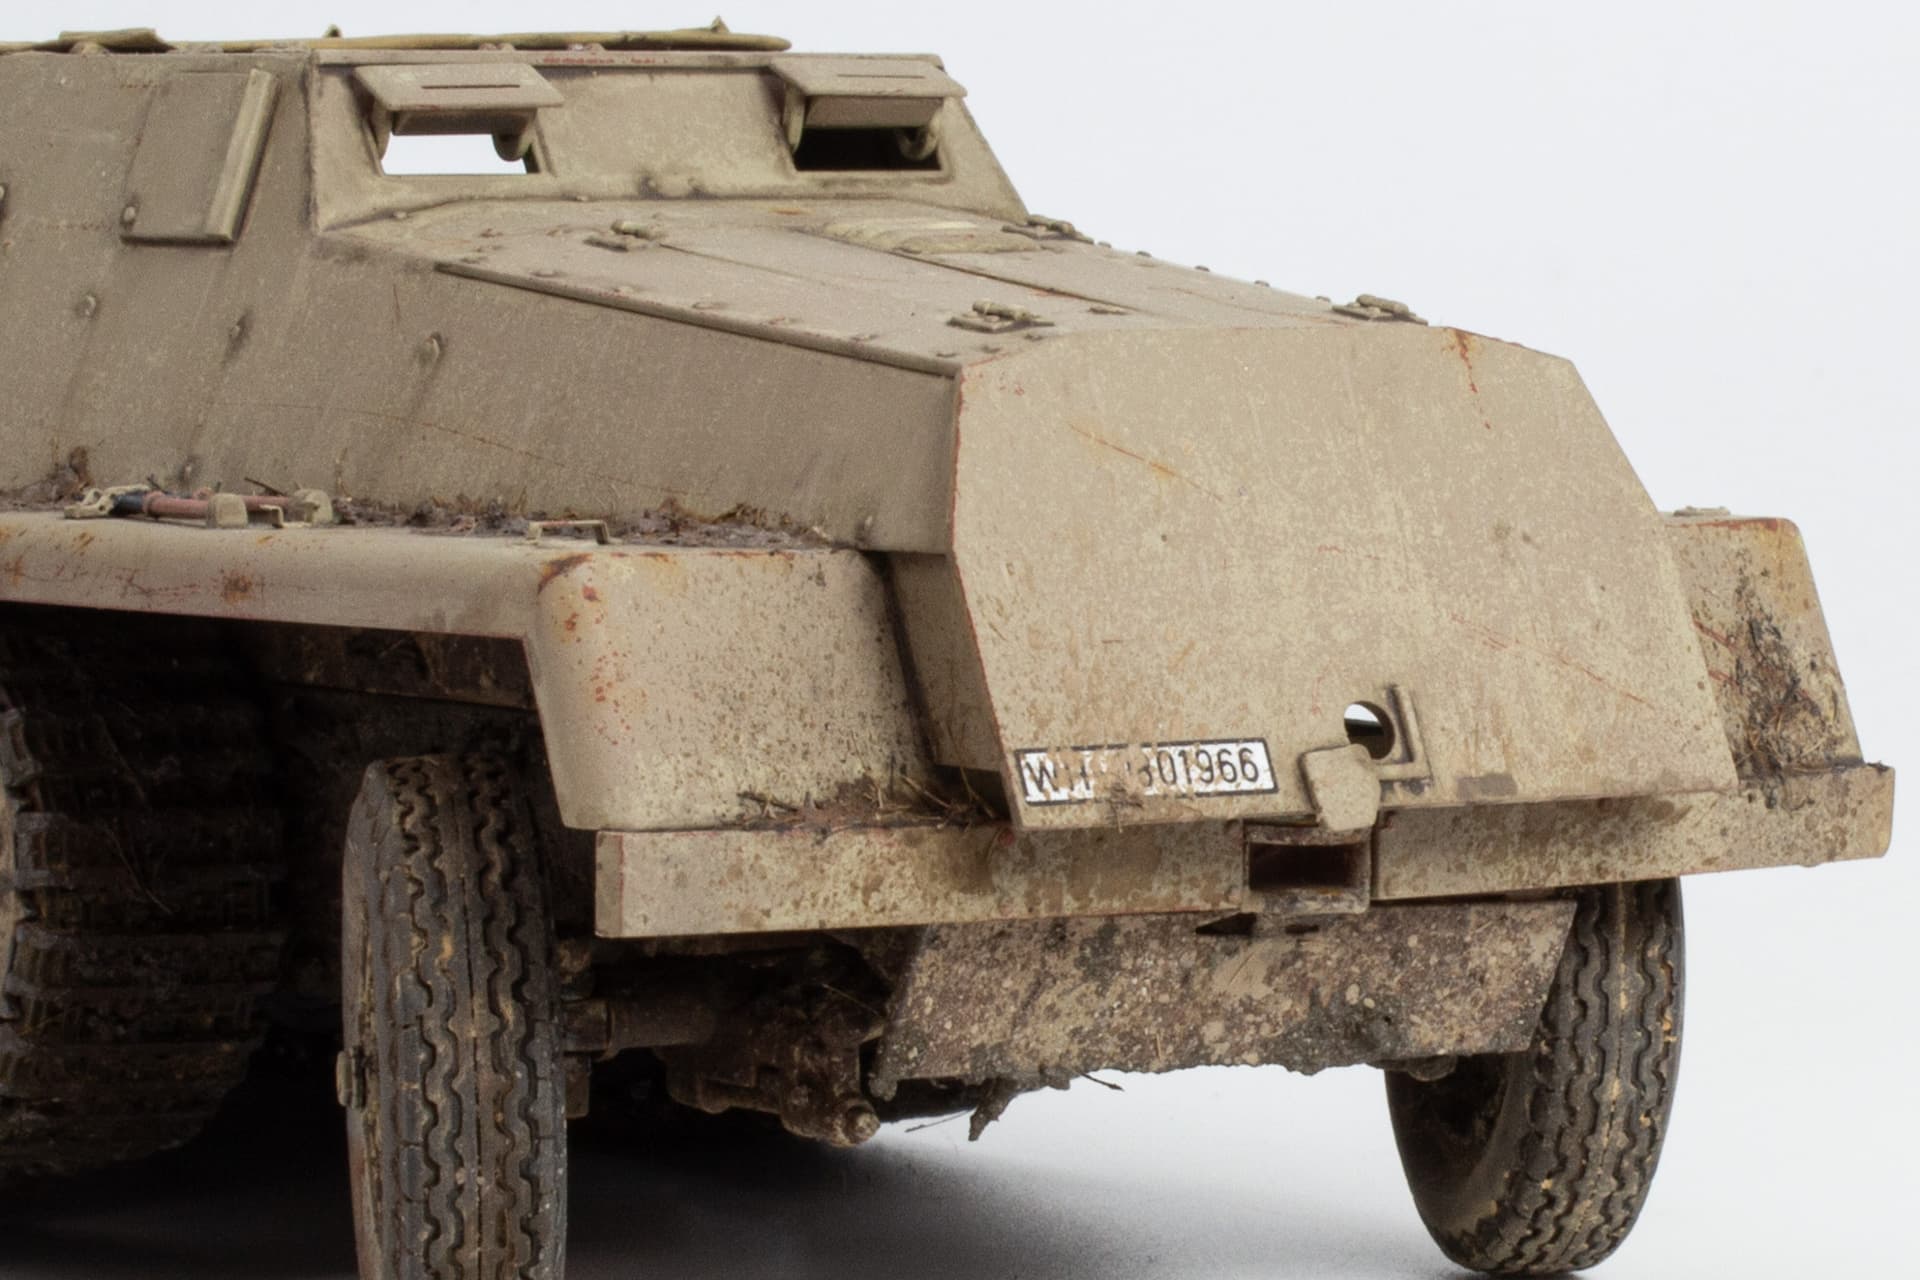
Keeping the loadbed seperate from the chassis has allowed for easier access and handling to complete these stages

7 Likes
Thank you
1 Like
the weathering is fantastically realistic
3 Likes
Looks great. Fantastic job!
2 Likes
Cheers Steviecee
1 Like
Impressive work. It looks realistic. I like it very much.
Congratulations on the job.
Kalin
2 Likes
Thanks Kalin
1 Like
Thanks Nefer
1 Like
The many storage items have been painted with Vallejo acrylics and I have started the weathering process with some enamels.
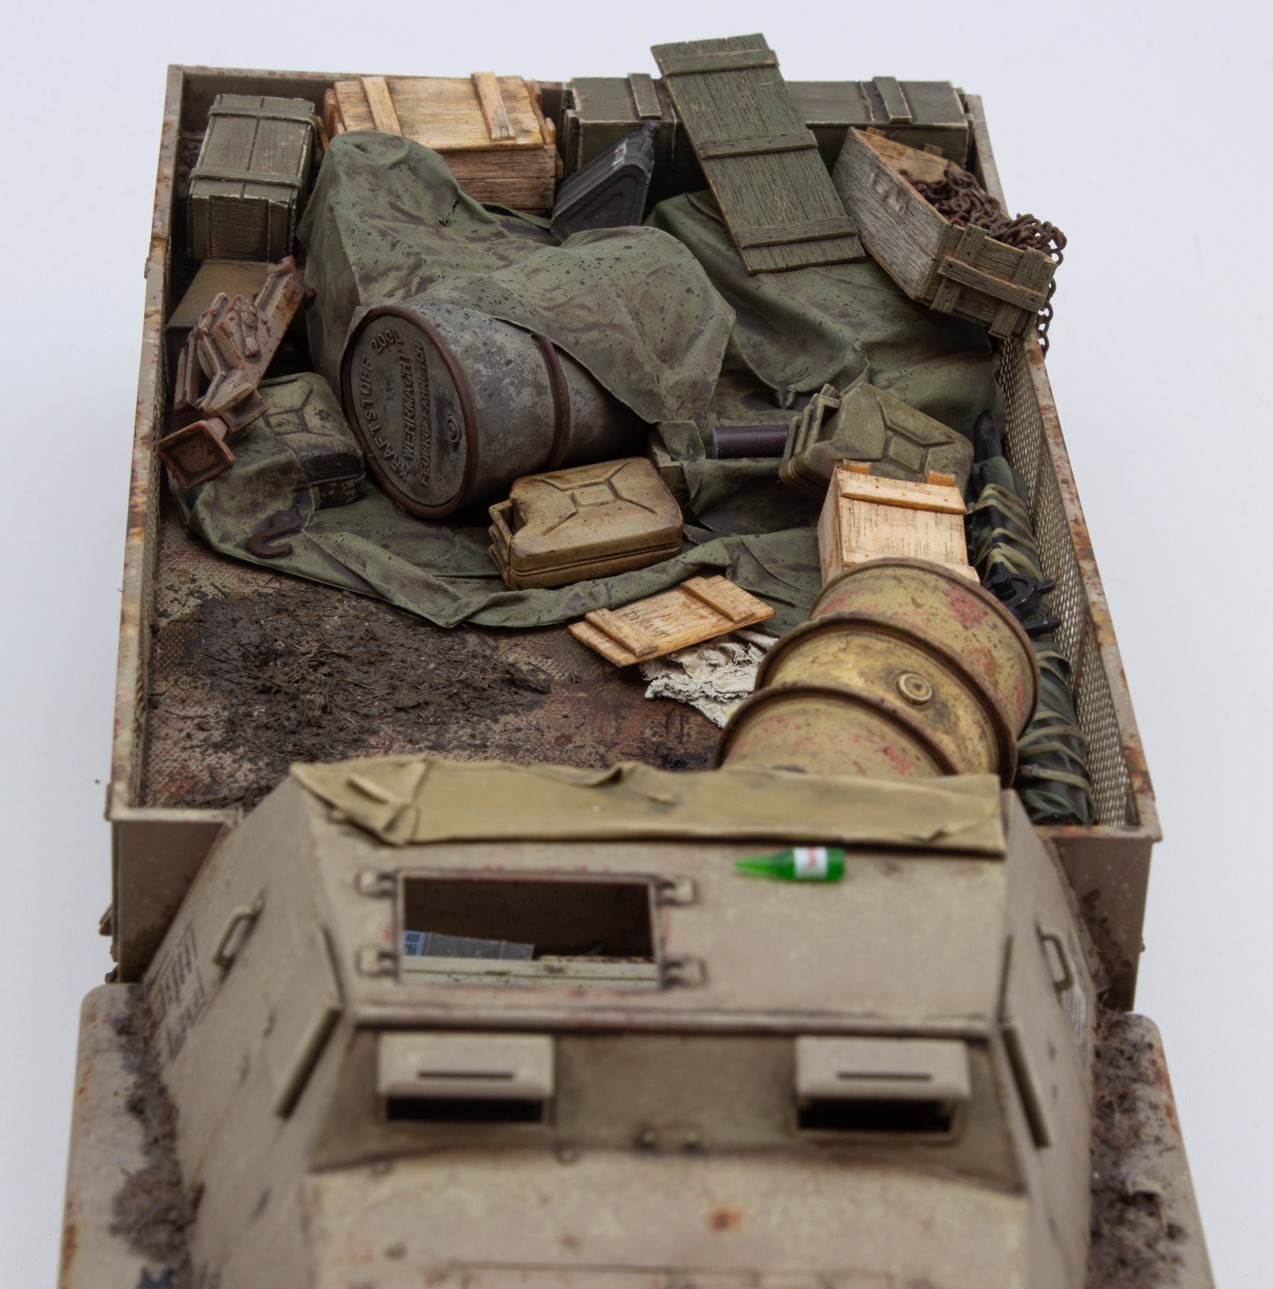
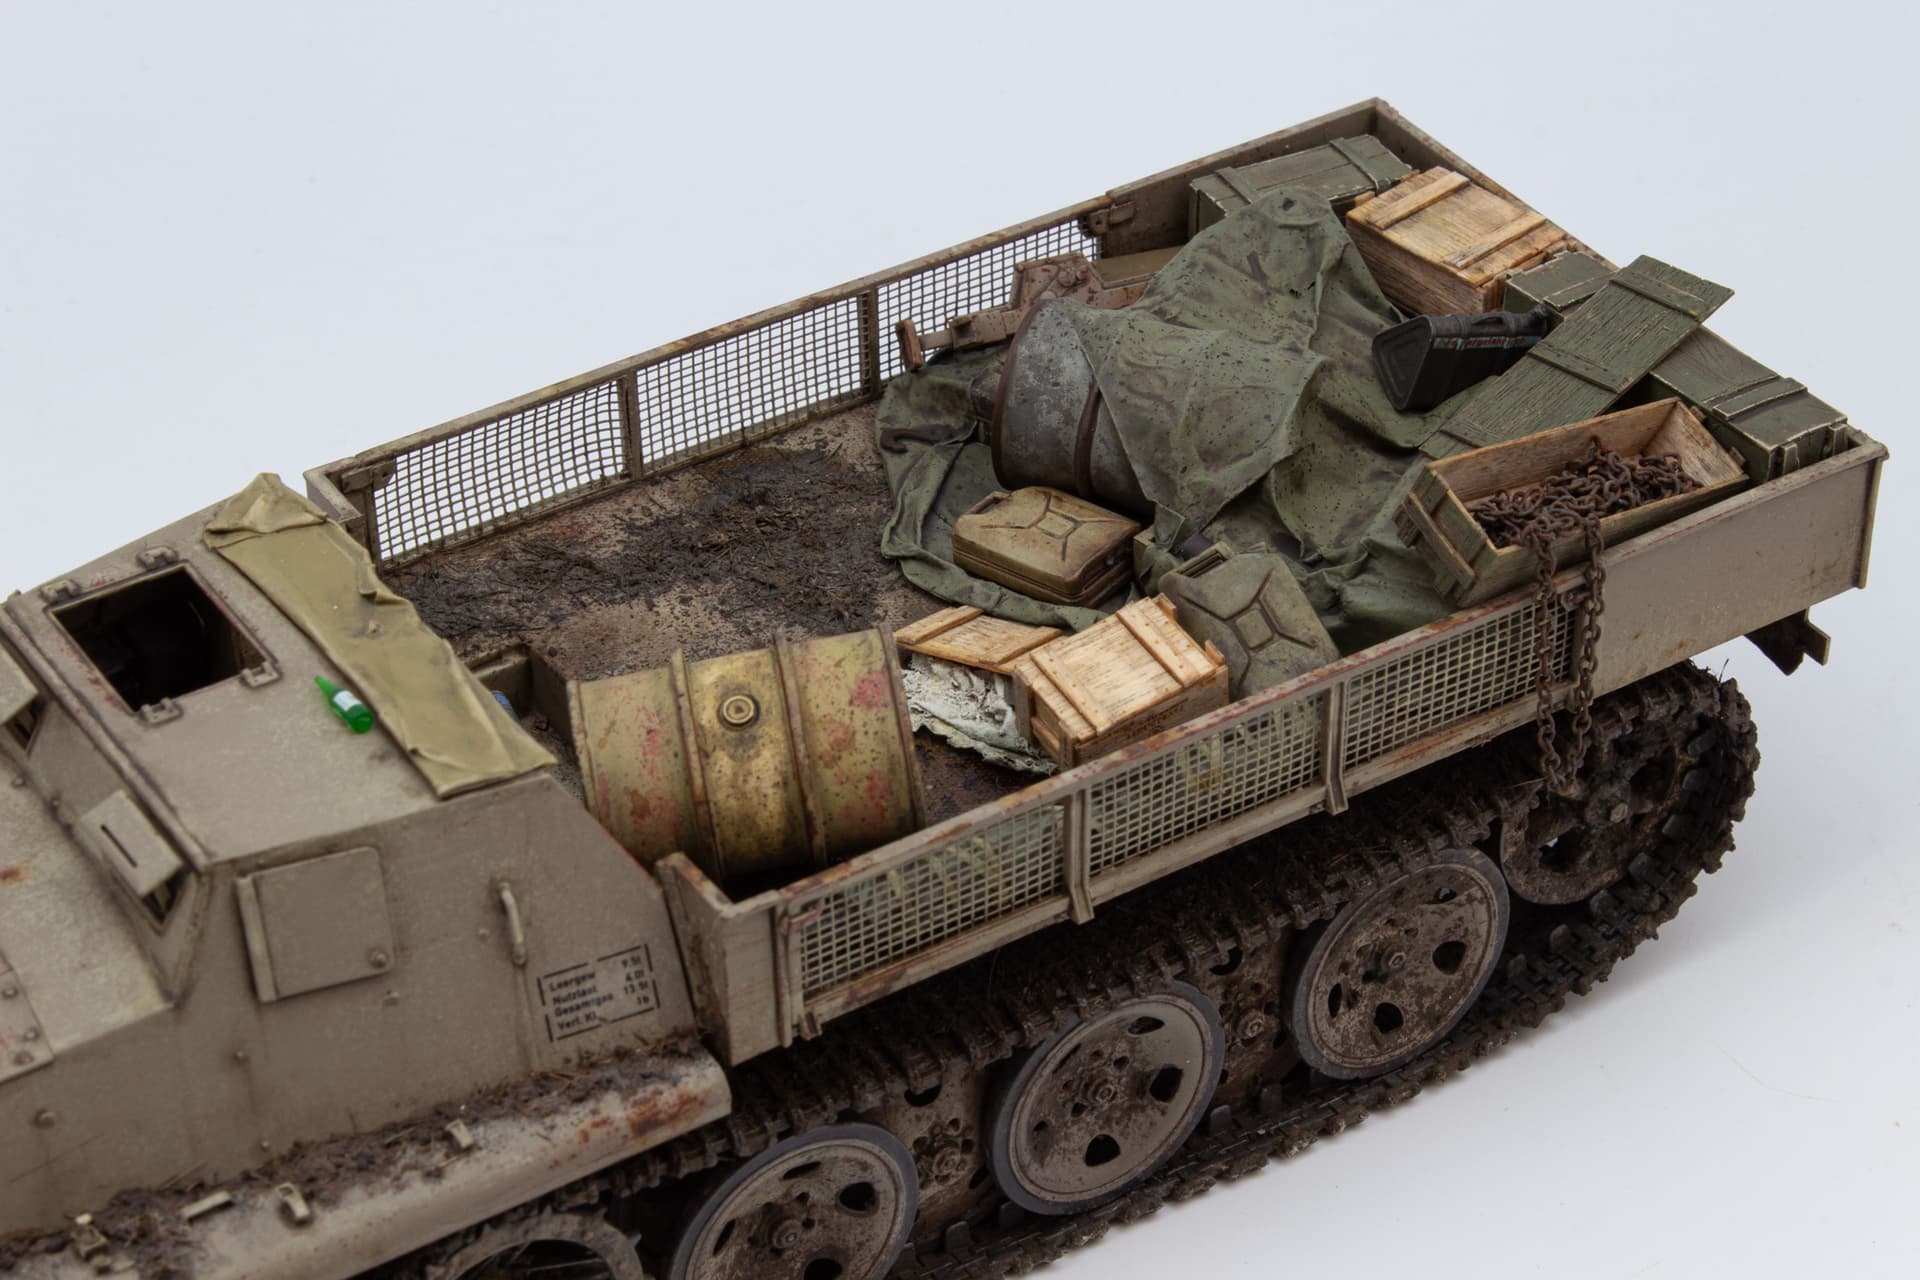
It took a little while to whittle down the selection of items I had prepared, and it took some time to play about with the most natural looking placement, but I’m now happy with how they are currently positioned.


Next it’s time to get the oils out and add some refinement to it all before fixing in place.
8 Likes
Hope that chain doesn’t get caught in the track or they might have a mess! ![]() Wayne
Wayne
1 Like
Vehicle will be displayed as abandoned in a field so not an issue I foresaw, but yep, that could turn messy falling into a running track ![]()
2 Likes
I got yelled at for having a short length of tow cable drooping along the side of a Panther build because it could have gotten caught on a track section.
I didn’t fix it. I’m going to build a base where the Panther is sitting there while the crew fusses around with loading/unloading gear. They will fix the cable when they are done.
2 Likes
Yea, its not really an issue. Plenty of period images with tow cables hanging off vehicles that look to be moving.
1 Like
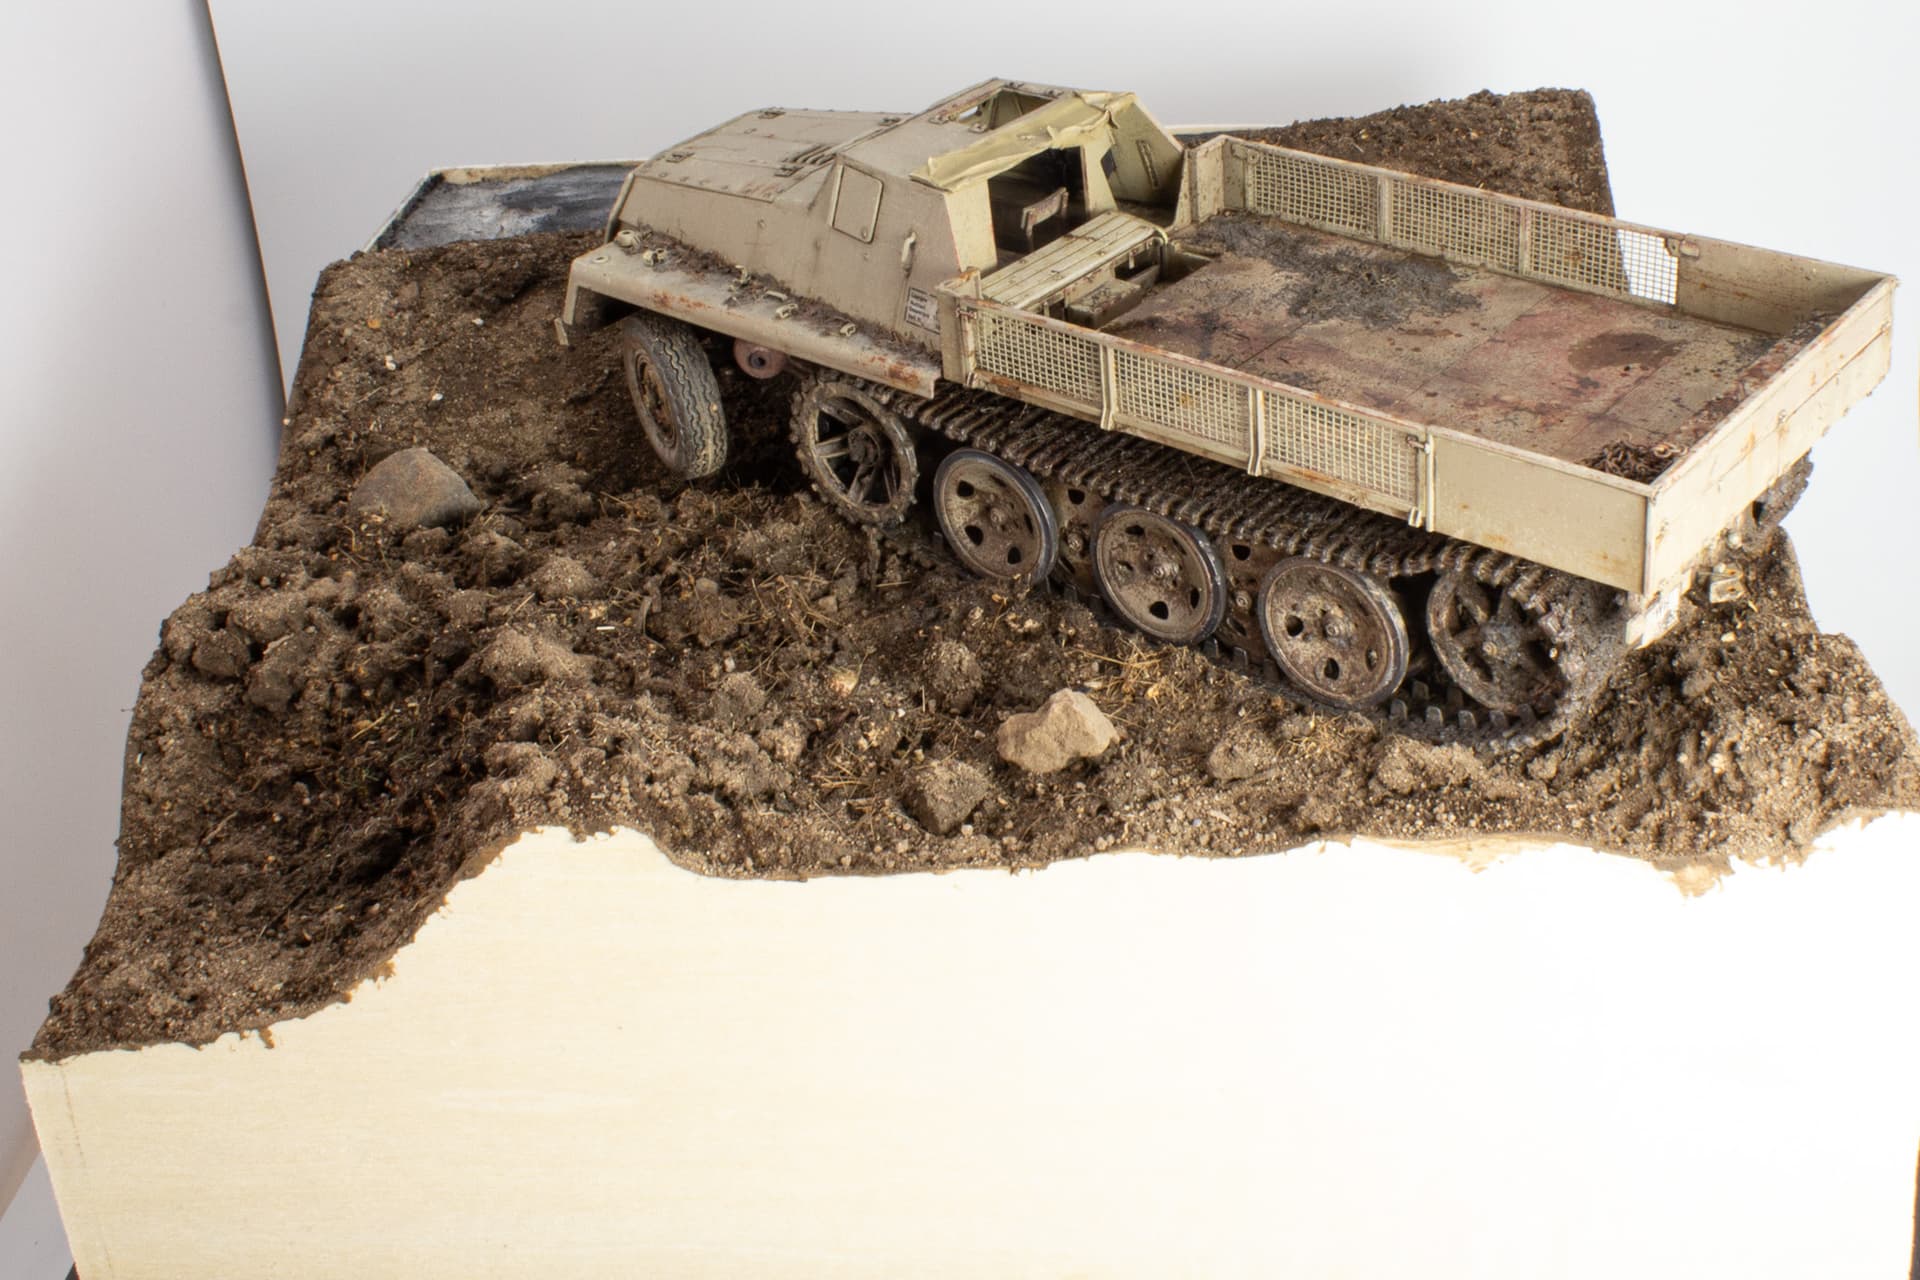
My intention was always to display the sWS on a small diorama. I had made some rough drawings before building began and had articulated the front axle and angled the front wheels for this purpose. This was to be a simple base displaying the vehicle abandoned in a muddy field. It would include a shell crater, and a tree for some height.
Sketching out the scene it became obvious that to incorporate a shell crater to give a little narrative as to why the vehicle could have been abandoned, would enlarge the size of the base more than I had first intended. So, to balance the scene and add more interest I would add a small, angled section of roadway up an embankment. The tree now might morph into a telegraph pole so it’s still a journey I’m happy to take.
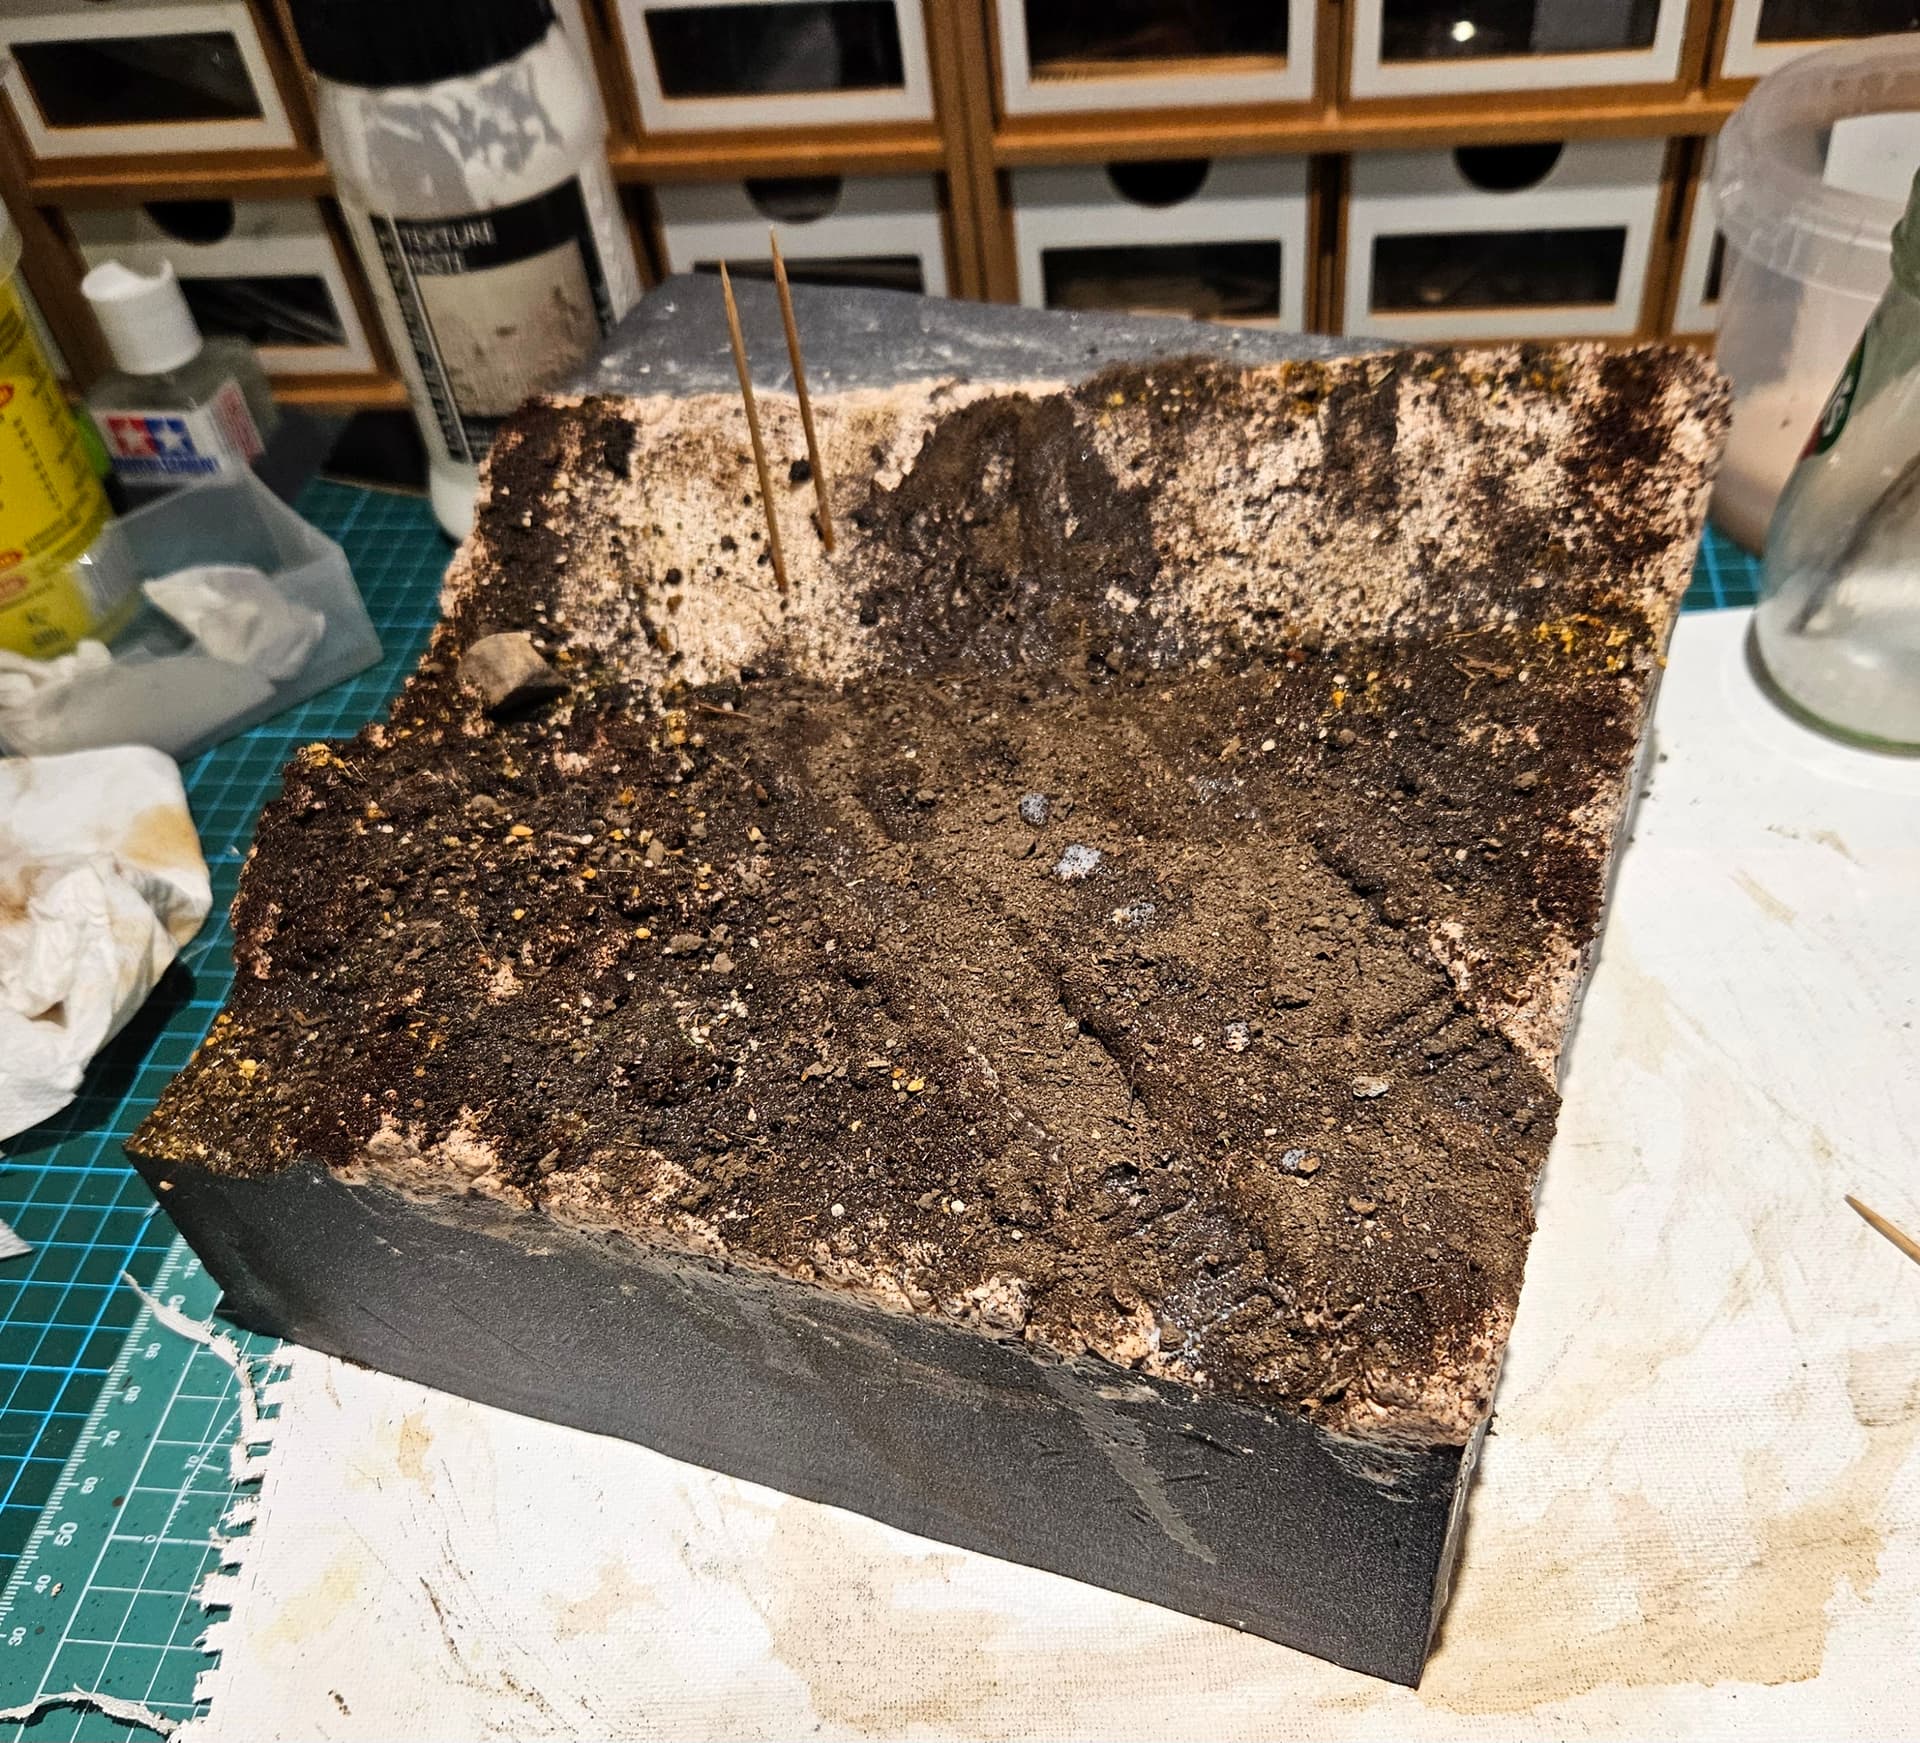
The main construction material will be Styrofoam, and this will sit inside a shallow shadow box frame. An appropriately sized block was cut square and offcuts were used to build up the basic terrain contours. These were glued in place and the shell crater was carved out in one corner.
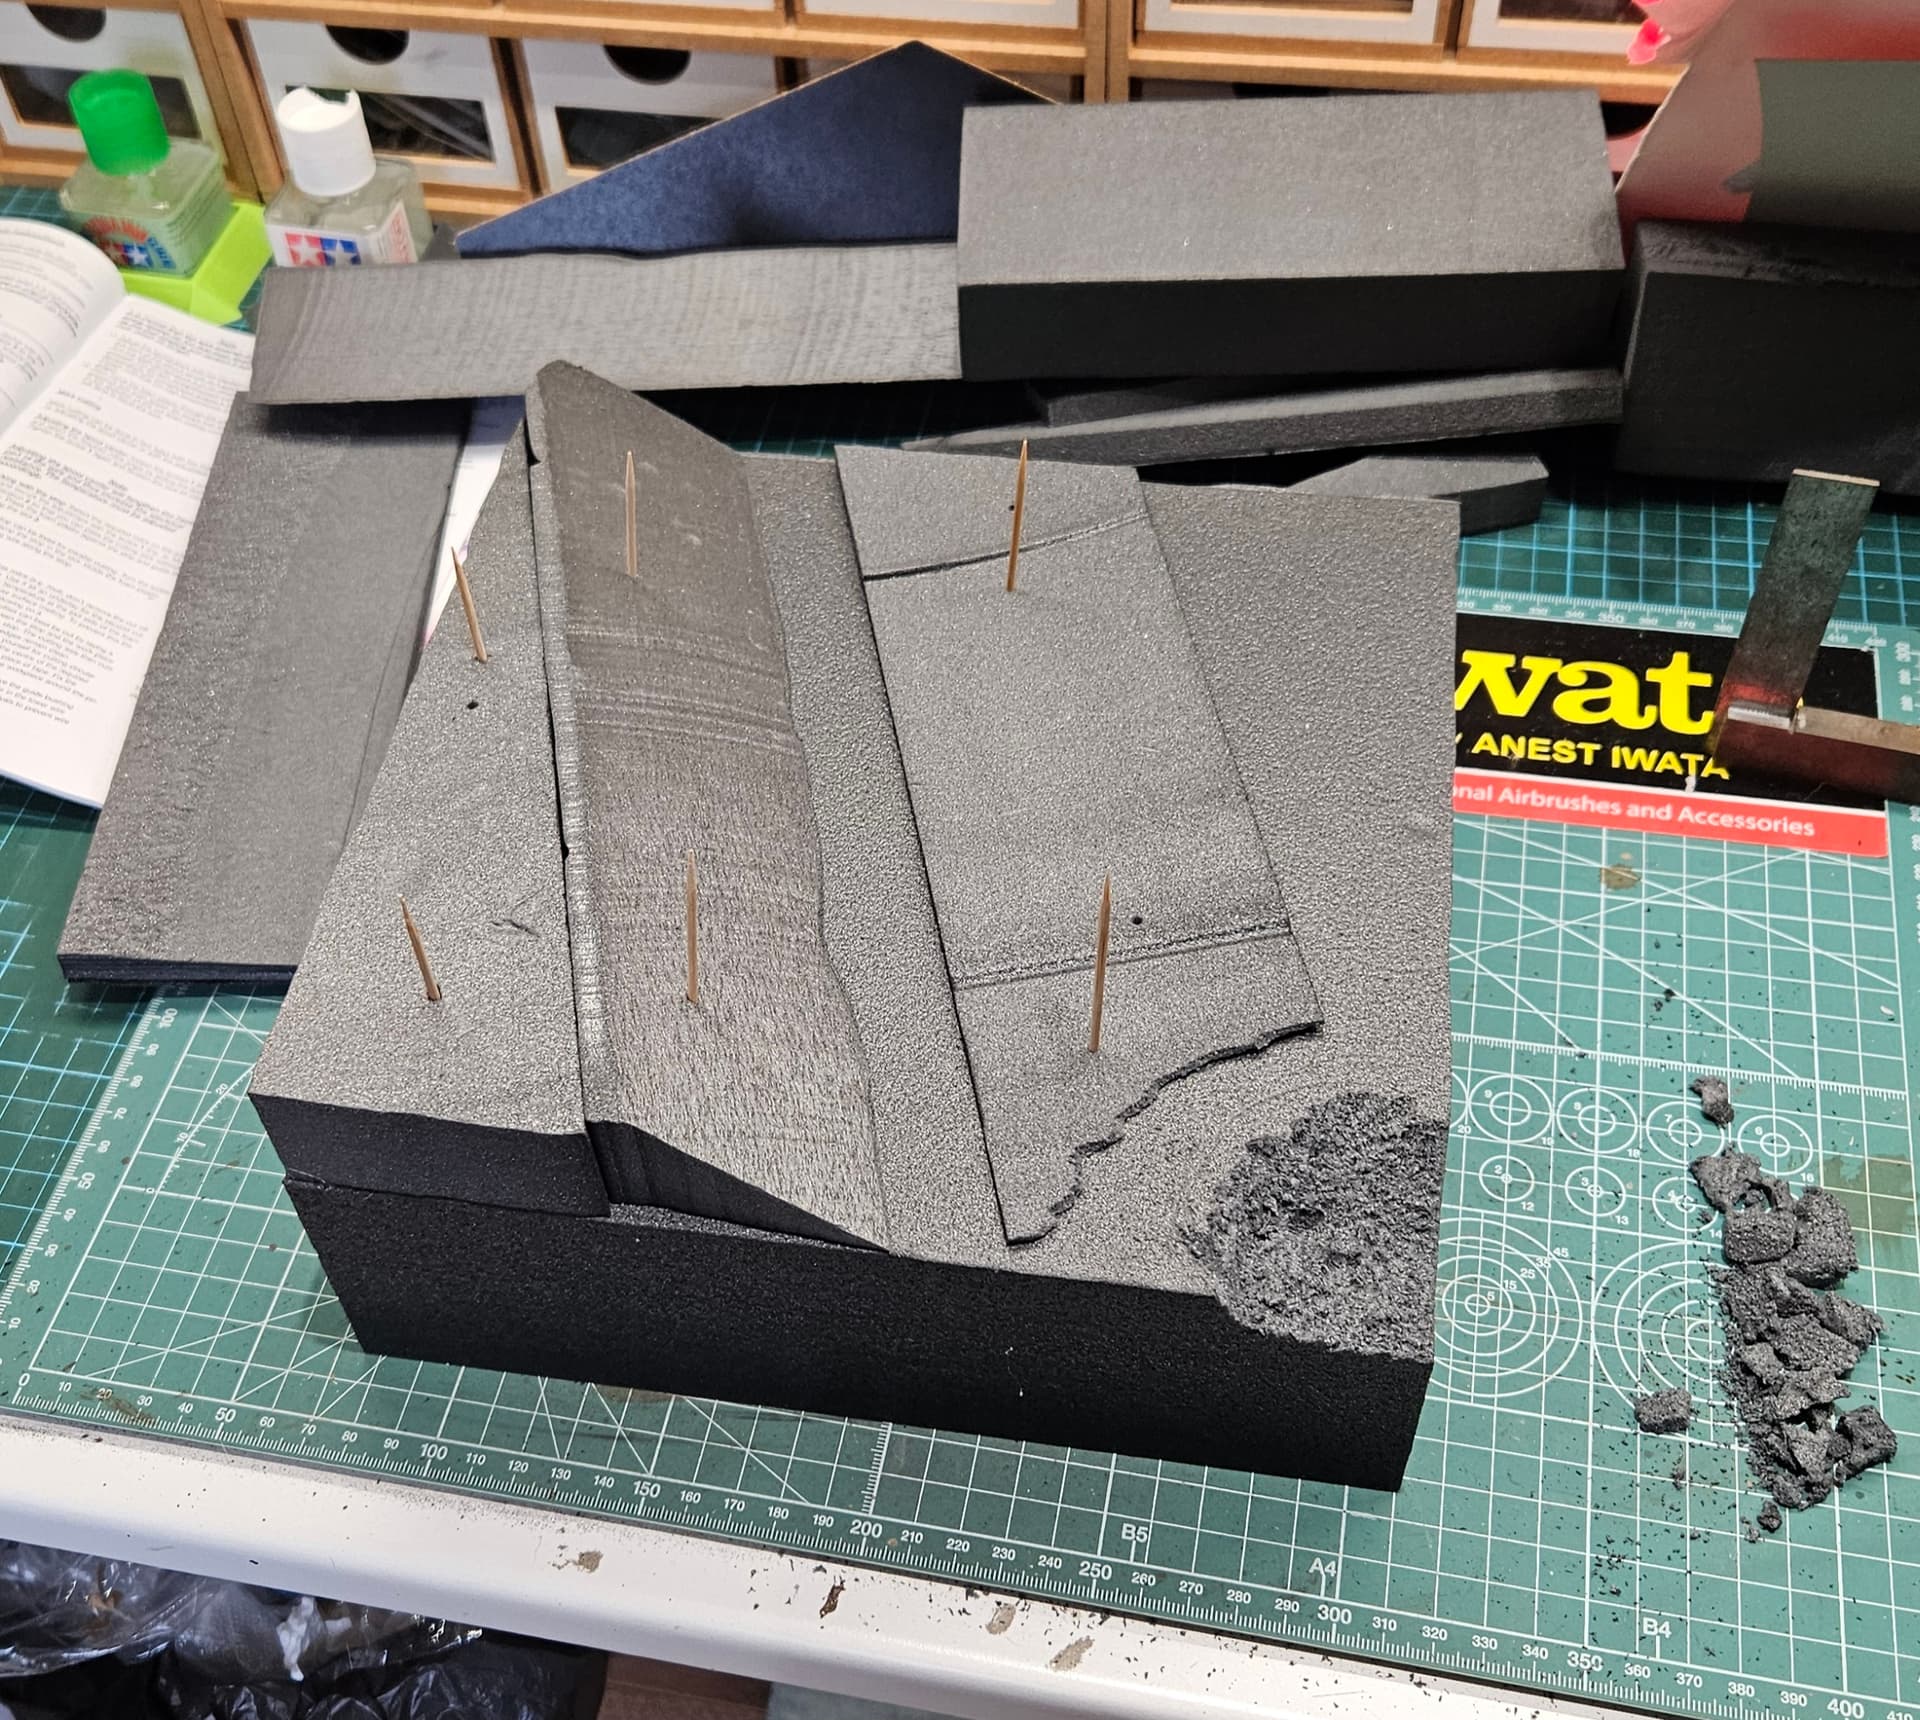
Before I added any terrain layers, I sealed the Styrofoam surface with a few coats of PVA and prepared the surface of my workbench for the mucky fall out that would ensue. Time to get messy!
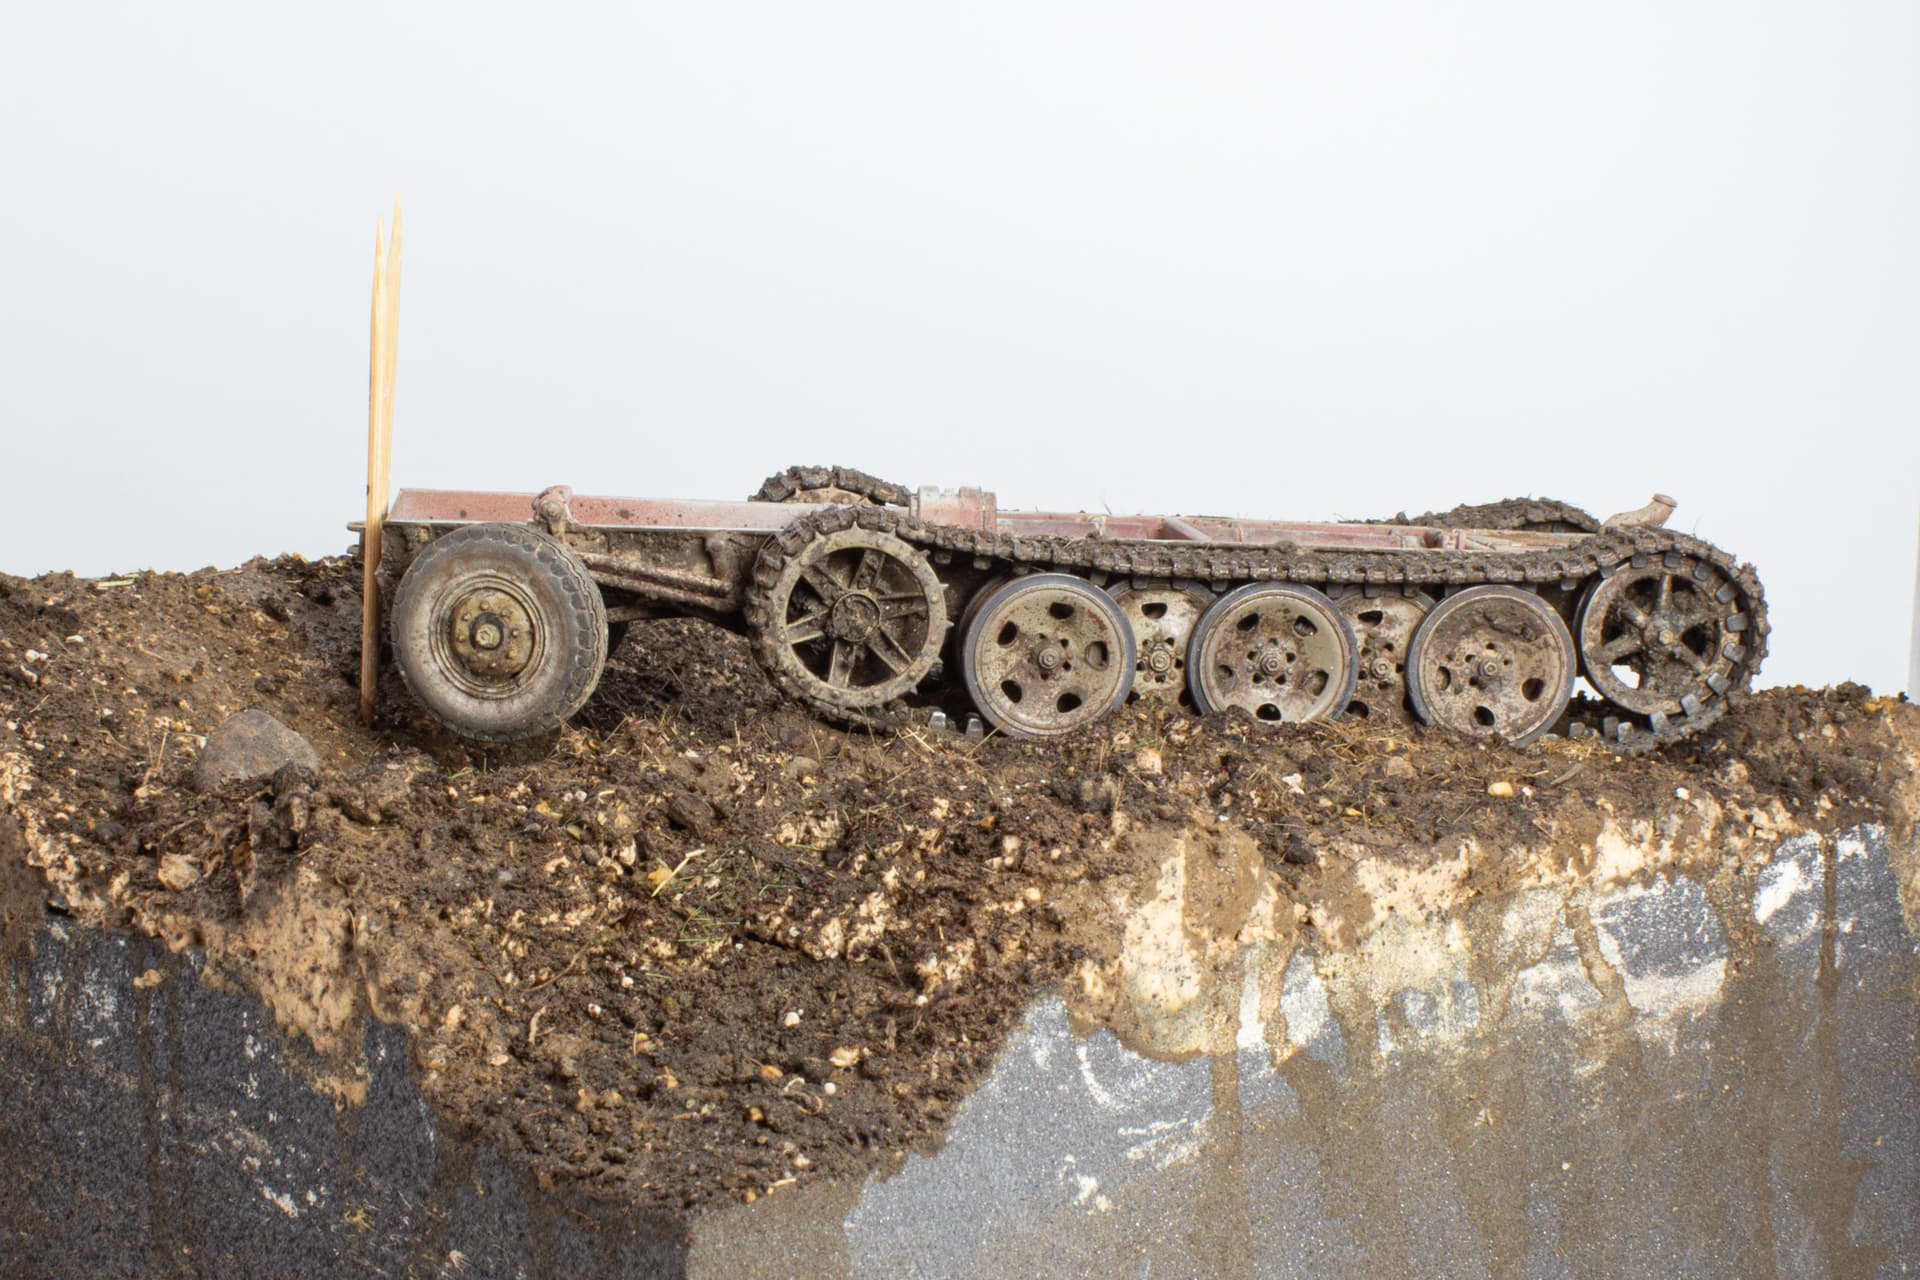
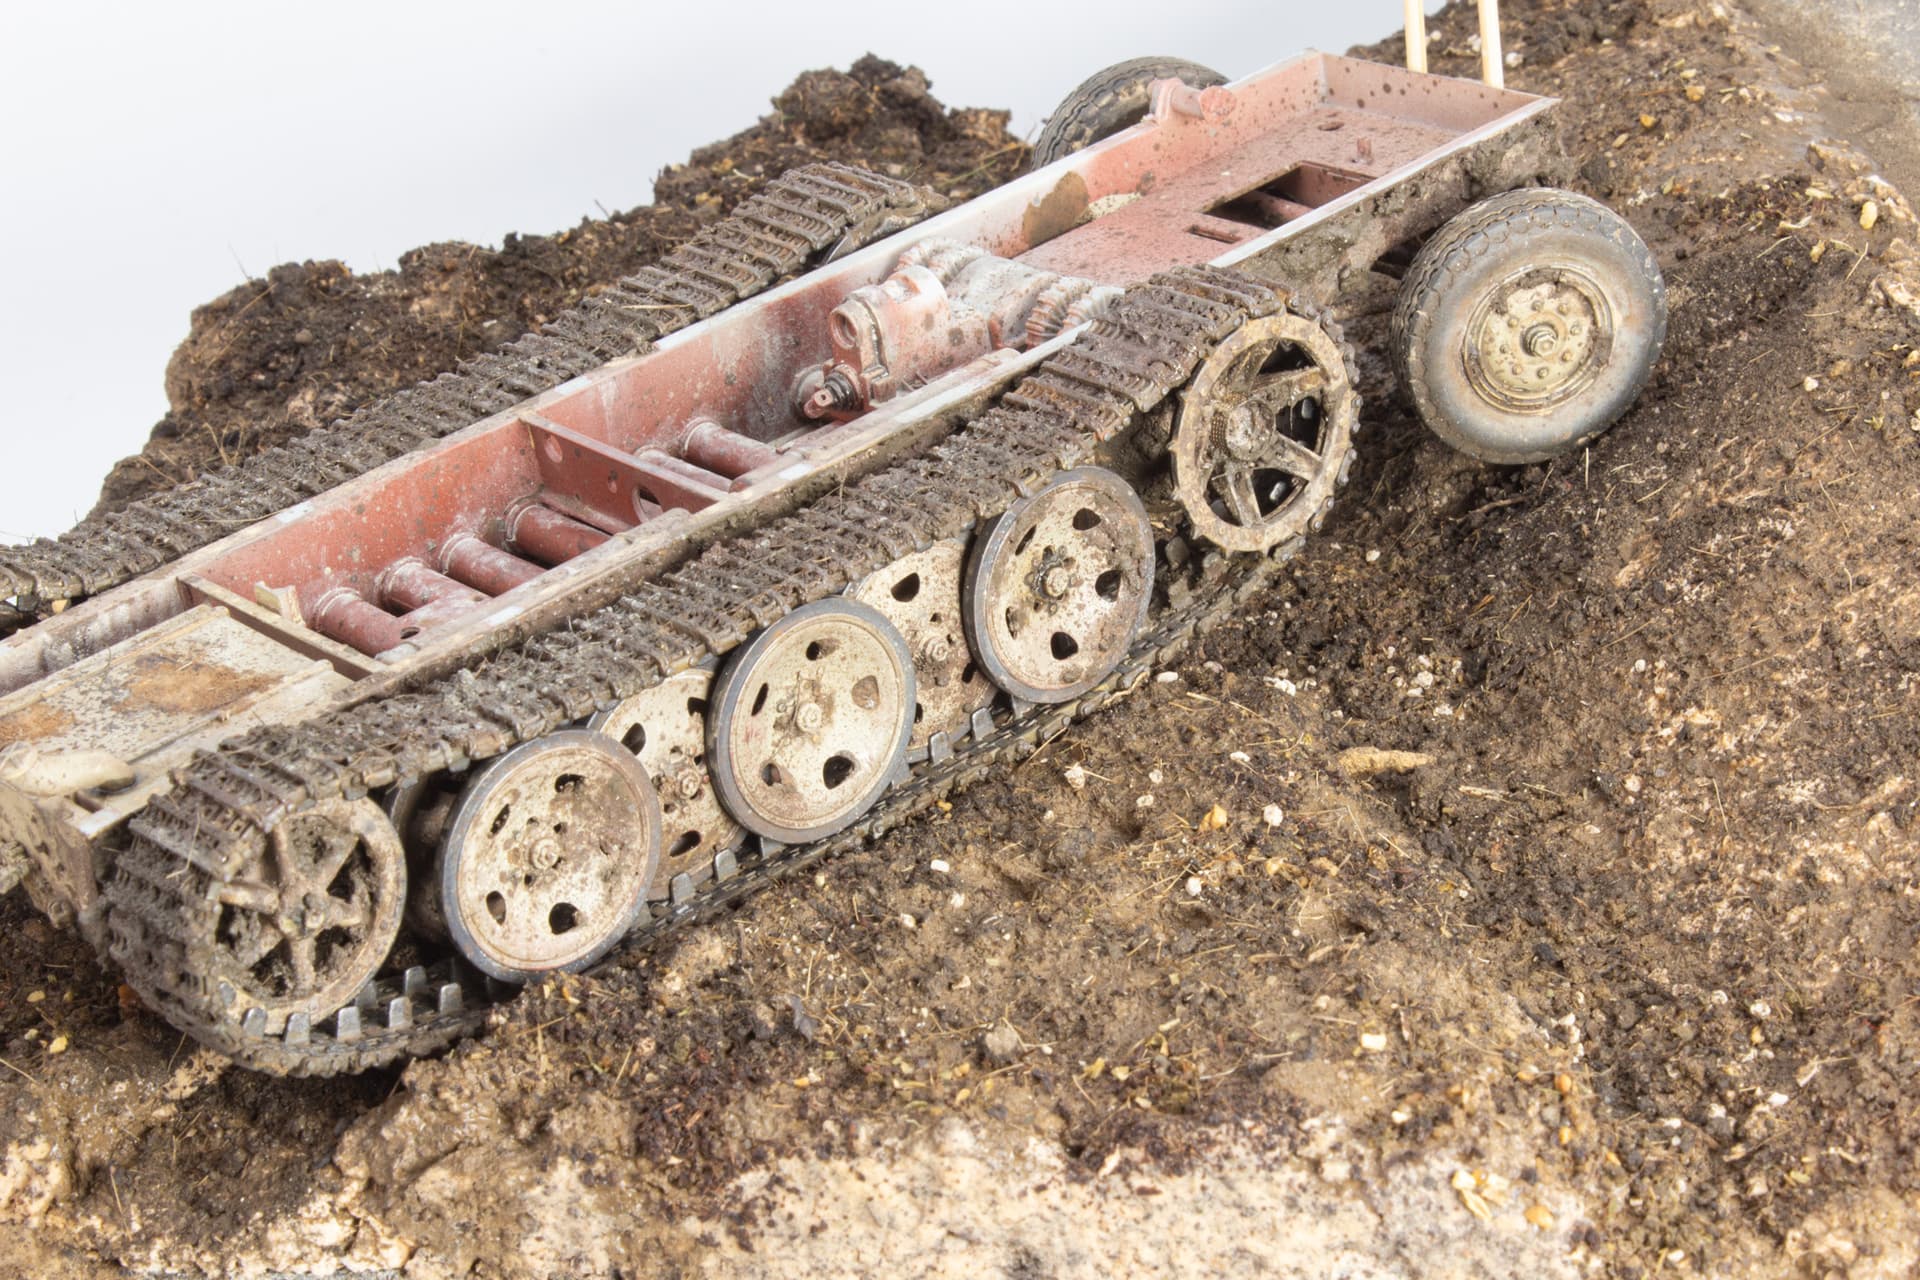
To start the ball rolling a Sculptamold and cheap hobby store earth toned acrylic was mixed up and an approx. one-centimetre-thick layer was applied with a small spatula to form the first terrain layer. Once this was 80% dry the sWS chassis was carefully placed on the terrain and marked with cocktail sticks. I could then work around this area with further layers helping the vehicle to appear sunk into the earth.
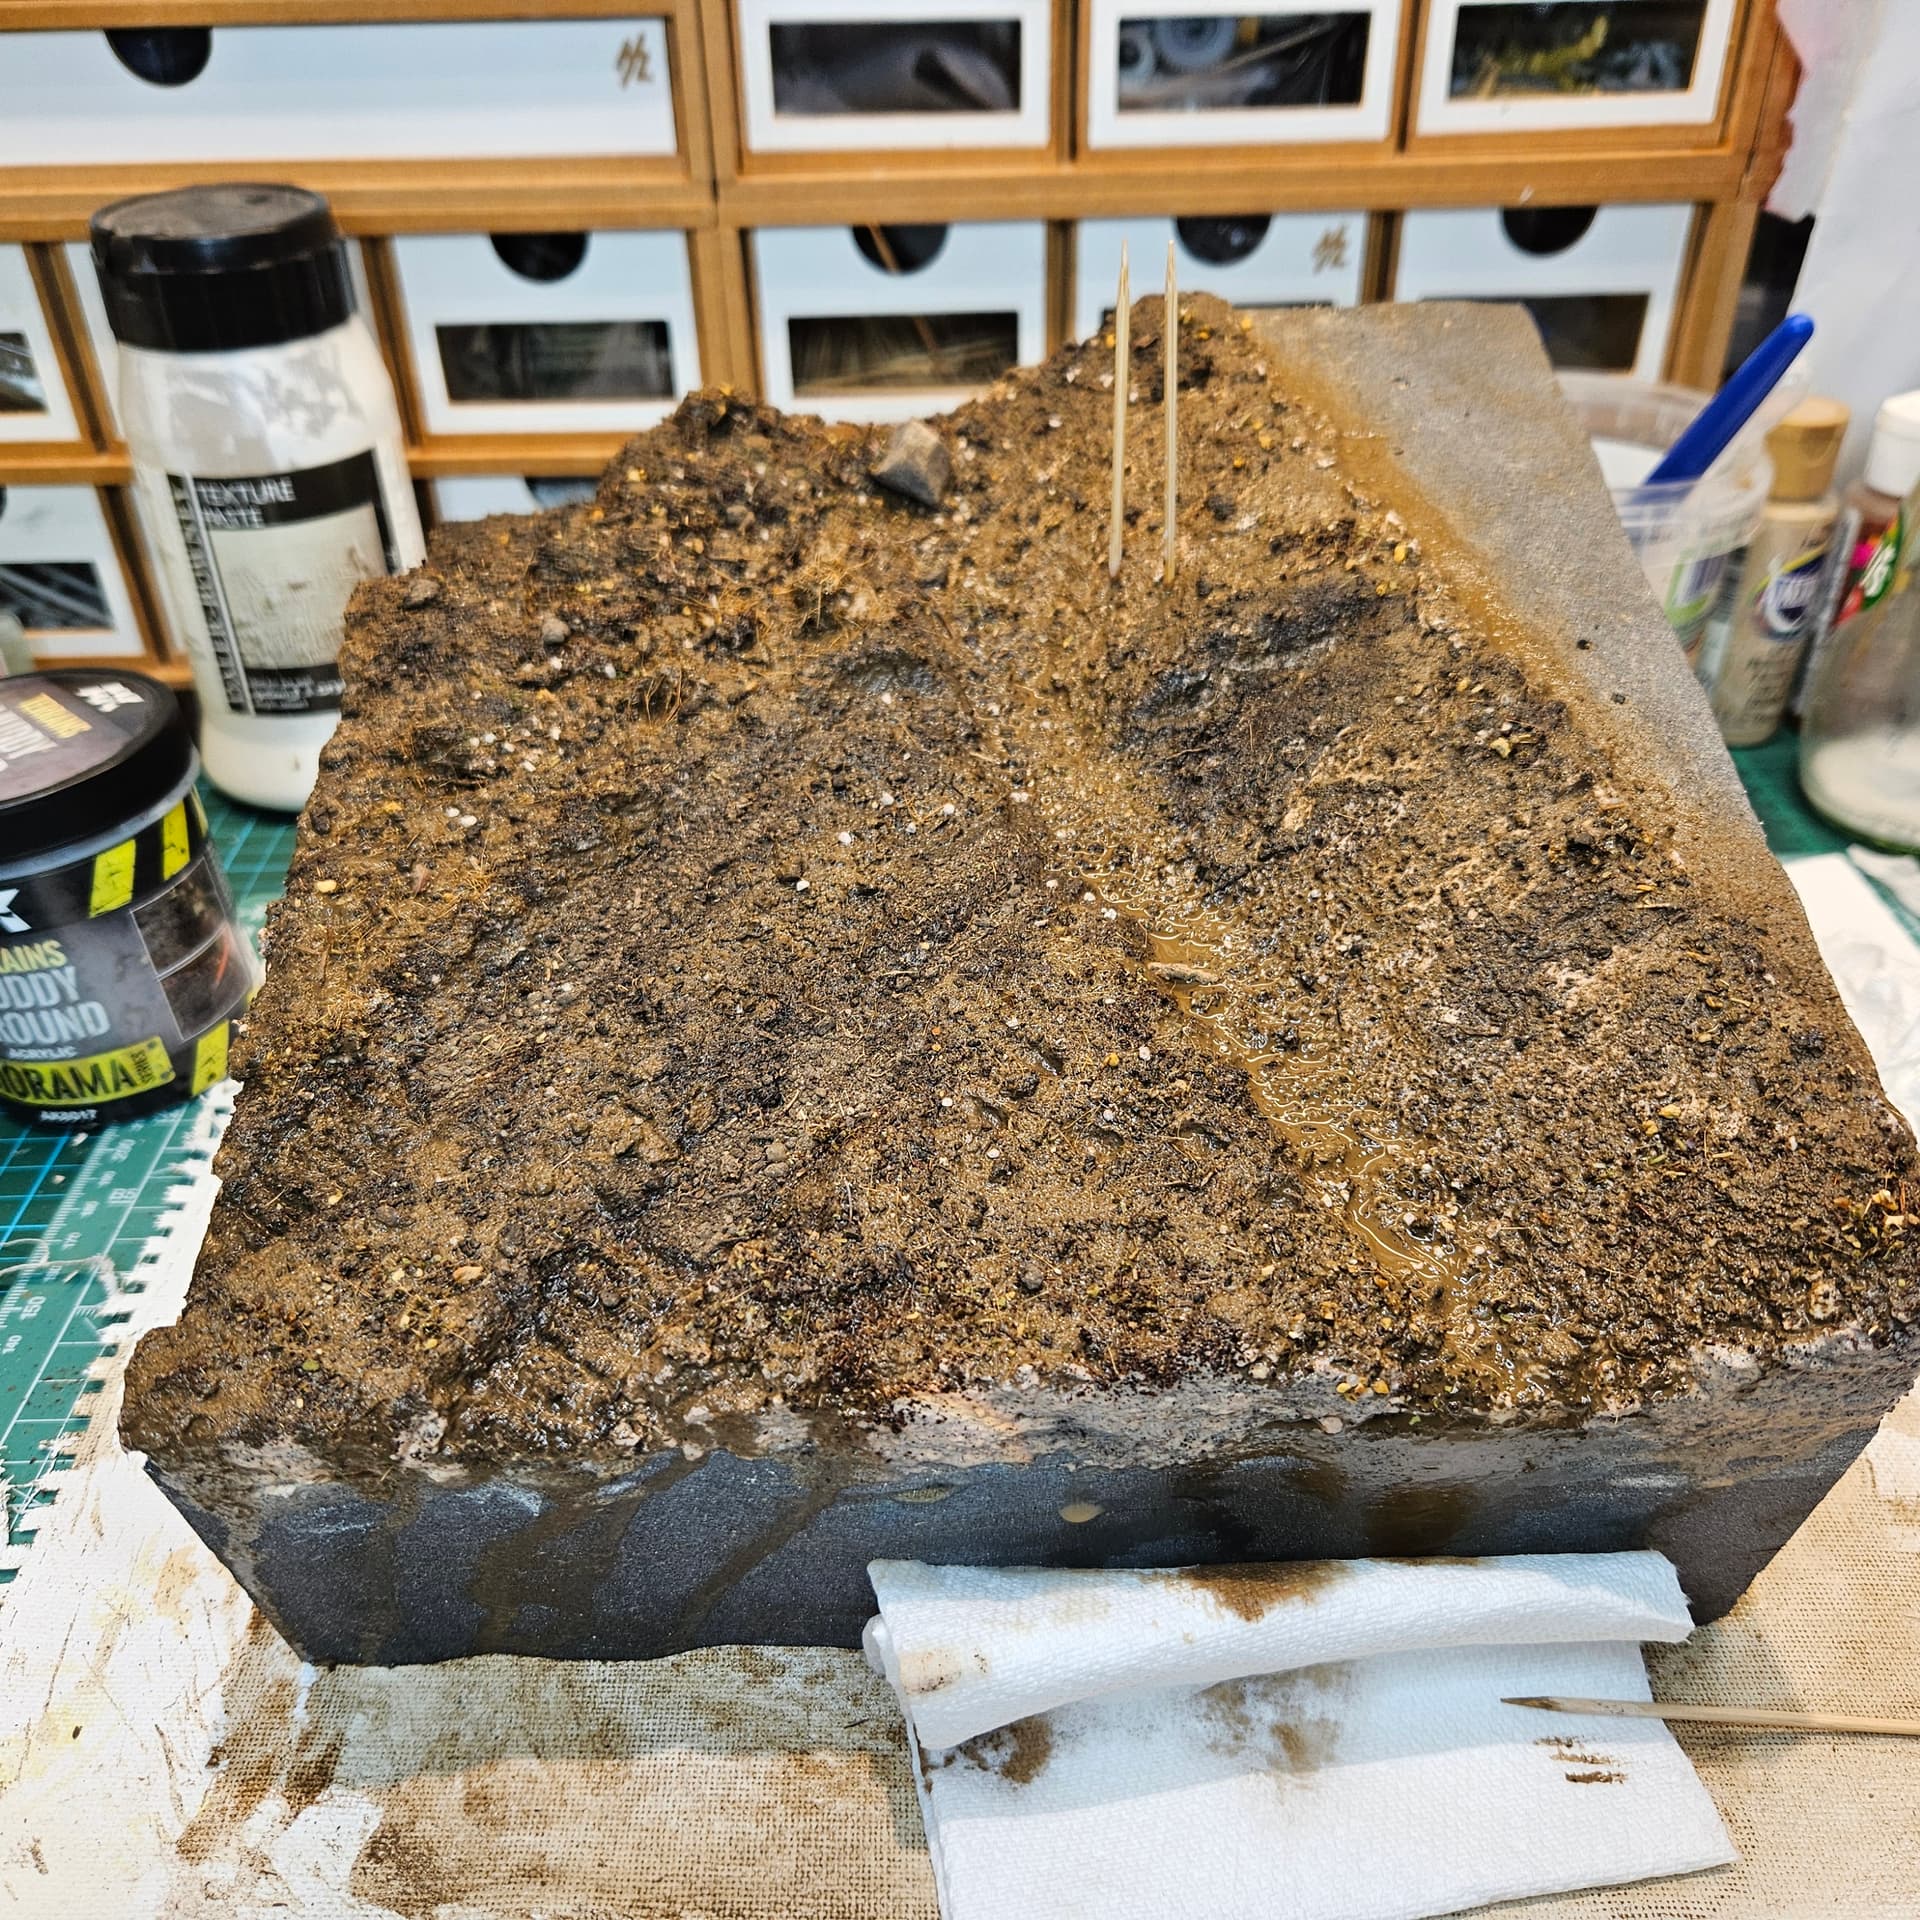
For the shell crater a Sculptamold and AK dark mud texture paste was mixed together to form a wet mix and allowed to part dry into small clumps. These were then strategically placed around the carved-out crater. Some of them were carefully prized apart to portray clumps that had landed and split further on impact. Whilst still moist a very light sprinkling of crushed dry garden earth was added and allowed to ‘soak in’. A dry scatter mix was then added. The scatter mix consisted of dried tea leaves, chopped sea grass, crushed garden soil with small roots, static grass, and a few small stones.
Surface after application
24hrs later

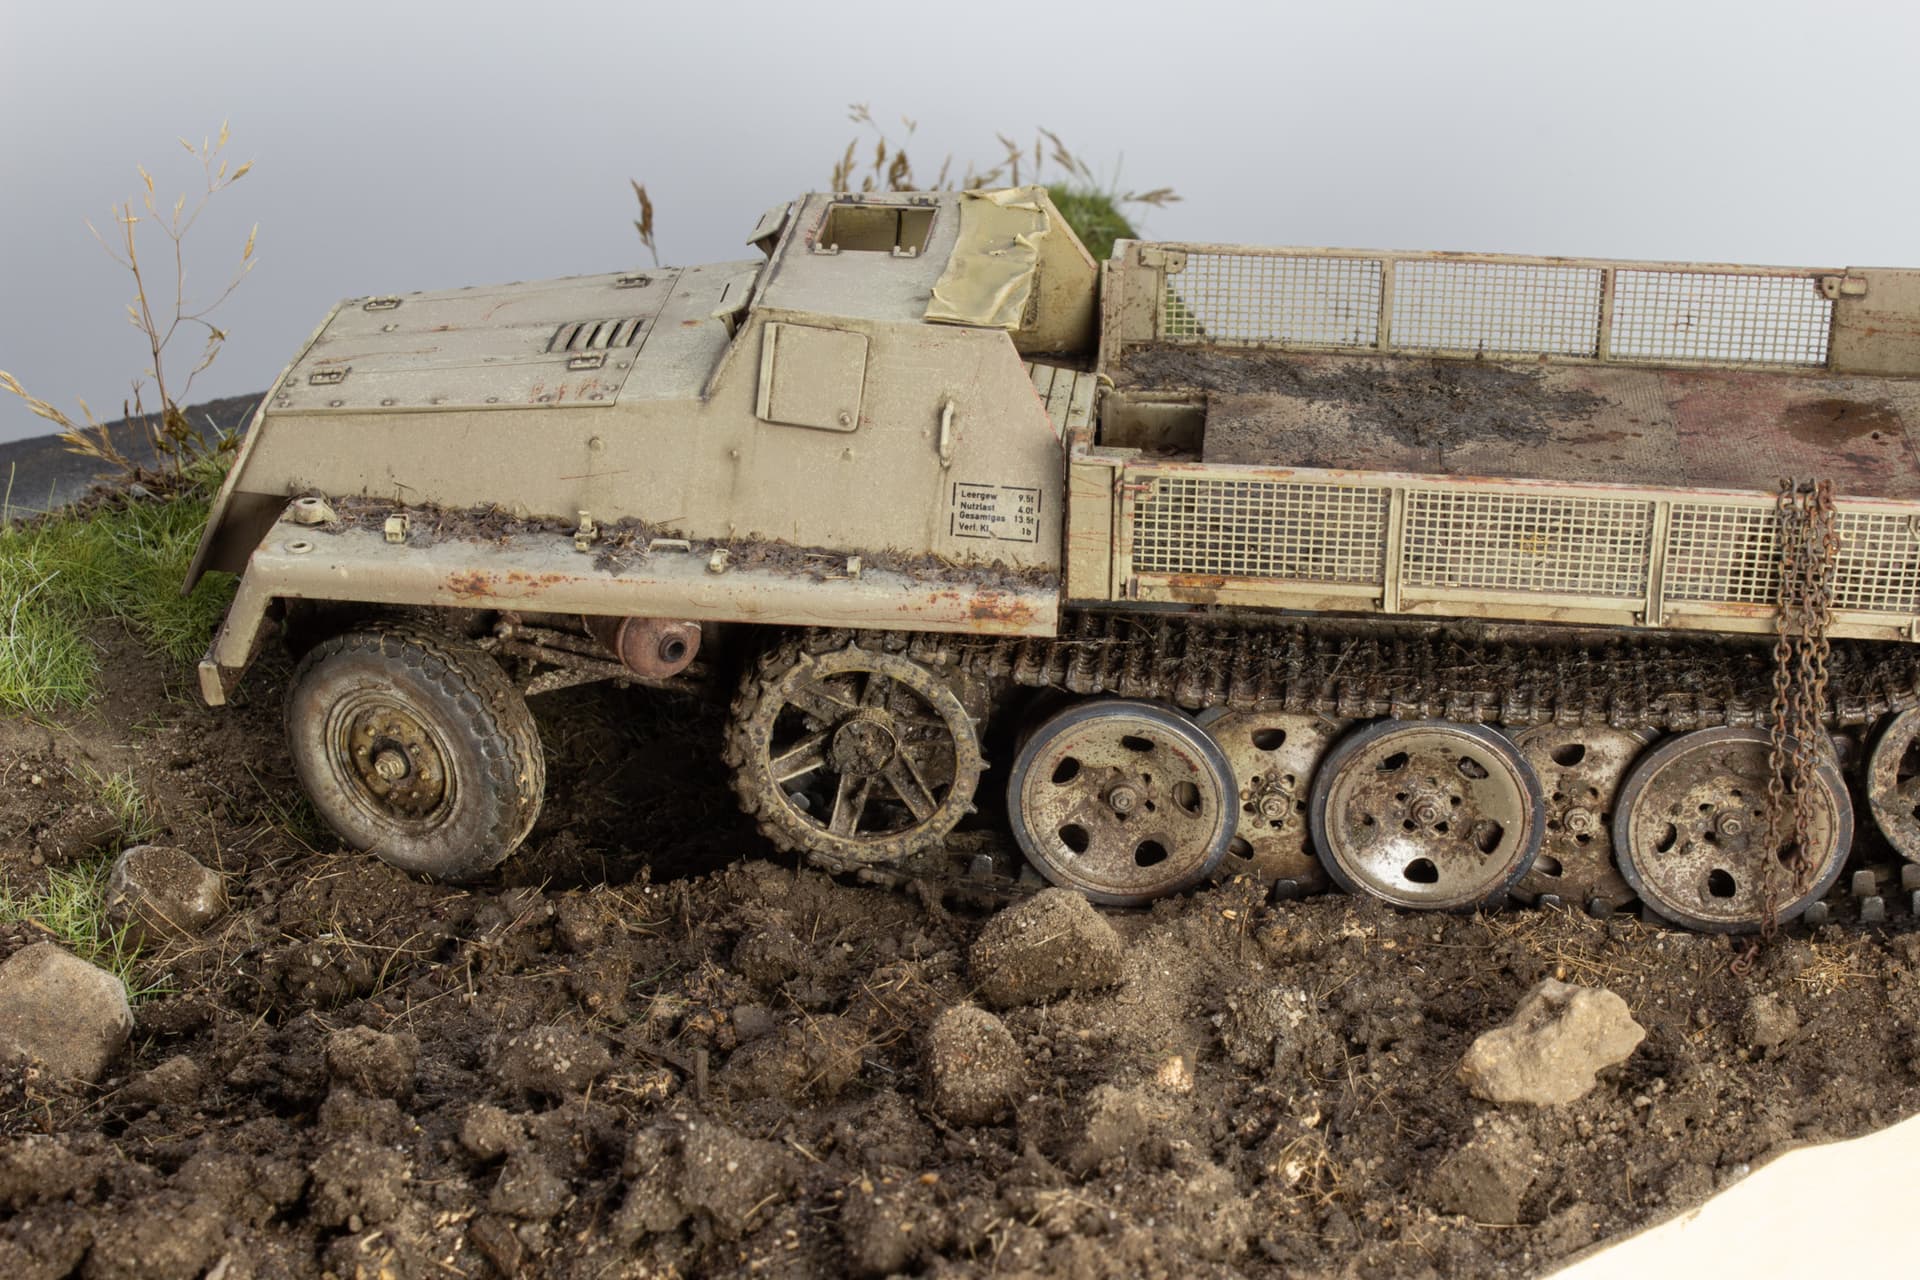
24hrs later a second wet mix was added over the remaining terrain with additional ‘scatter’ sprinkled over it. A mix of PVA glue and a little AK dark Mud texture paste was also employed and added with a pipette to ensure the scatter mix remained permanently fixed in place. With the surface still damp it was perfect for trial fitting the sWS again. Keeping the loadbed off the chassis made it much easier to handle the model. It was pressed into the damp surface so the track profiles would leave a deep enough contoured template for final placement. The two cocktail sticks are to aid quick test positioning of the front of the vehicle when required.

Next up will be to frame it, construct the road surface and add some vegitation
8 Likes
Wasn’t meant as a complaint, just reminded me of a time we got some concertina wire caught in our dozer’s tracks. What a mess cutting that out. Wayne
1 Like
The weathering looks excellent.
2 Likes
Cheers Mech
1 Like
To level off the road section with AK Asphalt texture paste I had to frame the piece first. So, armed with some 1.6mm Basswood sheets I marked out, cut, and added four nice straight side pieces with the aid of UHU Por glue. Once cured AK dark mud mixed with tea leaves and scatter was added into any small gaps that were left and blended into the existing terrain.
The corners of the basswood framing were all sanded nice and square ready for some matt black paint. AK Asphalt texture paste was then layered onto the small road section in two layers to level to the side of the frame. I didn’t speed up the drying process but cracks appeared all on their own, which thankfully in this case turned out a nice happy accident ![]()
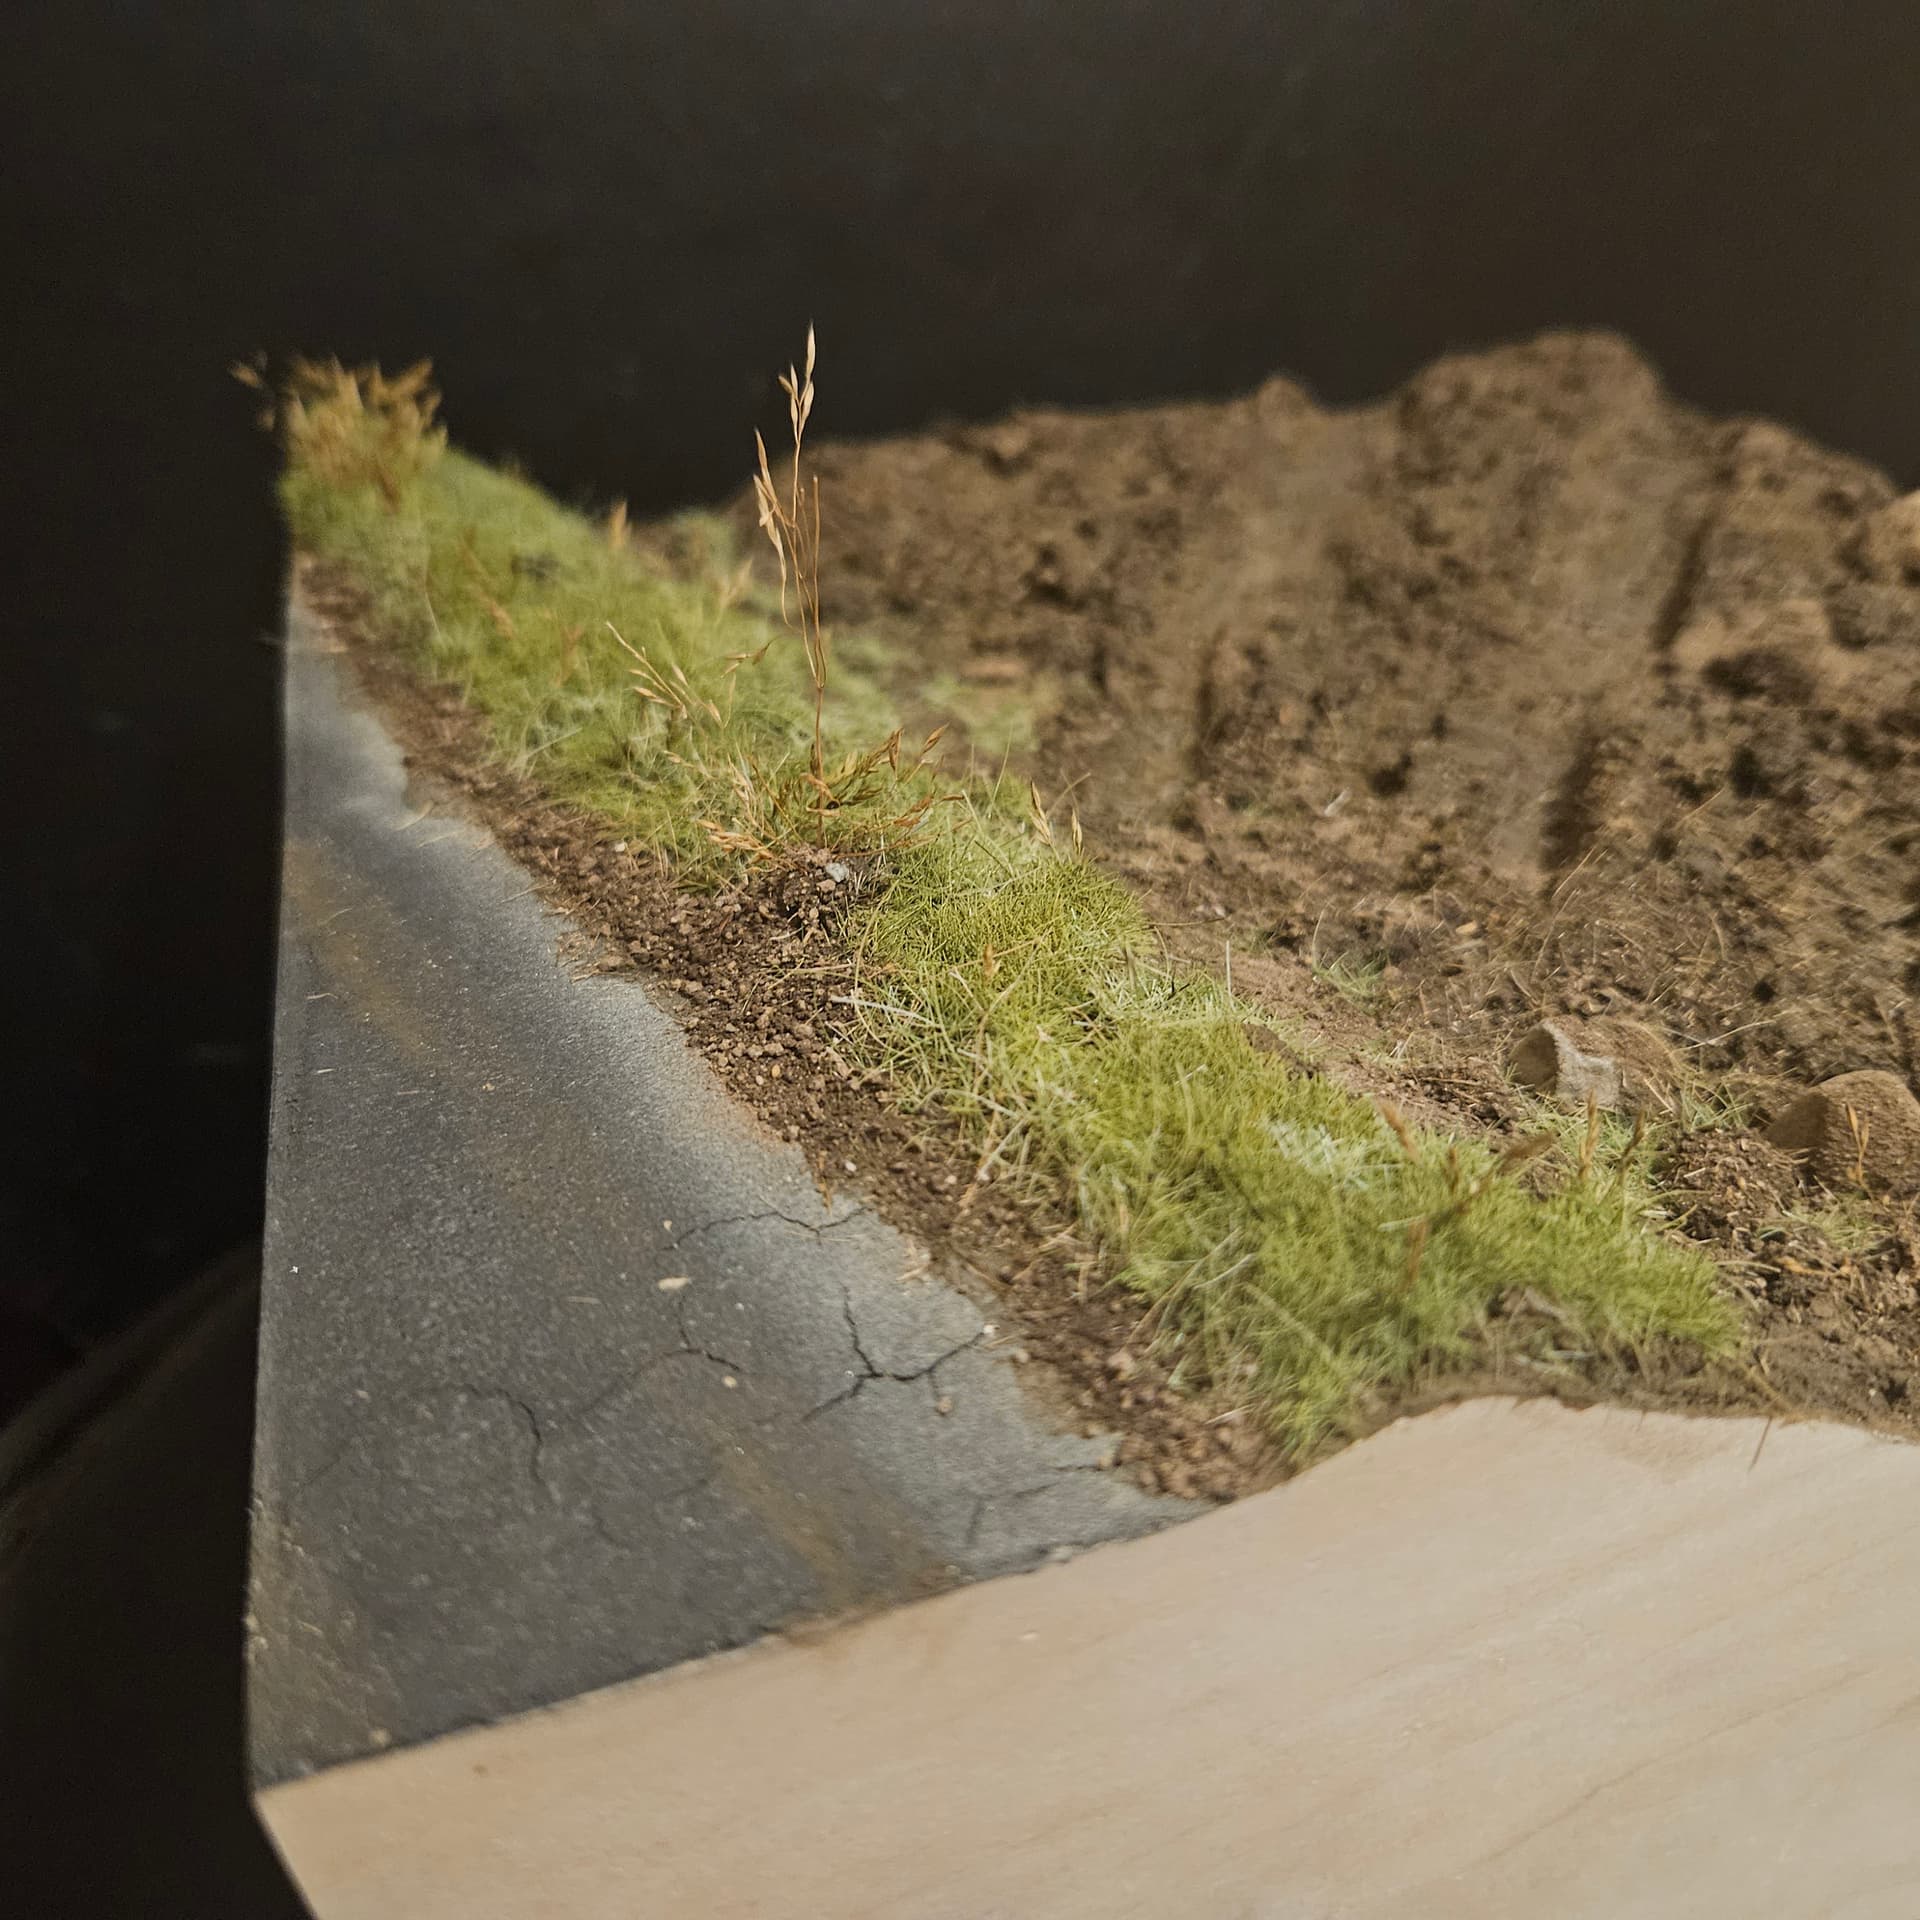
A much-needed splash of colour was then added onto the raised embankment, care off static grass and MK35 wild grass. These were airbrushed in different mixes of Tamiya Flat Green and Yellow Green.
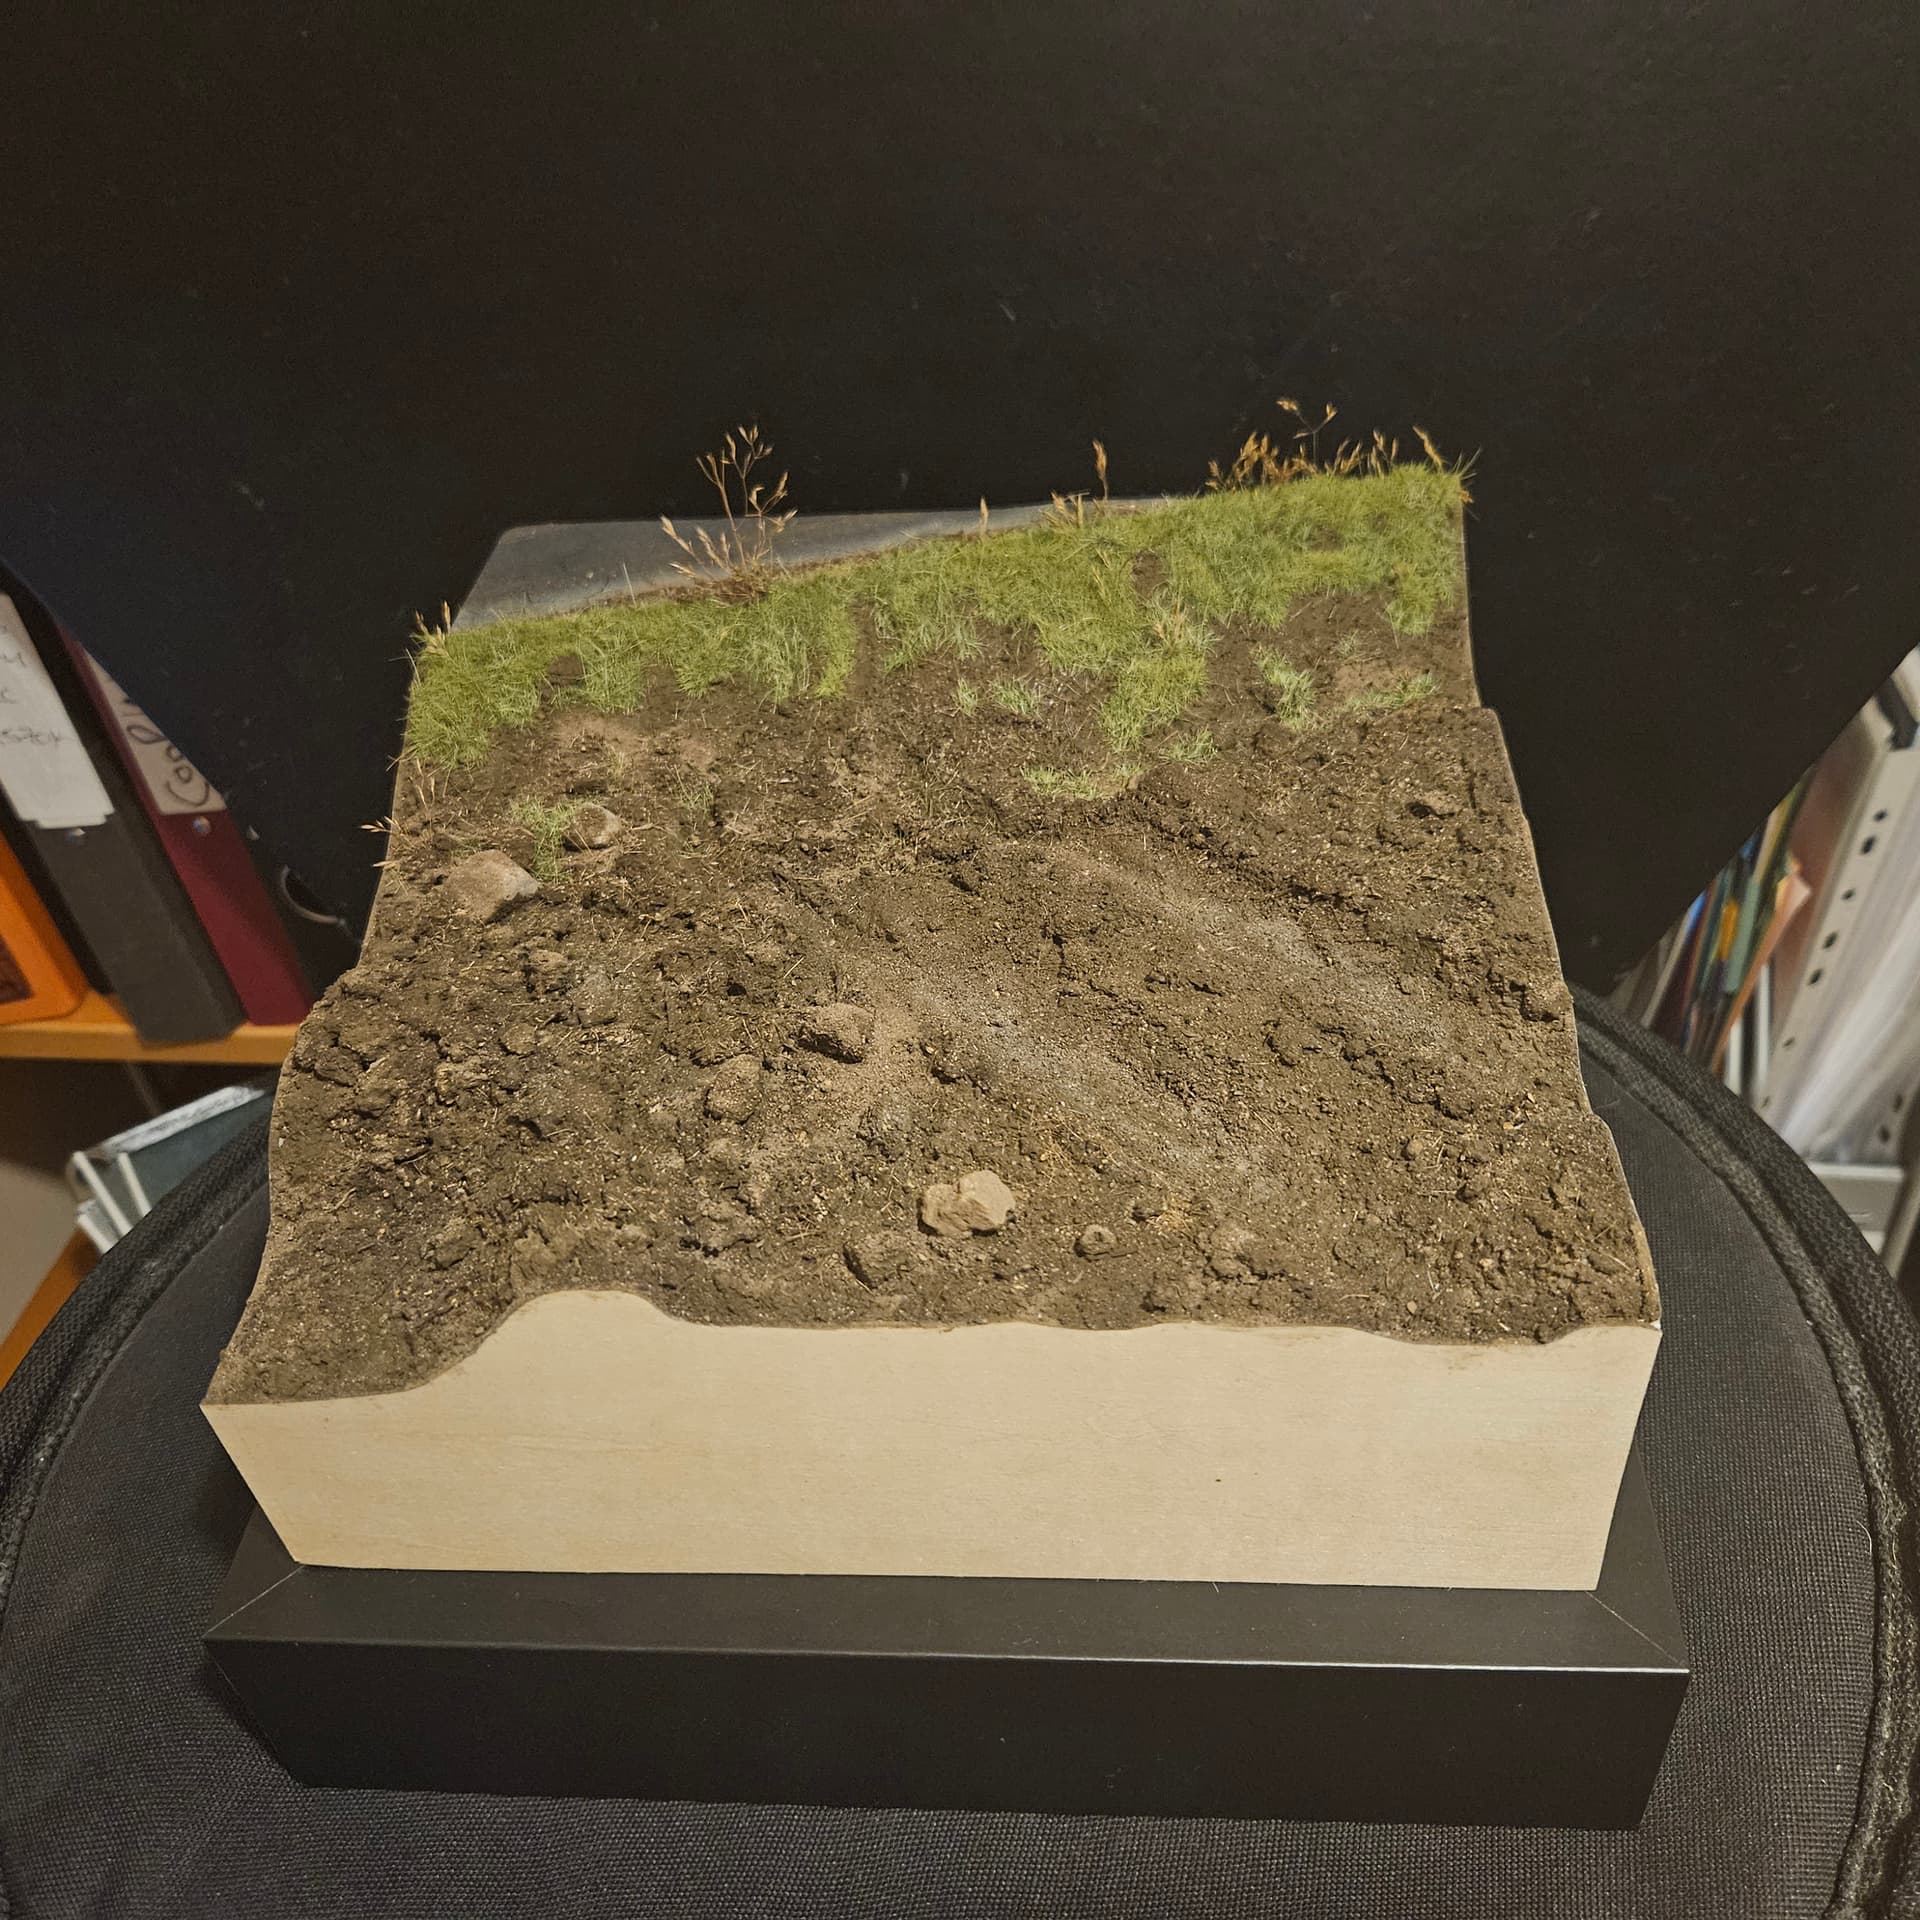
I’m currently working on a small fence section and a telegraph pole to give the scene some height. I’m still in two minds about adding a small tree. It wasn’t in the original plan, and it might obscure the vehicle too much, but I’m willing to have a play around to see if it will add to or distract from the overall look.
Progress for now

11 Likes
Looks fantastic. Really well done!
2 Likes