1/35 Bronco Schwerer Wehrmachtschlepper (The late war Sd.Kfz. 6 and 11 replacement)

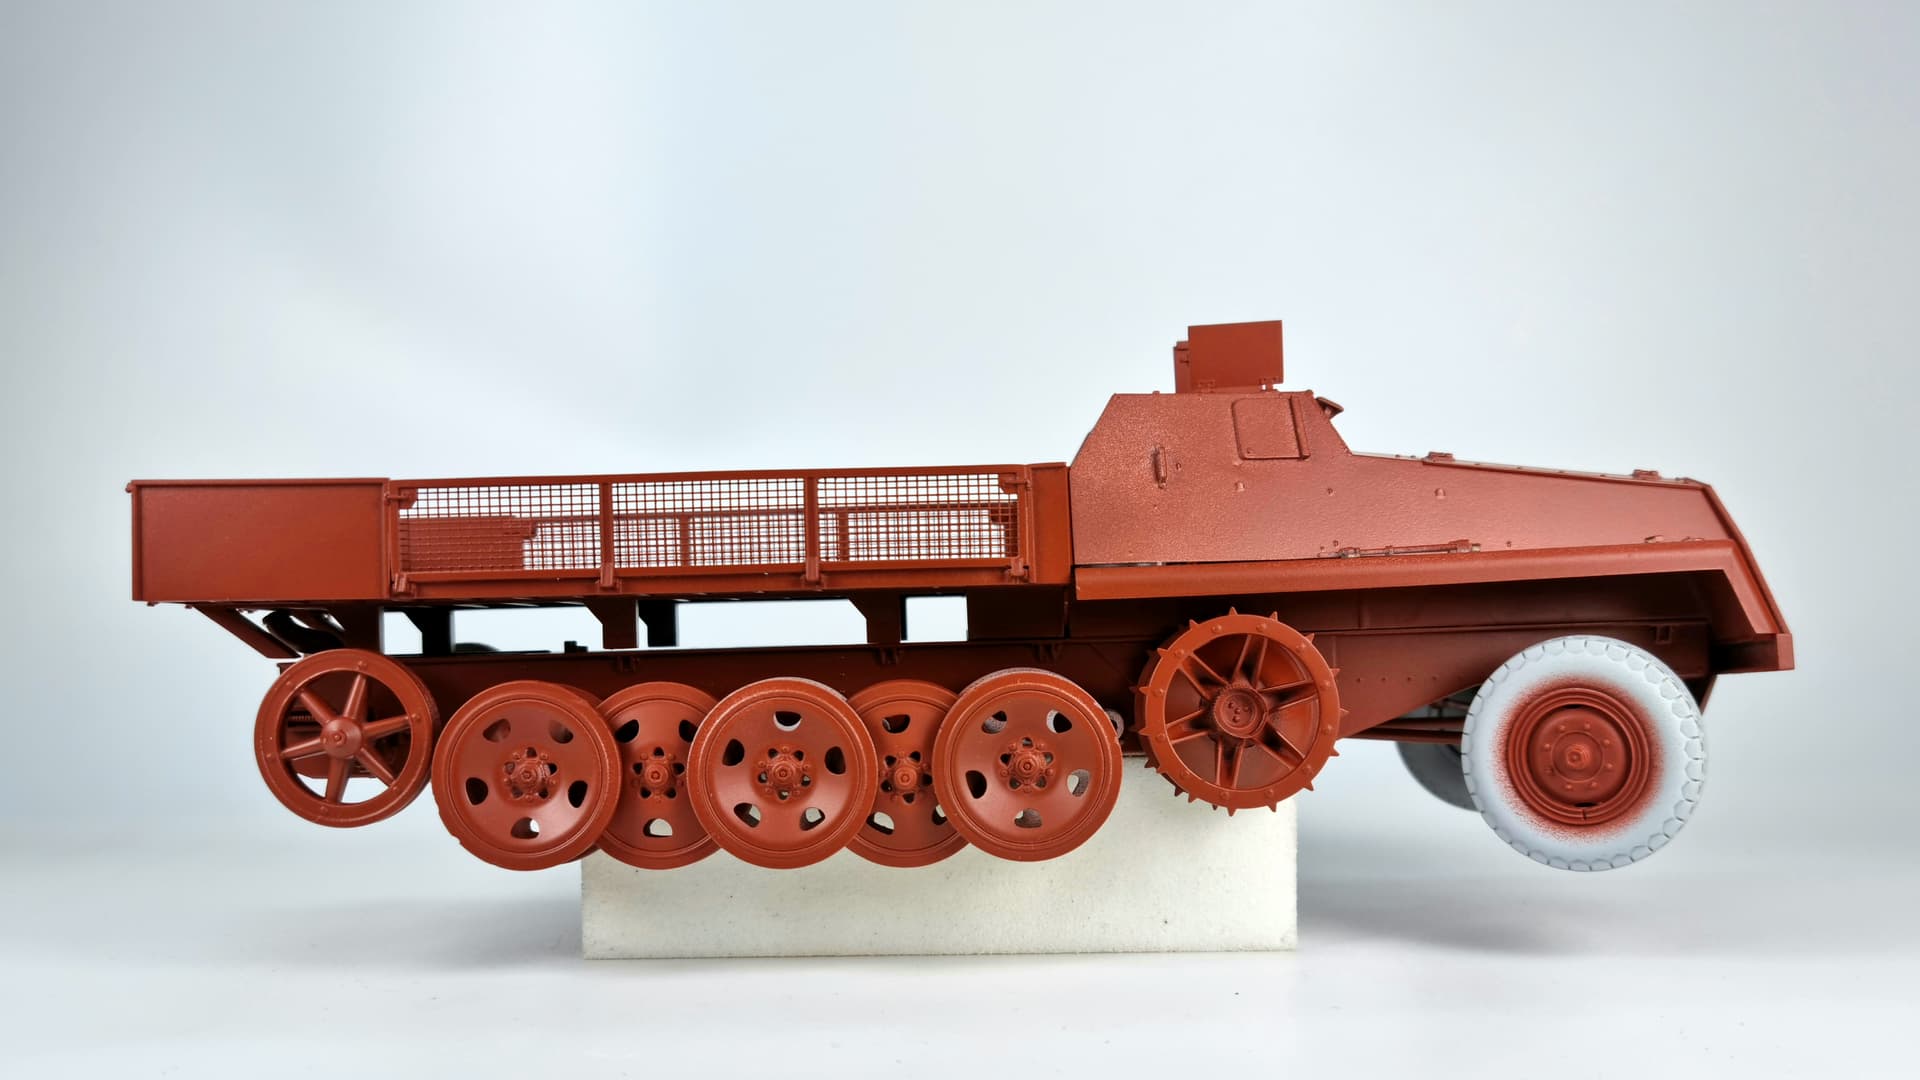
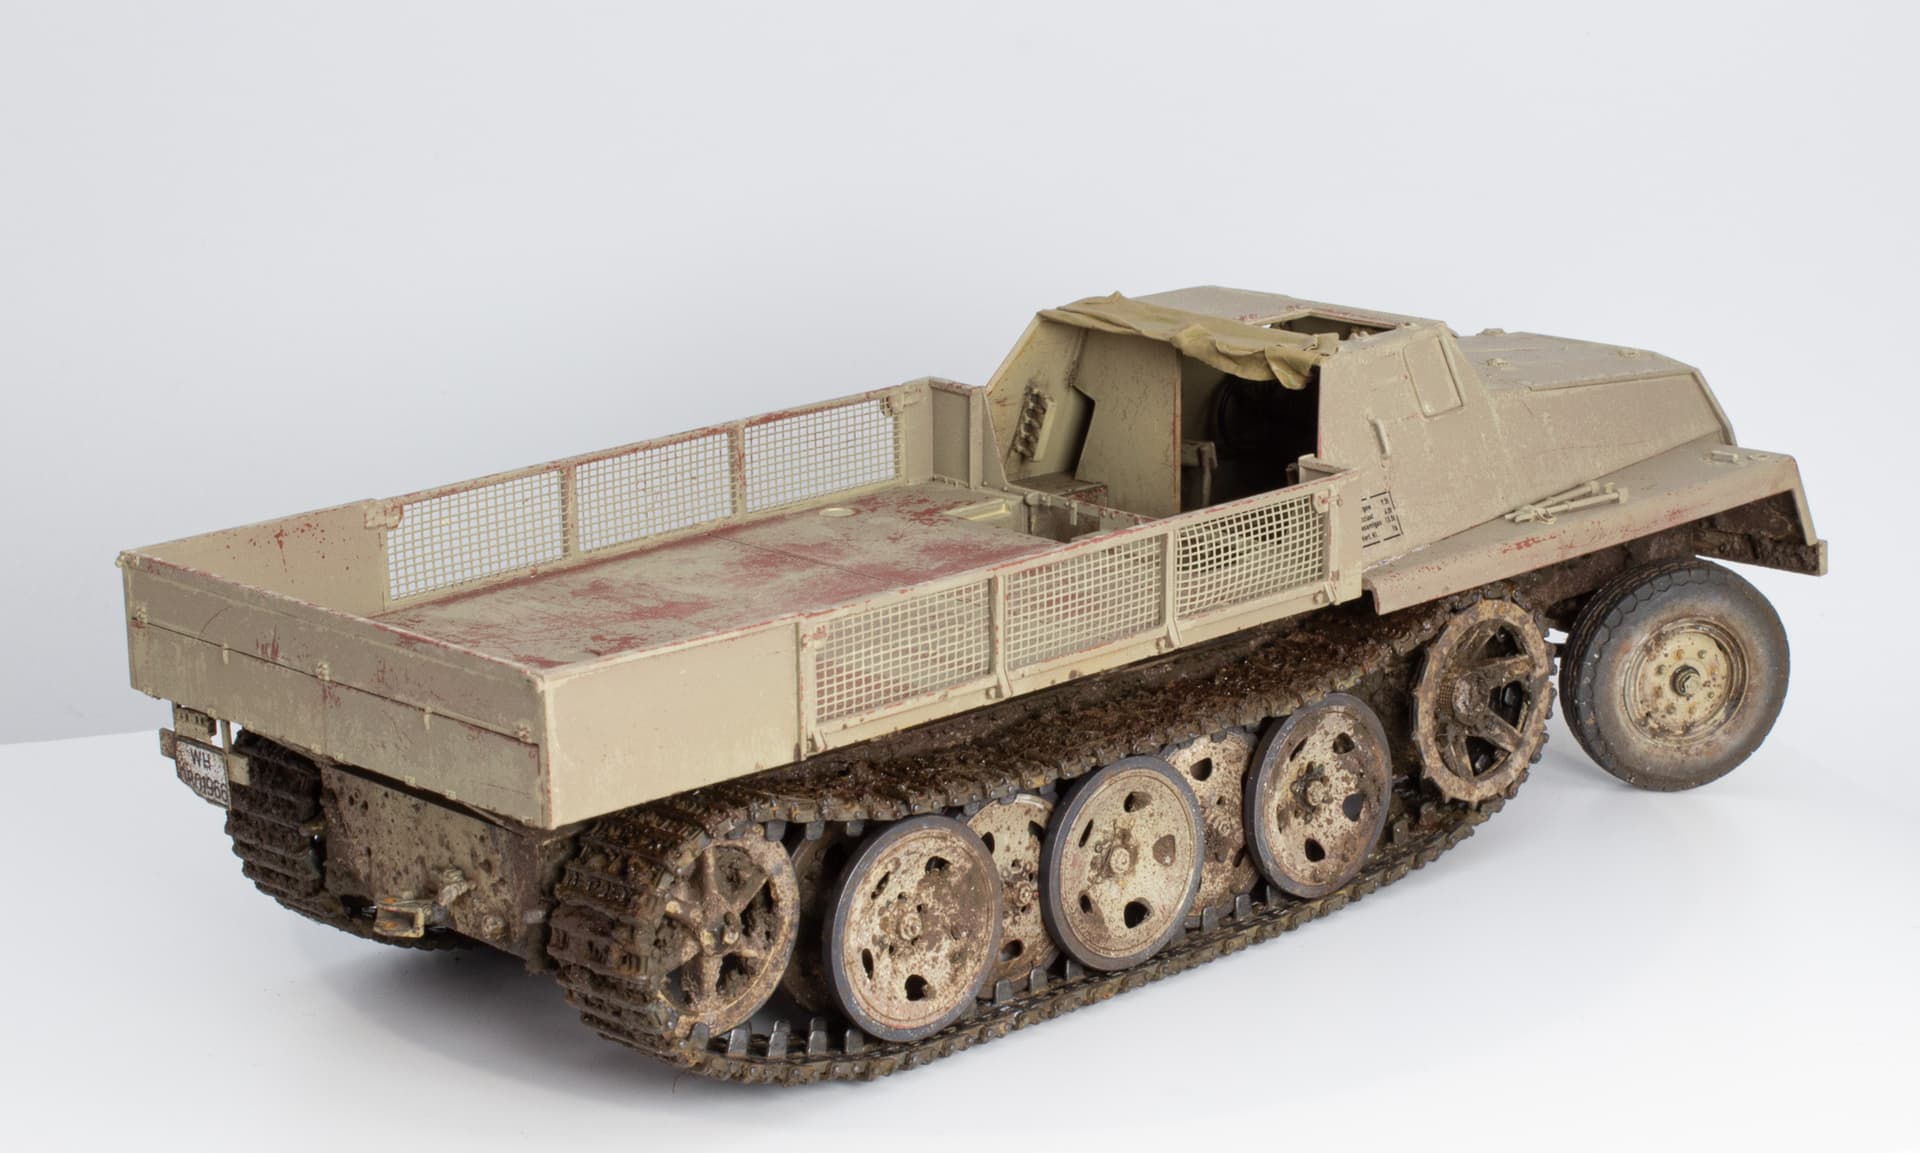
This is the 2016 ‘2in1’ Bronco kit #CB35214. It was the last release of a series of sWS variants, that were based on the original Great Wall Hobby mouldings stretching back to 2009.

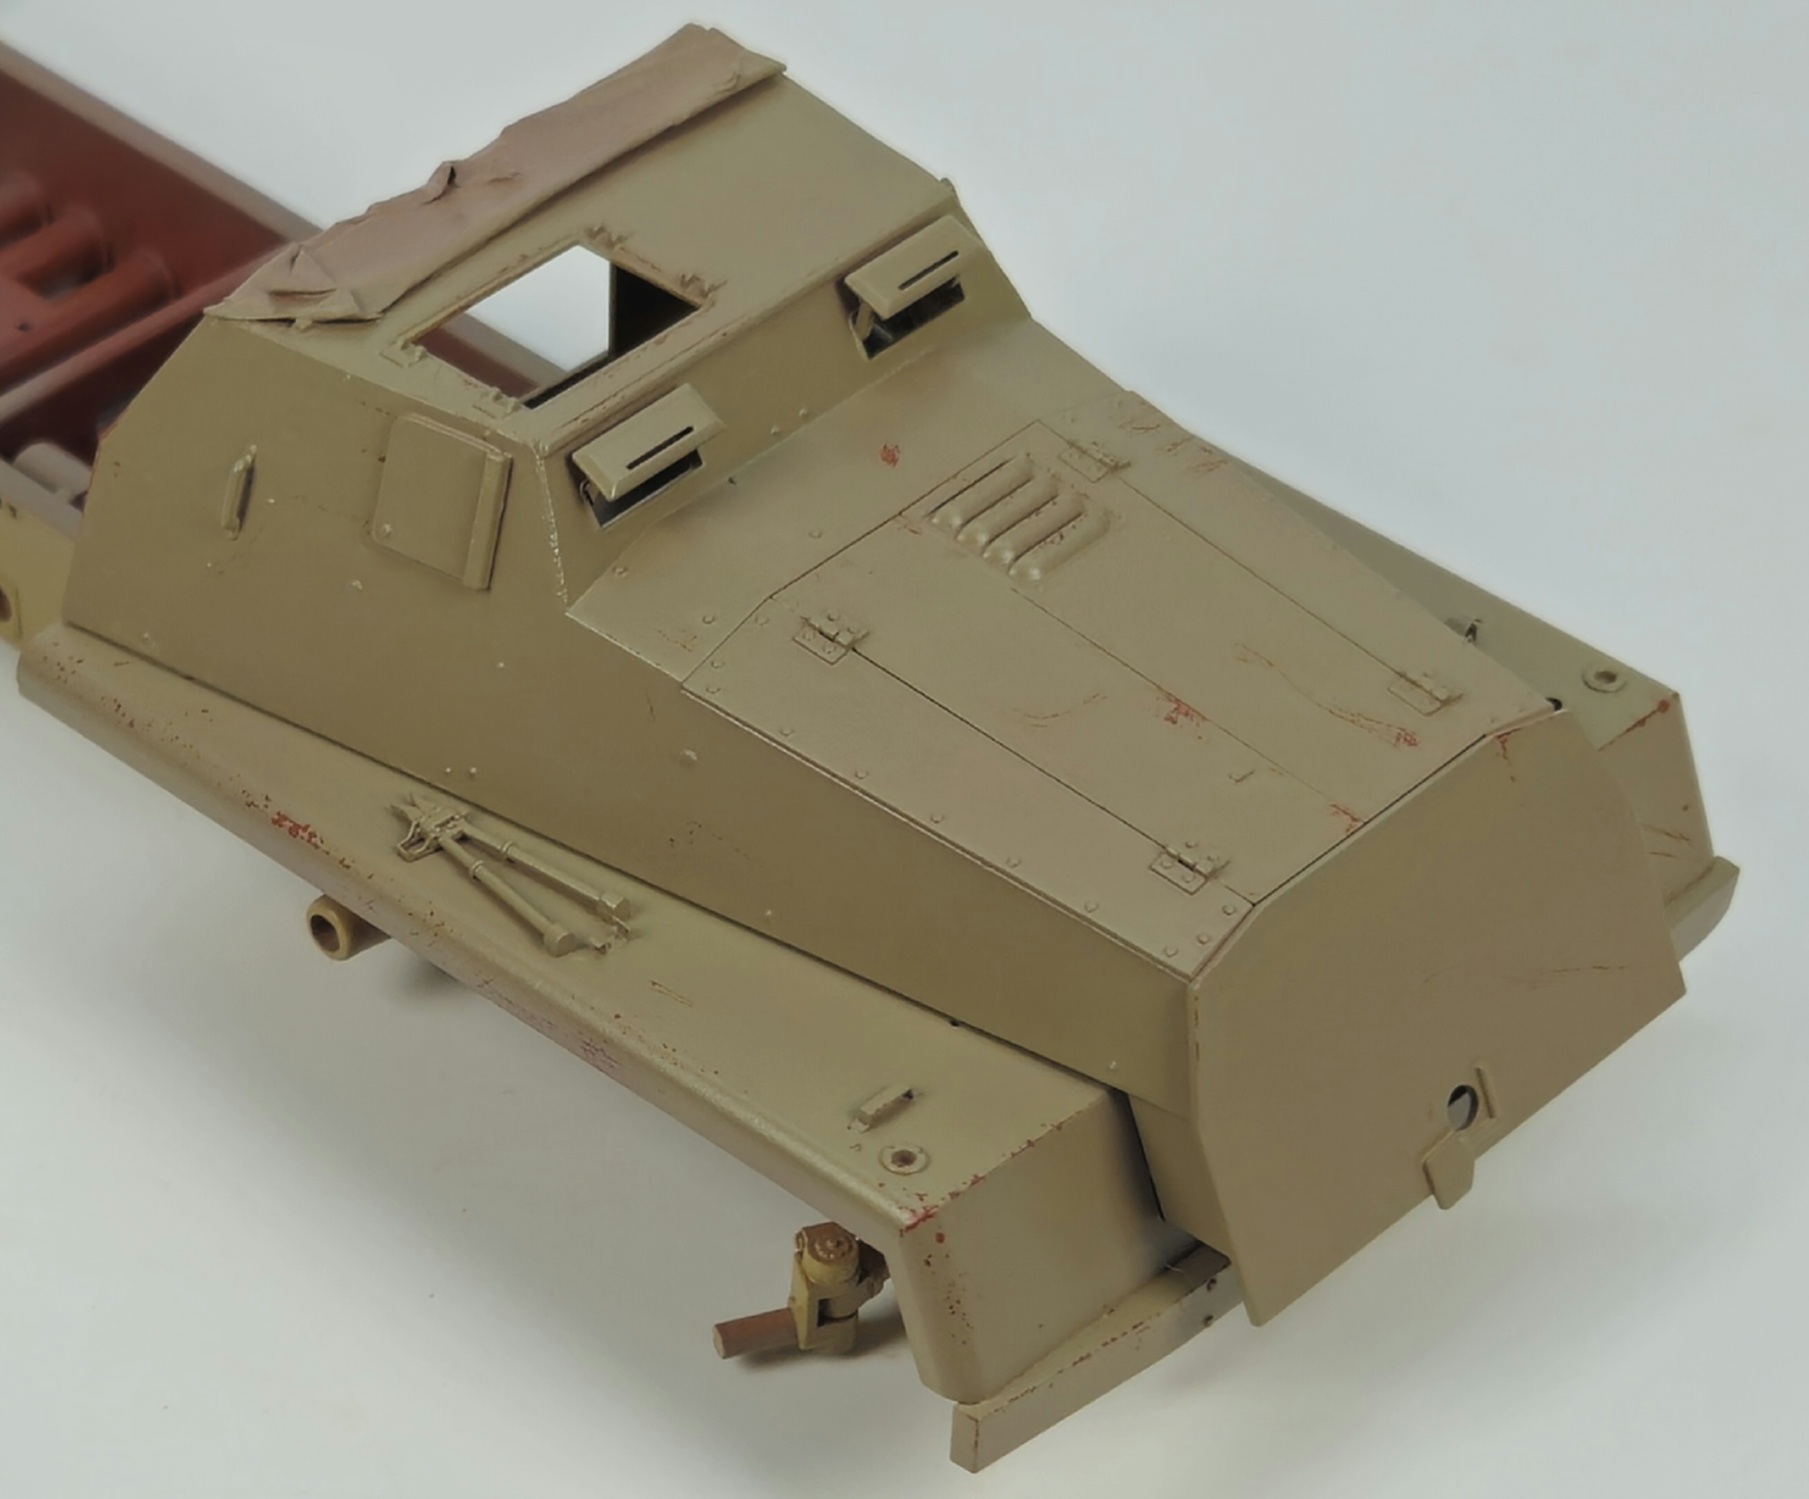
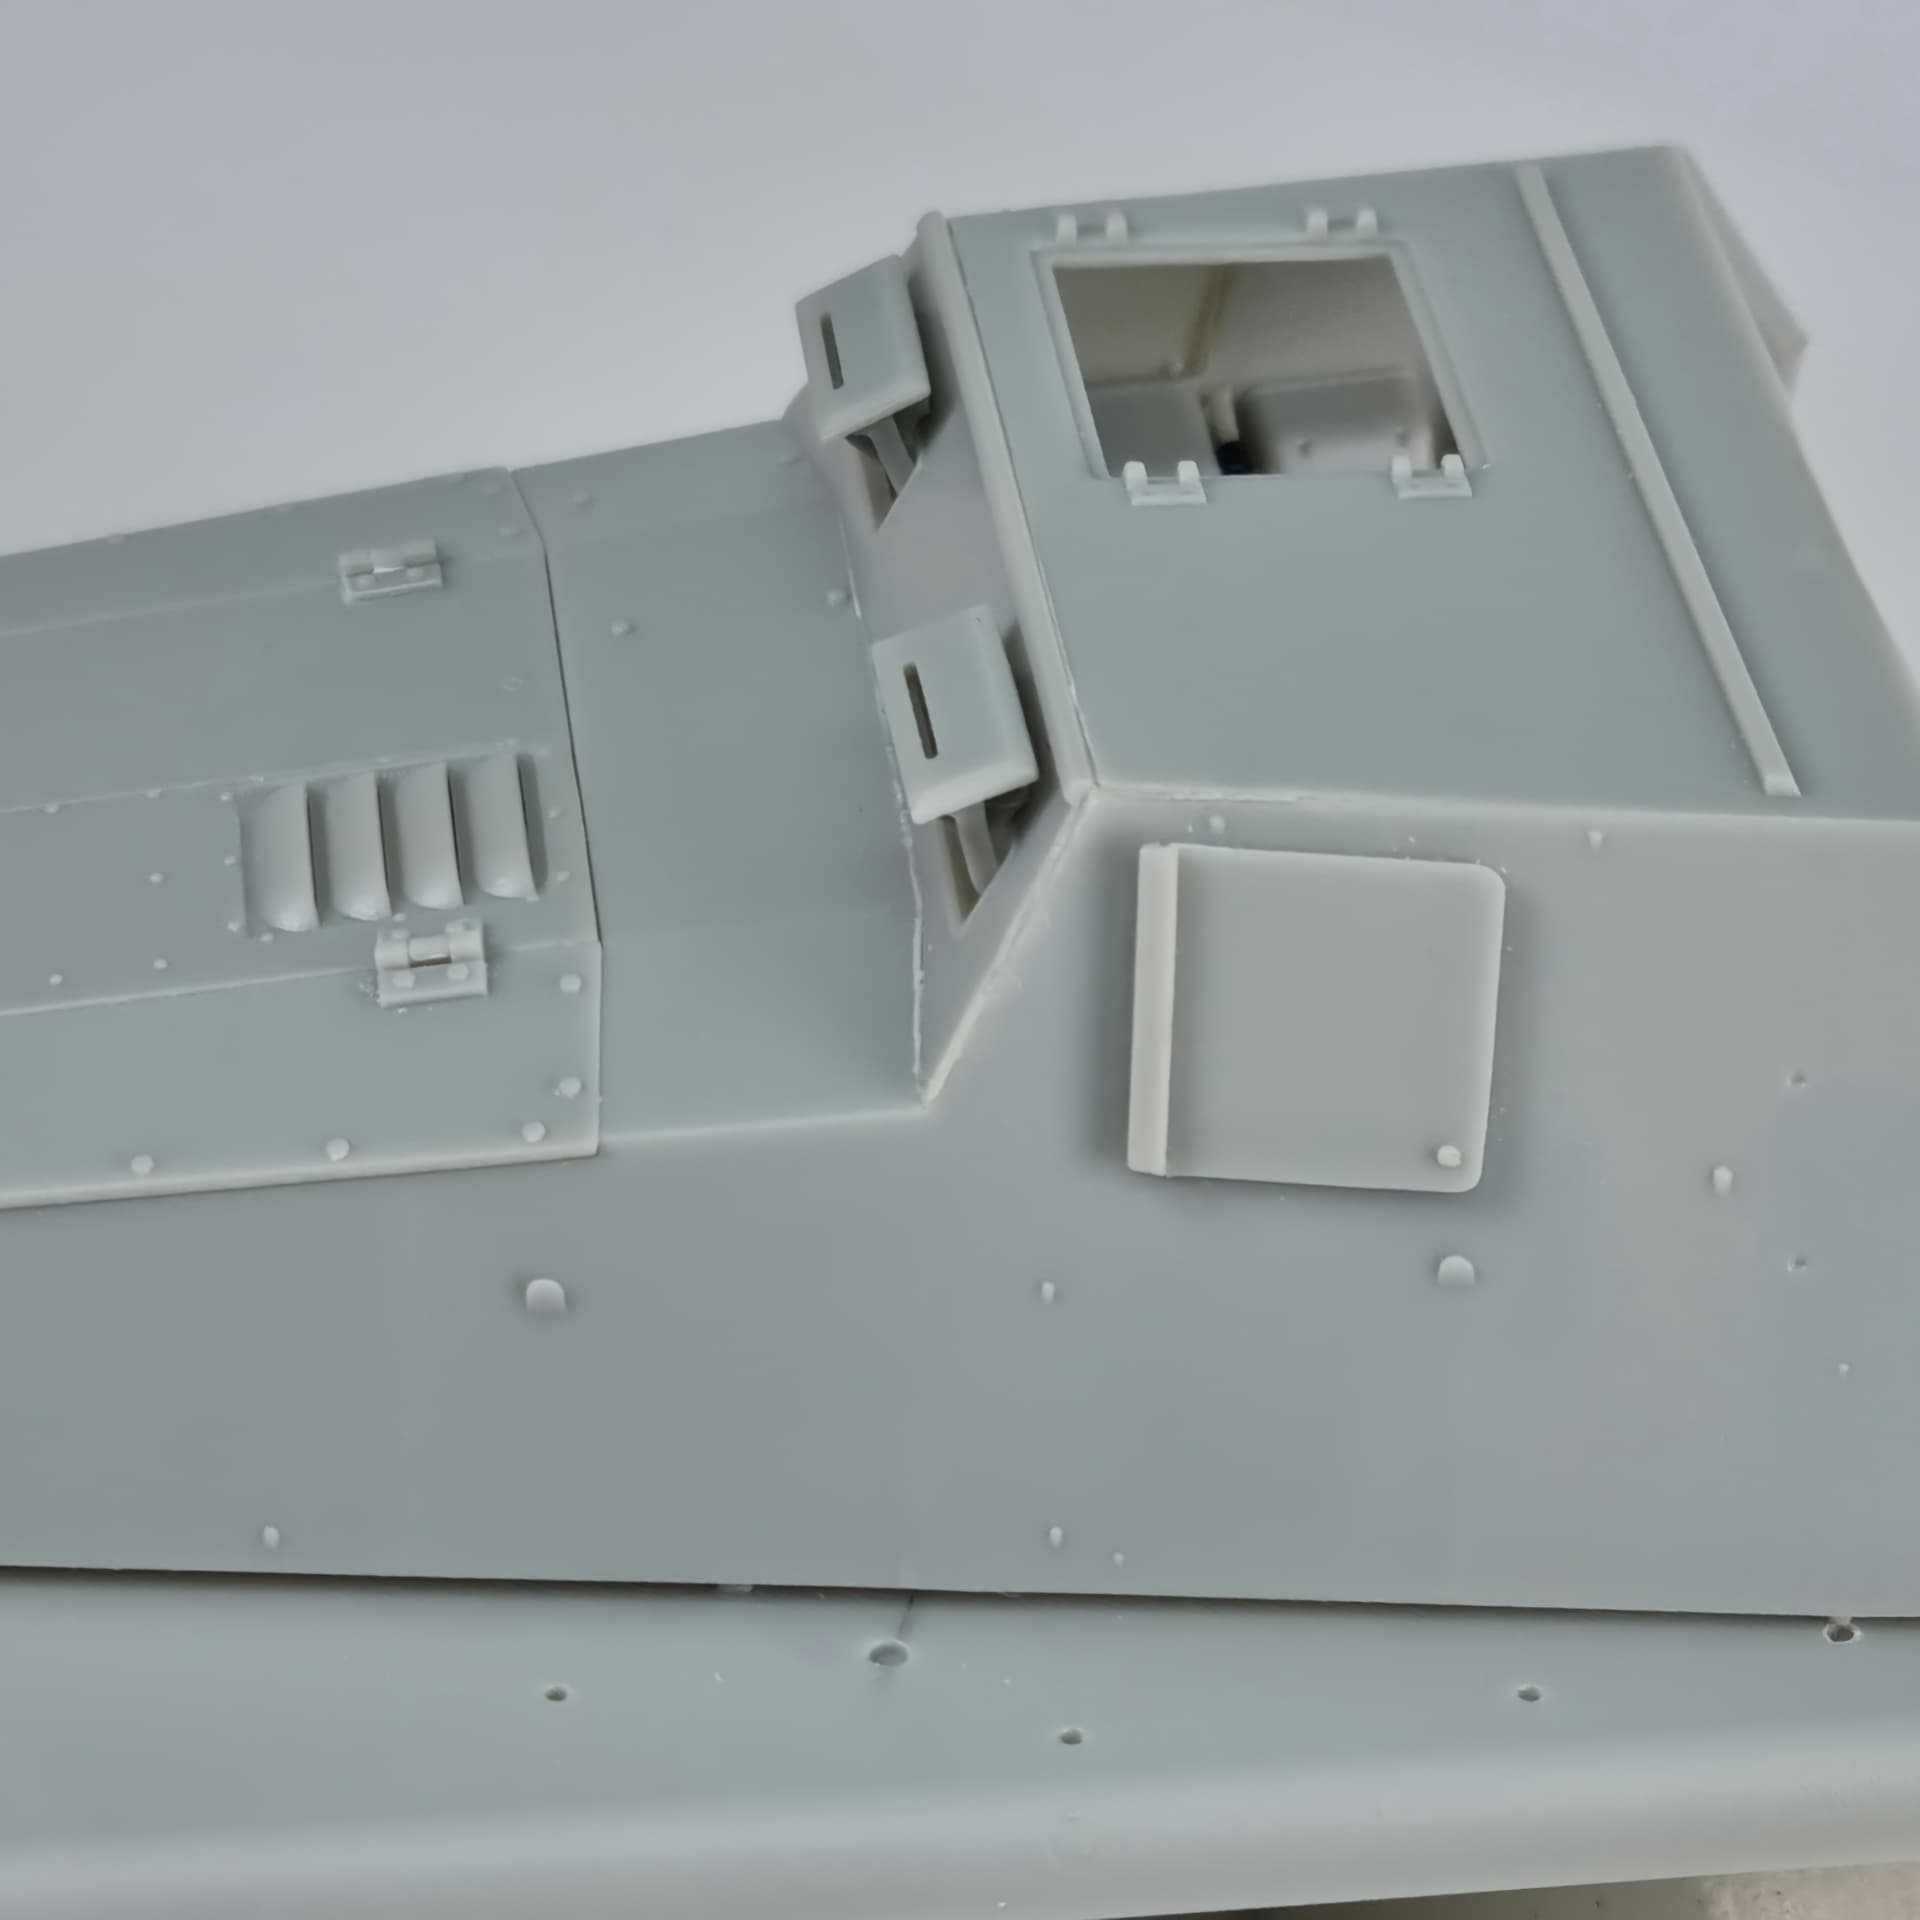
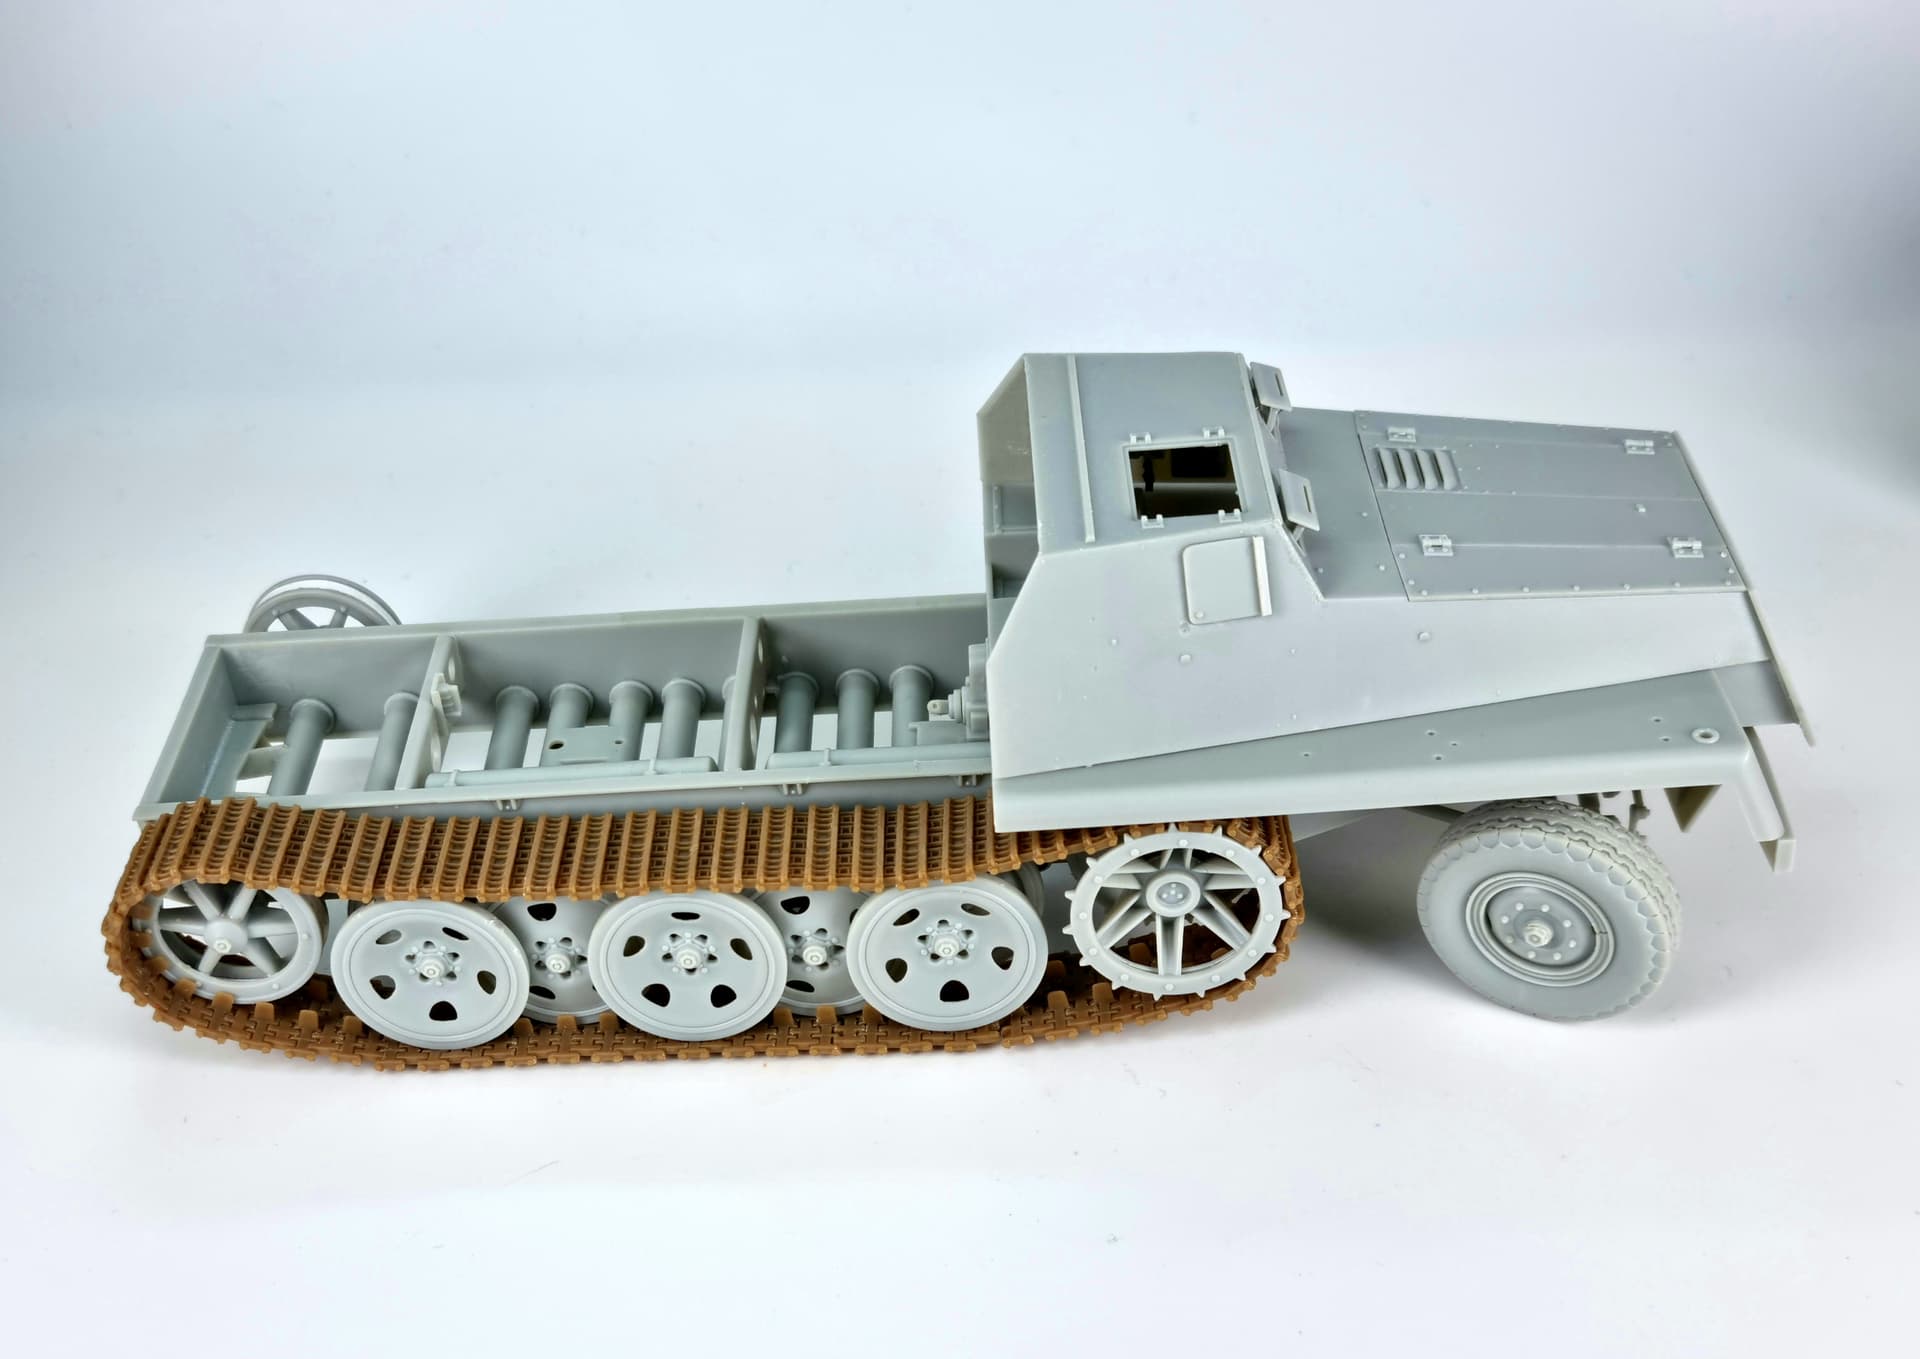
The detail is sharp, and the armoured cab thickness is nicely rendered to scale. Although there is a small degree of mould offset on a few parts there is no flash and very few pin marks present. It is also nice to see well thought out sprue gate connections, making removal of the access easier to accomplish cleanly.

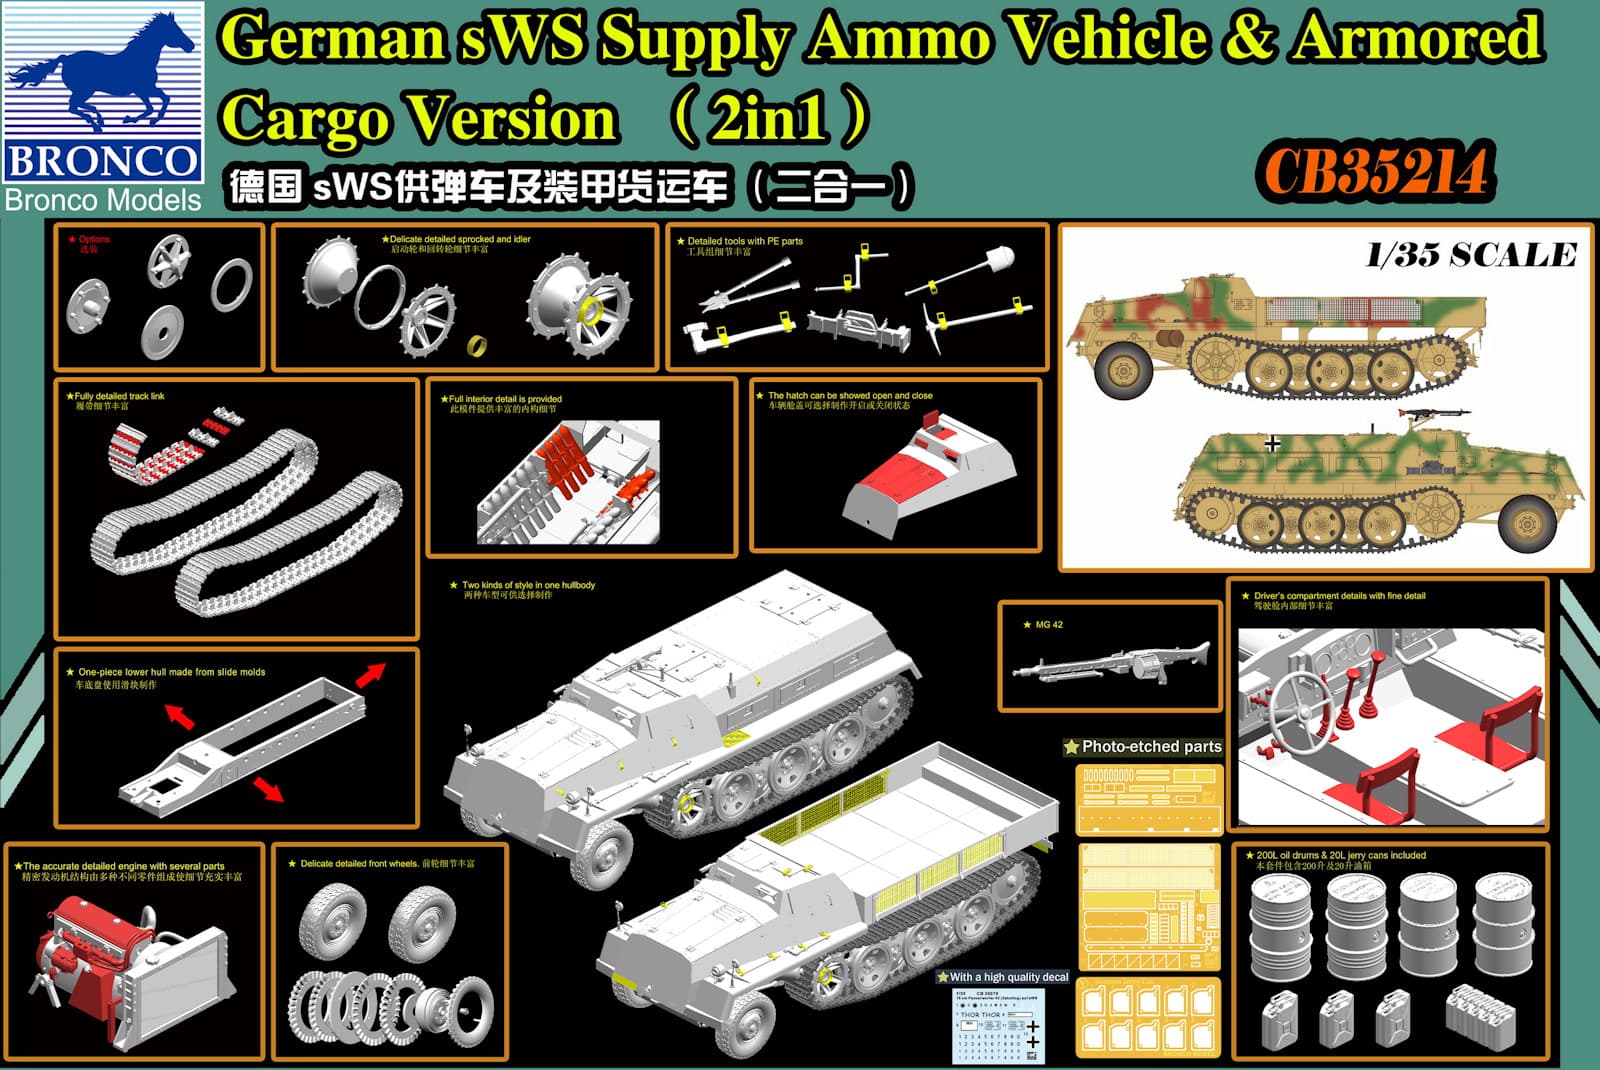
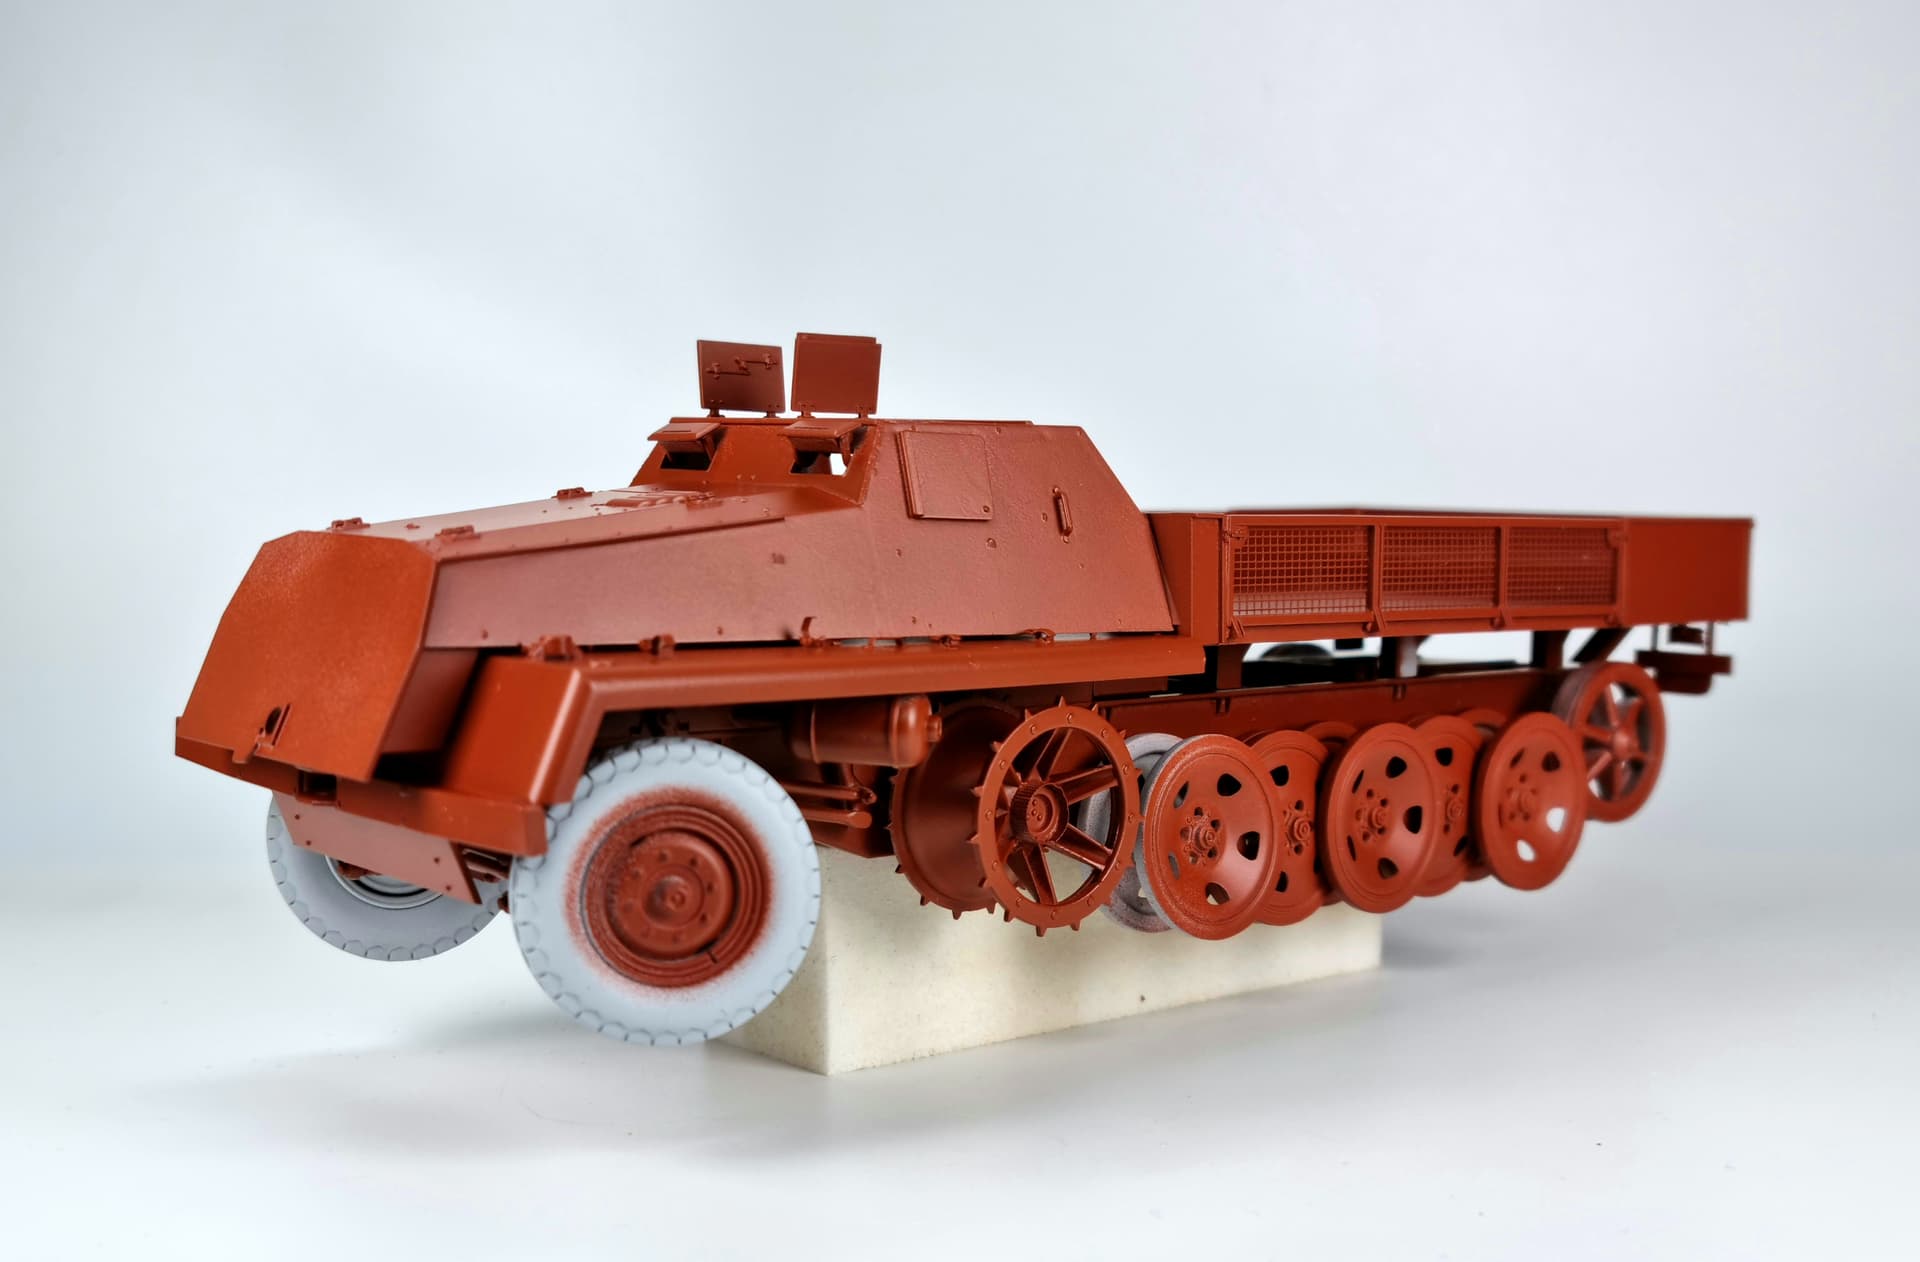
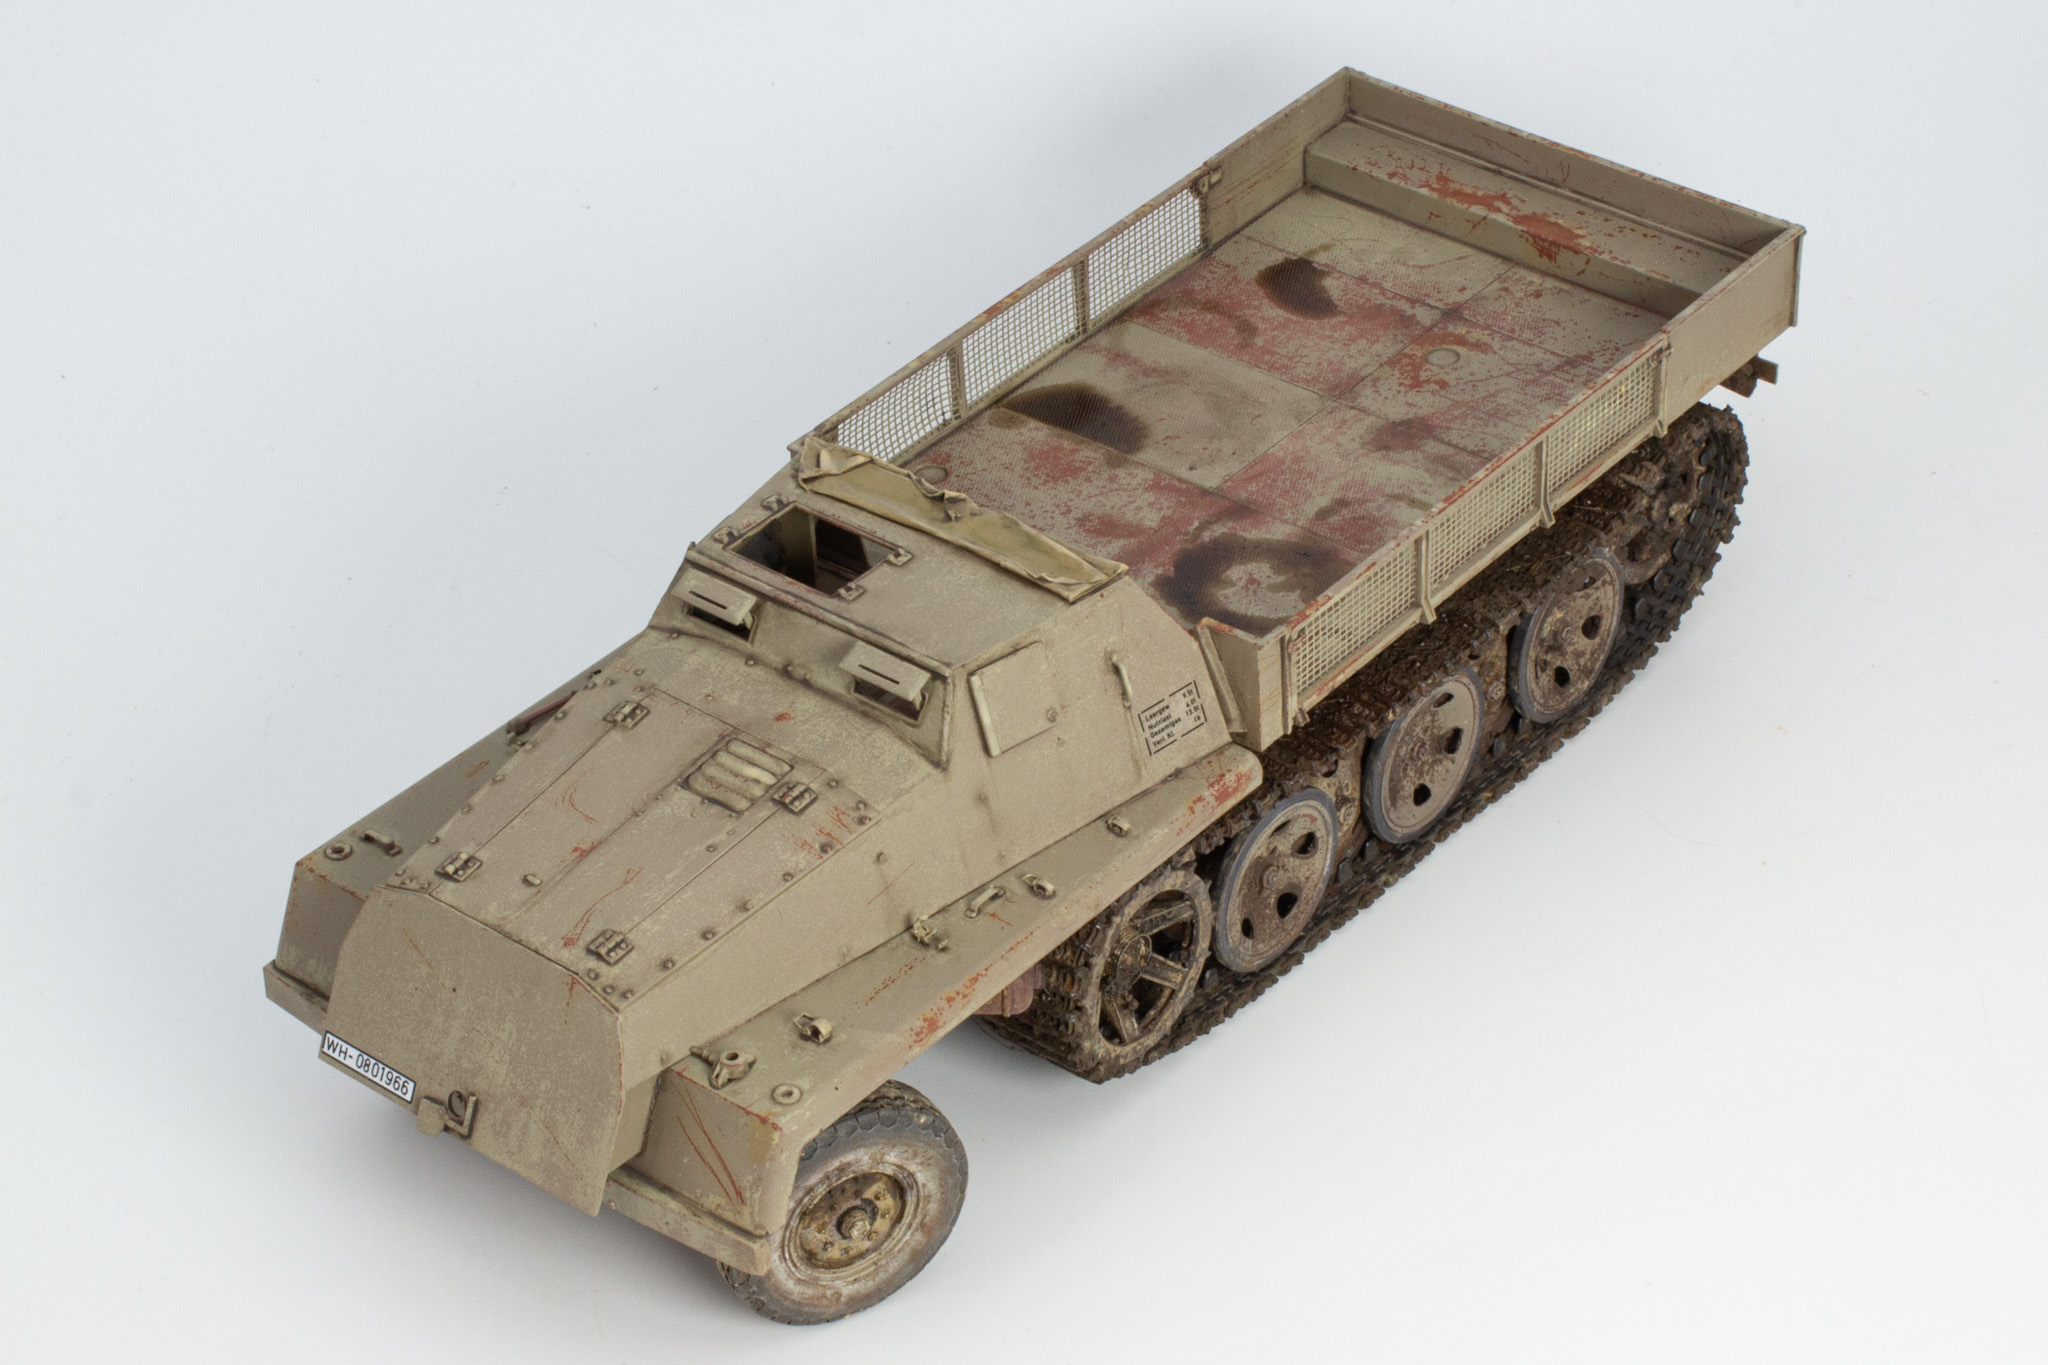
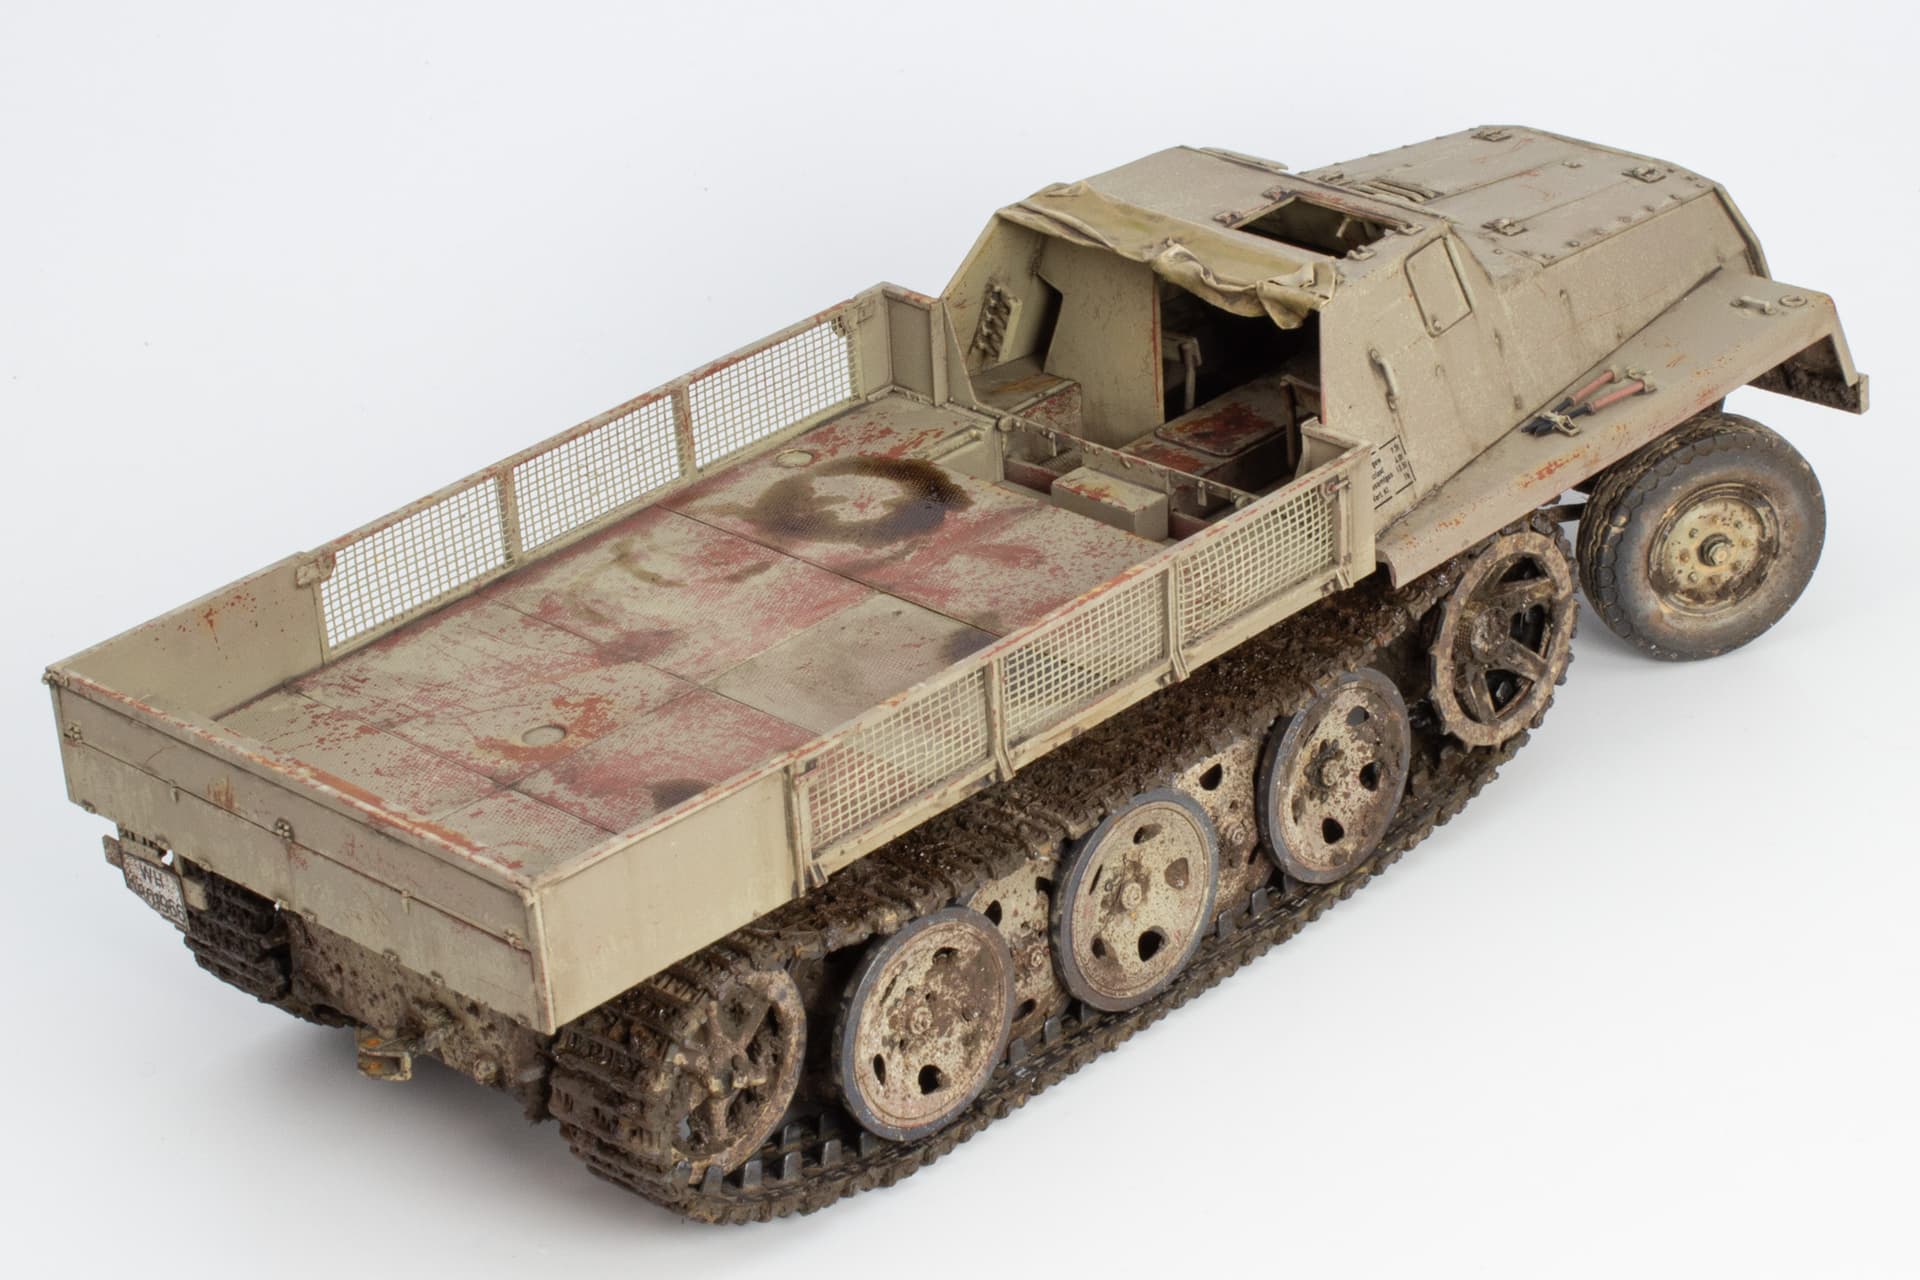
This kit gives you options to build a supply ammo or armoured cargo version. I decided to build the produced armoured cargo version and used the Nuts & Bolts 41: Bussings schwerer Wehrmachtschlepper (sWS) and Variants as a reference guide. The book has a nice feature clearly showing all the design changes from prototype to production series by way of colour coding CAD scale images.

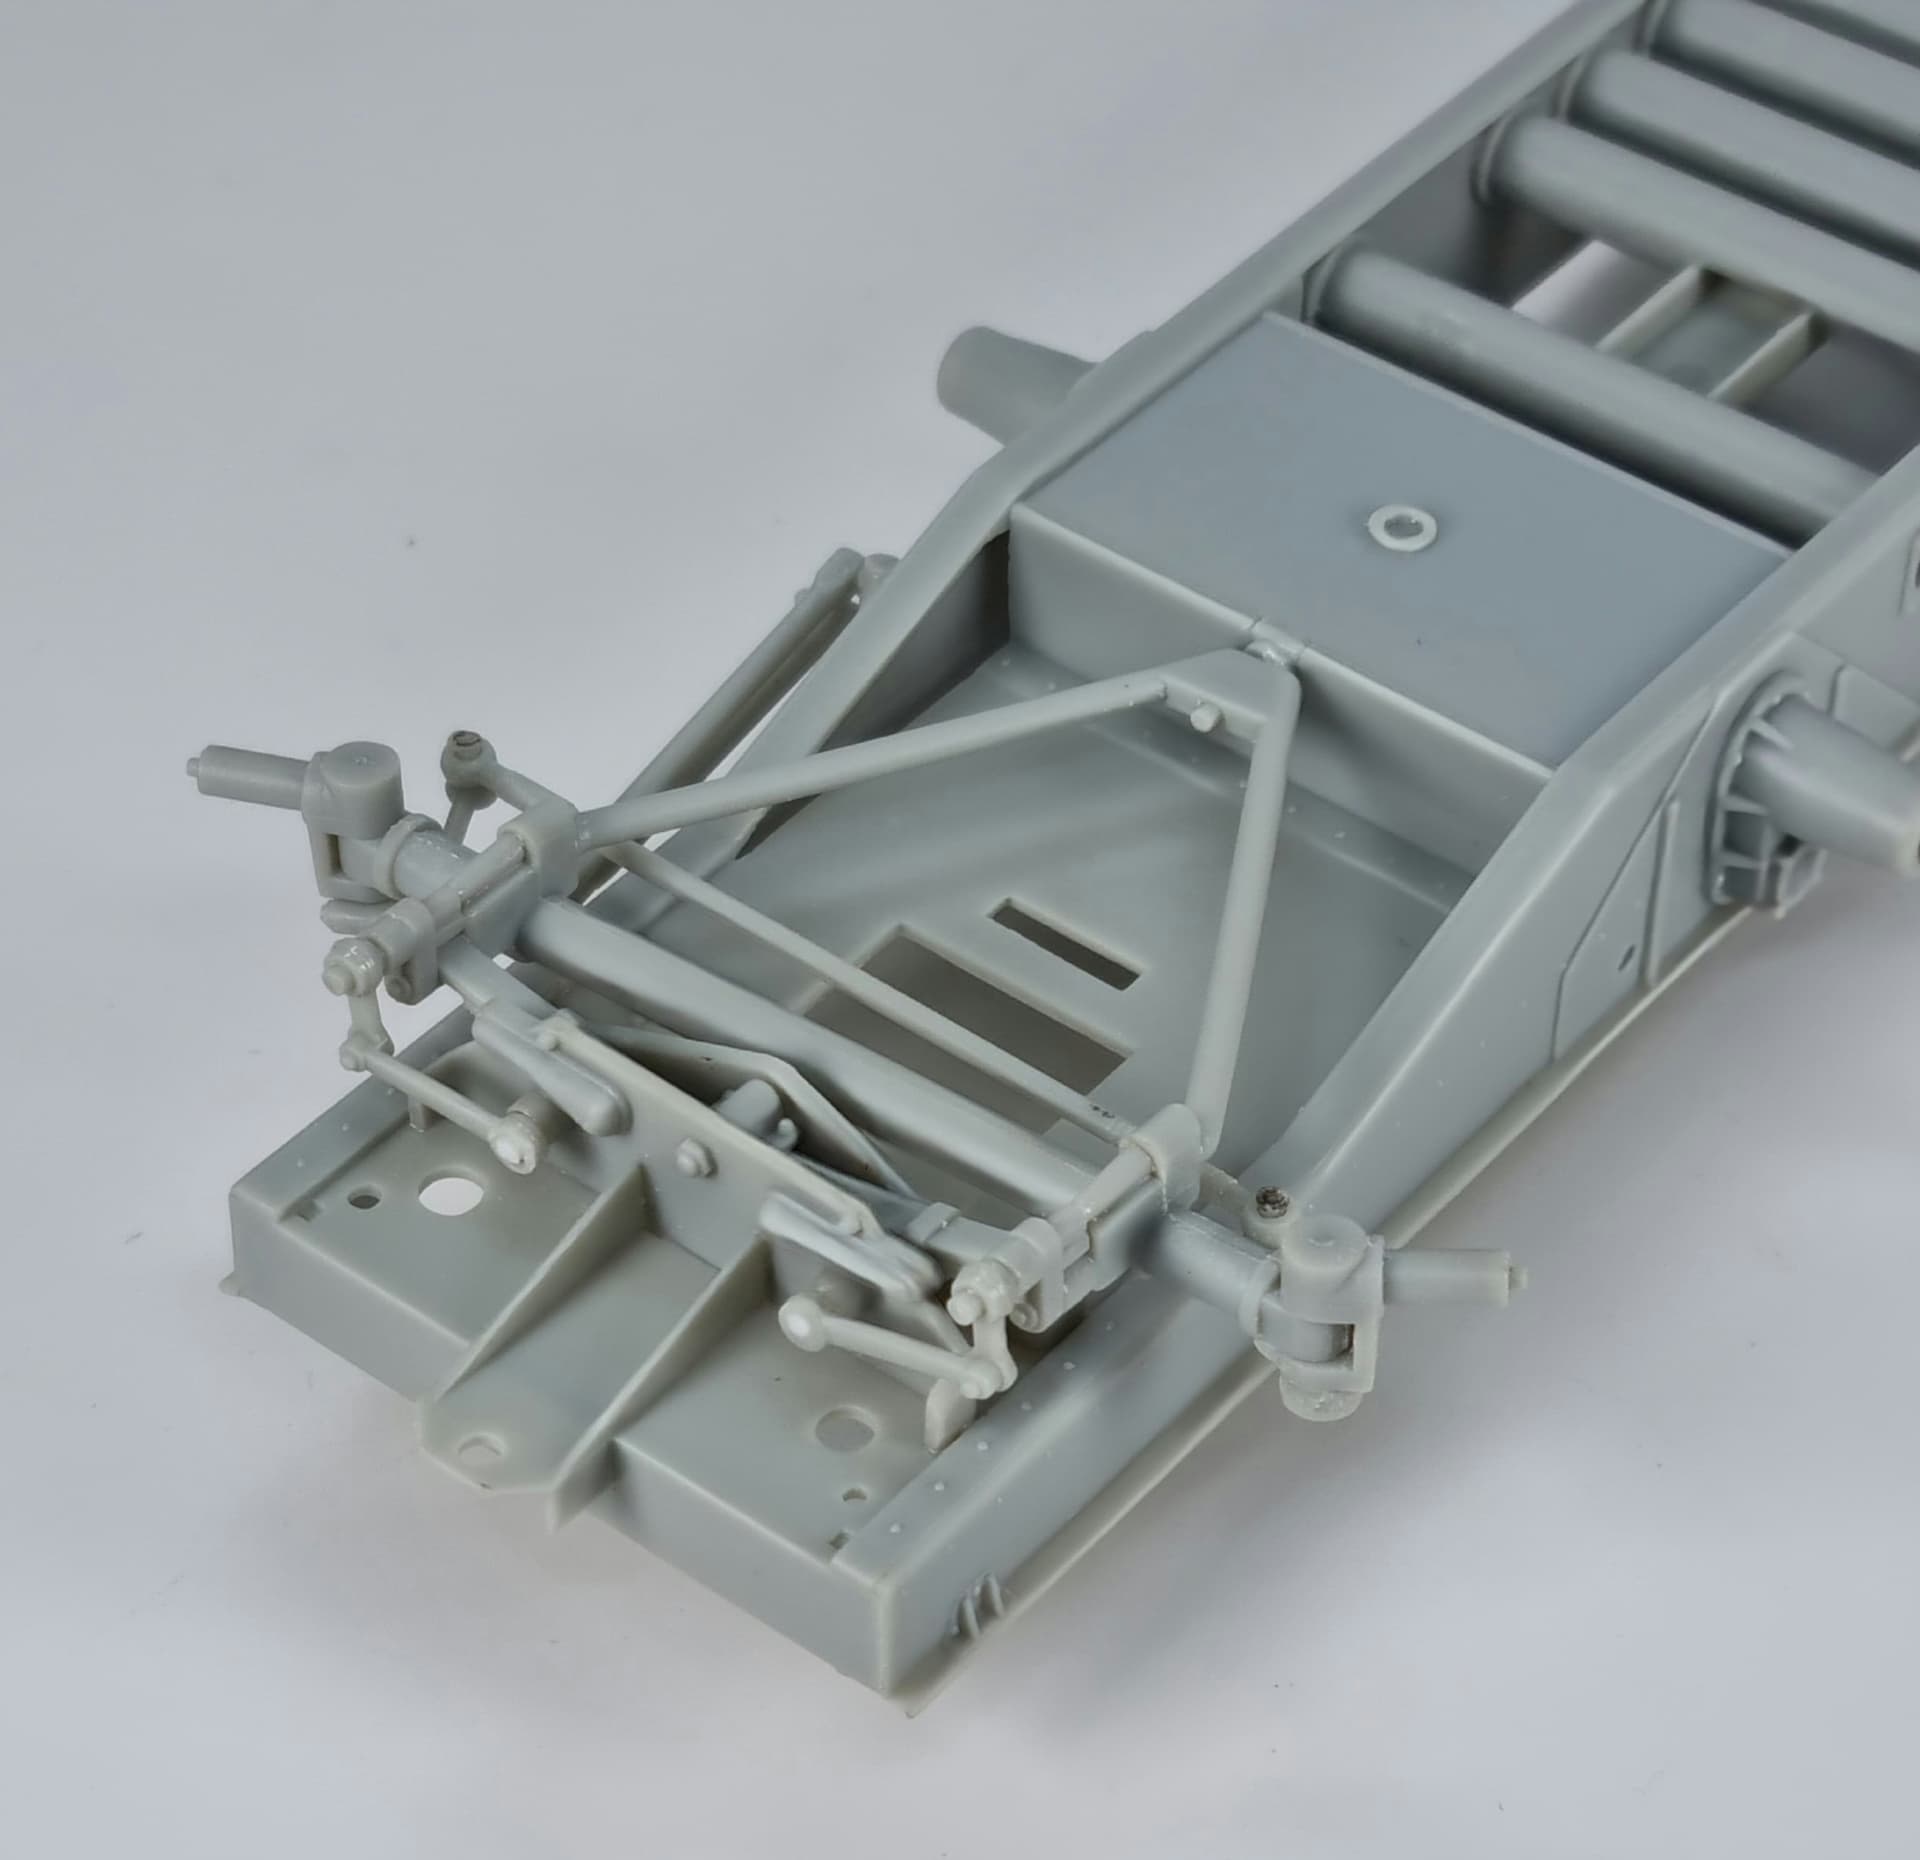
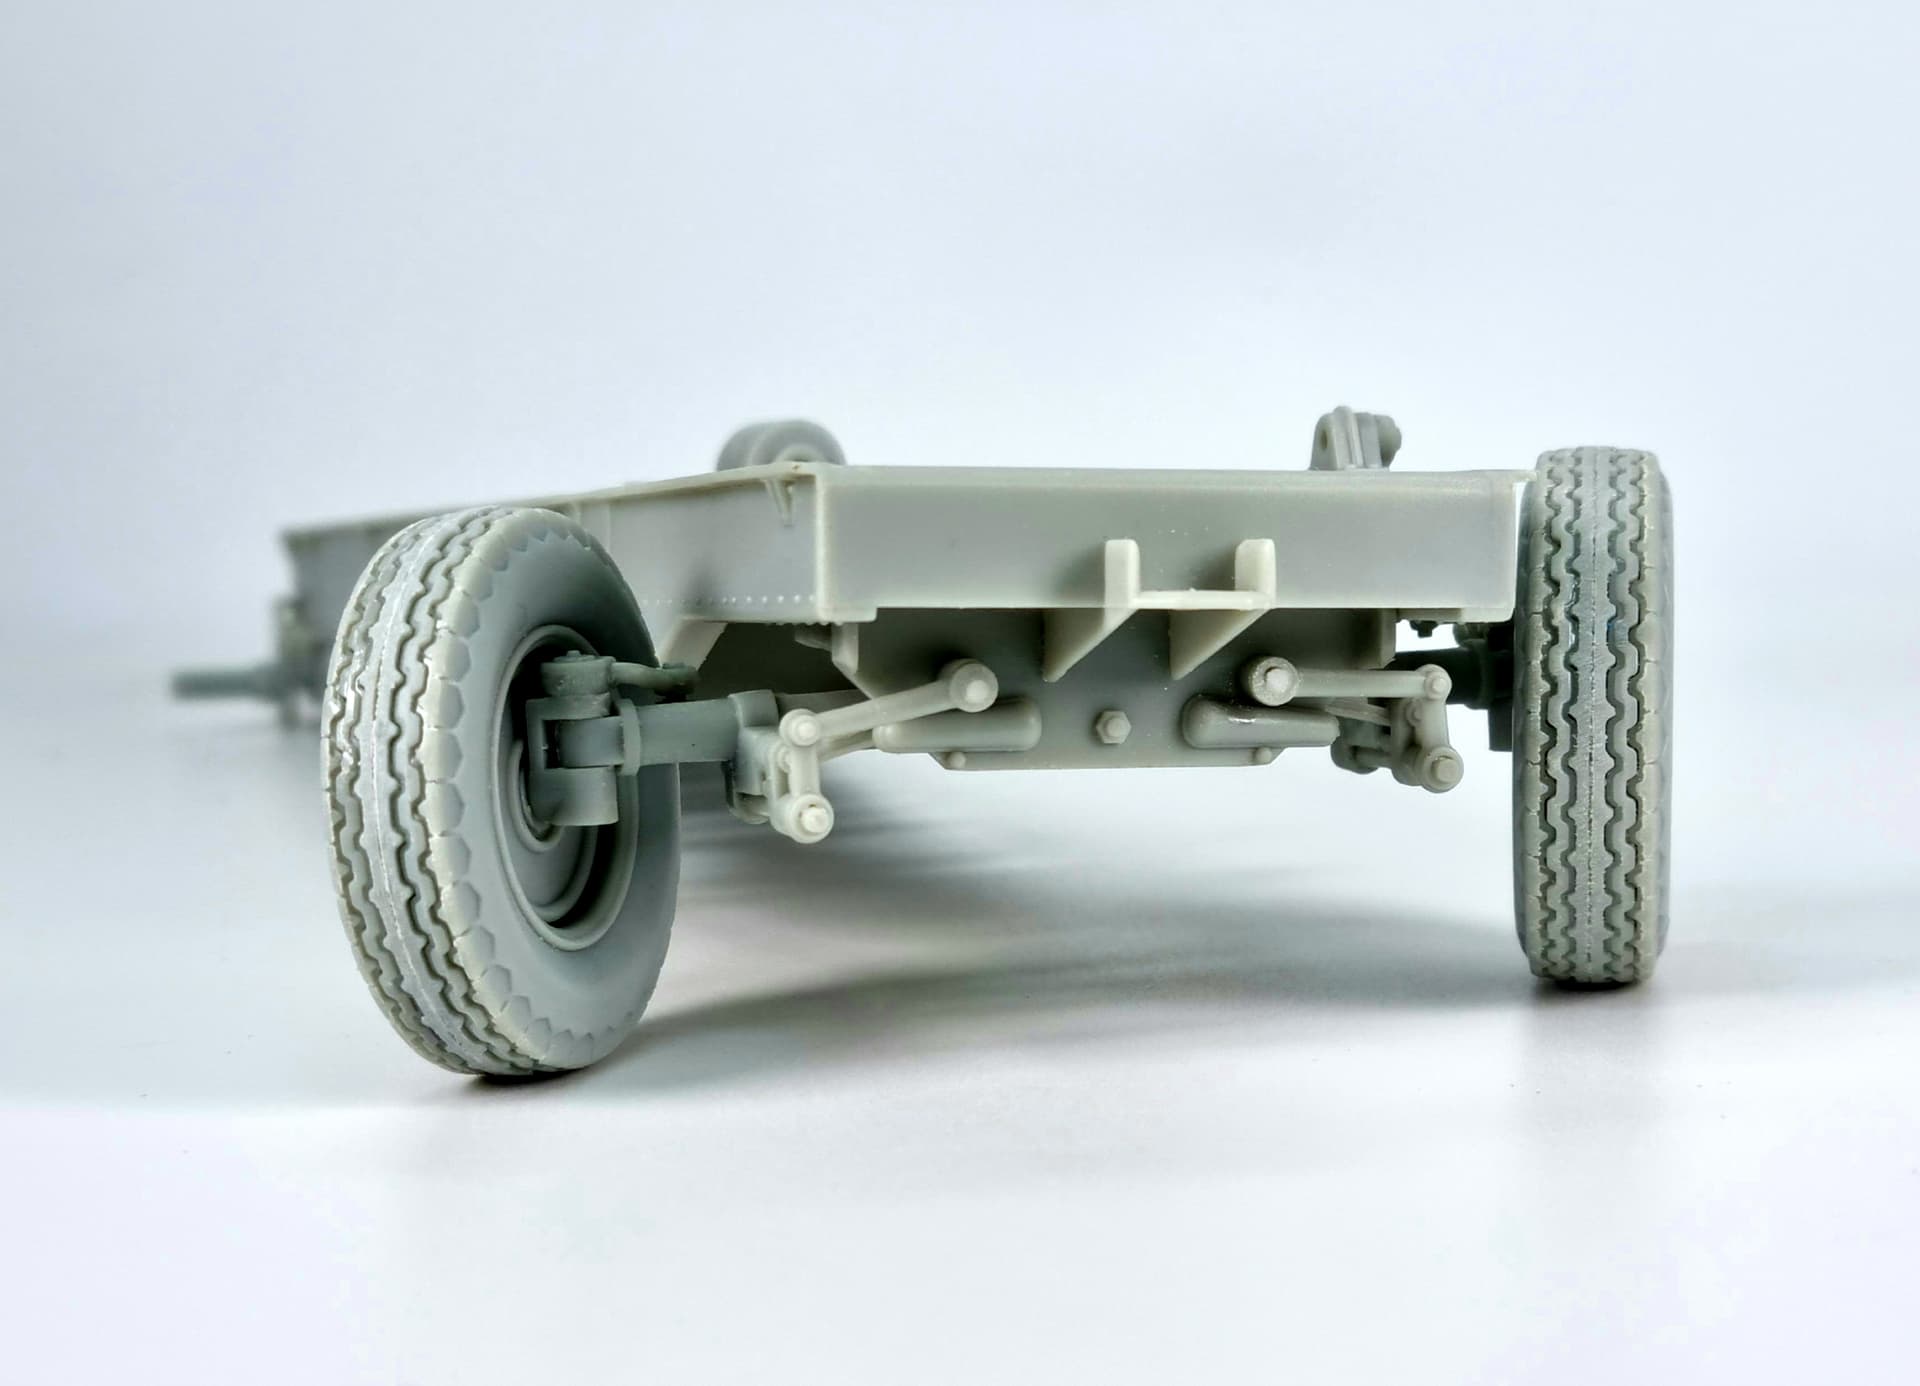
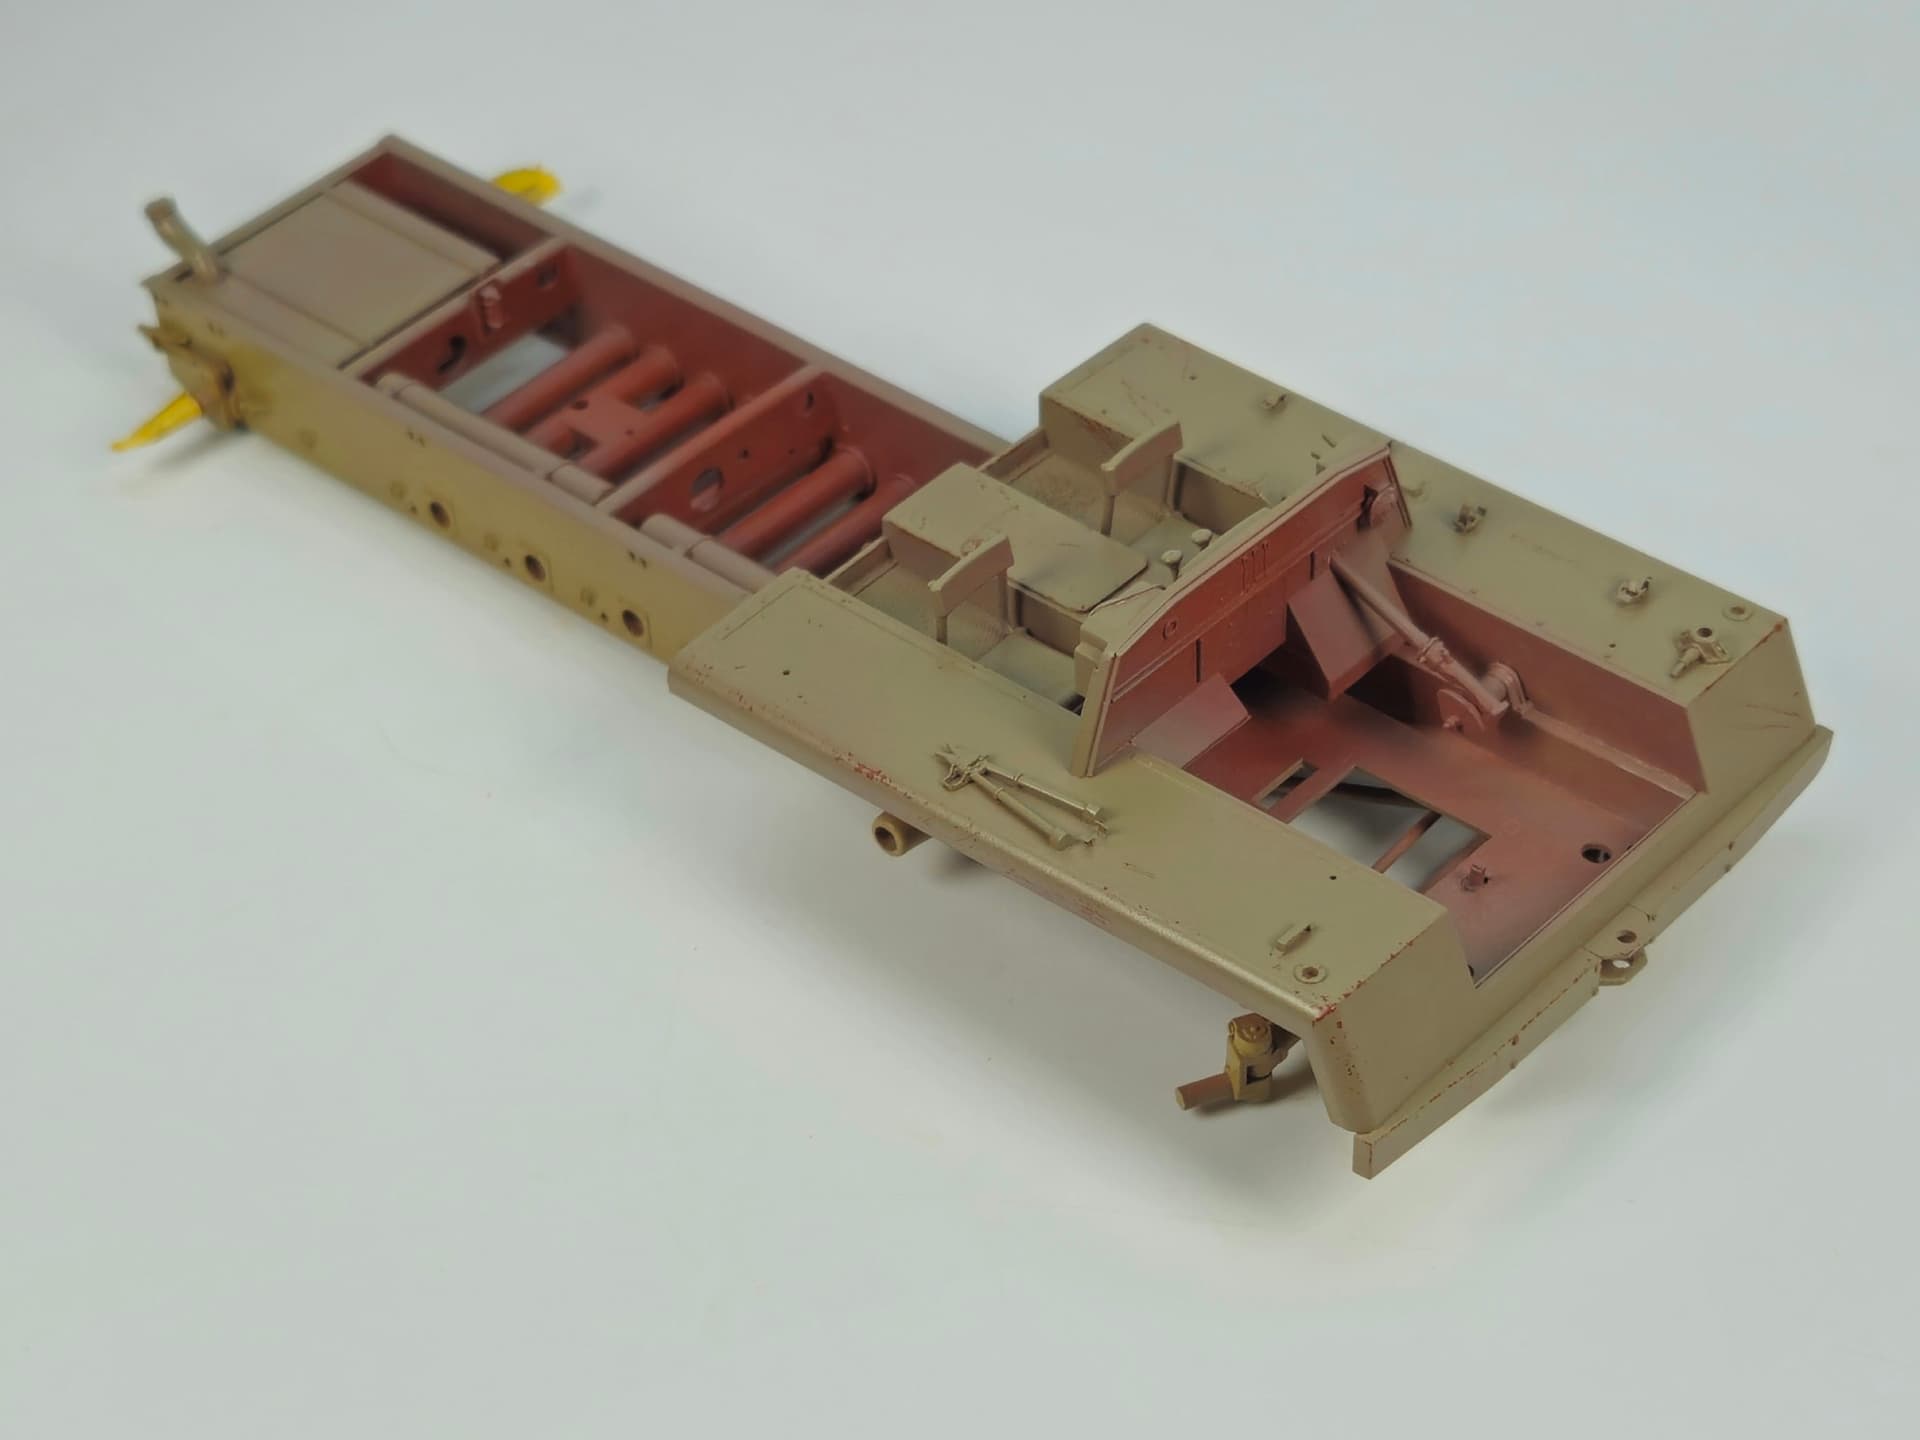
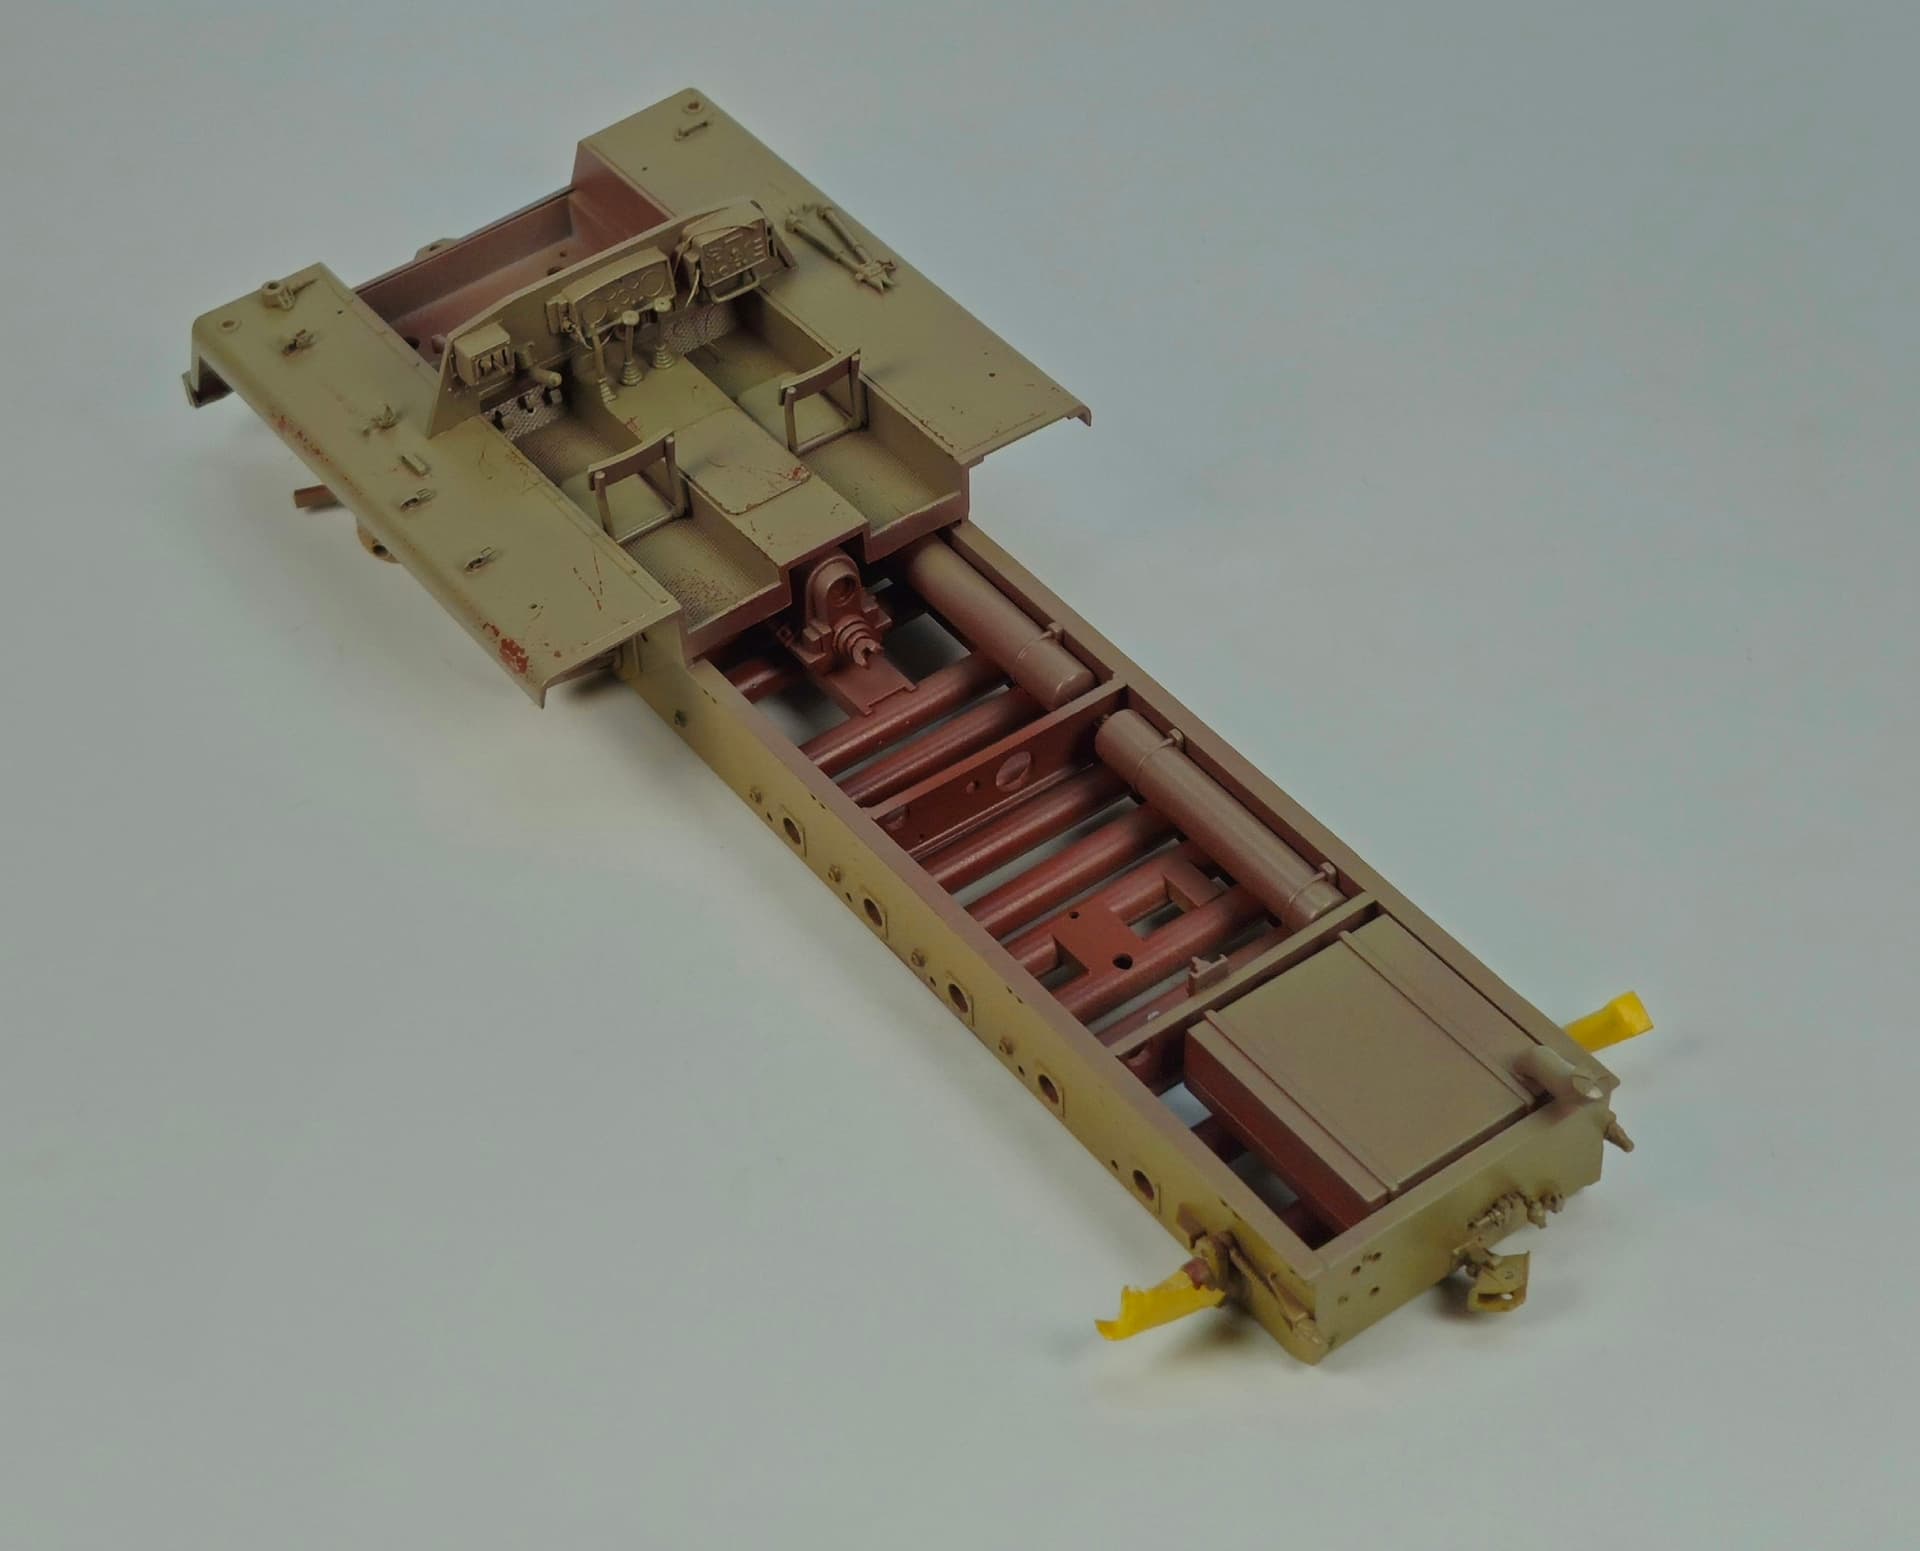
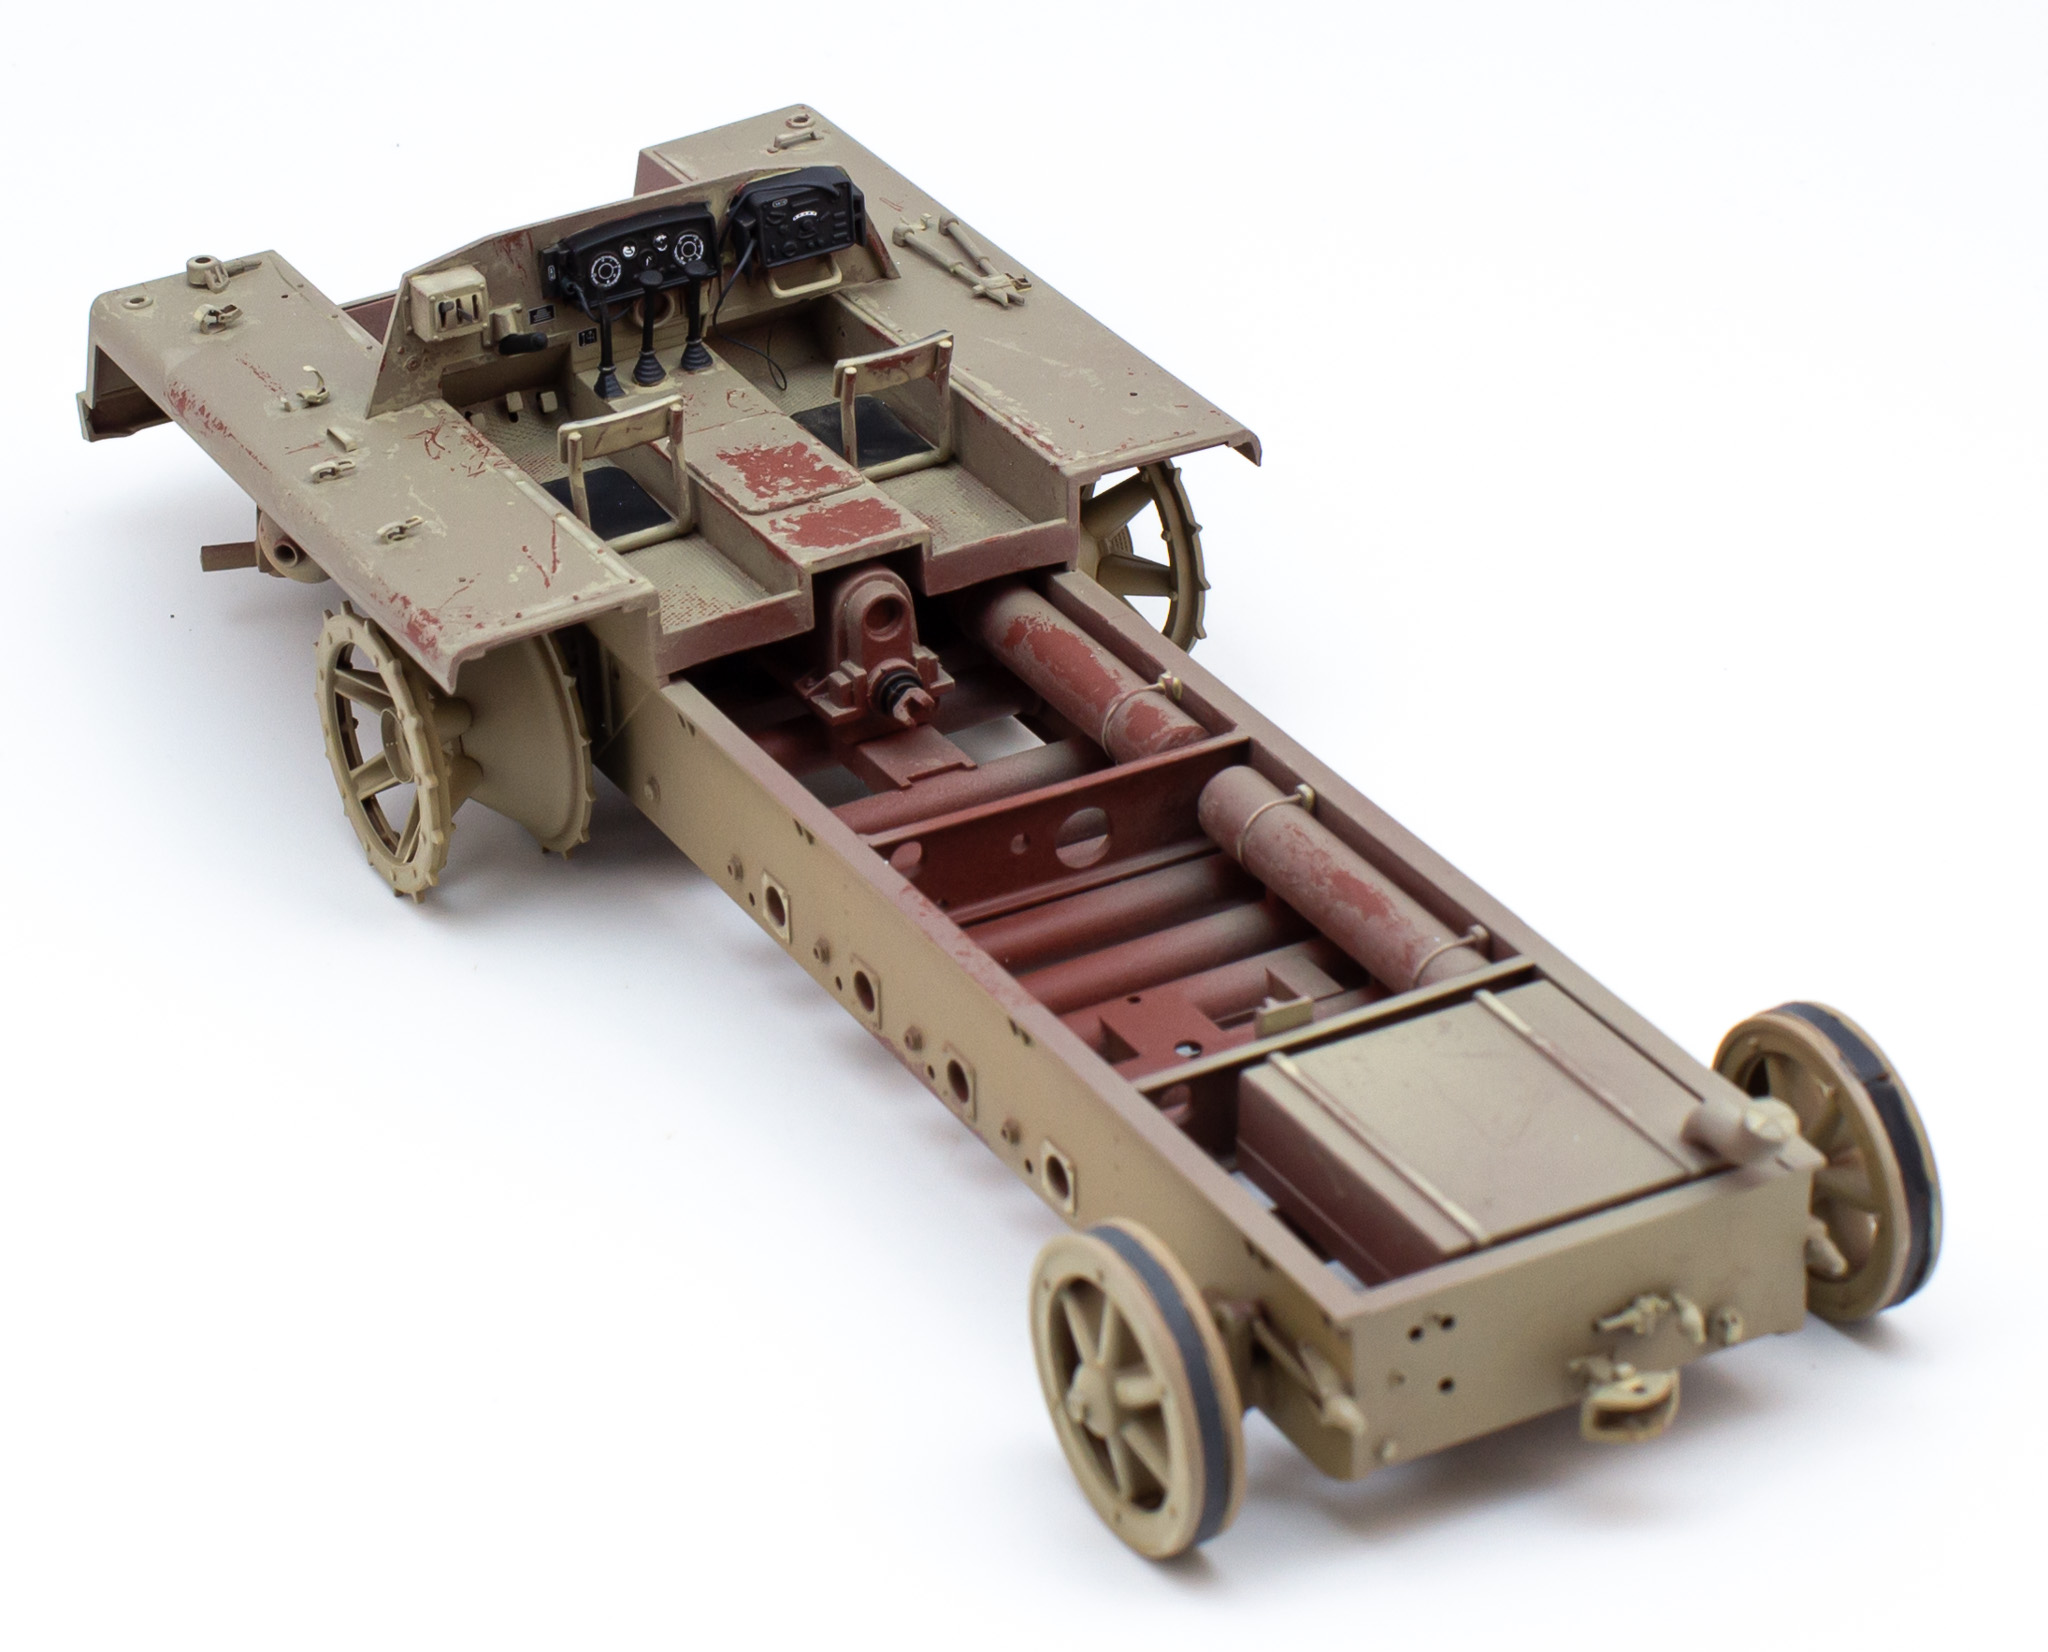
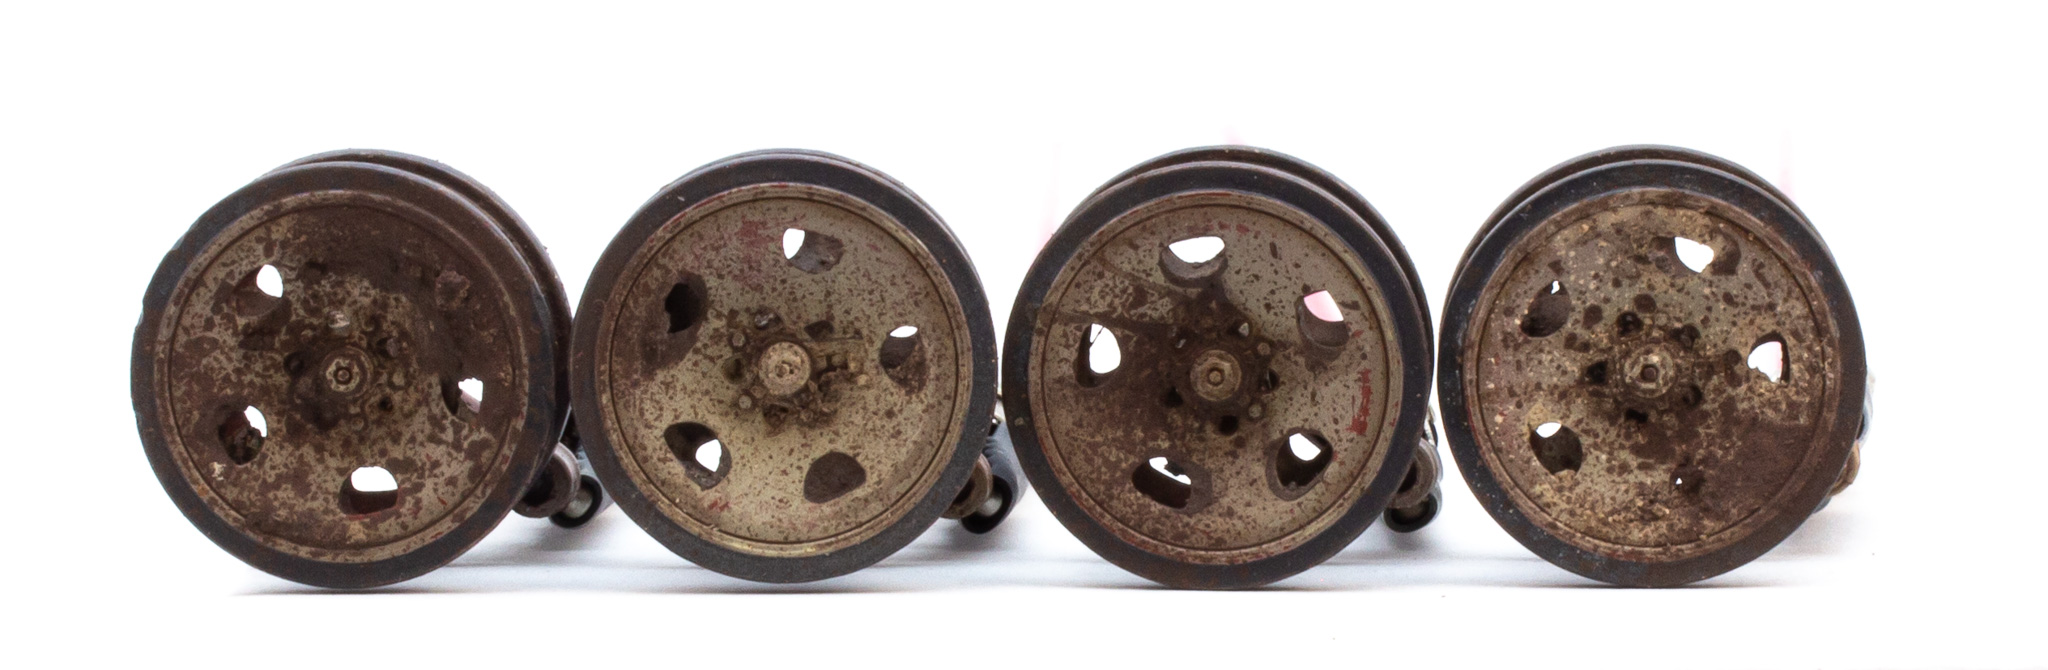
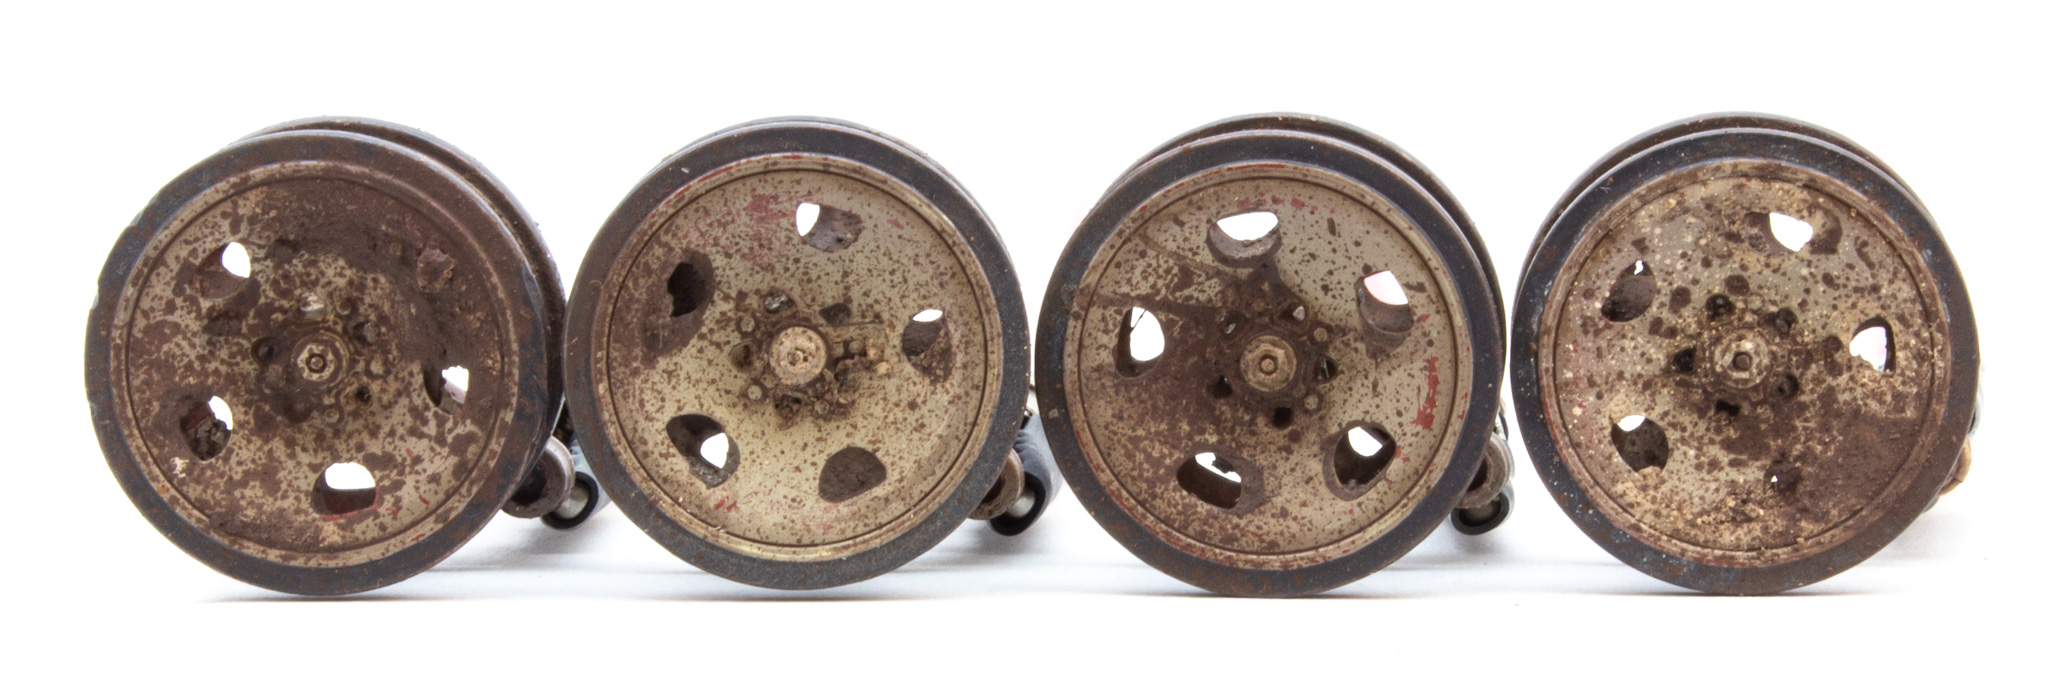
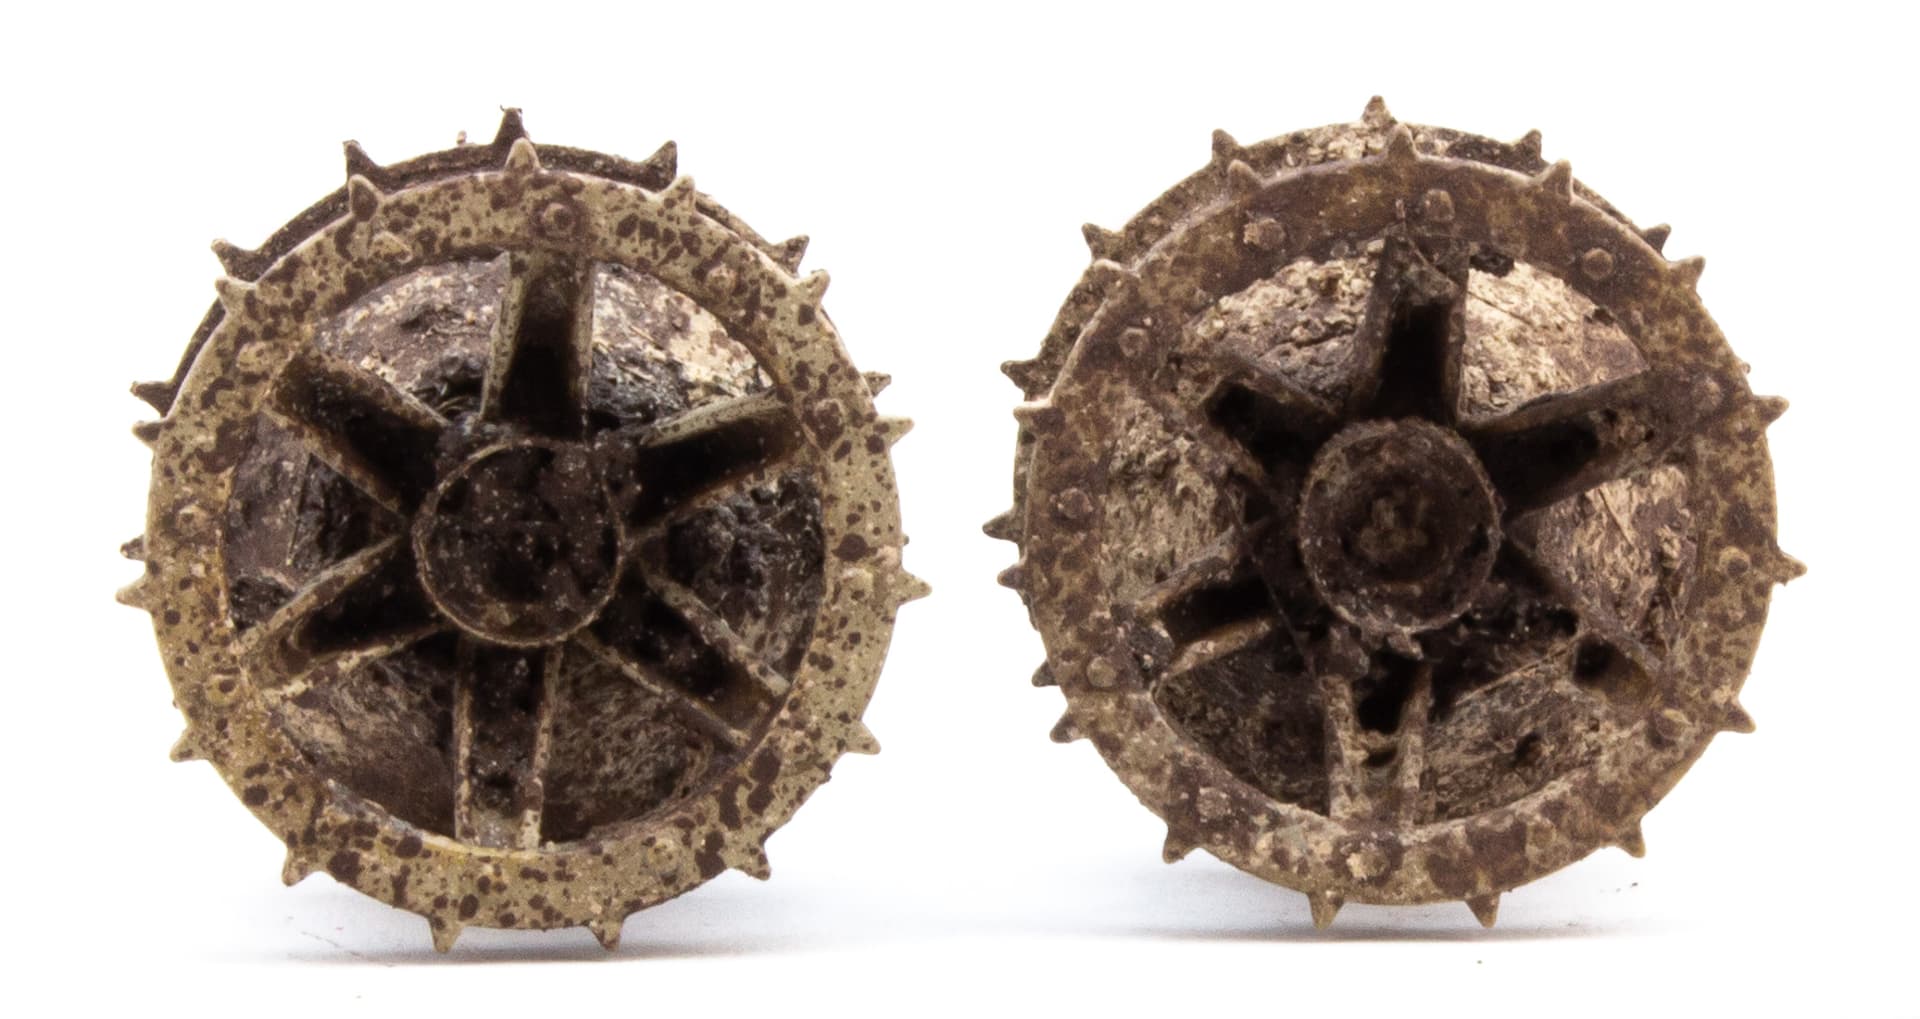
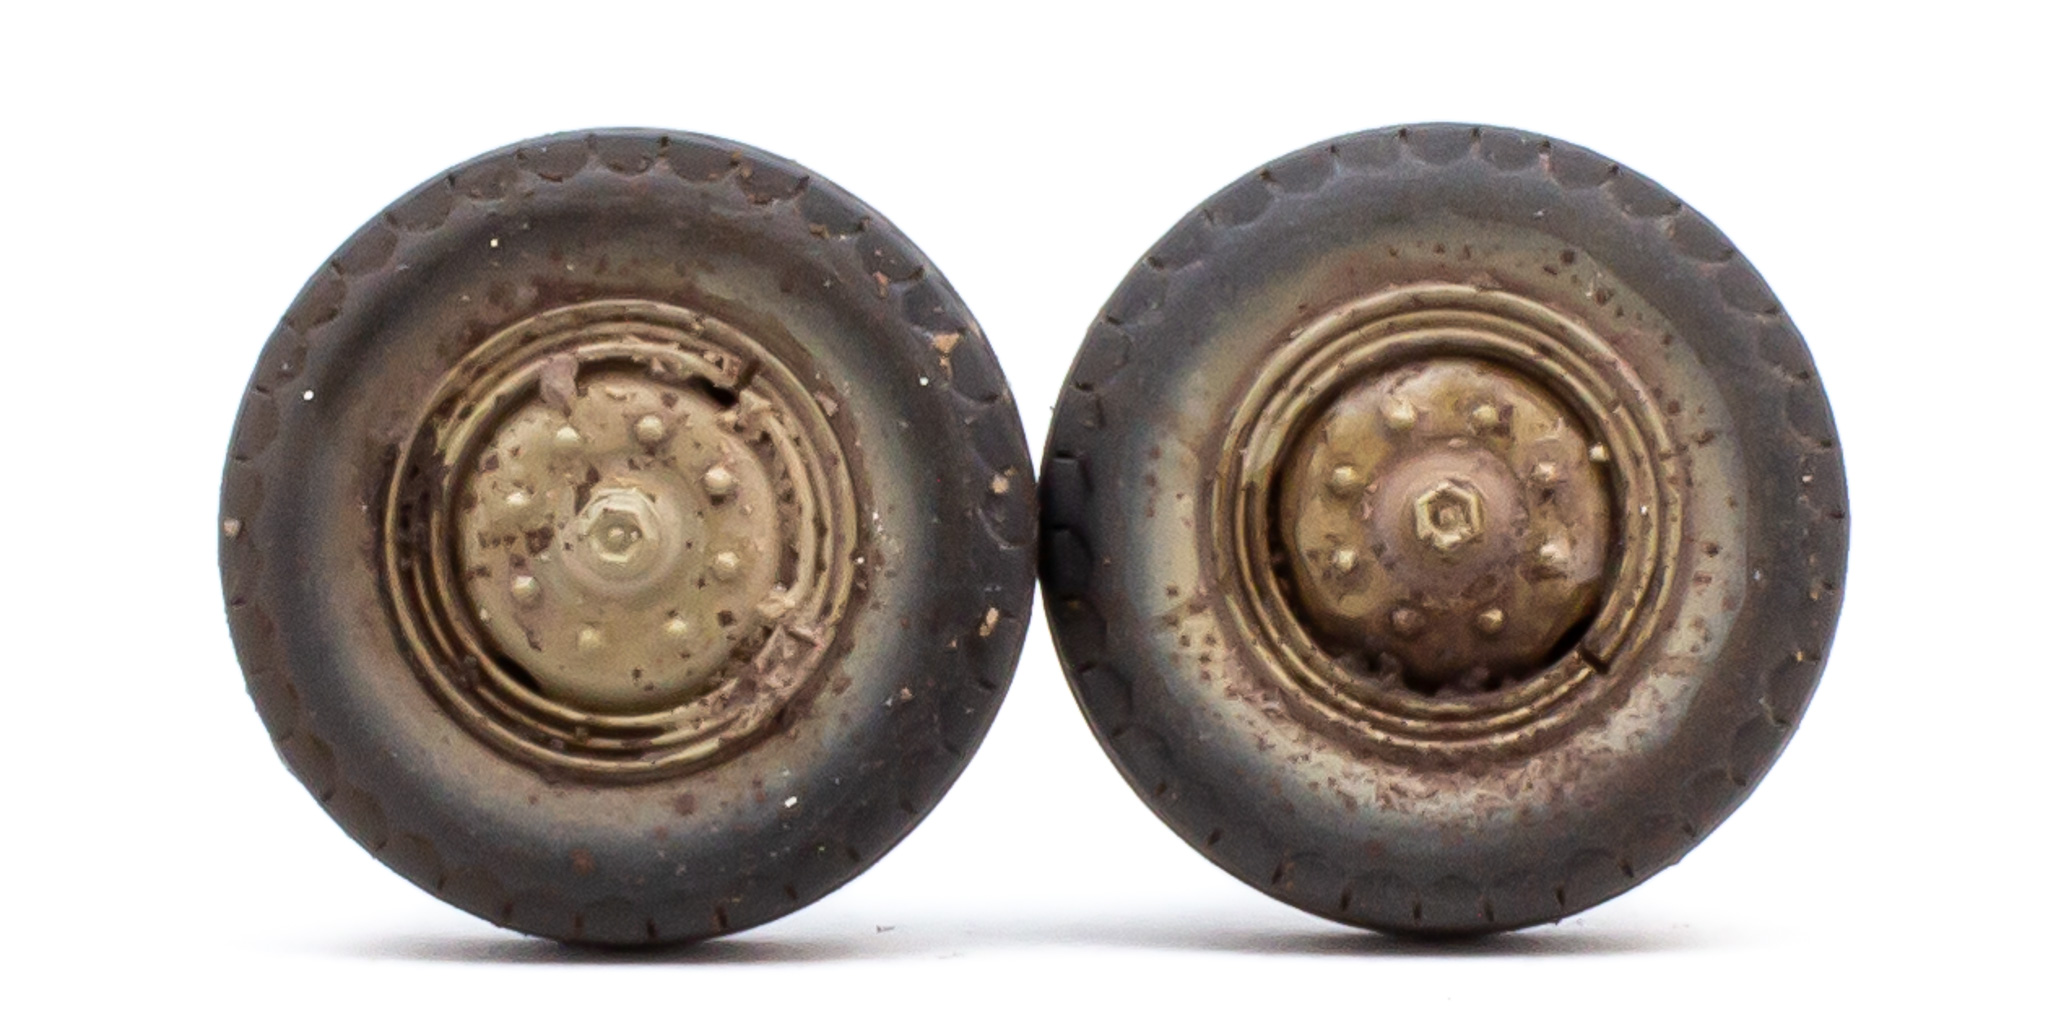
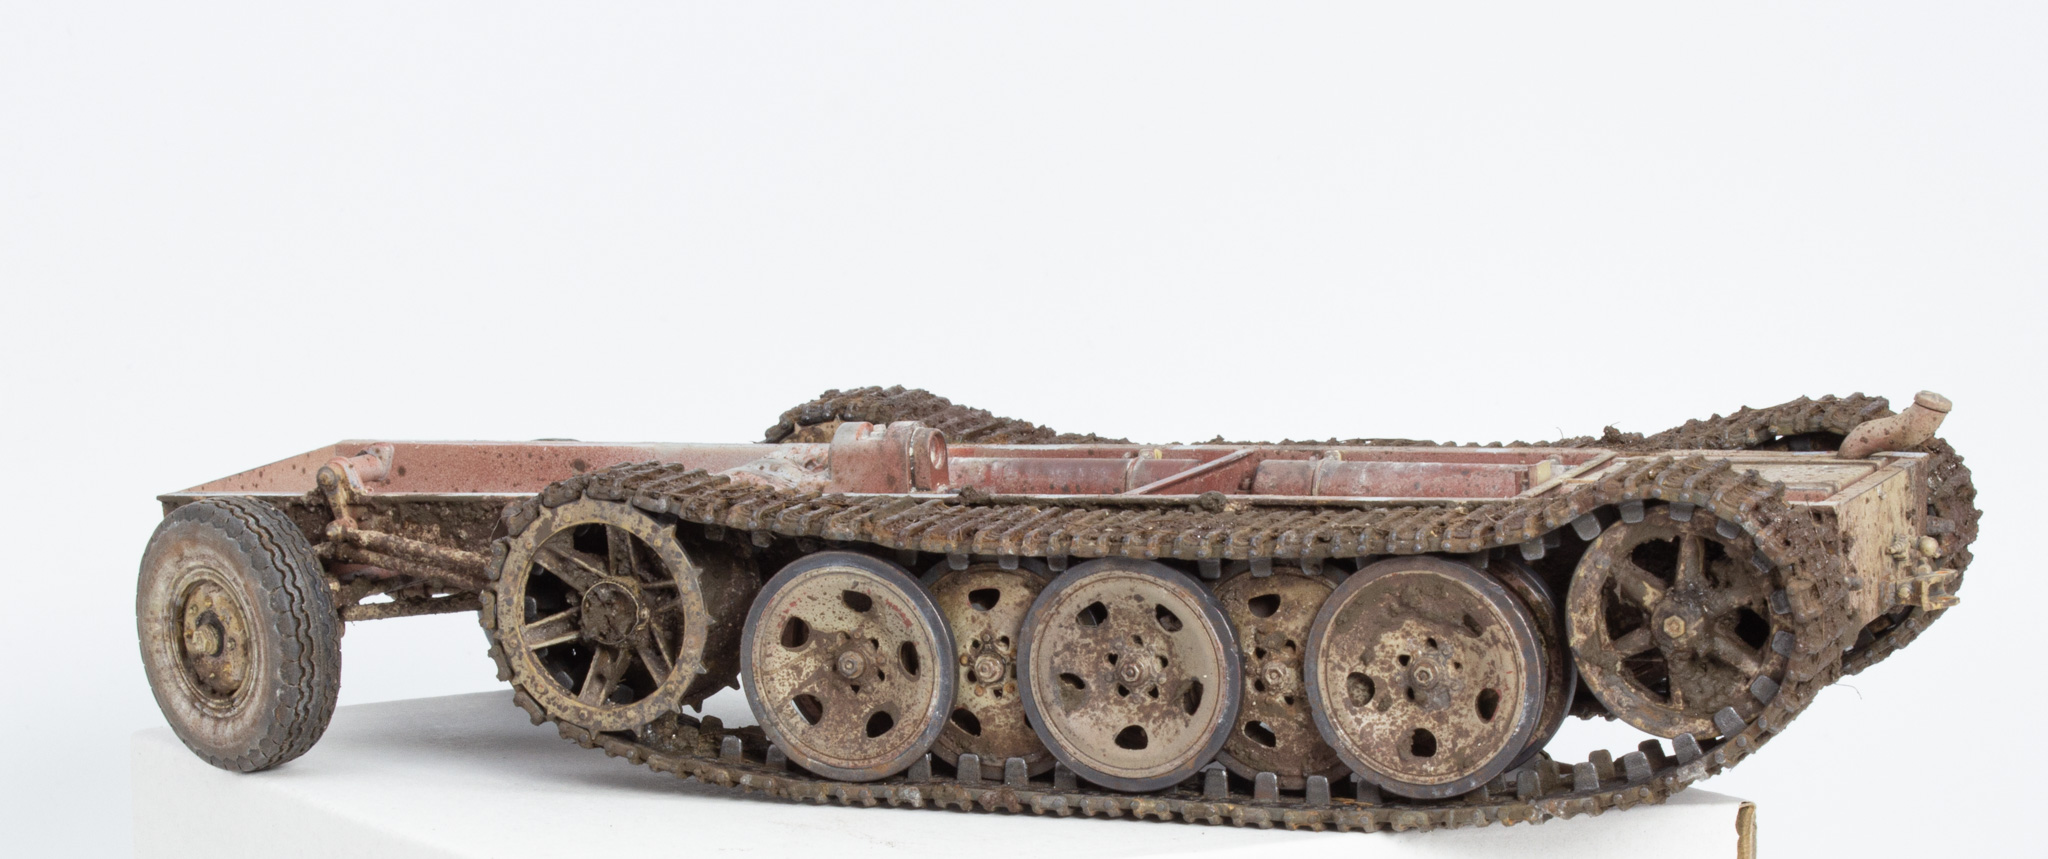
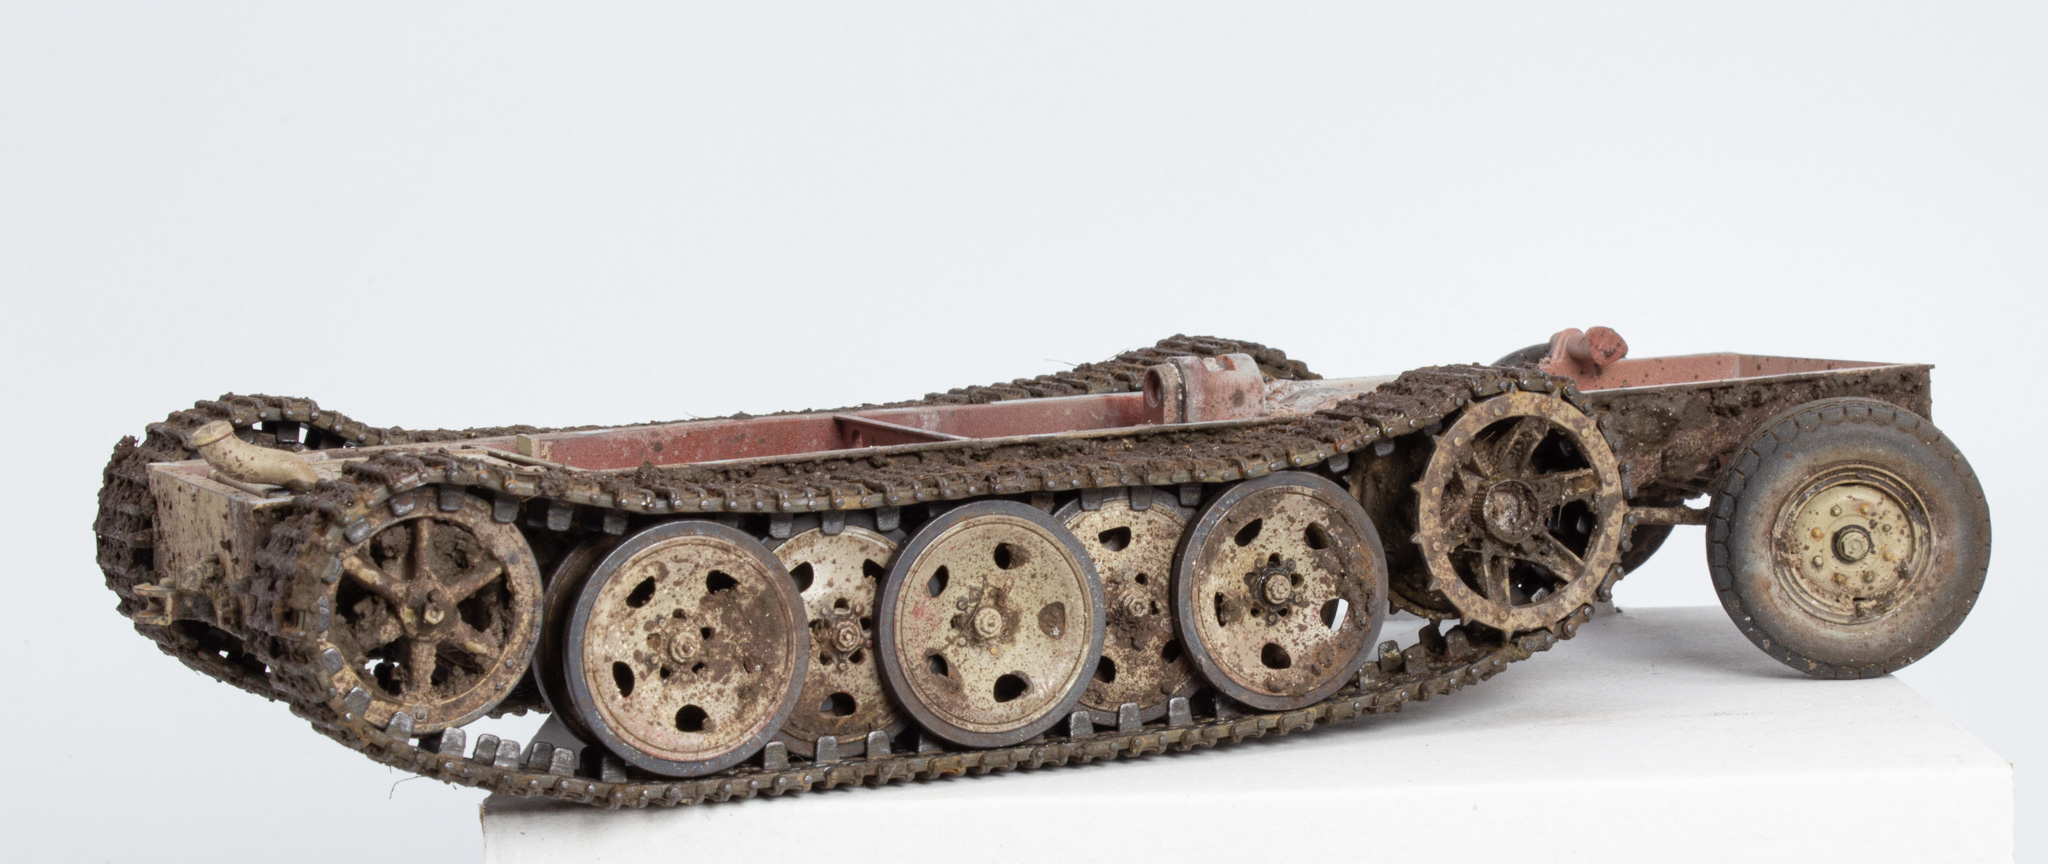
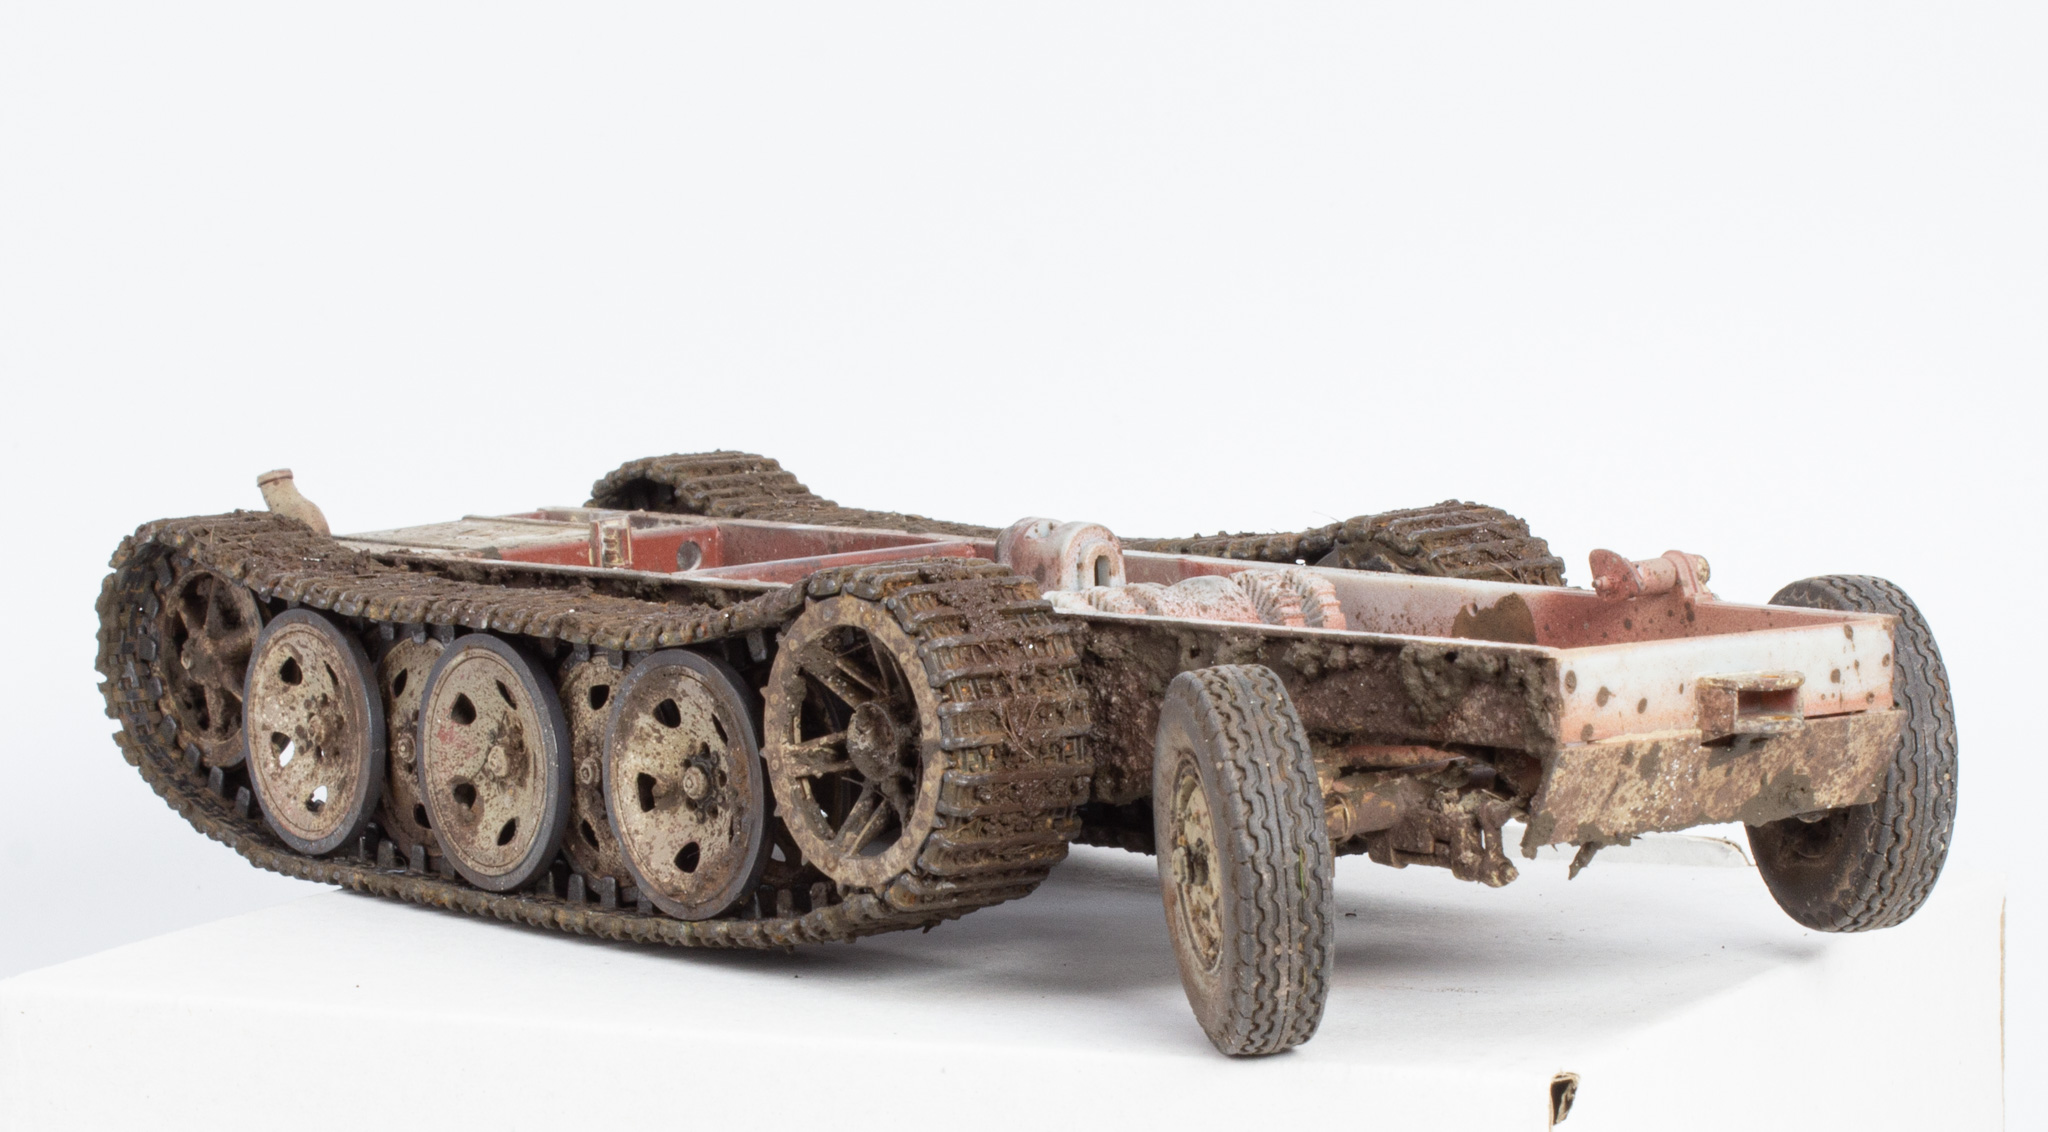
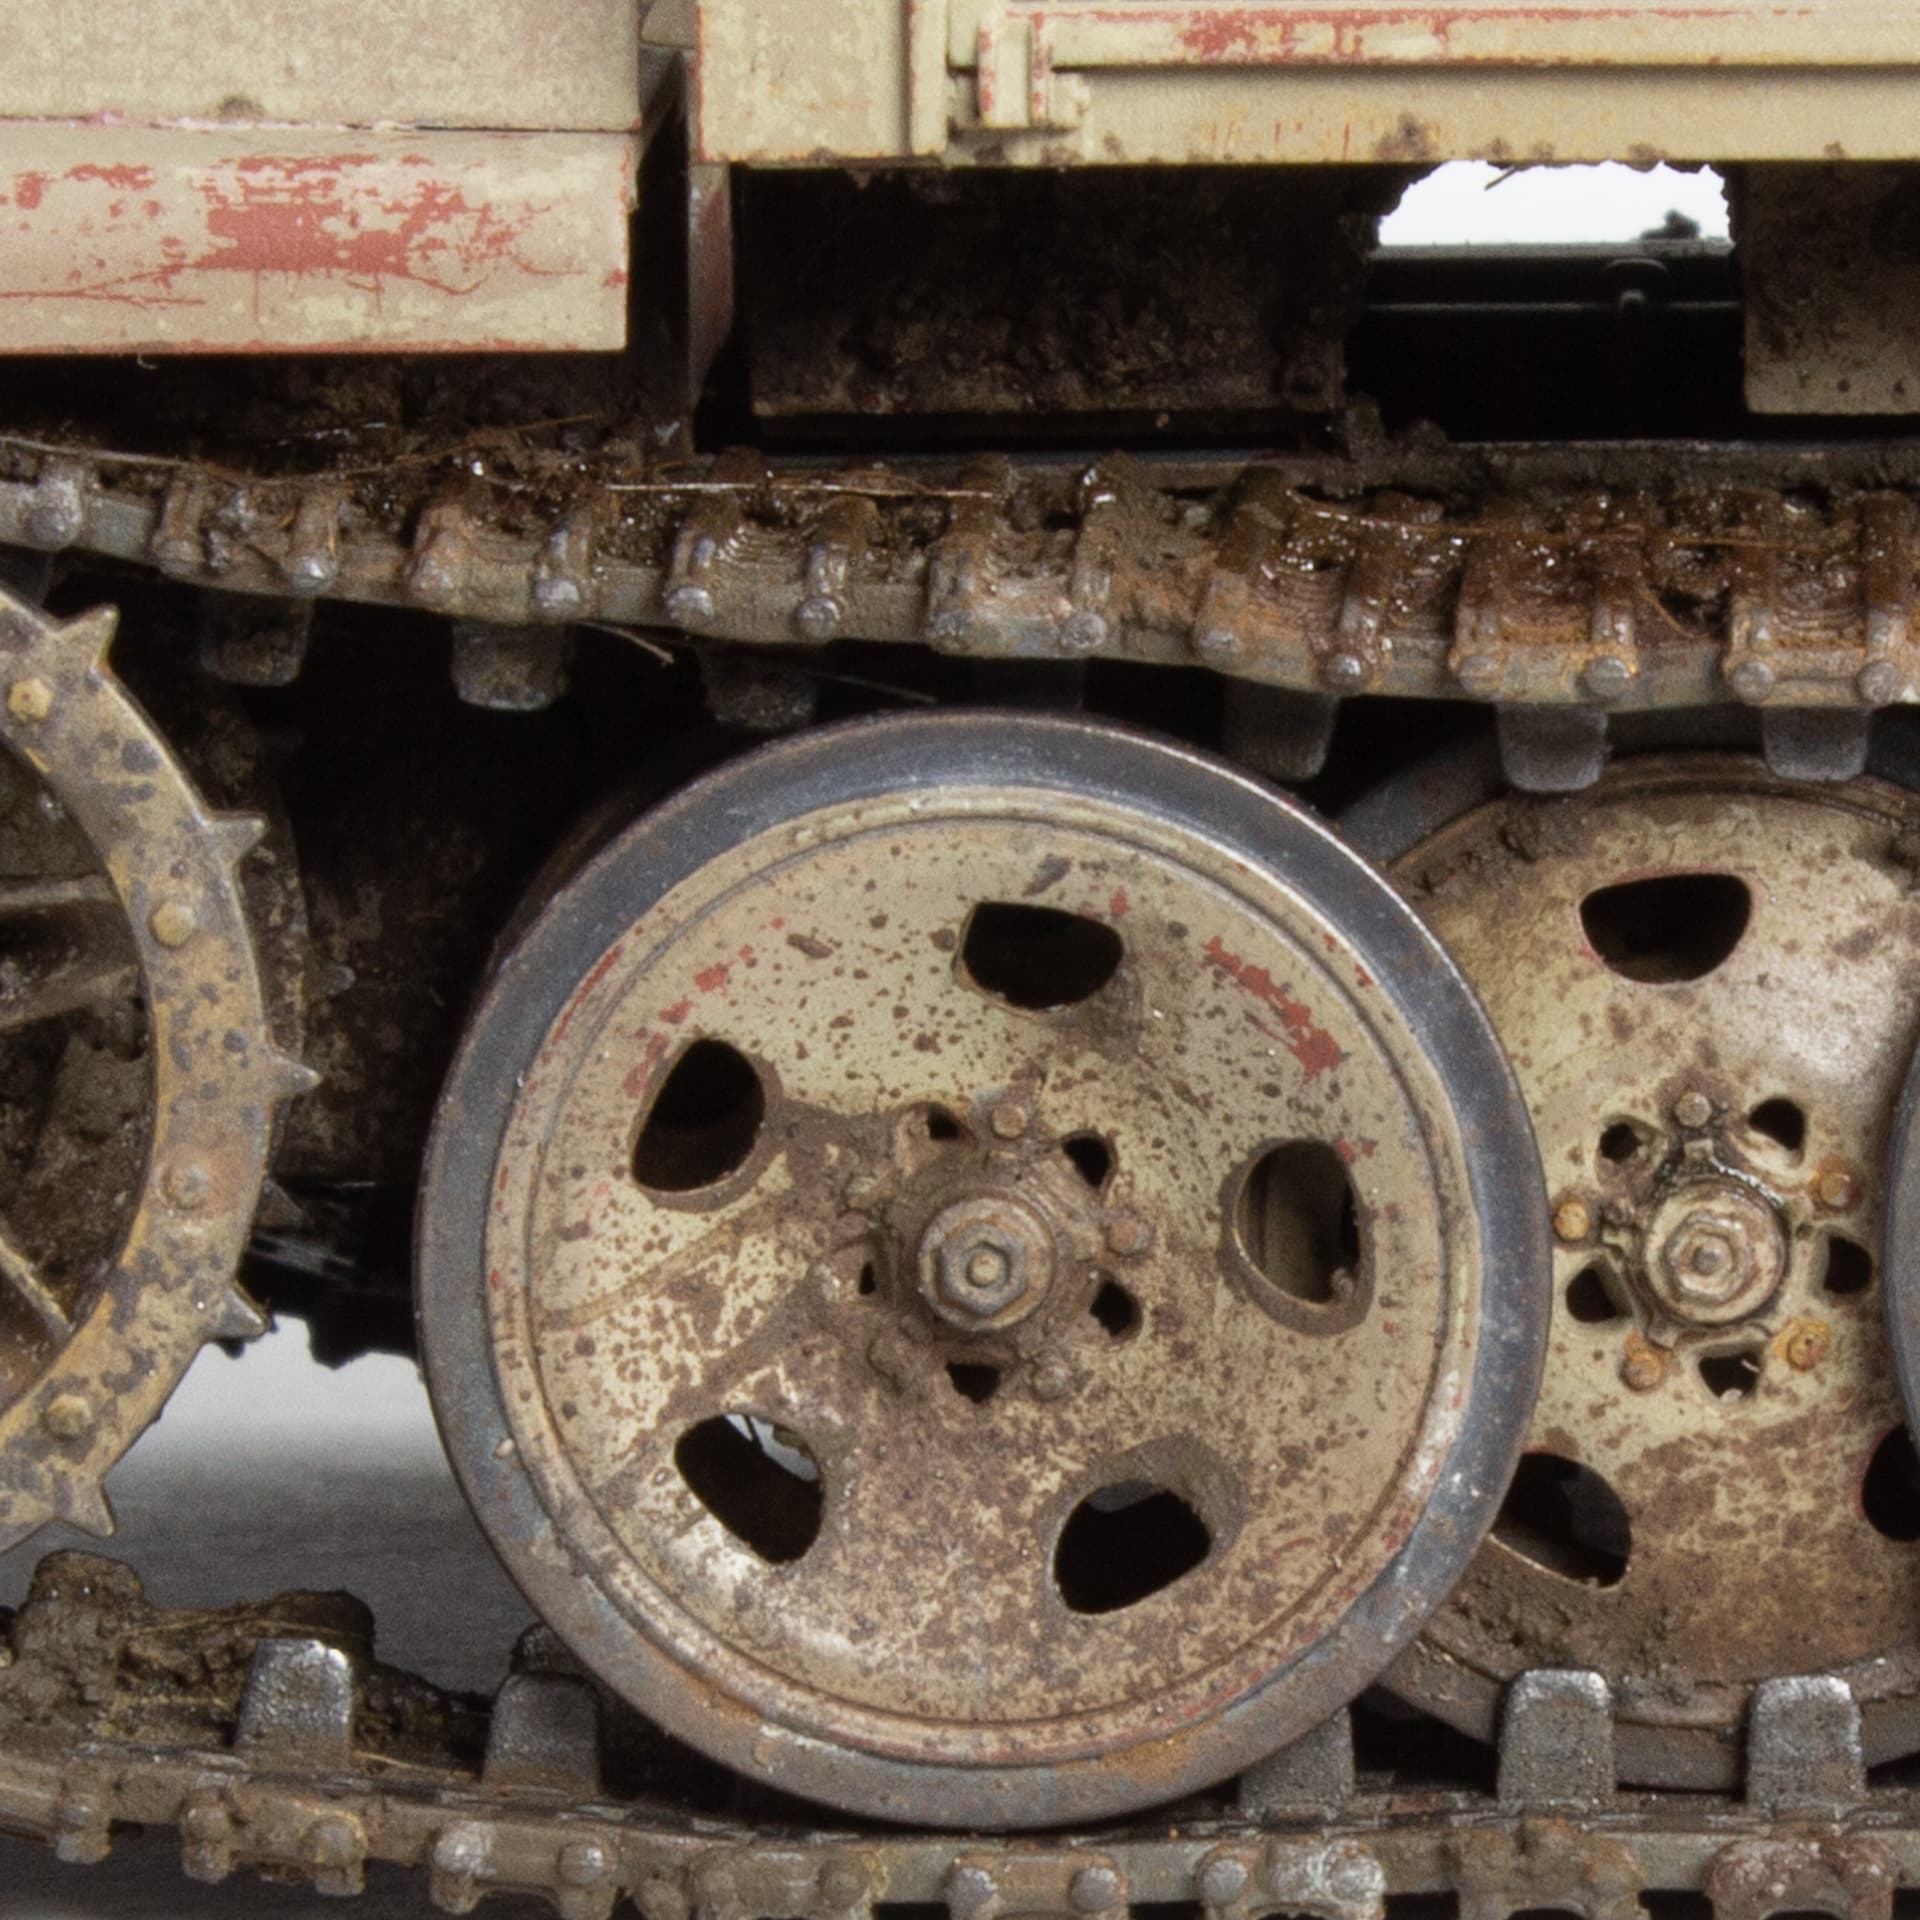
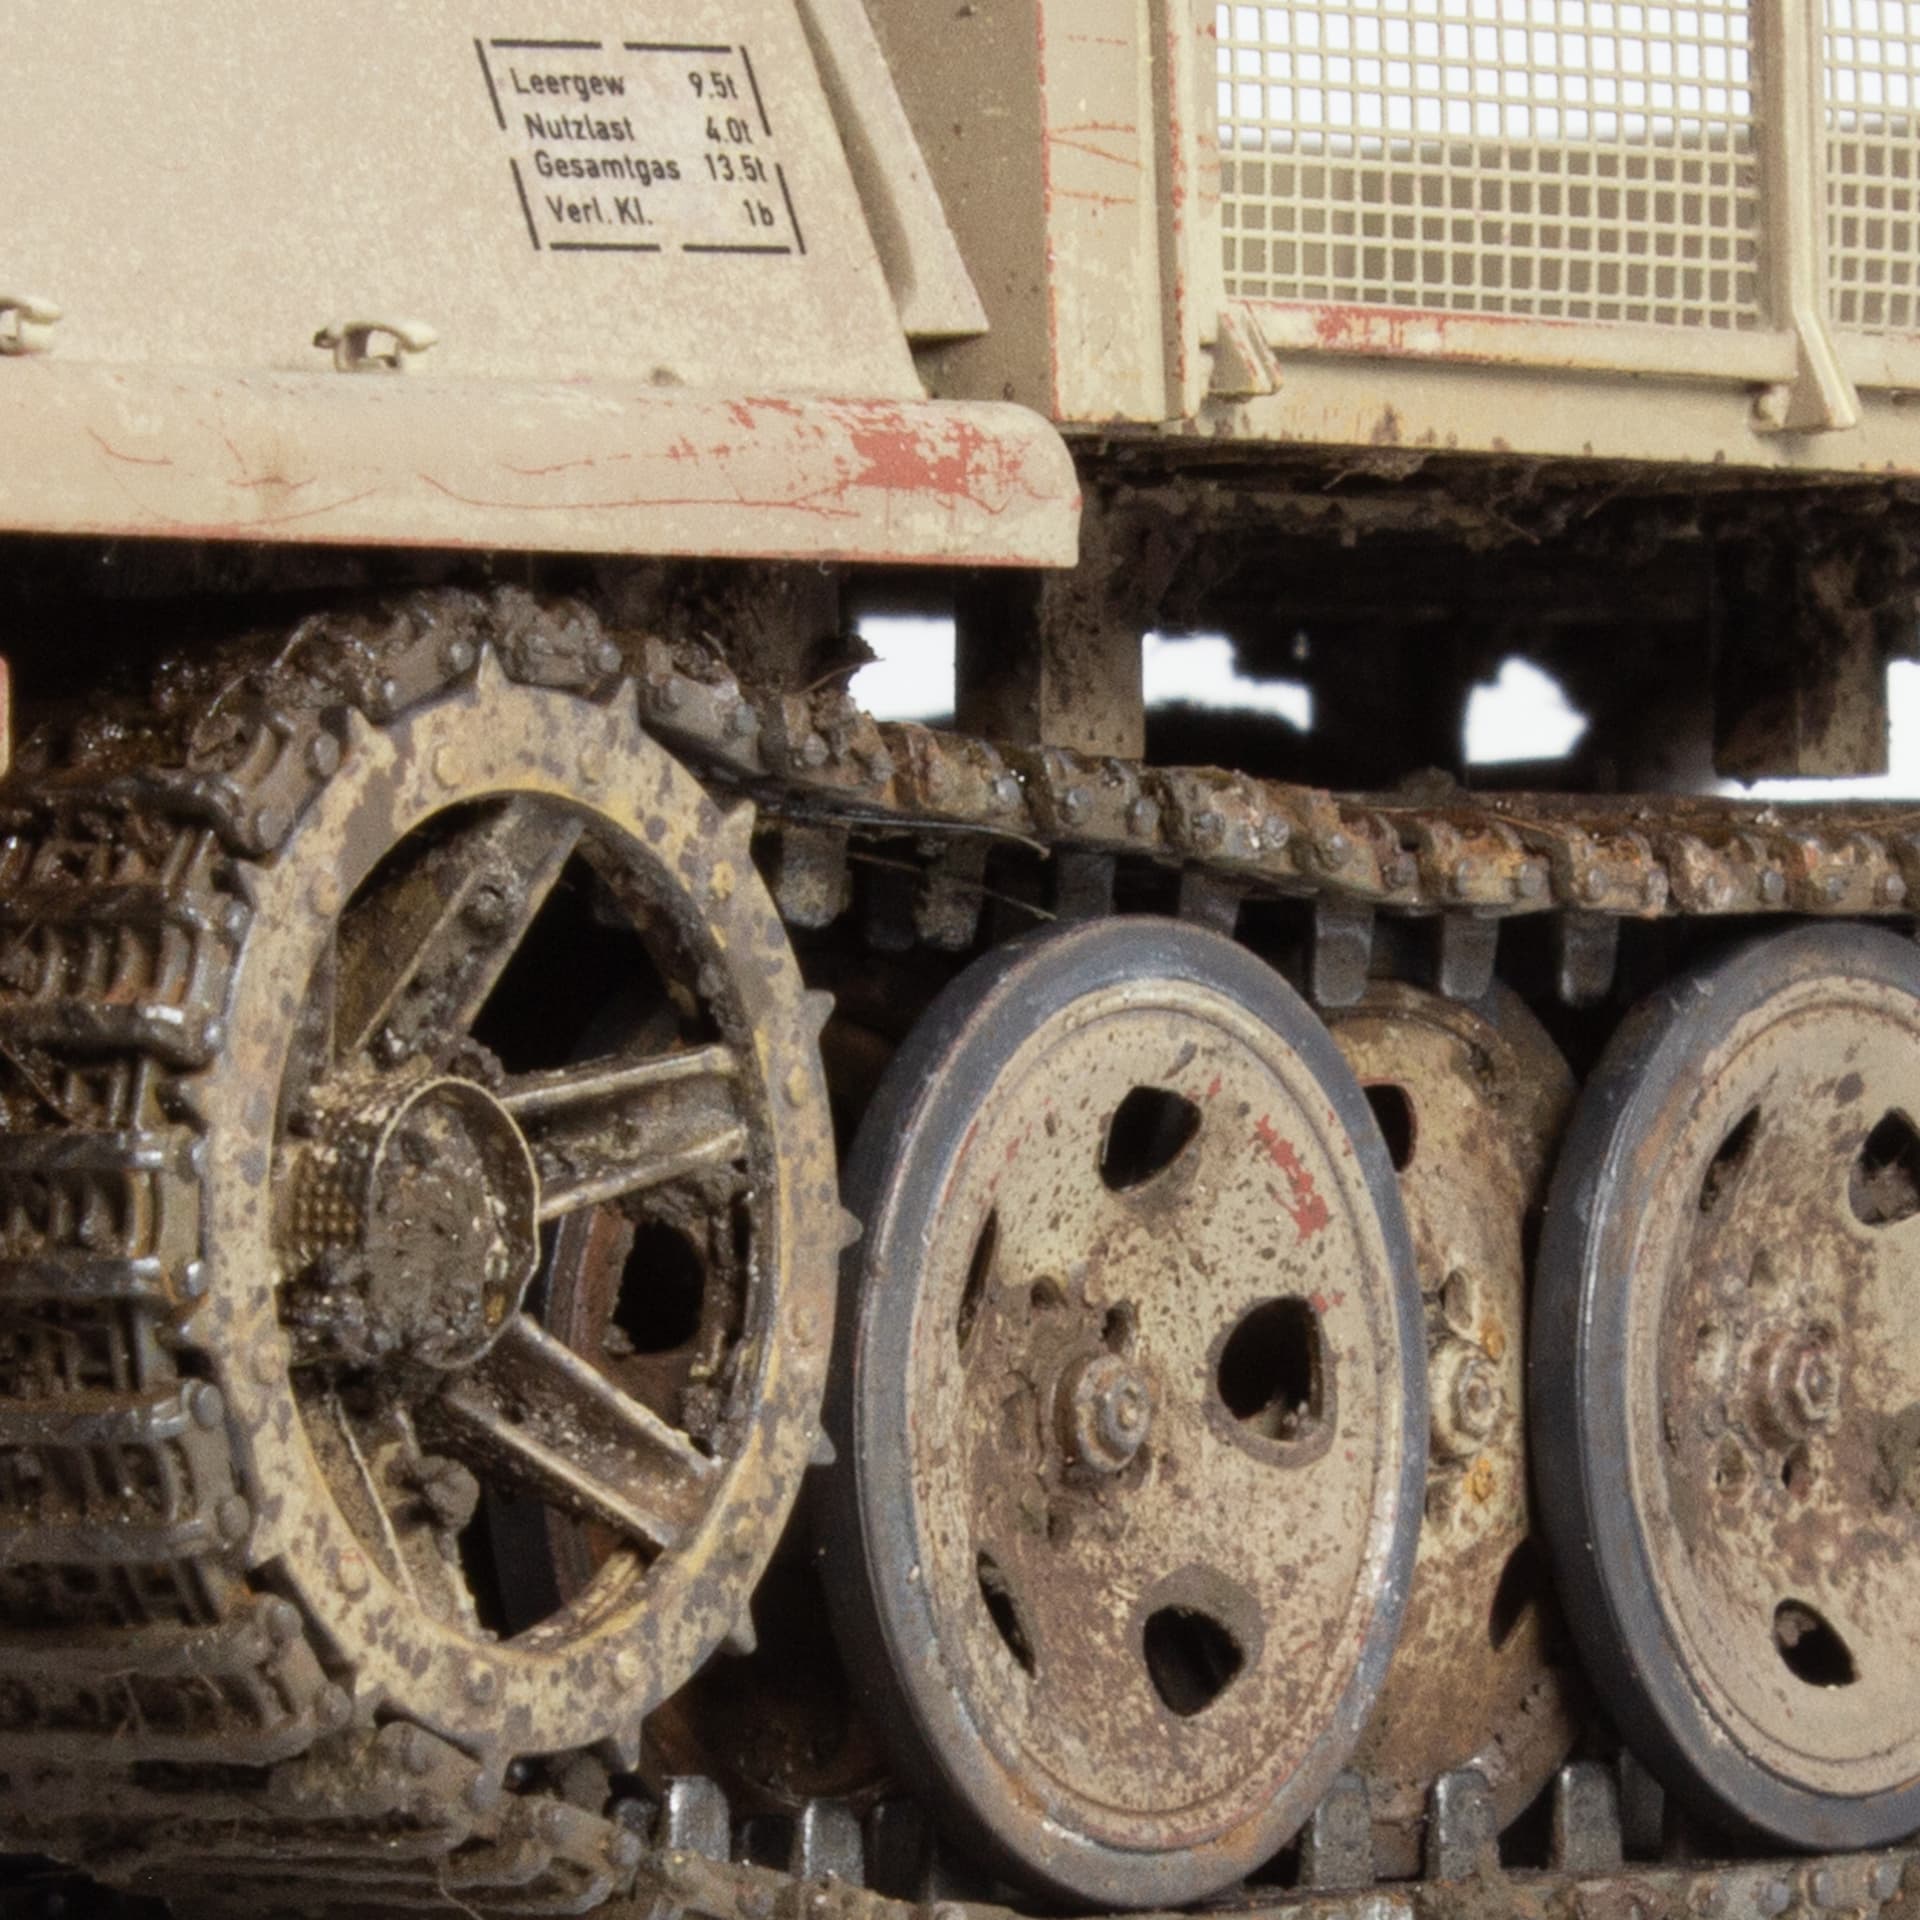
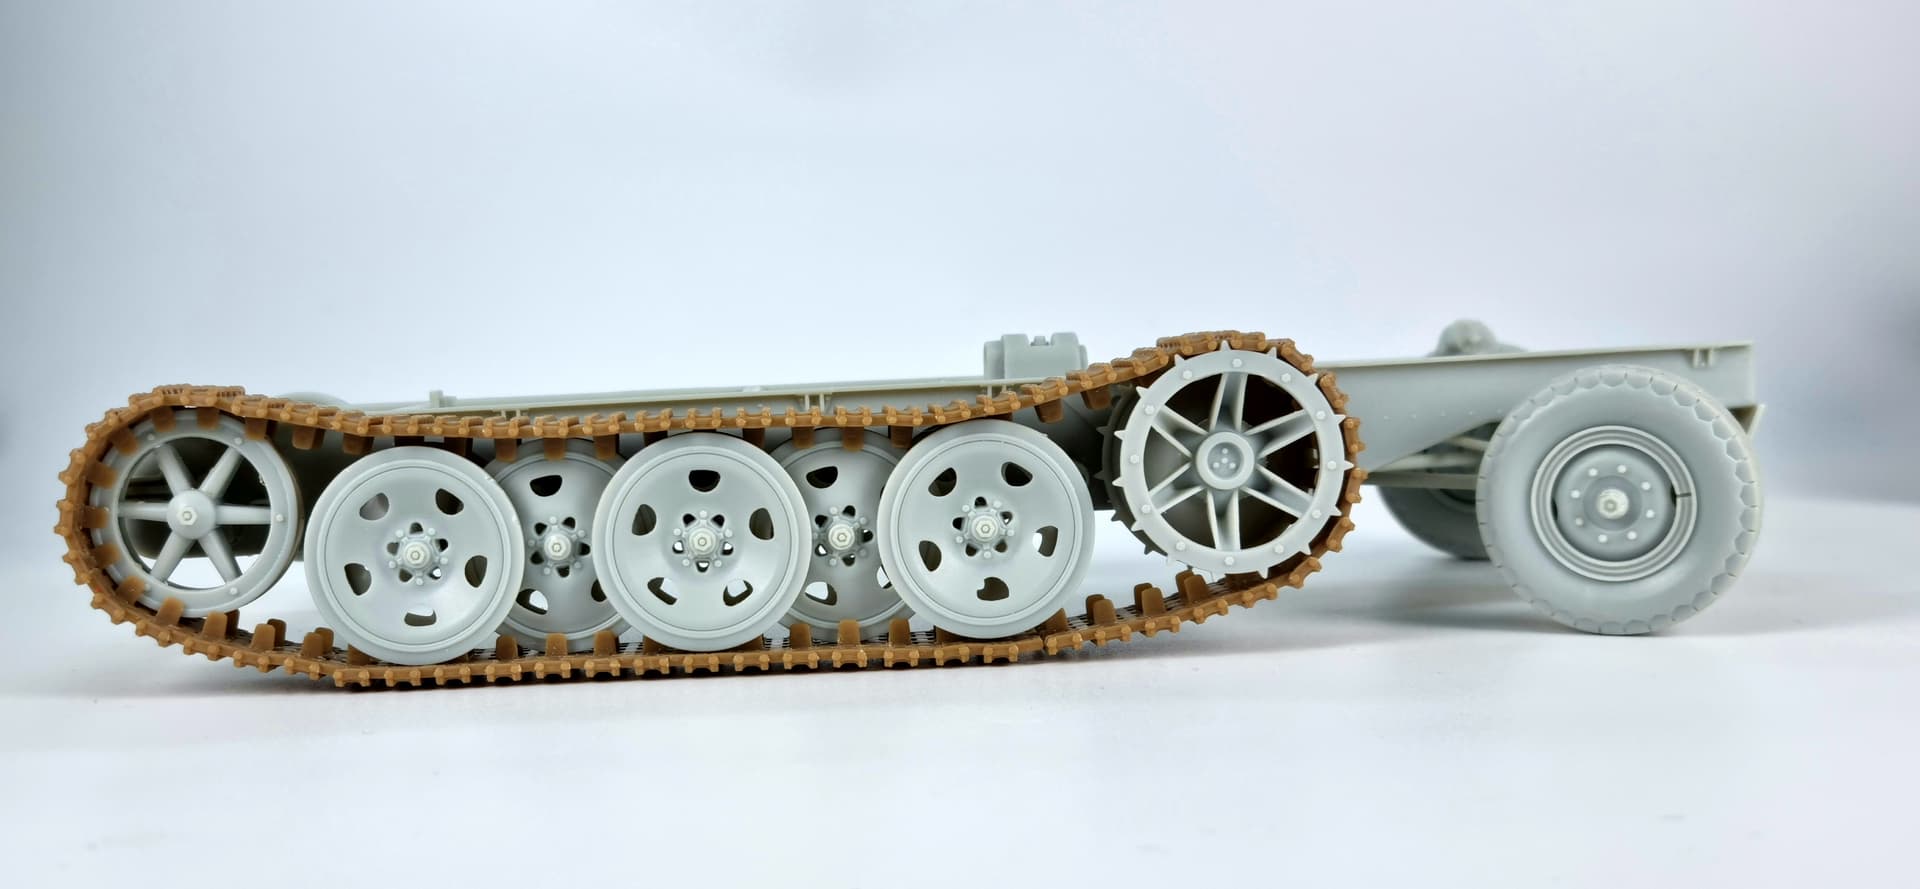
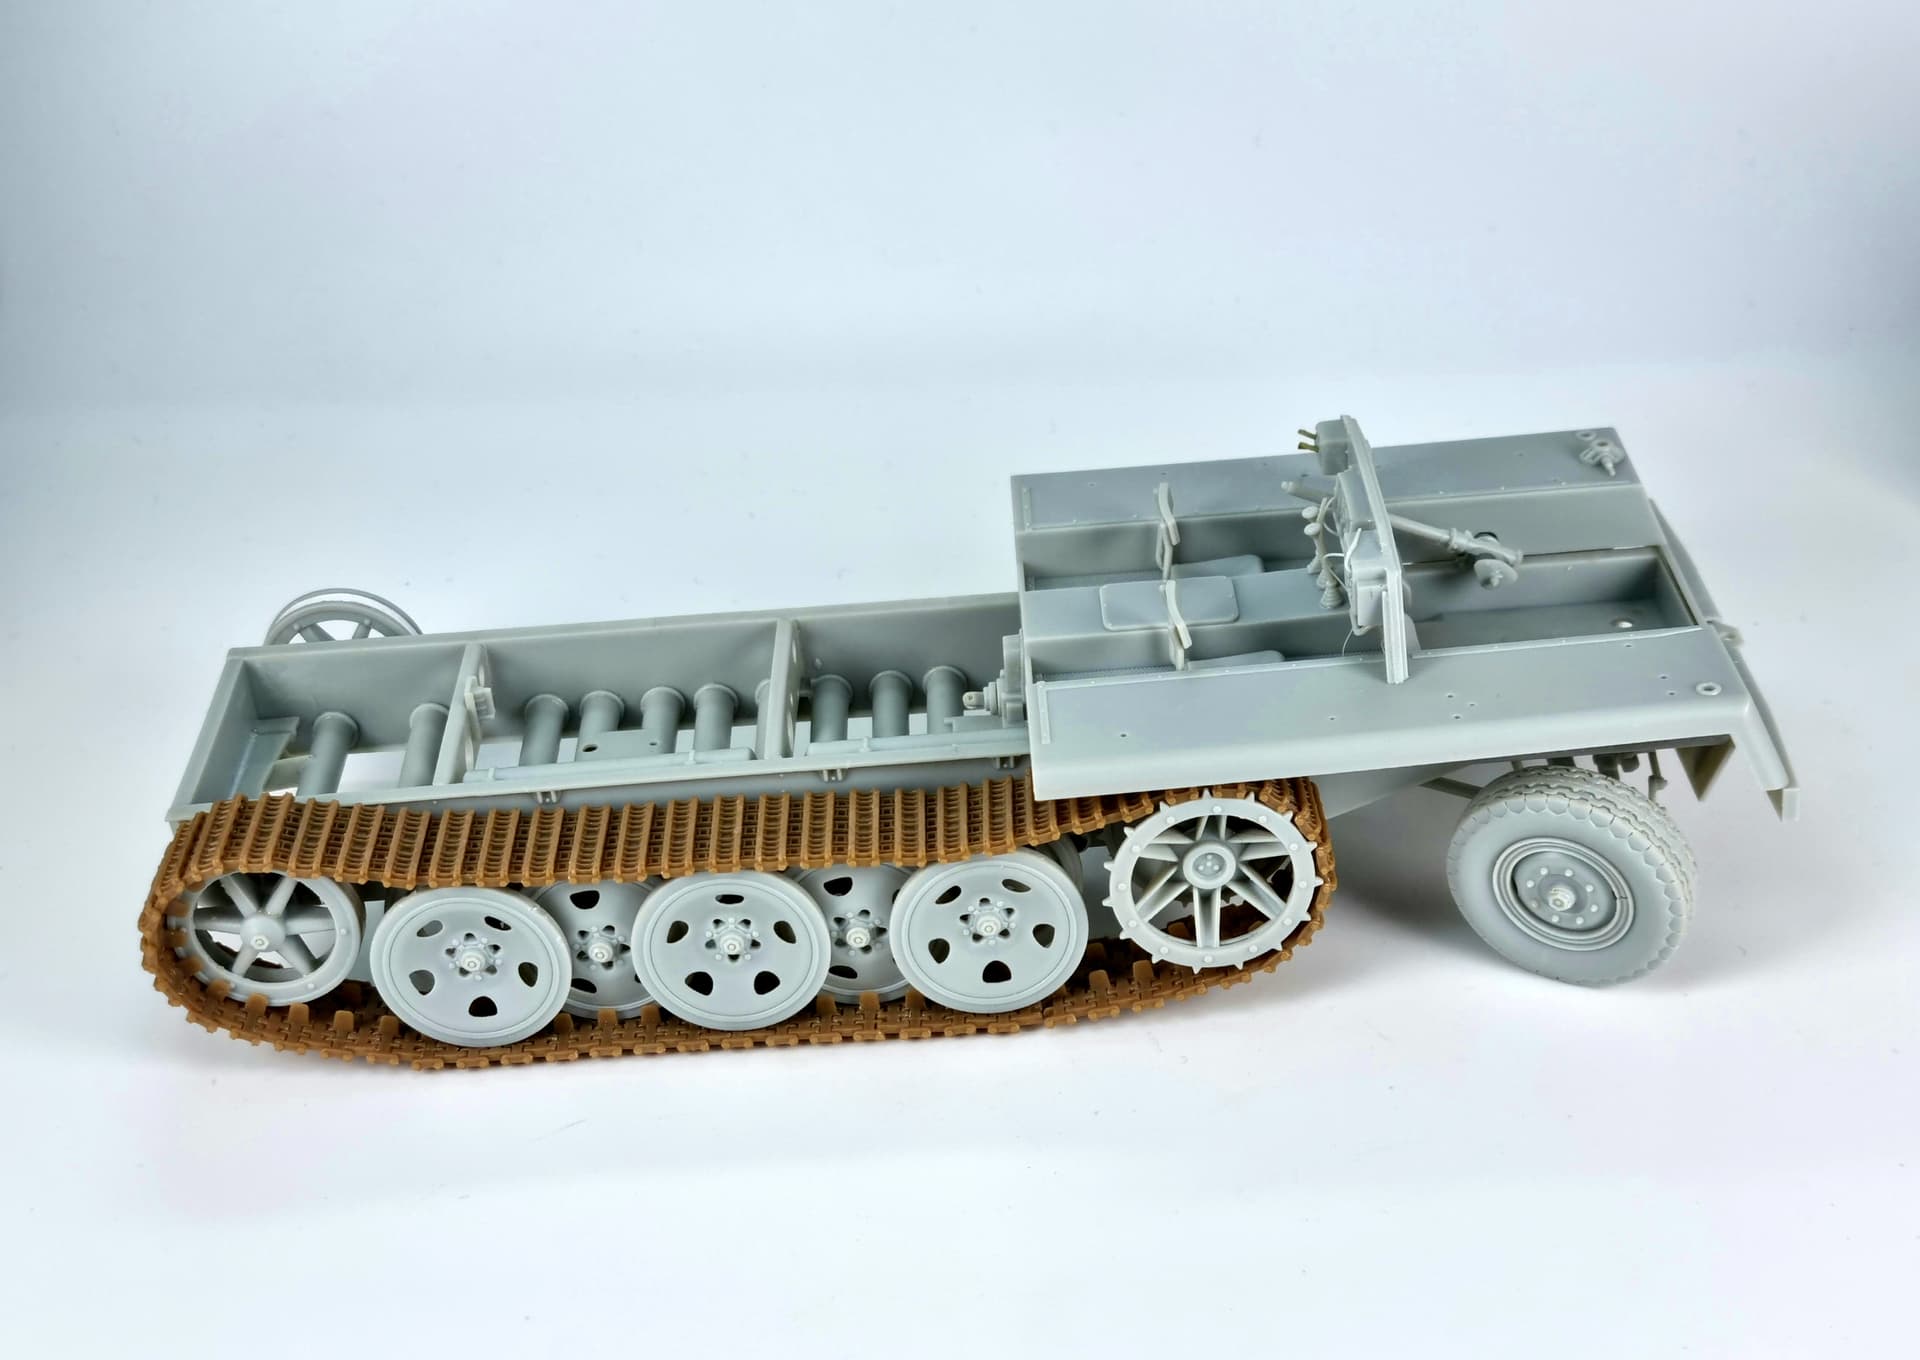
Steps 1 through 6 concern the construction of the chassis and suspension. It all fits neatly together although you do need to ensure the multipart torsion bar tubes are fitted in the correct places. I would also recommend leaving the idler axles off the chassis if an aftermarket set of tracks are used. I am up for the challenge of making the kit’s individual link non workable ones look good.

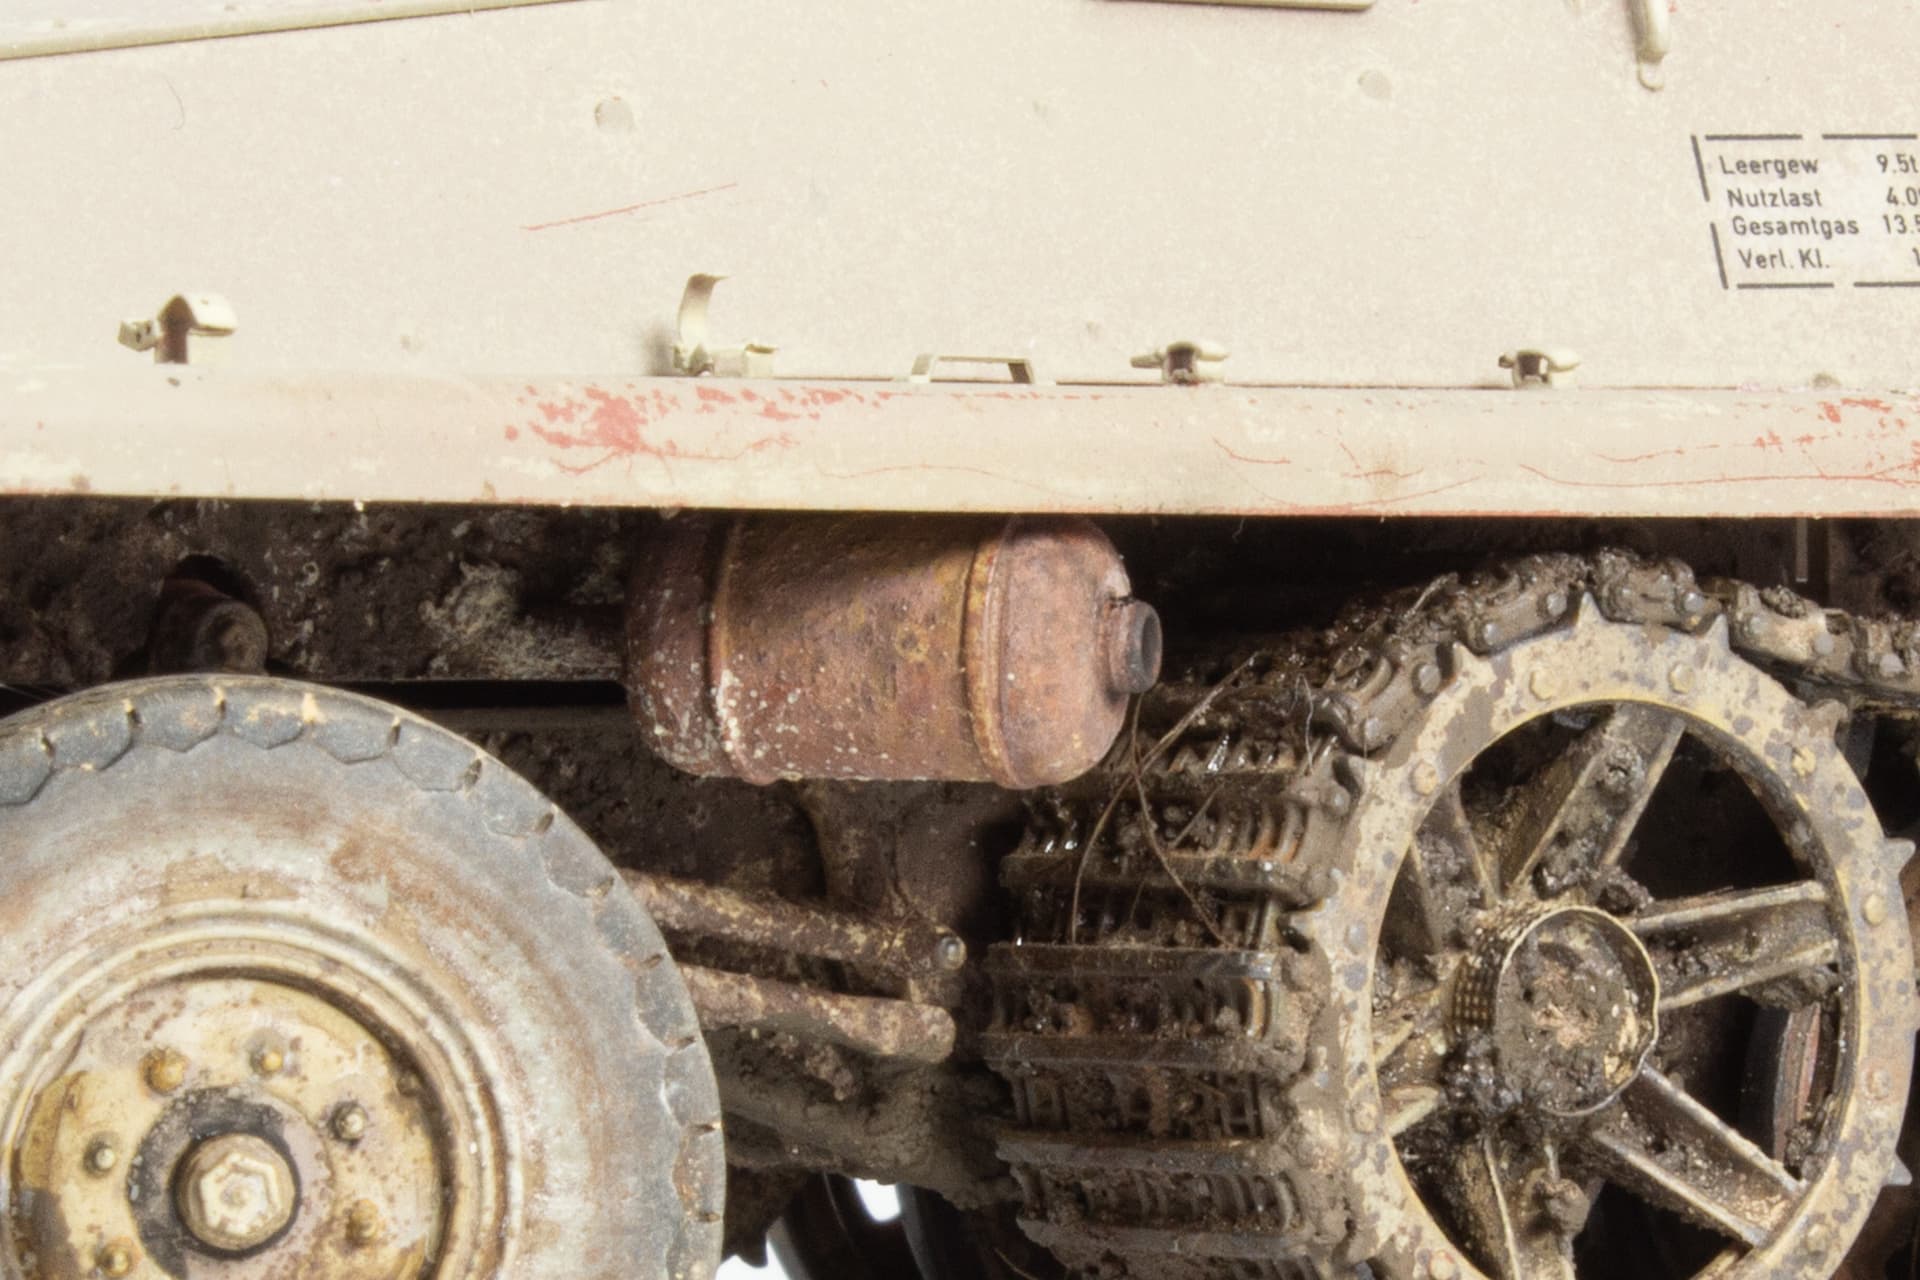
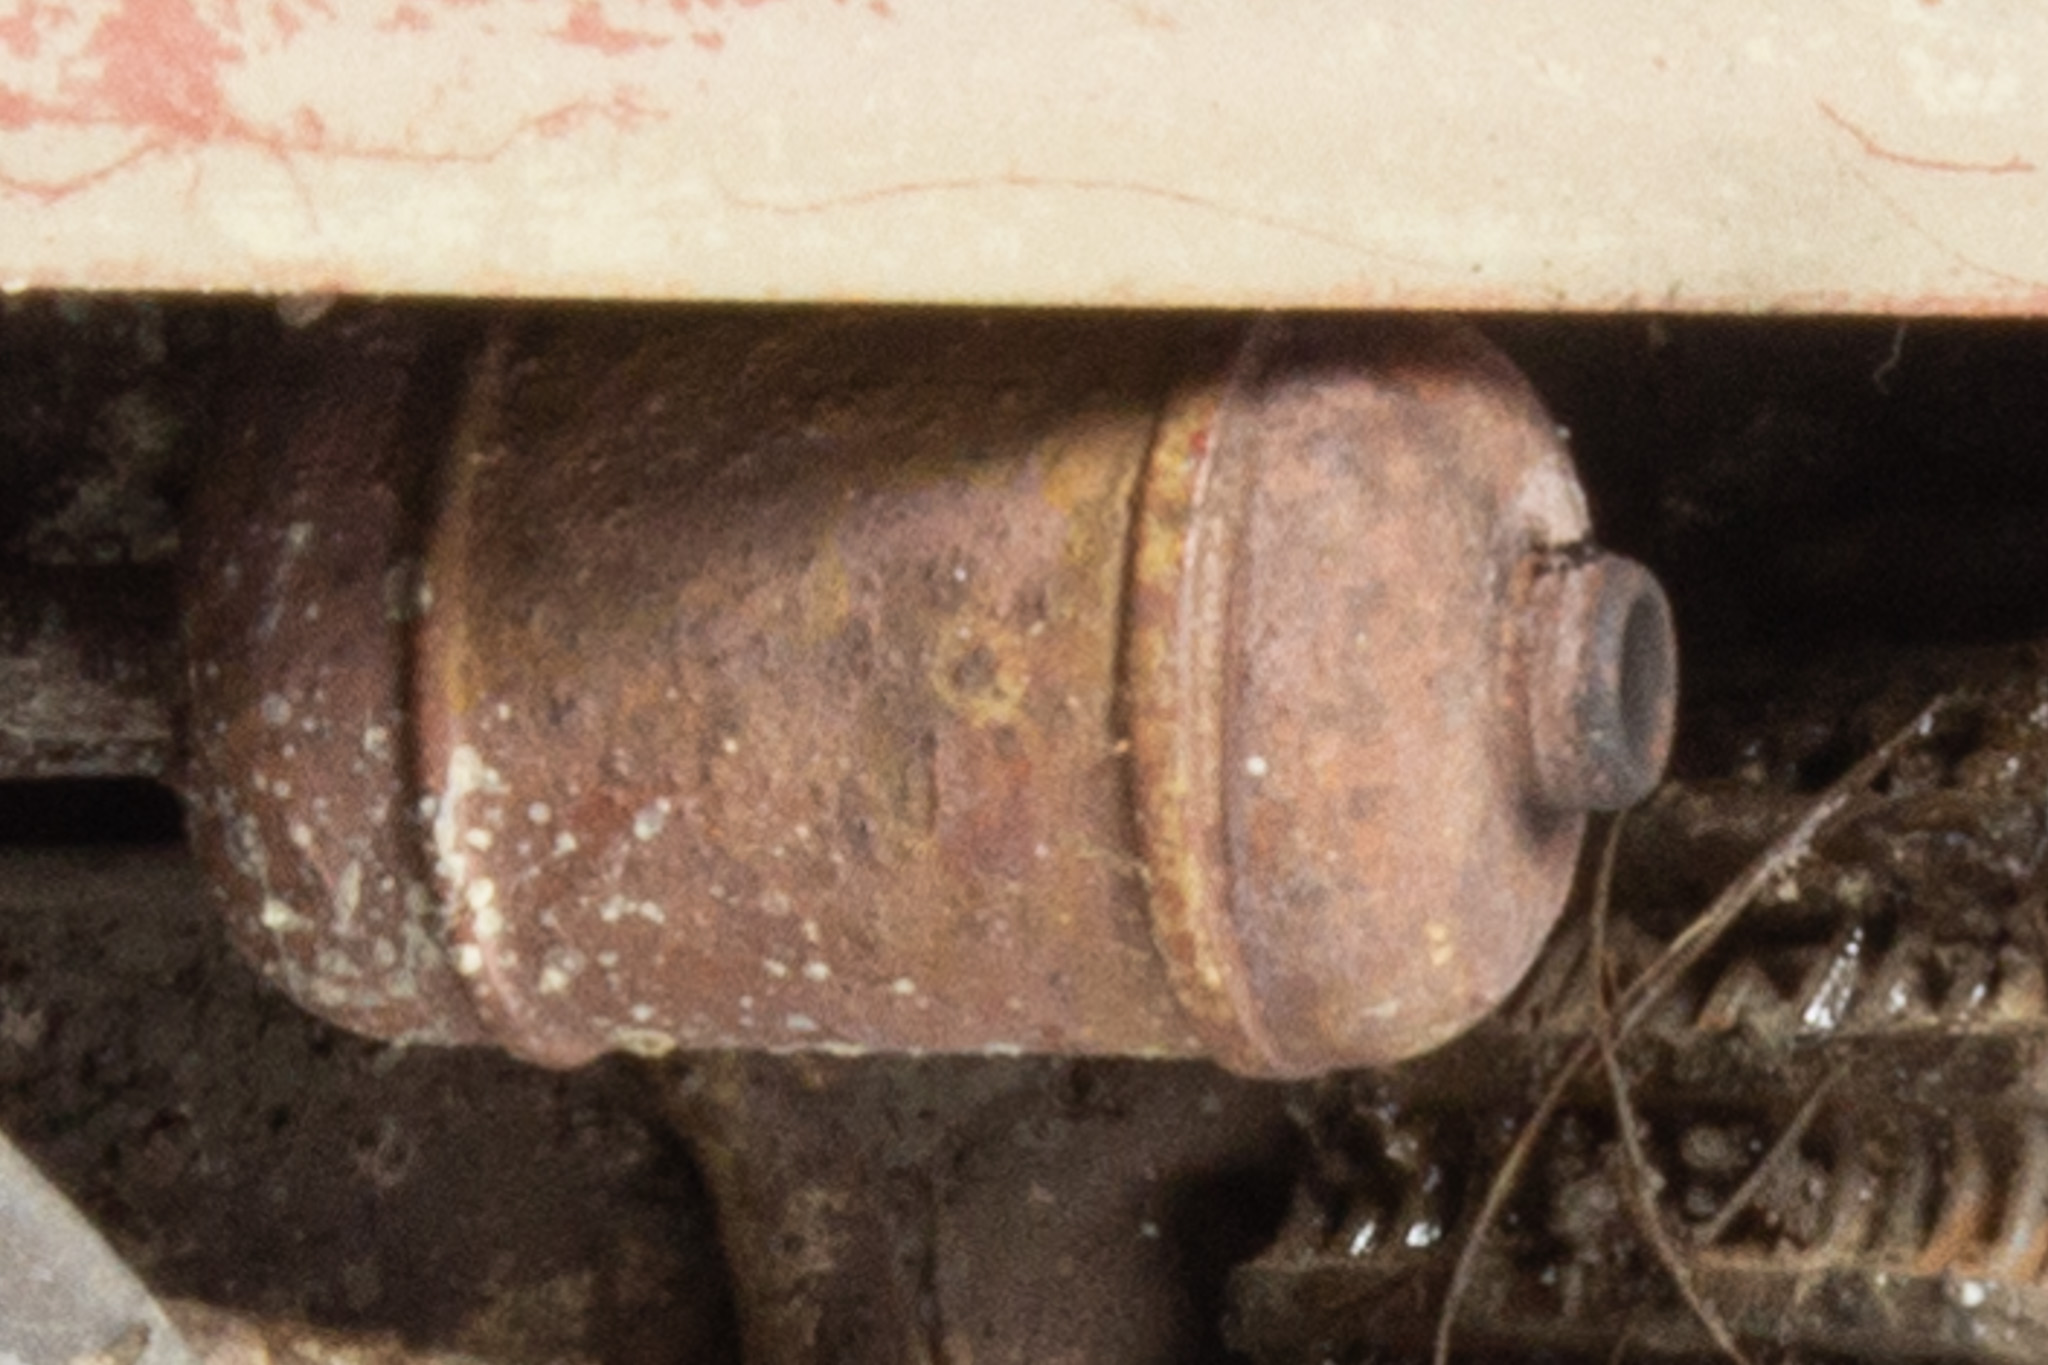
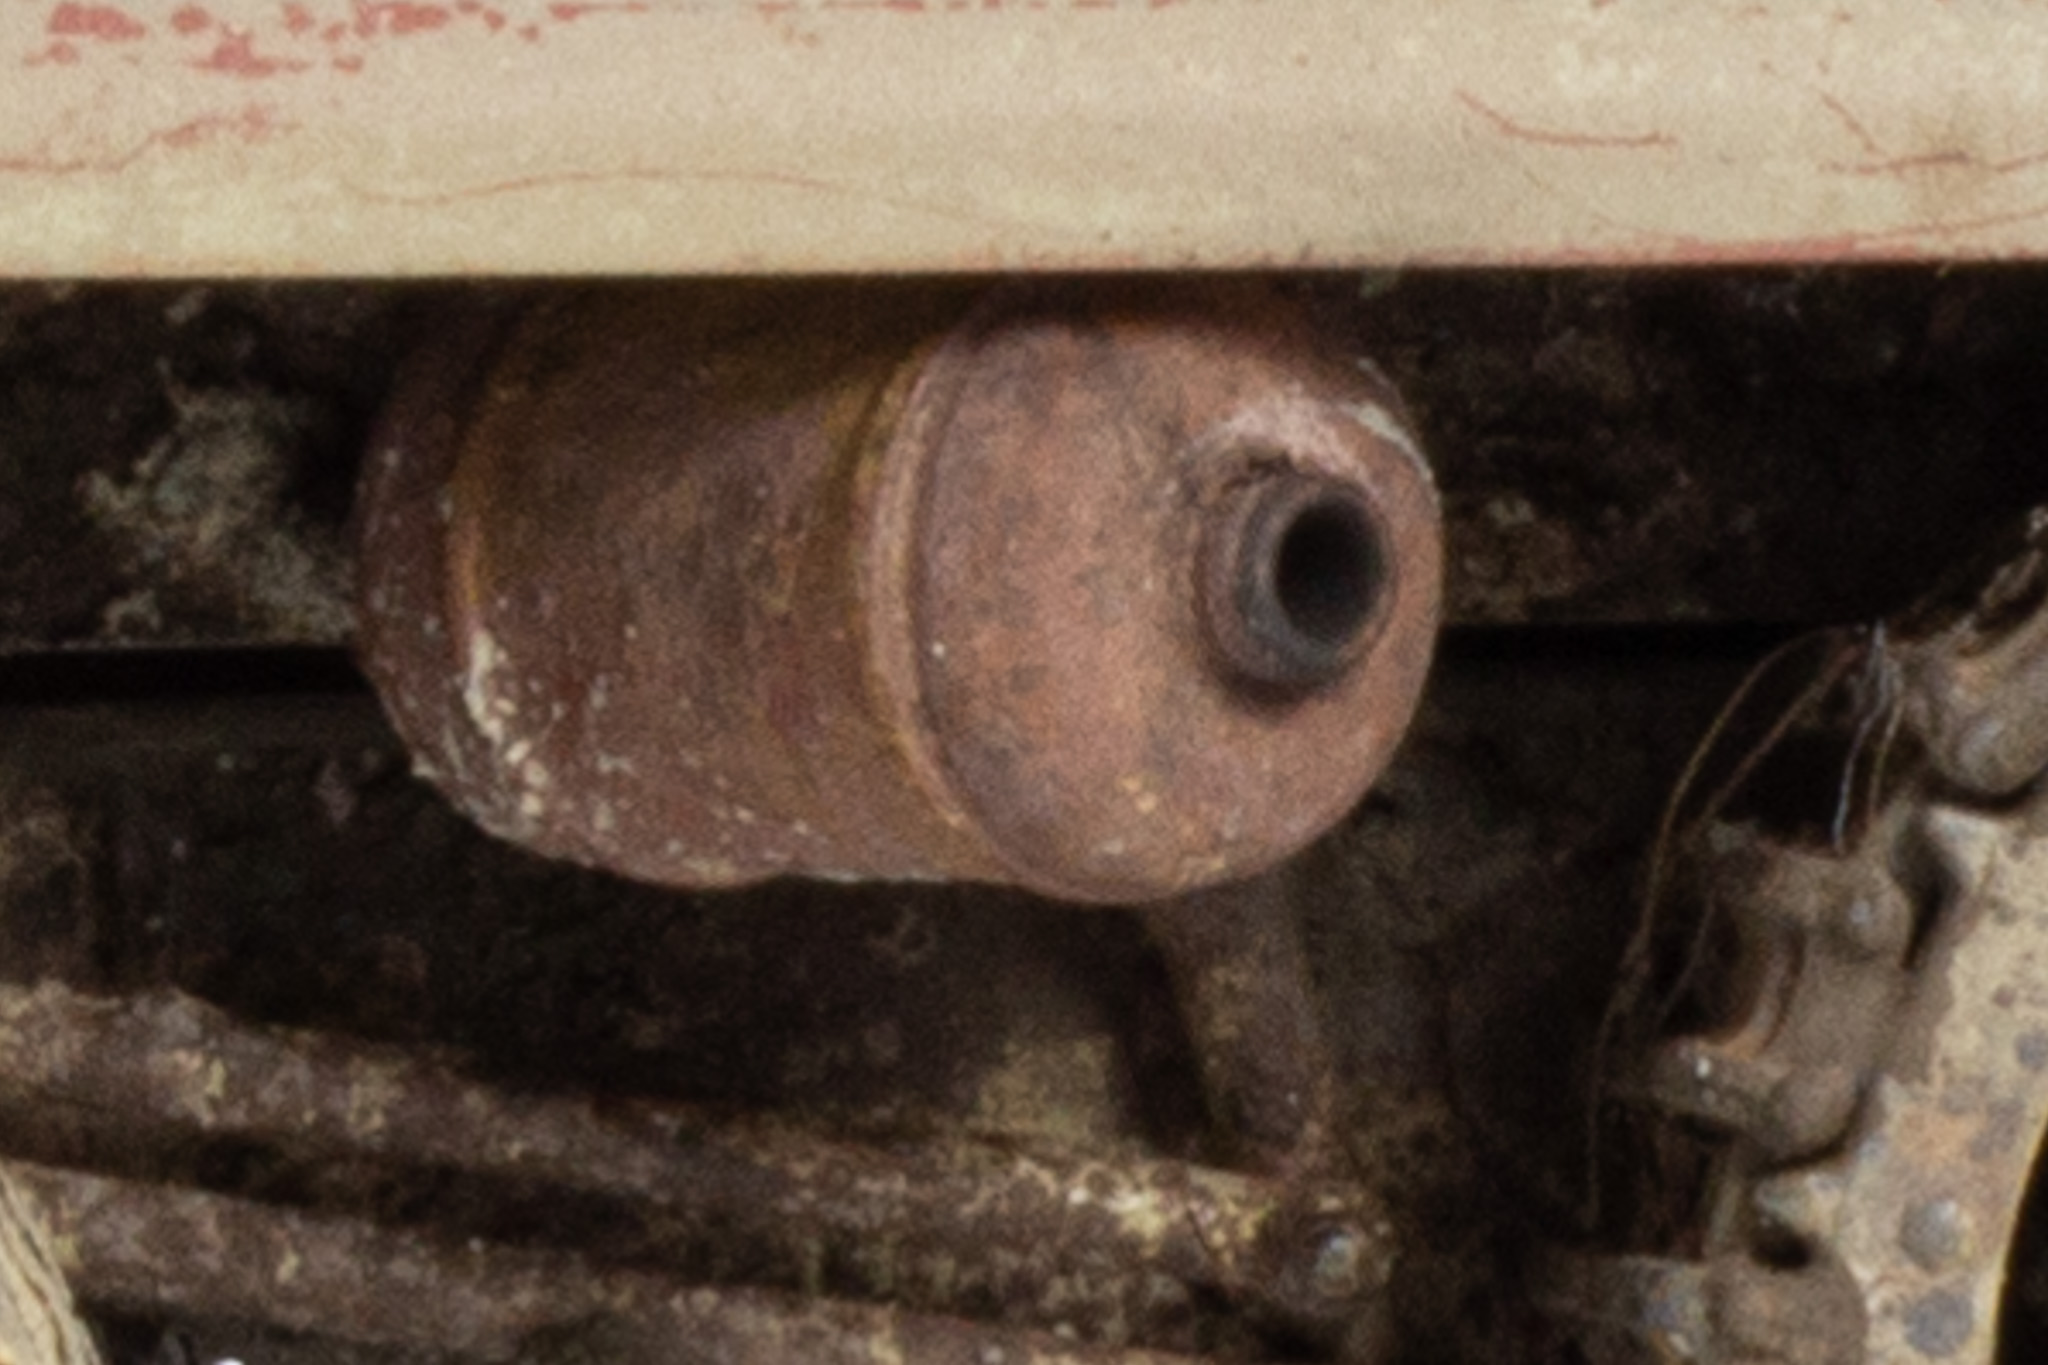
Steps 7 through 9 have you adding on the chassis inner bracing panels, the fuel tank and winch accessories. Only one in four production SWS’s ever received a winch so if not fitted the holes in the rear panel remained. I’m not fitting mine.

Steps 10 & 11 build up the *Maybach HL42 TRKMS engine. The engine looks highly detailed, but I won’t be fitting this to my kit, so I can’t comment on its sutability or fit.

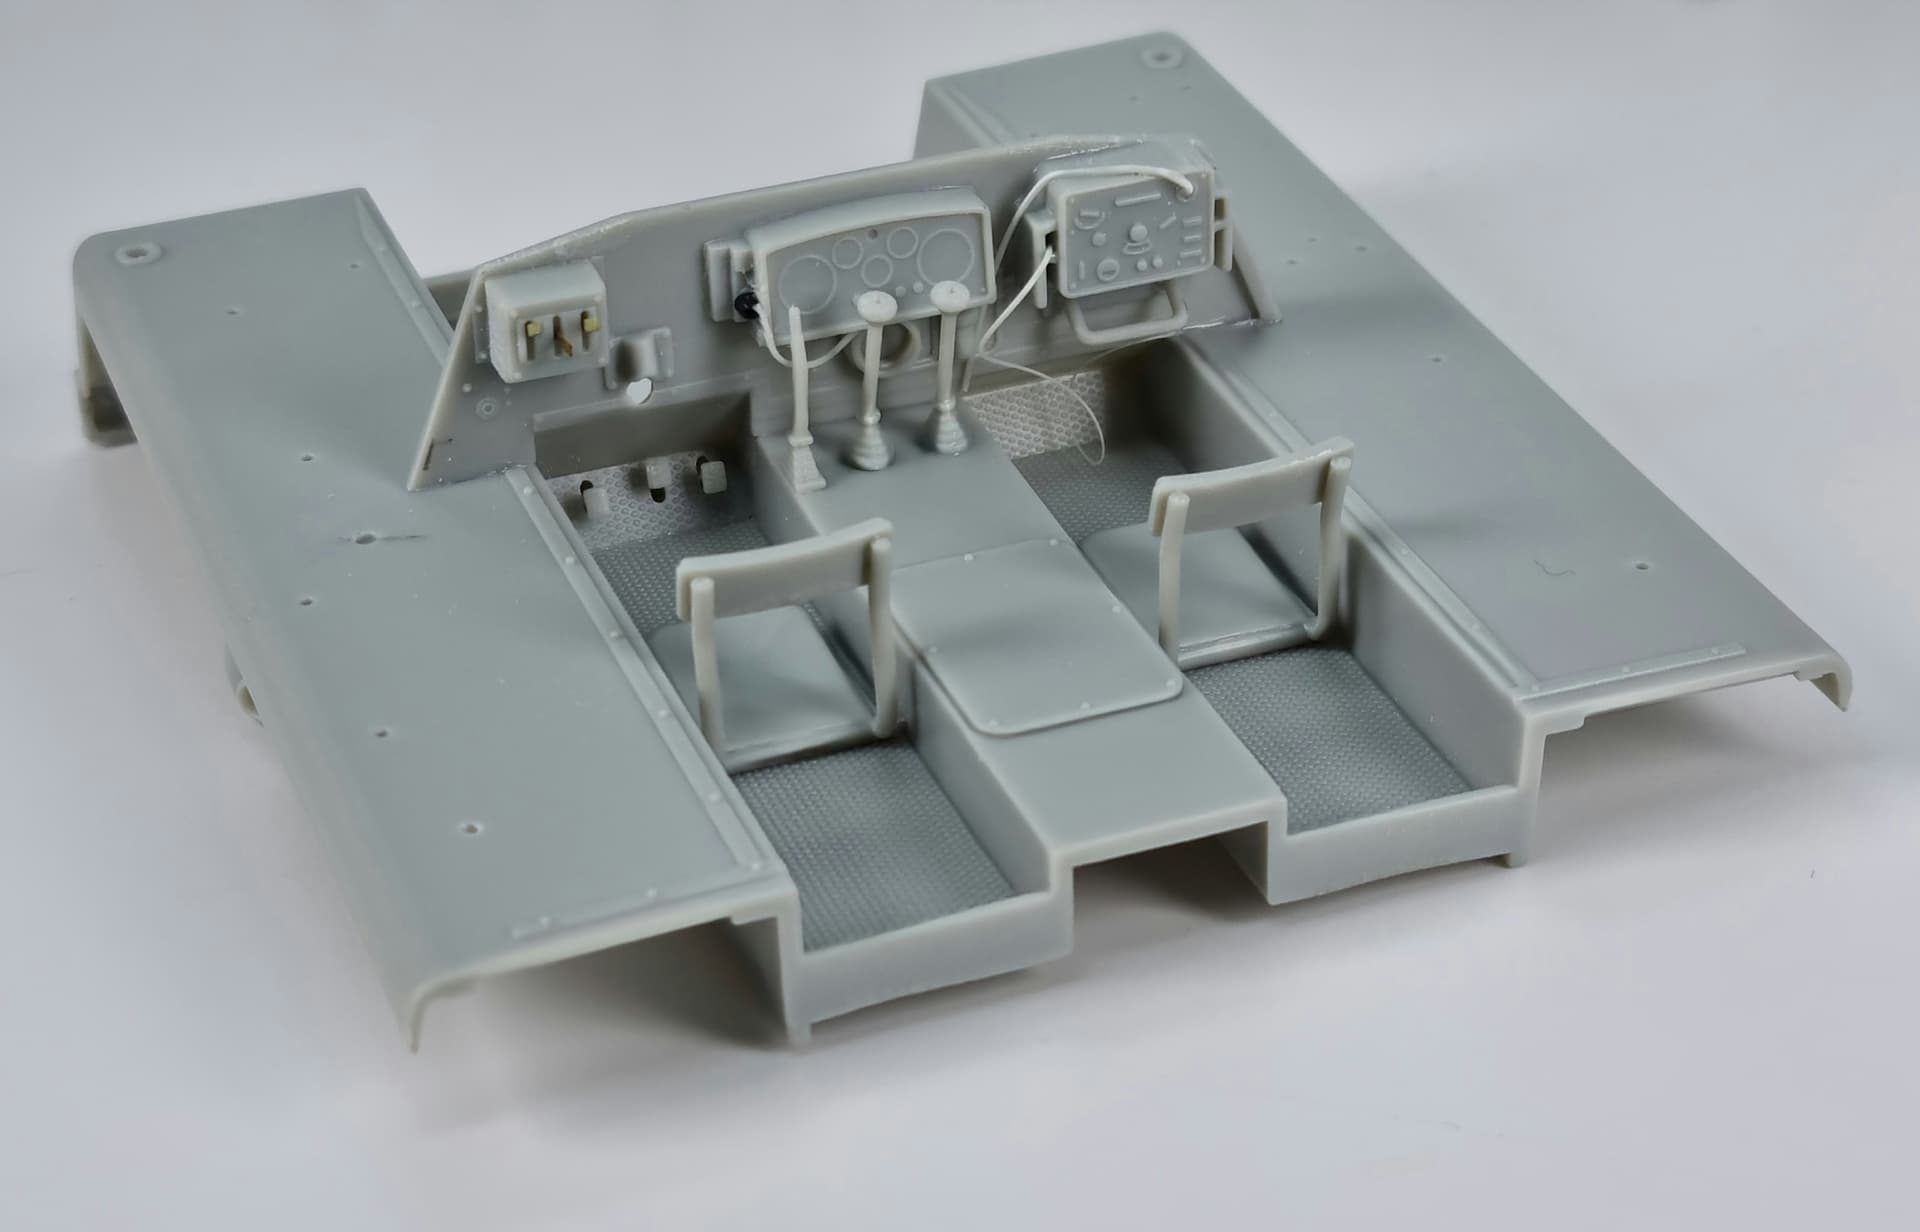
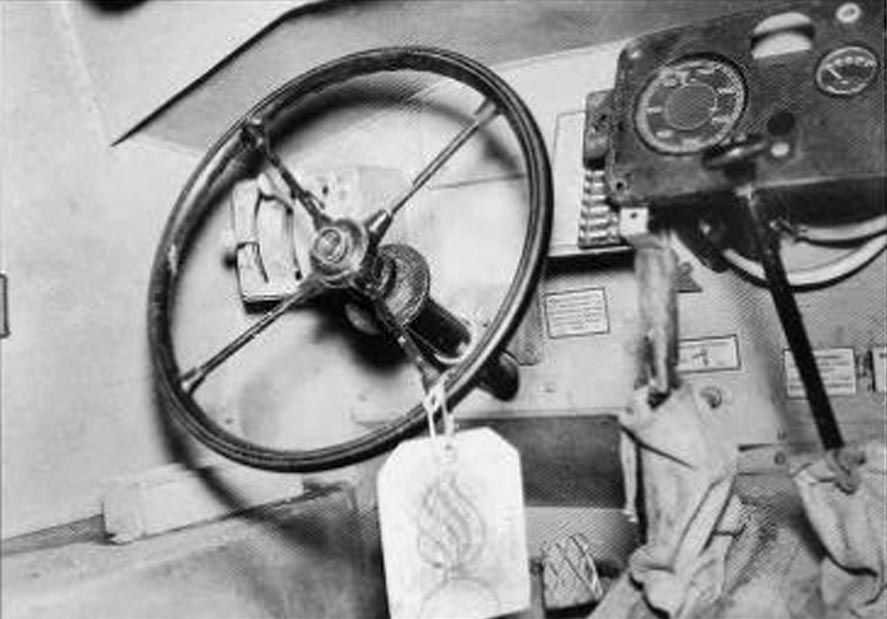
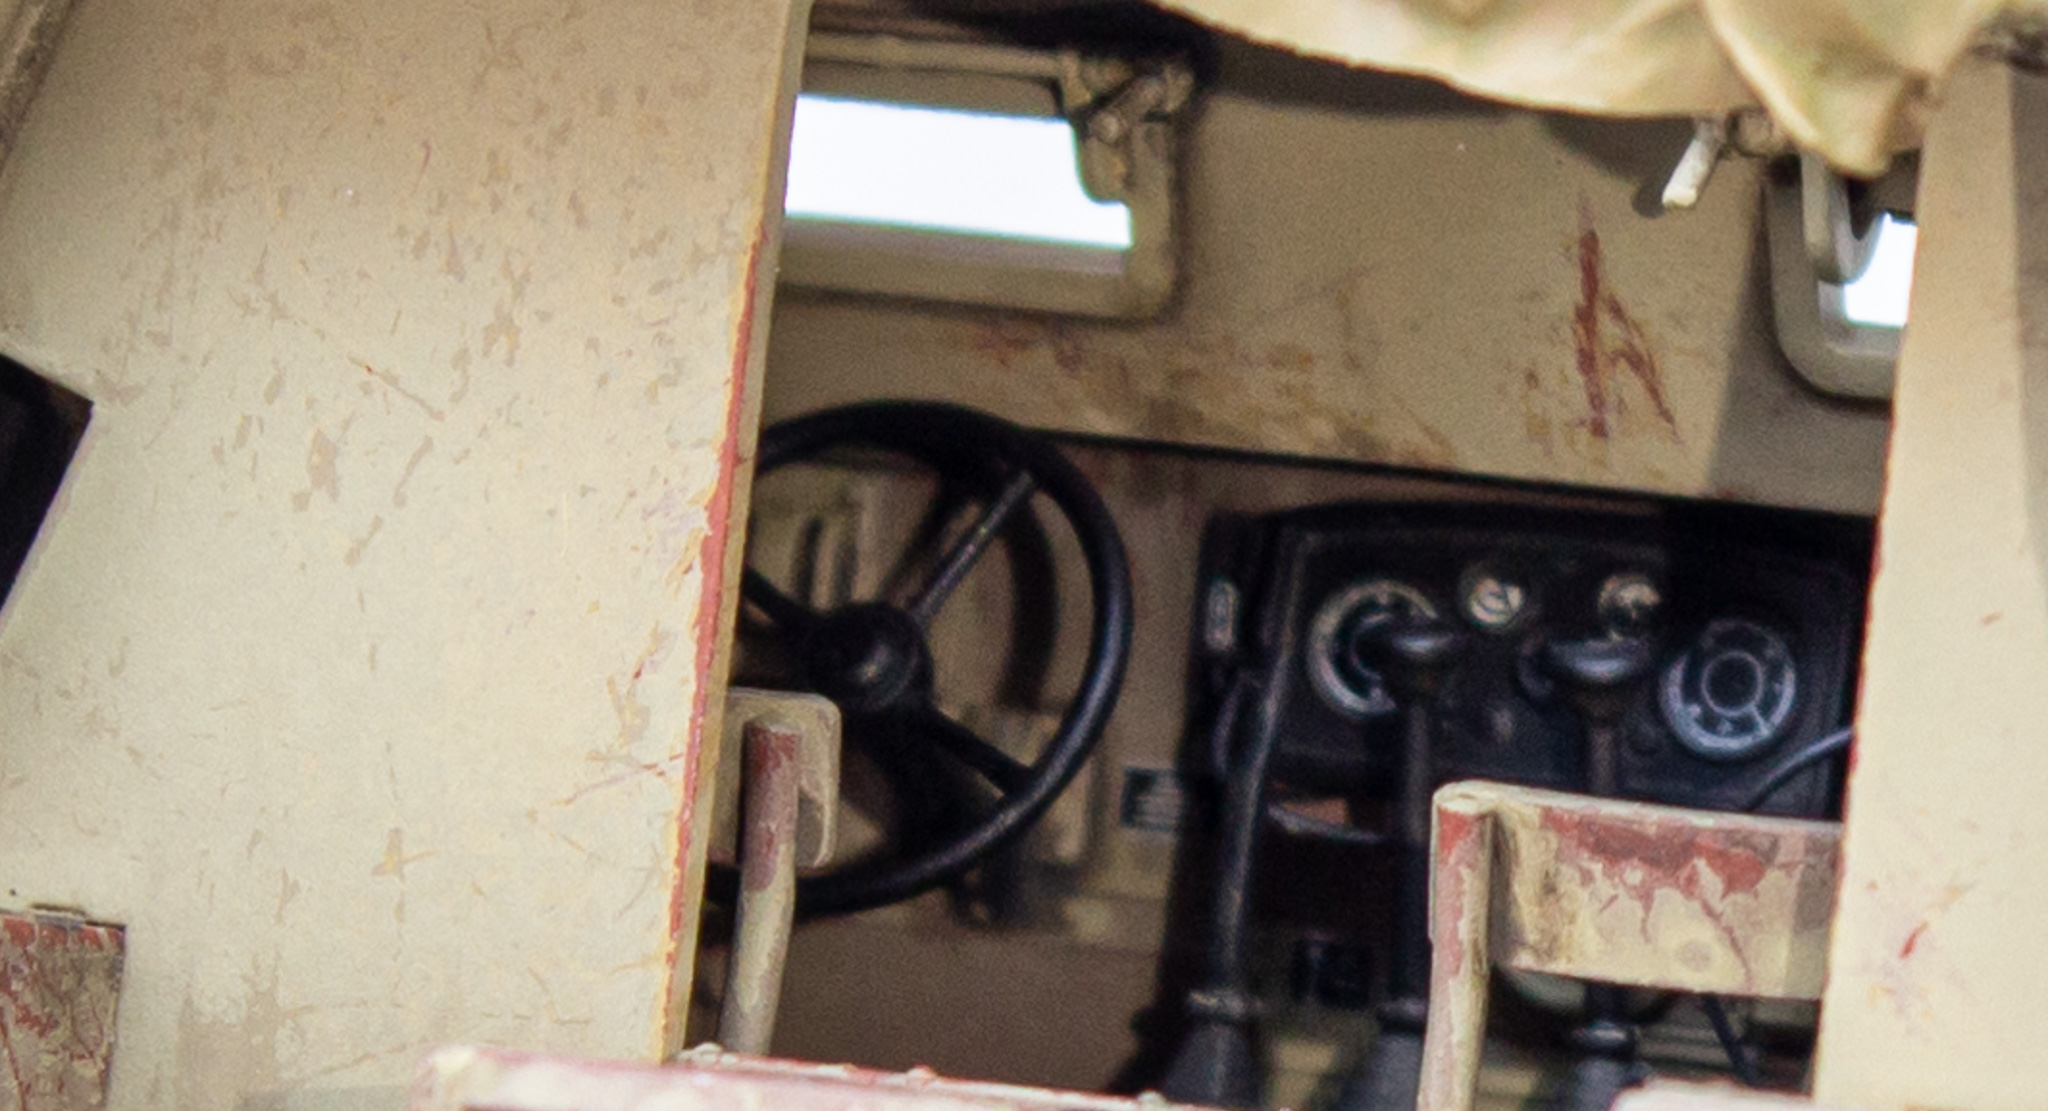
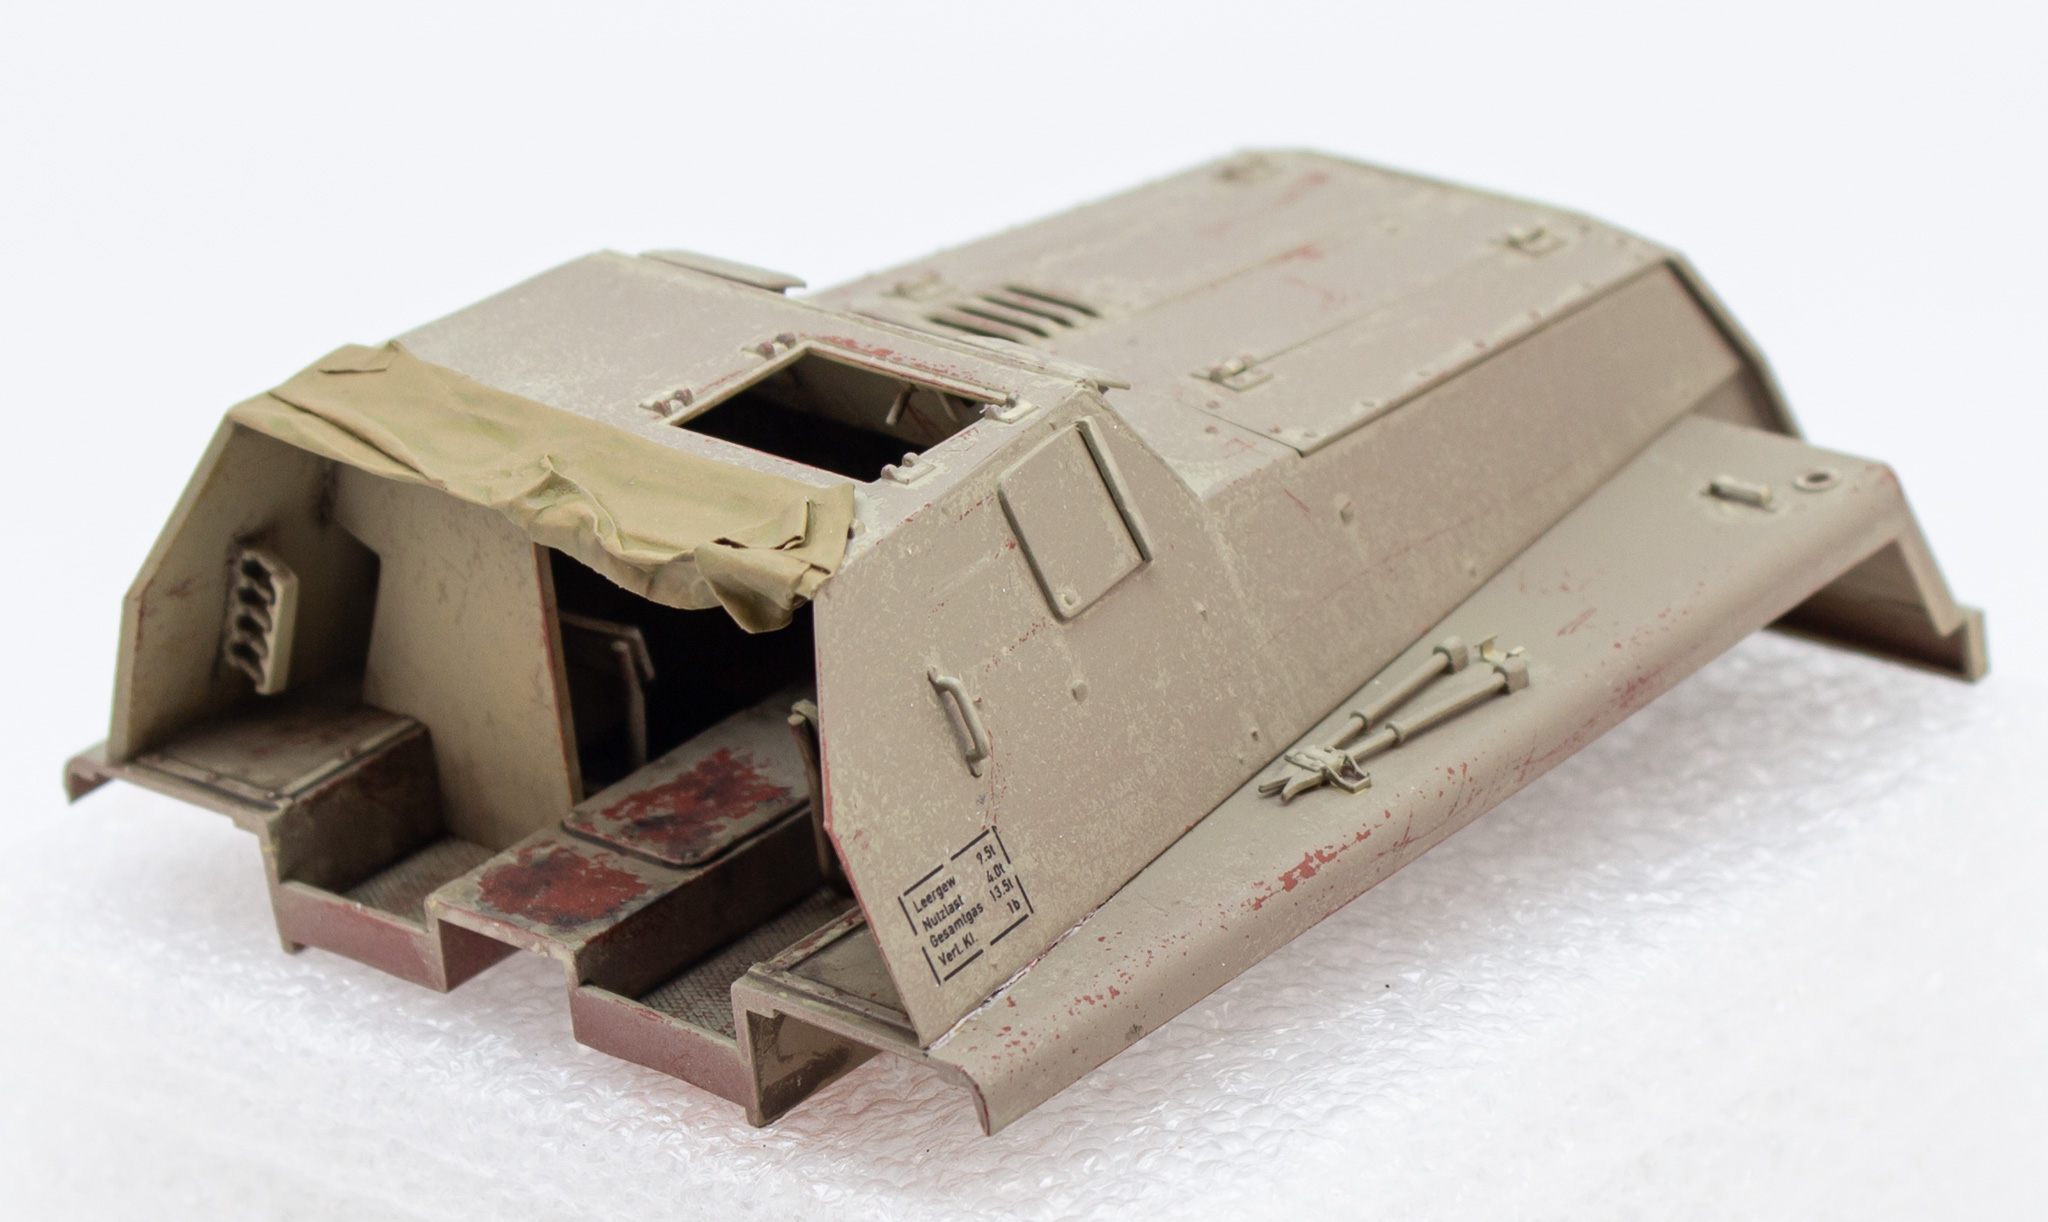
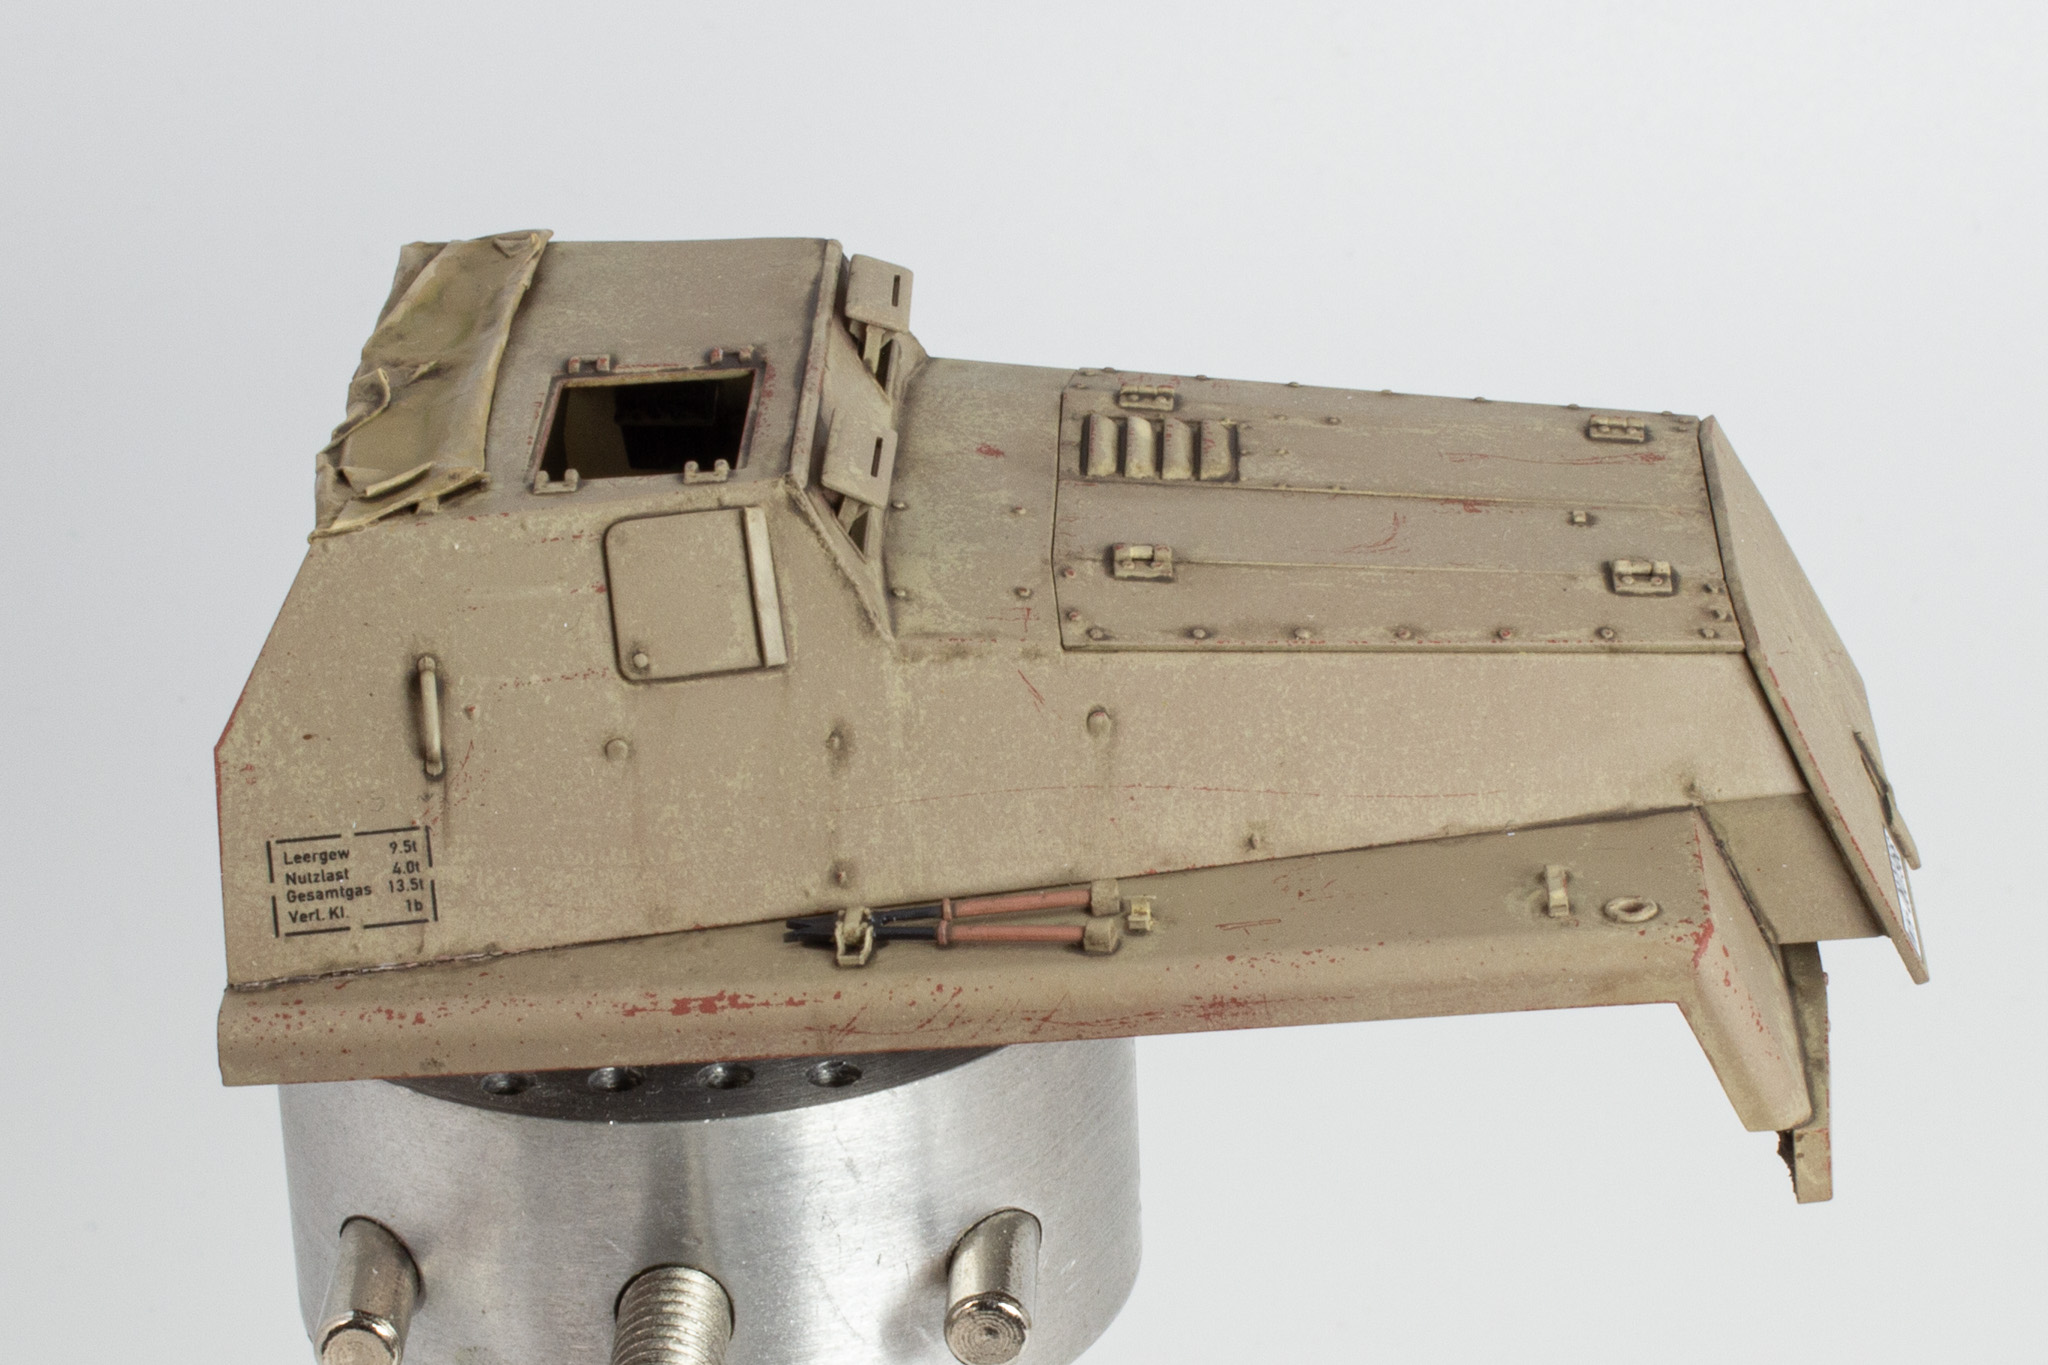
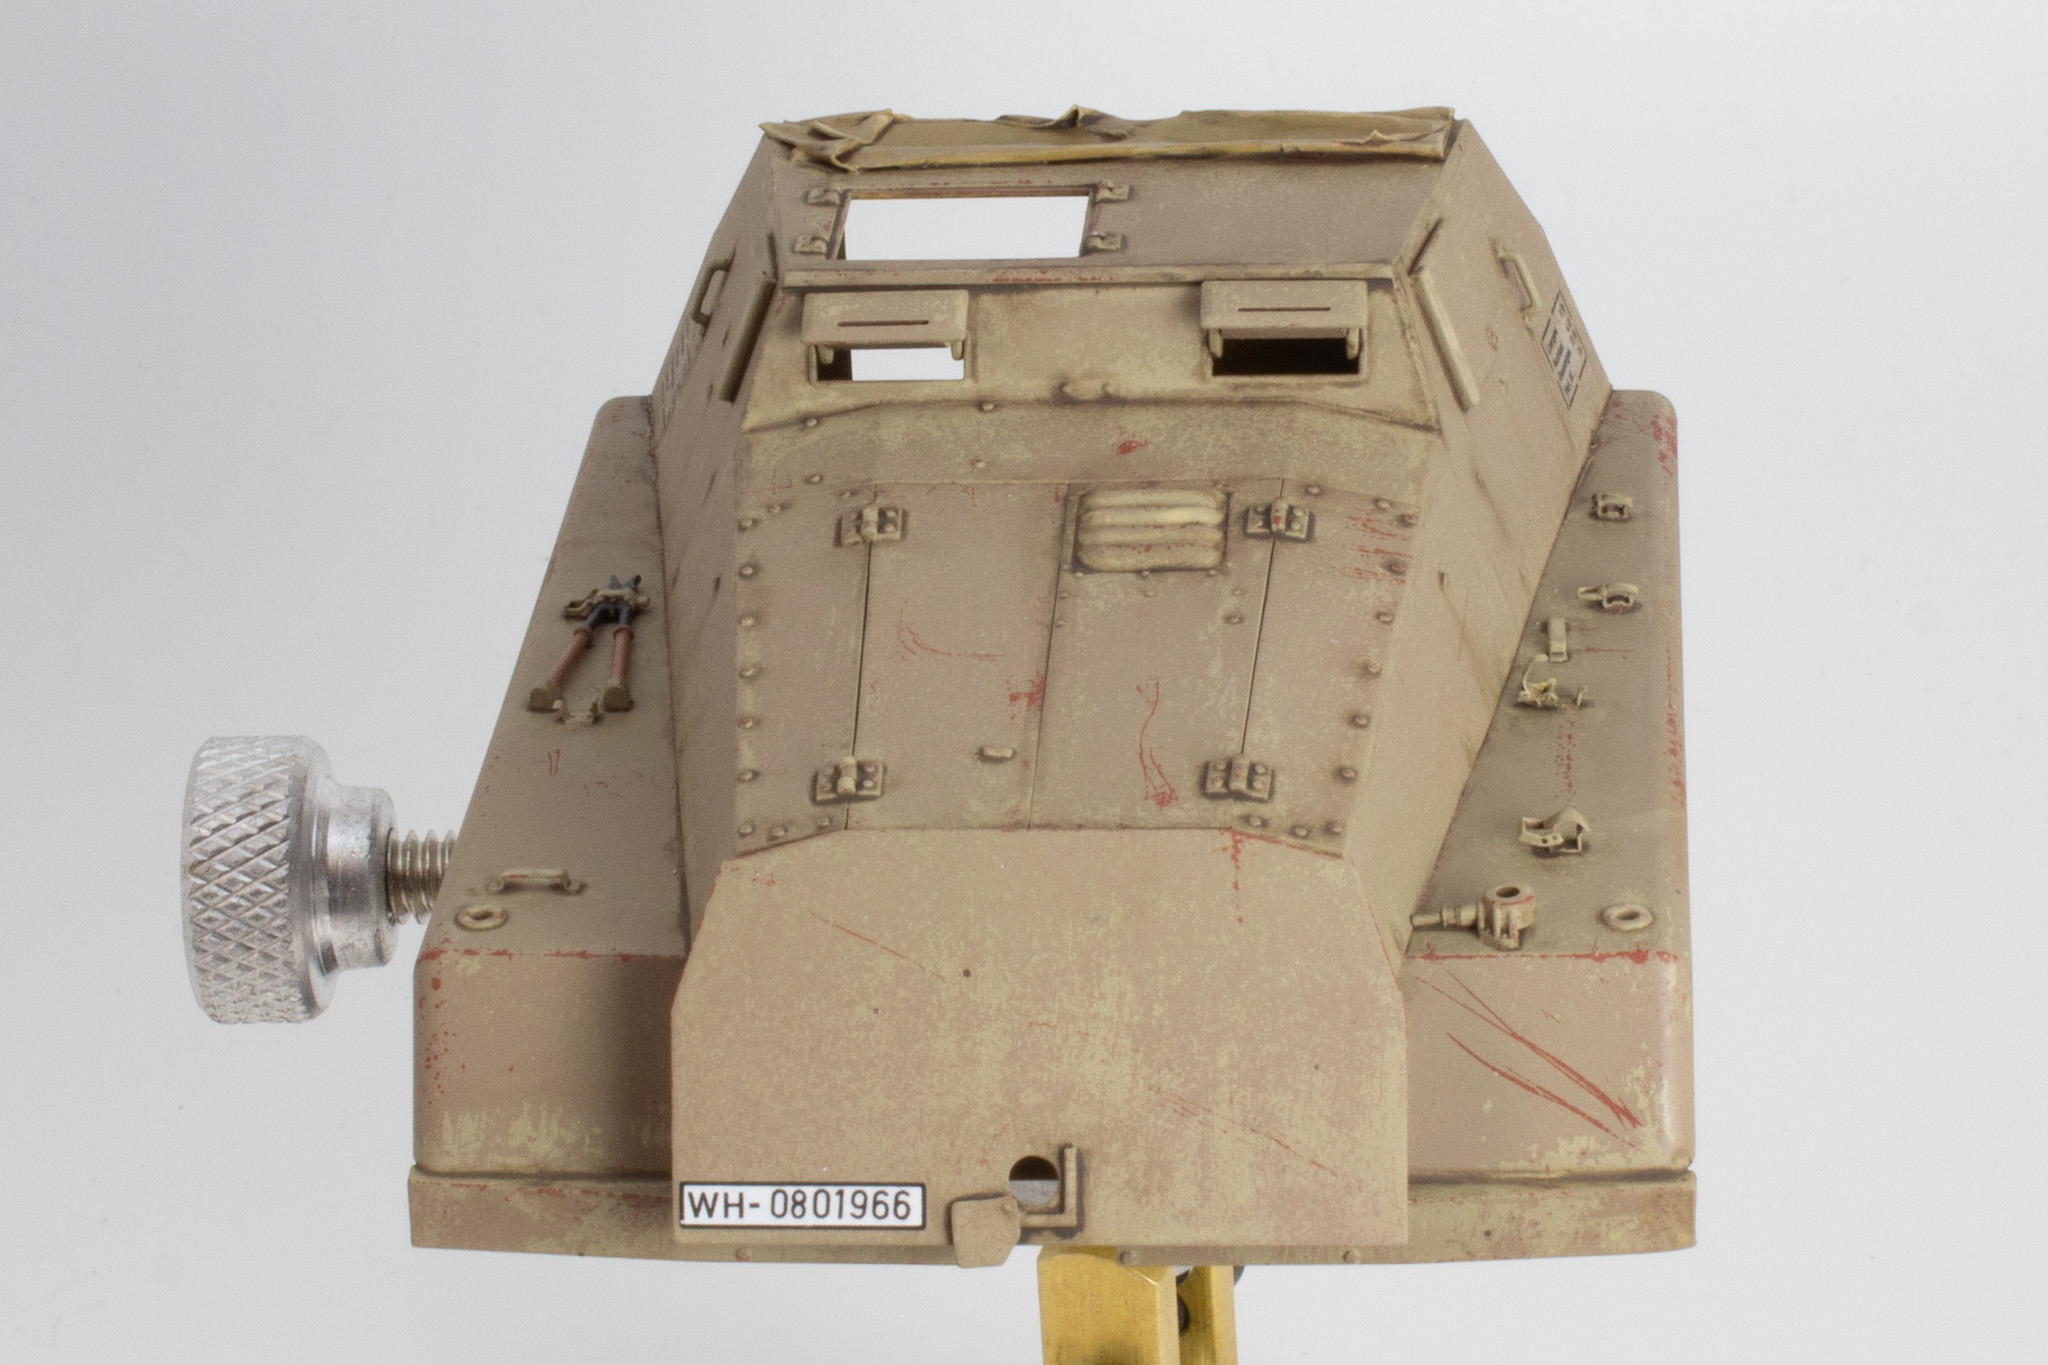
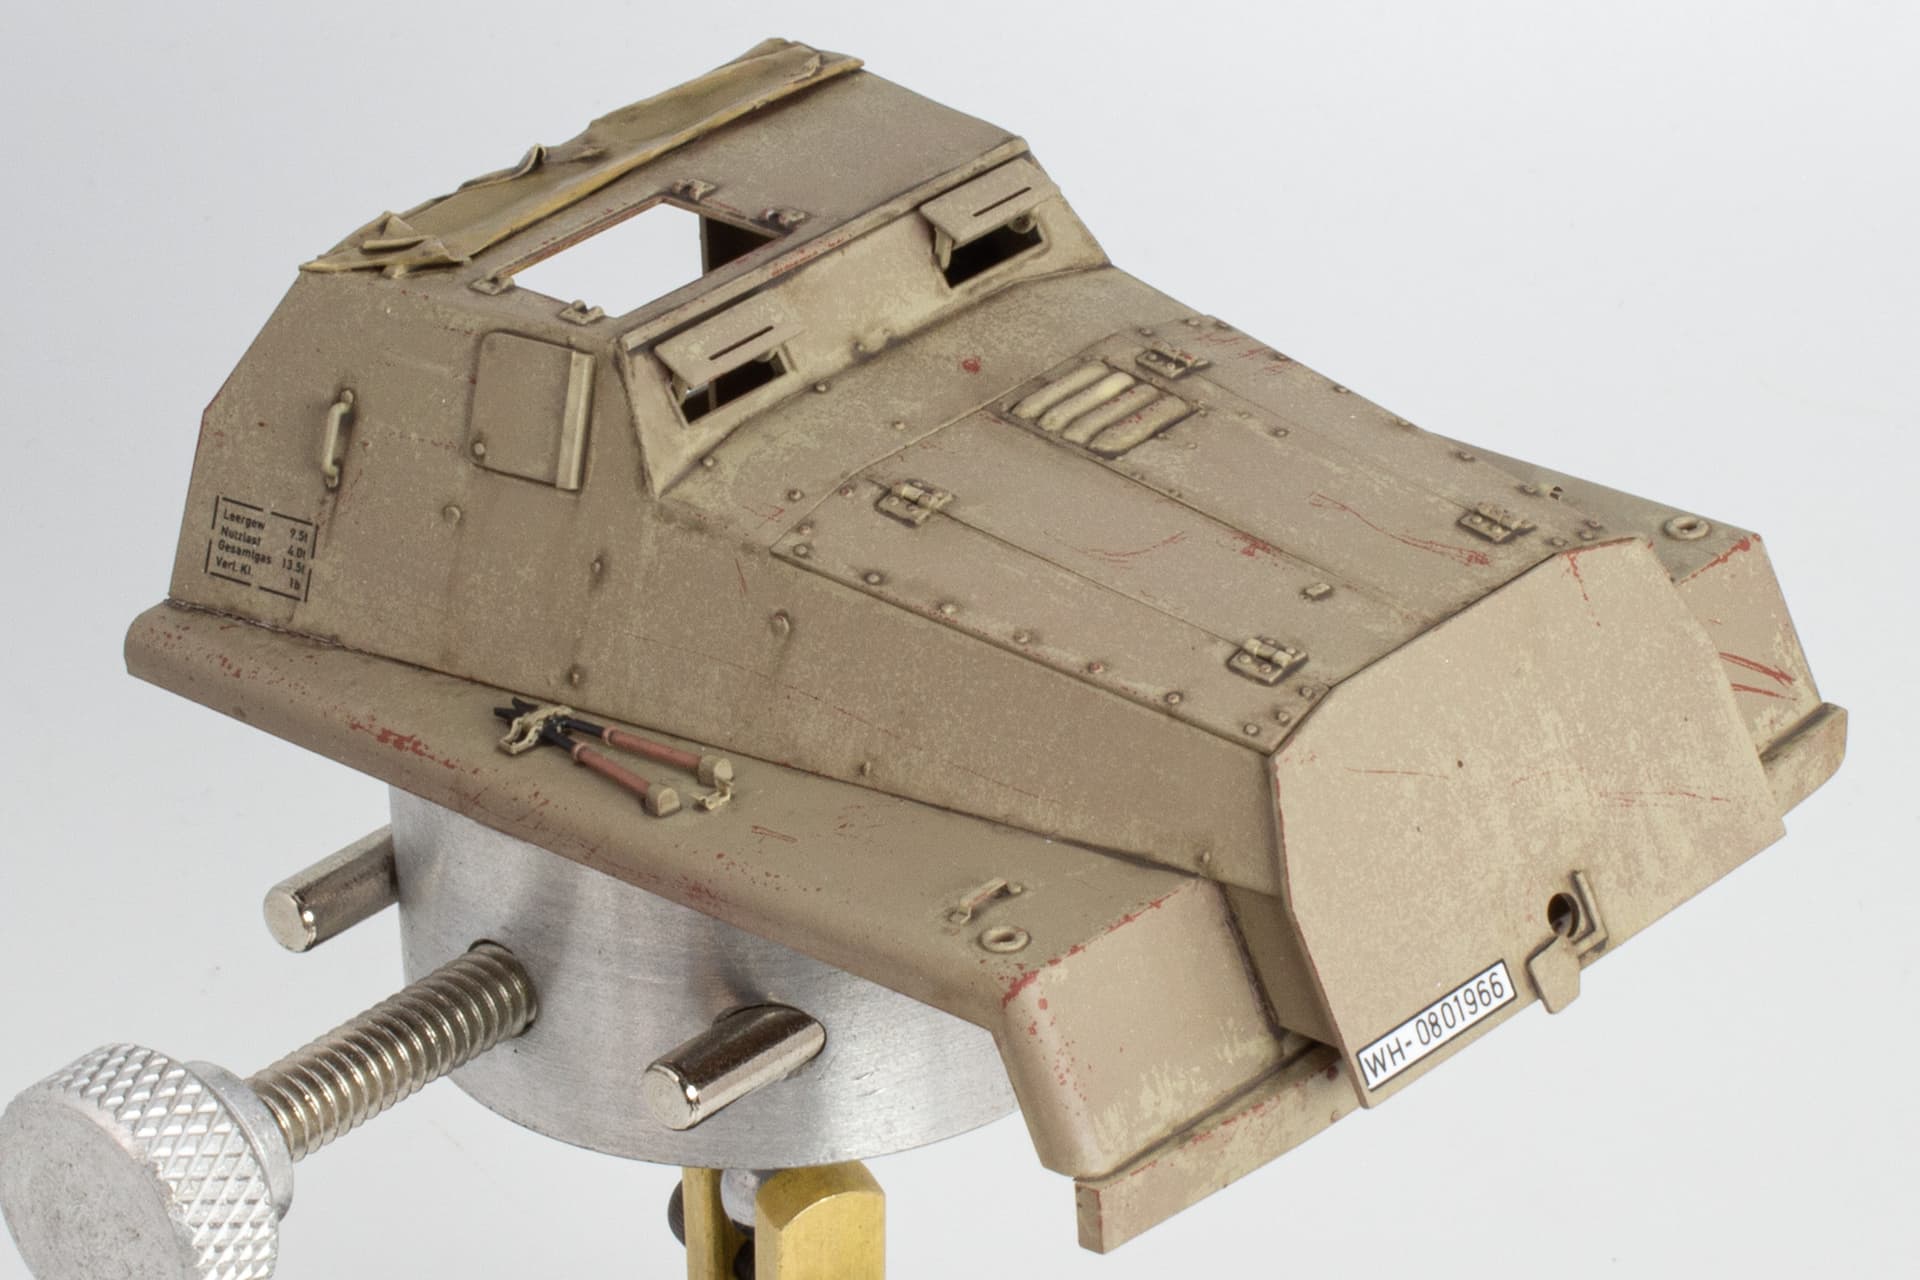
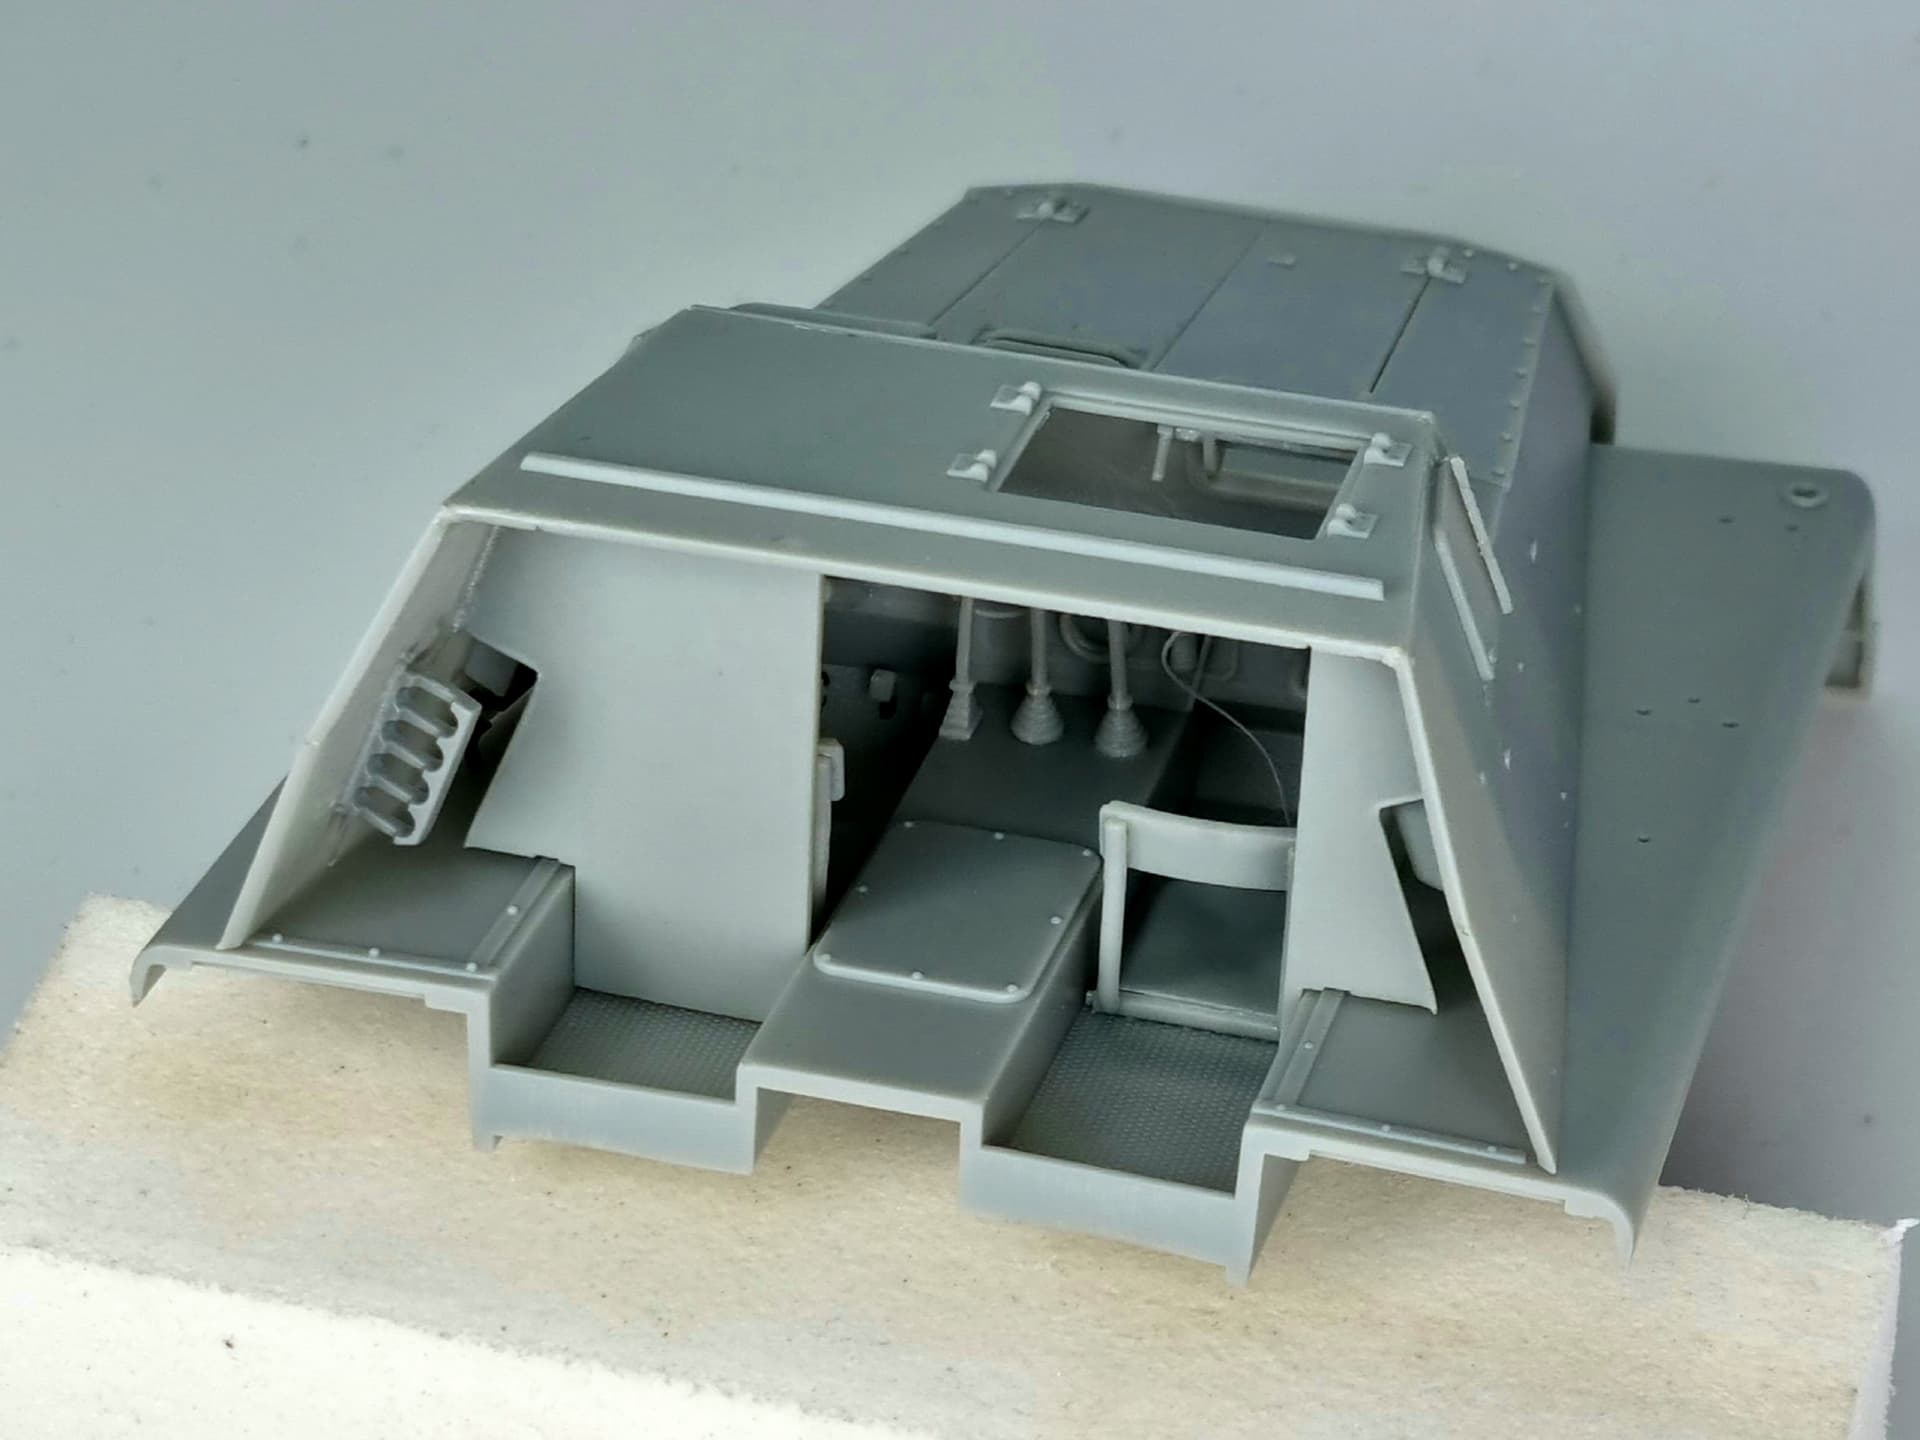
Steps 12 to 20 have you build up the upper armour components, adding tools and all the interior parts. You are also given alternative photoetch clasps to complete all the pioneer tools although you will have to shave the plastic clasps off the tools first.


Step 21 to 27 concentrates only on option 1: the enclosed armoured supply ammo version and supplies all the nebelwerfer rockets that this version would likely have carried. As I am not making this one let us skip right on to step 28.

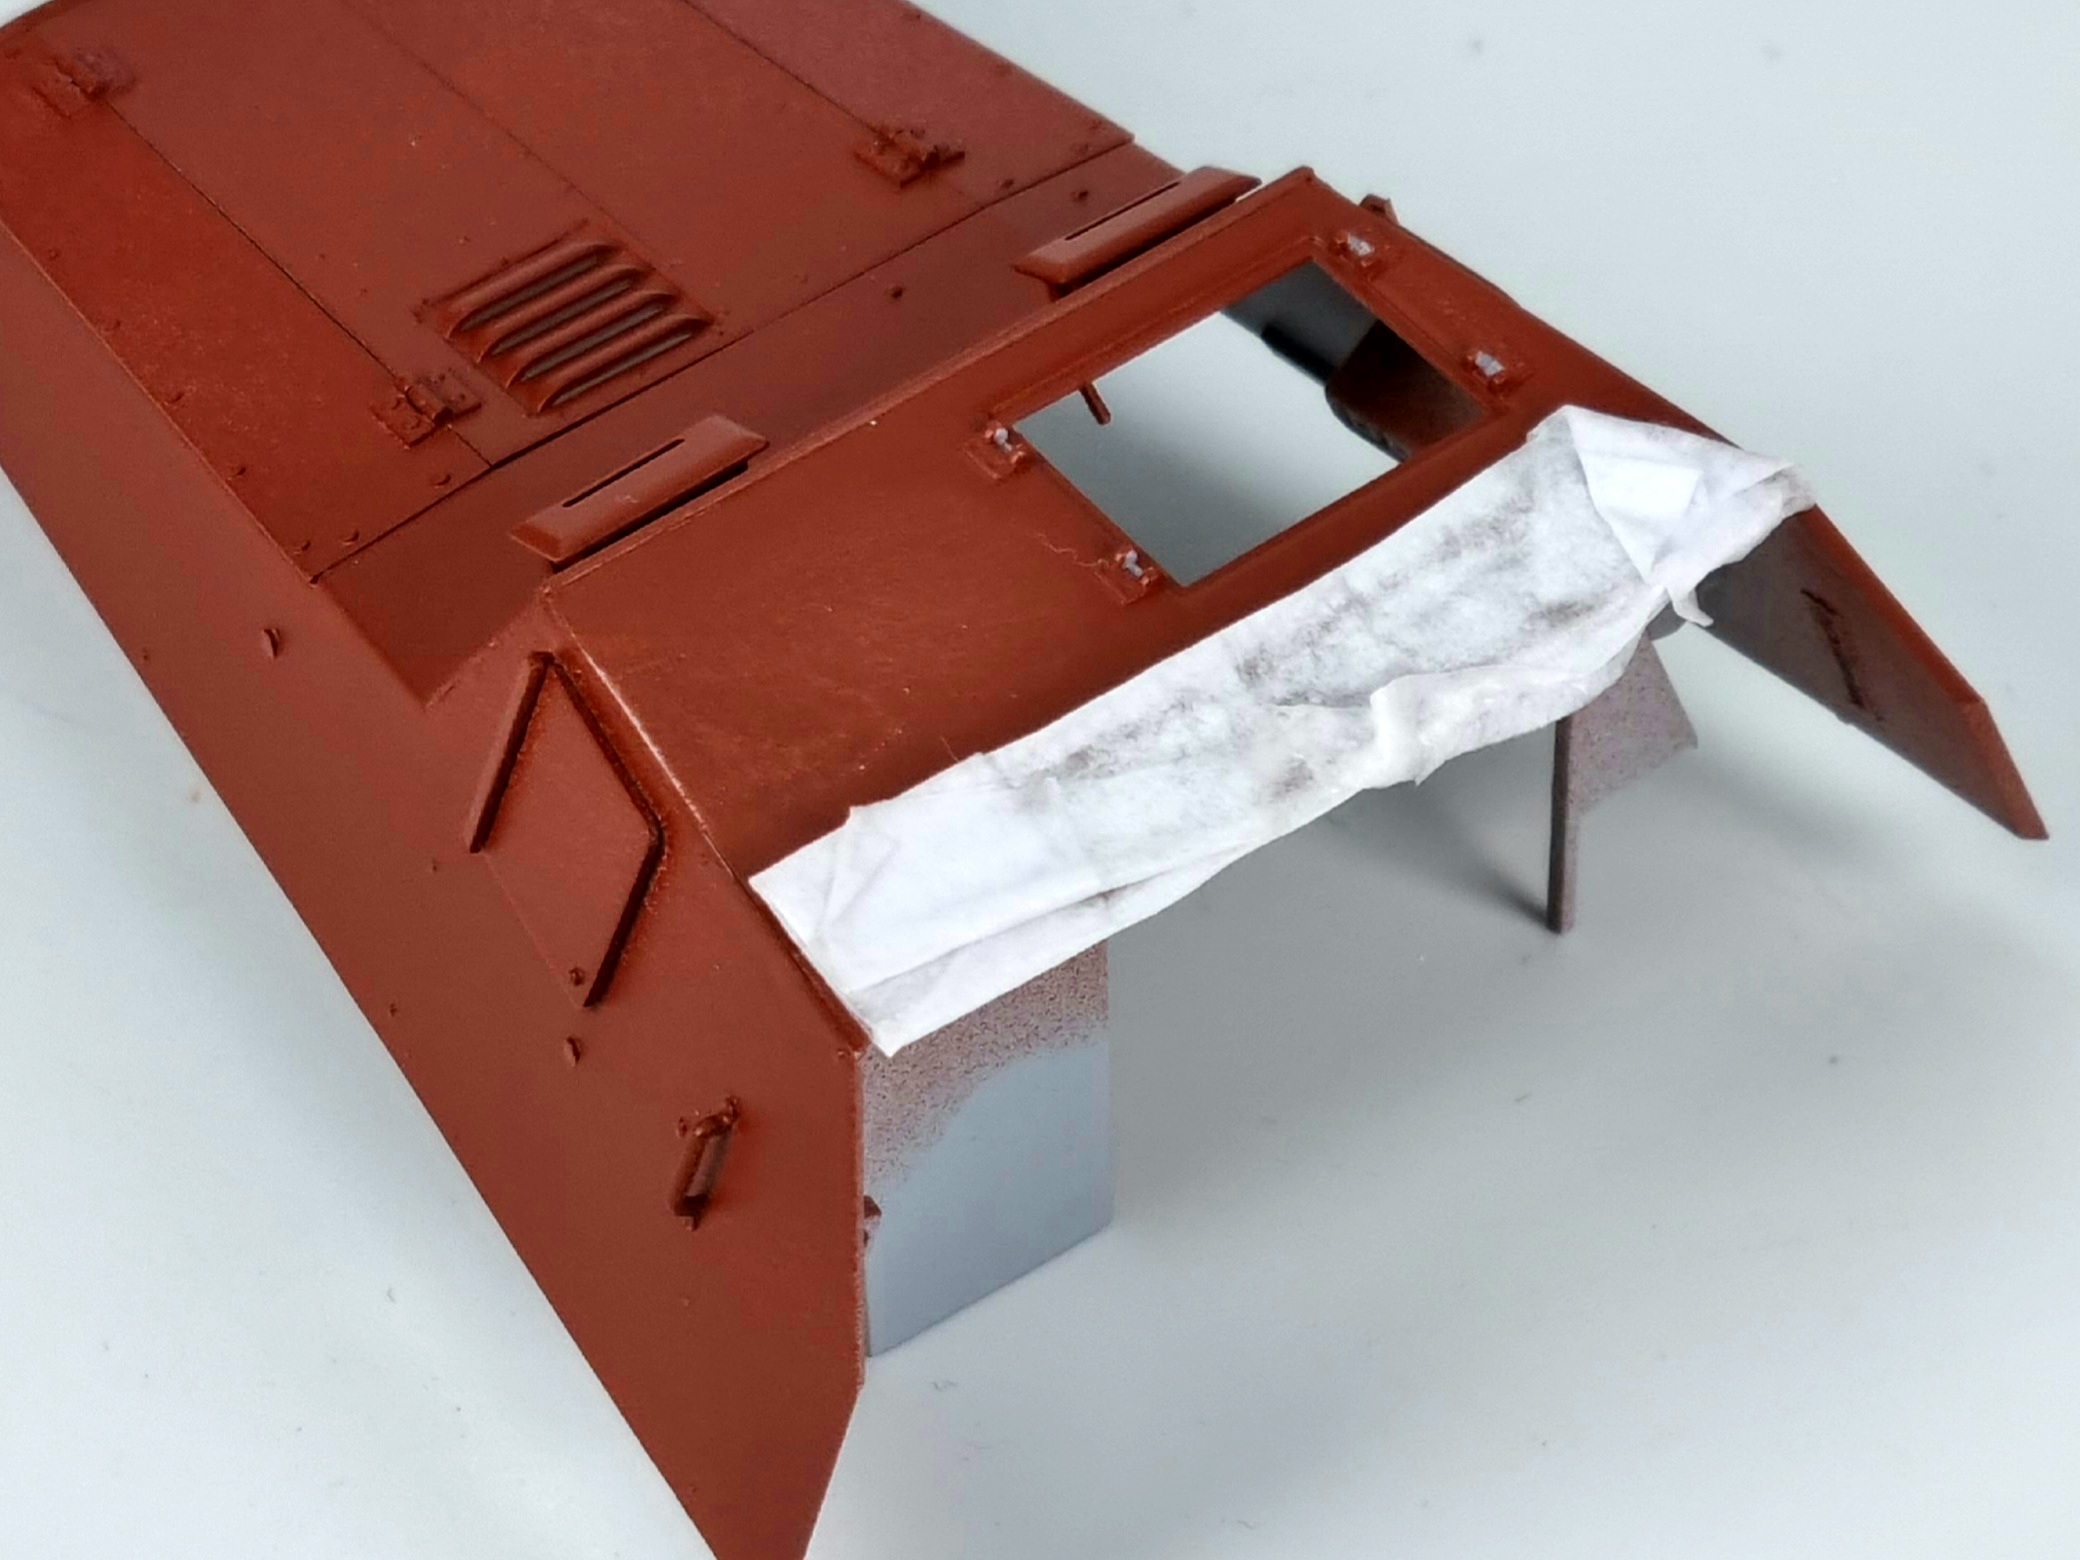
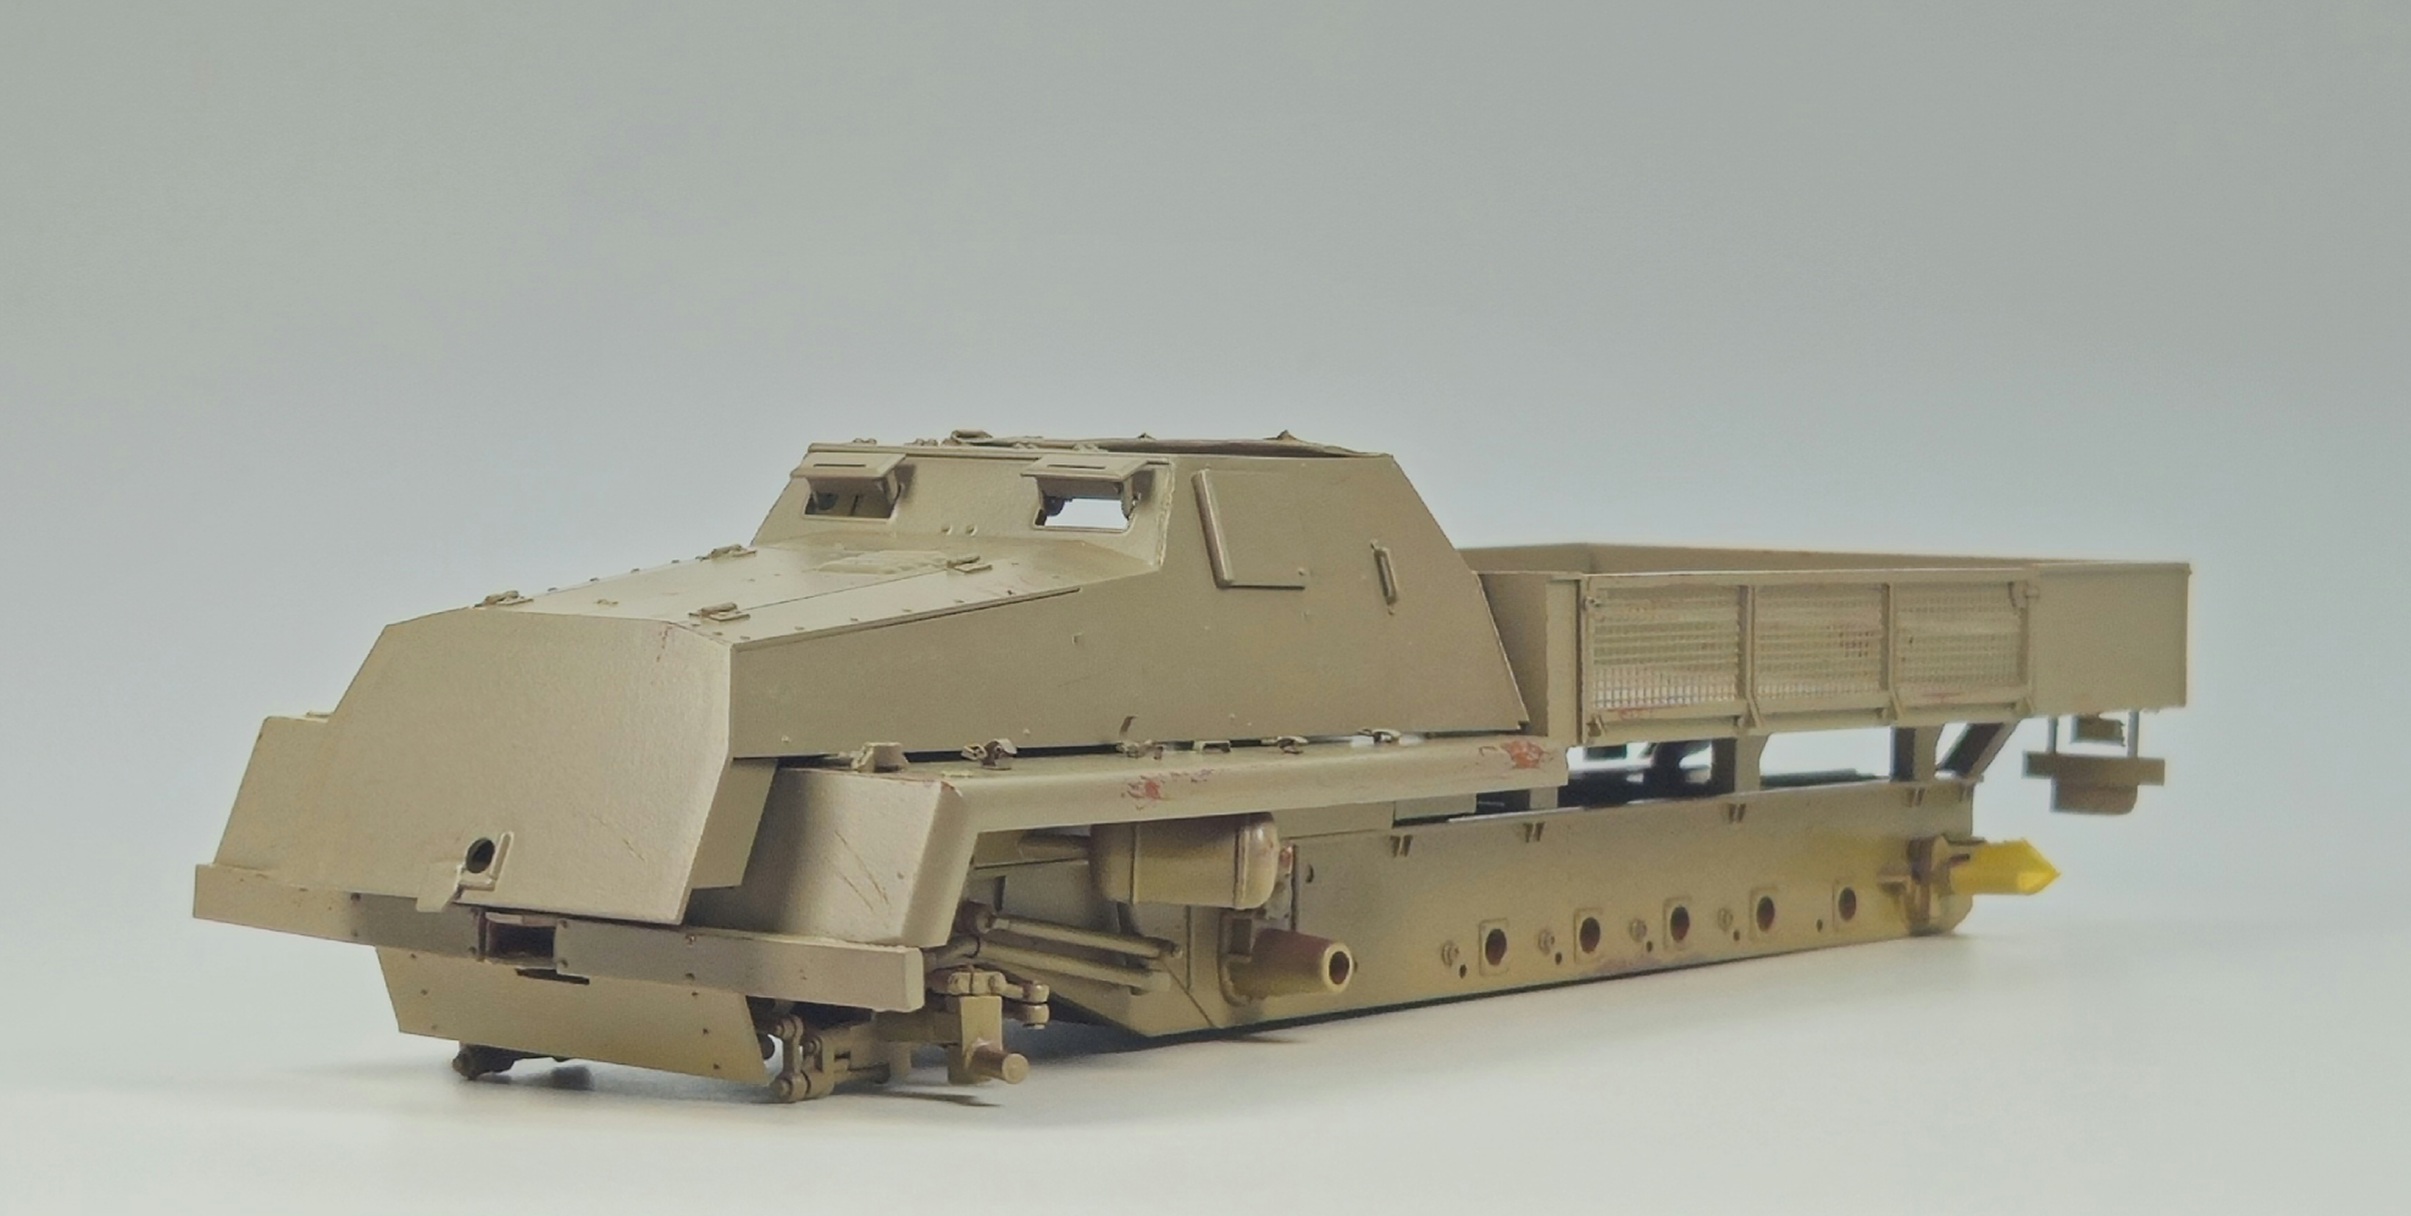
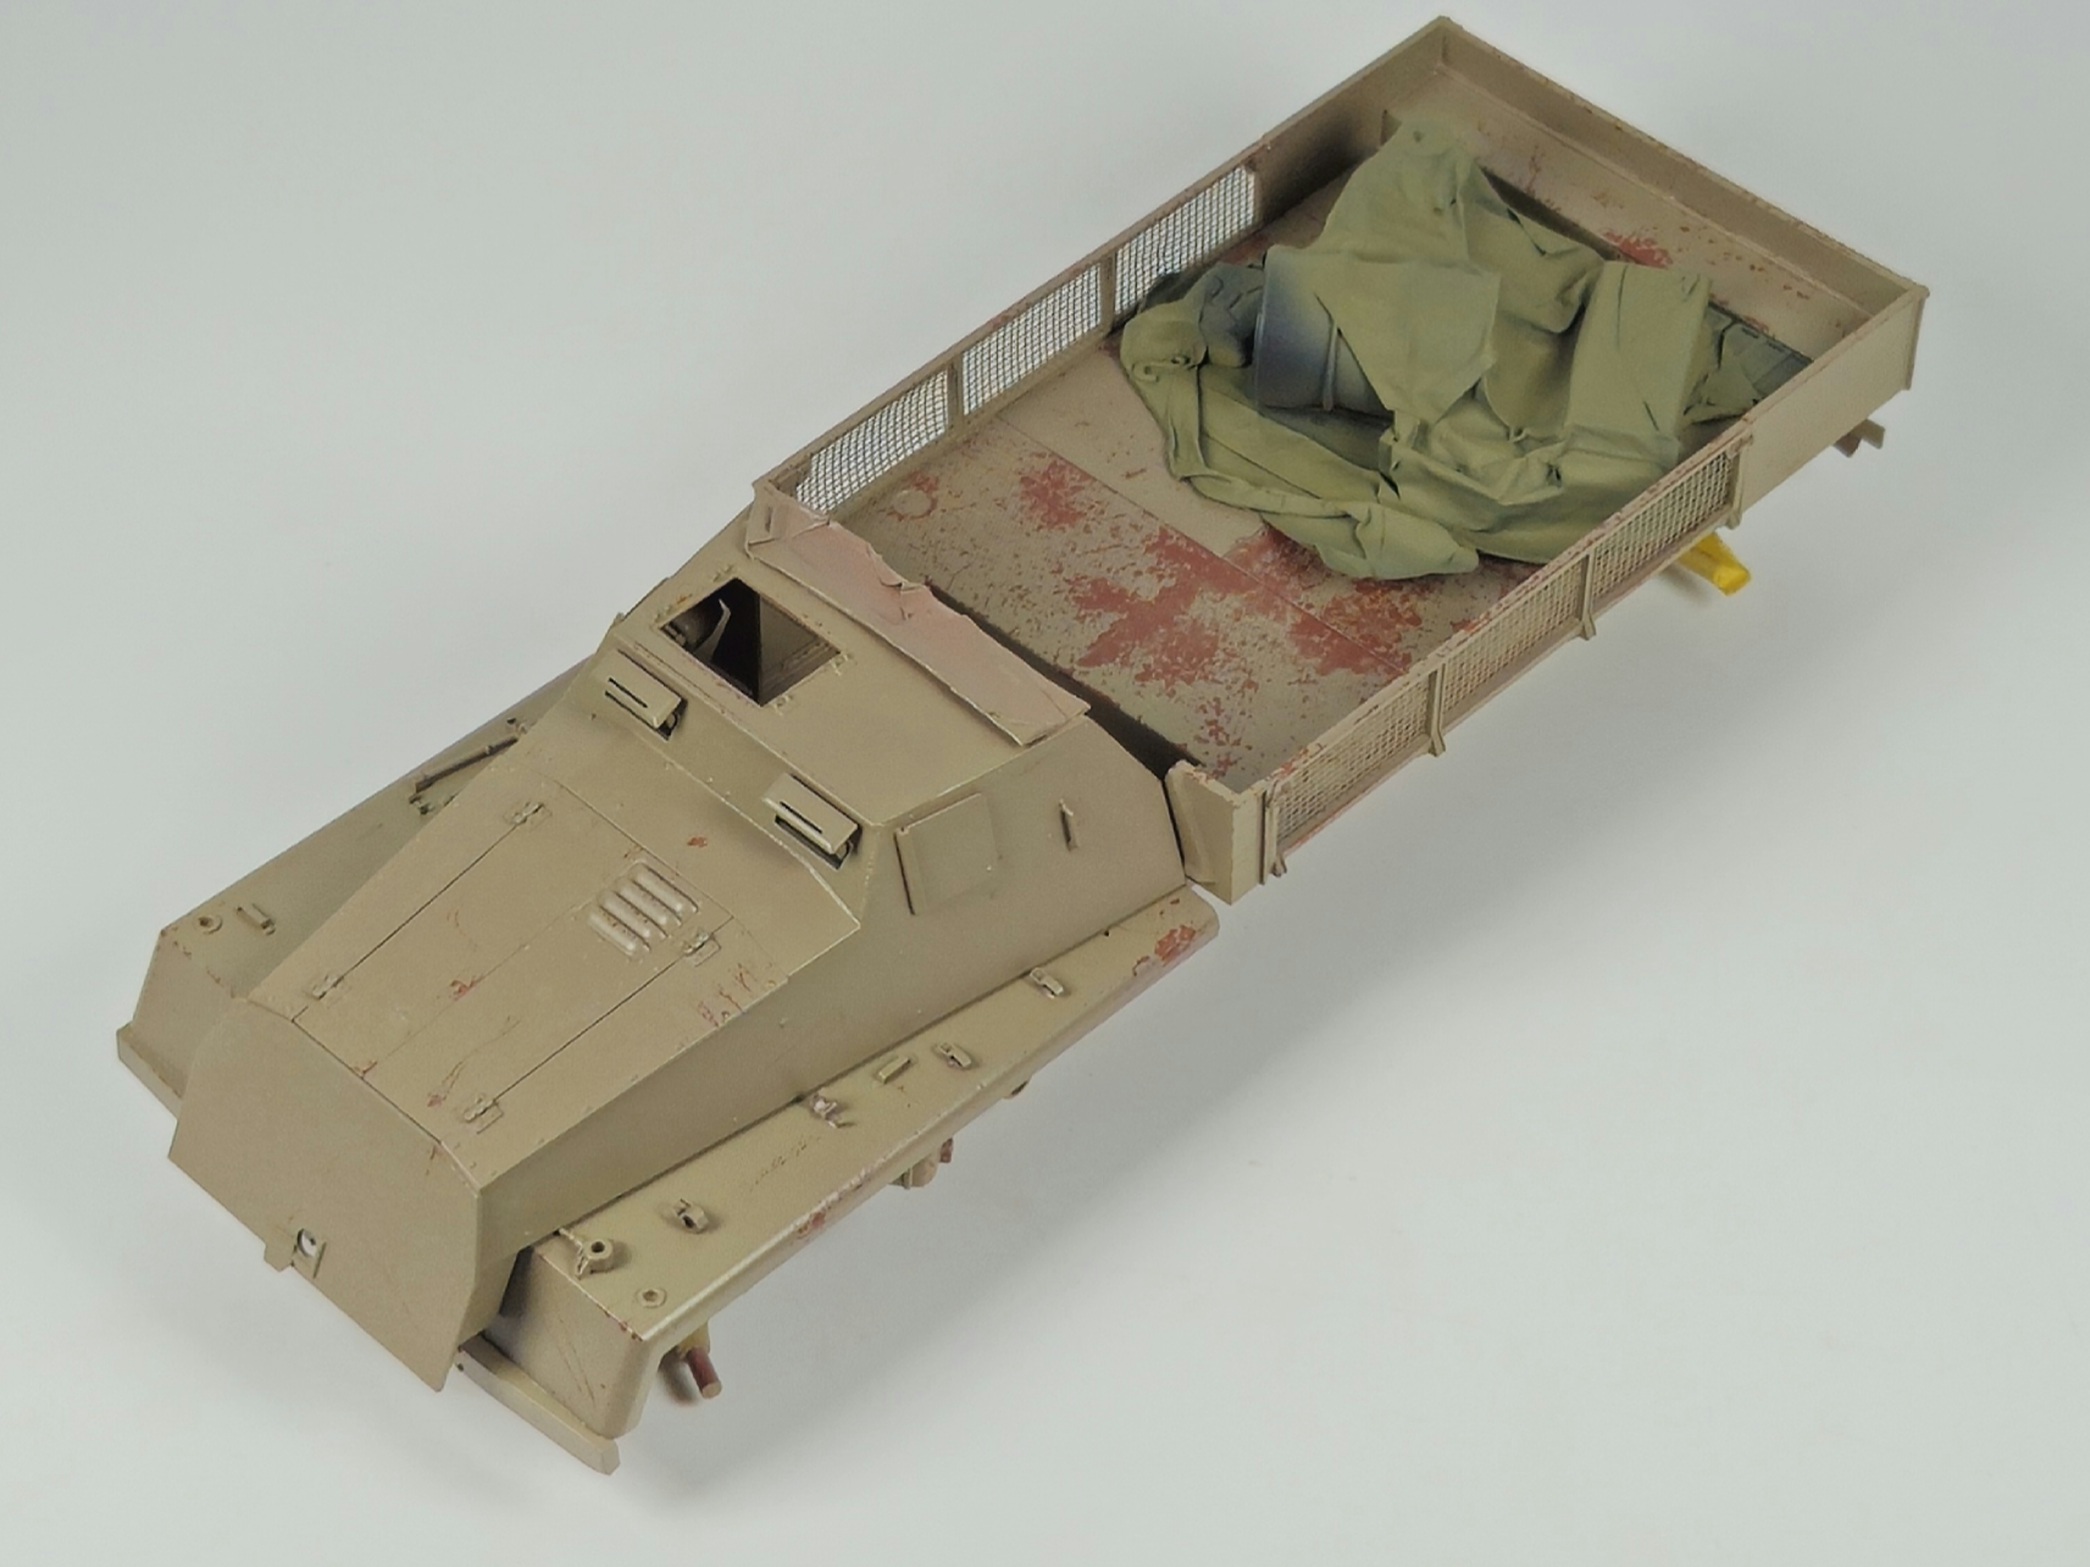
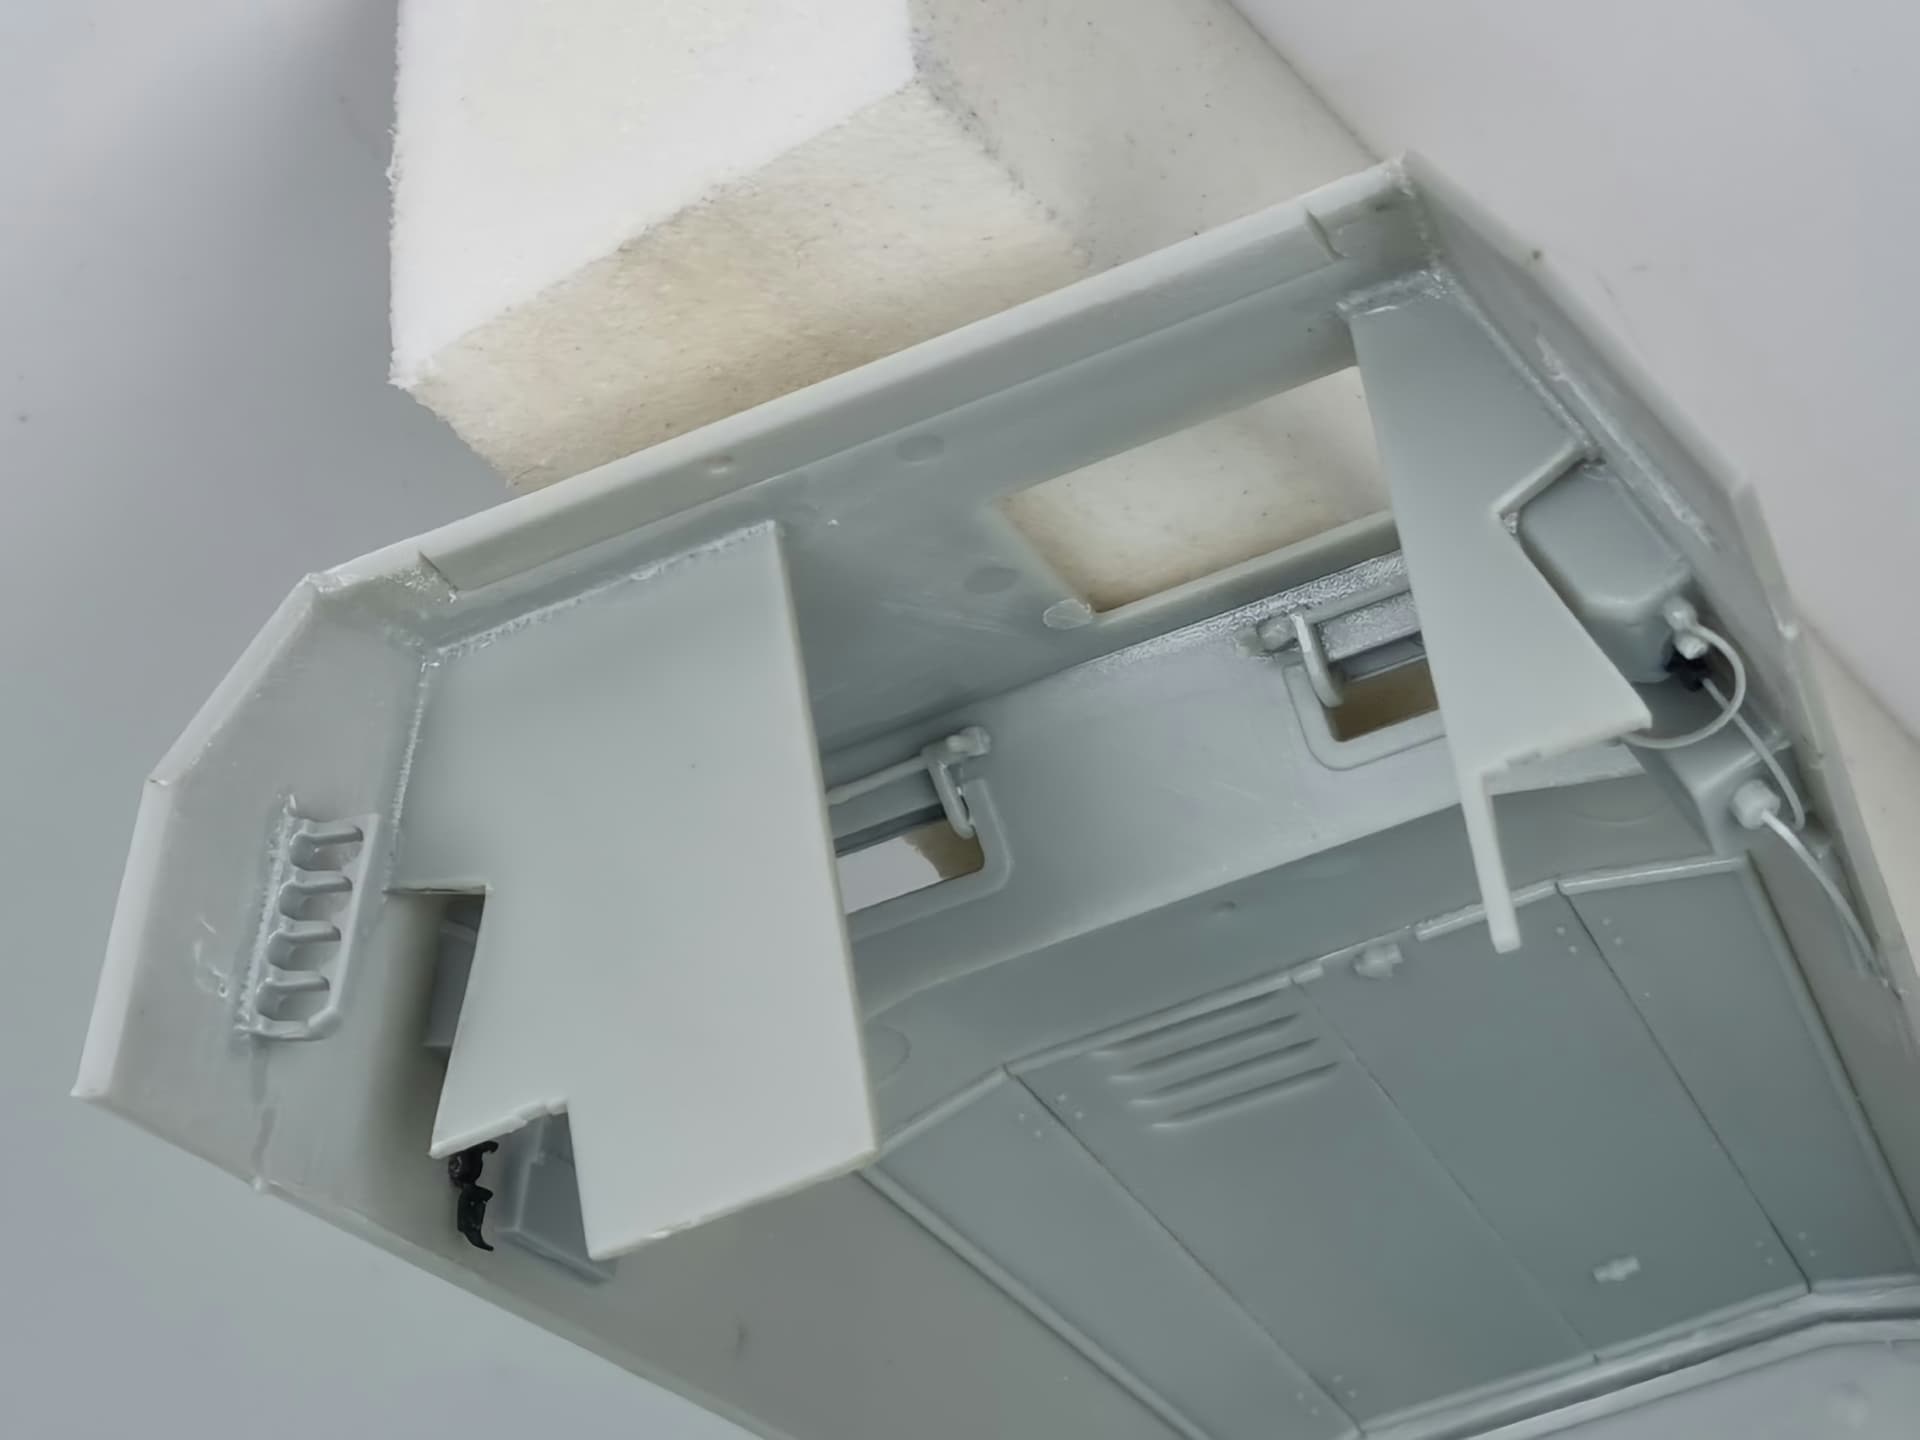
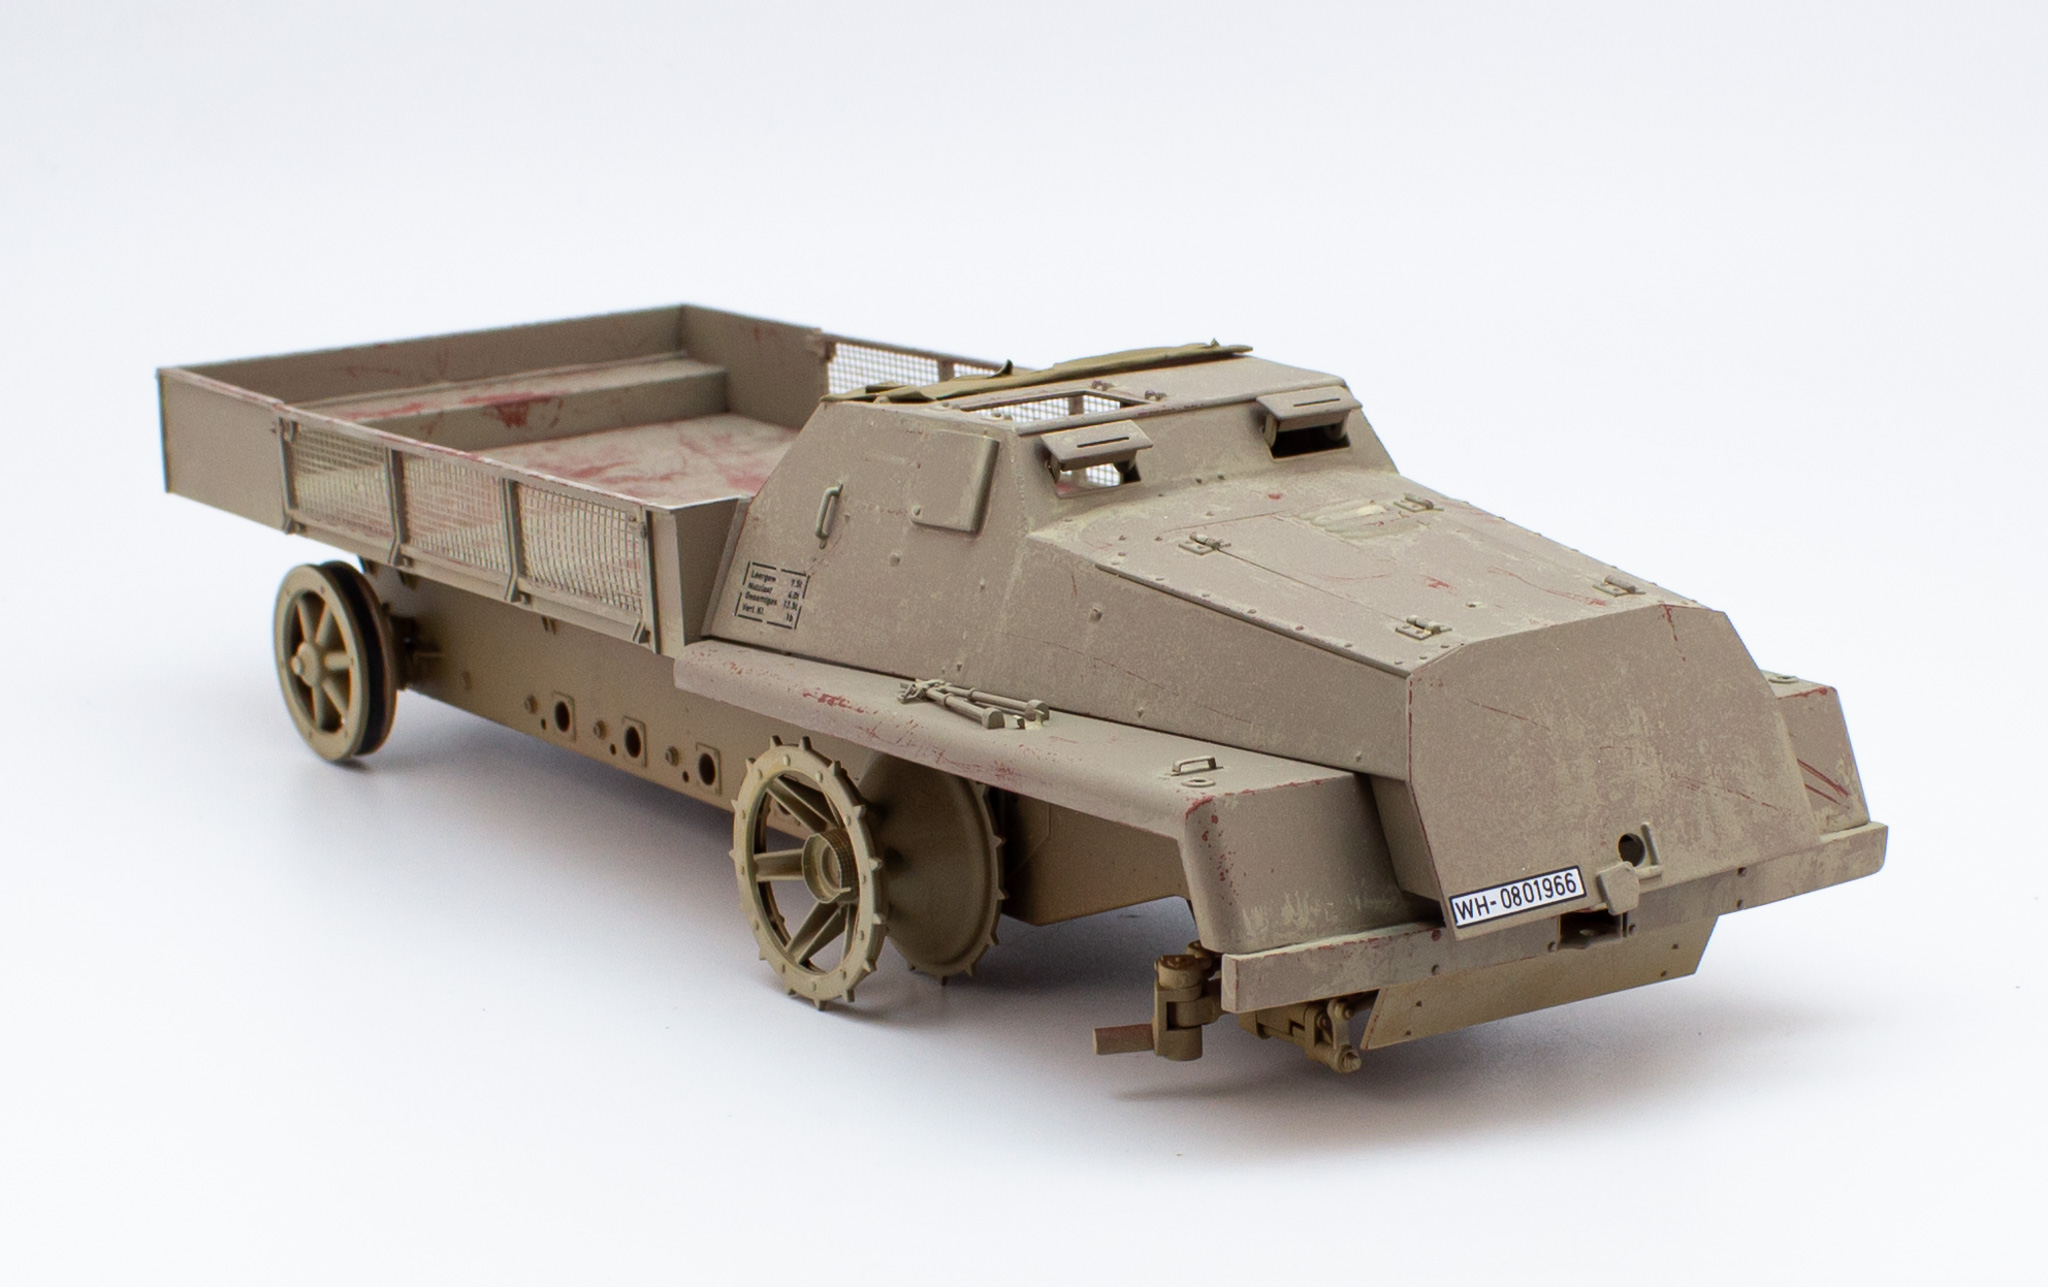
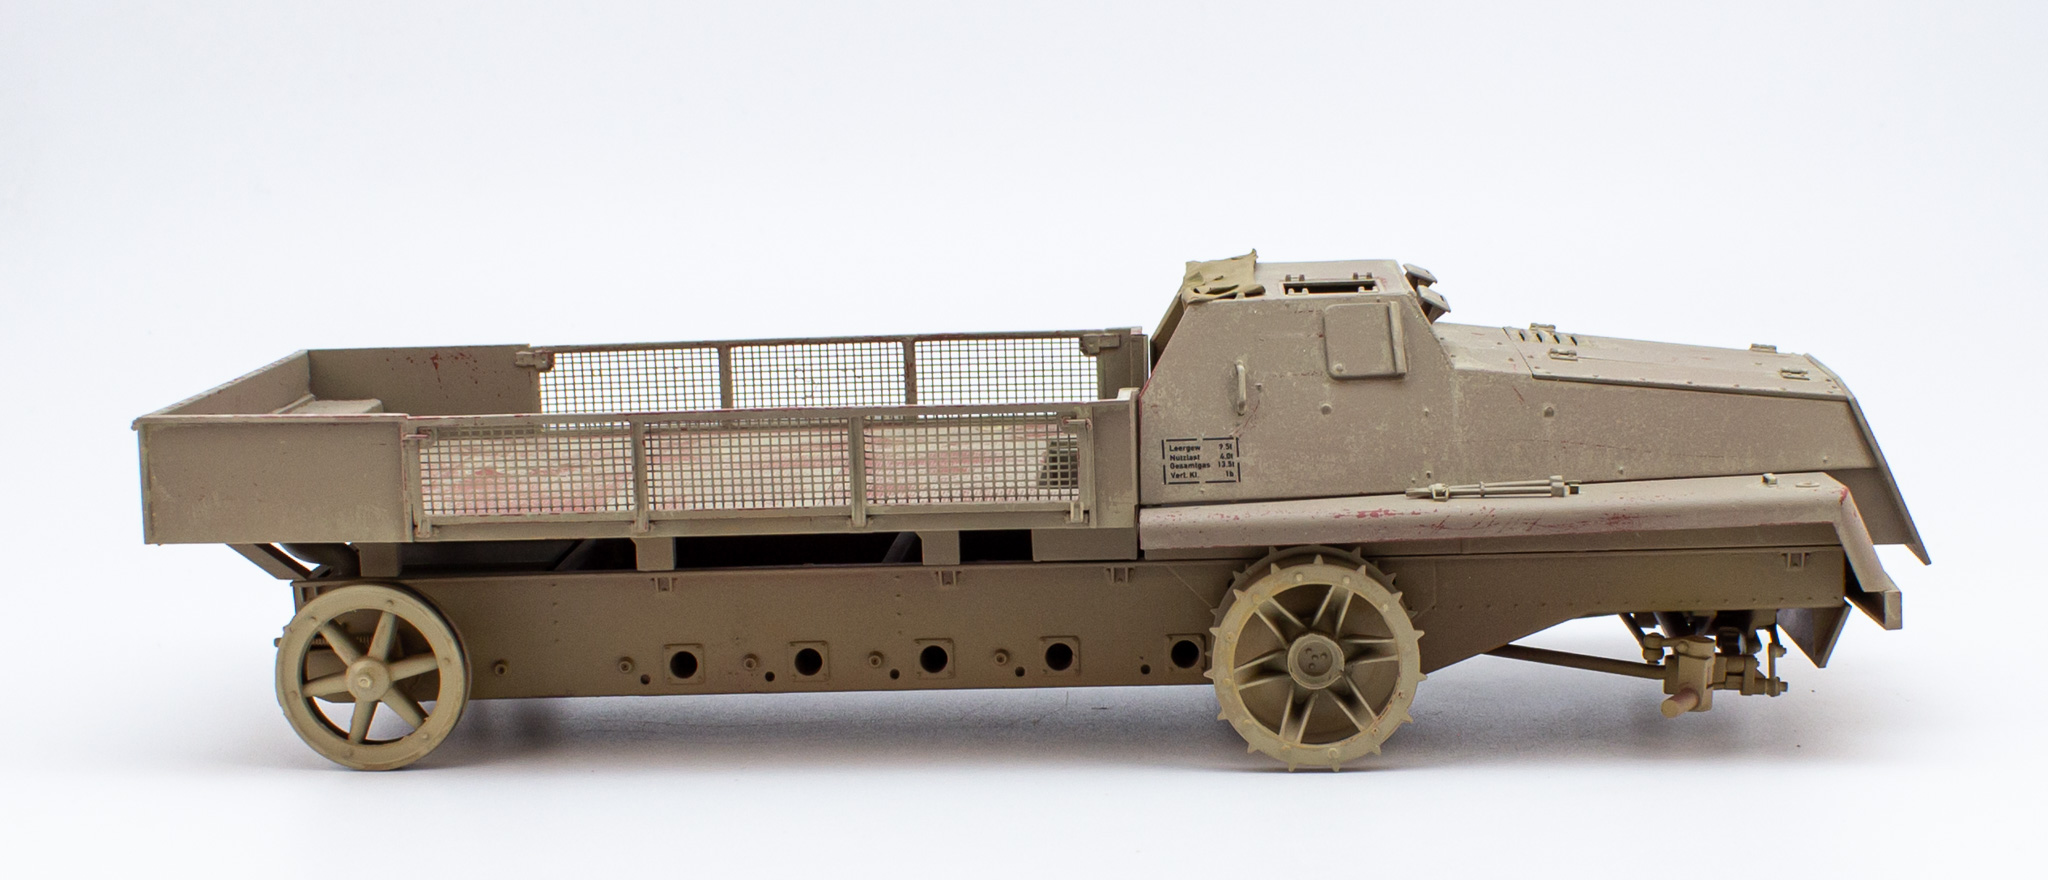
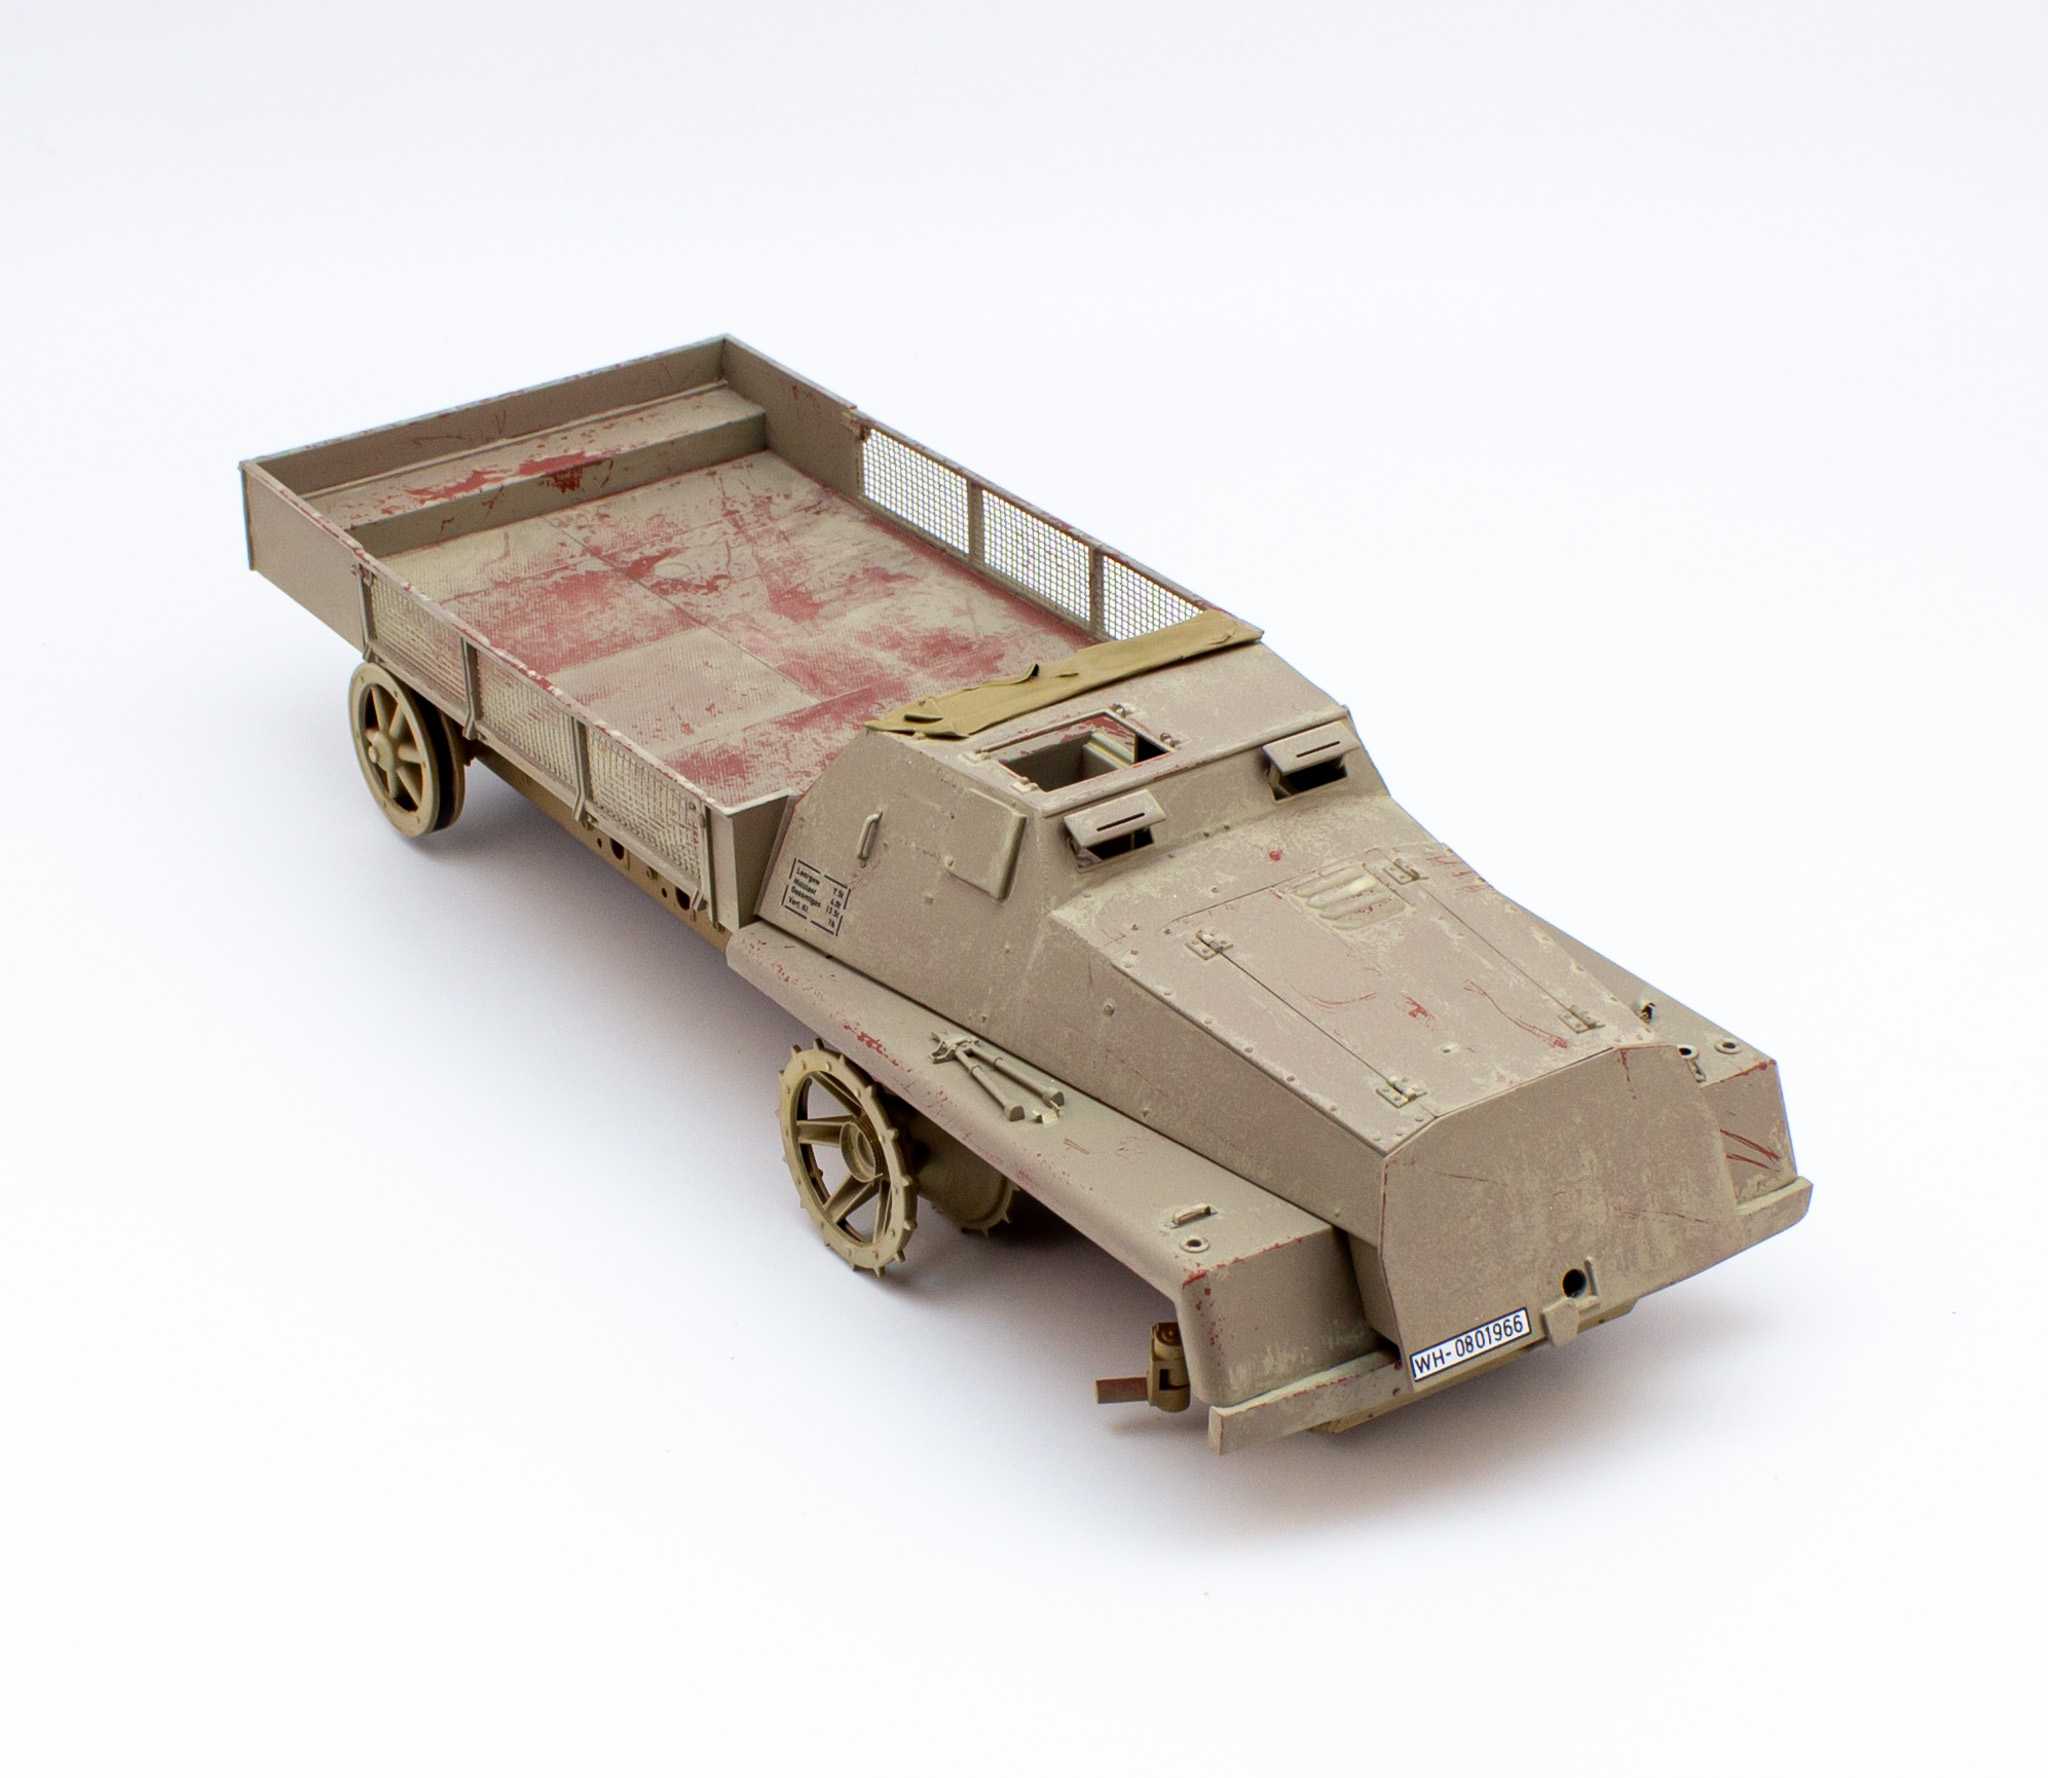
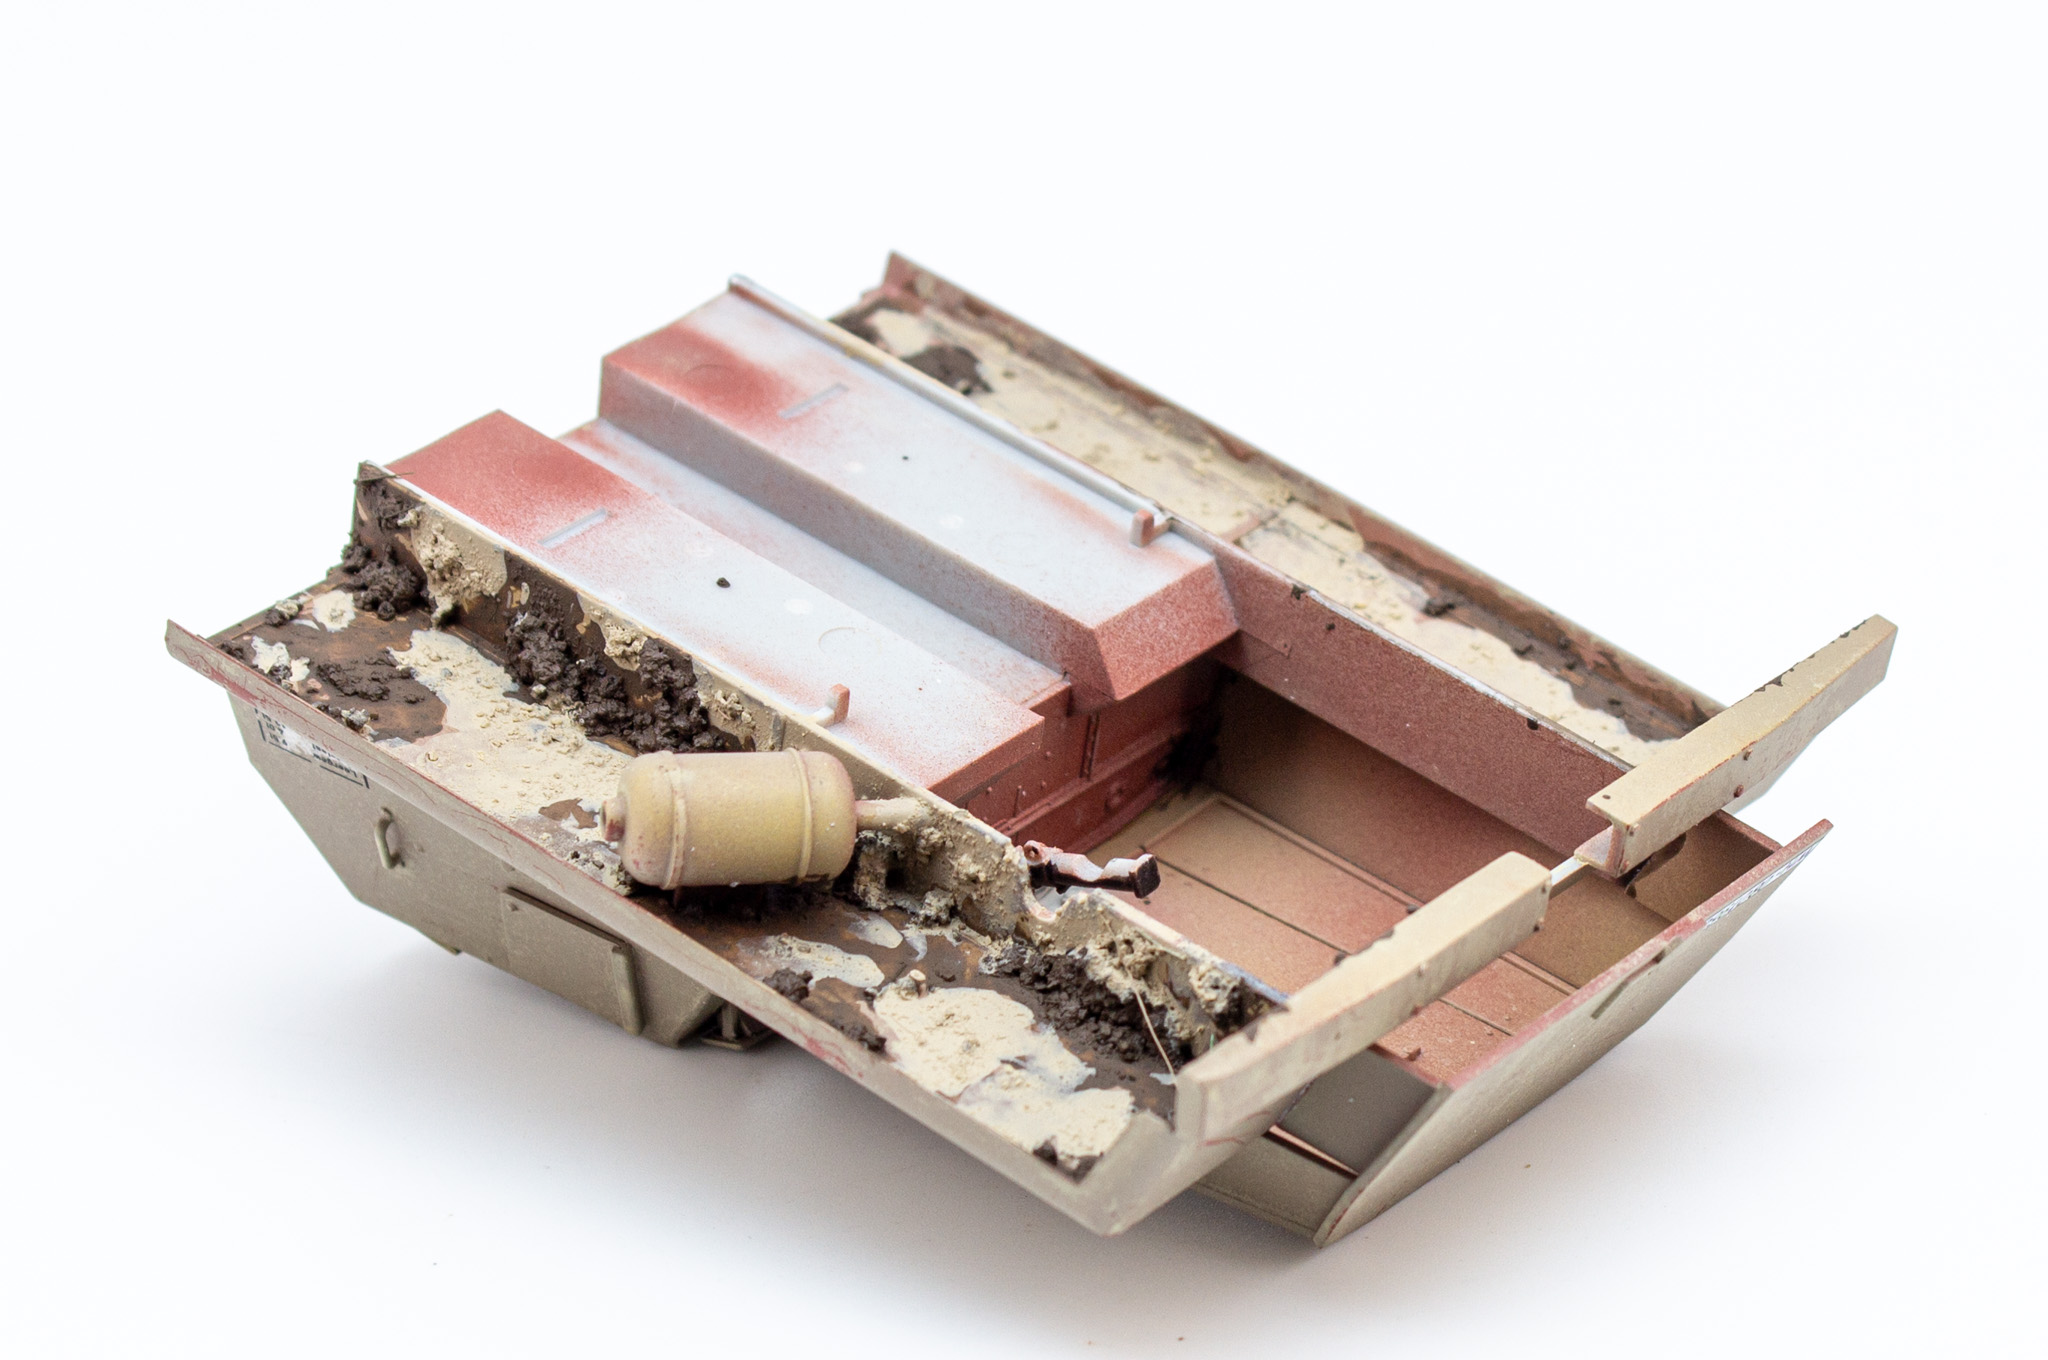
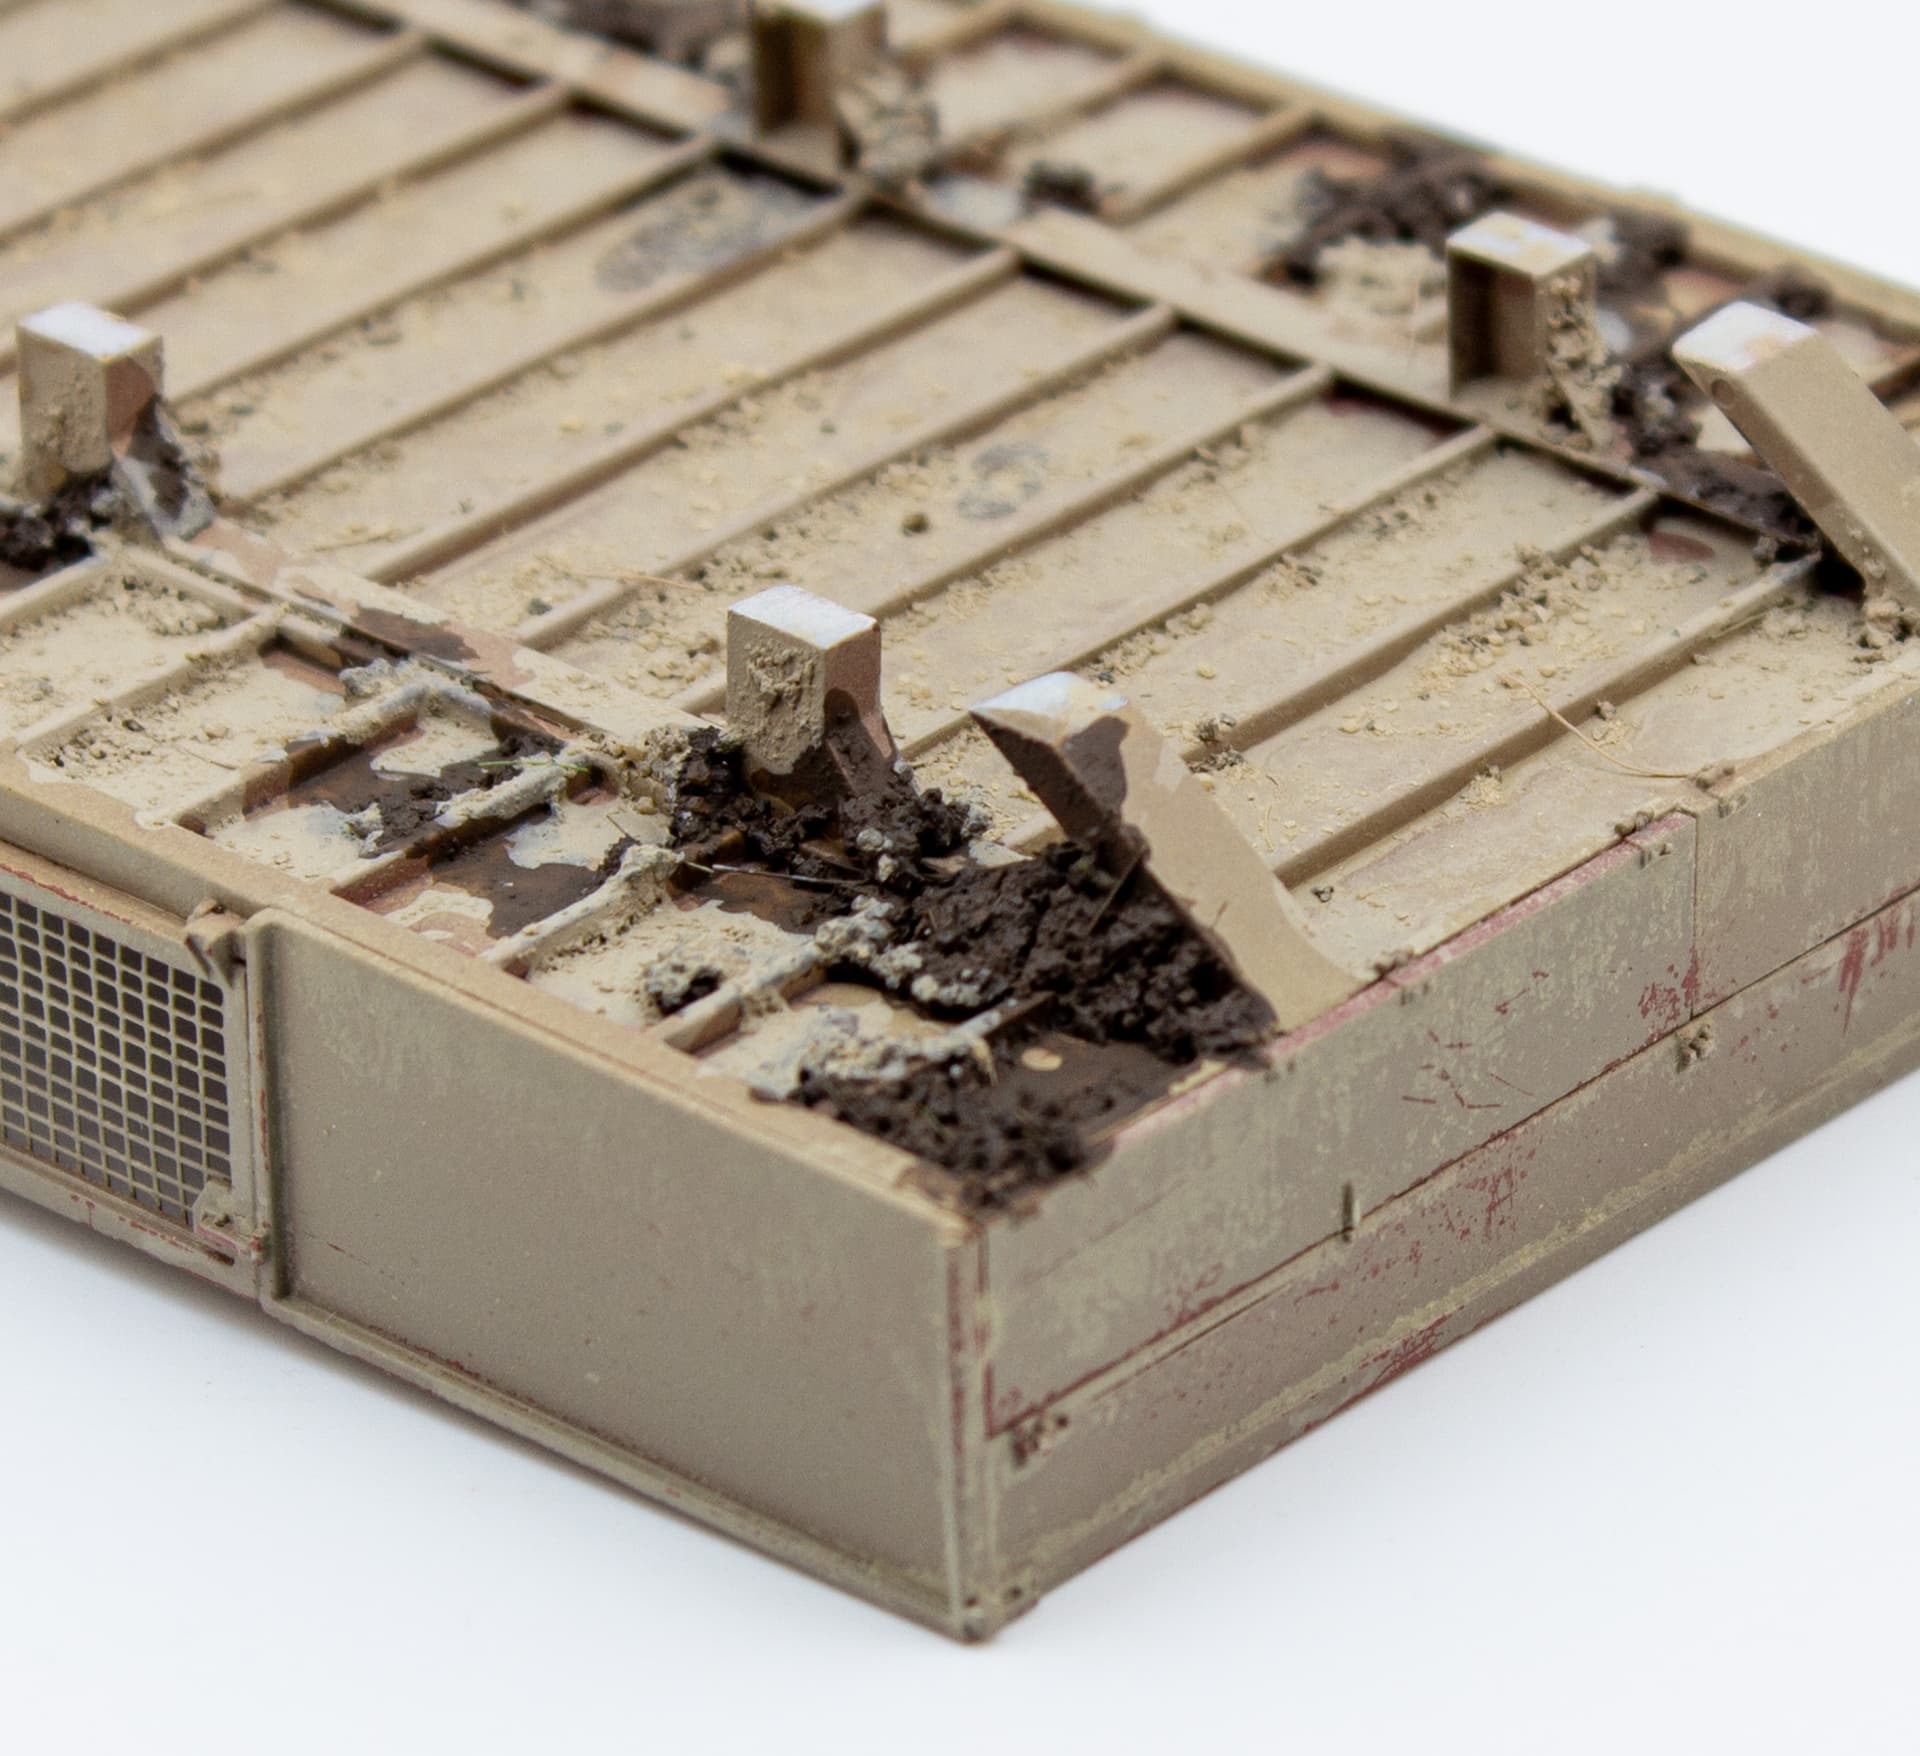
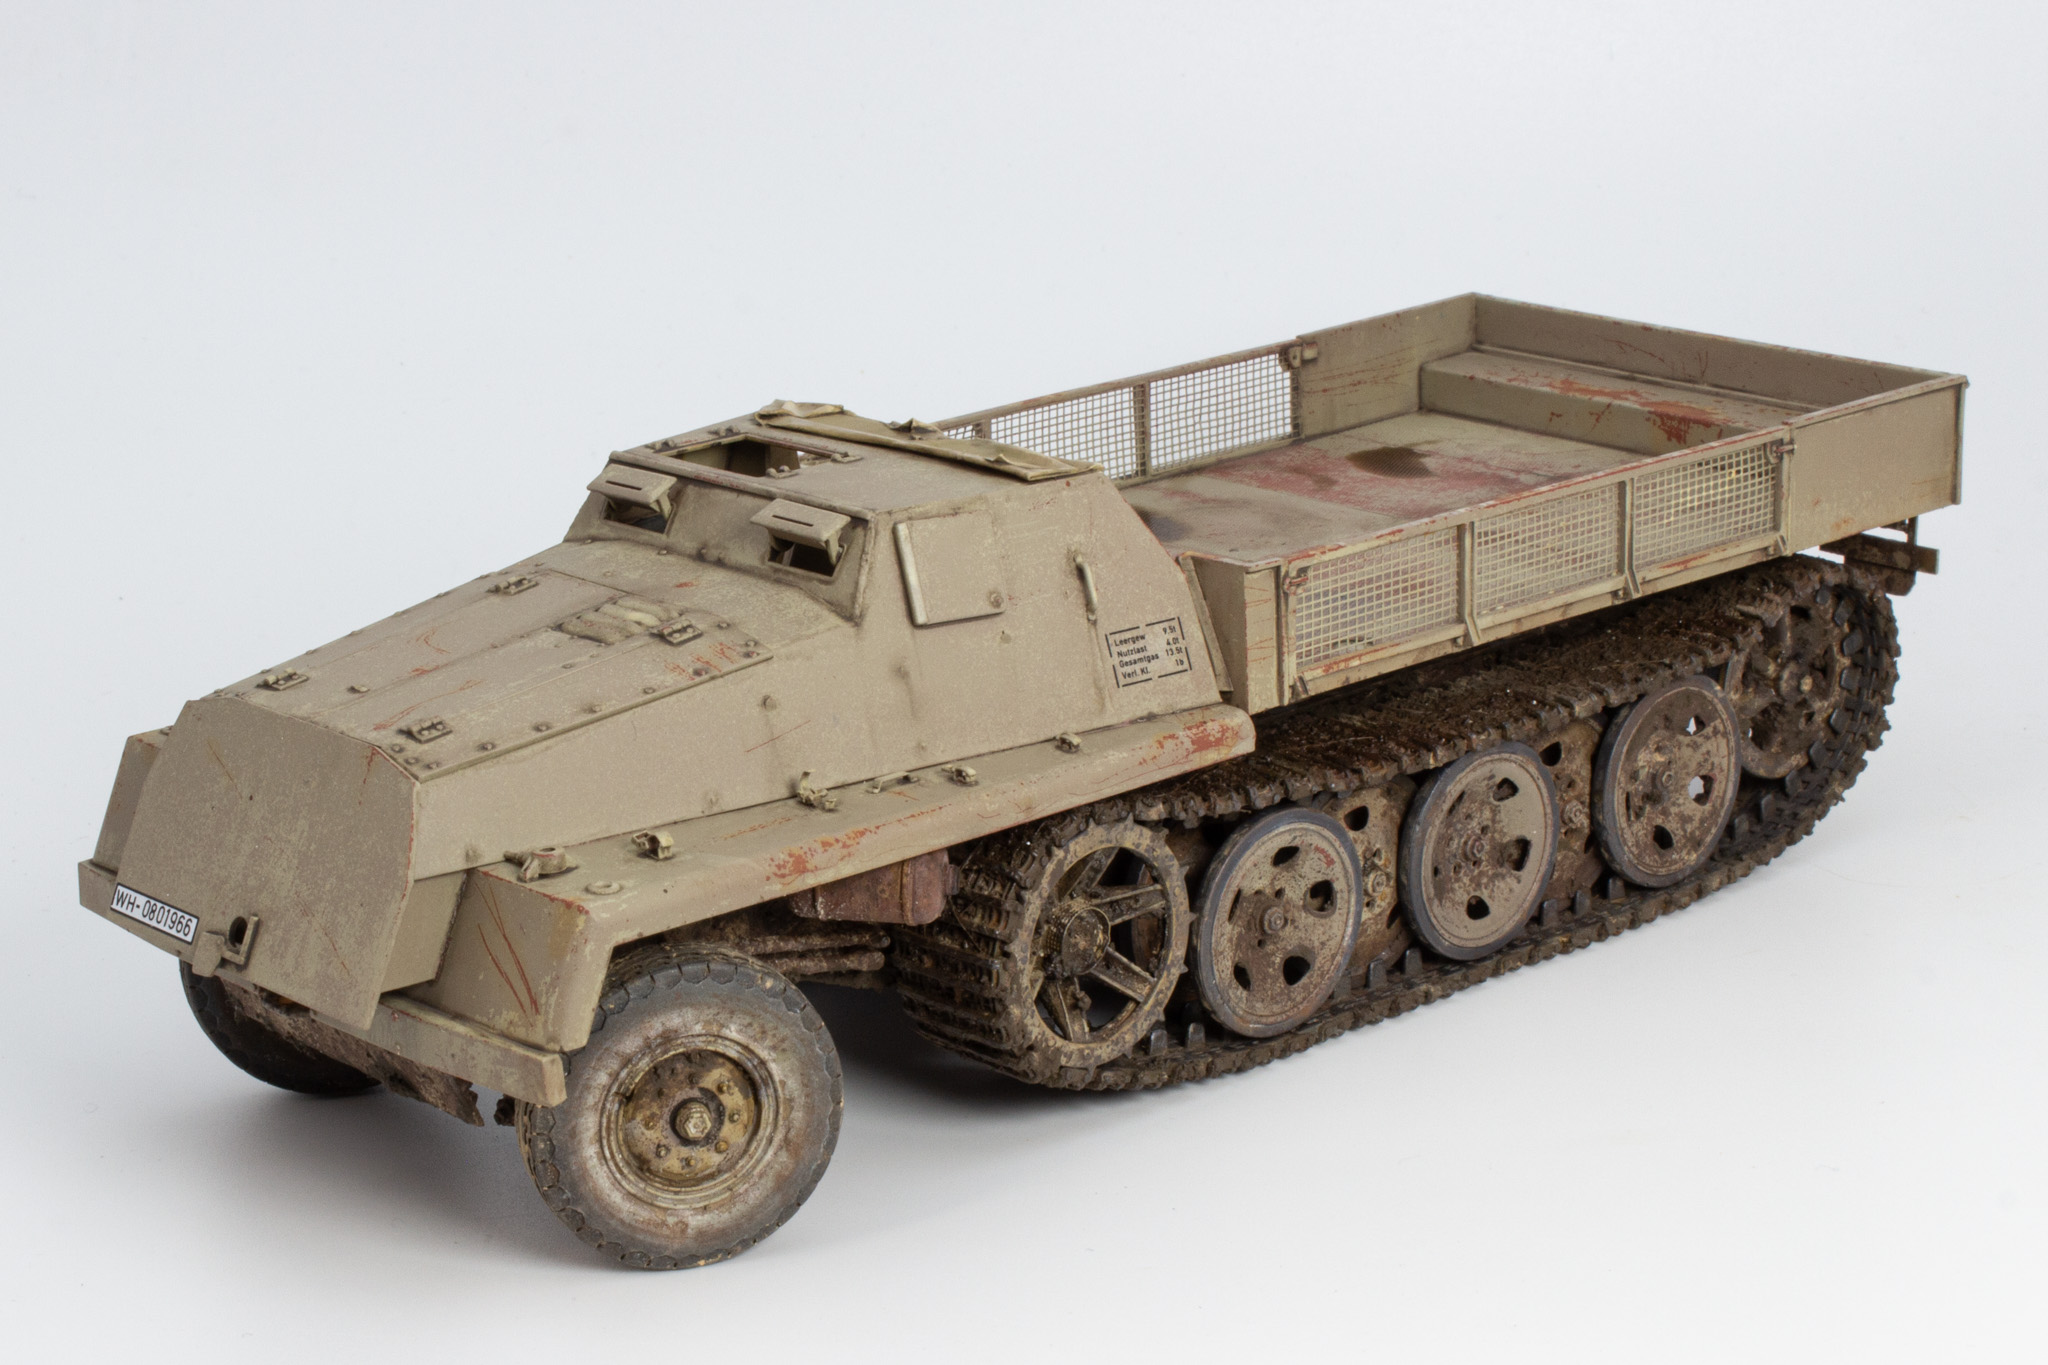
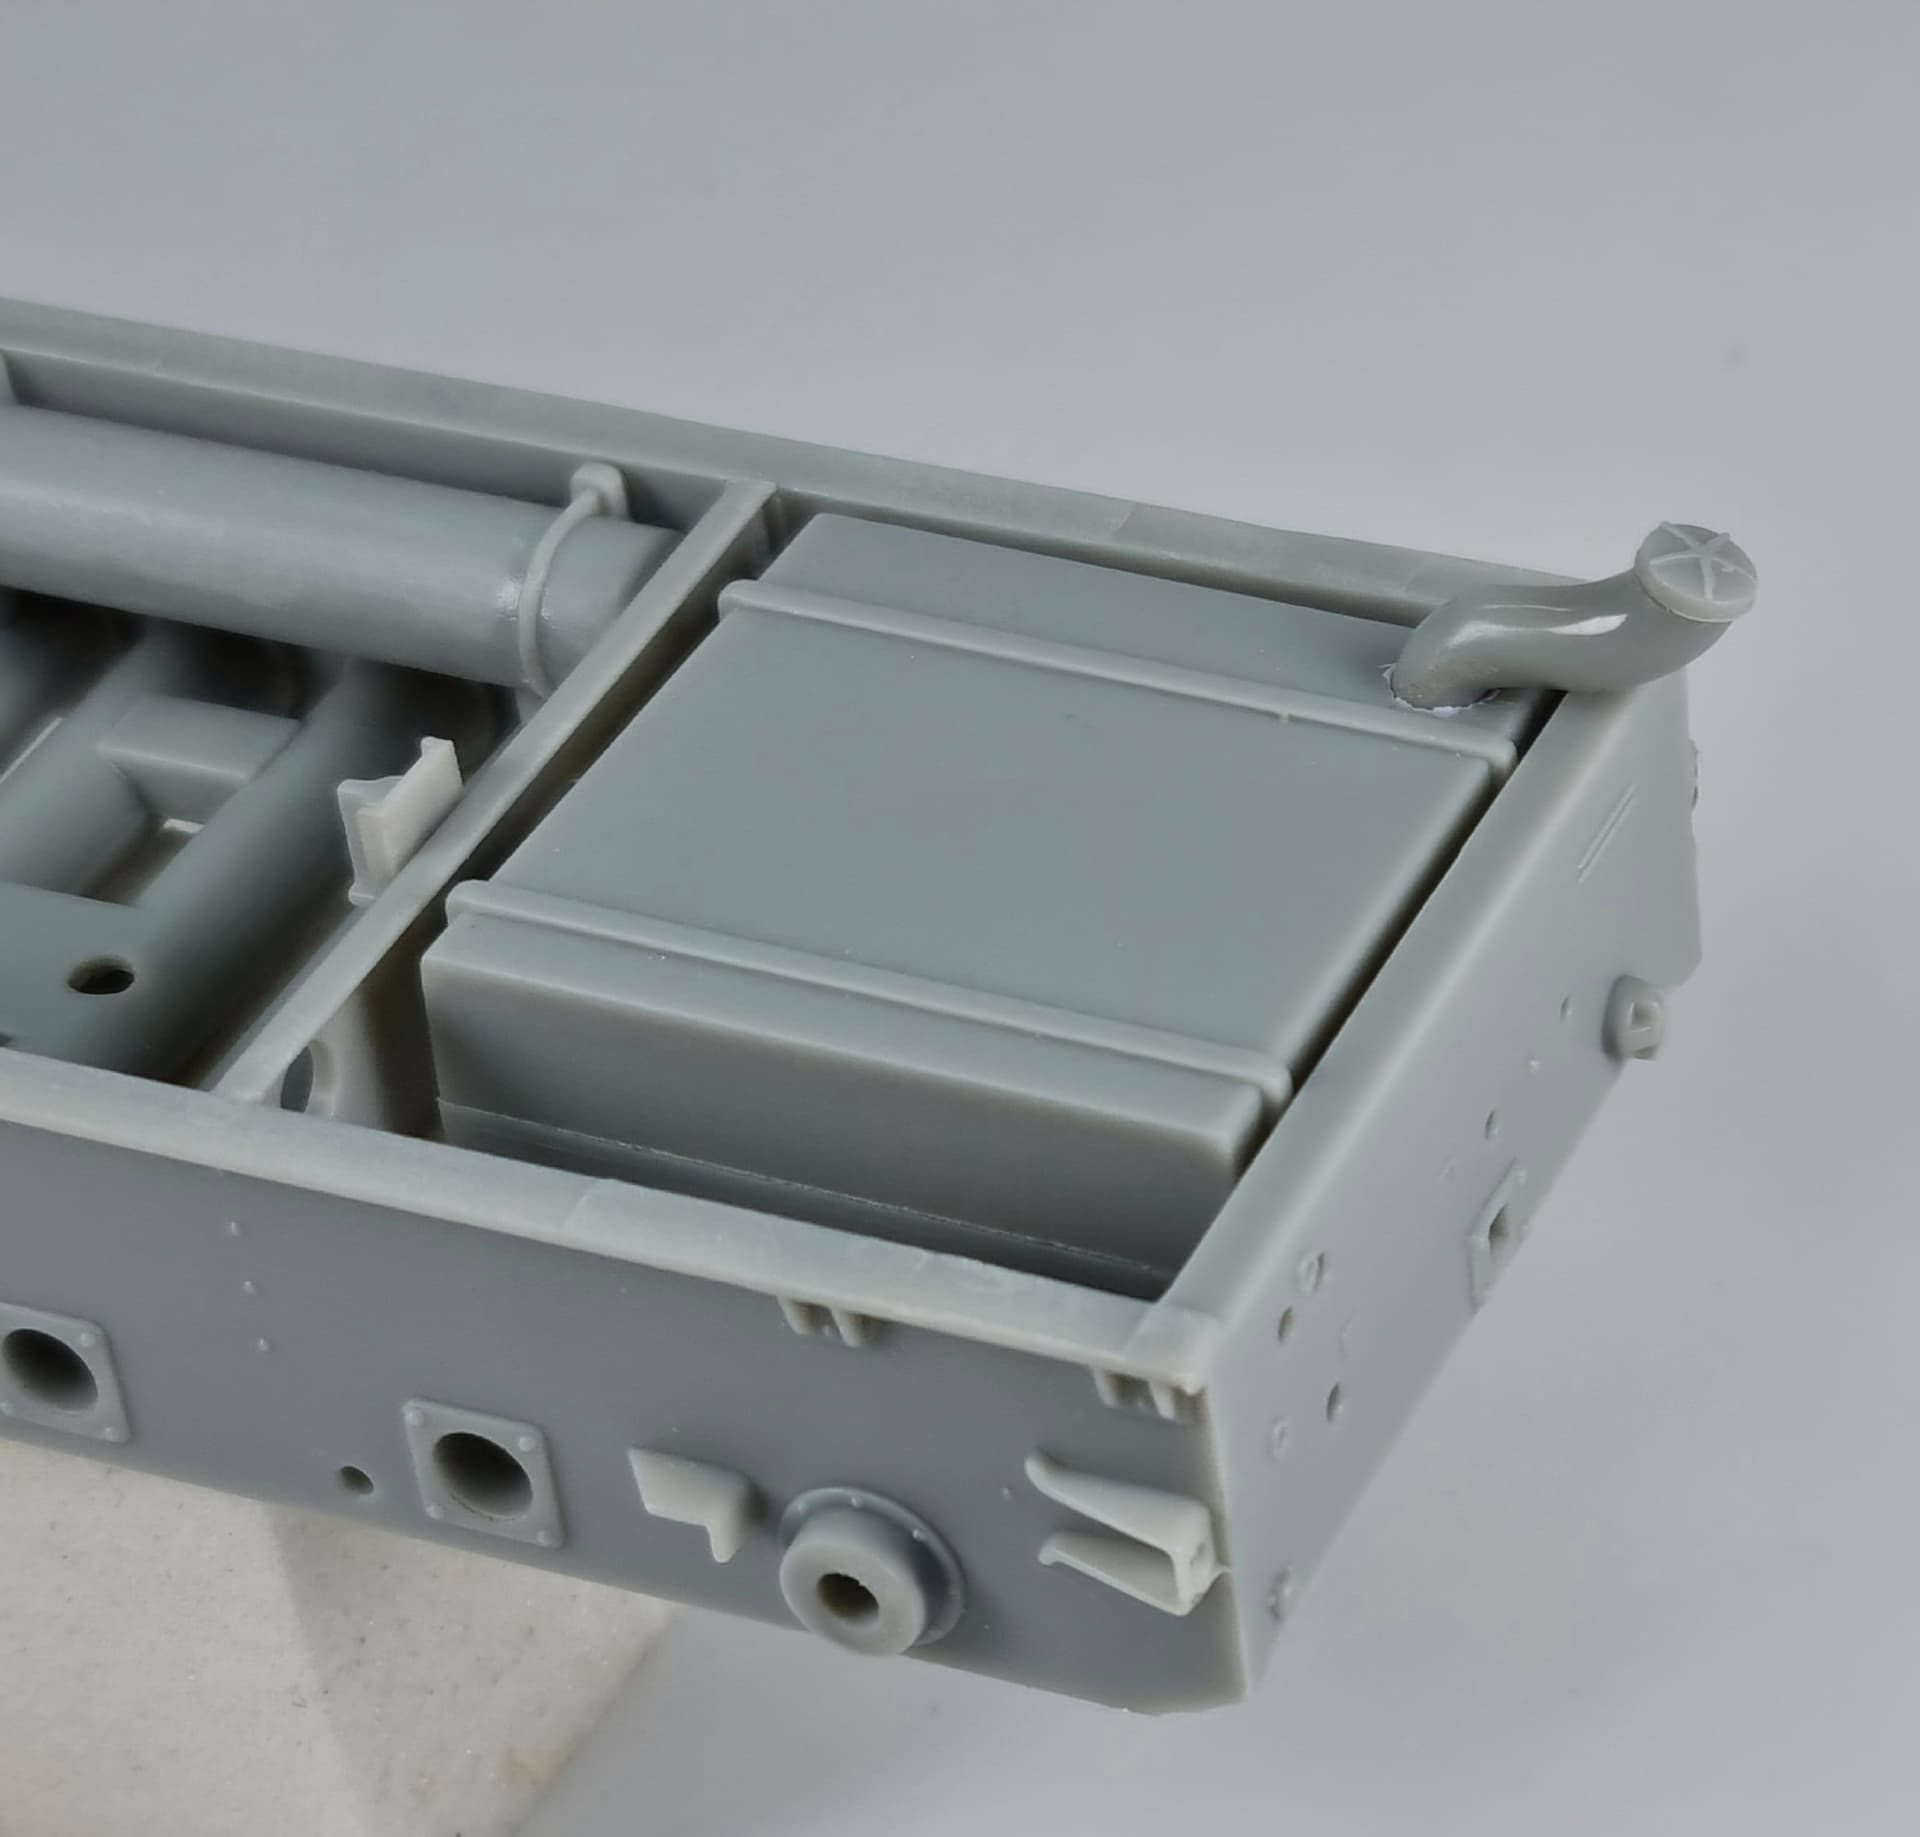
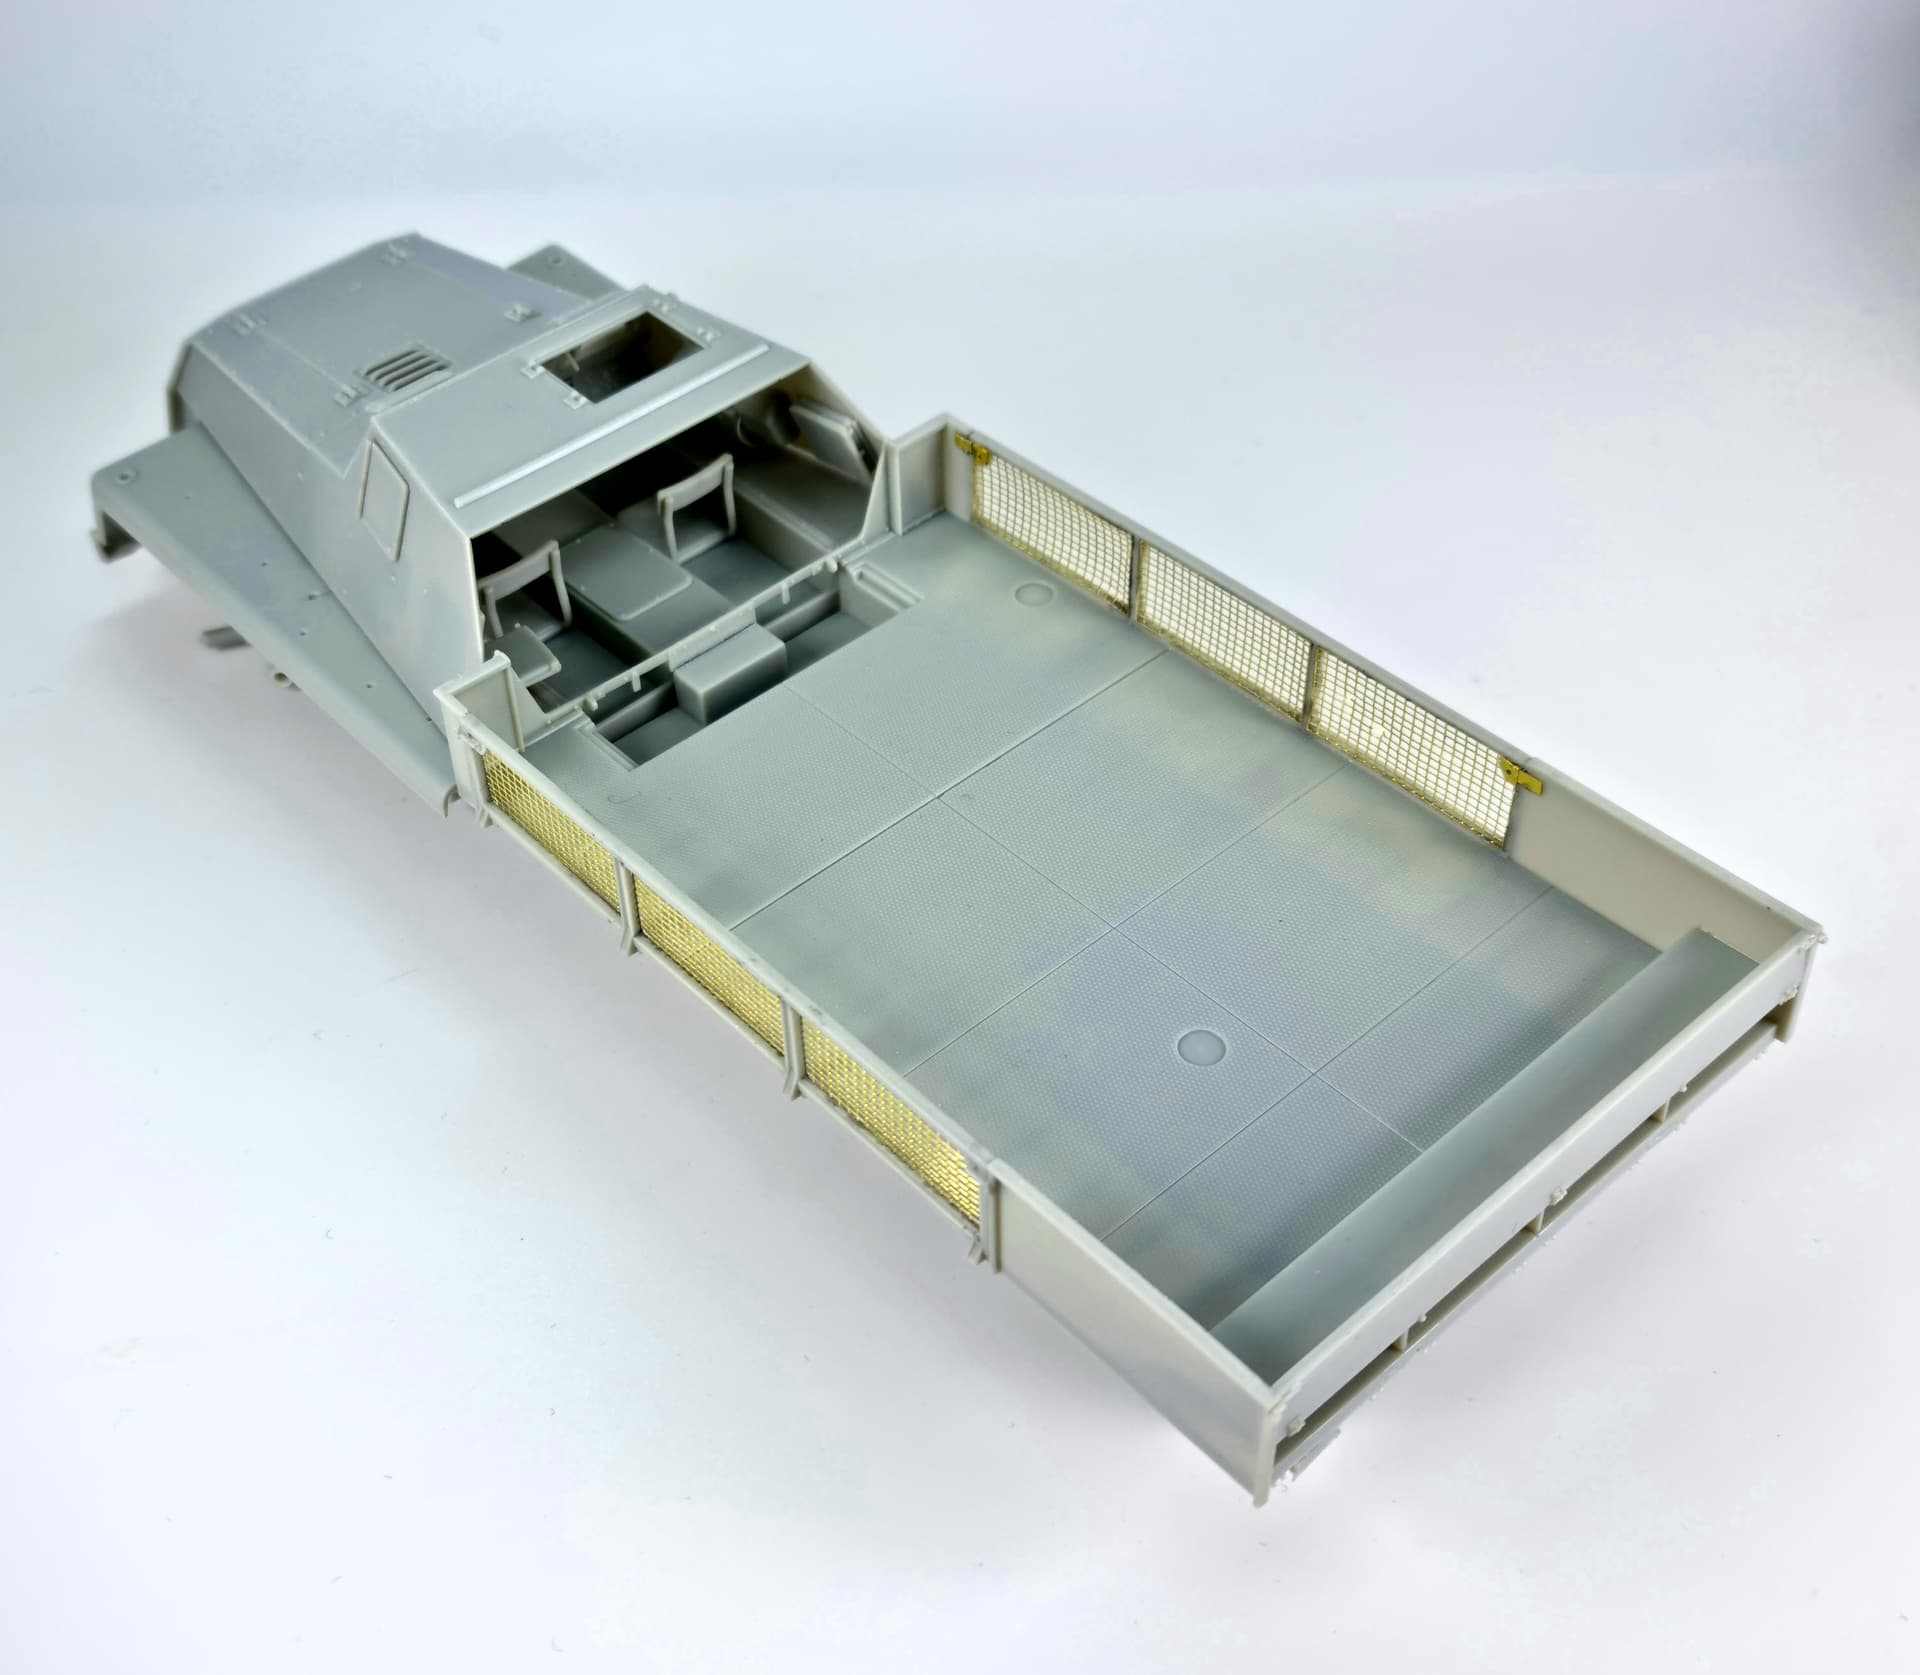
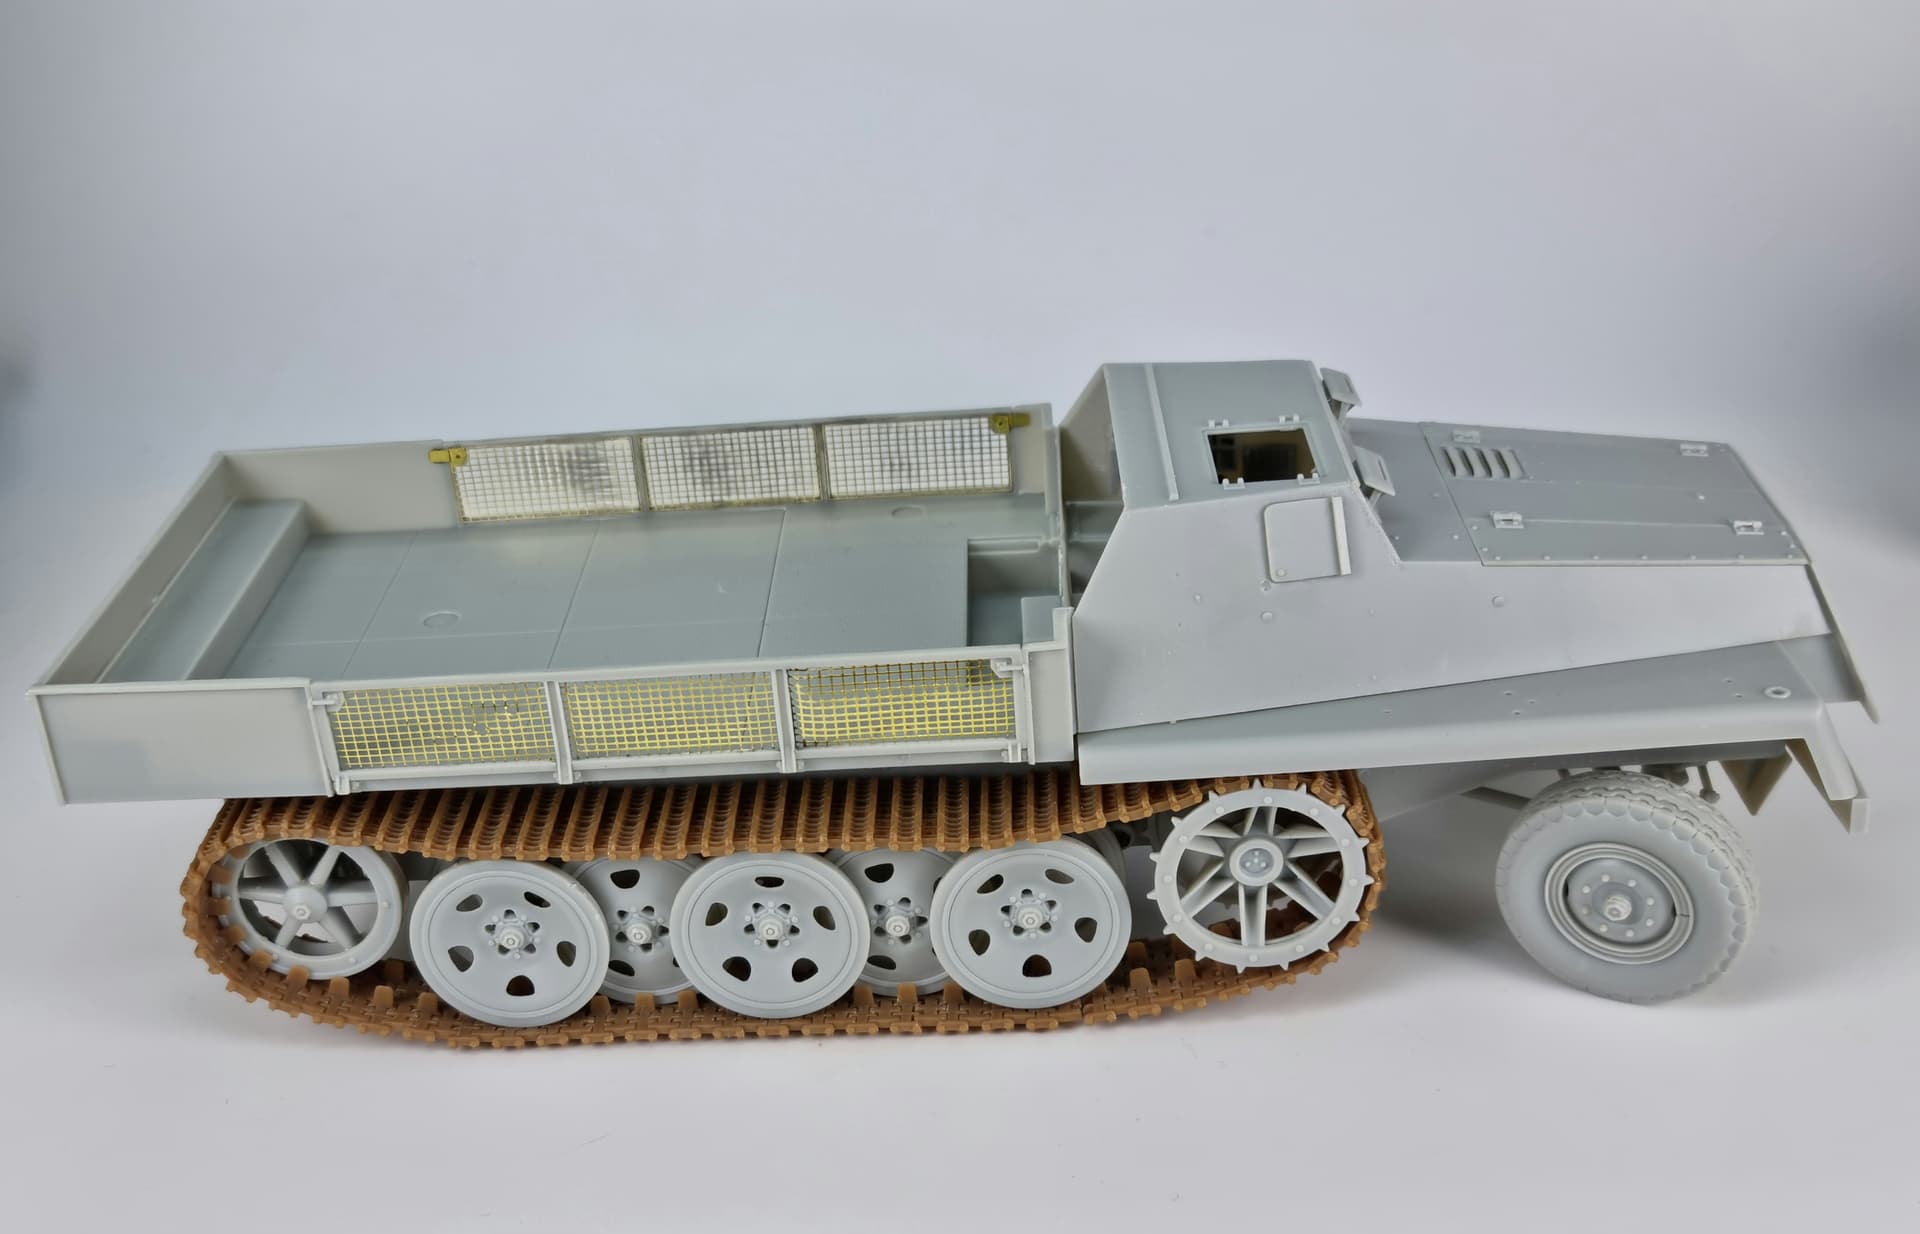
Steps 28 through 34 is just for the armoured cargo version and builds up the rear cargo platform. The front two thirds of the cargo sides are hanging and are represented by a plastic frame and a photoetched inner grill. No fitment issues at all here and although the latches are moulded in, it all looks good when built up.


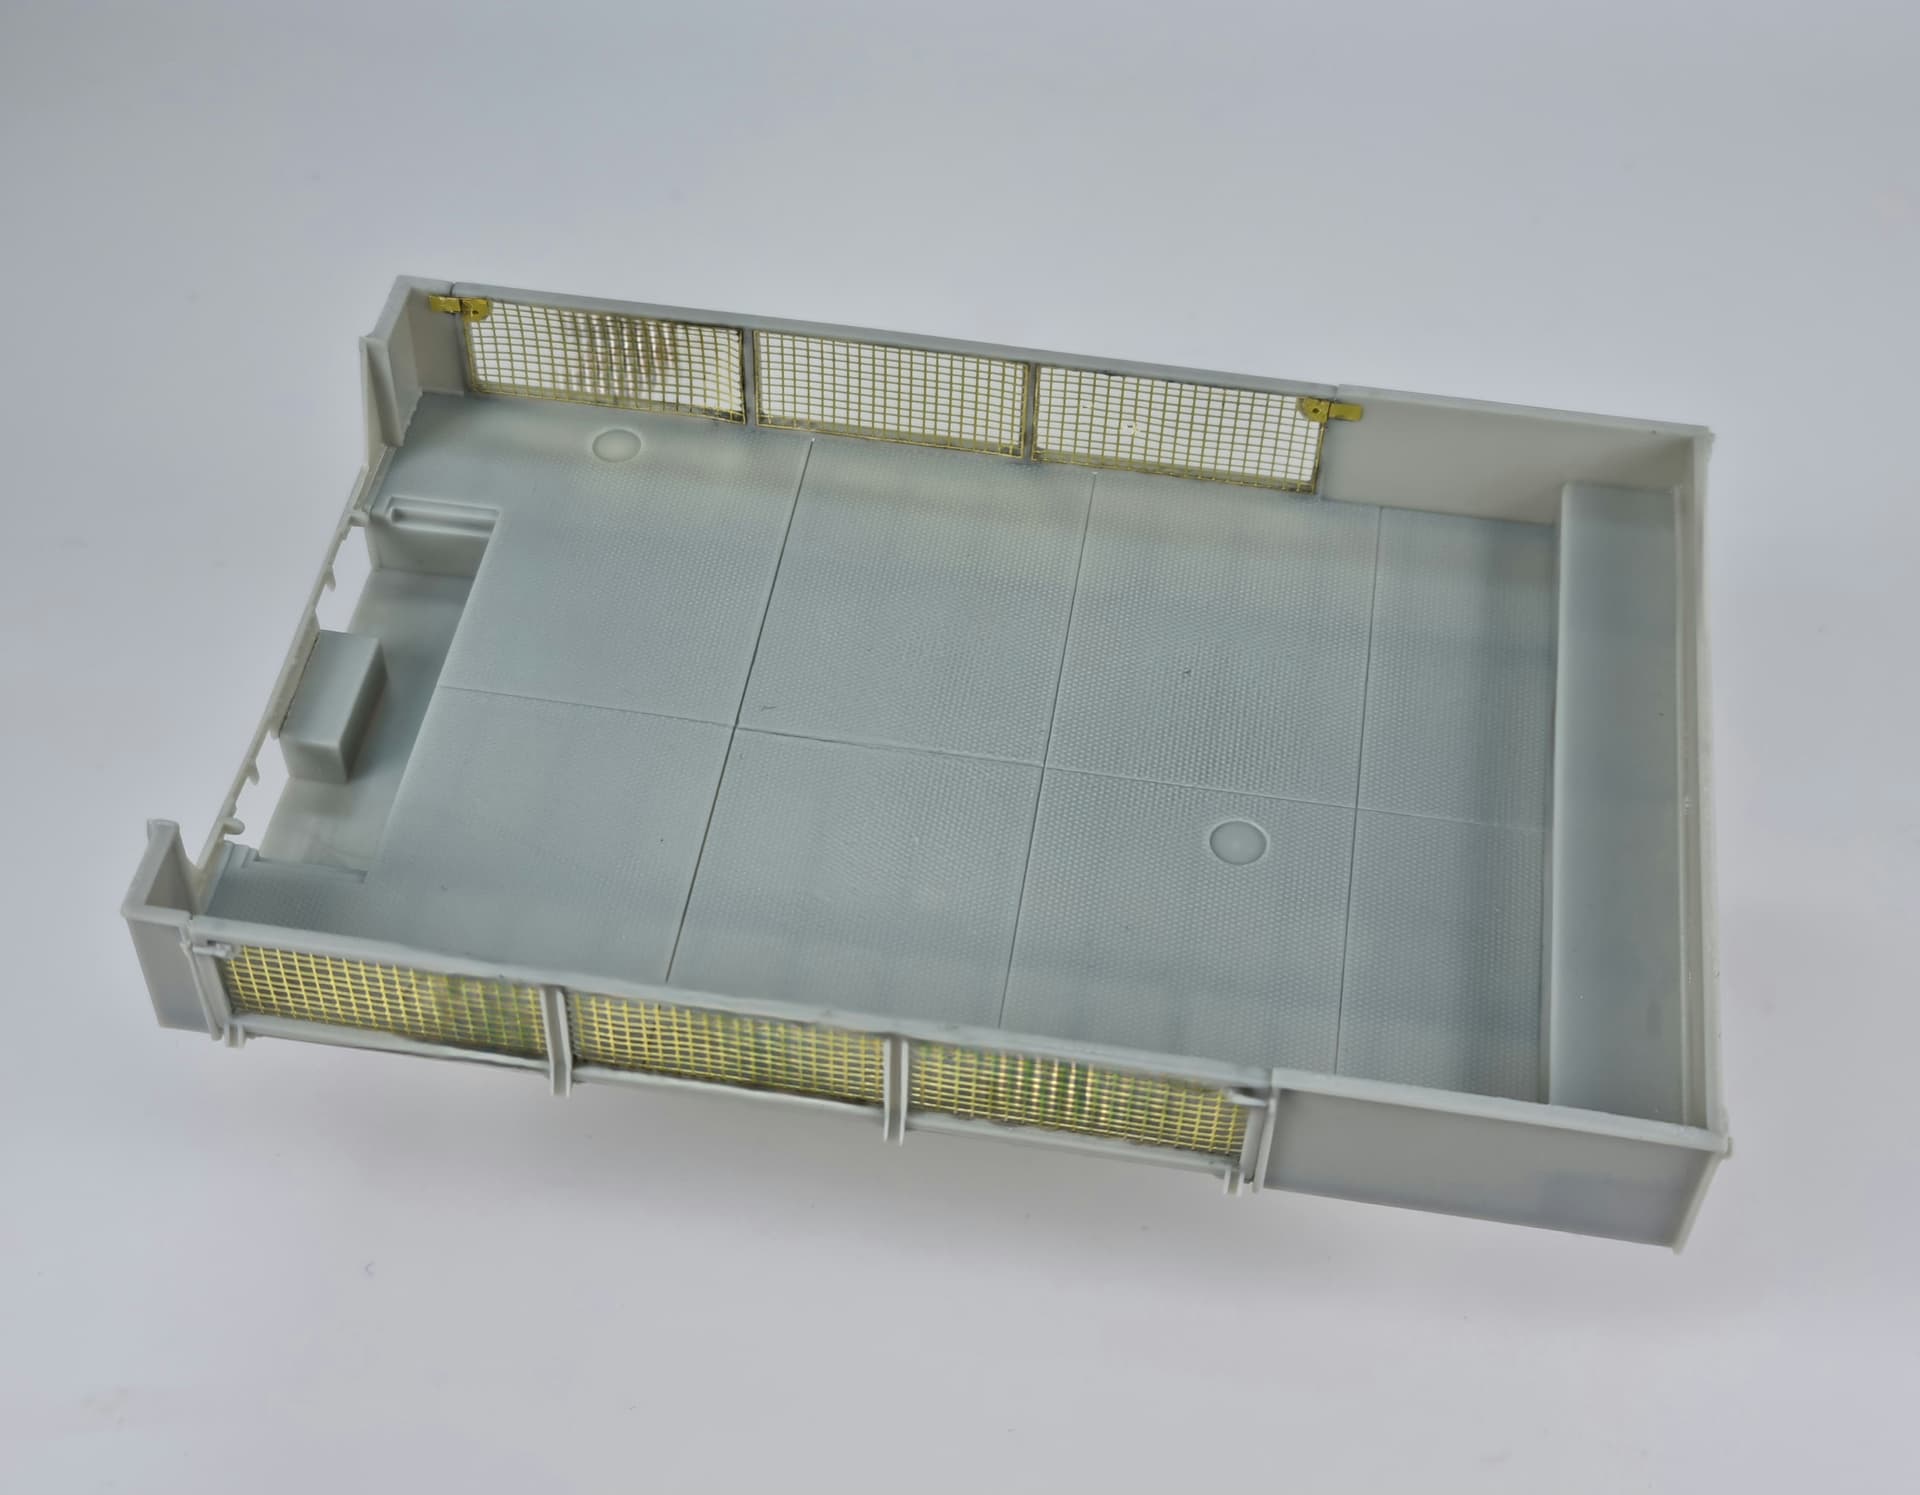
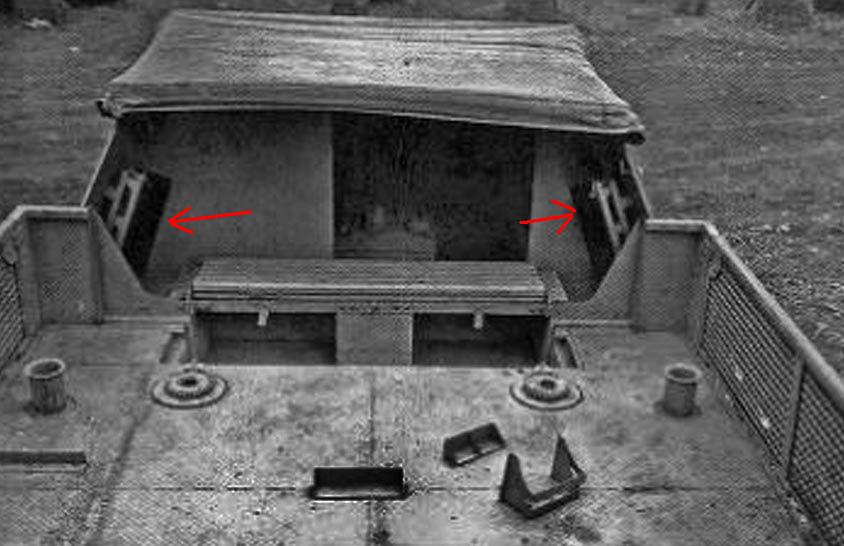
The platform bed floor is a tricky one. Other than a couple of ref images I cannot find any showing the armoured cargo version from above, so it is difficult to know what fixings were attached, if any at all? One of the images seems to show some ‘L’ shaped brackets over on the driver’s side but what they were for I’m not sure. There are circular location marks for the Flak 43 carriage on the kit’s platform and there are a few parts like the risers and fixing cross bar for that gun still on the sprues. If the vehicle was solely used for cargo, it makes no sense having the tubular flak carriage risers protruding out of the floor to limit floor space and for crew members to trip over etc. The N & B CAD images of the production cargo vehicle have no fixings evident, so I think it is safe to assume they were not present on the cargo variant platforms. I guess the flak platform fixings could always be retro fitted anyway.

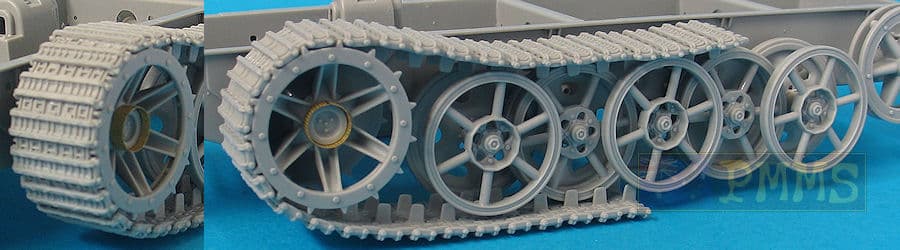
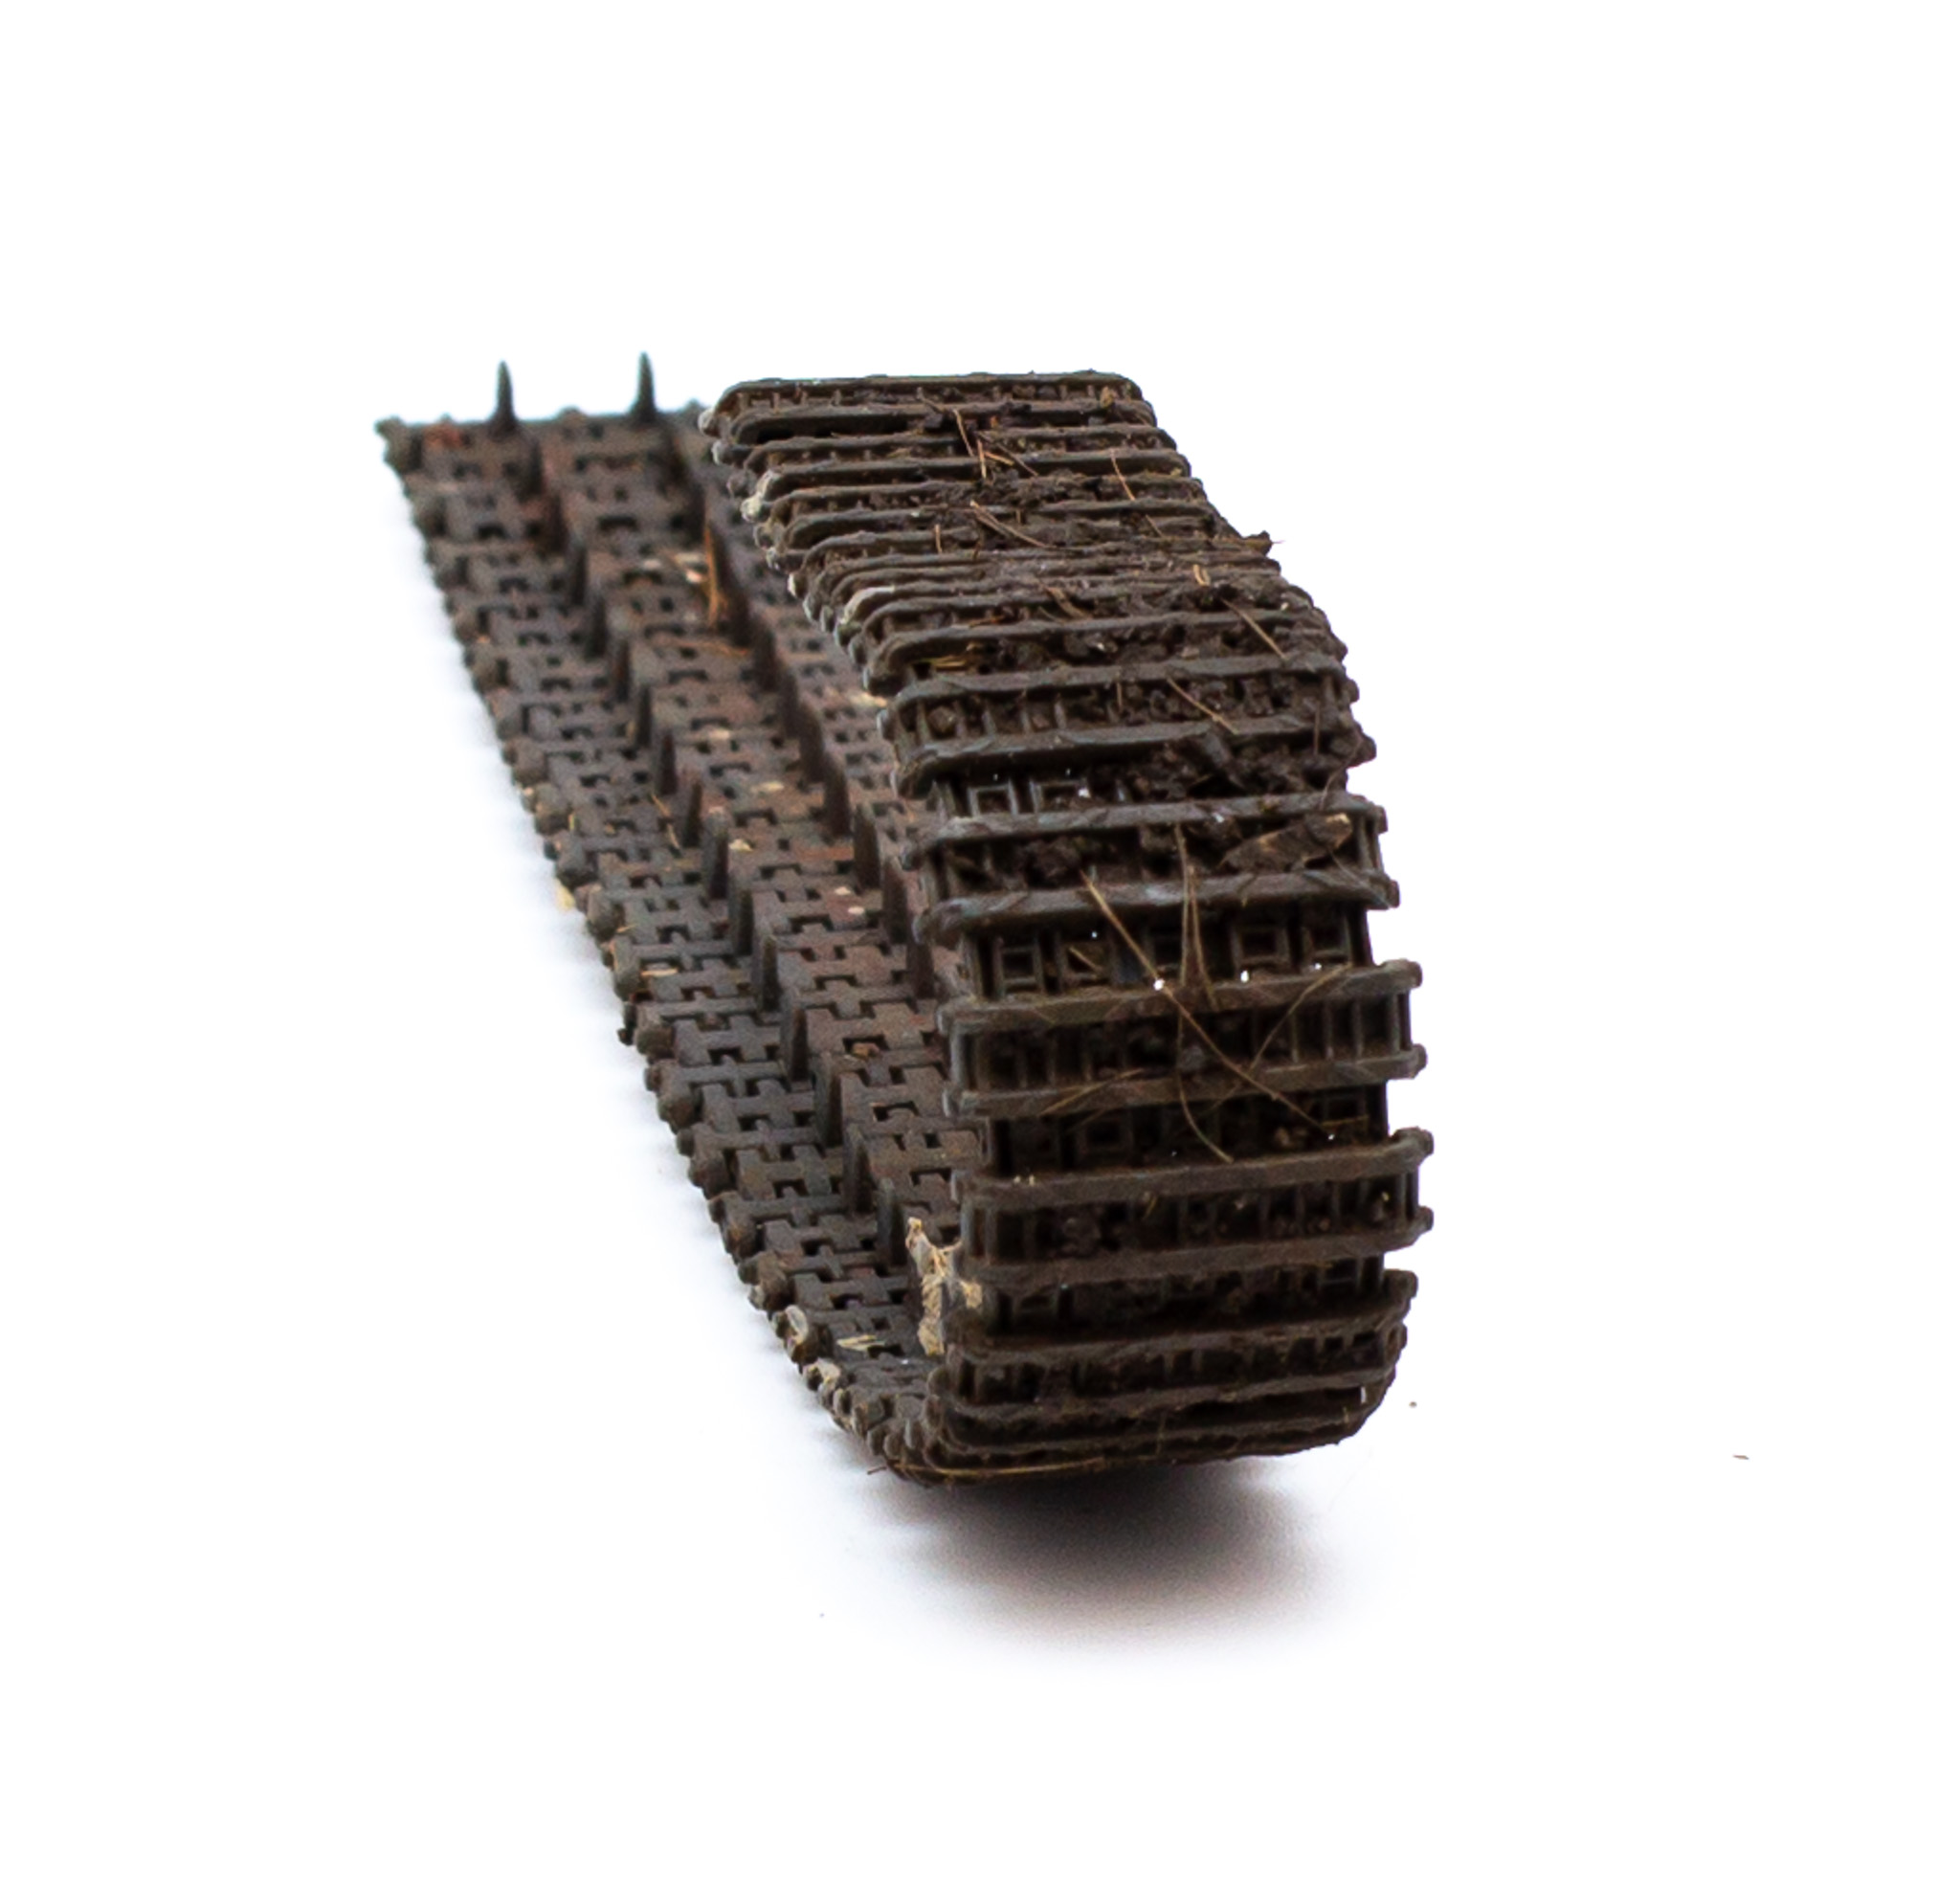
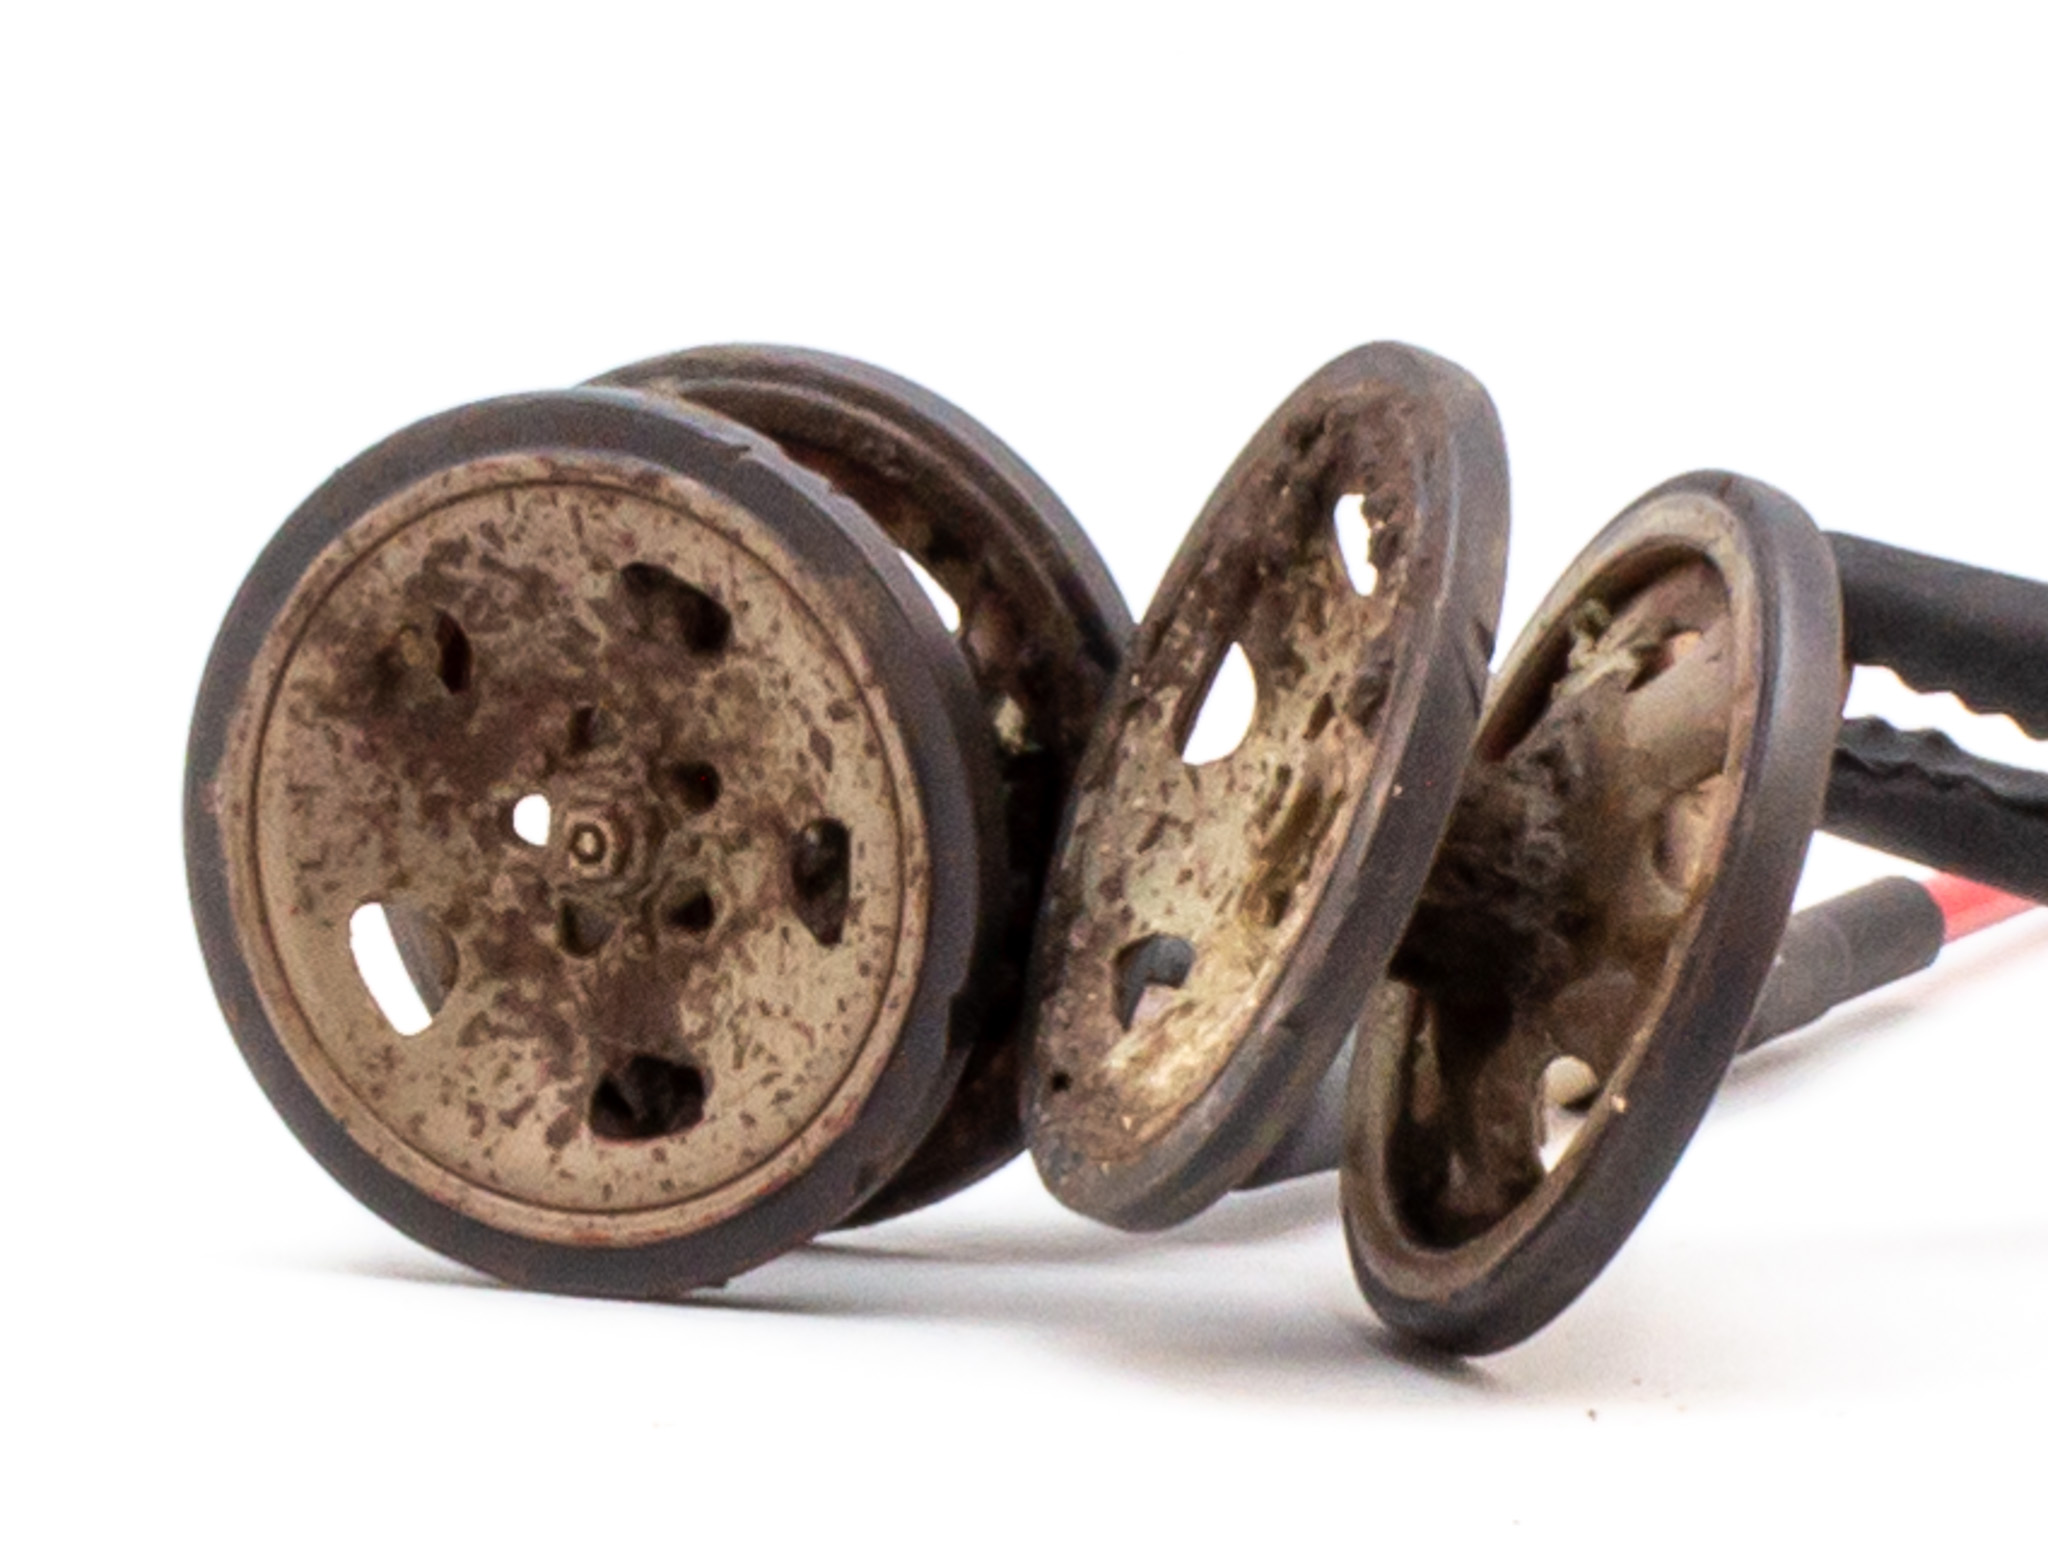
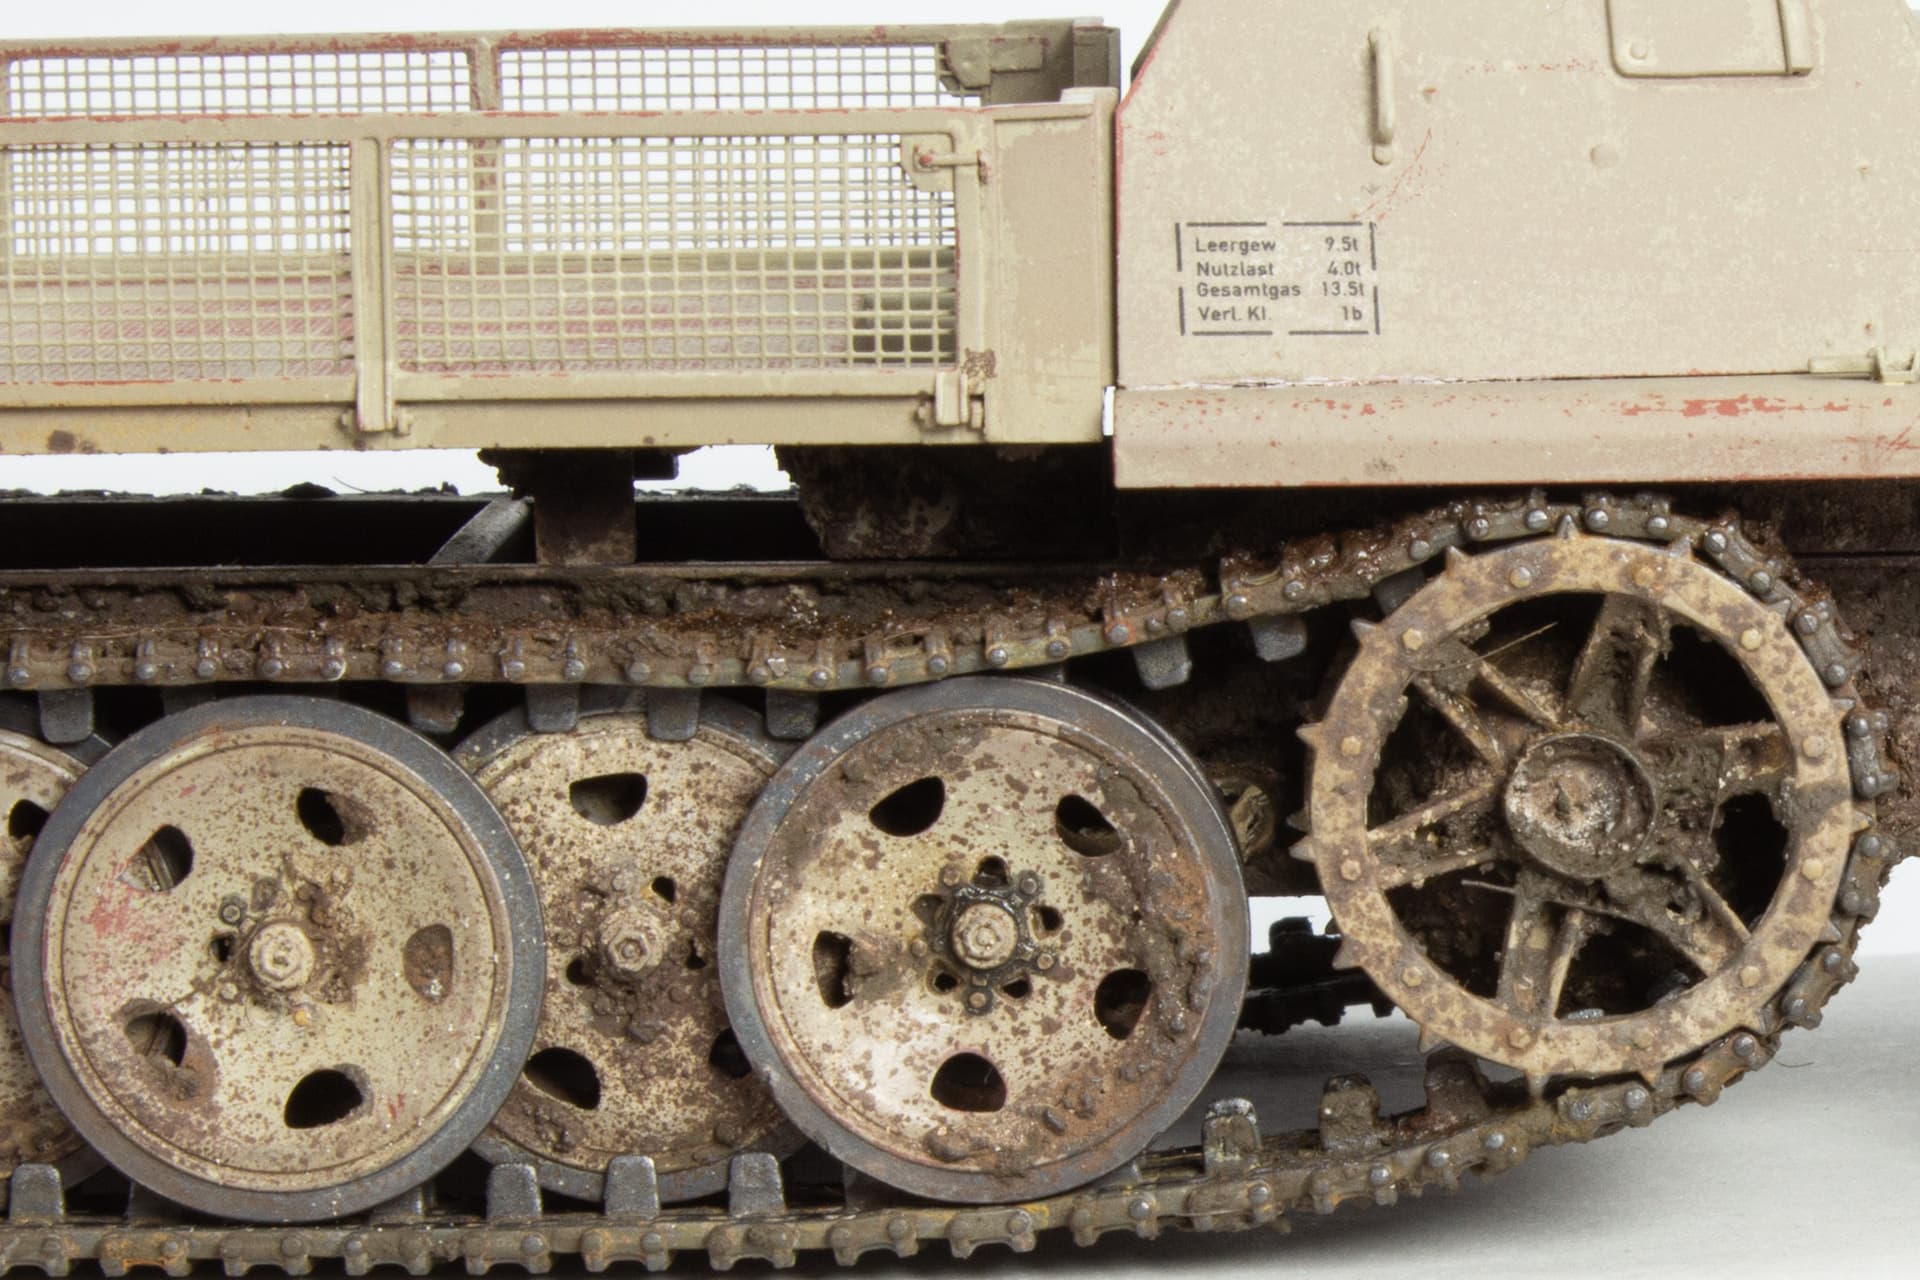
The instructions state to use 112 track links per side yet the N&B book states that only 110 were used. Without any idler adjustment its going to be whatever it turns out to be I guess!

Not the easiest design to manipulate so they have been broken down into seperate runs

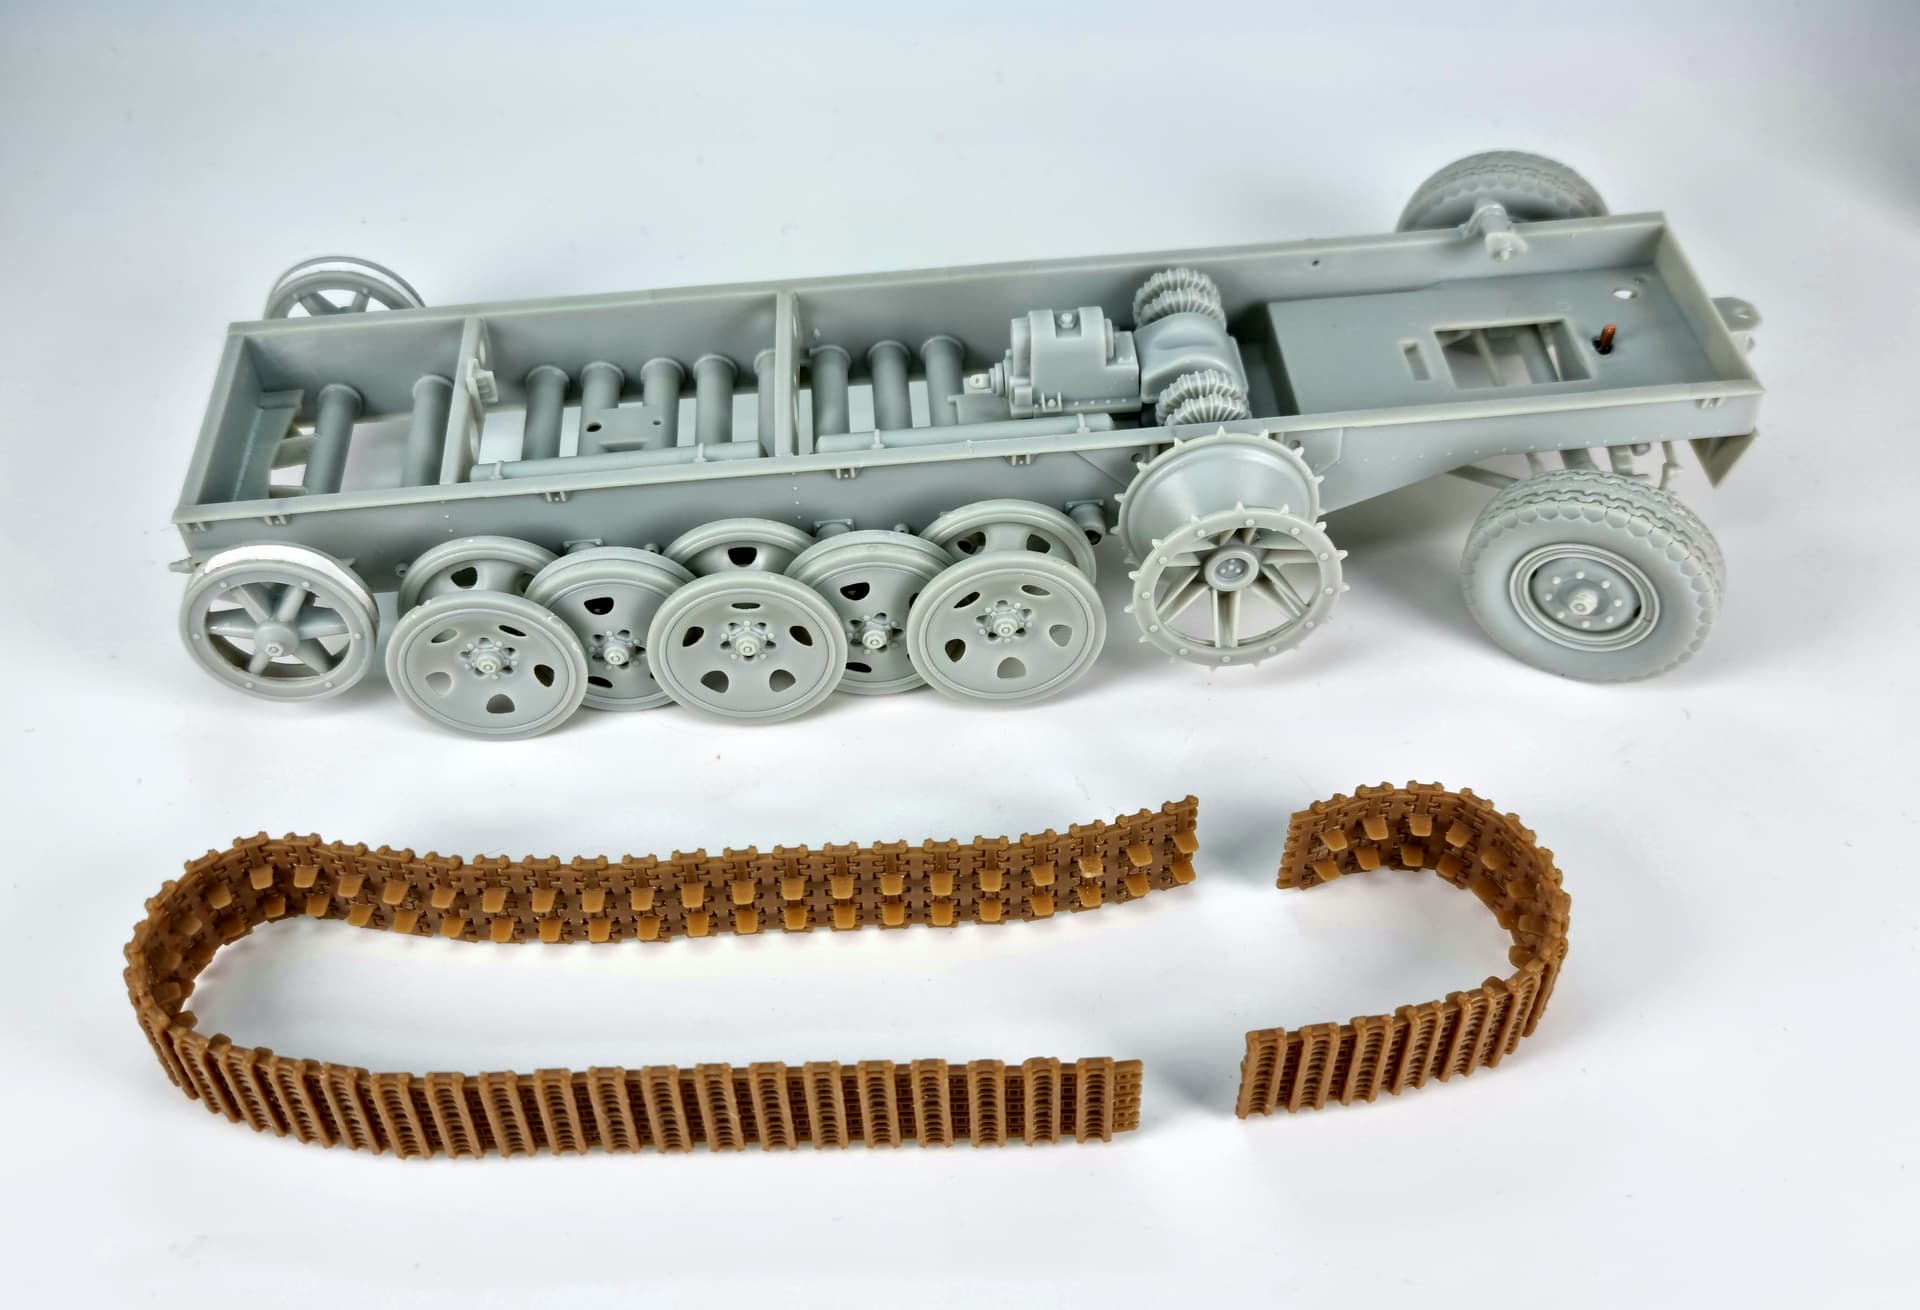
There are two sprue gates per link and a pin mark on every pin link. So, by my reckoning that’s at least a minimum of two hundred and seventy-five individual clean up steps EACH SIDE!

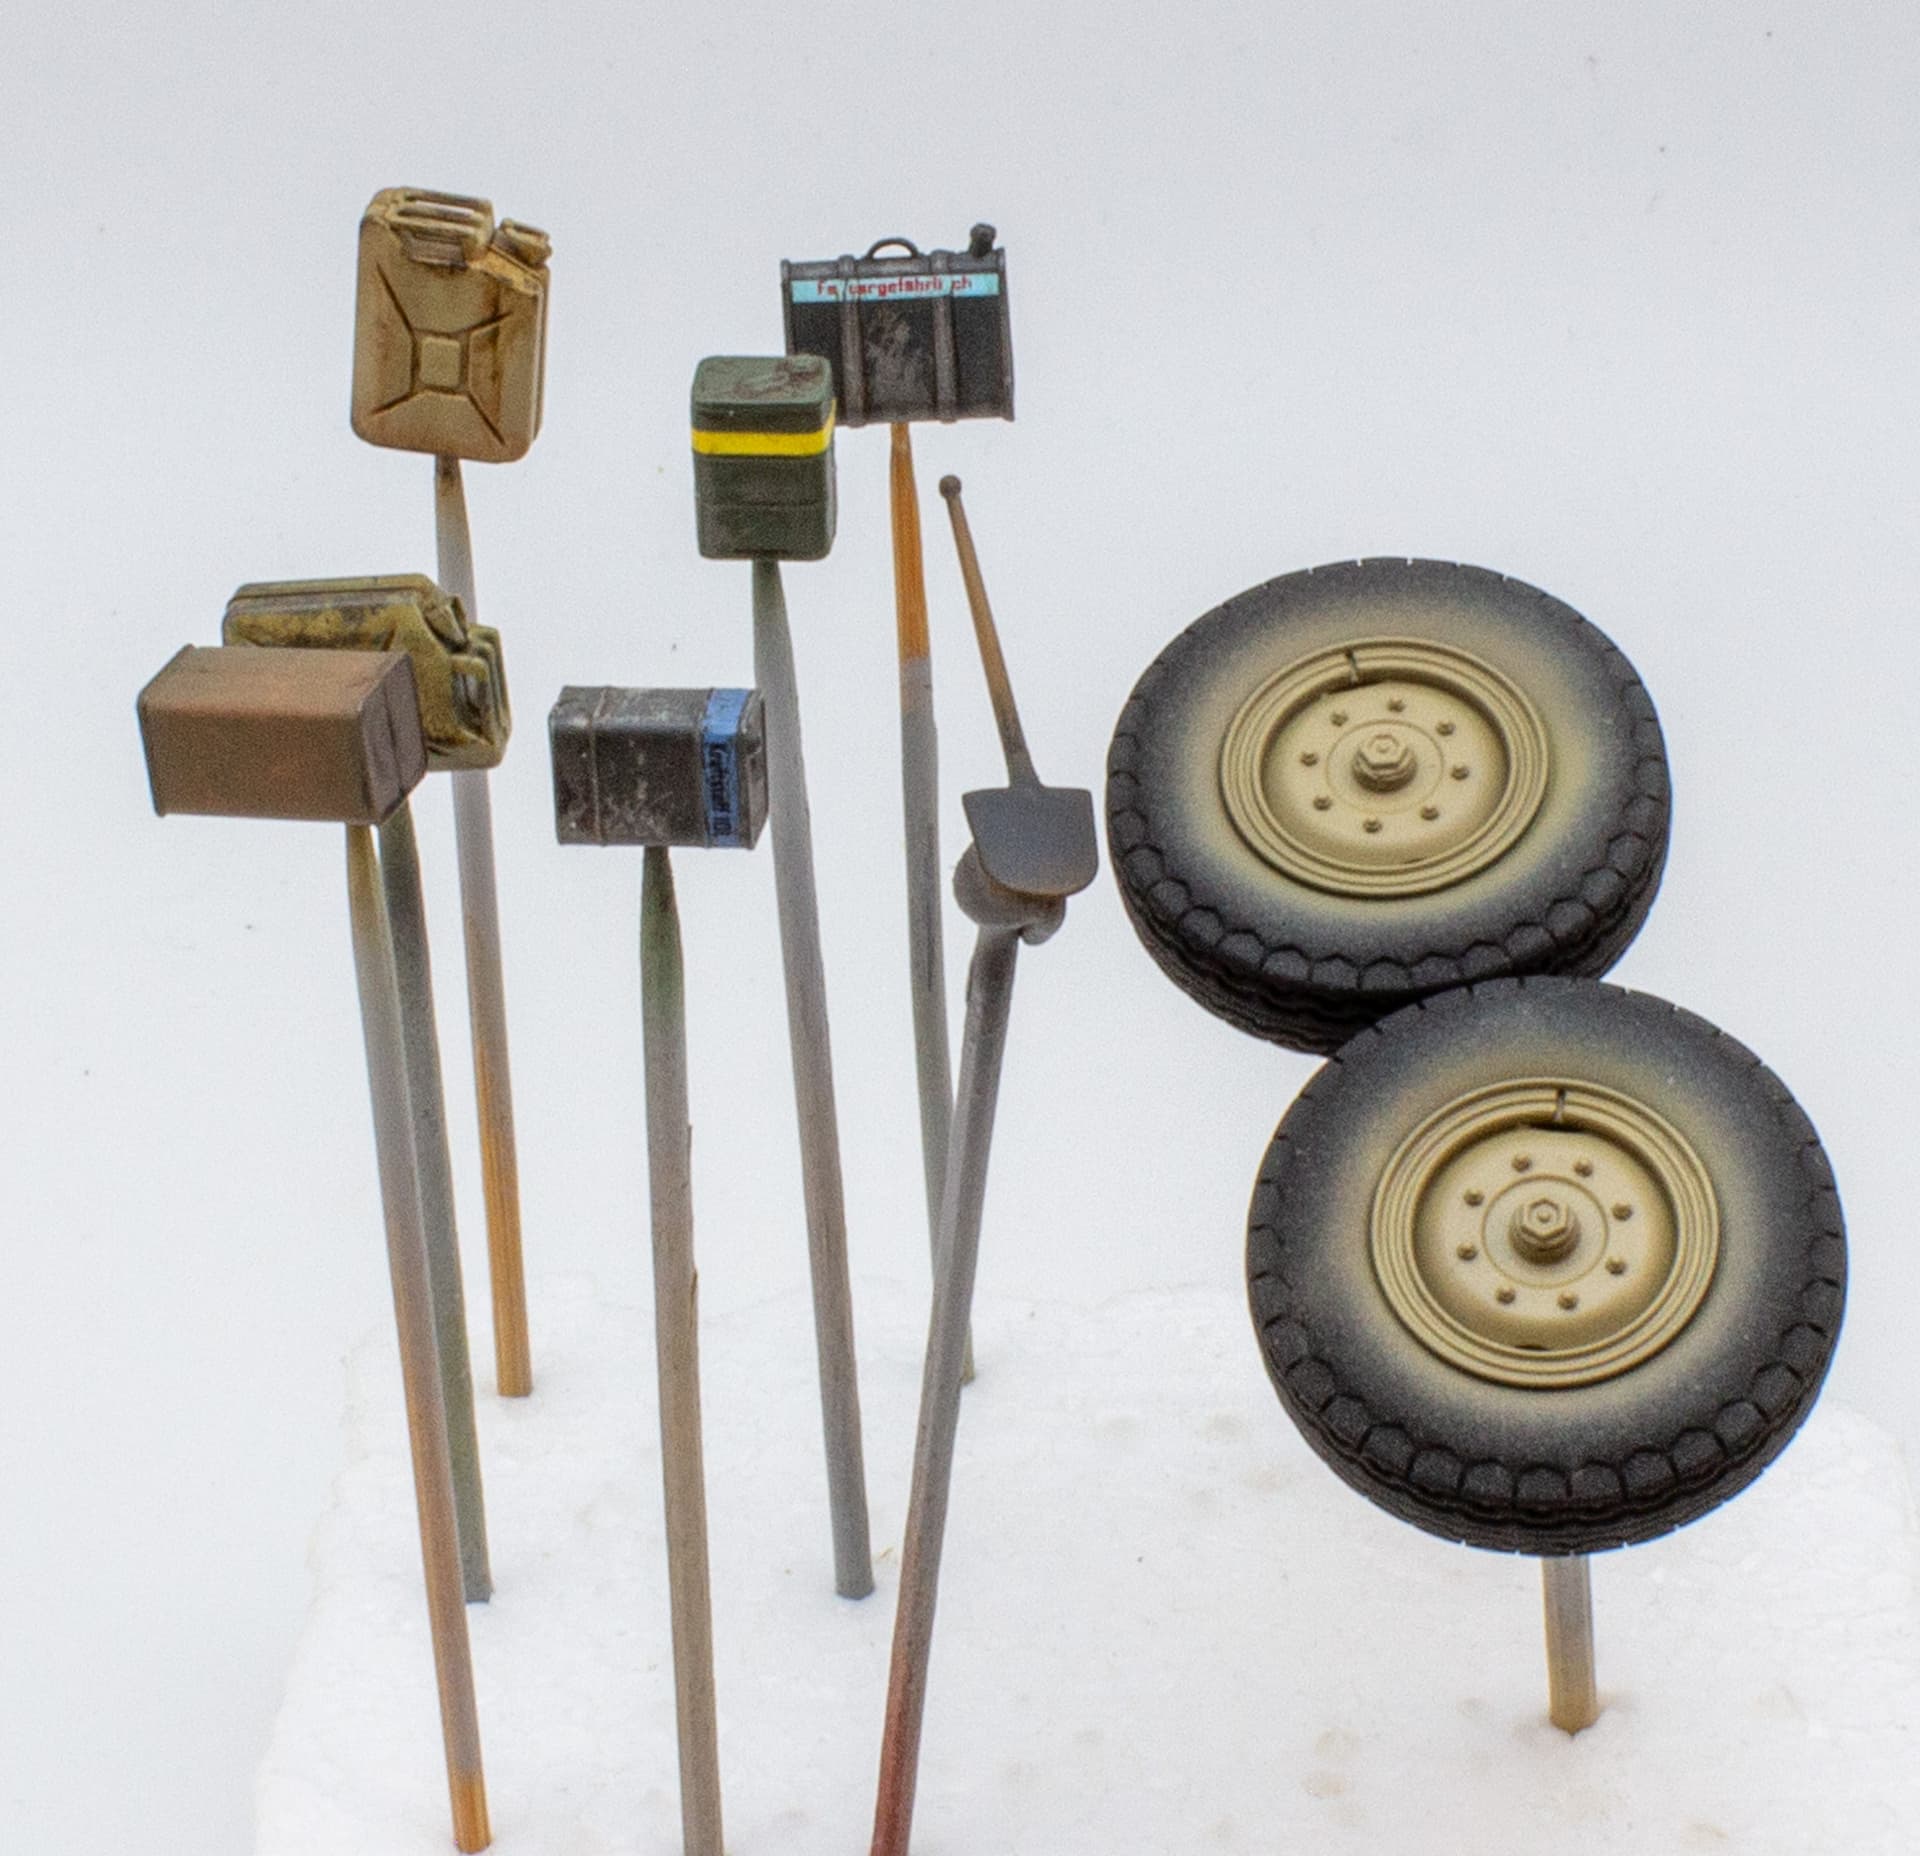
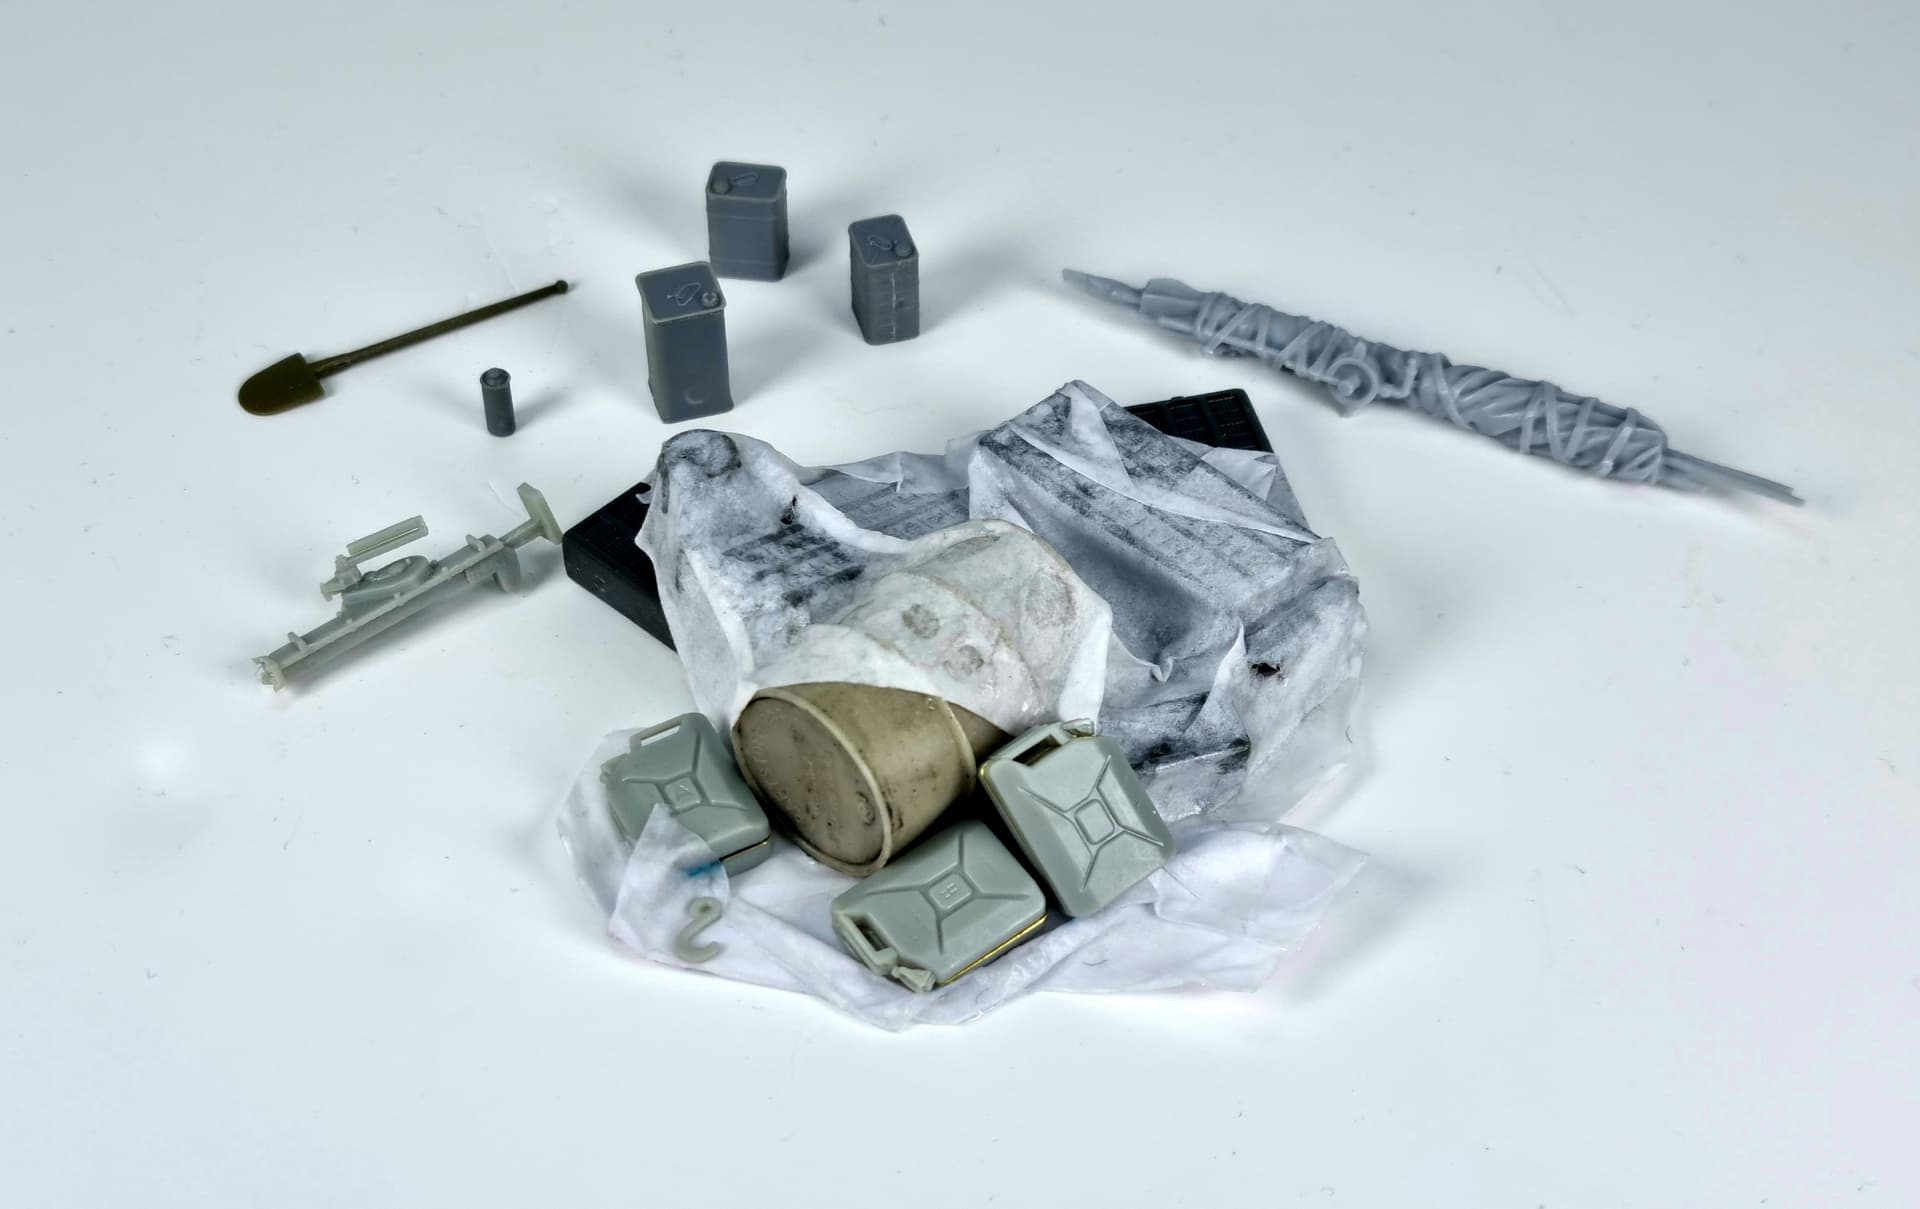
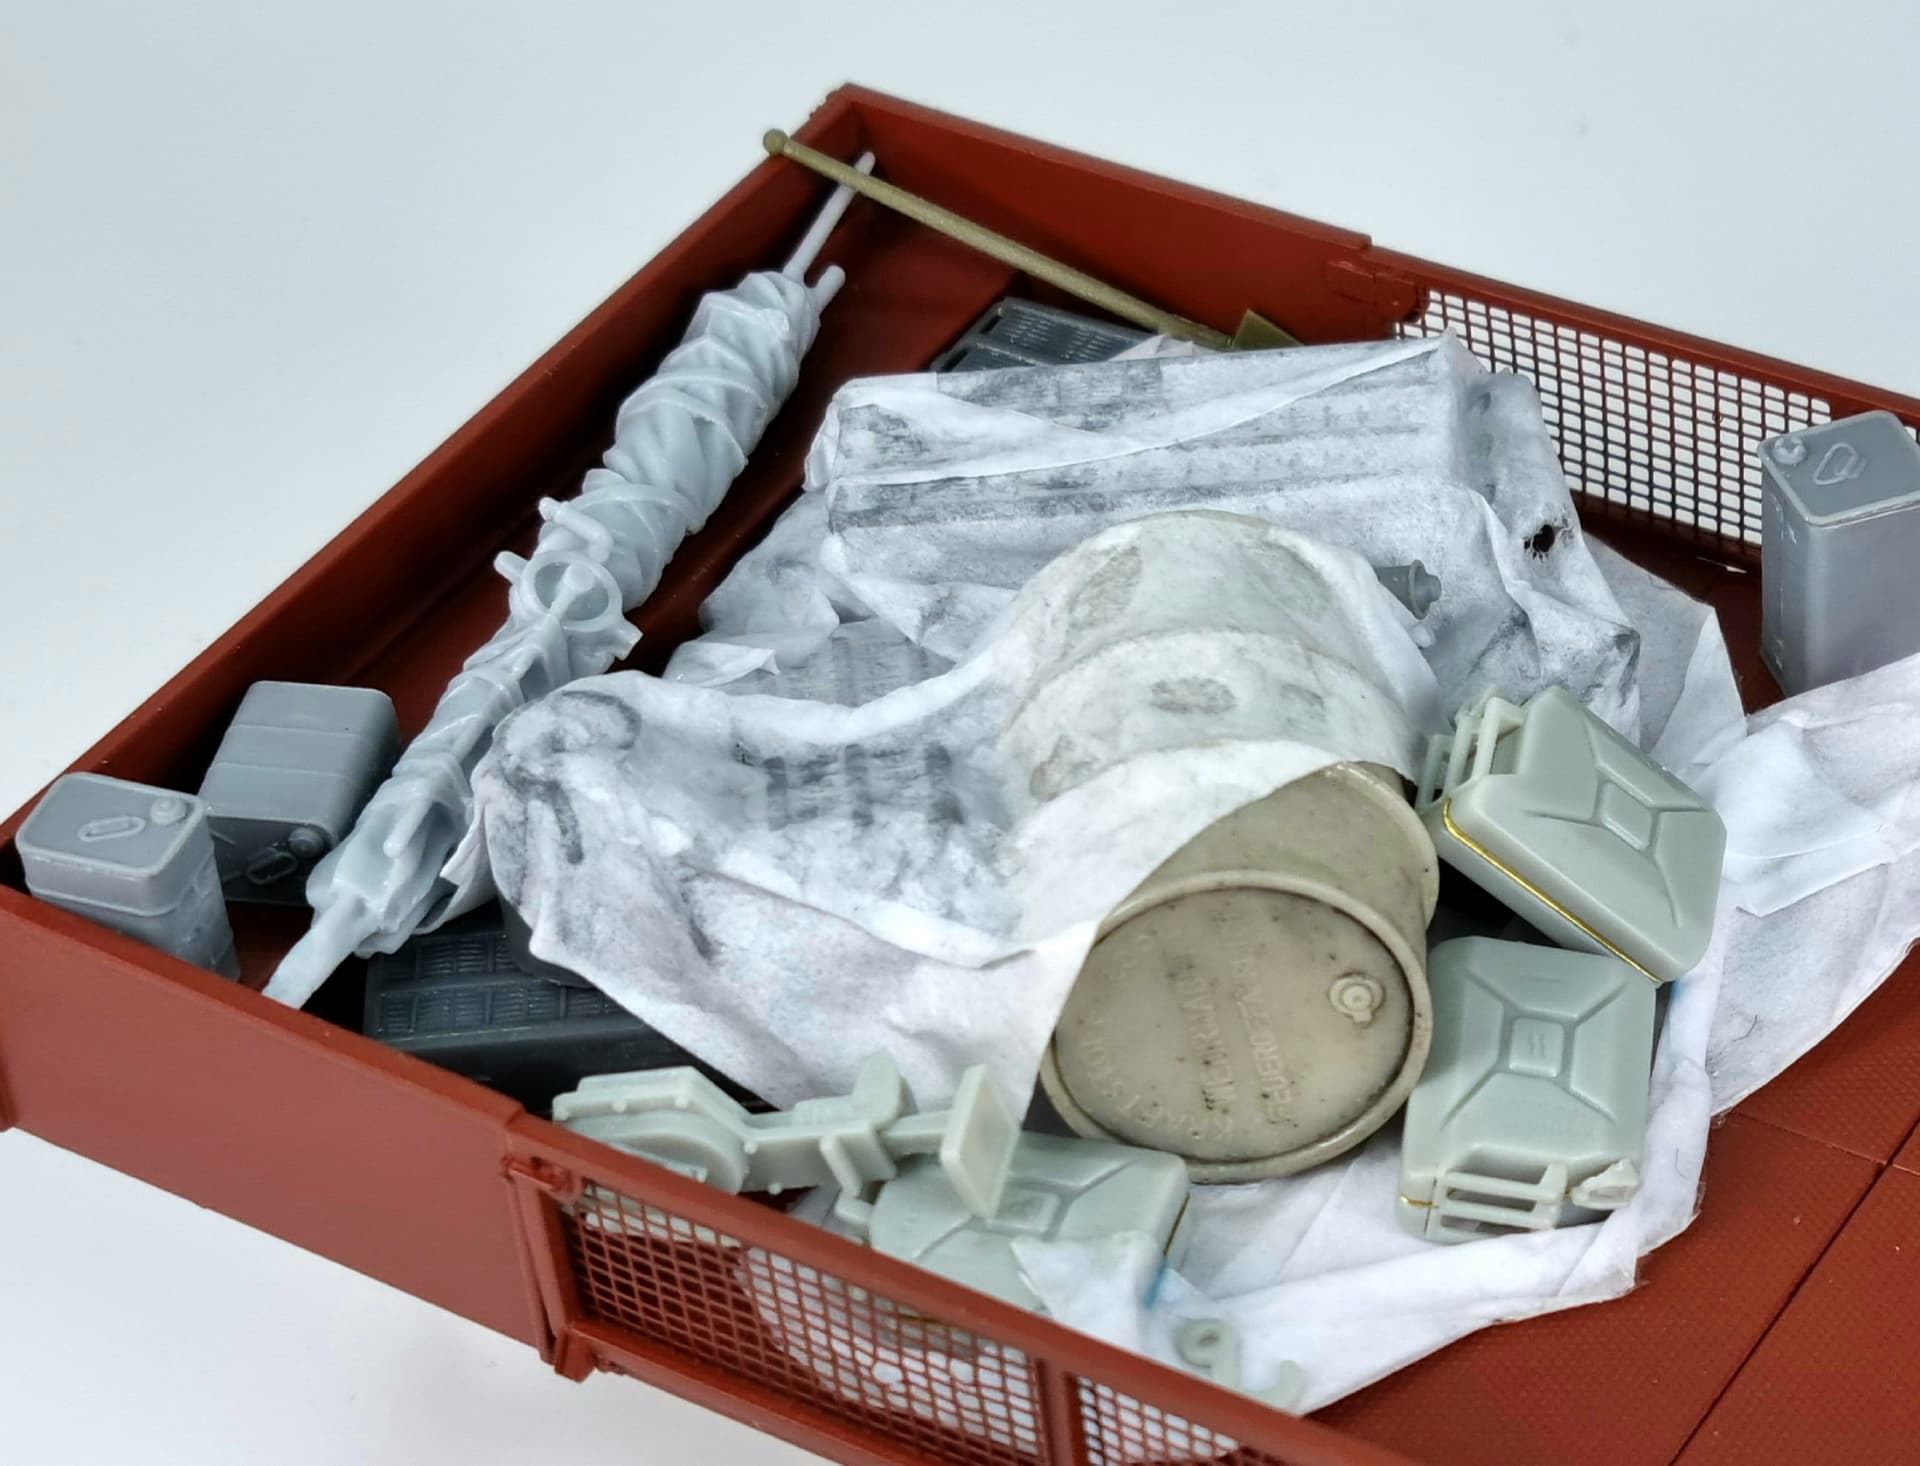
Jerry cans and oil drums were added to the Bronco kits, and they are a nice addition. You get individual water and fuel marked Jerry cans with PE reinforcing strips. You also get moulded together rows of Jerry cans which saves building individual ones and then hiding half of the detail. A selection of oil drums types are included along with their syphoning tools.

PAINT SCHEMES AND MARKINGS

The kit offers up just two paint schemes for the ammo supply vehicle and neither state any divisional info. One is in plain Dunkelgelb and one in a tri-tonal camo. As for decals just a weight stencil and number plates are provided.

17 Likes

Looking great! This kit is on my want list!

2 Likes

I have this kit and am following.

2 Likes

Looking good, just one thing though… Bronco has the FuSprech f radio mounted upside down:

There is a very interesting picture of the cargo version towing the Pak 41/43:

There was some debate over what was added to the top of the cabin for this one.

5 Likes

FYI, the kit is the old Great Wall kit. It has spoked steel rim wheels and solid rubber rim road wheel choices, but if you choose the spoked ones there is a fit issue. The spoked ones are correct size, but because the rear solid one is also used, and it is bigger, the spoked wheels are airborne:

Technically the solid rim wheels are wrong, as the rubber on the rim edge should be compressed due to weight, but as all solids are the same, it is just a detail issue, rather than fit issue.

For more info check out Terry Ashley’s old review on PMMS:
https://www.perthmilitarymodelling.com/reviews/vehicles/greatwall/gw_l3512d02.html

7 Likes

Cool picture. And now I have another two kits I need to buy

2 Likes

I have the Pak and the unarmoured SWS kits. I’m thinking of doing them both for the ‘Got Hitched’ campaign.

2 Likes

That would be a really nice project!!

I am considering joining that one too. With either an M2A1 and 5 inch AT gun or with a Maultier and a captured Soviet field gun

2 Likes

Either of those options would be nice to see done.

2 Likes

Thanks for the heads up on the radio direction. Didn’t spot that and luckily, it’s not that visible because TBH I’m not entirely sure that the vehicle was fitted with a radio. I’ve never noticed an external aerial pot so probably safe to assume that they were not equipped with them.

3 Likes

I didnt buy that kit for that particular error that Terry highlighted

3 Likes

Primed with Tamiya rattle can red oxide. The cab roof tarp is made with VMS paper & shaper

Although I do not intend to beat up the paint finish on the exterior, there will have been prominent areas on the platform and side panels which will likely have seen some significant wear. For this task, I will employ the ever-dependable hairspray method.
For this project I will be using MRP paints. These are lacquer based and require clean up with a lacquer thinner. These are excellent paints that can be airbrushed direct from the bottle without the need for thinner. I found for base coats my 0.4mm needle worked fine running between 10-12psi. You do need a few coats to build up the opacity but what you are rewarded with is a lovely smooth and tough finish.

For the base coat I used MRP-216 dark Yellow-RAL 7028 (variant 2 Ausgabe 1944) It was airbrushed in two fine coats. The paint does exhibit a satin sheen which will help with any pin washing and won’t require any additional varnish coats.

Chipping can begin as soon as the overcoat layer of paint is touch dry. I have found lukewarm water works better than cold in agitating the hairspray and the surface needs a little time to absorb any moisture. A drop of detergent can help to avoid any water pooling. Whereas even a soft brush or a cocktail stick is enough to scratch the surface on a Tamiya/water mixed overcoat, creating the same effects over this lacquer coat takes a little longer. Some modellers have even employed fibreglass pencils to start things off! However, if the ratios of hairspray and paint is in the sweet spot, extremely fine chips and scratches can be made without too much effort. Good results don’t happen overnight, so testing the method on a shelf queen or spare piece of plastic card always pays dividends. Another plus for MRP is that it sprays so fine that many multiple layers of both paint and hairspray can be added before any chipping takes place. Great over a tritonal scheme etc.

Base coat chipping

The chips on the exterior were kept light and mainly just to the very edges and areas where wear would likely occur immediately in operational use. The cargo bed however was roughed up far more, with the treadplate panels receiving serious wear and tear. Half of the surface will be covered in stowage so it makes for a good area to practice on the technique.

Before the upper & lower cab assemblies can be fixed together the instrument binnacle,radio ,wiring and seats were brush painted with Vallejo acrylics and the instrument decals added. My kit included two sets which was fortunate as decal number one did not represent the dial in anyway shape or form. Decal number two was used twice to represent the largest dials, and some extra placards were also added from my decal spares box.

Very few photographs exist of the interior on the armoured versions, so areas of the cab mouldings are still up for discussion. This kit does provide a split bulkhead behind the driver on the sprue trees but for some strange reason does not call it out for either of the versions in this kit. There are two issues with the version I am building in this area. Firstly, Great Wall Hobby researchers mistook the rifle racks (red arrows below) that sit on the interior walls for seats! The kit provides two folding seats for each side when in fact the split bulkhead had two slots (see dark areas behind the racks) and a rifle rack fitted which allowed the rifles to fit through the bulkhead, along the walls. Secondly the rear of the cab roof was cut short on production vehicles and a tarpaulin used to weatherproof the rear of the cab. This appears to be fitted behind the splash guard which is not present on the prototype roof.

I utilised the bulkead, cut the slots out and added a rifle rack to one side. Unfortunately I had already constructed the cab interior before my N & B book arrived so I just simulated weld marks where the passenger side rack had been removed. It saved ripping out all the electrical boxes already assembled on the passenger side wall.


This is the only interior image I could find online

The cab has been closed up. There are only four tiny locating holes to connect top and bottom cab assemblies and with the lower half having a slight downward bow a few clamps were required to hold it while the glue cured. There is a little clean up required but TBH it could just as well be hidden with dust and debris.

I have taken a few pics looking inside and while these images are always tricky to shoot with so little light in the interior, I think there is just enough to see. While the two halves were separate, I used a MIG neutral wash to highlight raised detail with a drop of MIG Dark wash added to darken corners and use to lightly speckly the floor and sidewalls.

The road wheel tyres were airbrushed with Tamiya Tyre Black and all the running gear wheels hand painted with Vallejo Dark Rubber. I also started gathering some stowage accessories together. The main stowage assembly was created on a thin plastic card base and VMS paper & shaper was used to create a tarp to cover some items.


Exterior decals for this kit include just Wehrmacht licence plates which you can add your own individual numbers, a weight stencil, and divisional insignia. I added just the weight and number plates.

Cab roof tarp base painted and a first step of dust applied to the cab metalwork


6 Likes

That’s nice.

3 Likes

Main sub assemblies dry fitted ready to start the weathering steps

To start the weathering process off a light coat of sand coloured Lifecolor acrylic was airbrushed over a hairspray layer in a random cloudy pattern over raised detail. This was then scrubbed back leaving small remnants of the sand colour to simulate the first layers of dust and dirt. Now an acrylic coat had been added I felt it needed a coat of VMS satin varnish. This would aid a pin wash application as that smooth MRP coat had now been interfered with. It would also seal all the paint work in preparation for future weathering

As I would like to represent the vehicle in a late 1944 ETO setting the wet and damp conditions made a darker coloured pin wash more appropriate to accentuate the monochrome basecoat and lift the contrast. More vibrant colours will be added by way of the stowage accessories in the load area.

Cab assembly pin washed

8 Likes

The upper areas of the loadbed were treated to the same method of pin wash and initial application of dust as the cab. Next up is to get the muddy running gear ref pics out and weather up the chassis and wheels.

I’ll be honest, I’ve never attempted a muddy finish on an AFV so this is going to be interesting. Watching a few videos and taking inspiration from the guys that like to build vehicles set in the eastern European theatre it was clear that to pull this off well I would have to step carefully. I plan to make the lower chassis and running gear very muddy but not to cover it up entirely if that makes sense.

My first decision was with the choice of materials to use. AK acrylic textured weathering paste is a product I’ve already used and their dark mud in particular is a nice authentic tone out of the tin. This would fit perfectly into my late Autumn 44 setting in Belgium. Being water based it is easy to apply and simple to clean up if I take things a little too far! The tone can be adjusted with paint later if required too.

The first steps are to add some texture so mixing tea leaves into the paste will also give it additional volume. Looking at real muddy AFV images the wheels at the rear seam to pick up more of the track dirt. This is often kicked up and propelled over the upper track run. With this in mind I would leave some wheels cleaner than others. I also observed areas above the running gear that protrude over the tracks would likely prevent a lot of debris from reaching the upper mesh side and rear panels. This also meant the underside of the load bed above the tracks would receive far more.

To get my eye in I started with the underside of the load bed. I could experiment with both quantities and the positioning, and how the product would blend around detail without worrying too much, as only a fraction of these areas will be visible


What soon becomes evident is that the inital application always looks crap, and that it will almost certainly require a few layers before it starts to looking convincing.

I went back over selected areas thinning it with tap water. I also added streaks onto the chassis legs but much of them will be hidden by further effects. Much like with weathering tracks I then used the speckling technique, In addition to the AK paste I also used AK enamels with small amounts of MIG dark mud pigments thrown in to add yet more texture. This all looks very messy when wet, so I let it dry up and started work on the tracks and wheels.


The tracks were first primed with Tamiya Fine Surface primer and then base coated in MRP-034 tank grey. I then randomly washed on and then speckled my pre-mixed acrylic rain wash. Once dry a mix of AK acrylic dark mud texture paste and sea grass was added, smoothing over the cleats trapping the mud in between, so I didn’t get too much build up. I left the inner portions completely clear as any texture build up could interfere with the fit of the road wheels.

The main running wheels received far less overall mud texture than the chassis and was just adding to selected areas. Learning from my application on the underside of the load bed the effects were added in two stages. First a build-up of dark mud and light mud textured paste then after it was allowed to dry some AK enamel mud was thinned with white spirit and blended into the muddy areas.

The next steps involved adding splatters of mud to the wheels. A mixture of AK dark mud speckling and MIG dark mud pigments were mixed together and applied with a cocktail stick and brush. Keeping the speckling random and just to selected areas was my aim but I found it tricky without masking and often had to tone it down with a brush moistened with white spirit. This is the first round of both speckling and mapping with two slight variations on the dark mud tone and one with a lighter one. The next round will need to be more precise. I will also need to mix some oils to highlight raised detail and add some grease and oil stains to the hubs.

The steering wheels received a slightly reserved application

6 Likes

Beginning where we left off, I first tidied up any rough areas on the chassis legs so the running gear could be fitted. Before any more weathering could begin the wheels and tracks had to be fitted. I had used the kit individual links, and they were a little tricky to build around the wheels and be kept separate for painting. In hindsight I should have purchased a set of Friuls and I also think it would have been easier to have first fixed all the swing arms to the chassis minus just the outer wheels!

Before the tracks were fitted, I added graphite to the inner portions of the tracks where the tyres and wheels made contact and also to the sprocket teeth. As my swing arms and wheels were still not fixed, I had to both line these up straight on the chassis and ensure the tracks lined up as they had pre-paint. This is never guaranteed, and they both put up quite a fight. I ended up using CA glue on the tracks and the fit to one of the sprockets and over one of the idlers wasn’t ideal and I will likely look at improving these. On the plus side having so much mud around the running gear means it was much easier to blend over all the new attachment points. The vehicle is to be placed on some undulated terrain and as the steering wheels were articulated on the central leaf spring, it is sat at a slightly jaunty angle. I haven’t glued the lower track run to the wheels so any visible gaps showing now will disappear once it sits on its base.

The steering wheels received some enamel washes and pigments should round these off in a future step.


With the running gear attached I could now begin adding further weathering effects. Each wheel was dealt with separately, tidying up any overscale effects and adding both rust, oil and grease effects with enamels. The AK texture mud was also used again but in minute quantities just to blend in areas that required a little improvement. As I was conscious of how fragile the track runs were I just used pigments and kept the washes to acrylics only.

10 Likes

Looking good so far!
Very nice weathering on the cargo bed.

Regards
Carlos

3 Likes

My previous pics highlighted the fact that I had neglected to paint the exhaust muffler before slinging the mud around. This needed rectifying. This was completed with the brilliant Lifecolor acrylic rust set and a drop of off white for the base coat. I started with a pinky base coat tone. Next came various mixes of the three darkest rust tones, generally going from the darkest to lightest tone but also going back and forth building up the layers until I felt I was getting somewhere. An extremely diluted lightest rust tone completed the painting step. MIG smoke pigment was added in and around the end of the pipe.

Looking at the close ups I think I’ve been quite fortuitous in the fact that completely forgetting to mask the muffler before adding the splattered mud effects has now added a little texture. The last effect was to add a few dried mud splatters back over it.

After inspecting close up pics there was some clean up of the seam line along the edge of the kit plastic tracks required so it was removed with a scalpel blade, re-painted and the mud re-blended in.

Oil drum stains were then added to the loadbed

Progress so far


9 Likes

Thank you Mech

1 Like

Thank you Carlos

2 Likes