Alright guys lets get into this…
This will be the build log for my 1/35 RFM M1a2 Sep v.3 with full interior. I will be using the RFM v.3 kit with their M1a2 interior kit.
I intend to start cutting styrene in a few weeks but here is what I have been working on in the meantime.
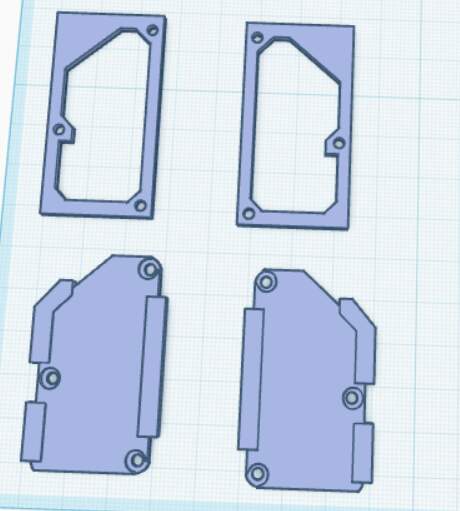
The kits interior is decent but lacking much detail as well as all the v.3 unique parts. Originally I intended on scratchbuilding them but then decided designing them myself in CAD would be much easier.
So thats what I did.
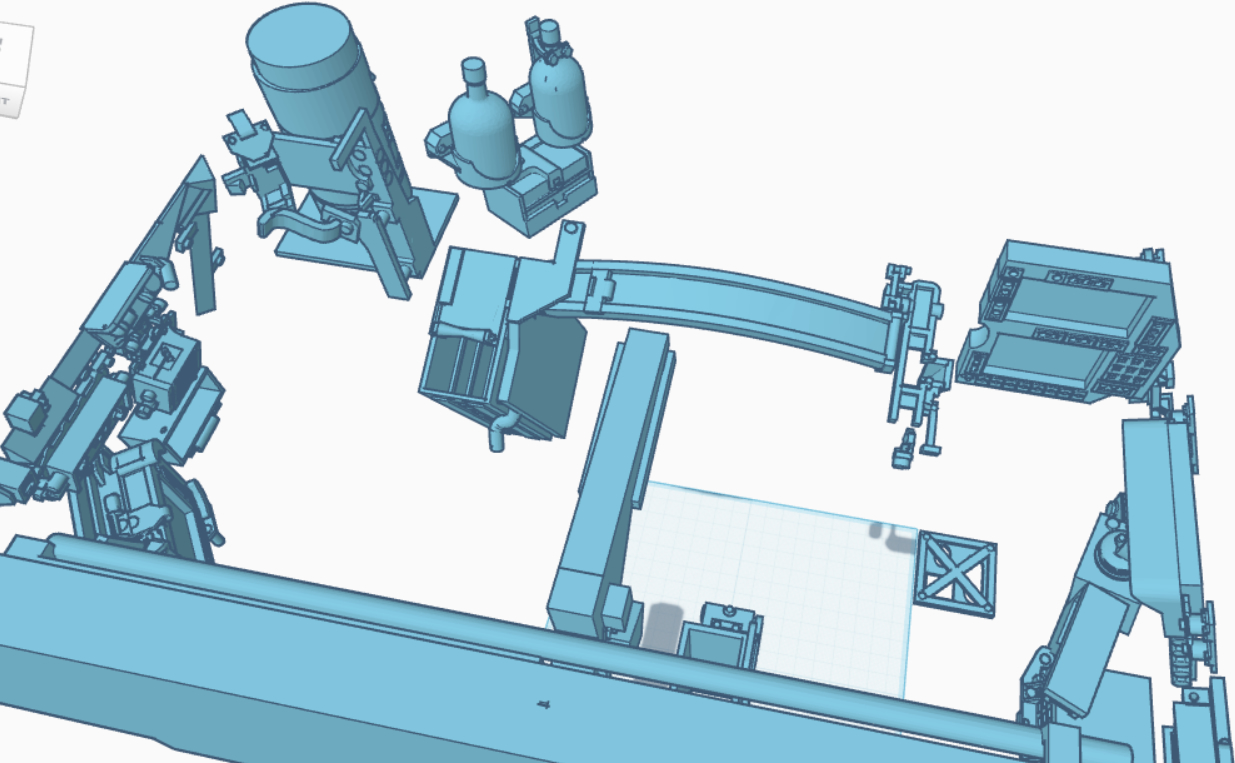
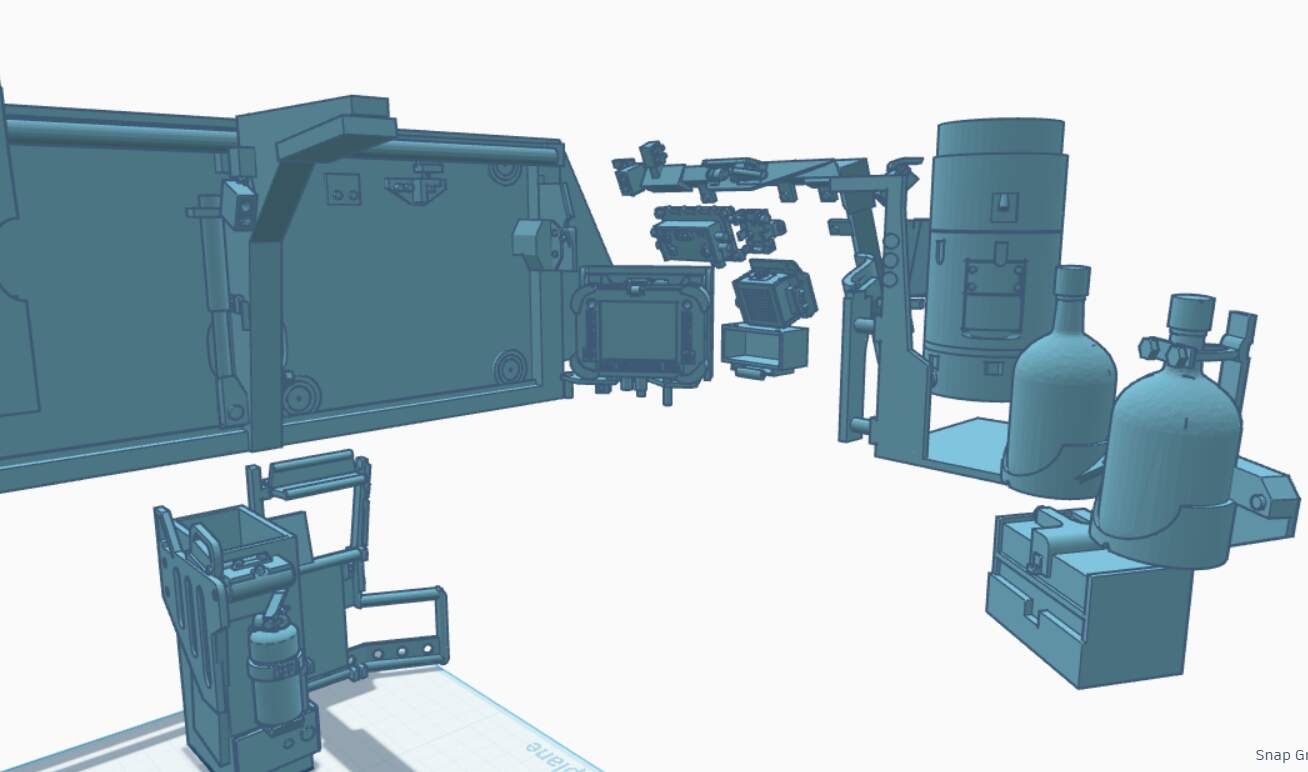
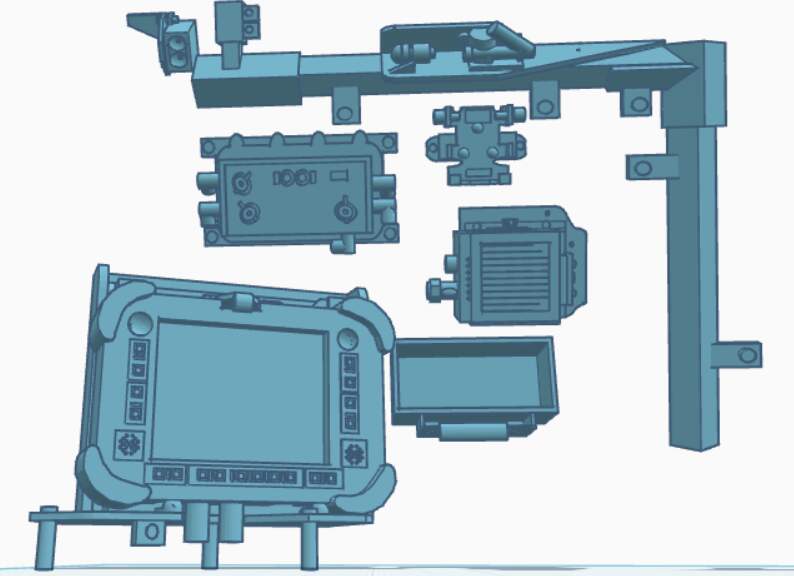
After 70~ hours I had new parts.
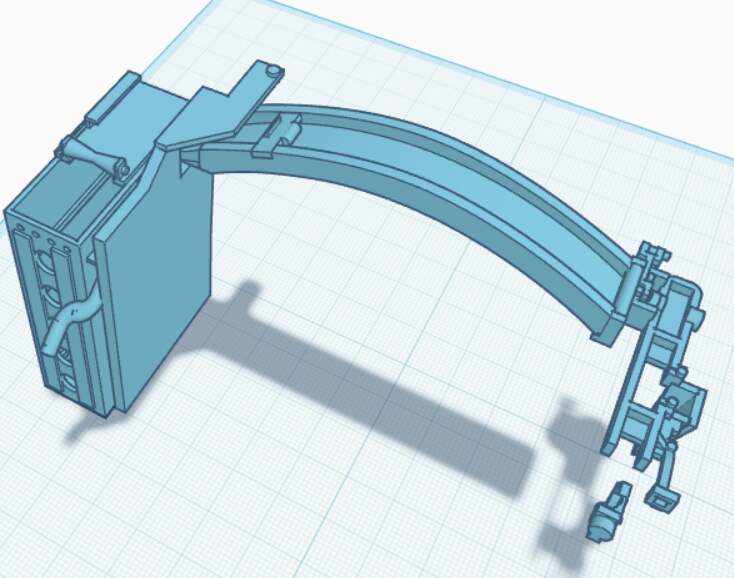
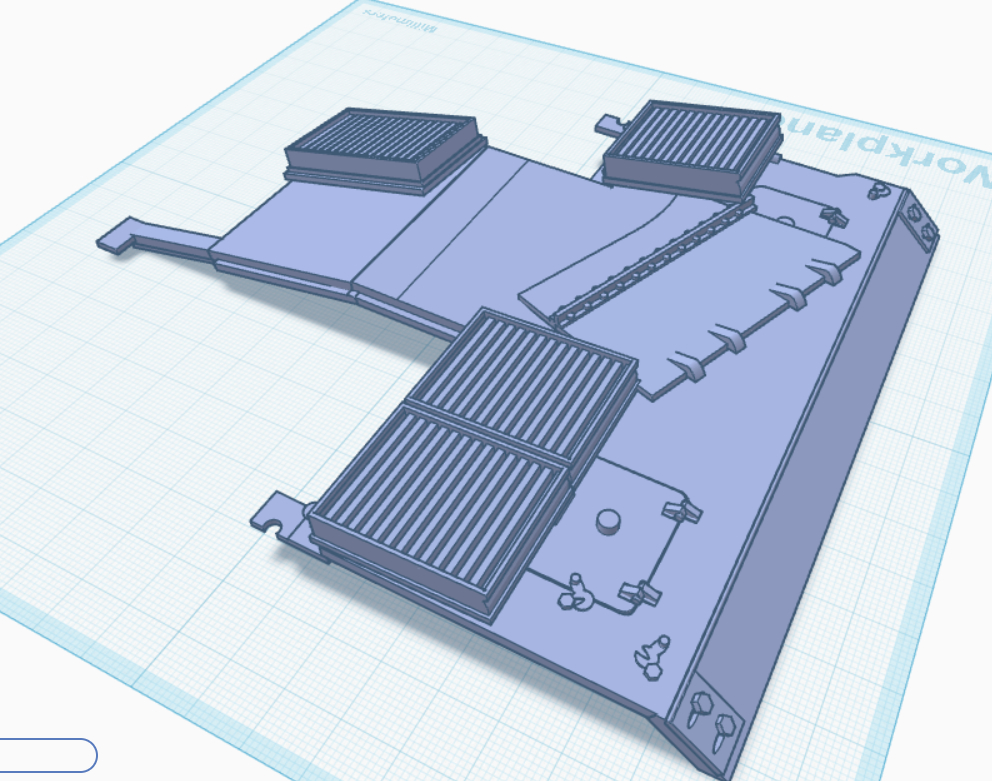
Then I moved onto the engine bay. Recreating missing details and a new deck plus access doors.
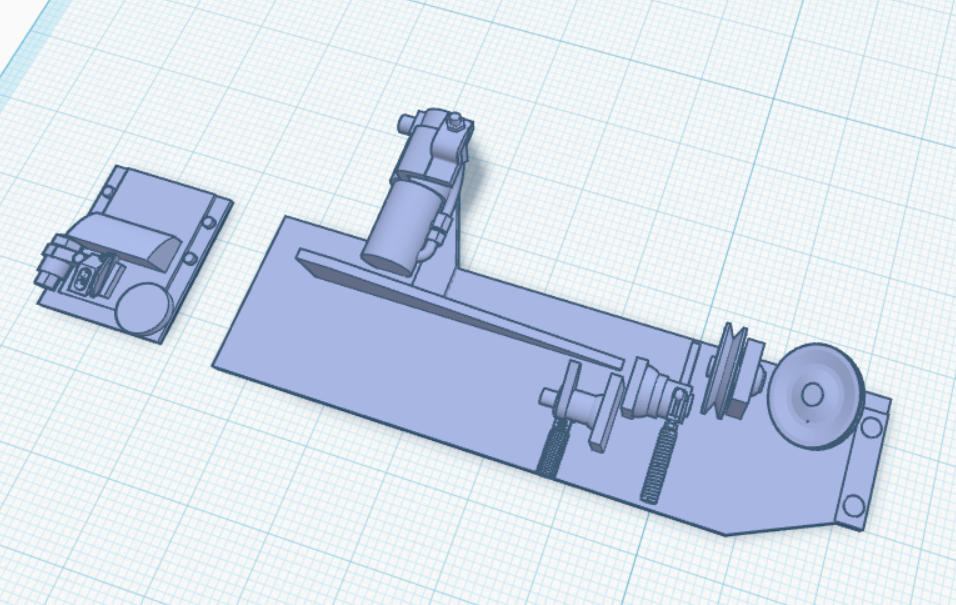
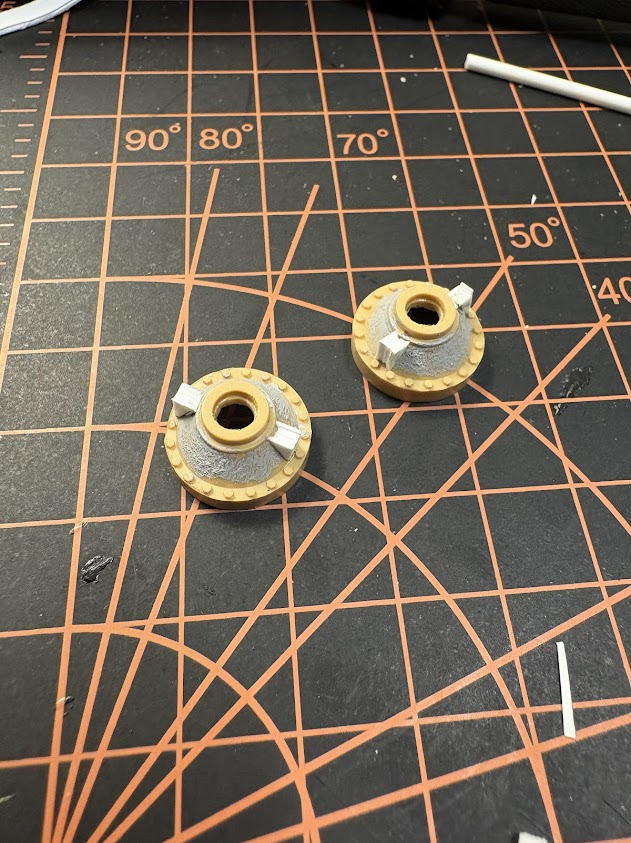
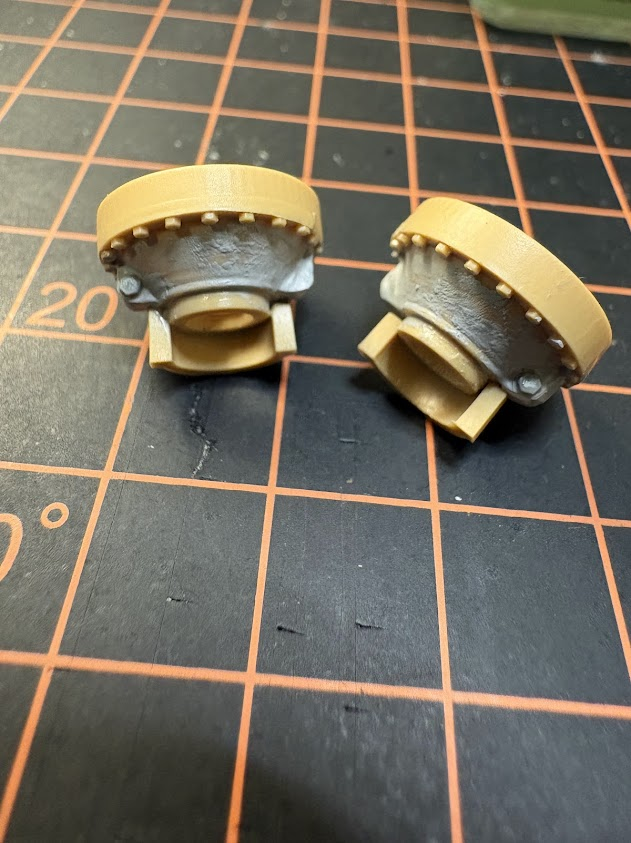
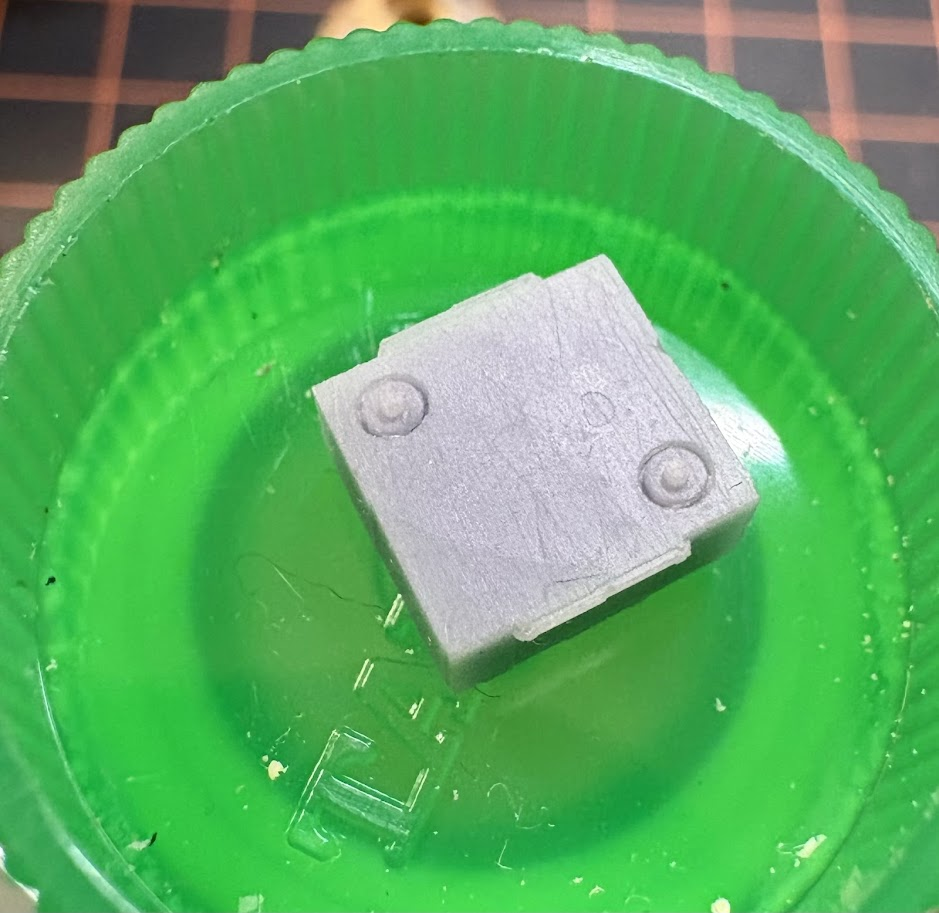
Downloaded a file from @Petition2God and fused it with my own design to remove the center cap and add a flipped final drive.
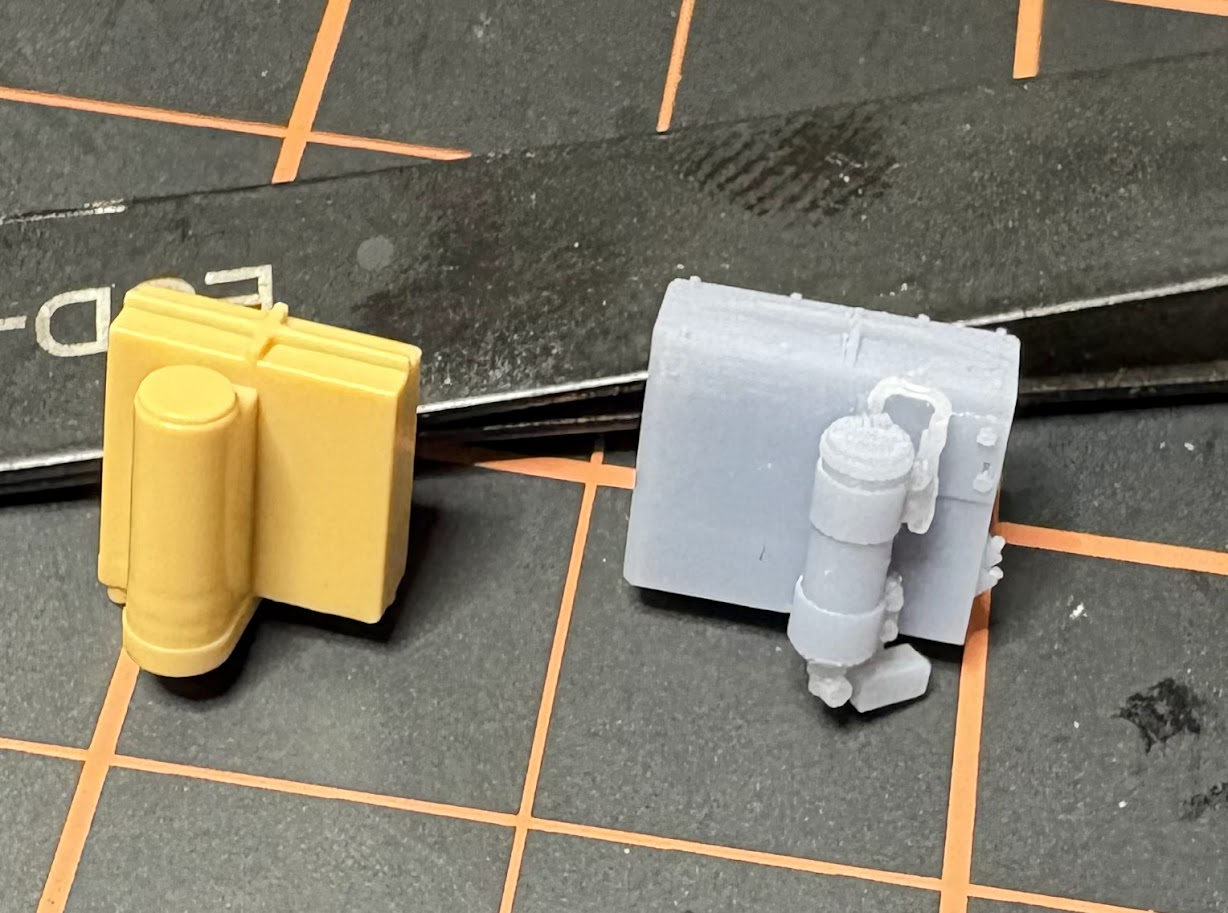
Saddlebolt covers and mount.
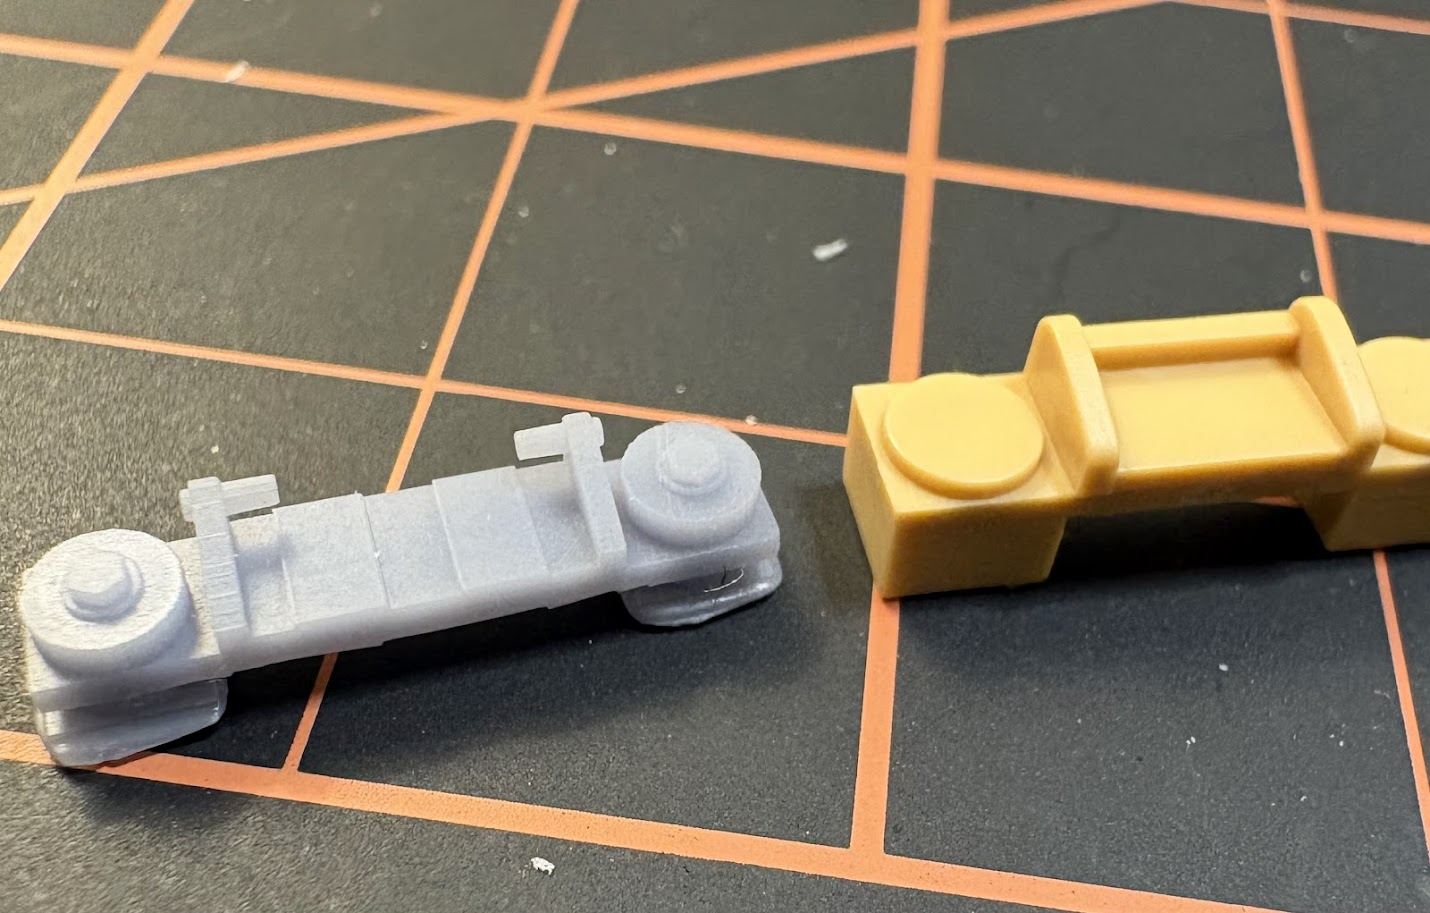
Parts for the parking brake.
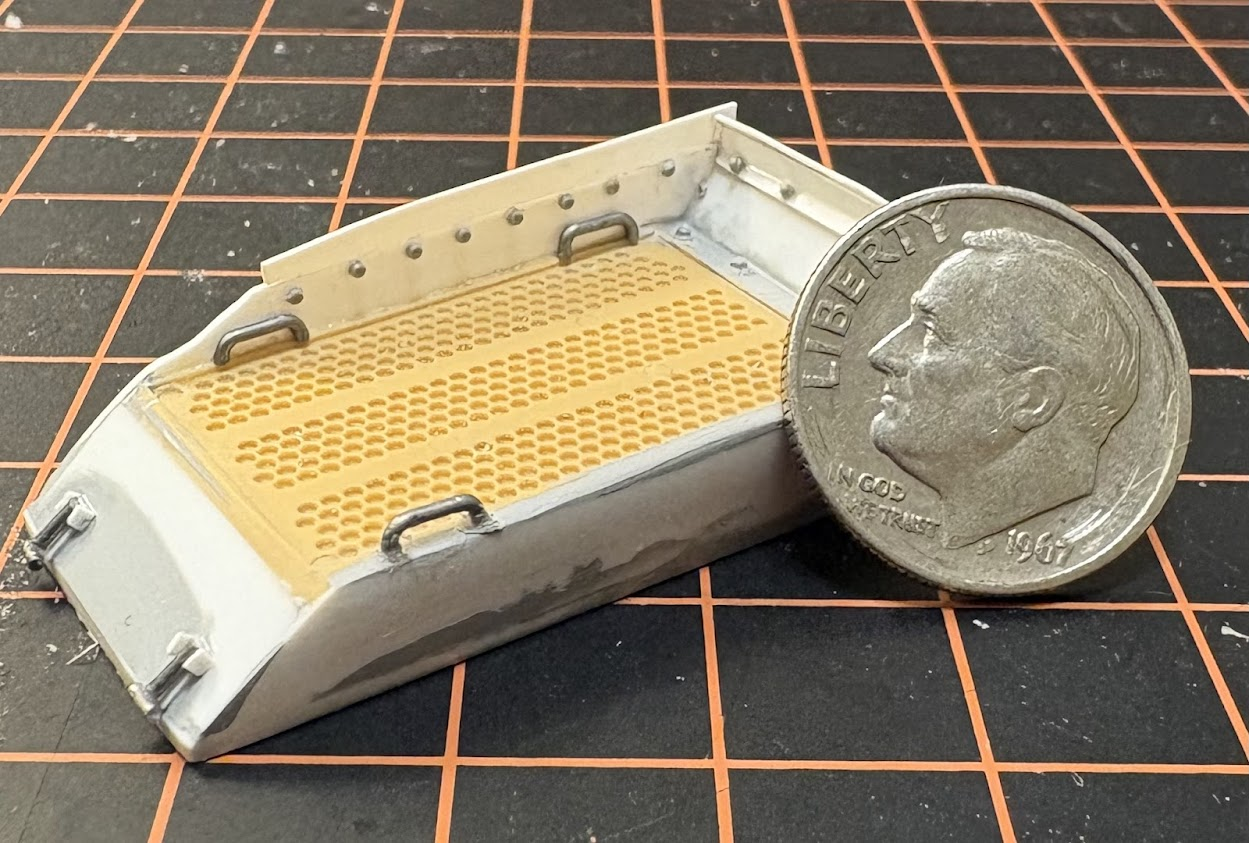
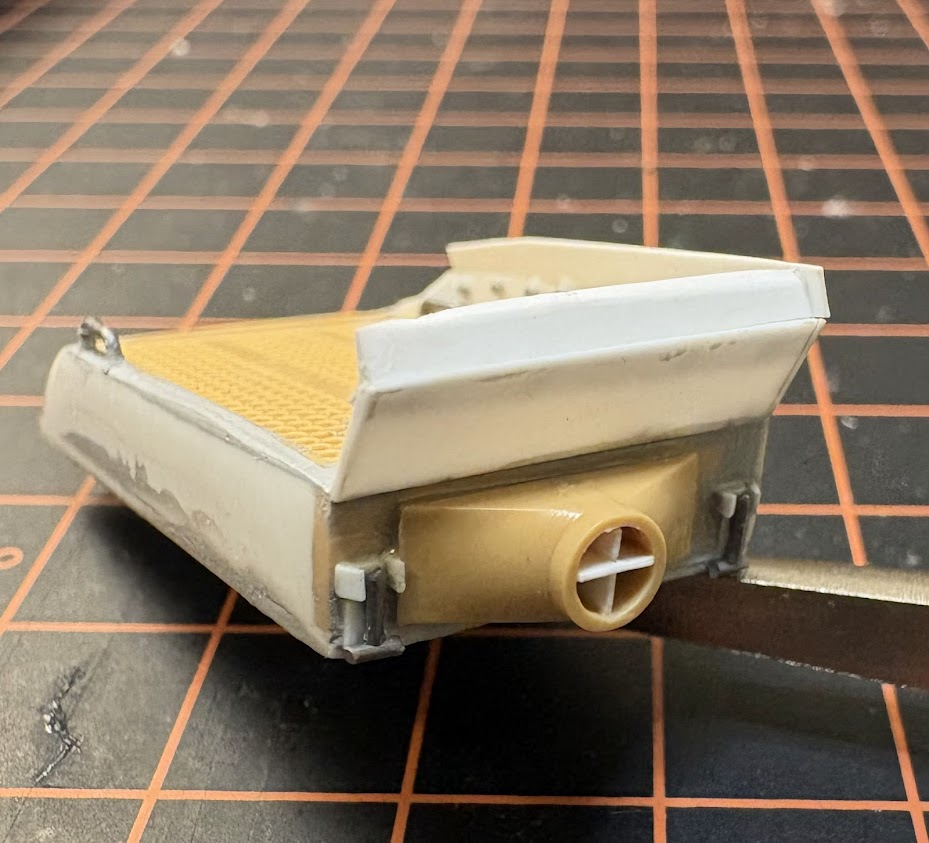
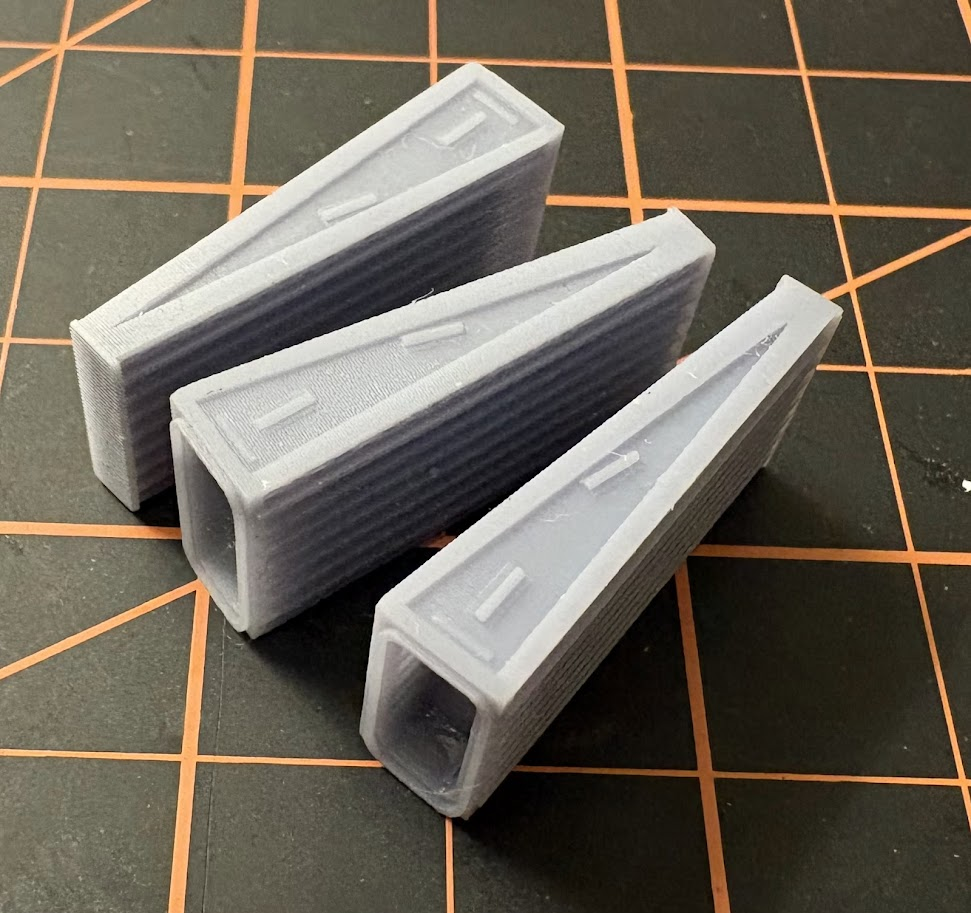
And for the exterior so far I have open and closed smoke grenade boxes.
Thats just scratching the surface of all the parts Ive designed.
If anyone is interested I will be posting the files for the prints on Cults.
Thats it for now! Next post will be cutting plastic and printing…
22 Likes
Very nice. I am interested. What is your name on Cults3D? How about a link to your files?
4 Likes
An incredible start Ezra! I will be following your blog closely. Have fun and good luck.
3 Likes
I’m looking forward to see that cad designs.
3 Likes
Definitely interested in those files.
3 Likes
A great start to well executed plan. Looking forward to seeing more as you move forward.
4 Likes
Thanks guys! I am so excited to get this party started.
There are now new players in this game… @HeavyArty I am in contact with TREX Studio’s and I am providing him with my files to be made into new detail sets for the Abrams.
This also means I will be using TREX tracks, lights, loaders hatch, and the common upgrade set on my model along with all my printed parts.
10 Likes
Congrats, that’s good news for you. Not so much for the rest of us who do our own 3D printing. Good luck with the venture.
2 Likes
Well, not everyone has the equipment do our own prints. So, it’s a good news indeed!!
4 Likes
I ascribe to the “Why buy when I can use someone else’s for free?” philosophy. I’ve got enough storage problems anyway, without introducing a whole new setup into the house.
3 Likes
Hi Ezra,
One word of caution: when working with a vendor or retailer (whether it’s TREX Studio, Elefant, FC MT, Legend Productions, etc.), be sure you get paid first before sending over your CAD files, which you’ve put a lot of resources into.
I heard that at least 2 designers (one directly and another indirectly) provided a vendor with their designs, then the vendor did not compensate them, while the 3D prints based on their designs were sold by the vendor. Even having a written contract may not be enforceable if the vendor is located in a foreign country, where there is no reliable legal system. I am not saying that TREX would do this to you, but I’d lean toward caution.
Here’s my experience - three retailers approached me for my CAD files a few years ago - honestly, I was flattered because I’m more of a novice. I found out from a designer in Canada that one company had the reputation of not paying the designers, and the communication was inconsistent. The arrangement never worked out luckily, then I stayed away. Two other companies low-balled me too much - it was like 10% of the sale price each time they make a sale? Plus, who knows they’ll be honest about how many prints they would have sold and keep a good record of it?
In the end, it turned out to be less headache and more profitable for me to sell the files via cults3D - a passive income source, and beneficial to the modeling community who already have their own 3D printers or have a friend who can 3D print because many of the physical 3D prints are just outrageously expensive.
My 2 cents.
Kind regards,
James
9 Likes
I appreciate the thoughts James I will def listen to it.
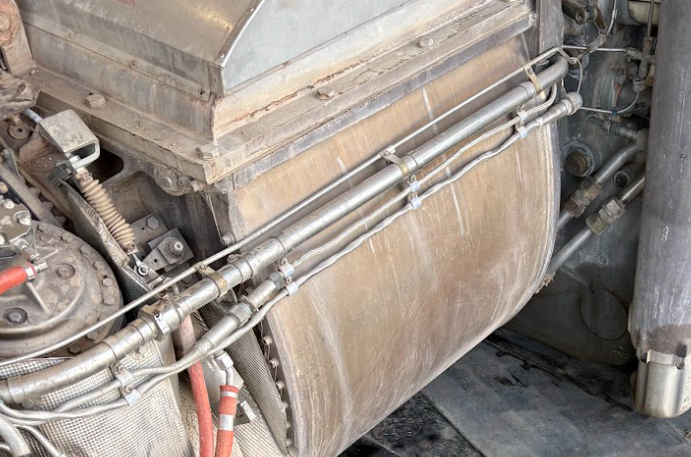
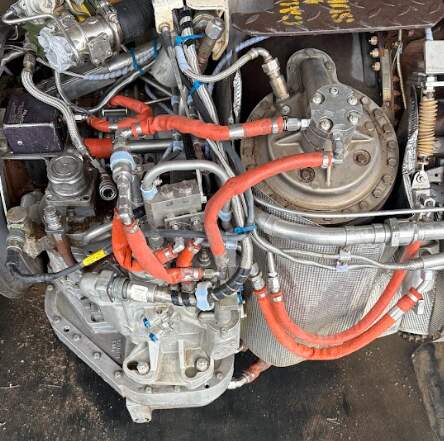
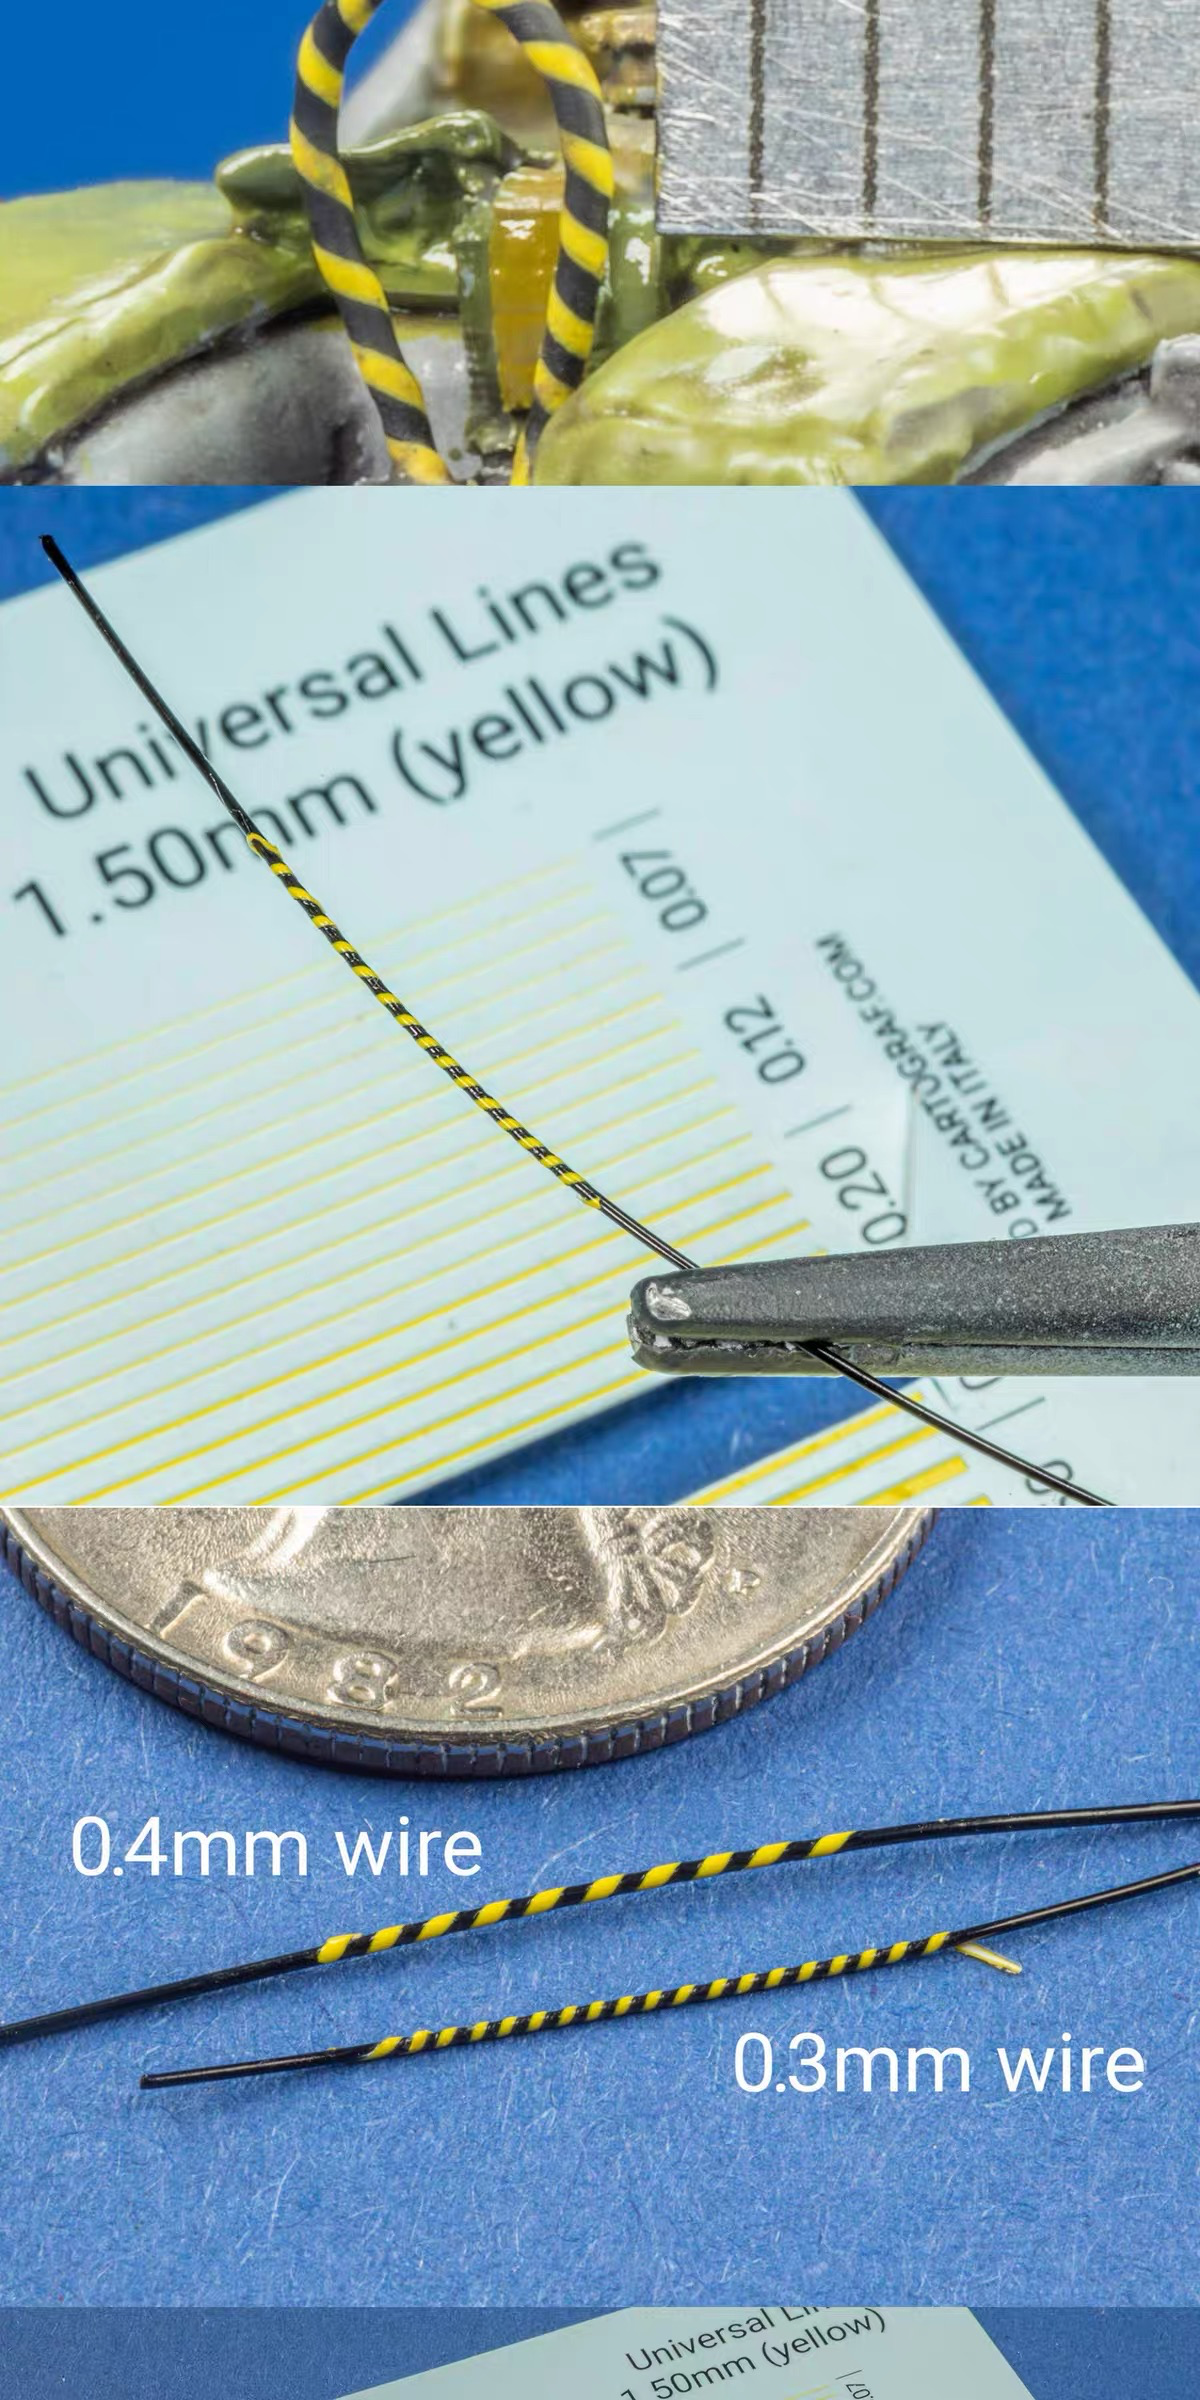
Ok this seems like a stupid question but how can I replicate the banding and fittings around these pipes and wires?
Also what would even be the best material to replicate these pipes be? Knowing myself I wouldn’t be happy just using lead wire.
I really need the help of some of the master scratchbuilders on here.
Also builds ready to kick off next week…
4 Likes
No master scratchbuilder here, but I did sleep at a Holiday Inn Express once…
Lead foil. The real stuff.
Solder. Not the real stuff - no lead needed.
7 Likes
I saw someone use cigarette paper and watered-down white glue to make the wraps on the wires. You can cut it to size.
4 Likes
Lets get this party started!
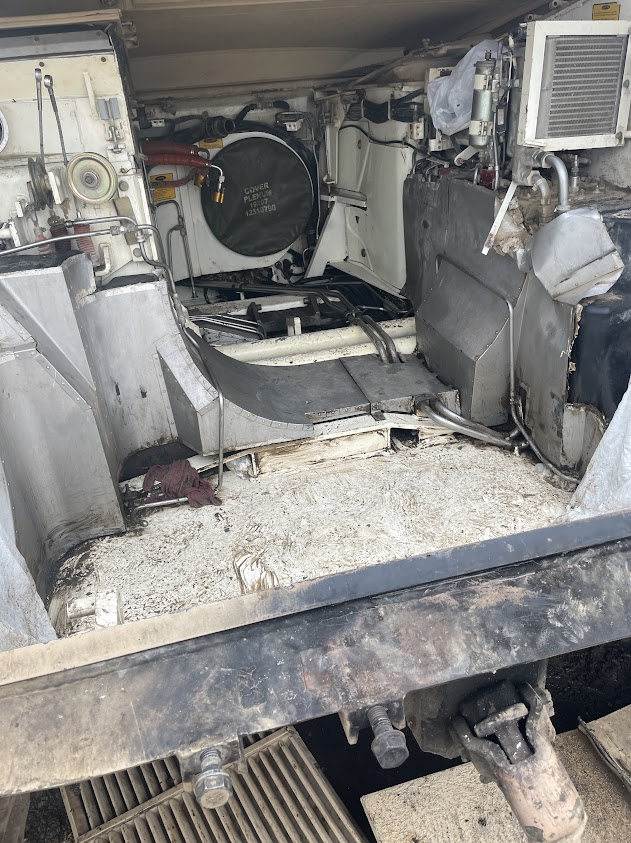
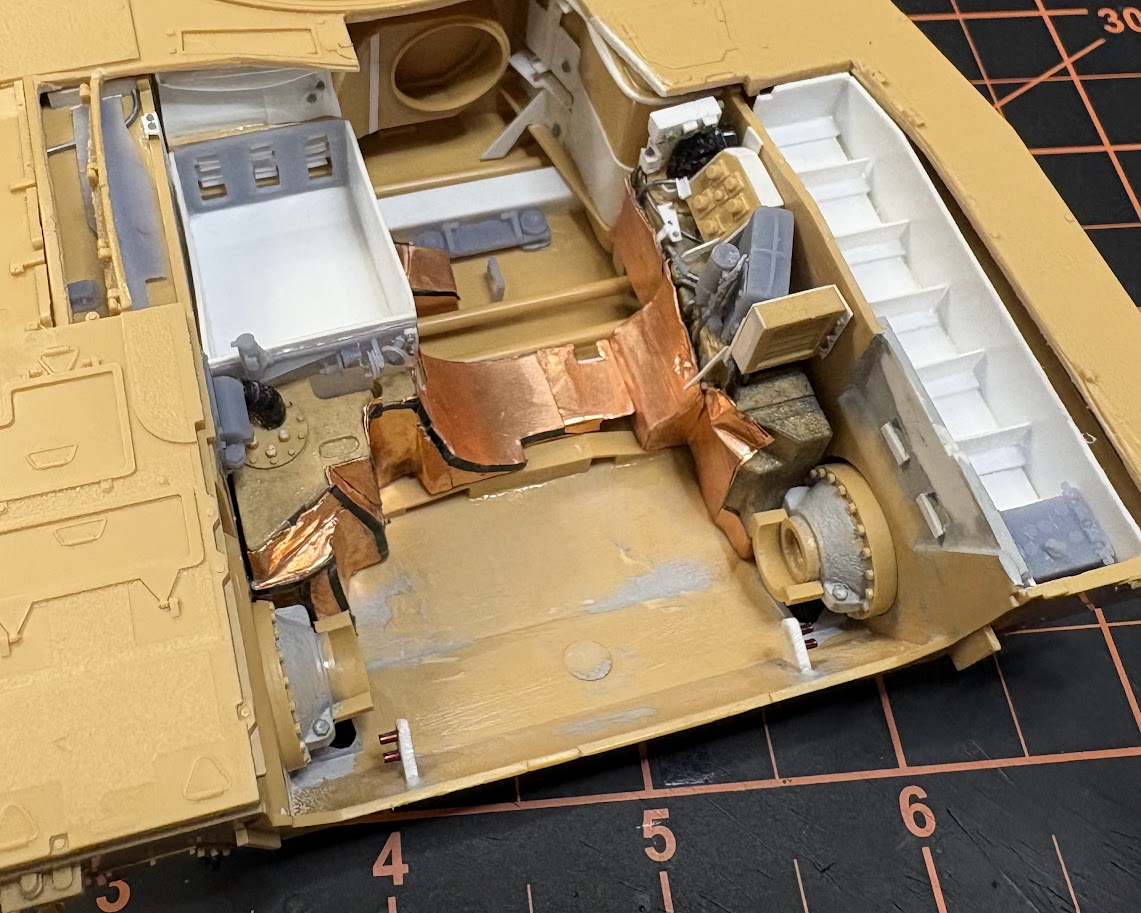
I want to start this build saying I think it is entirely unacceptable for RFM to release a nearly $40 interior set and have such a vital parts inaccurately molded or missing. You will see more of what I am talking about soon. Lots of the details that I am replicating can be found in a quick google search or publicly available downloadable PDF’s of the TM.
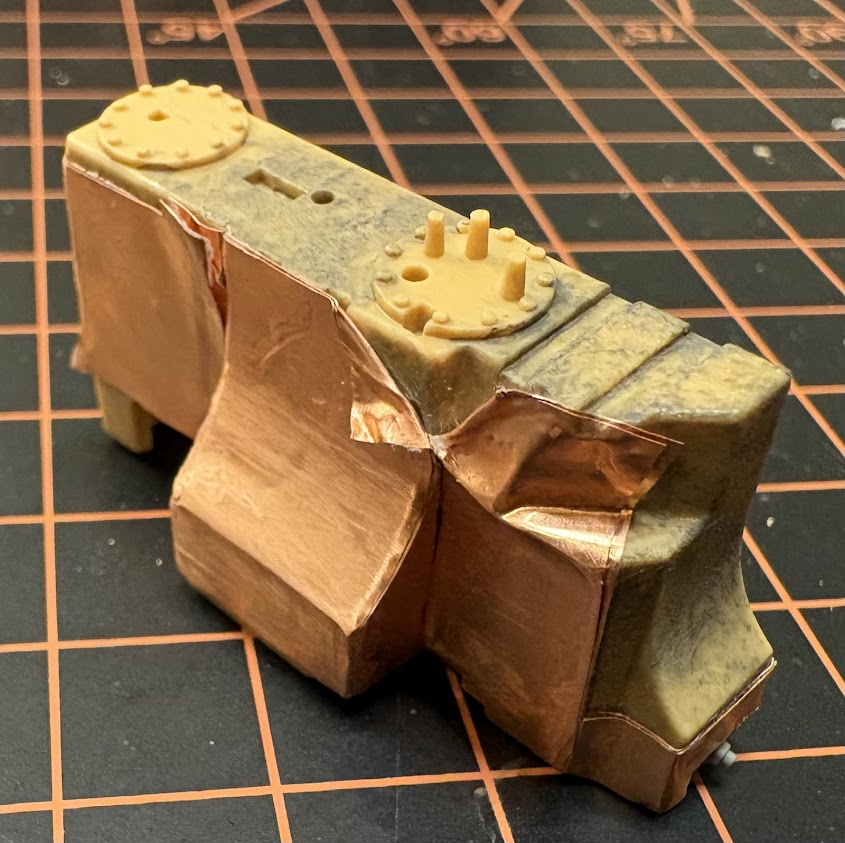
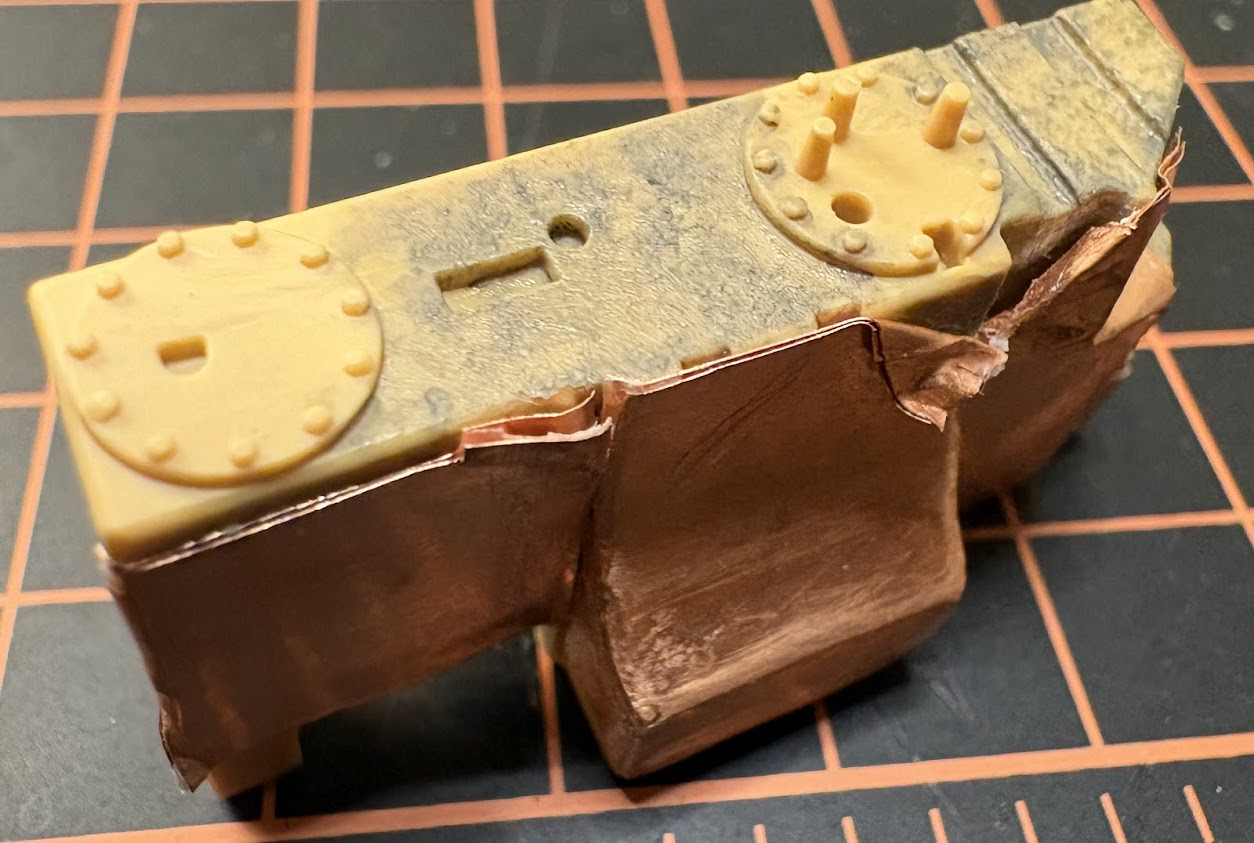
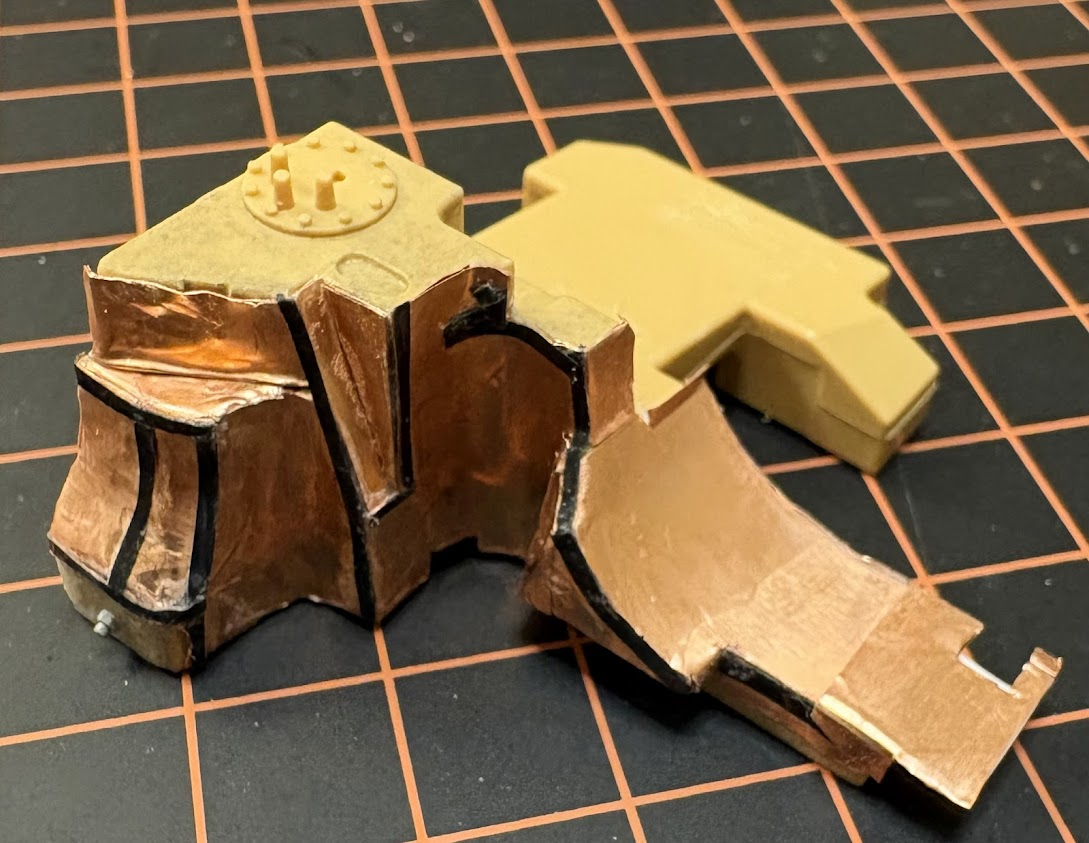
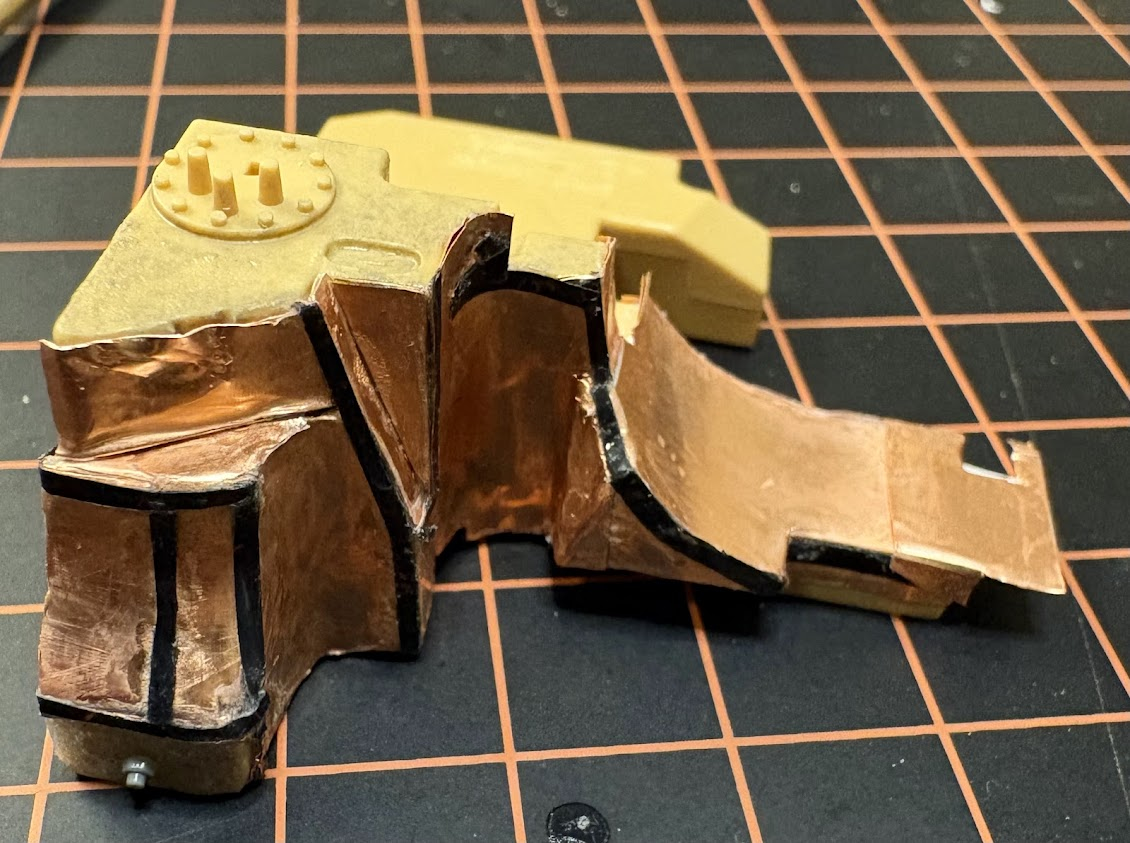
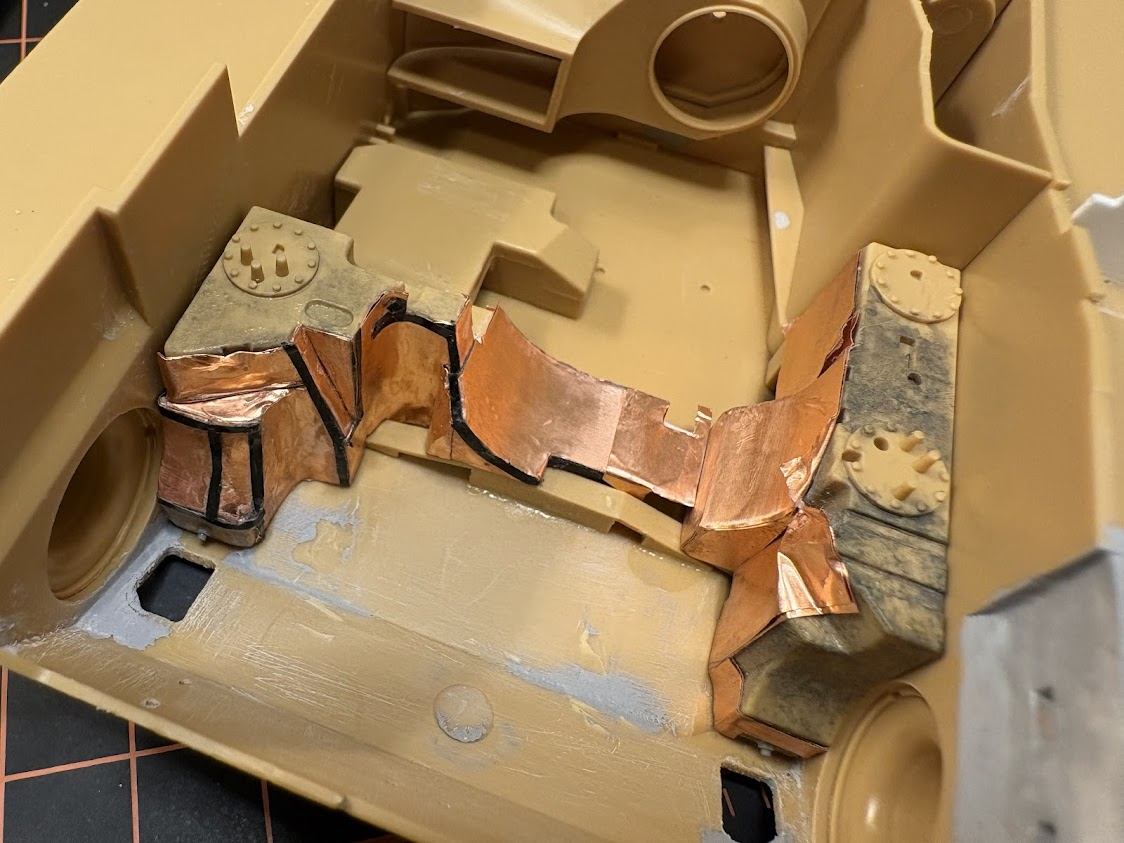
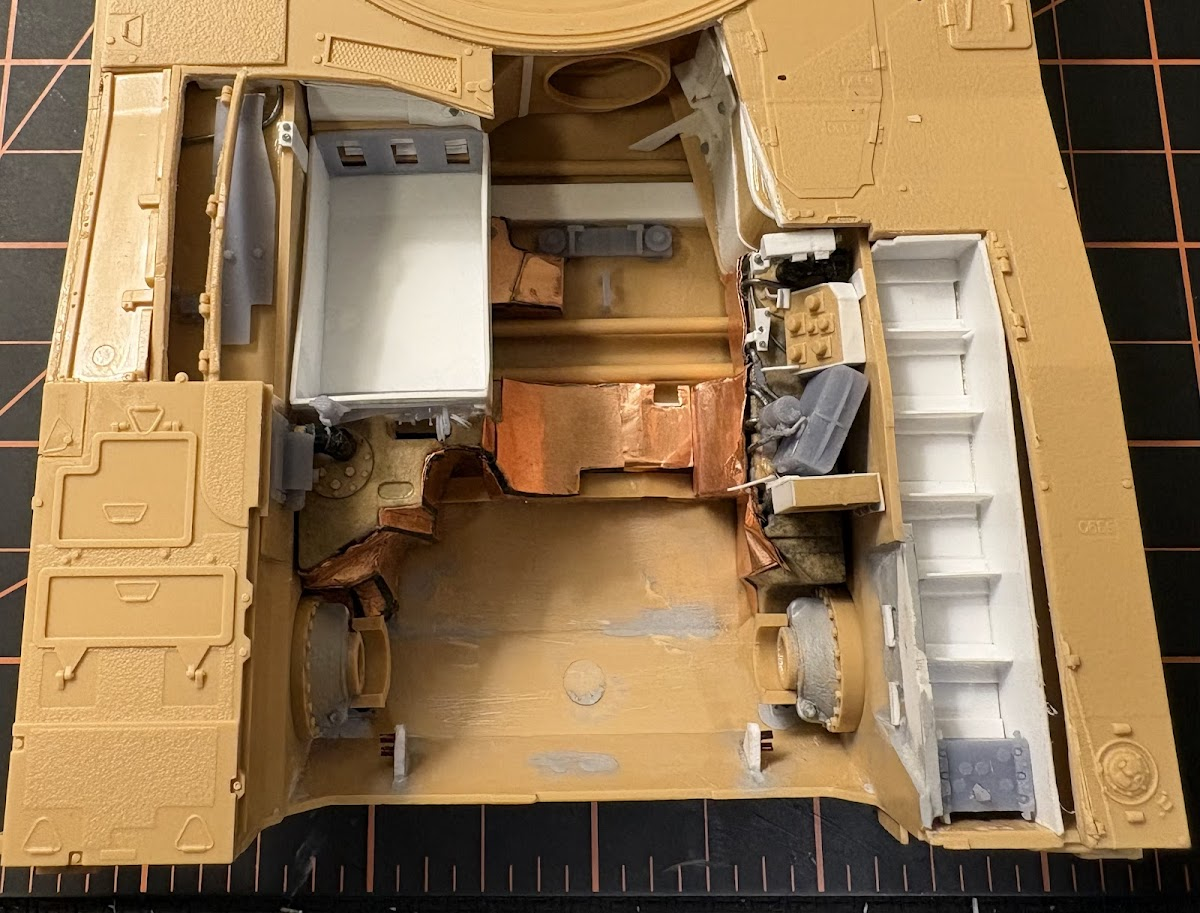
My first victim? The heat shields. Now this is understandable RFM omitted due to the complexity.
I replicated them with copper sheeting and a weird tape I bought off Amazon for airsoft. The sheeting was super flexible but was a very steep learning curve to figure out how best to achieve suitable results. Once I had them in place I added damage with a pair of teasers to match my reference photos. I also added a slight texture to the fuel tanks as they are made out a slightly textured plastic. I did this with extra thin and a dirty brush I had laying around. Finally I added the fuel drain on the bottom.
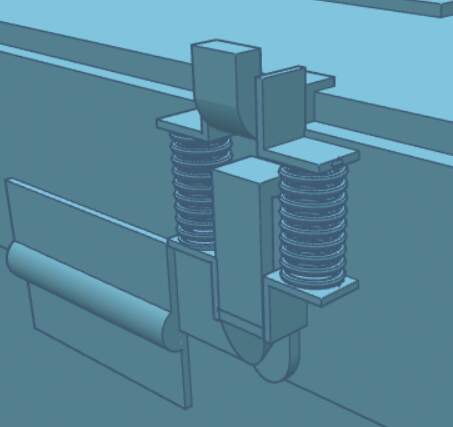
I also drilled out the openings for the saddle bolt covers that need to be removed before pulling pack. They will later have their own 3d printed details. As well as removing the kit plugs for mounting the engine. It’s hard to see but that big ejector pin mark is filled, I just used clear gap filling superglue.
Then I moved my attention onto the air cleaner. This is what is supplied in the kit…
From the start I knew I wanted to build the model with the top of the precleaner removed and the V packs removed so I would need to seperate the to from bottom.
So I did. This is when the great noticing happened…
The shape is the entirely inaccurate.
So I rebuilt it using plastic sheeting only keeping the center. Which will eventually be covered with a fine mesh.
2 kit parts + 47 scratch built pieces.
Next I took care of the final drive covers. In the kit they are missing these extensions that come out from the middle so I added them with plastic sheet and sanded to shape. I also added a slight texture to match reference photos.
Wedges glued on…
Finished…
Pretty snazzy.
Now finally I added all the missing firewall detail as well as interior details for the air cleaner. Really RFM… you couldn’t have added a few extra parts or a more detailed molding?
And finally a shot of everything dry fit.
The real thing.
Soon we about to see the introduction of 3D printed parts…
Stay tuned.
21 Likes
Incredible attention to detail, not to mention modeling skills
2 Likes
Thanks guys!
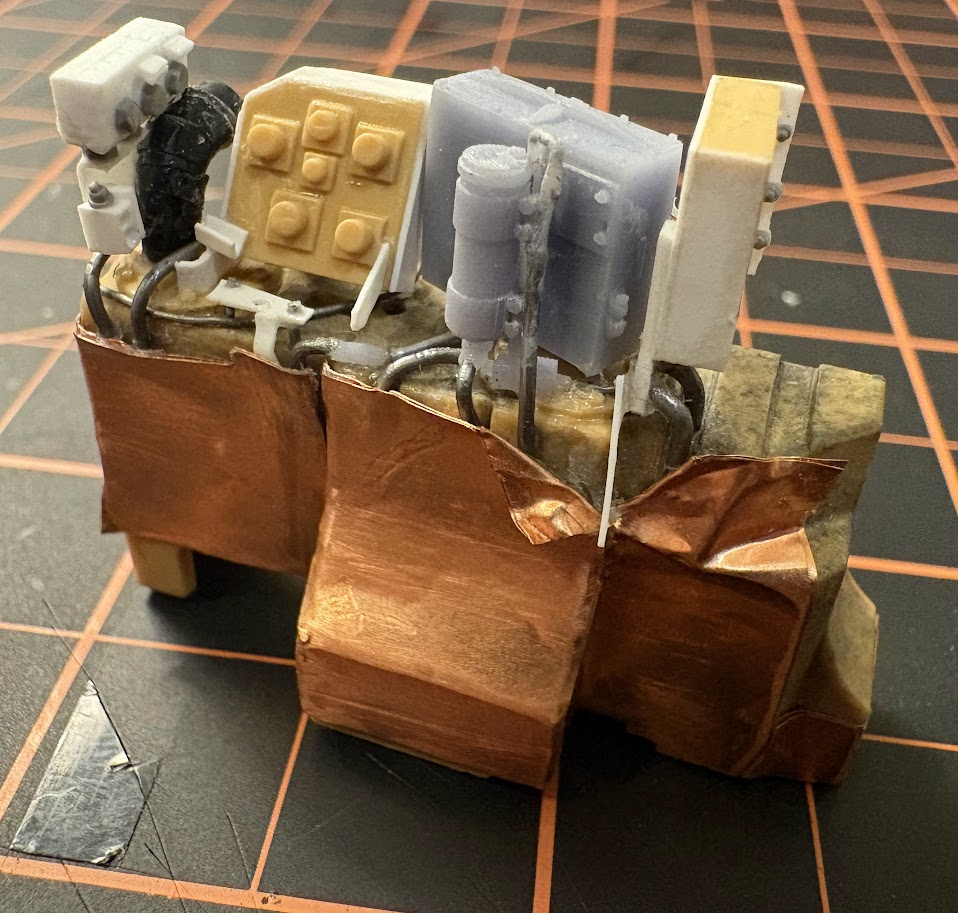
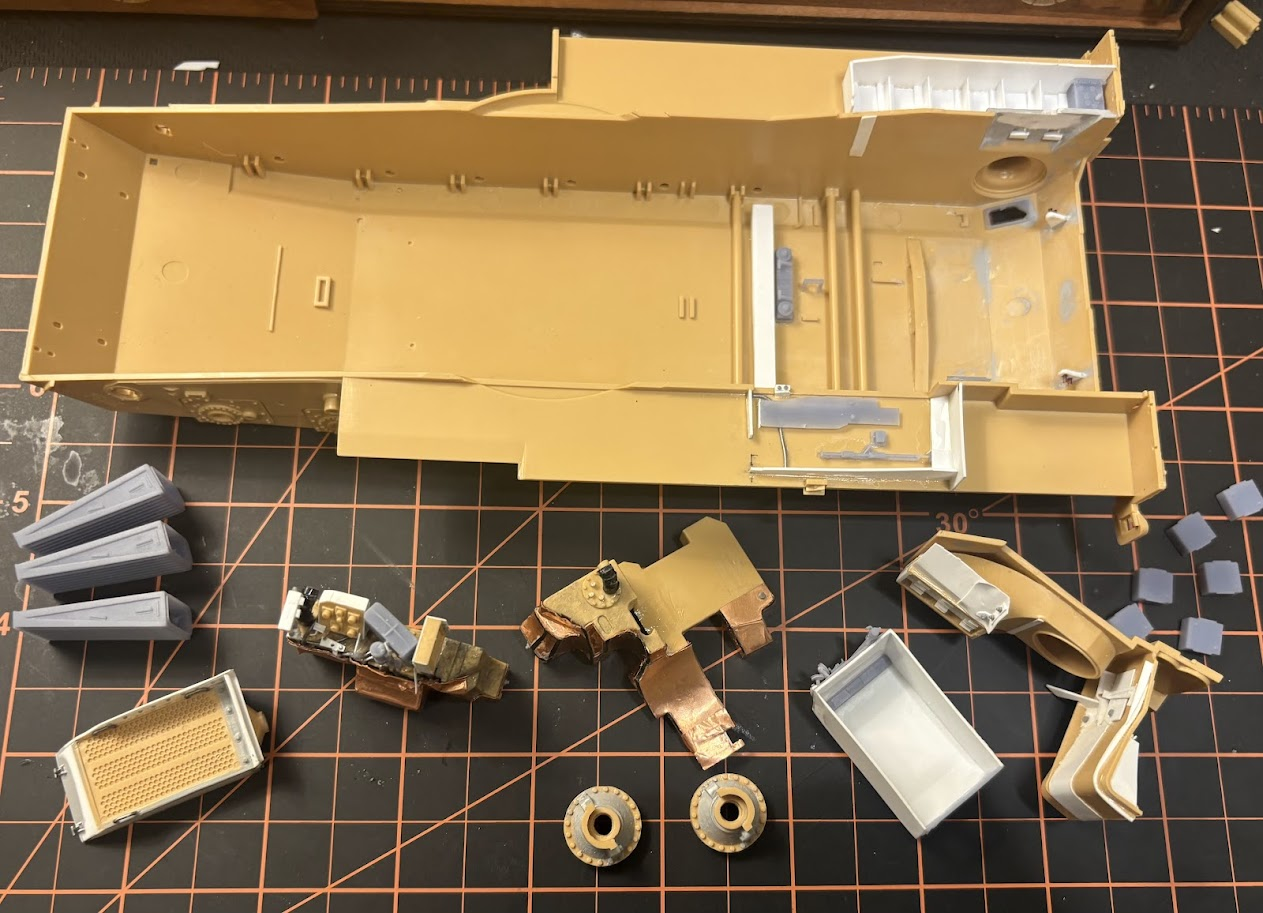
Alright i am close to finishing the build phase of the engine bay. Just need to print out one last final drive cap and add a few more details to the battery box.
My prints came out flawlessly and after I dialed in my new printer they looks awesome.
Here are few comparisons of the kit parts next to my own.
Comeon RFM its a $40 kit you really couldn’t put any more effort into these?
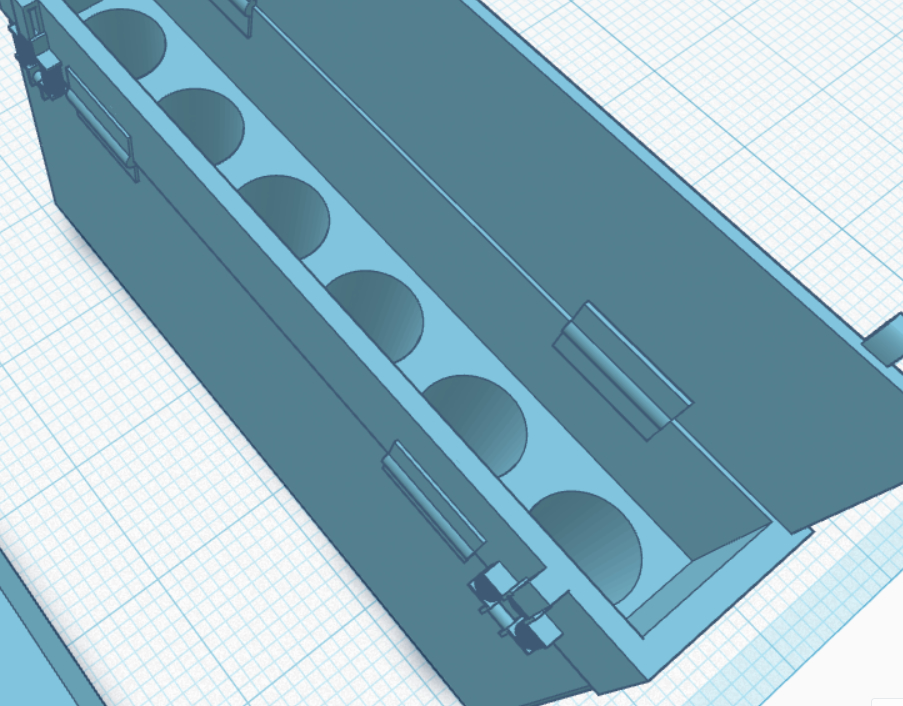
Here are the V Packs that I designed and printed.
Part of the wall that is completely absent.
PPC.
One of the batteries.
I also built up the Precleaner box, battery box and added all the details the kit is missing.
The sheer inaccuracy of every kit part I have touched so far is ridiculous. There is not a single kit part I have used that I haven’t changed in one way.
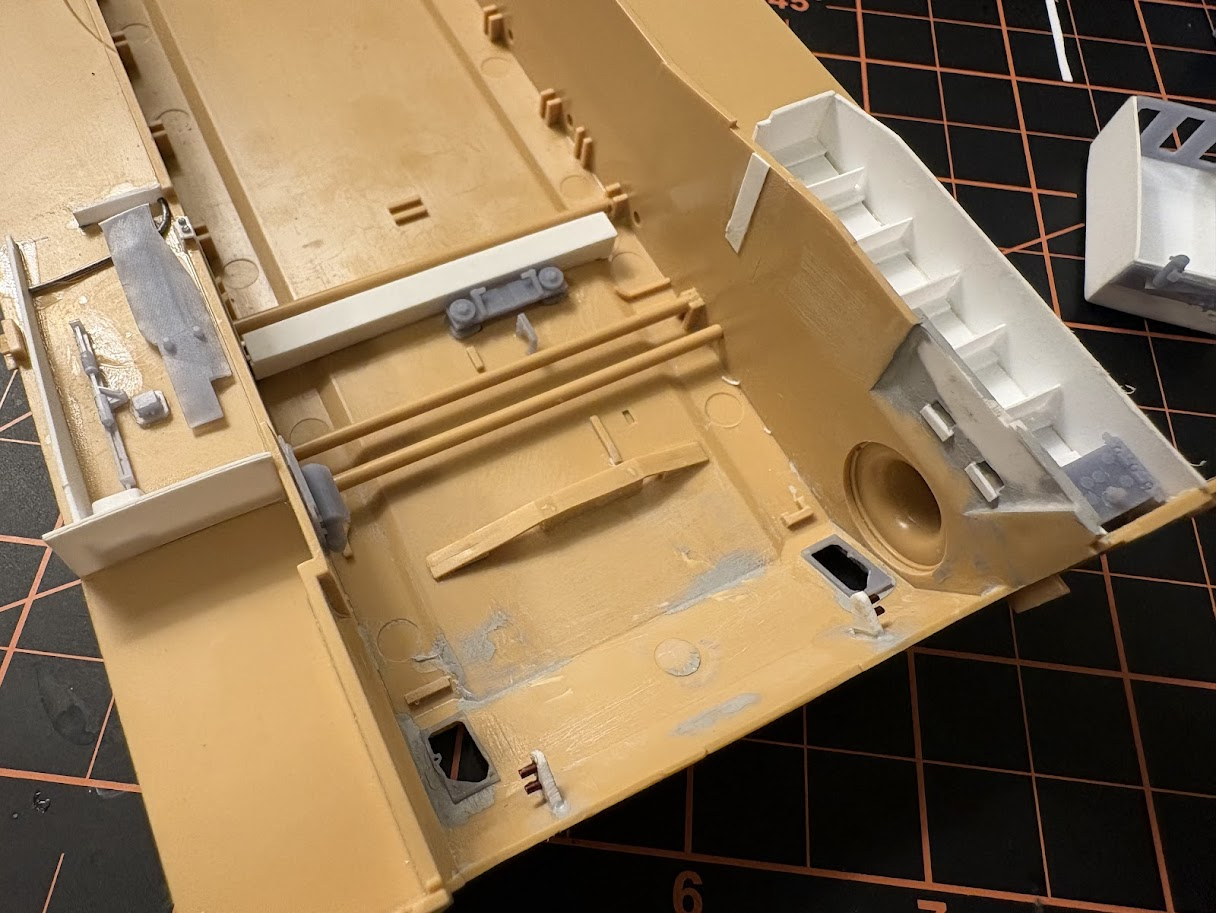
The right fuel tank proved to be the worst part and I sunk a good 8 hours into it practically detailing it from the ground up. The mounts proved very tricky but with some careful drilling and wires they are actually very solid and secure. I added the piping and I will wait until after paint to add the wires and cables. It is still needs to be cleaned up and have a few more details added but here is a peak.
Here are all but one of the hull parts glued in place. The PPC in the battery box, parts for the APU, engine mounts and the frames under the saddlebolts.
All put together…
Starting to look like the real deal.
All parts are still removable.
Thats all for now!
20 Likes