PM me if you want to buy a print and live in the US. $21 per print + $6 postage.
3 Likes
That basket looks amazing, James. really looks good.
2 Likes
For those of you who want to scratch-build the extended basket instead of buying my $22 3D print, here are the dimensions of the design to help your endeavors:
Width 73.8 mm (from top to bottom in the below photo) × Length 51.3 mm (from the left side attaching bar to the end of the edge of the basket mesh) × Height 12.9 mm (top to bottom of the basket itself)
Use the photo below for attaching or as a template.
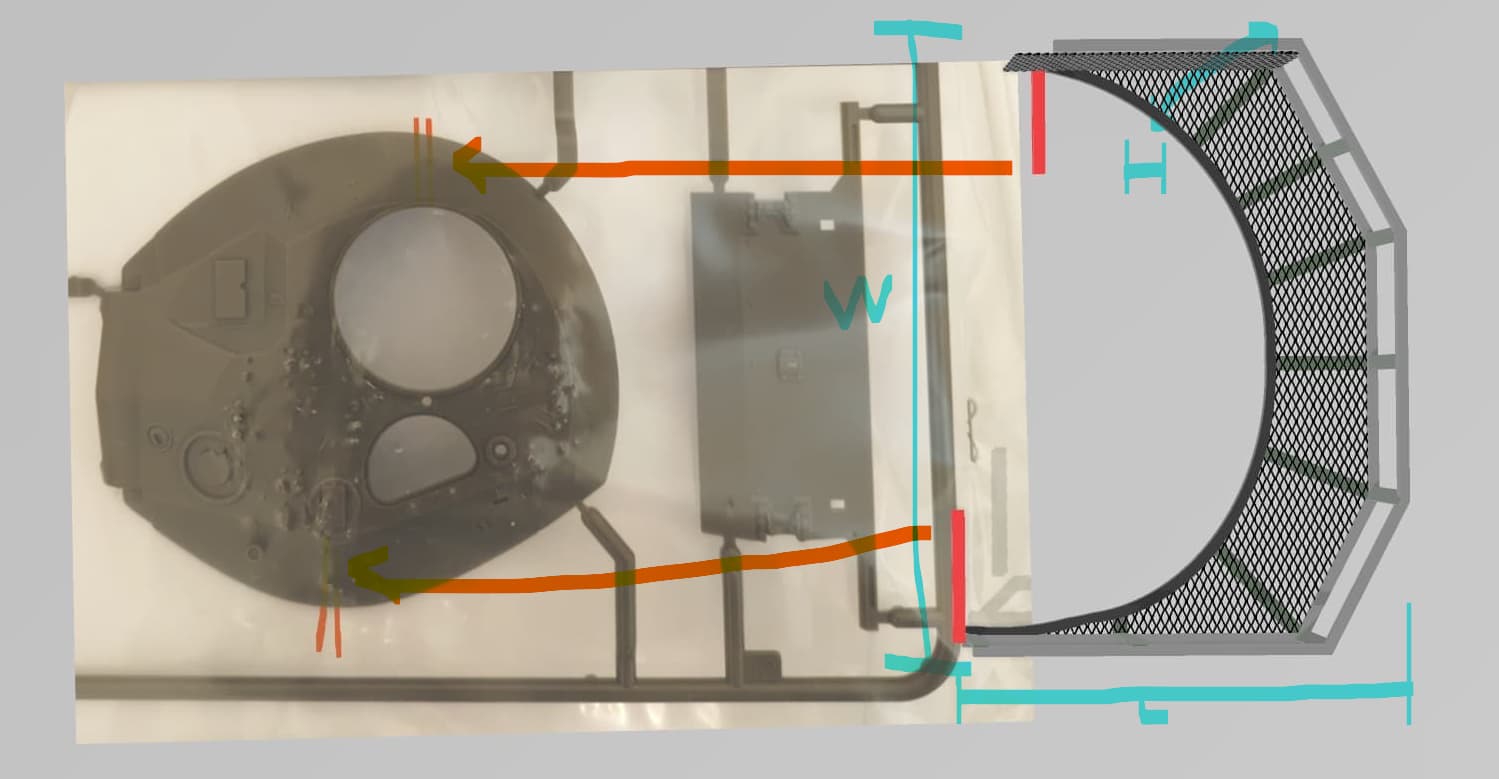
You can also see other reference photos on my post:
I hope this helps. 
Kind regards,
James
2 Likes
James,
Just received the basket yesterday.
Outstanding!
I highly recommend buying the basket.
Tom Michalovic
3 Likes
OK, so I am reviving this 2-year+ old thread to explain how to install the basket like the real thing whether you are using my 3D printed version or making your own DIY basket.
A couple of people raised the question on how the basket is not fitting well - I am guessing that they expected the mesh to sit flush onto the turret and simply superglue the bottom to the kit part but that’s not the design I had in mind or how the real thing looks.
So here are the pictures that may be worth thousand words.
As you can see below, the basket does go around the turret, but the contacting points are not going to be enough to hold the heavy basket part:
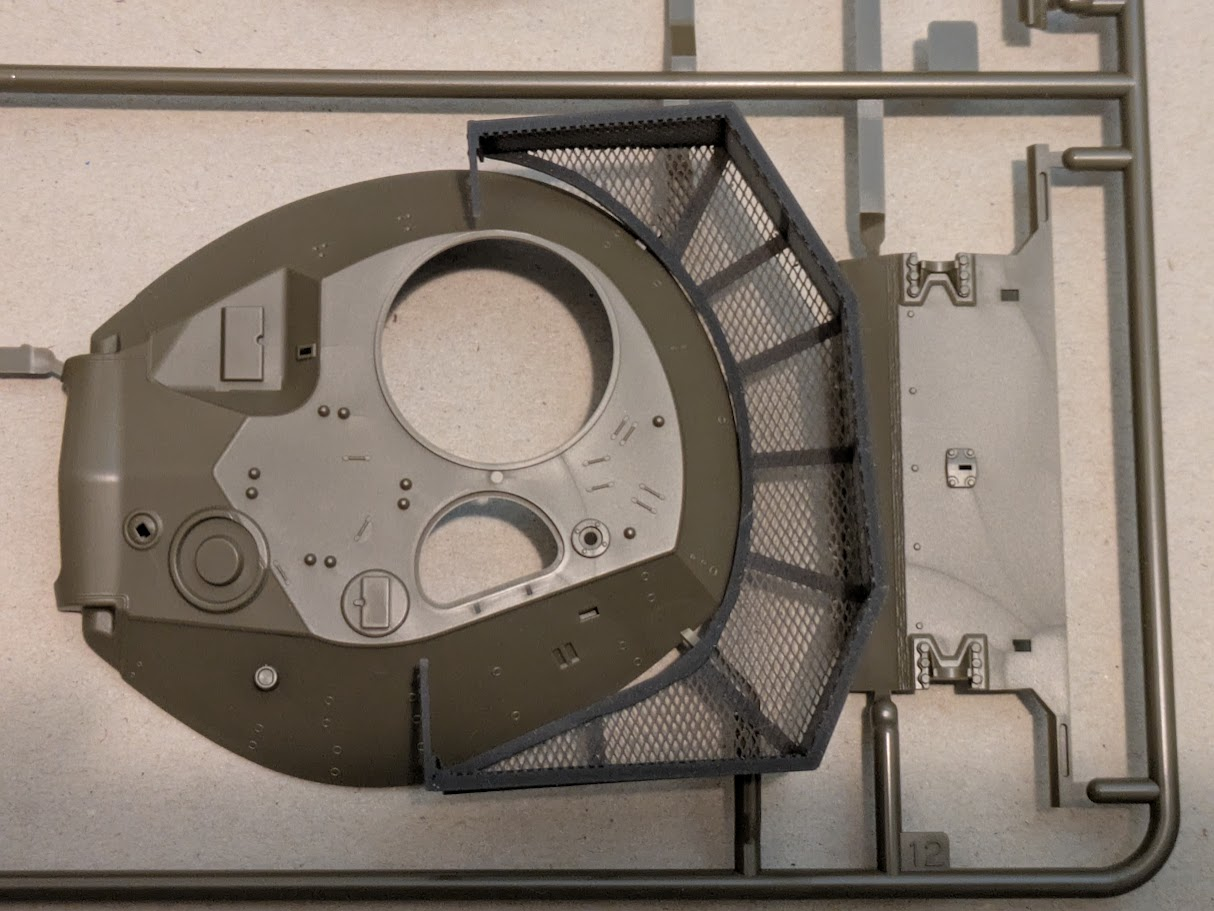
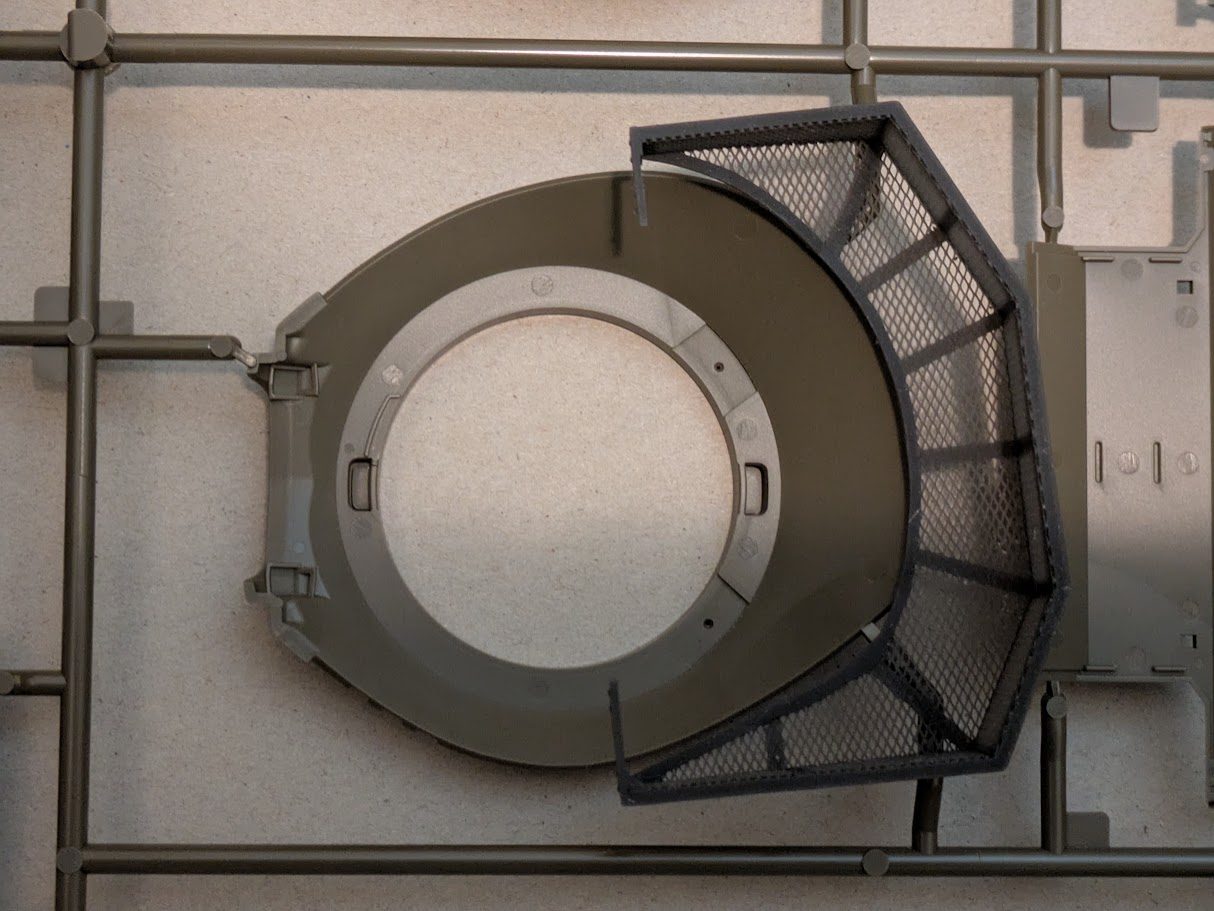
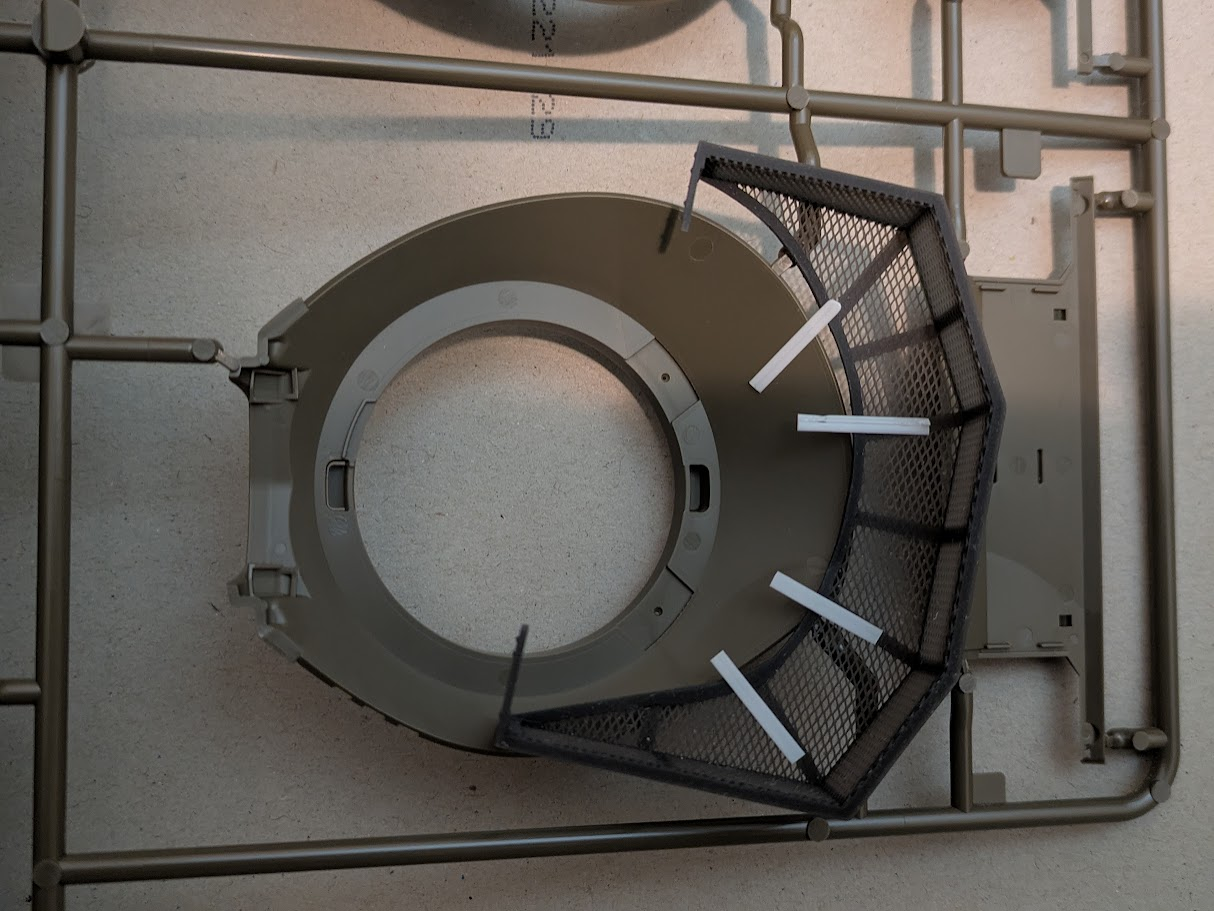
What you will have to do is add around 1.5cm length of plastic strip (recommend 0.25 x 1.5mm dimension from Evergreen) to each frame to the bottom as shown below → then glue those strip ends to the turret’s plastic surface to sit properly.
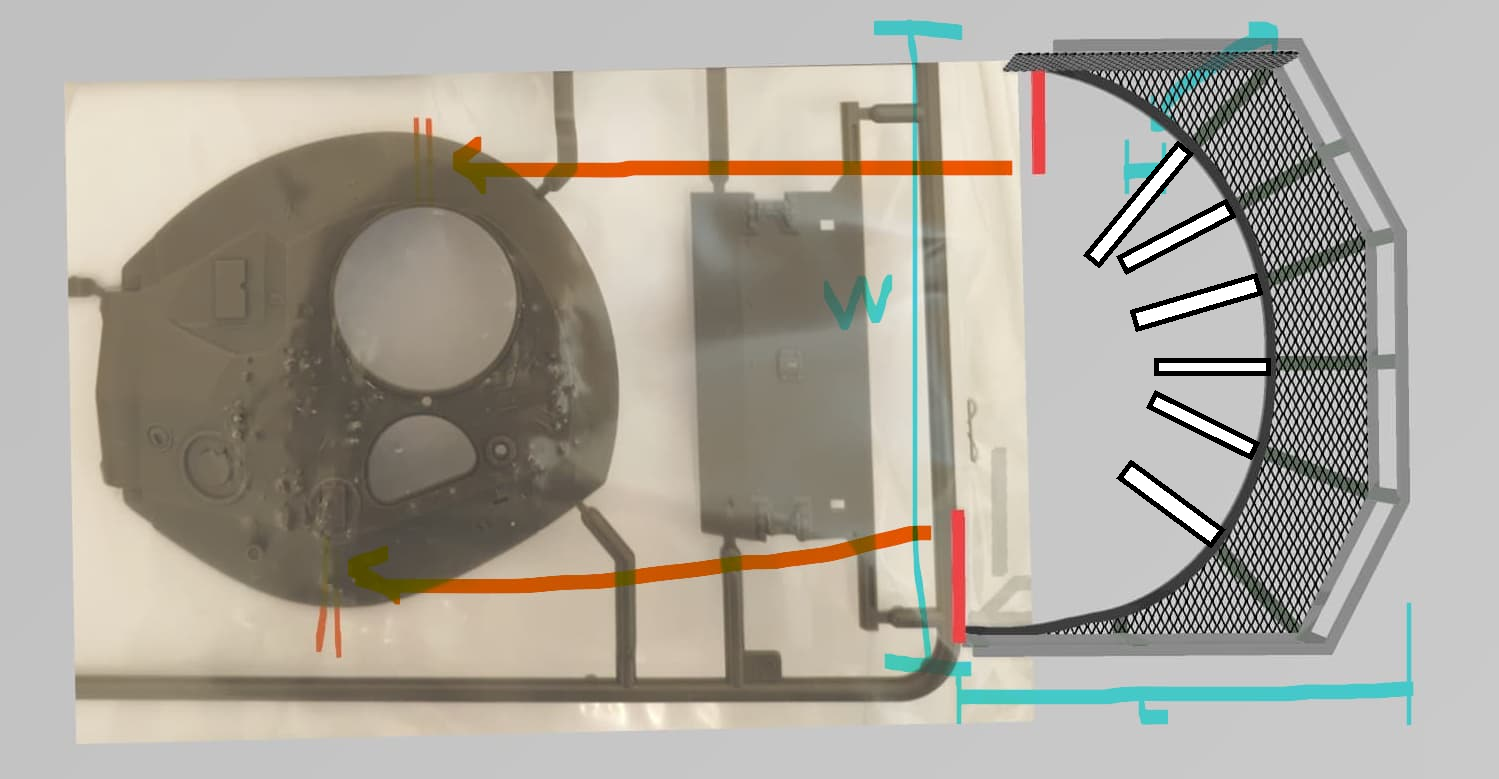
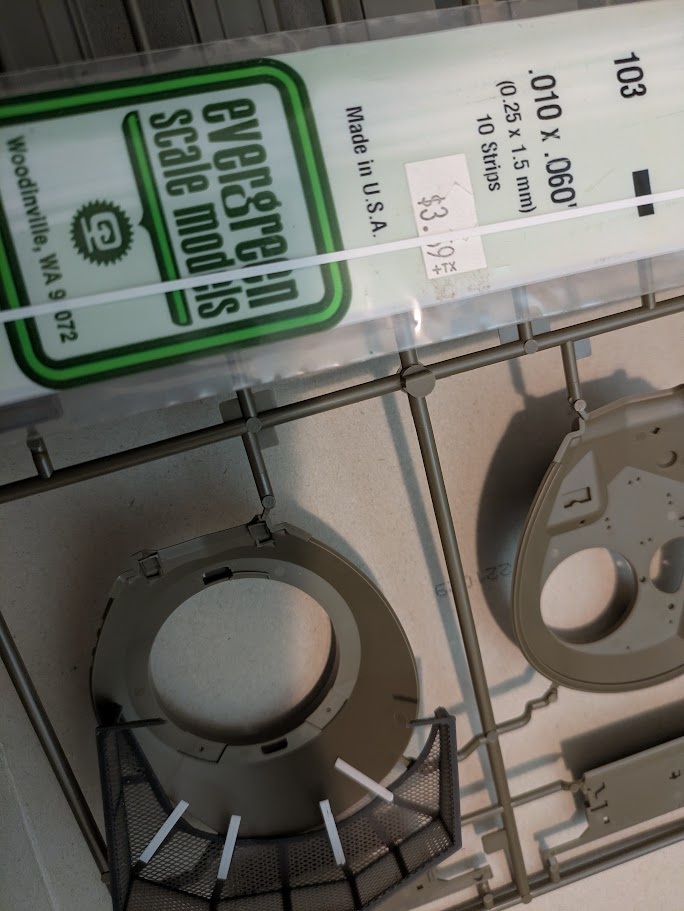
Here, the strips are on the top for visualization purposes. They need to go to bottom and be bent a little to glue to the angled turret surface - Does that make sense?
The following photos are posted for reference and educational purposes only under the Fair Use doctrine.
So these photos will give you a better sense of how they are attached.
- Someone built a DIY basket for his 1/16 RC Sheridan. You see how the frames (circled in orange) extend from the bottom to the turret surface?
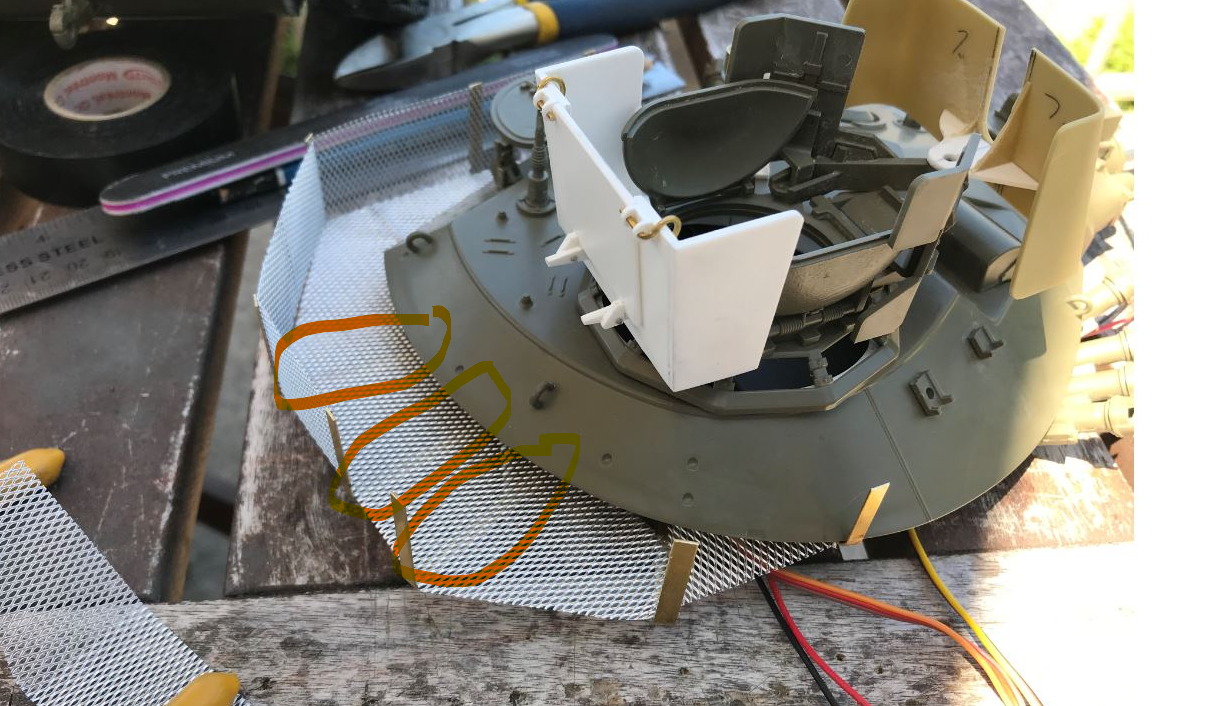
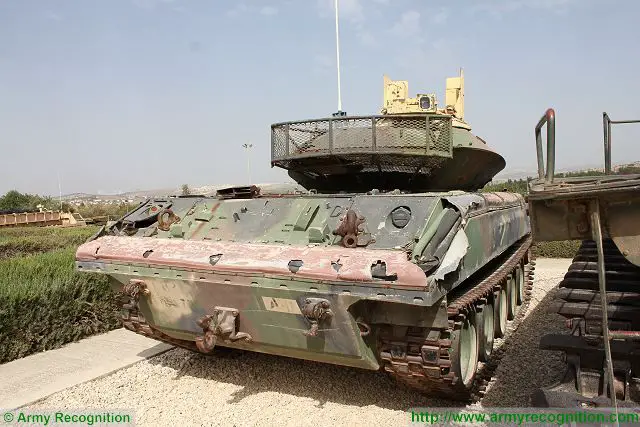
It’s a bit hard to see with this real object photo unless you zoom in closely - the “strips” extend from the basket to the turret’s bottom surface - either bolted or welded onto it.
I hope this helps. Please let me know if it needs further clarification. Excuse me for not being so “plug and play” design.
4 Likes
Here’s another view of the Latrun Museum Sheridan

H.P.
3 Likes
Thanks H.P.! Although the basket is not the make-shift VN version, that reference photo gives a better illustration of how it would attach to the turret.
2 Likes