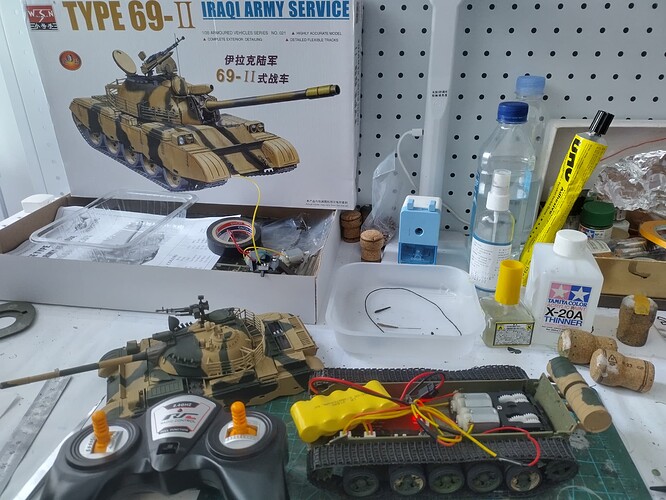
Hi all, my latest 1/35 armour and the 2nd on this site. I’m building the Trumpeter’s Type 69-II tank, it’s an old mold of the type before the debut of Hobby-boss, Miniart and Takom kits and the series is “motorised”, it comes with a gearbox and rubber tracks. As a nostalgic build (my first motorised tank model was Tamiya’s M-60A1, with wired remote control), I will build it as a remote controlled model!
Brief history of the Type 69 Tank
The Type 69-II is an improvement of the early Type 69 Tank. Contrary to common knowledge, it’s not really a development of the Type 59, much innovation/new design was incorporated into the Type 69, such as new suspension, engine, infra-red search light and laser range finder. These came about when Chinese army studied cloesly on the captured T-62 tank during the border skirmish on Zhenbao Island. Although these were already “outdated” by the time Type 69 entered service, so the Type 69 did not enter PLA service in large numbers. However, it was an export success and many units are exported to Pakistan, Iraq, Iran etc.
Back to the model build:
Since it’s a rarity in the PLA, I’ll build it as a Type 69-II in Chinese army service instead. It’s simlar to the Iraqi model, but with some differences in the search light installation and also the turret racking, otherwise, everthing can be built “out of the box”.
As with early Trumpeter kits, the plastic is some what soft and also slick with injection mold lubricant, so the part trees definitely needs a good wash on detergent. As this is a motorised kit, no internal detail is required and I need every millimetre of space in the hull to house the gear box and also the remote control receiver and power pack unit.
I began construction with the road wheels, drive sprocket and the idler, moving onto the hull and the superstructure first.
The kit is farily easy to build, but as the plastic is little on he soft side, some parts will need superglue/UHU to get it to stick, the front end also needs a hefty dose of putty to seal the gap between the upper and lower halves. As with rubber tracks for motorised models, previous experience tell me that melting the “buttons” will not be strong enough, some needle and thread work is needed to ensure a tight knit. Once everything is in place, I’ll start painting first and install the motorised module at the end.


