1/350 IJN Destroyer Fuyutsuki Operation Ten Ichi Go 1945 Wave

Continuing with the hull, I had noticed that a picture of Yoizuki clearly showed rivet strips that appear to be lapped over the armour plates. The instructions for Fivestar show intermitent strips but just the upper row, when two can clearly be seen.
Yoizuki Rivet Strips
This detail is not really visible in any of the other Fuyutsuki subclass memebers; however they are very hard to make out on all other Yoizuki pictures, so it is probable they appear on all other memebes but easily blend into the hull at once the camera perspective is any further distance away.

Further investigating just Fuyutsuki, one of the post war pictures seems to show the strips if you look very closely (excuse the messy arrows):
Fuyutsuki rivet strips
The orange arrow is most likely a strip as it is in the exact same location as the corresponding one on Yoizuki. The green arrows I think may be strips as they appear a little 3D against the plates, but they could also simply be breaks in the plates.

There is literally no possible way of determining this (no other Fuyutsuki pictures I am aware of are close enough to tell) so I will go with the most likely conclusion that yes, they are present. If anything, adding them will add some more visual interest to the hull.

3 Likes

For the rivet strips I used Shipyard models 1/700 as anything 1/350 would be far too out of scale.

I recently came across a great database of images, being the official Kure maritime museum database website: 検索トップ | 収蔵品データベース | 呉市海事歴史科学館

I searched through every image of every Akizuki class member and there are a fair few not included in any publications I own. Some of the interesting ones were pictures of the hull construction and gave a further insight of the rivet strips. A picture of Wakatsuki shows two sets of rivet strips on the lower hull section across the part which sticks out (I don’t actually know what this is called):


Again, there is no guarantee Fuyutsuki would have had these, but it adds further visual interest and there is no way of knowing, so I included them using the smallest rivet strips I have:

From a post war Suzutsuki picture, I noticed a rivet strip at the exact position which Fivestar places the last one (orange arrow). The yellow arrow is a break in the hull plates (no strip):


I placed the rivet strips up to this point and make a plate break at the appropriate position.

Zooming in on another Yoizuki post war photo, I can pick out the rivet strips across the hull, which appear to be evenly spaced:


Using the features around these positions I gauged the distance and equally spaced them to the final strip. I assumed the lower strips would be similarly spaced, so using the first one as a guide I similarly repeated them. I used the double width strips, as that appears to match what is in the pictures.

The results:


On a side note, I installed the lower and upper decks. Nothing too interesting, just a whole lot of sanding and removing detail.

6 Likes

Enjoying following along on this - thanks for sharing.
The piece in question is referred to as a bilge keel or bilge strake .

1 Like

I have received a few new references recently, so I thought I would make a quick post about them.


Maru 2021 Akizuki special, Gakken 23, and Legends of Naval Warfare Akizuki-class destroyers.

I decided to finally grab Gakken 23 when I realised the PDF copy I found online only has about half the pages it should have (I thought it seemed a little short!). Plus its nice to have references in paper, especially as I am trying to collect all the Naval Gakken issues as of right now, so it looks great on the shelf!


I was missing a lot of the text heavy diagram pages, which seem pretty useful, so owning this now is a win.

Moving on, I grabbed the Maru magazine 2021 issue, which somewhat focusses on Akizuki-class destroyers.

I have never owned a Maru magazine issue before, and while it is only about 10% about Akizuki destroyers, I was pleasantly suprised by an article filled with colour Suzutsuki pictures I have never seen before. There are 3 pages in total and it looks like shots maybe from old colour video? I have had a brief search into the origin of the photos with no luck, but maybe by translating the text I can do some more digging (or if anyone knows feel free to reply). This would be very useful to a Suzutsuki build, maybe not as much to a Fuyutsuki one.


The issue also had some Natsuzuki pics and aerial combat snippets I haven’t seen before. Again, not particularly currently useful but unseen pics are always a win.

Finally, the Legends of Naval Warfare publication (I had preordered this ages ago and had been patiently been awaiting a UK release).

Honestly, I have to say after owning and being underwhelmed by the Kongo Legends of Warfare publication, I am really impressed with this. It is crammed with pictures and diagrams, even a handful I have never seen before! Plus it is always nice to have English text publications you can actually read. It seems there is a lot of crossover with Gakken 23, with the plans of Akizuki and Fuyutsuki from it being shown. This may mean it would be a good substitute for those who don’t fancy trying to track down a rare Japanese publication, but likewise, if you already have Gakken 23, it is not that necessary to pick up. Still, I am overall really happy with this book, and having pictures (even if elsewhere available) printed nice and big with English captions is very convenient. I can only hope future releases in the Legends of Naval Warfare series are to the same standard.

2 Likes

I have been away a lot recently and been distracted getting my I-400 close to finishing, so unfortunately I have not had much time to update the log. Should be quieter from now on and mean I get more time to get Fuyutsuki moving.

Now back to hull work…

So a pretty obvious feature on the Akizuki class vessels (well aside from Hanazuki) was the shape of the corners at the aft of the forecast deck. On Akizuki these were curved, while on the later Fuyutsuki class they were instead a straight diagonal to simplify construction.
Fuyutsuki aft foredeck
It is shown here in this picture of Fuyutsuki and appears quite a substantial portion of the deck. There are many postwar photos that show other Fuyutsuki-subclass vessels where it does not appear to be as major, but that may be down to angles of perspective or maybe a build approach alteration.

Despite being such an obvious feature, neither the monochrome releases or wave depict this feature at all.


This forced me to reproduce this feature myself.

I first made lines to file to based of the above picture and used a flat file to file down the deck at the angle roughly shown in pictures.

Fivestar also did not account for this feature in there brass decks, so I had to cut off the deck portion corresponding to where the filed section ended.


The final result.

Looking at it now maybe I filed slightly too far back, but I can always hide this with the AA mount splinter shields which cover this section.

9 Likes

Only slightly late to the party.

Interesting build, will be along for the ride.

Cheers, Si

1 Like

\

Ditto!
Mark :beer:

1 Like

Wow! This is going to be an amazing build with all those resources and research.

A number of years back I bought Tamiya’s 1/700 Yahagi on a whim, fancied something different, without knowing of it’s involvement in the Yamato story. I had the idea of doing all the ships involved but never got around to finding them.

1 Like

Thanks for all the responses since my last post, I am going to try and post more regularly from now on.

Life continues to not allow me time to spend on the build, plus I have been trying to finish off a I-400 I have had in a nearly finished state for a long time now (still waiting on a Hobbyeasy order to add the finishing touches).

Anyway back to Fuyutsuki…

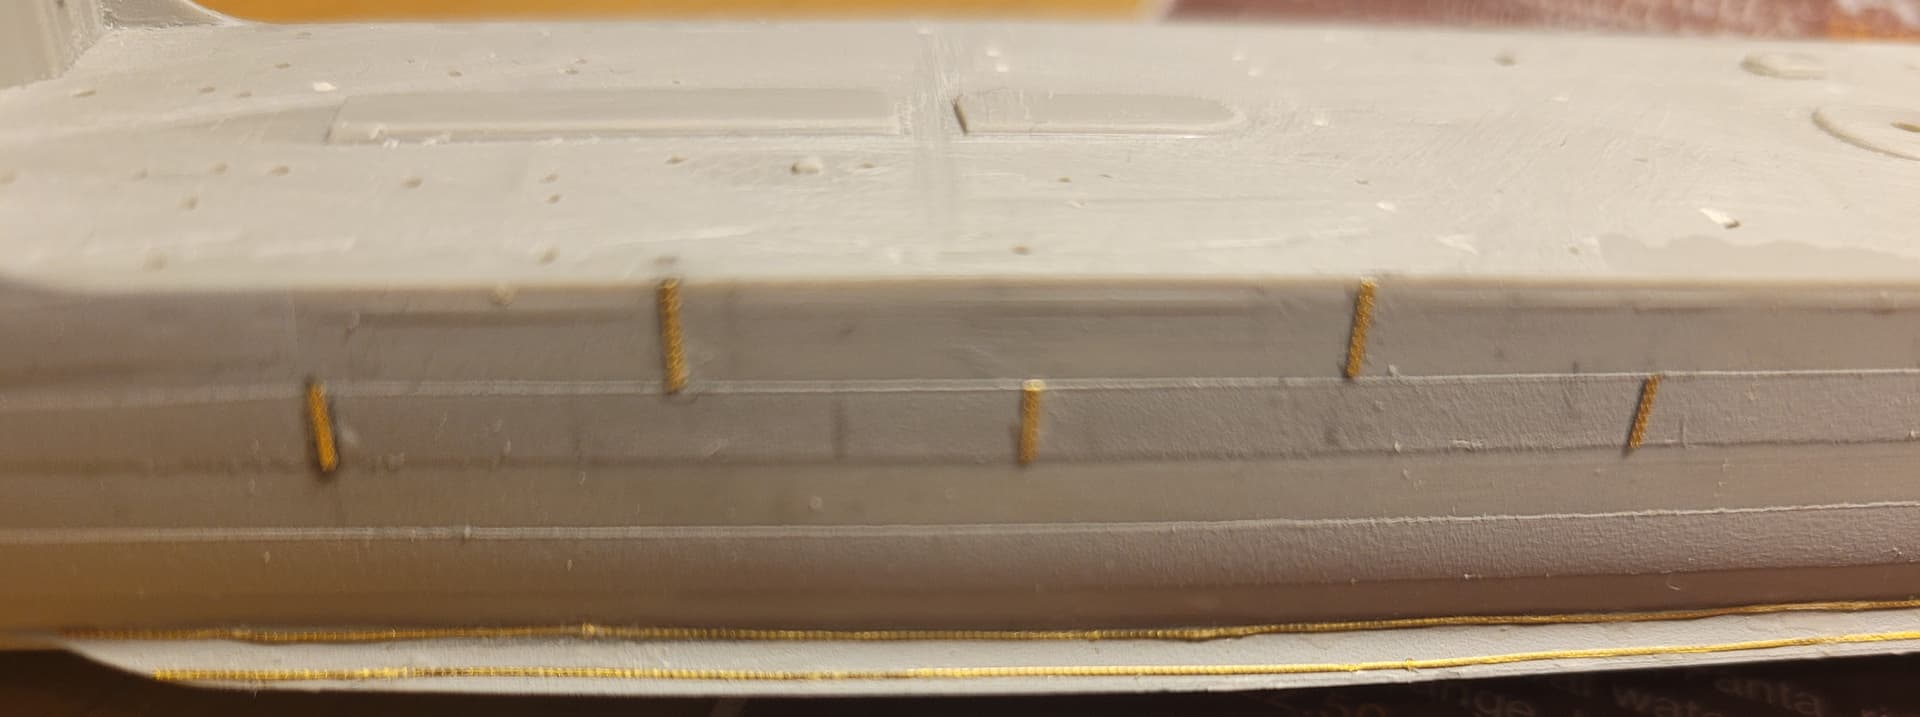
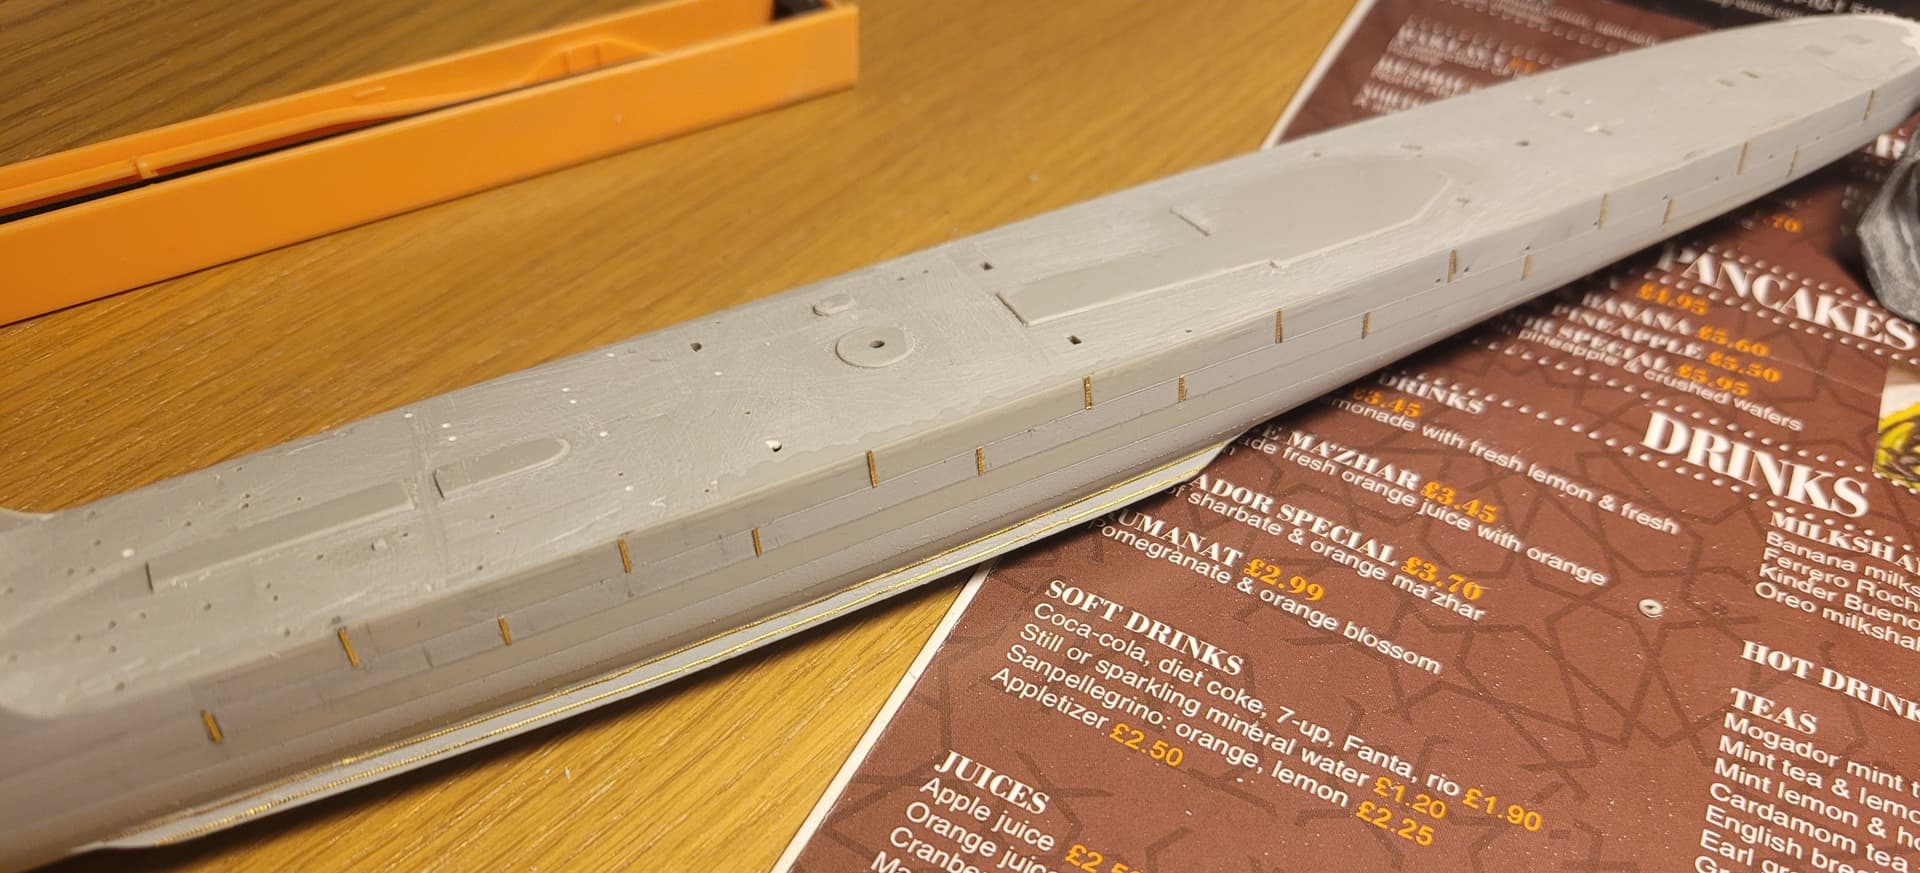
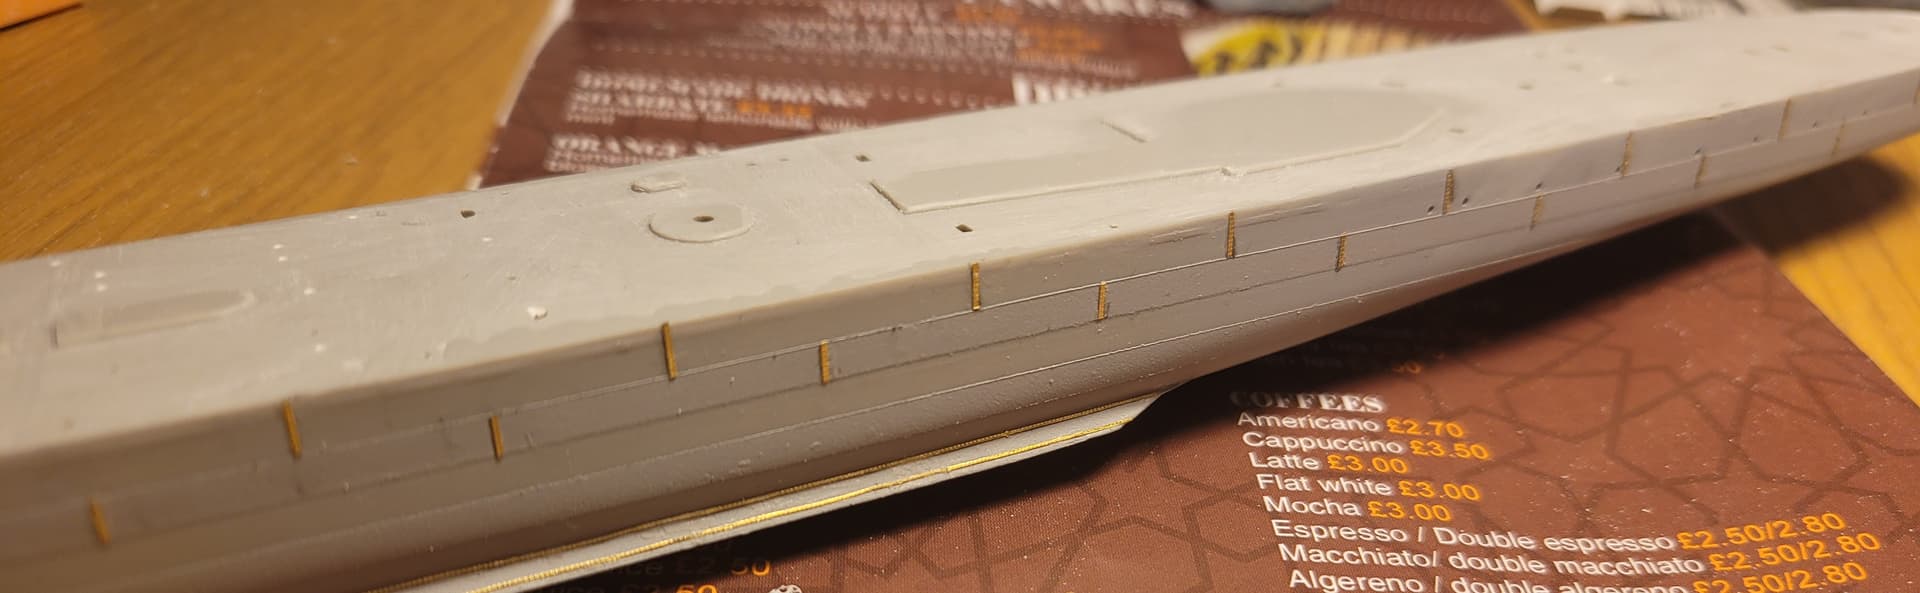
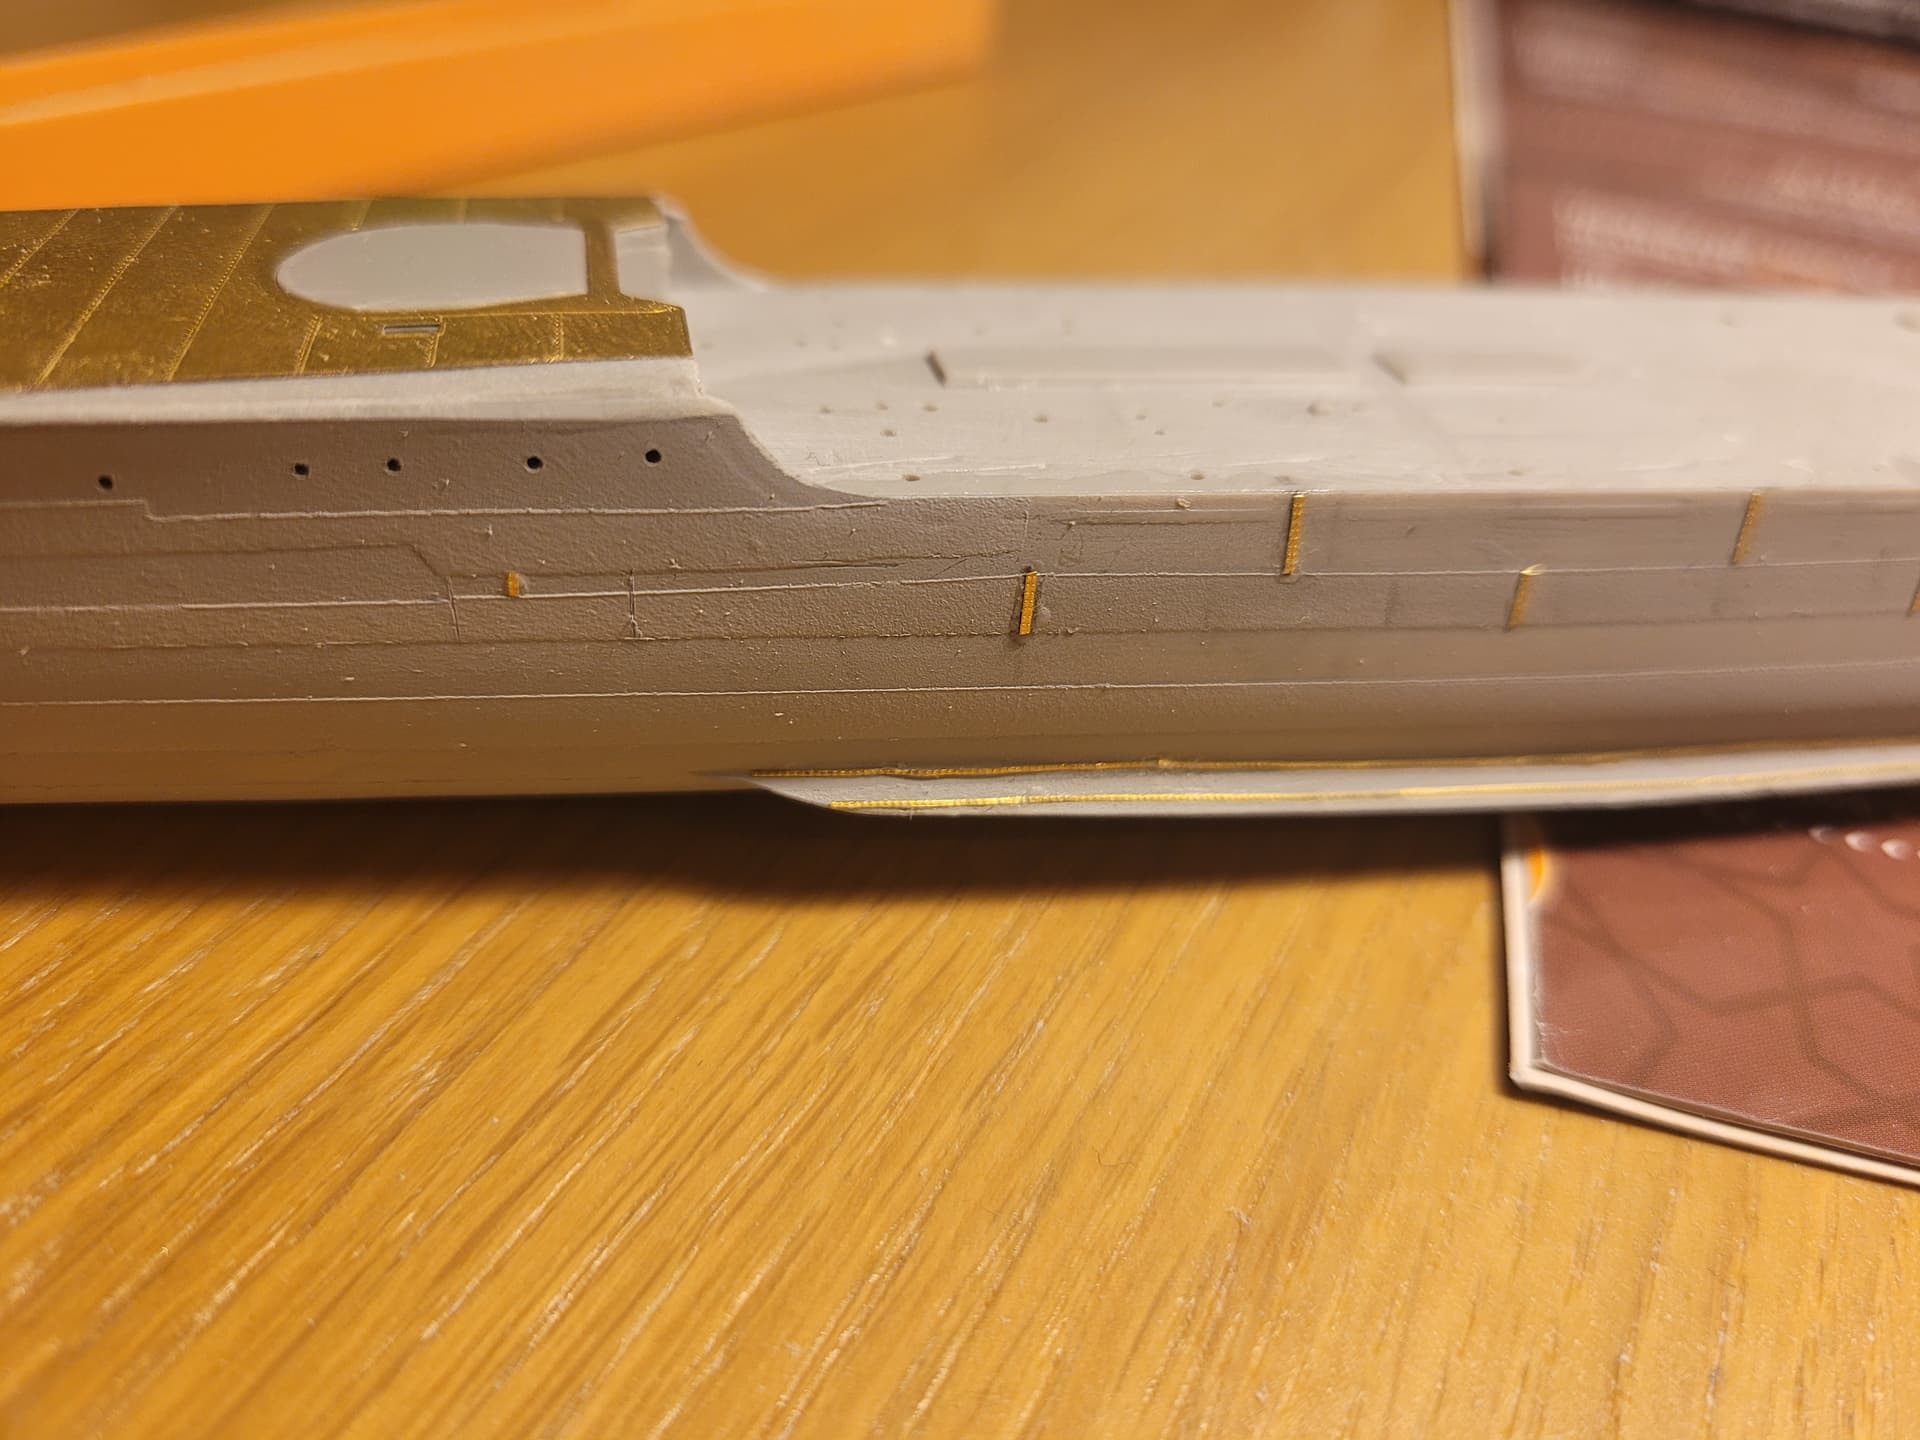
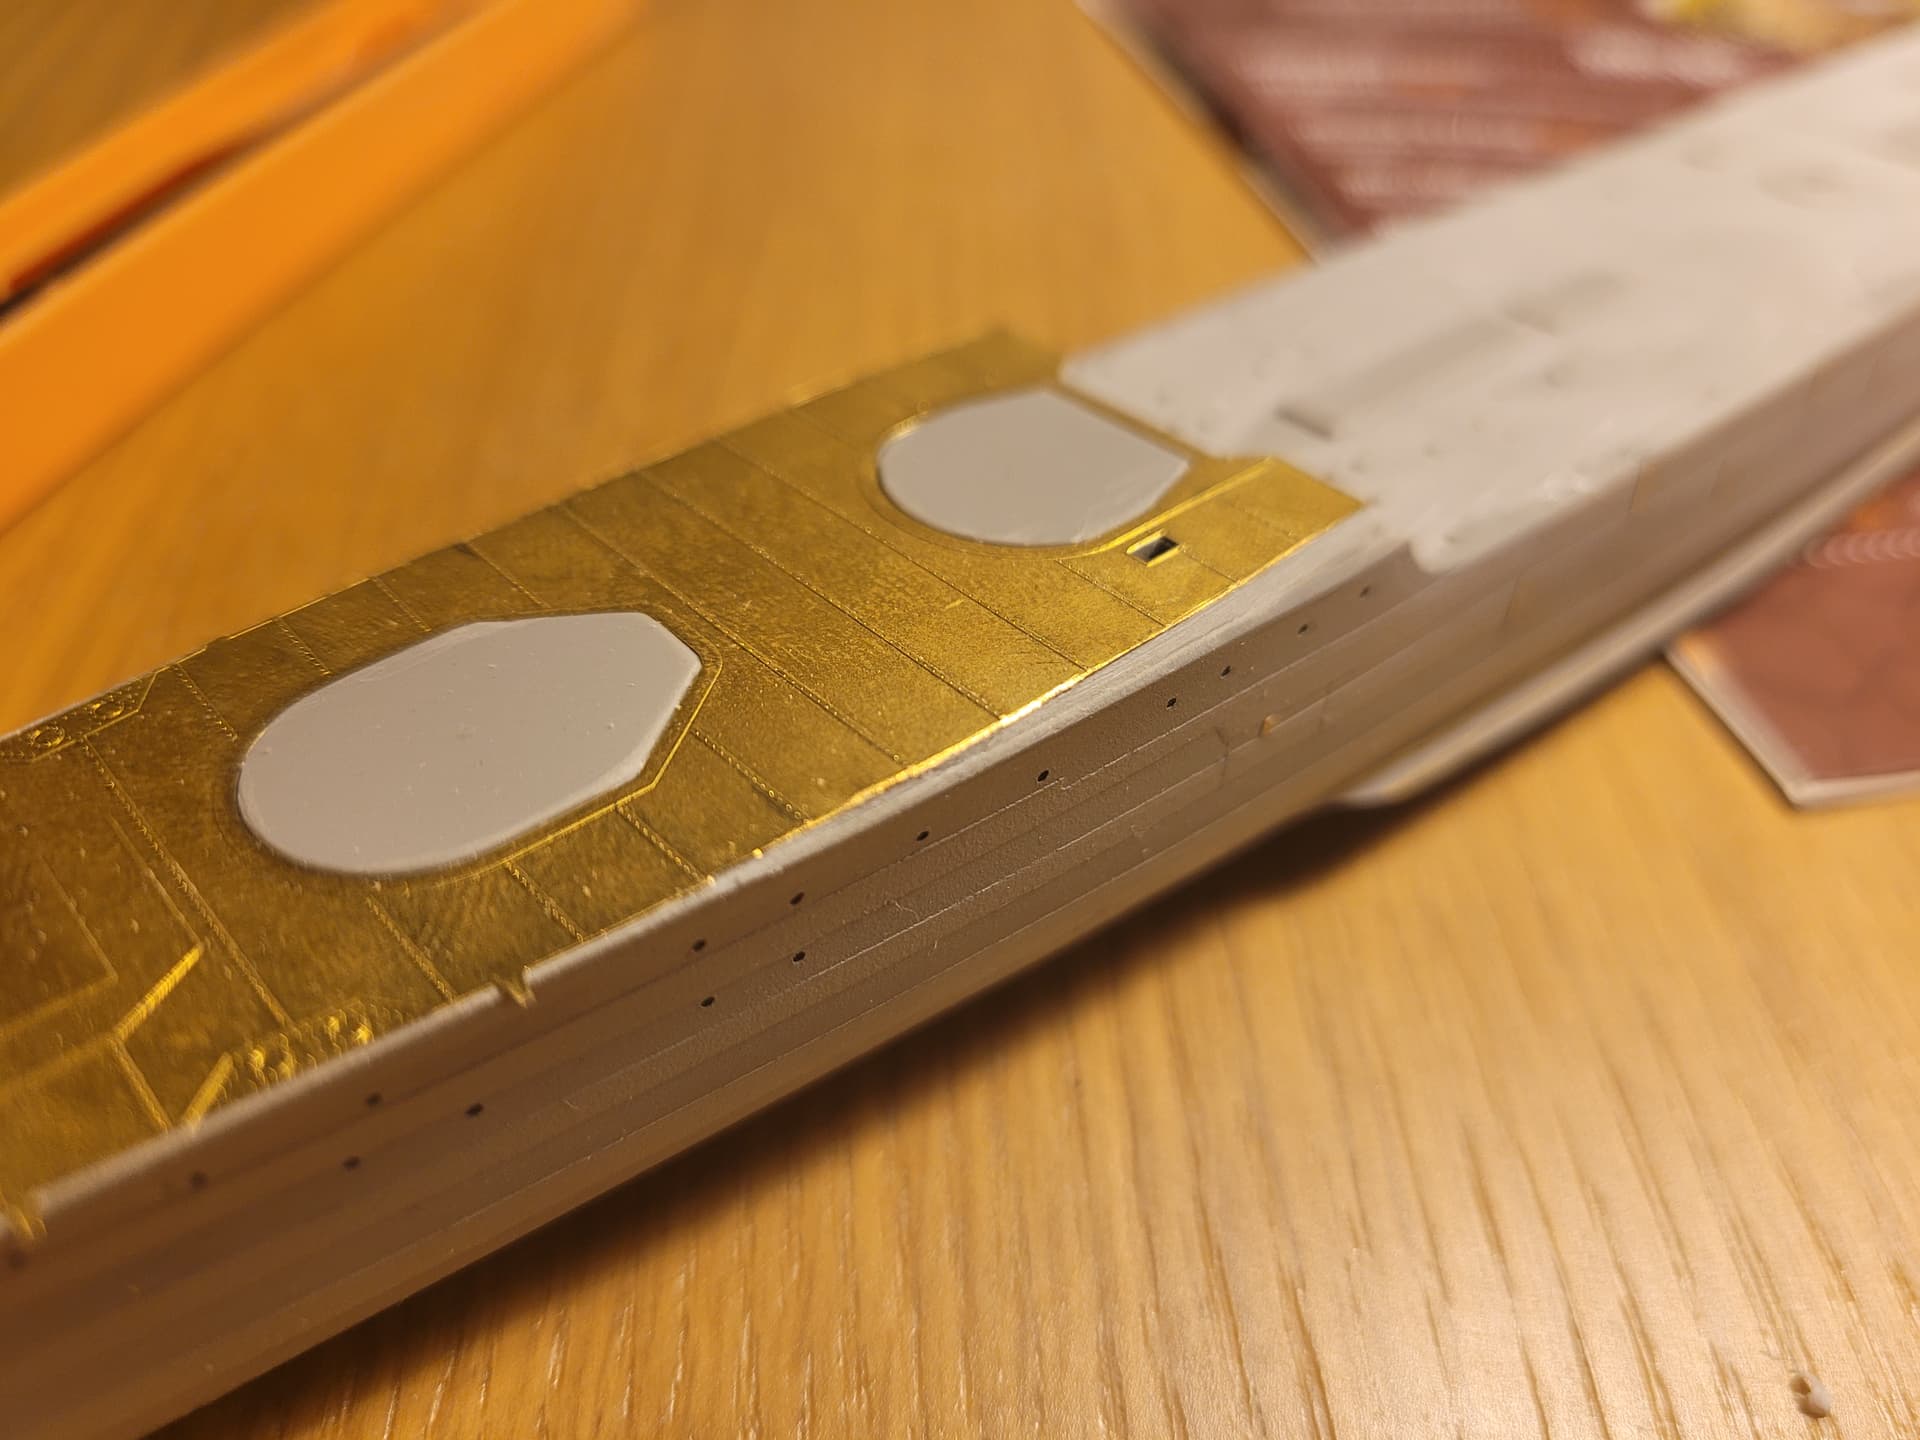
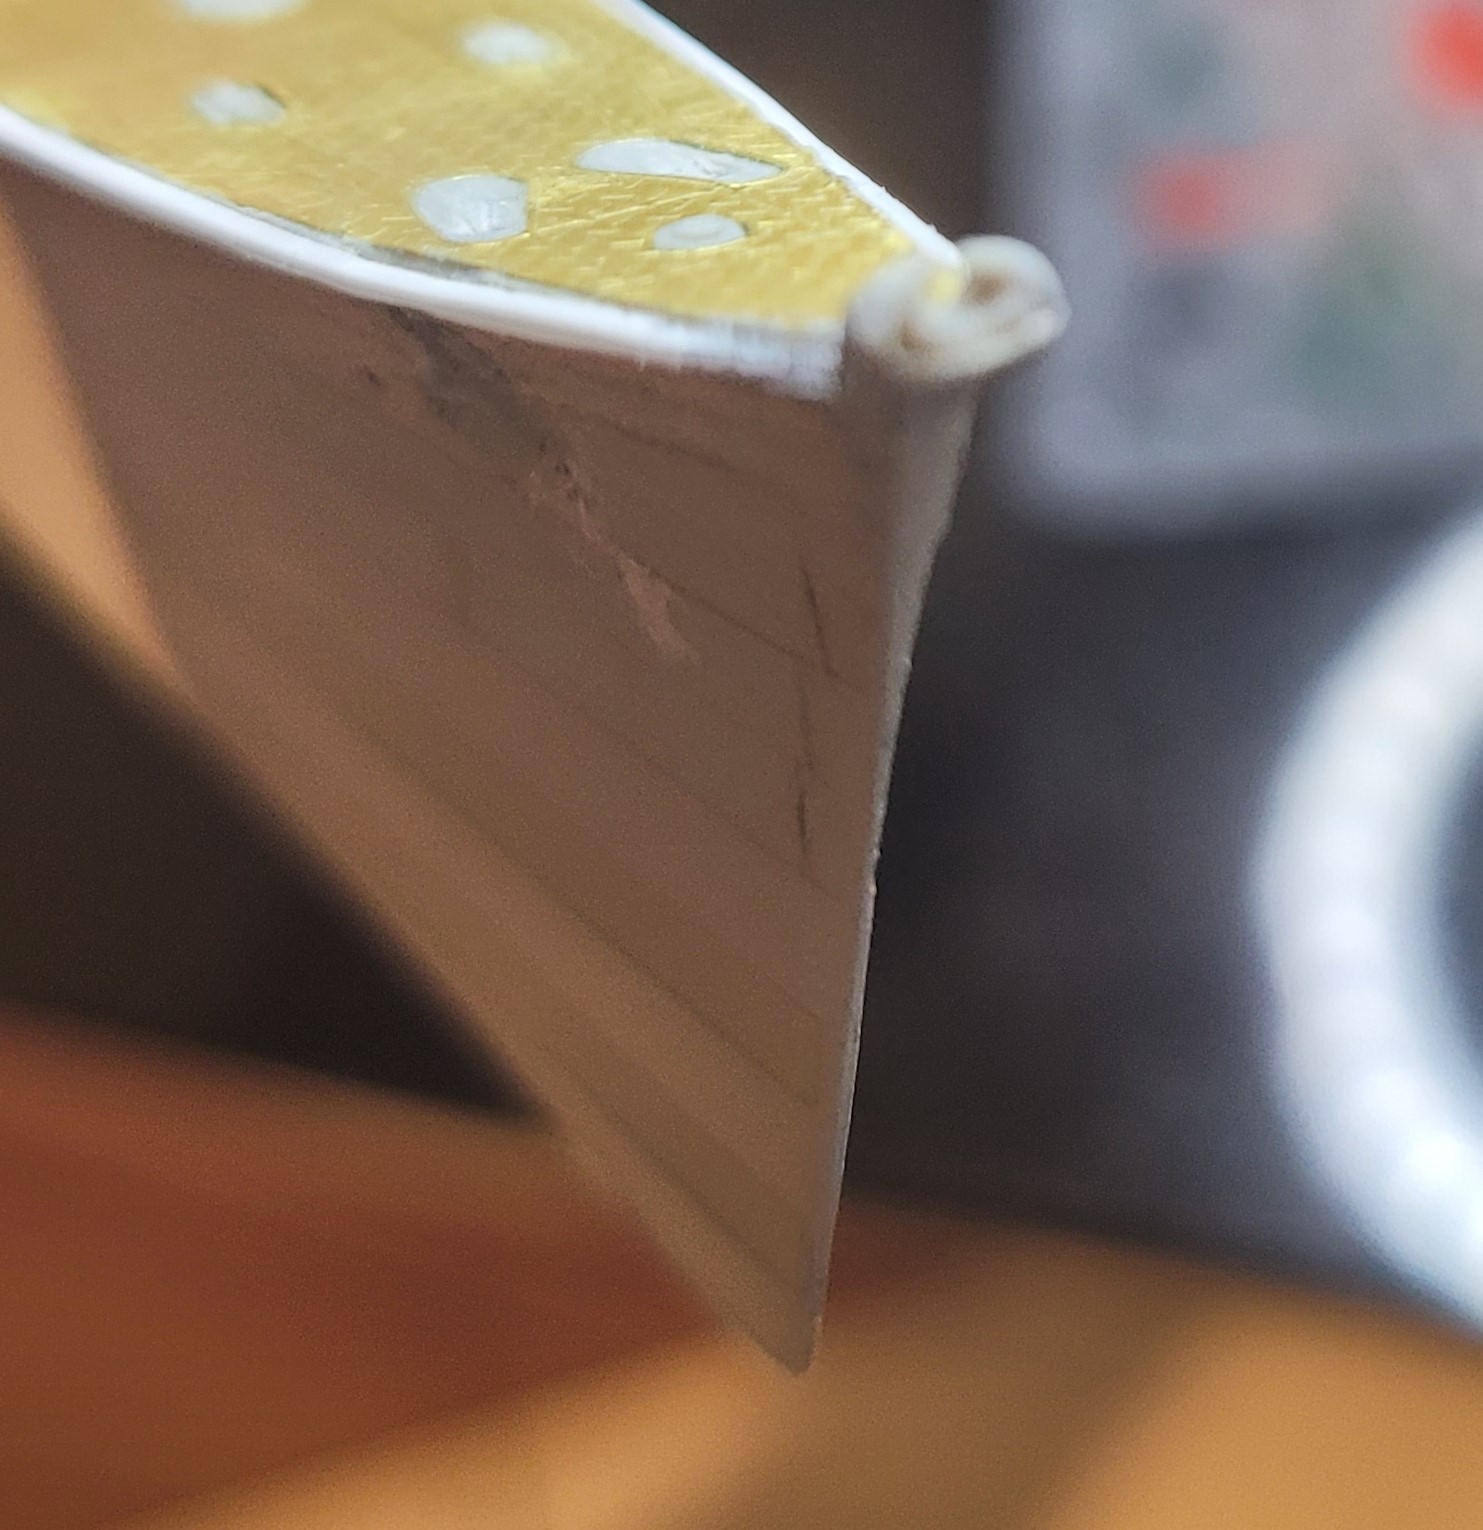
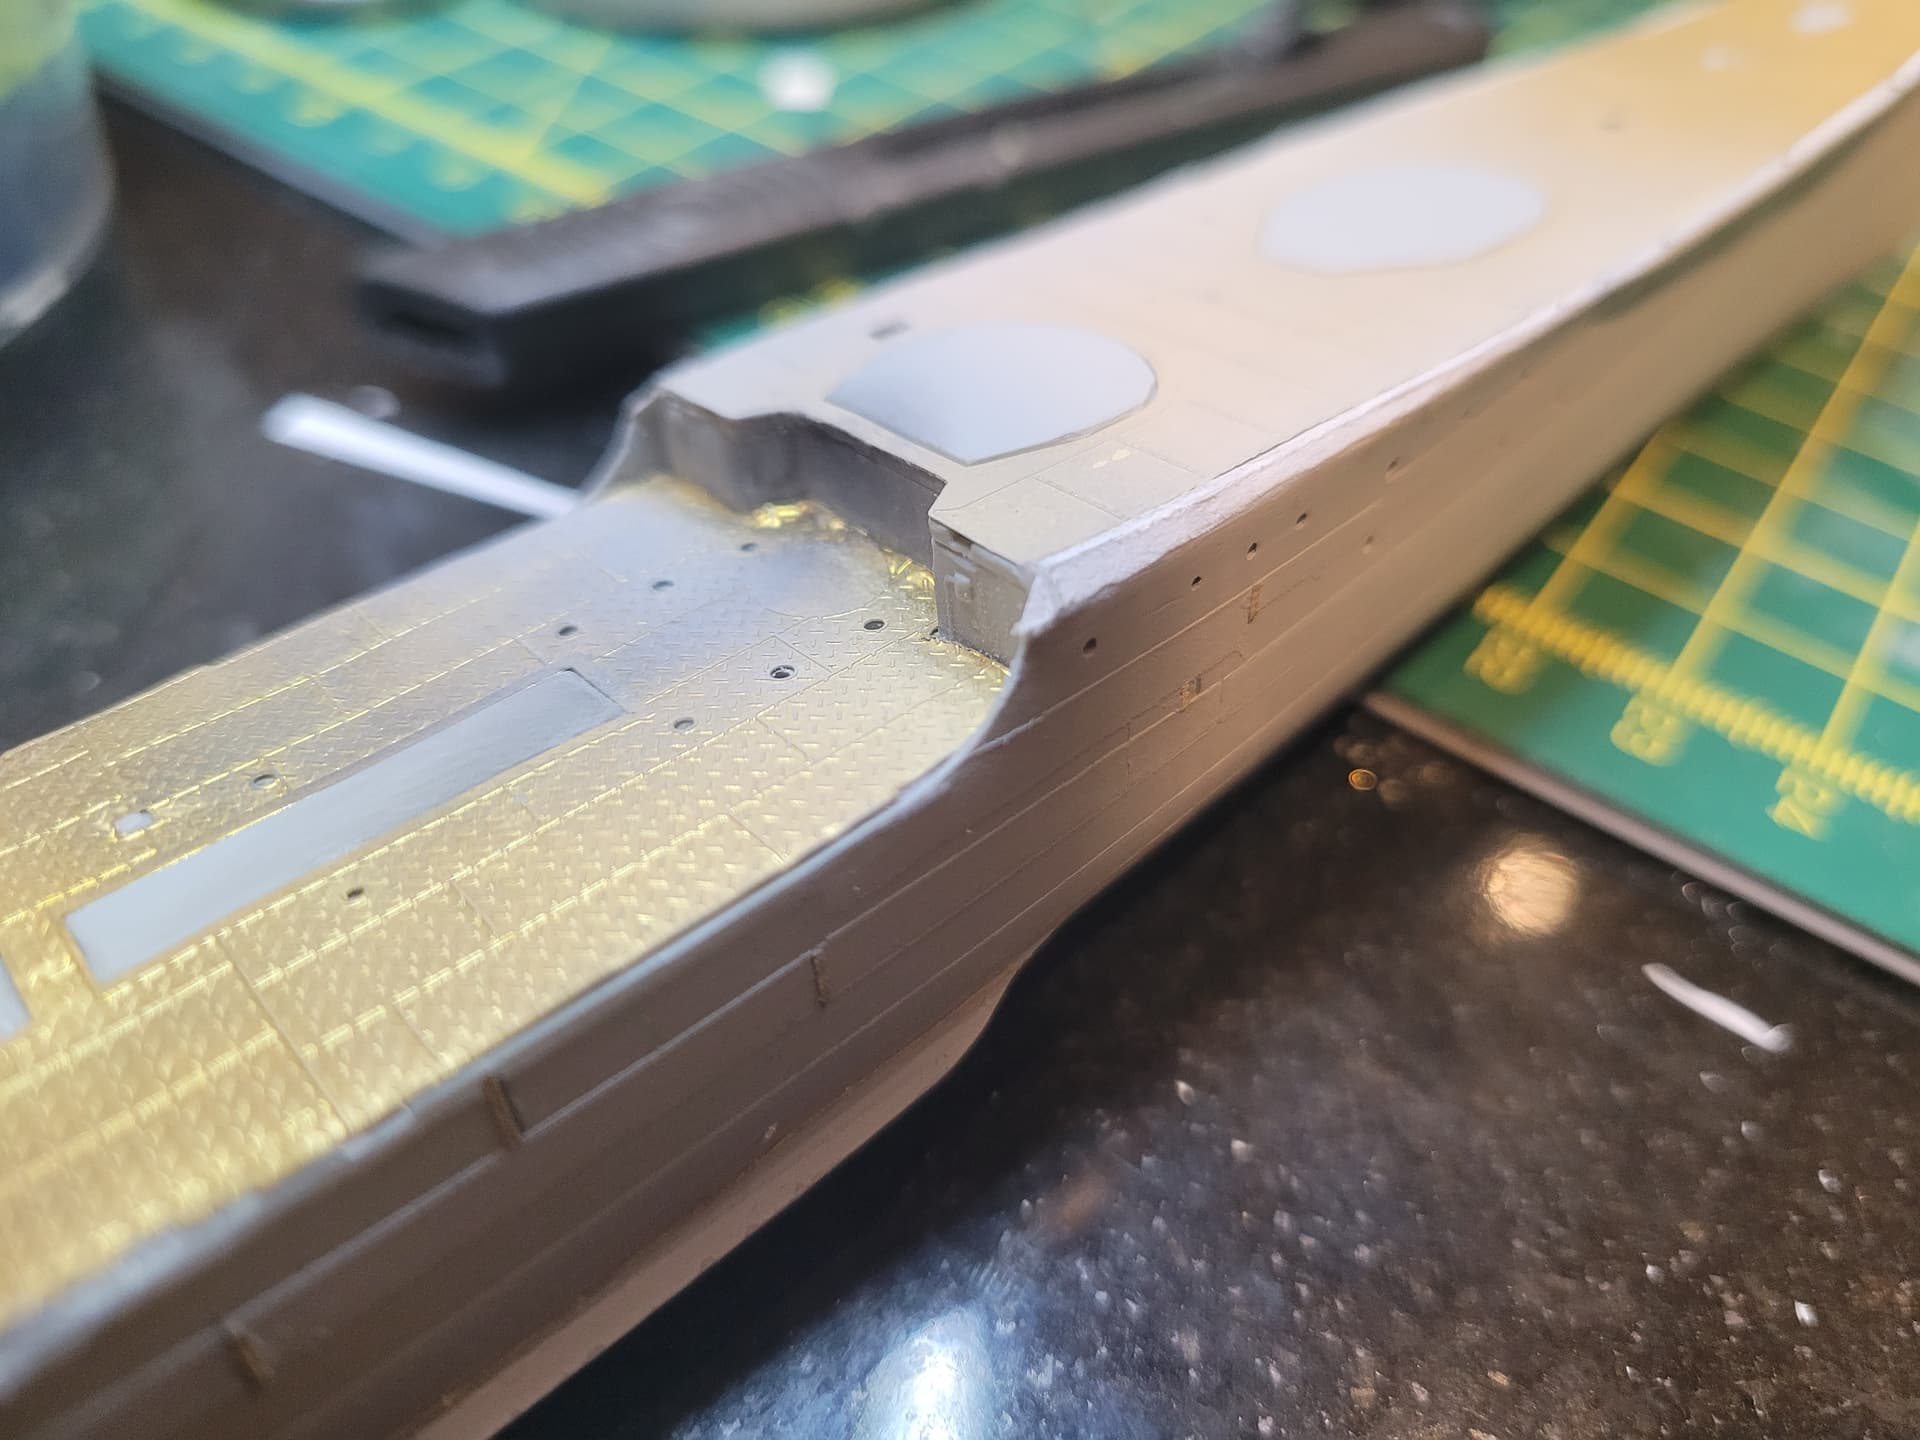
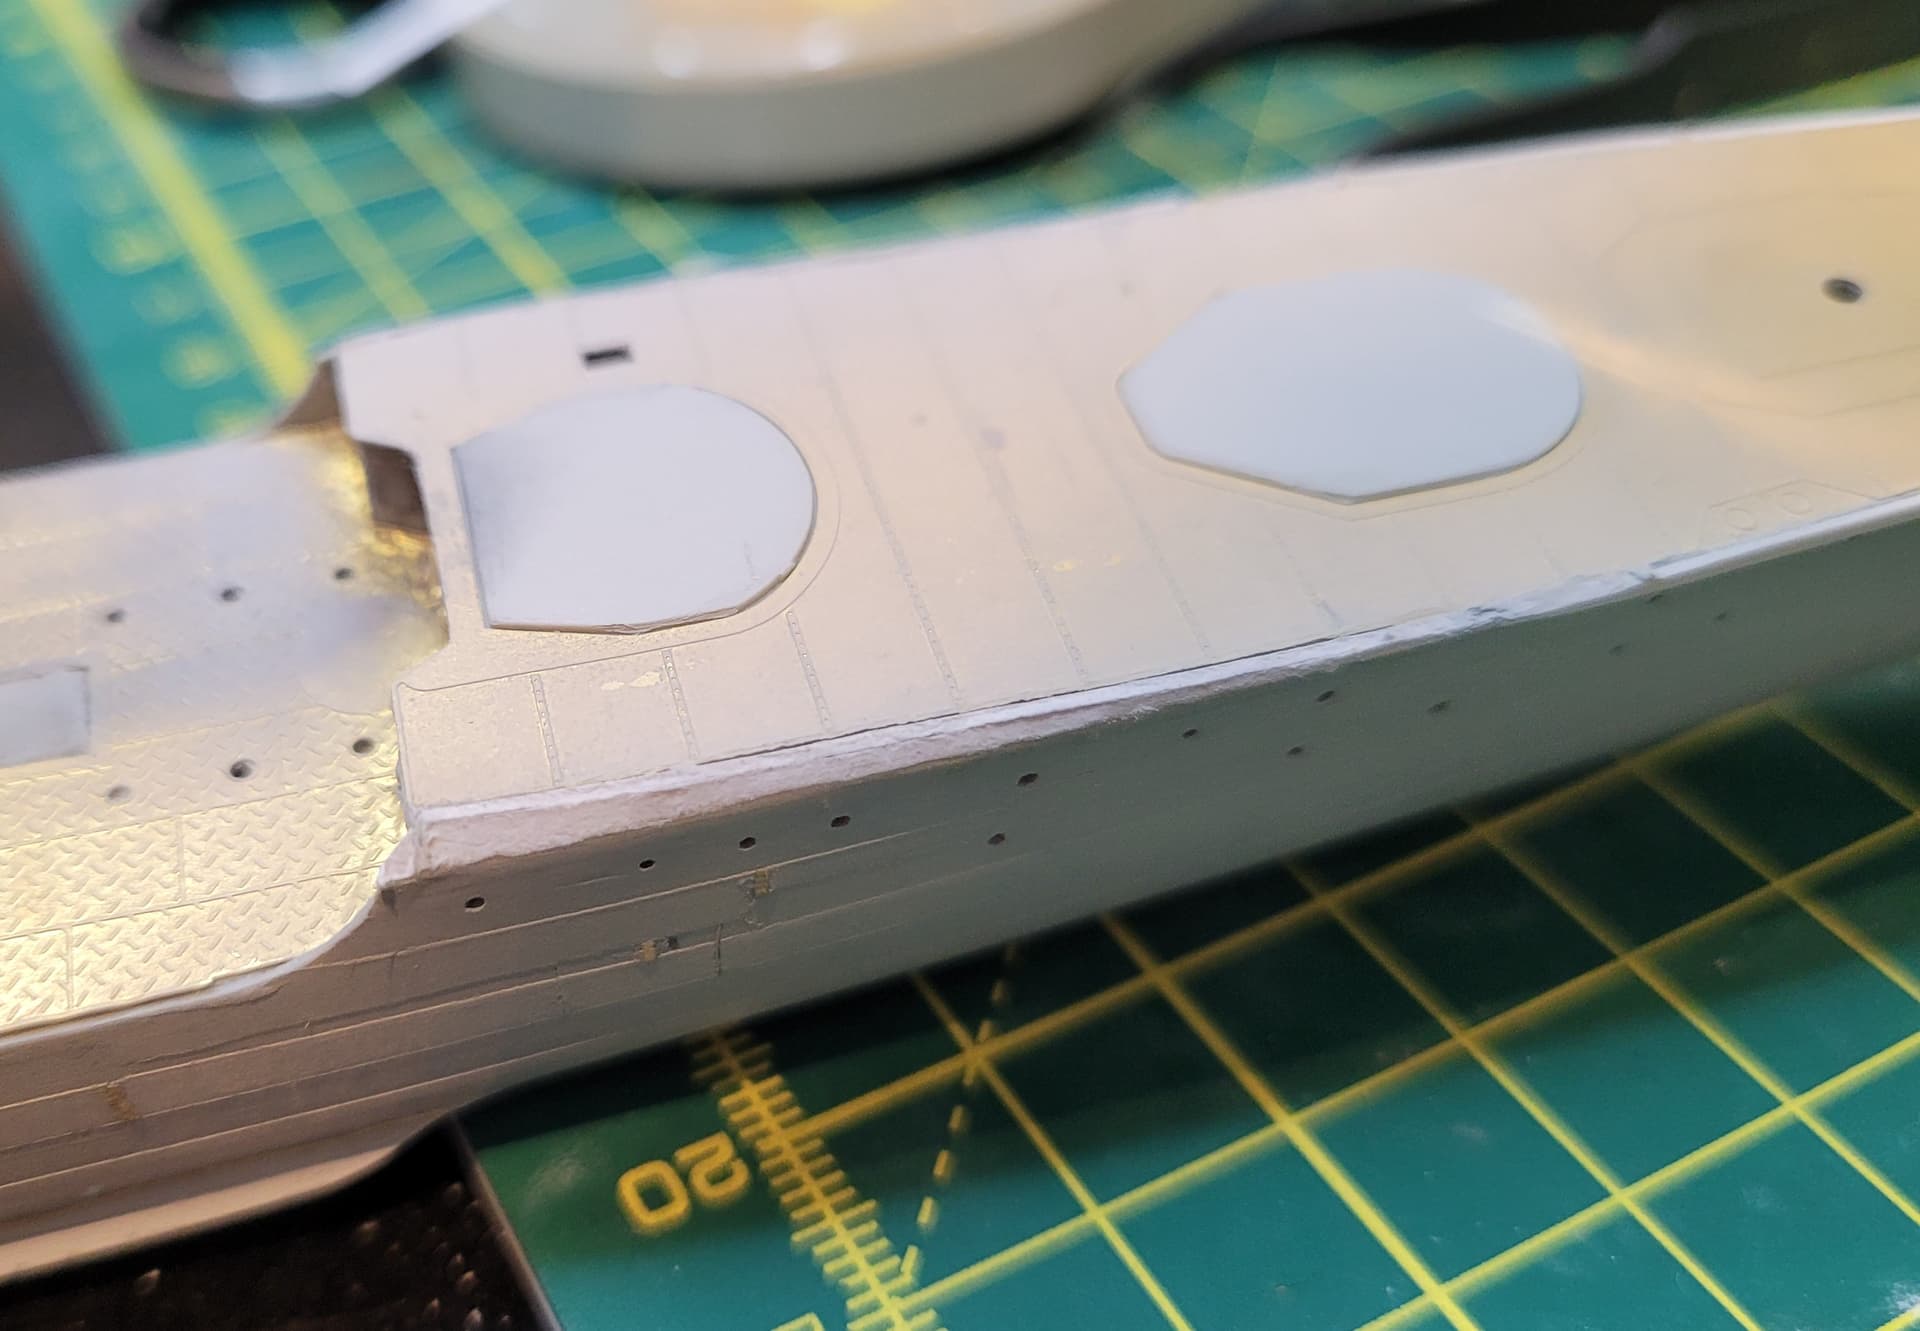
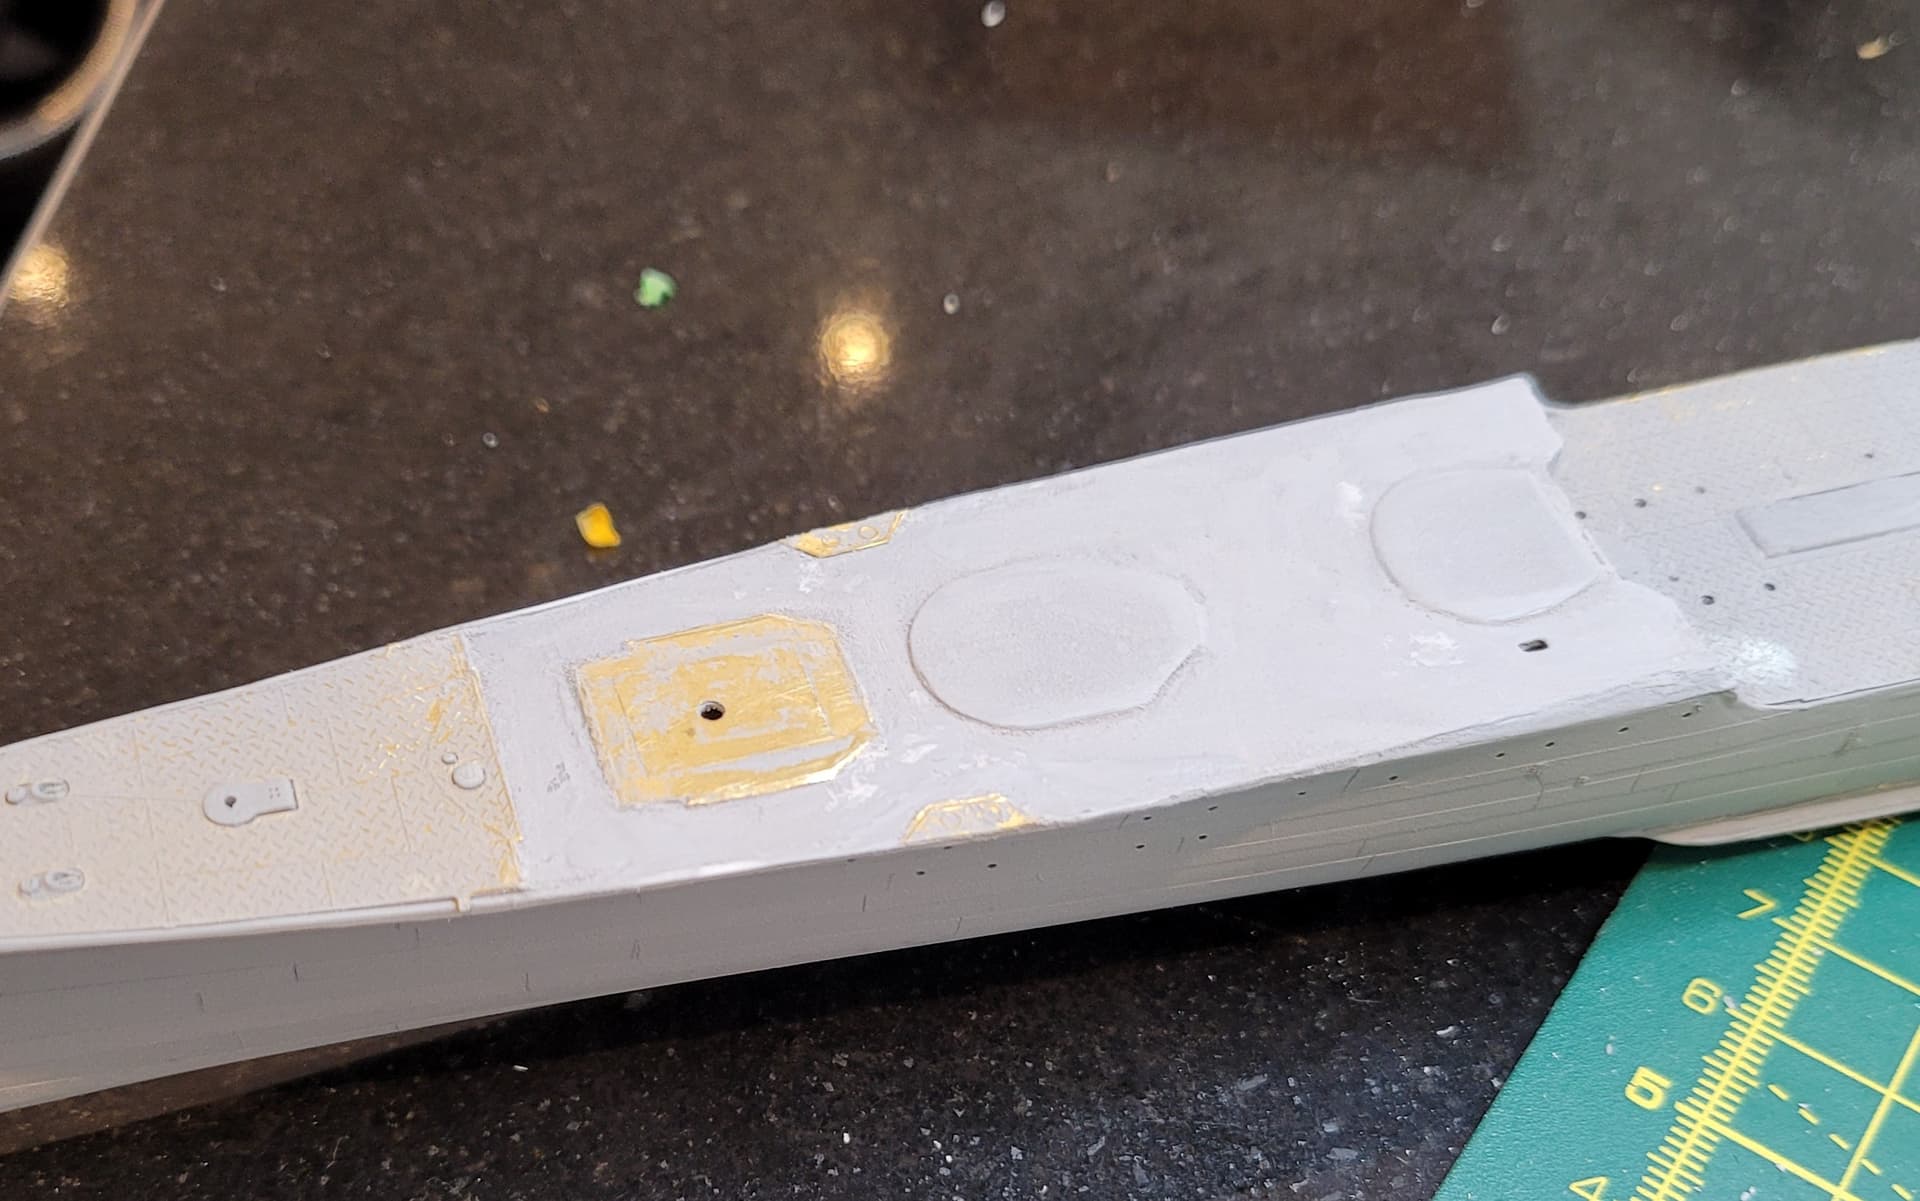
So after applying the brass decks to Fuyutsuki, I quickly realized Fivestar had not allowed the correct spacing around the edges of the decks, especially the forecast one.


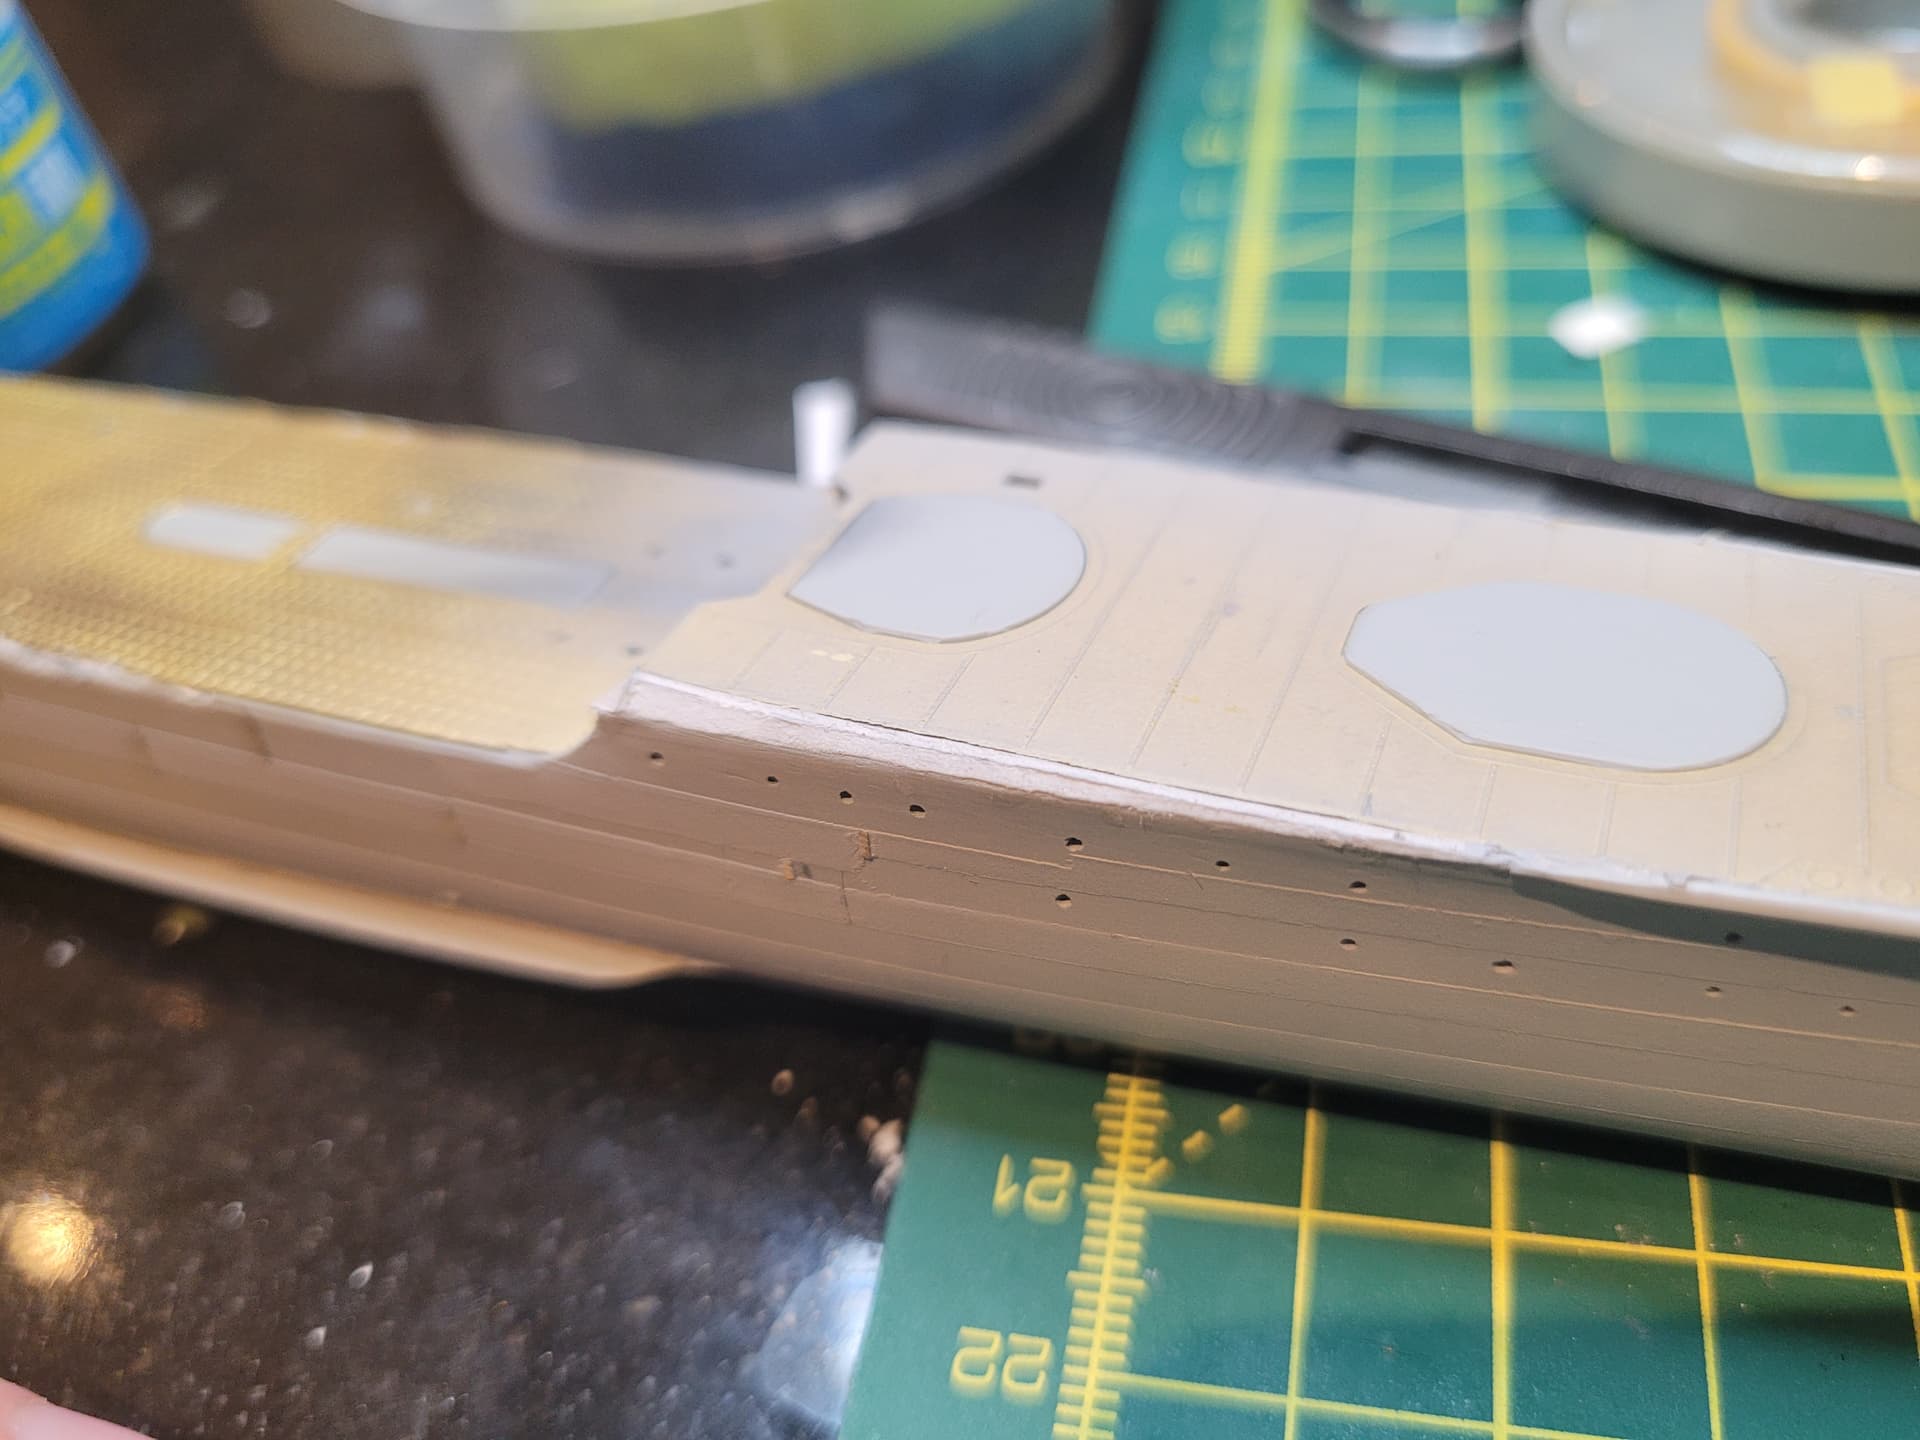
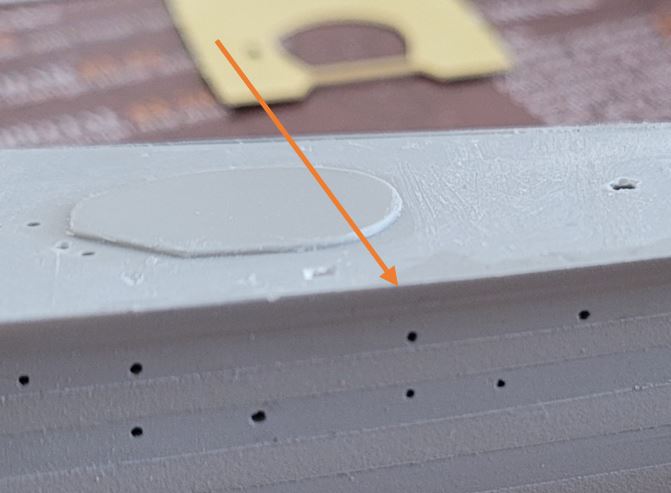
As can be seen here there is a reasonable border around the linoleum and treaded deck sections where the railing stanchions sit.


As can be seen, the gap left is not consistent and very tiny.

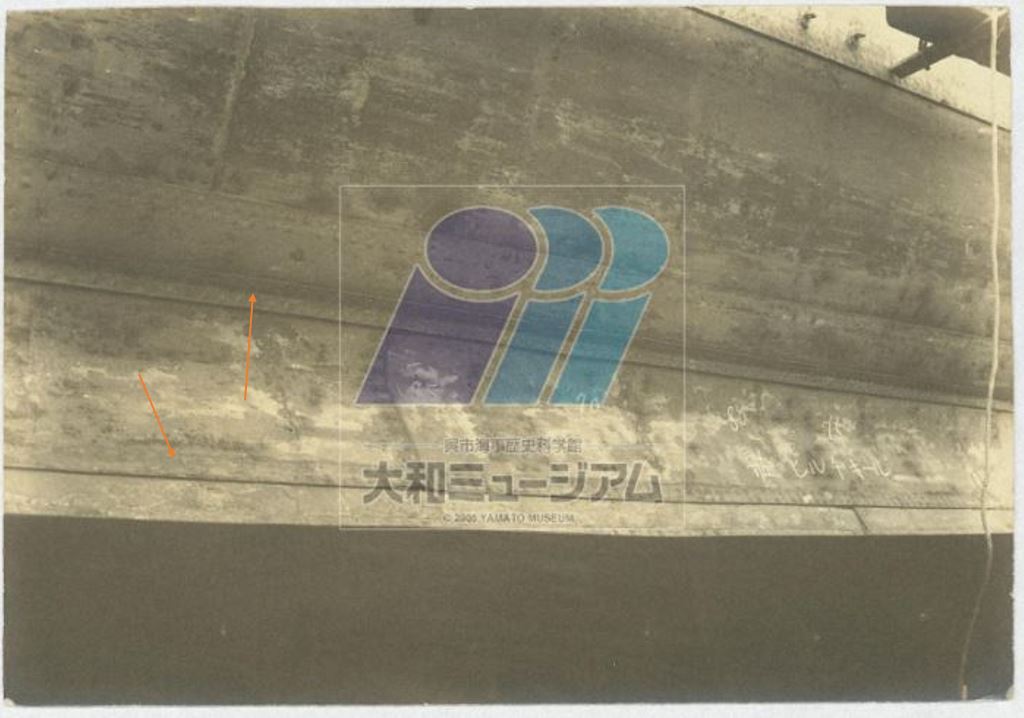
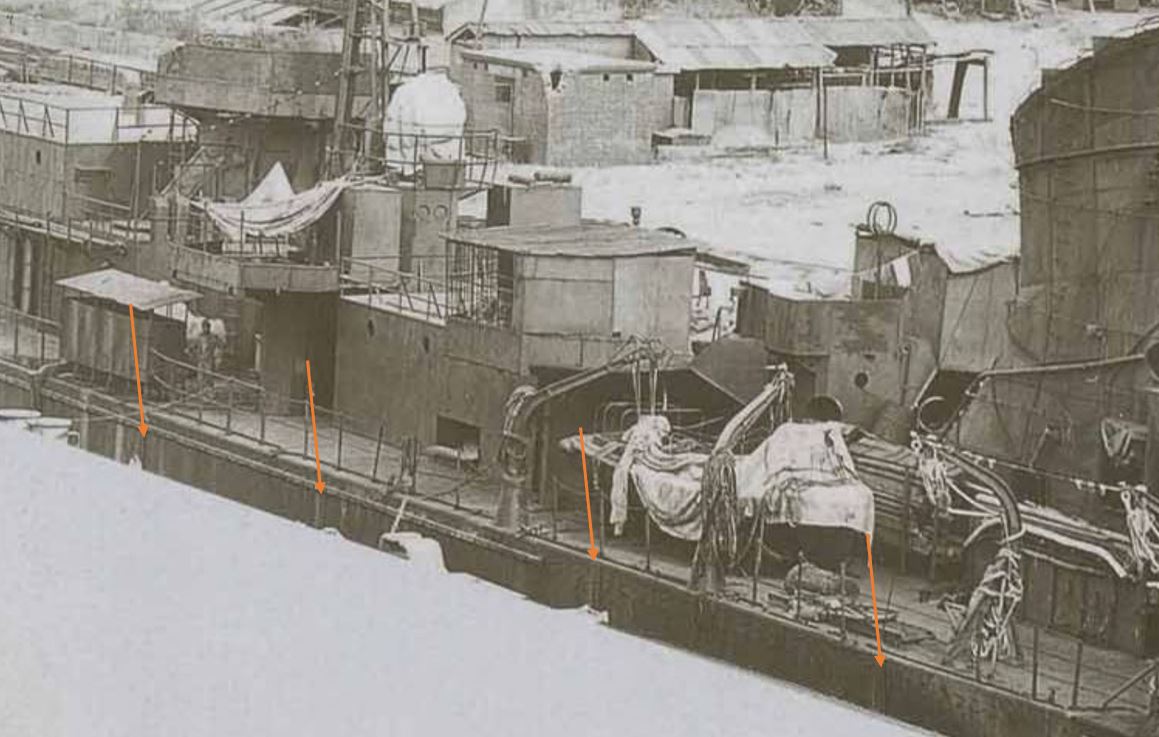
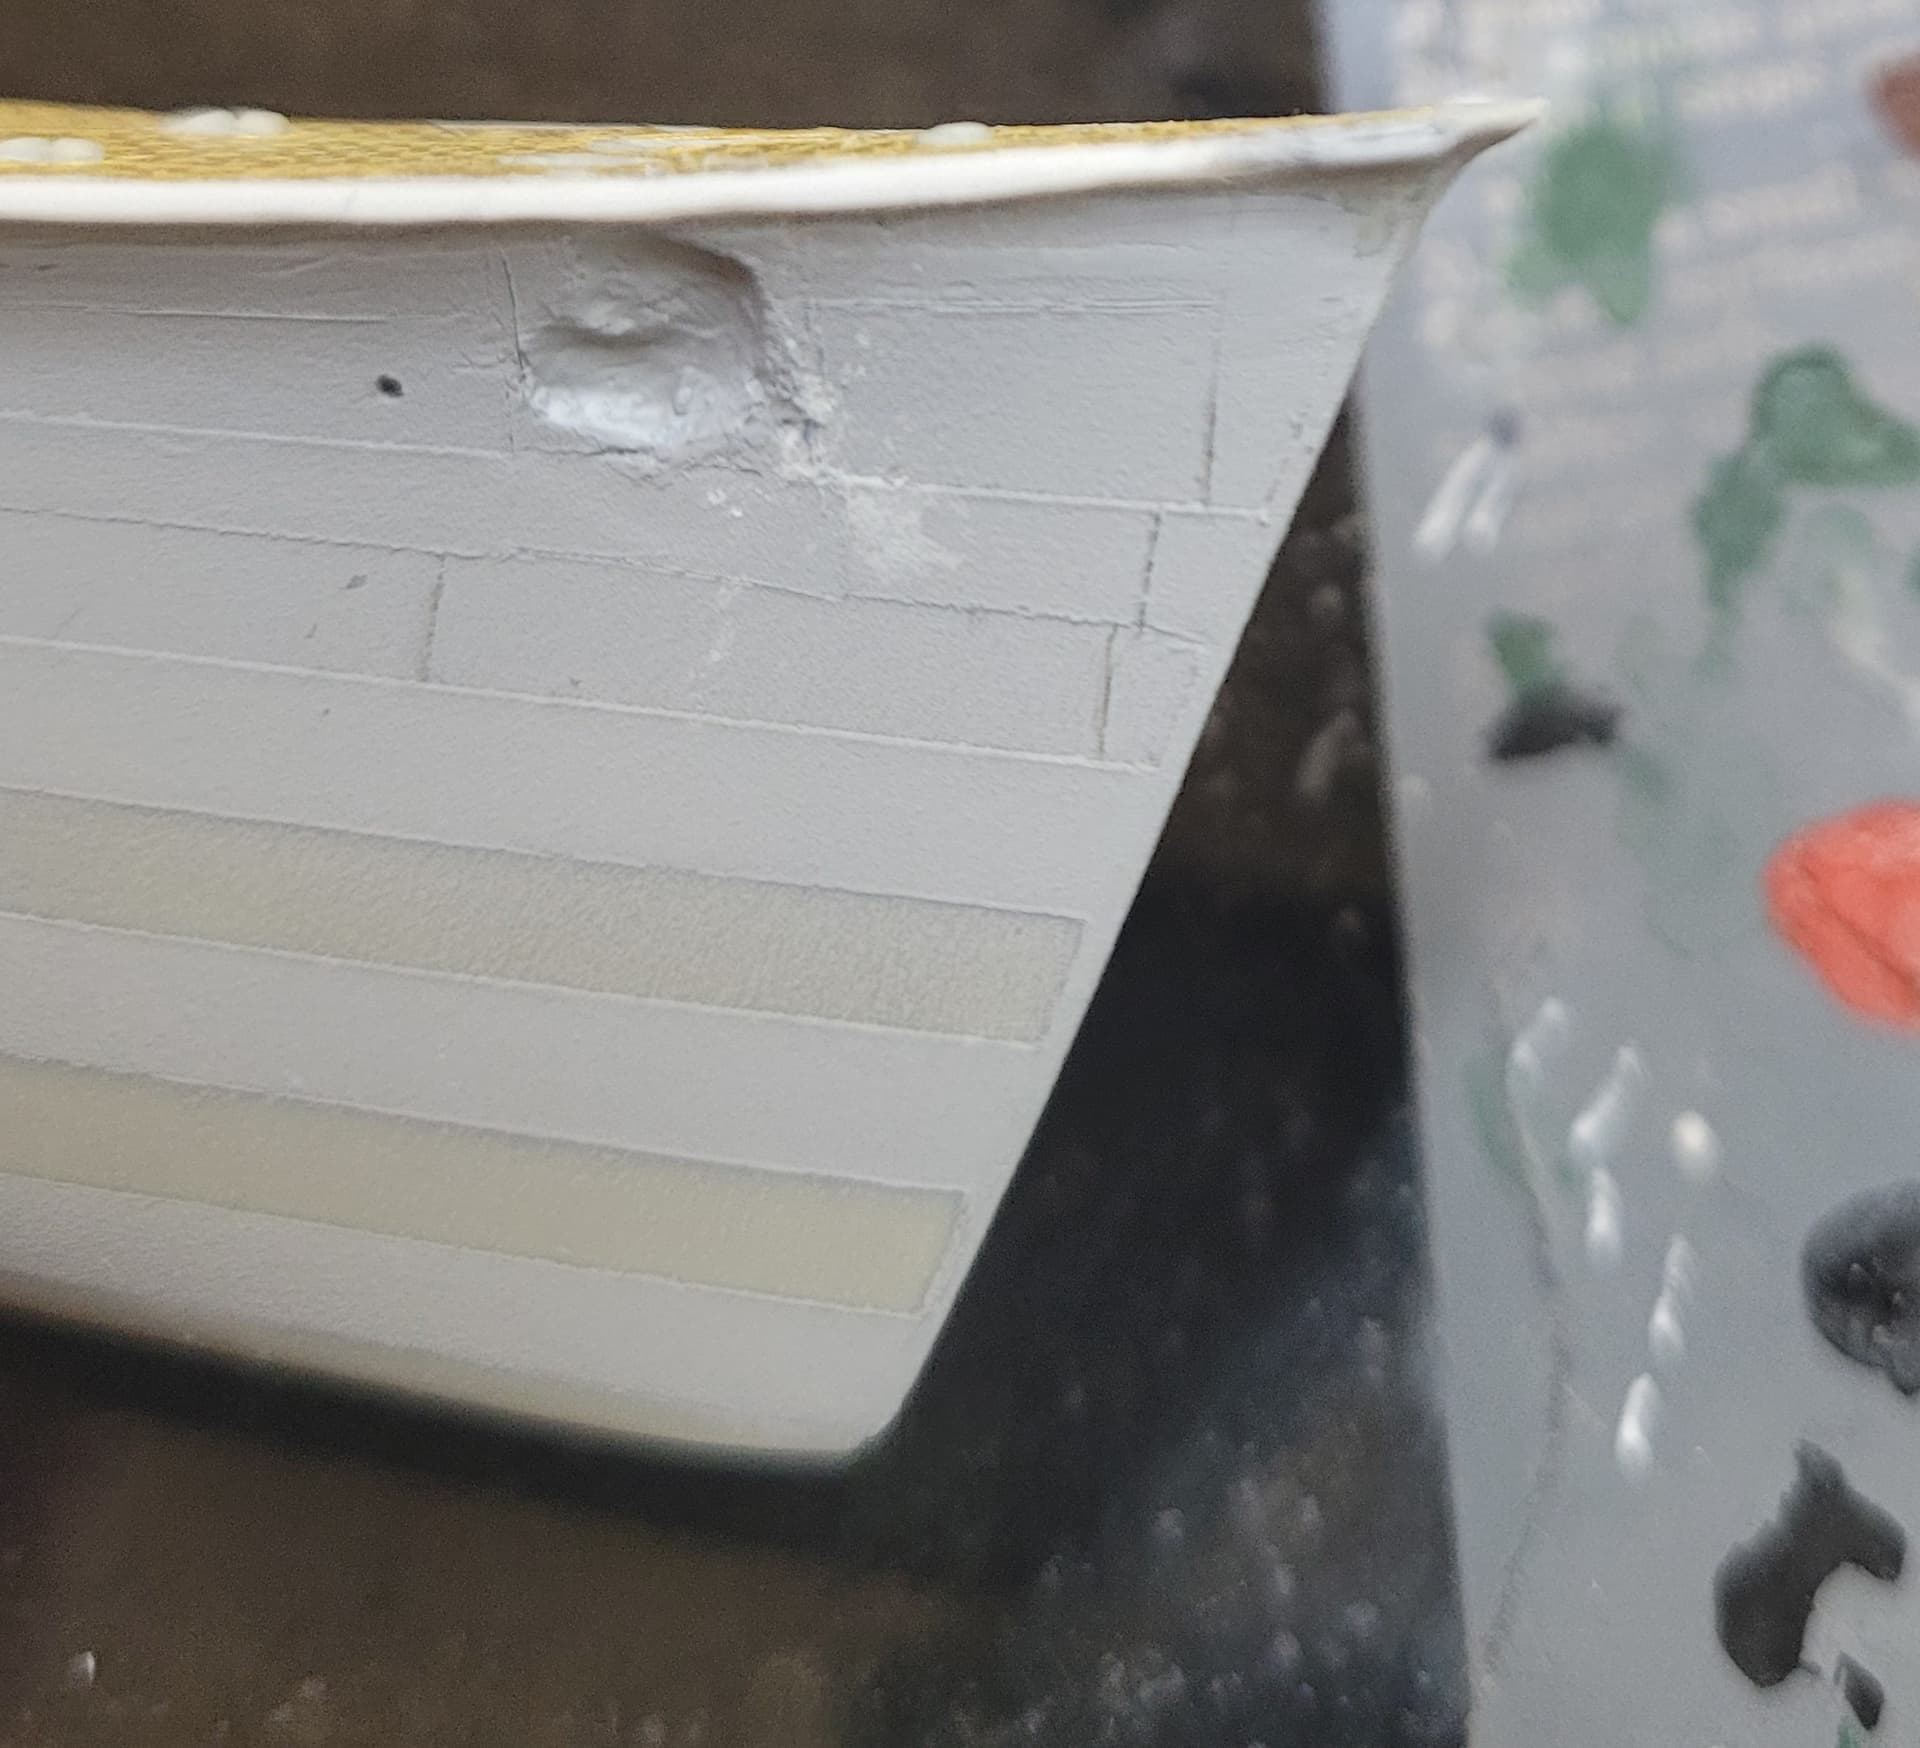
Additionally, the Akizuki class vessels have flat side surfaces stretching across the border of the upper deck.

Wave instead decides to depict this as a fine point…
Wave side wall

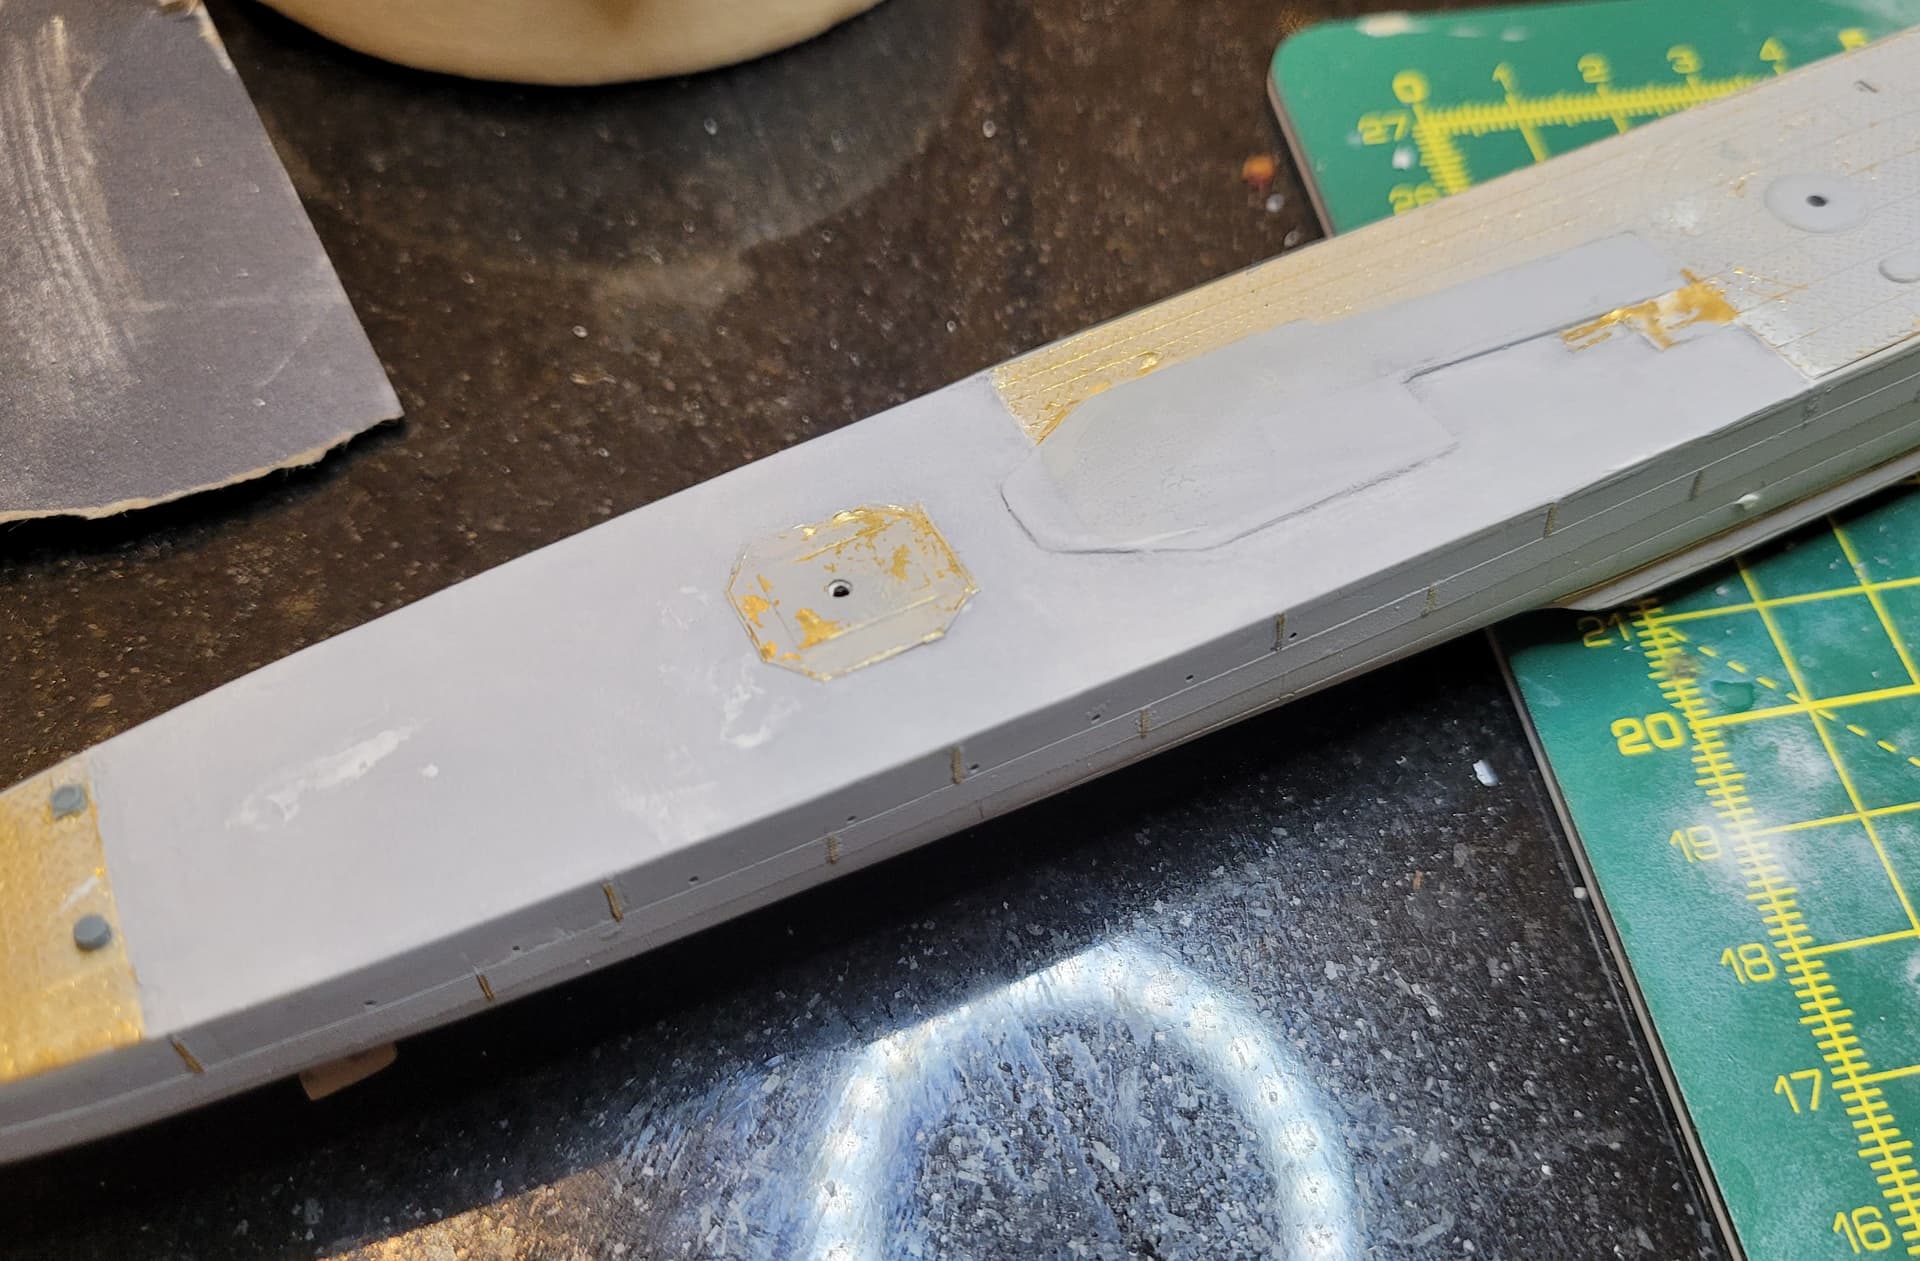
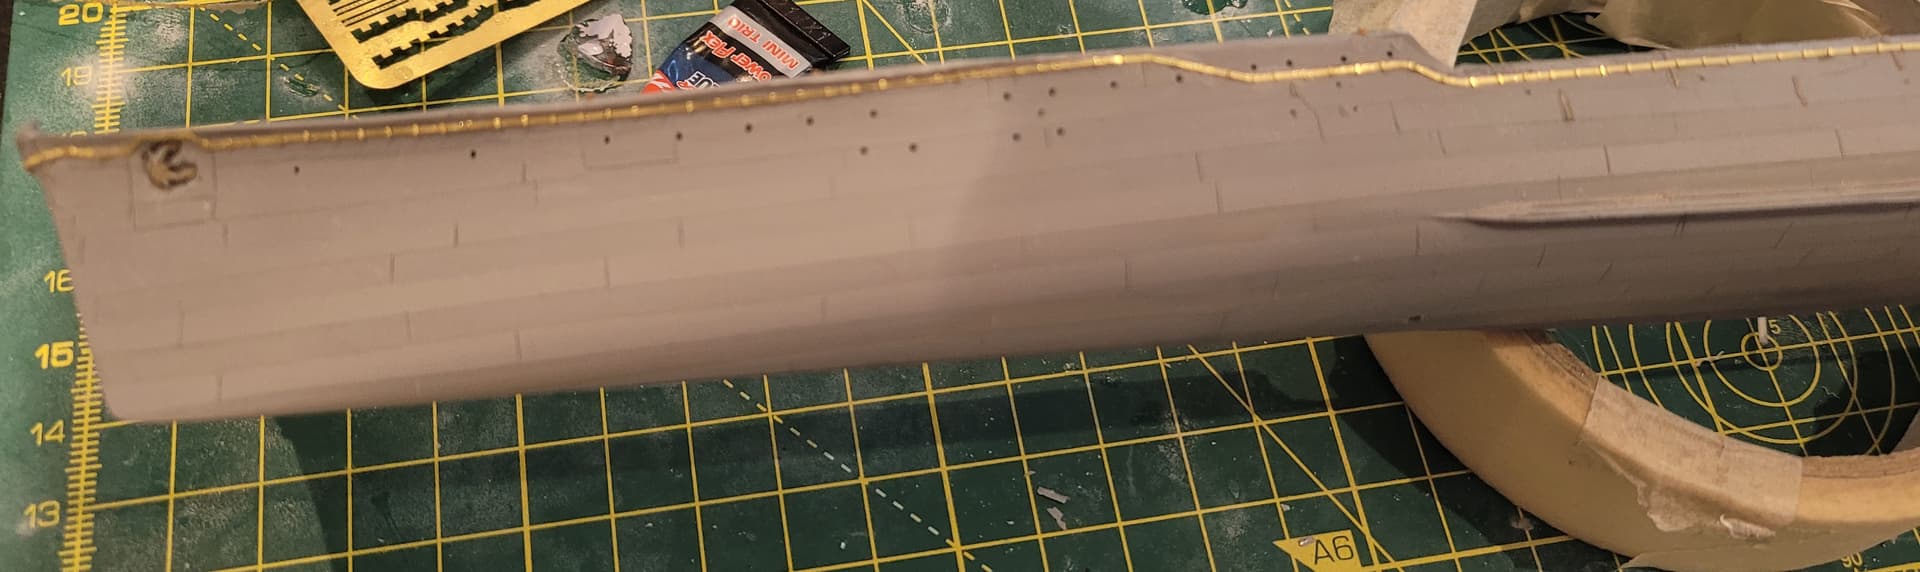
To fix both of these issues I sanded off all the deck left around the plate. Next, I ordered a 0.8 mm thick styrene sheet and cut thin strips to the estimated width of these side surfaces. I could then stick them across the edges of Fuyutsuki and blended the strips into the angled portion at the end of the deck. I also sanded a little to recreate the slight reduction in the width of these side walls as they approach the bow.

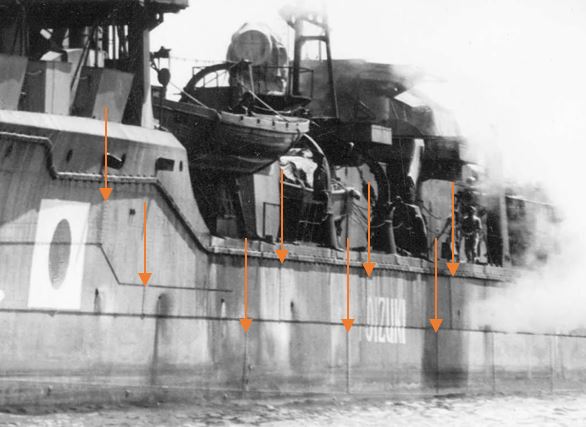
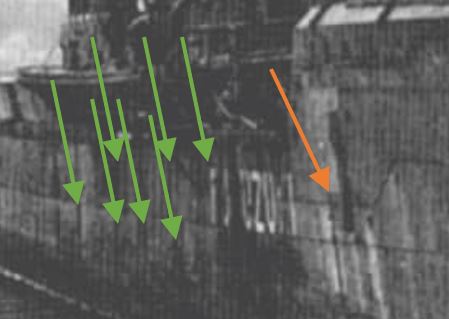
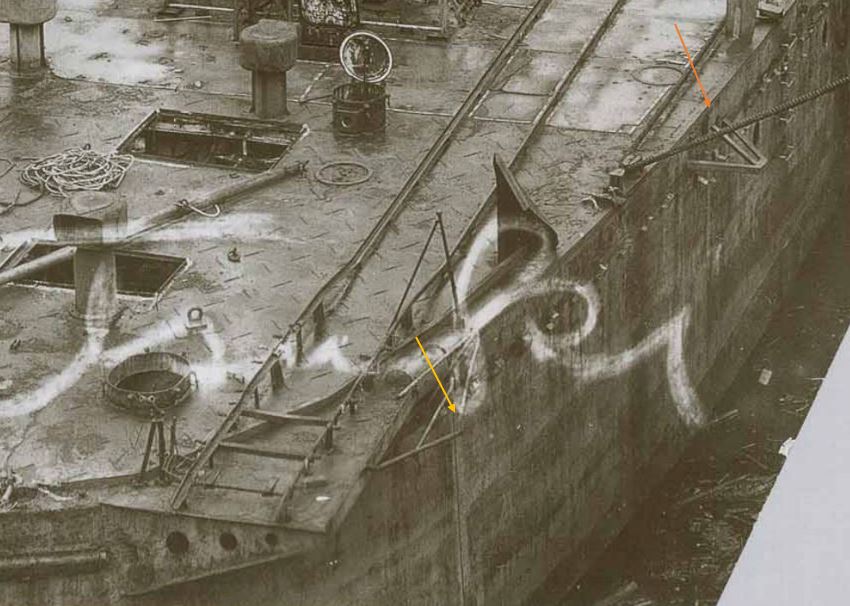
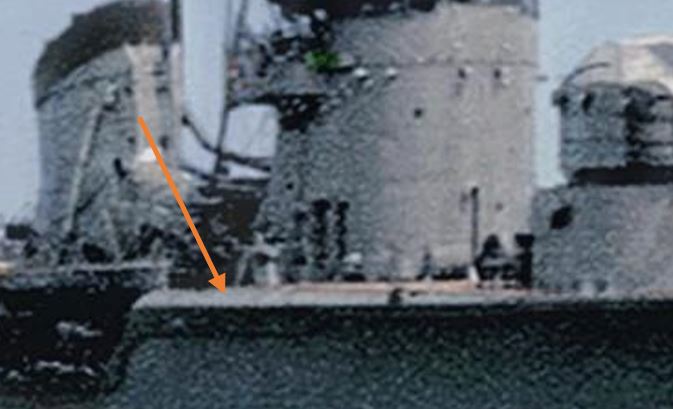
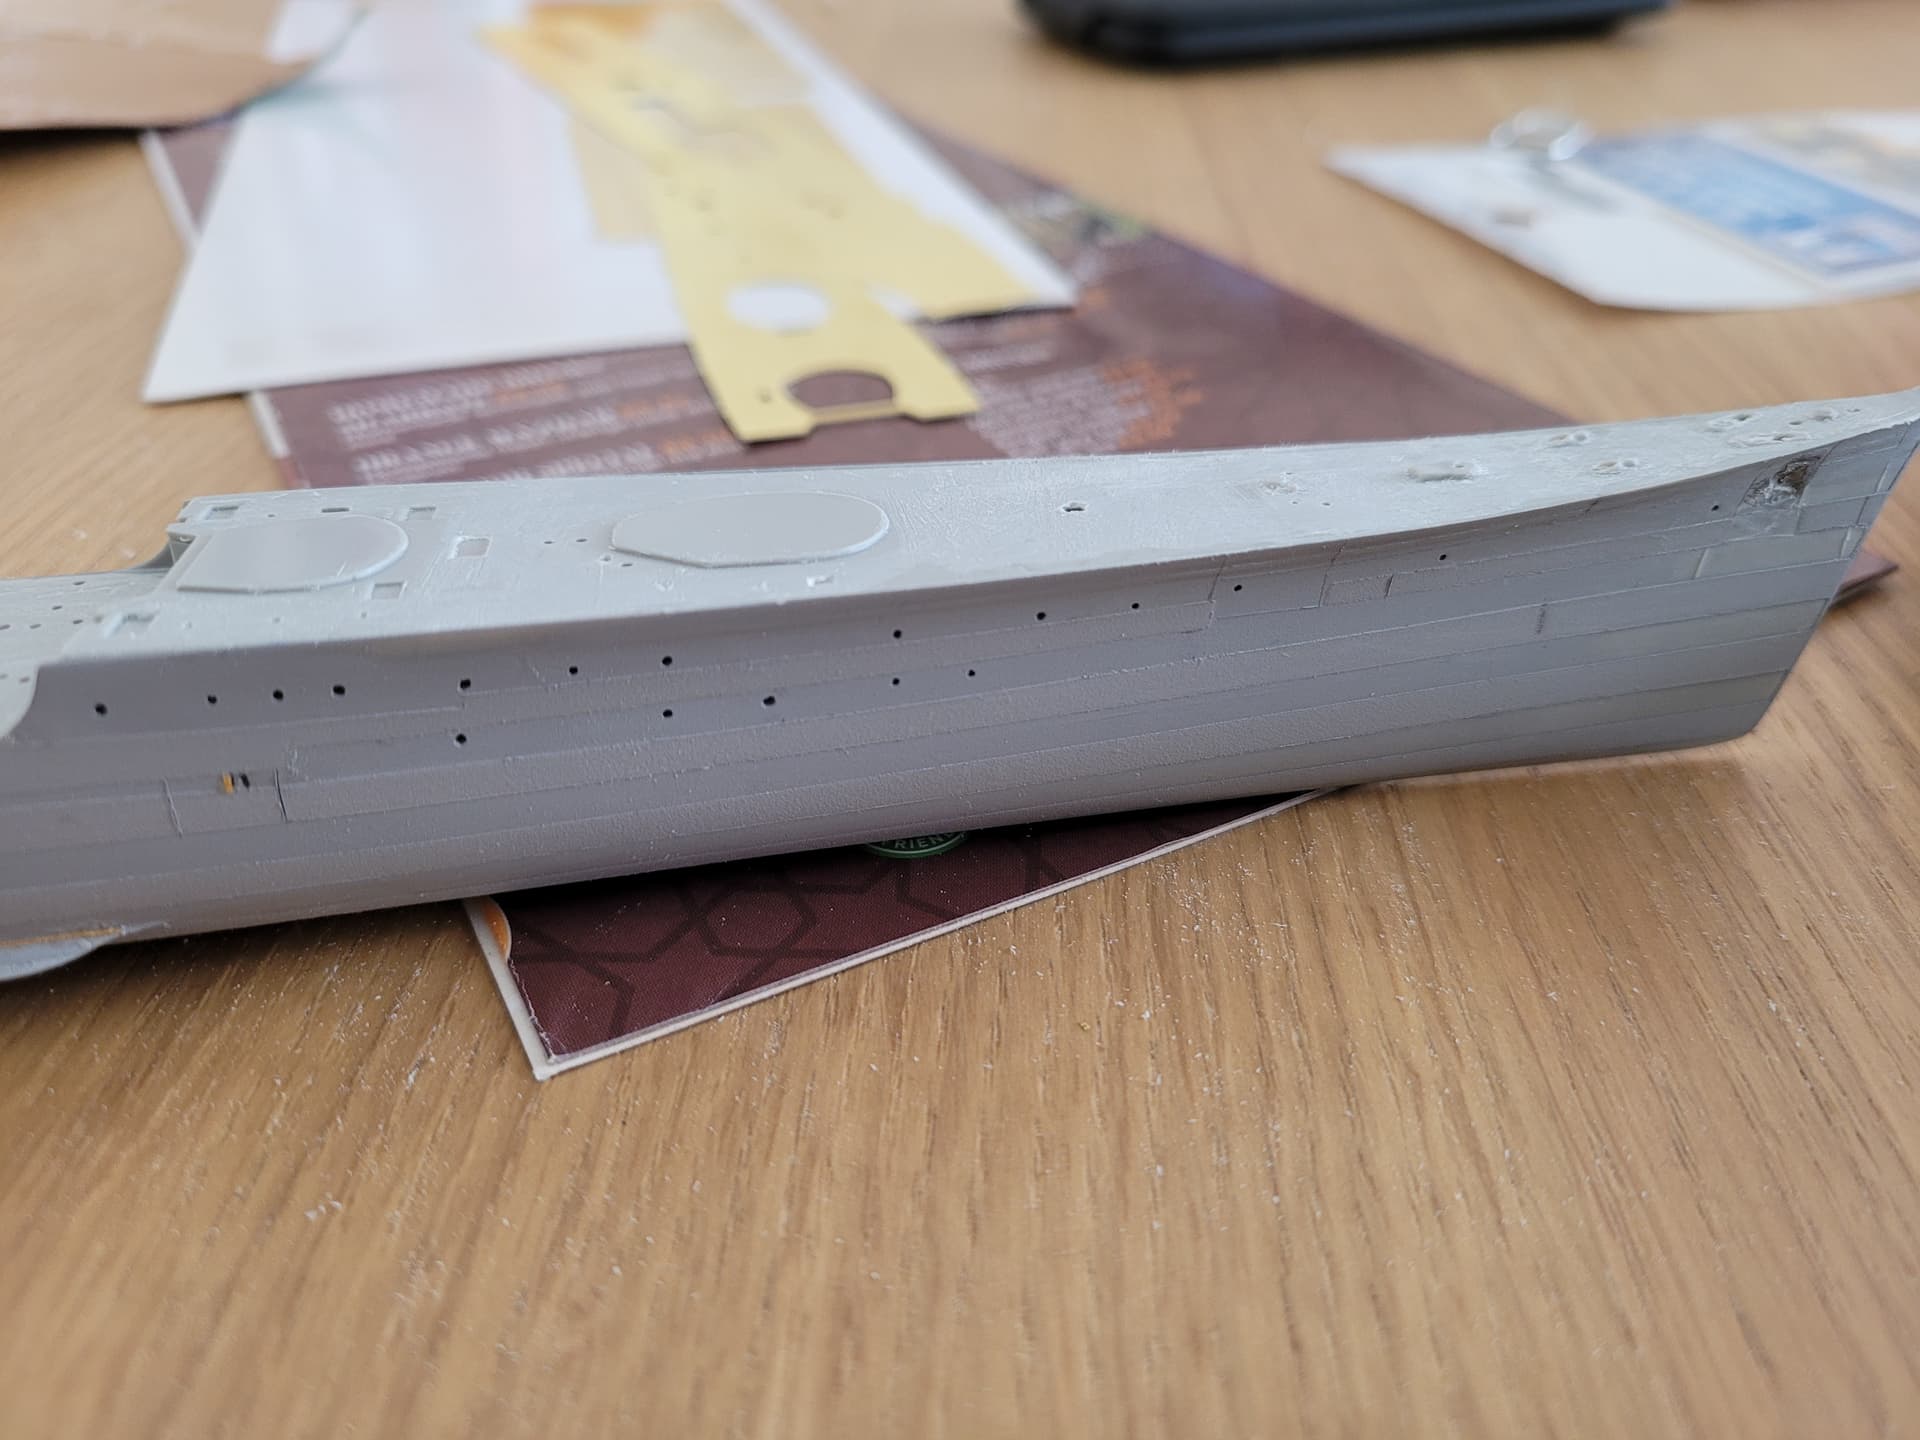
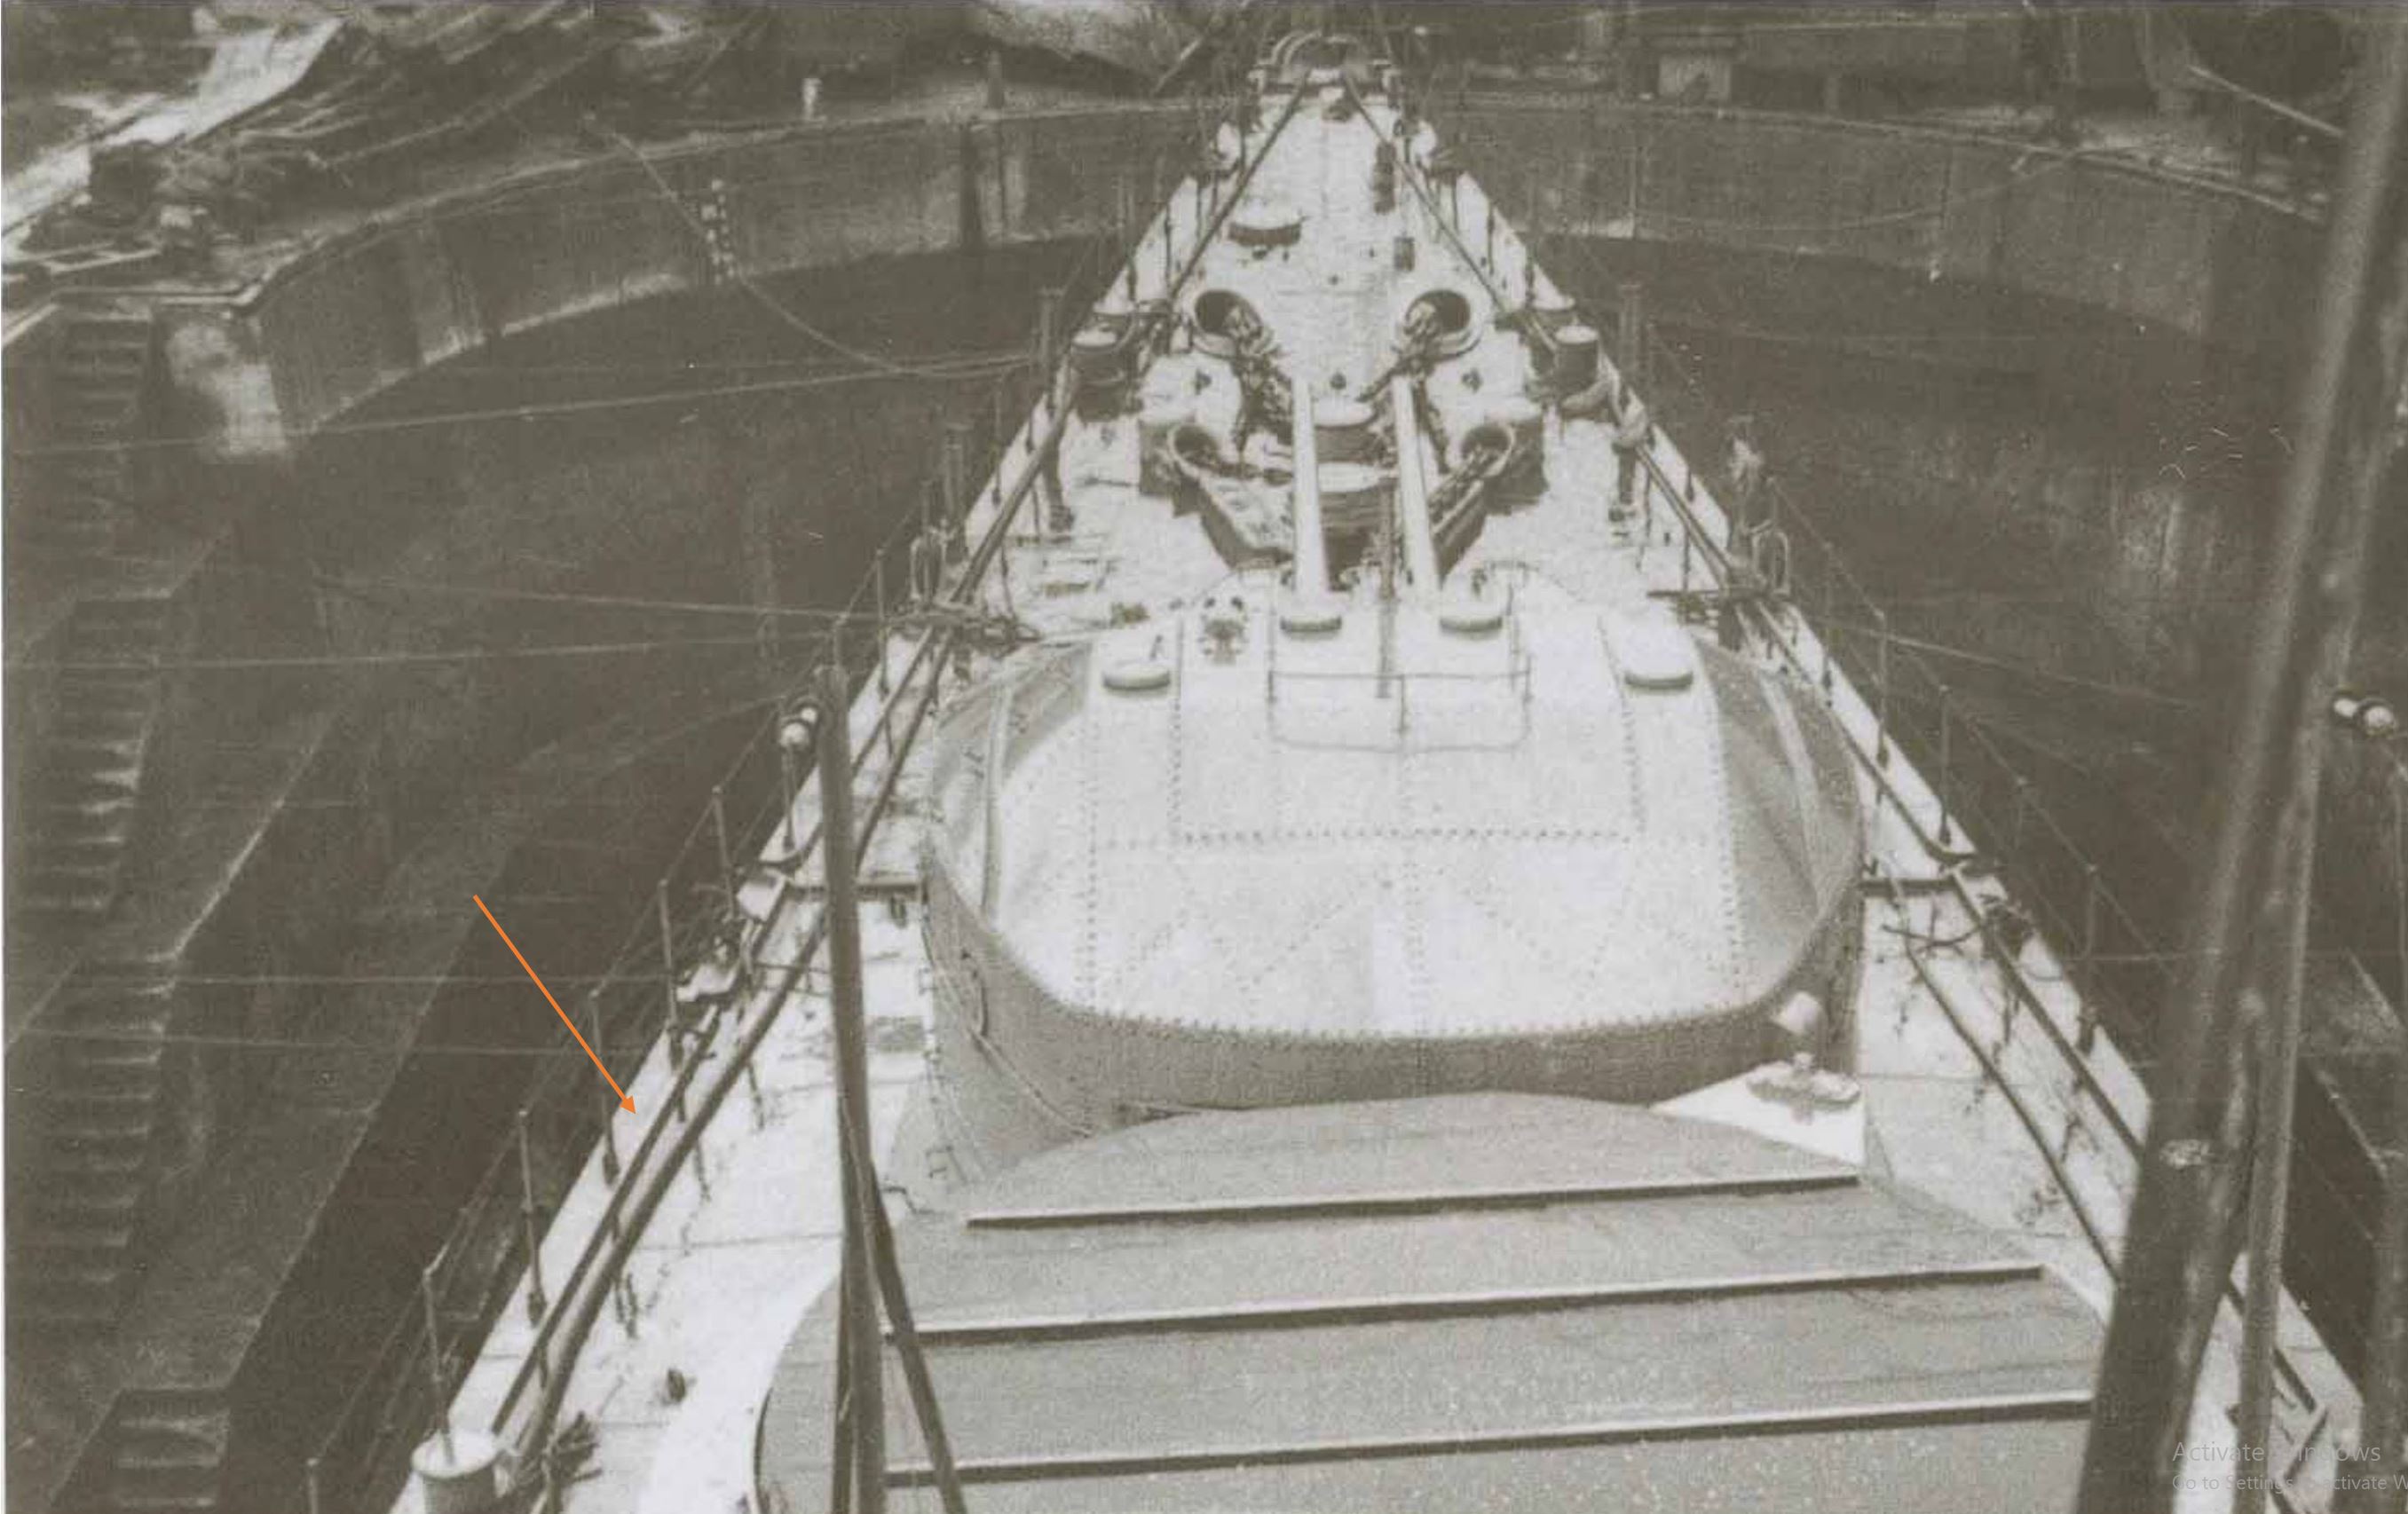
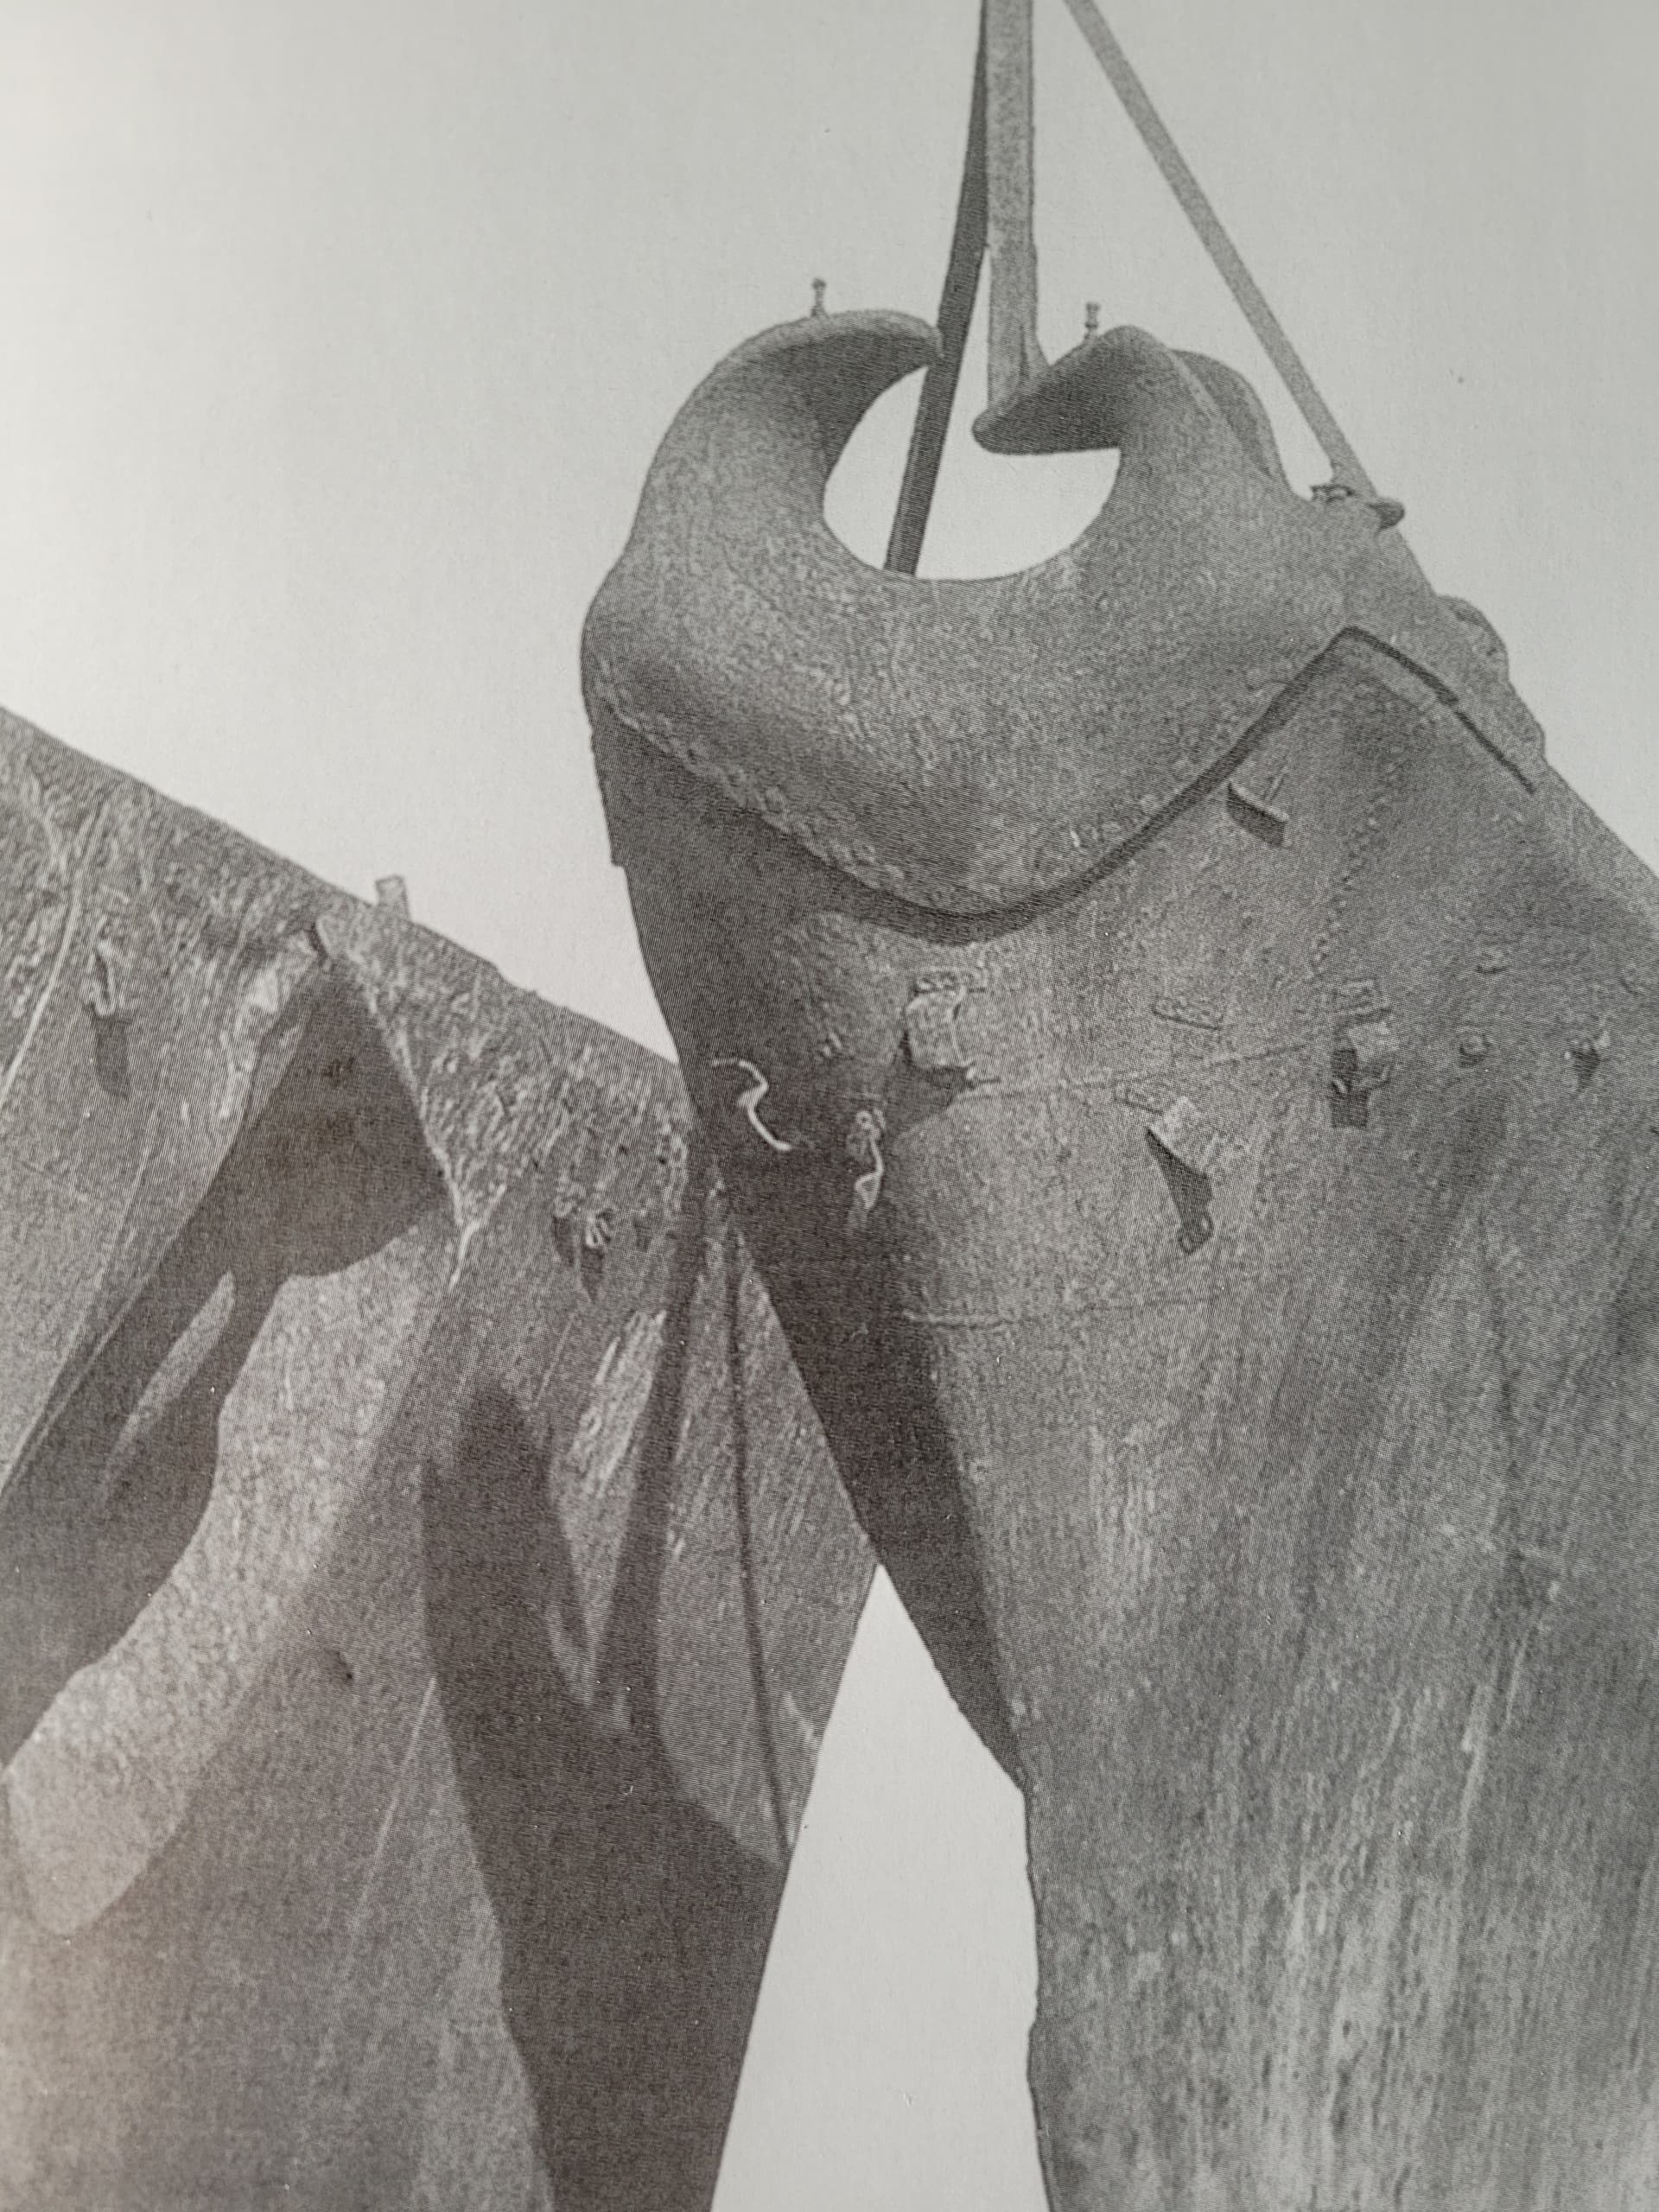
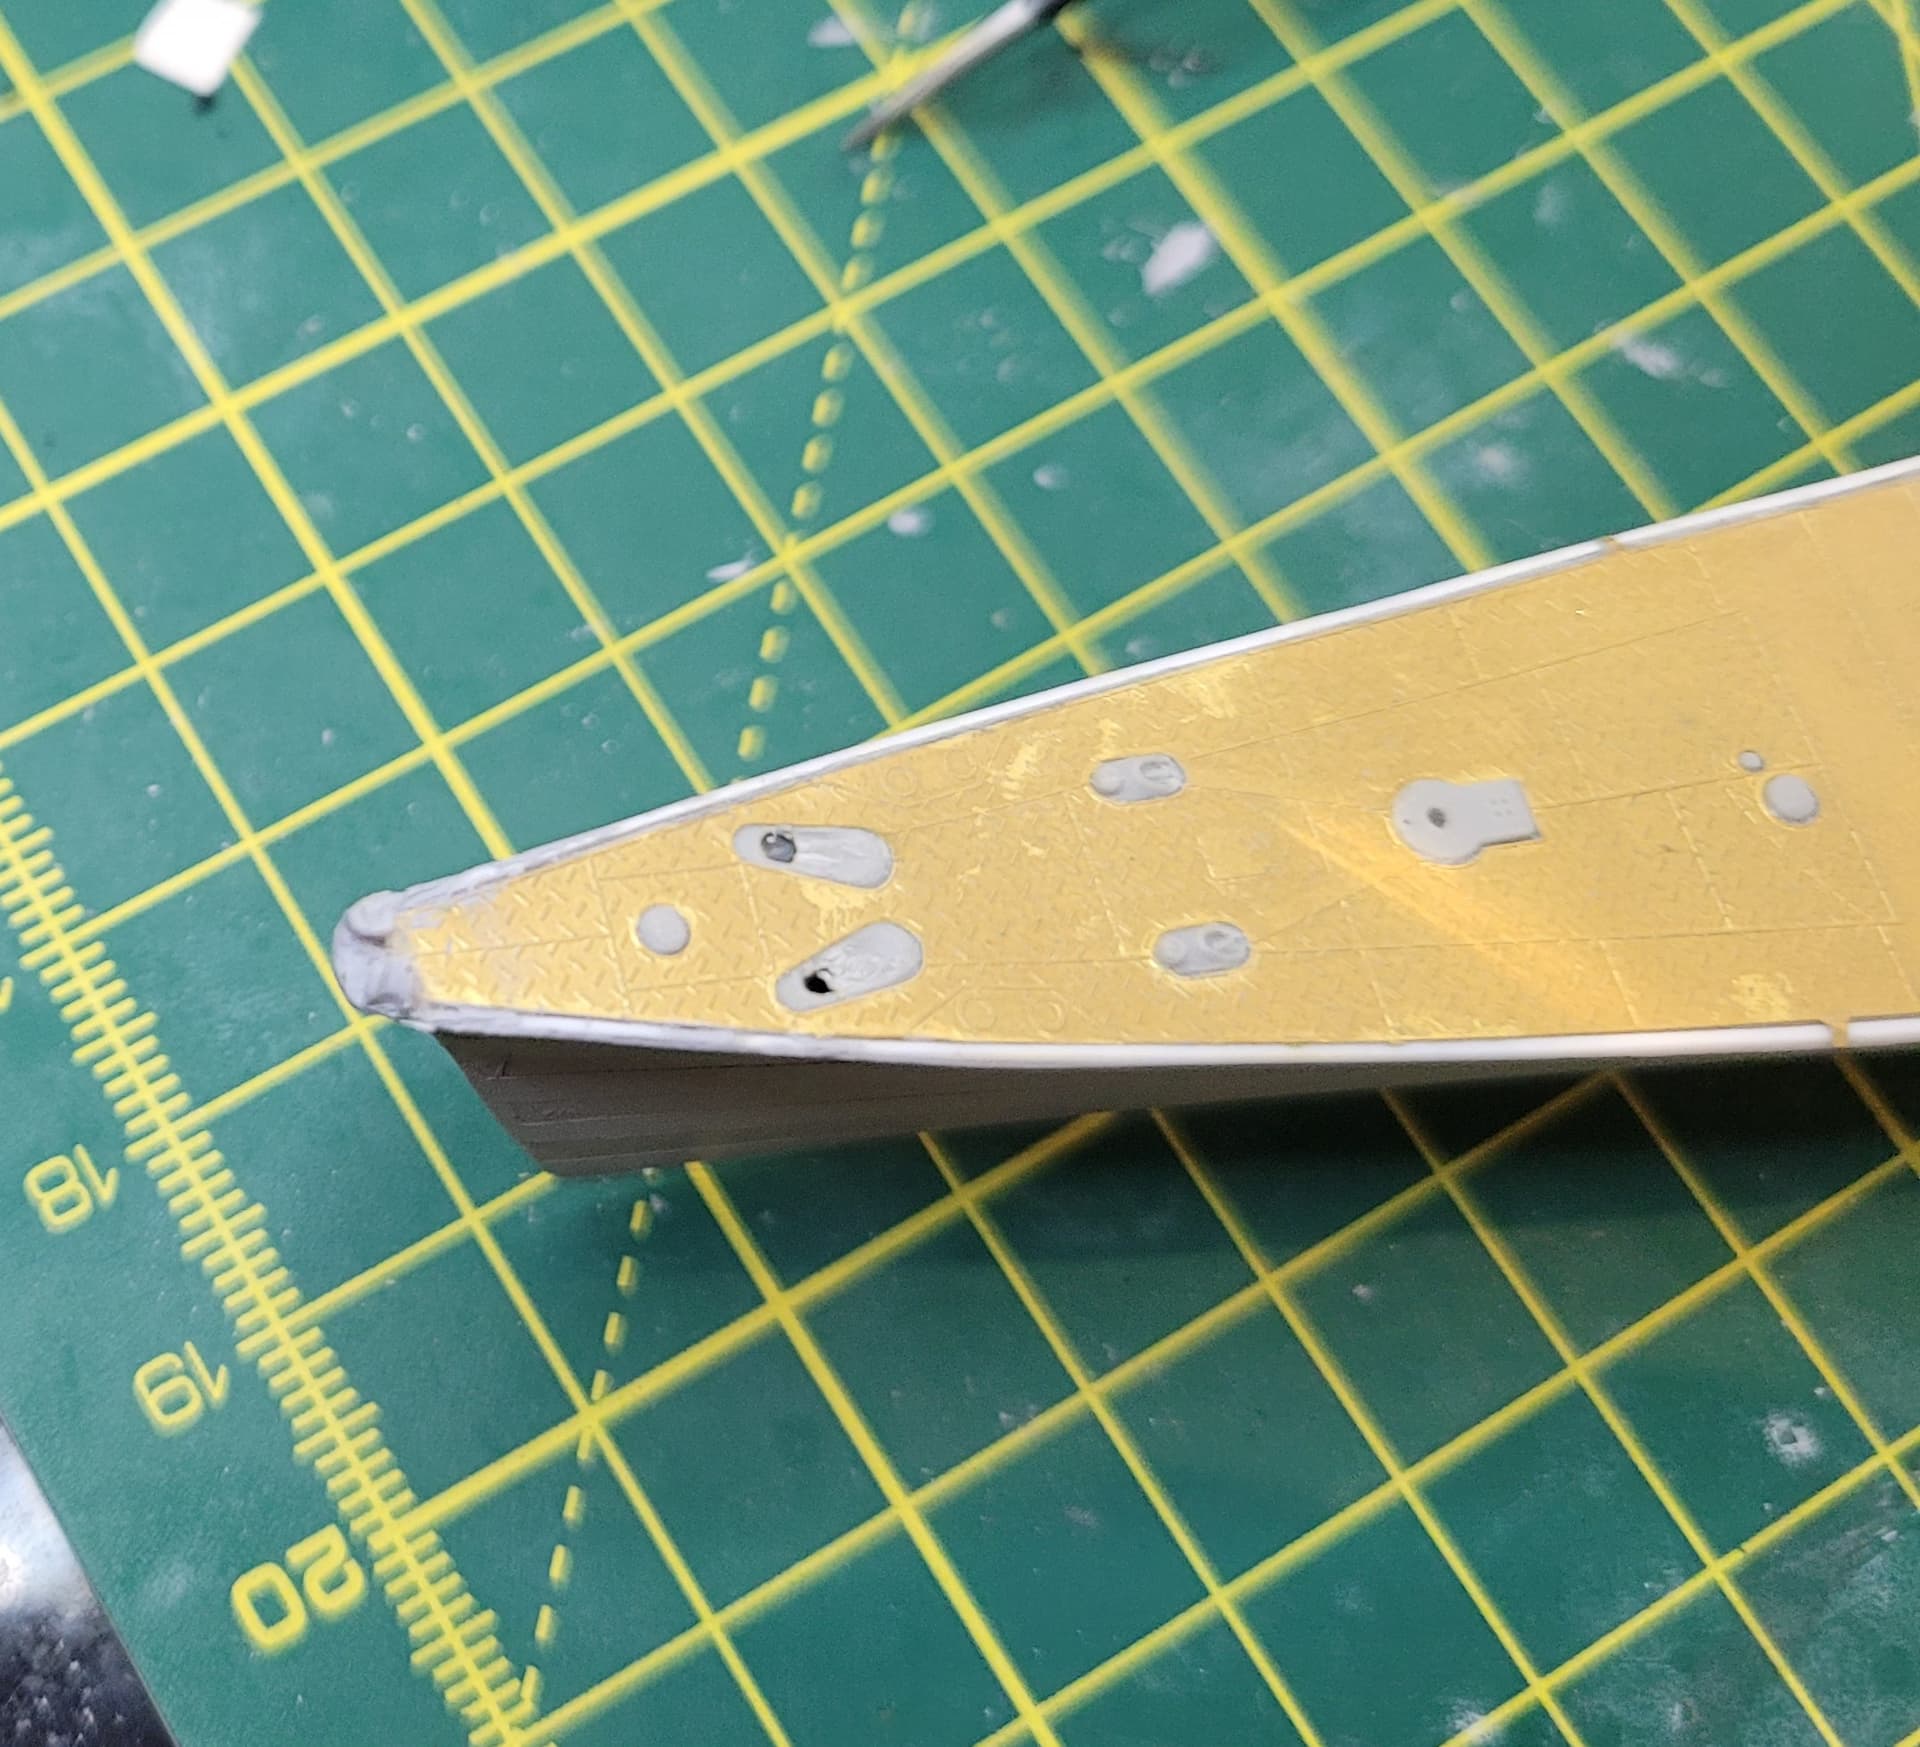
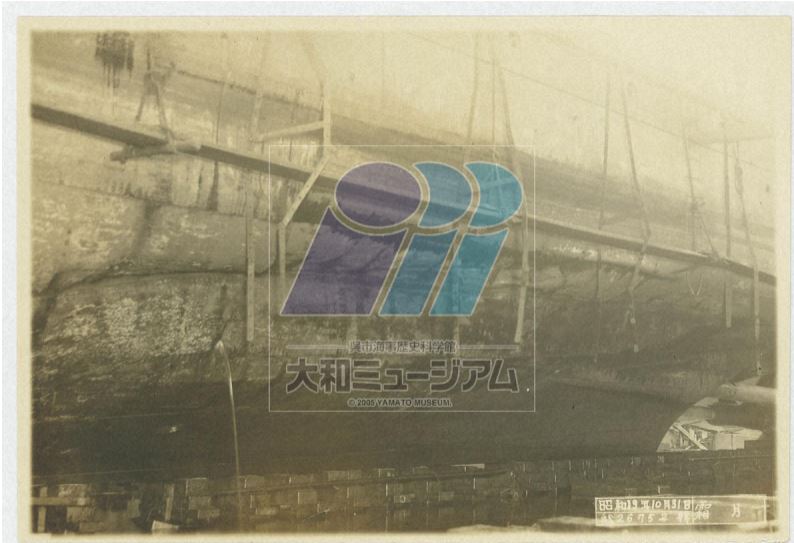
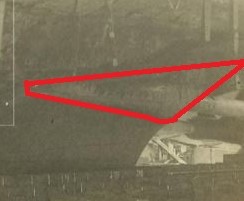
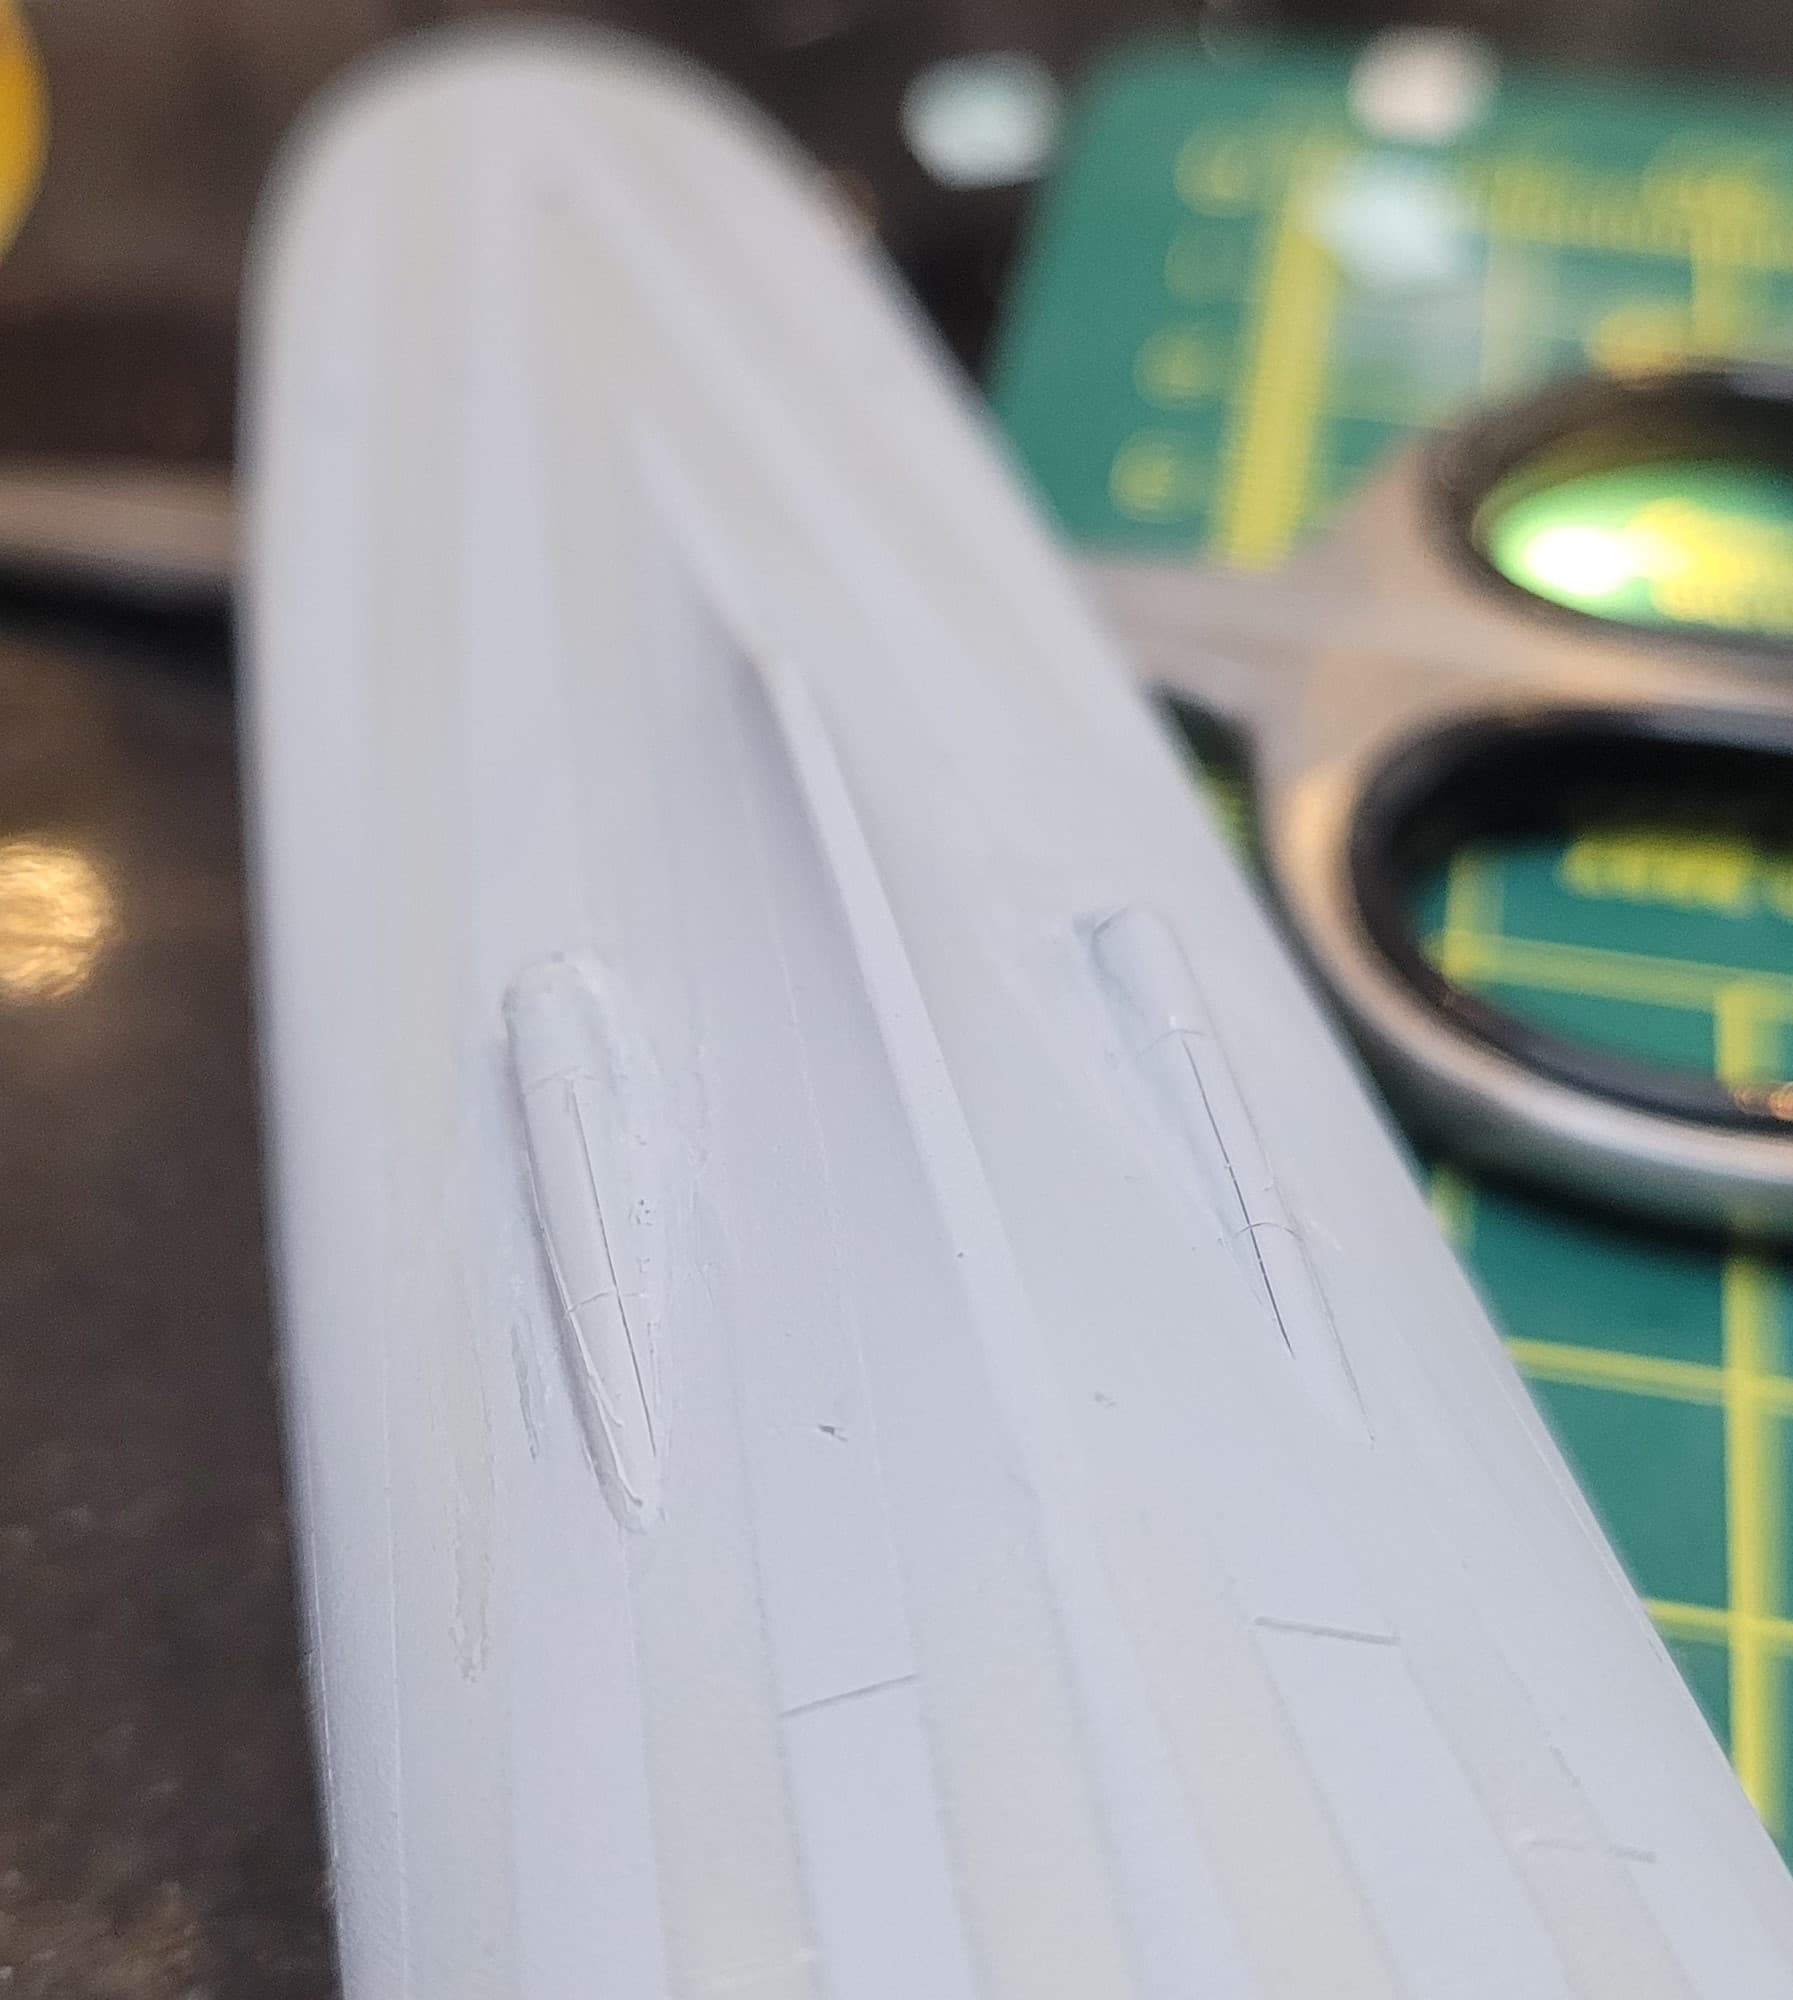
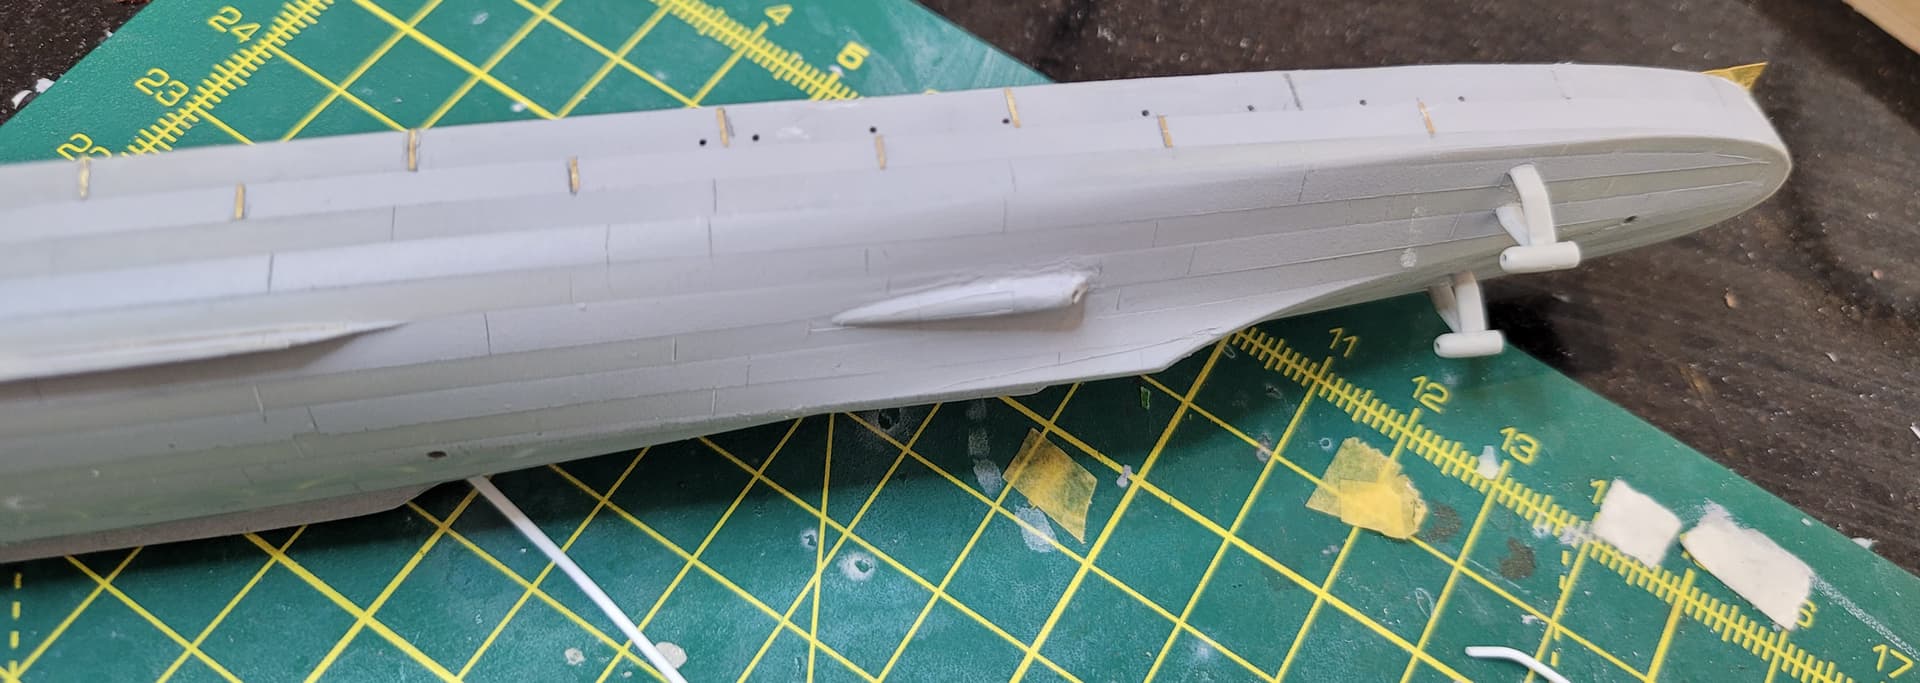
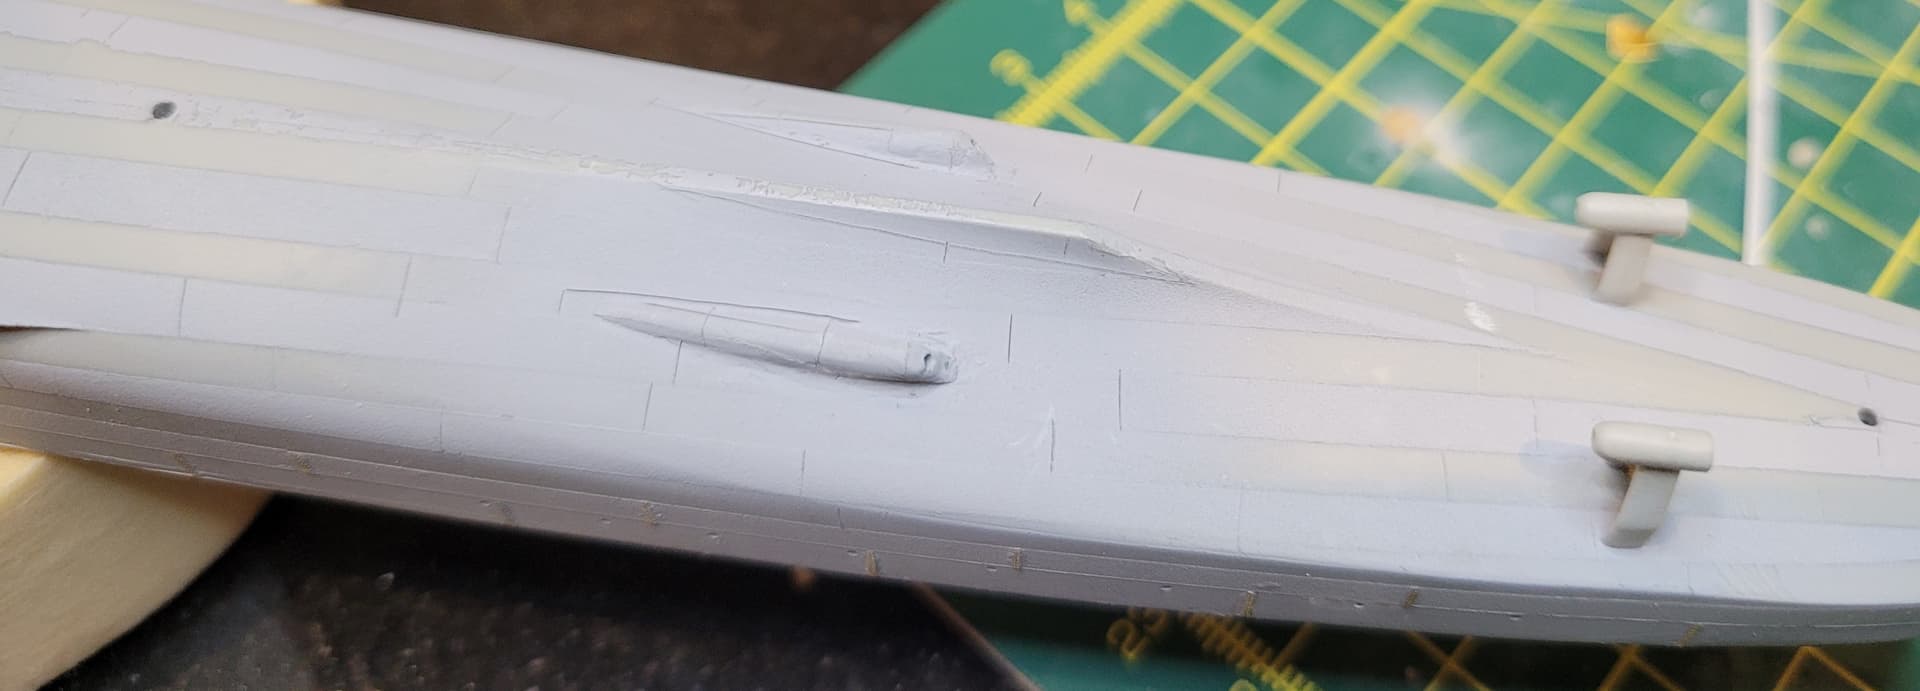
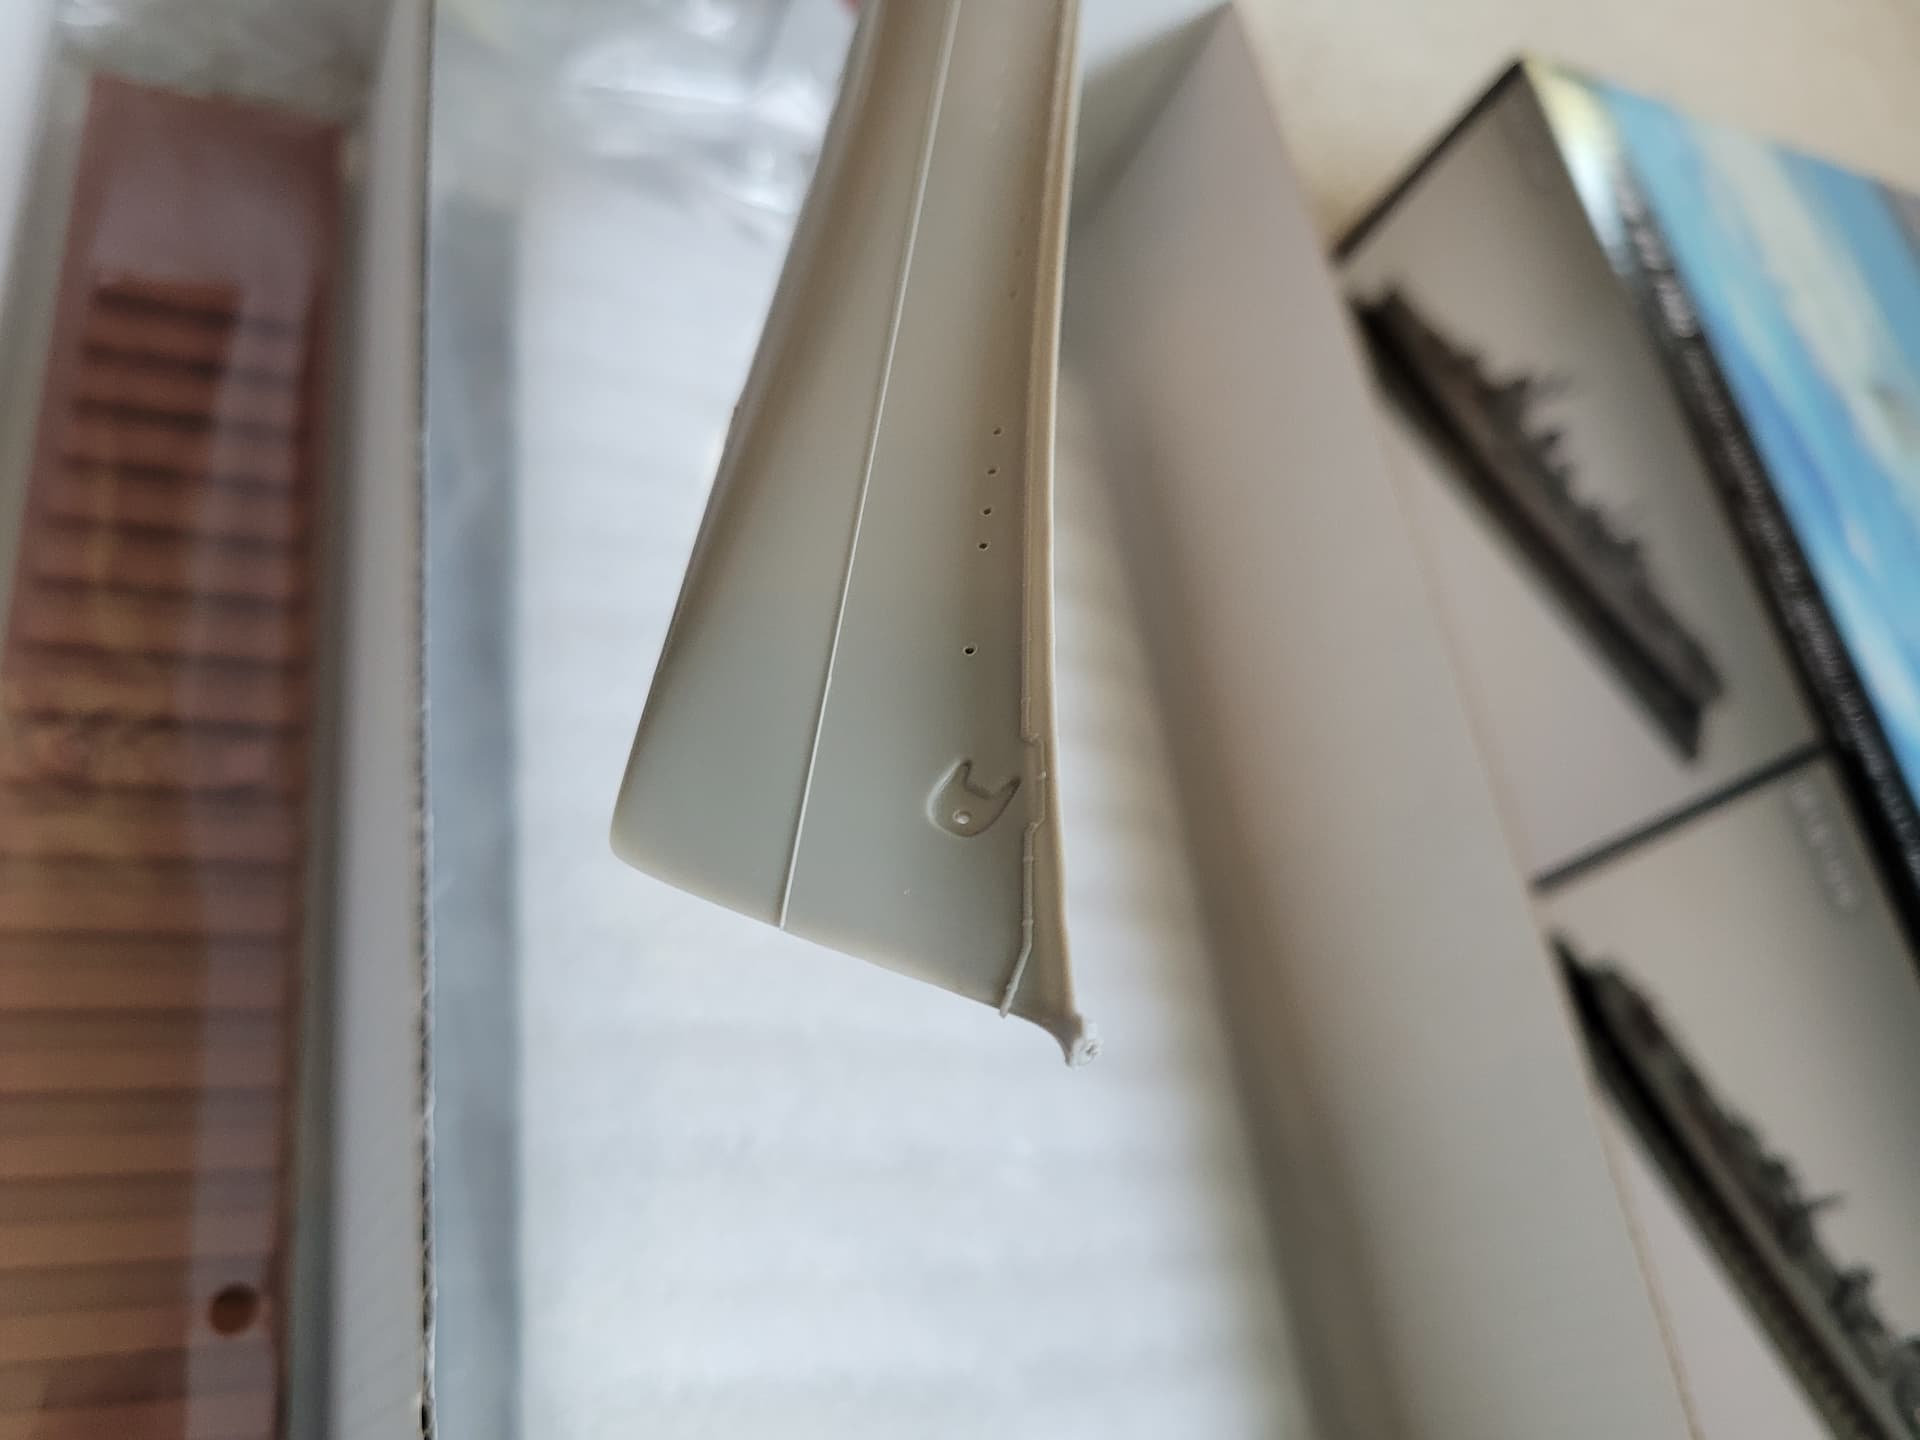
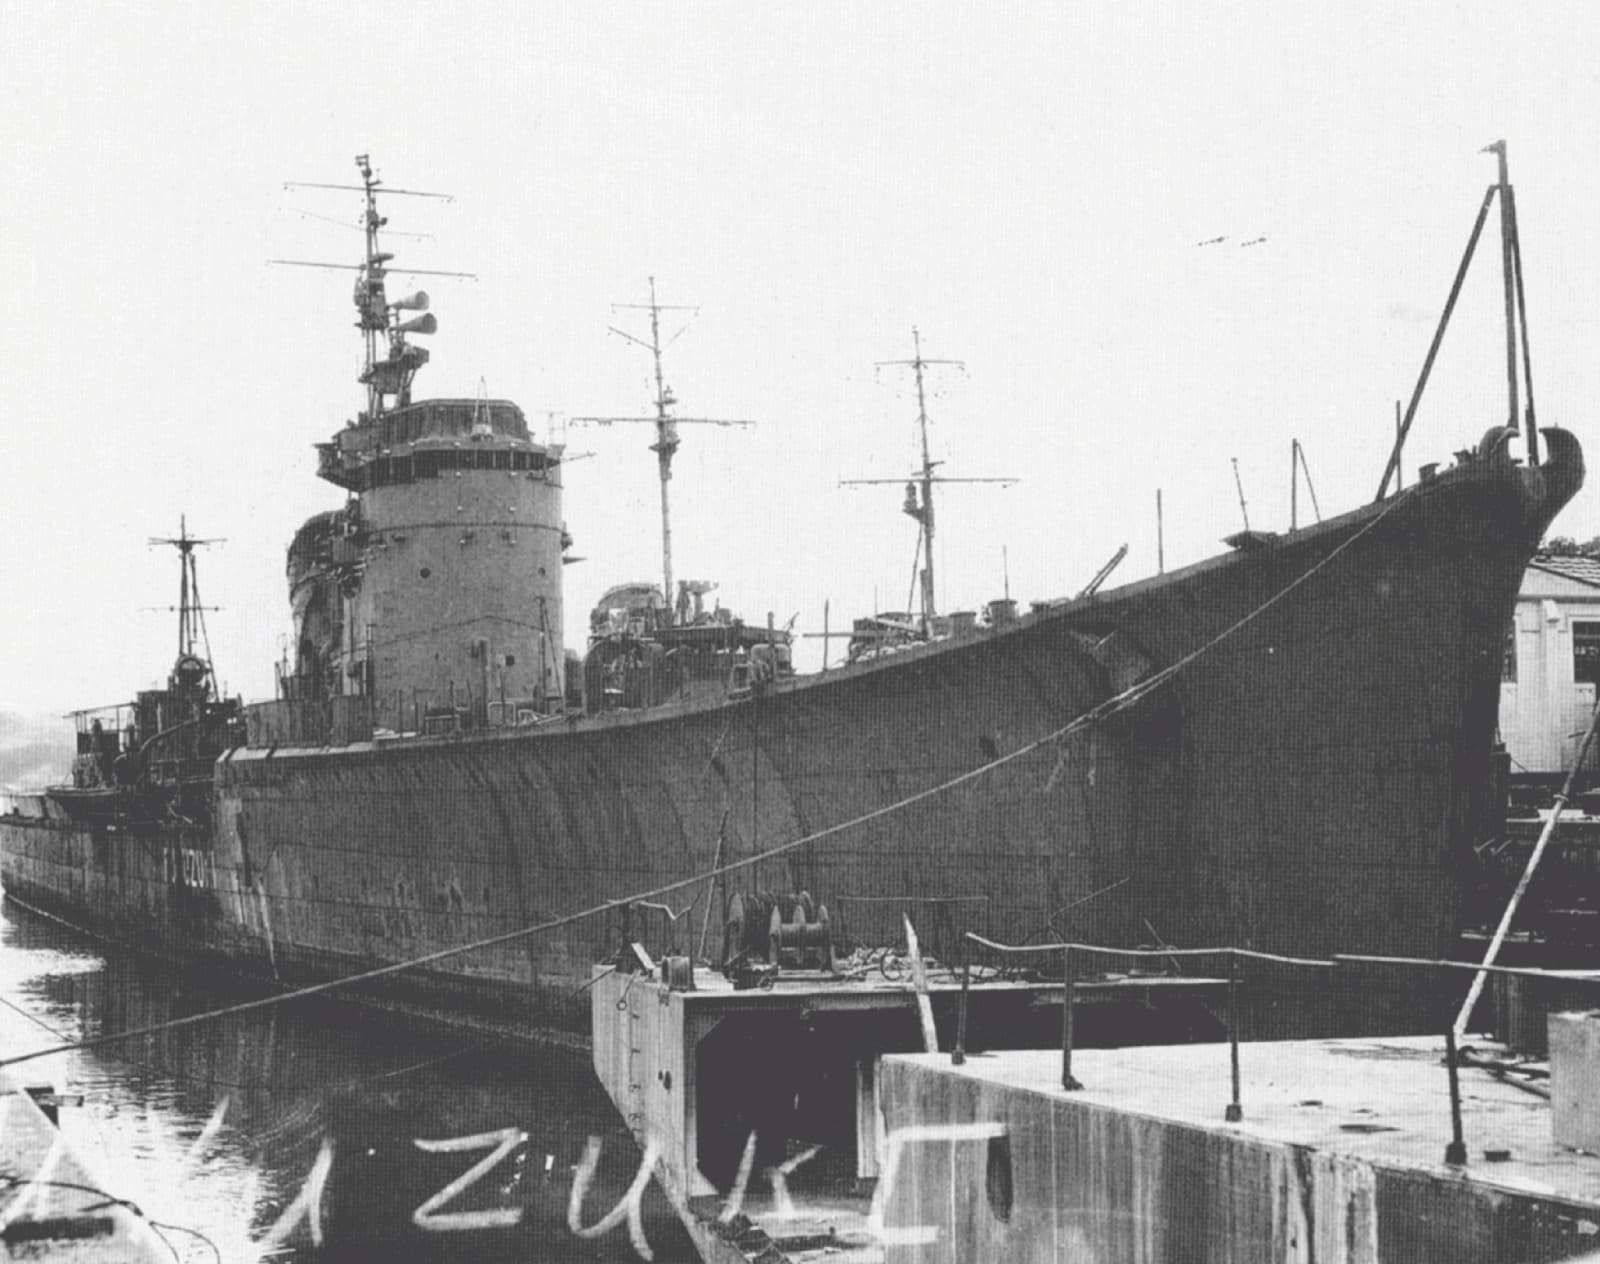
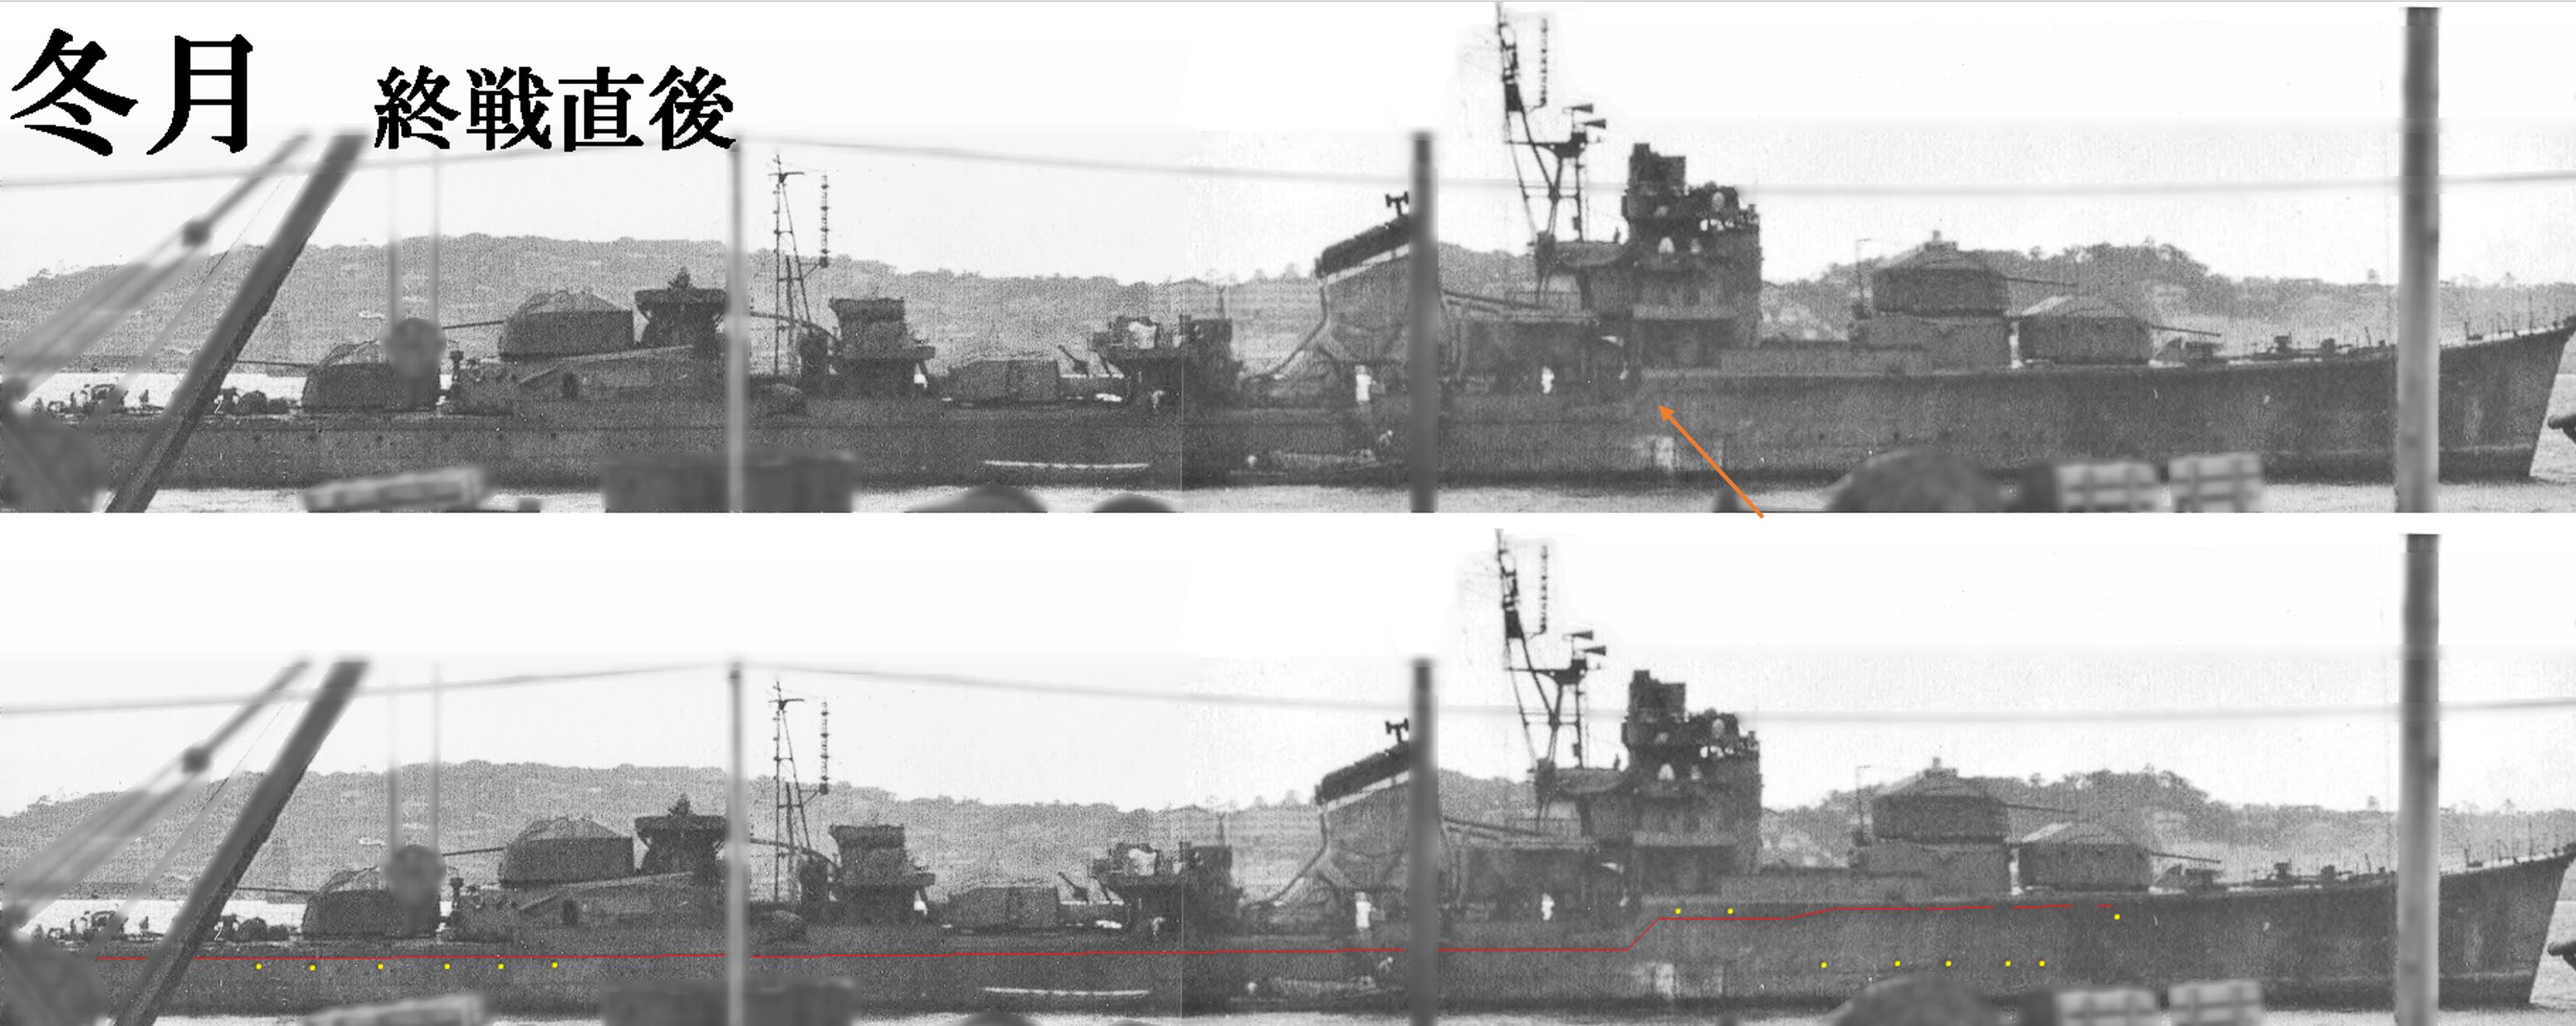
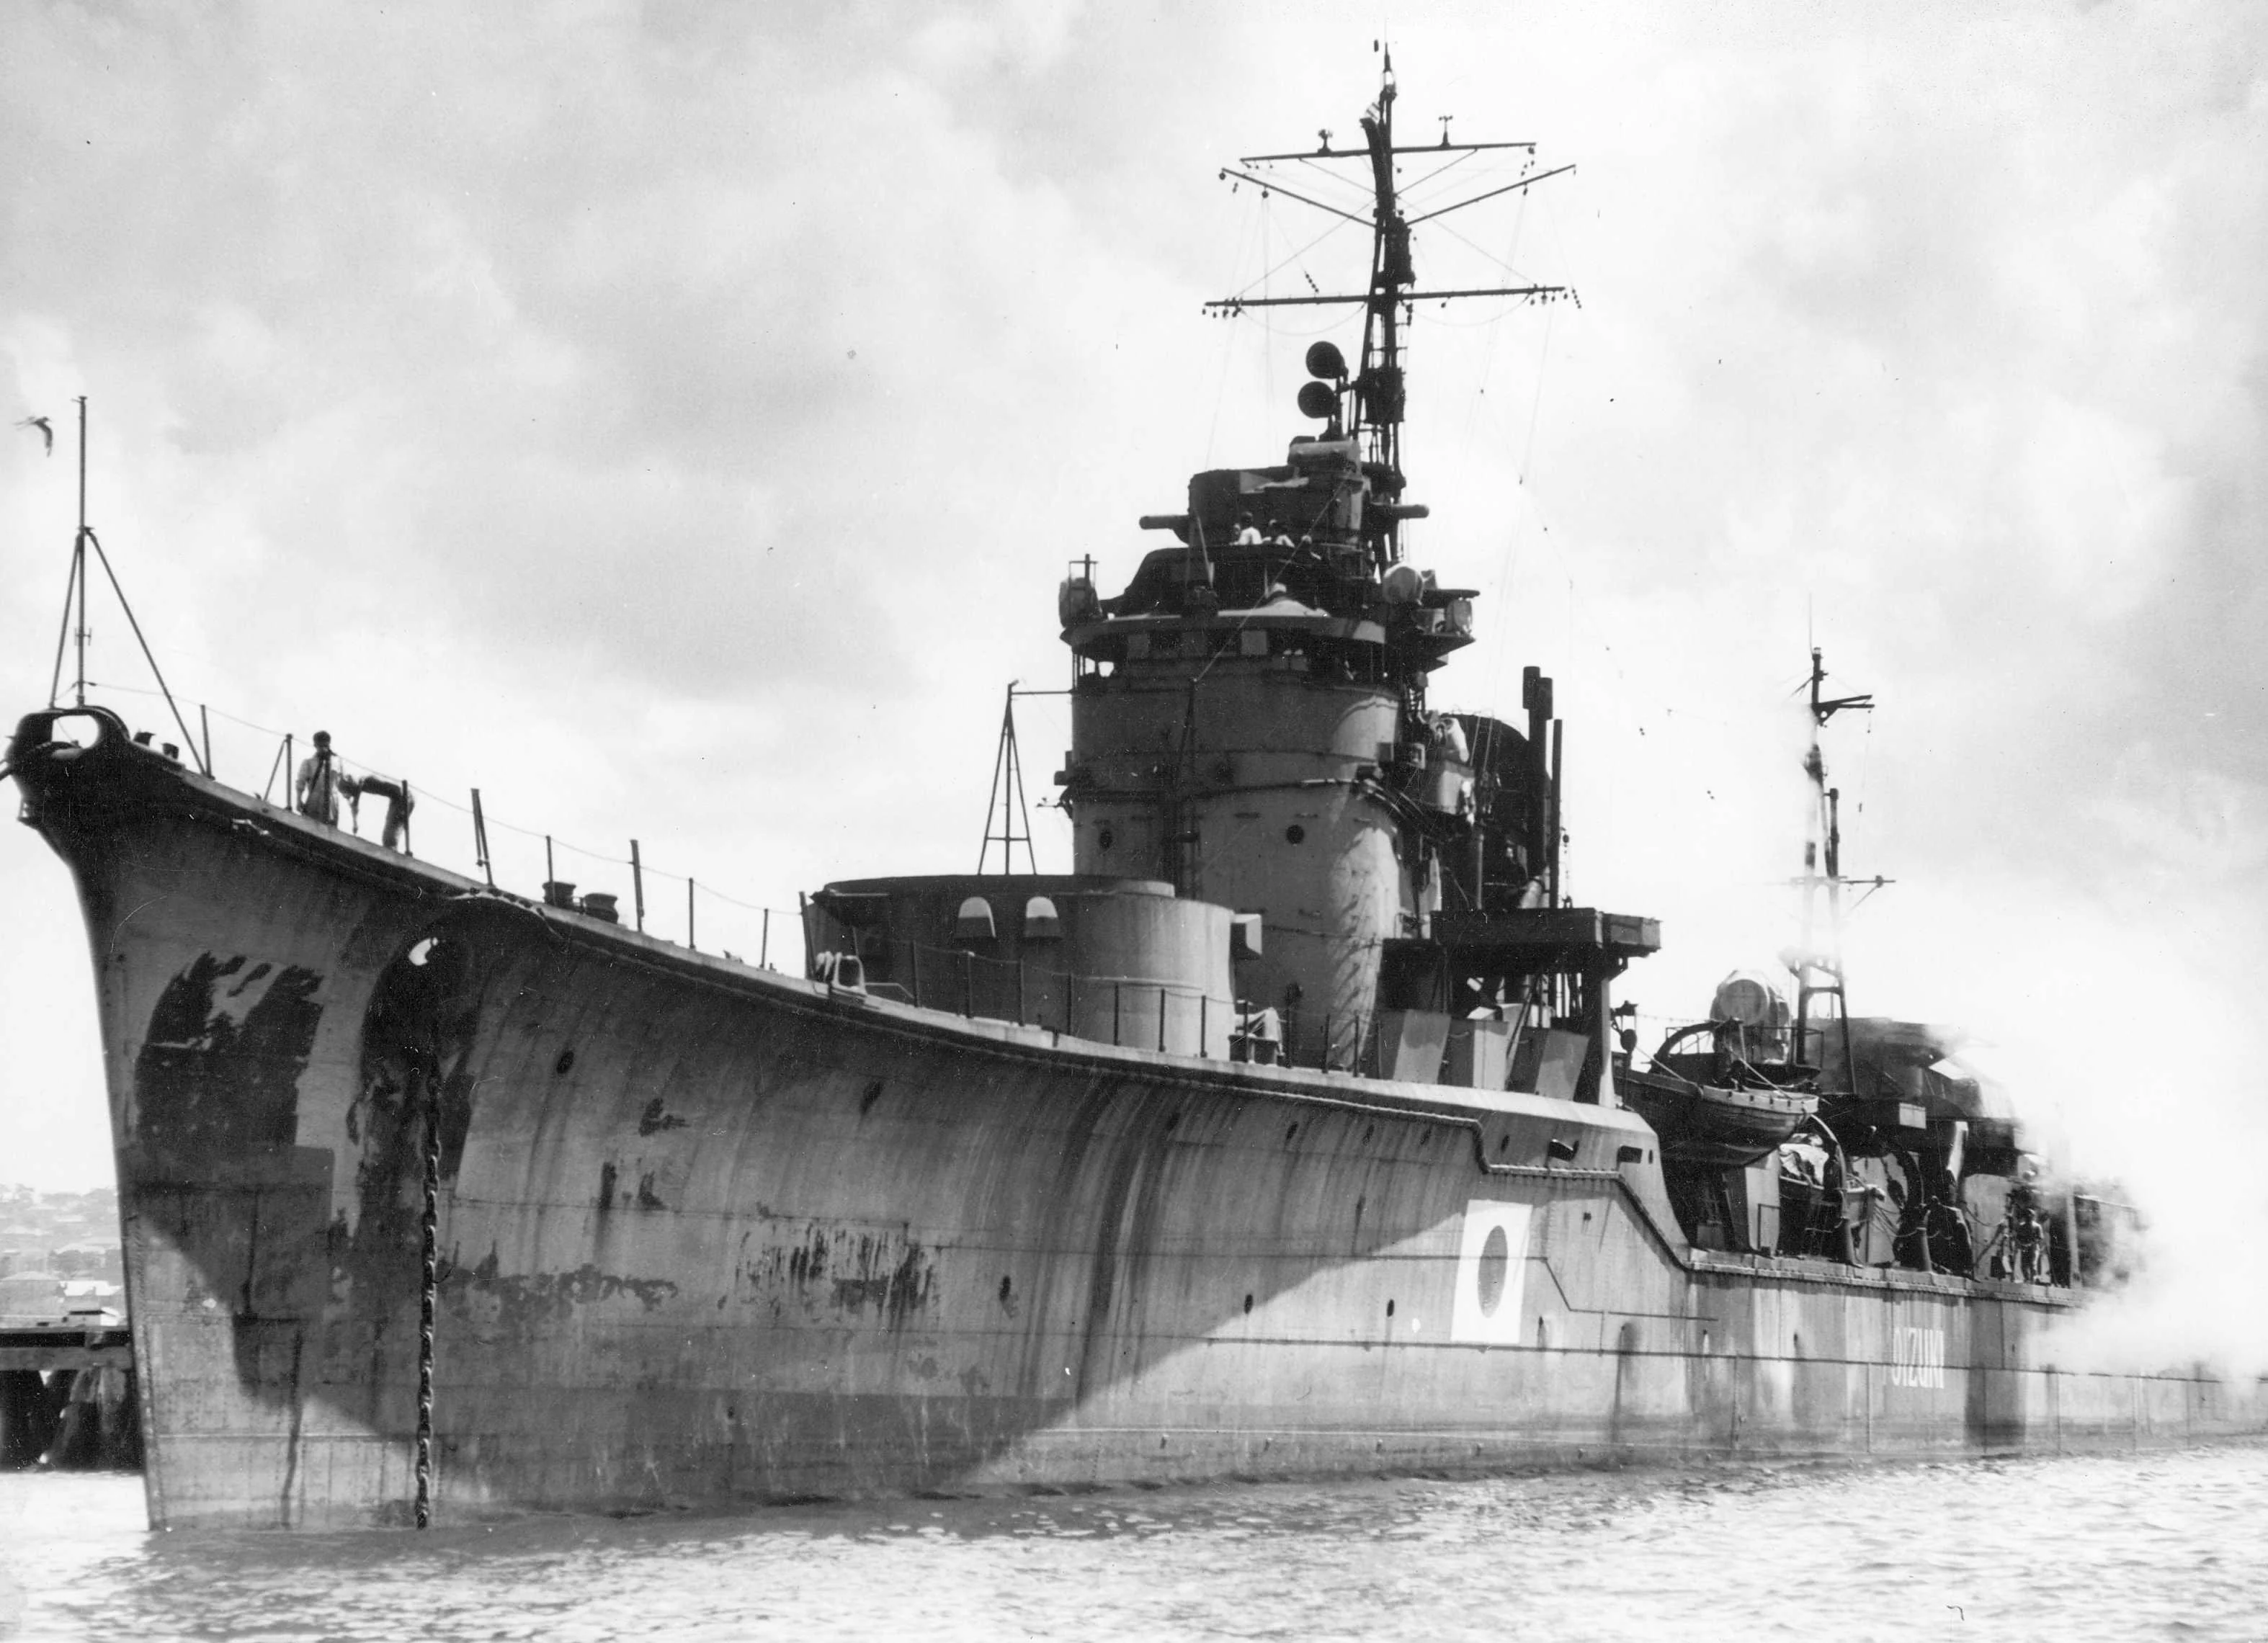
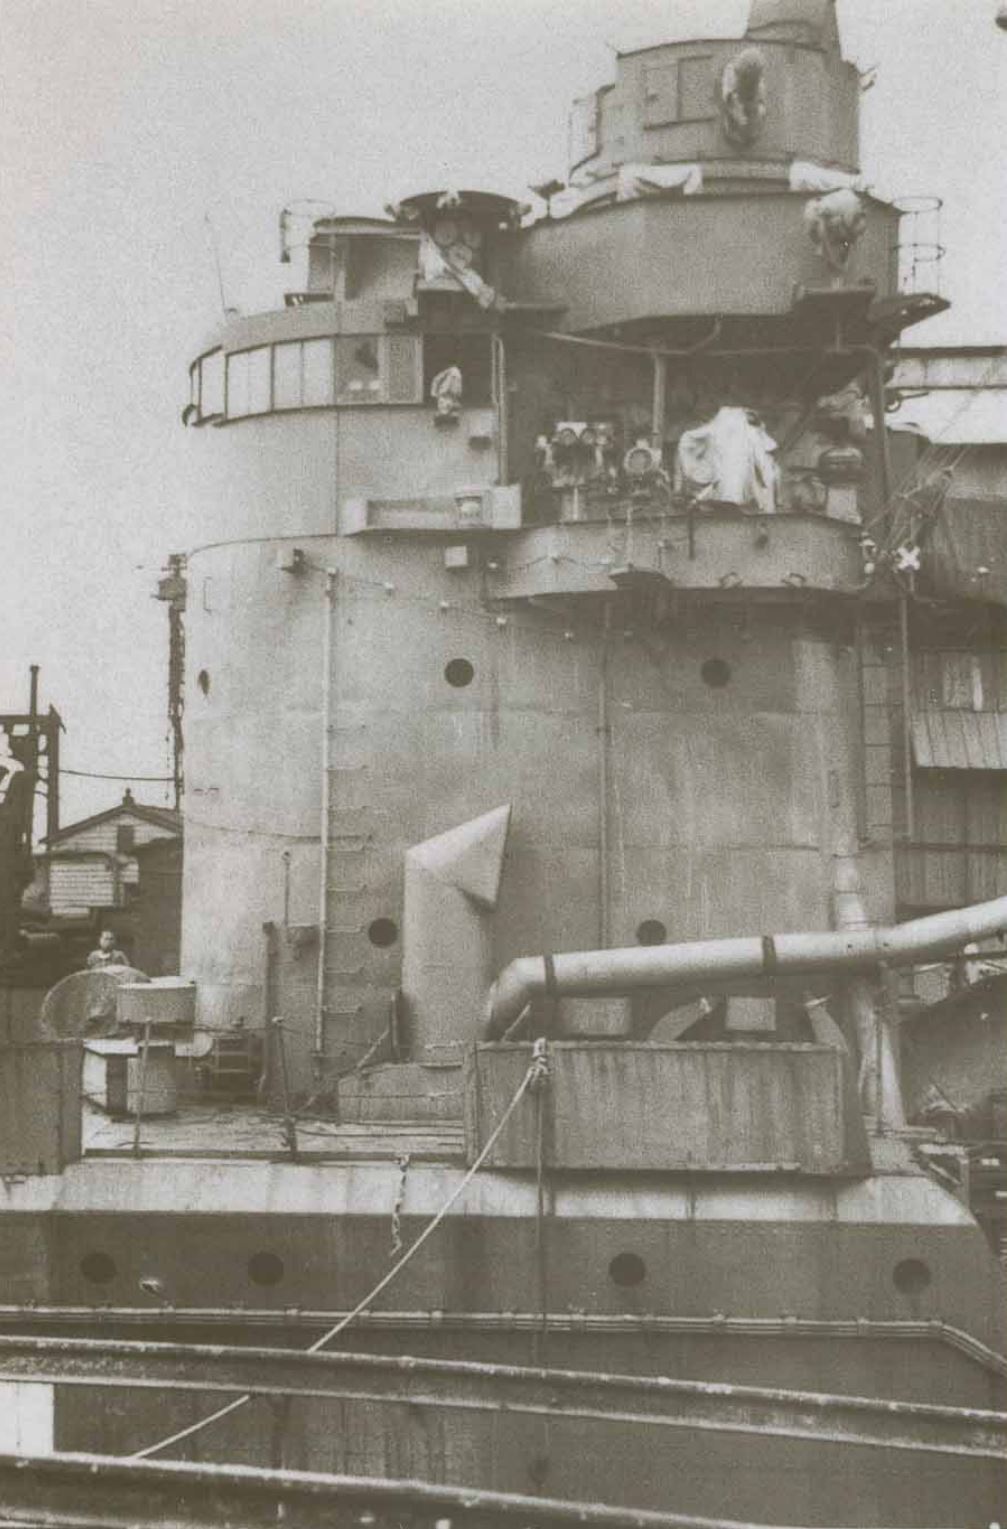
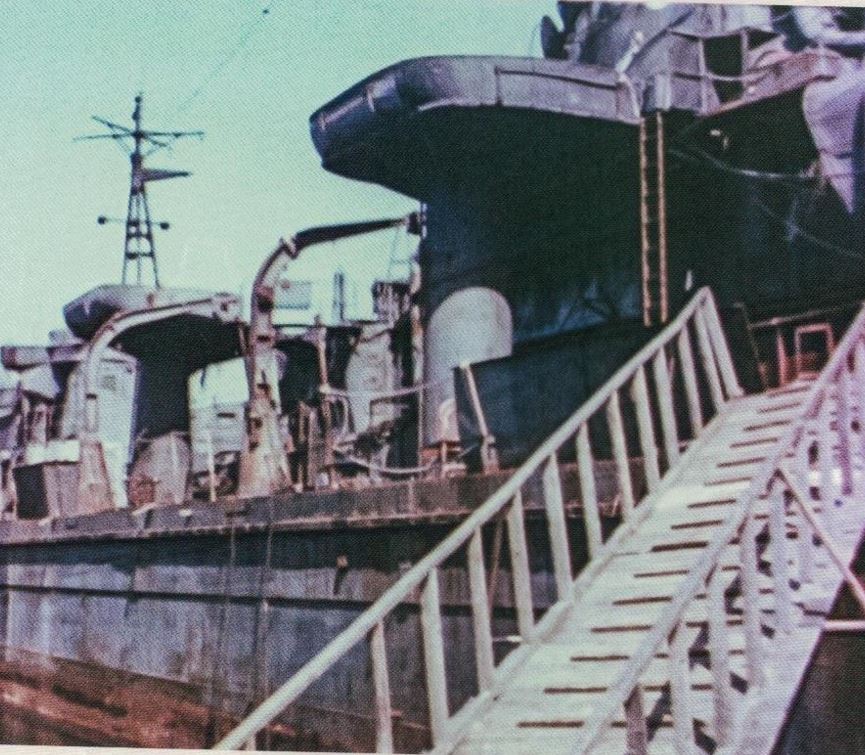
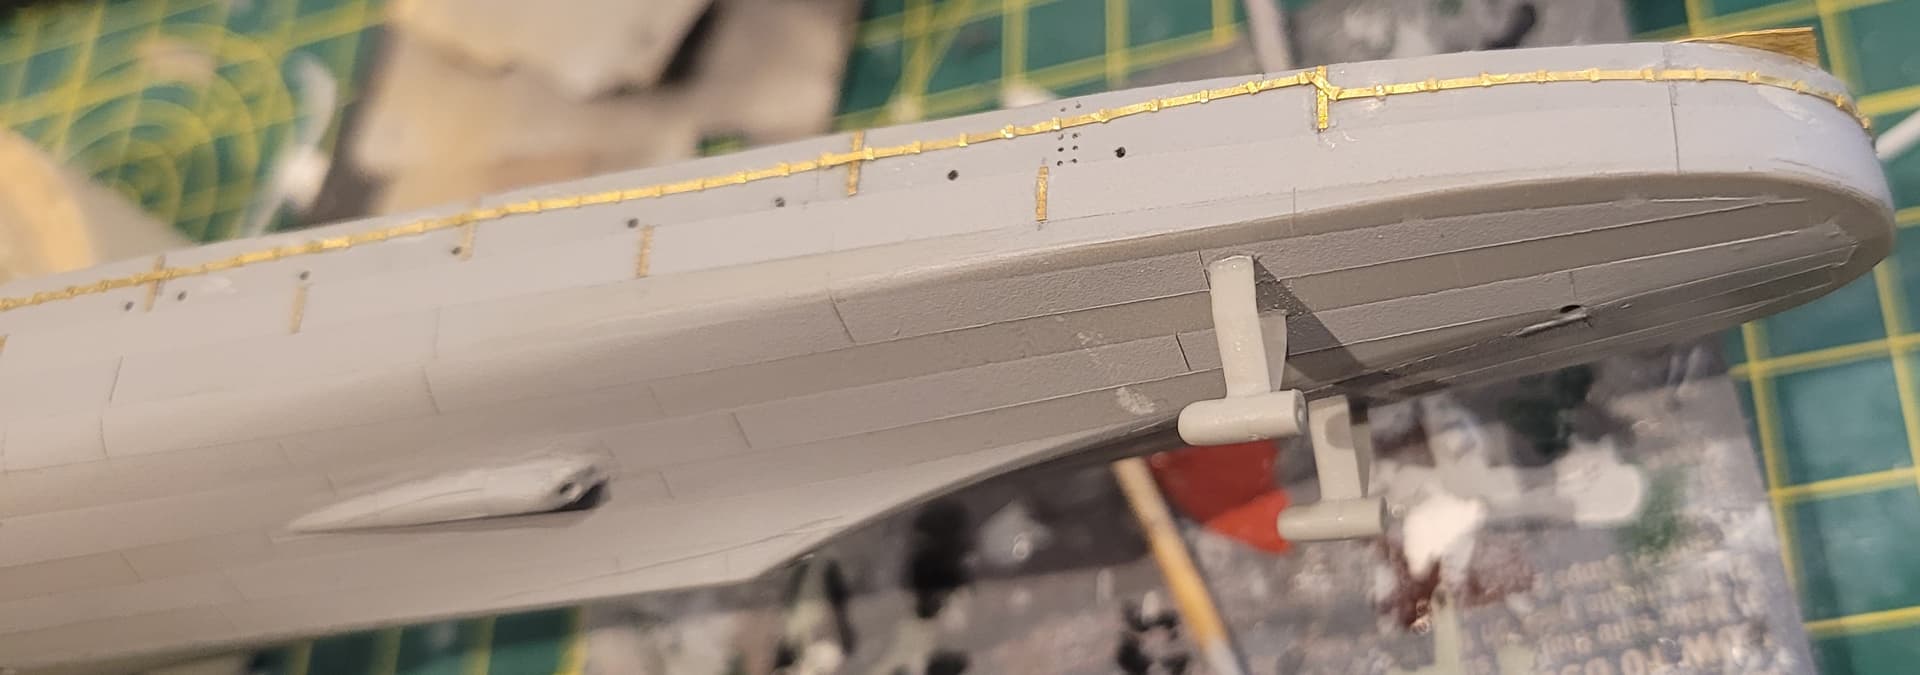
Another big and rather unexpected job was fixing the bow of the ship. The shape molded is slightly off, possibly as a result of Fuyutsuki’s bow reconstruction as it looks a little different to the other Fuyutsuki subclass vessel bows.


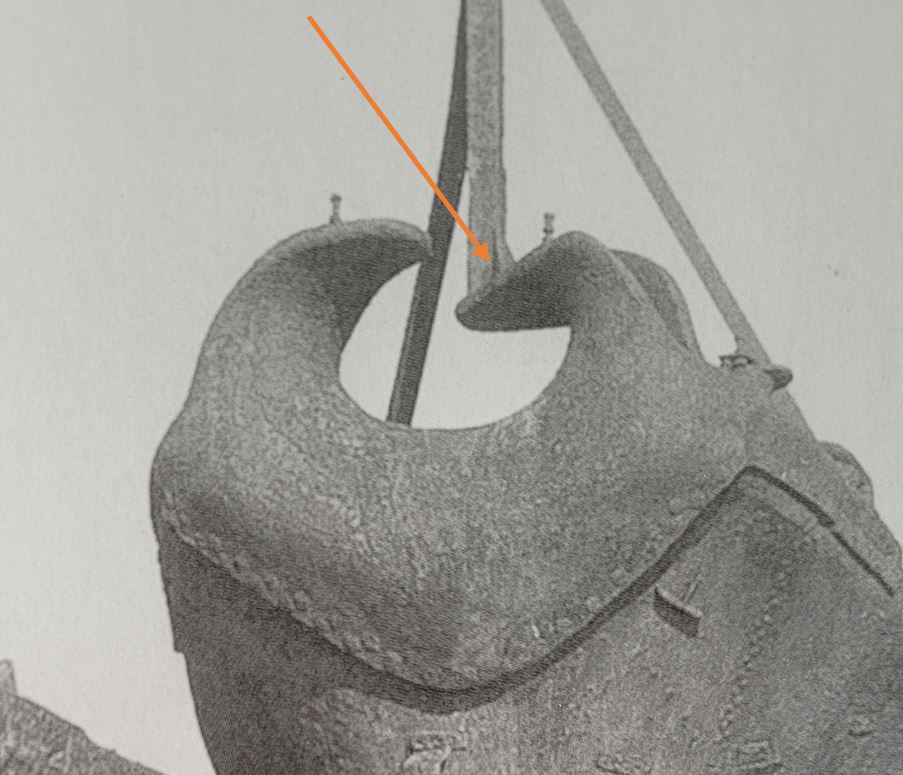
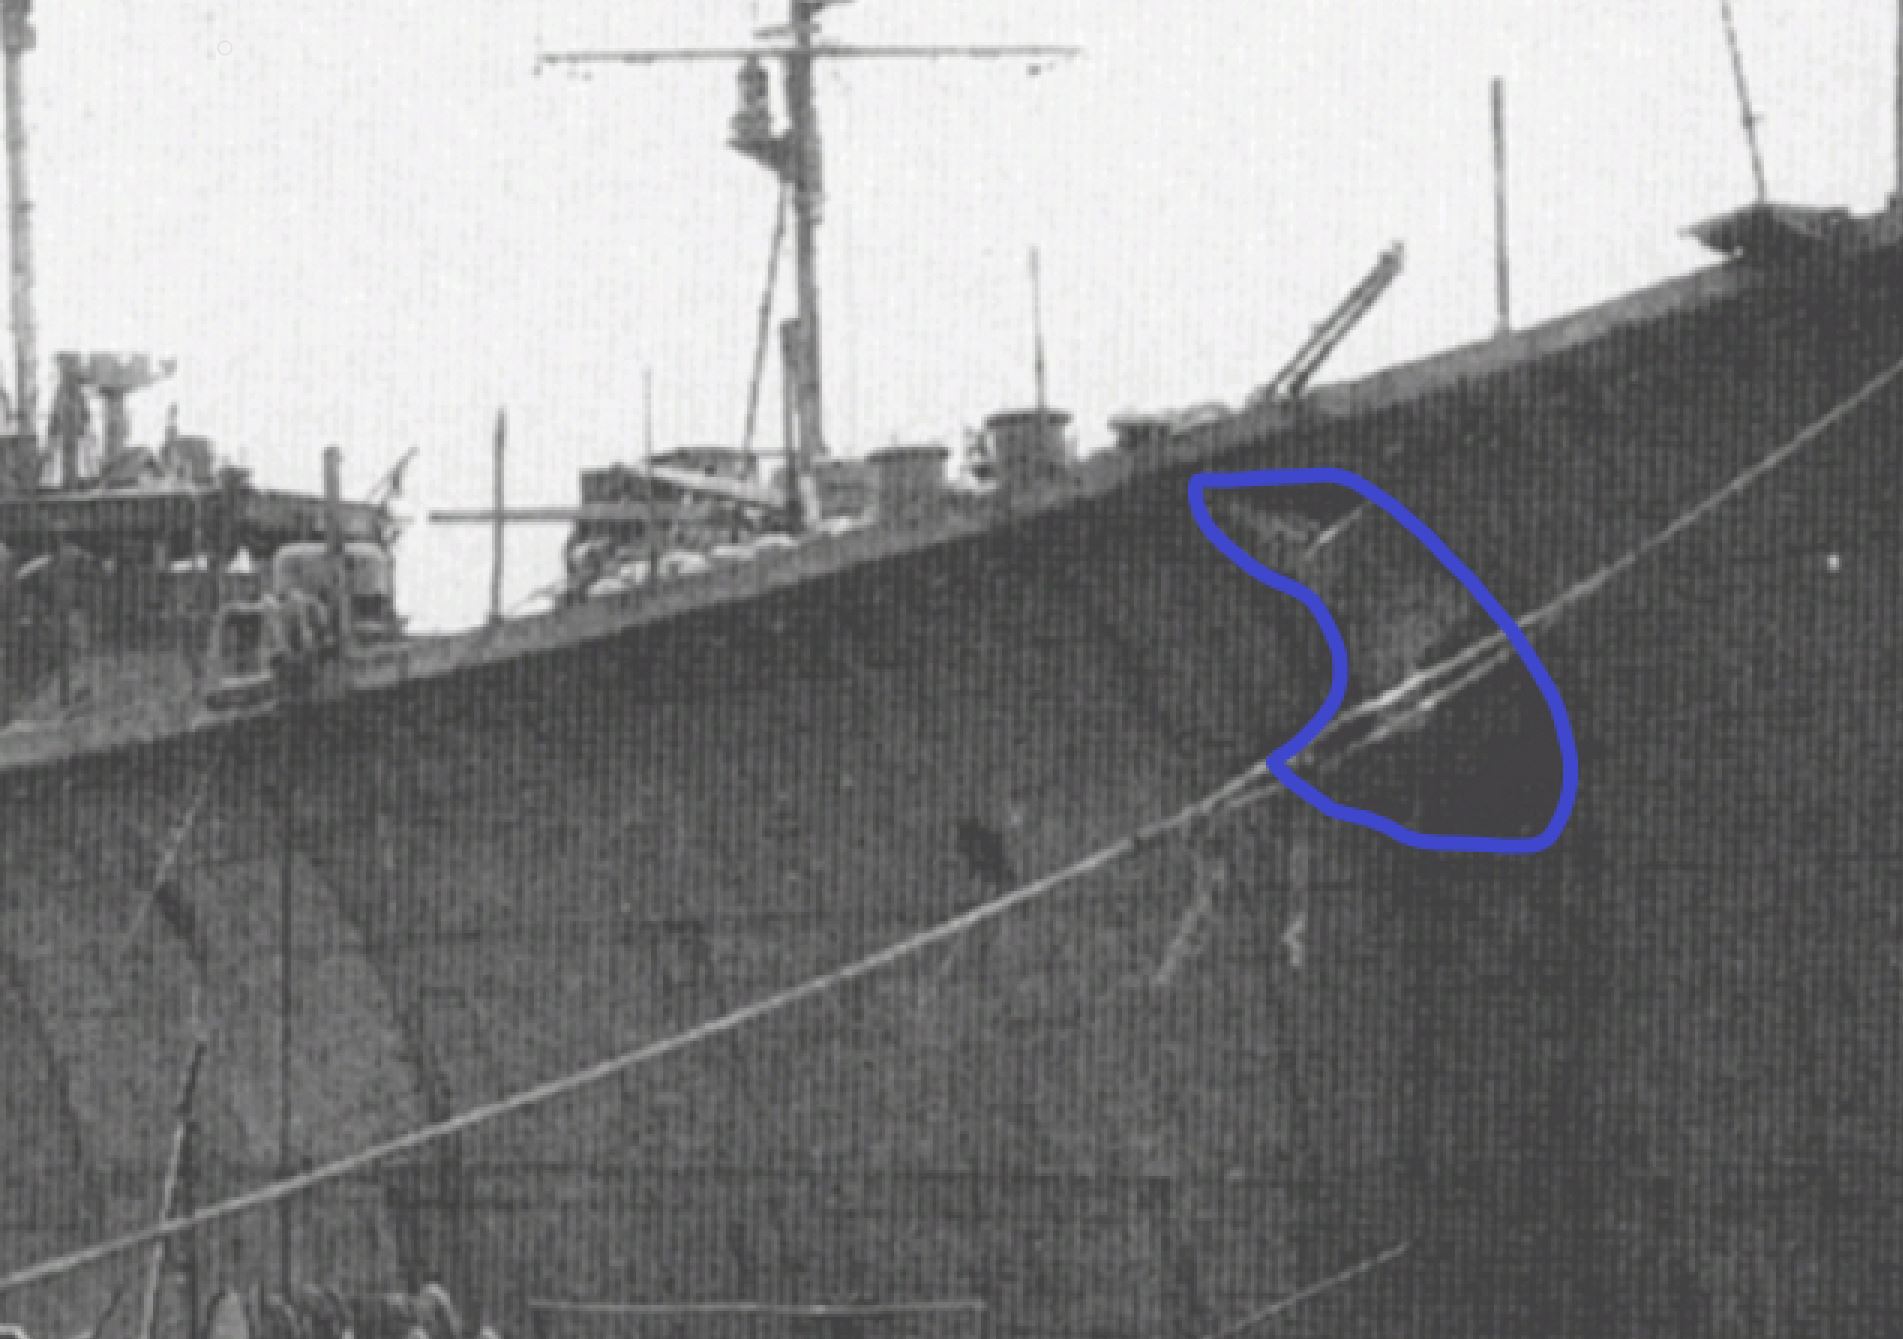
It can be seen here that Fuyutsuki’s bow is rather large and chunky, with a clear raised plate at the top. The kit on the otherhand has a protruded section and is too streamlined when it shoould be more rounded.


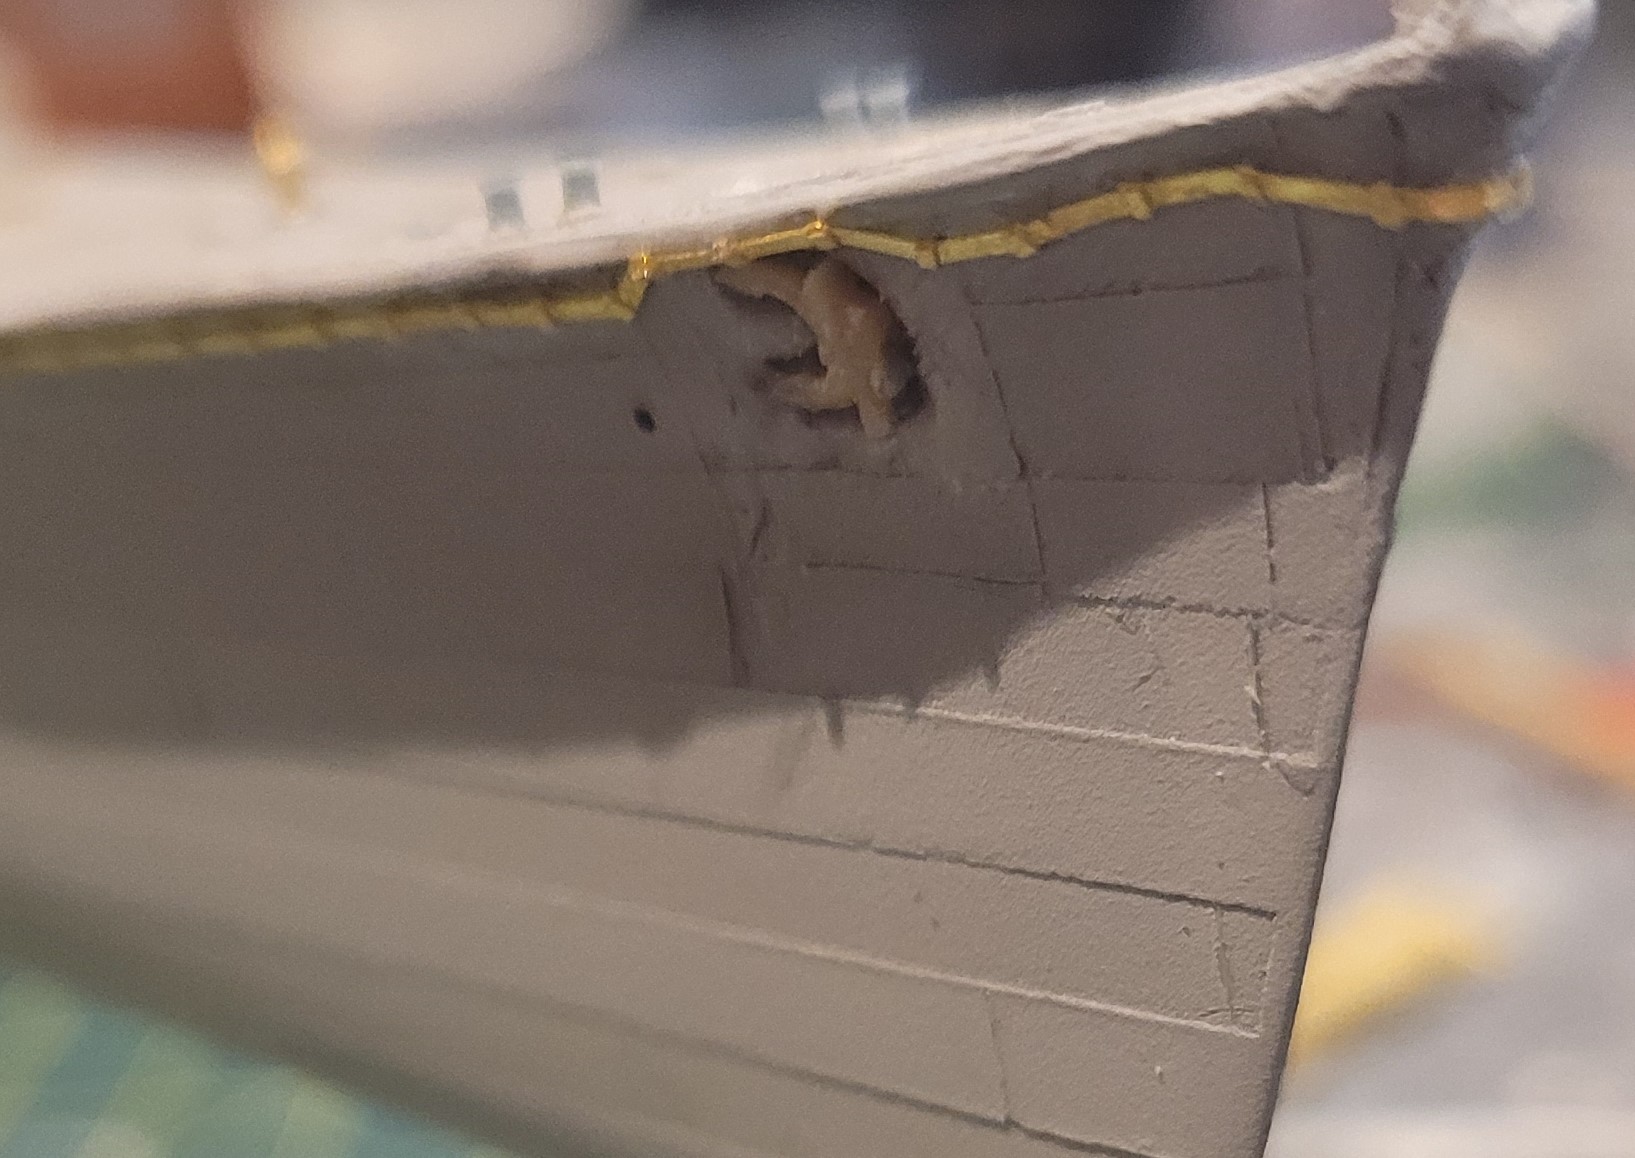
I couldn’t get a good focus on my camera but the molded-on chocks also look pretty terrible and inaccurate…

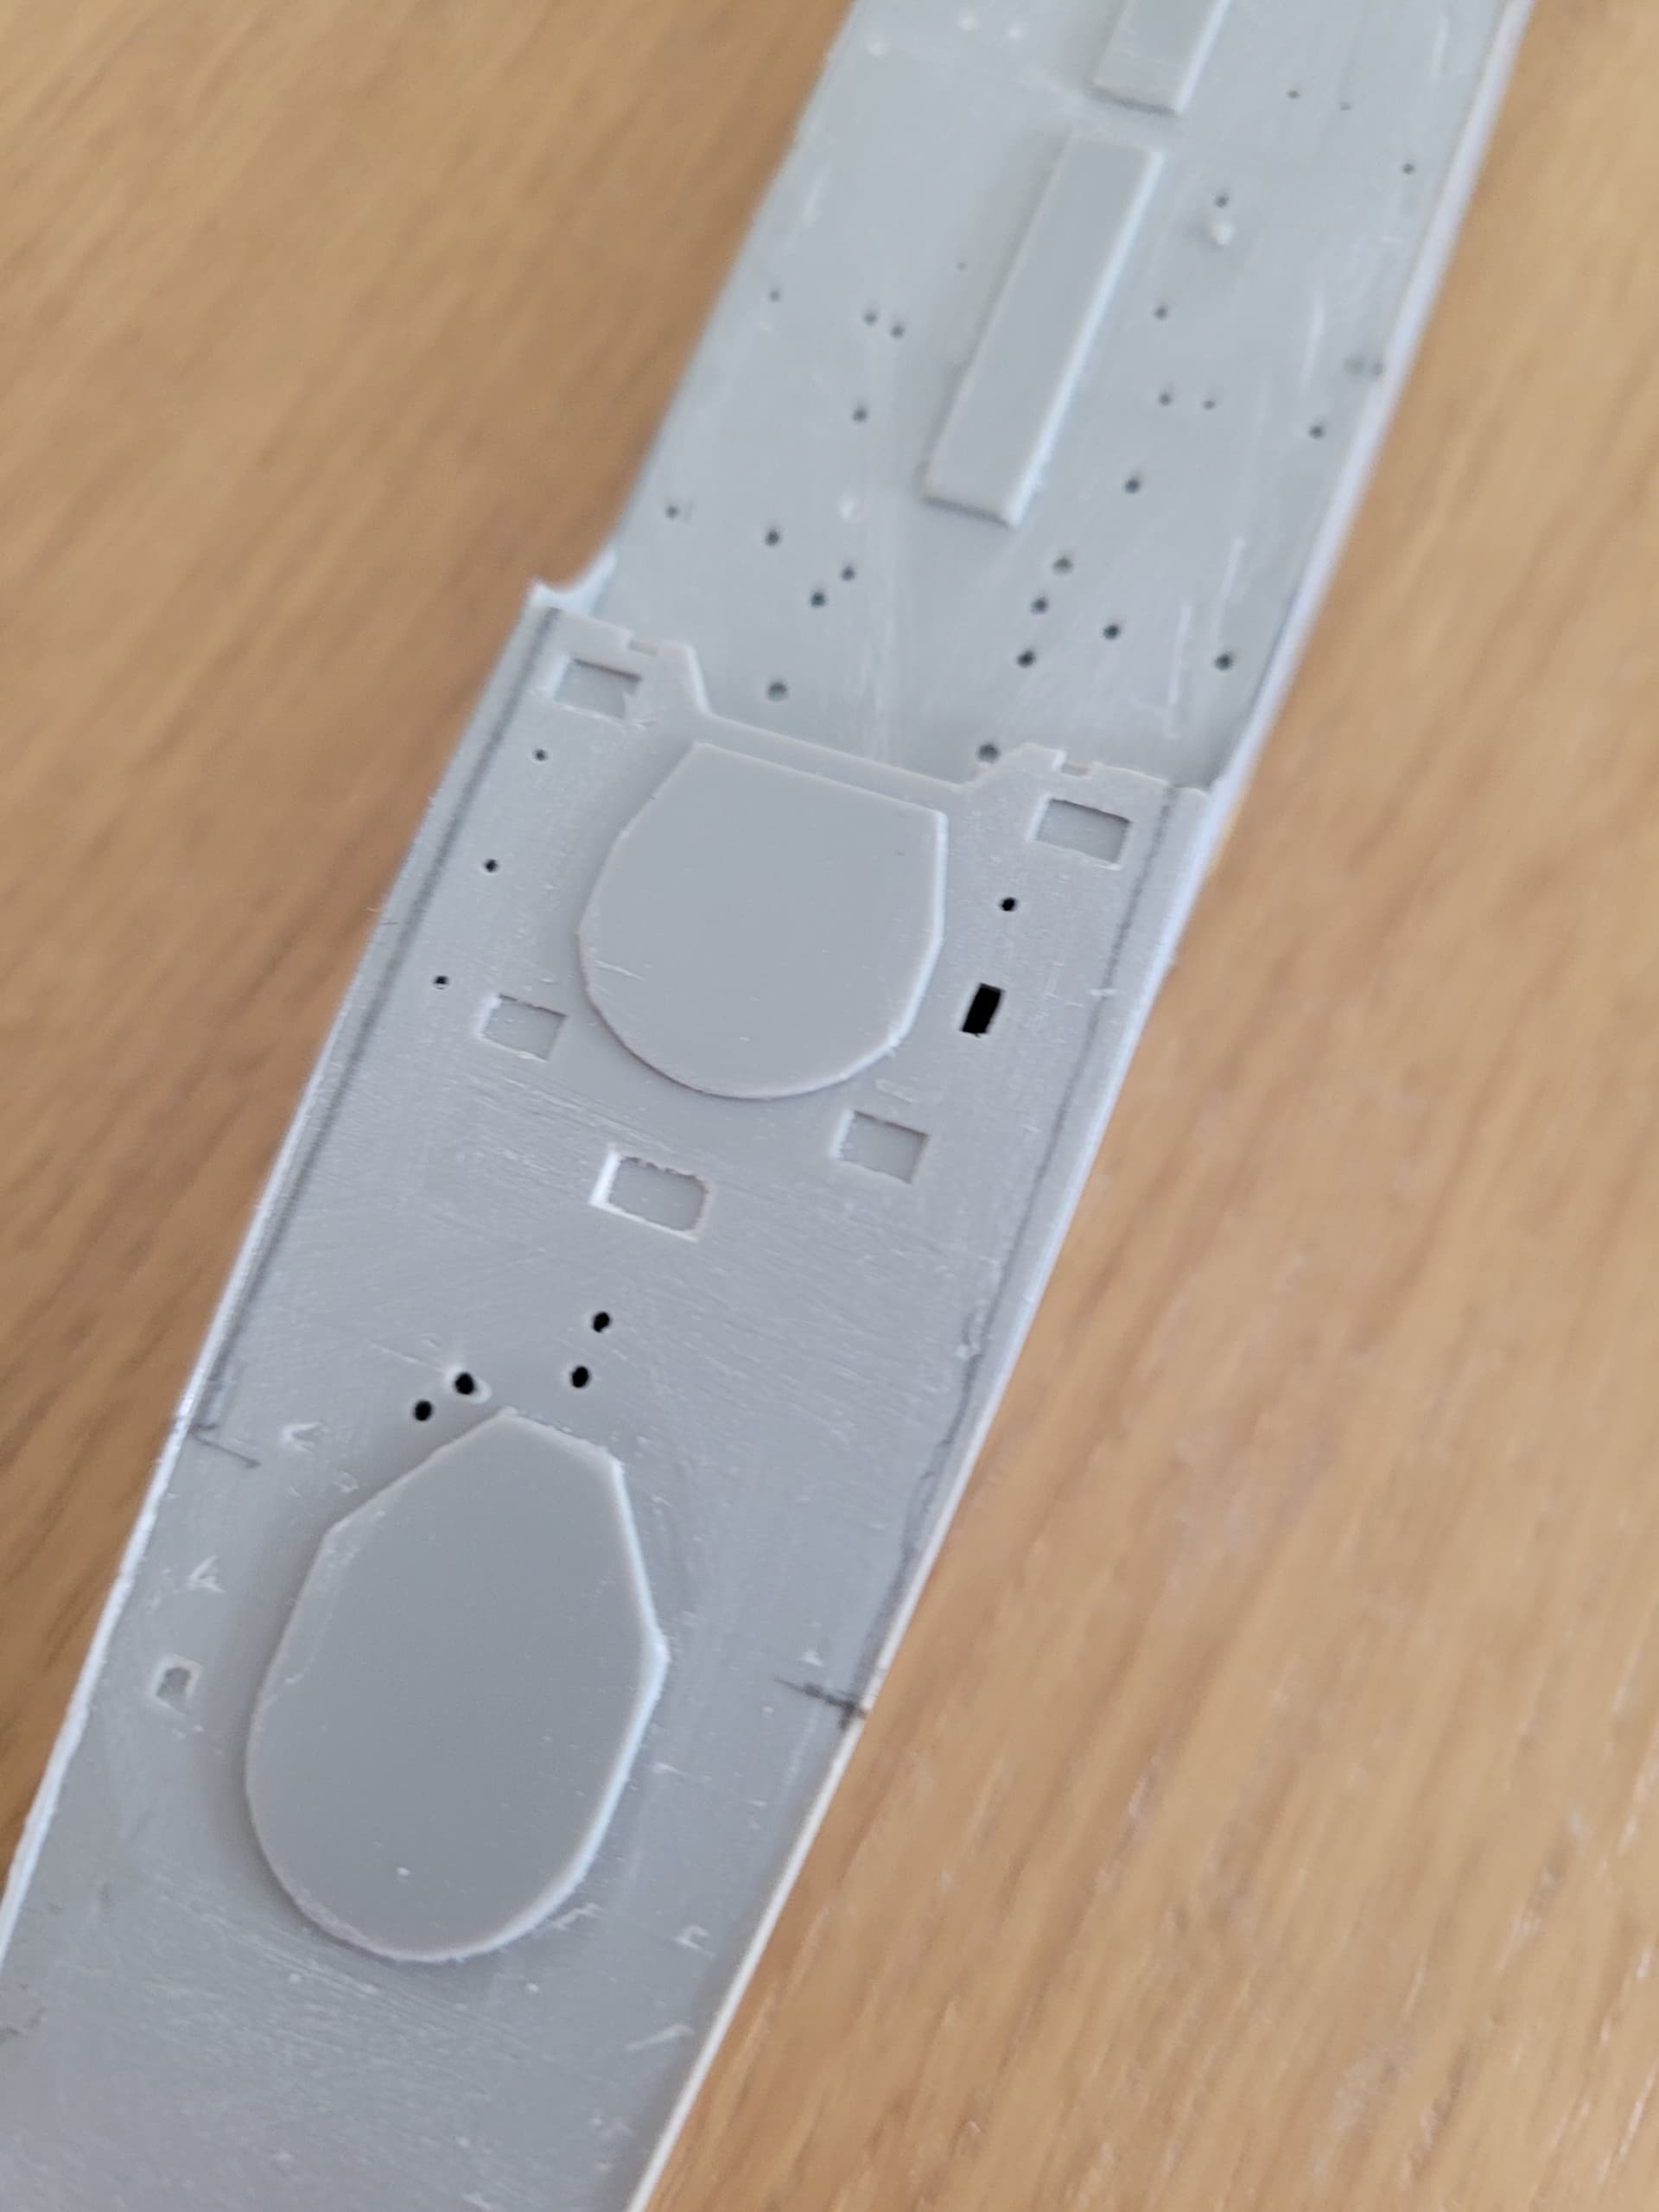
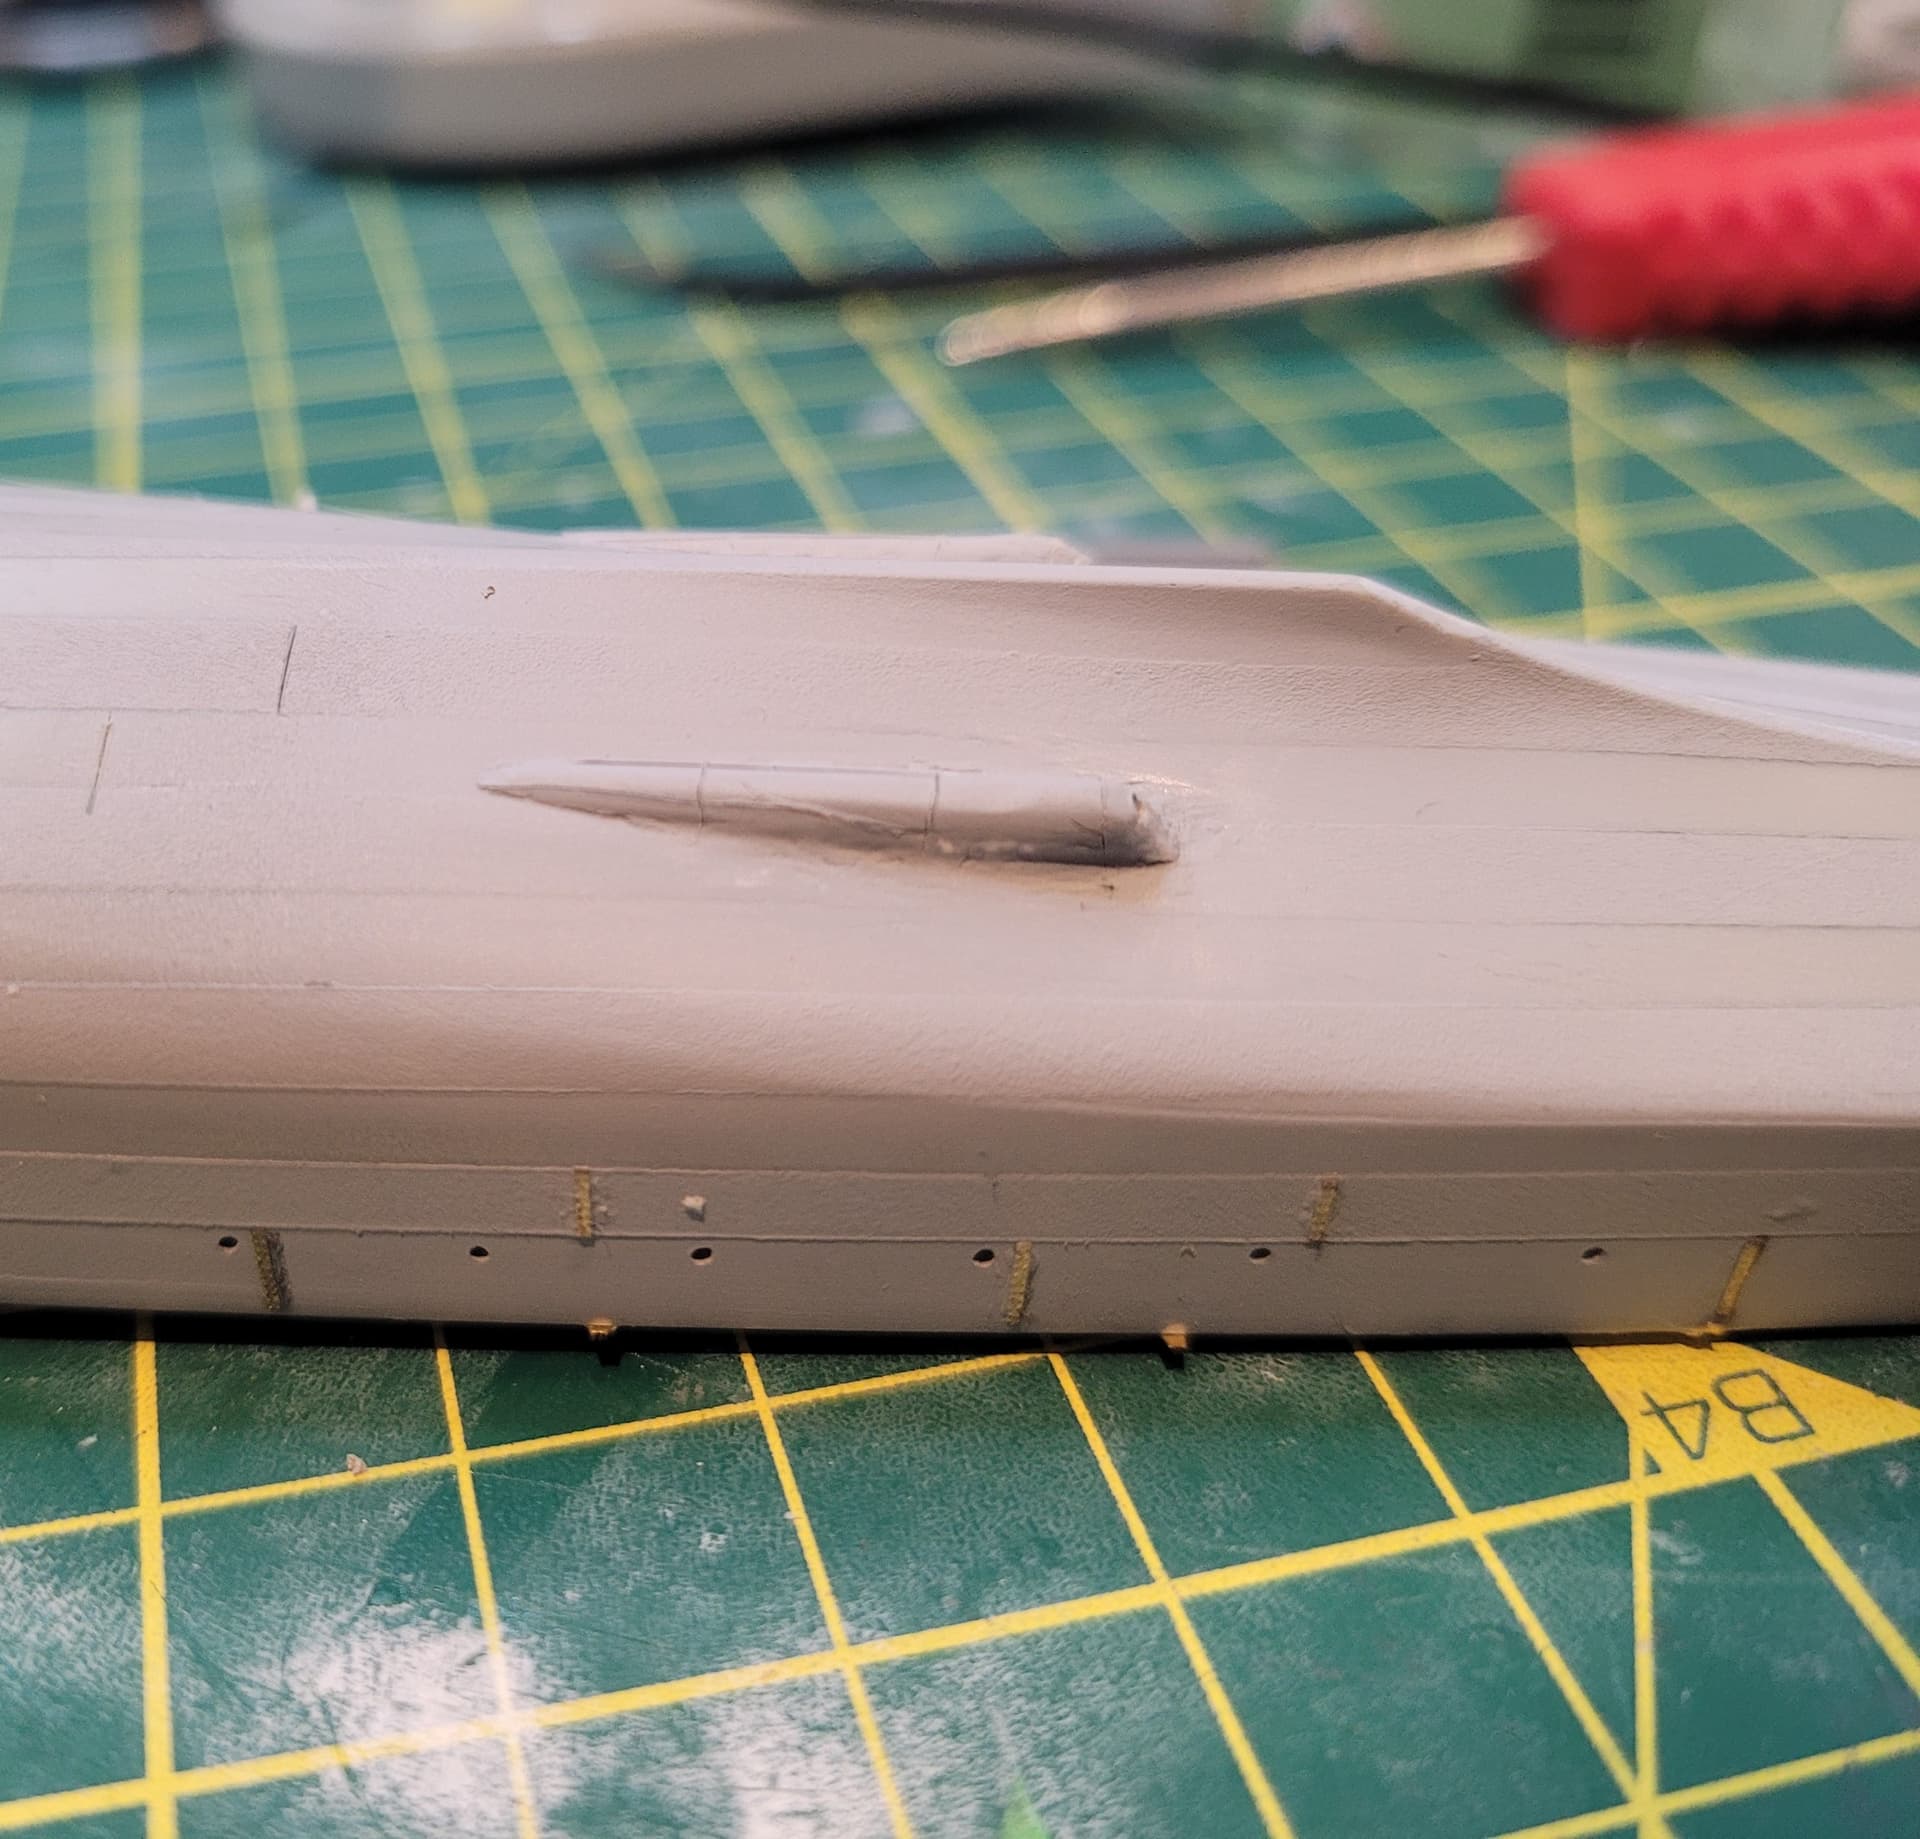
I removed the chocks, sanded down the protruded section slightly, then got to remodeling with some ‘greenstuff’ (basically firmer modeling putty).


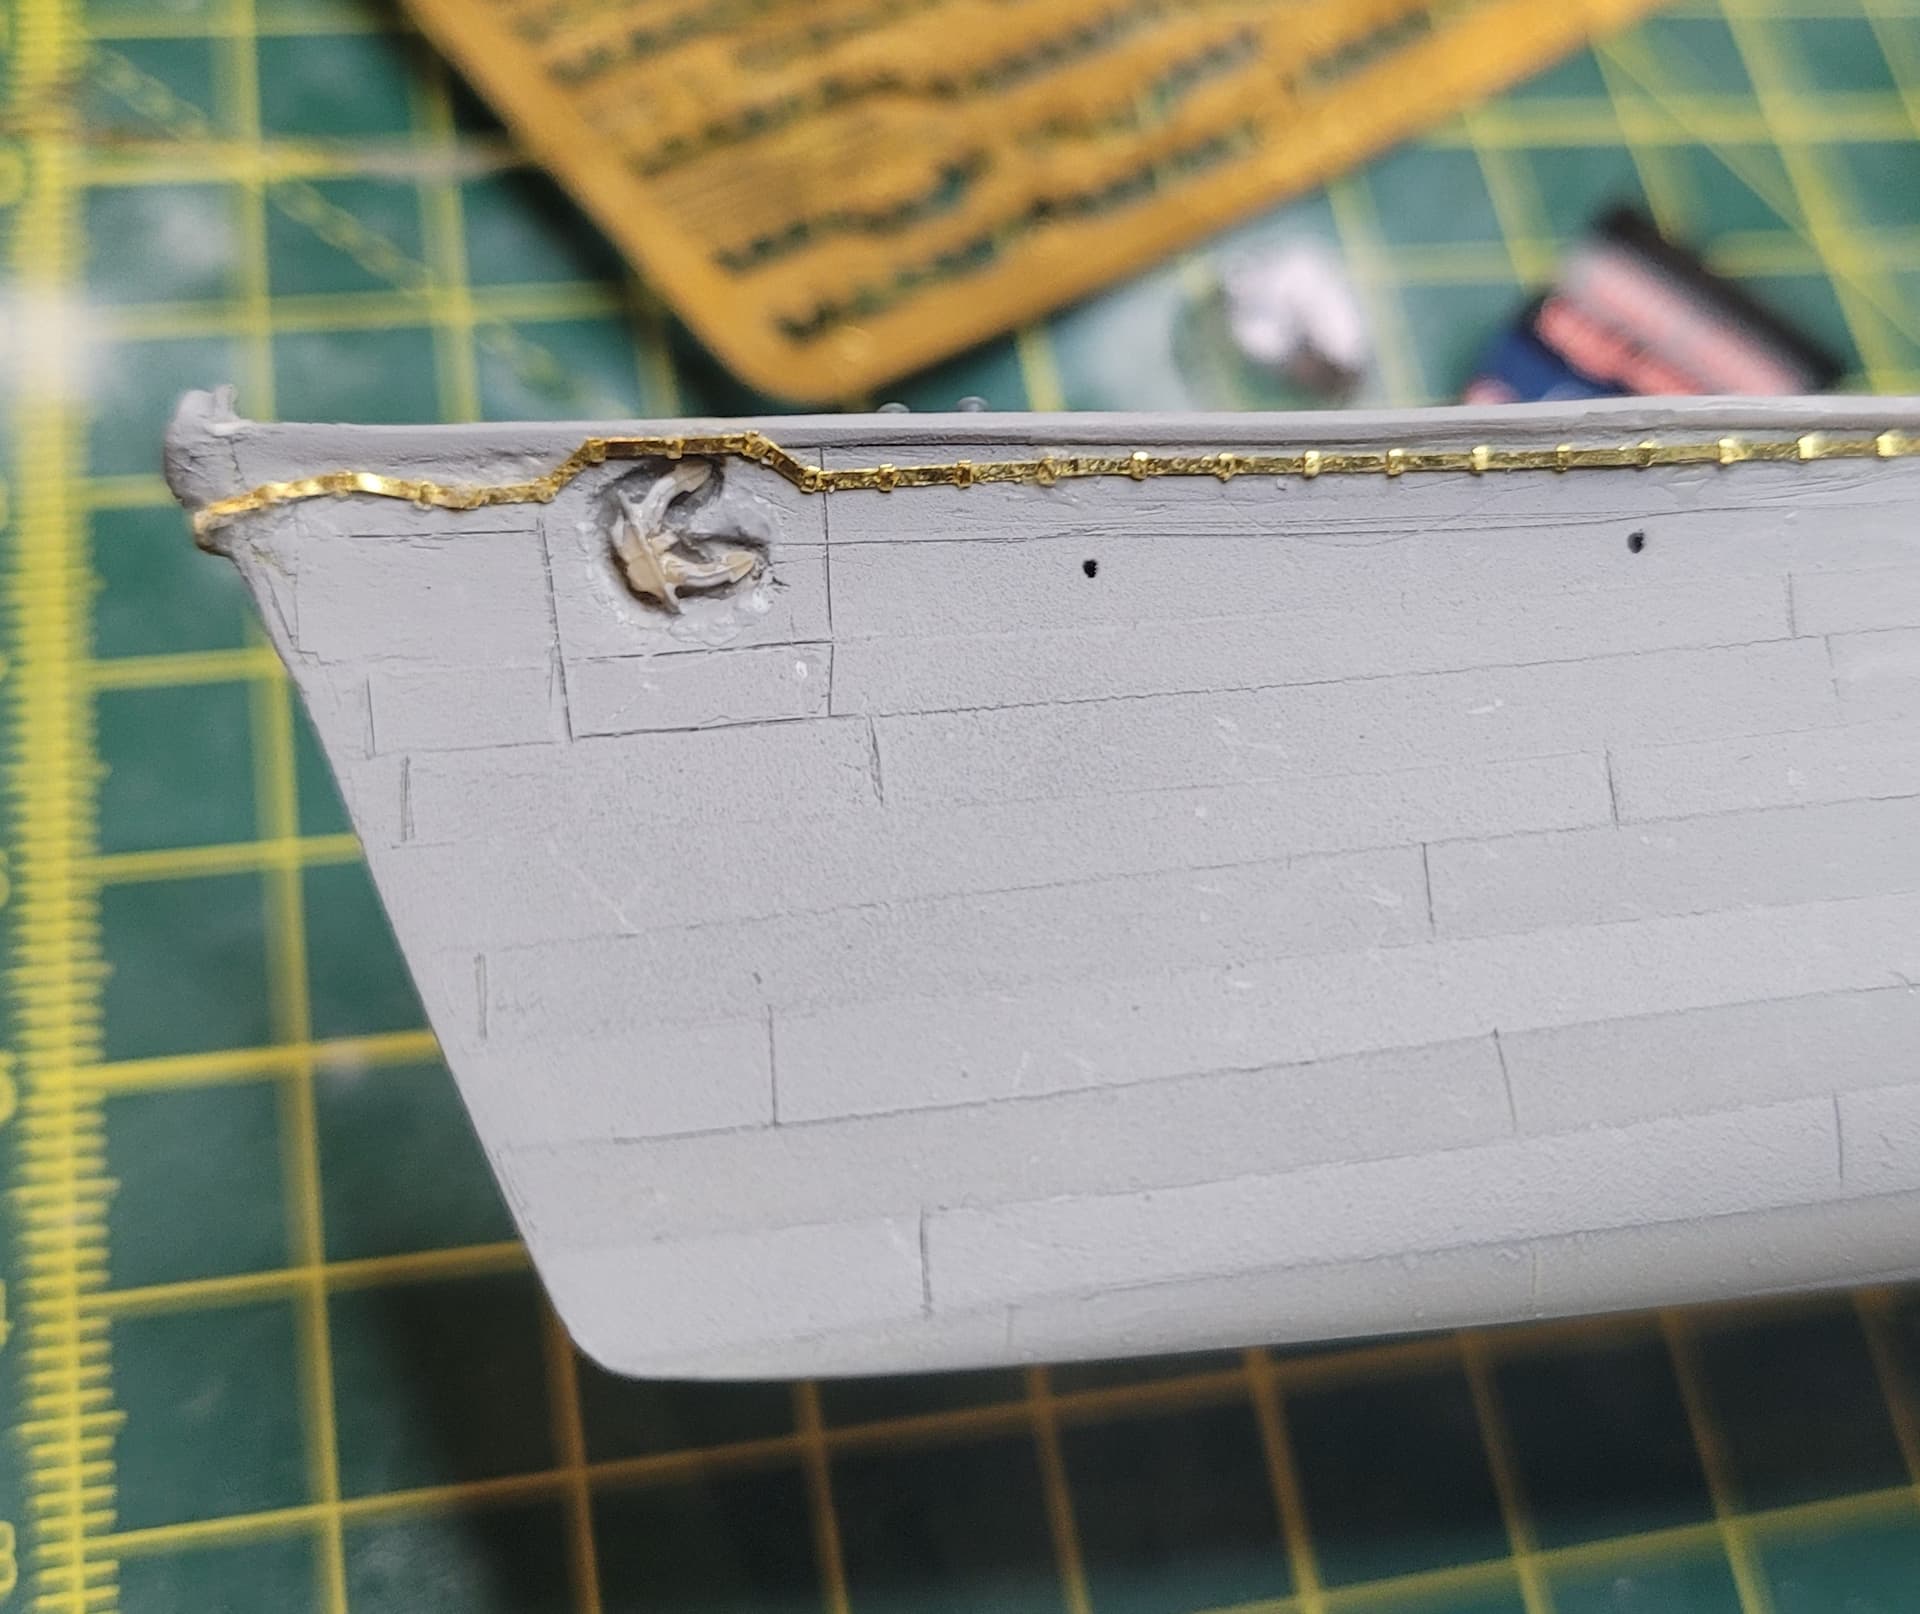
I sealed the putty with progressive thick coats of Mr Surfacer 1200 and smoothed it down.

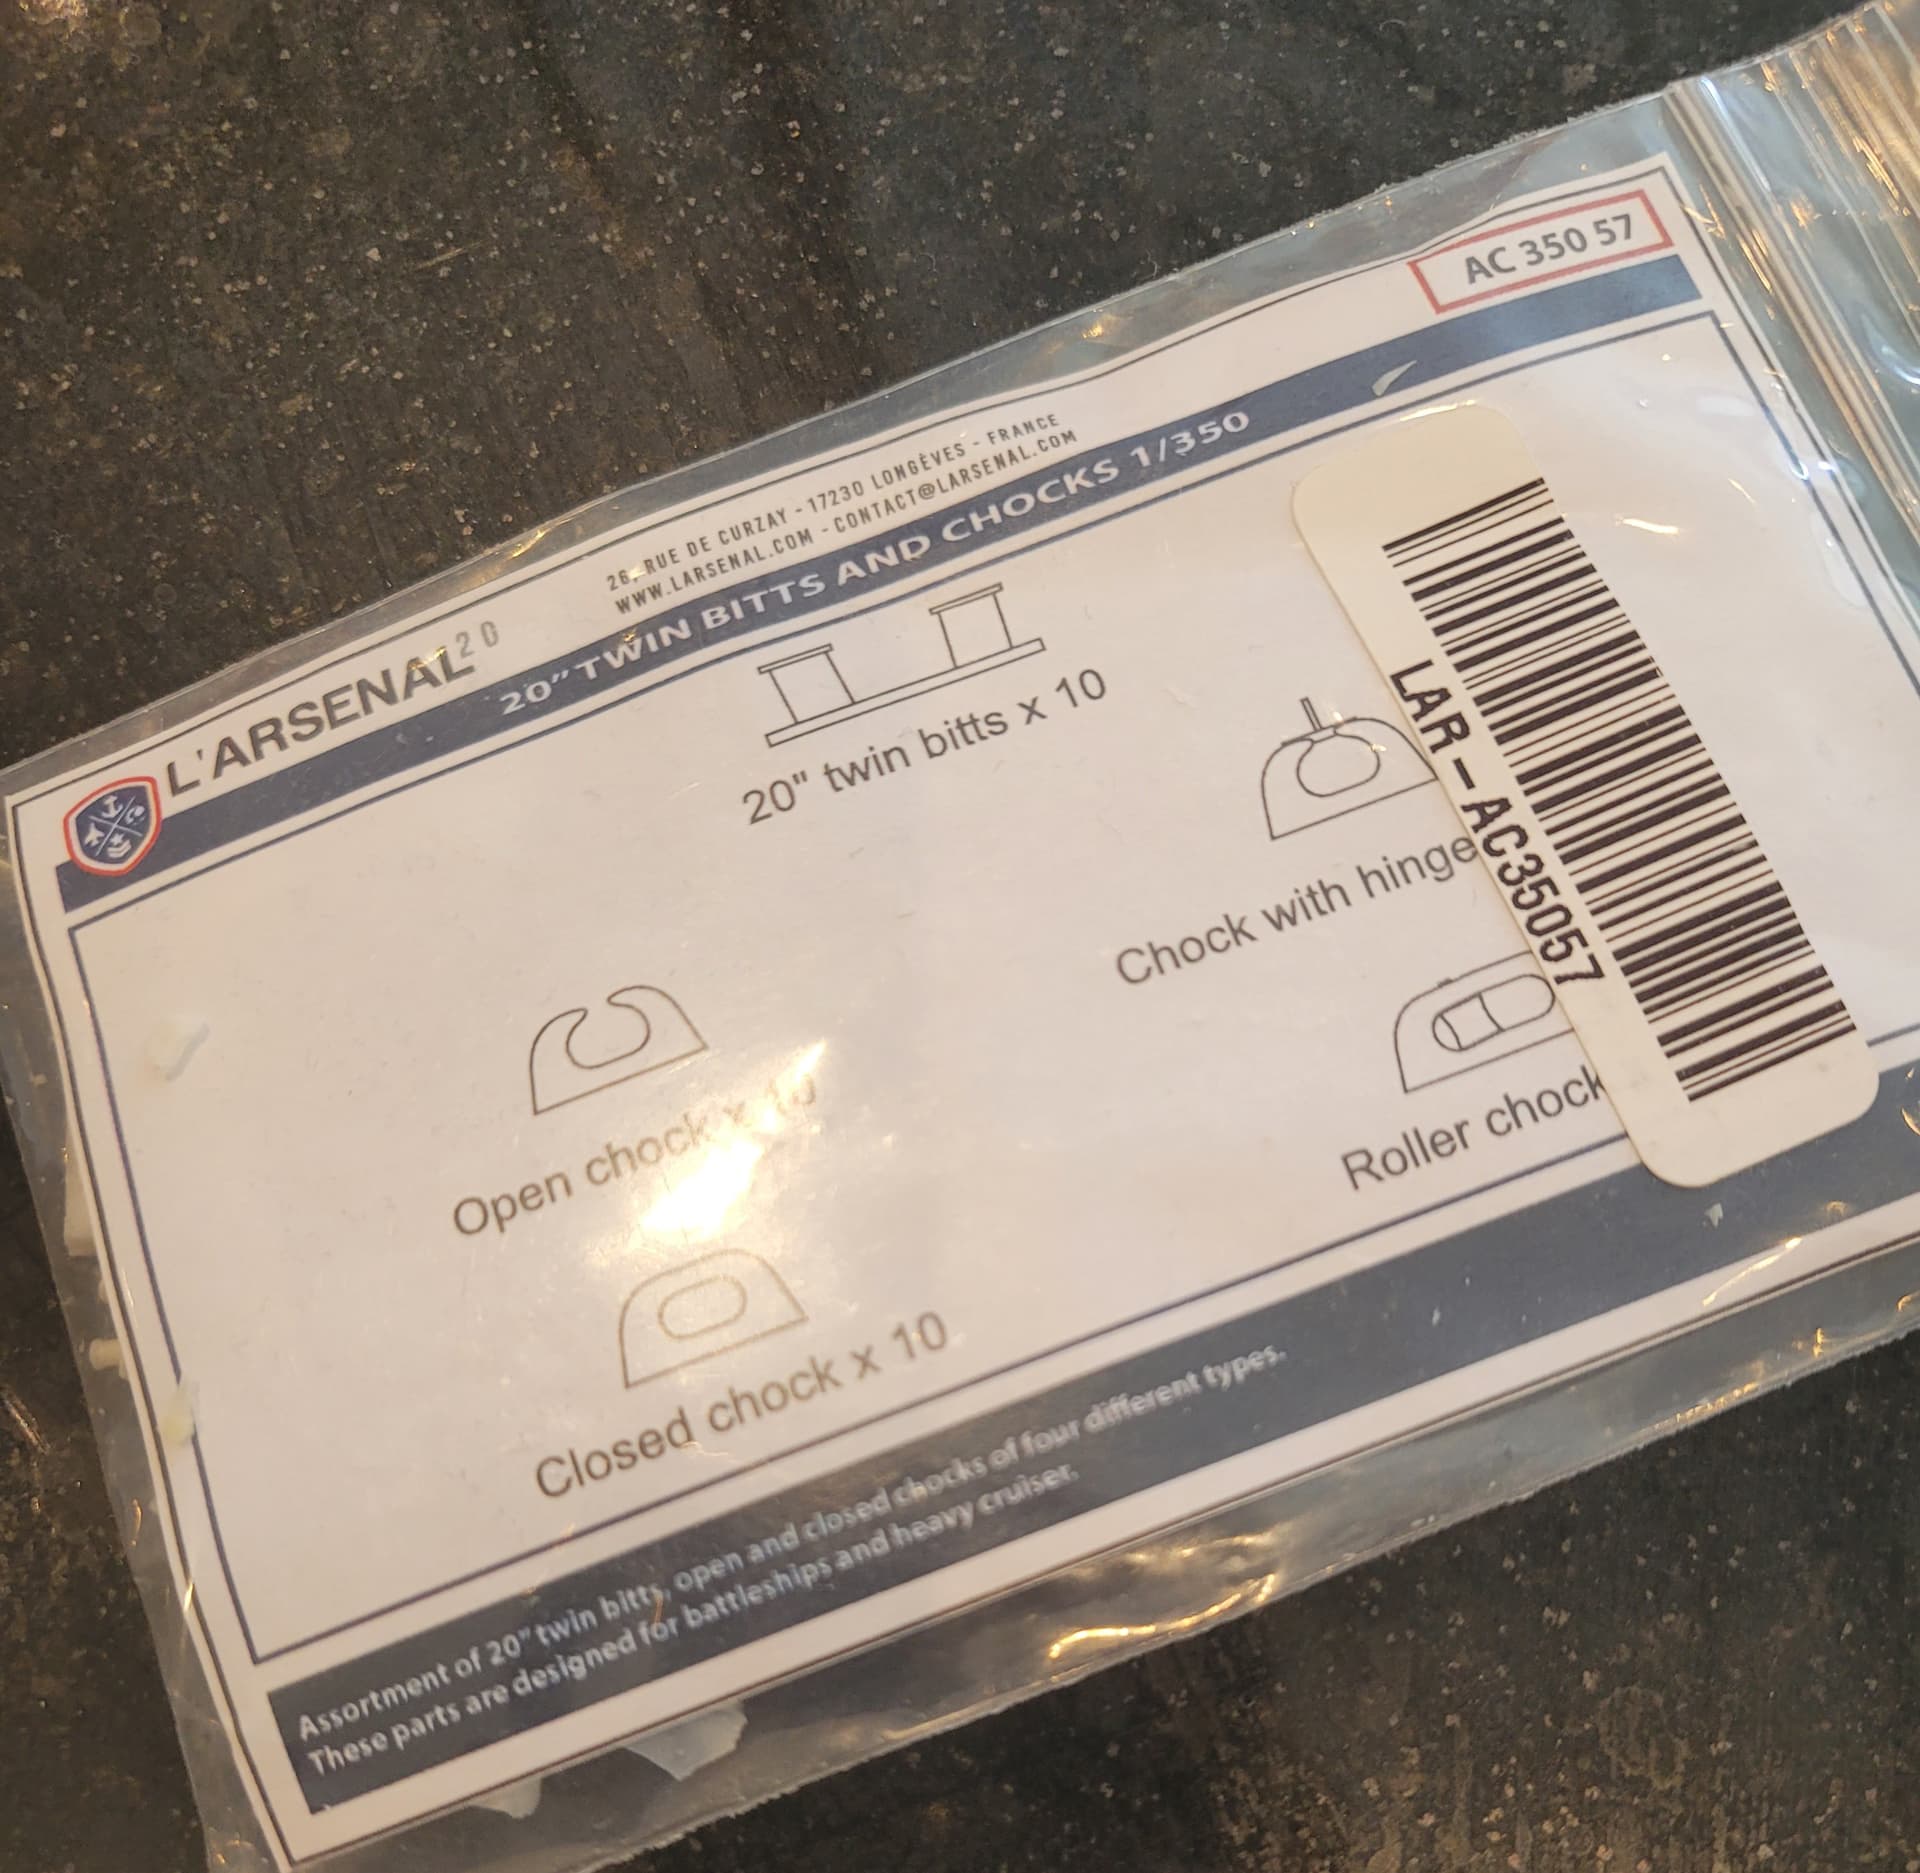
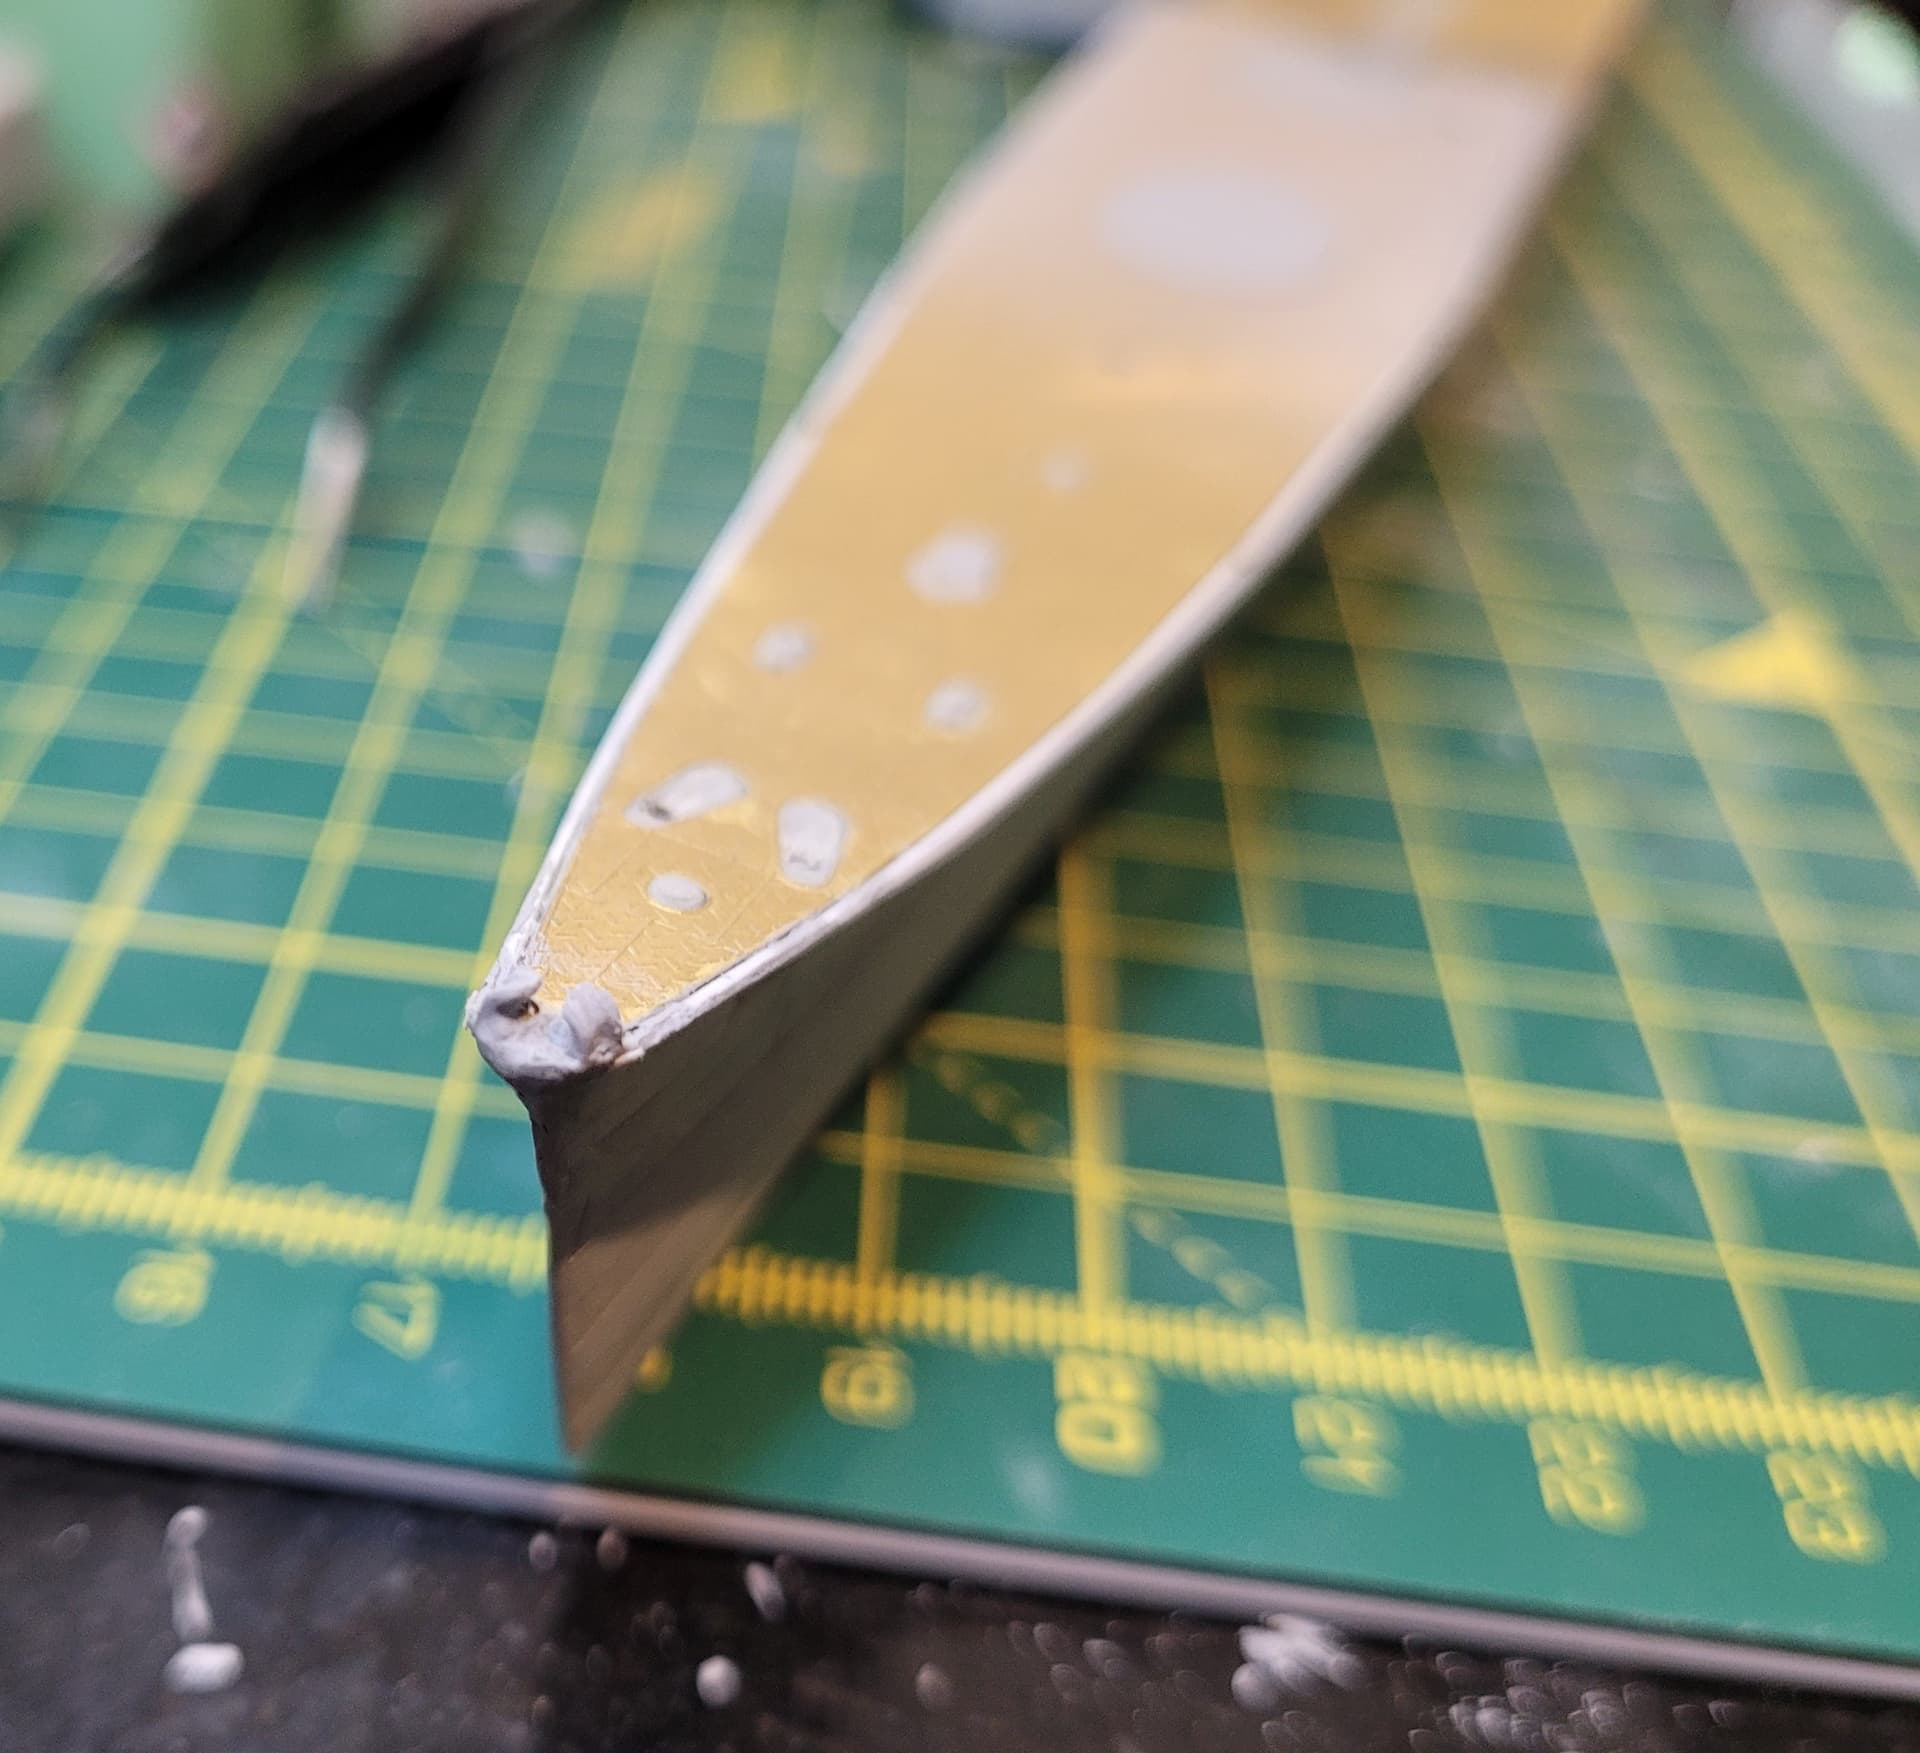
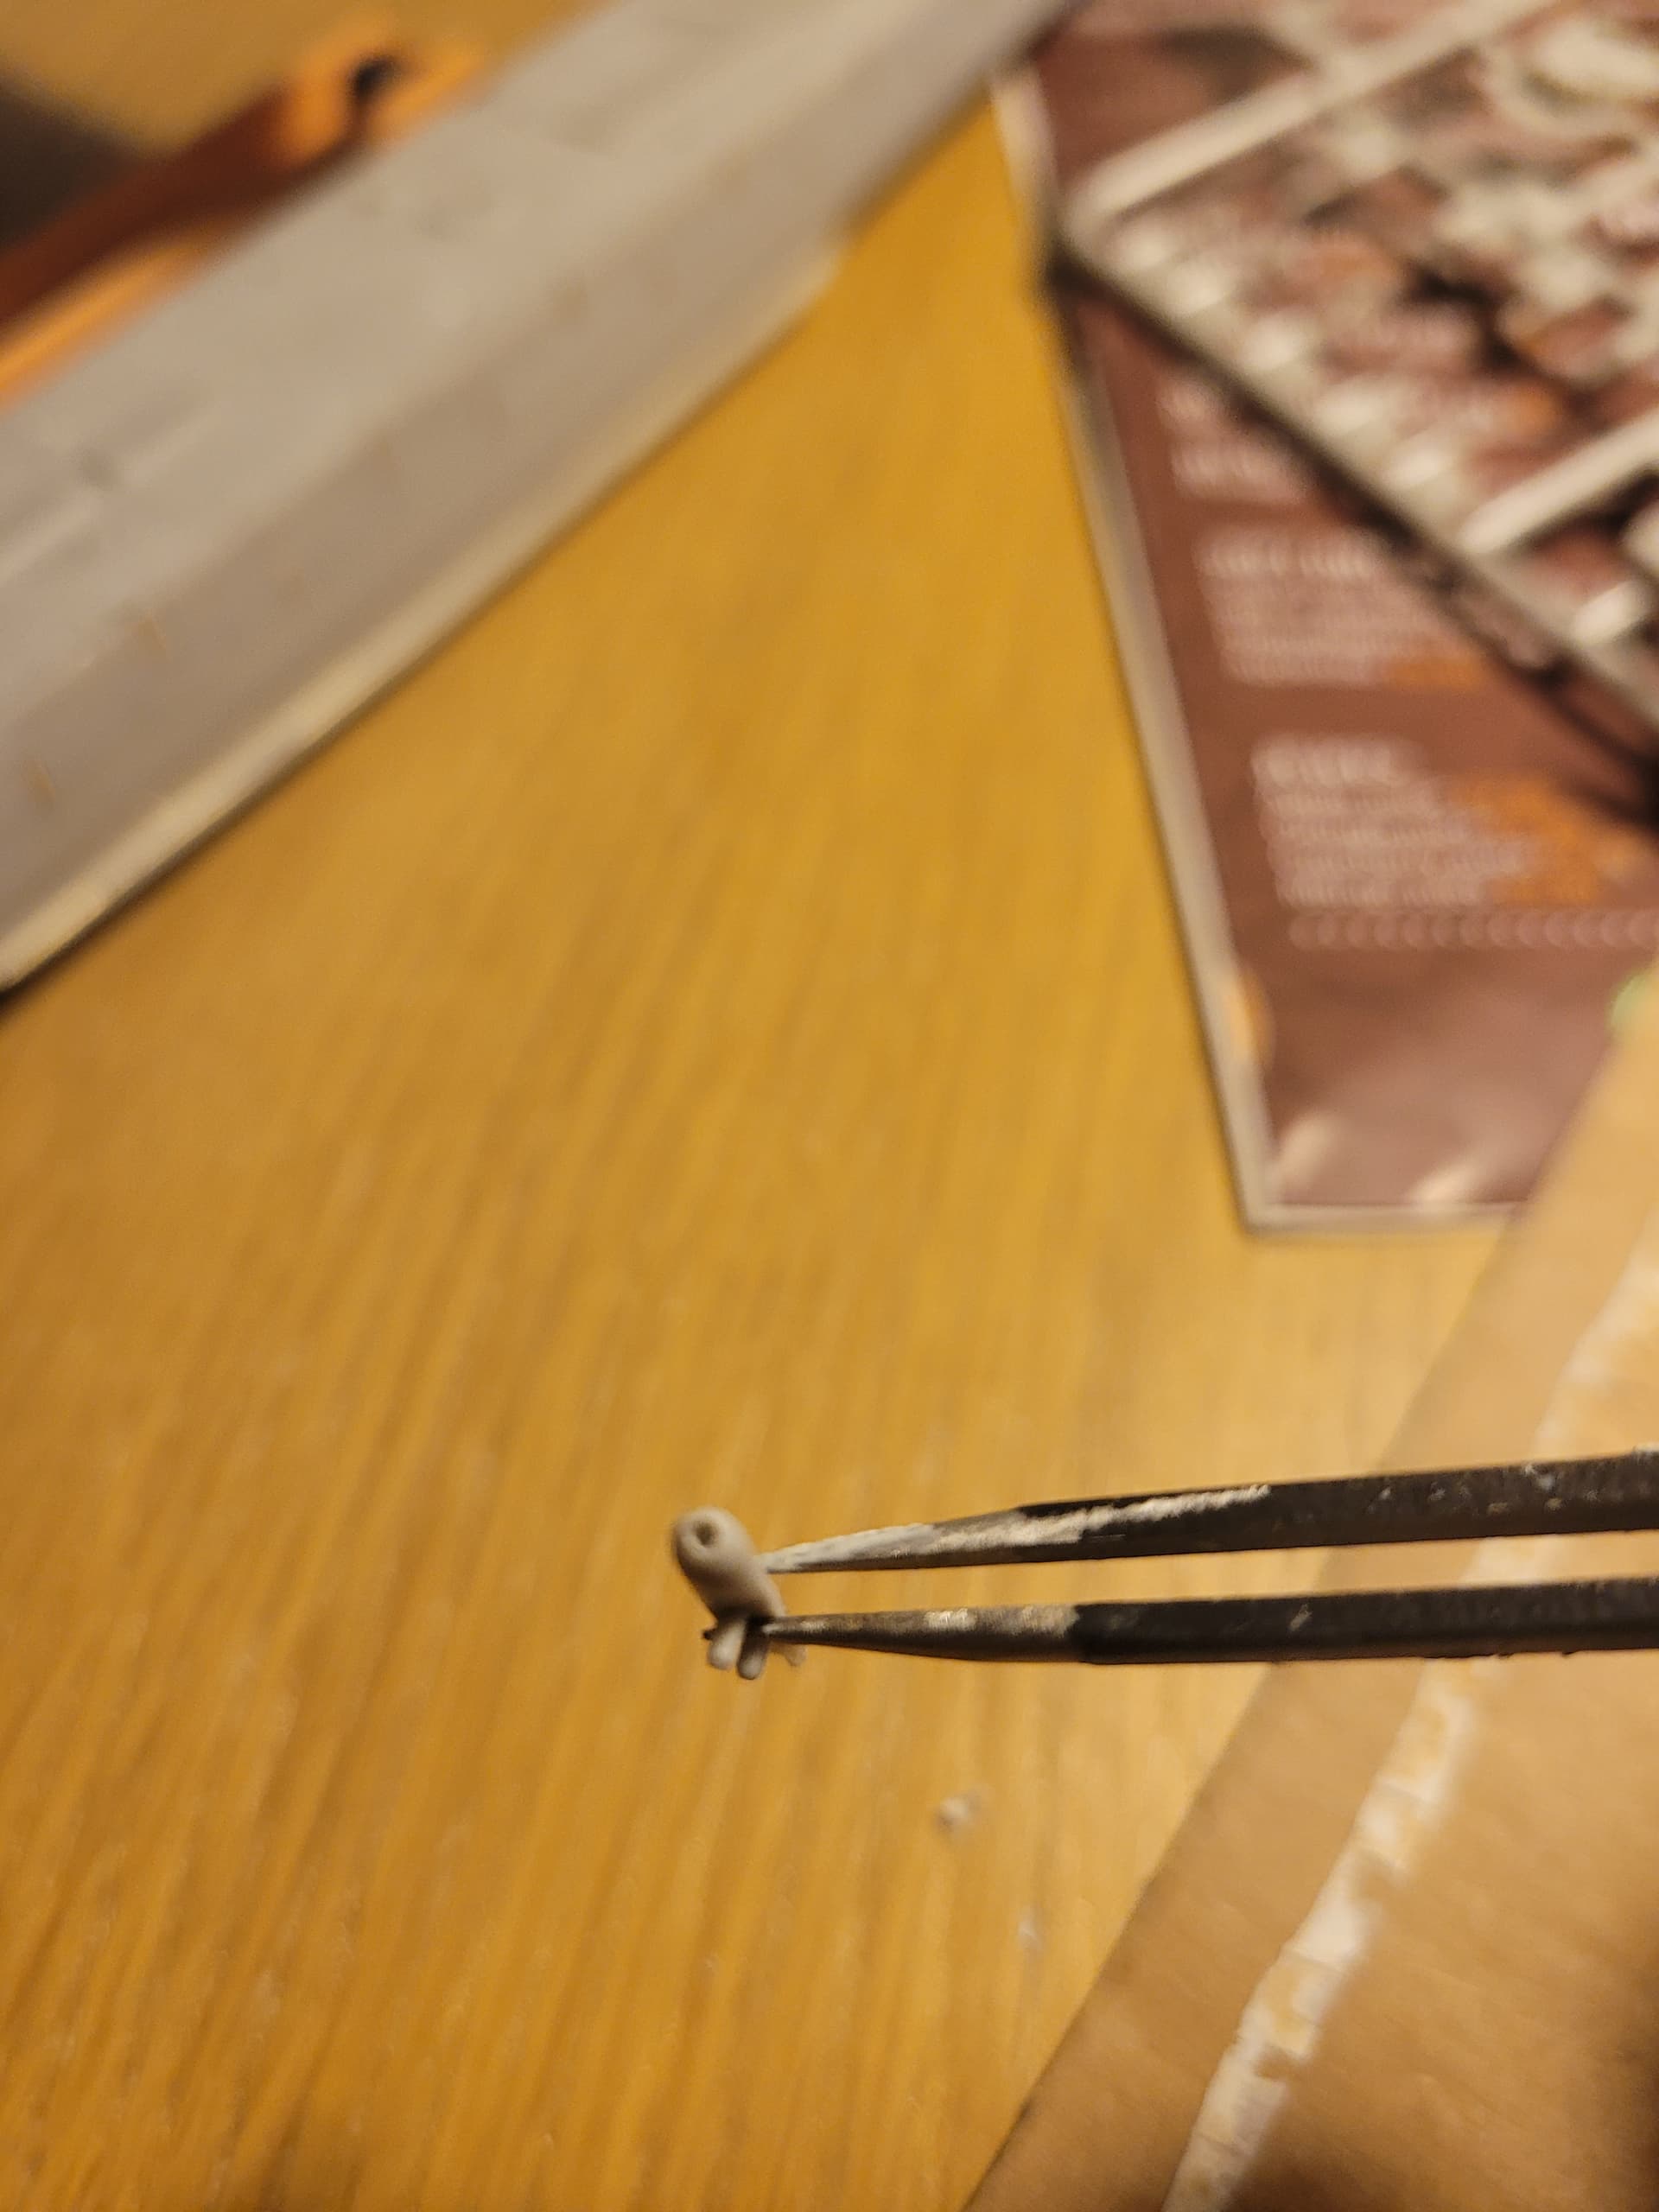
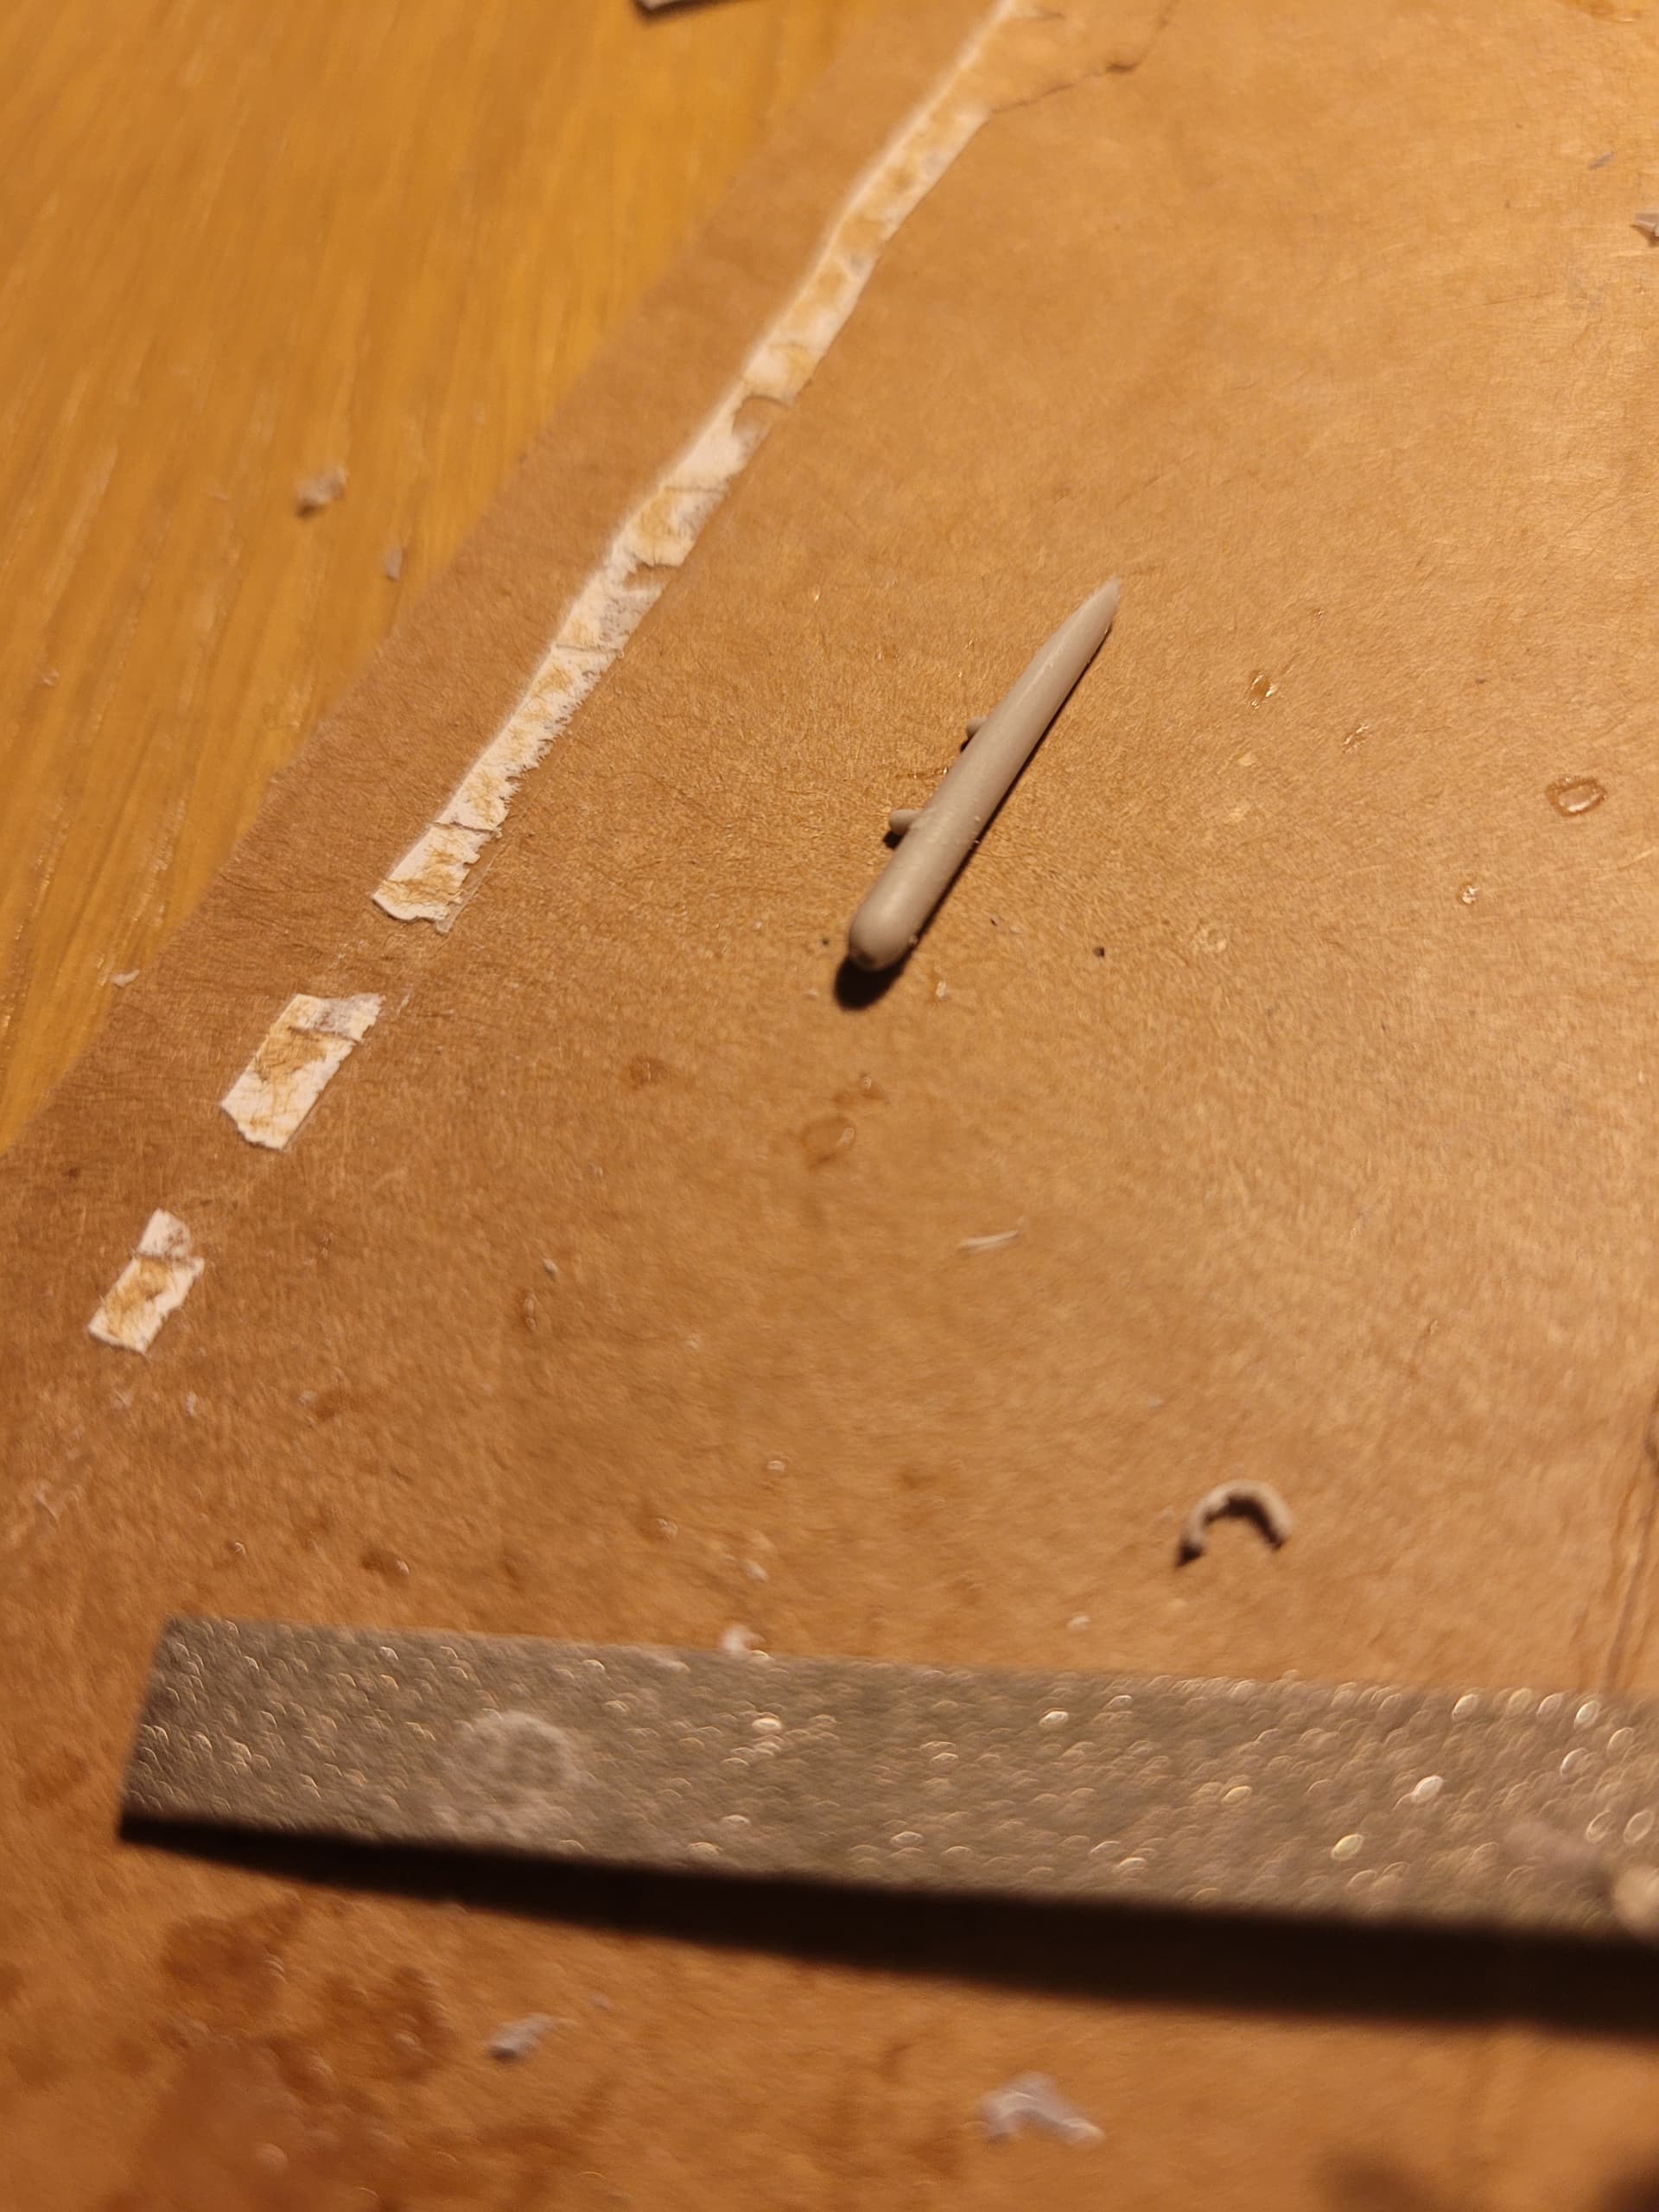
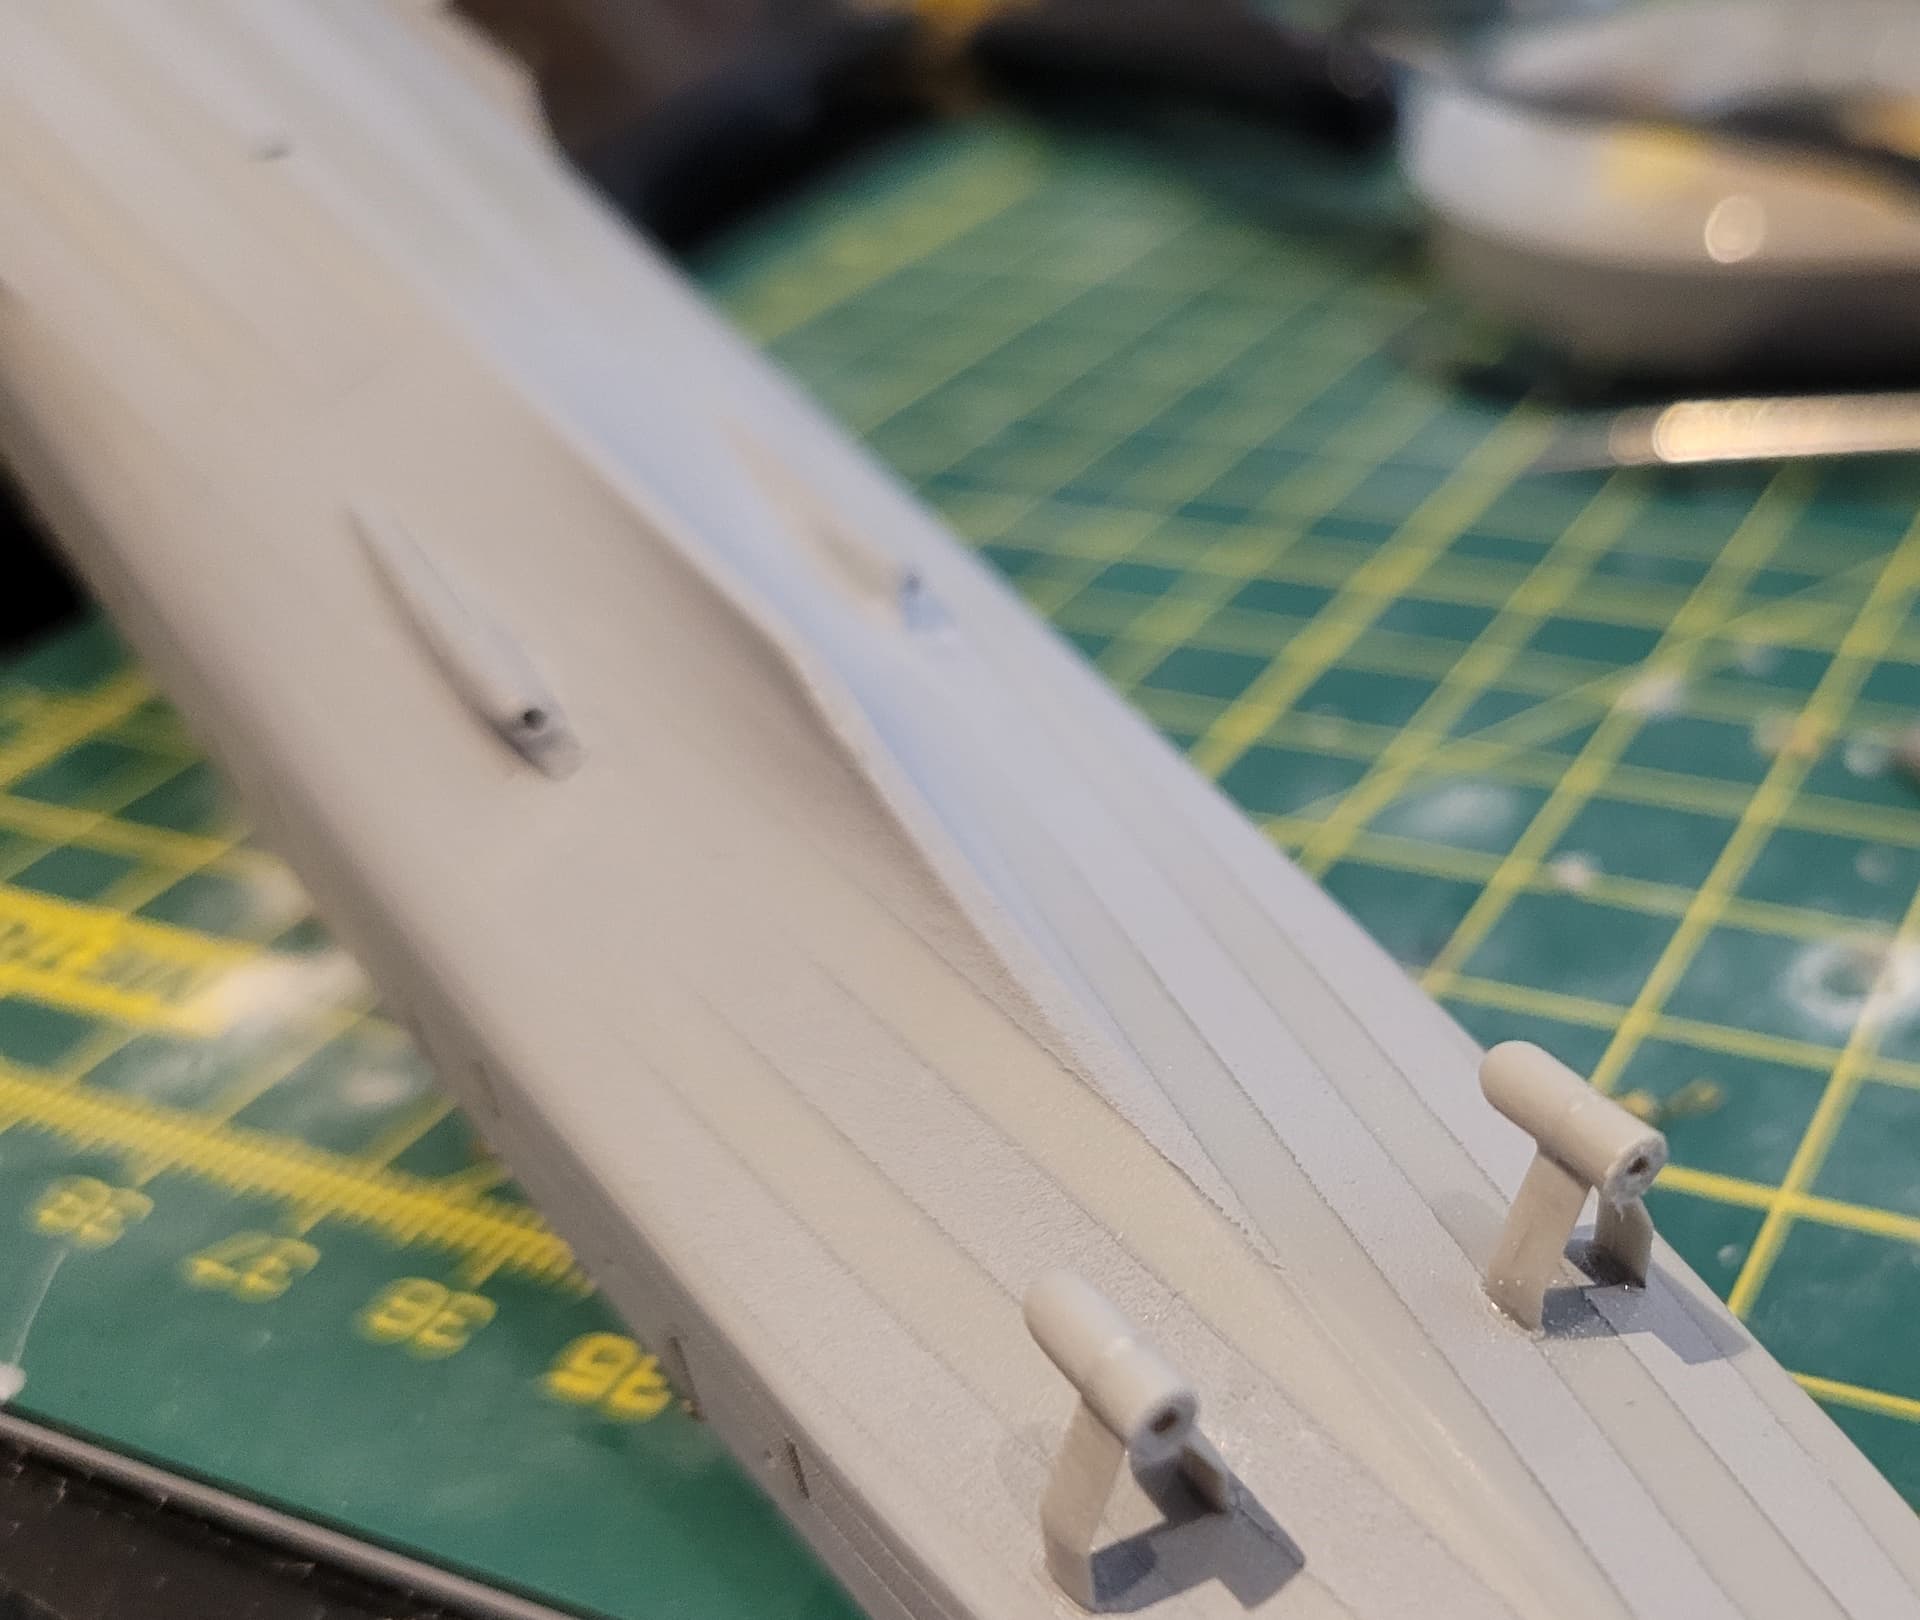
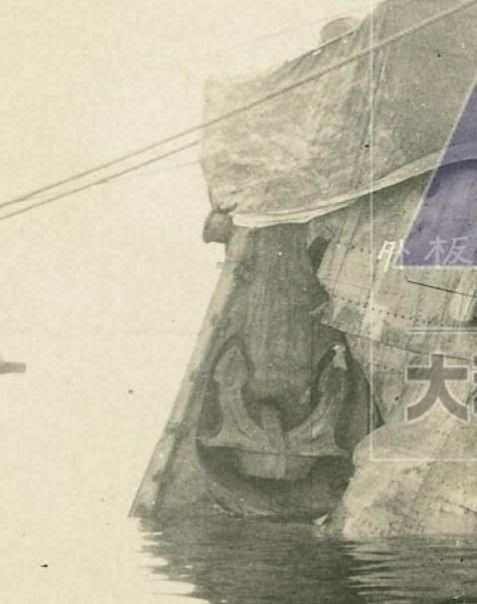
L’Arsenal provided the chocks, the open chocks looked similar to those on the Fuyutsuki.

As can be seen, the right chock is angled aft, so I cut off the two chock arms and glued them separately to account for this.

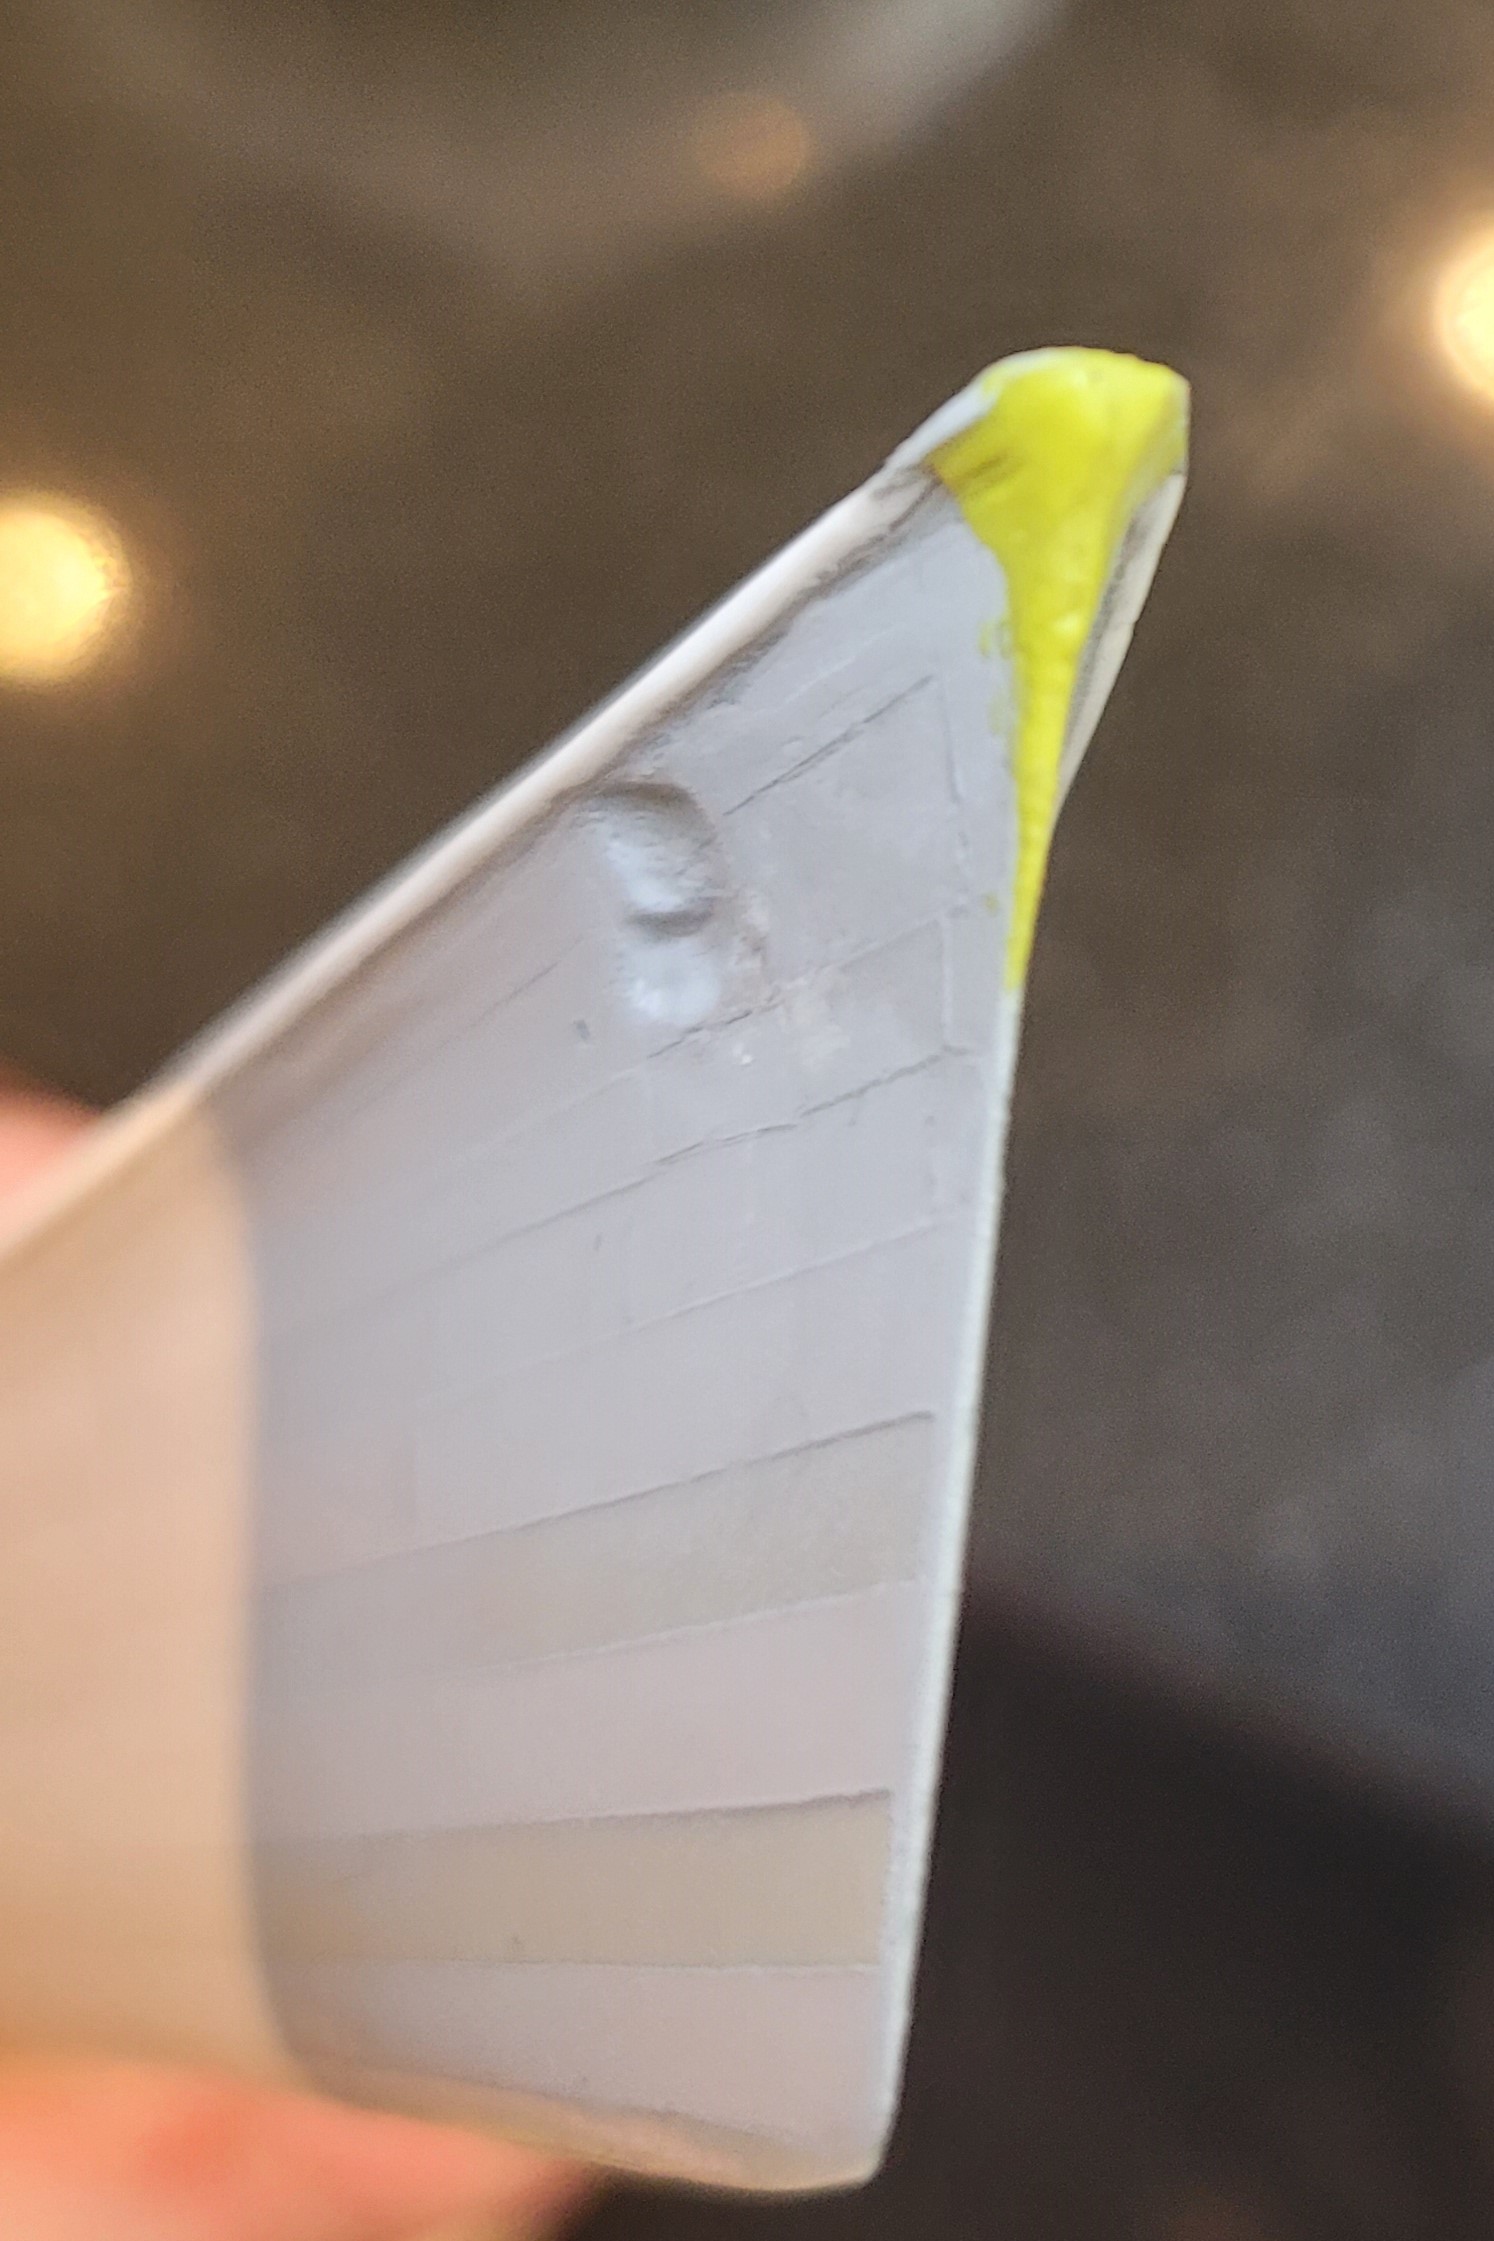
To represent the aforementioned plate, I masked off the shape of it on the bow, then sprayed a thick coat of Mr. Surfacer 500 just to this section.

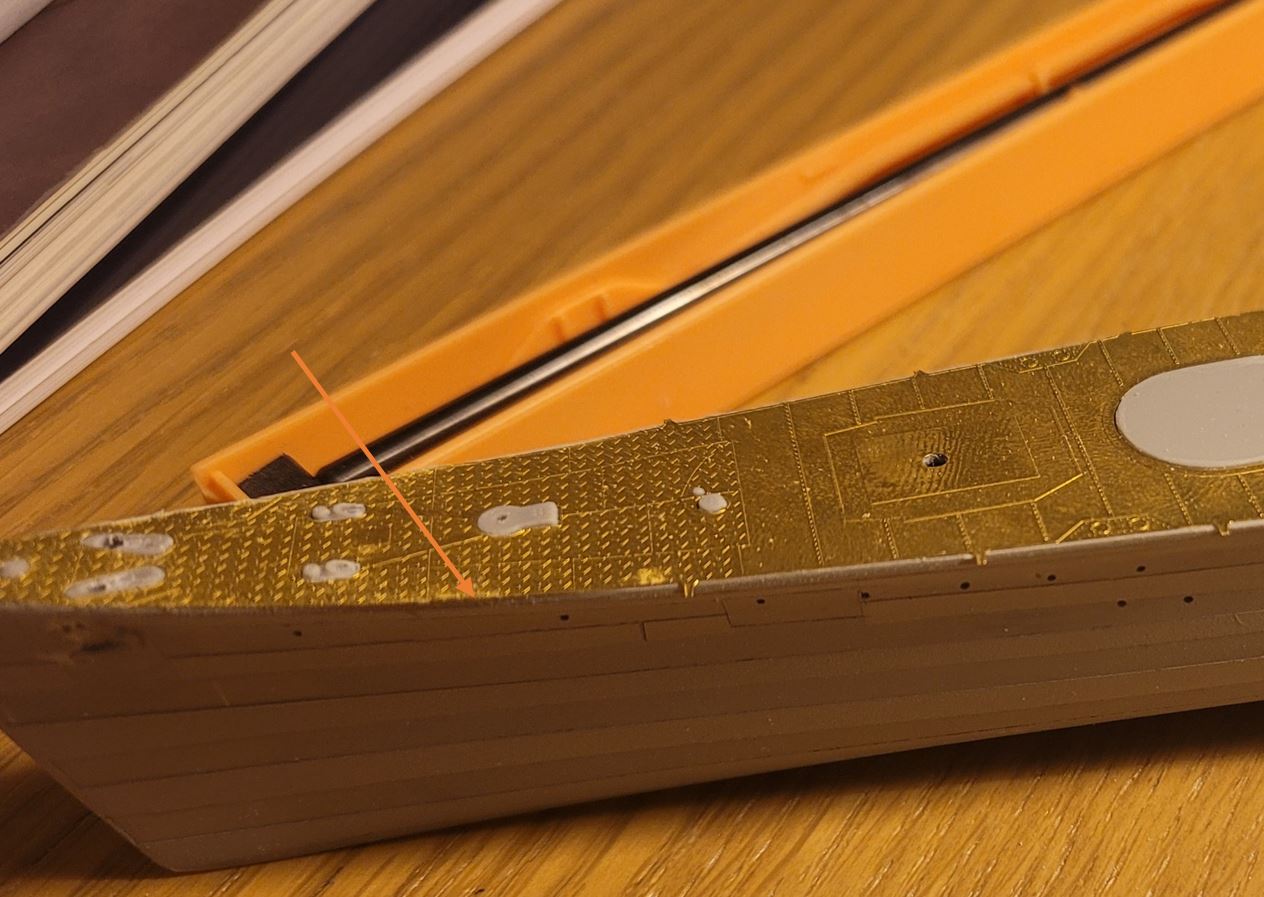
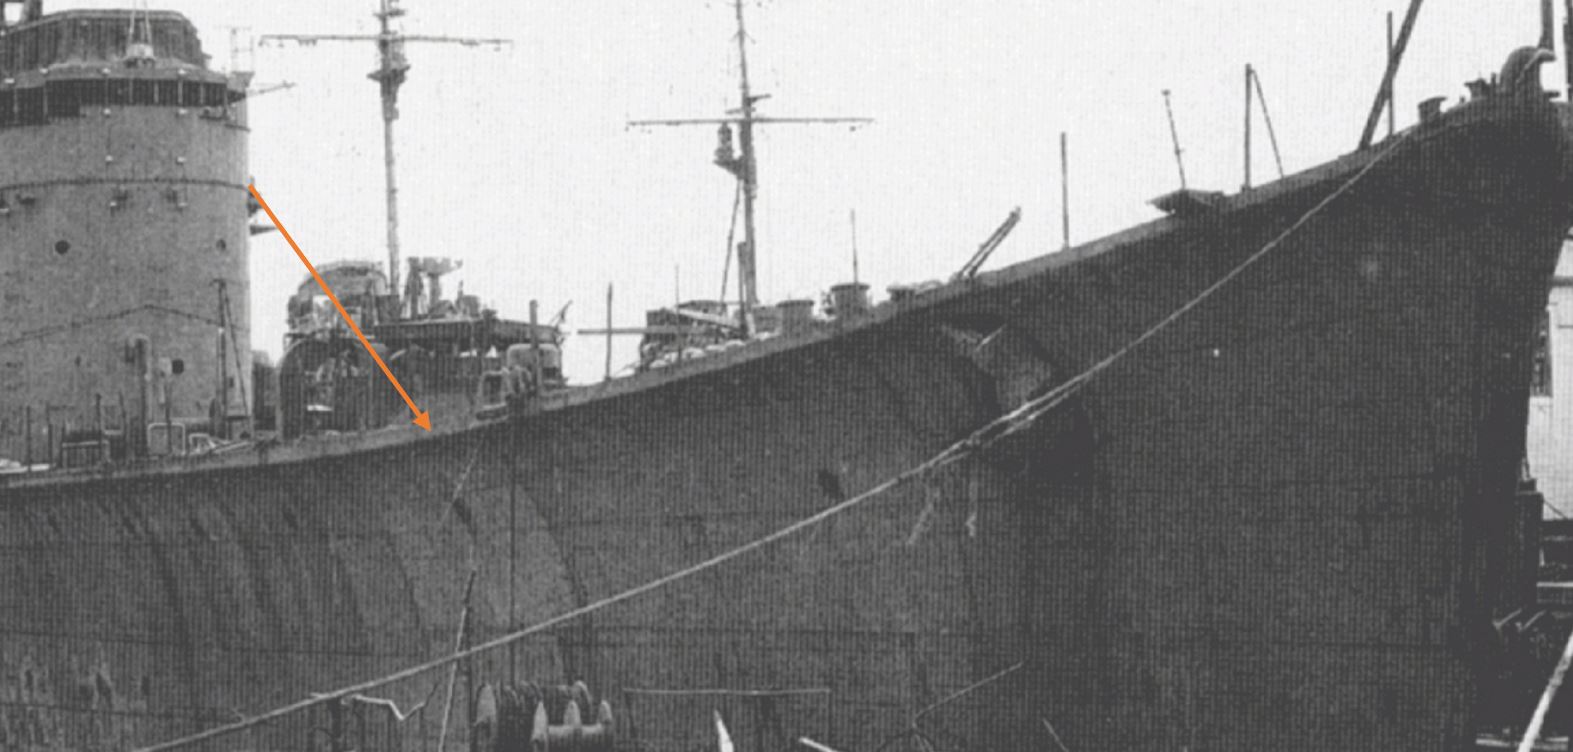
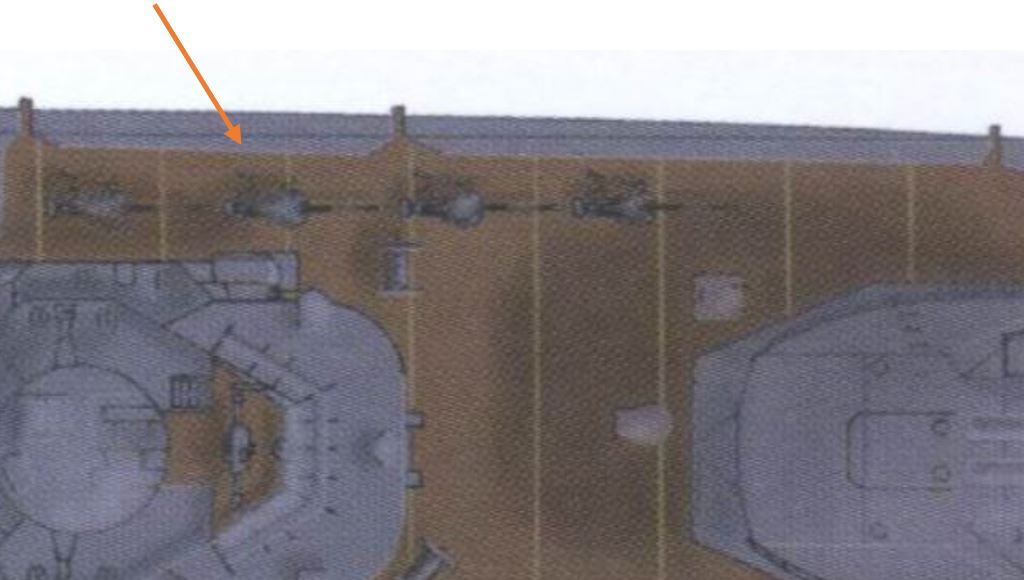
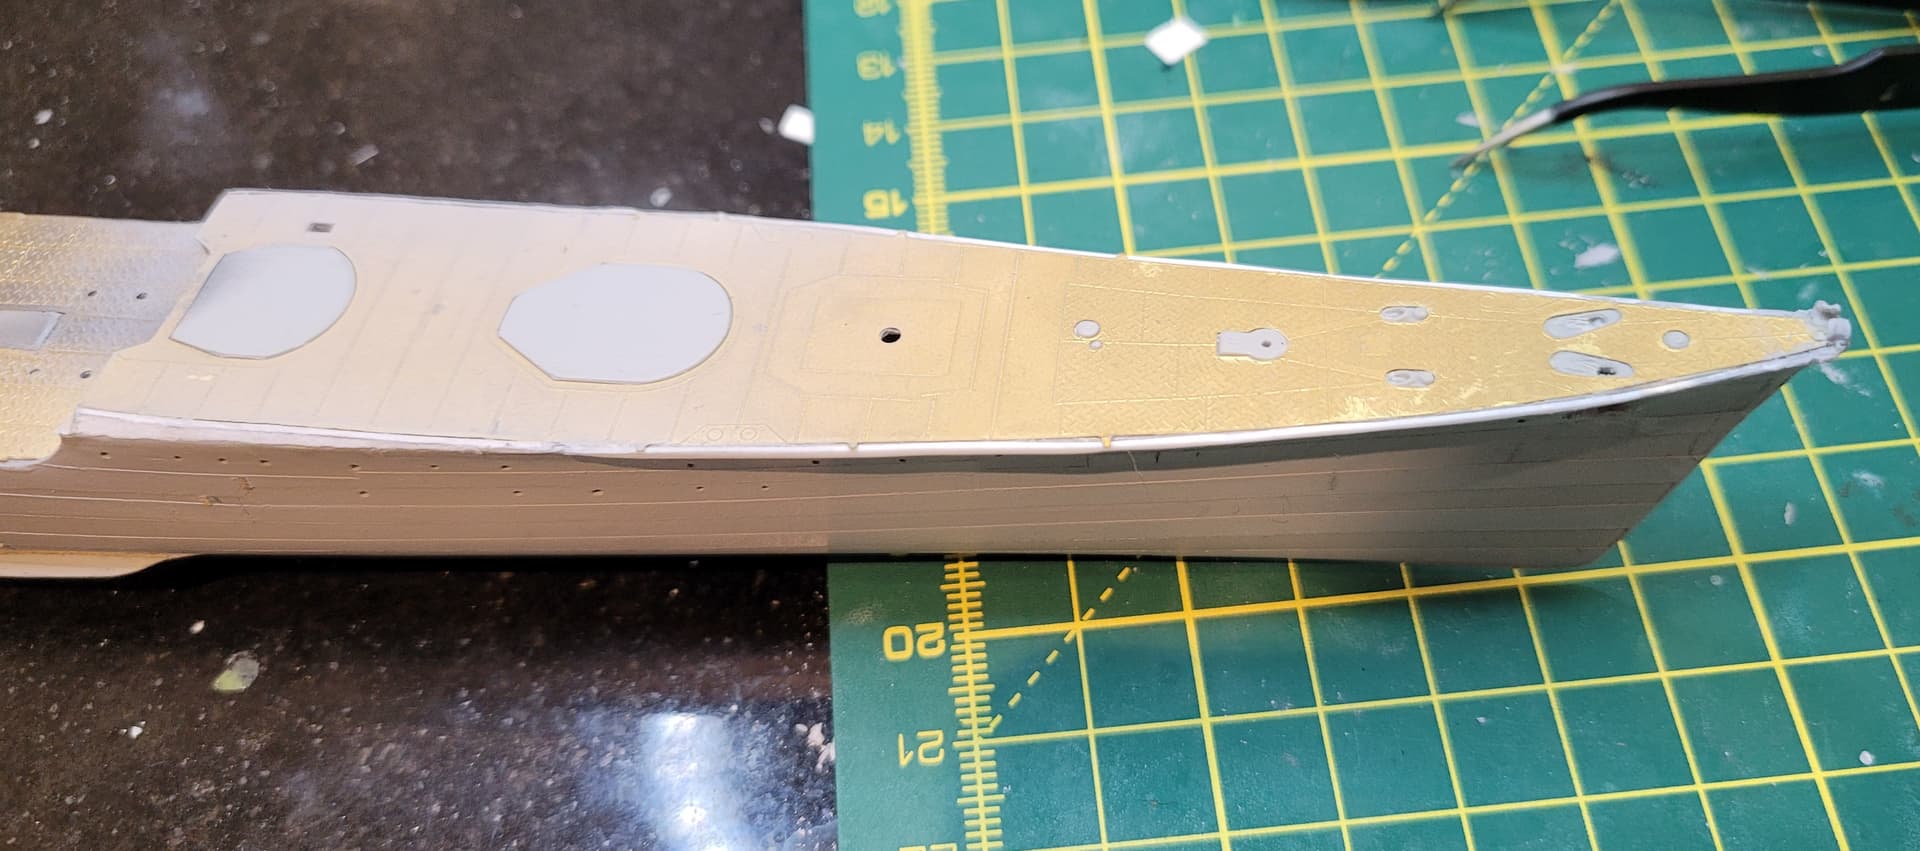
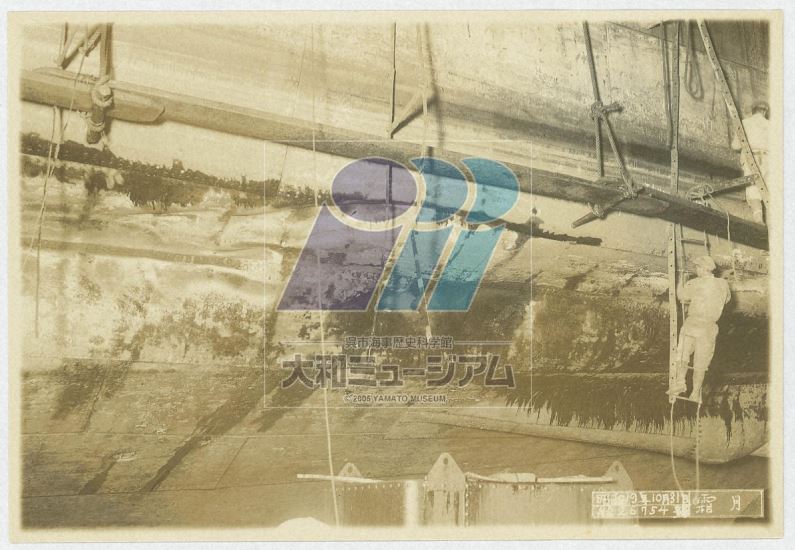
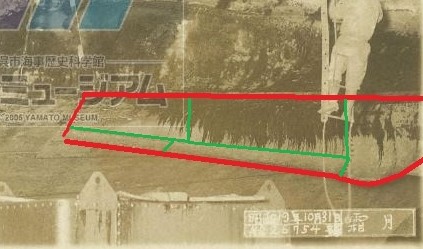
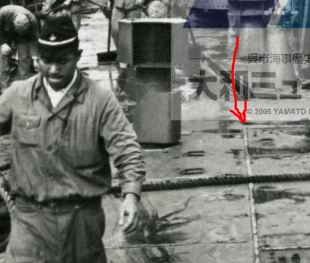
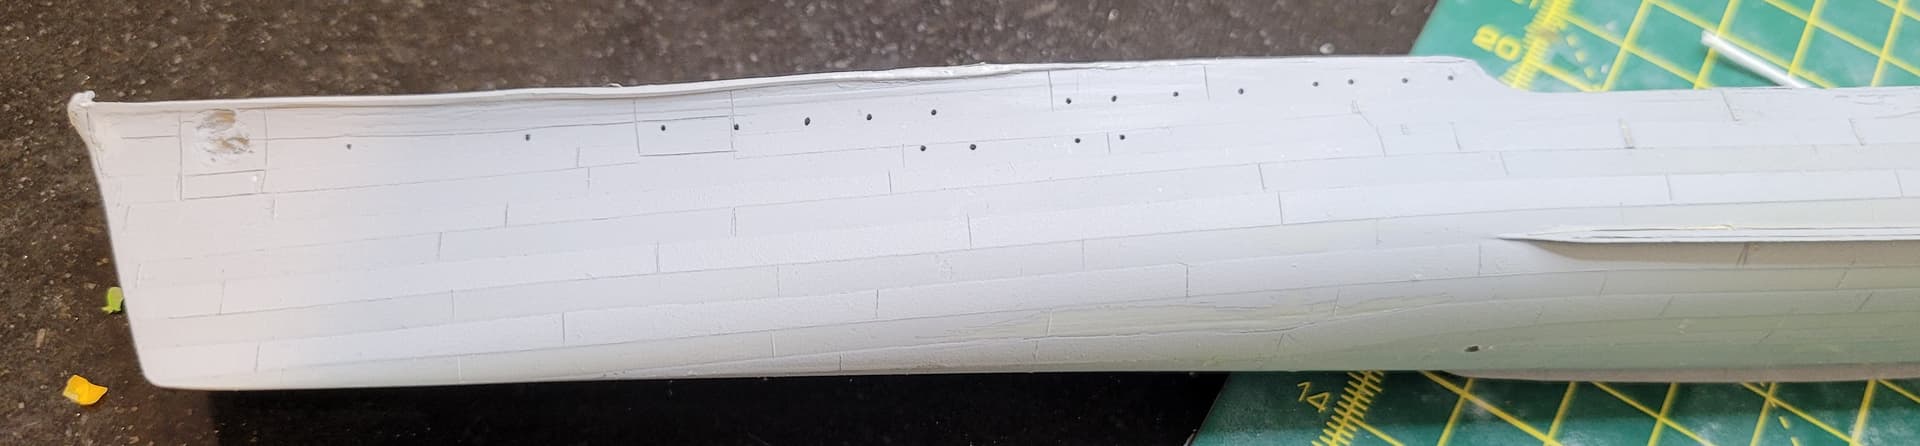
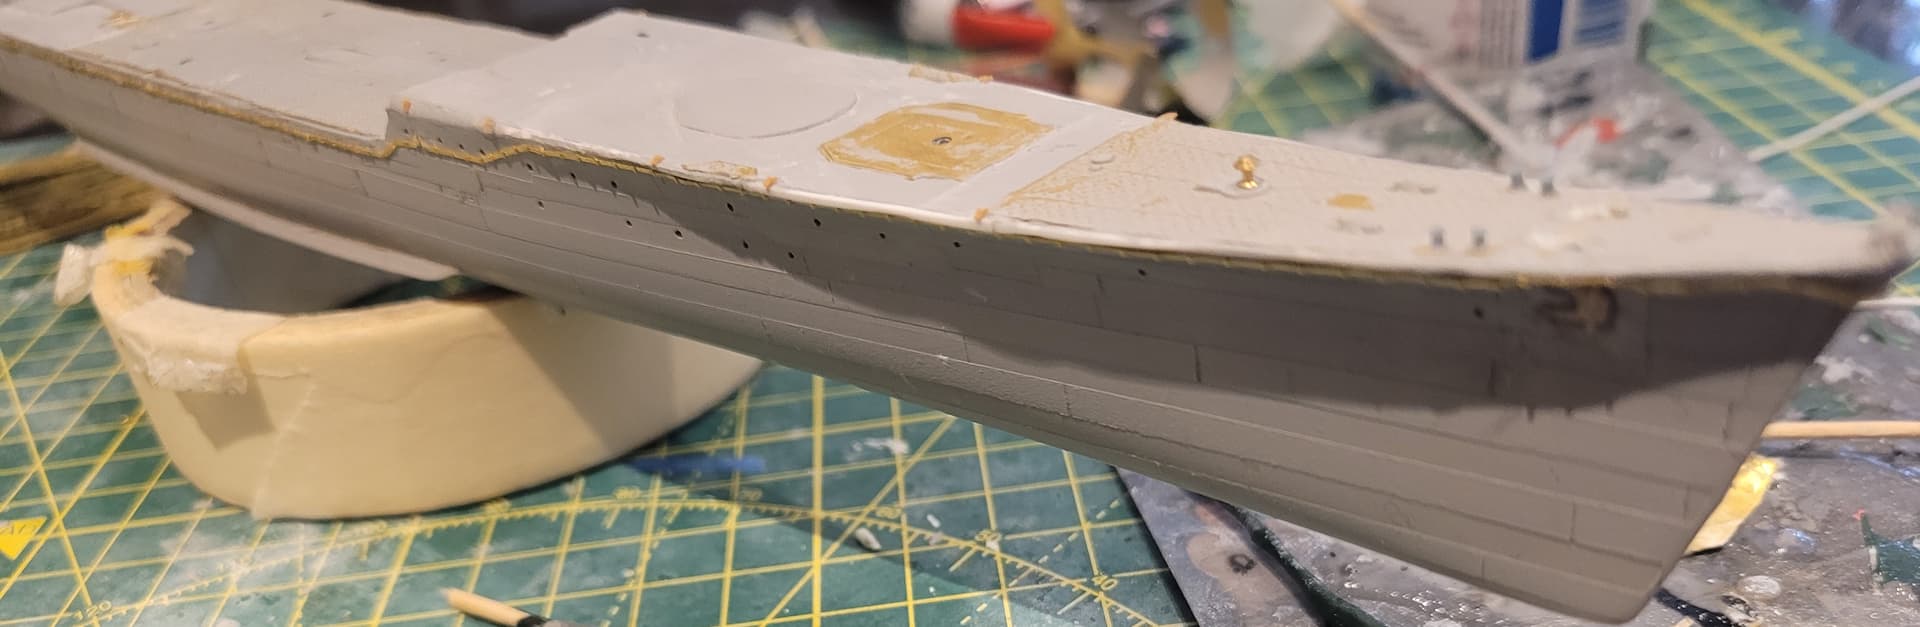
Returning to the aft of the forecast deck, I had not accounted for a small portion of non-linoleum deck which was not angled.


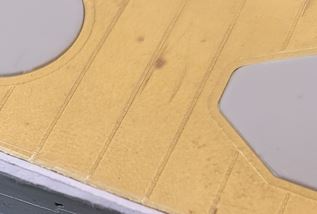
The Profile Morskie illustration depicts this nicely (maybe has oversized it a little), but it is visible in a fair few pictures of Akizuki class vessels.

To replicate this, I cut strips of paper soaked in glue to the estimated width, and also cut another paper section to the shape of the angled section to layer it. I also cut a small section to add the corner at the rear of the deck. A coat of Mr. Surfacer 1200 later and I had a much better-looking angled deck section.


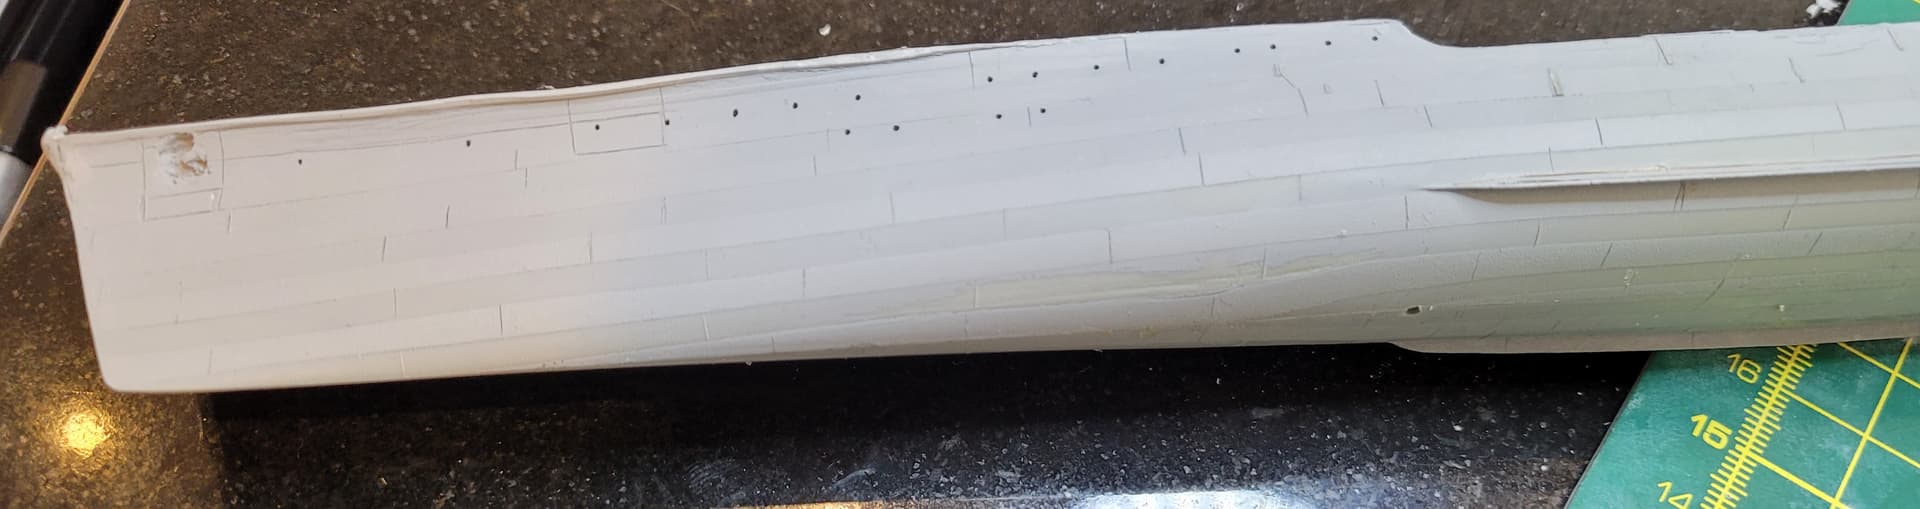
Anyway, some finished results pictures…


My camera continues to do a horrible job of focusing on anything small and making everything look a little messy. I’m planning to completely spray the hull with a coat of Mr. Surfacer 1200 then send when I have finished all the heavy hull remodeling to hopefully clean up some of the more messy sections, then the finer details can be applied.

5 Likes

Wow, that’s quite some rebuilding done here, great effort and really nice job!

Cheers
Jan

1 Like

This is going to be fun to watch. So many changes to the base Kit…Cheers mark

1 Like

somewhat late to the party, but following along :slightly_smiling_face:

1 Like

Beautiful work. Following along also.

1 Like

Once again thanks guys for all the nice comments, I am glad so many people are getting enjoyment out of this build.

A lot has changed since my last update, so I’ll give a quick rundown of the changes made and some of the research for each of them.

Firstly I quite heavily altered the prop shaft area after realising how incorrect and crude the molded parts were.

Here are two pictures of Shimotsuki and possibly the only two pictures in existence of this area of the ship, courtesy of the Kure Yamato Museum archives.


Now with the prop shafts outlined (panel lining in green).
Shimotsuki 1 annotated zoom
Shimotsuki 2 annotated zoom

Compared to the part from the kit:


Which also leaves a gap at the end when installed (I forgot to photograph this), but very inaccurate.

Using modeling putty, plenty of Mr. Surfacer 1200 and 500, then sanding, I managed to reach a reasonable result which seems to share a similar look and shape as the pictures. The panel lines were scribed as seen in the pics.


I also installed the bosses the propellors sit against:

The next step I took resulted in some real issues and annoyance. Since the start of the build, one of my main concerns has been the oversized look of the linoleum hold-down strips etched onto the Fivestar deck. While from what I have seen in 1/350 they are on the smaller side, compared to the real ships.

For instance, on Harutsuki see the size of the strips compared to the naval personnel:
Linoleum strip Harutsuki
On the Fivestar deck they are 3x larger at least:
Fivestar linoleum
Also on the real ship the pattern is more complicated, not just parallel lines.

To begin with, I was just going to accept this inaccuracy, so I could utilize the other benefits of the PE deck, but that decision has never sat right with me as it is too glaring of a feature. I finally decided to attempt to remove them from the brass deck, although I quickly realized that a file and sandpaper are little match for etched brass features, and scraping them scratched up the deck too much. It was just impossible to completely remove the strips consistently, so I brought out the Dremel, which worked ok but started to take chunks out of the deck and really made a mess of it. At this point I just decided to pry off the remaining linoleum deck portions, being careful to cut them off at the transfer point to the metal treads and saving any details from the decks to separately stick back down.

Well, this gave me a whole host of problems including messy superglue marks and all the unnecessary holes molded by Wave. It took a long time of sanding, filling, and airbrushing Mr Surfacer to restore these plastic sections to a nice uniform surface, which was an incredibly painful and monotonous task, but in the end, I have a result I am happy enough with:


I will now be using 1/700 Shipyard Linoleum strips, which are less than a 1/3 of the Fivestar depictions, so will look much better and in scale. I just don’t get why none of these aftermarket companies produce 1/350 linoleum strips accurately sized…

3 Likes

I have also finished scribing the panel line breaks in the hull. This was completed simply using a hobby knife, which gave pretty good and consistent results. These kind of details really are impossible to get 100% correct, but I used the methodology of simply going through the entirety of Akizuki photos I have a marking where I can see panel line breaks. As the number of angles of existing photos is limited, I had to resort to a bit of interpolation to complete them. To try and keep it accurate, I used the Akizuki bow replacement diagram as seen in the Gakken and Legends of Warfare publications and attempted to scale the panel lengths and starting positions as seen in the diagram. I did this for all the sections of hull I was unable to see in any photos.

Here are the results:


3 Likes

Also, a large order of aftermarket for Fuyutsuki came through the other week I have yet to post about…


Purchased:
YXN model deck gutters

Blue Fatty Model General Handwheels

Blue Fatty Model Brake Wheels - I’m not sure if these will be used but useful to have

Blue Fatty Model Yamato Hatches (closed) - I already had the Wu La set for my Yamato before this was released, but this set has extra parts for the anchor deck and I figured that using the 3D printed hatches from this set would be superior to the photo-etch ones from Fivestar


Blue Fatty Model 90 Type Radio Transmitter and E-27 Radar - both look better 3D printed than the photo etch alternatives

Fivestar Small Vessel Anchors - these are identical to the ones included in the Fivestar kit, I somehow broke all 3 of them so these will be the replacements

Fivestar Fire Extinguisher - recently released by Fivestar, most IJN vessels use these including Fuyutsuki

Fivestar Signal Light - both types feature of Fuyutsuki, these are translucent resin, and one of the parts I was surprised to see omitted from the Fivestar detail set

Fivestar Pinnace Cable - to secure down the ship’s boats when I finally get to that point, lots of really detailed straps/securing ropes


Bunker Studio Type 98 100mm AA Guns - the main armament replacement, these look great and only the forward two mounts will need any modification


Wu La model Type 92 Torpedo Launcher - to replace the sole torpedo launcher, surprisingly there are no fine rivet details I was hoping for, and it’s honestly a little disappointing. I think I could achieve a better result simply using the kit parts and Fivestar upgrade but I may wait to see if Blue Fatty Model puts out their own Torpedo mounts before settling on what I want to do.


Also, I forgot to include the Blue Fatty Model IR transmitters and receiver in the picture. The receivers will be better than Fivestar’s photo-etched parts and the transmitters I think look superior to the Veteran model resin ones I already have in my stash.

Quite the hall in total, I am sure I will find stuff I have missed or needs replacing or something I could use gets released, but for now I think I have just about all the aftermarket I will need. Also, I have just realized I forgot to buy anymore 1/700 Shipyard rivet strips sigh. I guess they will have to wait until my next order.

On a side note, recently I have seriously considered getting my own 3D printer to start producing parts of my own, as my 3D modeling skills are quite good and there are still plenty of plastic parts/details I wish to replace on the kit. I just know very little about printer specs so if anyone has any idea what kind of printer the likes of Blue Fatty Model and Bunker Studio use to produce their own parts I would appreciate the info…

5 Likes

Whow this is quite a lot extra parts you have invested in your kit. Not much less than my Yamato :smile: :+1:

Cheers

Thomas

1 Like

I guess so, your Yamato build was amazing by the way. I am in the process of acquiring a similar set of aftermarket for my Yamato. All these 3D printed parts really are handy but deadly for the wallet.

Thanks

Harvey

1 Like

Onto the anchor hawses…

I’m sure some of you have noticed my rough looking anchor hawses so far, right when I started the build I noticed that they were positioned a too low. It was enough to make me want to completely revise them. Little did I know what I would be getting myself in for.


The kit ones

Vs real.

You can see that on Fuyutsuki the anchors are positioned higher up on the hull, right up against the degaussing cables.

To fix this I filled in the molded hawses at the beginning of the build with modelling putty and Mr Surfaced until they had completely vanished. Next, I drew outlines of the anchors on either side and tried my best to line them up and make their positions equal.


Fuyutsuki’s hawse shape in 1947.


The pre-bow reconstruction for reference…in the 1947 picture it appears like it could have been slighly simplified in shape but it is hard to tell.

To make the new hawse, I gave the hull several careful Dremel sessions.


Which unfortunately gave some pretty ugly results…

However, through some persistent Mr Surfacer 1200 usage and sanding I reached a good result, with the anchors making them look even better when in place.


They somehow lineup really well, so the front profile looks seamless.

As you can see the degaussing cable has been installed… but I’ll save that till my next post (hopefully tomorrow) as there was some research required for it.

4 Likes

Finally back to talk about the degaussing cables…

So with the degaussing cables, I had 2 questions to research and try and answer. 1, what was the exact shape of them, and 2, did they have a protective cover (Fivestar depicts them as bare cables)?

The shape part was relatively easy. I already had an annotated picture of Fuyutsuki at Moji Port from another build log for a 1/700 kit, with the cable highlighted.


Source: 1/700 冬月 舷外電路(5) : 北鎮海軍工廠
I’ve highlighted with an arrow the cable section with curvature, as on other Fuyutsuki vessels it seems to actually be a straight section. Overall, it seems the shape matches Fivestar’s instructions very well.

Now the covers or no covers matter seems a little more difficult to decide on. All post-war Fuyutsuki photos show that the cables have been completely removed and earlier pictures are not clear enough to make this detail out, so they are not much help. As for her sisters, the confusion continues with pictures showing with and without the covers.


Yoizuki with covers…

Harutsuki with no covers.

There are other Yoizuki post-war pictures that seem to show her in the absence of the covers as well. this would suggest that maybe the covers were frequently removed long before the actual cables themselves and all Fuyutsuki class vessels started out with them. Another alternative is that in Grand Prix publishing Mechanisms of Destroyers, it is stated that some late war vessels did not receive the covers to begin with, although there is no indication of how late in the war. Fuyutsuki is quite an early vessel, but her initial bow damage could mean that by the time her cables were replaced, covers may be no longer being applied and would this be naval arsenal specific?

Suzutsuki was similarly damaged by torpedo and also repaired at Kure on October 16th 1944 (Fuyutsuki was damaged 4 days prior).


It can be seen in this post-war photo that she indeed had covers applied to the degaussing cable, so I finally decided to do the same for Fuyutsuki as it is highly likely in terms of cover or no cover they would have been treated the same upon repair.

Rather than buy new degaussing cables, I just used the Fivestar parts but folded them the opposite way to show the flat etch side rather than cable. The Fivestar cables were great, with individual folded attachment points, but this made it draining work to have to individually glue and fold each of these. Rather mind-numbing but worth it for the 3D effect.


Some of you may notice some installed foredeck fittings, some more work to be done in that department then I’ll explain in my next post.

Also I apologise for the messy workspace…I should just clean it :sweat_smile:

5 Likes