1/350 IJN Destroyer Fuyutsuki Operation Ten Ichi Go 1945 Wave

Hello,

This will be my first ever build log, I have always wanted to do one and I think now is the time. I will try and go really in depth in my process, as I have real OCD with making my models as accurate and detailed as possible, so be prepared for this log to be rivet-counting heavy with plenty of references. For that reason, any experts please feel free to chime in at any point with accuracy notes or concerns, the more knowledge the better.

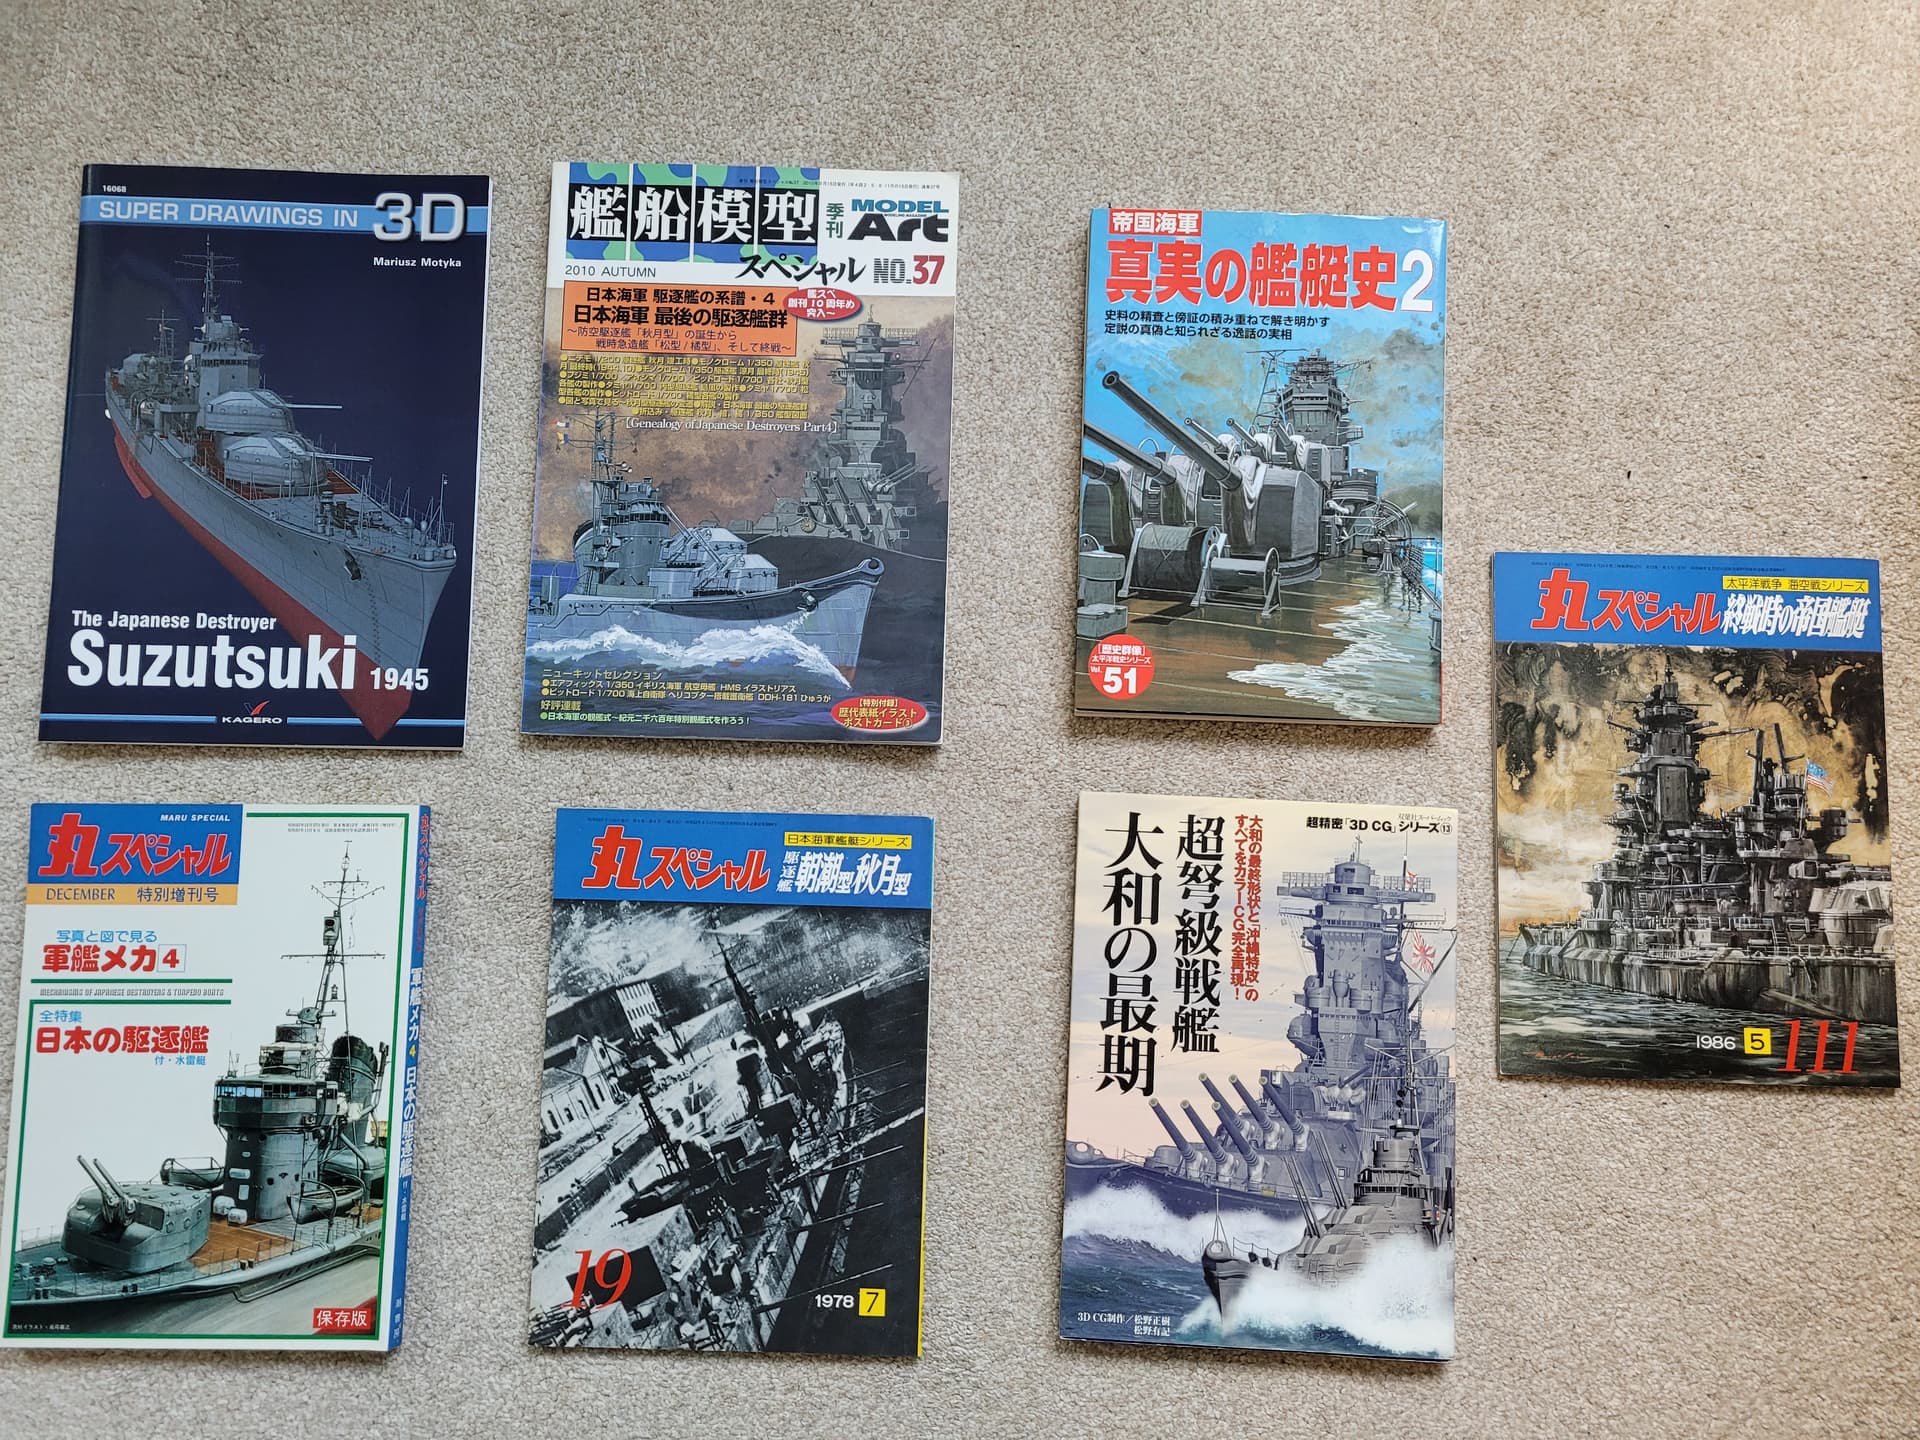
Just to give some background on my hobby situation, I build 1/350 scale IJN only and have been collecting and researching vessels available in 1/350 for quite some time. As a result, I have amassed a respectable stash including some quite rare kits (mostly Aoshima) and in the last year or so have really gotten into collecting rare Japanese reference material (Maru Specials, Gakken, Model Art etc.). I like to replace pretty much anything I can with aftermarket and am open to a little scratch building as long as I believe it lies within my skill range. What I am still getting to grips with is airbrushing and finishing techniques, as I have not been the owner of an airbrush for too long and few of my ships are yet to have reached the finishing stage, so I’ll probably ask for modelling tips when I am struggling.

I am also completing this build around studies, so I can’t promise the most regular updates, but in my updates I will try and make them as comprehensive as possible.

Anyway, with all that said and done onto the ship and build…

History

I’ll quickly brush over the history, if you want more detail I would check on Wikipedia or Combinedfleet.com.

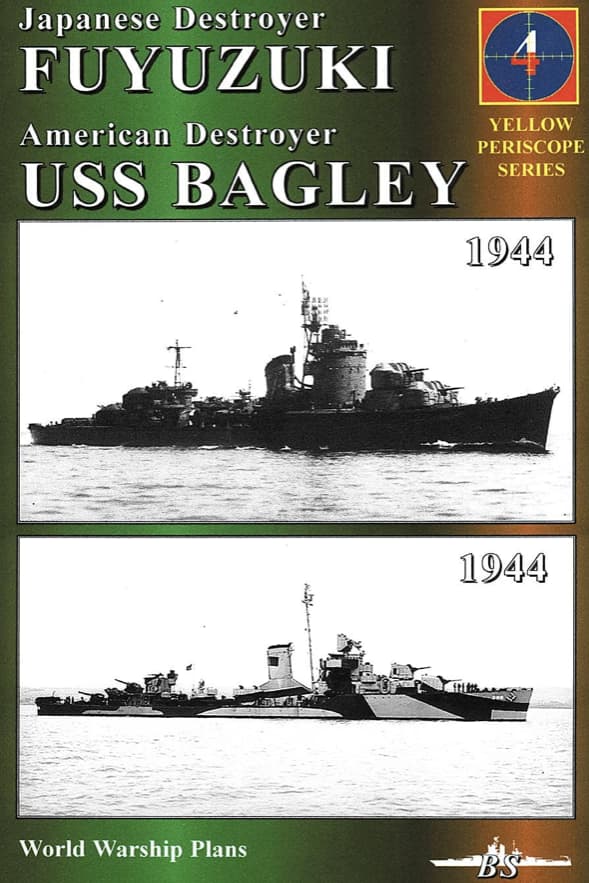
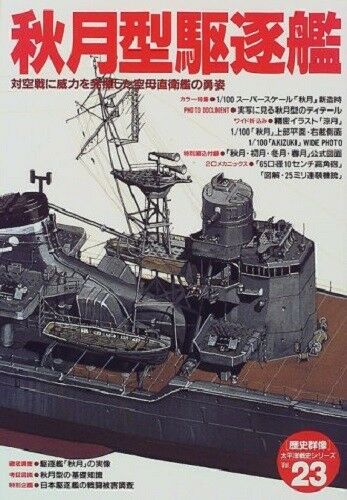
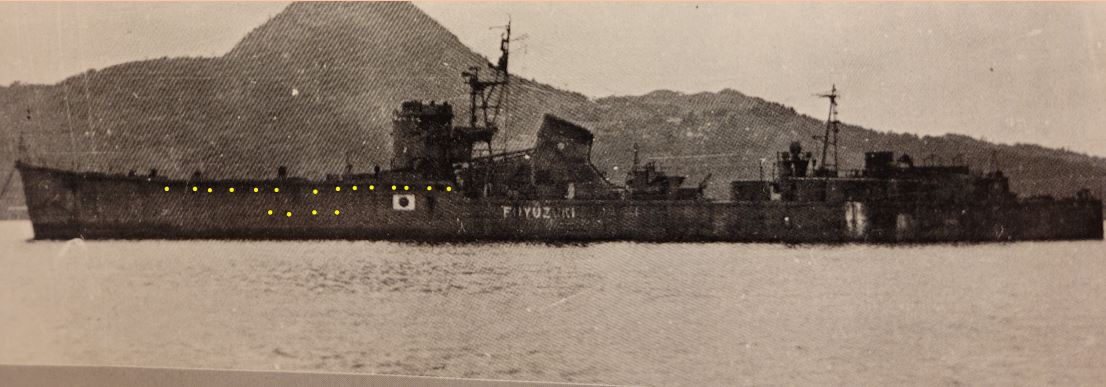
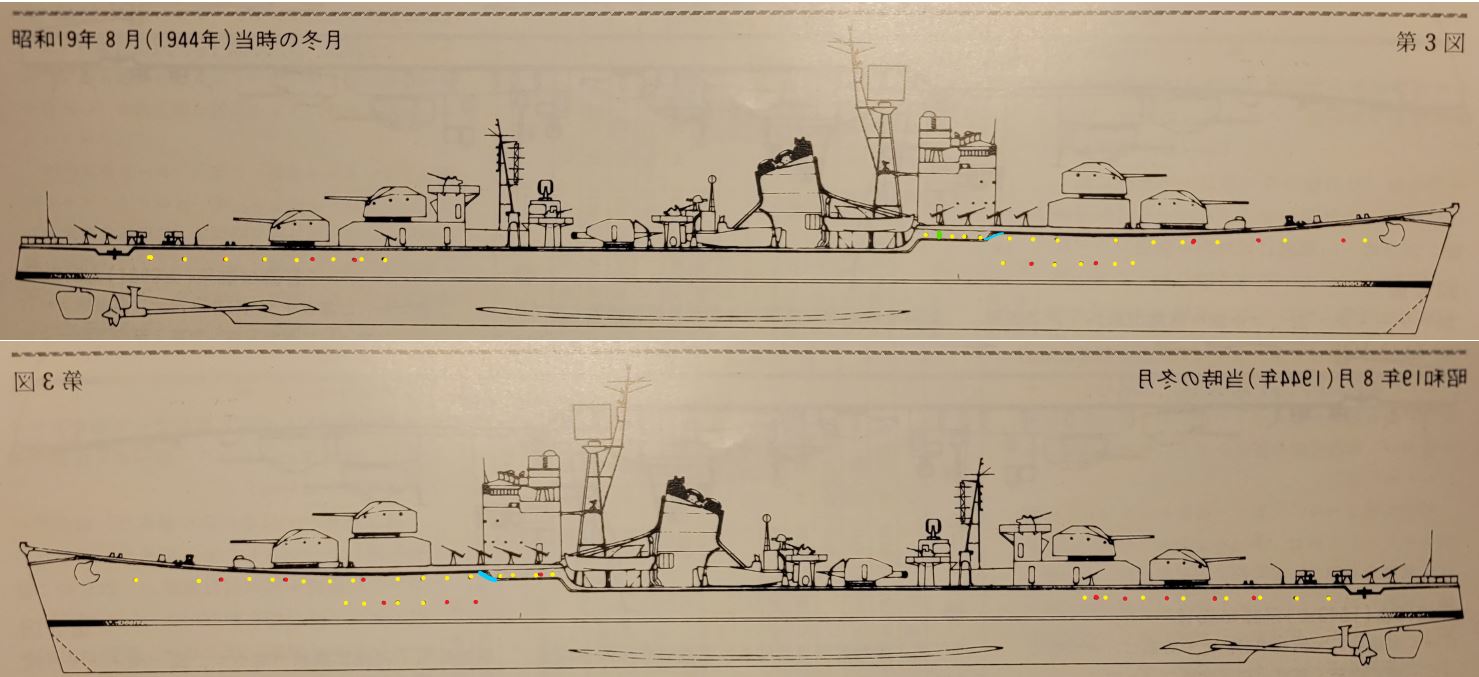
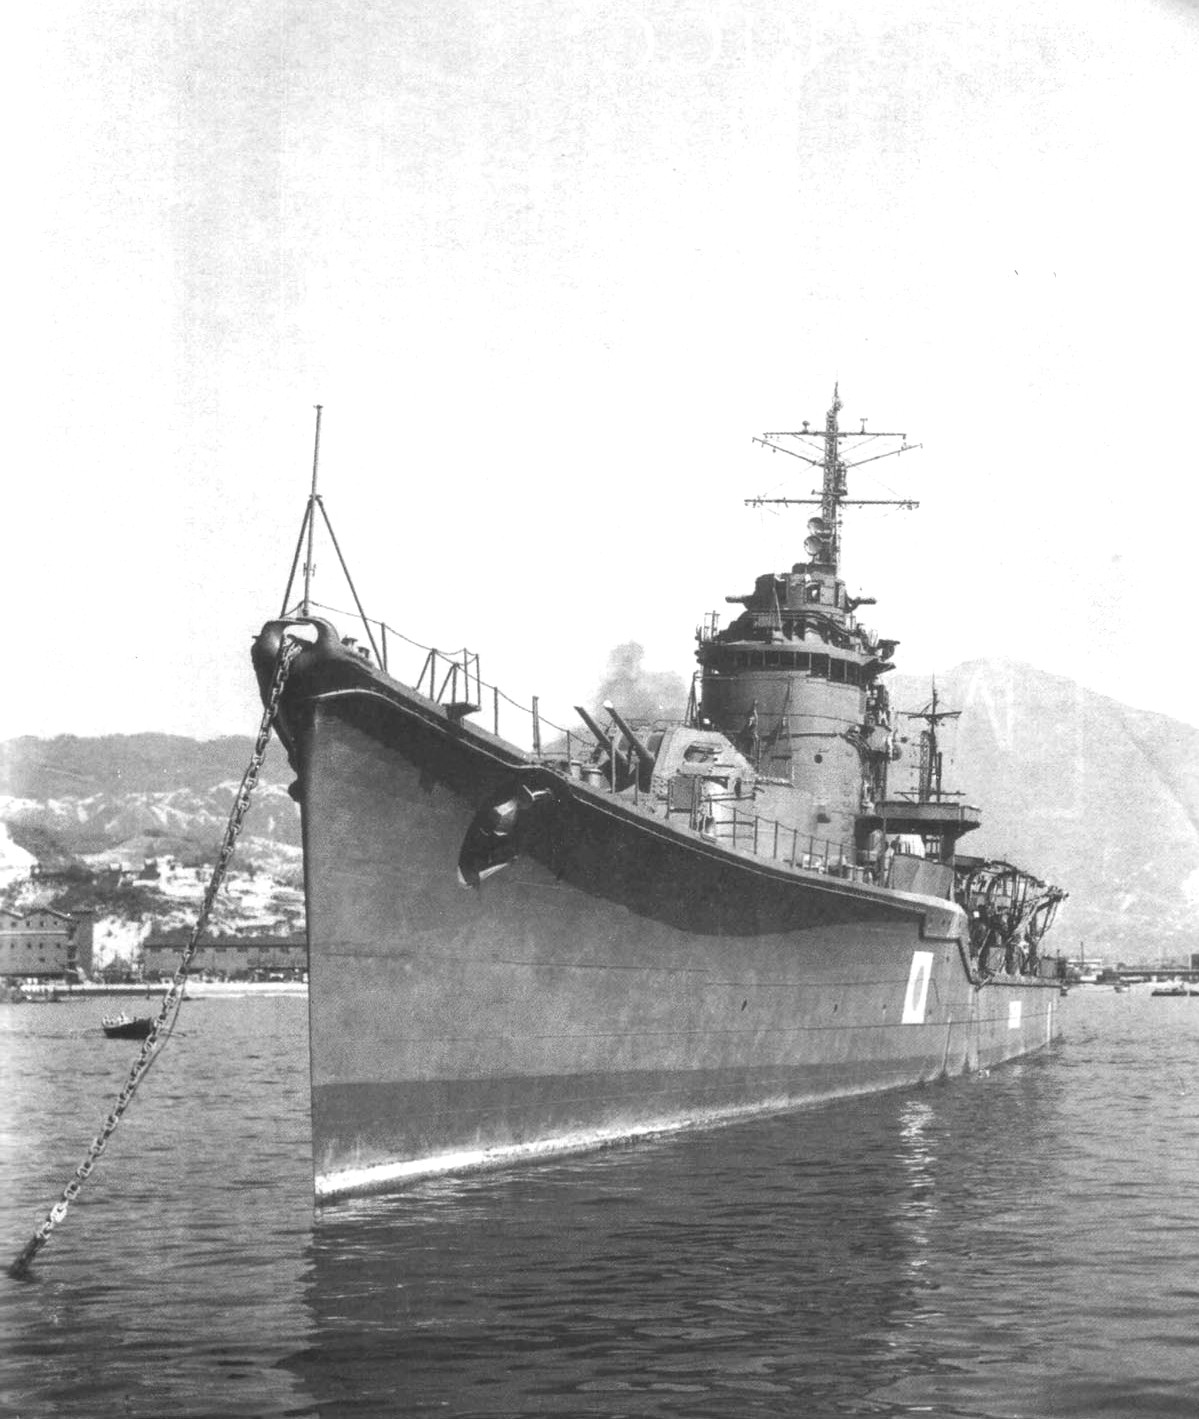
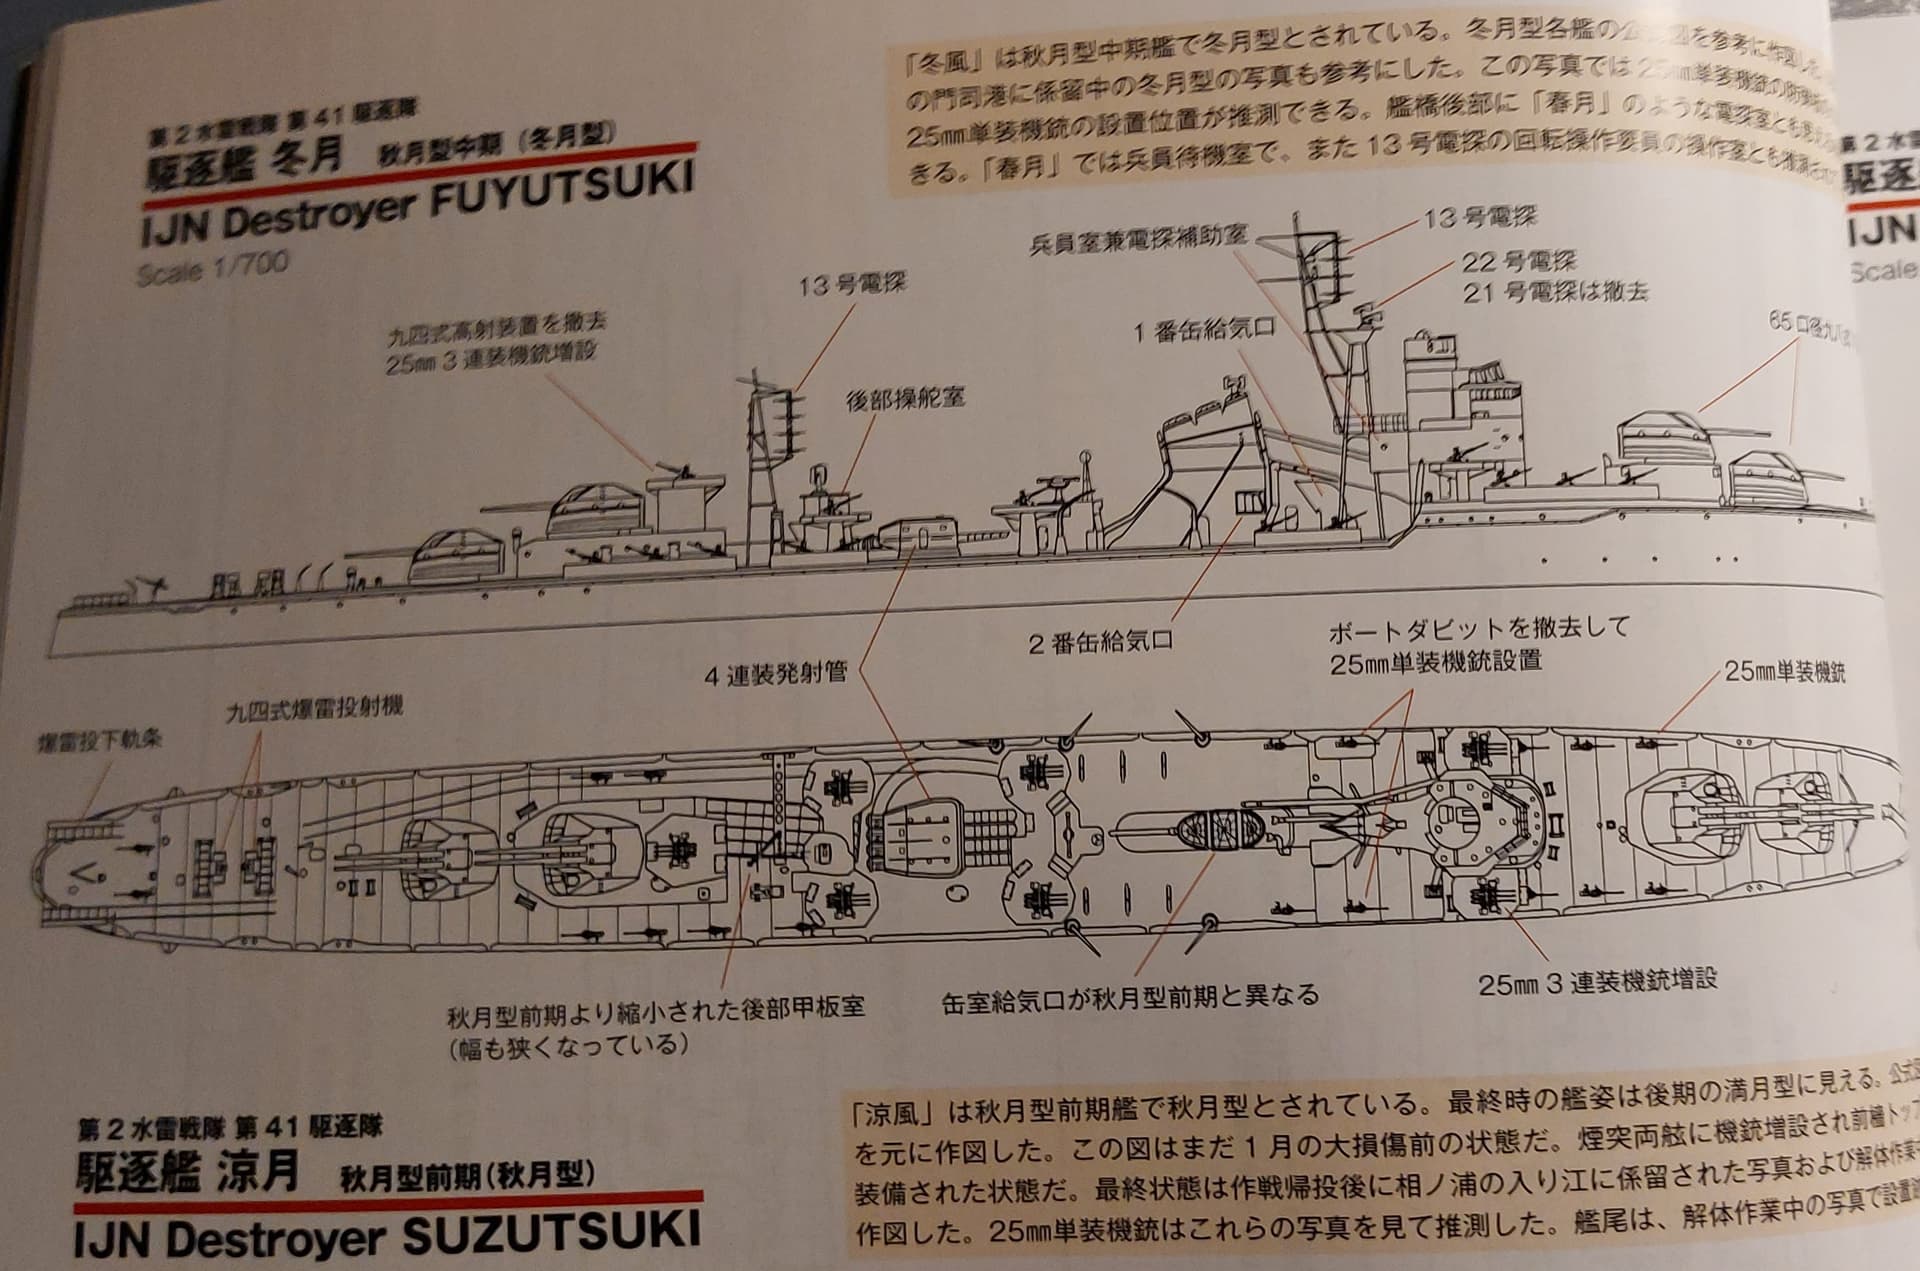
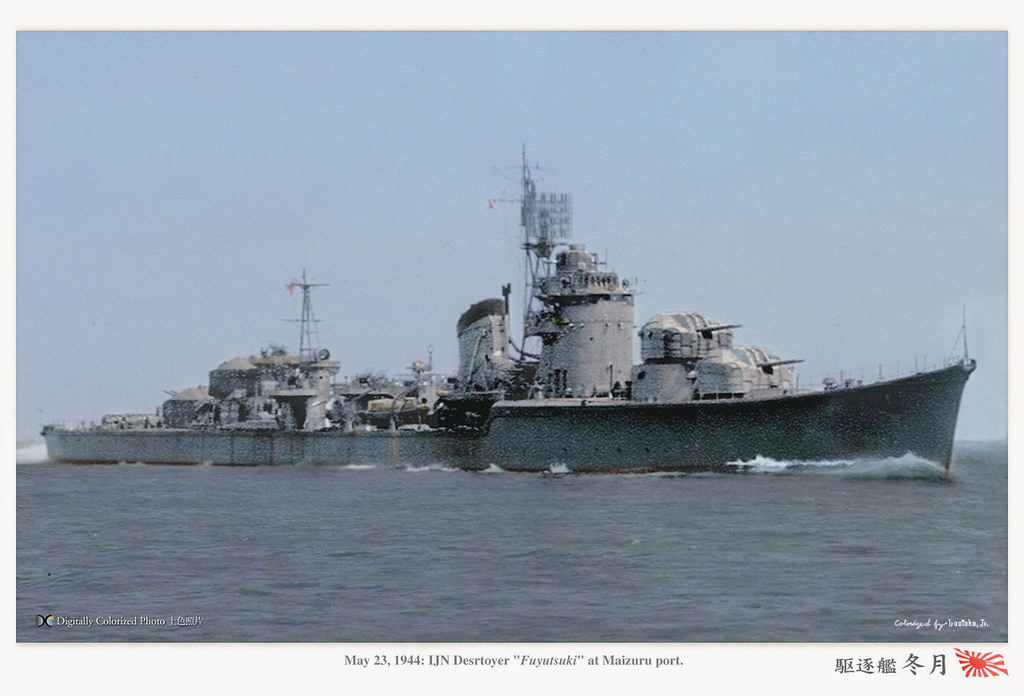
Fuyutsuki (冬月, “Winter Moon”) was the 8th Akizuki-class destroyer built by the Imperial Japanese Navy, and the first member of the Fuyutsuki sub-class. This sub-class was very similar to the original Akizuki design, but construction was more simplified for faster production. The most notable modifications consist of a simplified bow design, removed rear deck house, and fitted two-dimensional air inlet for boilers.

She was constructed at Maizuru Naval Arsenal and completed on the 25th of May 1944, being assigned to the 11th Destroyer Squadron of the Combined Fleet initially.

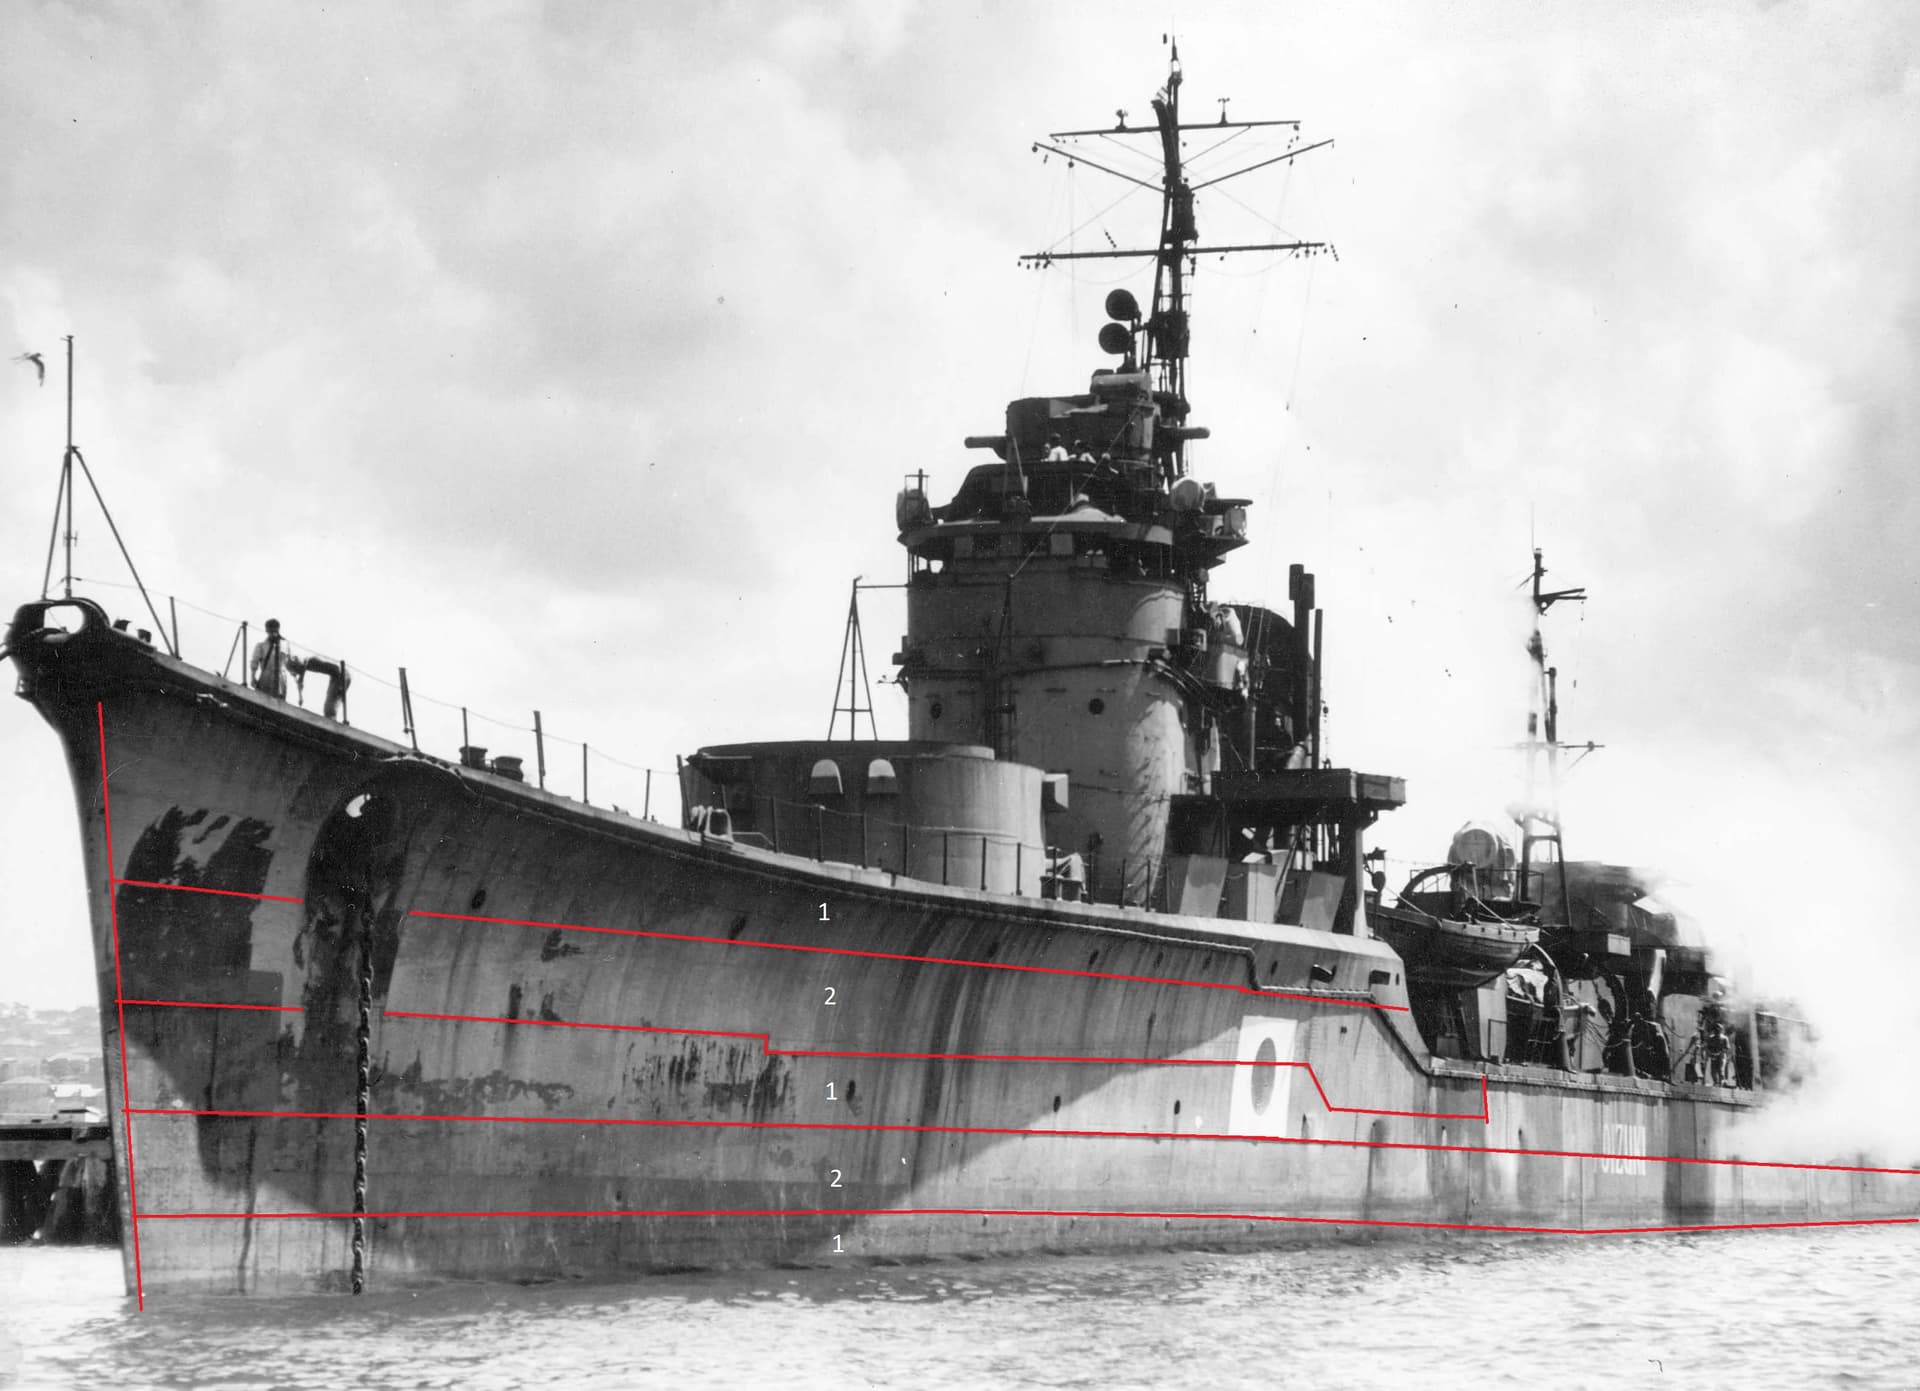
For her early career, Fuyutsuki mostly completed rather uneventful escort and patrol missions. However, on the 12th of October 1944 while escorting light cruiser Oyodo, her bow was badly damaged by a torpedo fired by US Balao-class submarine USS Trepang. Following this, Fuyutsuki was repaired at Kure. She would be later damaged during a training mission on the 31st of January 1945 near Ōita and would once again spend some time at Kure for repairs.

Fuyutsuki would join 8 other destroyers and light cruiser Yahagi in the task of escorting battleship Yamato on the 6th – 7th of April 1945 during operation Ten Ichi Go. The operation was a failure, resulting in most of the convoy’s ships, including Yamato, sunk by enemy aircraft. Fuyutsuki escaped with minor damage, 12 dead and a further 12 injured from rocket and bomb strikes. Fuyutsuki rescued survivors from the damaged Asashio-class destroyer Kasumi, and scuttle her with torpedos.

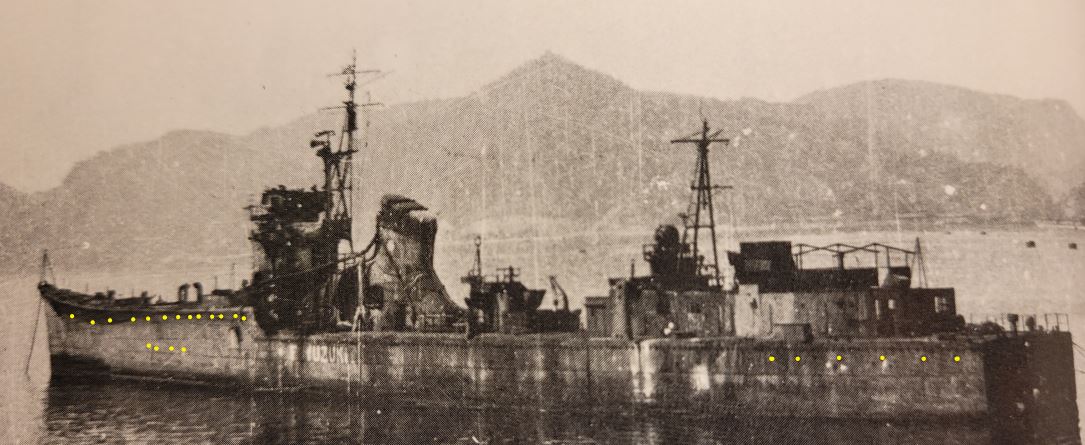
On the 20th of August 1945, Fuyutsuki would strike a mine at Moji, in Kyūshū. The damage was heavy, causing the complete removal of a portion of her stern and put Fuyutsuki out of much operational use for the short remainder of the war. Never receiving repair and having her armament removed, she eventually surrendered and was used as a breakwater at Wakamatsu, later being broken up.
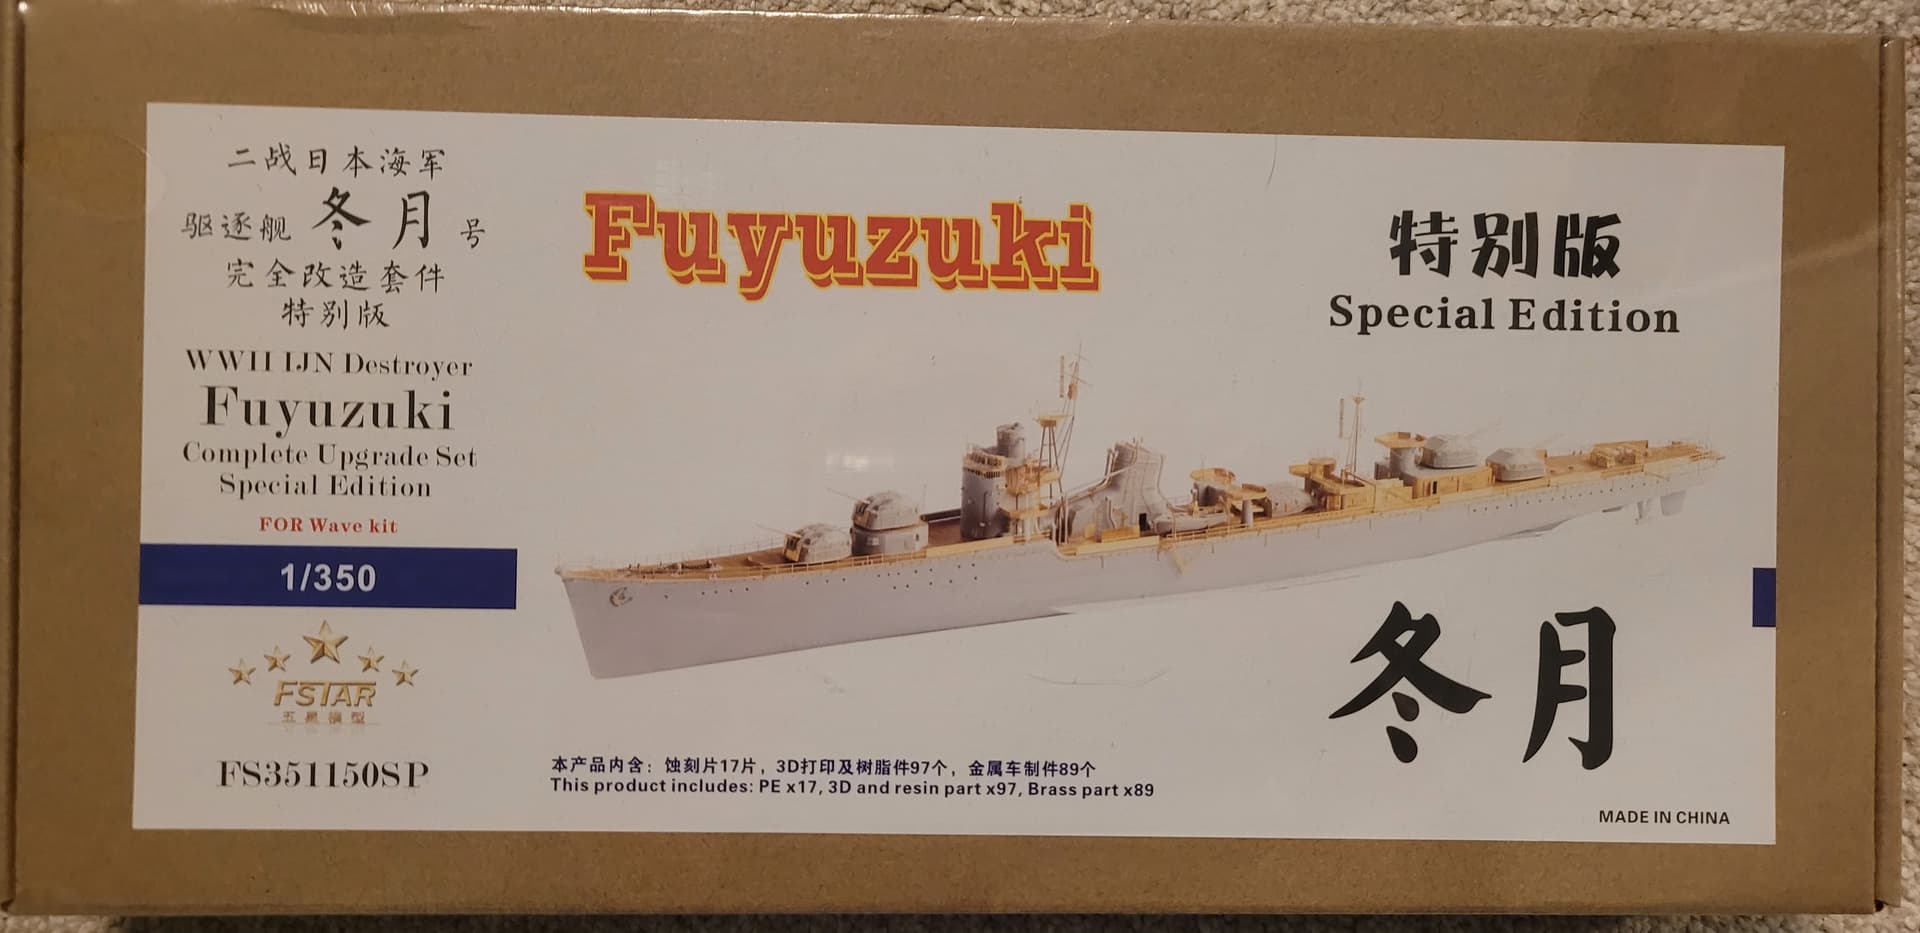
The Kit

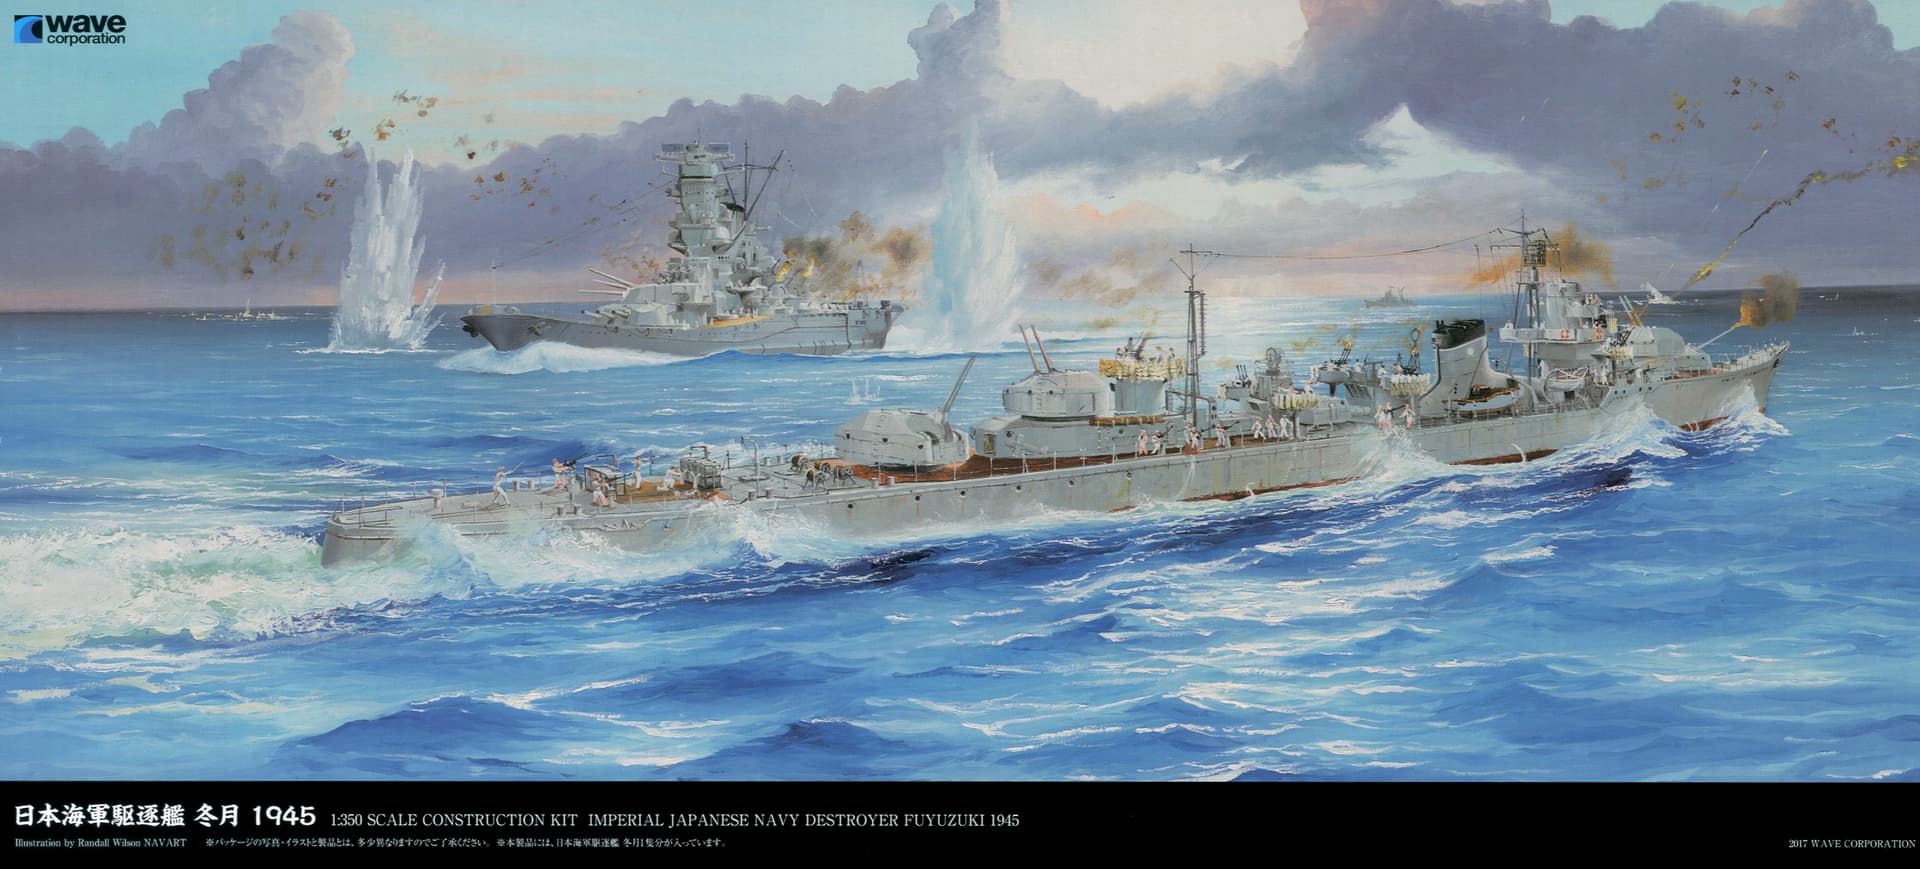
The kit was released in 2017, by the “Wave Corporation”. It is essentially a reboxing of Monochrome’s earlier Akizuki/Suzutsuki kit, with some new sprues replacing some of the old ones.

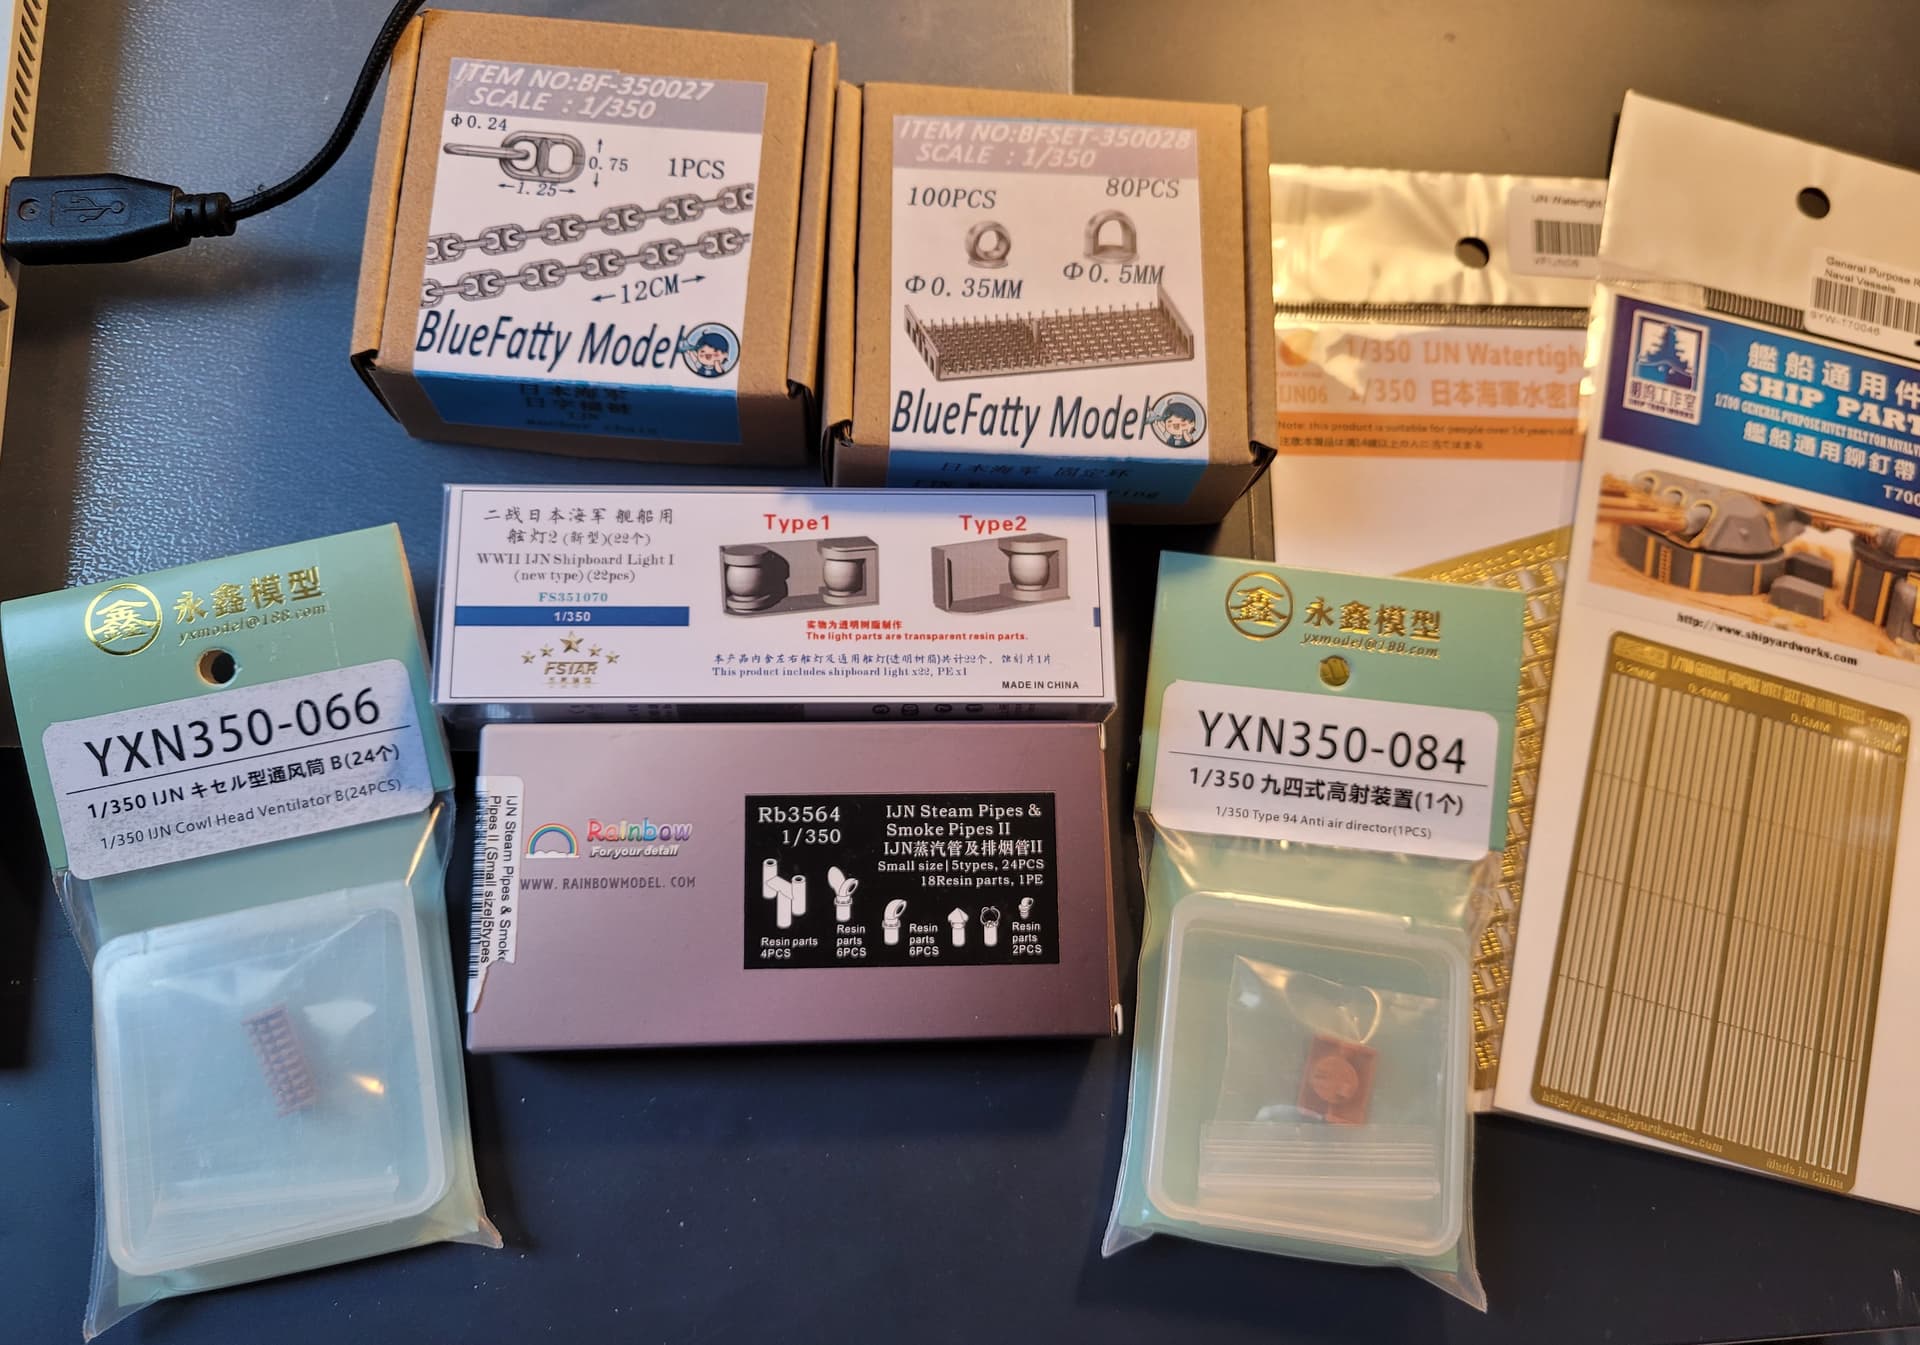
The quality is mixed. Some details are nicely moulded, however others appear blocky and will have to be replaced with aftermarket. Anchor chains and a good portion of deck detail are moulded on and will such have to be removed to allow for aftermarket replacement.

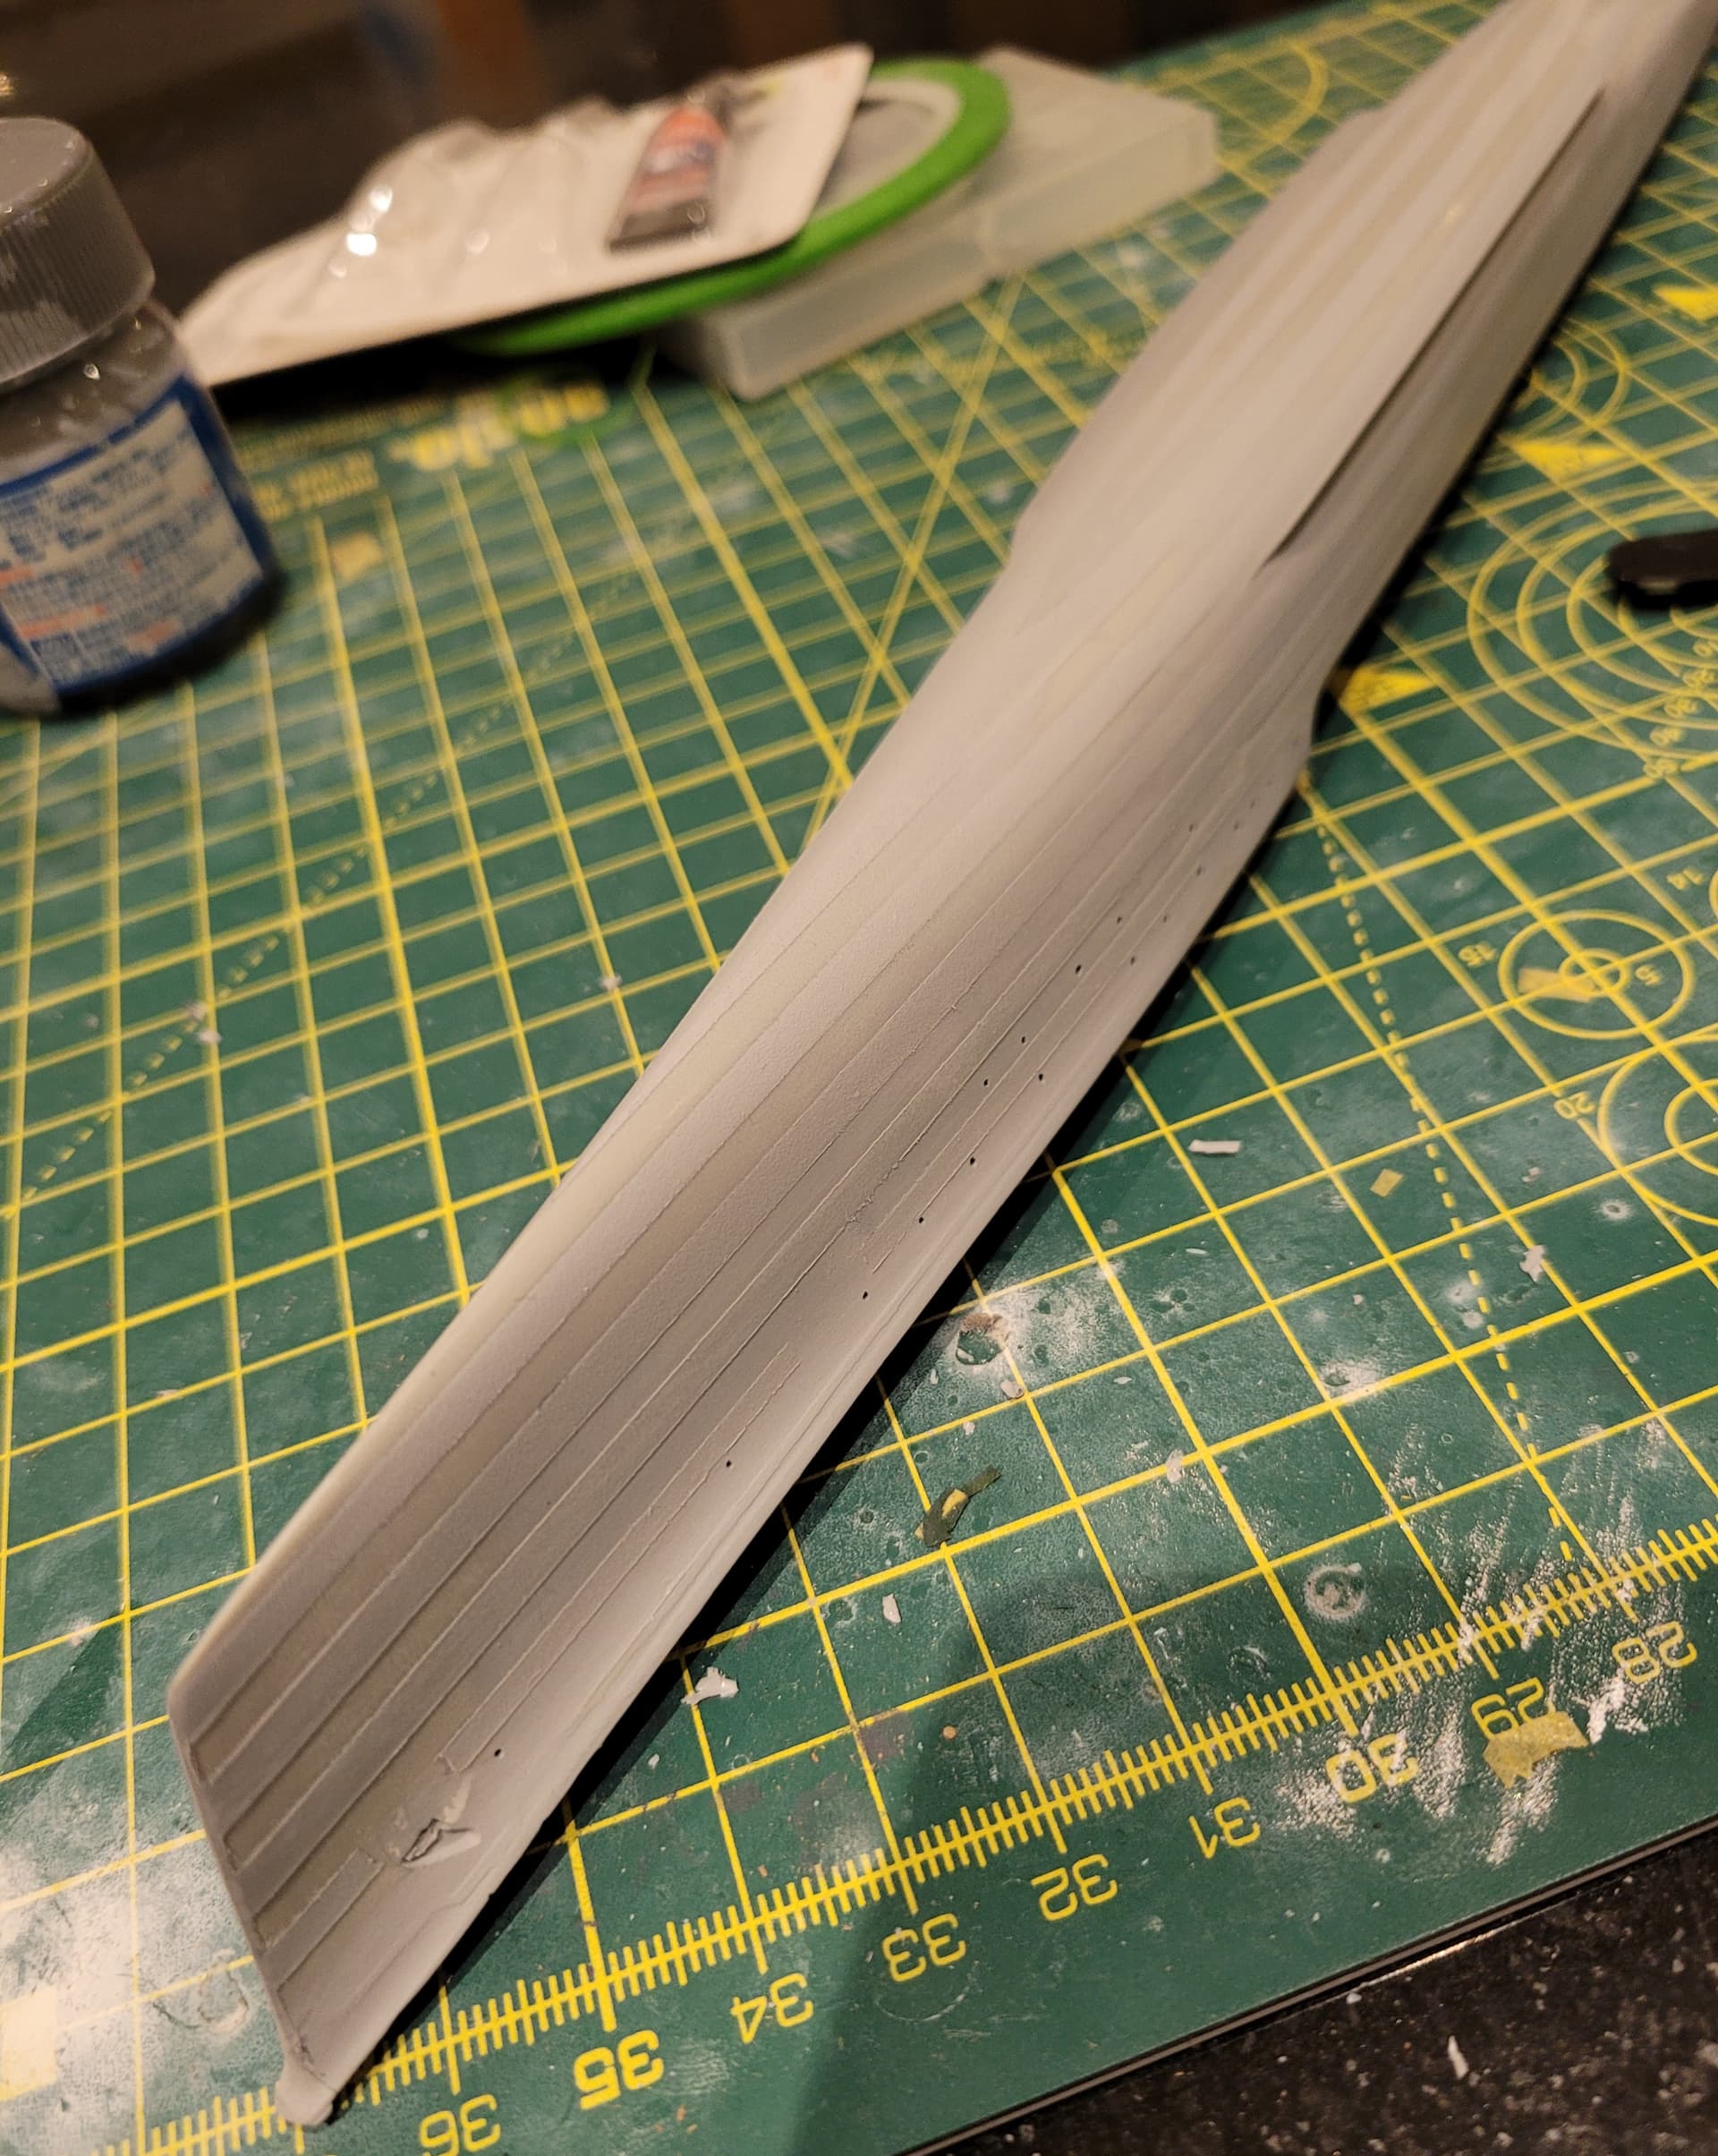
Some flash and mould lines are also visible on some of the parts, most notably some strange moulding on the bottom of the hull. Furthermore, the accuracy of the kit seems a dubious in some areas, and some of the differences between the Akizuki and Fuyutsuki subclass are not accounted for. Also, the boxing clearly states the version of the Fuyutsuki to be built is of the 1945 configuration, even depicting Operation Ten Ichi Go on the box art; he kit is not accurate to this, still depicting a type 21 radar on the mainmast, which was replaced with a type 22 and second type 13. In short, there is going to be a lot to correct.

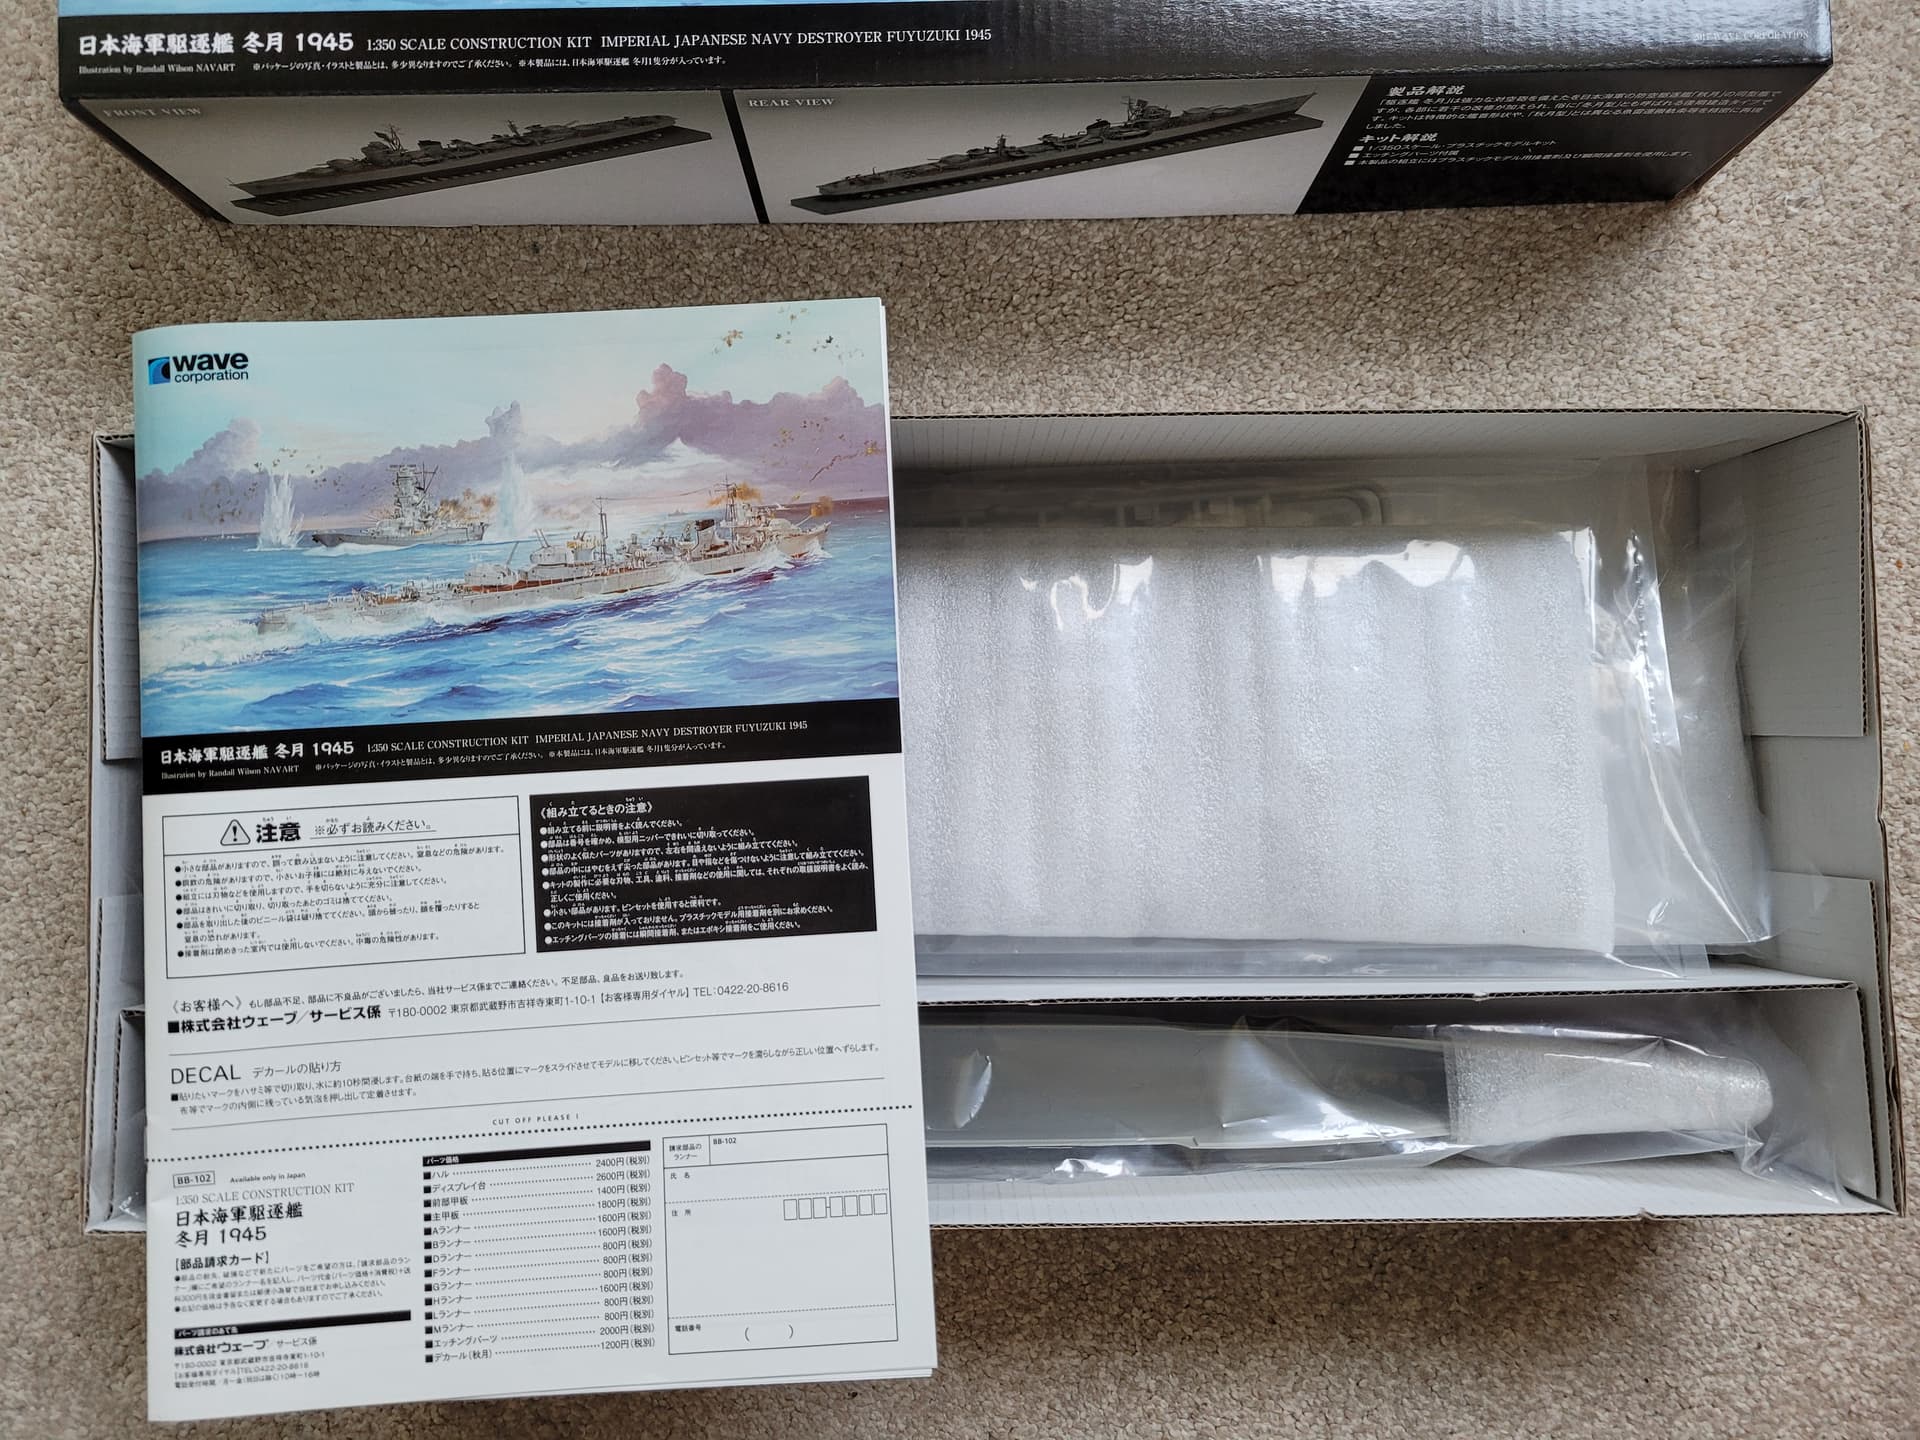
The parts are packaged nicely, with sprues being contained within protective bags and plenty of styrofoam.

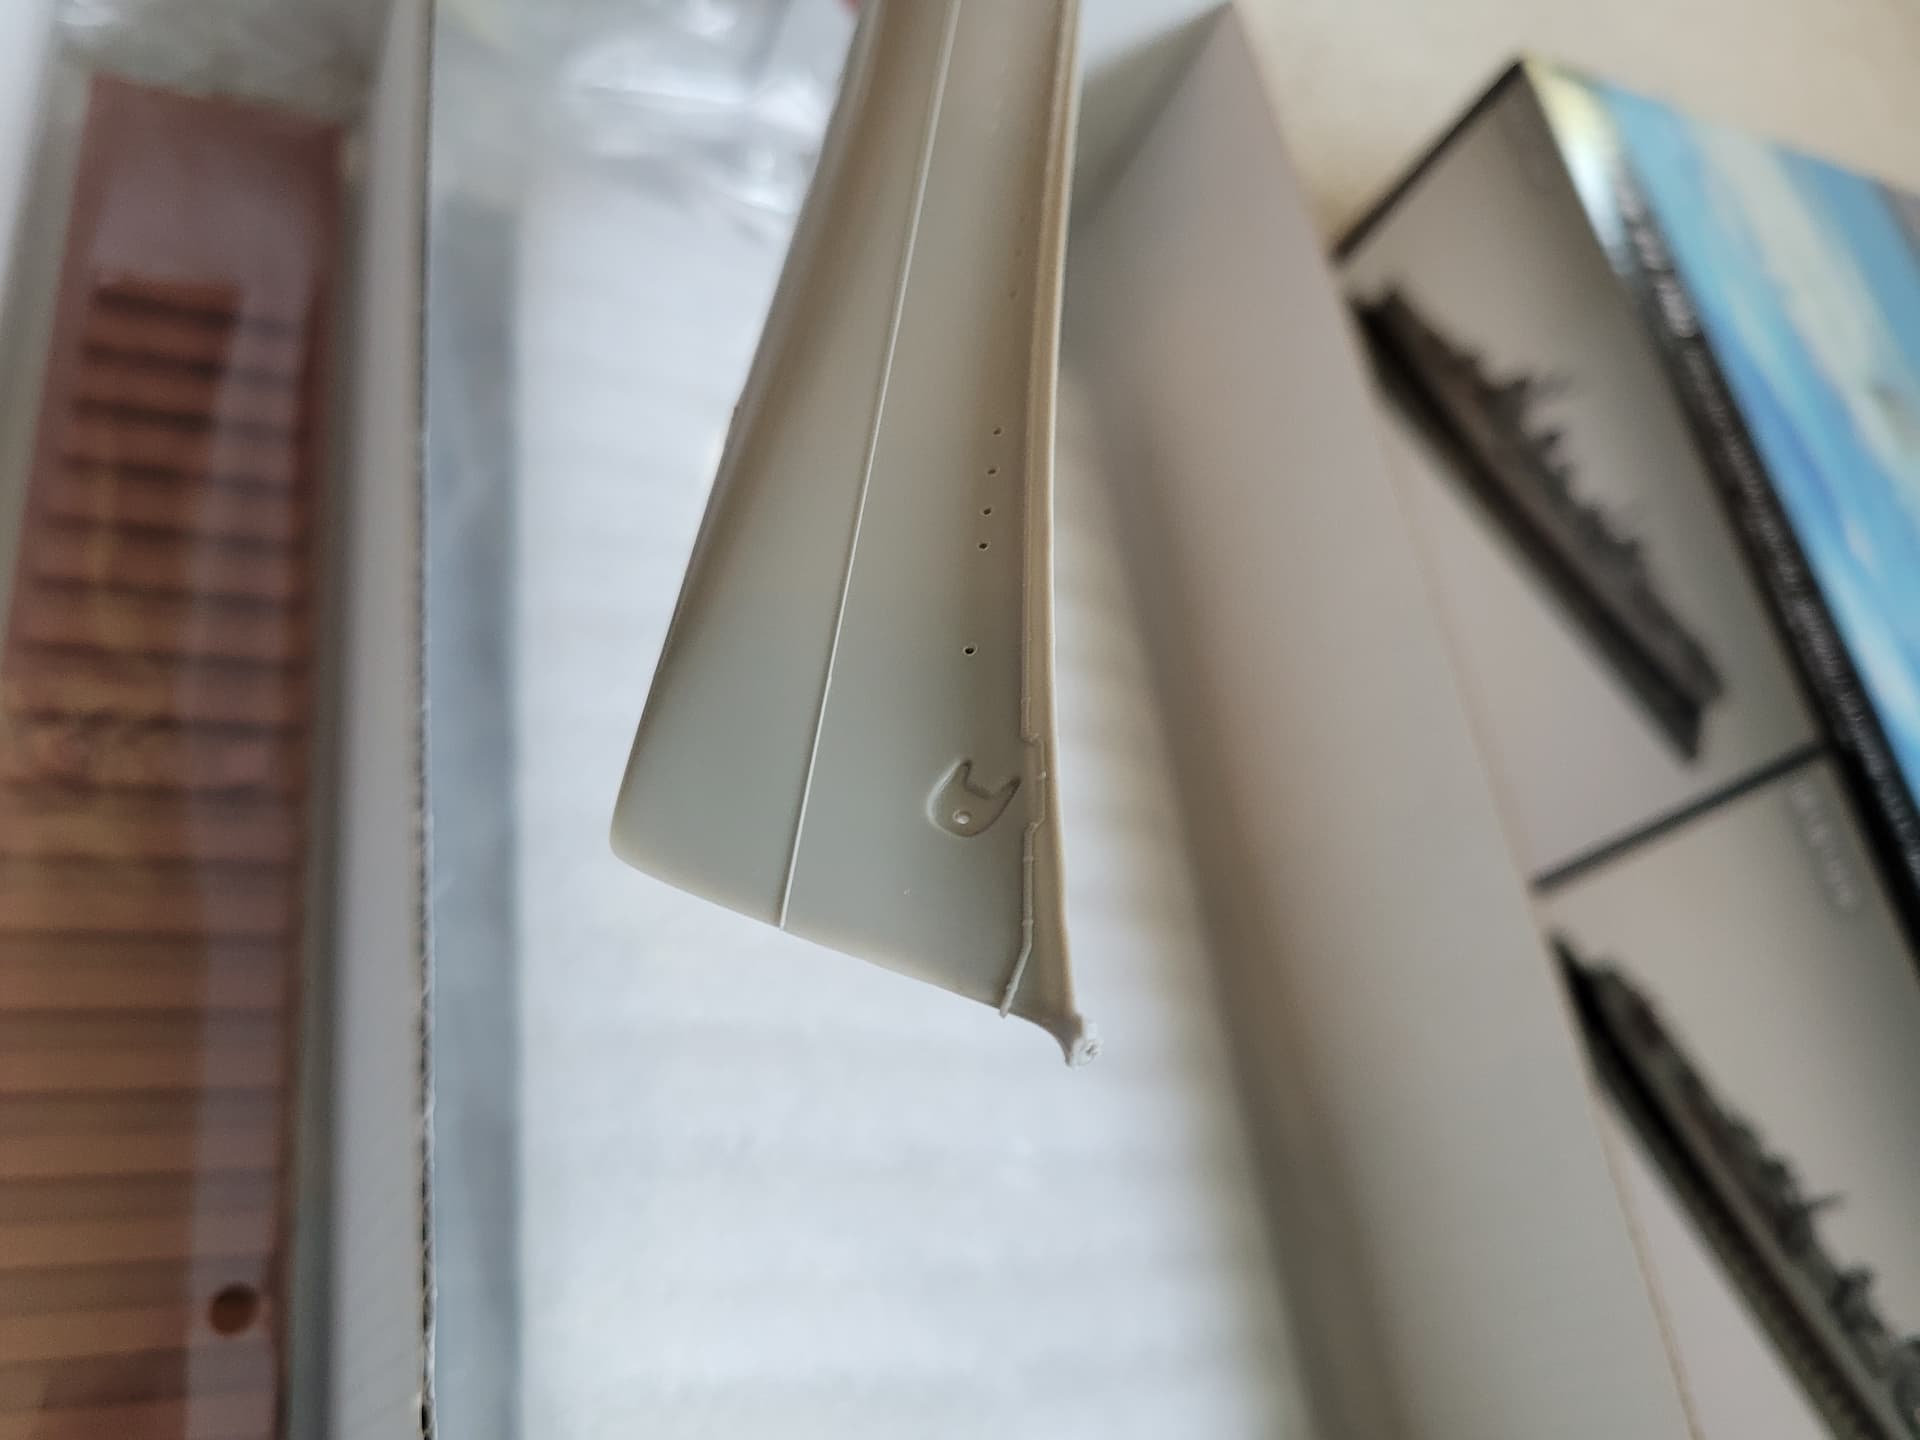
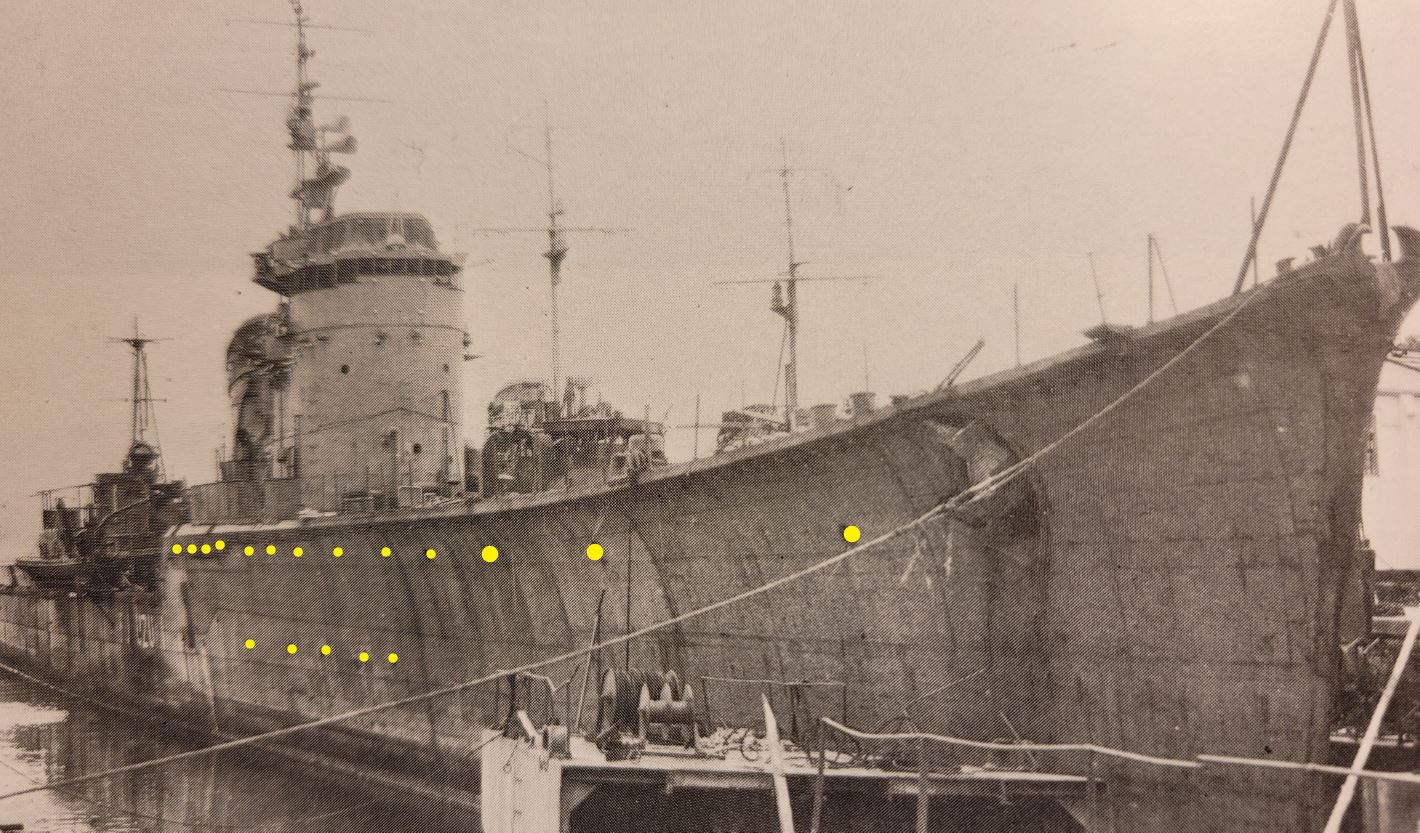
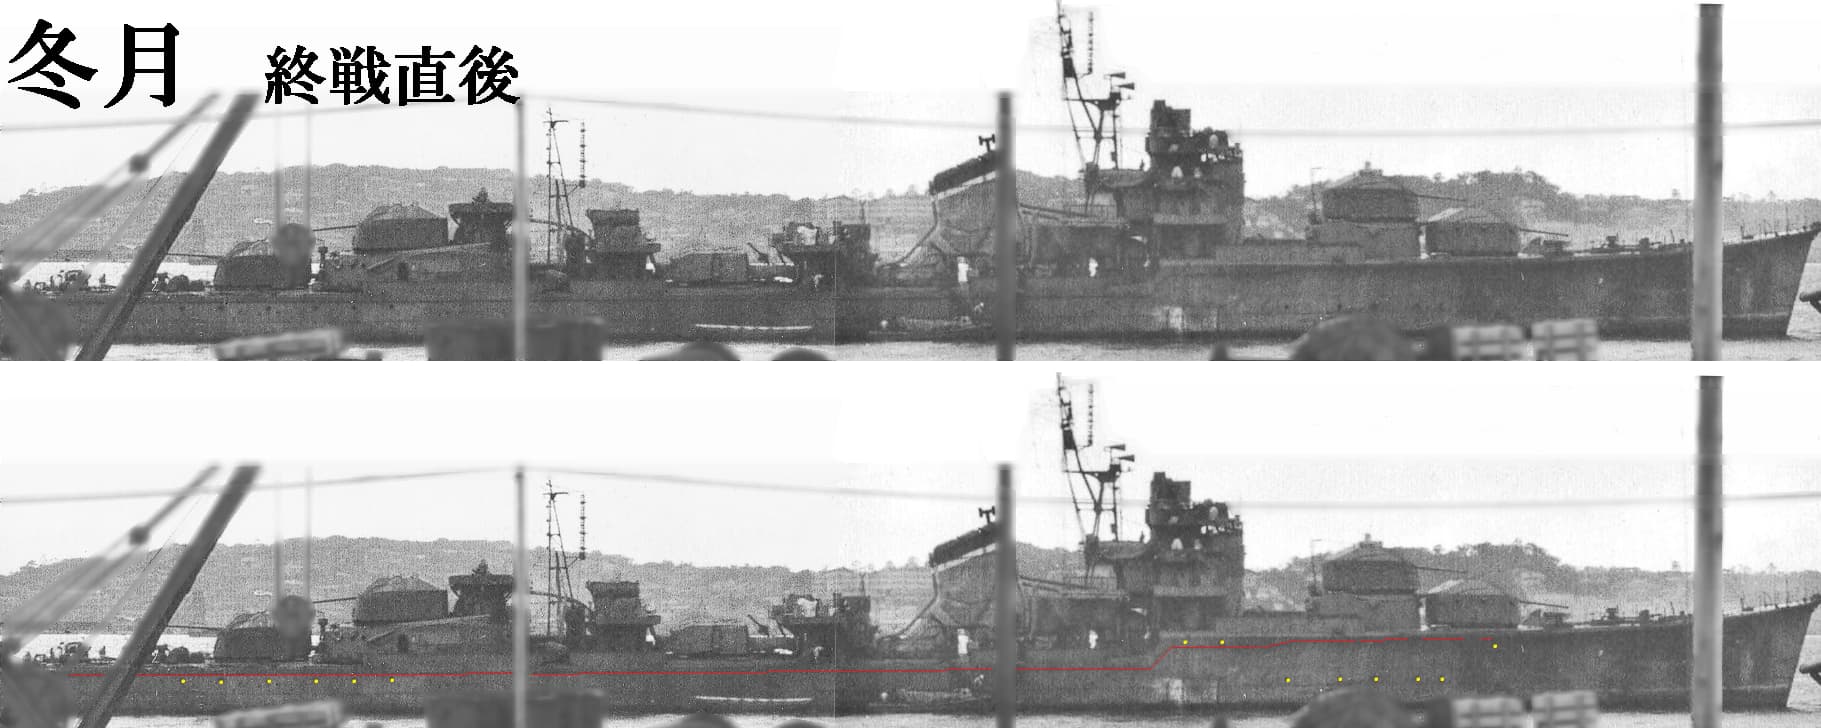
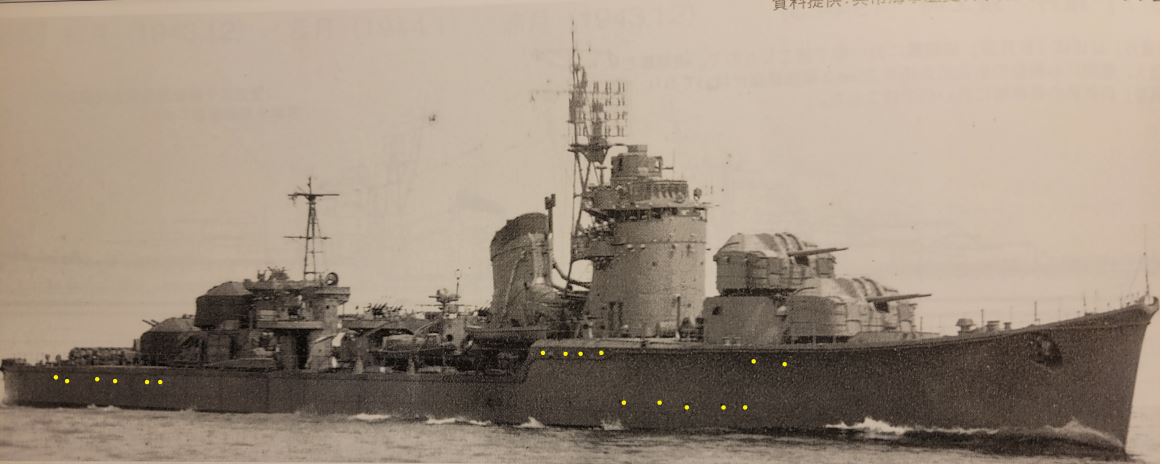
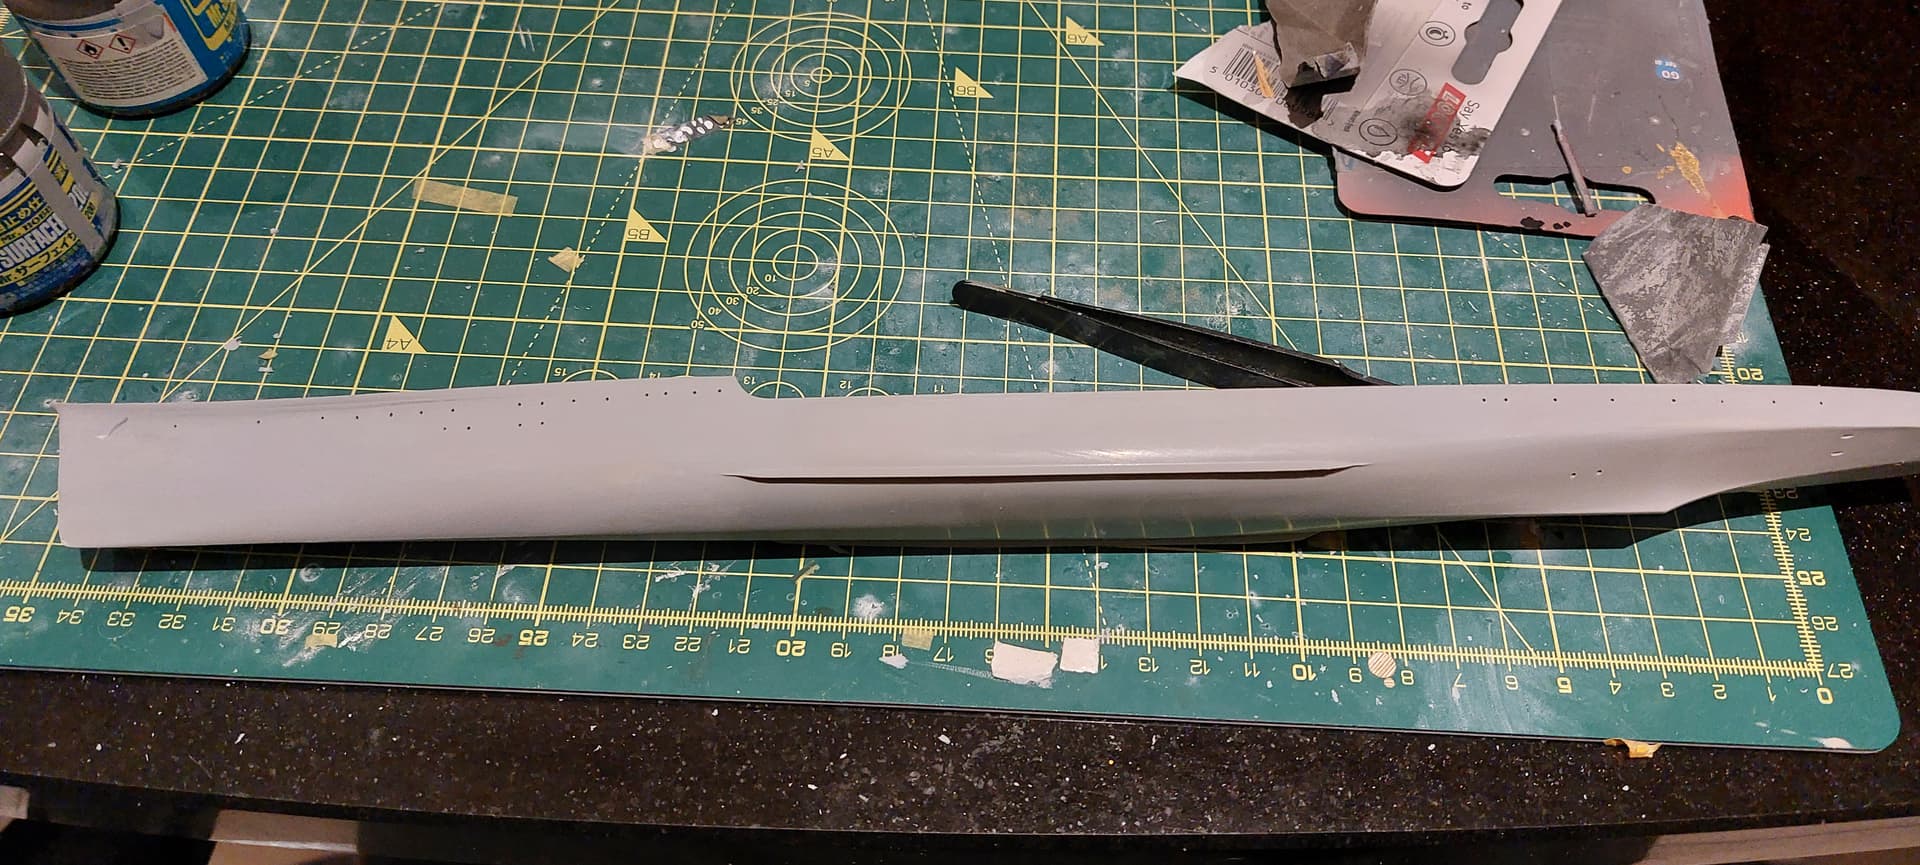
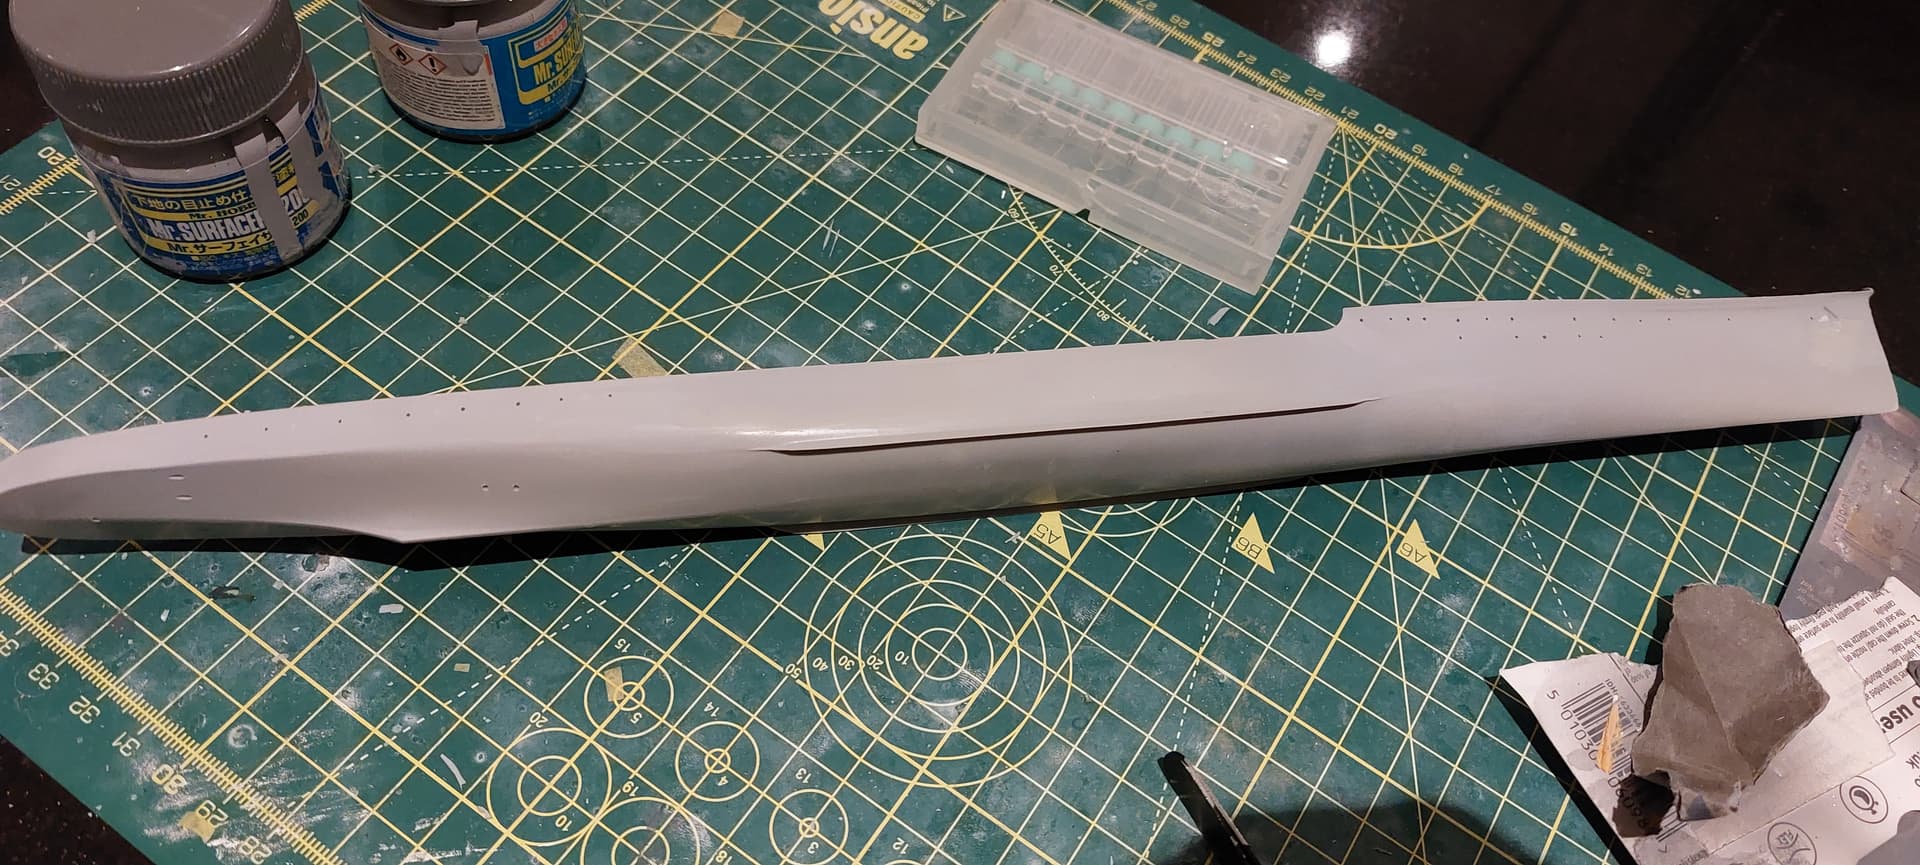
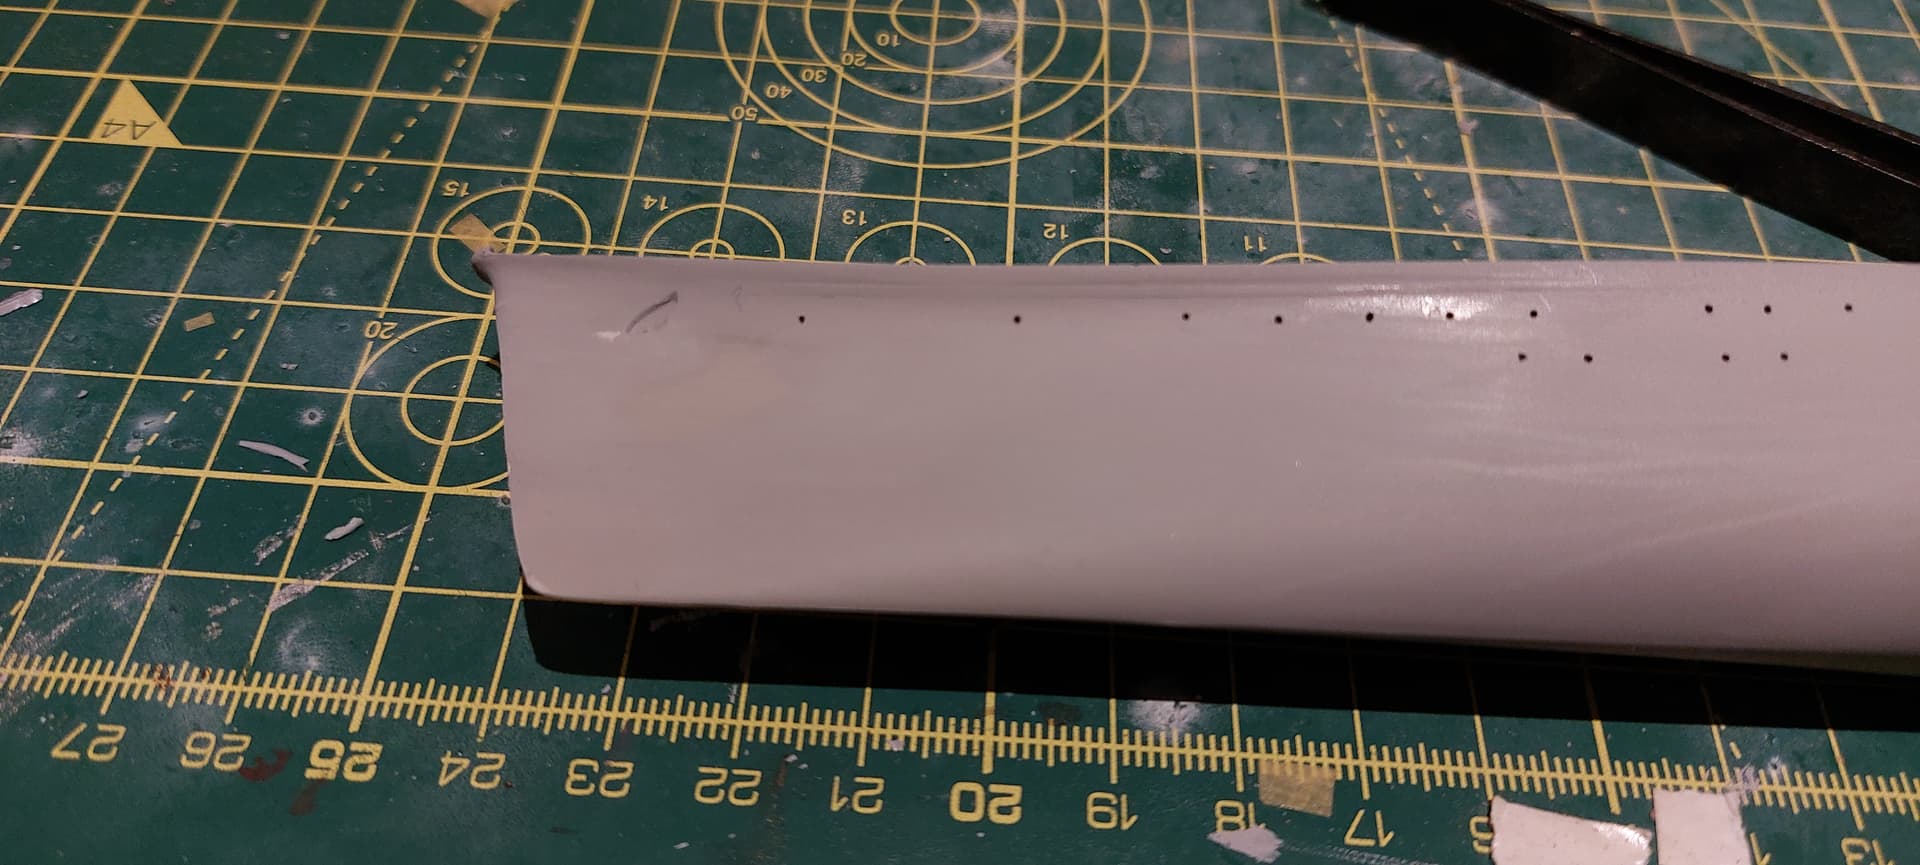
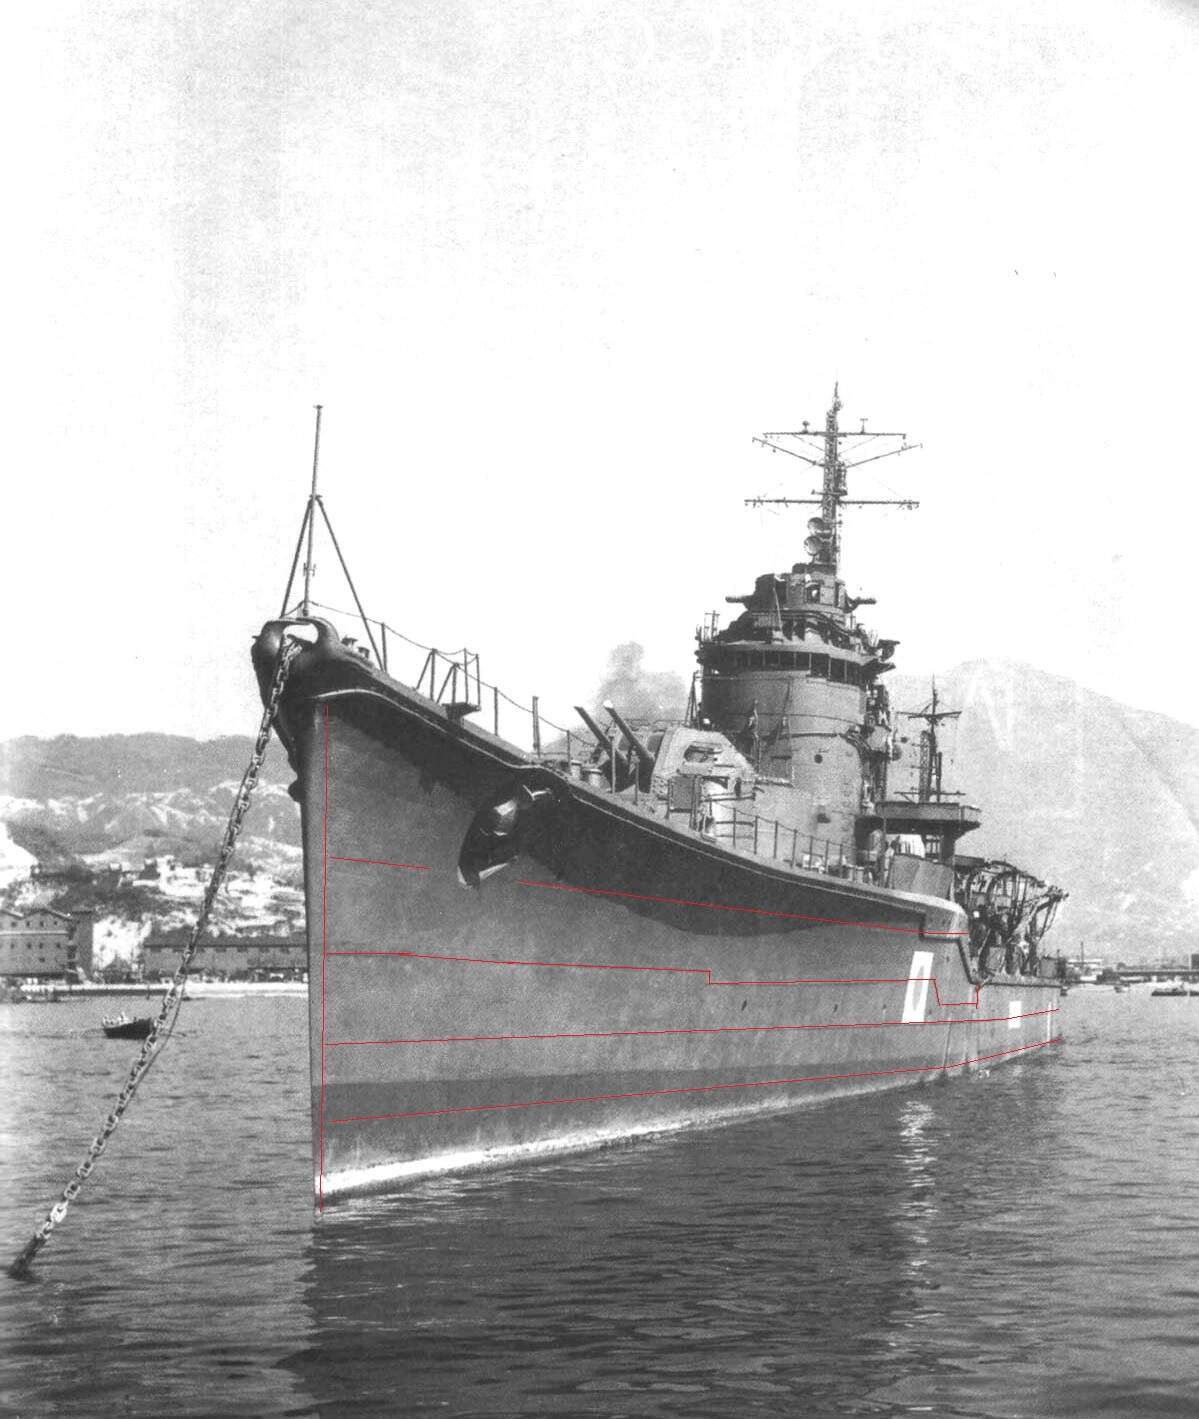
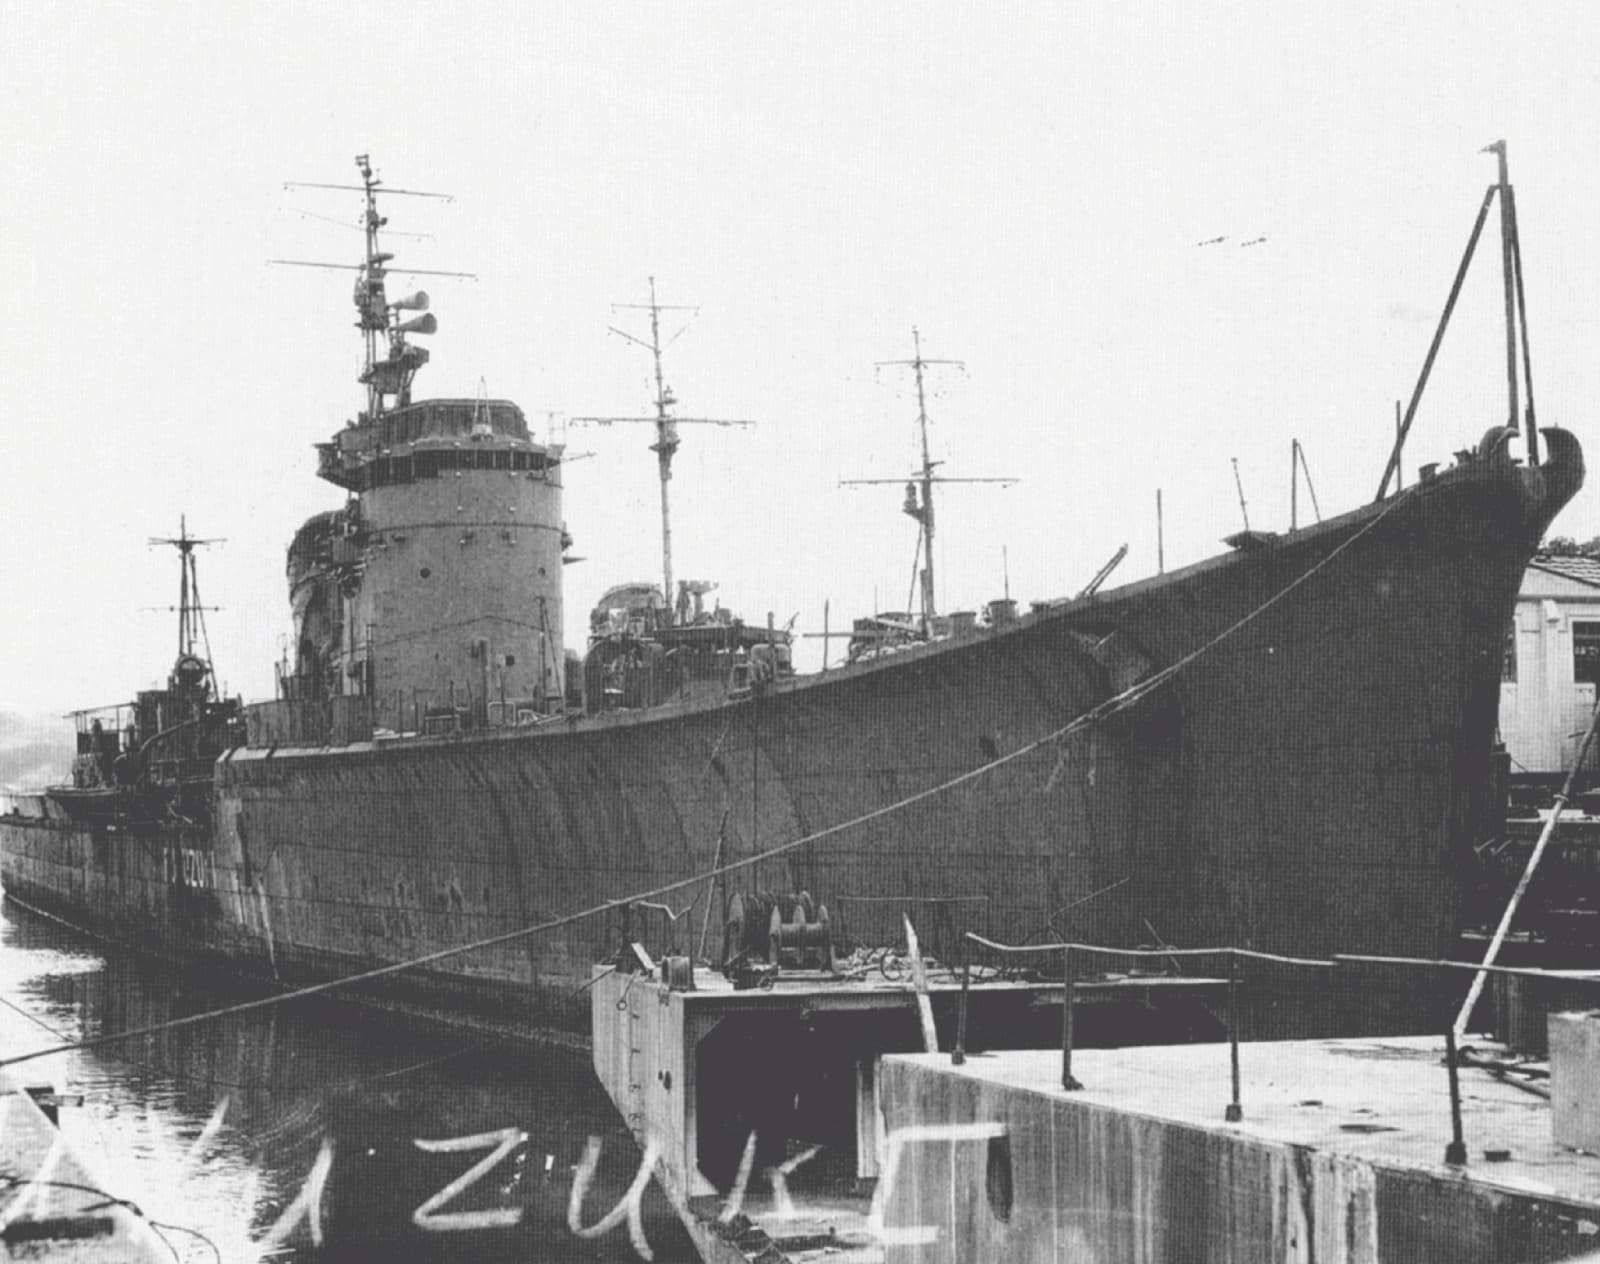
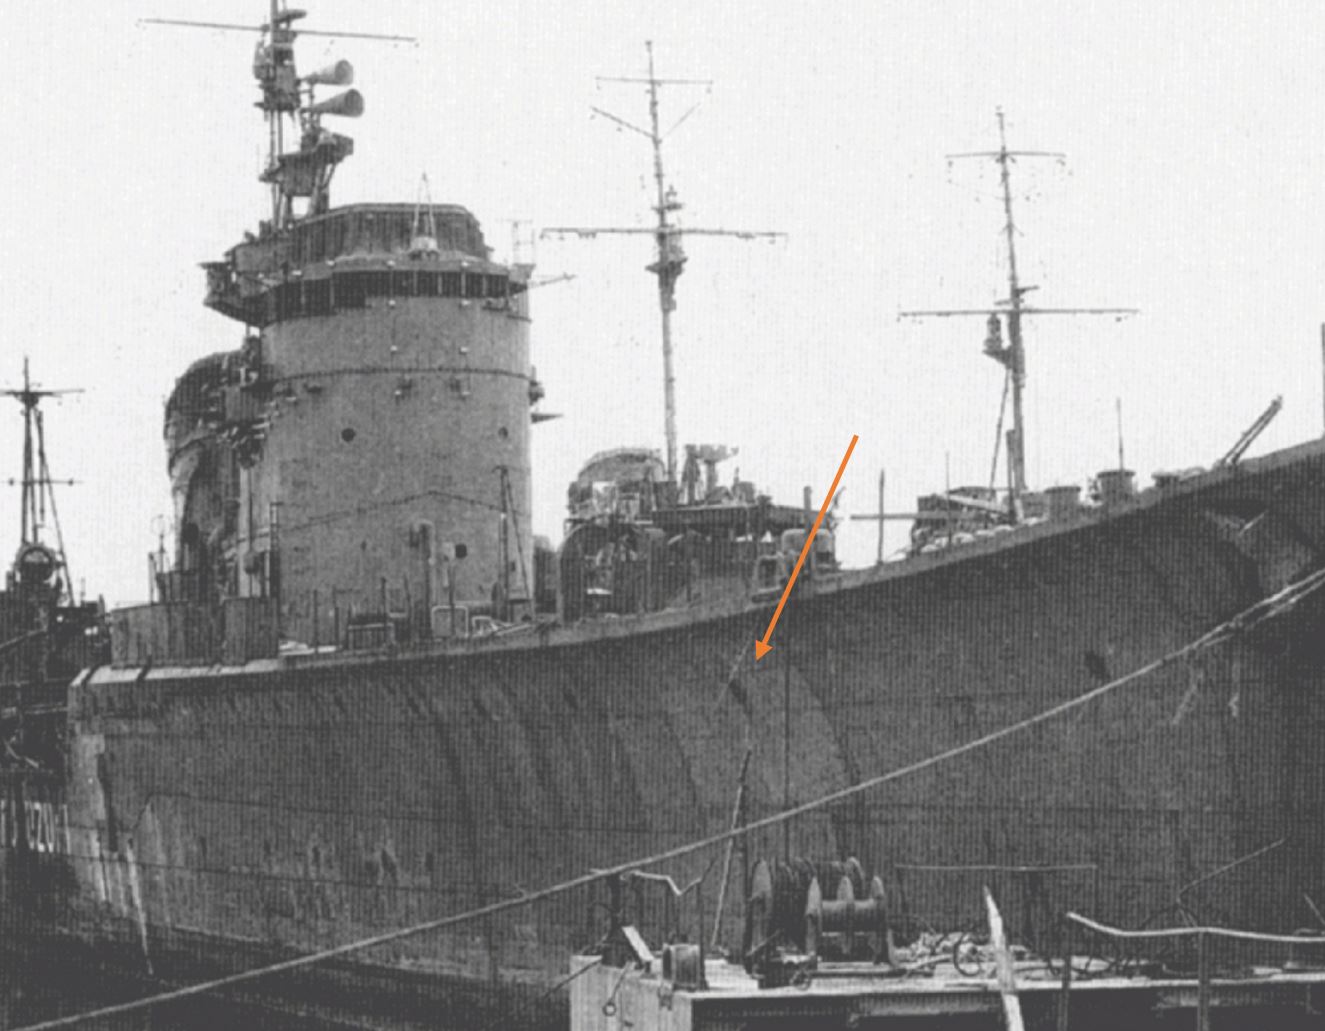
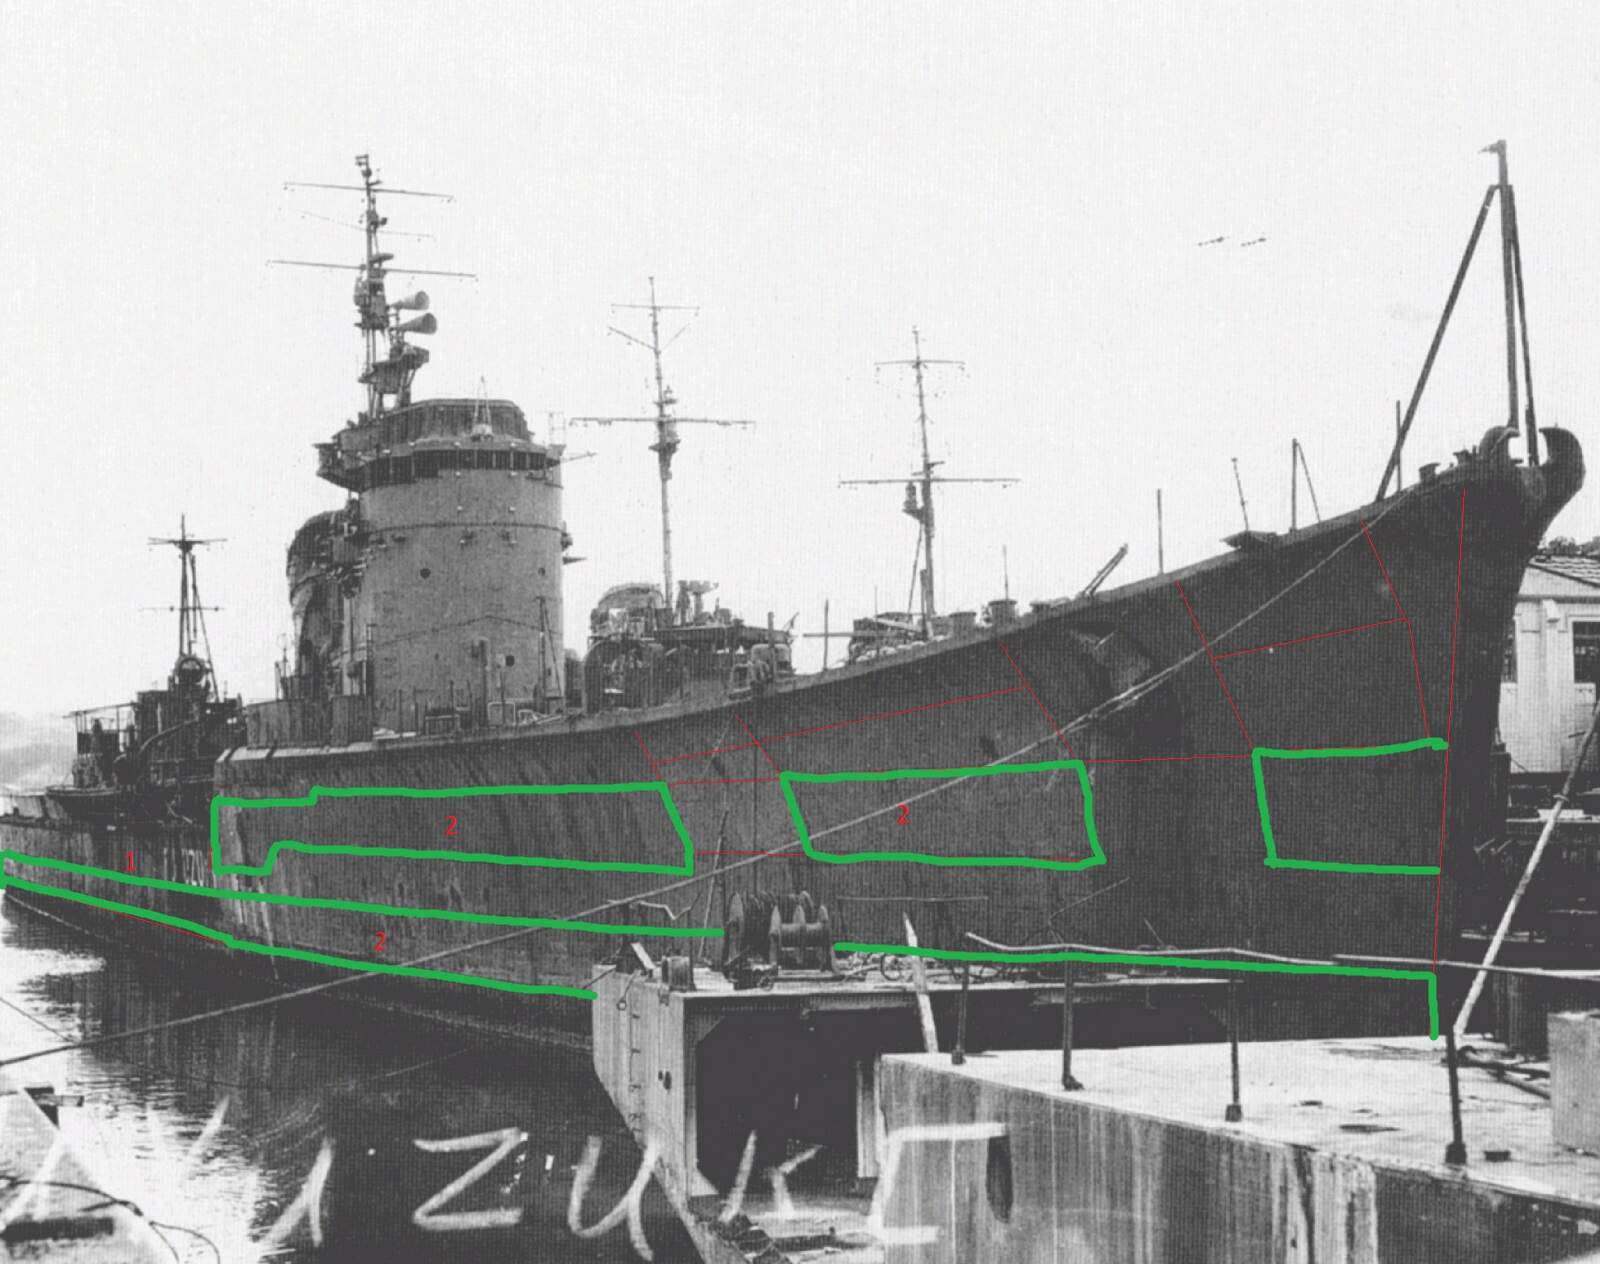
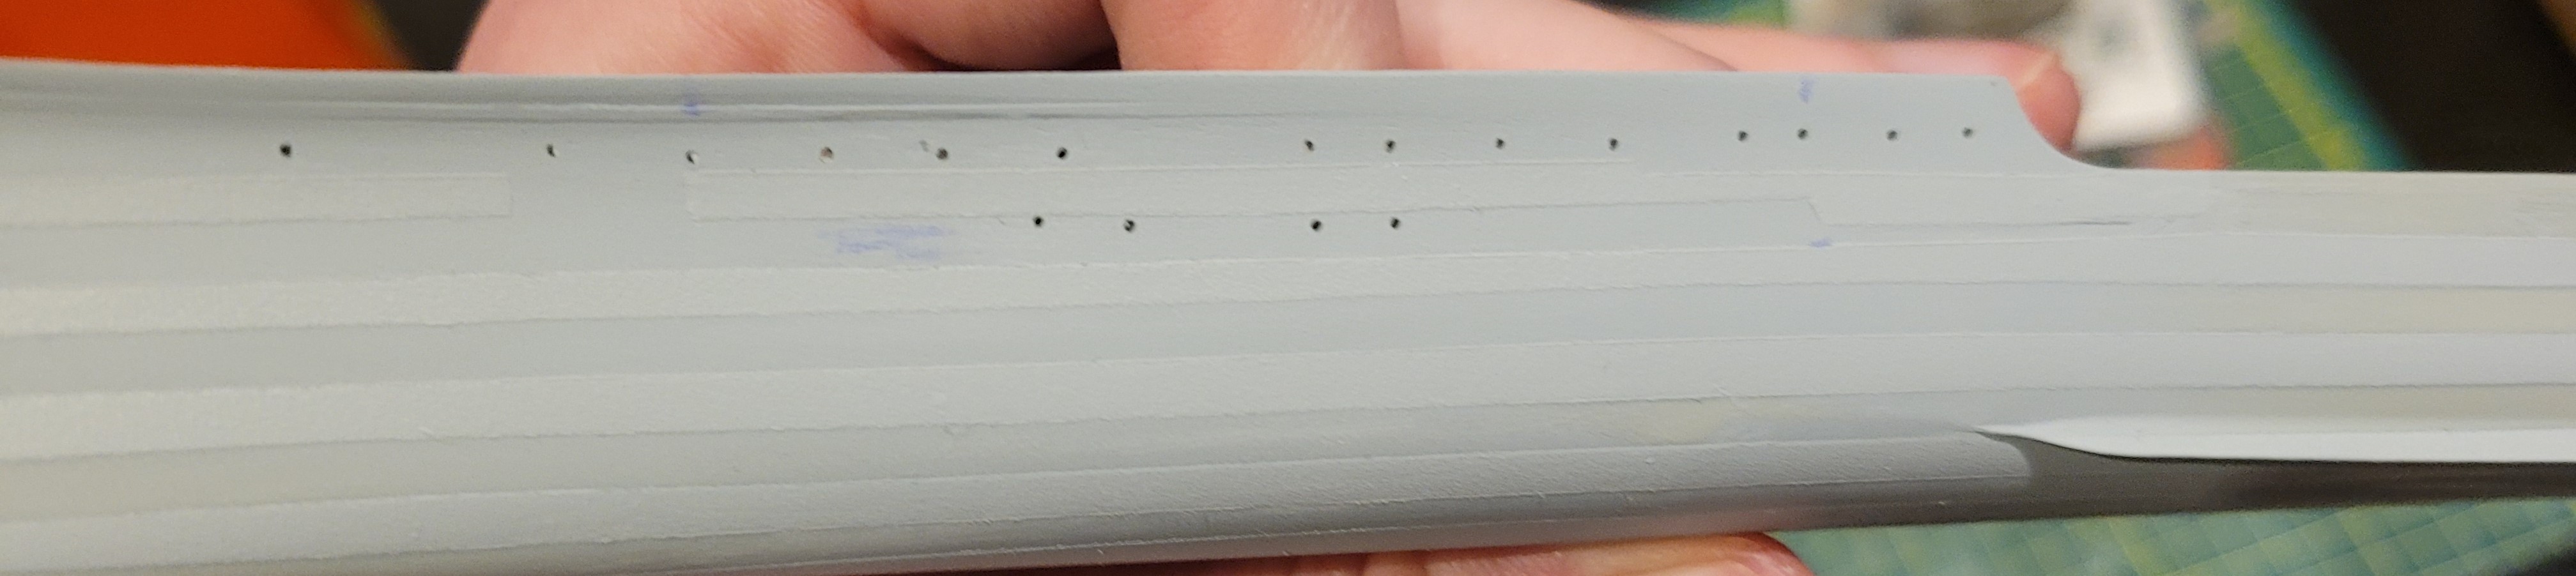
The hull comes as one piece, which is nice and saves a lot of pain with filling a seam line. Although, being a recycled monochrome Suzutsuki hull, the portholes are far too numbered and the degaussing cable is not completely correct, so lots of research and correction will have to be done here. Funnily enough, the bow appears to be quite accurate to that of Fuyutsuki, which had a notably sharp and simplified bow.

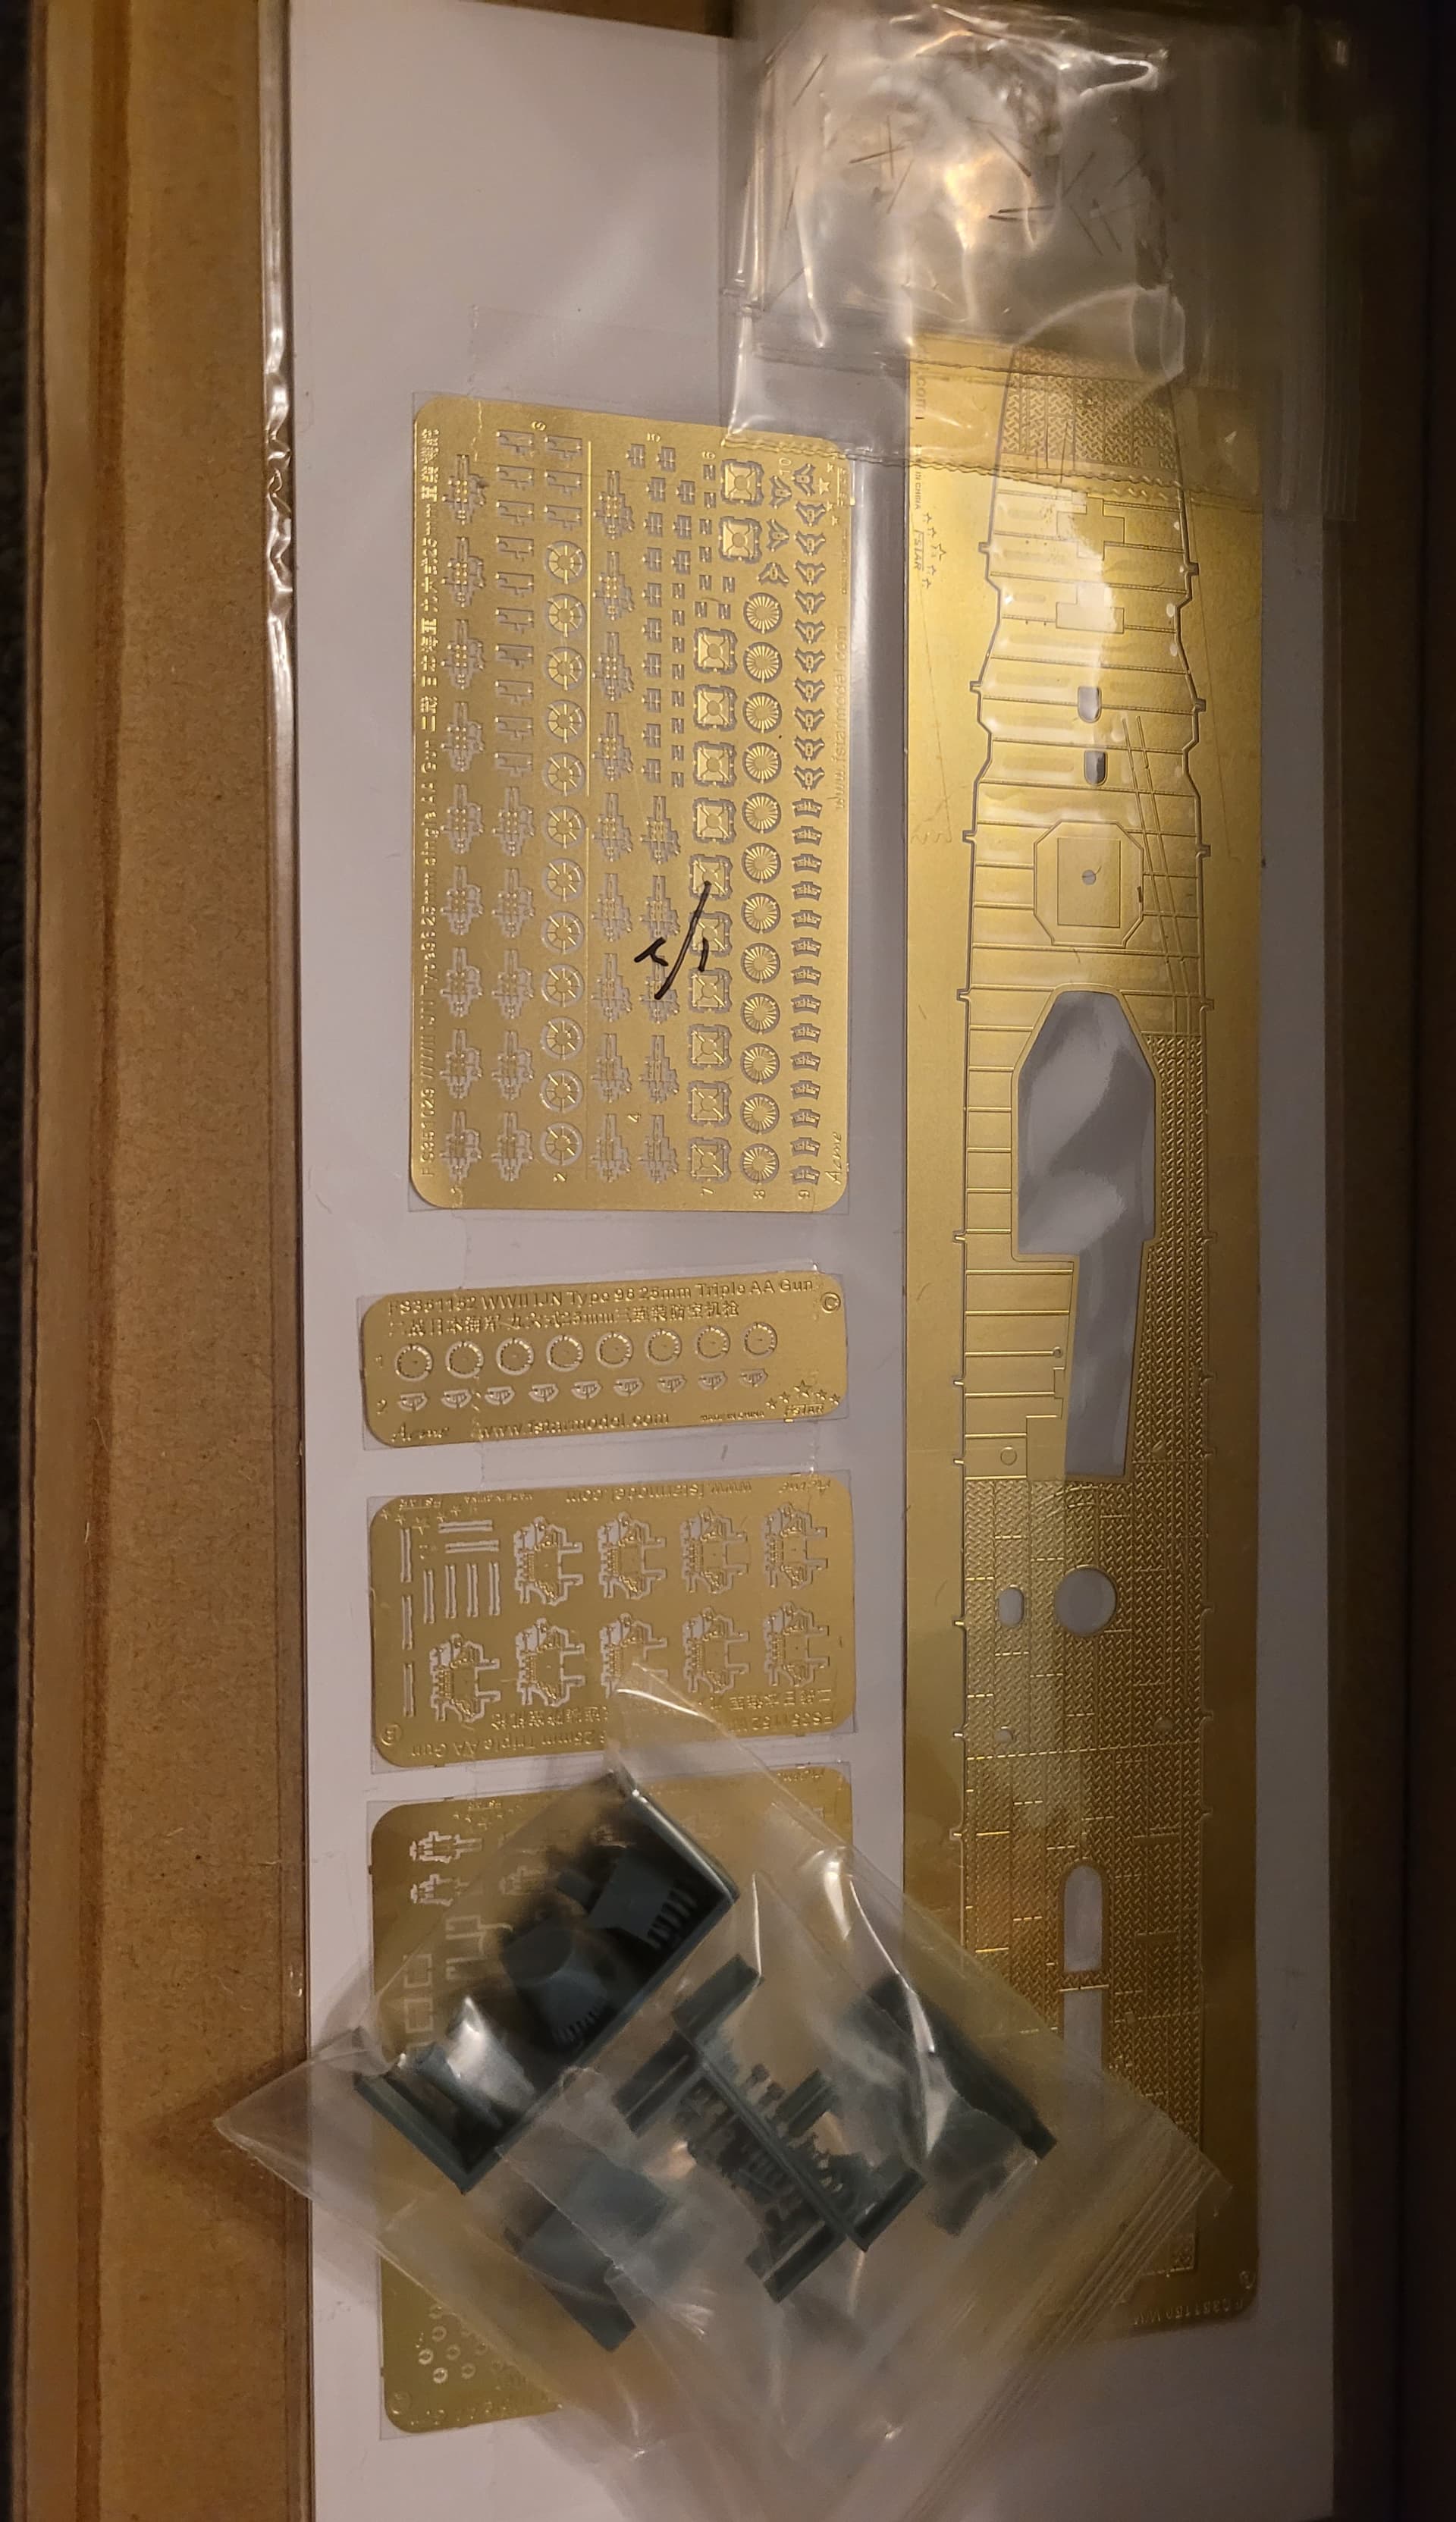
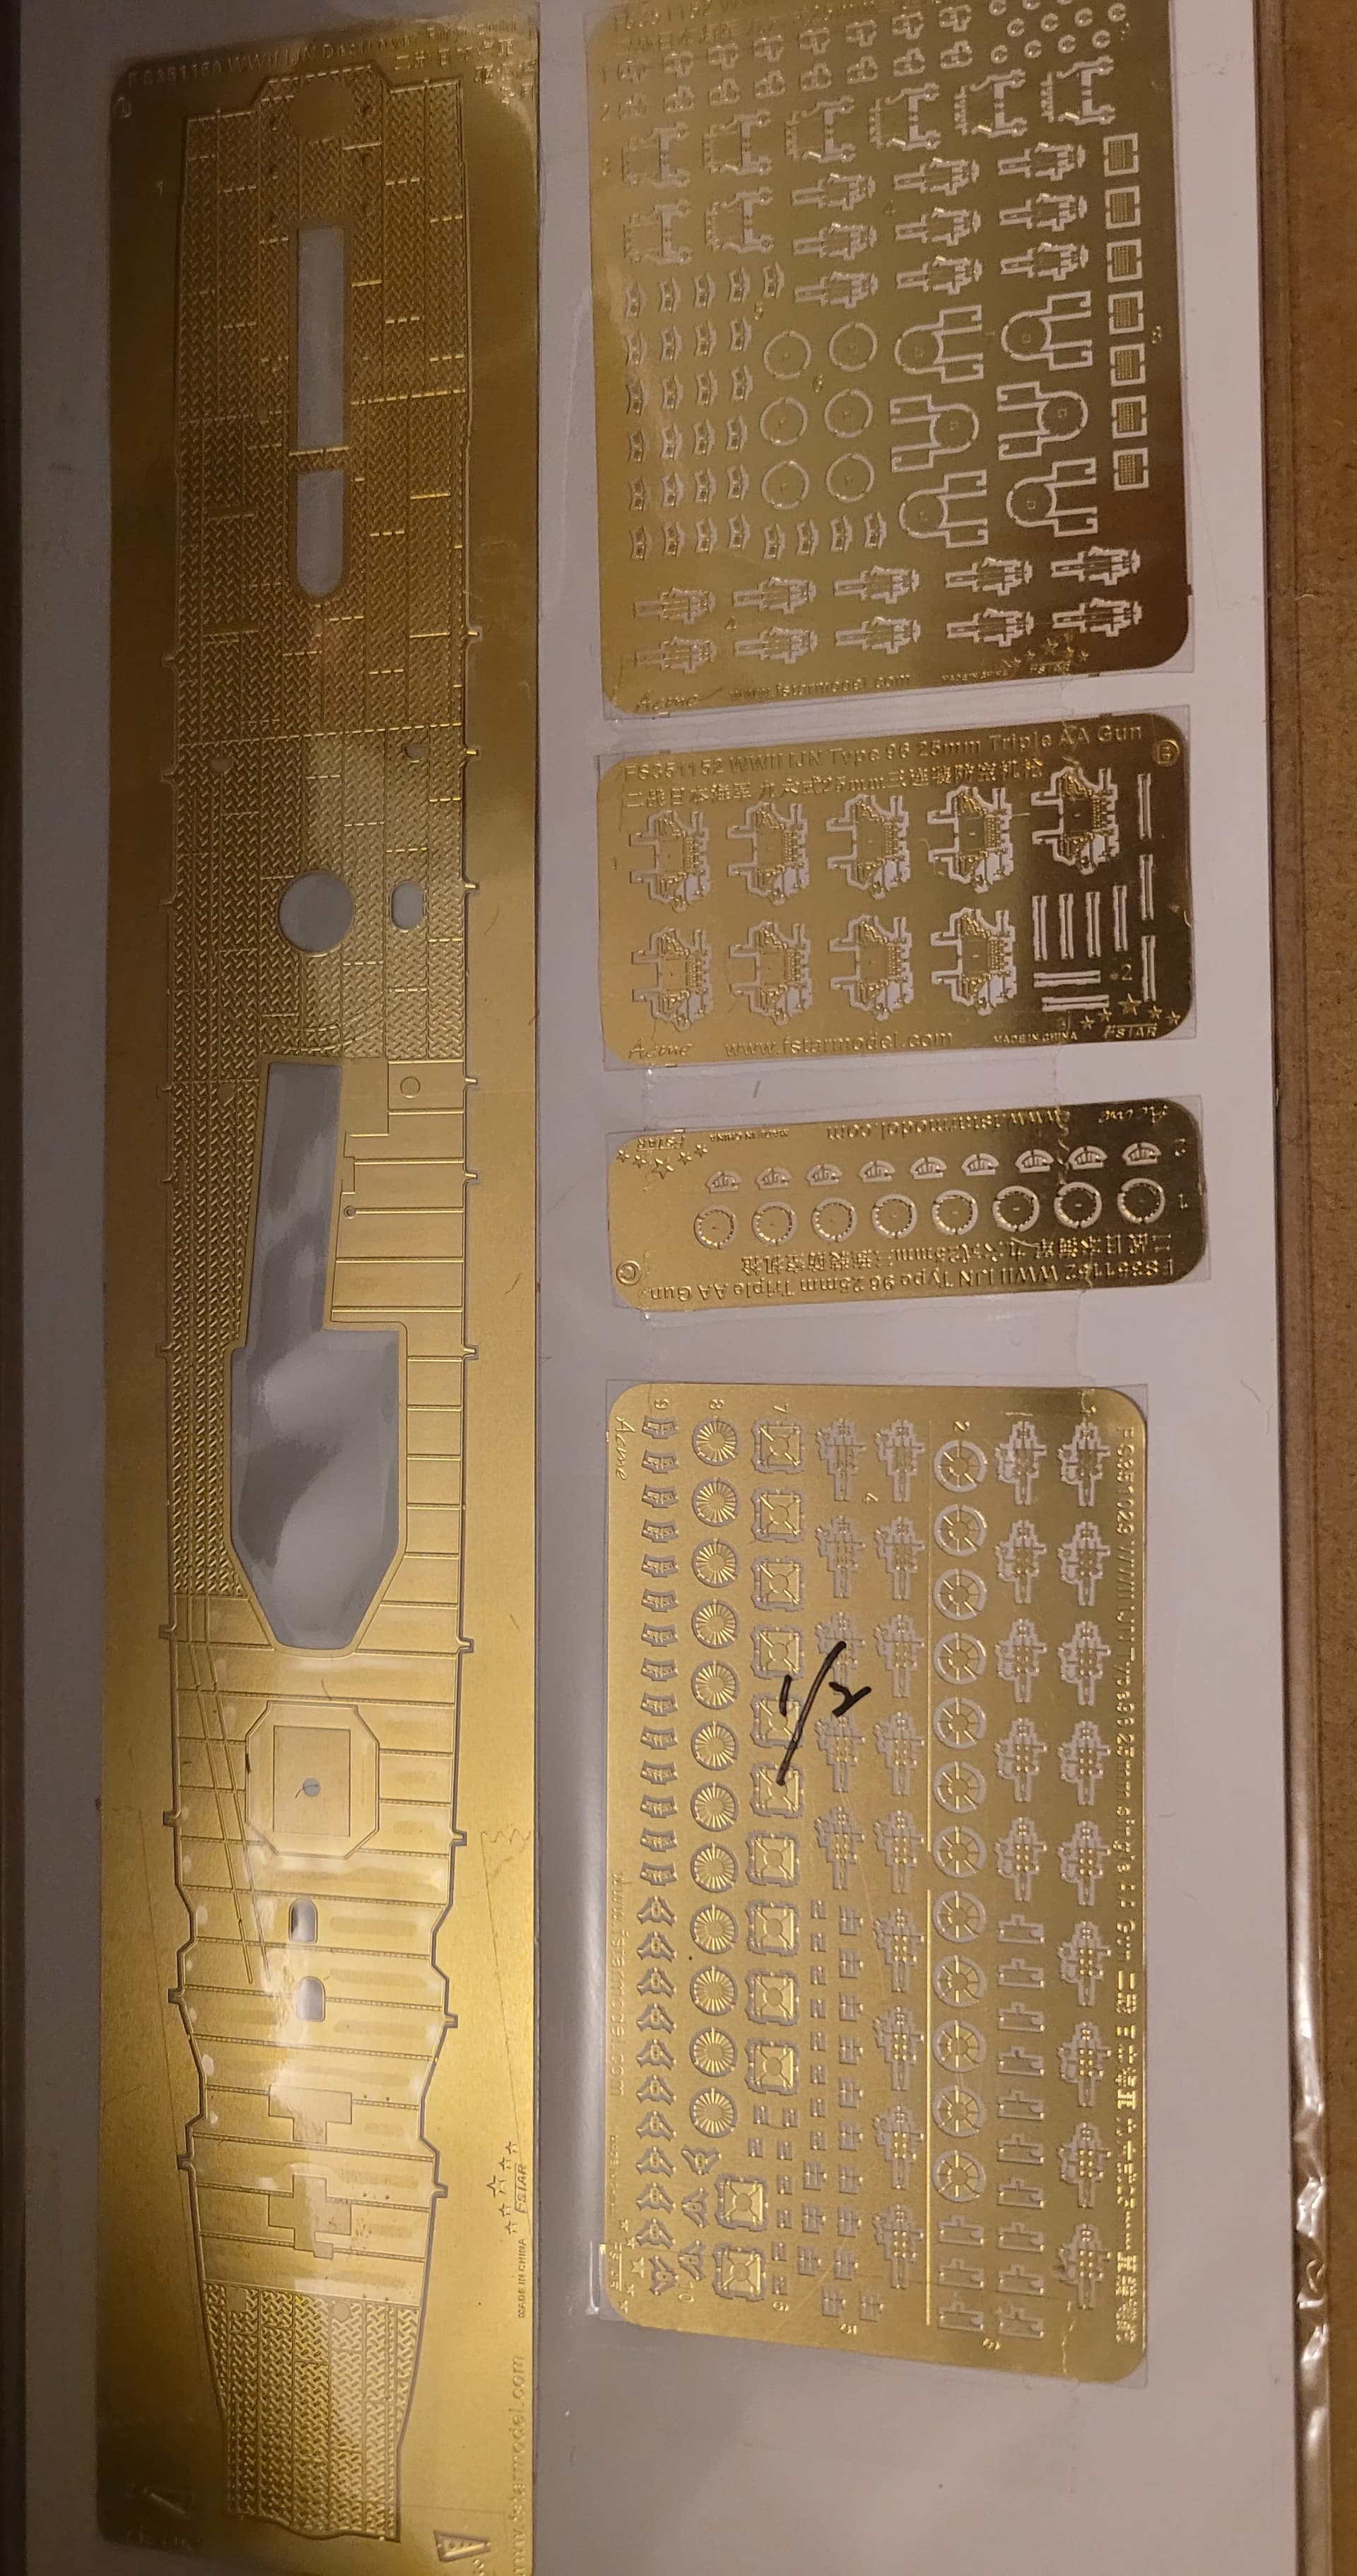
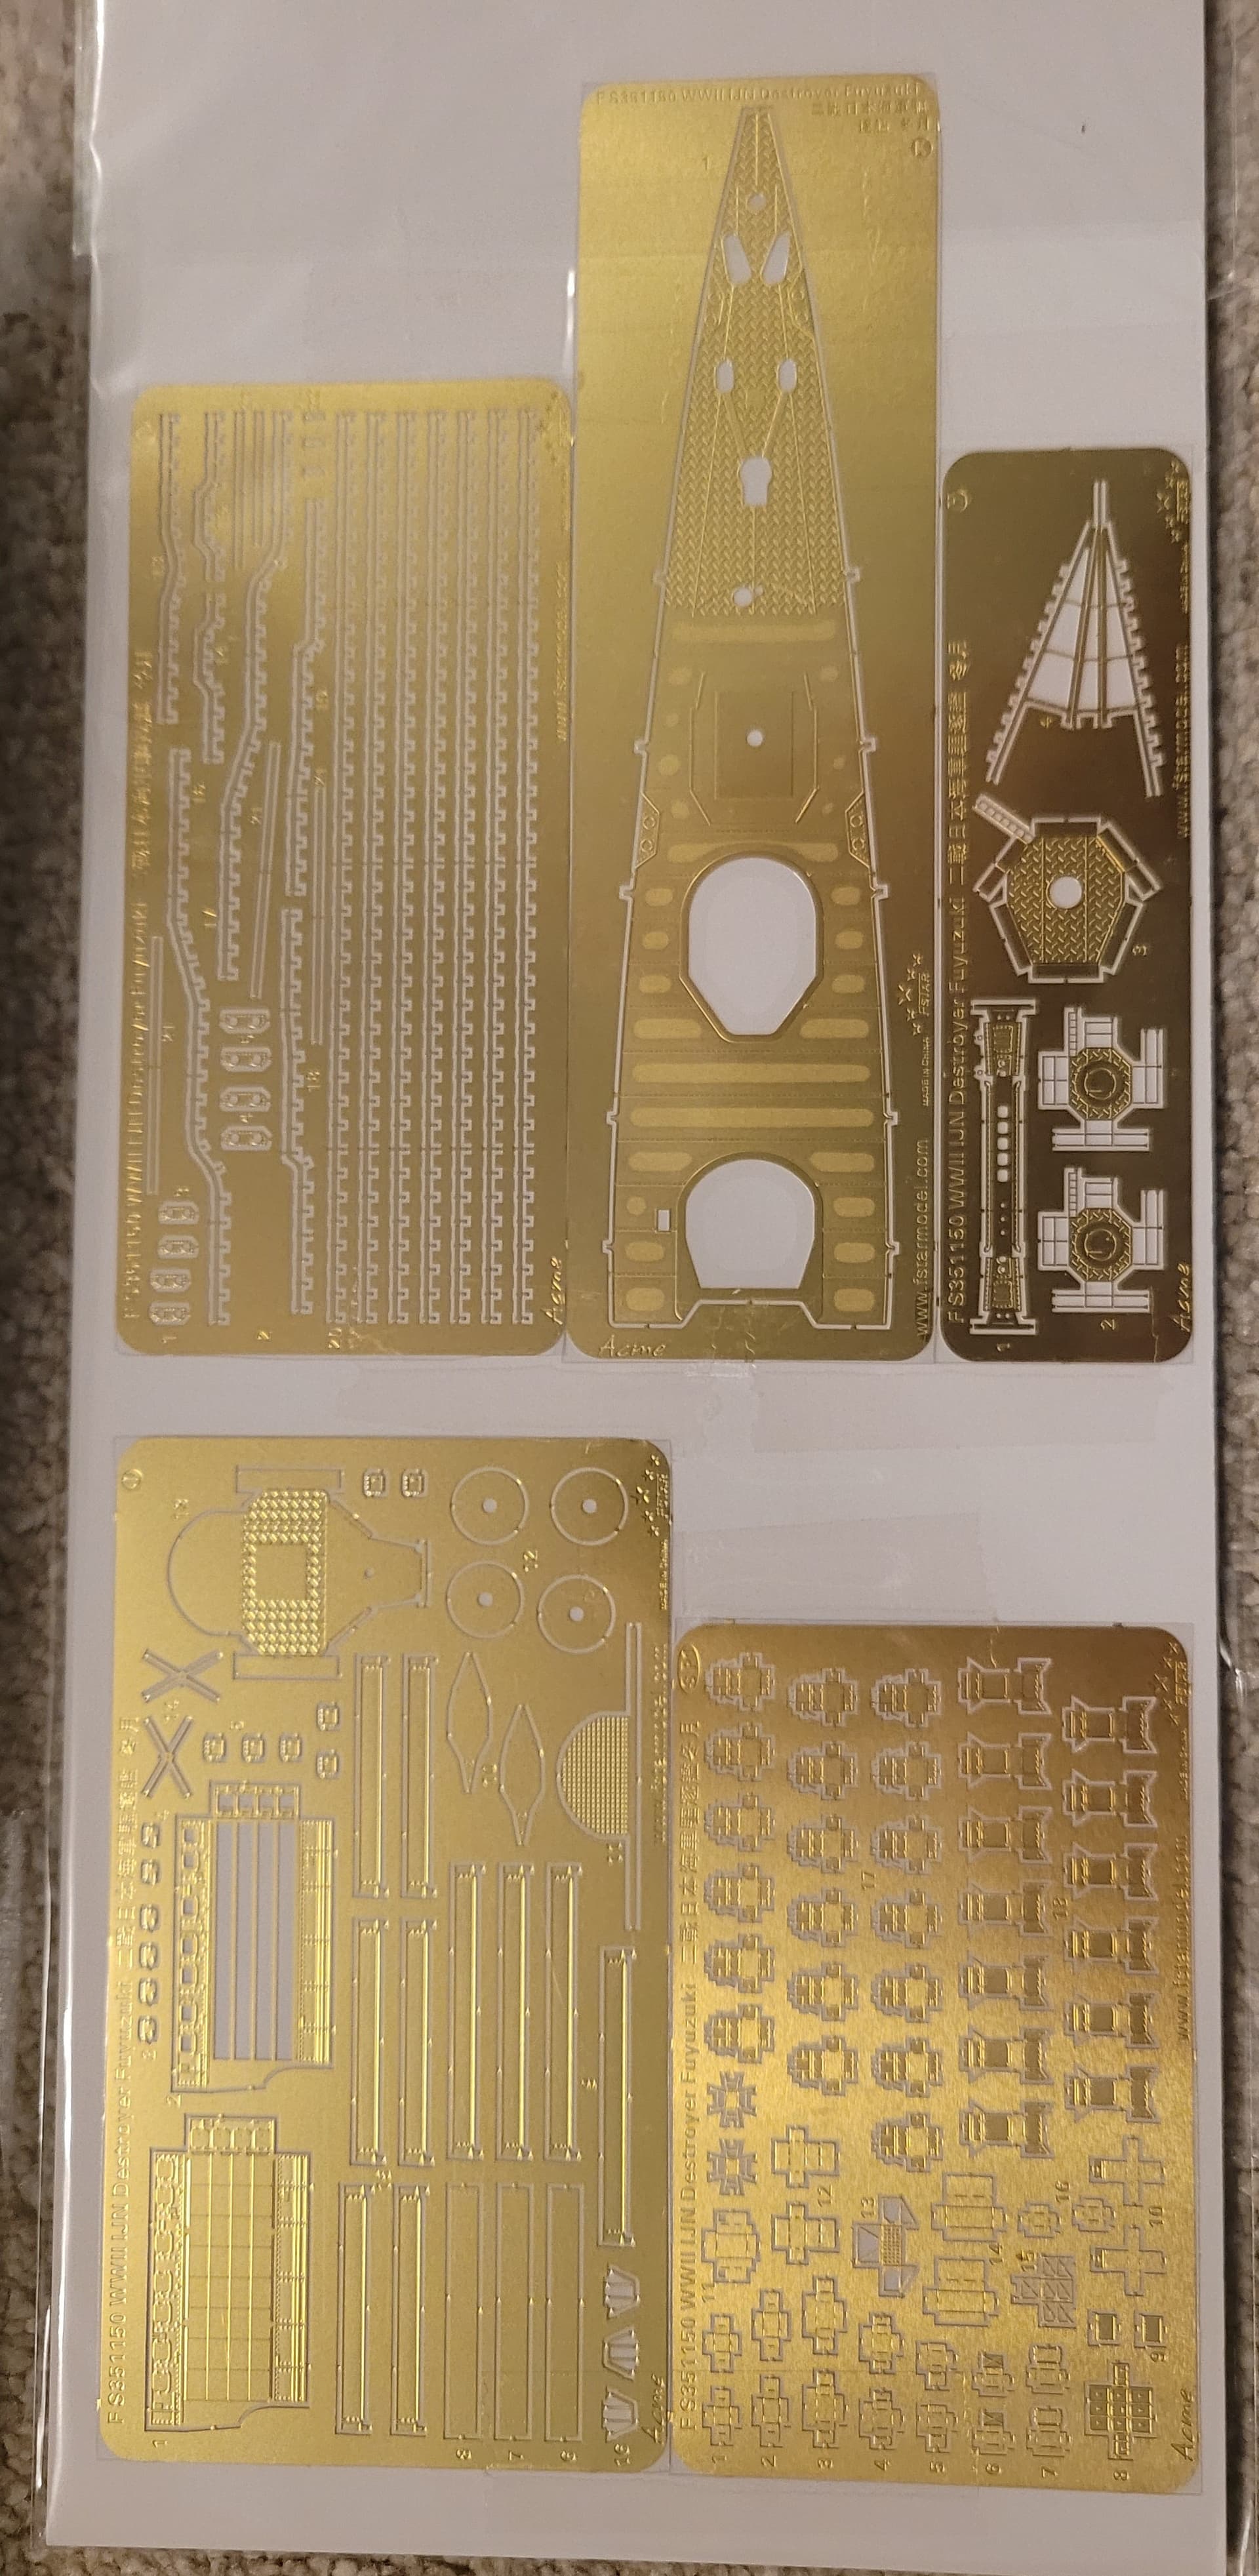
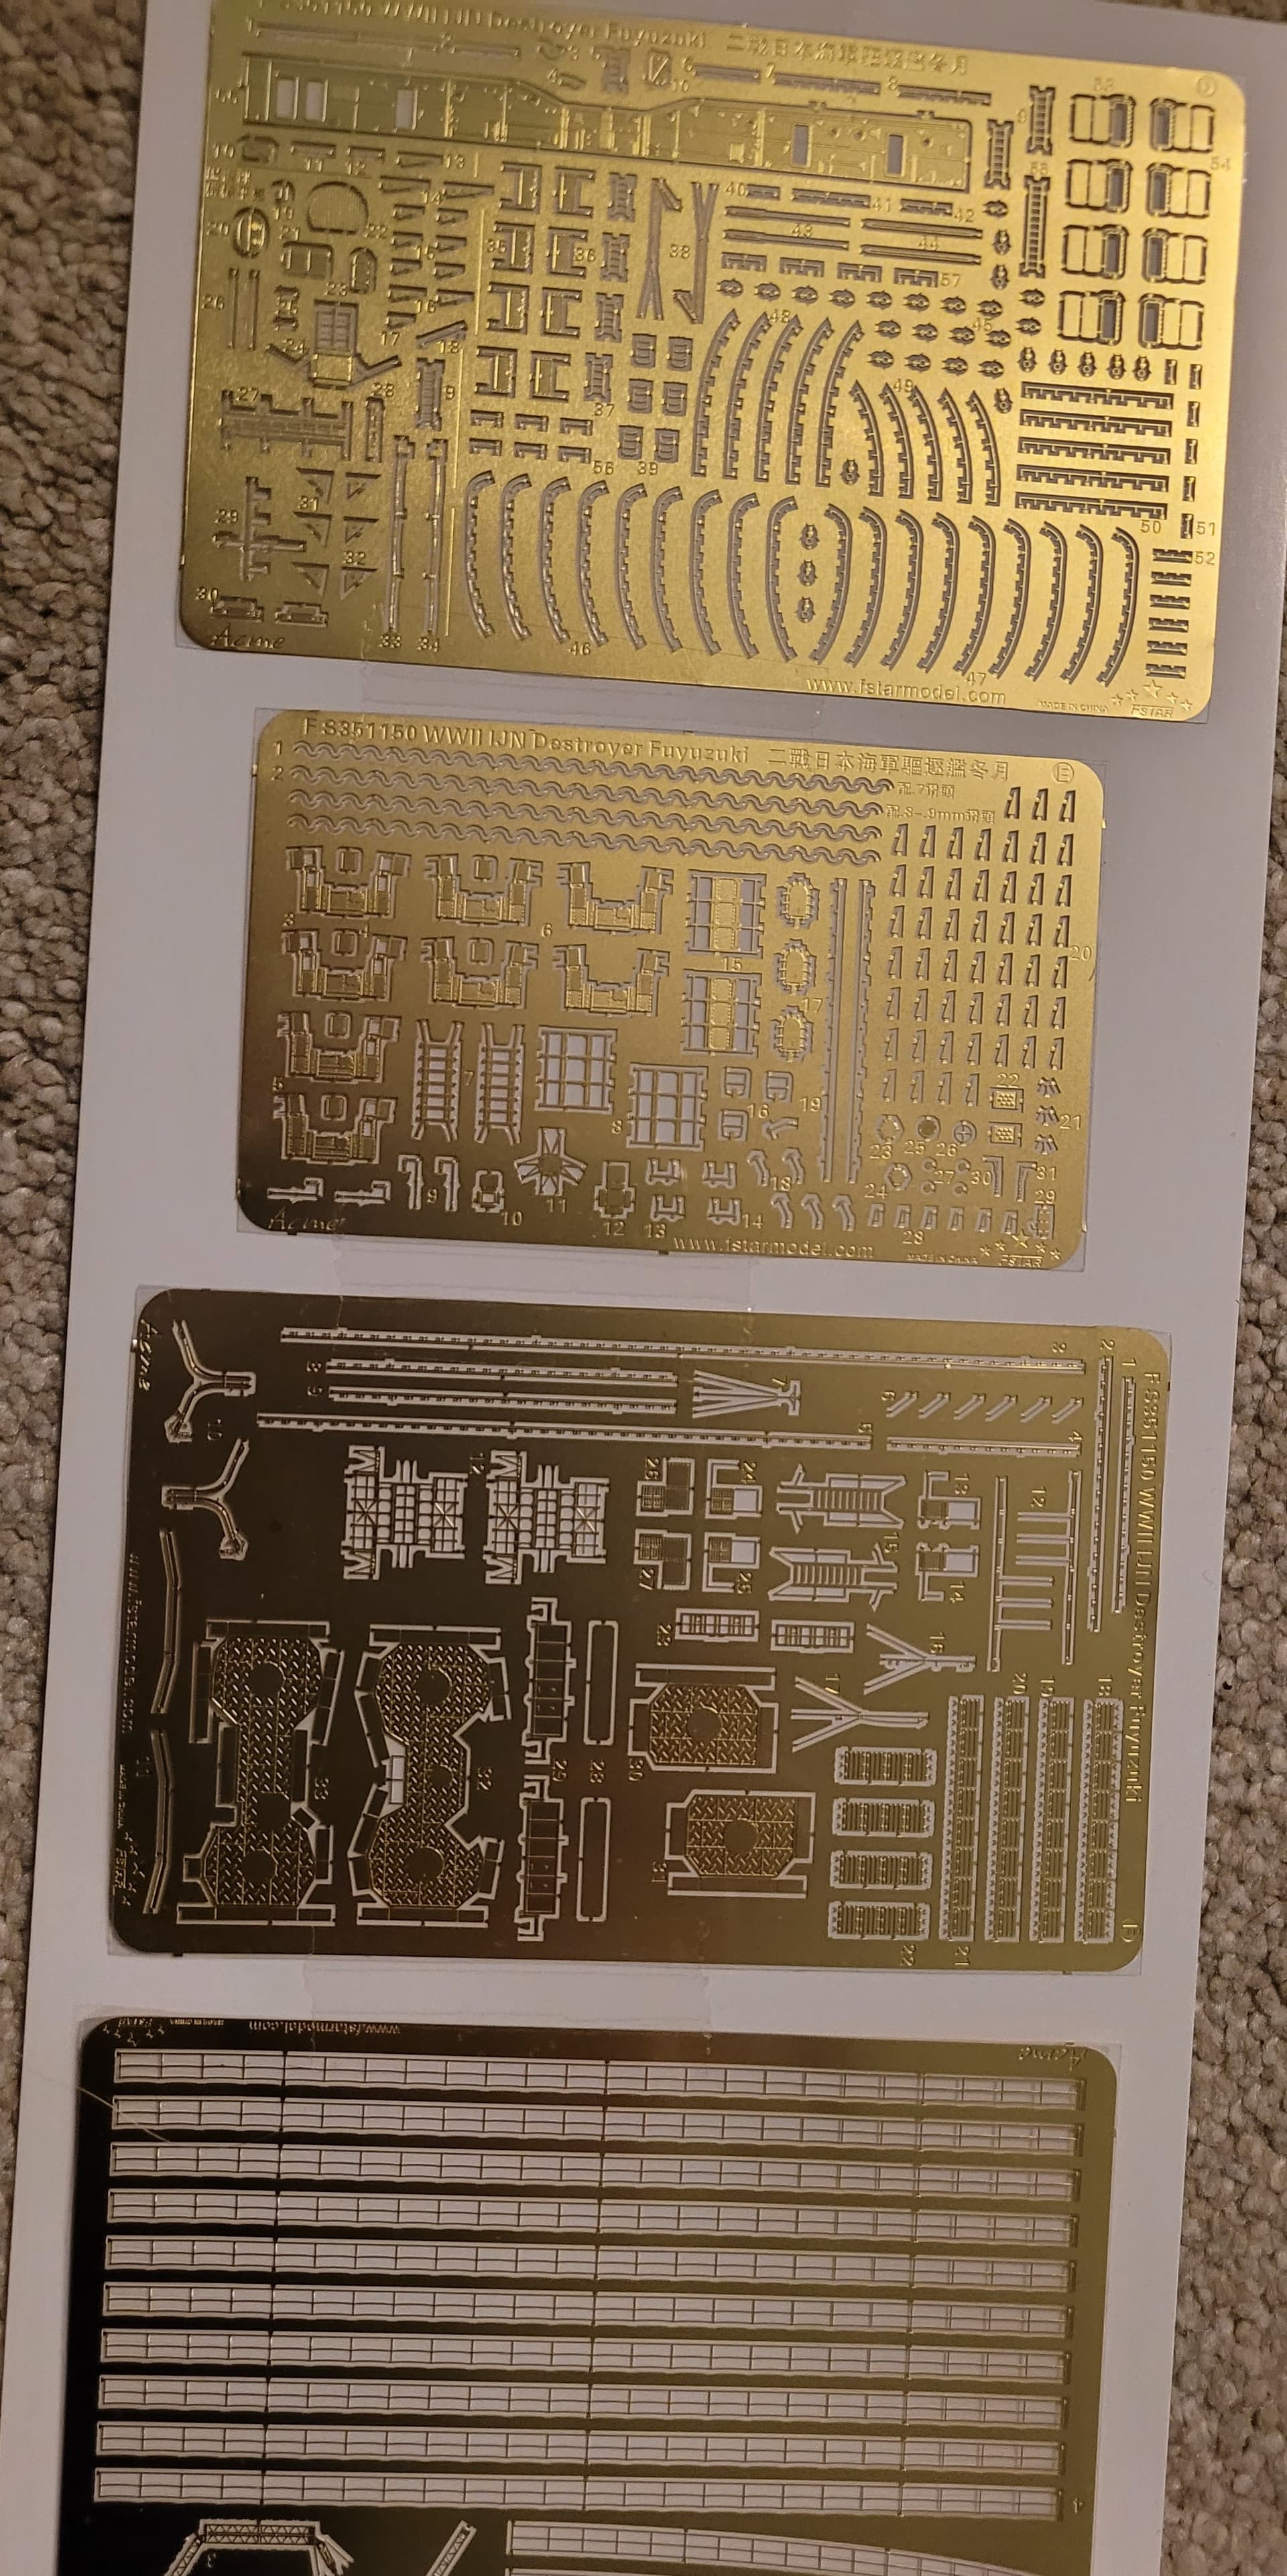
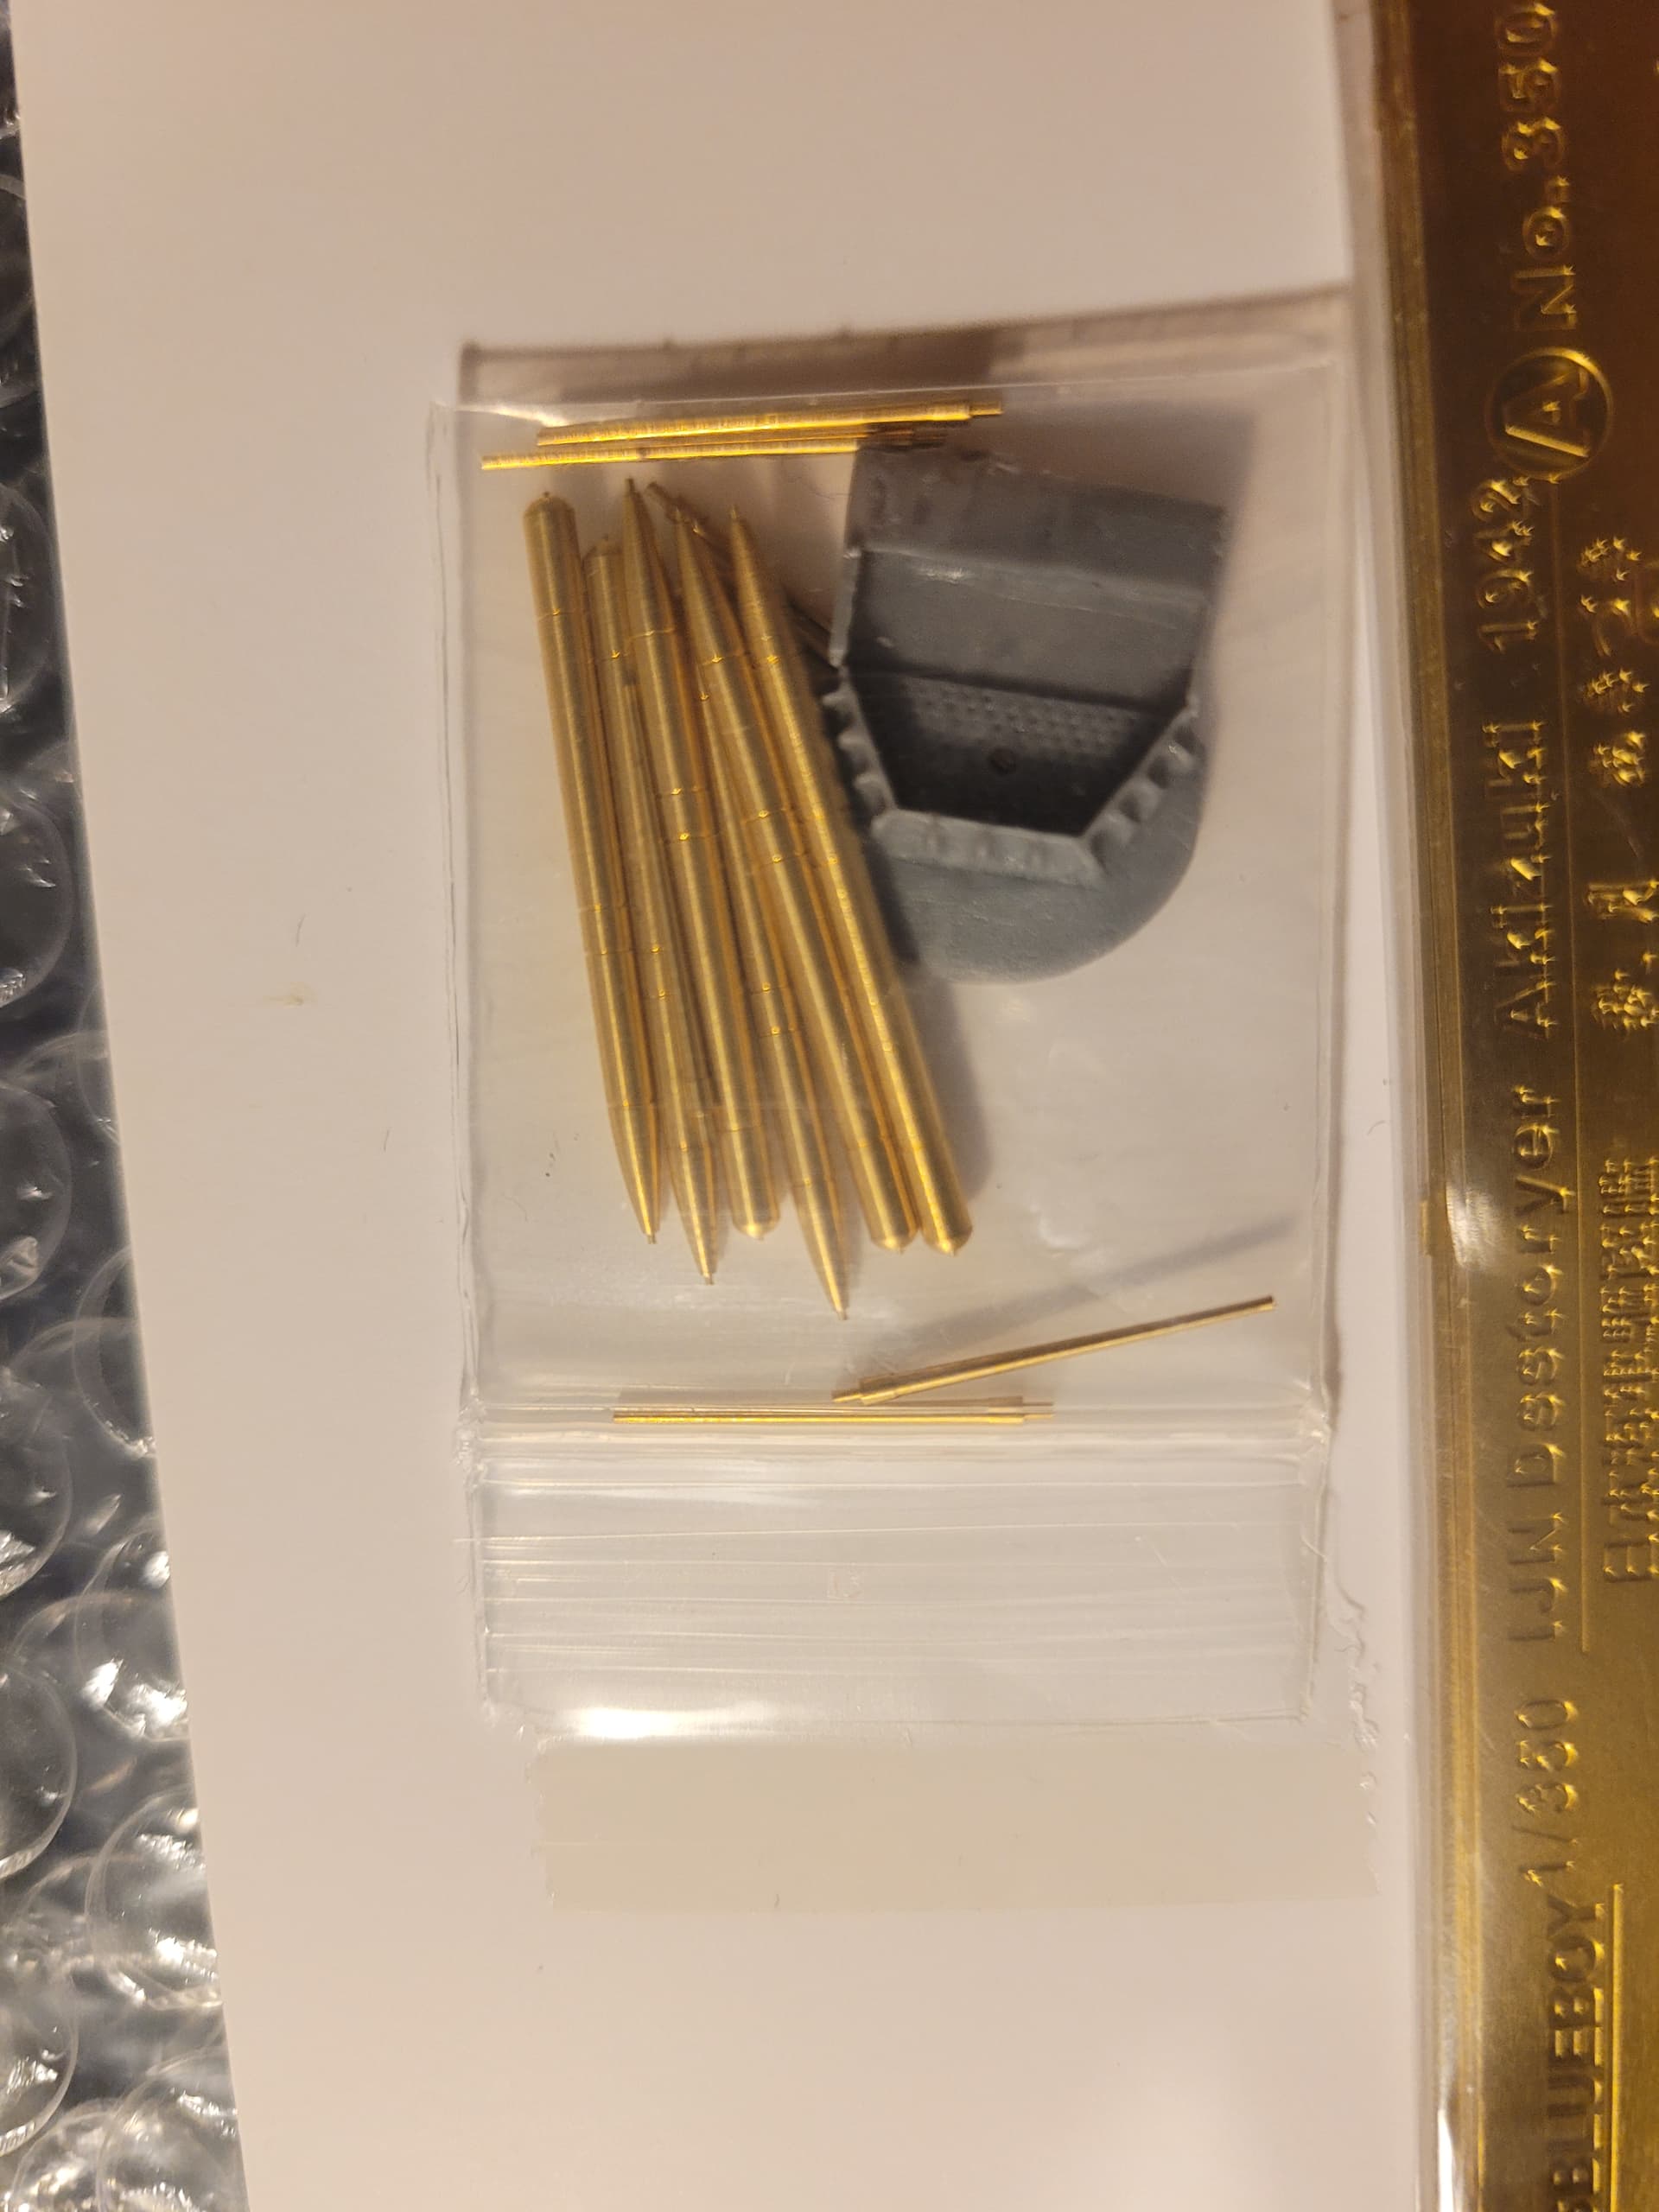
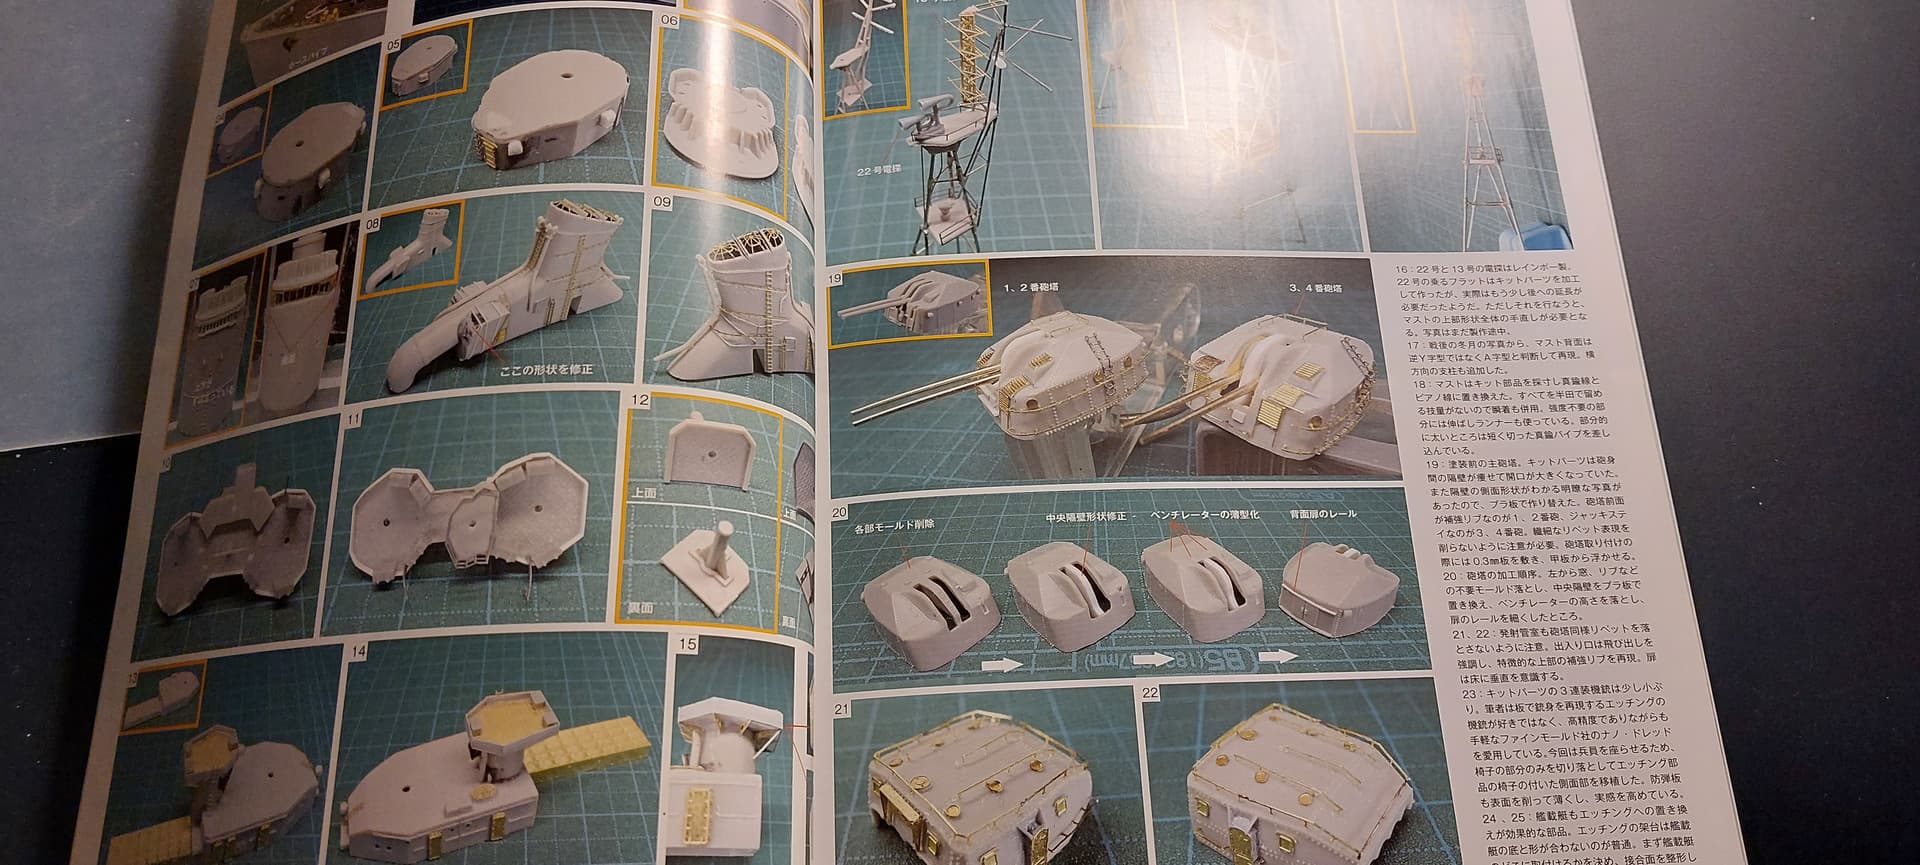
A minimal photoetch fret is provided, containing - ladders, porthole covers, depth charge cages, AA mount shields, a few miscellaneous bits and most interestingly, a construction to allow the torpedo storage bay to be open. Unfortunately, the etching is a little blocky and reminds me of Pit-road’s 1/350 PE sets. Still, a nice bonus to have although most of this will be swapped out with aftermarket.

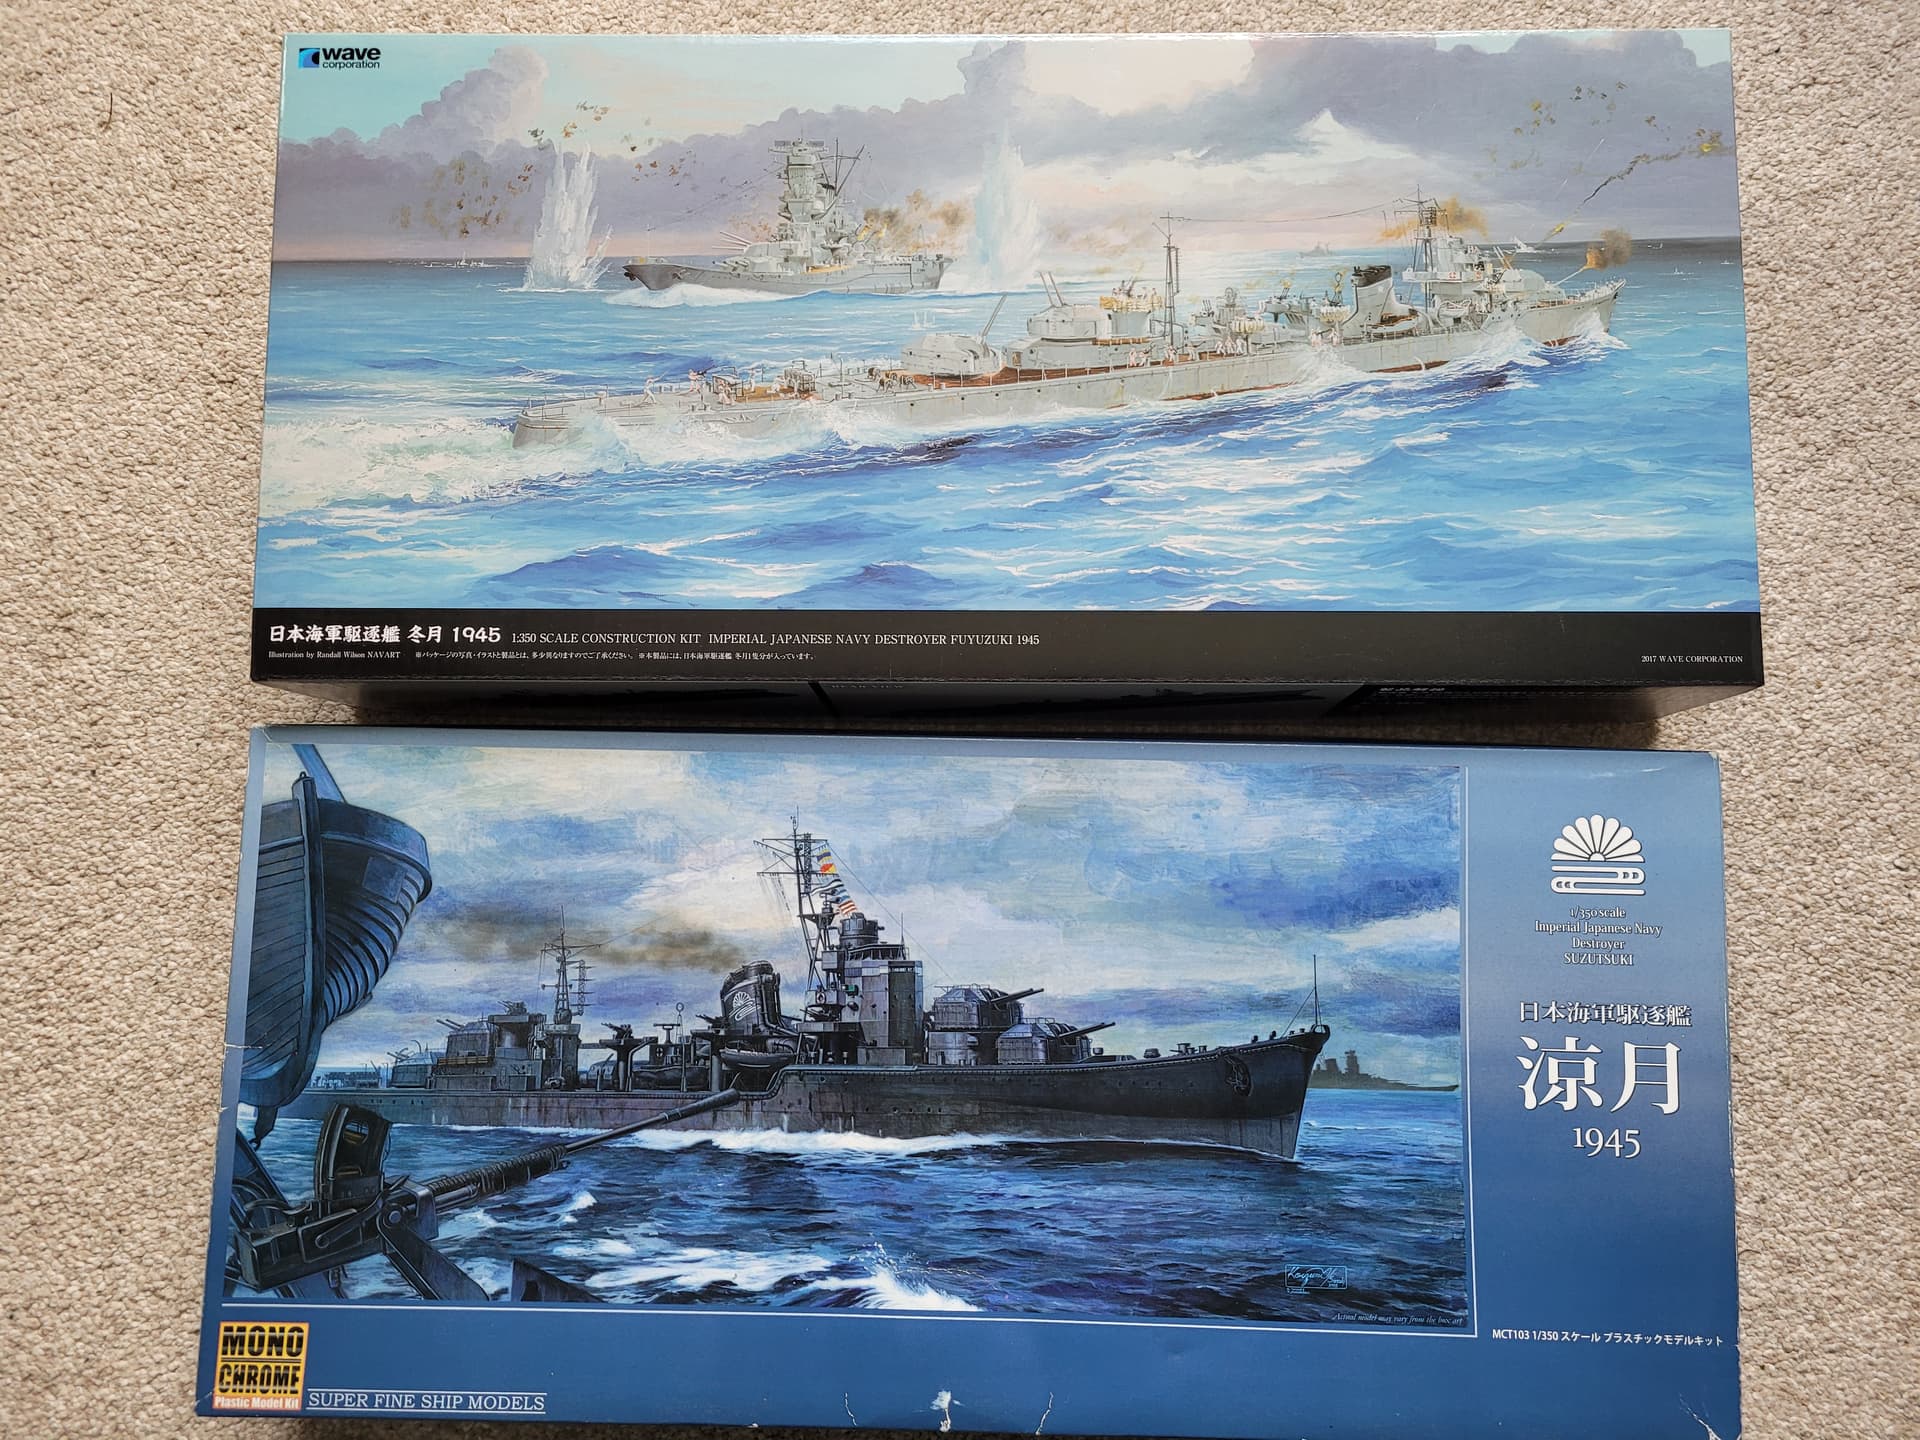
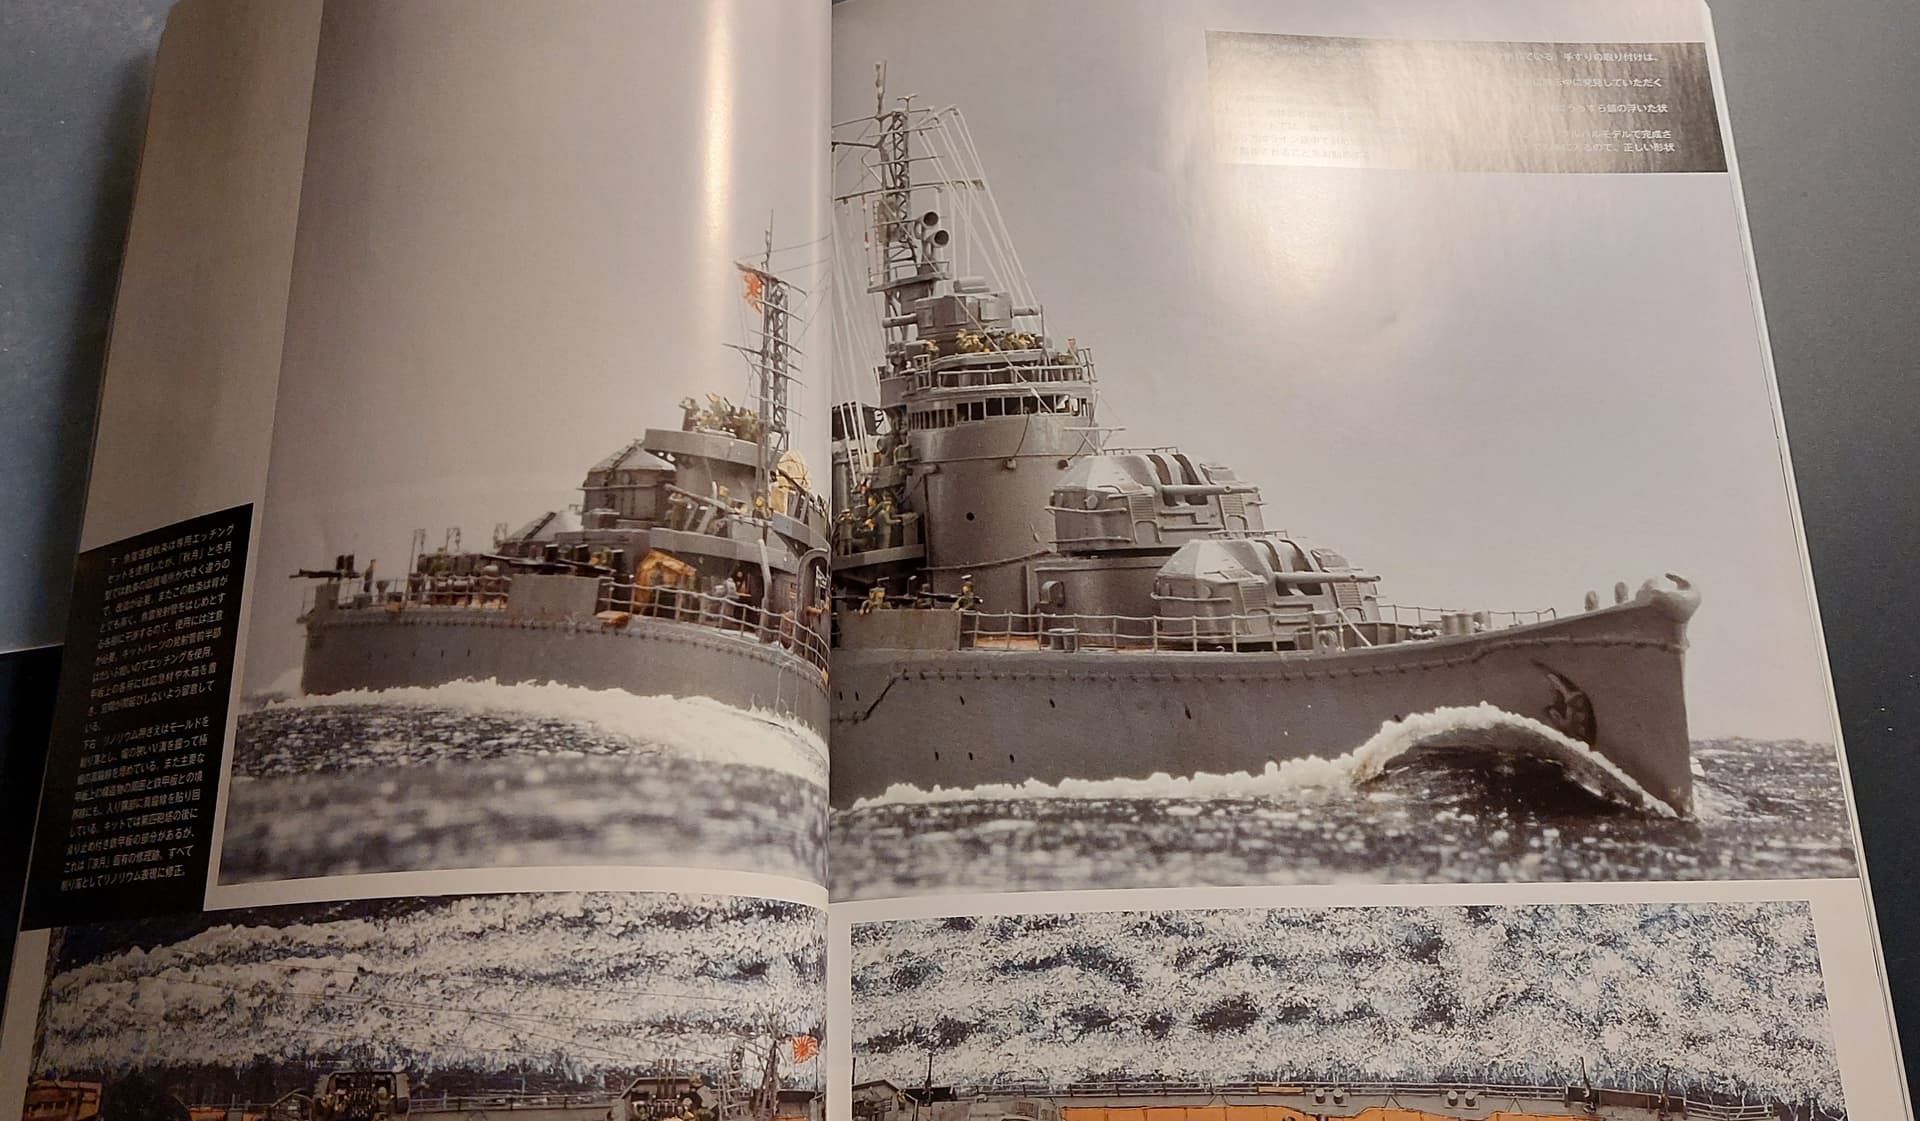
I actually own Monochrome’s rather hard to find Suzutsuki kit and nearly chose to build her instead; however due to the presence of existing online build logs and the apparent difficulty of reshaping the hull to be more faithful (as seen in Model Art No.37) I thought best start with Fuyutsuki. Fortunately there also seems to be much better documentation of vessels of the Fuyutsuki sub-class due to many of these vessels making it to the end of the war.

4 Likes

As for the aftermarket, my original setup was to use primarily the BigBlueBoy Akizuki set with a large complement of various generic IJN parts to tackle the missing details.

However, Fivestar recently released an incredibly comprehensive detail kit specifically for the Fuyutsuki! Not a moment too soon either, as I was about to start the build with the inferior BigBlueBoy parts. It conveniently addresses a lot of the inaccuracies seen in the kit and tackles plenty of Fuyutsuki specific details which I was not looking forward to scratch building or sourcing more general IJN parts. It is going to make a lot of what I had in the first picture redundant.


The detail level truly seems incredible, plenty of brass parts, PE and 3D printed parts replacing the vast majority of plastic detail. Very good stuff from Fivestar and well worth the money, I can only hope they make more complete detail sets for more IJN subjects in 1/350 (this is the first one).

I still see gaps in accuracy and parts inspecting the instructions, but this detail kit really seems essential if you plan on building this vessel. Be warned, it is very comprehensive and filled with tiny fiddly parts but that just means all the more joy for an aftermarket head like myself. I really can’t wait to get stuck into this!


I was intending to sell my BigBlueBoy set due to the release. Although, it contains enough Suzutsuki specific parts to seem worthwhile keeping around. Also, the bridge construction is not only more PE heavy, but the bridge top is completely remolded from resin with the correct wind deflector shape which would have otherwise been quite difficult to correct.

3 Likes

And for the references…

Kagero Suzutsuki - the 3D renders will be partially applicable to a Fuyutsuki, seemed worthwhile having as I will use it again for my Suzutsuki. Seems to be one of Kagero’s more high quality and accurate releases.

Model Art Vessel Special No.37 - specializes on Akizuki class vessels, with plenty of drawings and pictures and even some build logs. Well worth having and one of the better volumes I have looked through.

Gakken No.51 - I was tricked to include this in the picture when I saw a nice colour picture of an Akizuki class early in the book. Little did I realise it seems to be an exception as the only Akizuki-related documentation in the book.

Maru Mechanisms of the Destroyer - covers all major IJN destroyer classes with breakdowns of their plans and nice drawings of various features/labelled zoom-ins of photos. Plenty on Akizuki class vessels, another very useful publication.

Maru Special 19 - focus on the Akizuki class (as well as Kasumi), standard Maru special with plenty of pictures and some line drawings. Useful as always.

3DCG Operation Ten Ichi Go book - mixed usefulness, has a 3DCG rendition for all the participating IJN vessels but some details seem a little inaccurate. Nevertheless, a nice one to own.

Maru Special 111 - focuses on IJN vessels post-war, containing many nice photos of captured Fuyutsuki sub-class vessels including 1 or 2 of Fuyutsuki herself. Seems just as useful as the Akizuki focussed volume.


s-l640

What is not pictured are my PDF scans of Gakken 23 and Profile Morskie Fuyutsuki (I really would like to own paper copies but it saves me a bit of cash which can be spent elsewhere). Both also have nice drawings and pictures. The Gakken volume has a large-scale Akizuki model which should be useful and the drawings from the Morskie book should come in handy even if it is based on the 1944 fitting.

1 Like

Whow this is a lot material you gathered there for your interesting build! I´ve also seen that new release from 5Star but was hesitating to buy it because of the high price. Do you know that WuLa offers 3d-printed gun turrets for this ship class, too? They look very crisp at the pictures and would safe you a lot of blood and sweat to build. They are offered by hobbyeasy.com

I will surely take a front row seat and watching your build with great interest!
PjOh

1 Like

COOL build, one silly question, even with a jeweler’s mask, how do you not go blind LOL

Lots of great detail going to be happening here, so I will be tagging along … :+1::+1: … Great intro and back story as well

Wow, with all the aftermarket and references this looks like it will be a comprehensive build. I am working on Fuyutsuki’s semi-sister Hatsuzuki, so maybe I can pick up some pointers as you go along. Looking forward to it!

It certainly is an expensive set, but I think with the inclusion of 3D-printed parts and the correction of some key Akizuki-Fuyutsuki differences (Wave did not bother to deal with) it is justified. Also will save me on the usual money drain of purchasing the 25mm AA guns (Fivestar’s look quite nice when complete).

Yes, I have seen these turrets (I think they are actually Bunker Studio) and will probably include them in my next Hobby Easy order, I originally wasn’t going to get them but I think the detail level would just be unachievable sticking PE to plastic. The question now stands whether I also get the Type 93 Torpedo mount from Wu La as well or make do with the photoetch improved plastic.

Great job with your Yamato build so far by the way. I currently am off and on building Yamato in 1945 with a very similar set of aftermarket. The problem is whenever I get anywhere with the build some new 3D printed set of parts get released!

1 Like

I just had a look at your build log and wow very impressive! Hatsuzuki certainly isn’t far from Fuyutsuki so hopefully this build log can be of some help. I guess I do have a good selection of references but still am looking for the Gran Prix Destroyer Mechanisms book (I only have the cruiser one) for a somewhat reasonable price.

Also have been patiently waiting for this release despite constant delays: https://www.amazon.co.uk/Akizuki-Class-Destroyers-Imperial-Japanese-Legends/dp/0764365096/ref=pd_ci_mcx_mh_mcx_views_0?pd_rd_w=Itv57&content-id=amzn1.sym.f4b7c577-5729-4684-975a-4aa63e326d3f&pf_rd_p=f4b7c577-5729-4684-975a-4aa63e326d3f&pf_rd_r=TPY4TDS0XWPSQ1W70NXV&pd_rd_wg=j3bWl&pd_rd_r=c0a0fb4e-fe61-48dc-8473-8f8796fd375a&pd_rd_i=0764365096
I doubt it will provide any pictures that I don’t already have access to, but its always is nice to have a book I can actually read the text in! Plus the publication on the Kongo class they brought out was nice.

Some more aftermarket for the build:
BlueFatty Model anchor chains
BlueFatty Model retaining rings - these things are absolutely tiny!
Fivestar Light I - funnily enough the transparent part is not included in their Fuyutsuki detail set so I had to get these as well
Rainbow IJN Steam pipes and smokestacks - should add to the funnel area nicely
YXN Model IJN Cowl Head Ventilators - there are various similar shaped ventilator pipes across the ship, so for those which appear similar I will try and replace with these
YXN Model Type 94 Anti Aircraft Director - the kit part for this is more like a featureless plastic blob that even PE would not improve much, so this should look far superior
Veryfire IJN Watertight Doors - good to have around if any of the flyhawk doors are incorrectly shaped or not included
Ship Yard Model 1/700 Rivet Strips - 1/700 seems more inscale for 1/350 than the 1/350 rivet strip offerings I have seen so I thought I would grab these instead, I don’t know exactly where abouts or if I will use them, but certainly good for to have

1 Like

I also have these but I am not sure how and where to use them. I am surely not able to grab one of them even with micro-tweezers. Too much for me… :face_with_spiral_eyes:

I am definitely along for this journey. Out of curiosity, where are sourcing the Blue Fatty Model sets from?

David

David I got mine from hobbyeasy.com

thank you

Yeah I use Hobbyeasy as well. Great website, it has an amazing selection of detail parts you don’t tend to see on eBay etc. for good prices and cheap shipping. Only problem is the stock data is not always accurate, so sometimes I make an order and I find out a week+ later that some items are not in stock.

Unfortunately, work has had me incredibly busy recently, so I have not managed to make much progress with the build.

My first job has been trying to decipher the porthole arrangements of Fuyutsuki during Ten Ichi Go 1945, as the Wave molds are expectedly not at all accurate as they are just reusing the Akizuki hull molds. This proved to be more difficult than I previously imagined it to be, as none of the line drawings found in any of my sources appeared to be accurate to all available photos. Also it seems Fuyutsuki not only differs in portholes to the original run of Akizuki class vessels but even other Fuyutsuki subclass vessels, as the nice close-up pictures available of Yoizuki and Hanazuki do not match up to Fuyutsuki completely. This has led to me squinting at a lot of dark grainy pictures trying to decide if the black spot I am looking at is a porthole and then trying to work out how the photo perspective distorts the position.

The process I ended up following was to identify all likely porthole locations and marking them on MS paint from all close up pictures I have of Fuyutsuki. Then I could view all the pictures sequentially for each suspected porthole individually, with reference to the various land marks close to it (e.g. bollards, fairleads, turrets etc) to try to get as accurate of a location as possible and mark it onto the line drawings found in the Maru Special book I have when I am happy with the position. This was long tedious unrewarding work, but it needs to be done to move on to more interesting jobs. Also, I quickly realised the rear sets of portholes were not very visible in any of the existing pictures, due to Fuyutsuki losing her stern and a general lack of availability at angles you can make them out, so I just had to guess as best I can with inference from other Akizuki class vessels.

Anyway, the pictures I used with portholes dotted in yellow…


Very nice closeup of Fuyutsuki at the end of the war, showing clearly the front right side arrangement, often misrepresented as being in far fewer numbers.

This picture is from a build log of a 1/700 Fuyutsuki, where the author had conveniently already identified most of the portholes and outlined the degaussing cable arrangement, which I will come back to later as it slightly differs from the previous Akizuki vessels.

Fuyutsuki right after construction in 1944, some of the more forward portholes seem to not be visible due to shadows.

Fuyutsuki after the war after mine damage, shows how the left side slightly differs from right.

Another one of Fuyutsuki after the war, this one is taken from a more side-on perspective, so is easier to identify the exact positions of each hole.

Using all these pictures I threw together a diagram to follow…


The yellow dots are portholes, the red are portholes on the drawings which are incorrect, the blue is a slight adjustment to the degaussing cable shape, and the green a degaussing cable ‘hub’ (I will get back to these later).

This won’t be 100% accurate but I think it is as good as I will be able to get it.

5 Likes

I have been working away at the hull recently, beginning with removing the molded on degaussing cable to make way for the photoetch one. Also, the porthole eyebrows and the weird waterline marking line all had to go. Once that was done I tried to sand down the ugly mold lines on the bottom of the hull, although it became apparent filler would be necessary.

Once the hull was clean, I marked on the positions of the portholes from my plans. Luckily a fair few of the portholes on the kit lined up perfectly or close enough to leave them as they are. Addtional holes not on the kit were drilled out using a strip of tape to lineup and try and make them consistently straight. The rest first got a filling of Vallejo modeling putty, followed by intermittent sanding and covering with Mr. Surfacer 500 then 1200. I even gave the whole hull a coat of Mr. Surfacer to highlight areas where defects were still visible. I did two coats till I was happy with the hull, I even managed to just about fix the lower hull molding lines.


Another fix that was made in this phase was the positioning of the anchor holes, which were too low on the kit. As can be seen on the picture below that they should practically be pressed up against the above degaussing cable. Plus the shape of the recess seems to be off. Therefore, I filled the lower portion of the kit molded recess and once the panel lines are done I will come back to fix the anchor recess completely.

3 Likes

Also new reference came in the other day…


Model Art Vessel Special Issue 71
It is an issue completely dedicated to Yamato and its escorts during operation Ten-Go.


There is a nice Fuyutsuki 1/350 build, which has some build photos but most of the modifications/corrections that had to be done are covered by the Fivestar kit already. Still a nice build to give some inspiration.

As typical of Model Art, there are also line drawings supposedly developed from pictures and the official plans. However, there are some odd details here. Firstly, the utility boats are omitted and replaced with more 25mm AA when I am pretty sure you can visibly see them present in photos taken during Ten-Go. Furthermore, there is a section of linoleum aft of the bridge which I do not recall seeing in any images or refrence before. I will have to verify but this may be a mistake on Model Art’s behalf. Funnily enough most of the portholes lineup to my plans, but the drawings appear to be lacking some I can clearly see in postwar pictures.

Altogether a very nice model art issue, especially if Yamato or Ten-Go are of interest.

3 Likes

The next part of construction baffling me is the issue of panel lines.


As can be seen in this picture of Yoizuki, some of the panels appear to be slightly lapped, but it is difficult to tell the configuration due to the picture.

Here I have outlined the clear plates/lines I can see.

In this picture Yoizuki’s lines are slightly more visible and I feel like the plating lapping is more visible, logically thicker darker edges will indicate a plate edge rather than a weld.

Again plate lines have been outlined, 1 indicates the first layer, 2 indicates the lapped layer. In all the pictures the area around and below the anchor recess seems blended into the rest of the plates which makes things confusing.

Again with Natsuzuki…

The layers 1 and 2 look clearer in this image. However, the anchor area (3) could be either on level 1 or above 2, it is very hard to tell.

Furthermore, Fuyutsuki lost her bow and had to have it repaired, which could create differences in the plate config. Also, as was seen with the portholes, Fuyutsuki does not seem as related to her sub-class sisters as originally thought.


Fuyutsuki in 1947…

Interestingly there is a section which appears to be recessed (I think) that breaks up the panels compared to Yoizuki and Natsuzuki. This could be a result of the bow repair as it is just aft of where Fuyutsuki lost her bow…

This could suggest the bow was repaired from this point hence the anomaly.

All plates and lines marked. It seems to closely follow Yoizuki and Natsuzuki.

Plates to be sprayed outlined in green, I think I will treat the anchor area as recessed I think, unless anyone feels like it is actually a lapped plate. The red lines will be just scribed I think, as they appear softer and thus not evidence of a plate.

4 Likes

So life got busy and I had to put the project on hold…

But now things are clearing up and I have a long fairly quiet summer ahead of me, I will have some time to get back focused on this build.

I have made some progress since my last update which I had yet to make a post for.

Firstly I sprayed the panel lines a while back. I used a combination of 0.2 to 0.4mm masking tape and Mr Surfacer 500 in my airbrush to make the panel lines. This is my first time attempting this, but satisfied with the results. I had to do multiple layers to build up any kind of thickness, but maybe I was thinning the Mr Surfacer too much. The plates still are very subtle, but considering how subtle they appear on the actual images of the ship the thickness is more than enough.


The masking tape left some slighlty raised edges in areas, so i sanded them down.

2 Likes