Looking fantastic!
2 Likes
This gun is really turning out excellent. You’ve done brilliant work with the photo etch and it all really brings this ancient kit up to speed. Great project.
2 Likes
Nice clean work so far. I would much rather build a superb fitting old Tamiya kit than a new “super detailed” kit with a bizillion bits.
J
1 Like

5 Likes
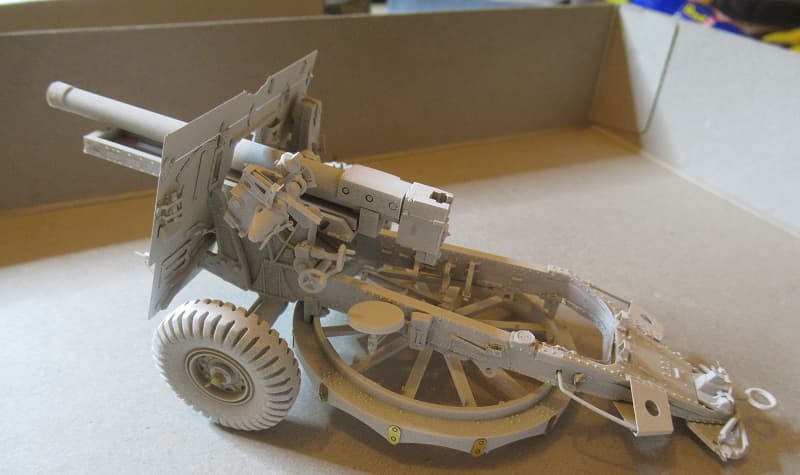
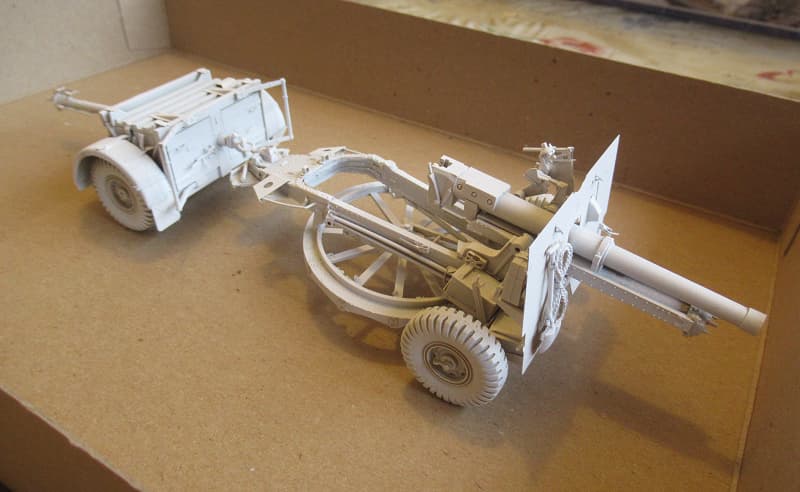
I left off the wheel hub nuts and the 12 PE strengthening plates on the edge of the rotation base. The gun in a light misting of white primer paint.

9 Likes
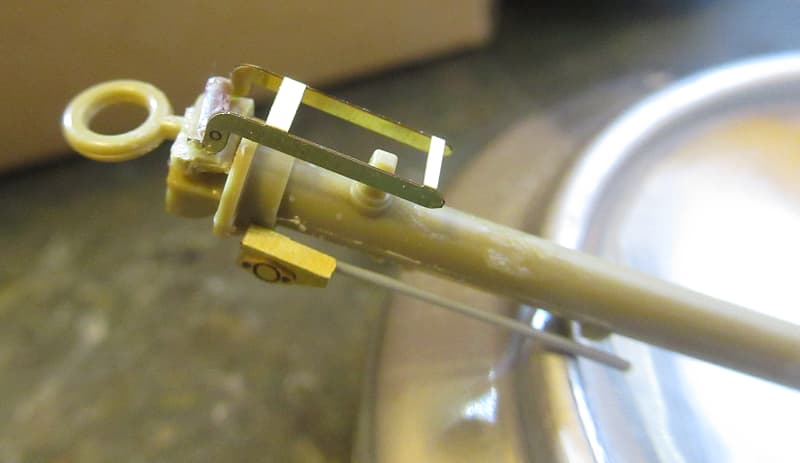
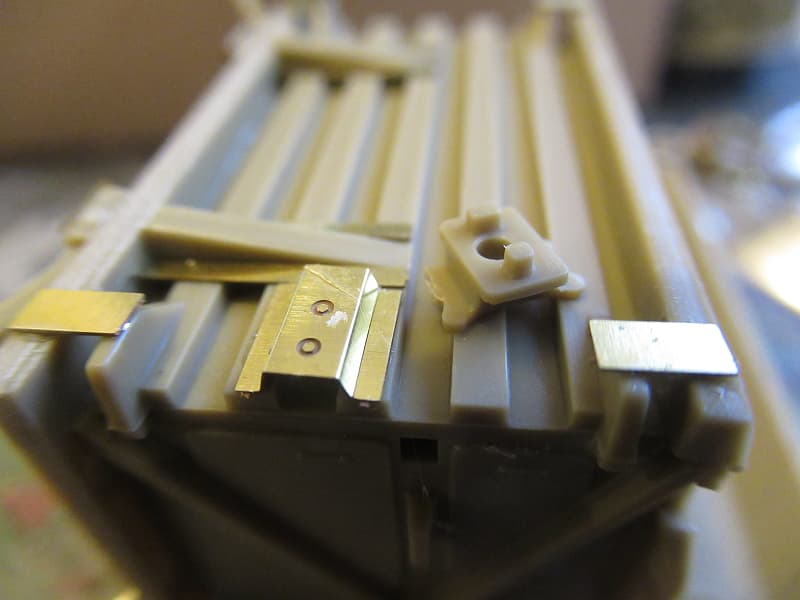
this shot describes the difference between the PE bracket and the kit part to it’s right that it replaced.
8 Likes
This is excellent work sprocket. The PE set really adds the necessary detail to an old kit. I’m not an artillery guy but your build and others on this site have inspired me. Just gotta get through my other projects first.
3 Likes
Beautiful!
3 Likes
Beautiful work.
If you don’t mind, Tamiya made a small mistake in their instructions. If you leave off the muzzle brake, then you should also remove the breech counterweight that was present to balance it. That chunky square block just forward of the breechblock, on top of the tube, is the counterweight.
2 Likes
Awaiting the Quad build now. Saved all the pics so far for future reference material. Great build so far. For a 50-year-old kit (released 1974), it still looks good with modelling “lipstick”. ![]()
Question: Are you going to use the Quinta Studio 3D decal set for the Quad interior? It’s part number is QD35093 just in case you want to know. It’s specially designed to the Tamiya kit. It will dress up the Quad to the “9’s”.
1 Like
No Jack I’m building the Gekko Morris Quad as that is what My Uncle Bob drove in the war, I’m building it here, but I’ve paused to build the Scammell for the 95 year old Vets Birthday.
2 Likes
Now that the Scammell is done, just waiting for it’s glass order. I can turn my attention back to the Quad, Gun and Limber. I had ordered the glass for this ages ago. So I’ve assembled the glass case and trial fitted it to the desert base.

once the rig is finished I’ll place it in there and bond it all down using Gorilla clear glue.

5 Likes
the Quad Limber and gun bonded to the Diorama base. Give that time to harden off.

After letting that dry for an hour, the final step, bonding down the glass to the base cardboard flange. Now all that’s left to do with it is to leave it to one side for the glue to harden. I can now concentrate on the Bismarck.

10 Likes
Nice assemblage ![]() . How was the Gecko Quad to build?
. How was the Gecko Quad to build?
1 Like
The only area of difficulty was the wheel to axle fit, very weak and vulnerable to breakage, so I ended up drilling and strengthening with wire. Apart from that it was a very enjoyable build, if you make one, dry test fitting are the watch words.

8 Likes
Wow beautiful job Sprocket!
2 Likes
Excellent job on all three pieces. The combination makes a stunning set. You’ve done an outstanding job on the Quad; Gecko kits are not easy. All of your photo etch and detailing work on the gun and limber have certainly paid off. You have brought them both up to modern standards brilliantly. The paint work is great and the weathering subtle but effective. Great work.
3 Likes