1/48 B-17F Build - 303rd BGs Luscious Lady {Continued)

I would call the choice “providential,” for which there are two accepted definitions:

1. occurring at a favorable time; opportune.
2. involving divine foresight or intervention.

Take your pick which applies. I will simply say I don’t feel anyone else in the world either would or could, do what HG is for me on this model. There is a unique synergy between us and a strong friendship as a result.

4 Likes

COCKPIT ROOF AND WINDOWS - AND CHEEK GUN BRACKETS

At long last, I see the cockpit windows joined to the roof. I’m assuming this stick is the tool that did it.

DSC01913 (Small)

but am informed it was only used to apply the filler in the following photo. . . . And here we see a masked application of that seam filler,

DSC01914 (Small)

later cleaned up to make a decent mating between the two parts, which really don’t fit together too well in the raw. Note the nice mating of the stbd. rear window to the roof part too. That’s another area where the raw fit is problematic.

DSC01911 (Small)

Here’s another nice view,

DSC01910 (Small)

or two.

DSC01909 (Small)

Again, note the nice join between the port rear window and the roof part. I can’t tell you the number of times I struggled with this on my own, finding a “just right” fit maddeningly elusive, or if achieved, prone to pop apart with too much handling.

And remember, there is a hidden surprise in the works regarding this subassembly.

Now on to the cheek gun brackets. I remind you that there were card-stock templates I used originally made by my late friend Art,

DSC01237 (Small)

using blueprints provided by Karl.

HG has taken those efforts to the next level, fashioning the brackets out of brass. You can see the start of this above.

But that is just the start. Check these pictures out.

DSC01907 (Small)

DSC01906 (Small)

DSC01908 (Small)

I’ve always felt that a true model artisan is a multimedia artist, able to work with the basic styrene of the kit parts, estra styrene sheets and bar, etc. resin and metal. One also has to have the artist’s touch with paint.

Artisanship in action here.

When it comes to the exterior appearance of these windows, HG wondered if we needed an exterior ring as shown in this picture of the Memphis Belle restoration.

My reaction was, “no,” let’s go back to the original source material

where we don’t see this part, just a metal ring.

Toots, BTW, later Butch (Gawd knows why – she looks like a “Toots” rather than a “Butch” to me IYKWIMAITYD)

was also a 303rd BG aircraft, lost to flak with crew deaths on a mission to Hamburg 7/25/1943.

A just received email from HG states:

I test fitted the wings (calm down) and they look good.

Need a color soon.

Ah yes, the [OD] color. Something I’ve thought about for a 303rd BG B-17F build since, literally, the last century. Fortunately, we have color pics from my book research

taken by the late David Shelhamer, a professional photographer and pilot who was there!

I’ll close on a whimsical note.

War may be hell,

but there were occasions to let off steam and engage in other pursuits.

Just a reminder that this effort is as much about remembering the men as building the model.

7 Likes

WINDOWS AND PAINT

THE WINDOWS

So, I believe we are at another milestone. HG finally reached the point where he was happy with the windows he installed in the fuselage. And here are the pictures that show them.

DSC02034 (Small)

DSC02029 (Small)

DSC02030 (Small)

DSC02035 (Small)

DSC02033 (Small)

DSC02036 (Small)

Notice the filled depression for the pitot tube that will be relocated per Karl Haufe’s suggestion.

DSC02037 (Small)

You have to like the join between the roof and the forward windshield!

DSC02042 (Small)

No worries about the fit of the roof! As I mentioned before, HG has a surprise waiting in this area.

DSC02043 (Small)

PAINTING PREPS

DSC02039 (Small)

DSC02040 (Small)

DSC02038 (Small)

DSC02047 (Small)

DSC02044 (Small)

DSC02046 (Small)

DSC02045 (Small)

PAINT!

That first coat of HG’s primer!

DSC02048 (Small)

HG was at pains to add:

I’ll be checking and correcting panel lines, rivets, areas needing sanding and filling.

And here is a look at the actual final paints that he will be using on the aircraft.

DSC02049 (Small)

As you can see, he is using AK in Dark Olive Drab 41, and Neutral Grey 43. Our sources indicate that this OD color was applied to USAAF aircraft at the time that Luscious Lady was built, and while there will be some lightening and other weathering work that HG will apply, we decided that it was best to start with the factory colors.

These are lacquer paints, and truth be told I do not know terribly much about the distinctions between lacquers, enamels, and acrylics other than that they are obviously made out of different materials and so have different application, wear and other qualities.

HG insists that lacquers are the way to go on this build, and I trust his judgment.

More to follow, of course.

8 Likes

Exquisite!

1 Like

Great work from HG as usual, Brian! :+1:

Love the photos!

1 Like

These words belong to

2432_2

of course. Here is some of his work.

DSC02052 (Small)

DSC02053 (Small)

DSC02054 (Small)

HG commented:

The filling and sanding may not be totally complete, but this is what I could find. Also the tail bay was smoothed out.

Here’s the long view.

DSC02050 (Small)

Here he comments:

The entire section in the picture with the riveting tools has been done

DSC02051 (Small)

Yeah, I’d say so. I can’t imagine how cool this is going to look with the final paint applied, decals and (I am told) hand-sprayed national insignia. You know, the mid-1943 ones with the red borders.

However, in our case, some of the bars may be a light grey. (To be determined!)

4 Likes

I’m already imagining that vertigo feeling when the airbrush is locked & loaded…

(24 mile jump - Felix Baumgartner 2012 – max speed 729mph)

:tumbler_glass:

2 Likes

RIVETING VIEWS OF LUSCIOUS LADY’S TAIL, WAIST, AND BELLY

Copy of na-lusciouslady

DSC02098 (Small)

DSC02100 (Small)

DSC02099 (Small)

HG’s work takes center stage, but I trust you see what I did here.

8 Likes

Brian & HG,
I finally got caught up with your epic build, and I’m just simply at a total loss of words, which for me is a very rare happening.

Riveting, and panel scribing is simply 2nd to none, and every window fits like a glove. I also love his use of Gunze liquid mask. He’s certainly a master at it.

As for using Lacquer based, not acrylic lacquer based paints is the right way to go. Nothing sands to a featured edge like Lacquer, it’s toughest paint of the three, and polishes out perfectly with no surprises.

joel

2 Likes

Brian,
Don’t worry we are not going to forget all the work you put into this! :smiley:

Cheers Rob.

2 Likes

Great to hear from you, Joel. I was just thinking of you today.

1 Like

Thanks, Rob. I appreciate that. :blush:

1 Like

"PAST OUR PRIME" – AND INTO REAL COLORS!

The three build pictures below are a teaser more than anything else, but after seeing the national insignia in my earlier post

c8aa7eda97cb15ea4b5804ba18e60e6395d0fcd7_2_345x187

HG decided to finish off the after fuselage and tail in final colors to show we are “getting there.”

He will also paint the national insignia on. I still have to confirm through period 303rd photos that LL’s sidebars were probably grey (in contrast to the white star) and will post the evidence here. But for now, check out the beginnings of this b*tch – meaning the difficulty of the build, not my affection for the aircraft – finally getting dressed in her proper livery.

DSC02109 (Small)

DSC02108 (Small)

And last but not least:

DSC02110 (Small)

I’ll “keep you posted.” Obviously, this is just a start.

4 Likes

A MISSTEP AND A QUICK FIX

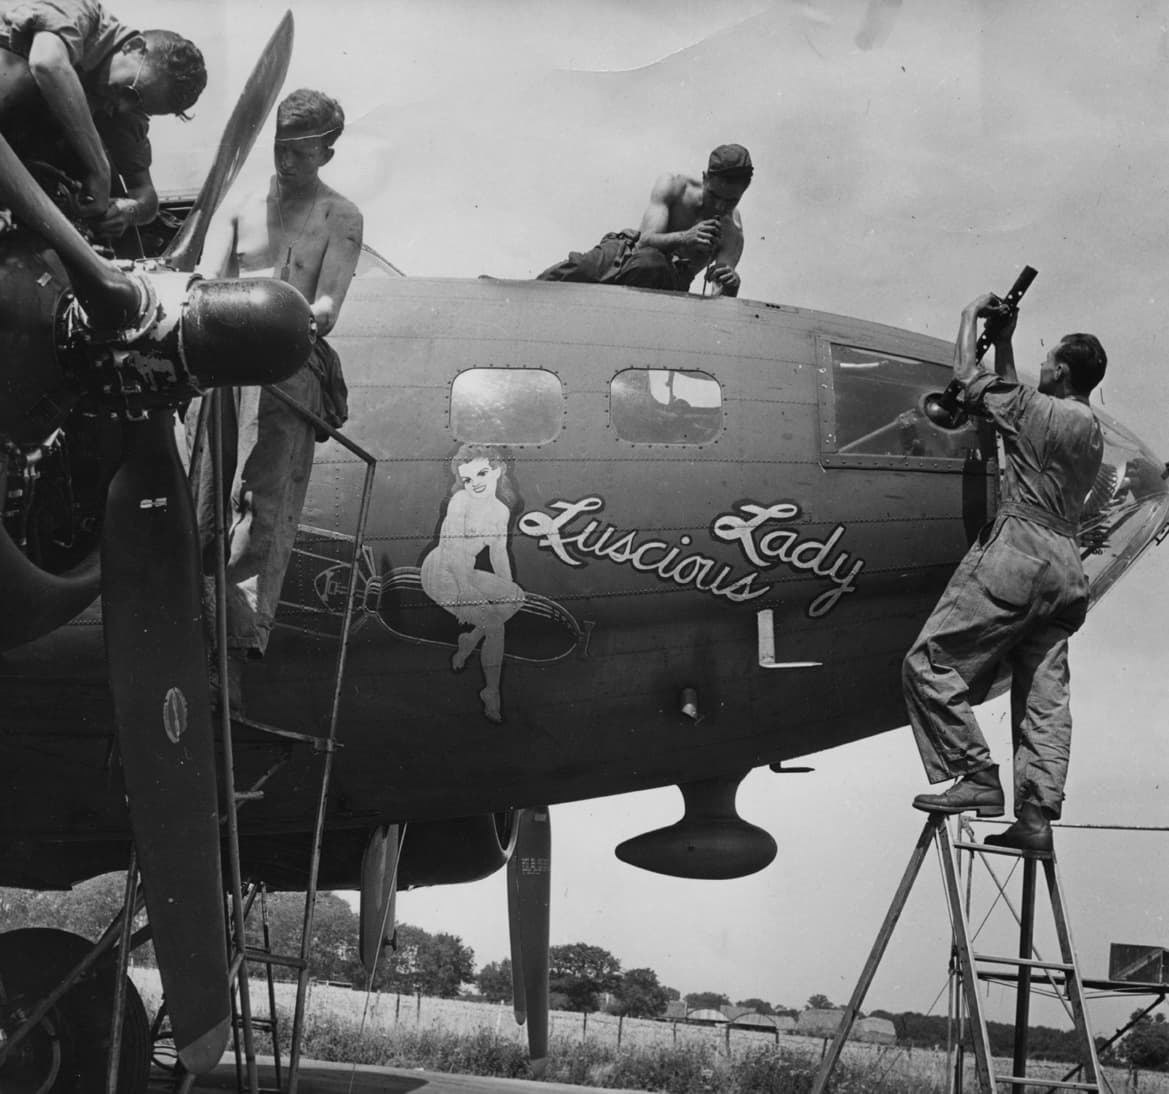
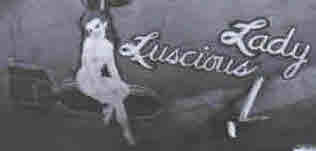
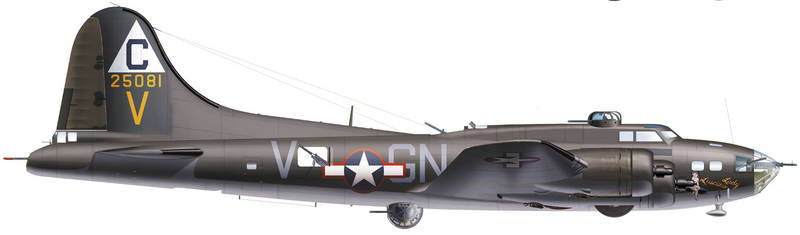
Here is the oft-reproduced (in this blog) profile of “Luscious Lady.”

The profile comes from my Osprey history of the 303rd

51cEGiSWloL

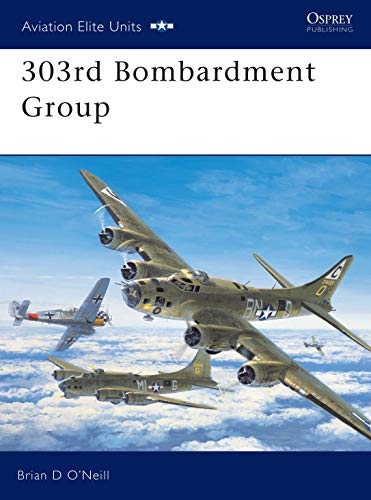
and I worked closely with the artist, Mark Styling, on the research for the profiles. The LL profile shows the de-icer boots on the wings and the tail leading edges, and hey, you would think that since it’s there and I researched it, it’s probably right, no?

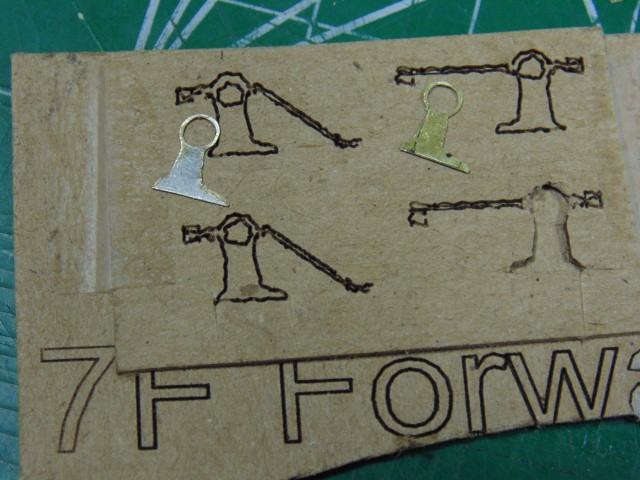
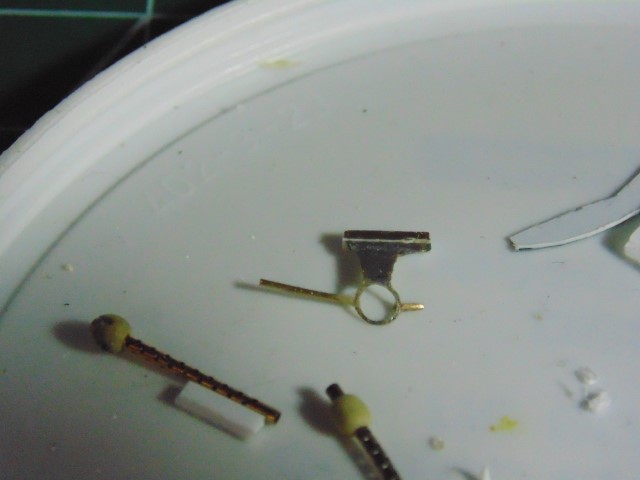
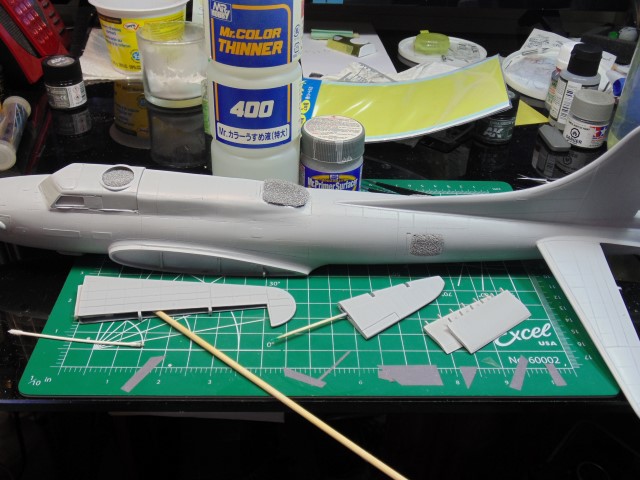
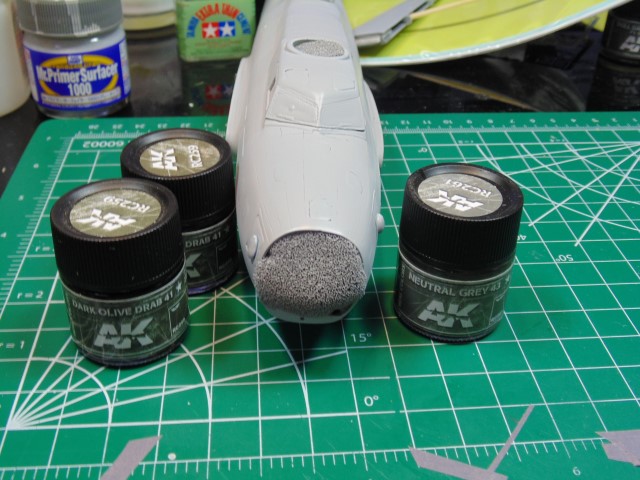
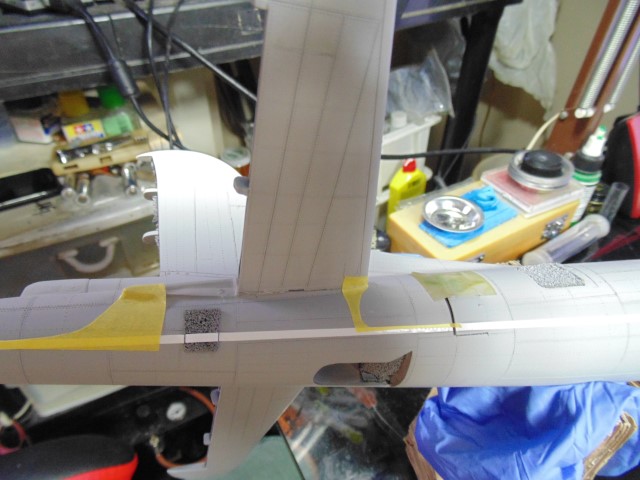
Well, NO! So, when HG sent me these “How’s this?” pair of photos yesterday

DSC02111 (Small)

DSC02113 (Small)

I realized he had gotten ahead of me and I had to act quickly. I knew that Styling and I had made a mistake in one area of the book profile research.

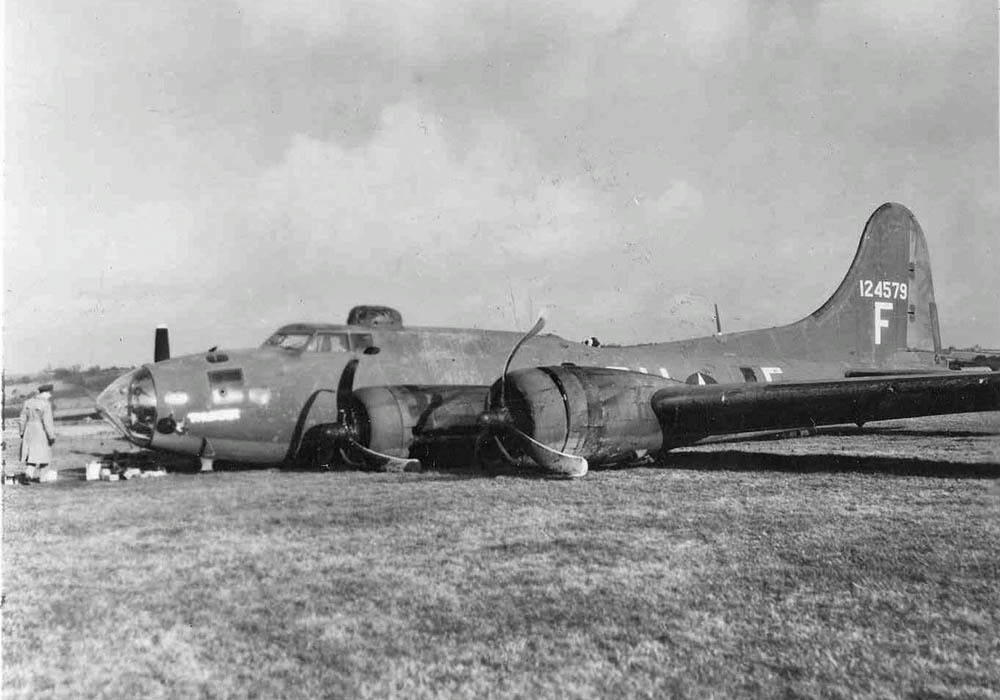
Here’s the thing. It’s pretty clear from period 303rd photos that fairly early on the Group (and other similar groups) made the decision that the wing and tail deicer boots weren’t worth the trouble of maintaining in combat. They were removed, and the bare aluminum was in some cases – not all – covered with field-applied OD.

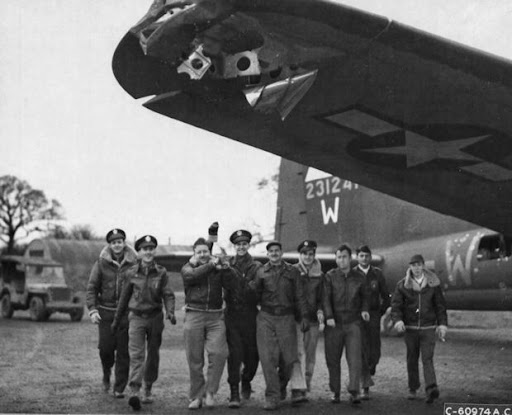
This crash photo of the 303rd’s “Thumper” PU*F, shows this quite clearly.

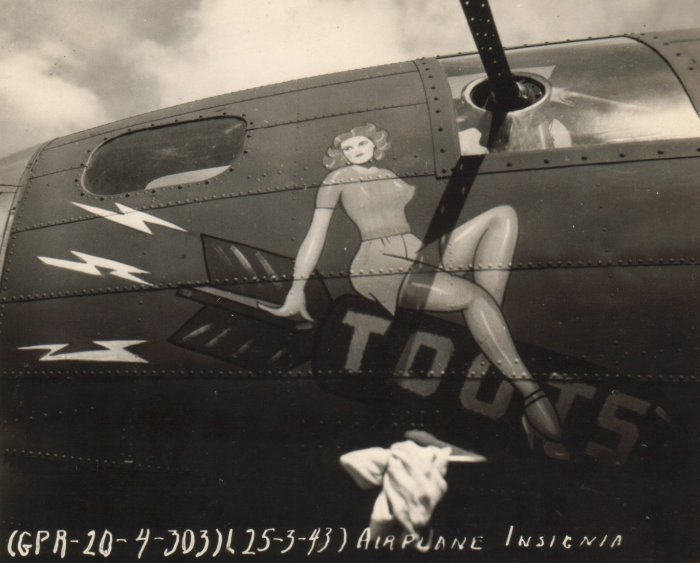
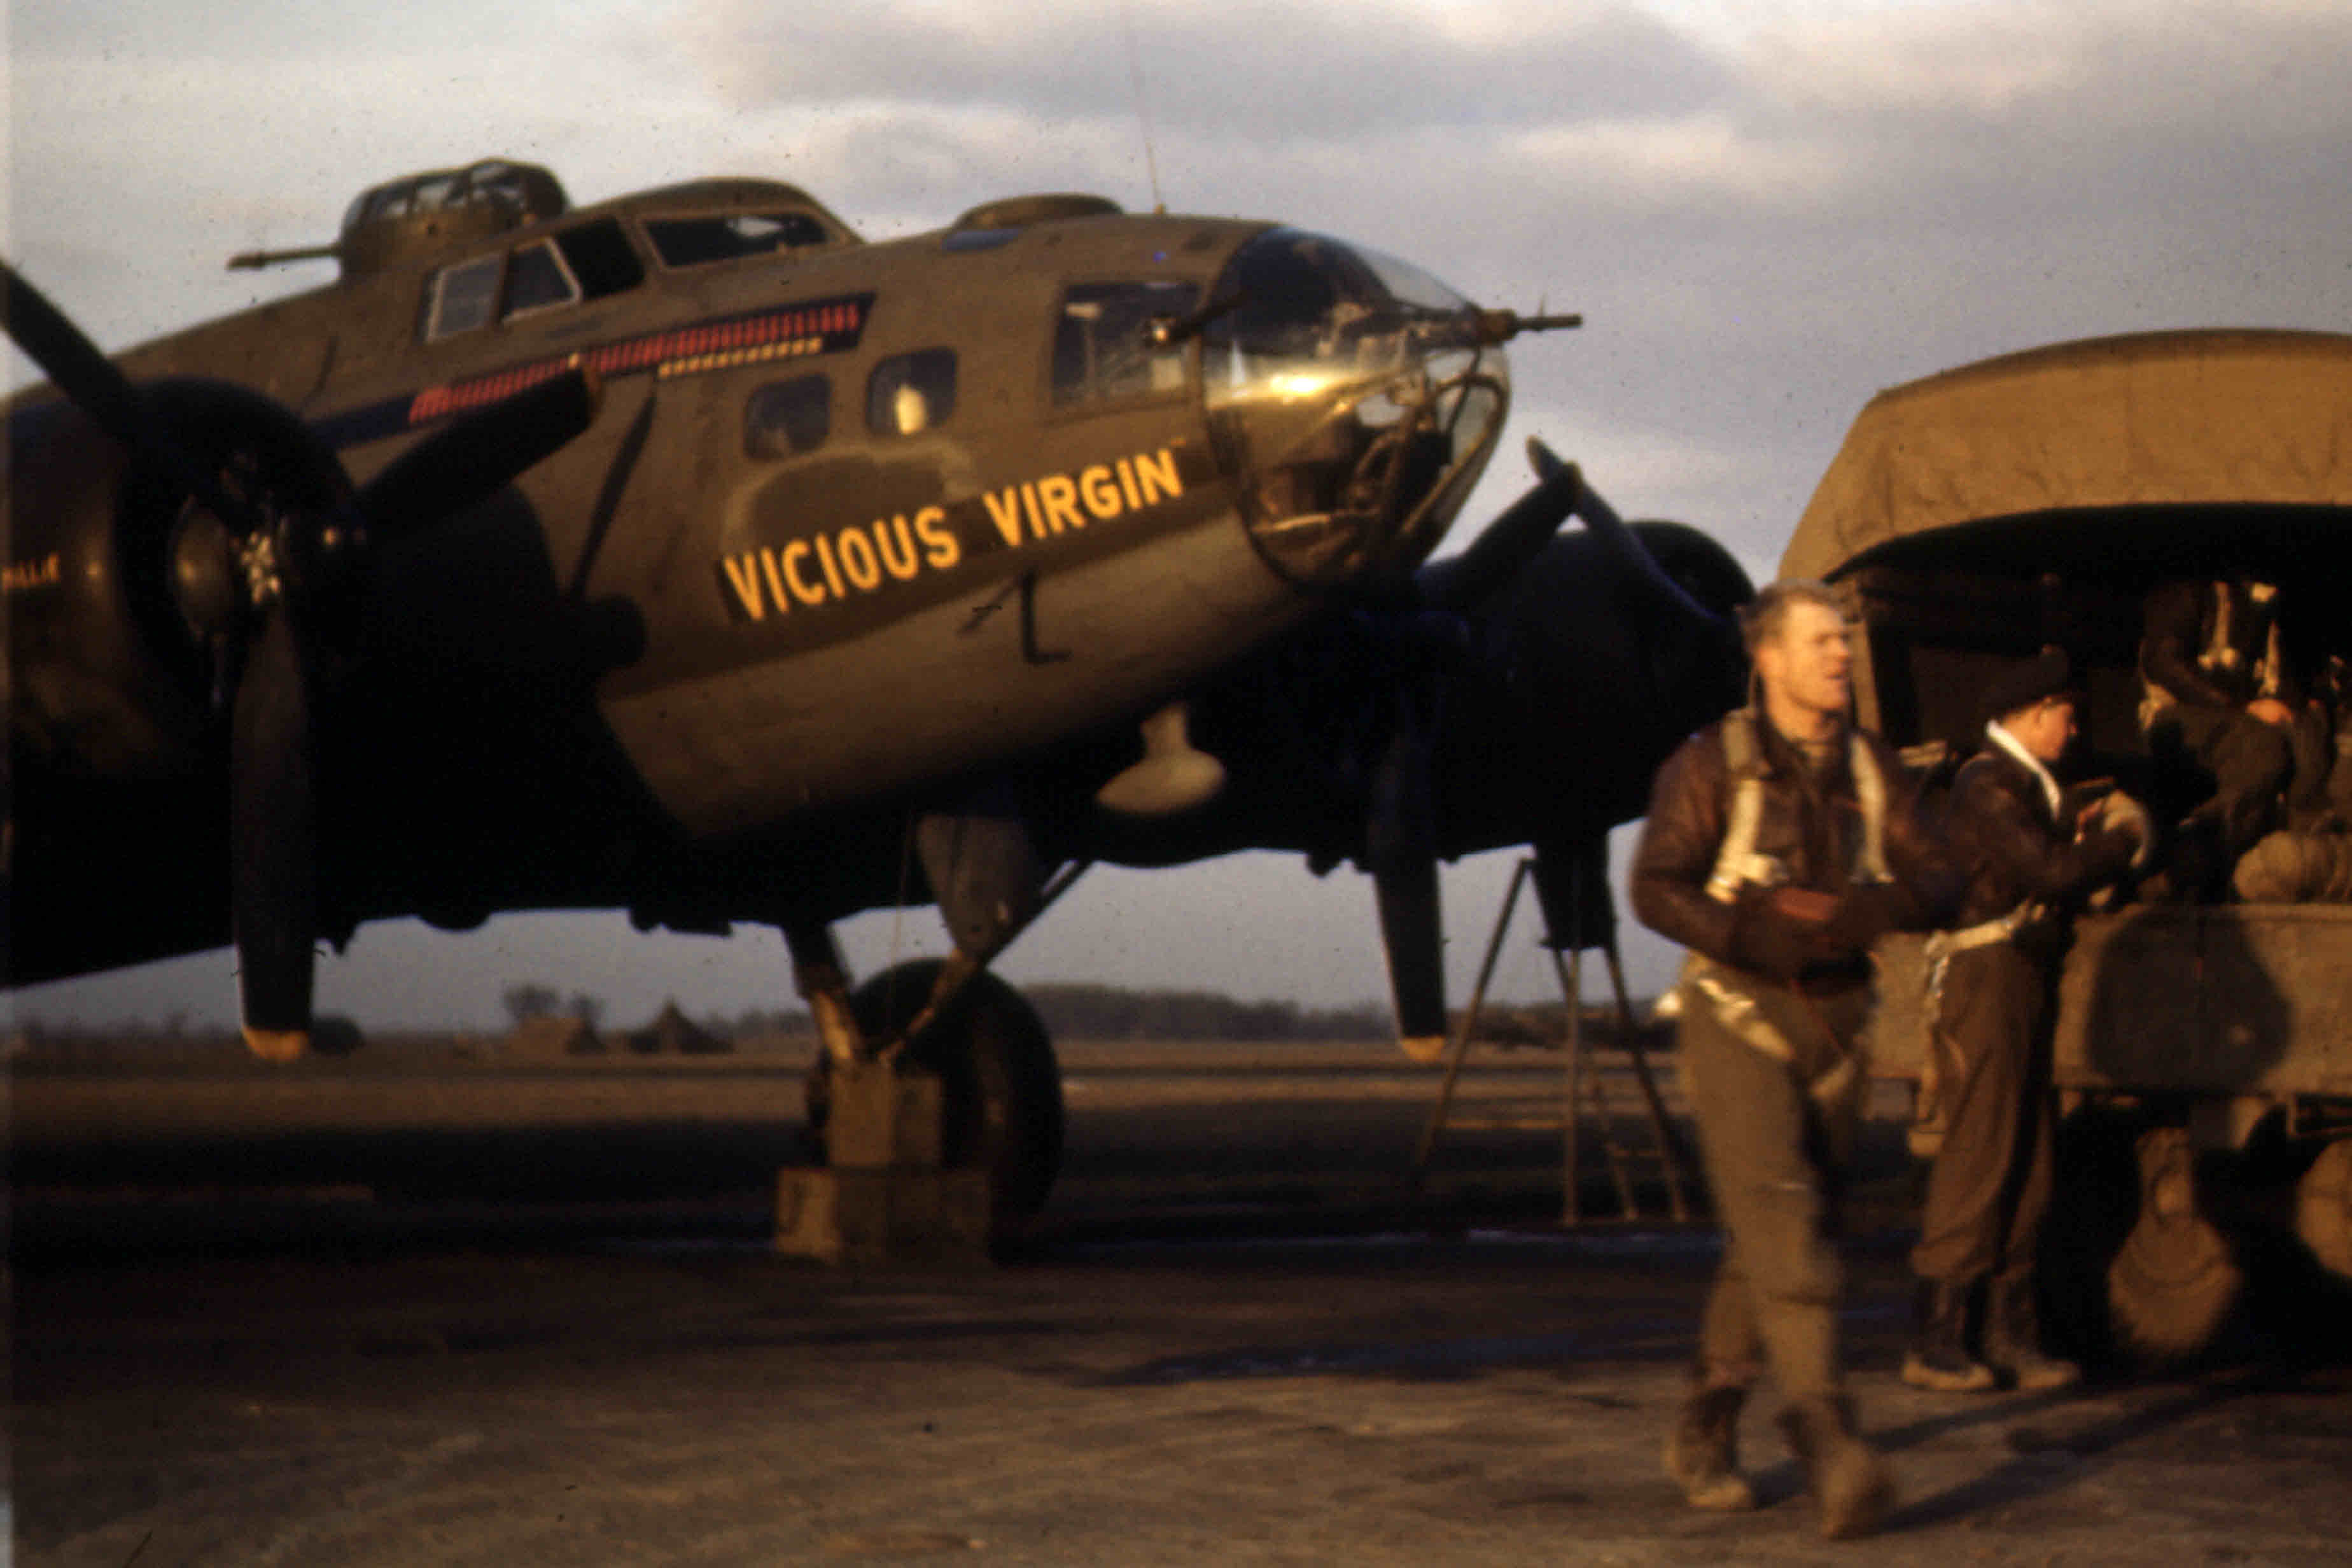
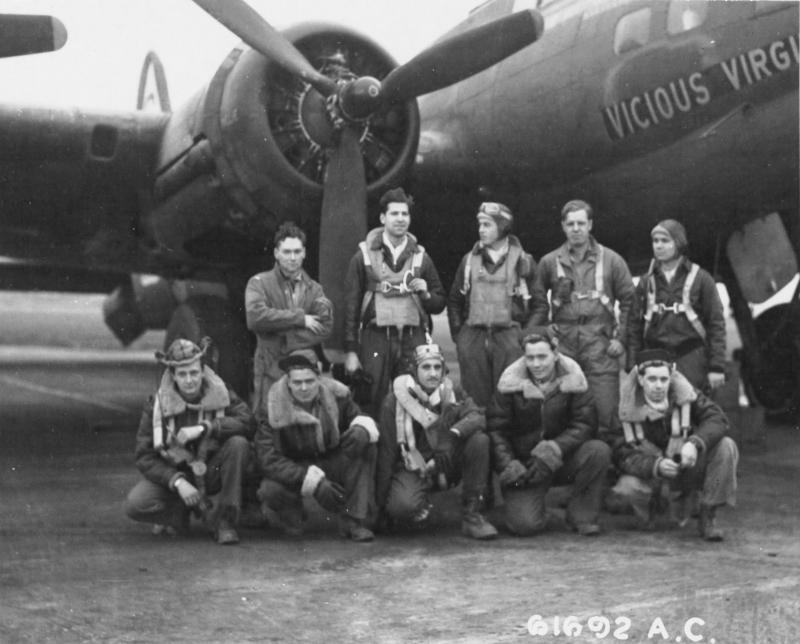
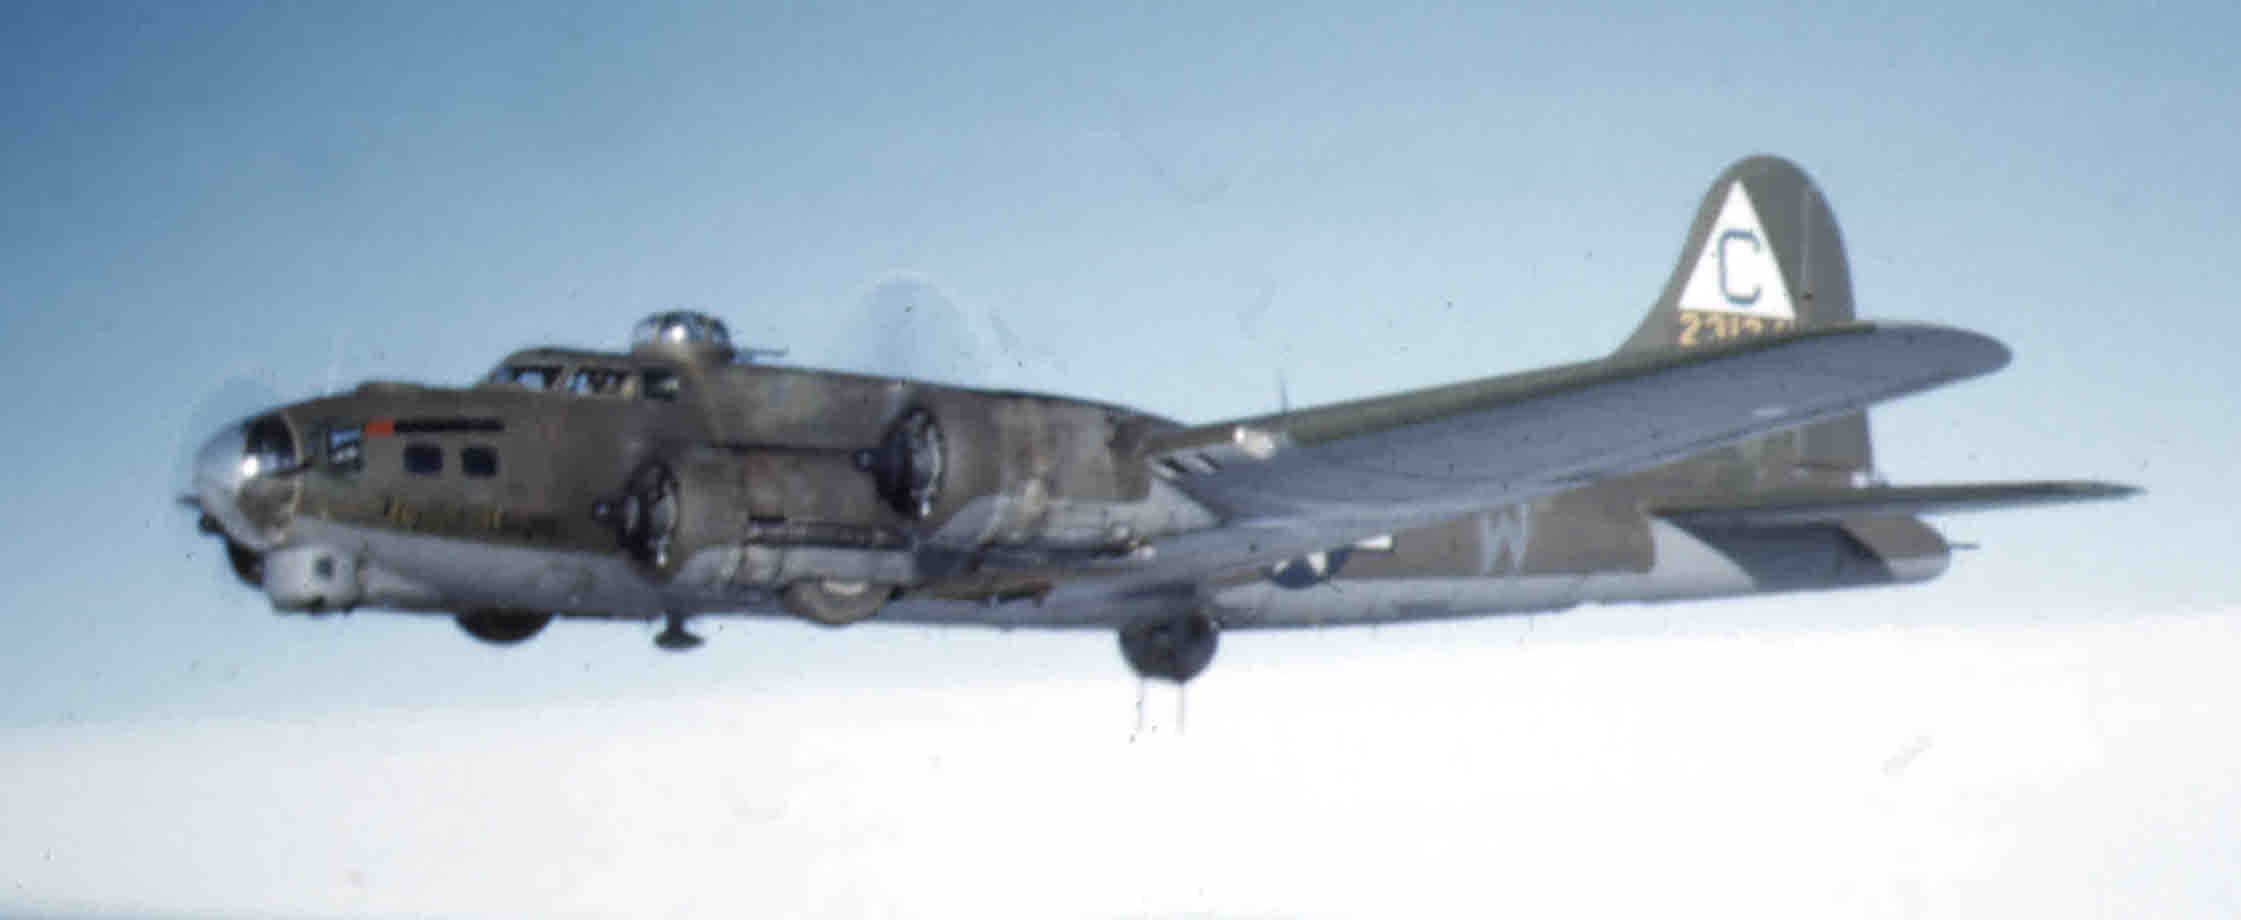
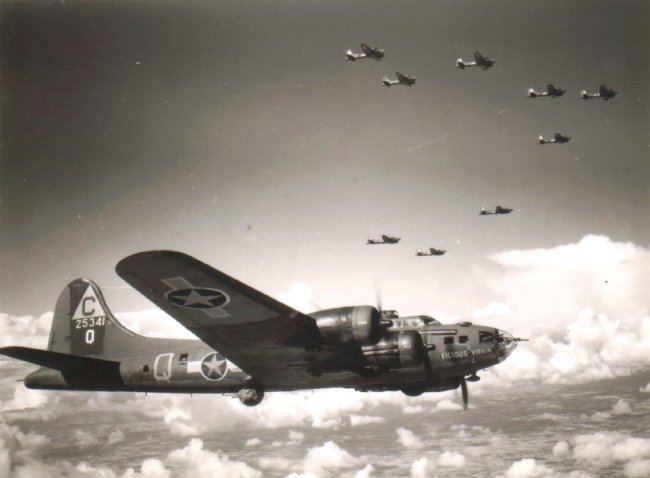
You can also see it on “Vicious Virgin”

,

especially here in this great formation photo of the A/C taken by David Shelhamer

pp-viciousvirgin

It’s obvious from some of the early G models too, such as the 427th Squadron’s “Spirit of Wanette.”

where it’s pretty clear the paint was wrapped around the leading edge in the same way we see on many “Golden Age” US Navy aircraft where the chrome yellow was extended to the bottom of the aluminum-colored wings.

You have to be careful on timing, however. Look at this picture of “Spirit of Wanette” after the 12/20/1943 mission to Bremen, where the deicer boots on the horizontal stabilizers have been taken off, and not yet painted over, as in the above photo.

unnamed (5) (1)

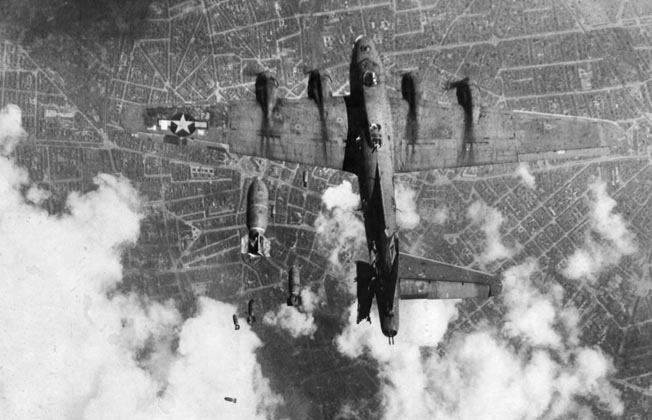
Finally, as this famous shot of a B-17 going down over Berlin shows, sometimes the aircraft flew with no overpainting of the deicer areas at all.

B-17-hit-2

“Check your sources for the particular aircraft you are modeling,” as they say.

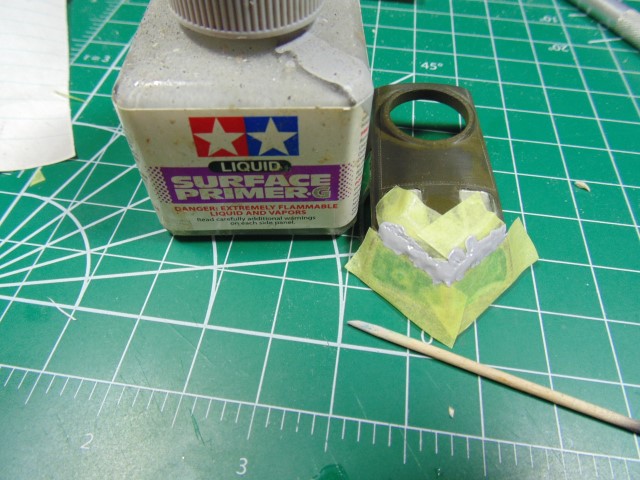
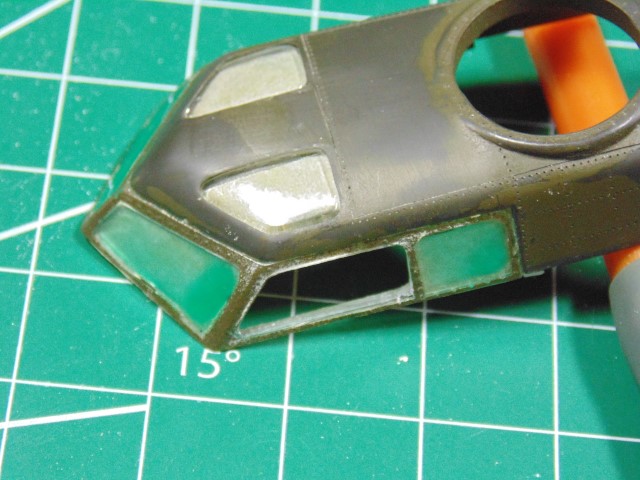
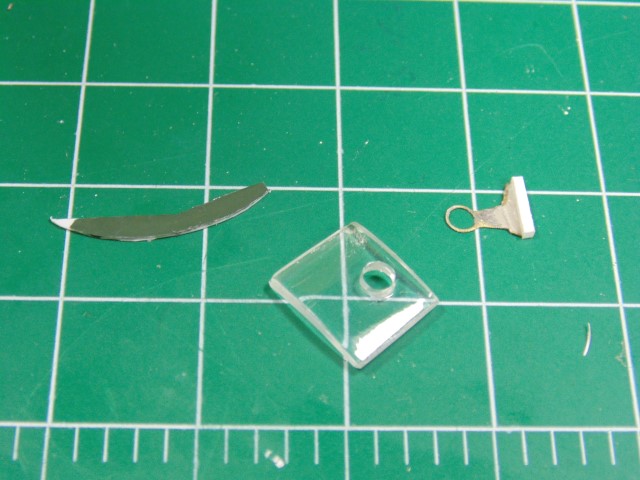
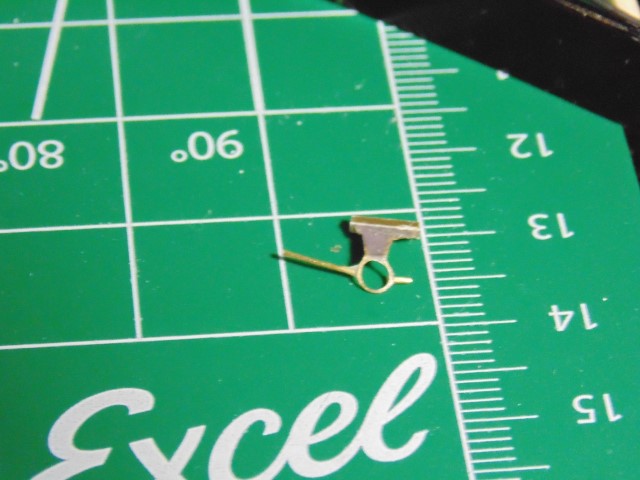
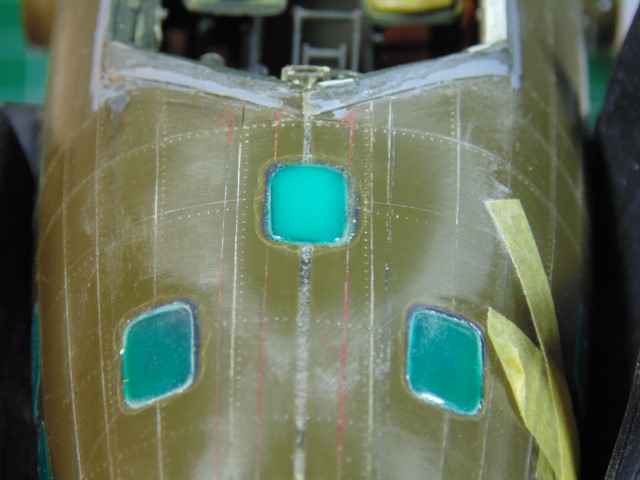
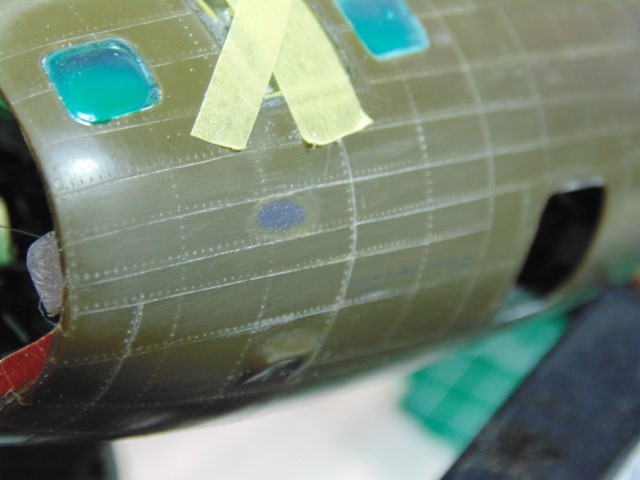
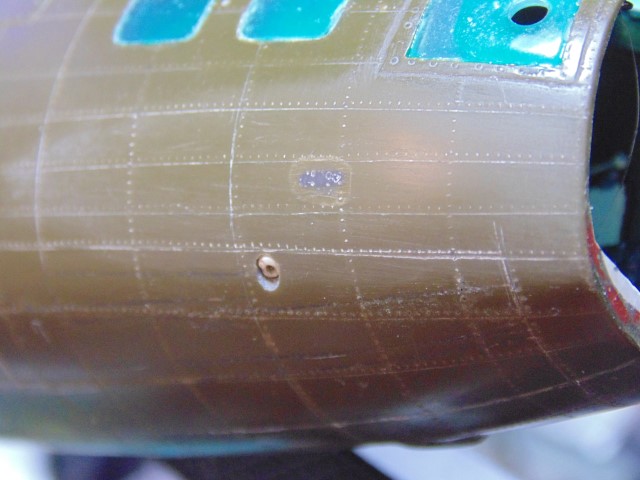
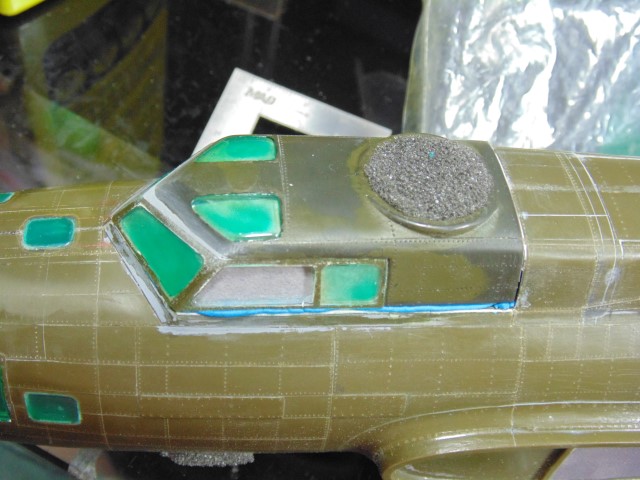
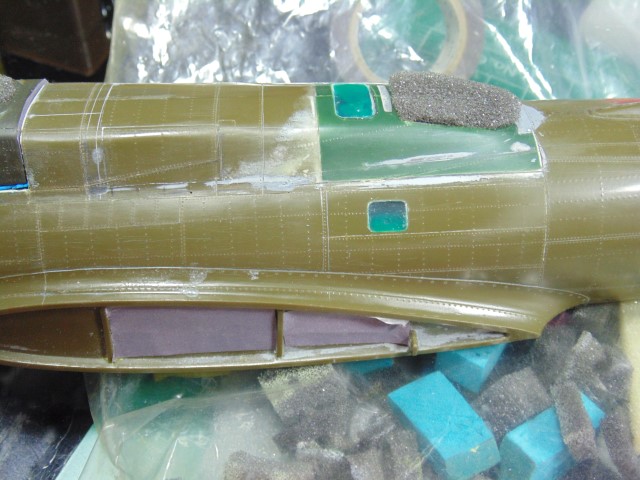
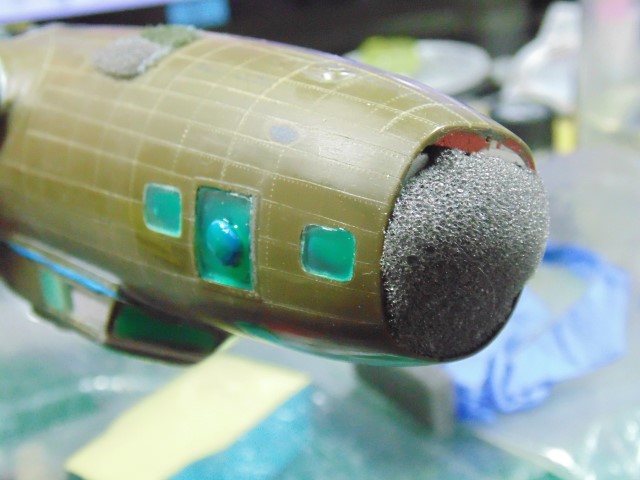
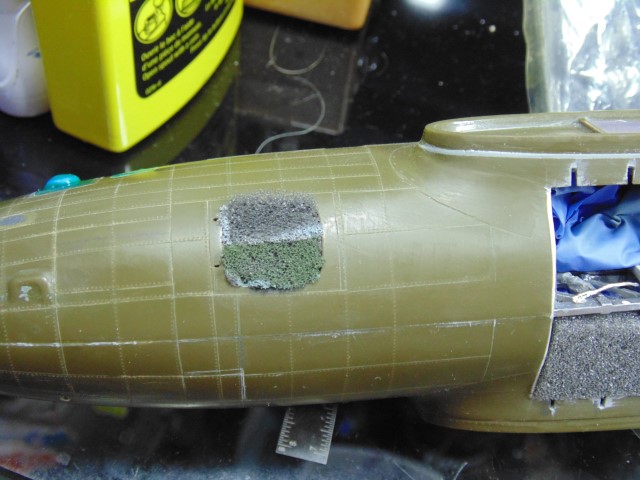
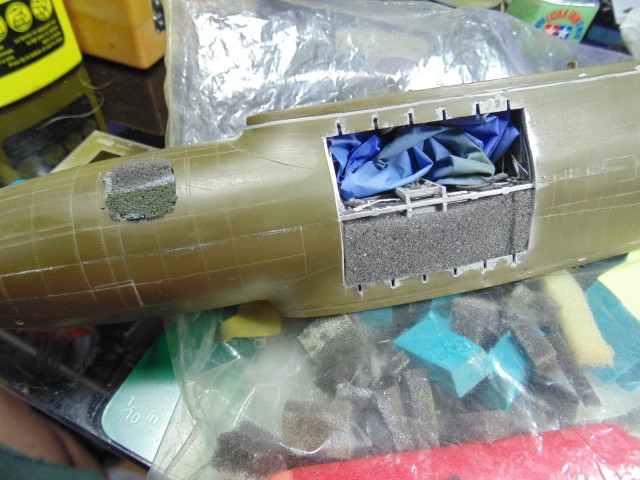
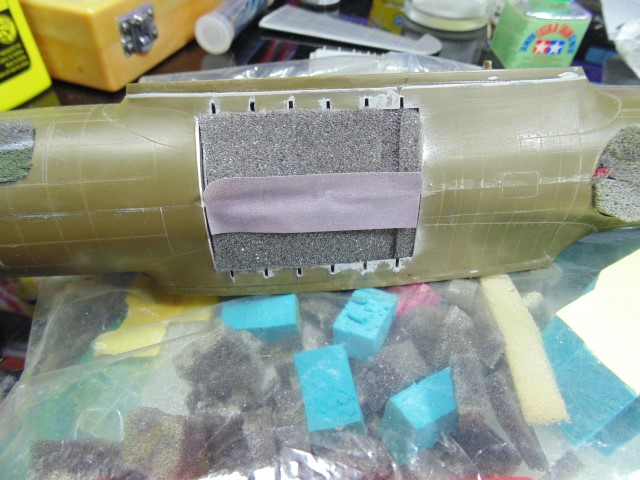
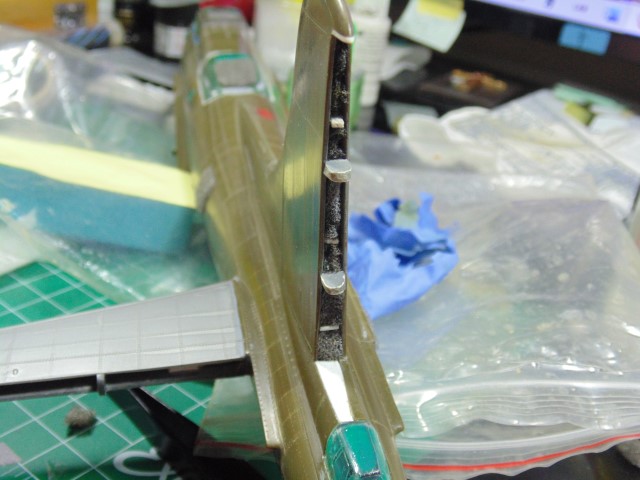
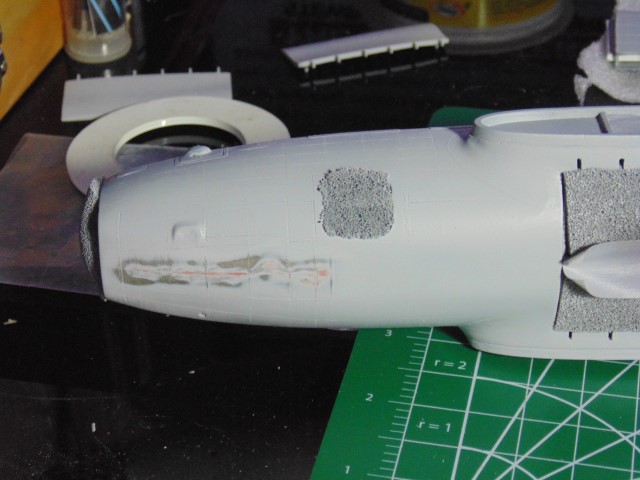
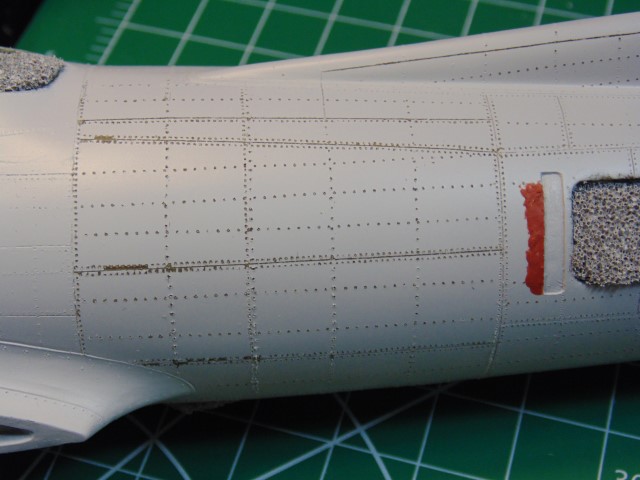
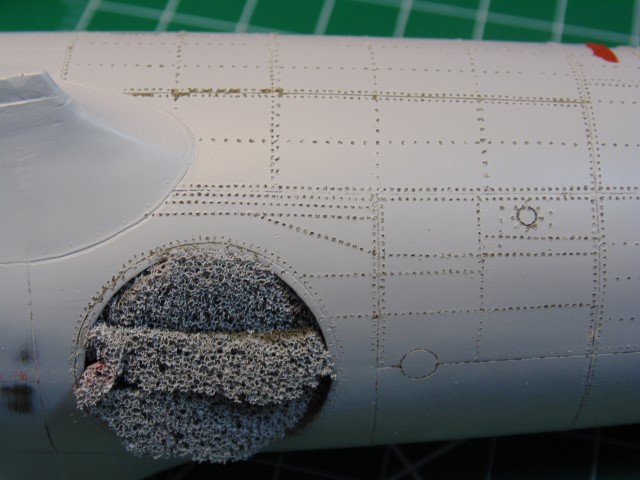
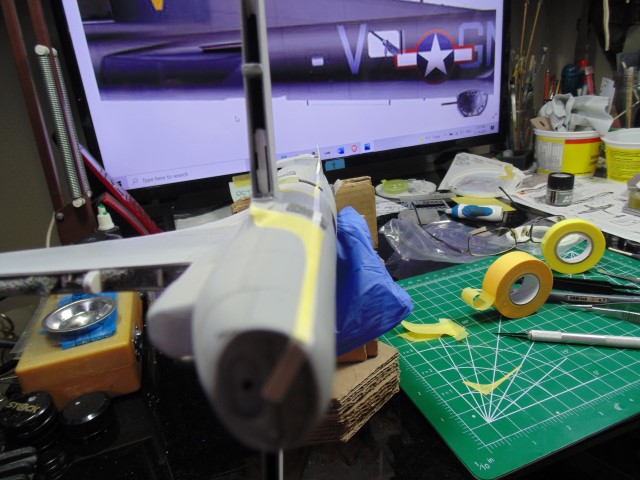
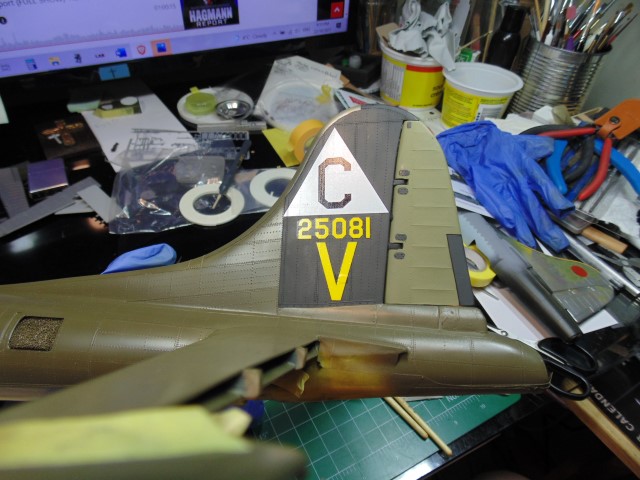
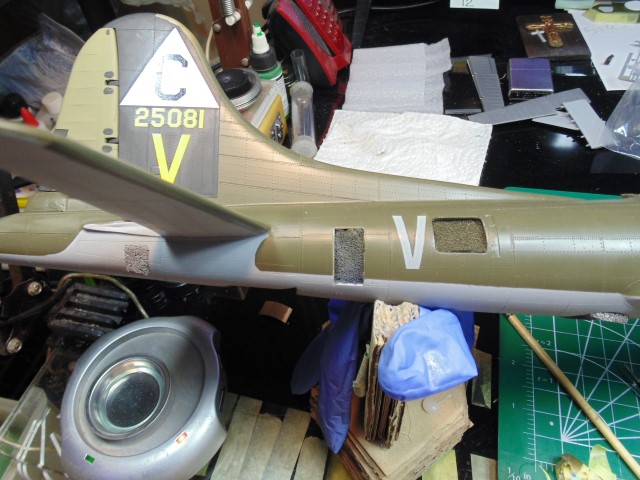
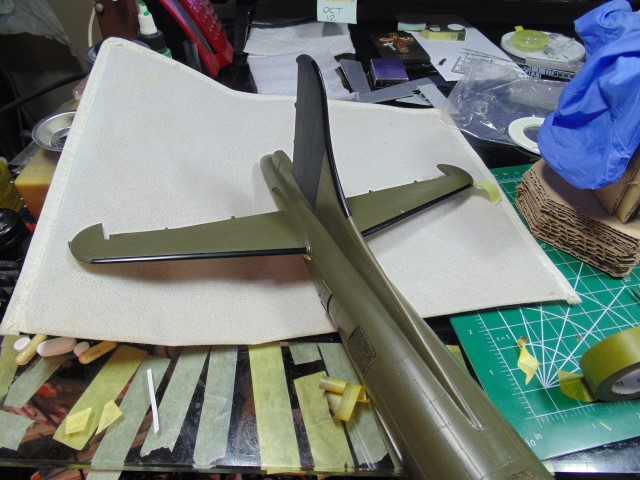
HG promptly addressed my error and you have these shots of “the particular aircraft you are modeling” to show how we are treating this:

DSC02118 (Small) (1)

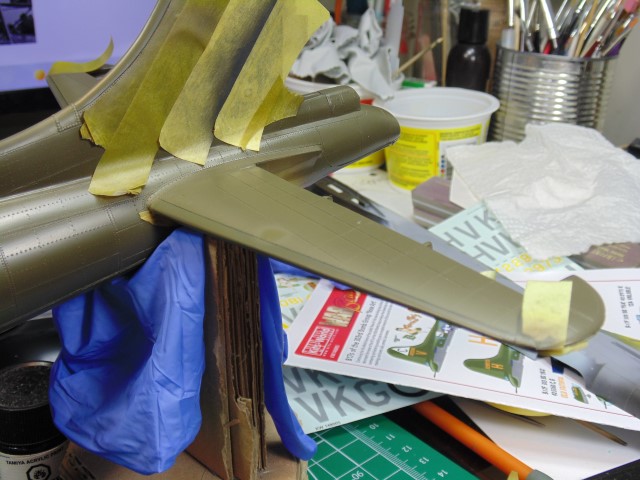
(I’m told the little circle behind the boot area in this shot will disappear when a flat coat is applied.)

DSC02117 (Small) (1)

DSC02116 (Small) (1)

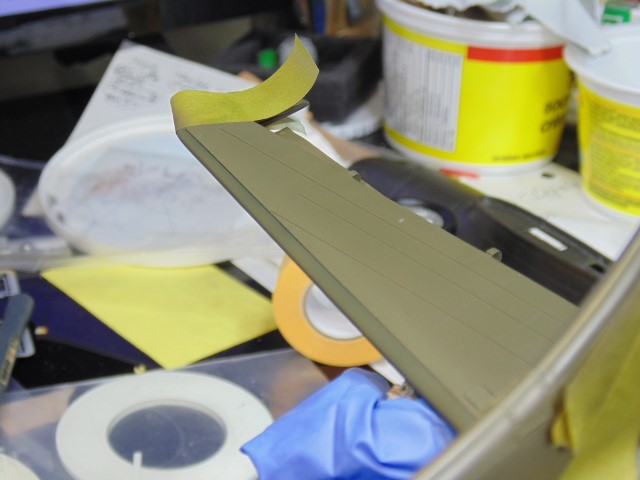
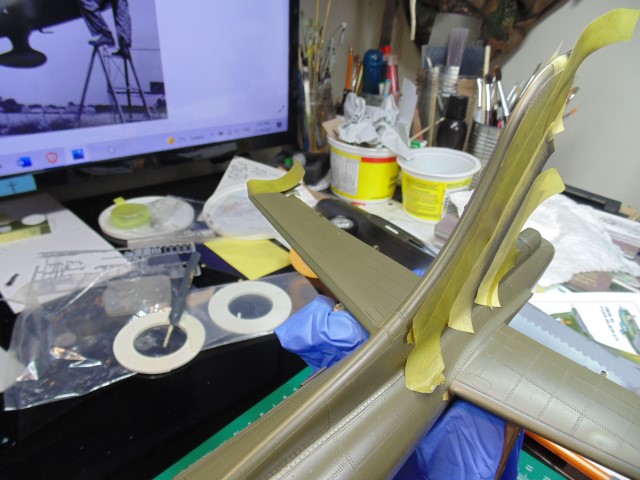
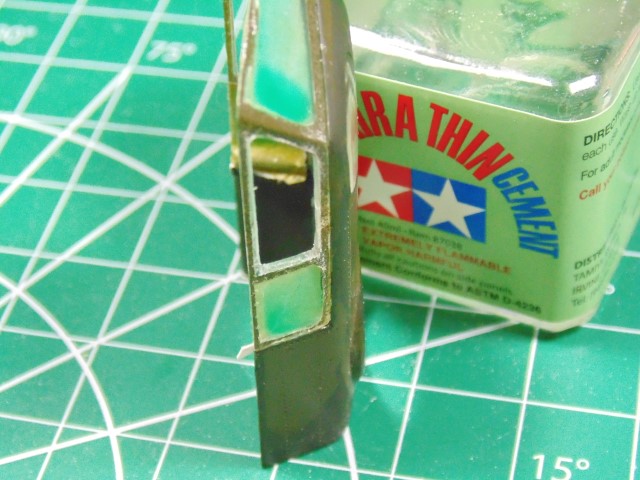
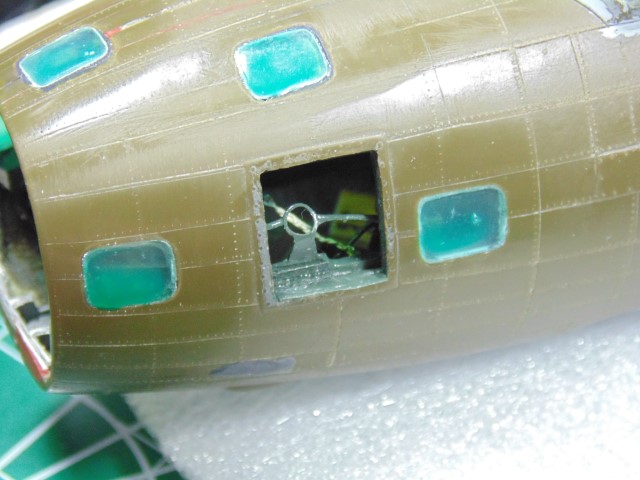
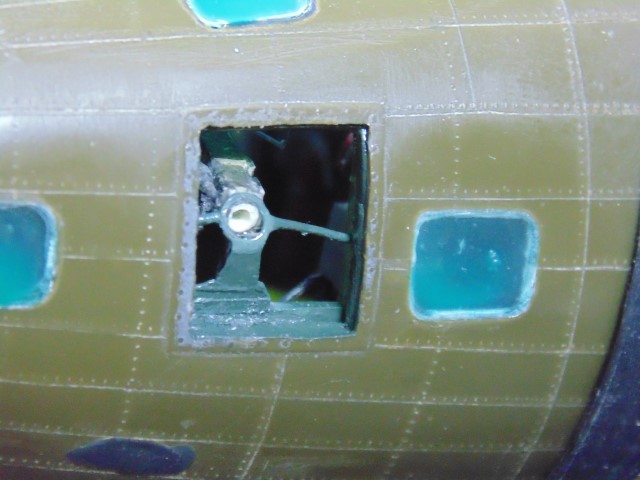
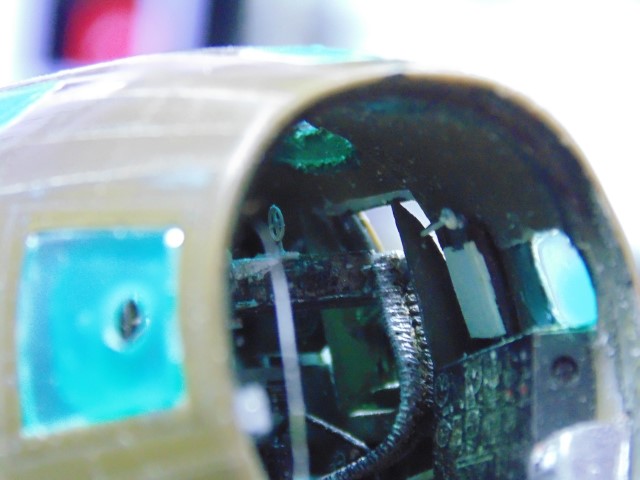
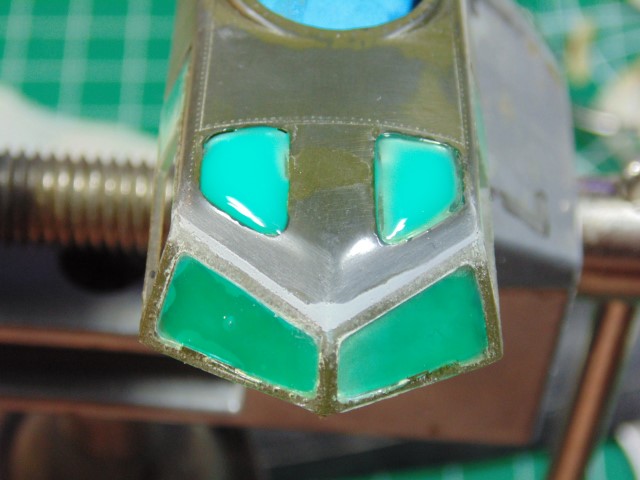
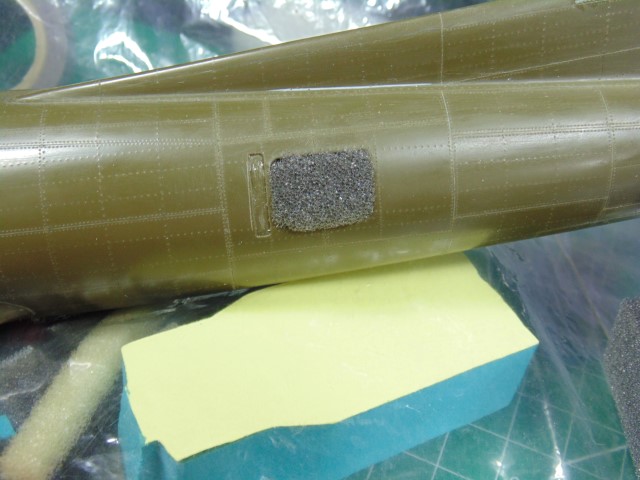
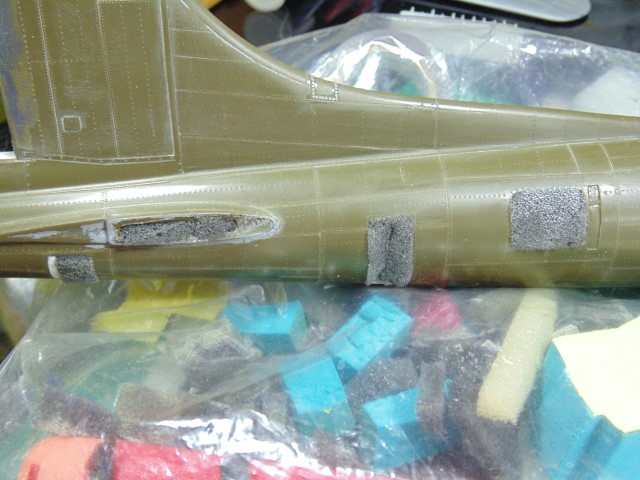
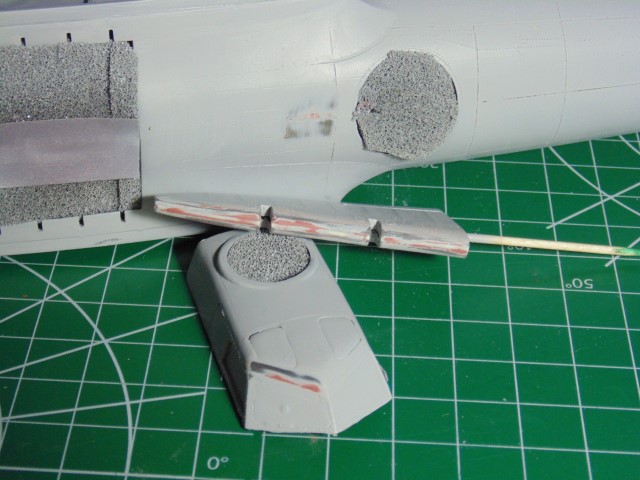
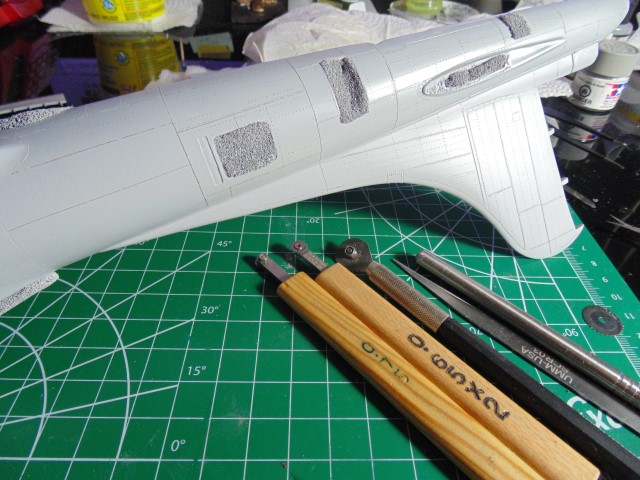
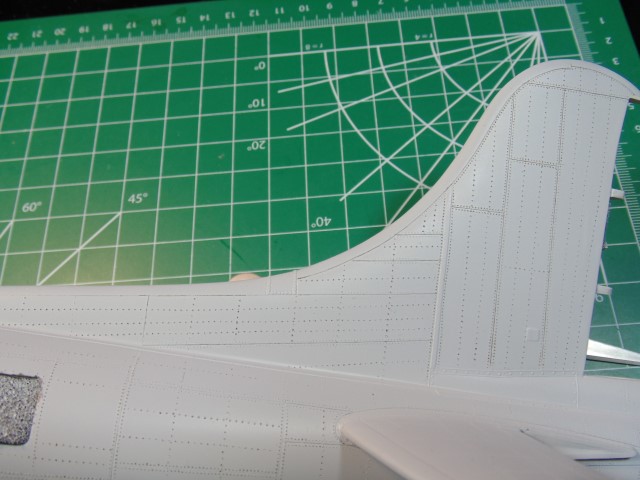
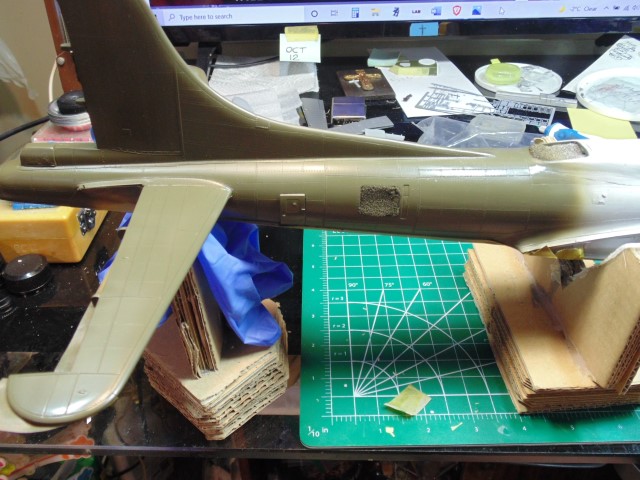
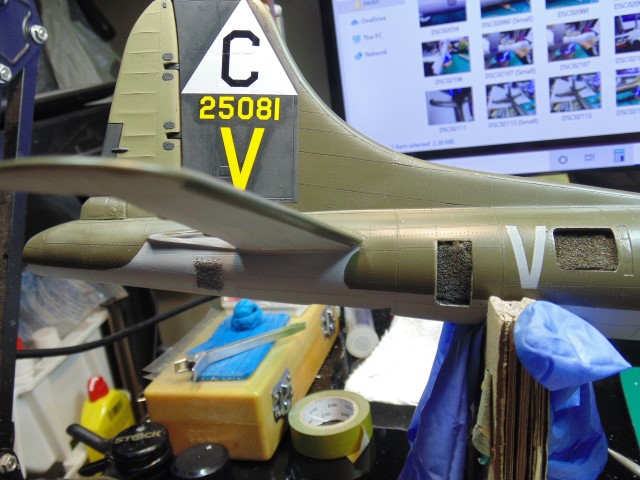
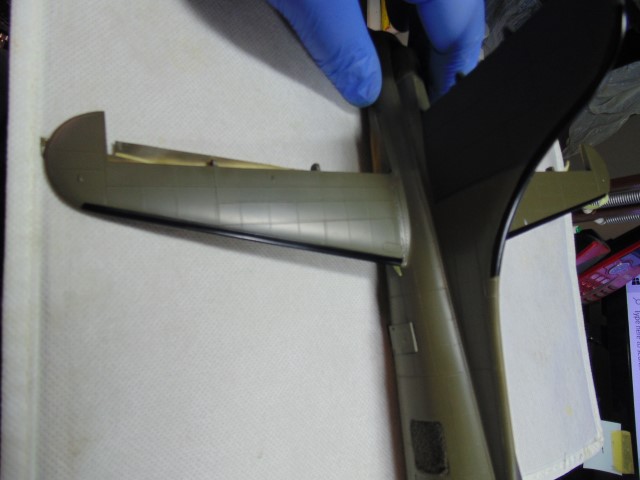
The below shots show further (beautiful) work on the rudder and tail.

DSC02119 (Small)

DSC02120 (Small)

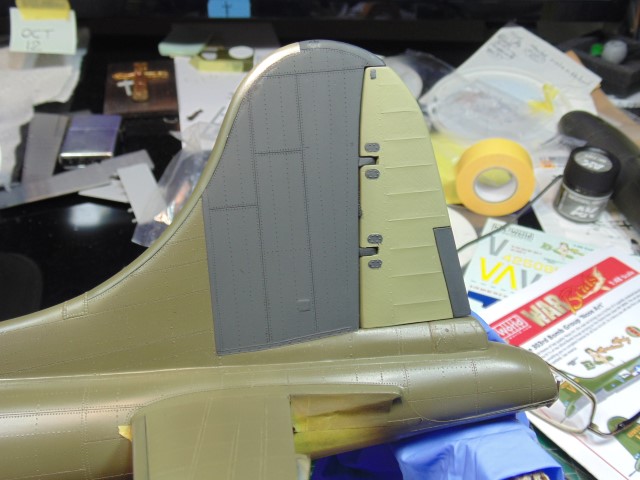
And yes, you see some aluminum shining through in the deicer boot area at the top of the vertical stabilizer. Artistic license, because some photos show this kind of thing.

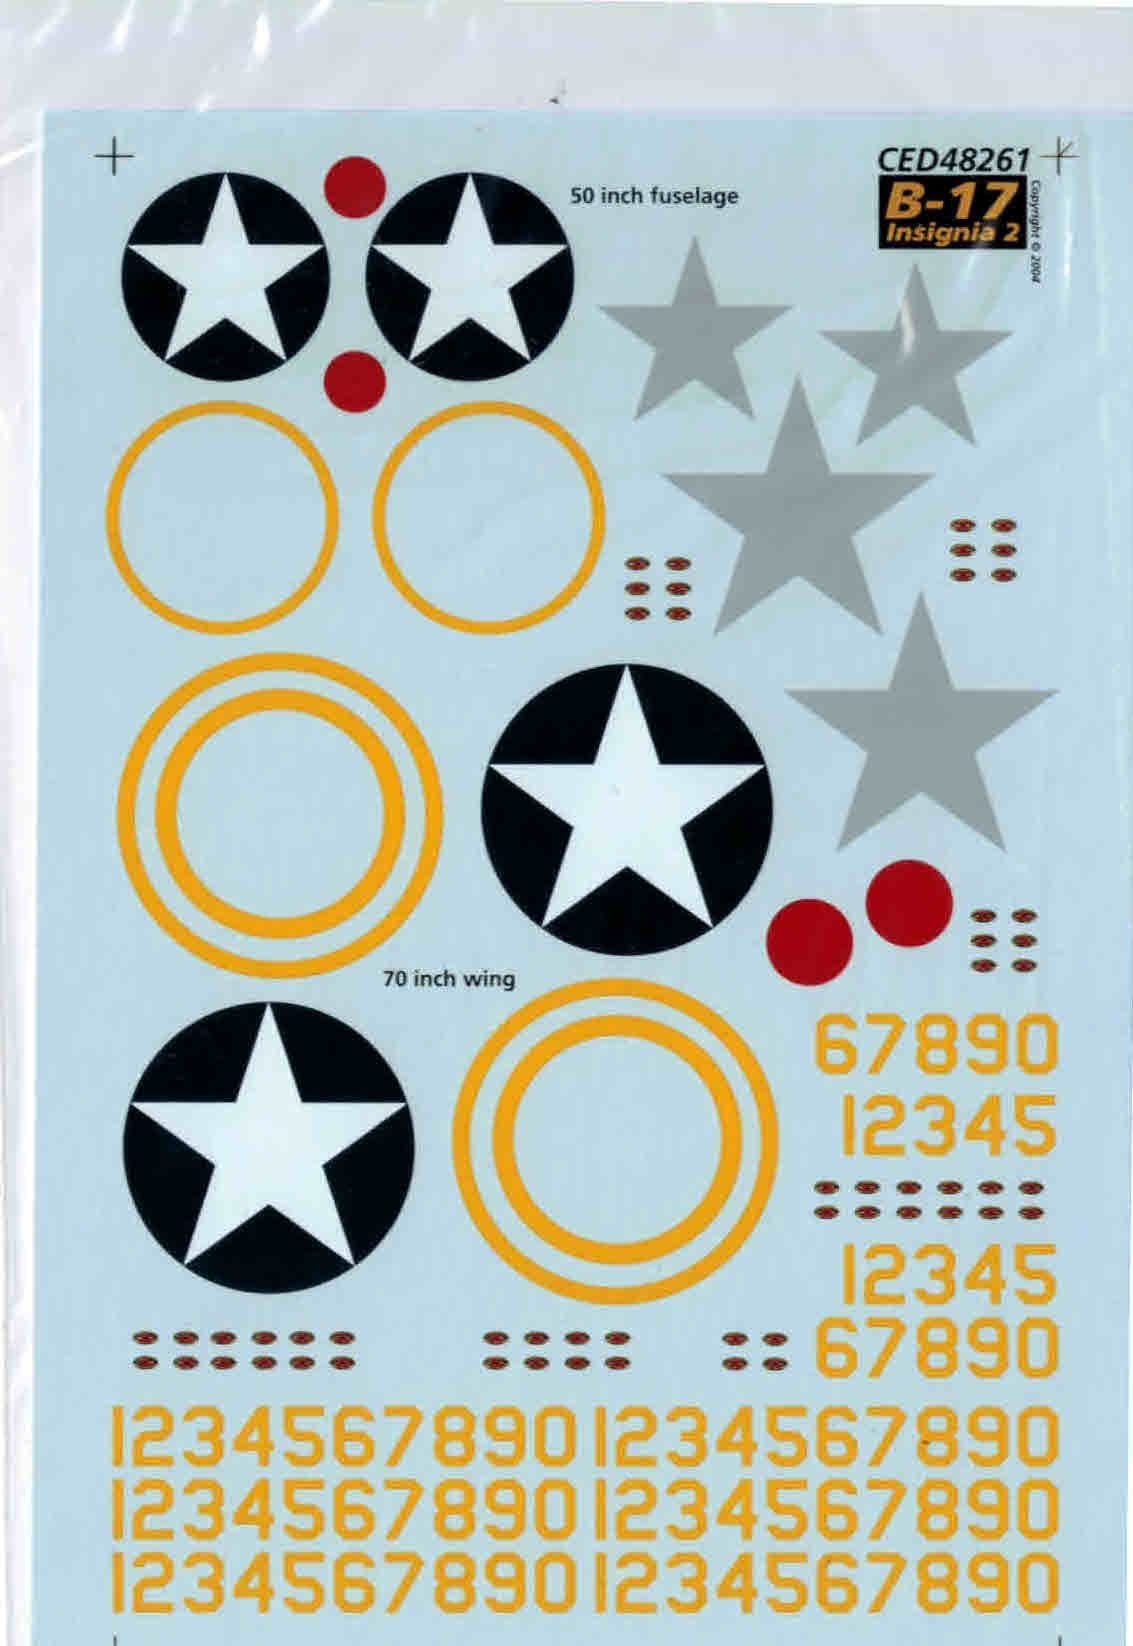
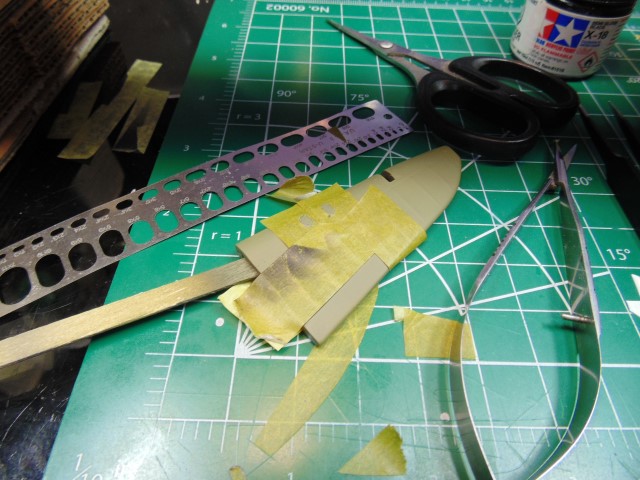
HG will be applying decals to this area next, but I caught one of my mistakes on what areas of the national insignia were painted grey, not white.

The sidebars were white: it was the stars that were overpainted in a light grey on the fuselage and upper wings.

Look at the above formation shot of “Vicious Virgin” again, and this decal sheet, to see the peril of relying just on memory.

It will be great seeing the “Triangle C” finally go on the tail of this build after, what, 7-8 years now?

9 Likes

Thank you for sharing Brian! This 1943 history comes alive with your deep dives into what was really happening. I (still) love your books! Press on my friend. Press on!

2 Likes

And thank you, Stuart! Much appreciated. We really are getting into the fun part of the build at this point.

2 Likes

More paint ! and decals !
I am excited Brian but you must be over the moon.
Keep it coming.
Richard

2 Likes

Yes, Richard, I’ll have the first decal post up later tonight! Check back, in a few hours.

2 Likes

DAY OF THE DECALS

Truly a milestone, even if a bit out of the normal build sequence. HG is putting these up now to give an idea of what the final build will look like, even though that characterization is a bit unfair. I say that because this is a layered work in which the final appearance only takes shape after multiple steps that build to the true finish. Modeling like this I think of as a master painting in oils. It takes more than one coat to create a masterpiece.

Anyway, here’s step one of the decals, starting with the tail, and in later posts working forward to the radio room.

DSC02121 (Small)

DSC02122 (Small)

DSC02123 (Small)

Wouldja lookit dat last one!?

7 Likes

Argh decals before paint?! OK so obviously the tail section will be masked/varnished first. I read your text but I’m still not really clear why the base OD coat hasn’t gone down first, could HG be actually related to Felix Baumgartner? :wink: :tumbler_glass:

1 Like