Hi John,
Good luck with the canopy. The first time I tried it my nerves were a little frayed, but I soon learned that gentle and patient sanding up through the grades works well.
There are youtube videos out there too. Just do a search and you’ll find quite a few.
Good luck!
1 Like
Hello guys,
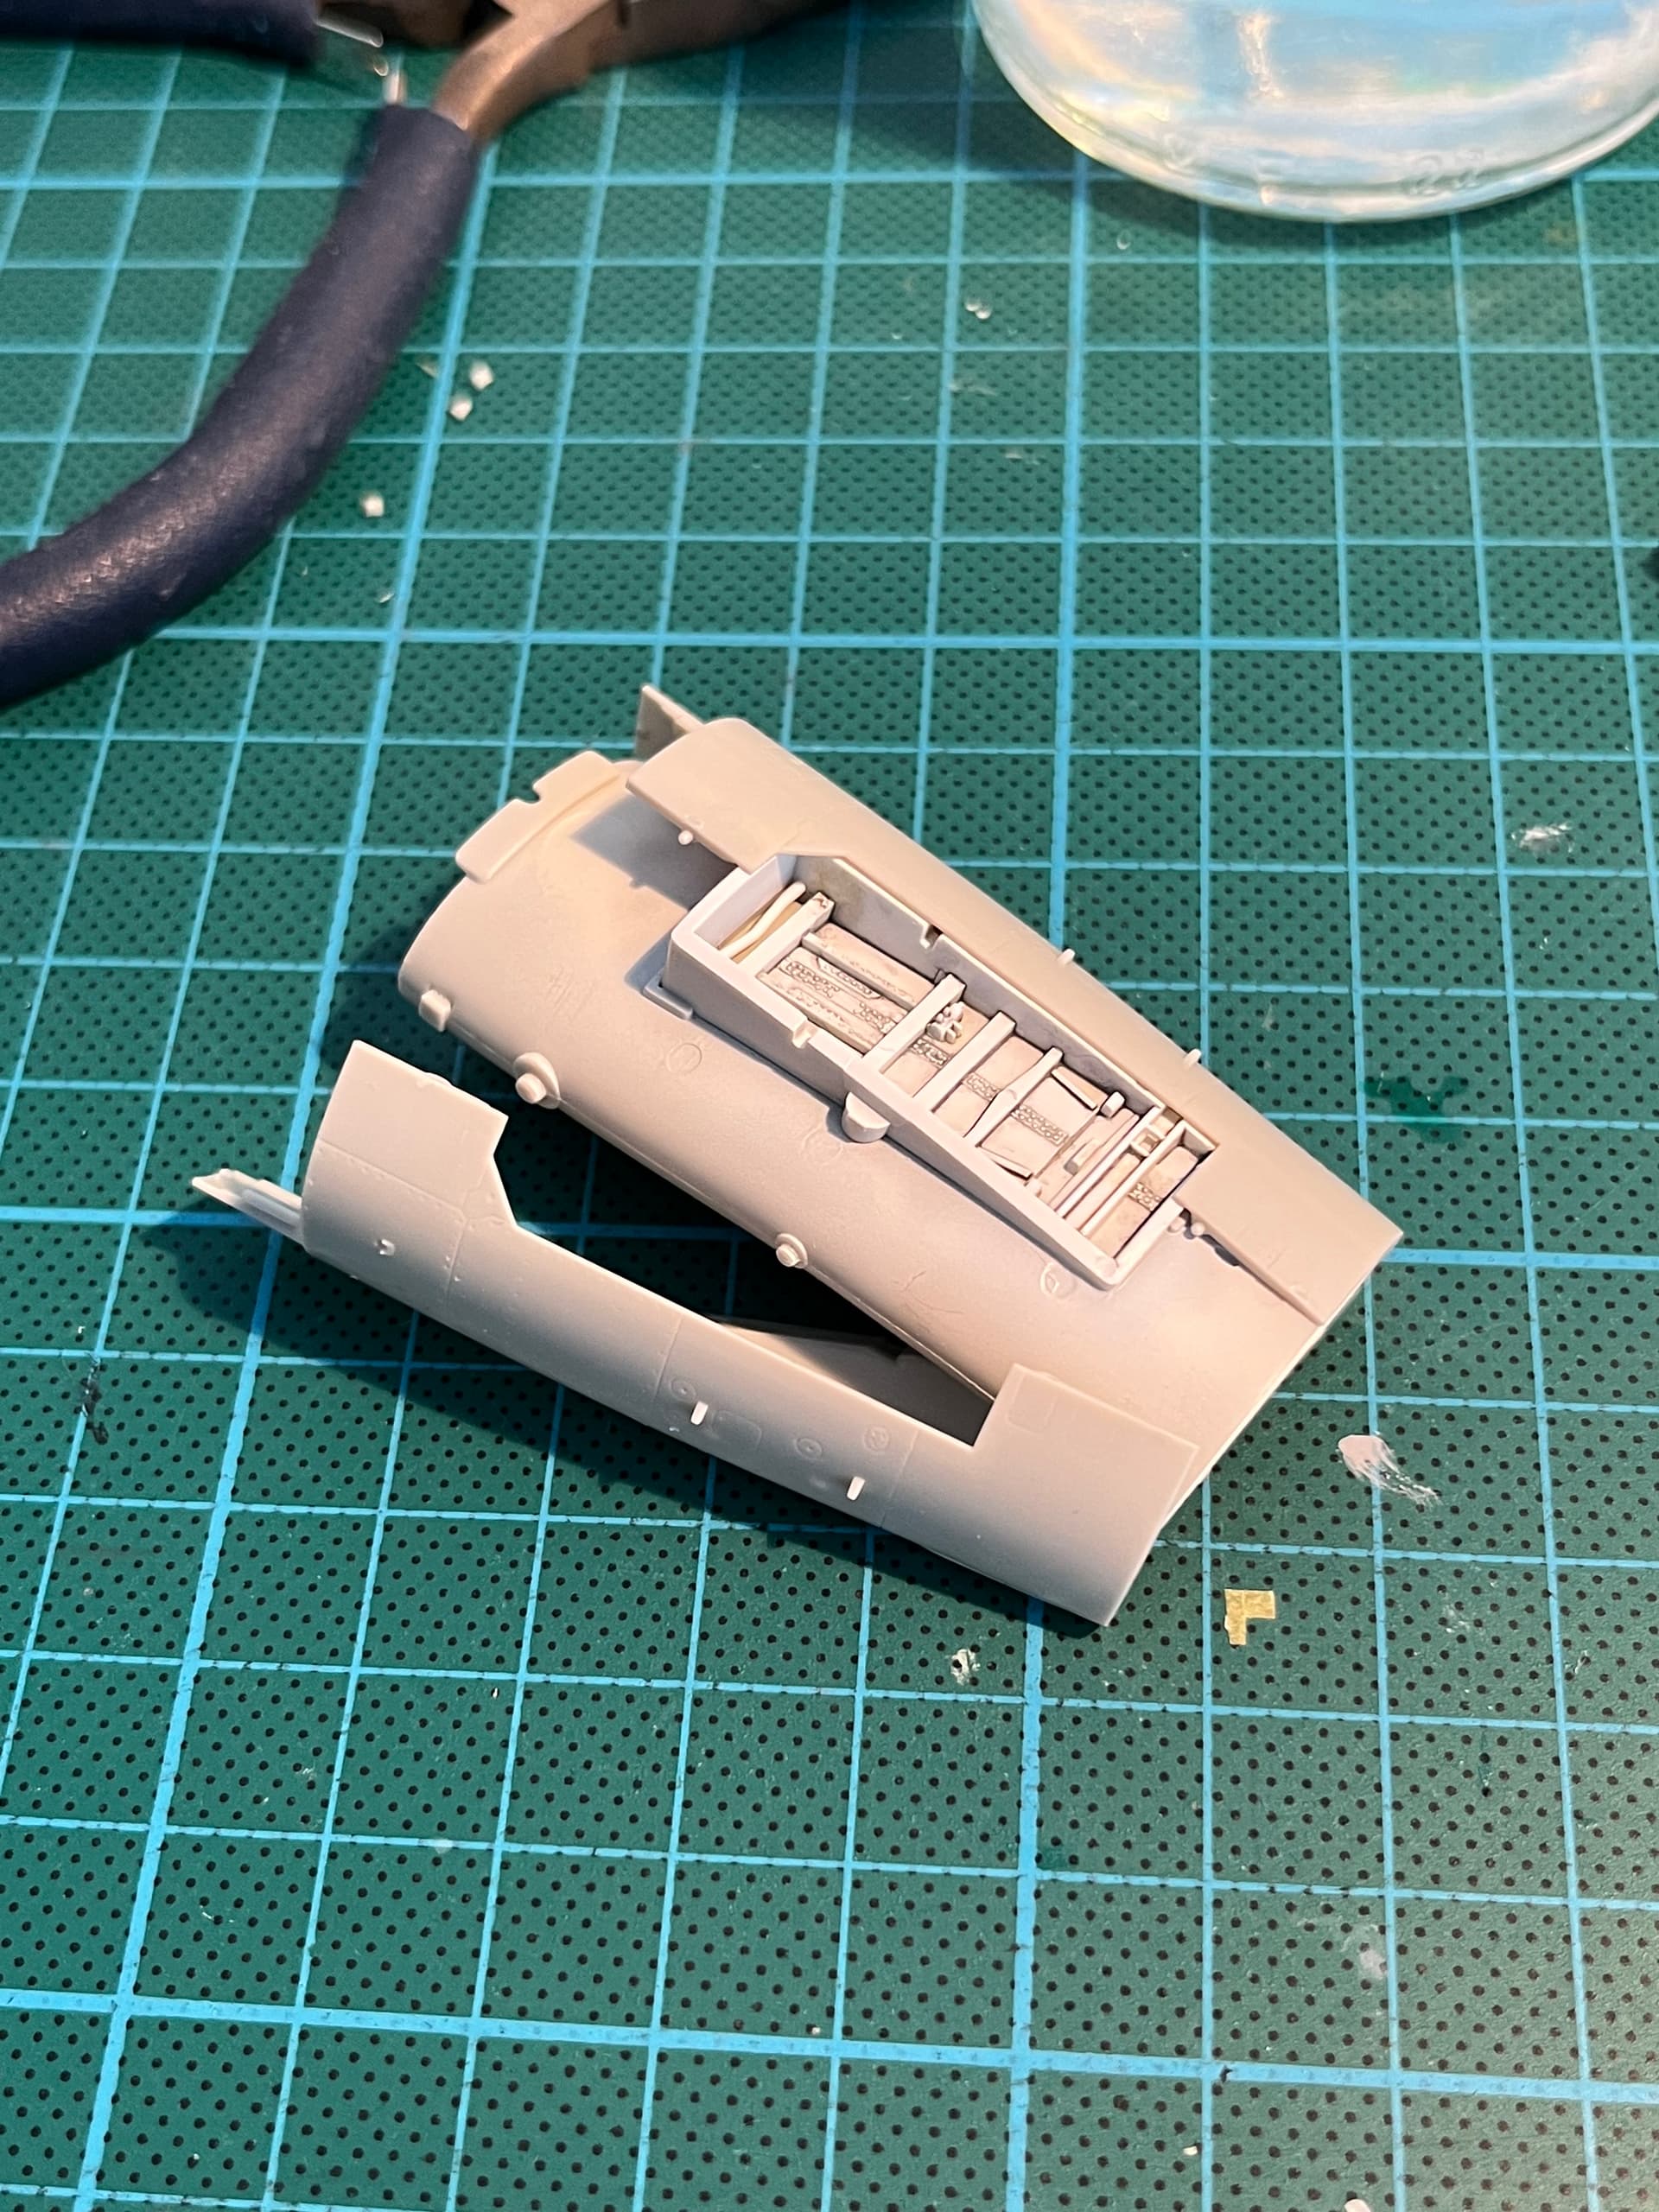
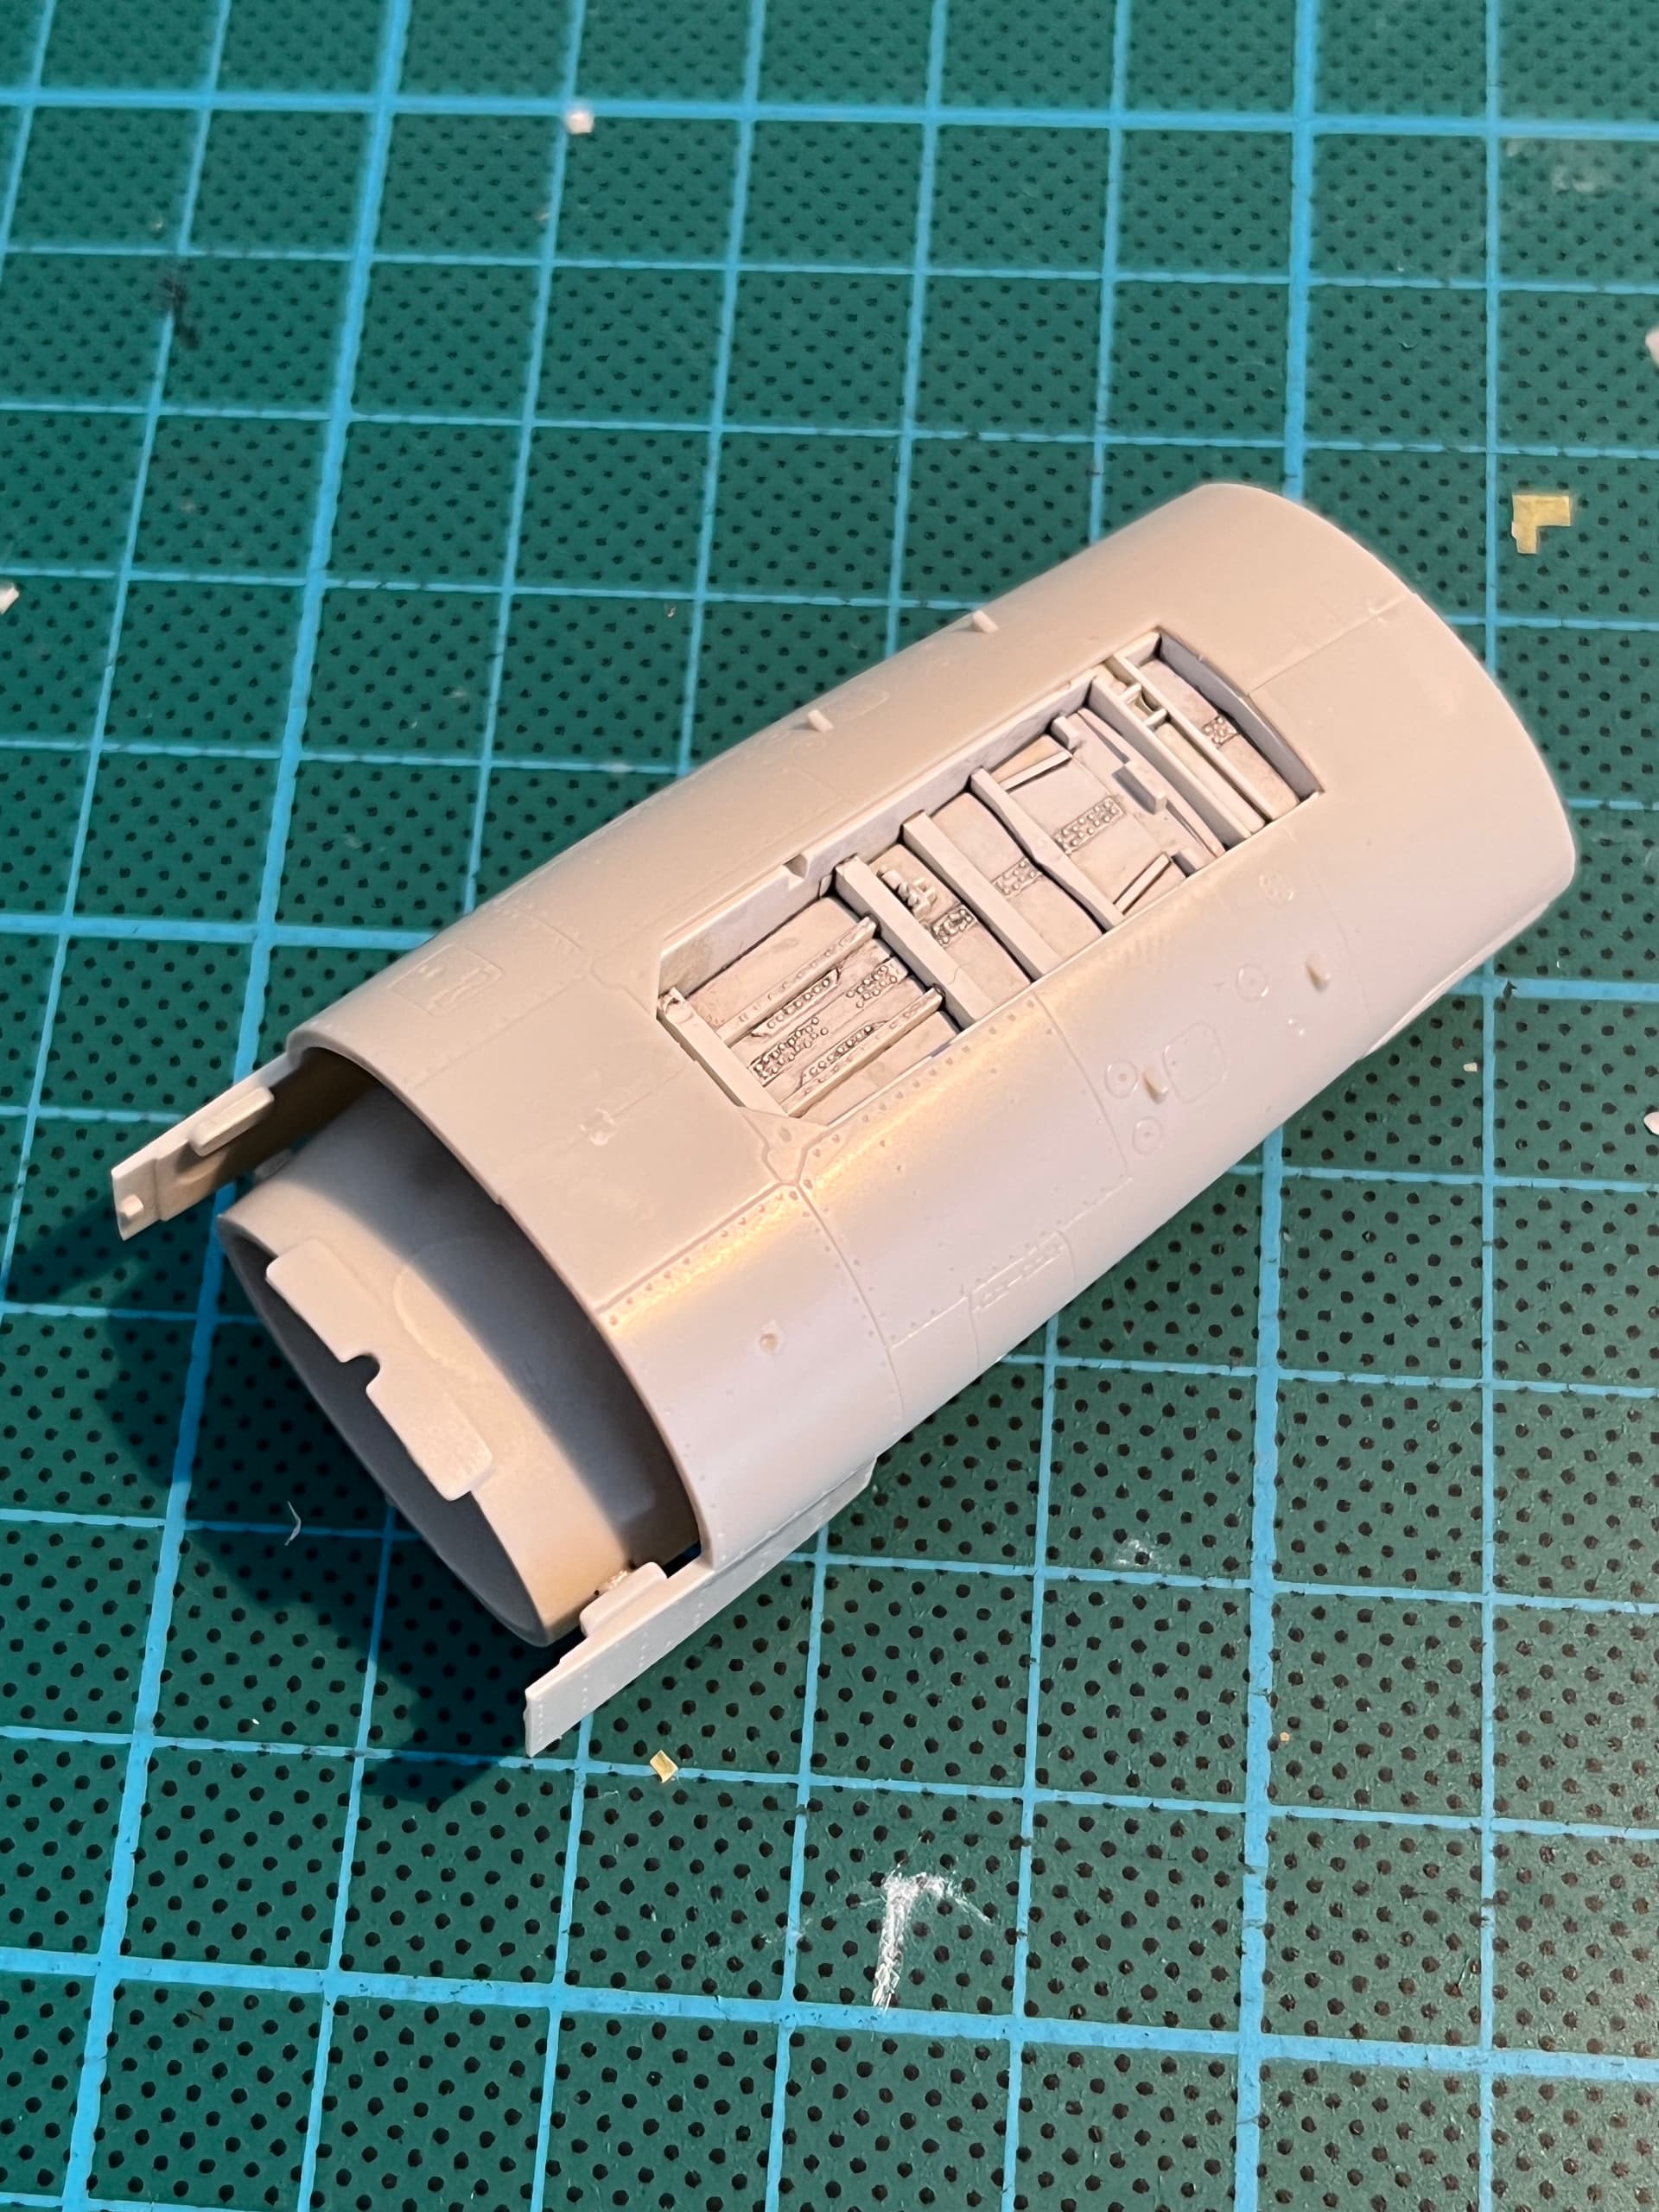
I’ve pointed out some problems with this kit, so - for the sake of balance - let me show you how good it can be as well. The outside parts of the air intake sandwich the inner part inside and come together beautifully. The first photo below shows the parts, and the second shows them just pushed together with no glue at all. Wow.
As you can see I’ve added a pin wash too. The part you can see weathered is the front wheel bay.
Happy modeling folks.
4 Likes
Is it possible to have too much of a good thing? I recently went to a model show, and there, amongst a tempting array of lovely kits, was the Tamiya aggressor version of the F-16. After circling the store’s stand about ten times I finally gave in and bought it. Now I have two F-16s, and I’m going to build them simultaneously. It’s like a solitary buddy build.  . I’ll try and keep this thread going as I delve in, and avoid repeating too much.
Happy modelling gents.
3 Likes
Hello folks,
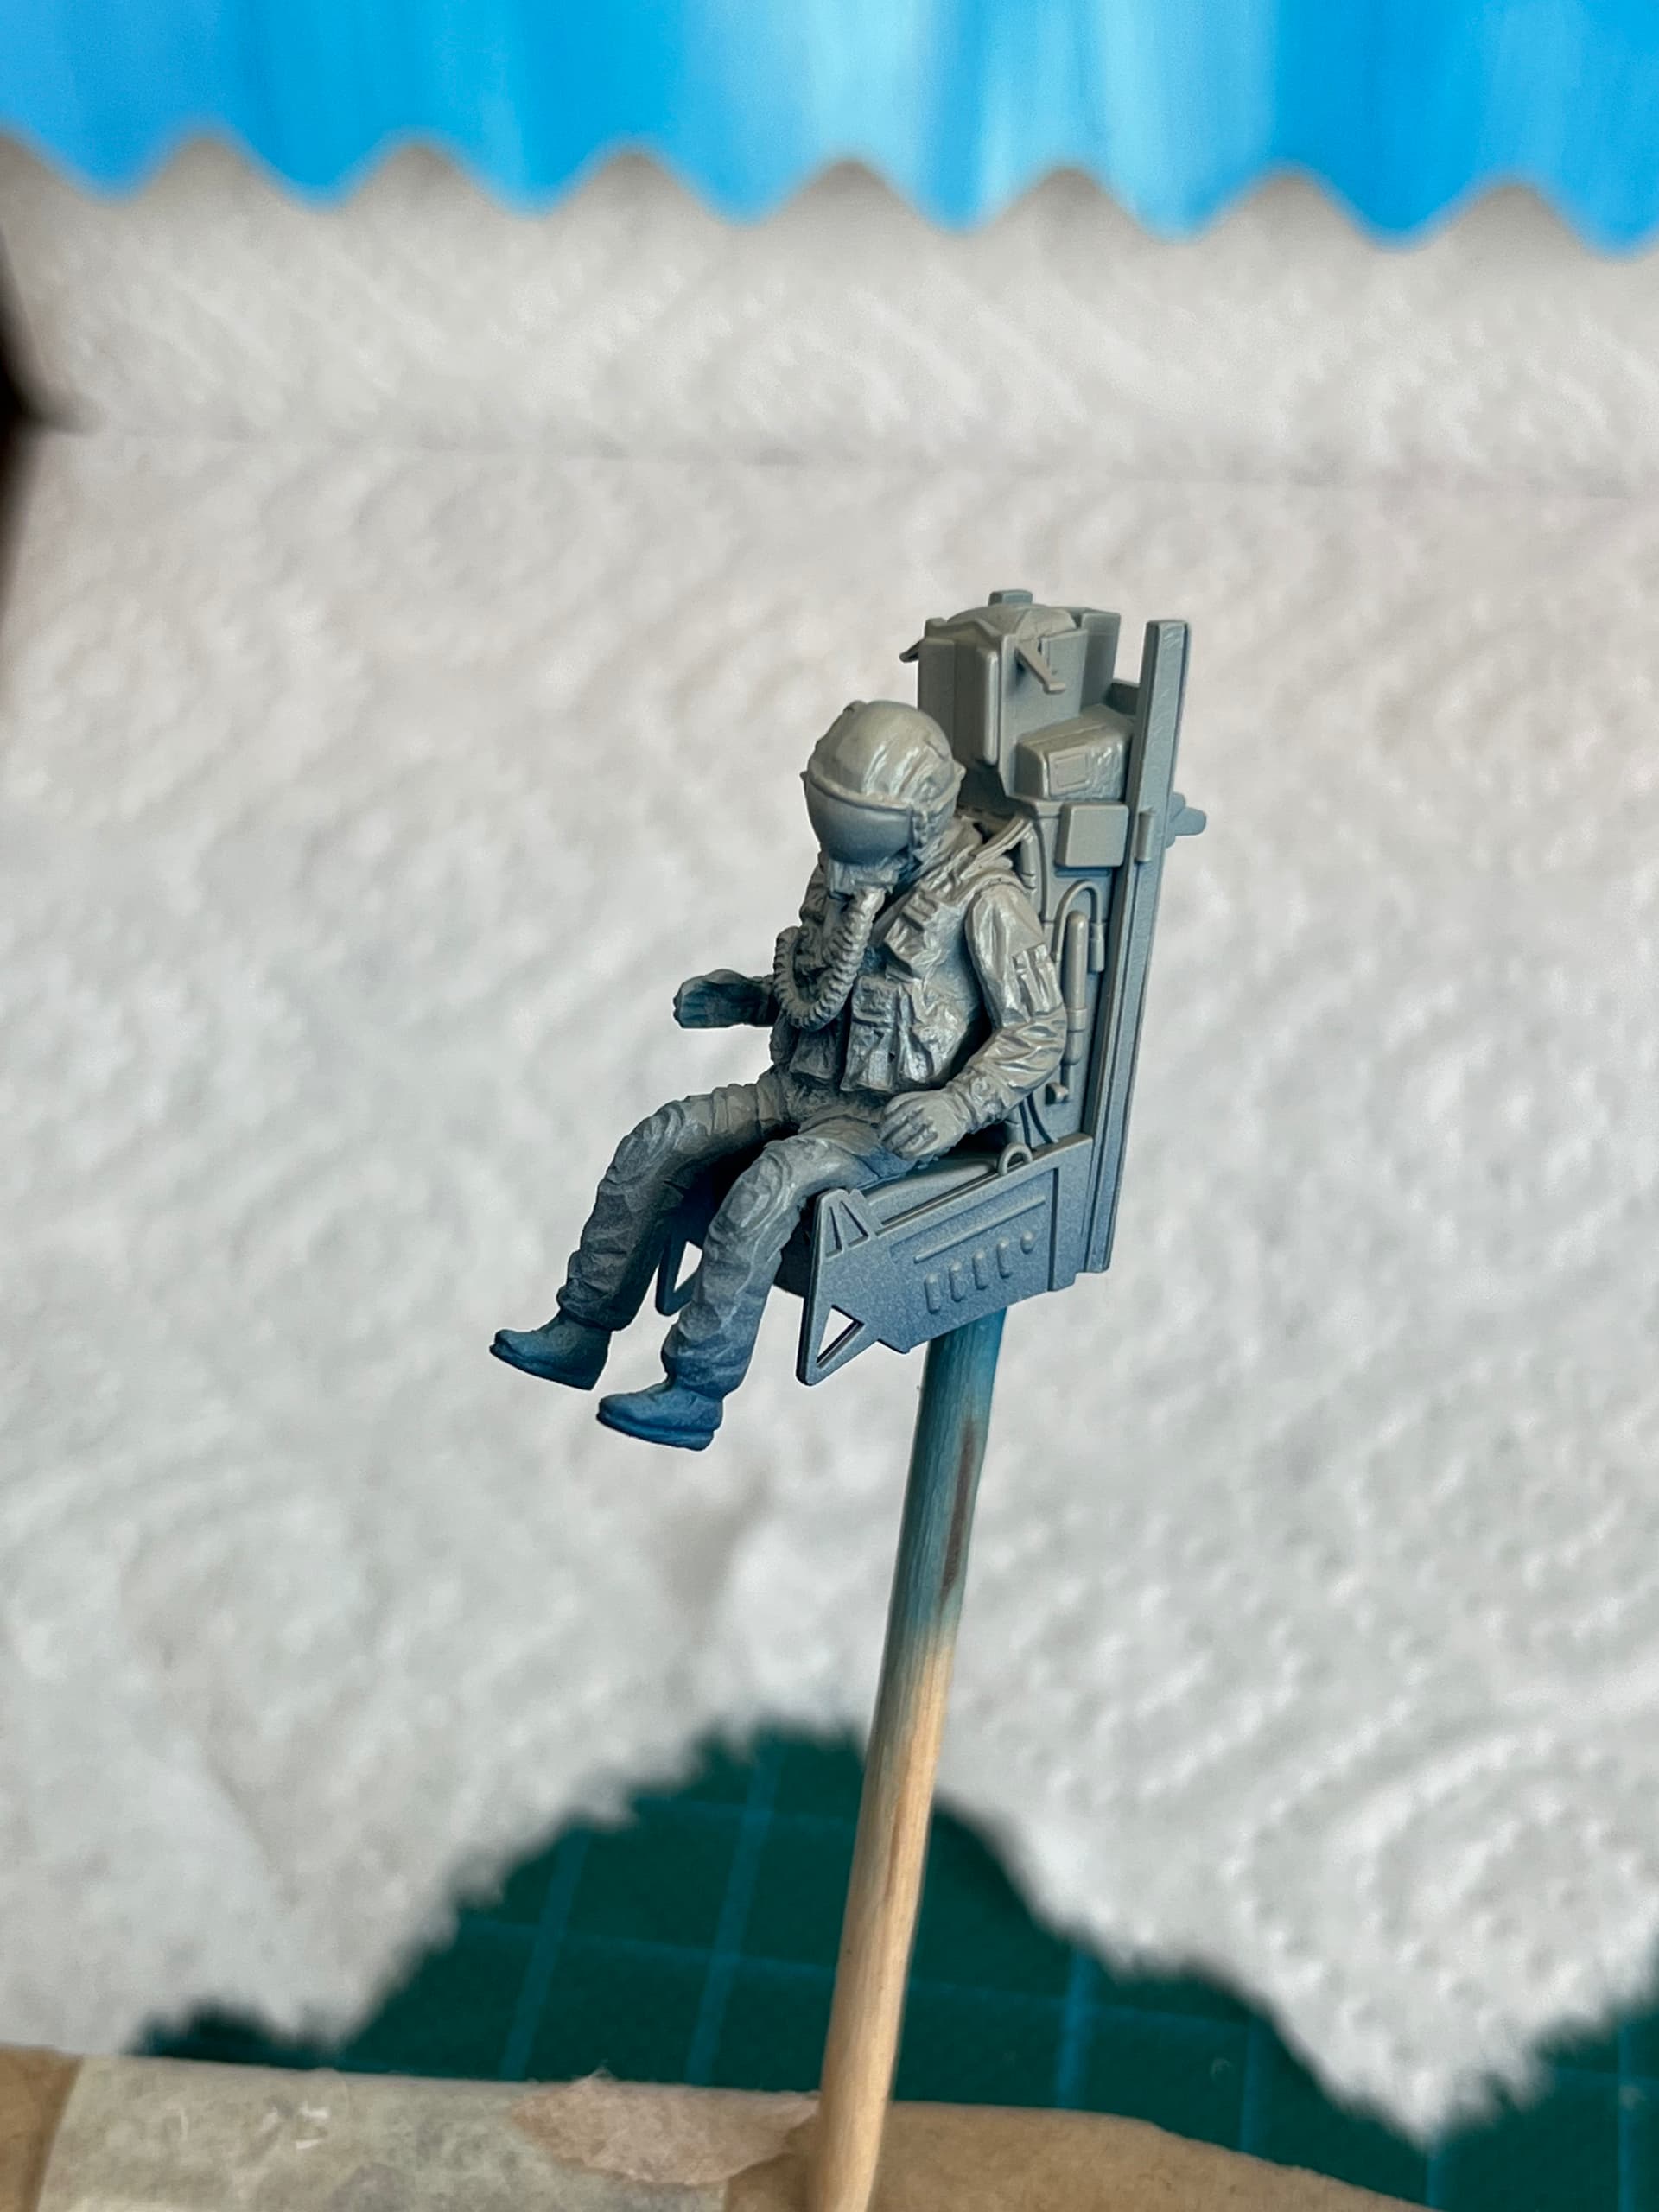
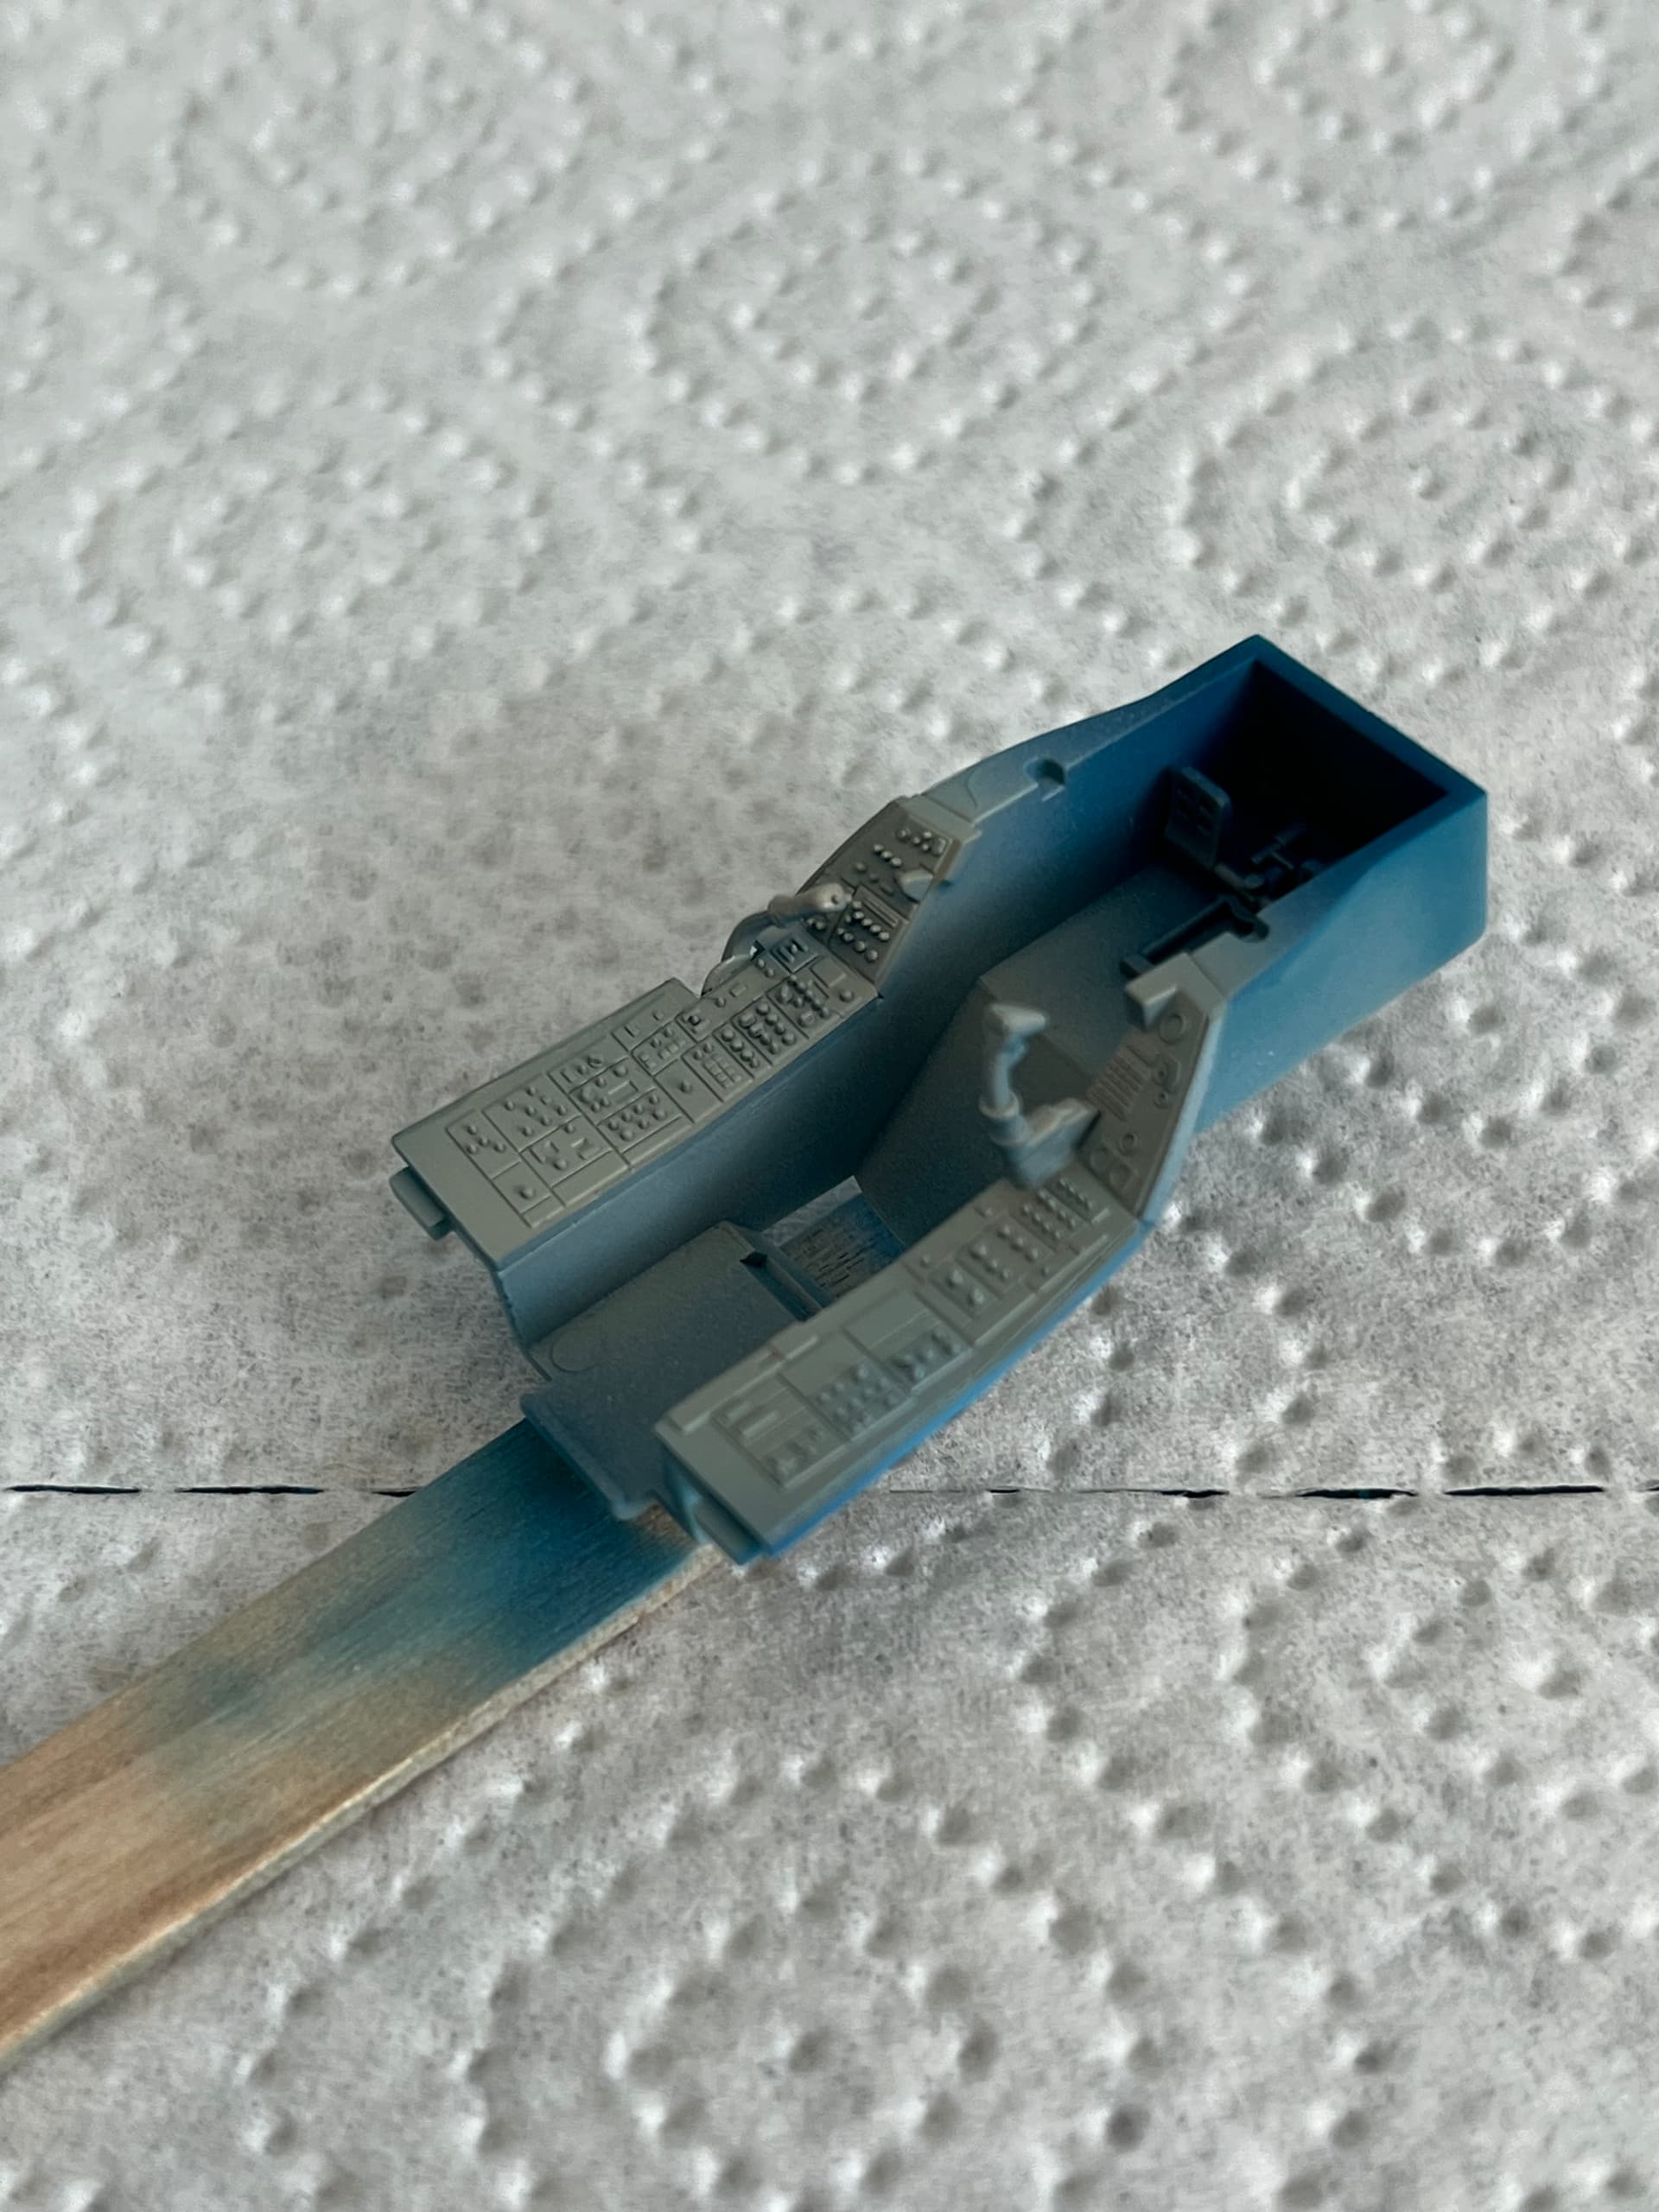
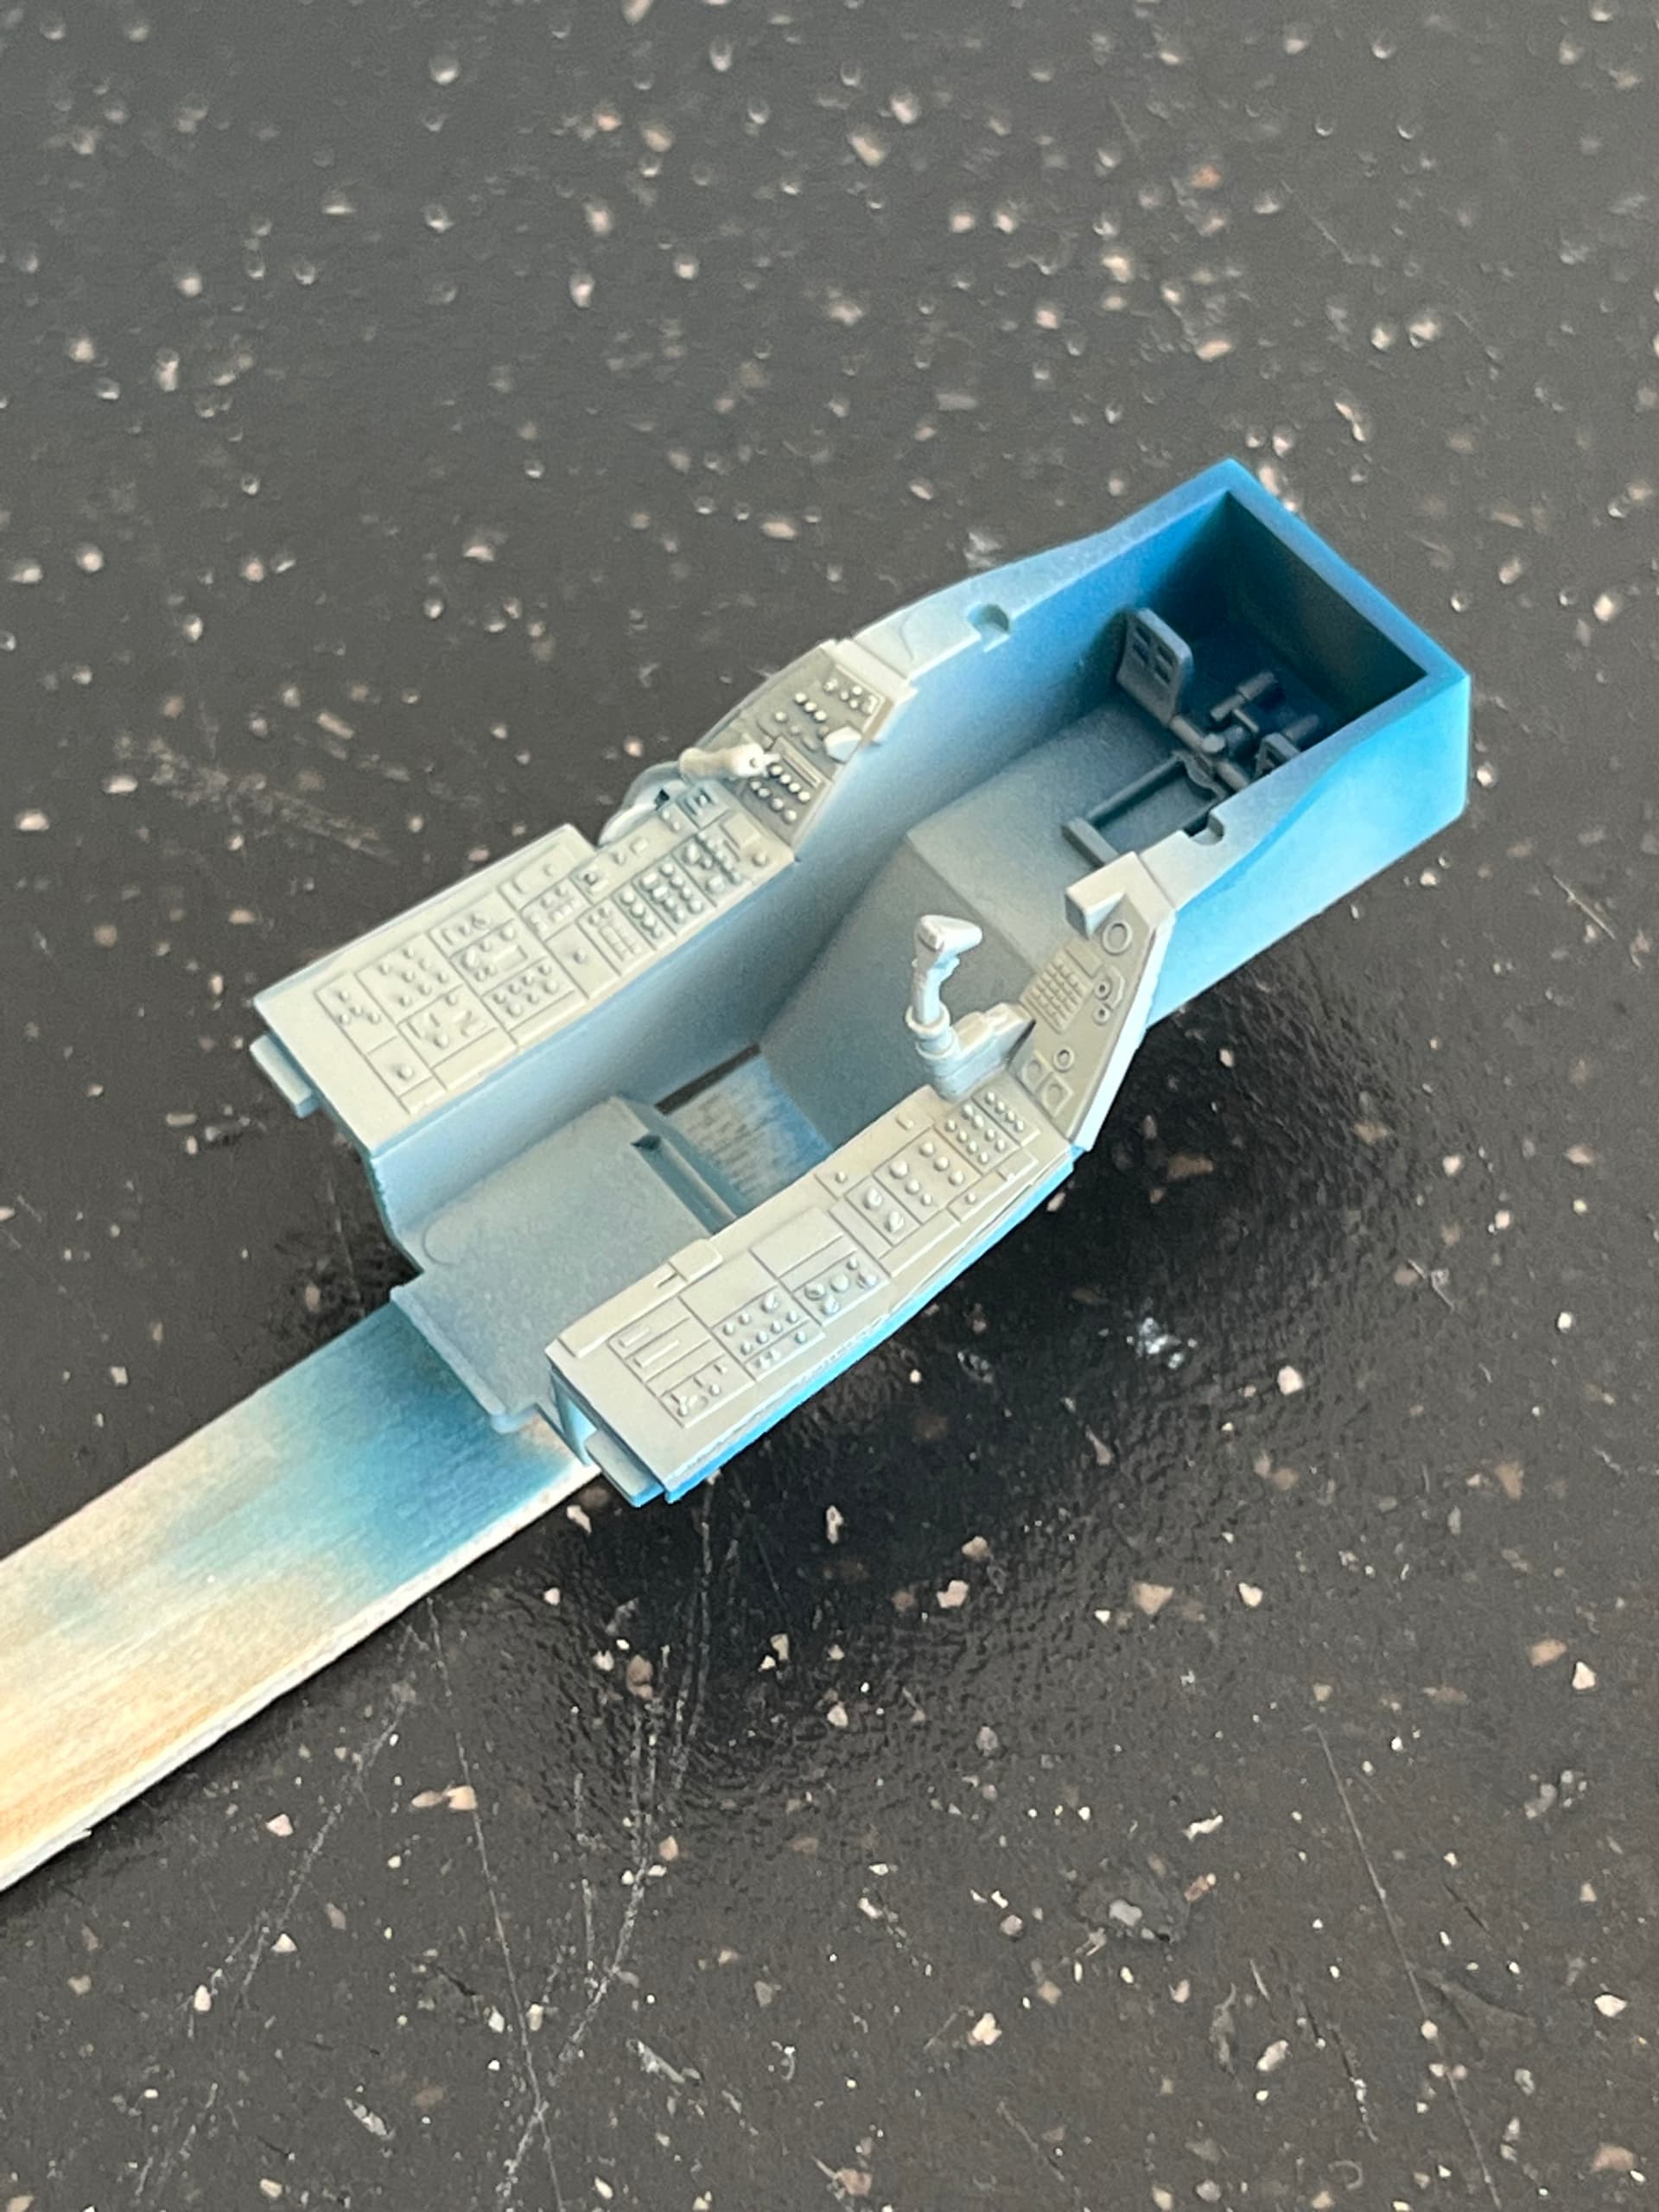
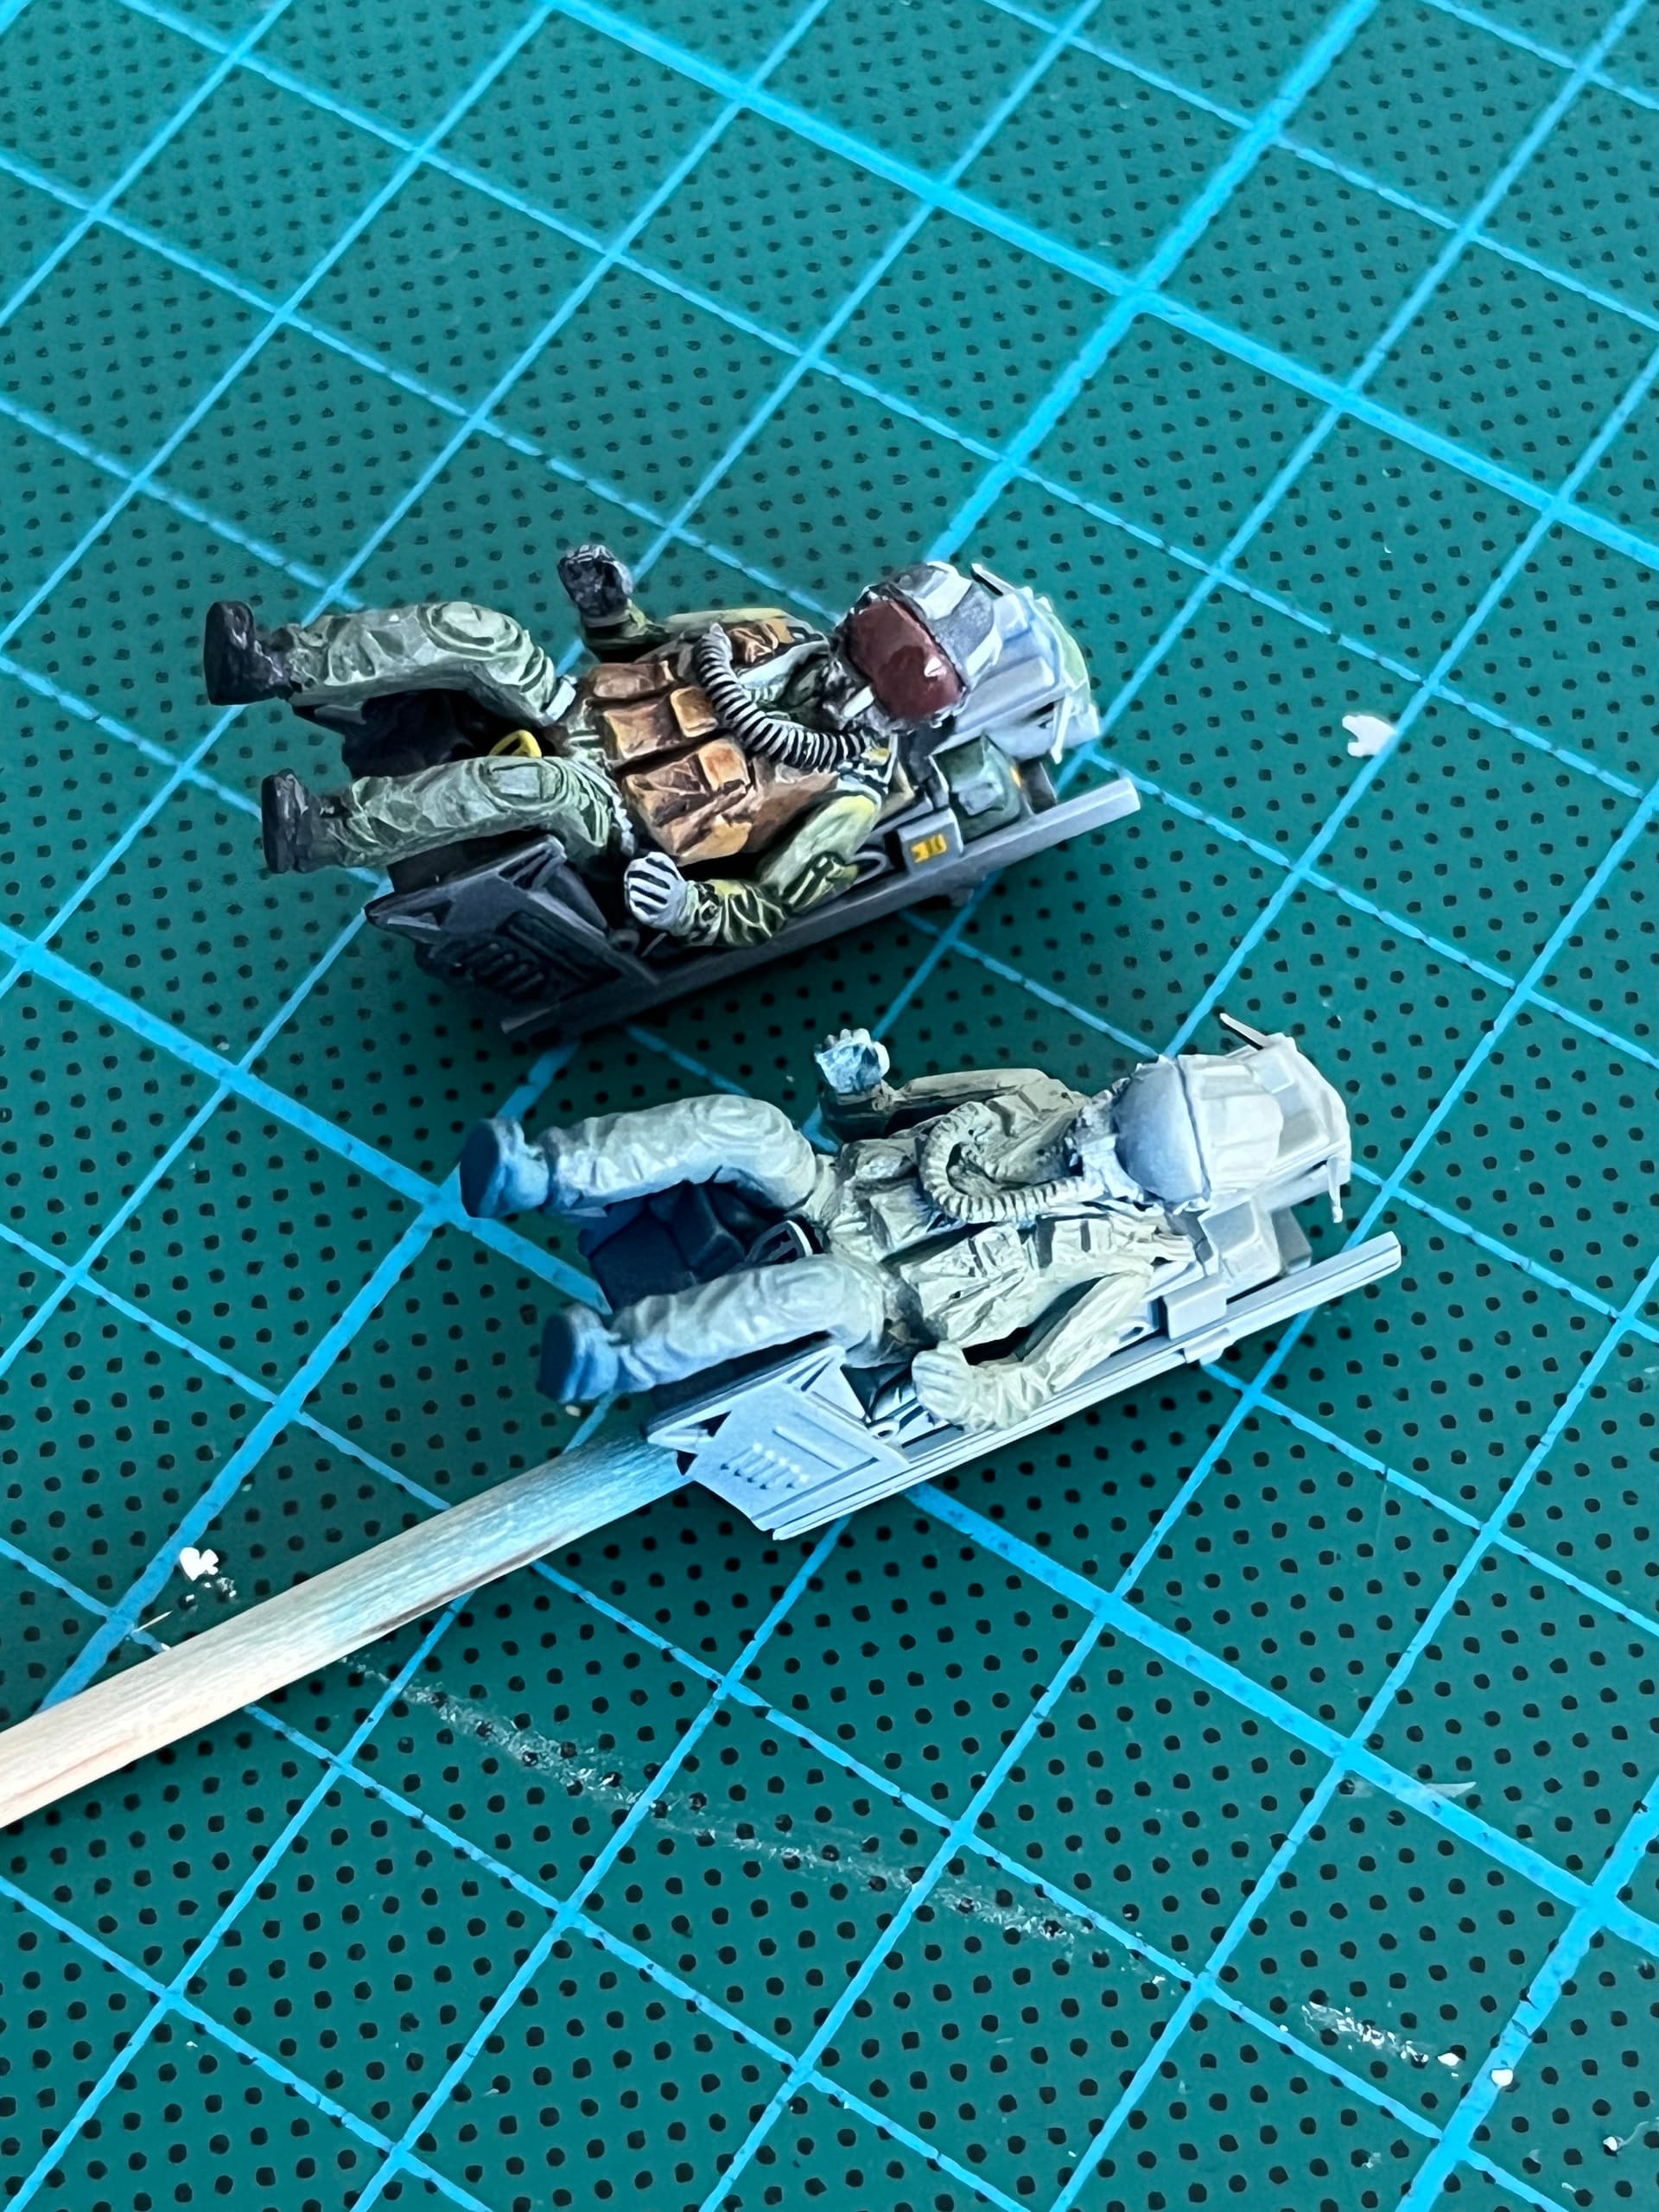
I’ve been working away in the background on the second F-16. It’s all a repeat of the first steps so I haven’t posted much. I have to say, that building the same kit twice is an educational experience. As you may guess, I’m doing a better job the second time around, or at least I’m more satisfied with my efforts, especially filling those pesky ejector pin marks. One thing I’ve very consciously changed is the pre-shading in the cockpit and on the pilot. It was lost under layers of paint on the first kit, so this time I’m pushing the colours, with more blue in the shadows and a hint of yellow in the highlights. Here are a few photos that fail to capture the effect fully, but still give you the idea, I hope.
Happy modelling guys.
2 Likes
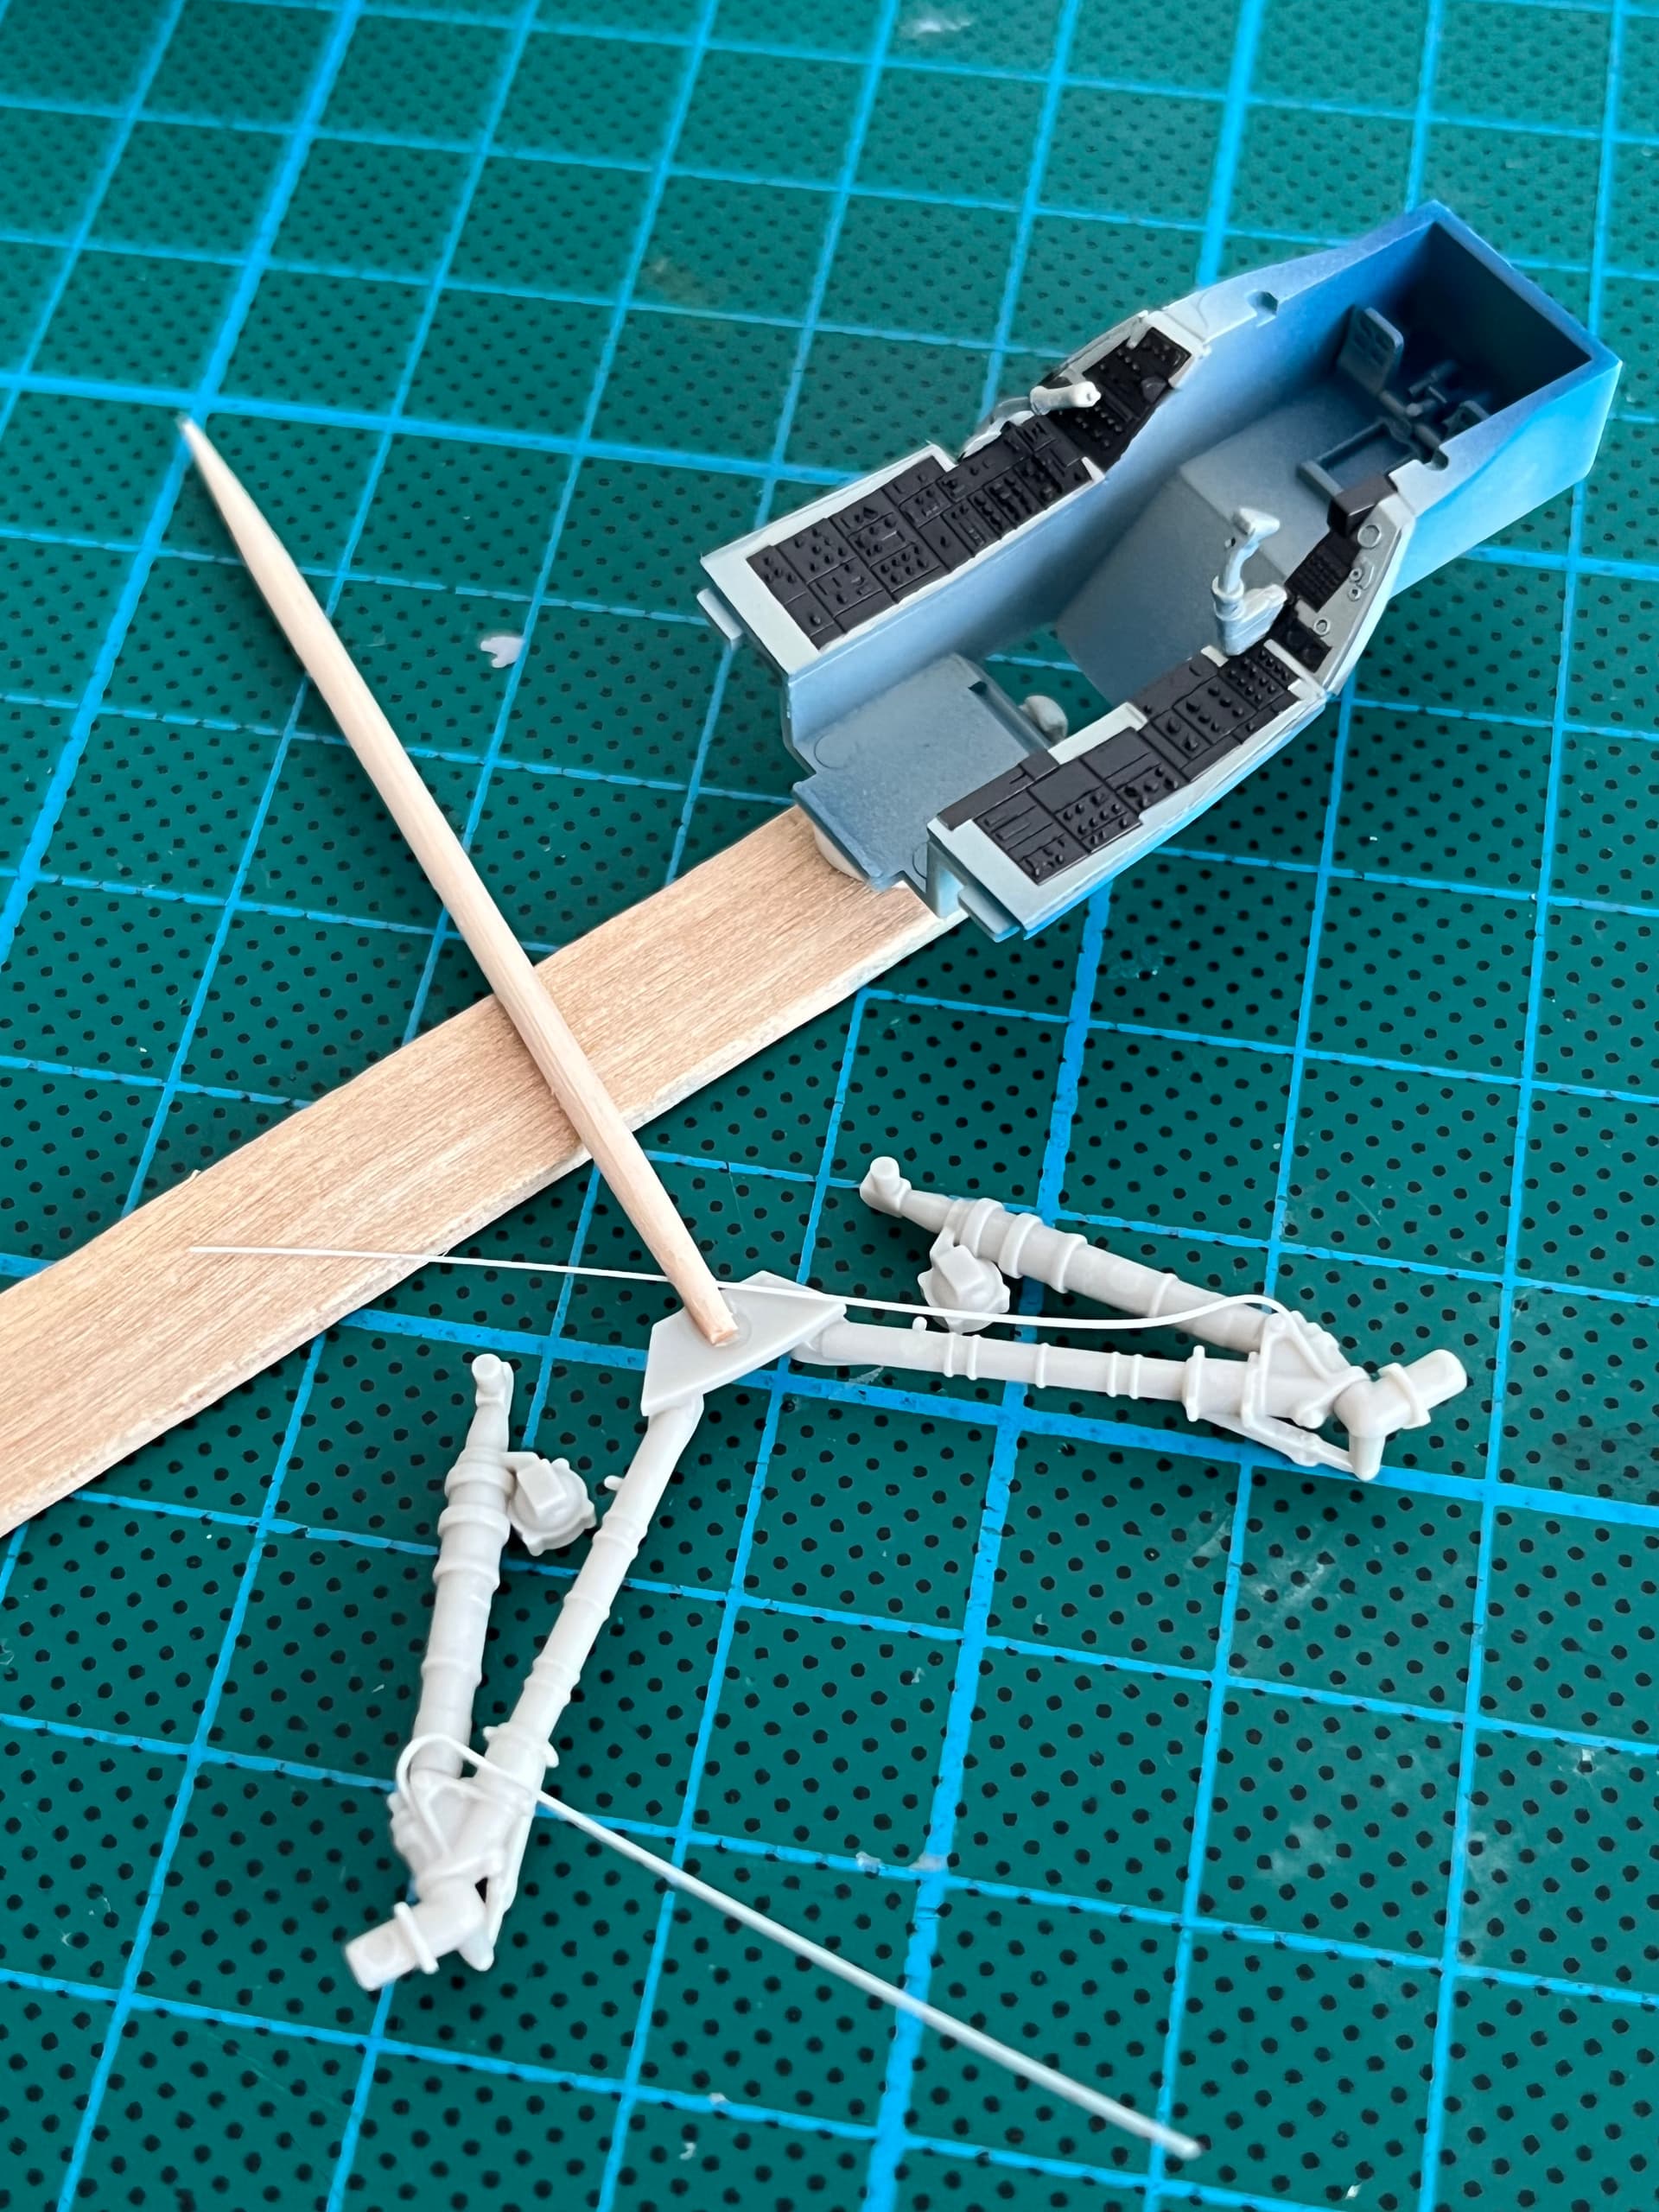
Here’s some progress. This time, I decided to give in to my impulse and add some cabling and pipes to the undercarriage. I tend to use stretched sprue in this scale. Sprue is more fragile than wire and harder to bend without breaking, but it is easier to glue when there are tiny contact areas and there are no super-glue blobs to clean up. With some practice - and acceptance that it won’t always go well the first time - I think a decent result is possible. I also tend to glue a small area, let it dry, then bend and glue the next bit. I find it gives a more robust result and makes this fiddly process easier. You can see it in action below.
Happy modeling folks.
4 Likes
Sweet looking build Steve!
Would love to see an update.
I think that is one of the wisest tools a model builder can ever have in the tool box.
FWIW - I think that’s a fun way to build and often do with subject matter I like. Keeps everything fresh and allows same research overlap to help two builds which is more efficient. Usually with AFV’s, say Panther ausf D & G, Pz IV ausf F1 & F2 and Pz III ausf L & N etc
If I’m remembering correctly, the panels in the variable-geometry exhaust nozzles are properly termed ‘petals’, but they’re usually called “turkey feathers” by aircrew and maintenance personnel.