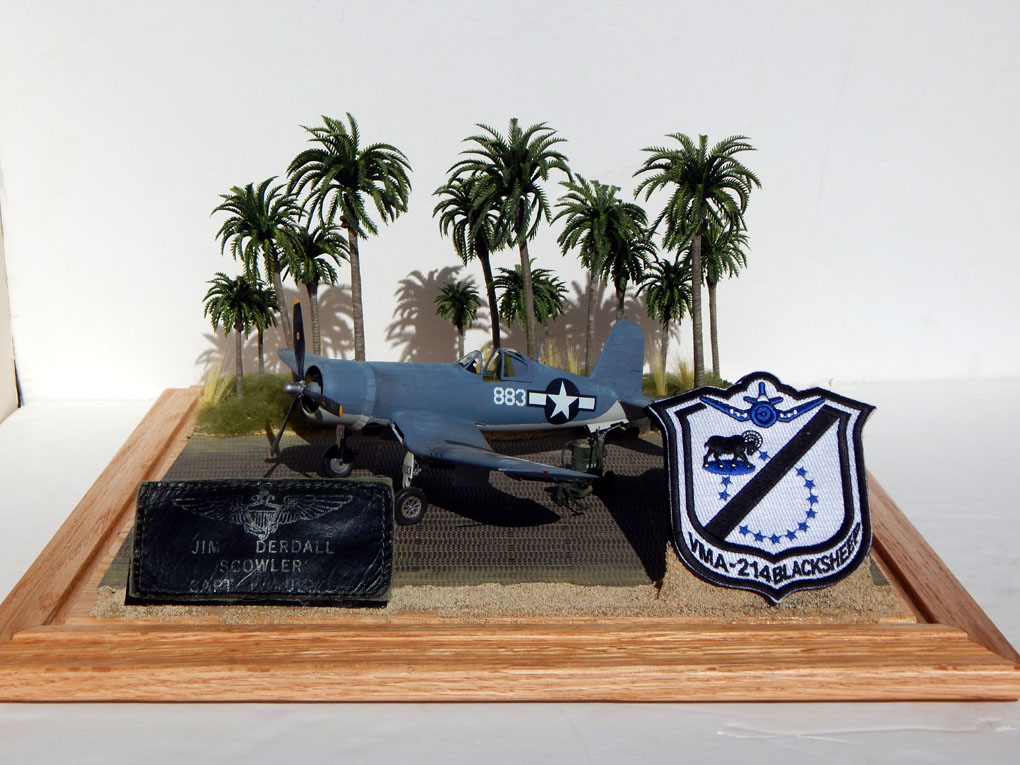
This next build is a commission build. I have a client who requests/schedules a build every year. He was a Harrier pilot for VMA-214 also known as the “Blacksheep”. For this build he has requested a build of the famous F4U Corsair the Blacksheep flew and it be set in a diorama of a Pacific Island Airfield. The F4U I will be using is the 1/48 Tamiya F4U-1A Corsair which will be mounted in a custom display case From Grandpa’s Cabinet’s featuring a typical island airfield with a Mini-Art Marston tarmac, a row of palm trees to line the back of the display, a background behind the trees of a beach/ocean view, and mounts that the client can attach the squadron patch and his name tag. I will also be using Eduard photo etch details to add to the realism.
Starting off with the cockpit I added the photo etch replacements for the seat and the seat mount on the rear bulkhead. The side consoles were then modified with more photo etch details. The instrument panel was replaced with a placard for the gauges and the photo etch face. The last of the photo etch details and seat belts were installed onto the cockpit halves and then the cockpit tub was assembled.
I am now working on detailing the inside of the fuselage halves and the engine. I am hoping to get the fuselage assembled and starting by the end of the next week.
You can see all the photos and details from start to finish in the build log at: 1/48 Tamiya F4U-1A Corsair


13 Likes
Wow. You must have some incredibly steady hands! That’s some great PE work!
Three different Squadrons claimed 214.
July 42-Sept 43
Unknown name from 42 to July 43
Swashbucklers July-Sept 43
Sept 43-Jan 44 Blacksheep
Jan 44-current Blacksheep
1 Like
Watching with interest David 
For the second week of the Corsair I started on the engine. I assembled the engine and then added the photo etch wiring harness. It was then mounted to the firewall and I installed the cowl with open flaps. The cockpit was installed into the fuselage and then the halves were assembled. All the lower sections were then painted white to match the paint scheme that is going to be used. Speaking of the paint scheme, the client has opted to modify the typical tri-color scheme. The aircraft will have the white belly but the rest of the aircraft will be overall intermediate blue. This will look more like the weather-worn corsairs viewed in some of the colorized reference photos found online.
Next I worked on the lower fuselage and center wing assembly. The main gear wheel wells were cleaned up from some minor mold marks and then detailed with photo etch. The assembly was then mounted to the lower part of the fuselage. The tail and rear horizontal stabilizers were then modified by removing the molded in trim linkage and replacing them with the photo etch versions. The horizontal stabilizers were painted and then installed.
I am currently working on the landing gear. These require some modifications due to the numerous photo etch details on them. Once these are completed I can then work in the outer wing assemblies. For this diorama the wings will be in the down position. Then once the aircraft is assembled I can take all the measurements for the display case size.
You can see all the photos and details from start to finish in the build log at: 1/48 Tamiya F4U-1A Corsair


9 Likes
make sure you paint the wheel bays and doors/gear intermediate white or what ever color the underside of your version your doing. They were definitely not int green. I got this info from Dana Bell himself at mosquitocon this year. Also something i didn’t know and now have to go back and fix my builds is the inside of the tail wheel covers on all corsairs were salmon. for some unknown reason he said they didn’t paint them. so if you already painted them green and you want the build to be accurate consider repainting them.
Joe
Vought used Indian Red as an additive to the zinc chromate for the second coat of primer on the birdcage F4Us until April 1943, when an order was issued to discontinue its use in the second coat. After the existing stocks of salmon-colored primer were exhausted, a black stamp of “1ST COAT” was applied on the primered areas, which would show faintly through the partially-transparent second coat to prove that two coats had been applied. Also in April 1943, the Navy told Vought, Brewster, and Goodyear to use up their stocks of Dull Dark Green, then switch to Interior Green as a cockpit color, with the changeover occurring between July and September. Vought also got a waiver to use stocks of aluminized zinc chromate that they’d found and wanted to use up, so a small but indeterminate number of Corsairs got the candy-apple green cockpit paint. Vought’s technical orders specified that the main wheel wells and cowling were to receive a coat of Light Sea Gray, so the only externally-visible salmon primer would have been in the tailwheel well.
4 Likes
For the third week of the Corsair I spent most of the week super detailing the landing gear utilizing the photo etch details. This required removing some of the kit molded details and replacing them with the photo etch. These were then installed in to the fuselage. I then base coated the underside in light grey paint. Speaking more in to the scheme, I have had lots of comments on the scheme. There are a lot of variations of schemes used on many different Corsairs. However, the scheme I will be using is one that the client has requested. The lower section is light grey and the upper with be intermediate blue. I will also be having the wings lowered and the flaps down.
I started on the flaps. The starboard inside flap has a square hole that is used in various versions. The instructions have this filled for on this version. I am currently working on the rest of the wings and will then paint the base coat on the topside.
You can see all the photos and details from the start in the build log at: 1/48 Tamiya F4U-1A Corsair


6 Likes
sorry for the wheel wells you are wrong. dana bell is the leading authority on this and researched this. what is written is not what was done. i think you confused cockpit colors and wheel well colors. only the first few corsairs were in salmon color the next were ordered to be painted as underside color, which as you state was grey, the same color as the underside of navy aircraft at the time. by the time of the tri colors scheme came about the underside was intermediate white including wheel wells on ALL aircraft. there was no salmon or greens used except the rear wheel covers in salmon. they were allowed to use up their green stocks on cockpits but not the wheel wells. there were no corsairs with green or zinc chromate wheel wells. so if david wants his commission build to be accurate he needs to re paint the wheel wells white and rear covers salmon for tri scheme and grey if it is the two tone blue/grey over grey scheme otherwise it will not be a true representation his customer is paying for. you can reach out to Dana if you wish
Joe
1 Like
That is great work. Love the detail on the gear. Where did you get the etched spring on the gear? Your bay and gear colors are not correct though
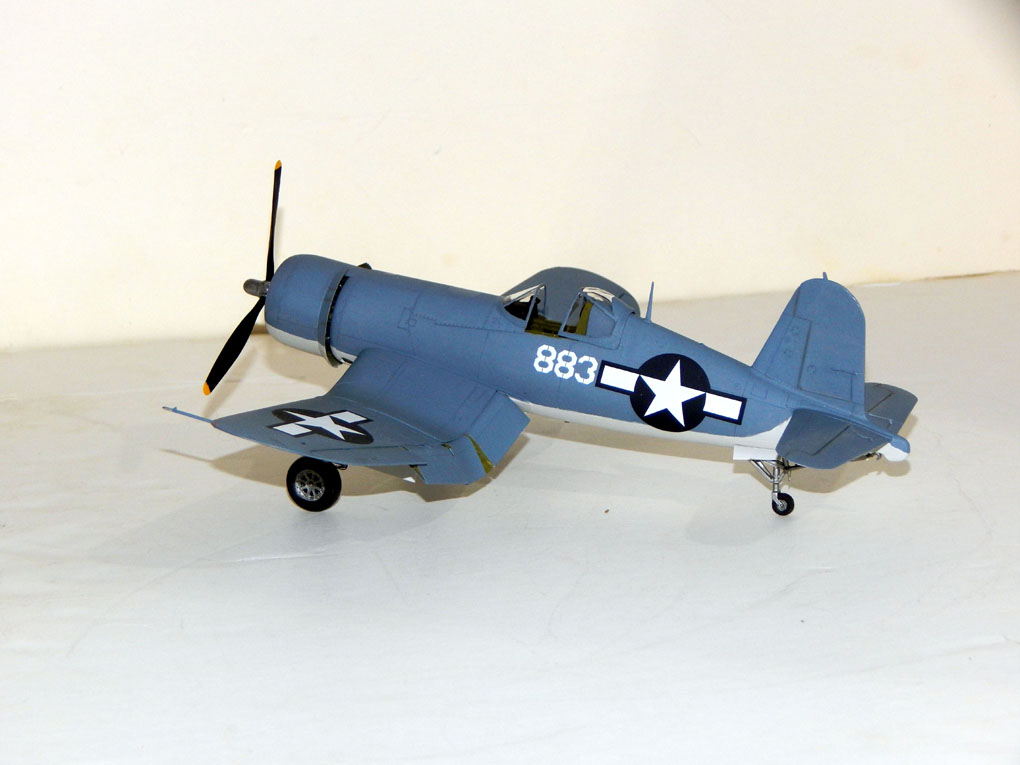
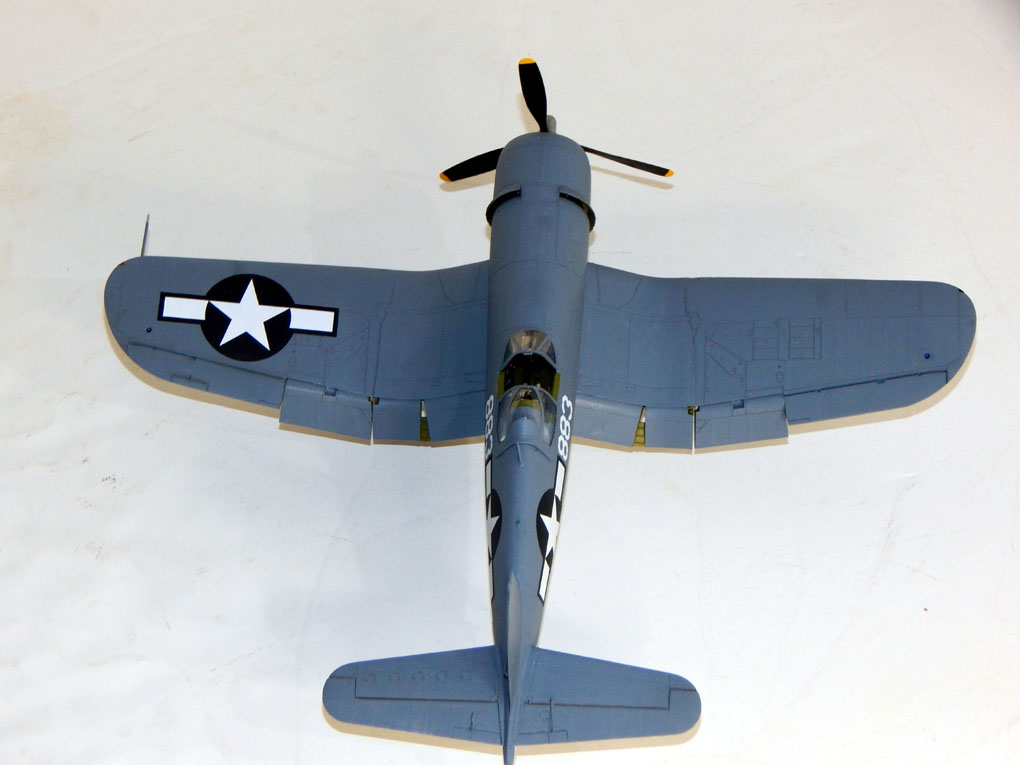
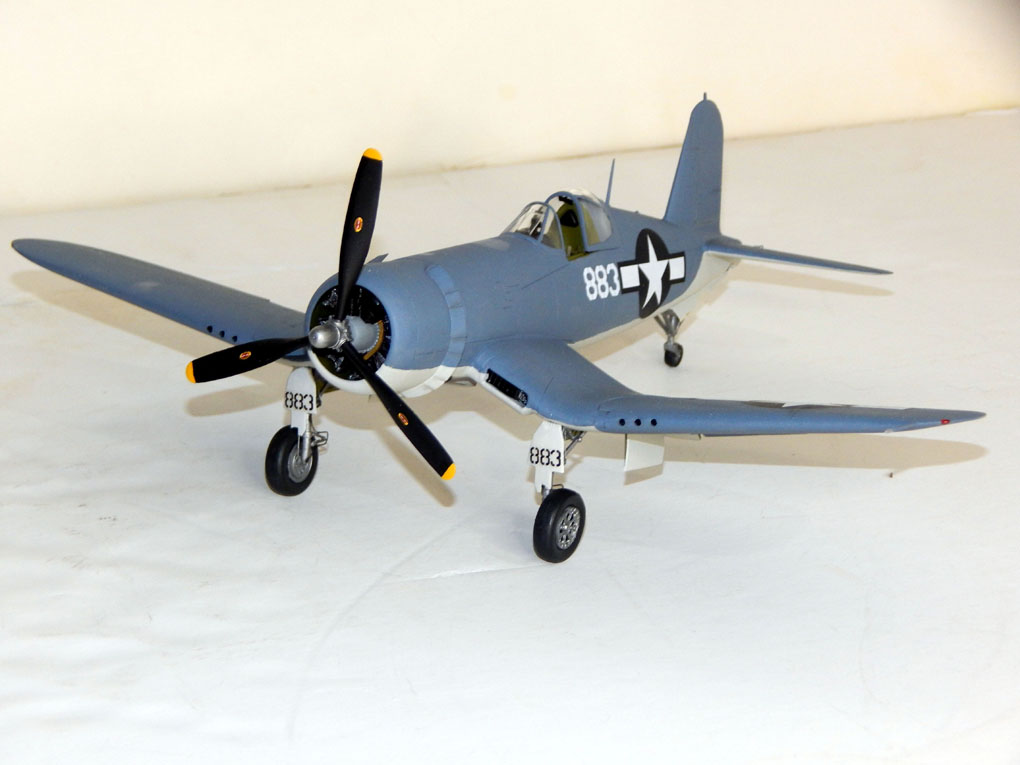
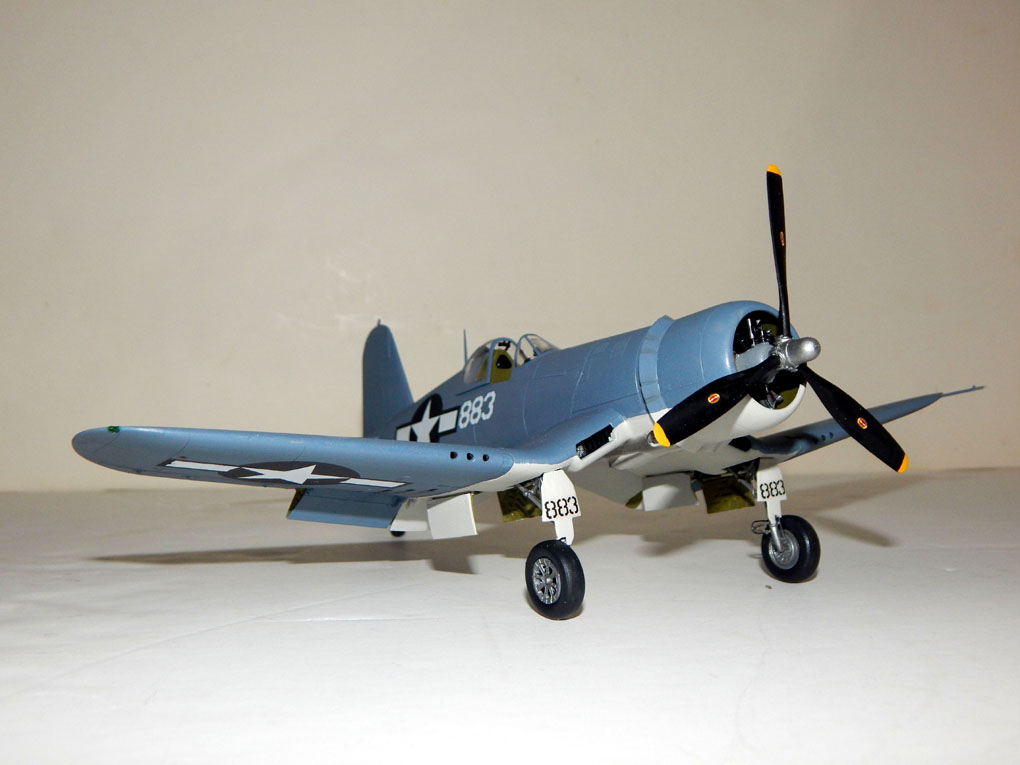
I had some limited time on the bench over the last two week so for the fourth week of the Corsair I was able to base coat the paint scheme. The client requested the scheme so the underside was painted light grey and the topside is intermediate blue. I then assembled the wings, flaps, and other details which were then installed on to the aircraft.
I then applied the decals. I had to use a mix of the kit decals and the Warbird decals. The Warbird decals were very thin and very brittle. The insignia’s on the side of the fuselage were the kit decals as the Warbird decals cracked and split a little when trying to conform to the curve of the fuselage.
I should have the aircraft completed over the coming week and then I will begin working on the display base diorama. Just to refresh, this will be a typical Pacific island airfield complete with a palm tree line, Marston mat, and a beach view behind the trees. I will also be adding two patches supplied by the client to the front side of the display base. All of this will be inside a custom display case from Grandpa’s Cabinets. I need to figure out the size so all of the details will fit under the cover.
You can see all the photos and details from the start in the build log at: 1/48 Tamiya F4U-1A Corsair
[img]https://i0.wp.com/davidsscalemodels.com/wp-content/uploads/2025/09/DSCN3983.jpg[/img]
[img]https://i0.wp.com/davidsscalemodels.com/wp-content/uploads/2025/09/DSCN3985.jpg[/img]
[img]https://i0.wp.com/davidsscalemodels.com/wp-content/uploads/2025/09/DSCN3988.jpg[/img]
[img]https://i0.wp.com/davidsscalemodels.com/wp-content/uploads/2025/09/DSCN3990.jpg[/img]
[img]https://i0.wp.com/davidsscalemodels.com/wp-content/uploads/2025/09/DSCN3991.jpg[/img]
[img]https://i0.wp.com/davidsscalemodels.com/wp-content/uploads/2025/09/DSCN3993.jpg[/img]
2 Likes
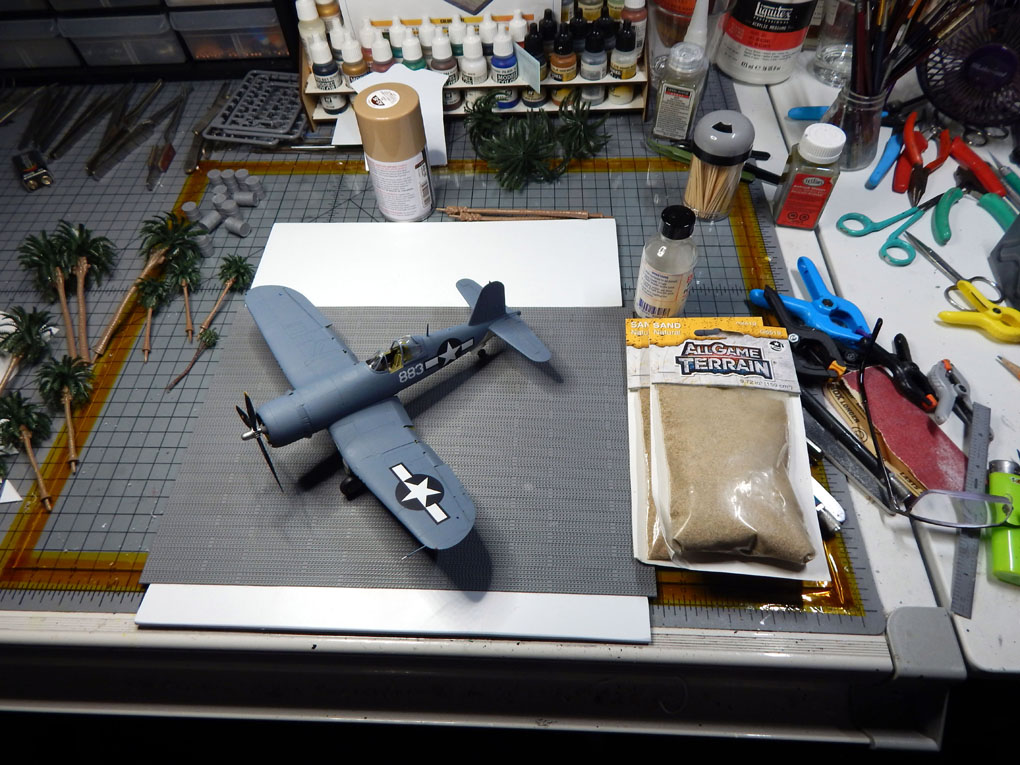
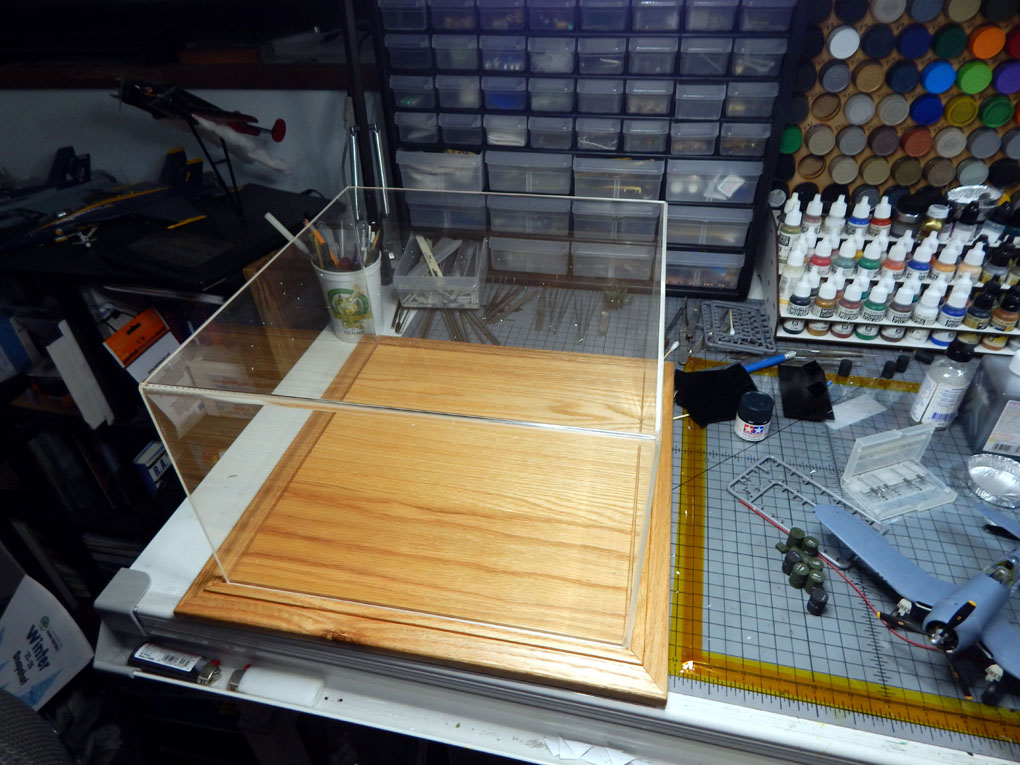
The fifth week of the Corsair I was able to finish the aircraft. I still need to add the antenna lines and there is some minor weathering that I still need to do but I am waiting until I get the correct colors to match the scene. With that being said I began working on the scene and the display case. I ordered the display case once I figured out the size I need.
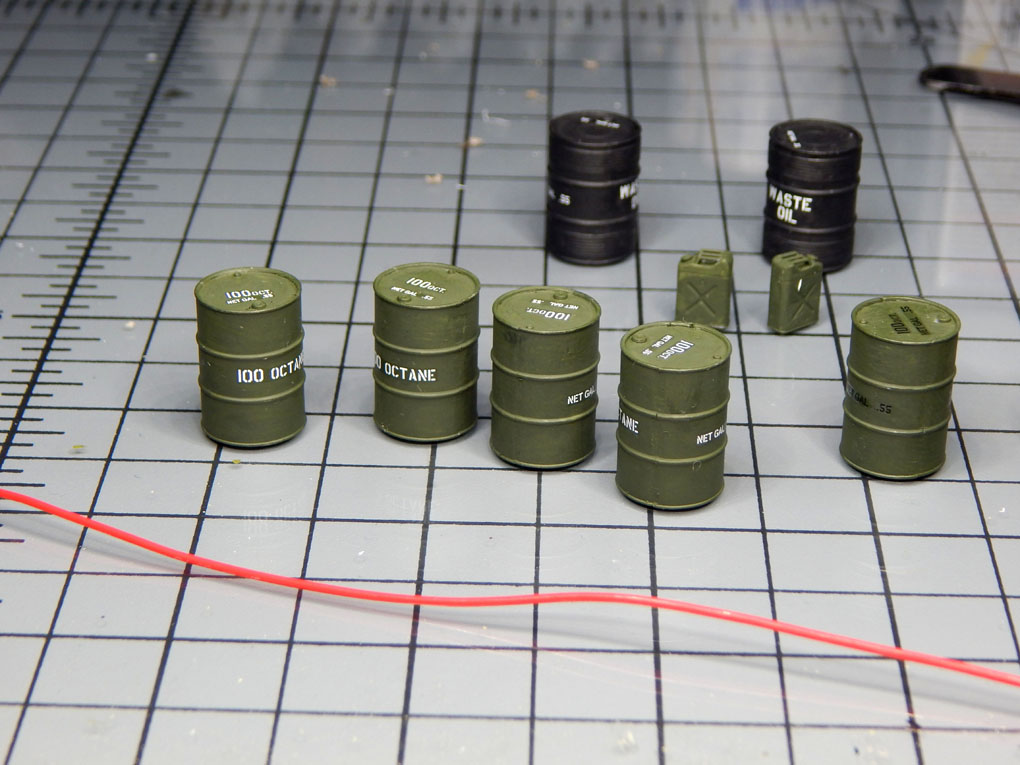
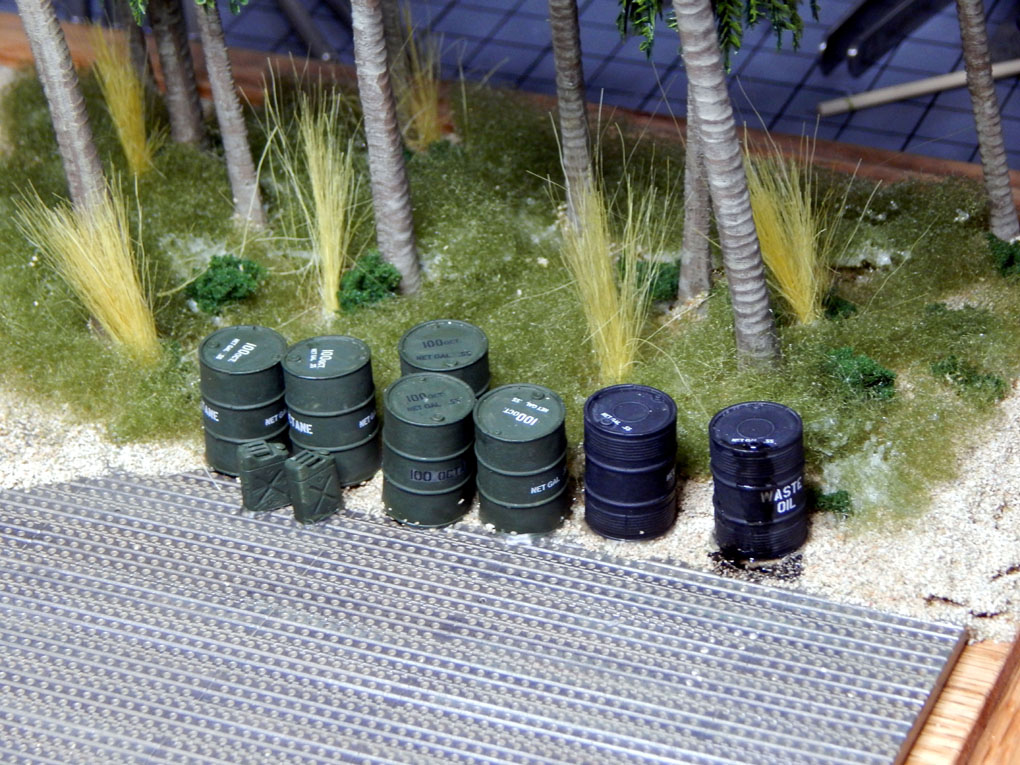
I started off by trimming the edge of the Mini-Art Marston mat. The mat had a thick edge which I needed to thin down so it would meet up with the styrene sheet extensions. These extensions will be the sandy areas. The front will also hold the patches and the rear section will have the palm trees. The size of each section was measured out after I made a mock-up of how the display will be set up. For the sand I will be using All Game Terrain. The Mini-Art Marston mat kit came with some fuel and oil cans which will be added as well. I also purchased some palm trees. These came in various sizes which I will use to create a forced perspective view to a beach.
I am working on the palm trees need to be worked on the make them more realistic looking instead of the glossy plastic toy look. These will them be mounted and then the sand base can be applied. I will be working on assembling the scene from back to front.
You can see all the photos and details from the start in the build log at: 1/48 Tamiya F4U-1A Corsair
7 Likes
The sixth week of the 1/48 Tamiya F4U-1A Corsair
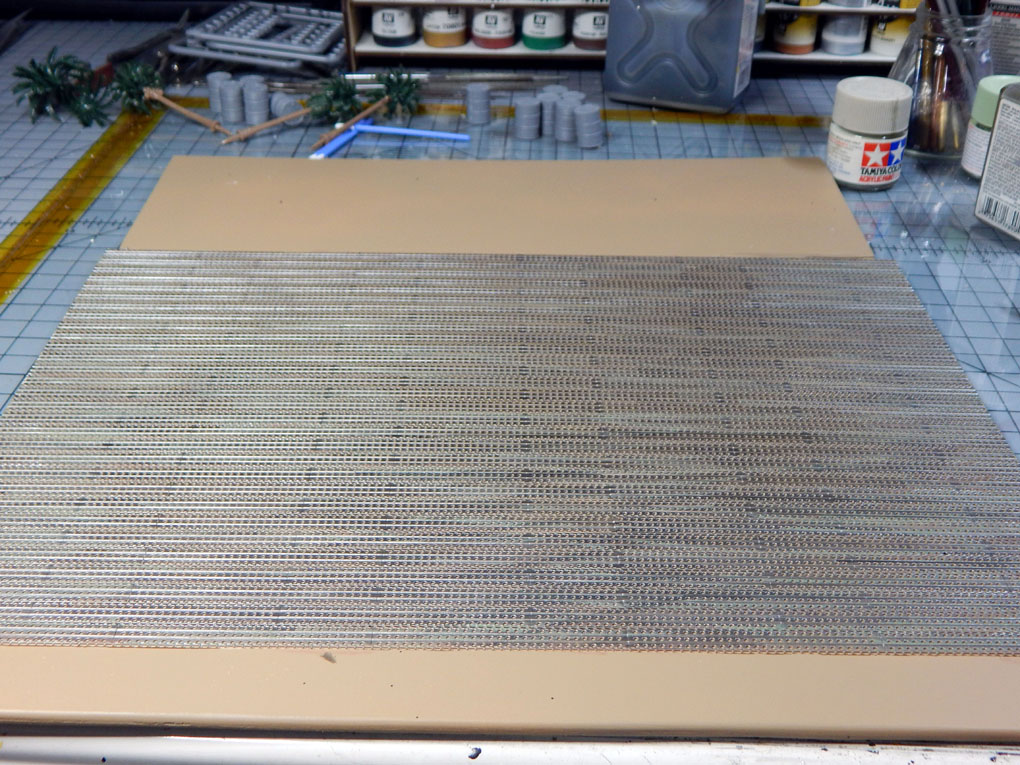
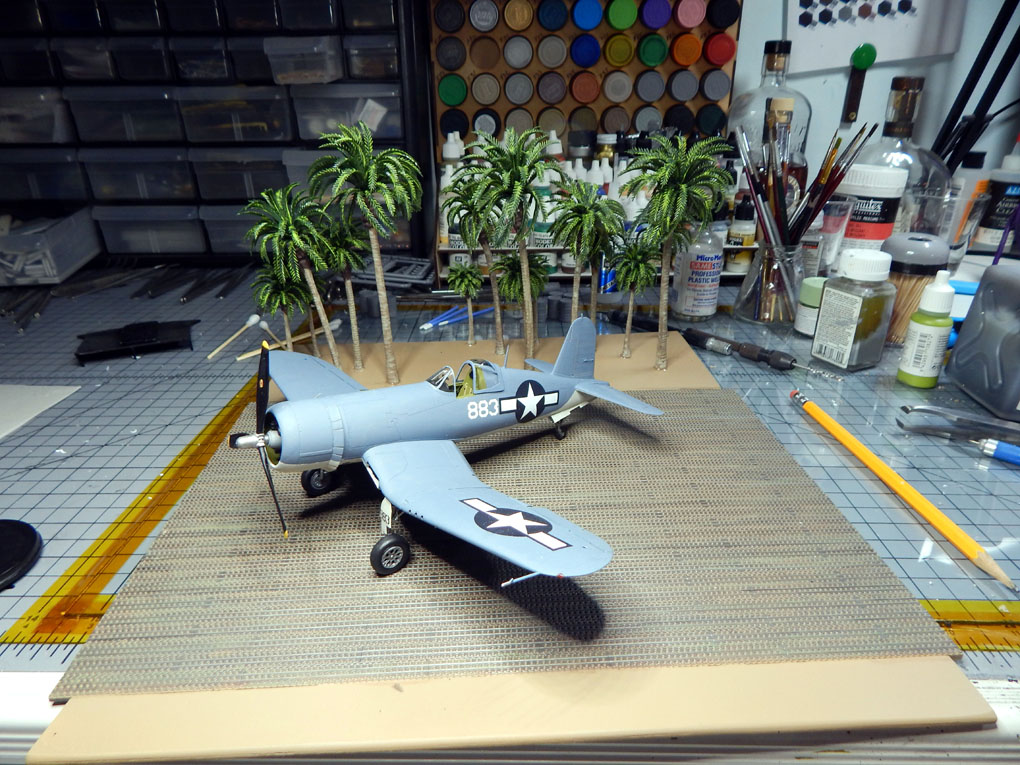
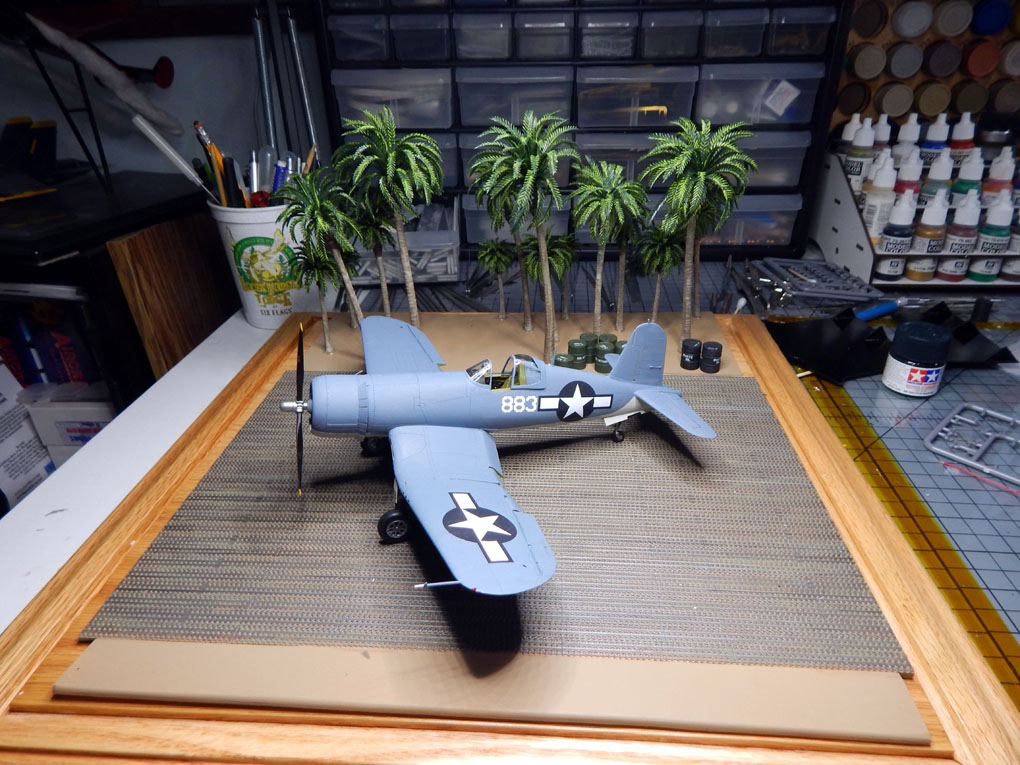
The sixth week of the F4U-1A Corsair project I started off painting the base of the scene. T[It was sprayed with a desert sand so that the holes of the Marston mat show the sandy base. The Marston mat was then base coat painted using a silk swab and Vallejo Metal jet exhaust. The joints were then dry painted with Vallejo Metal gunmetal grey. The edges were then weathered with Vallejo rust and some of the scuffed areas were Vallejo Metal exhaust manifold grey. The final coat was a dry brush of moss green for the algae areas that were formed in low areas.
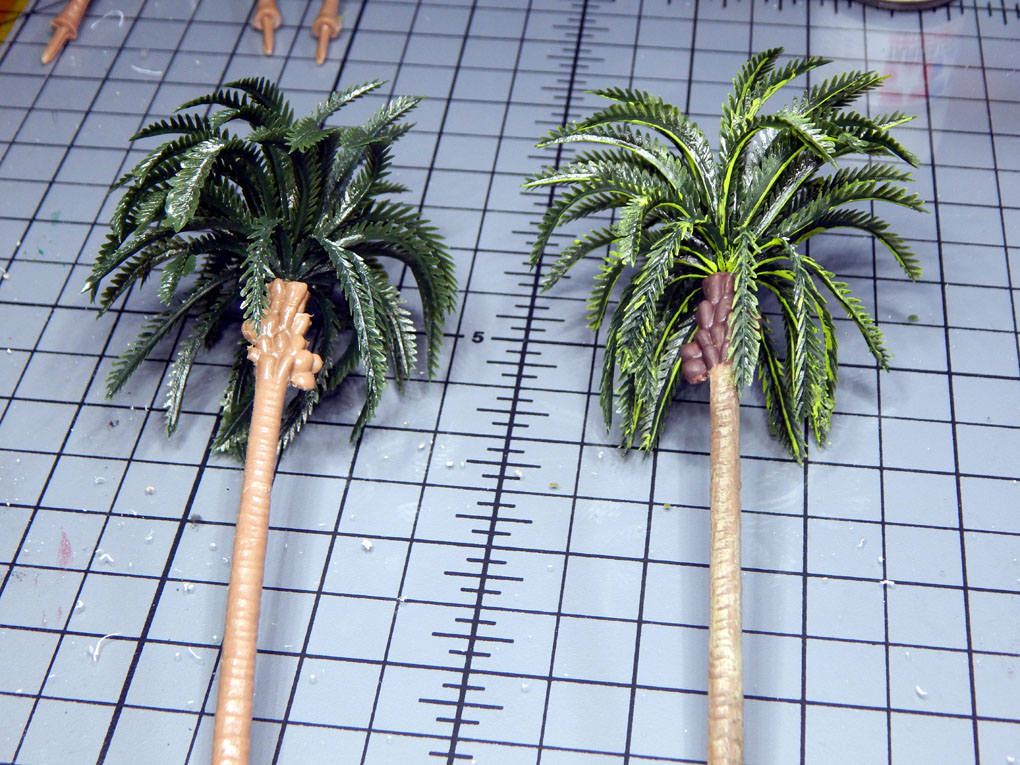
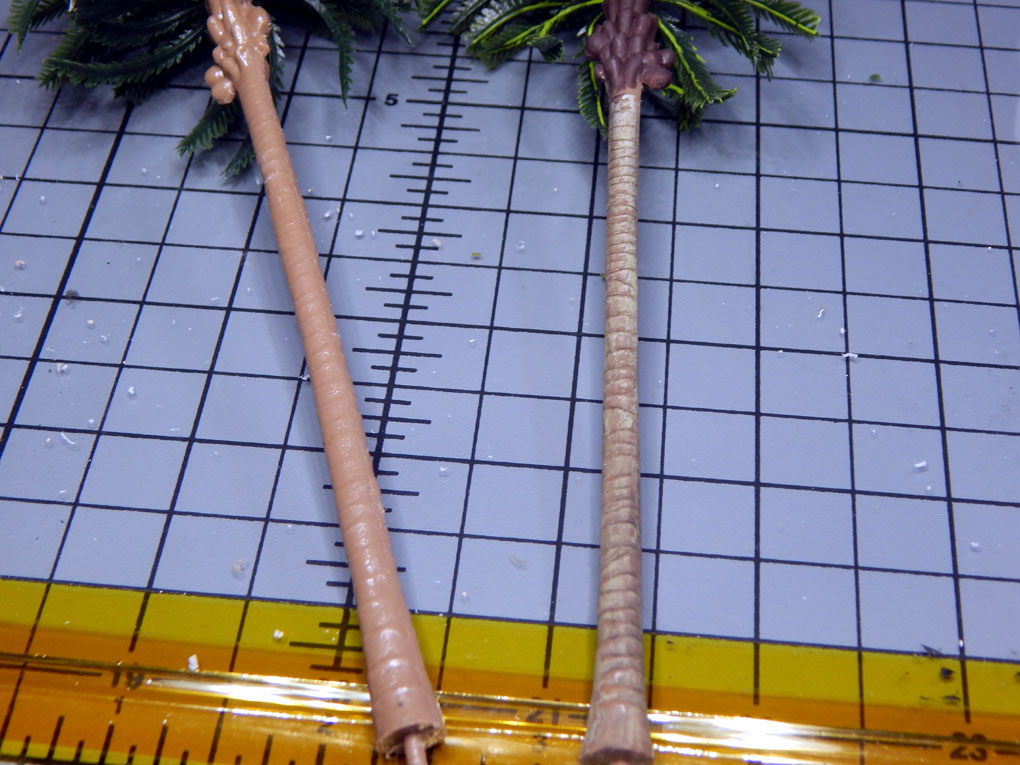
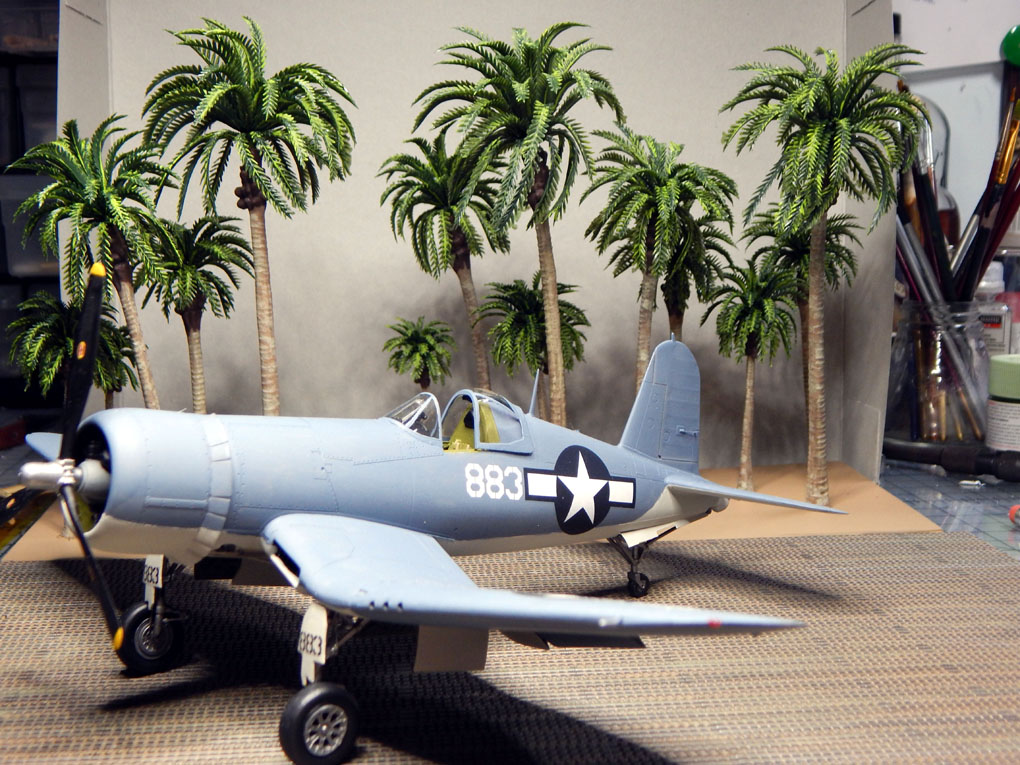
Next I started working on the palm trees. The trees have a “toy” look as they were molded with soft glossy plastic. To make them more realistic I used 1000 grit sandpaper and wet sanded all the tree trunks to rough up the surface. These were the dry brushed with bamboo paint. I used brown and light grey pastel chalk to highlight the ridges and details of the tree trunks. The coconuts were then painted with a brown base. I then used a nylon dry brush using a medium brown to replicate the textured hairy coating on them.
Turning to the fronds of the tree I used some photos and found a light green that match the photos. Vallejo lime green was very close. I then started painting stem line on the underside of the fronds and then the edges of the leaves on the topside of the fronds. This is very tedious and time consuming effort due to the number of fronds on each tree.
I still have the other half of the trees to complete and then I can start mounting them to the base. I still need to complete the stands for the patches and then add the sand on to the base. I also need to paint/detail the barrels and do the final weathering on the aircraft. Finally when the custom case arrives I can mount the base and create the back drop of the beach to complete this project.
You can see all the photos and details from the start in the build log at: https://davidsscalemodels.com/build-log/1-48-f4u-1a-corsair/
5 Likes
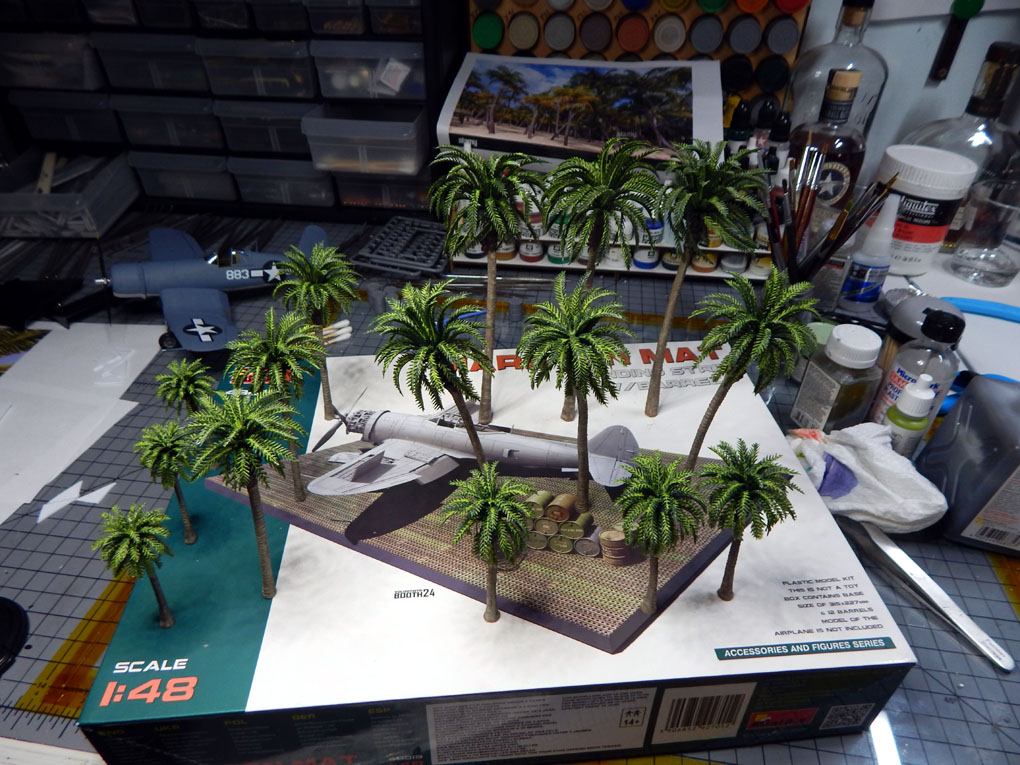
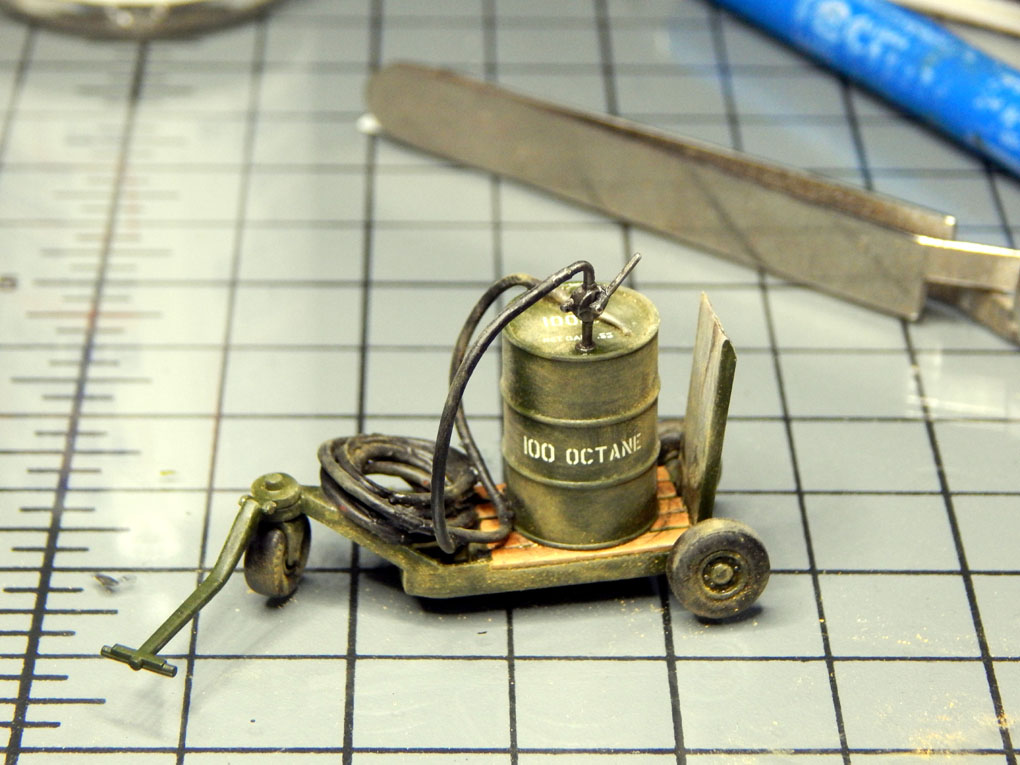
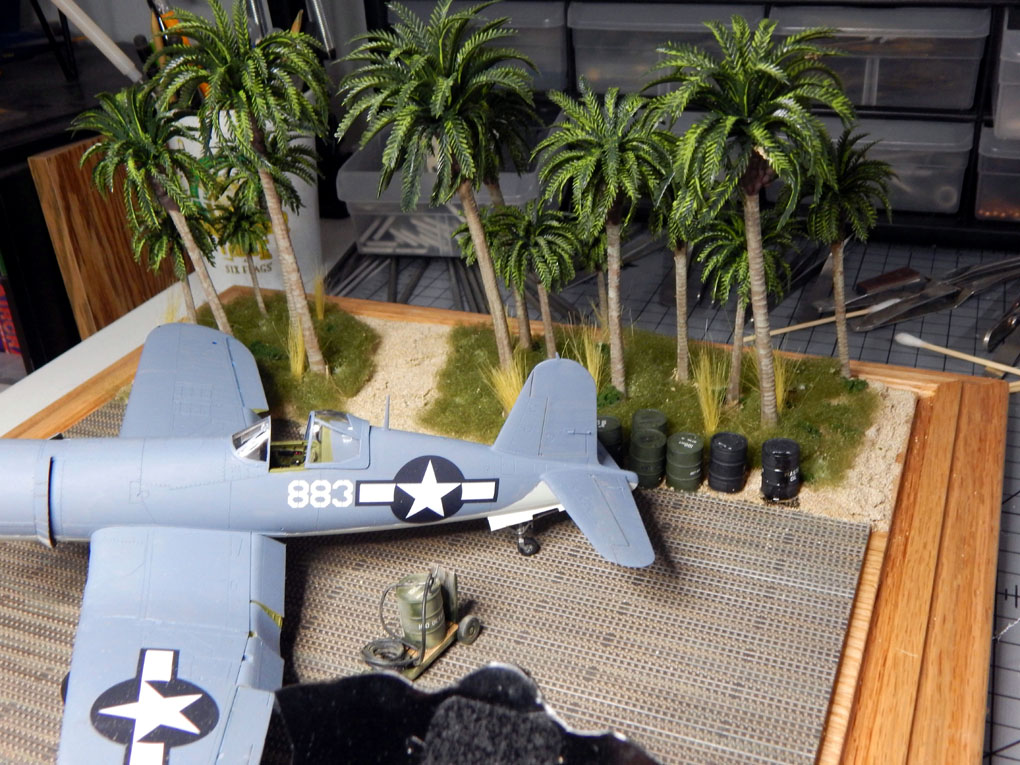
The seventh week of the F4U-1A project I finished all fifteen of the trees and then arranged them on the rear section of the base. I used 10-minute epoxy to set them in place. Next I worked on the fuel and waste oil barrels. One of the additions included with the barrels was a hand fuel pump and nozzle. I used some red tubing from some 28 gauge wire and some brass pins to make the fuel hose. This will be painted with black rubber. I still need to scratch build a barrel dolly which will hold the open fuel barrel. I also had two jerry cans in my spare parts drawer so I will be adding these to the display.
The display case arrived yesterday from Grandpa’s Cabinets. I verified the diorama base will fit correctly on the display case base. I need to mount the diorama base to the display case base and I can then begin laying down the sand. Once the sand is down I need to add some fallen fronds and some ground cover. The gap in the tree line will be made to look like a path to the beach.
Once the display base is completed I will just need to add the patches, create the beach backdrop, and do final weathering on the aircraft. The client is scheduled to pick this up the week before the Christmas holiday.
You can see all the photos and details from the start in the build log at: 1/48 Tamiya F4U-1A Corsair
7 Likes
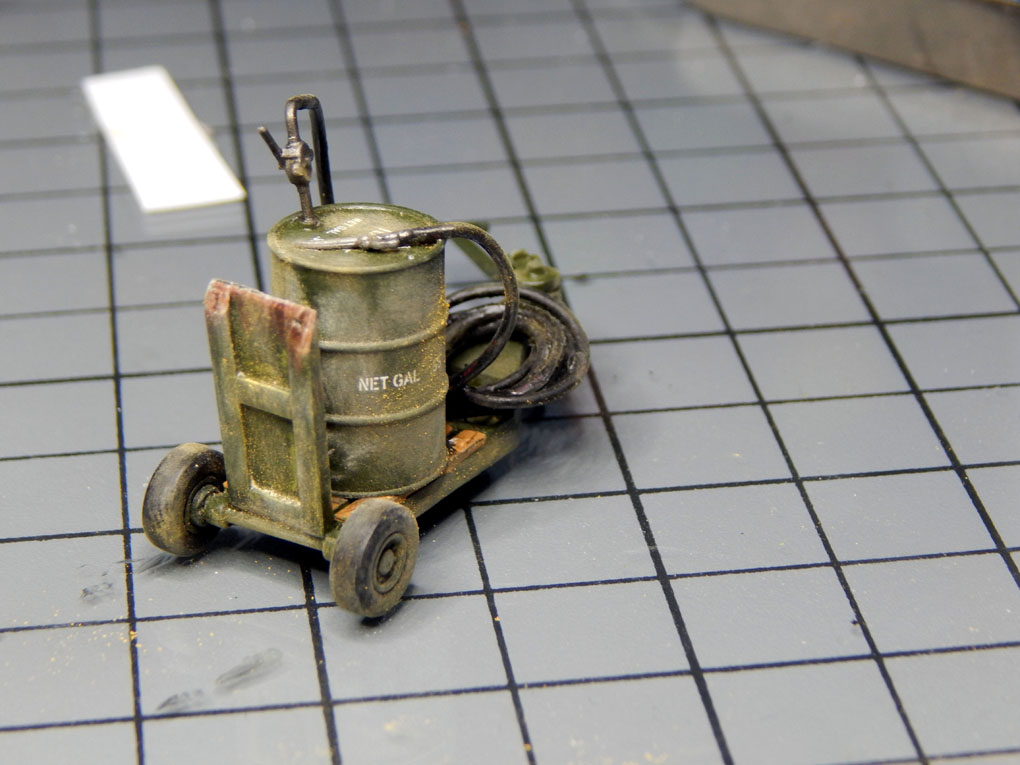
The eighth week of the F4U-1A Corsair continued with detailing the display base. With the diorama base attached to the display base I scratch built a refueling cart. Using some spare parts from past model kits I made a cart that replicated one I found on a Google search. Once the cart was built, painted, and weathered I placed one of the fuel barrels with a hand pump and nozzle that was included with the Mini-Art kit on it. The fuel hose was made using 28 gauge tubing.
I then installed the two mounts for the patches on the front edge of the base and added two layers of sand to the base. The sand was adhered to the base using a 50/50 mixture of PVA and water. A final coat of PVA glue was used to create dunes and foot prints down the path. After the sand had dried I then added the ground cover, tall grass, and small shrubs. I then glued down the jerry cans, fuel, and waste oil barrels. One of the waste oil barrels was then opened and I added some spilt oil down the side and around the top.
The goal for this upcoming week is to complete the weathering of the display base and then do the final touches on the aircraft and get it mounted. I have located a couple of photos to use for the backdrop. I need to see which one will work the best with the diorama. NOTE: The photo with a back drop is just the cover of the Tamiya kit just to get an idea of what a back drop would look like. This project should be coming to a close in the next two weeks.
You can see all the photos and details from the start in the build log at: 1/48 Tamiya F4U-1A Corsair
5 Likes
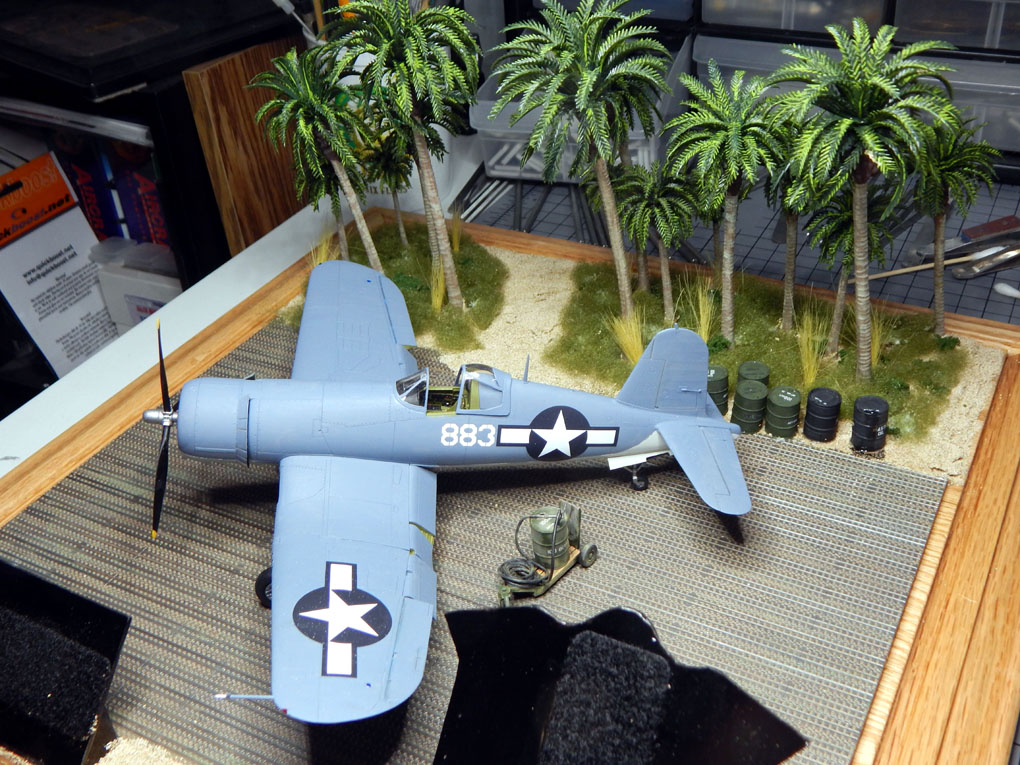
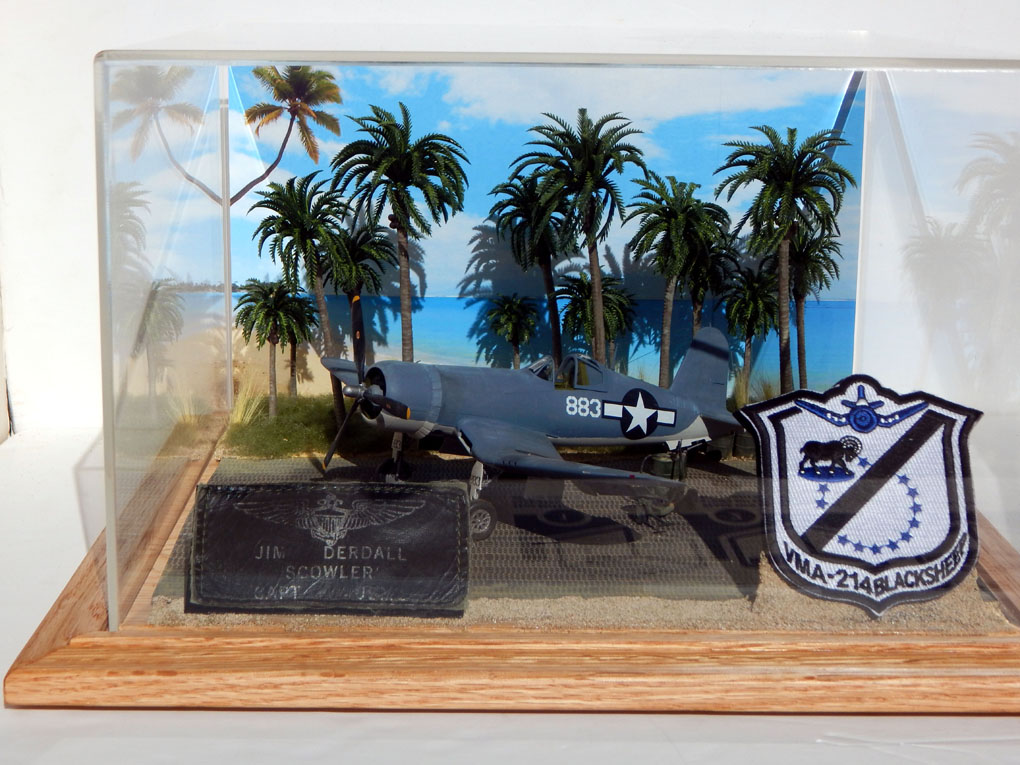
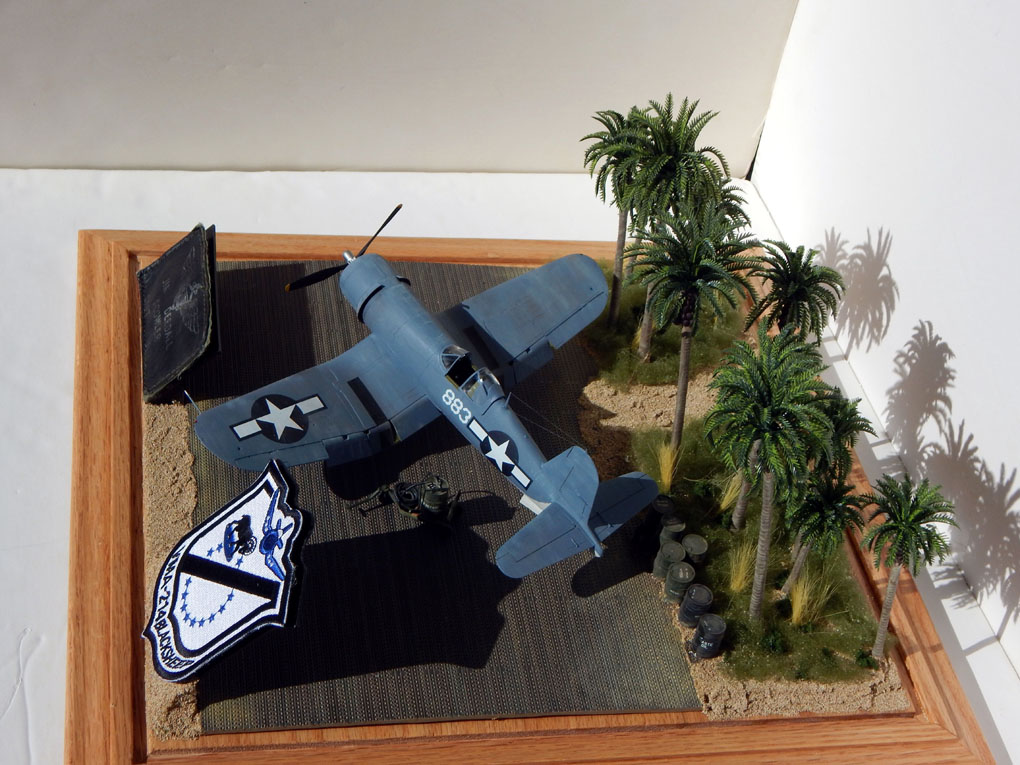
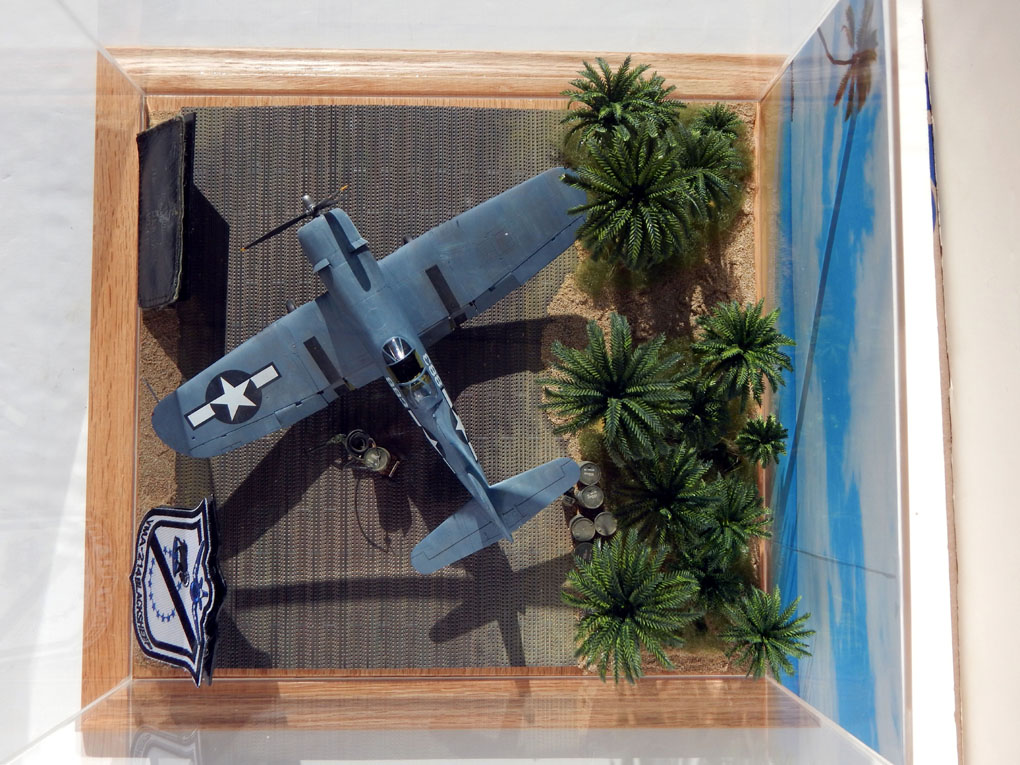
The ninth week of the 1/48 Tamiya F4U-1A Corsair project is finished! The start of the final week I completed the final weathering and added the antenna cables to the aircraft. The aircraft was then mounted to the display base along with the refueling cart.
I printed out a few back drop photos and after seeing what the diorama looks like with each one I found one that worked very well. This was then printed on photo paper and attached to the inside of the display cover. The final touch was to add some sand to the squadron patch mounting board to give the patch a better look.
I tried taking photos on the table with the ring light like I typically do but could not get a decent photo of all the details. I ended up taking photos outside in the natural sunlight. This worked out very well highlighting all the details of the diorama. This was a very fun build. I especially enjoyed creating the scene inside a display case.
Thank you for following along on this unique project. Happy modeling!
You can see all the photos and details from start to finish in the build log at: 1/48 Tamiya F4U-1A Corsair
8 Likes


![https://i0.wp.com/davidsscalemodels.com/wp-content/uploads/2025/09/DSCN3983.jpg[/img]](https://i0.wp.com/davidsscalemodels.com/wp-content/uploads/2025/09/DSCN3983.jpg%5B/img%5D)
![https://i0.wp.com/davidsscalemodels.com/wp-content/uploads/2025/09/DSCN3985.jpg[/img]](https://i0.wp.com/davidsscalemodels.com/wp-content/uploads/2025/09/DSCN3985.jpg%5B/img%5D)
![https://i0.wp.com/davidsscalemodels.com/wp-content/uploads/2025/09/DSCN3988.jpg[/img]](https://i0.wp.com/davidsscalemodels.com/wp-content/uploads/2025/09/DSCN3988.jpg%5B/img%5D)
![https://i0.wp.com/davidsscalemodels.com/wp-content/uploads/2025/09/DSCN3990.jpg[/img]](https://i0.wp.com/davidsscalemodels.com/wp-content/uploads/2025/09/DSCN3990.jpg%5B/img%5D)
![https://i0.wp.com/davidsscalemodels.com/wp-content/uploads/2025/09/DSCN3991.jpg[/img]](https://i0.wp.com/davidsscalemodels.com/wp-content/uploads/2025/09/DSCN3991.jpg%5B/img%5D)
![https://i0.wp.com/davidsscalemodels.com/wp-content/uploads/2025/09/DSCN3993.jpg[/img]](https://i0.wp.com/davidsscalemodels.com/wp-content/uploads/2025/09/DSCN3993.jpg%5B/img%5D)