Hello
I have been ploughing through a lot of Soviet tanks recently and now I am shifting gear to try and move beyond the slapping it together routine.
So Im pushing out my boat and trying this one. I prefer Dicker Max but the suspension is hard to do.
I bought Trumpeters 1:35 kit and I will just multiply everything and blow it up to 1:16.
The interior will be a nightmare but if I mess up I will just slap a lead sheet tarp over the top of it.
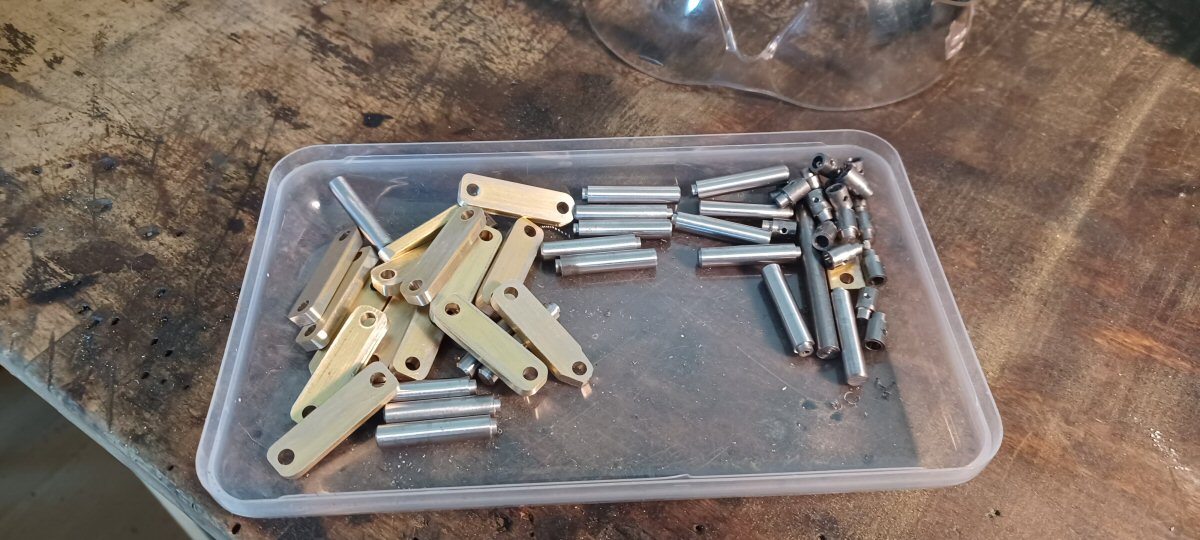
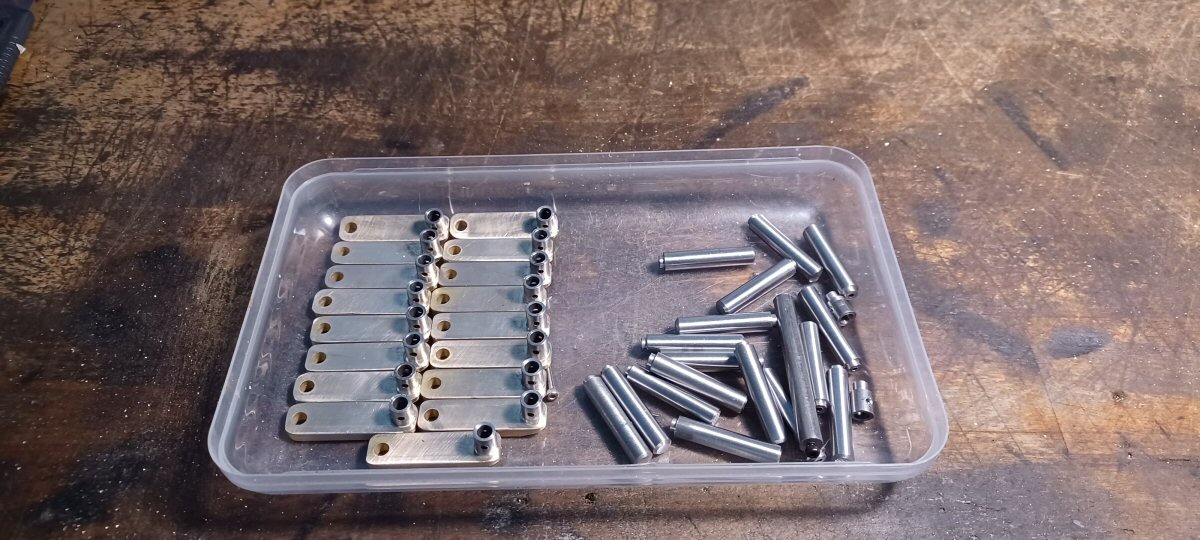
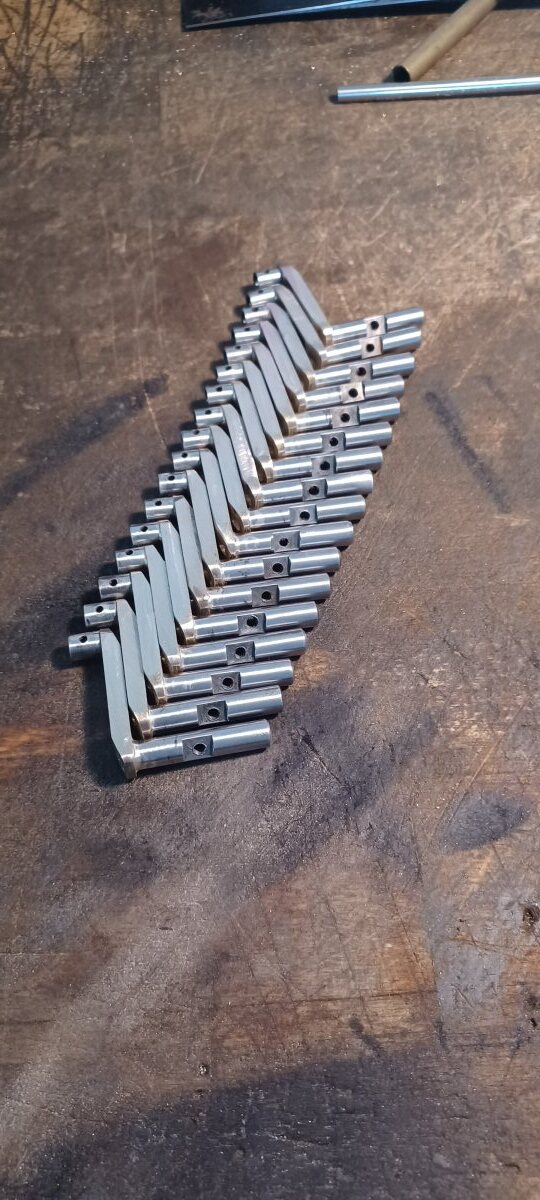
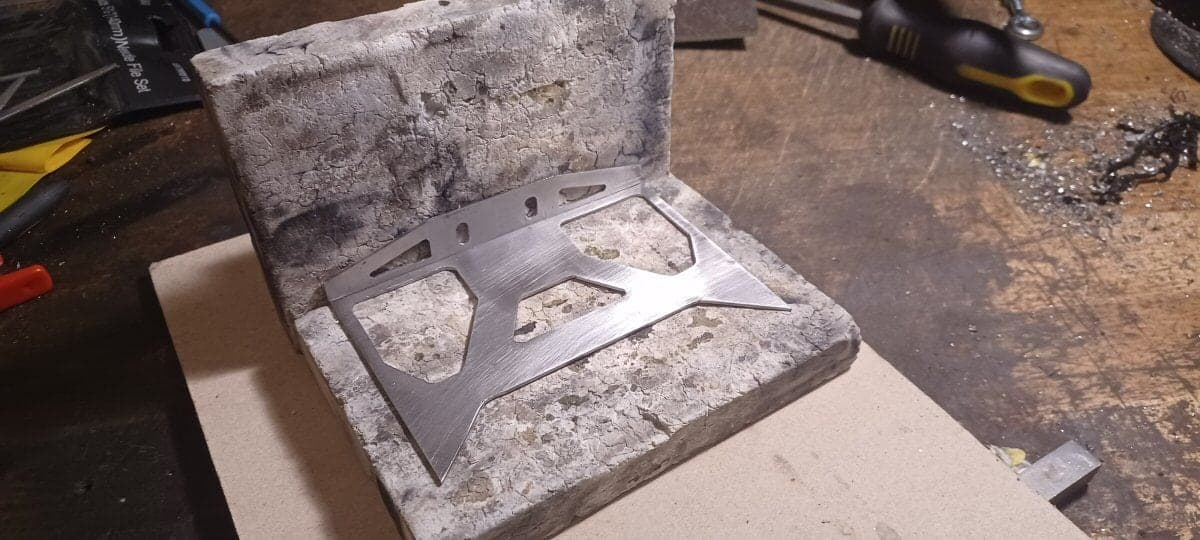
I started on the swing arms and just made them from brass and bits of steel rod iinside bits of steel tube and whole lot of silver solder.
A lot of filing and grinding and I got there in the end. My plan is to use Panther road wheels … 100% not correct in terms of the “teeth” on the track but they actually do not look a million miles from the pictures I could find and they will fit some tracks I have.
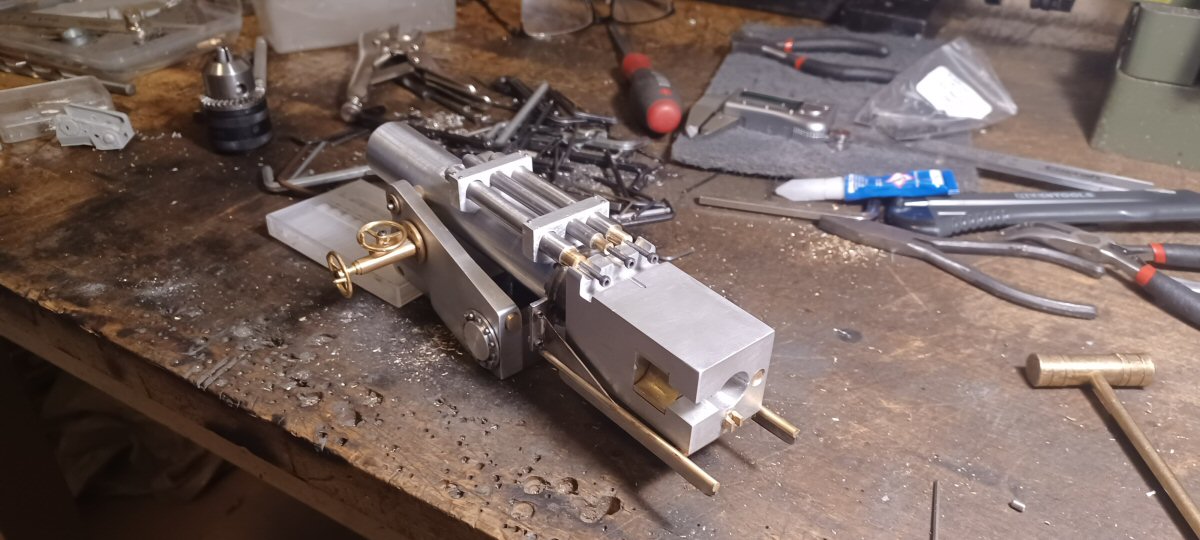
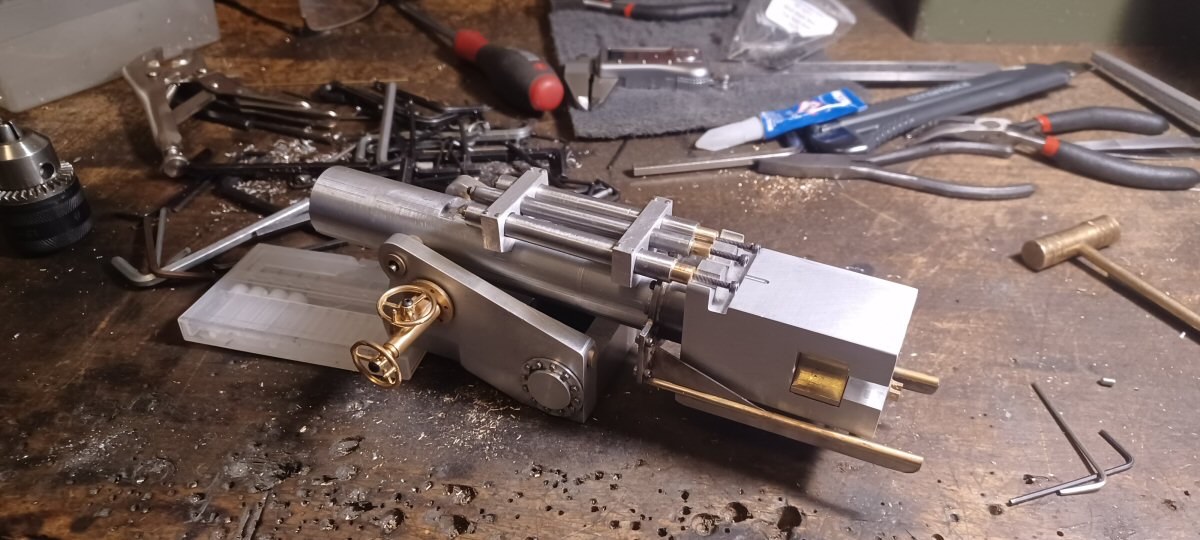
Then I jumped in the deep end and started on the back end of the gun assembly. There is a lot to do on this and small bits but I roughed out the breech and some of the mount from lumps of aluminium and brass and steel and kind of stuck it all together. Lot more to do with this bit.
After starting the gun I realised this was going to be a very long project so I cannot promise regular or frequent posts but I will post when I have something.
P
14 Likes
This will be a long journey, I will follow your steps. I see some hard days coming to you, good luck with this project 
1 Like
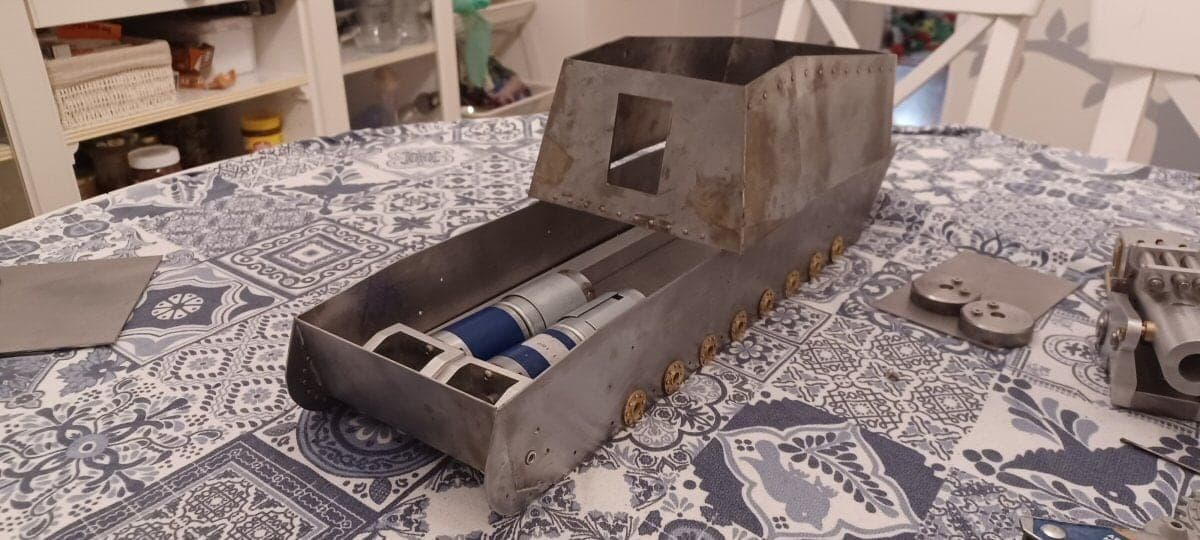
I thought I better show a sign of life on this build so here is a short, if not entirely interesting, update.
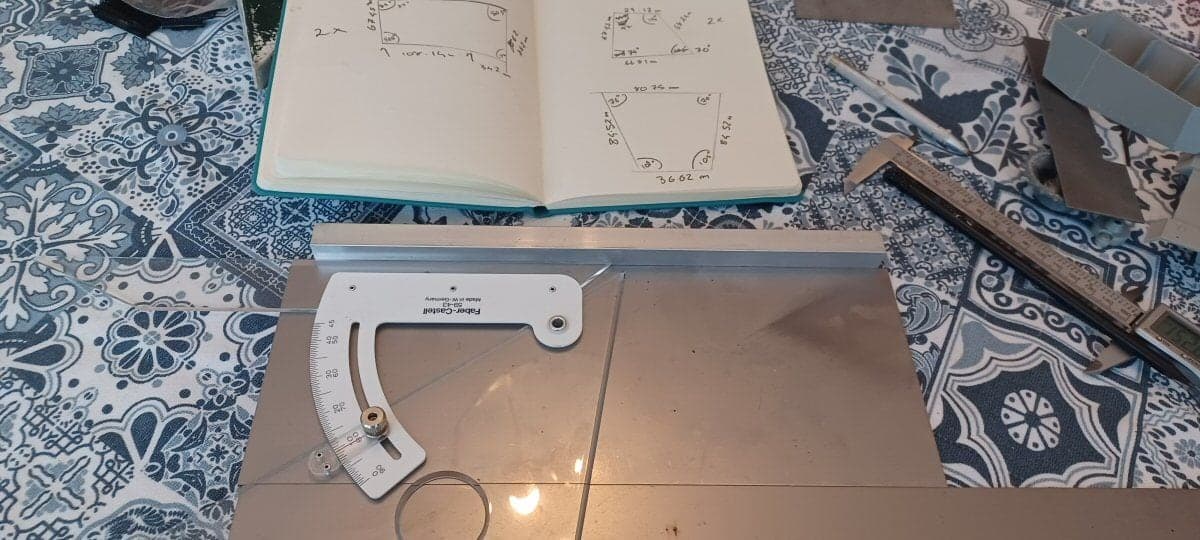
This model has a huge amount of surfaces and that meant a lot of measuring and laying out on sheet and then chain drilling, filing and hand fitting.
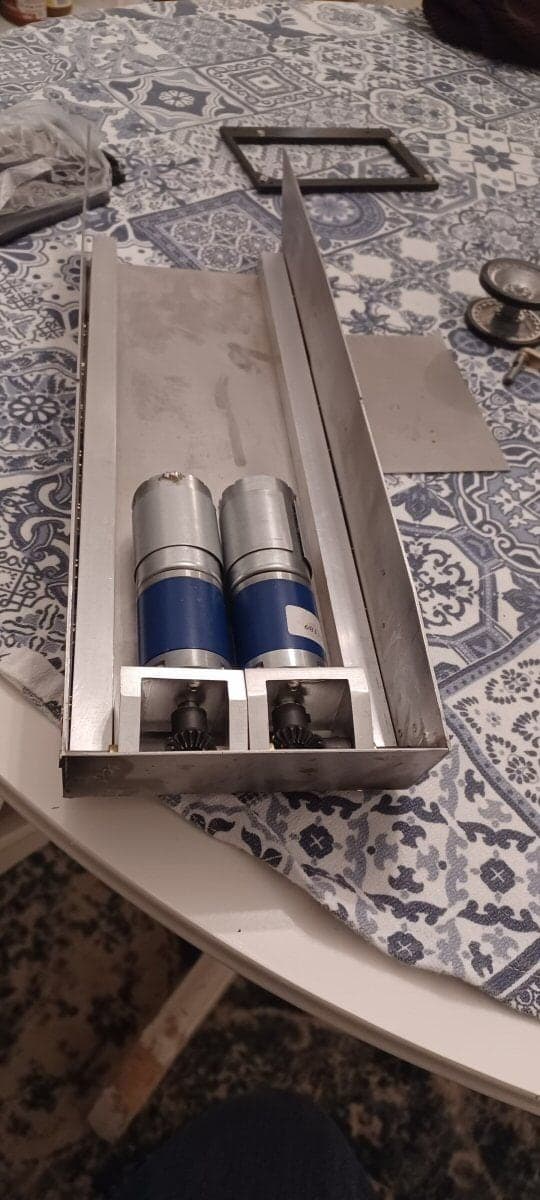
I also did some work on my motors…they just fit between the two suspension rails and I still need a mount for them.
Some of the bits were really annoying - such as the weird rack thing that th egun is going to sit on…this has at least twenty individual plates and putting it together was horrible.
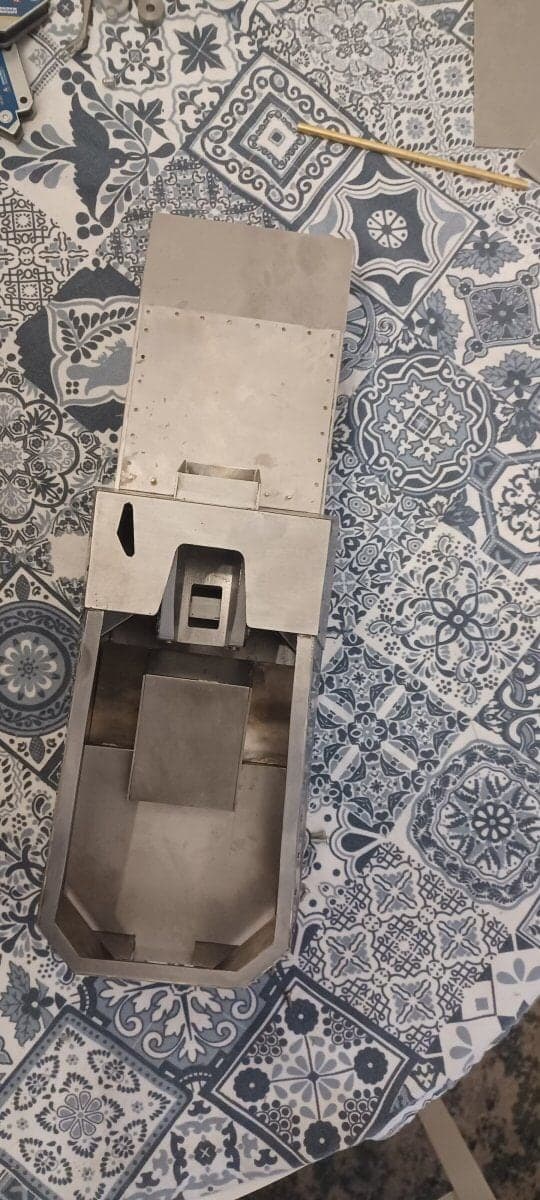
Then the hull started to go together. There are so many angles and so many weird joins that it was a real hassle. But the skeleton of it is in place.
Looks horrific at th eminute but thats just the way of it…
P
5 Likes
Ive been quiet on this one but progress has been made…mostly on the interior bits.
Slowly but surely I was putting together all the features which involved work I had sorely underestimated.
Even those stupid wooden (brass) slats on the base board took literally weeks…filing each one to the right length ans angle. I managed to get hold of many of the things like grenades and MP40s in metal but a lot of stuff I had to make.
Those damned shells nearly killed me and they still dont look OK.
Everything needs fixing and smoothing out.
The hull looks like I dragged it from a swamp…the surface rust is winning the battle.
I still have to do a radio, the optics and so on. The gun mantlet needed more trigonometry than I remember learning at school…
All I can do is push on and look forward to getting paint on this…
P
7 Likes
Very impressive and very clever.
1 Like
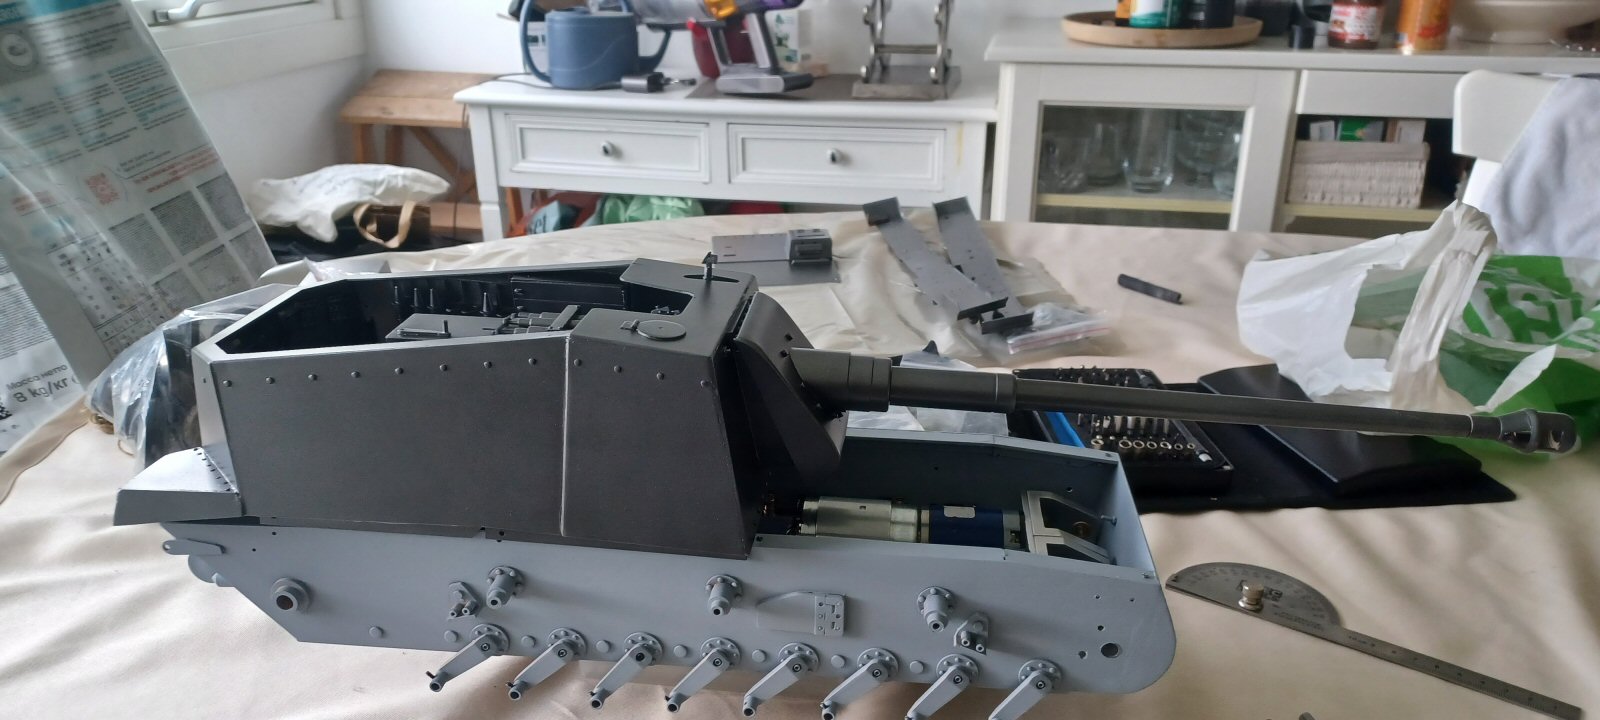
Started roughing out the cannon today and its really puts everything in perspective… its huge. And my measurements are correct.
Its in a total of four parts - the breech, the mantlet and its tube, the bit in front of that and then the barrel.
They are all held together with a length of M5 studding. This is necessary as the mantlet needs to be removeable to get the casemate off.
Lot of detailing and stuff to do but the cannon is in the home stretch…
p
4 Likes
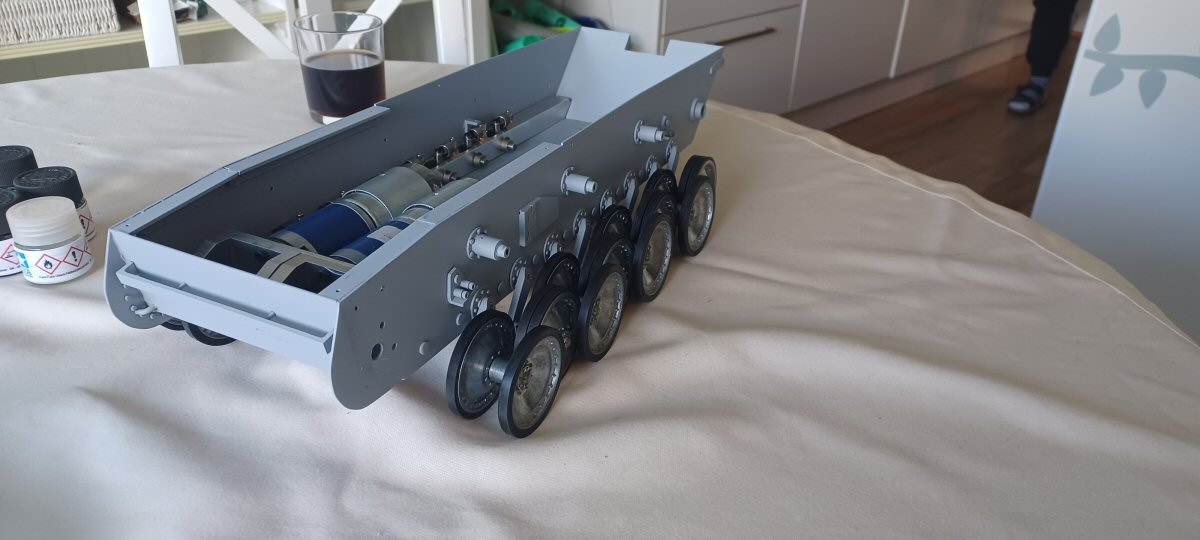
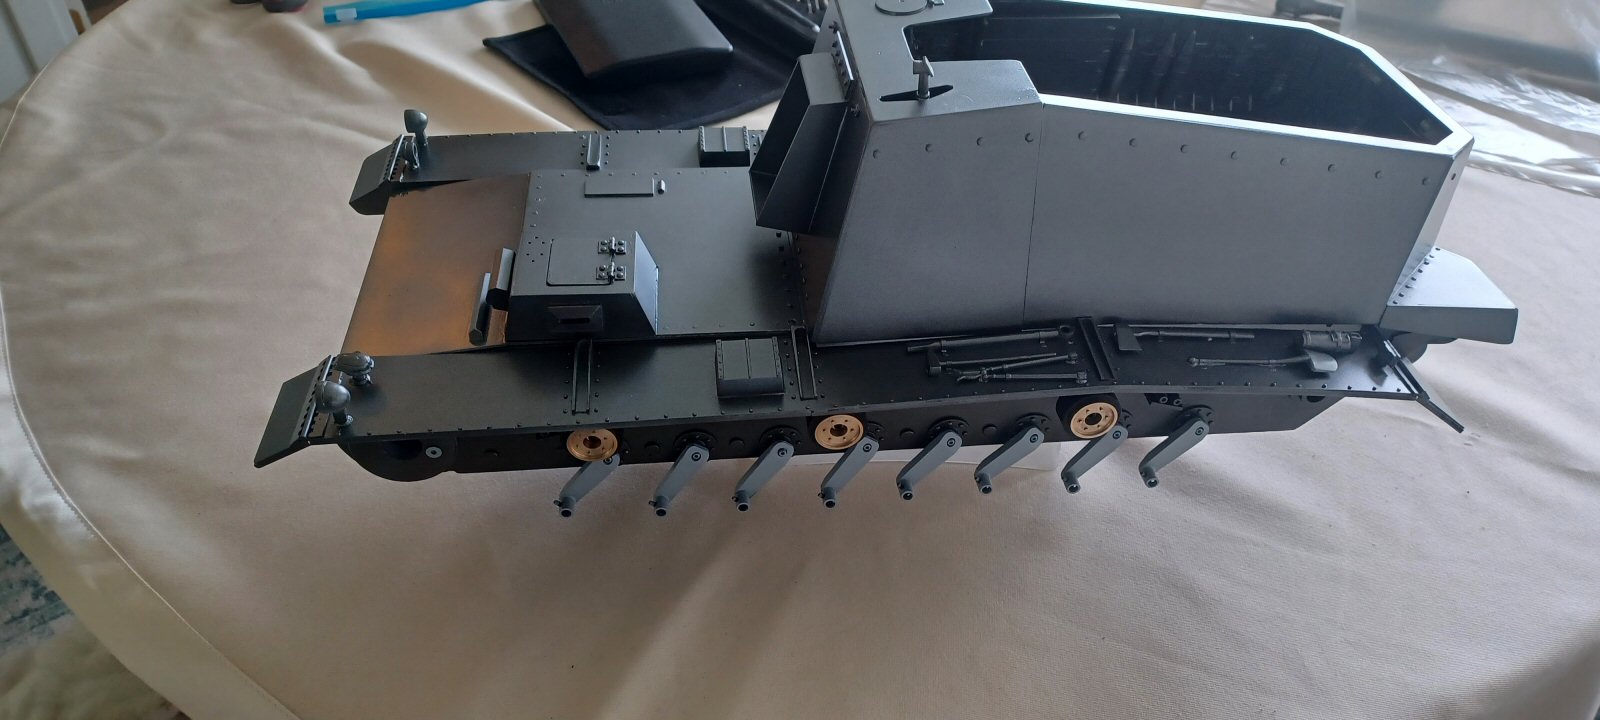
Ive started putting primer on this tank now as well as moving into the home straight…
Had to make a move on the suspension racks so I did. Got as far as shown but then realized I was missing M2.5 bolts of a very specific length for the swing arms so I have to wait for those. Otherwise test fits of the road wheels showed no problems and every thing is swinging freely and not binding.
Mounting the motors meant I had to make some cuts in the mounts to accommodate the shaft rings that will hold the swing arms in place but that was OK. Also, the entire suspension system is just below the height of the crew platform which cuts the hull internal heights so I was glad about that as it was a stress moment.
As can be seen…I have started priming everything as I move towards final assemble. Mudguards are next, then it will be the drive shafts.
I tried to track down the Aber dimple plate for 1/16 but got one and realized I would need four packs. They are hard to get and expensive so I am think there will not be any dimple plates. It would raise the cost of teh tank by 50% and thats a bit daft in my opinion.
I also got my swing arms on left and right and connected to the suspension racks.
And then I test fitted the wheels which are after market as I have no way of dealing with wheels this big. For the first time ever I got a set of interveaved wheels that are not touching each other and where one is not higher than all the rest!
P
5 Likes
This is a discussion about the radio in Sturer Emil.
David
1 Like
I saw that one.
Im guessing two points are pertinent:
-
Where its placed - I plumped for the side mounting that Trumpeter went with. For no real particular reason. But it did seem to me that you would need very long arms to reach from the right hand seat to the front armour plate from a seated position? But maybe he didnt need to actually reach the dials or whatever. Either way …I went with Trumpeters positioning. Simply because it seemed logical to me.
-
The type of radio. I cannot see well enough to try and make a radio. So I bought every one I could and compared them to what was in the Trumpeter version. Then used the one I thought looked OK to me…
I’m not really too stressed about the fine points - I’m using panther wheels, Tiger sprocket and Tiger transport tracks after all so my sins are indeed great!
Saying all that … the position of the radio is a conundrum. I have never found a picture of it in position so have no idea where it was in reality. Saying that…there are not many pictures of the vehicle at all.
P
2 Likes
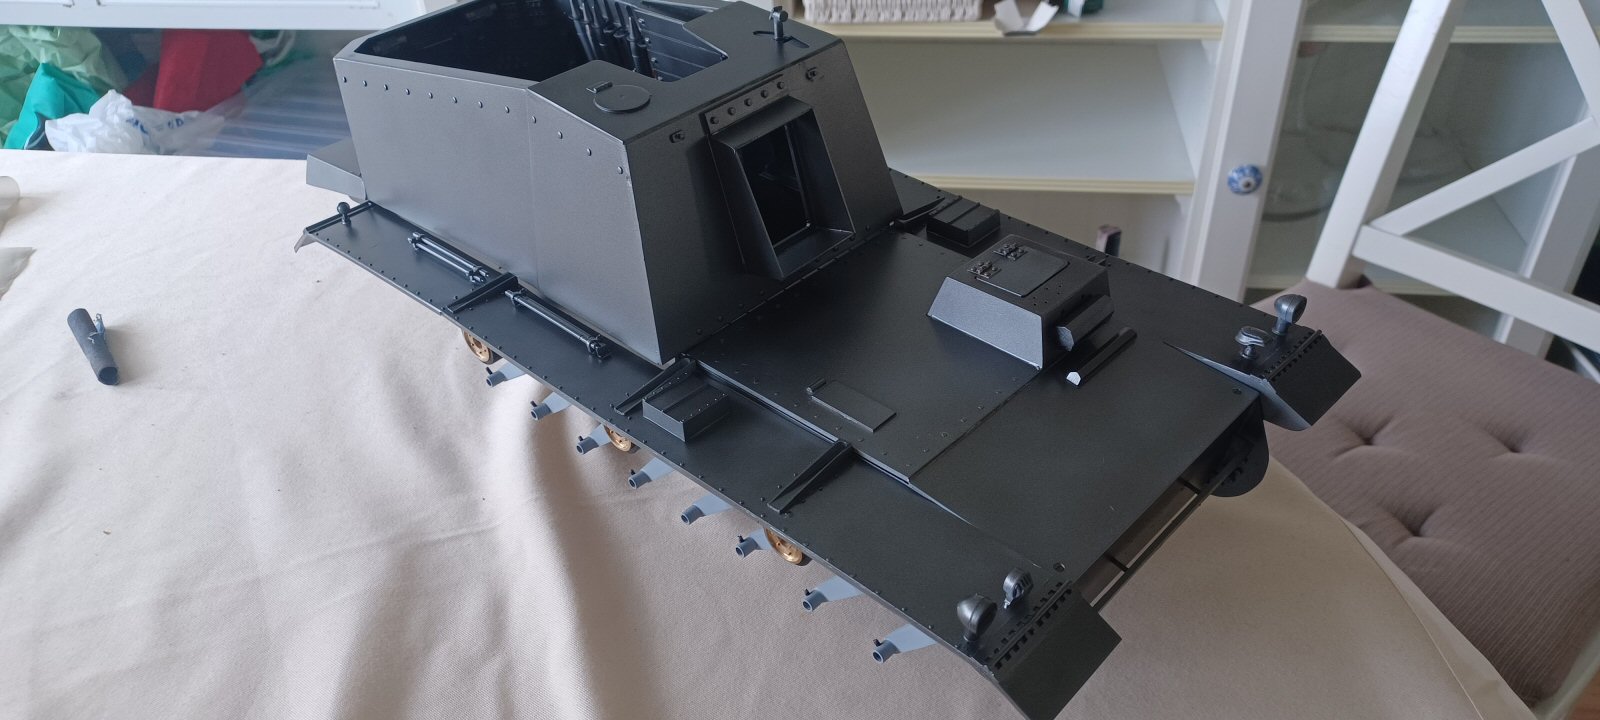
I have started to paint and test fit components now and identify issues as I go along hopefully. It really needs another coat(s) of paint but with an airbrush this is very annoying to do franky.
There is going to be a probable issue with fitting the casemate around the gun assembly but I was expecting this and I have one good and two dodgy backup plans to fall back on.
The gun itself is back heavy and will need a screw or something to keep it level.
I am waiting for some M2 grub screws before I finally attach the wheel and tracks.
Exhaust pipes need making, the idler mounts need making and a few other things.
p
3 Likes
You could use a spring to keep it level, but still movable. Or a gear drive if it is to be RC.
Ken
1 Like
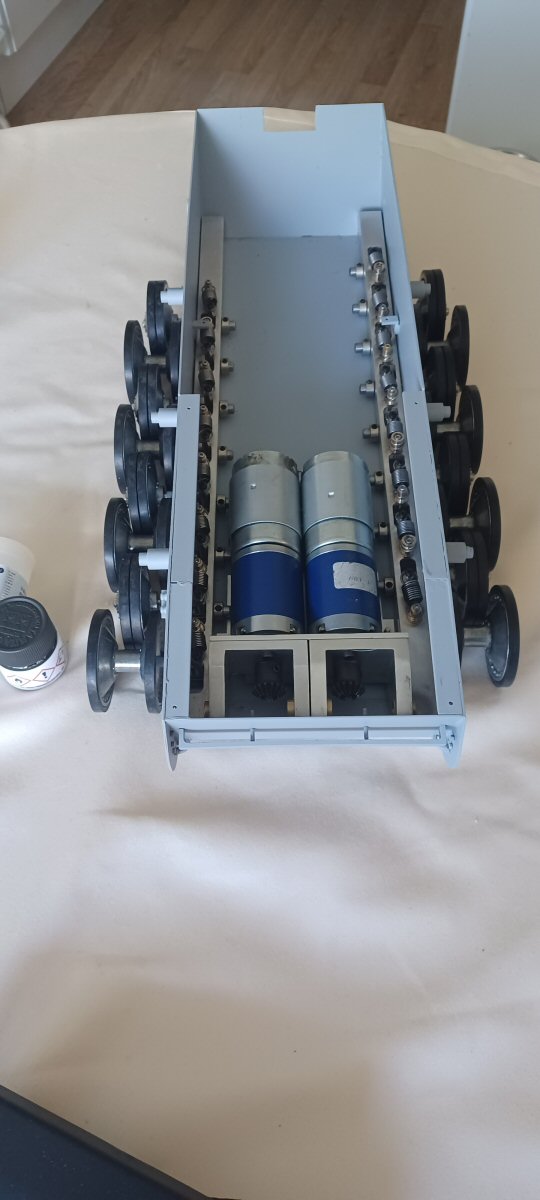
This is probably as “assembled” as it has been and Im actually fairly satisified. Some fit and finish issues but nothing major I think.
The motors are working and for once, thanks to some very careful measurements 6 months ago, I do not need shaft collars to hold the drive shafts in place - the gear themselves does th heavy lifting and I dont have to worry about dropping grub screws…
Otherwise…some of the heavy rear end of the gun was offset by the long barrel and the balance issue does not seem so bad at the minute but I will deal with it with a spring or something as suggested.
Sprockets and idlers finally fitted.
Still some coats of paint to go on and some screws to be fitted. Not to mention the wheels.
4 Likes
A real metal monster. Brilliant skills and real model making …
2 Likes
I am not the most prolific of posters but there comes a time in every tanks life where I cannot resist taking a photo.
And the first time it sits on its own two tracks is one of them.
When all the measurements were made months ago, all the holes drilled ages ago and all the time sunk in it… and then the tracks go on and I do not have to say Fu#¤%&/()()?**^^k it! because of some mistake I made at the very start…thats satisftying.
The road wheels, sprockets and tracks are not mine - I bought them aftermarket off Asiatam. As I cannot make the “dished” in curves on the wheels. But I like them very much.
Still need return roller hubcaps, an exhaust, adjustment of the muzzle brake and a few other things but I can really see th eend of the road at this point…
3 Likes
Finished construction on this today. Some screws to be tightened, some to be loosened maybe.
It now goes on the shelf until I get enthused enough to kit it out for mobility. I have all the stuff already but need to clear another tank off the bench before I start messing around with soldering and wires and stuff.
This all took a bit longer than anticipated but at least its done now.
Thanks for folloiwng along and when I do get it to move, I will post a video or something.
Cheers
P
3 Likes