12 year old shelf queen resurrection (Sd.Kfz.8 armoured (gepanzerte) DB10

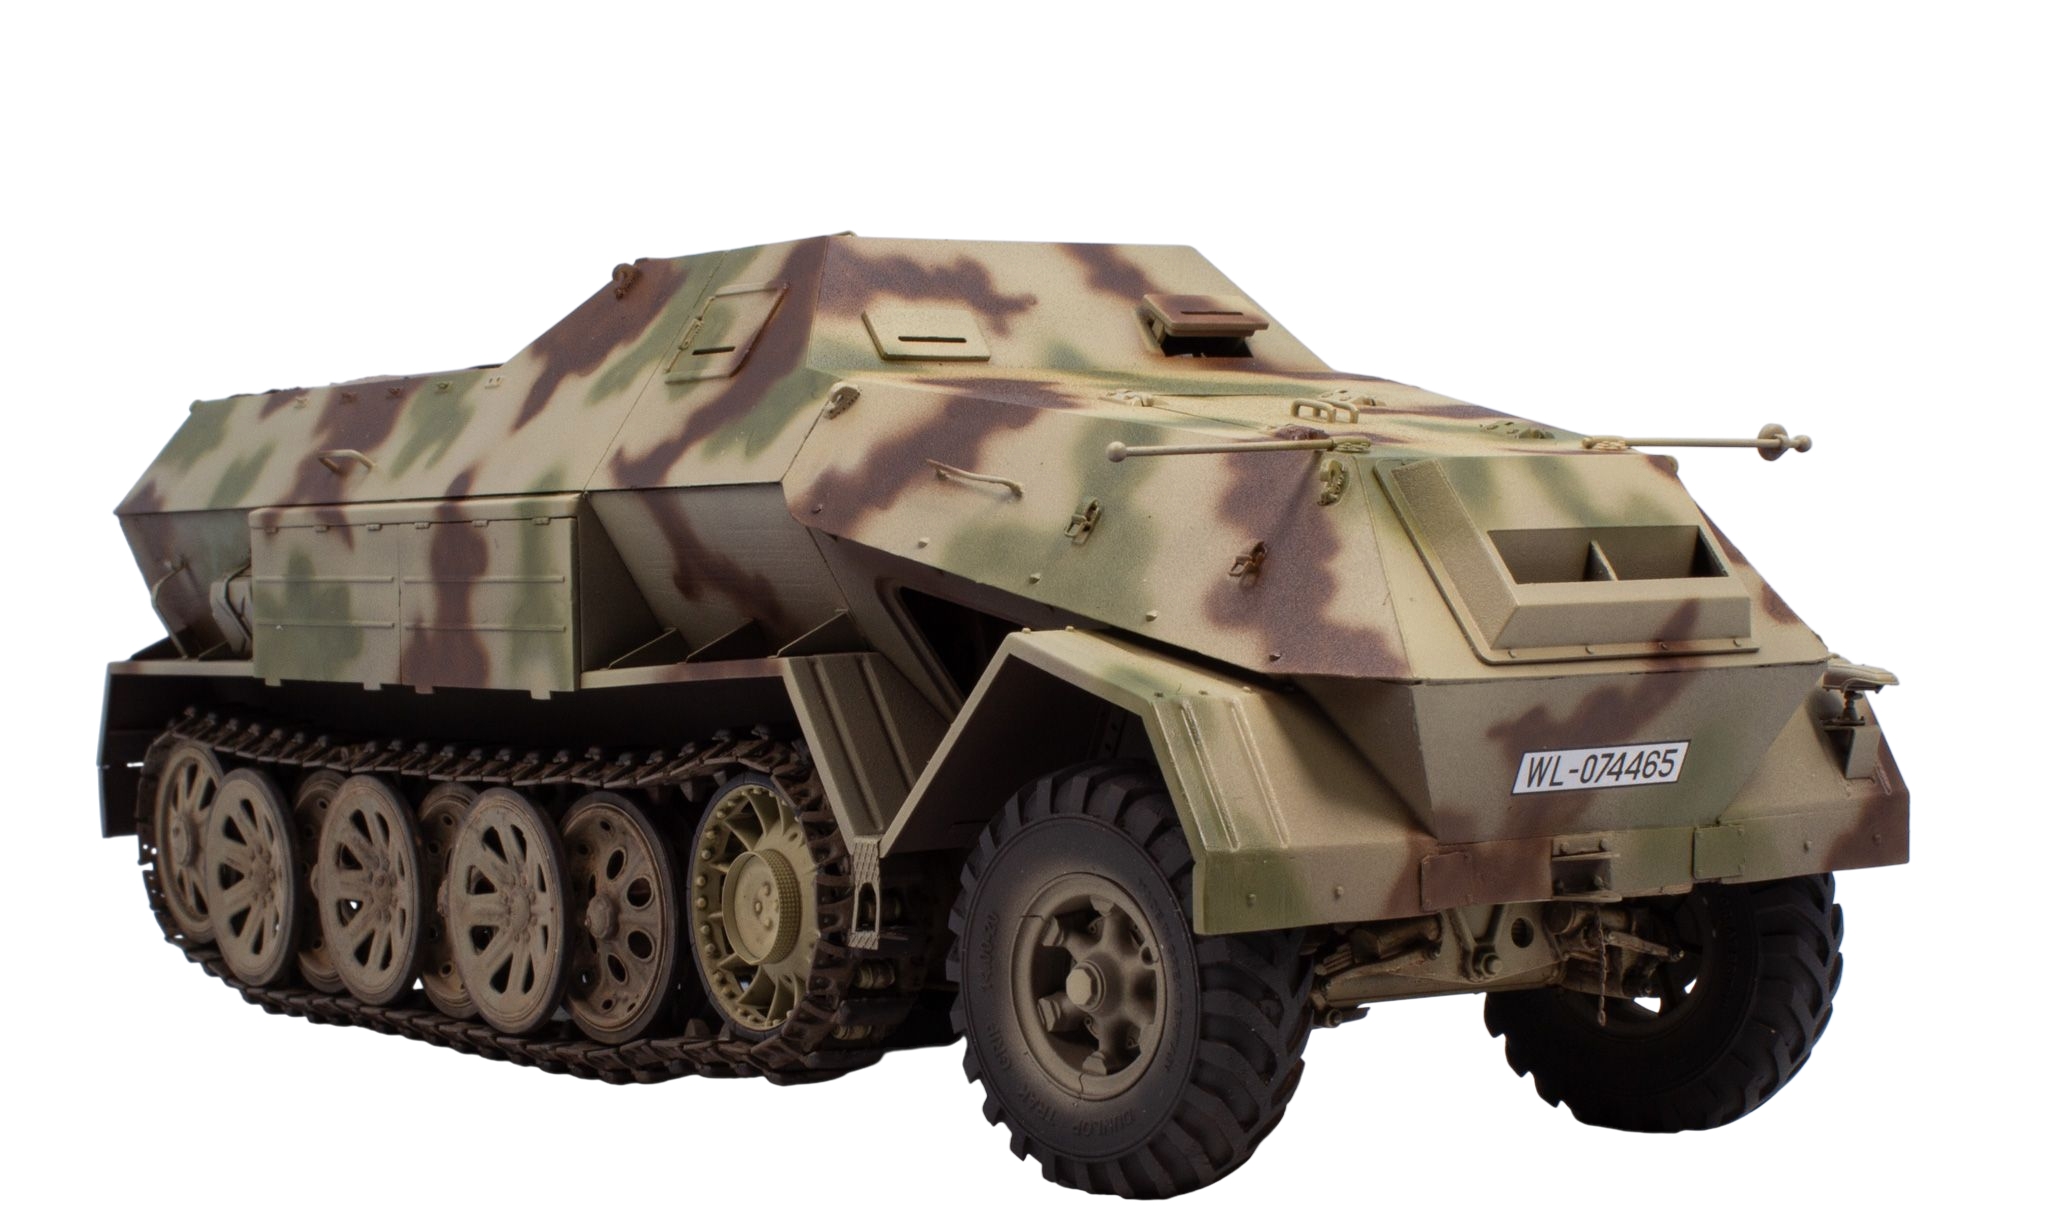
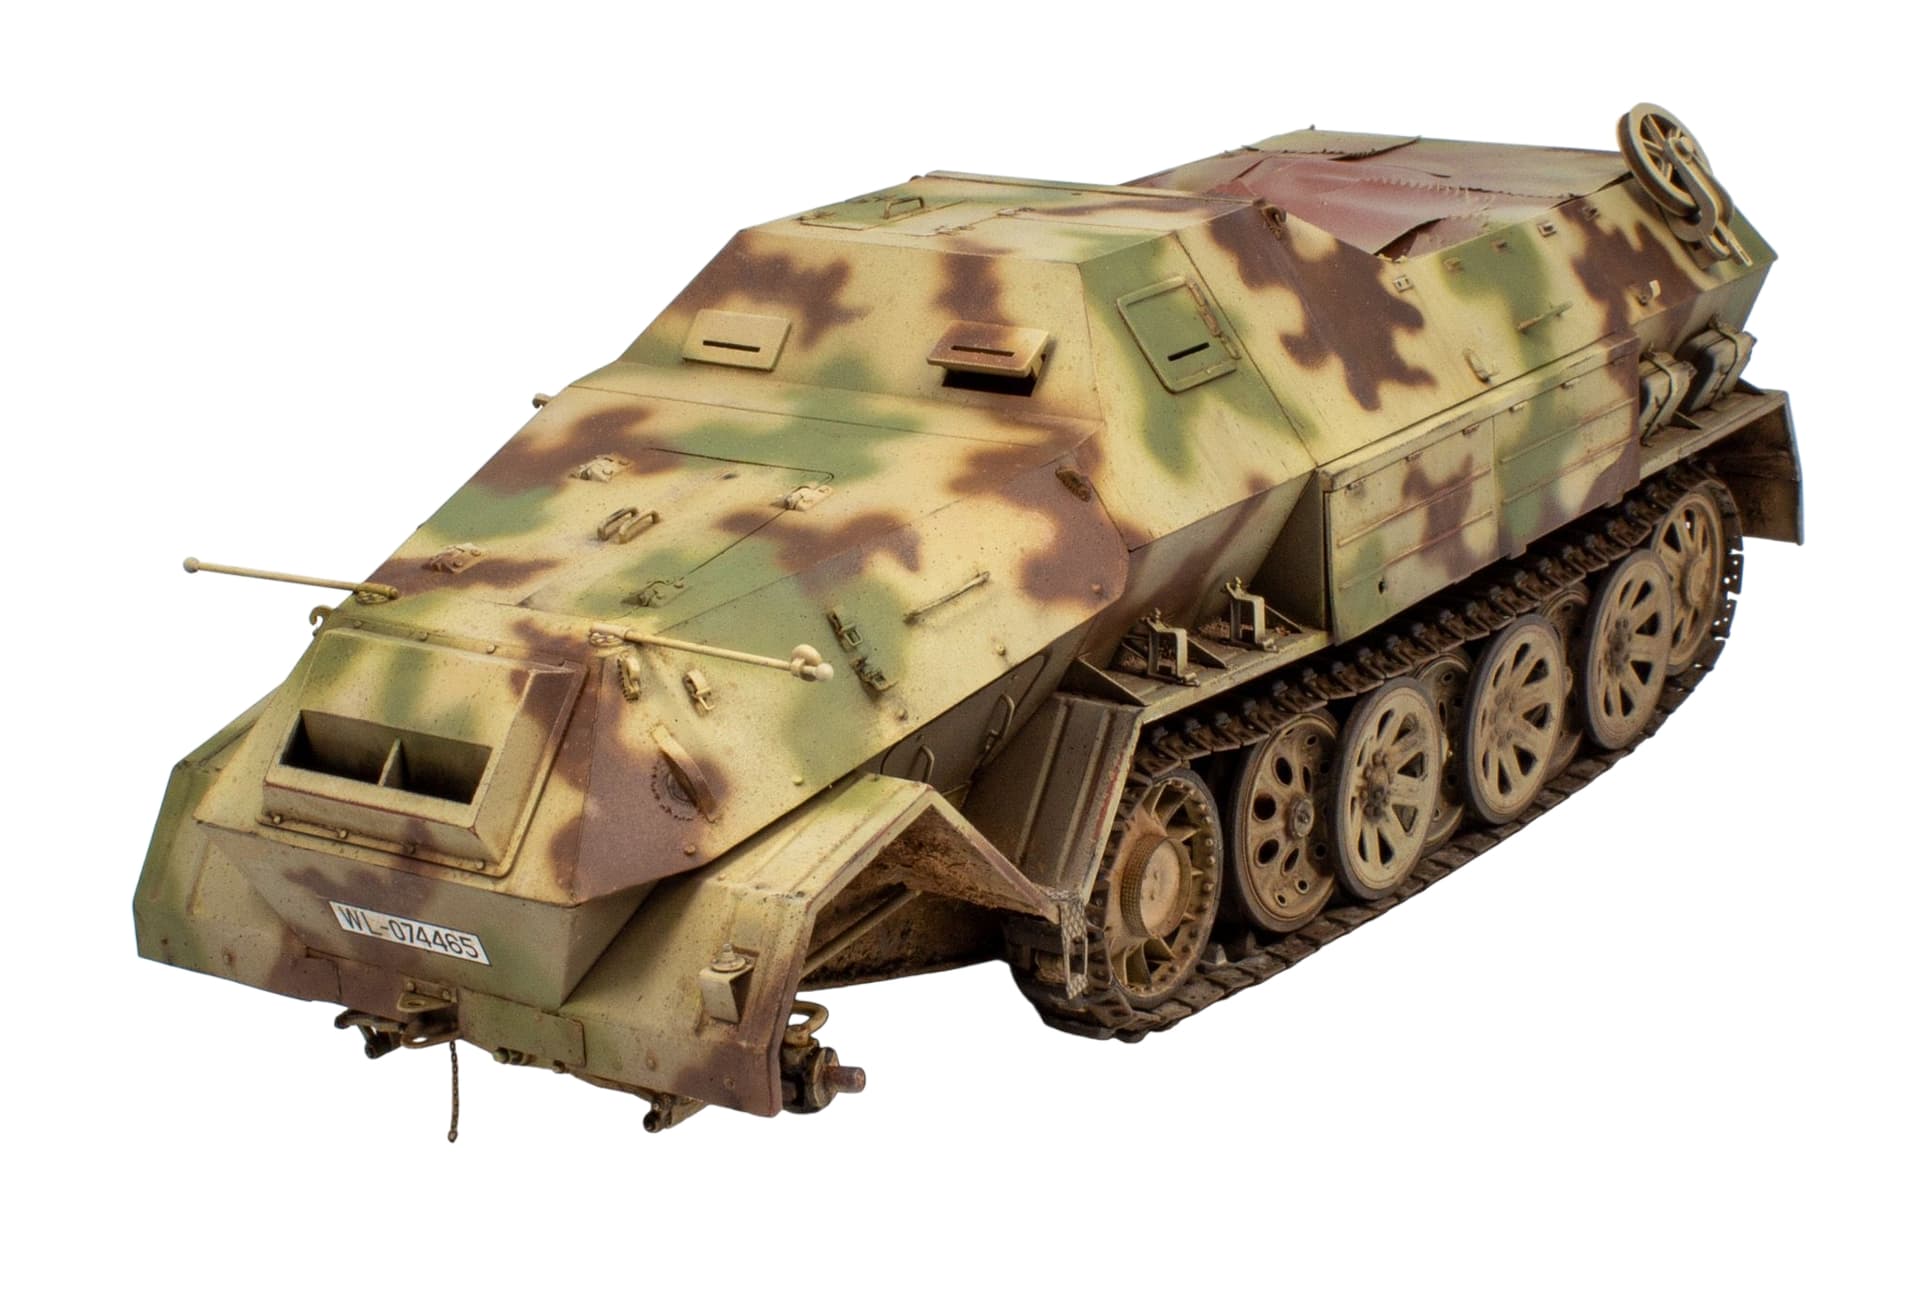
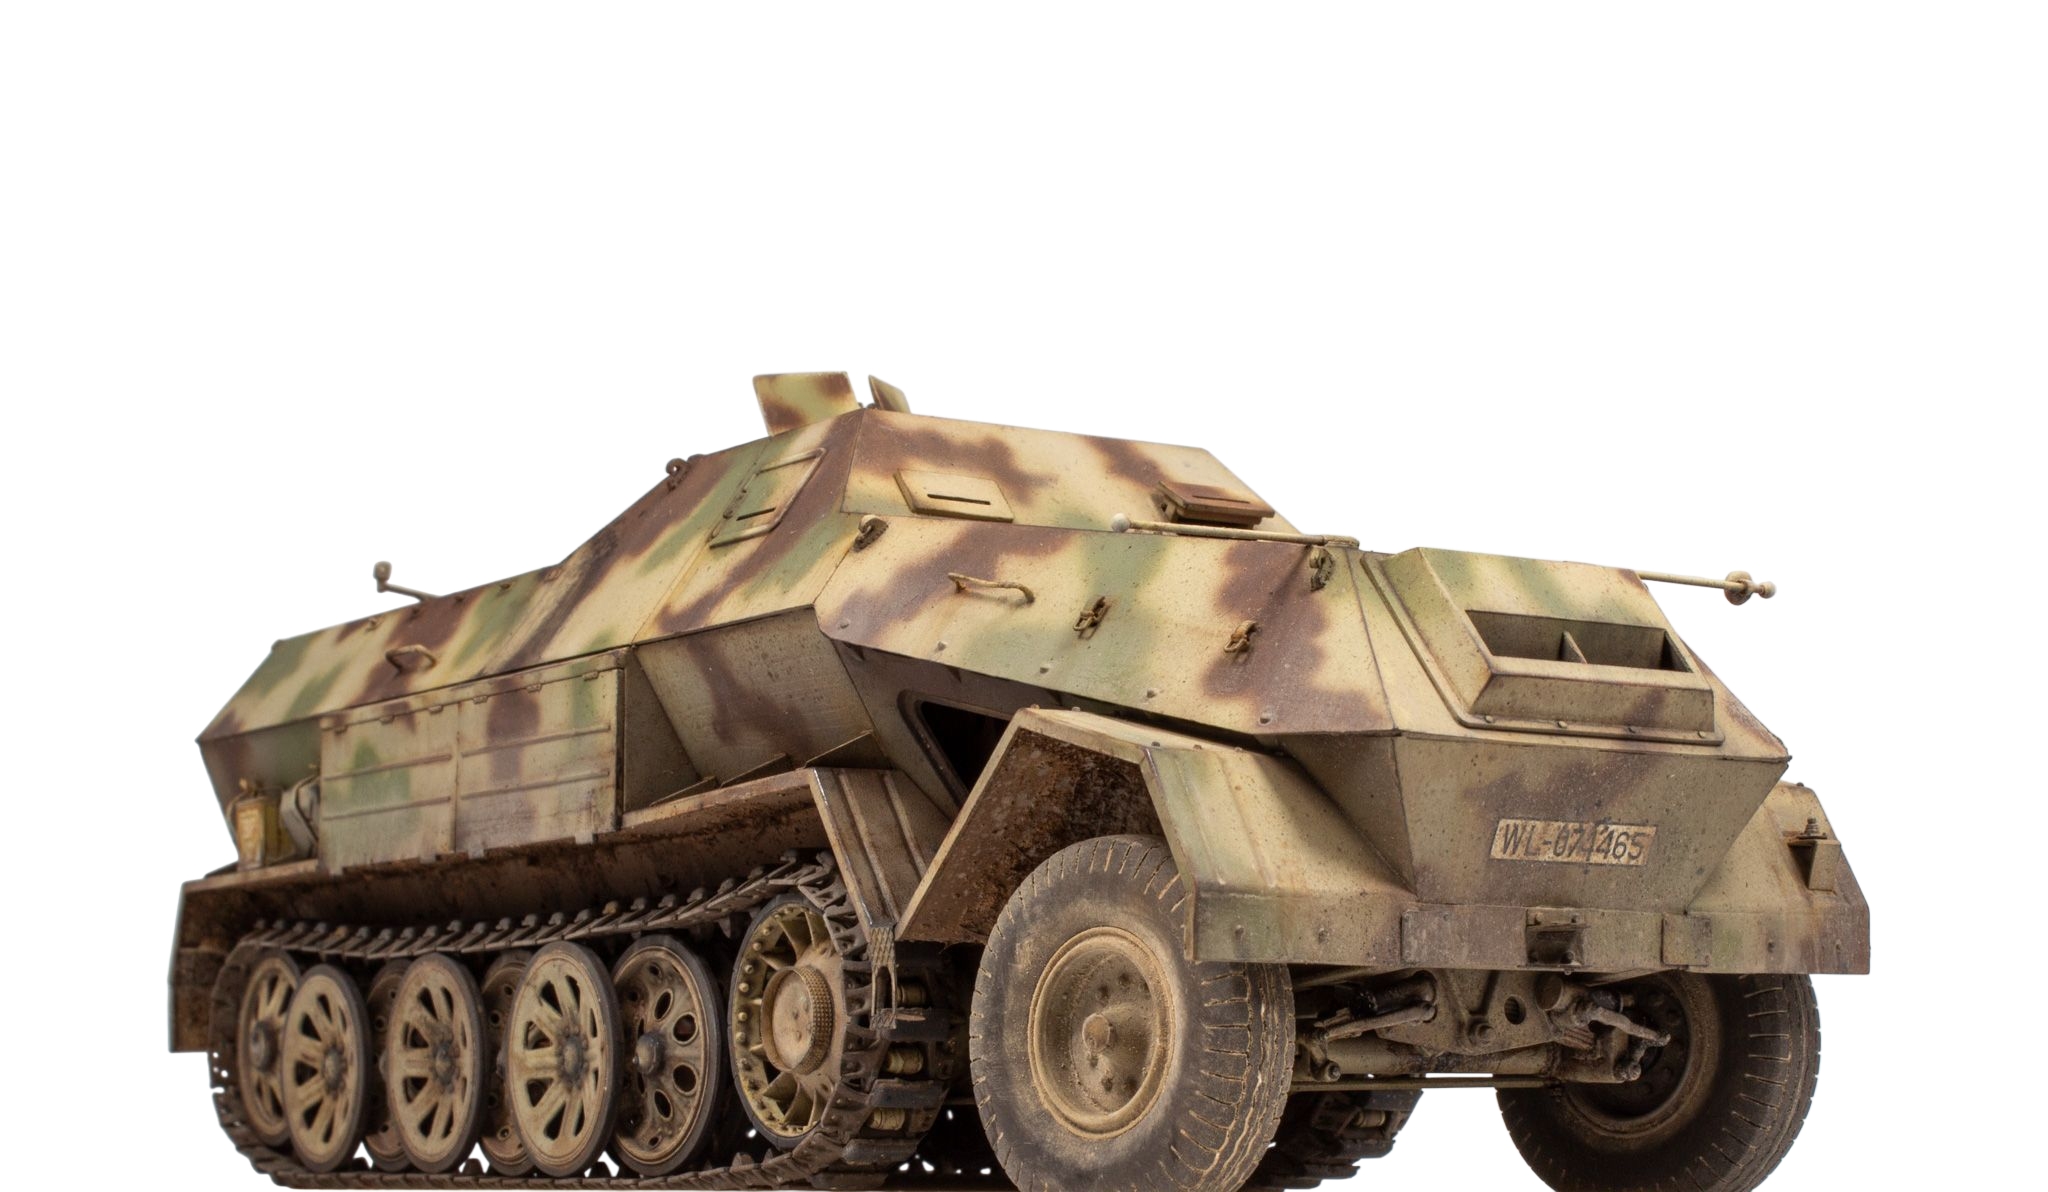
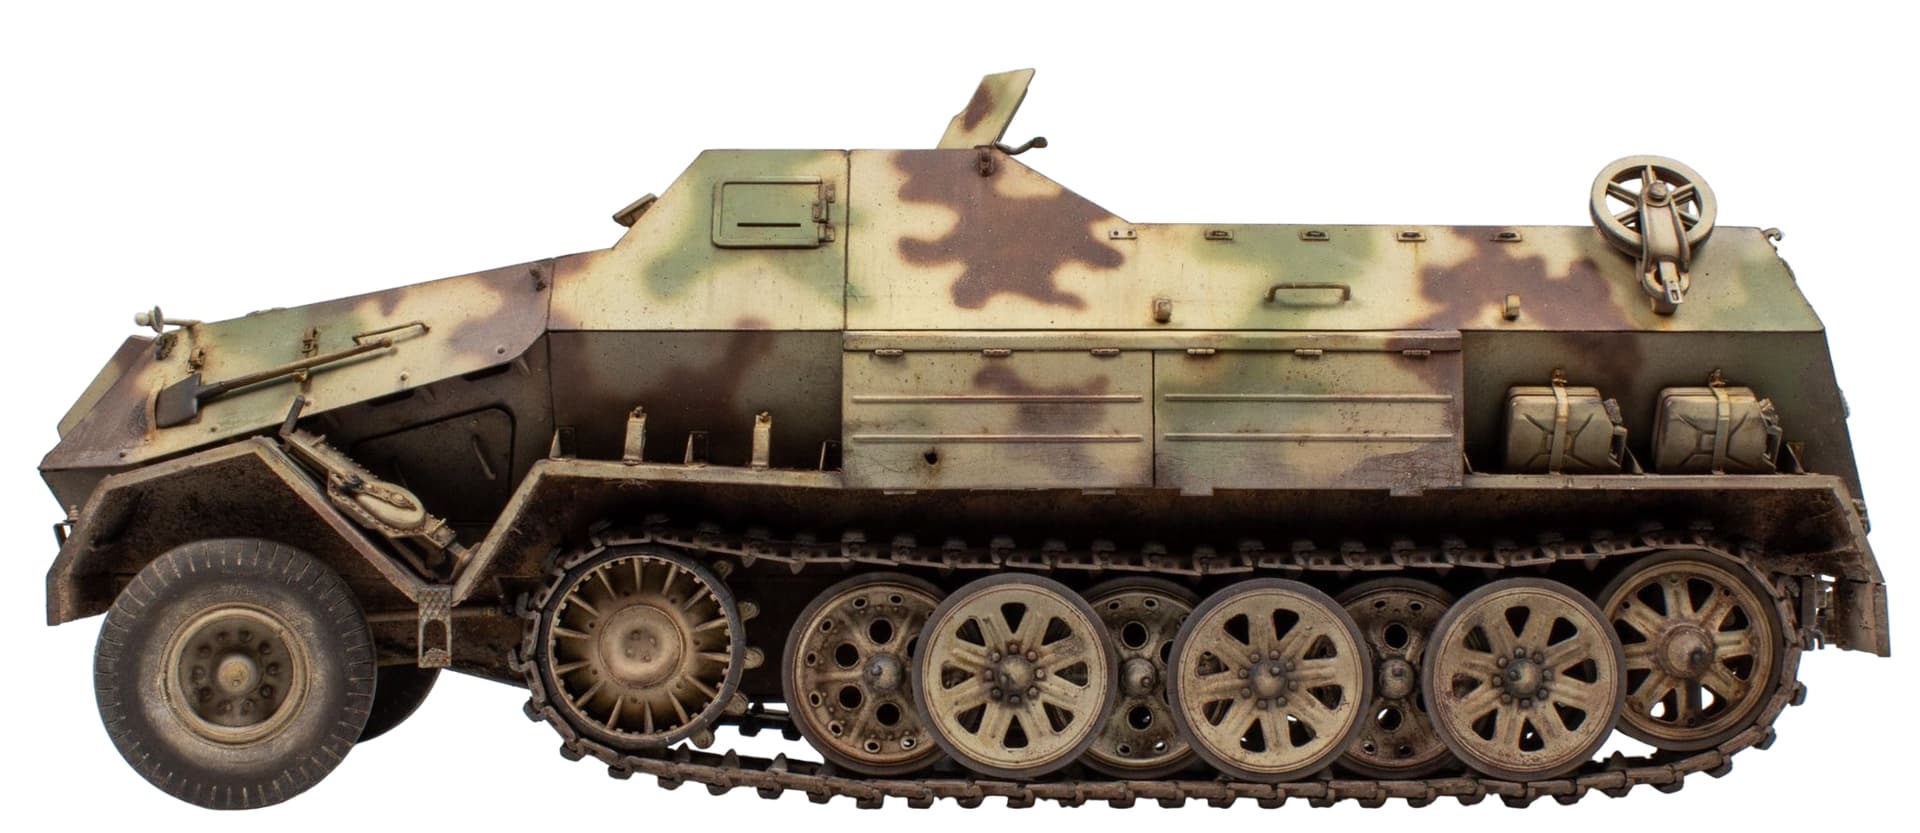
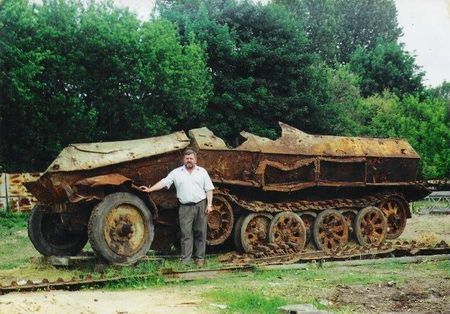
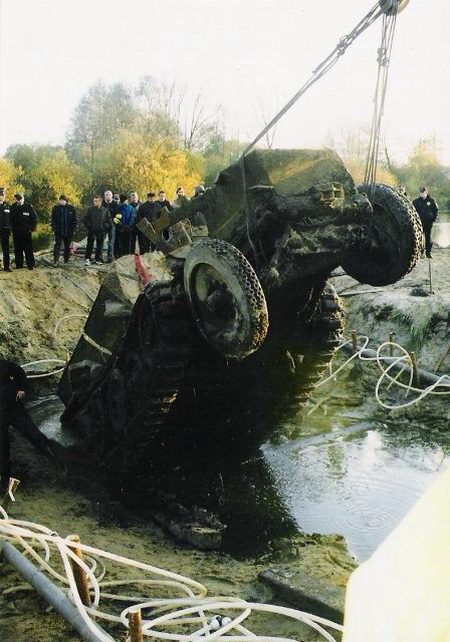
Apologies in advance if you have already seen some of the WIP images that I will have been posting on the book of faces or elsewhere as this is a recap of a 12 year long build that is almost at a journey’s end. I opened the lid on this in 2013 after reading a story about an unusual, and as it turned out, unique late war built German prime mover. Built on a Sd.Kfz. 8 DB10 chassis, this was a rare, armoured variant that was pulled from the Pilica River in Poland in 1999. It had sunk in the river on January 18, 1945, during the German forces’ withdrawal. The vehicle was later restored to a running condition in 2003 and is now on display in a museum.


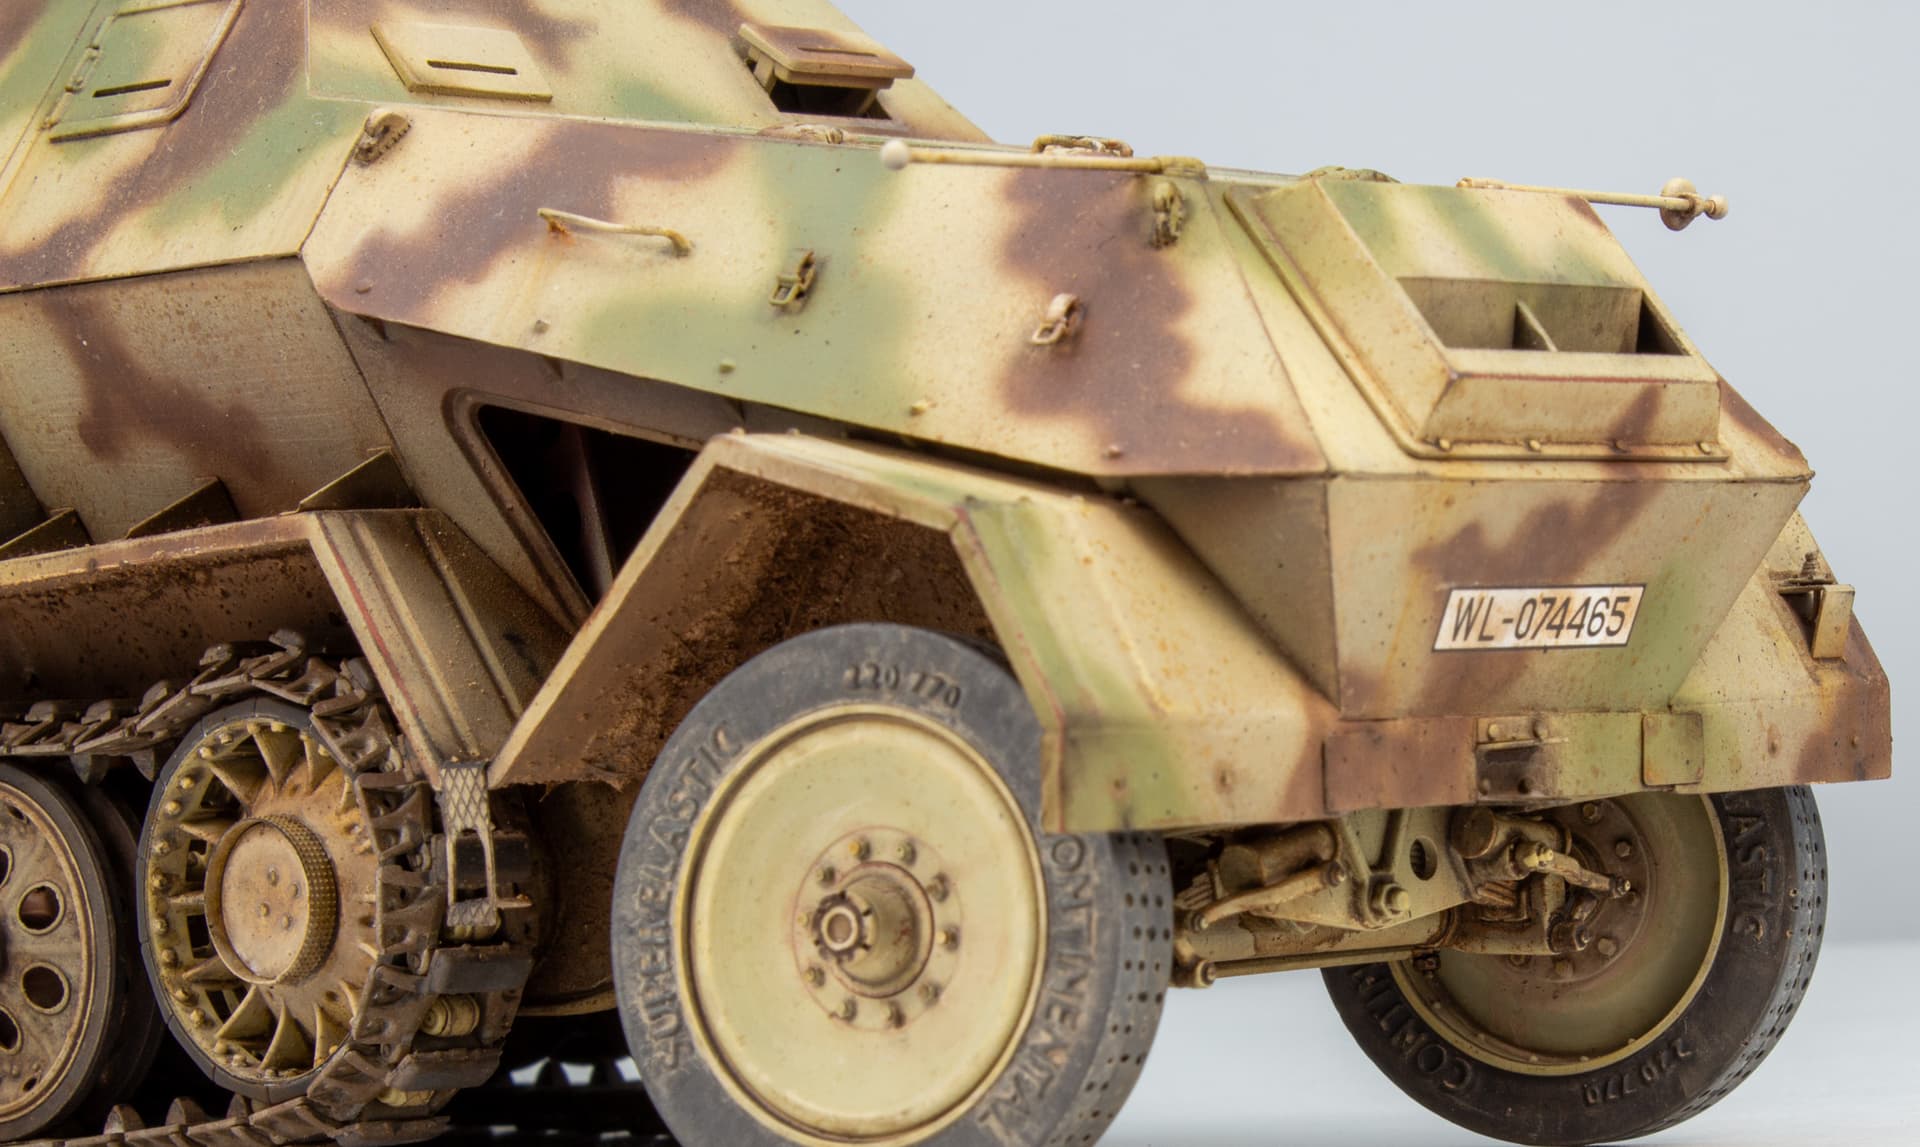
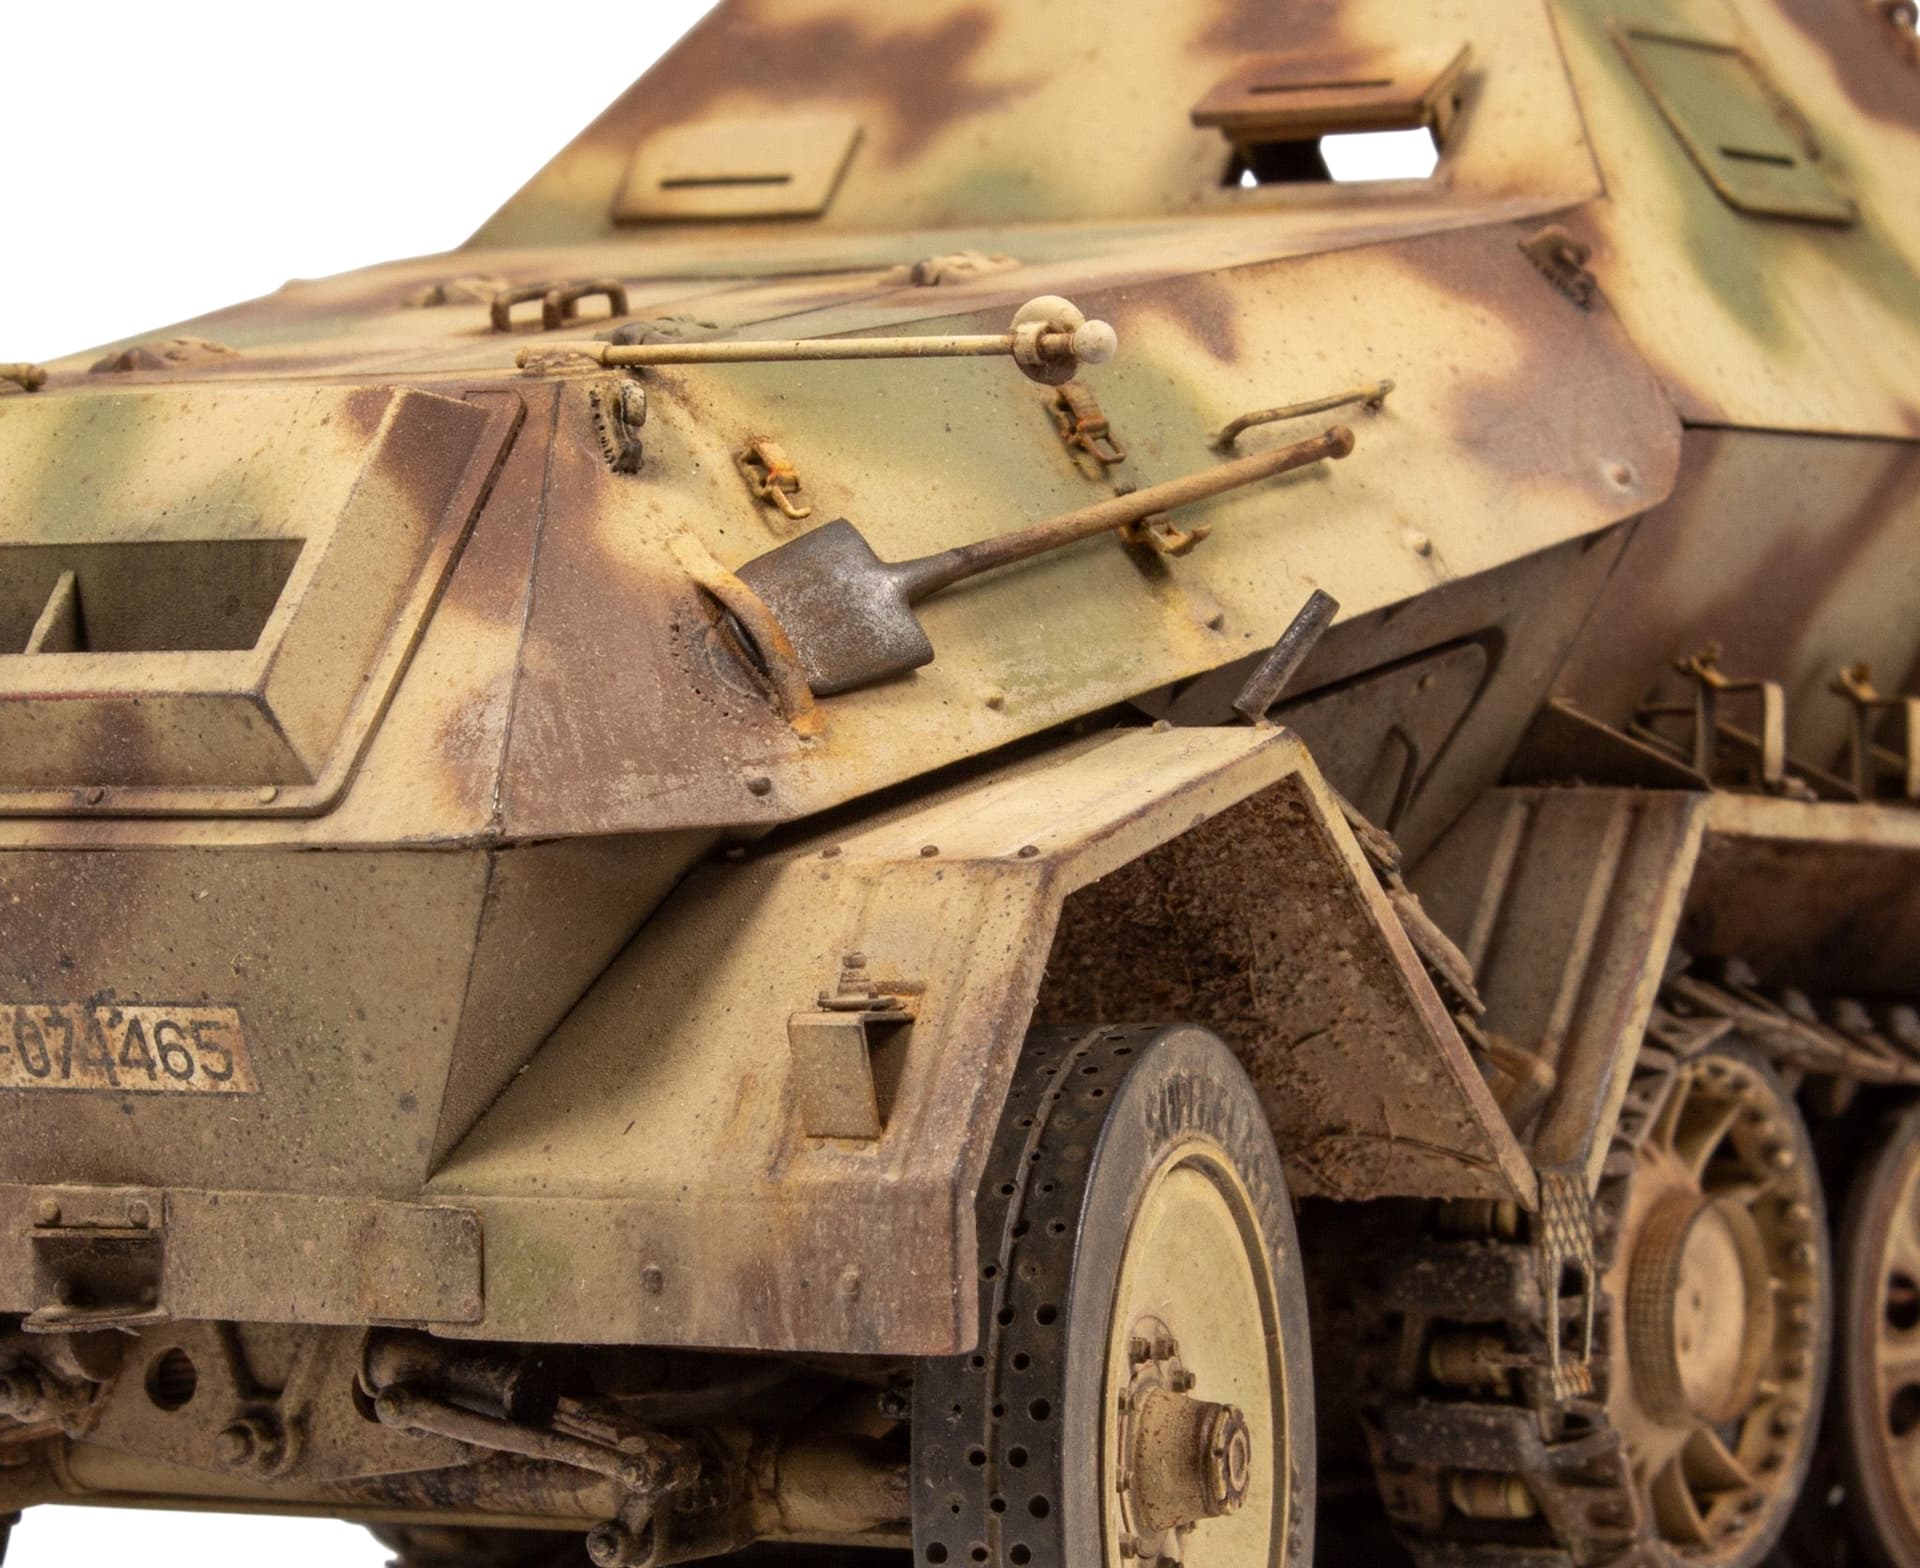
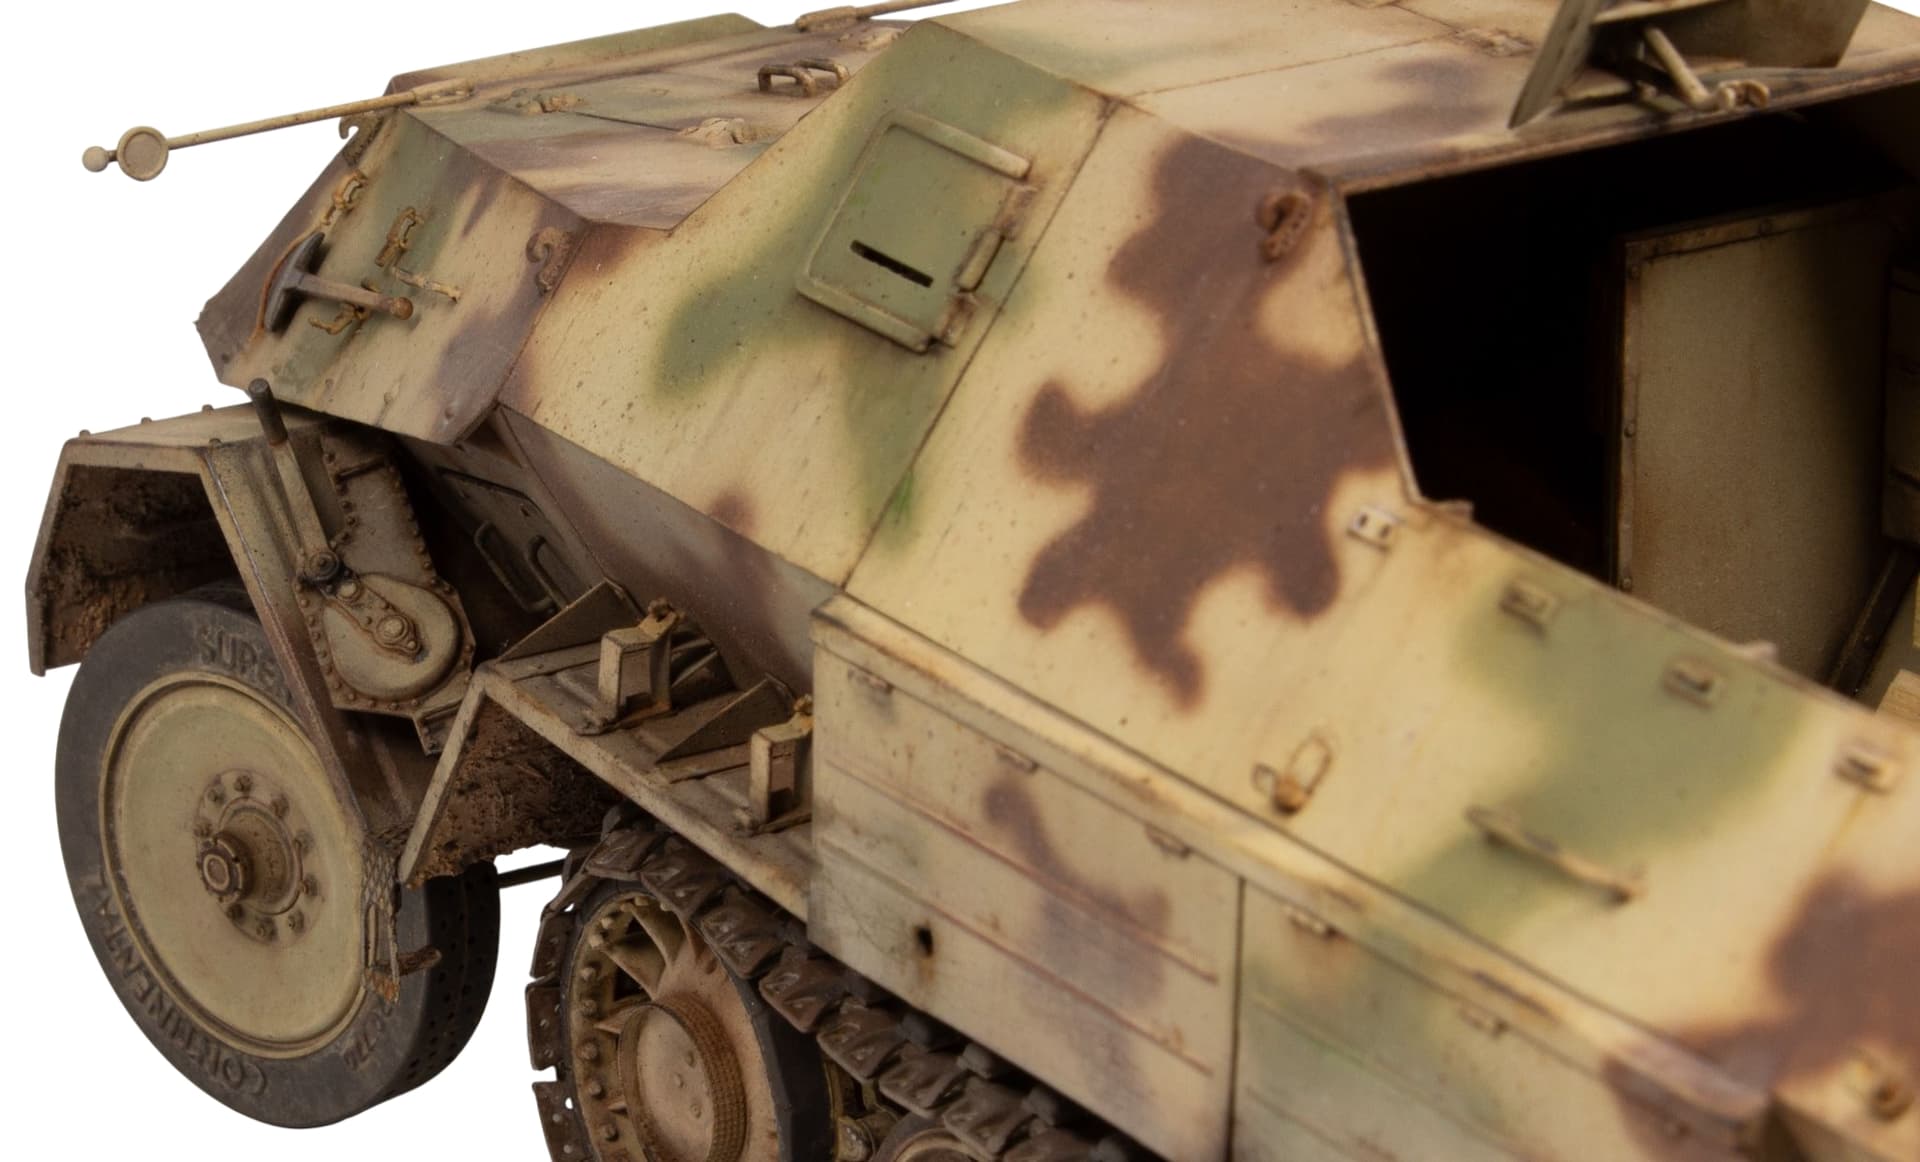
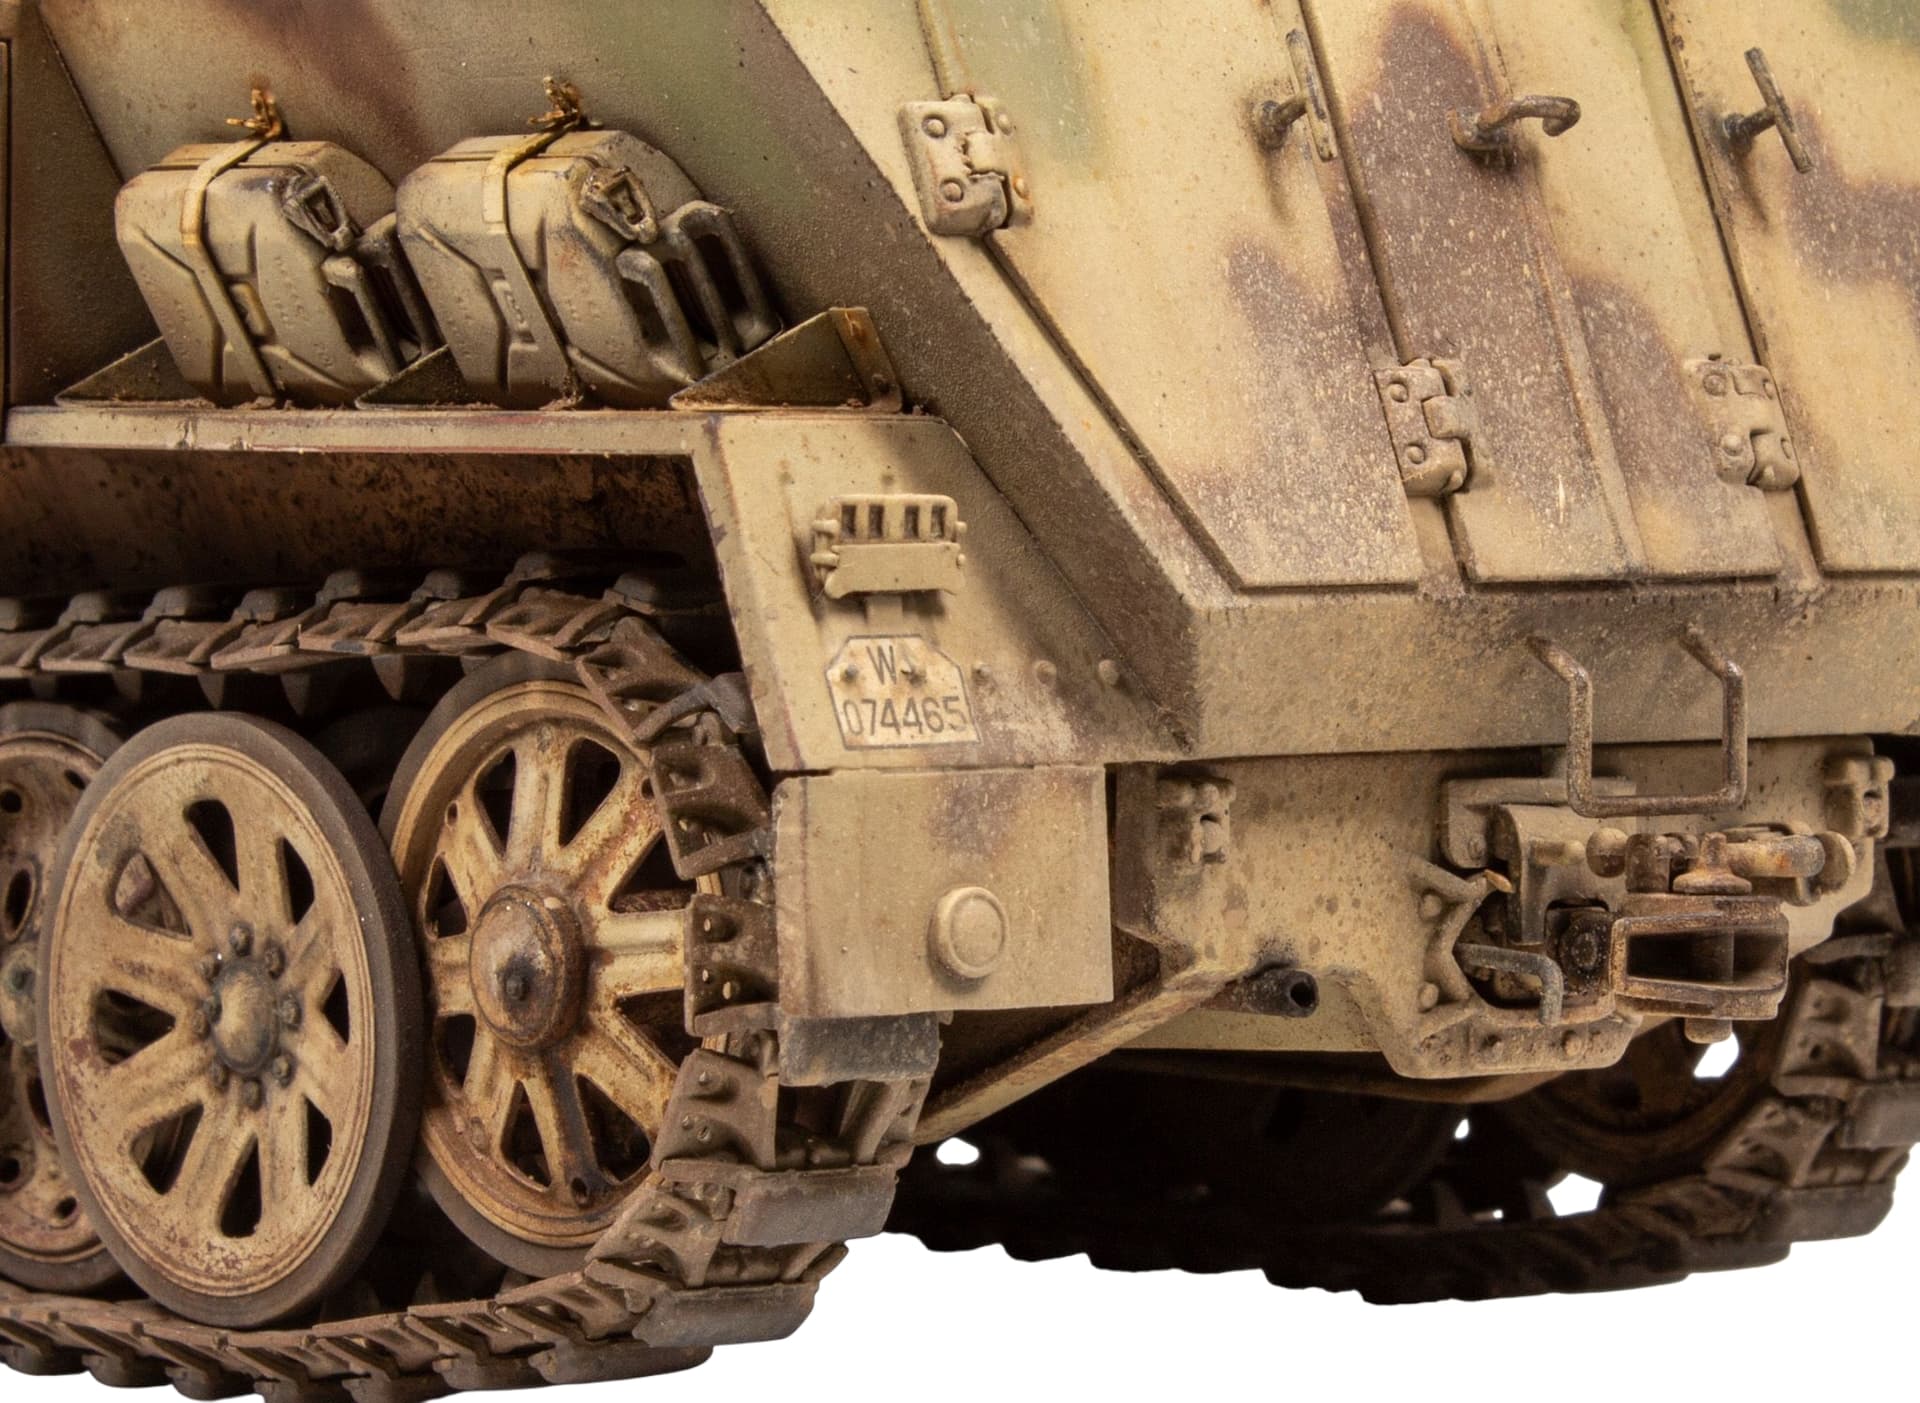
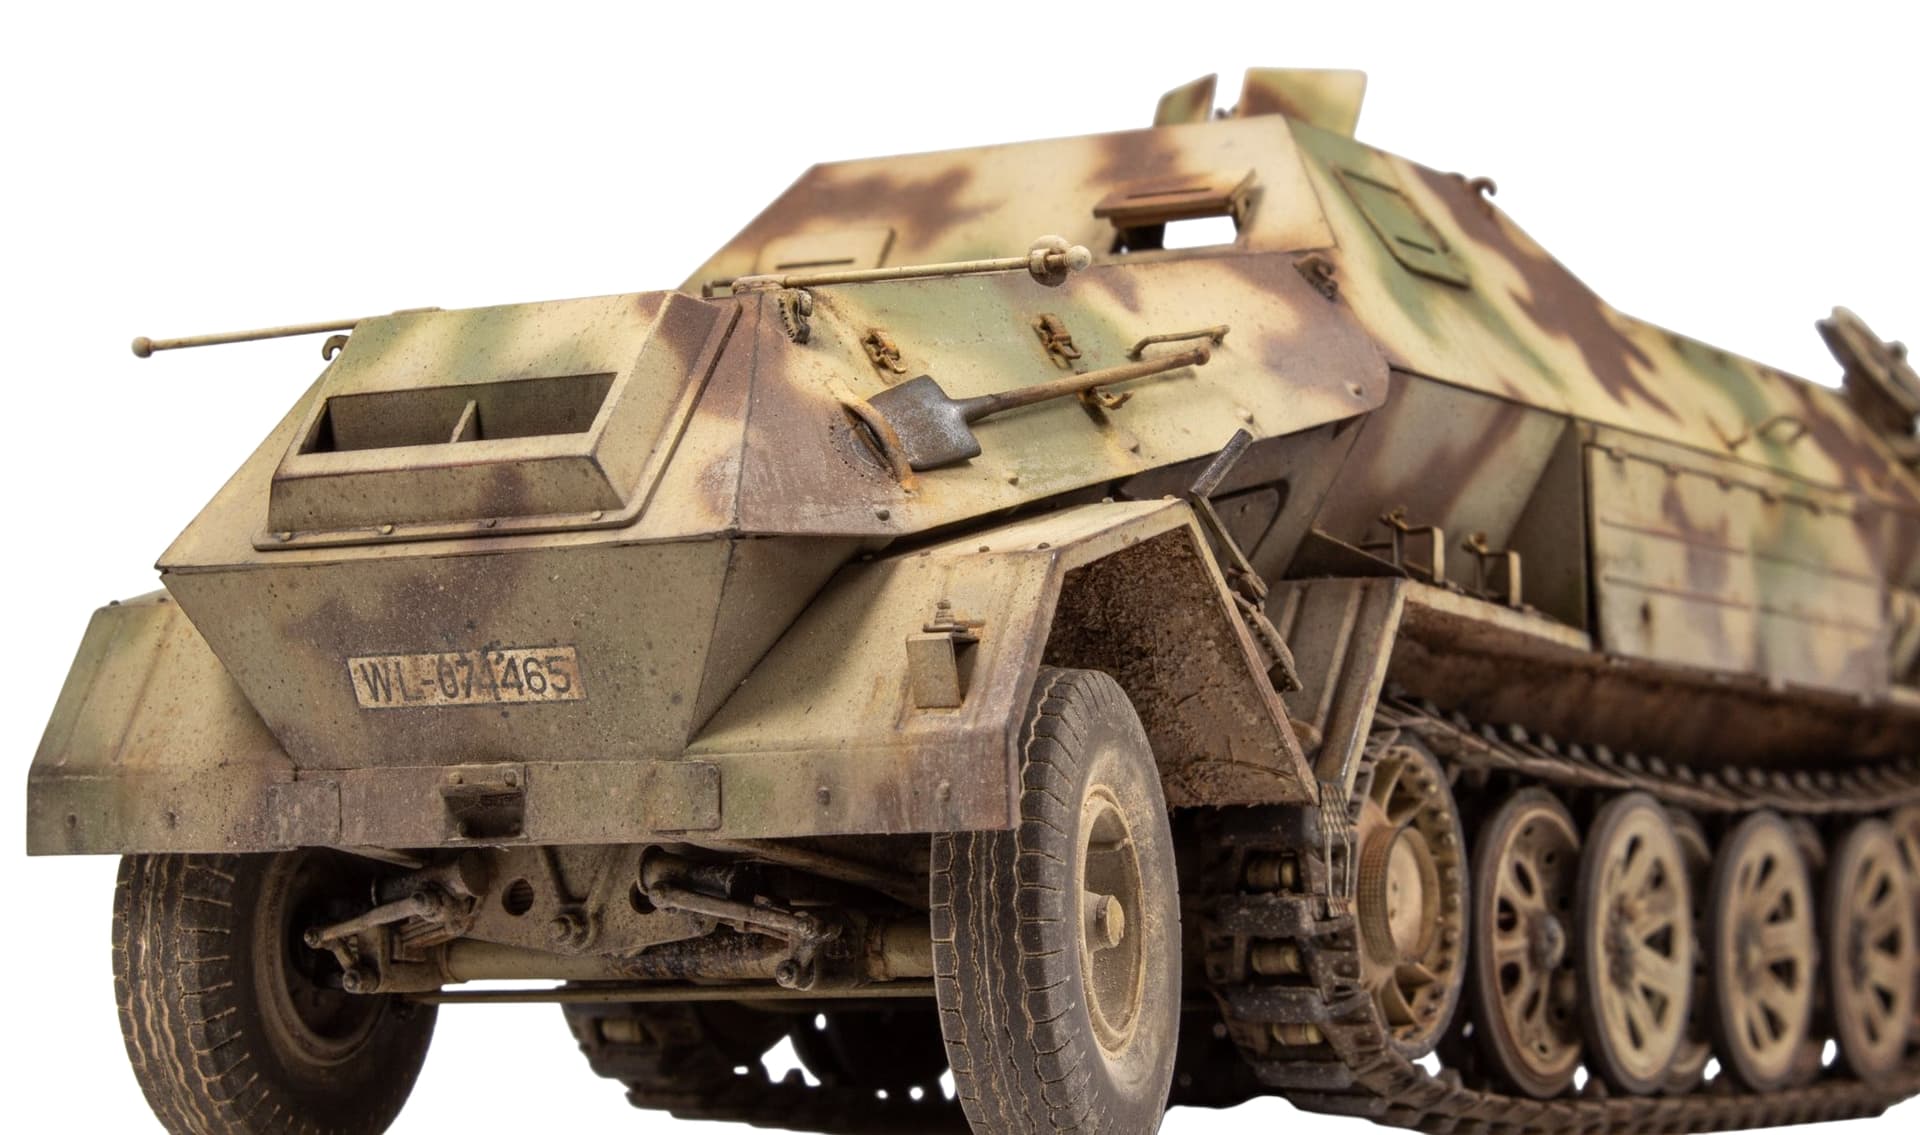
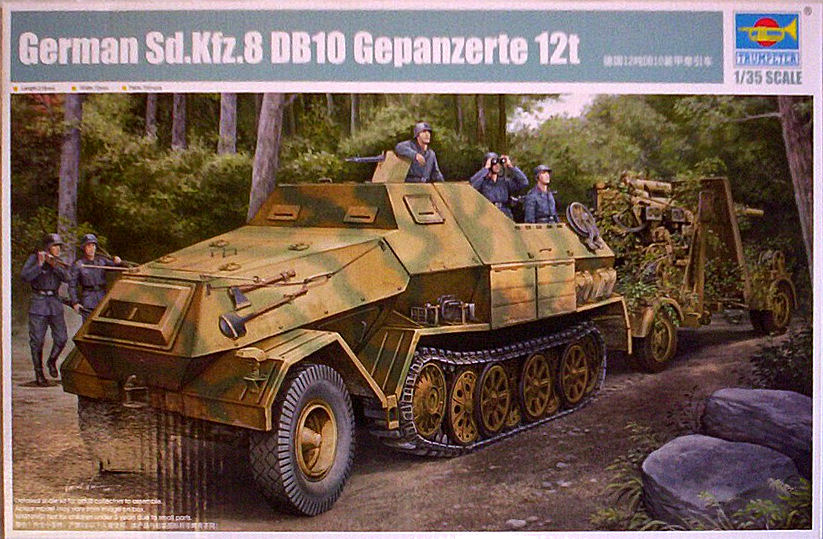
Trumpeter’s 2012 kit is based on this restored vehicle and on the whole, is a fairly simple kit to build. From an accuracy perspective there are a few inconsistencies even with this one-of-a-kind restoration, and they have opted to include just a late set of regular DB10 front wheels and not the large rimmed, solid tyred type that were present upon recovery

I managed to get 90% of the kit built, with the chassis, running gear and interior fully painted before a house move in 2015 shelved it. It remained unloved in its box until May 2024 when it saw daylight again after getting a new photobooth.

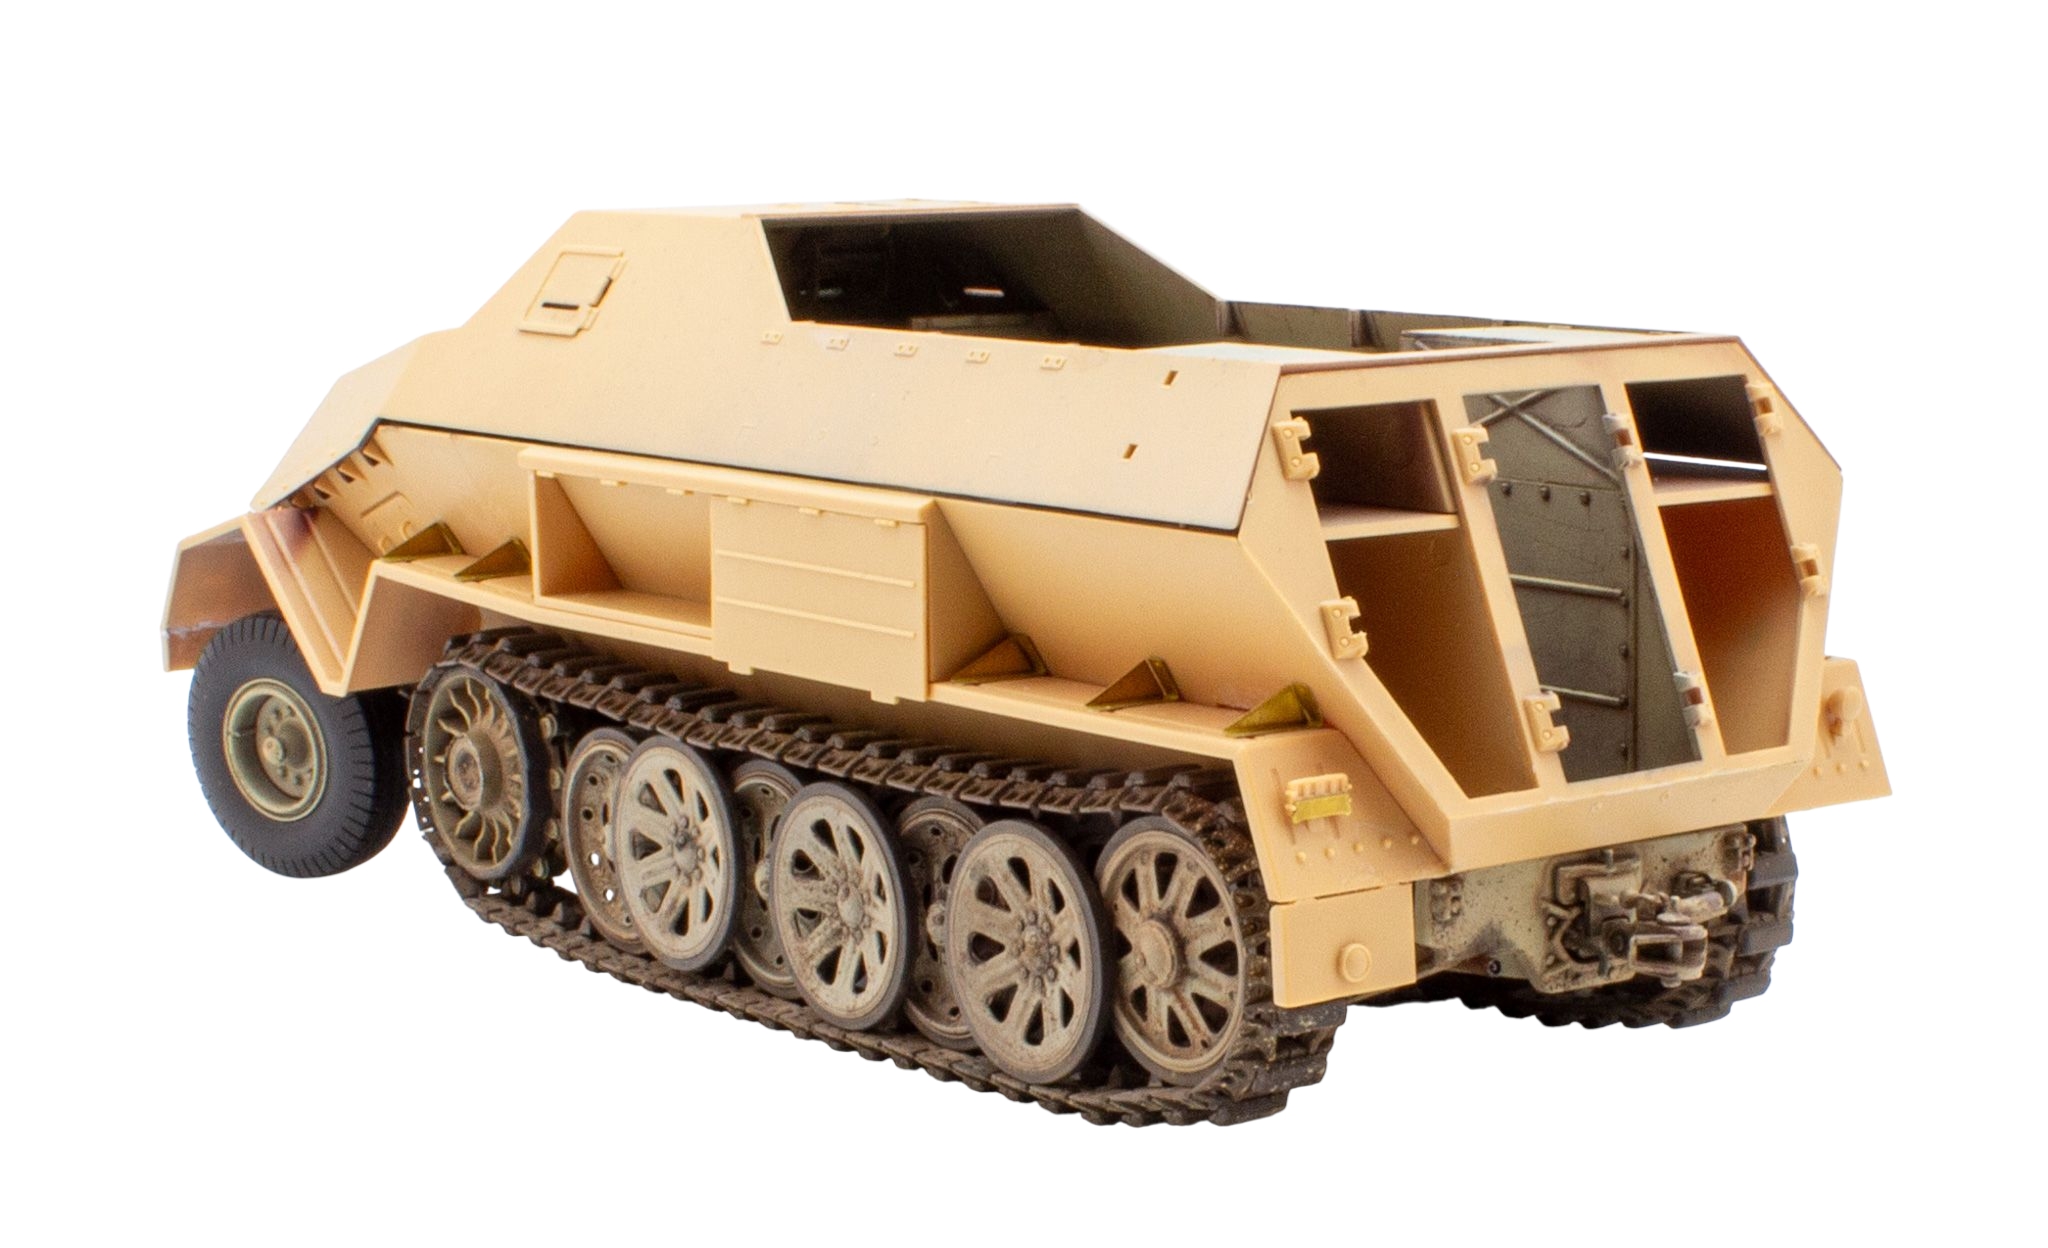
I was just grabbing stuff to hand to experiment with it and the chassis ended up getting photographed. After inspecting the pics, I liked what I saw. It needed updating in places, but I figured it was presentable enough to resurrect it. I’m pretty sure it’s not the norm to return to projects abandoned so long for obvious reasons, but I liked the fact it not only looked cool ,but was unique and I rarely see this kit built.


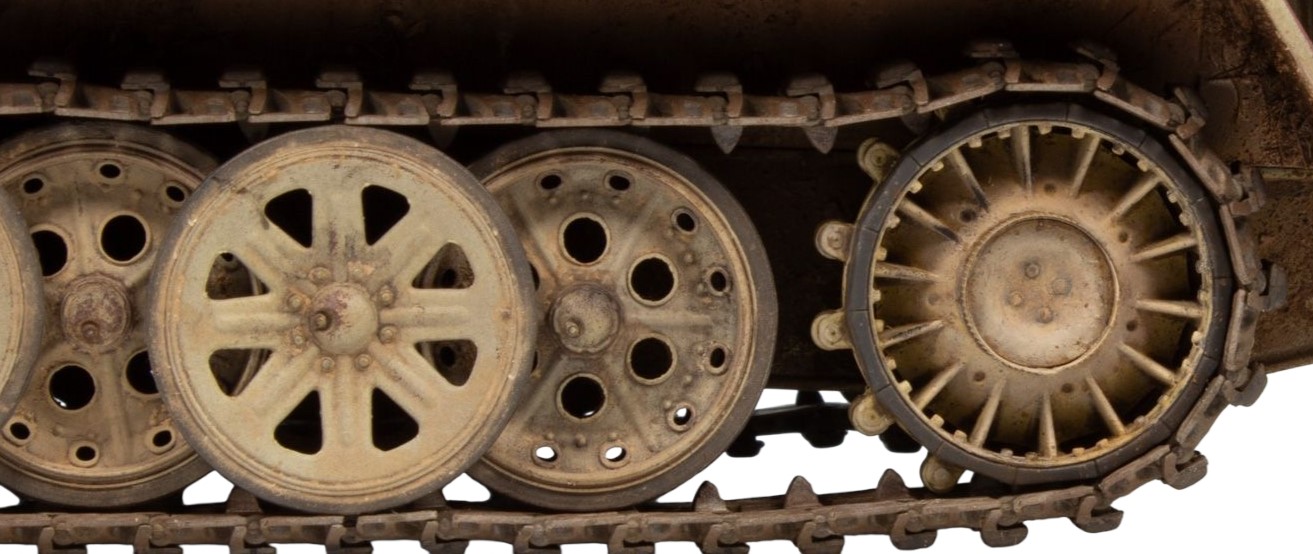
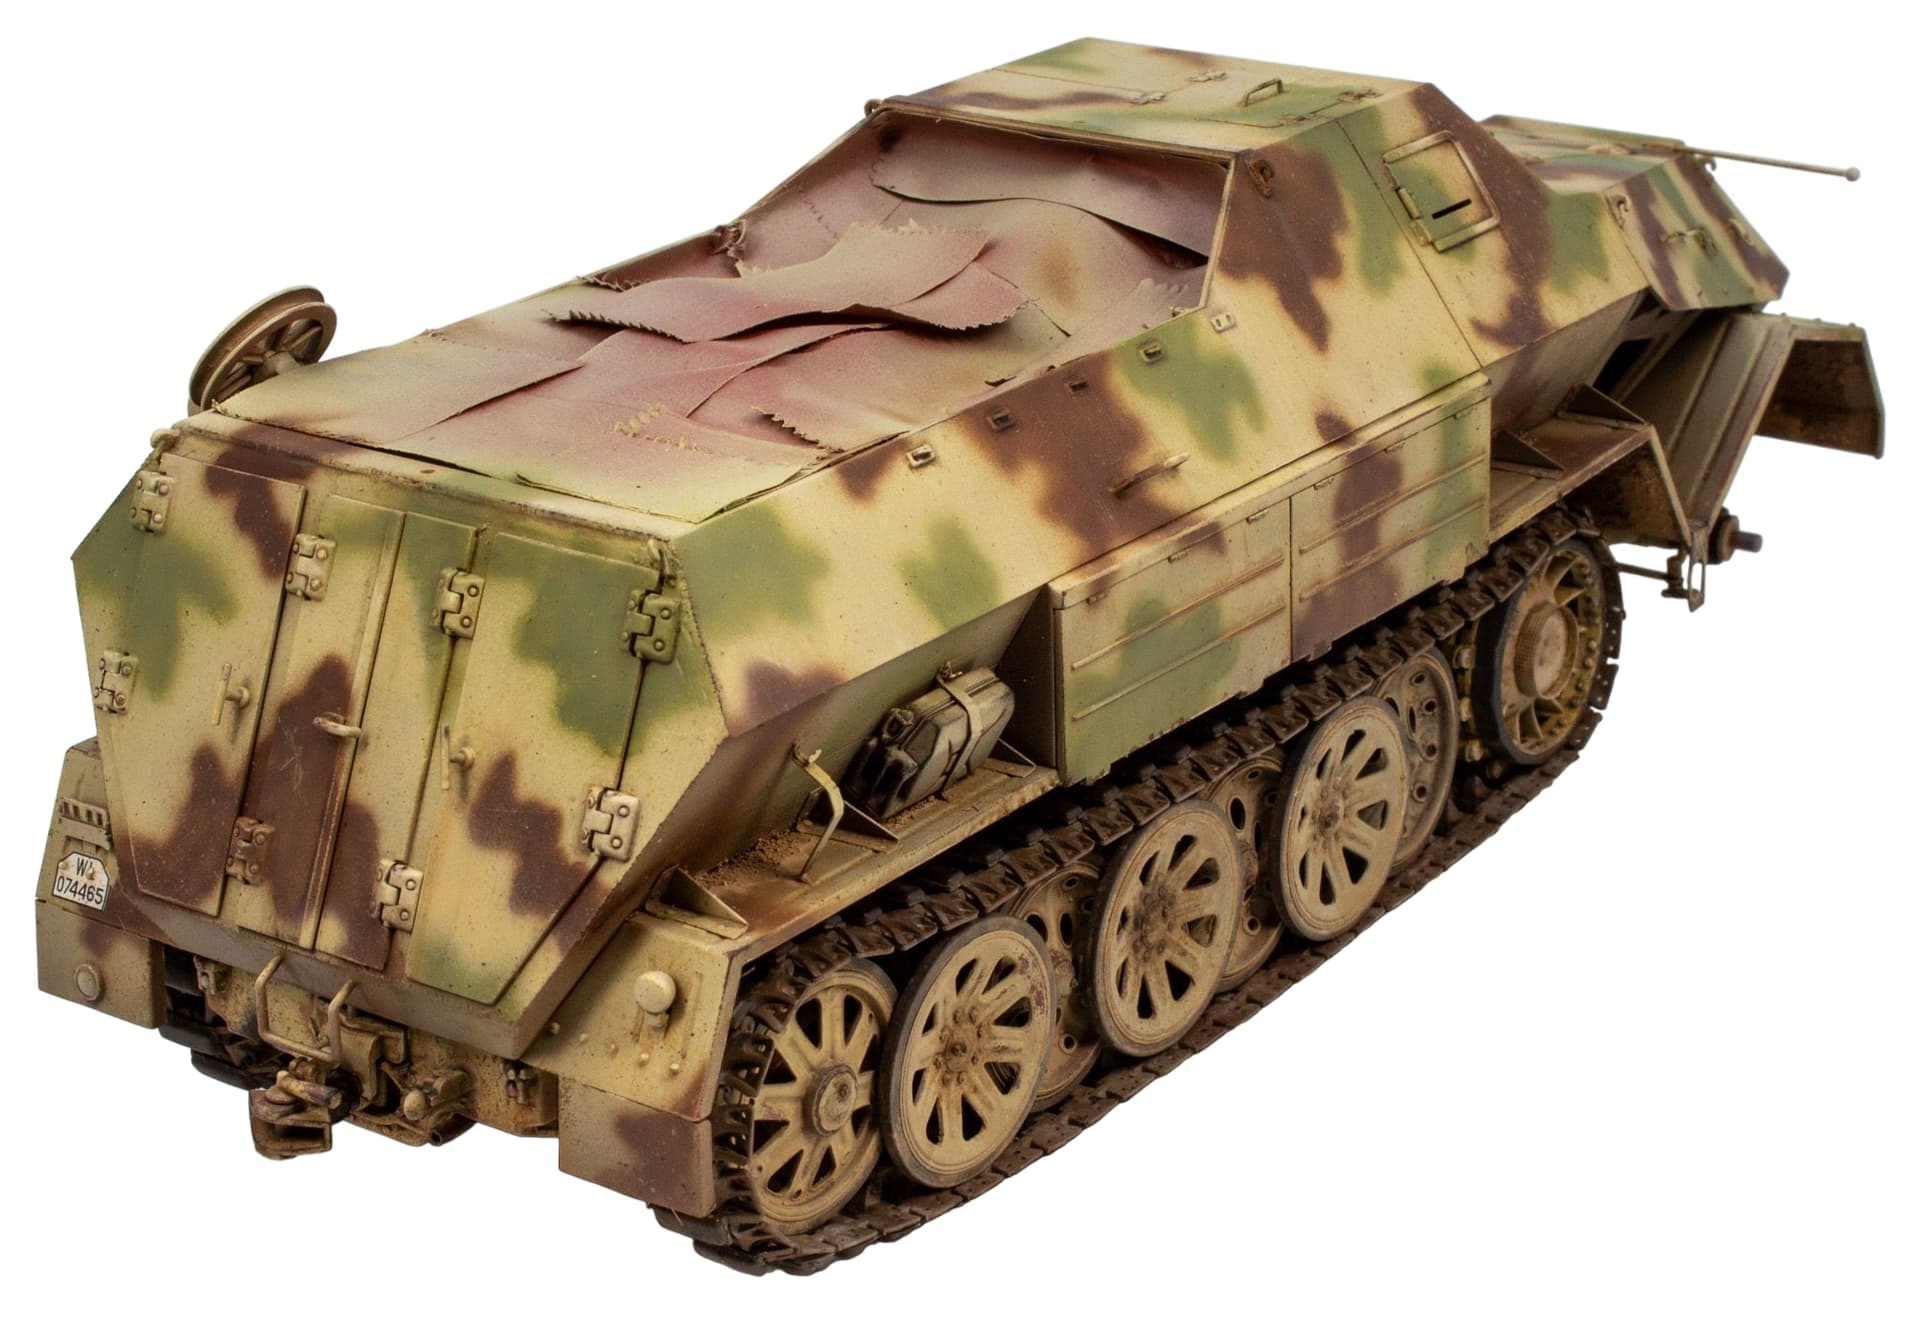
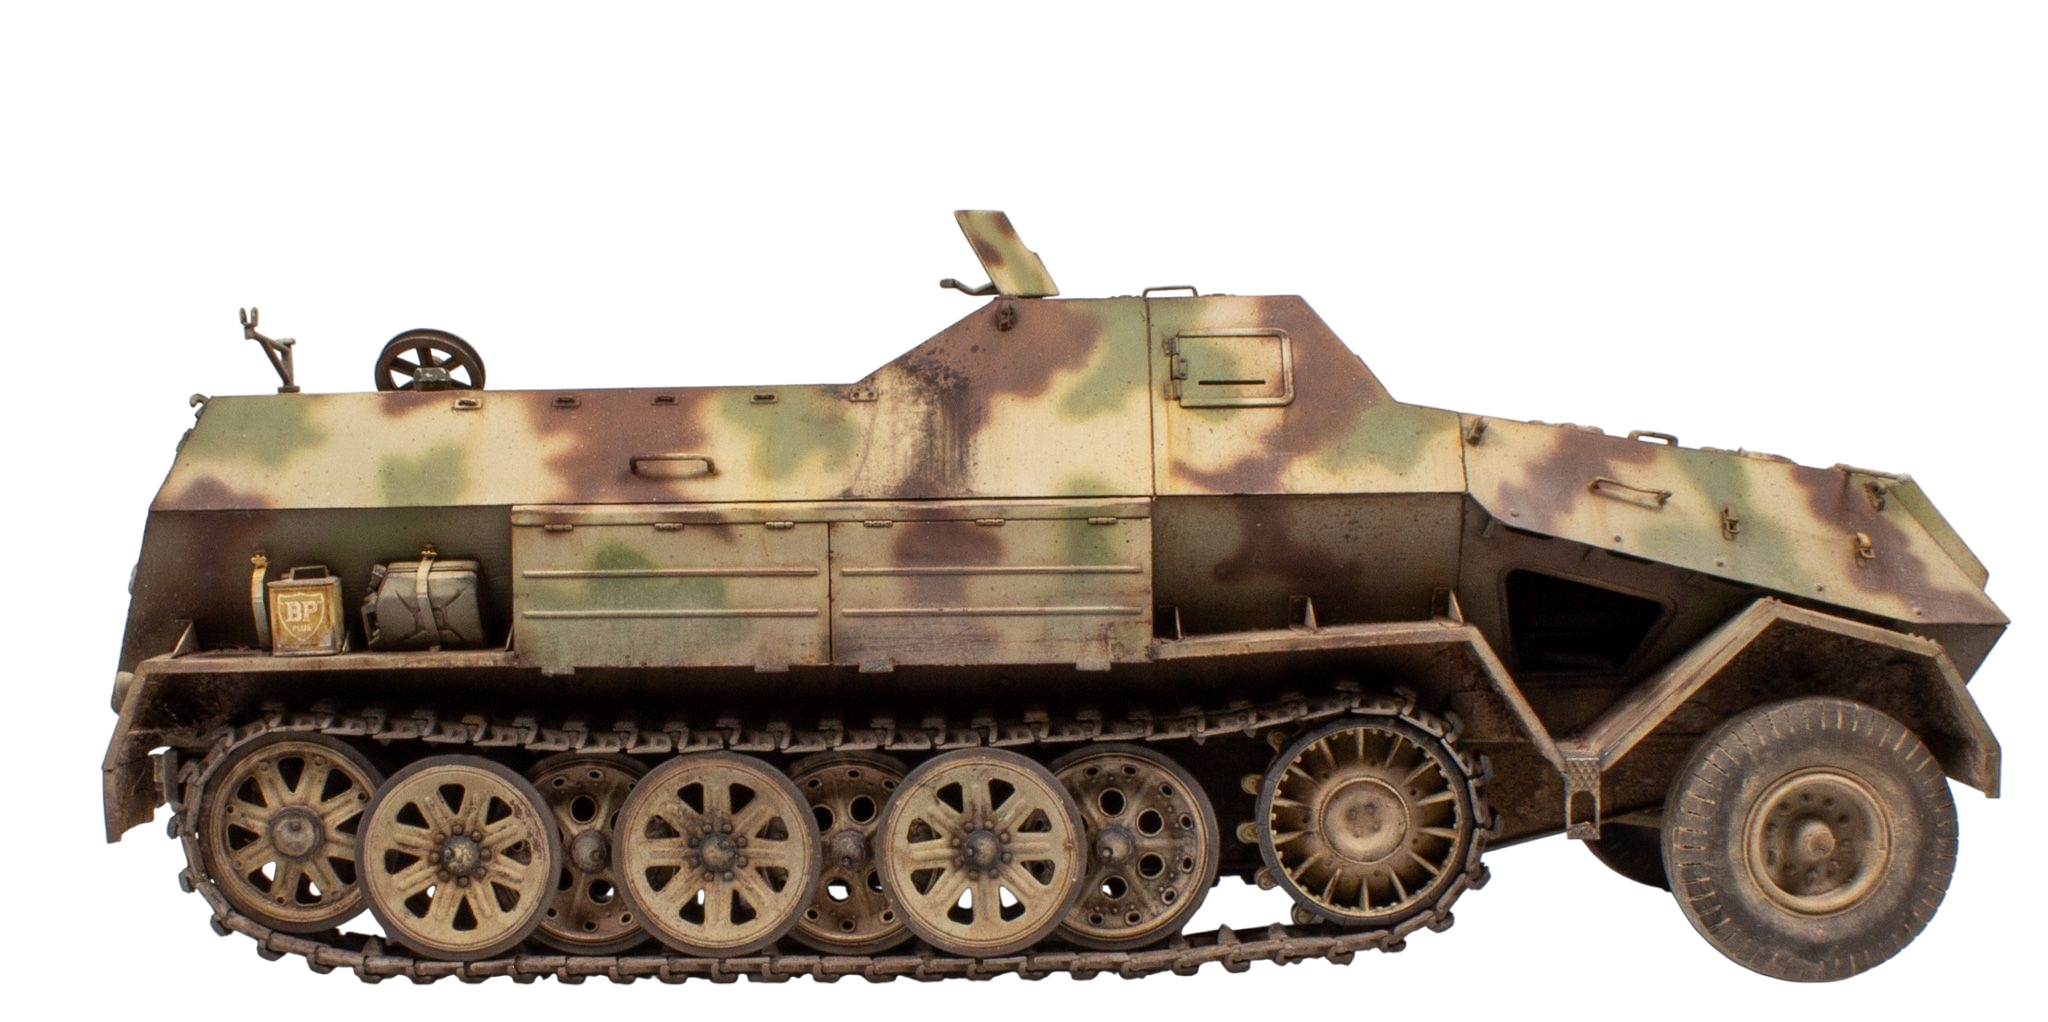
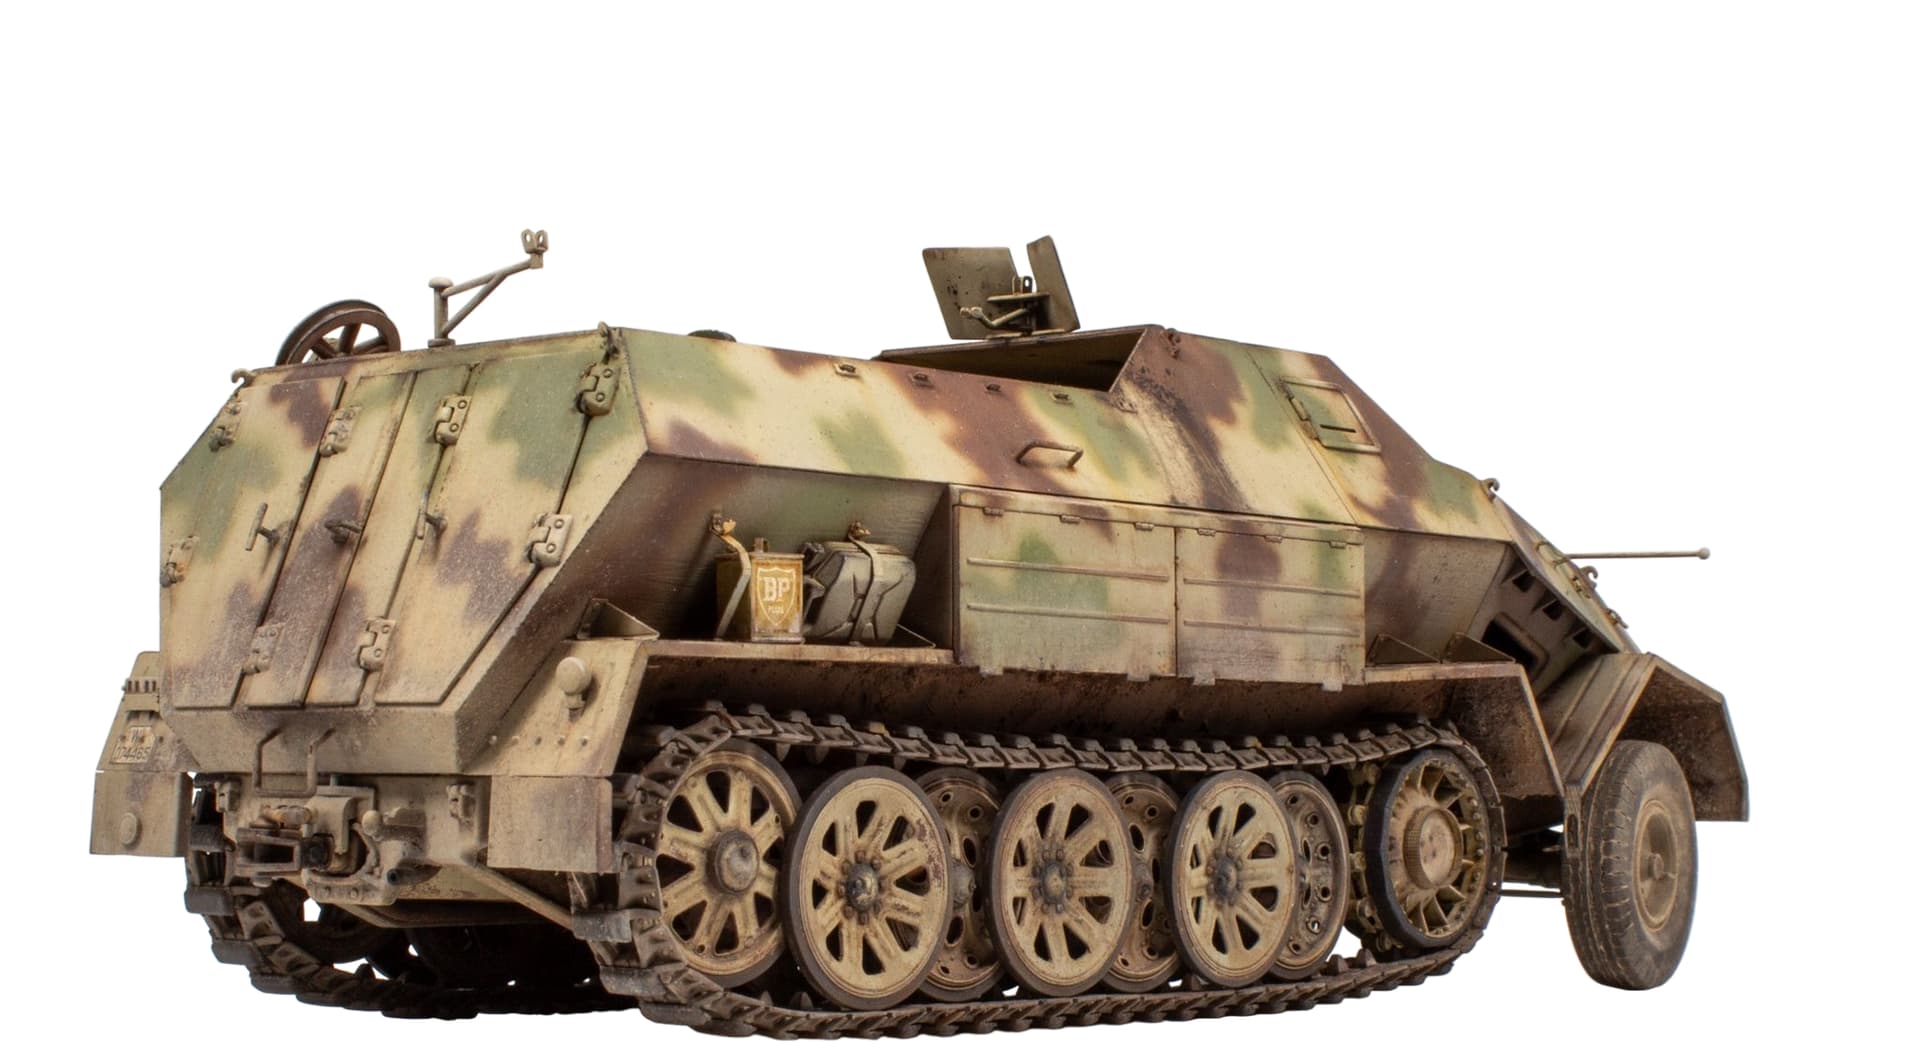
It had been sat safely in a storage box so it was in great condition, but upon inspection there were some areas of my original build that could still be improved on. Amongst the re-workings and improvements to the running gear, two sprockets were included in the kit and typically I had not used the ones fitted to the restored vehicle. Refitting the correct ones was a challenge but it was a worthwhile improvement.

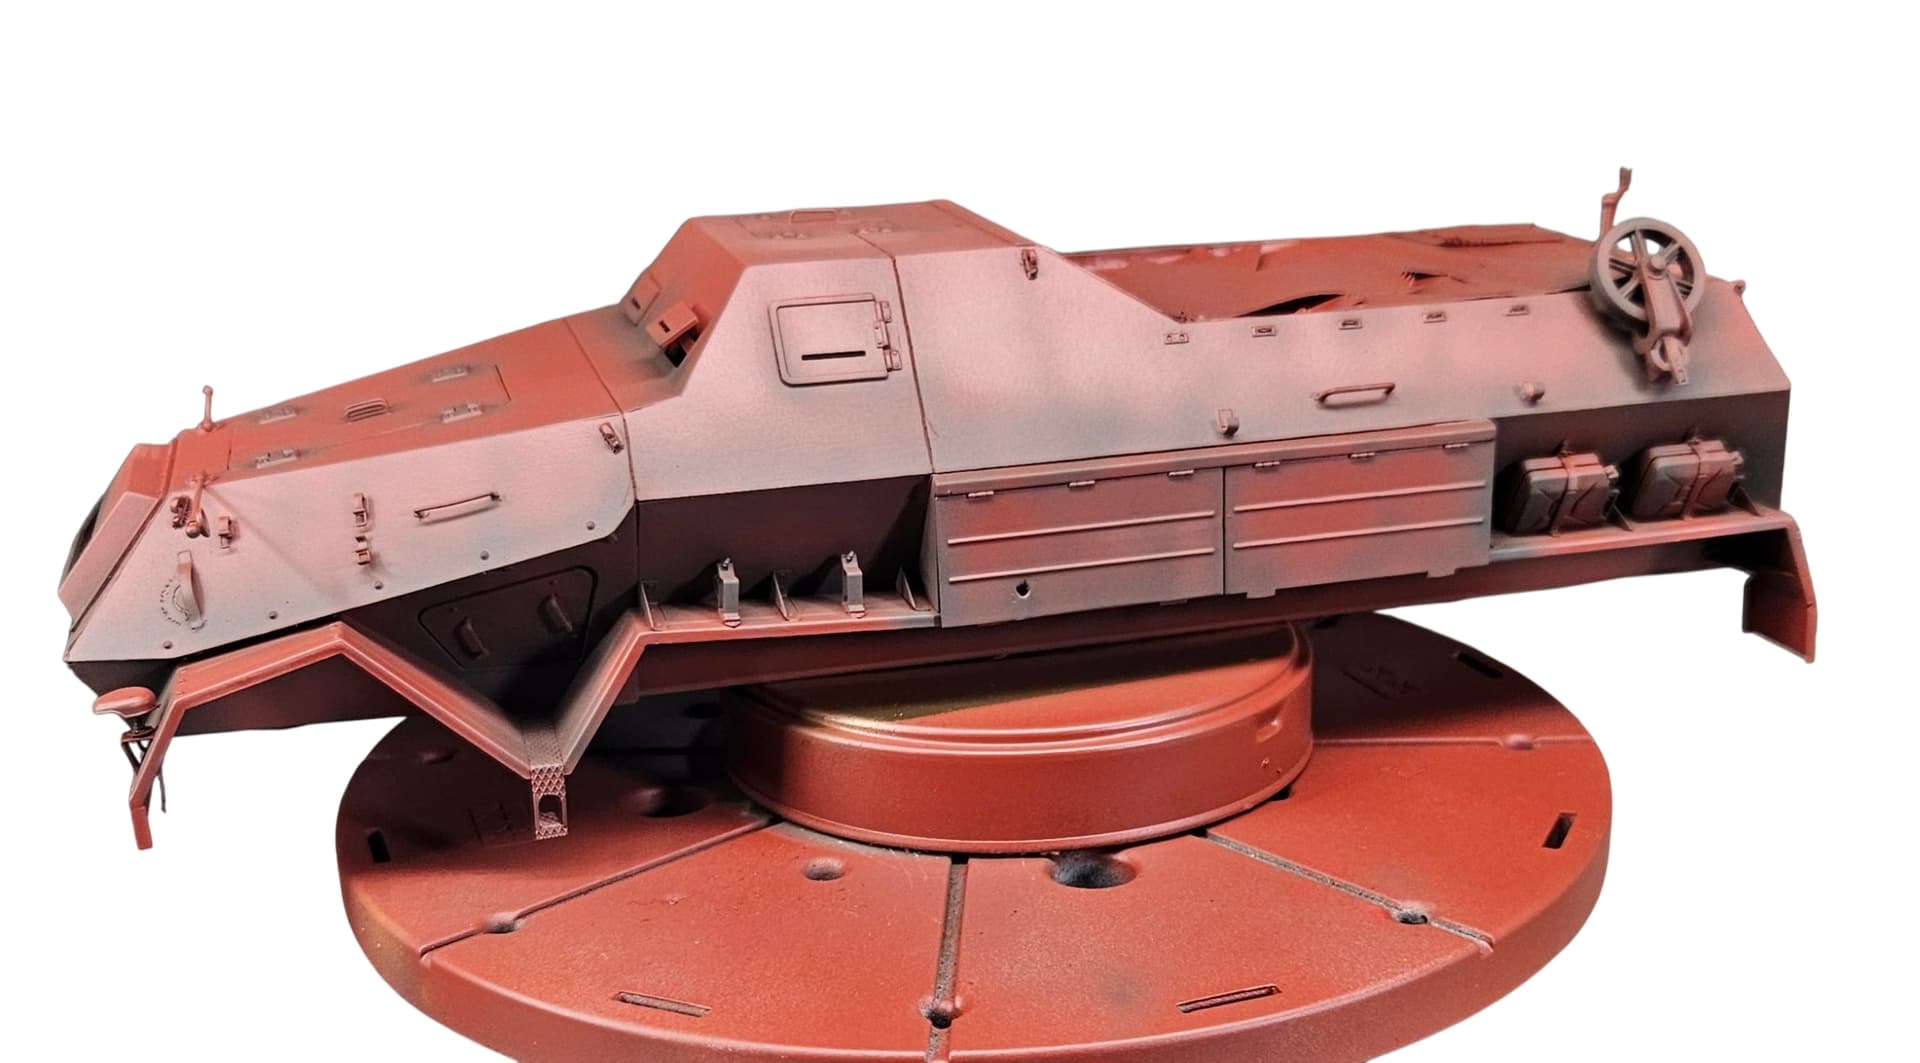
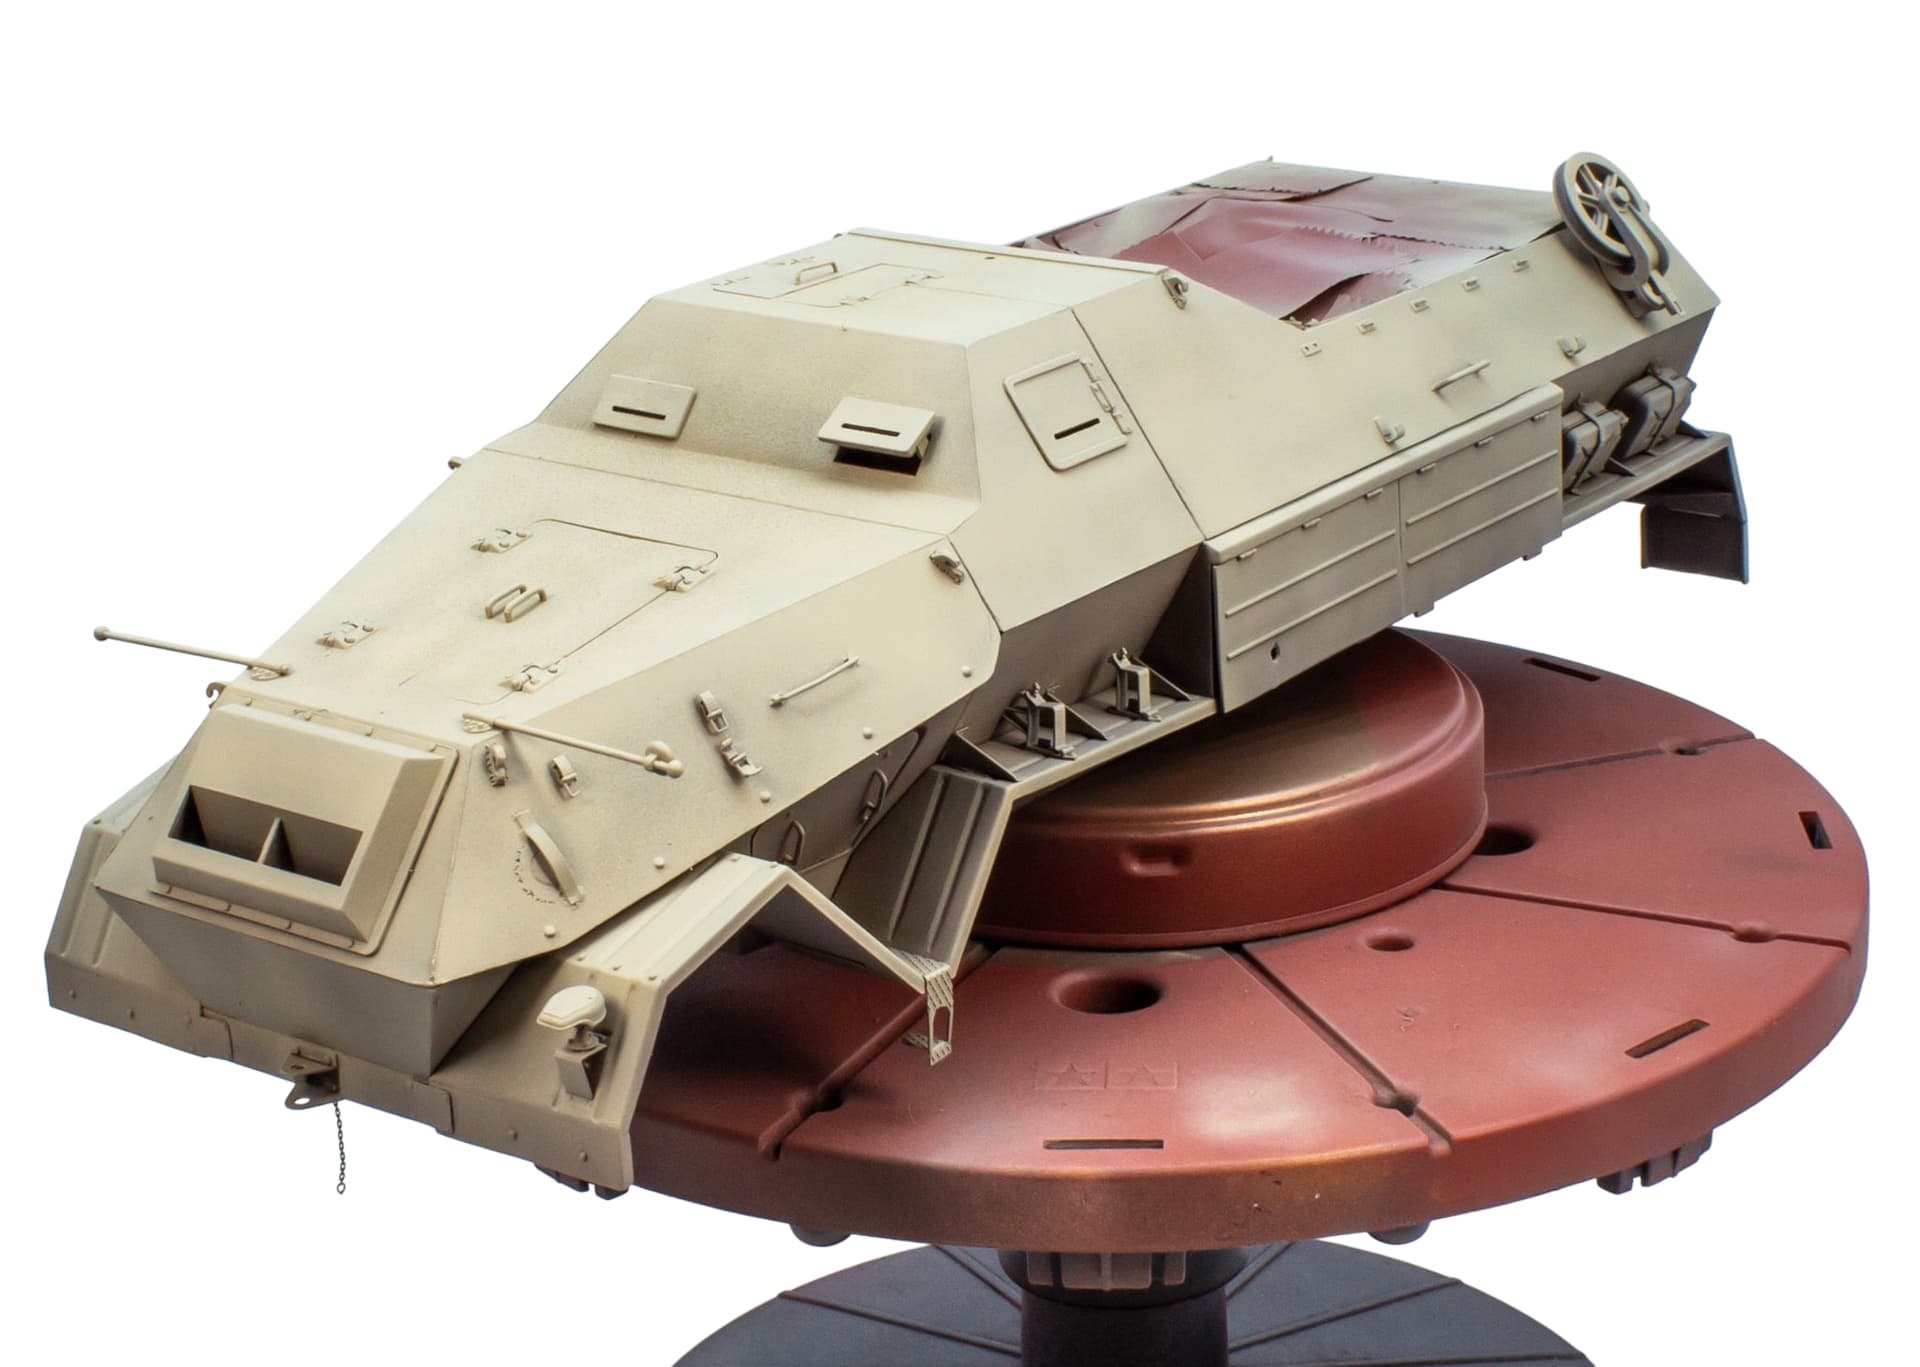
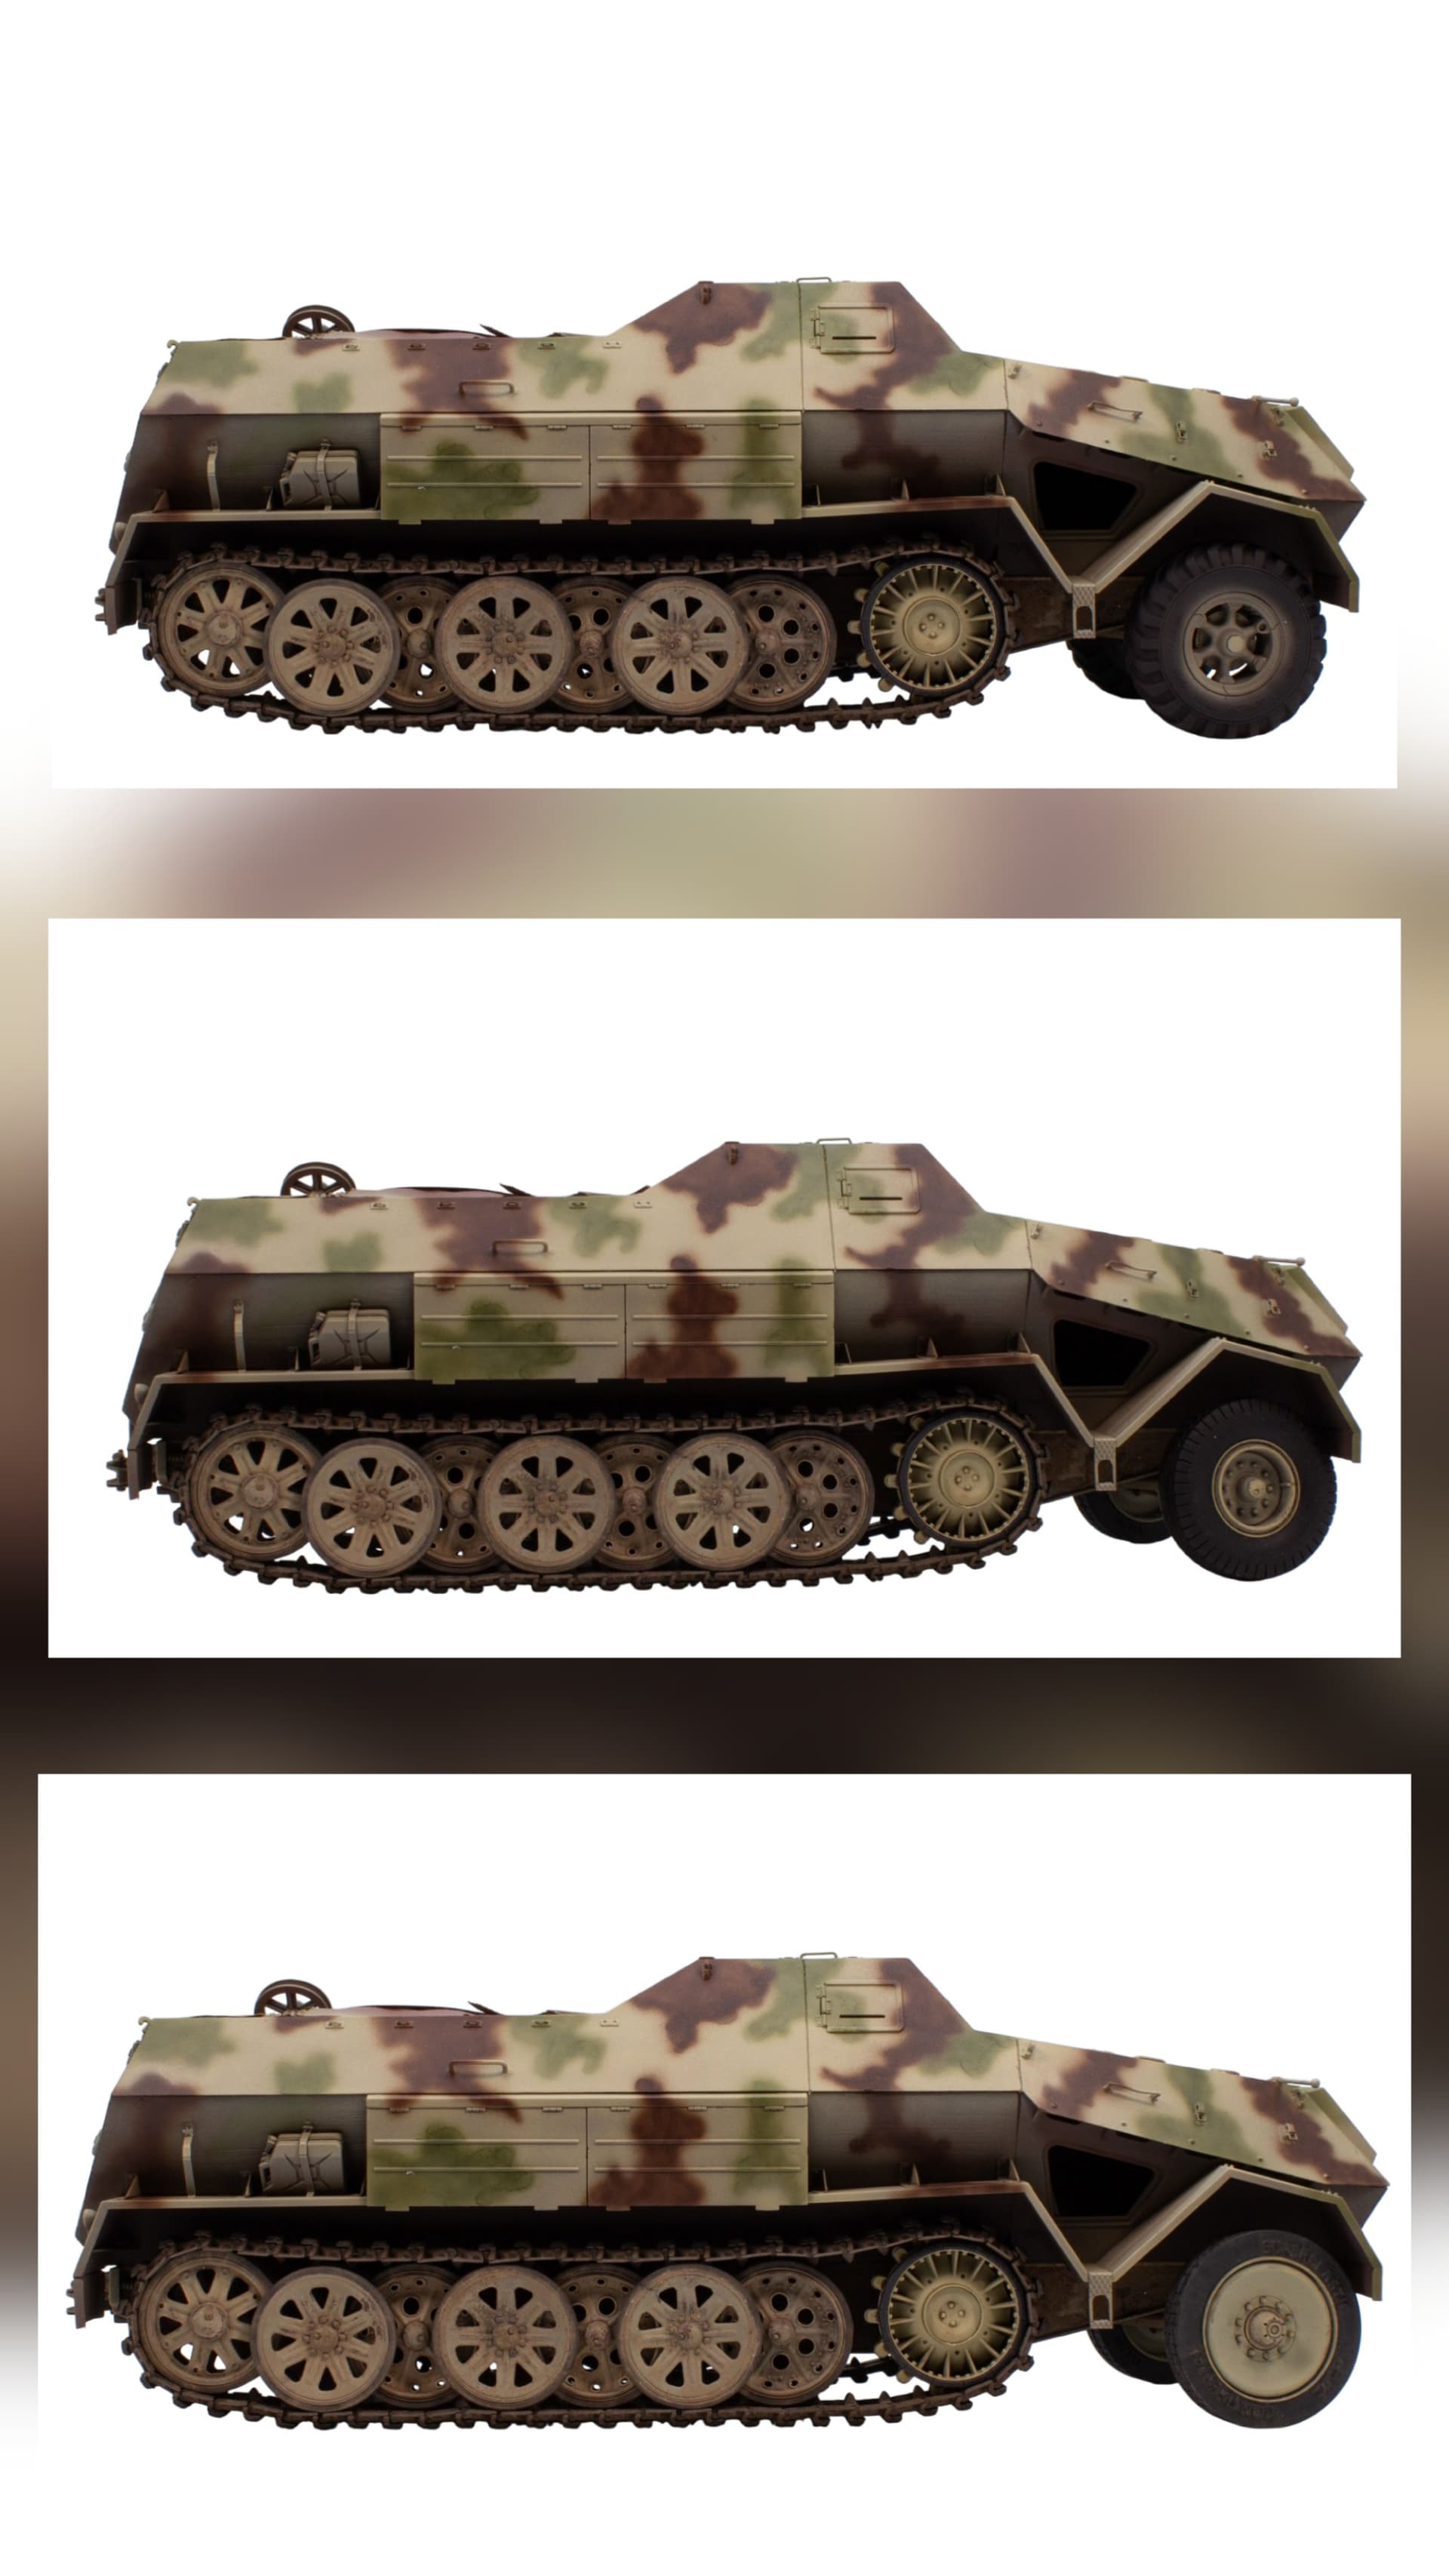
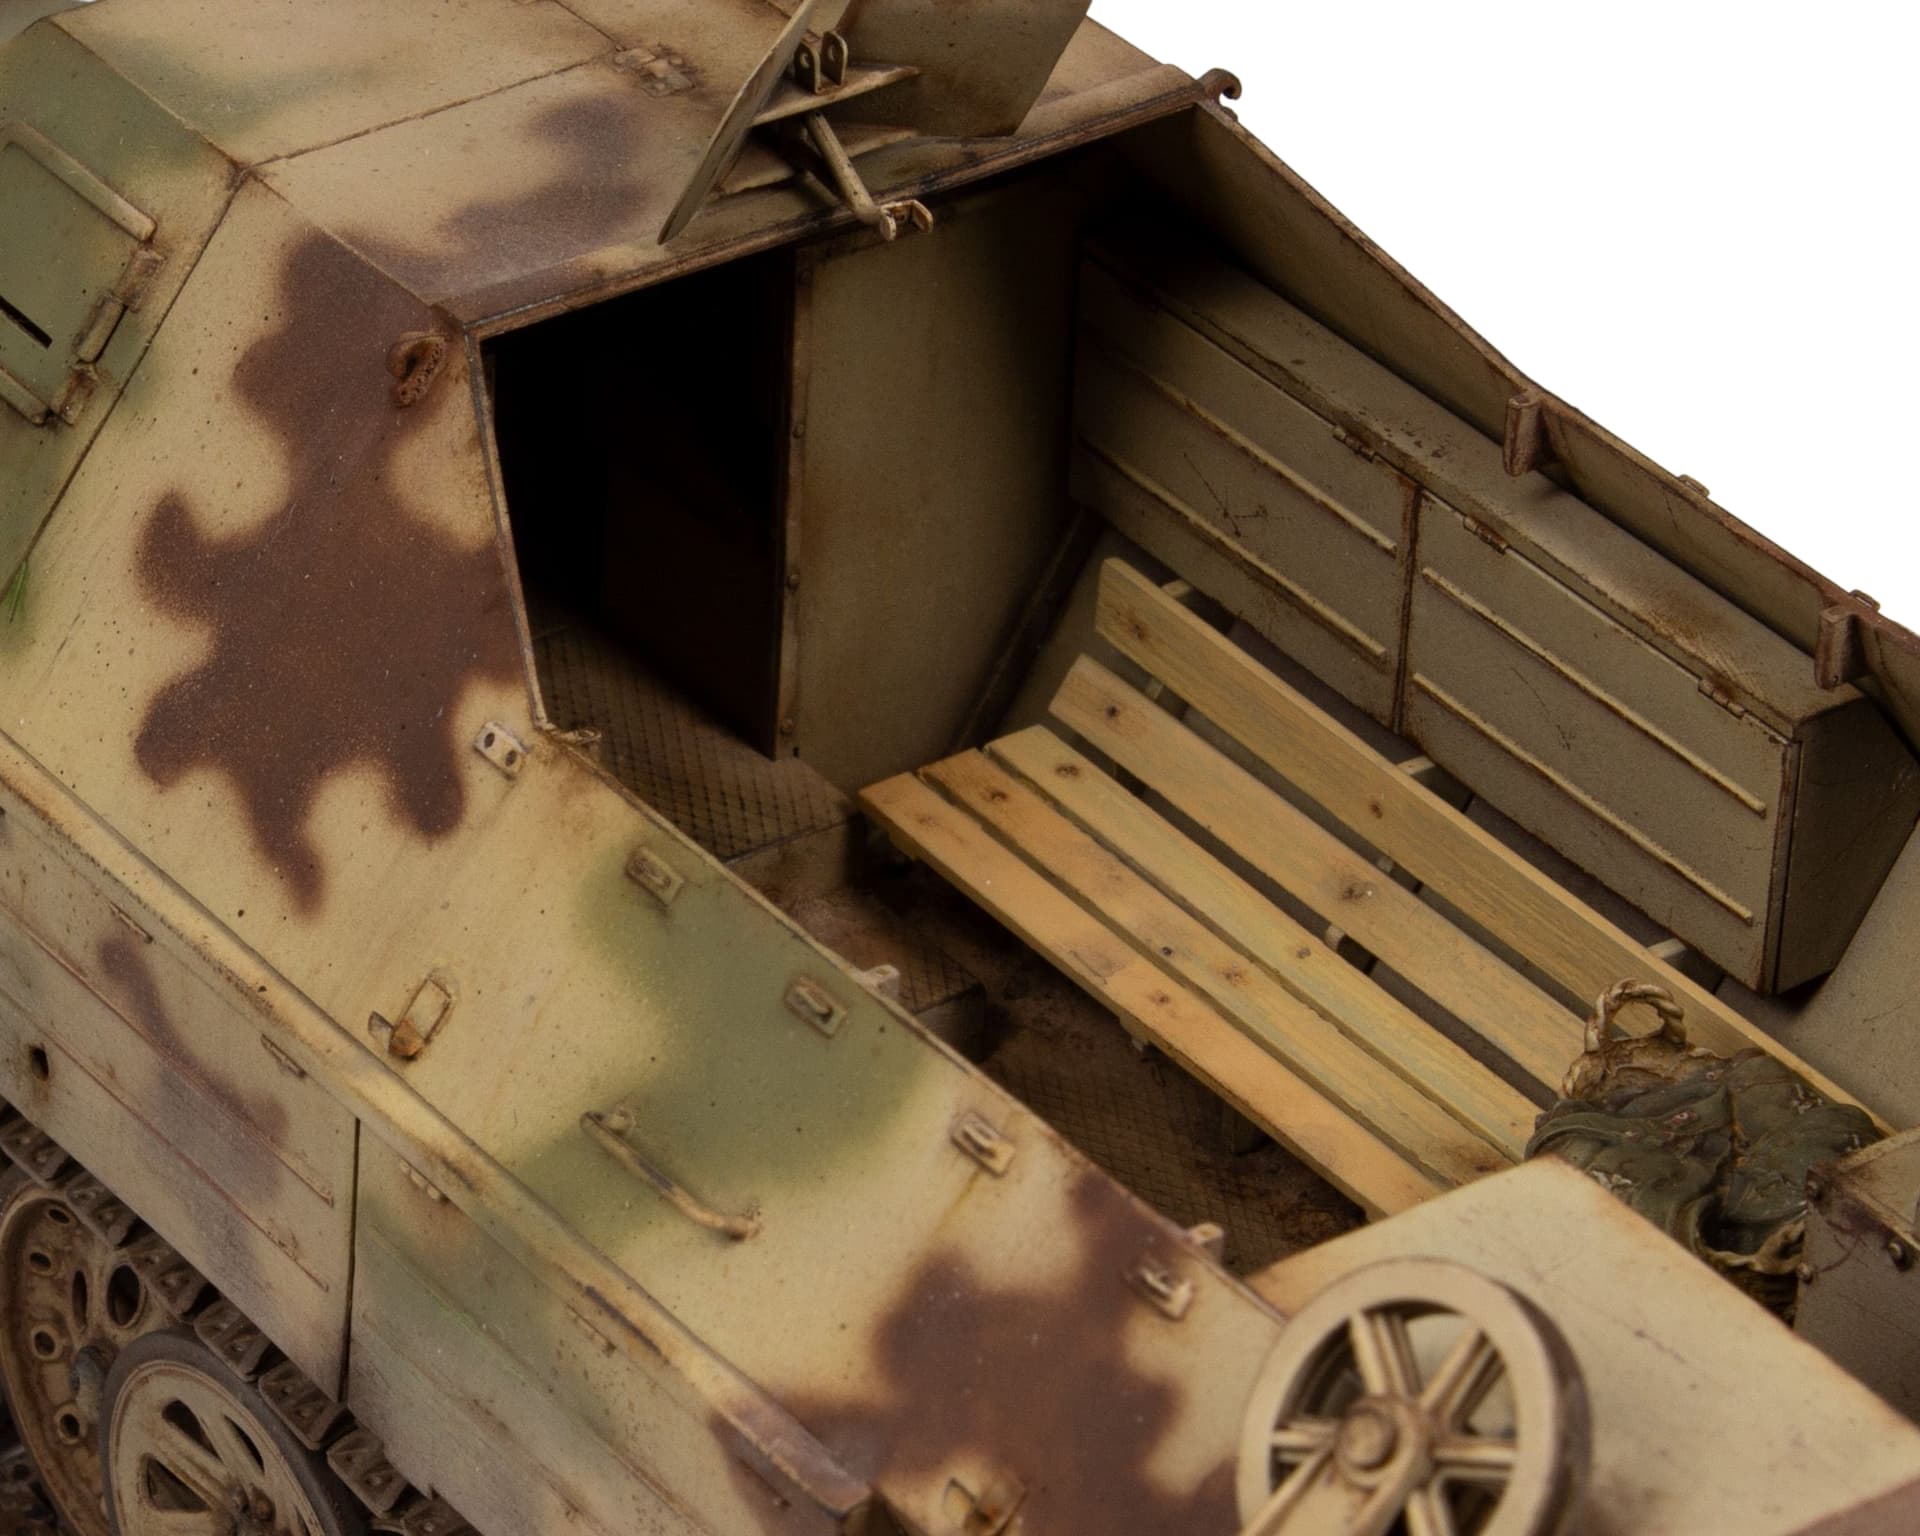
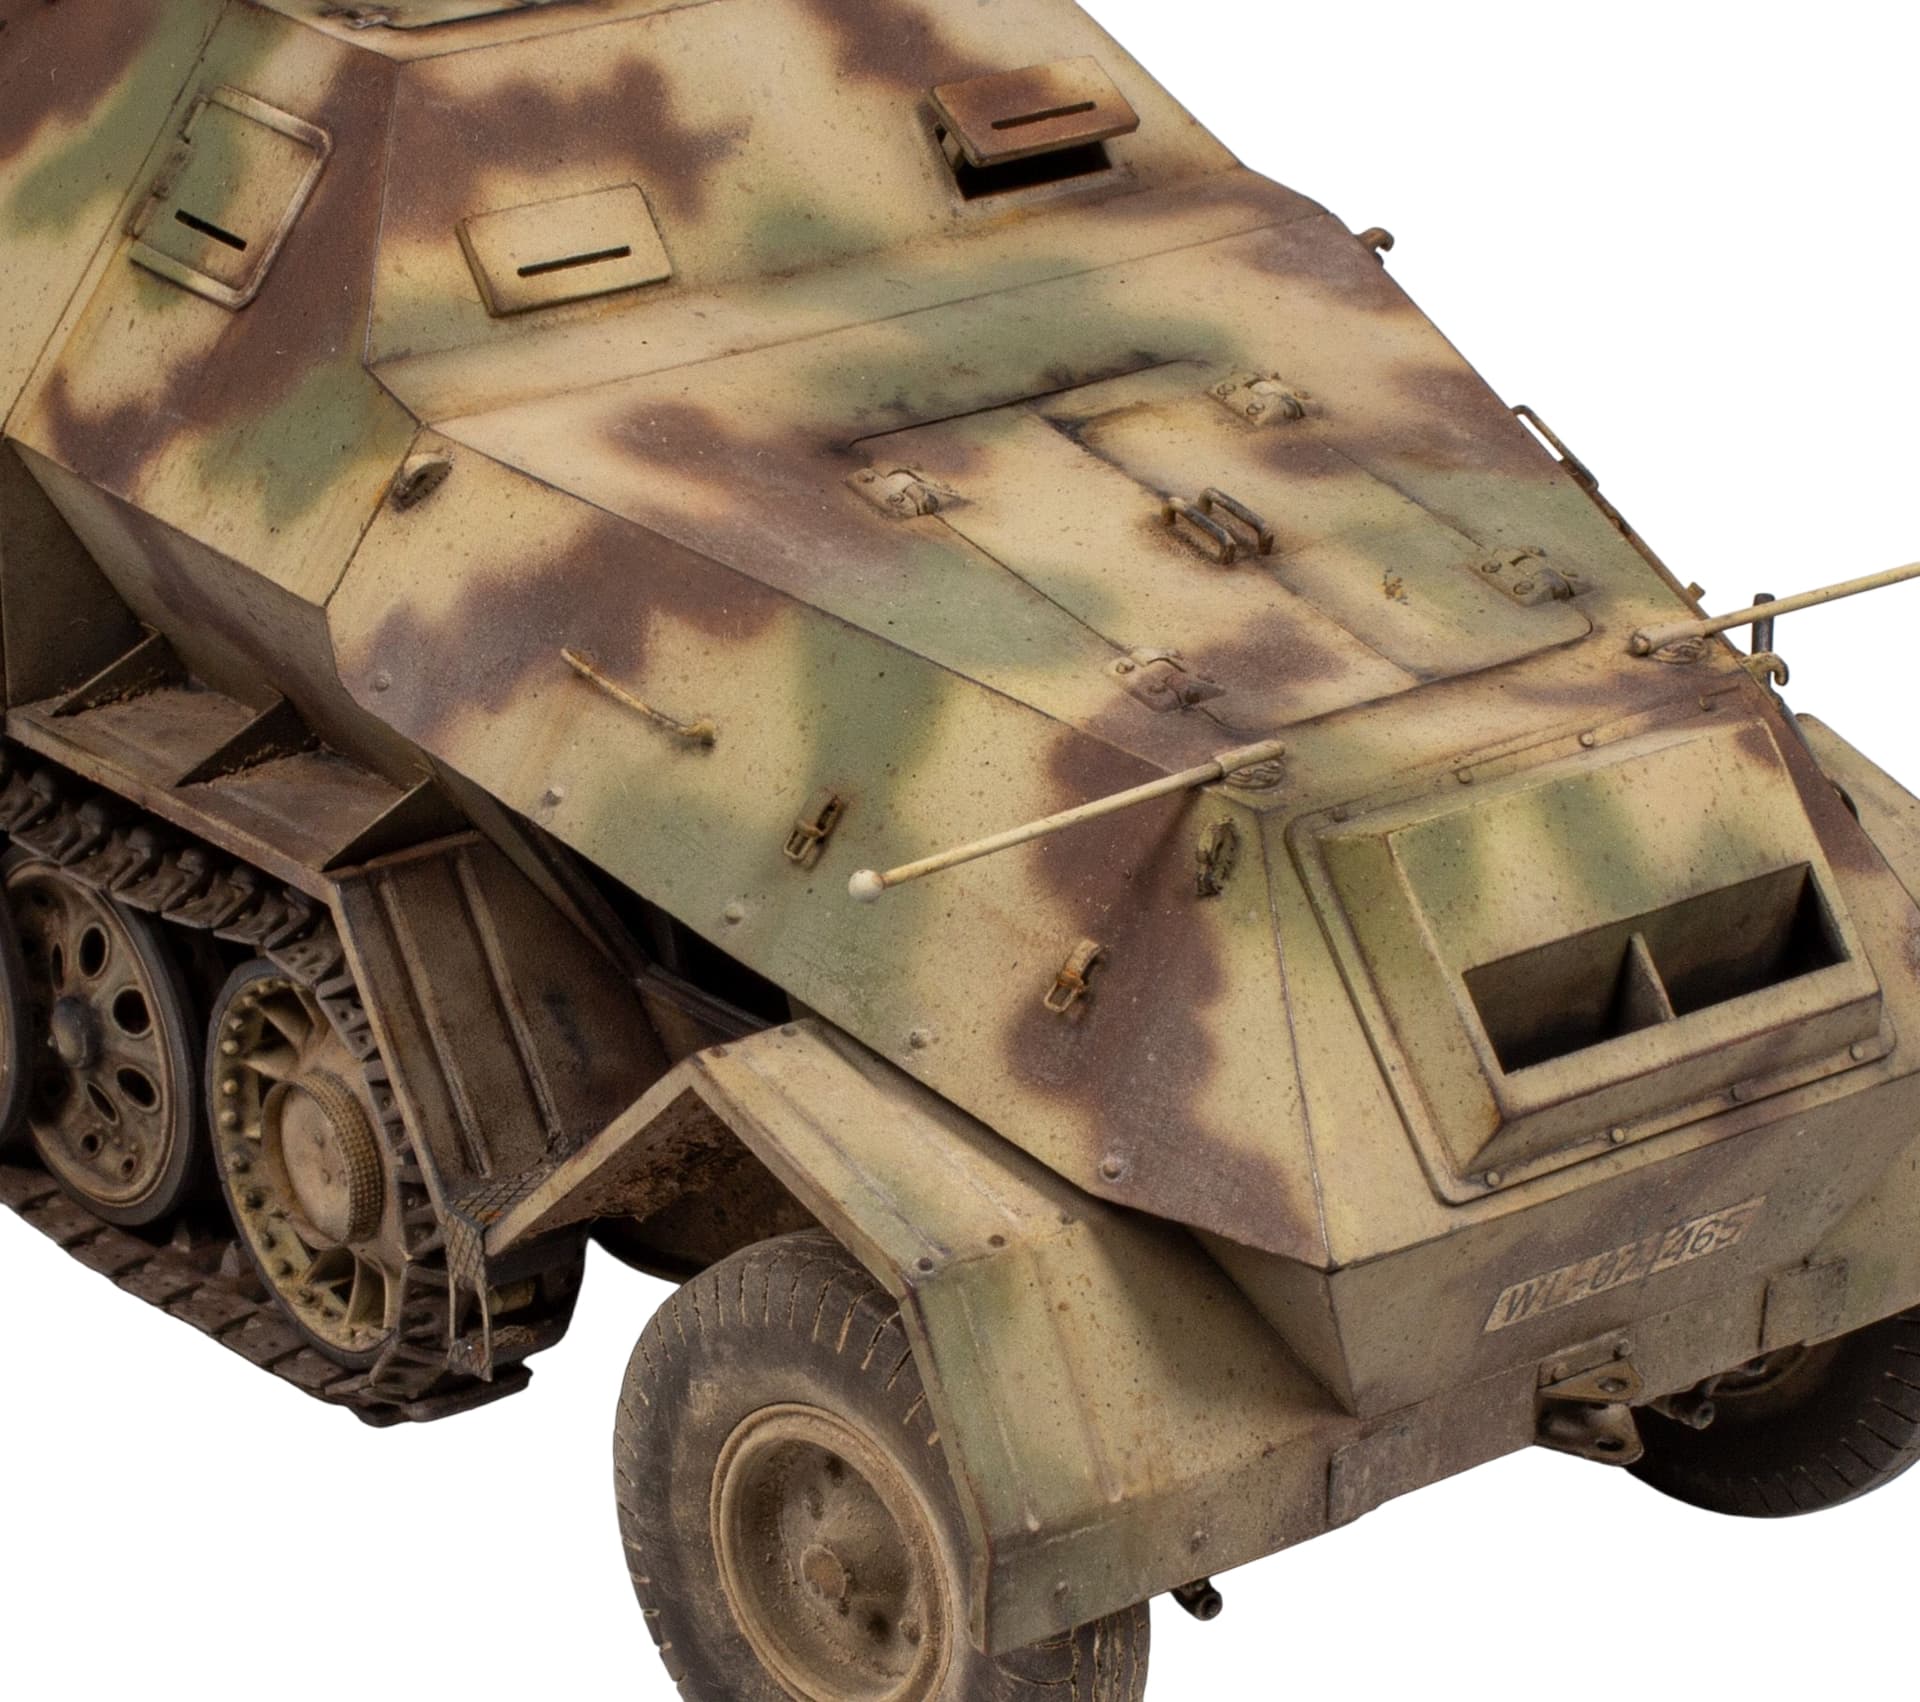
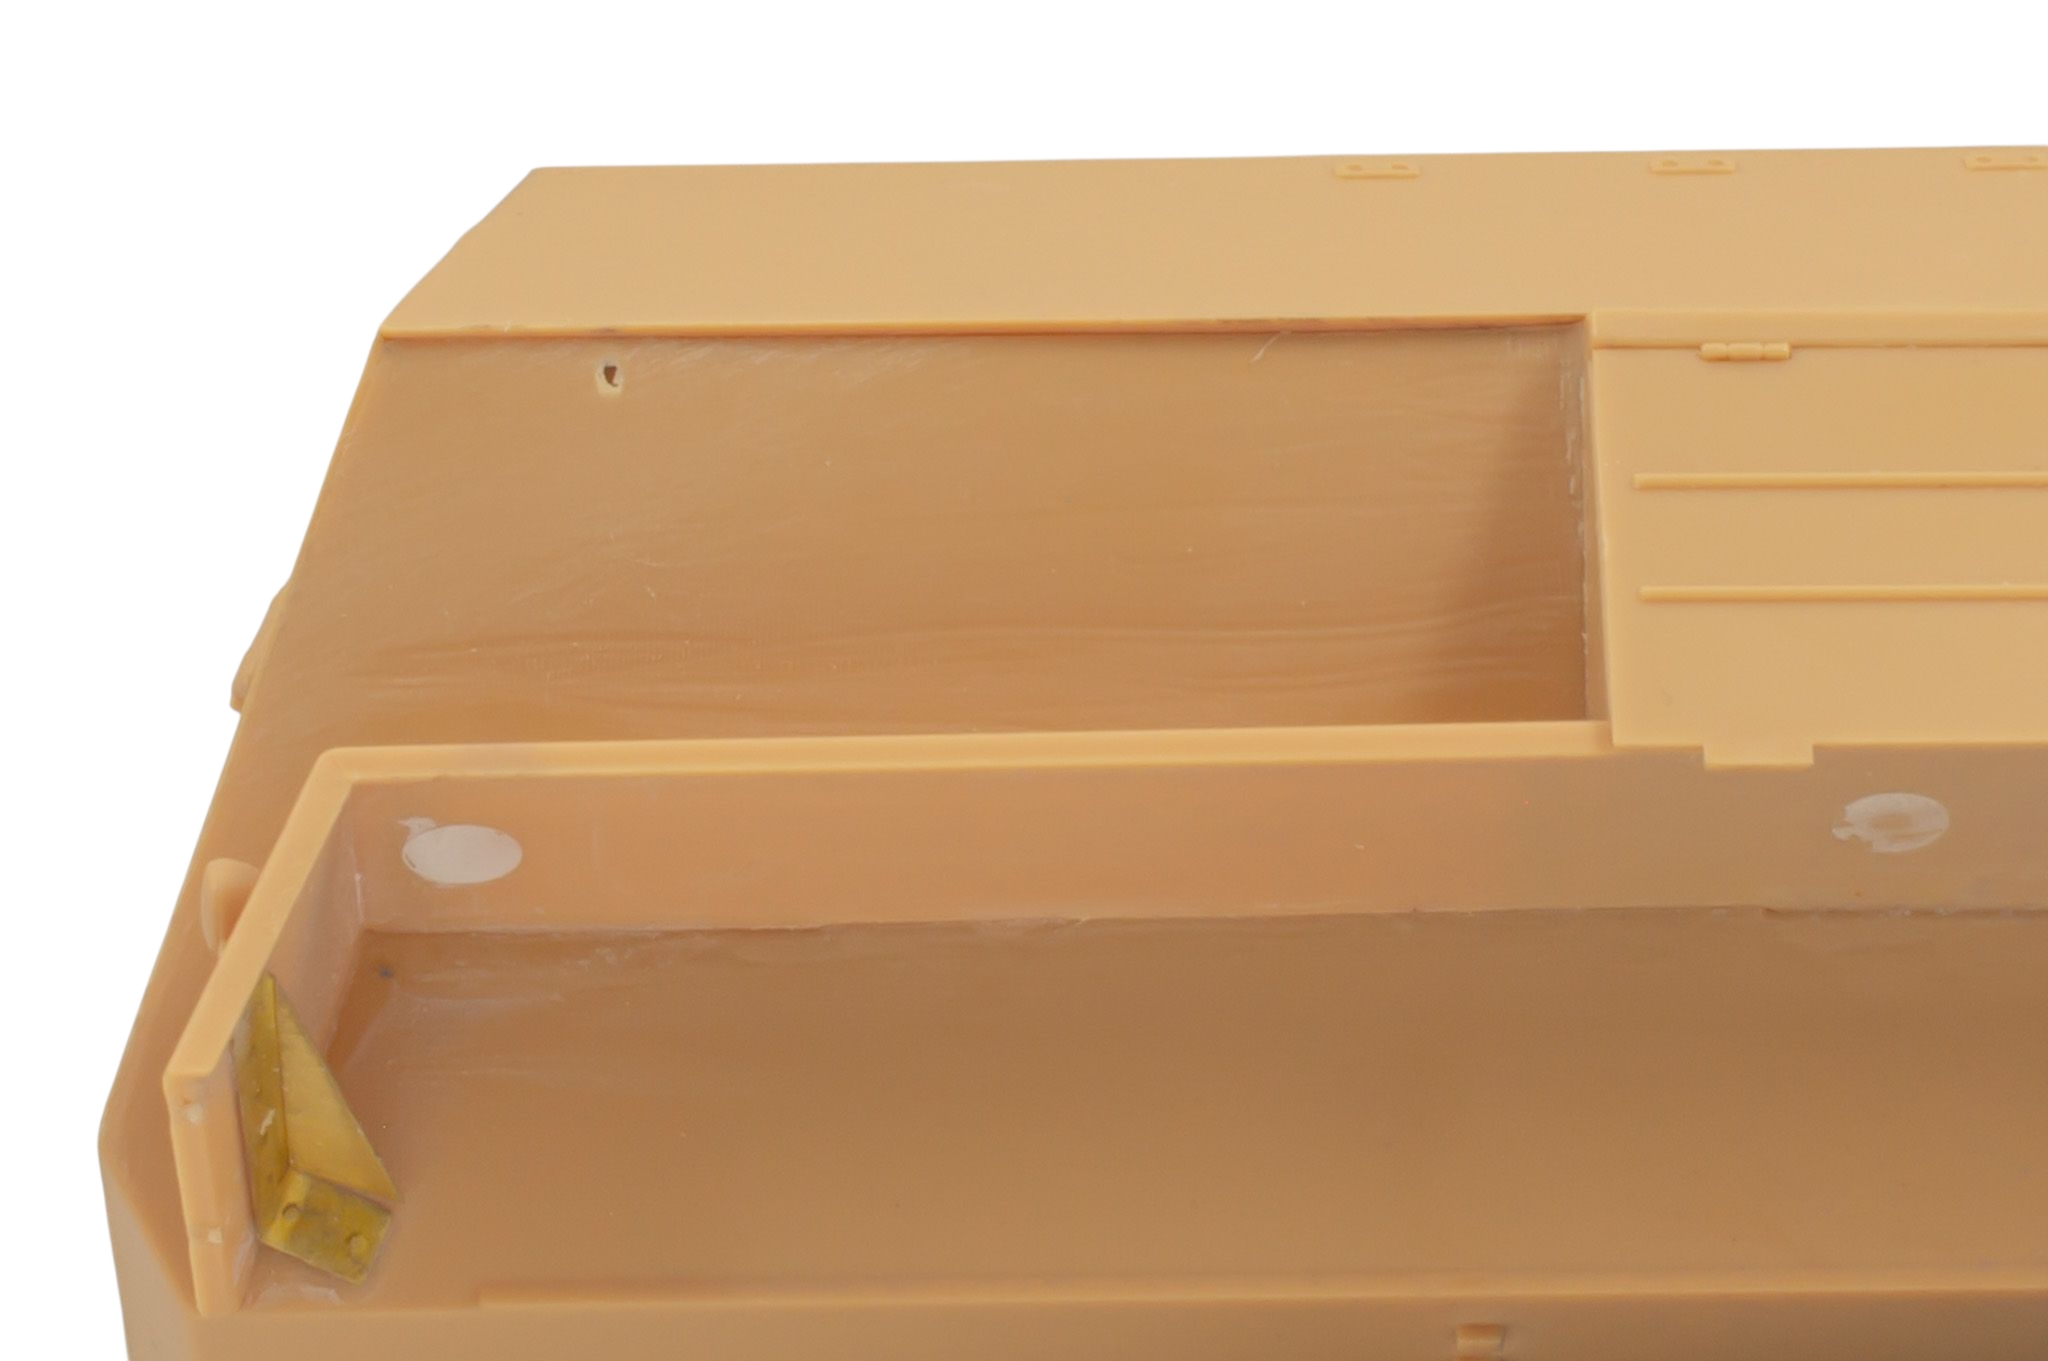
I worked on this in between other painting projects, so progress was slow but by May this year the new sprockets were fitted, and I was onto the bodywork. A pretty big visual anomaly with the kit parts is the lack of any real upper armour overlap. Unfortunately, the kit parts pretty much butted up to each other. Not wanting to disturb the work on the interior I opted to resolved this by shaving off a small amount of material from the lower angled plate.


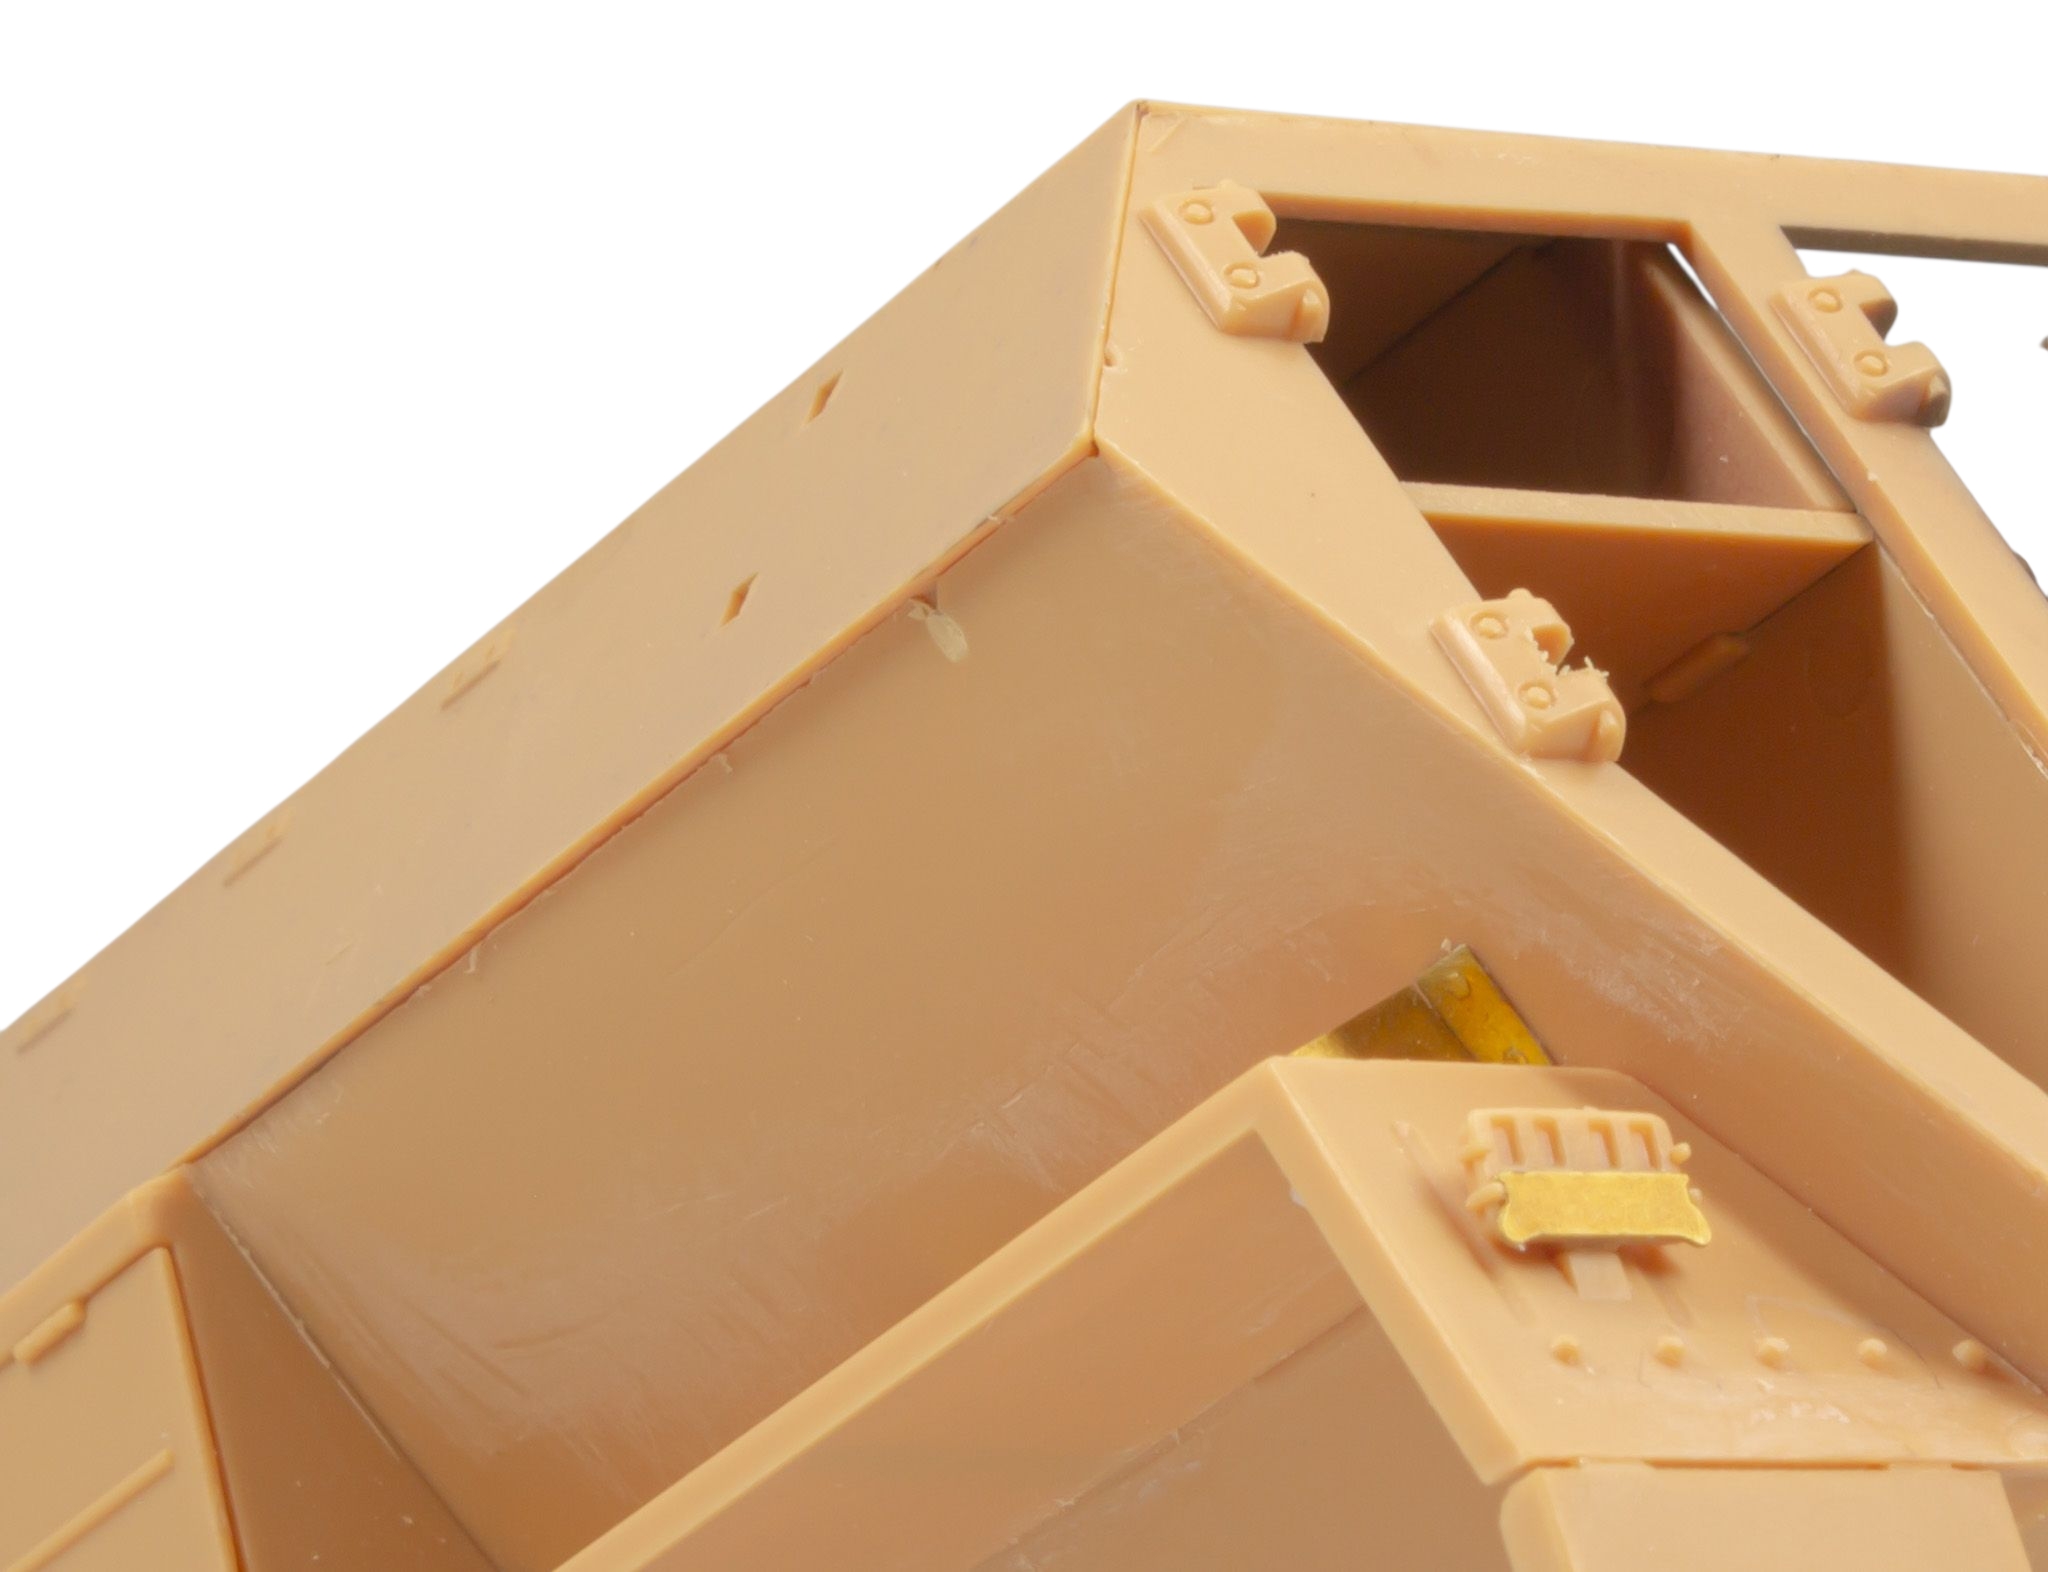
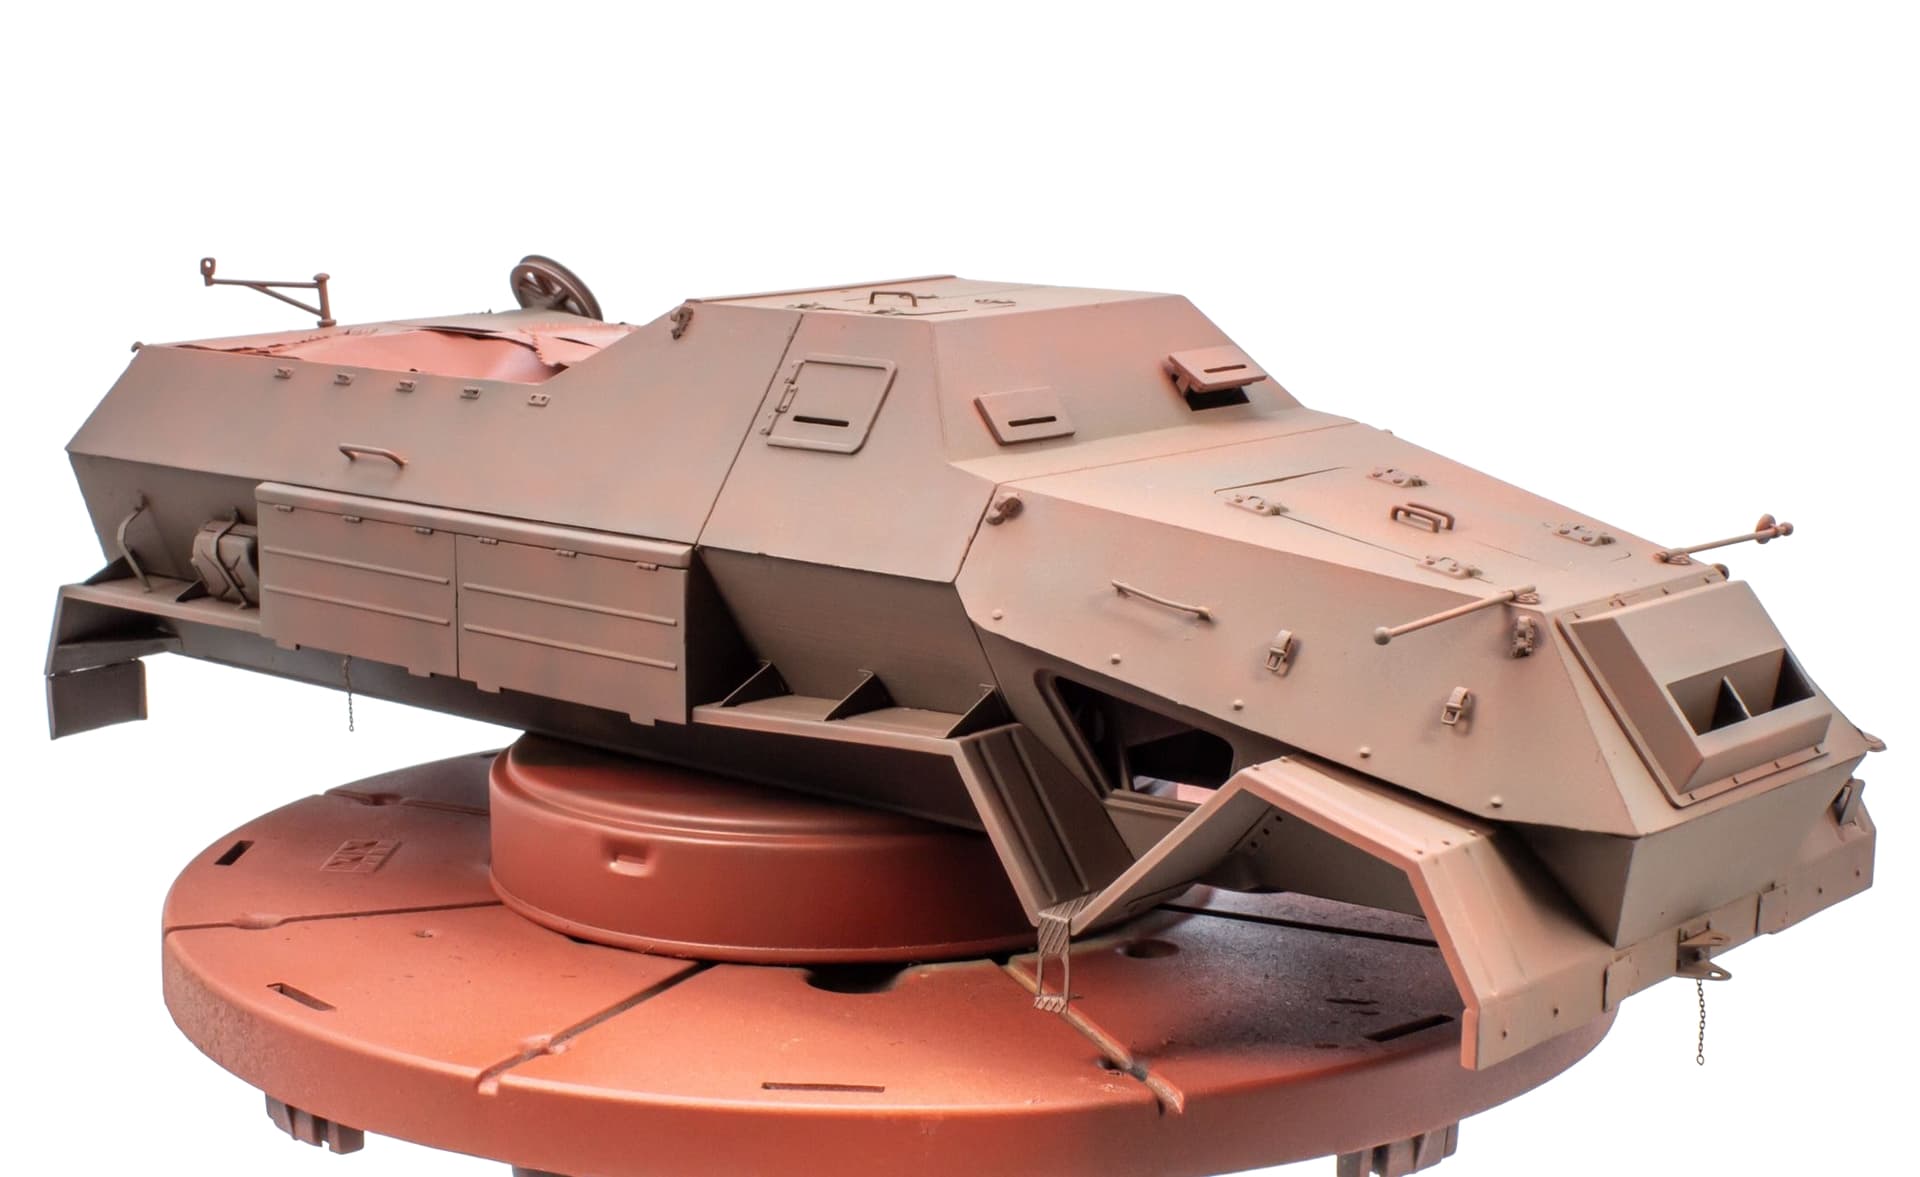
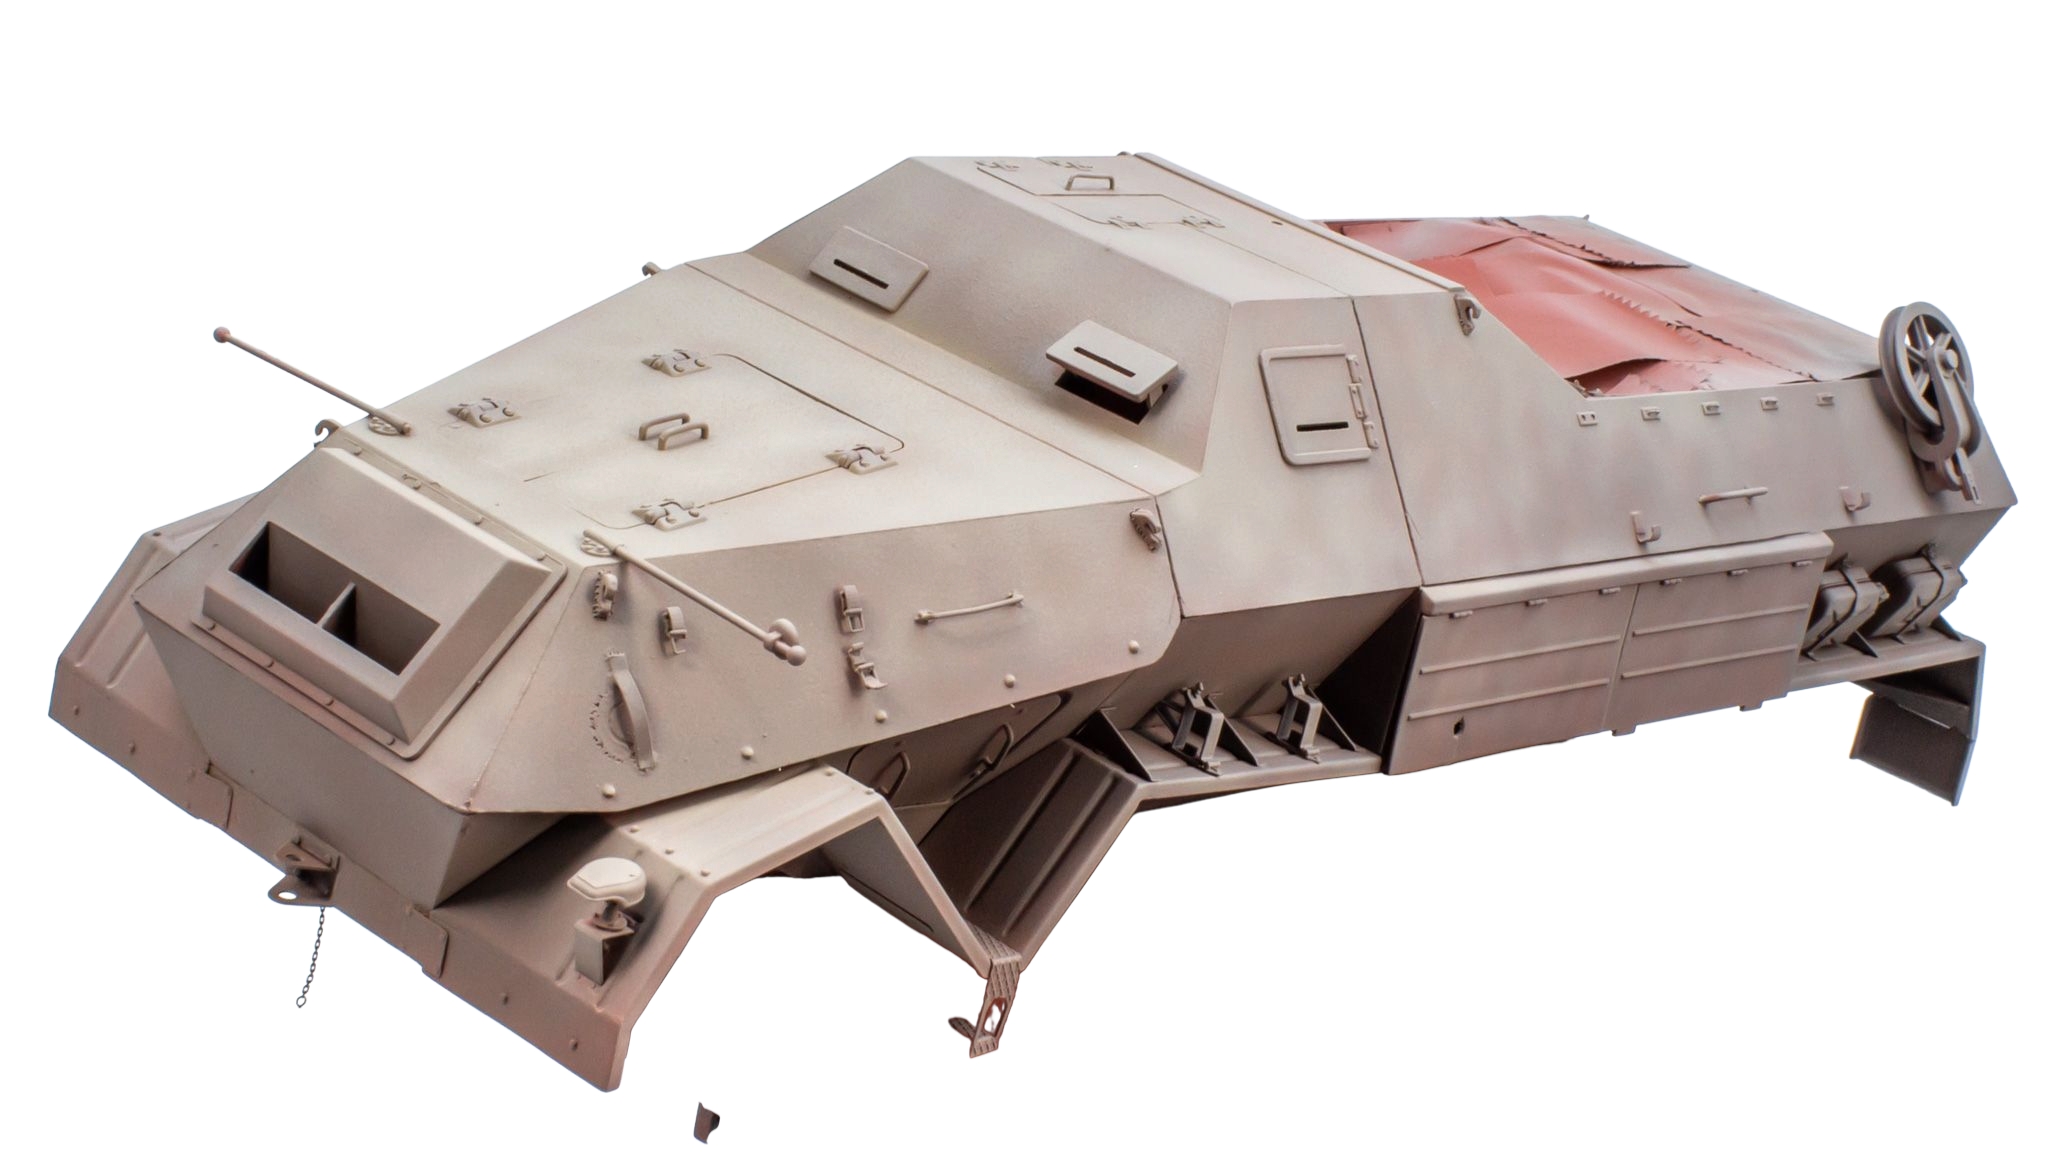
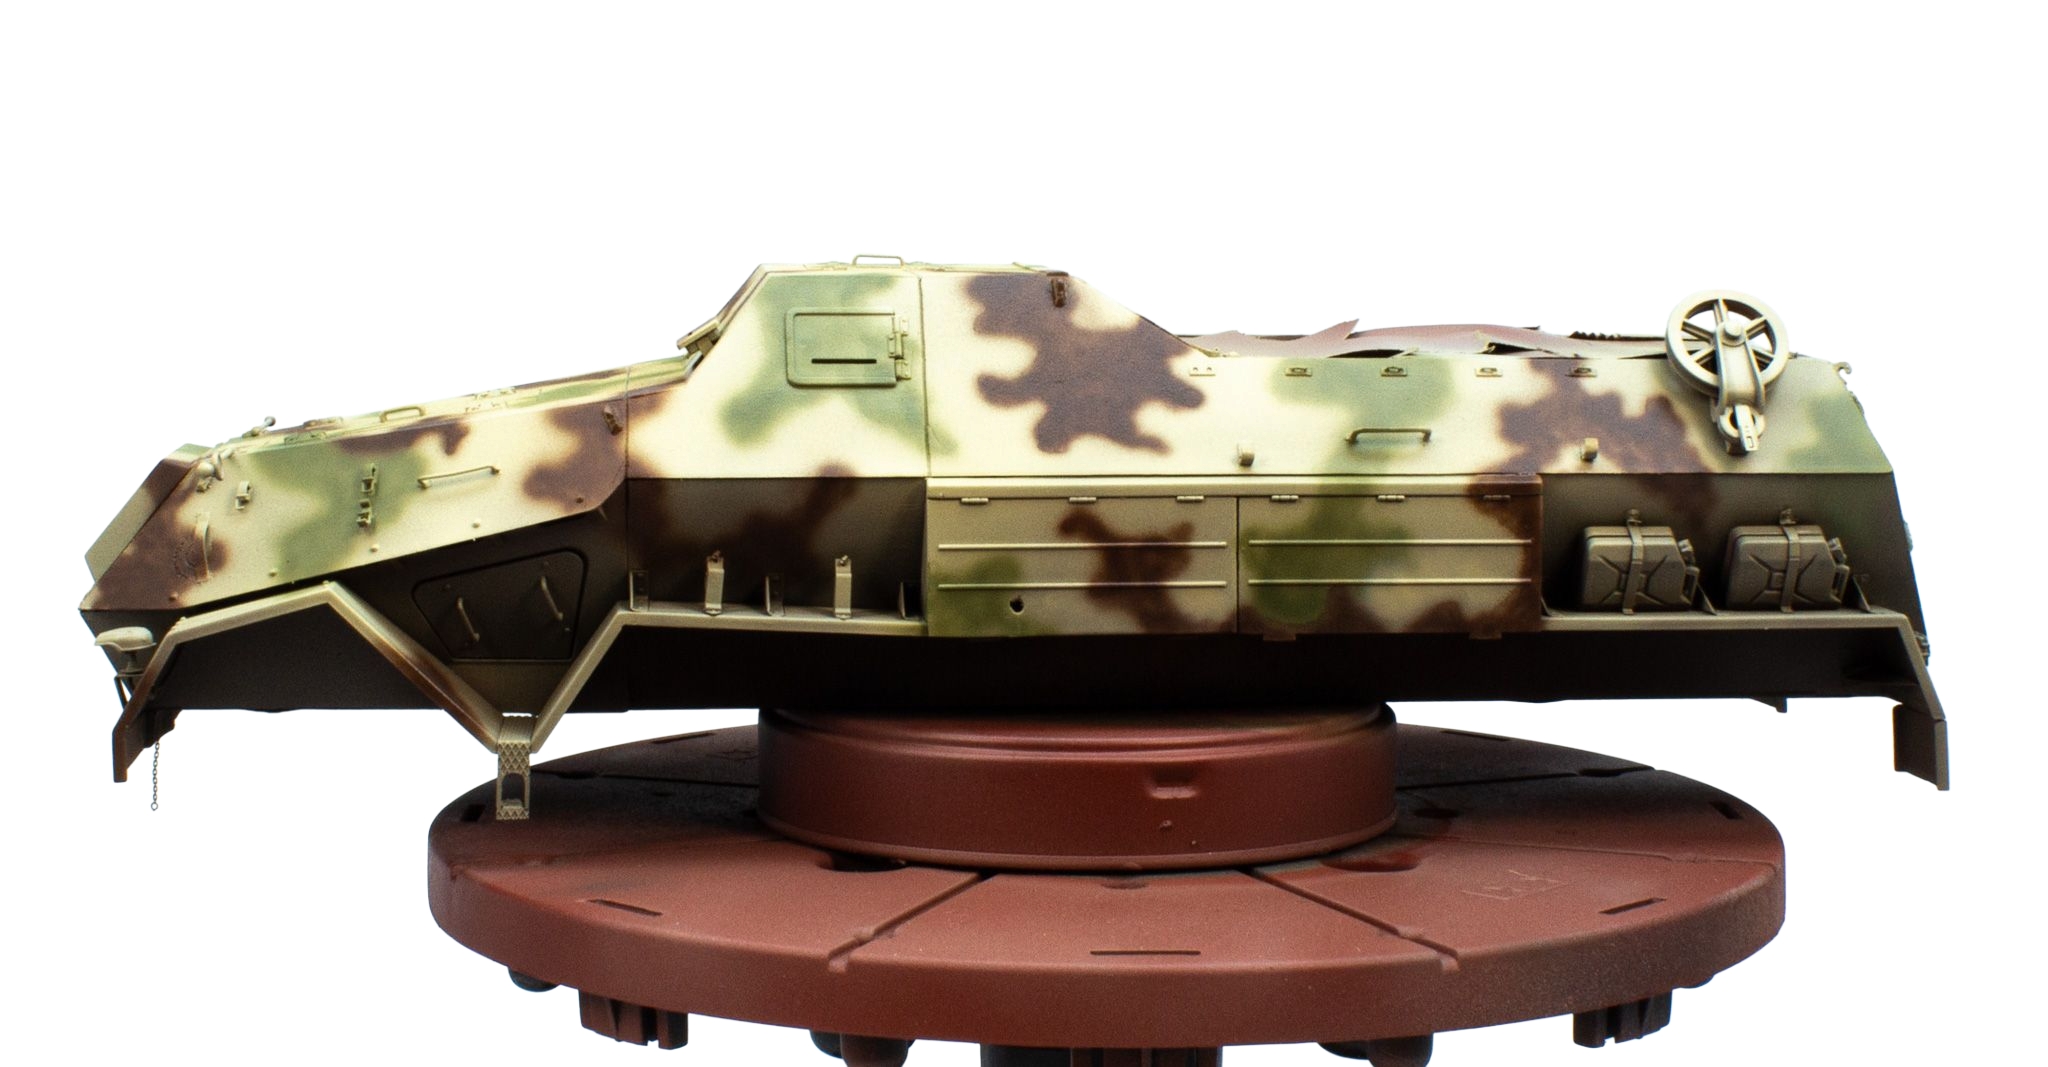
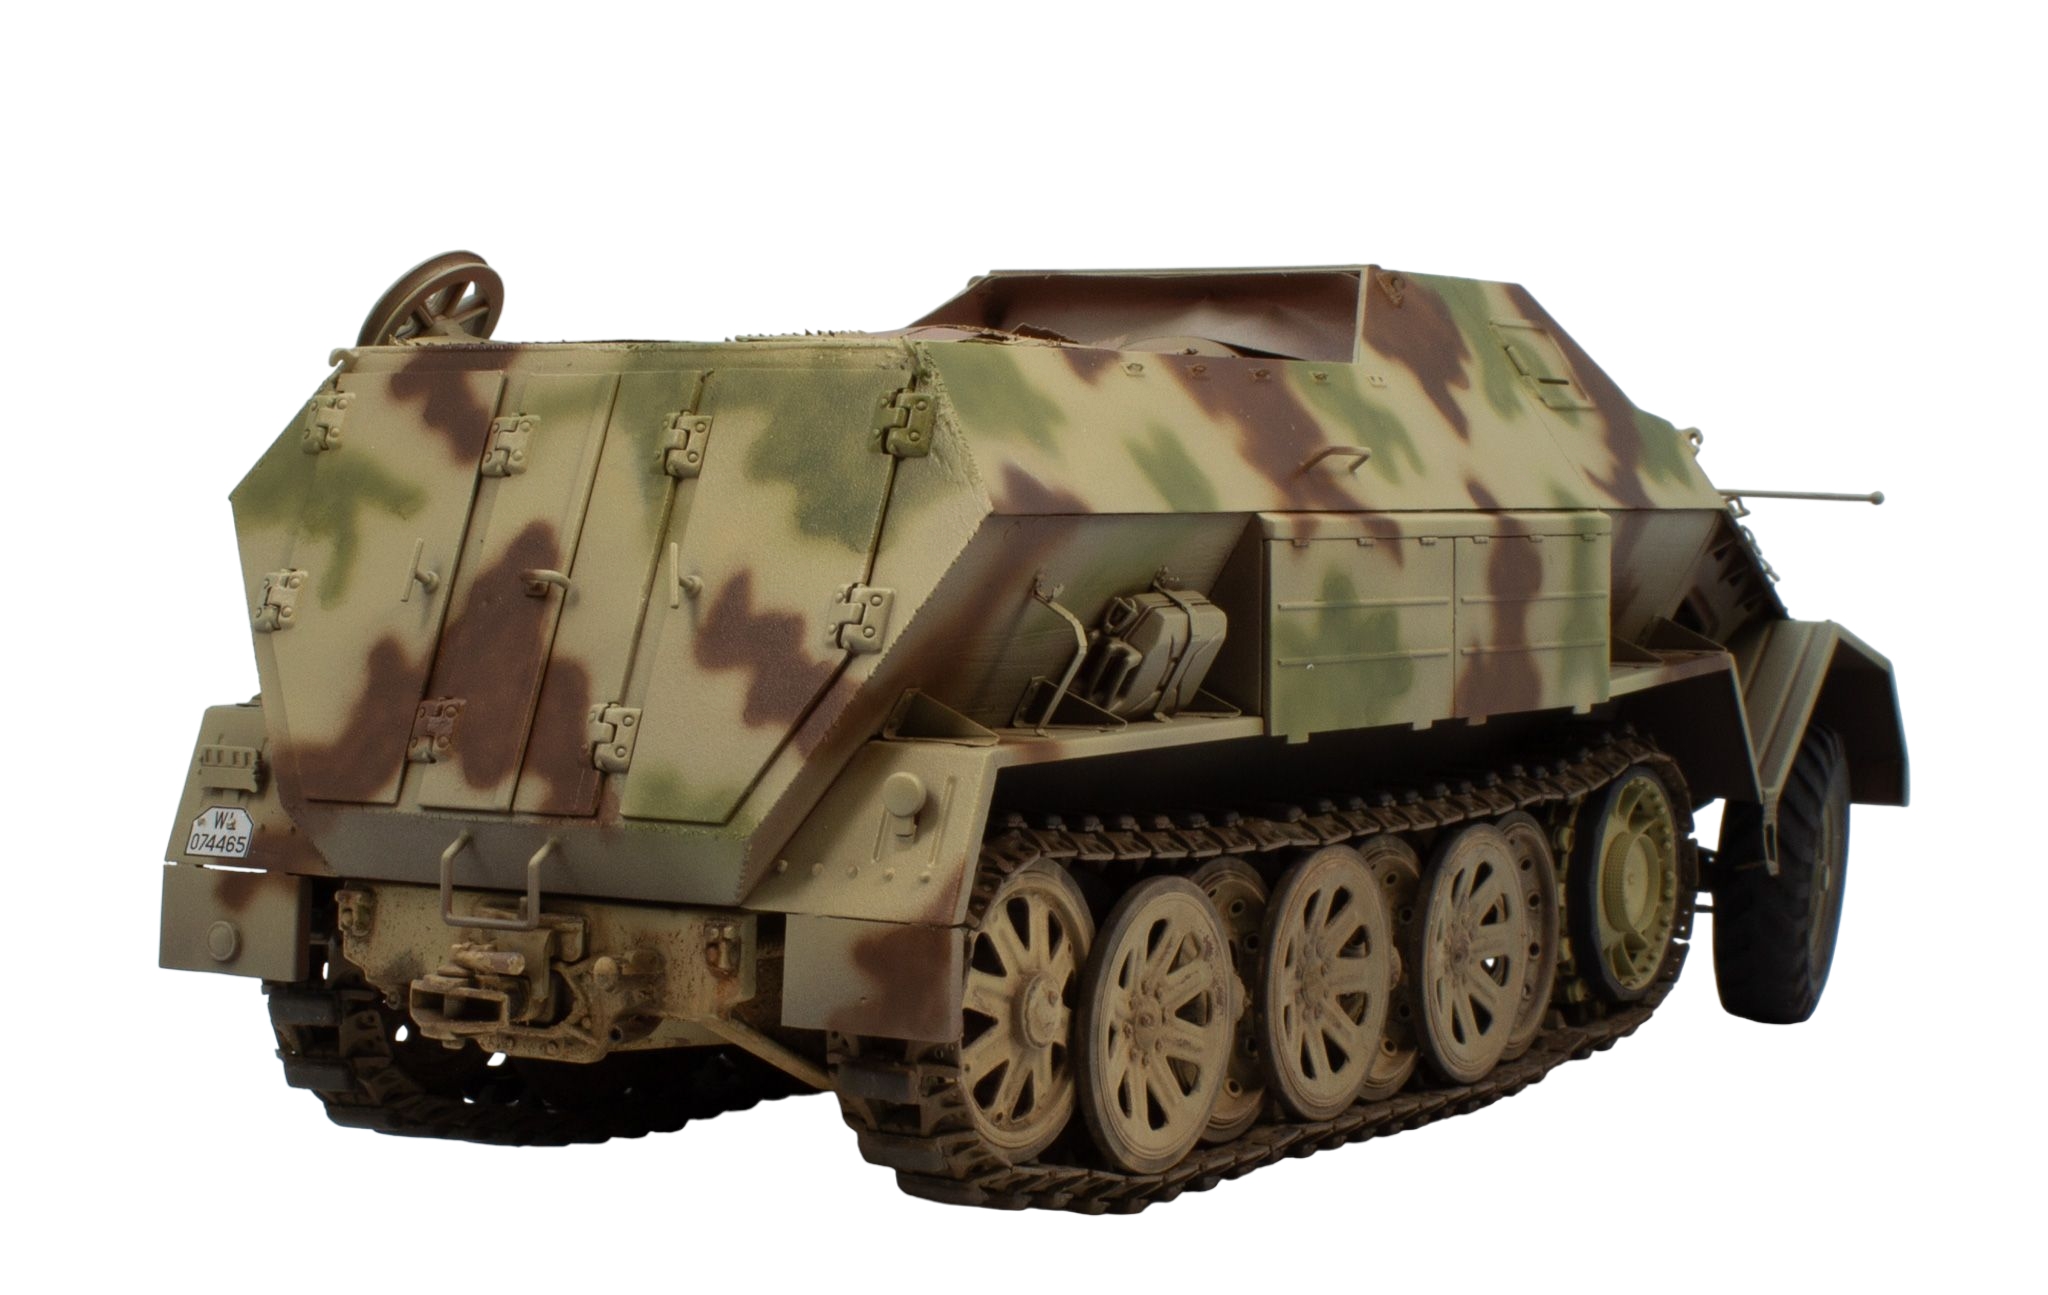
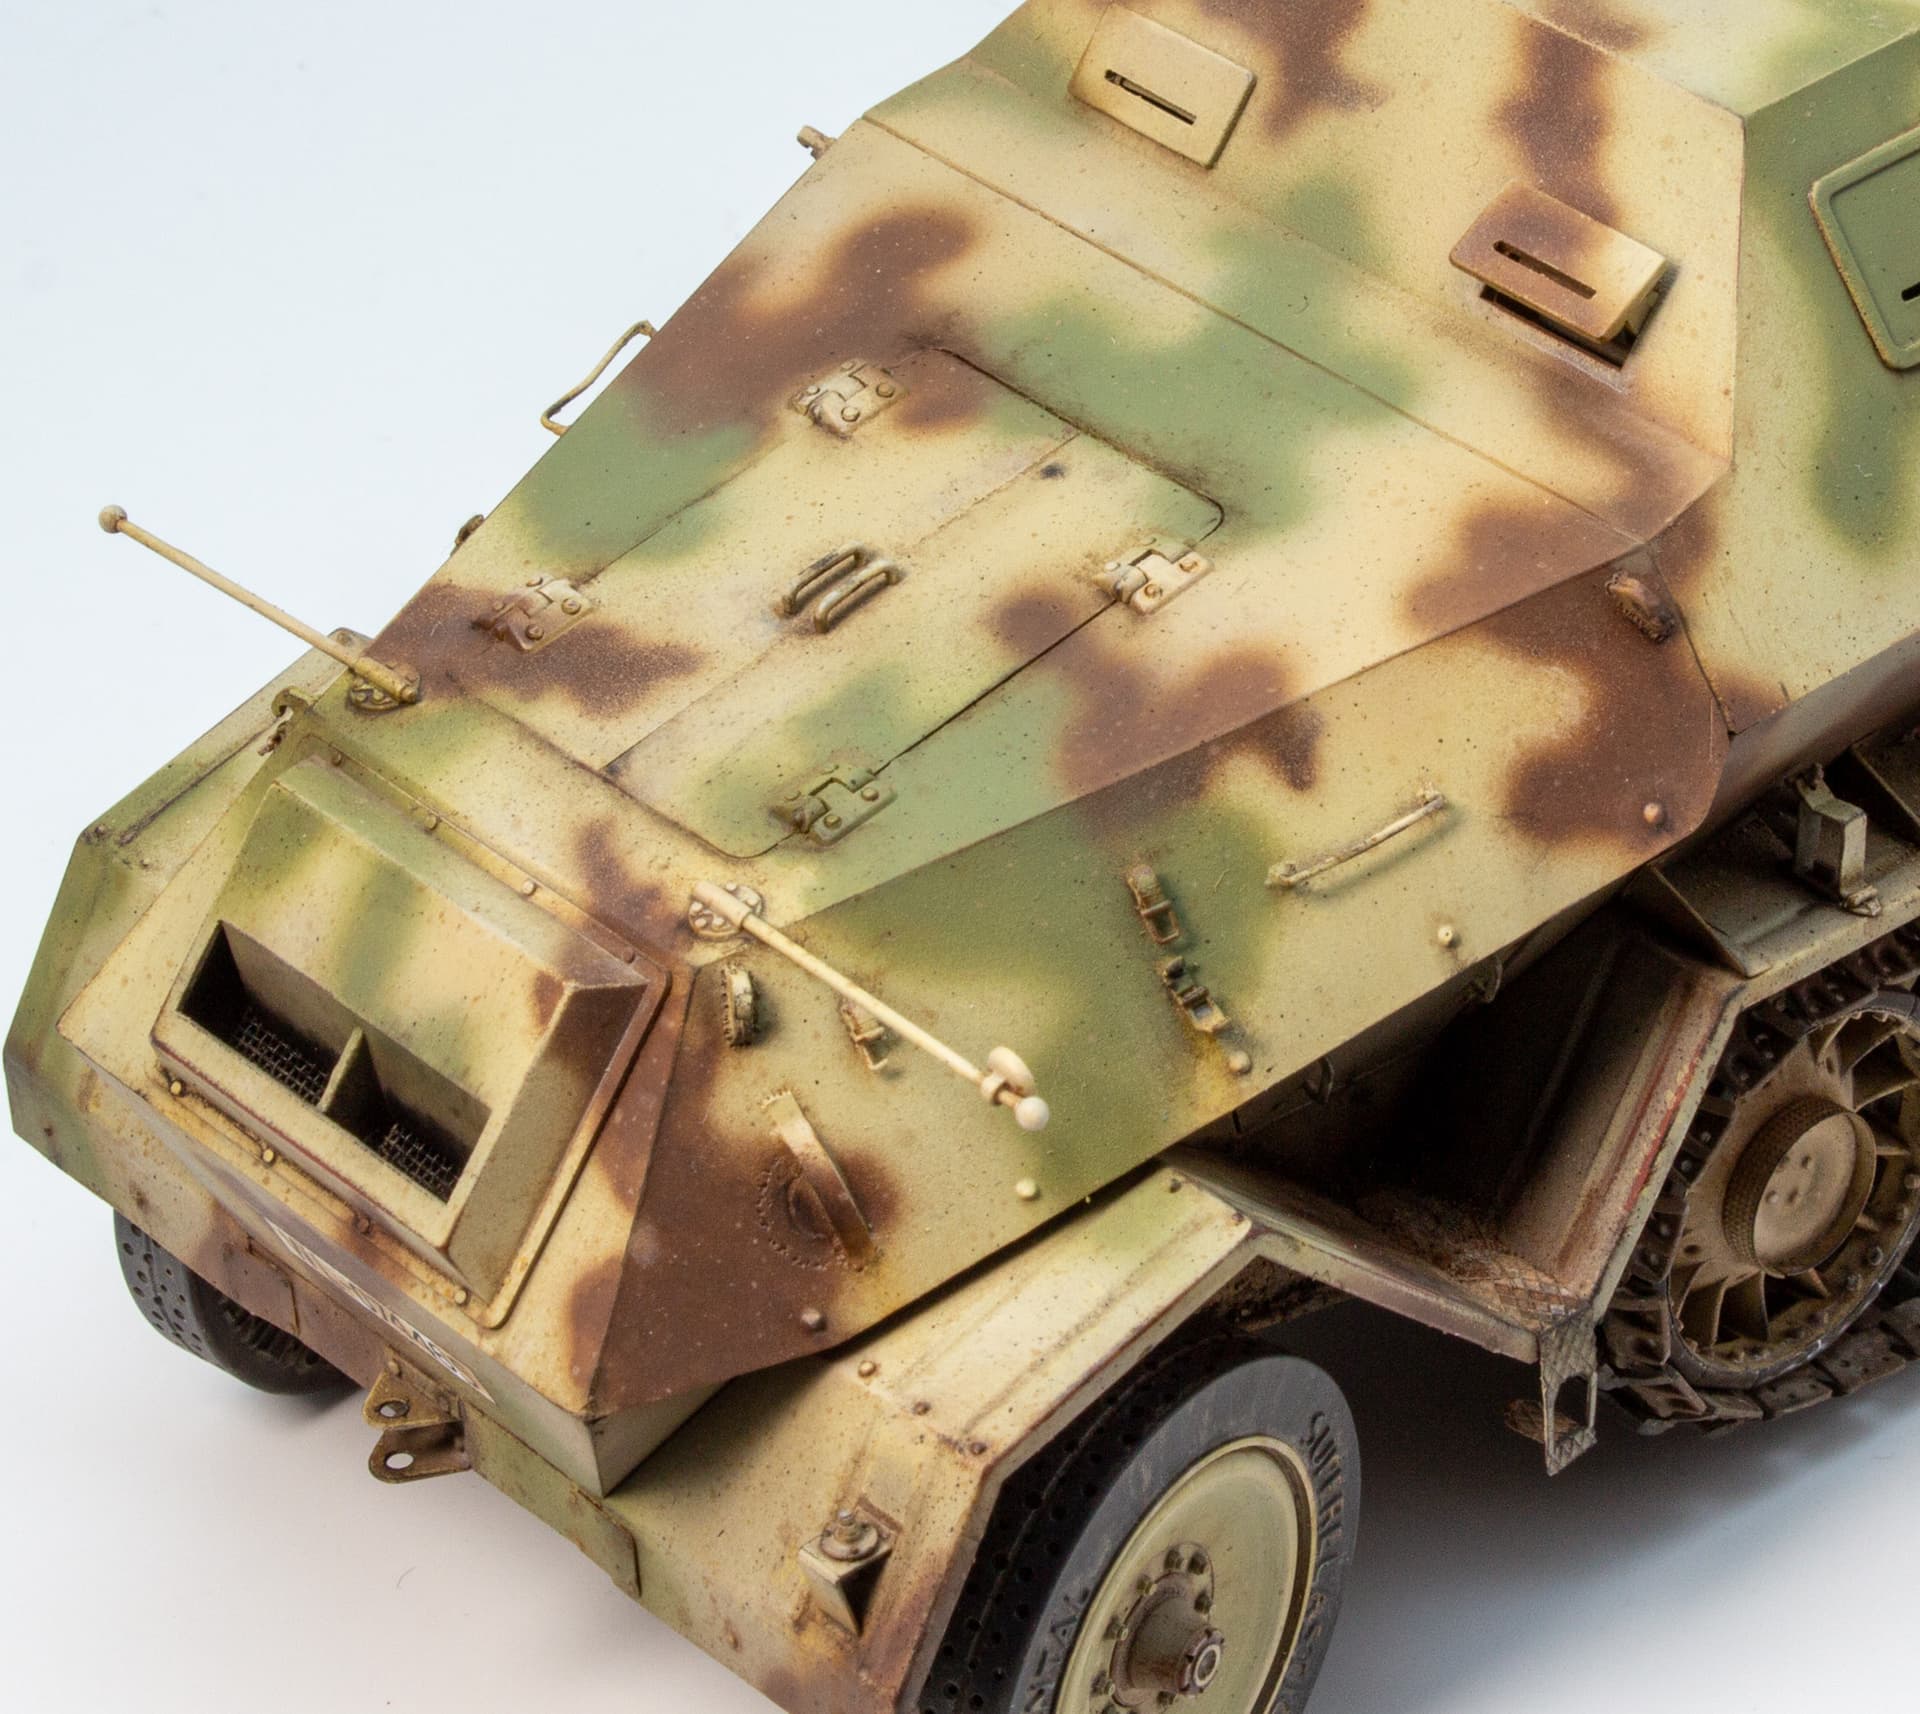
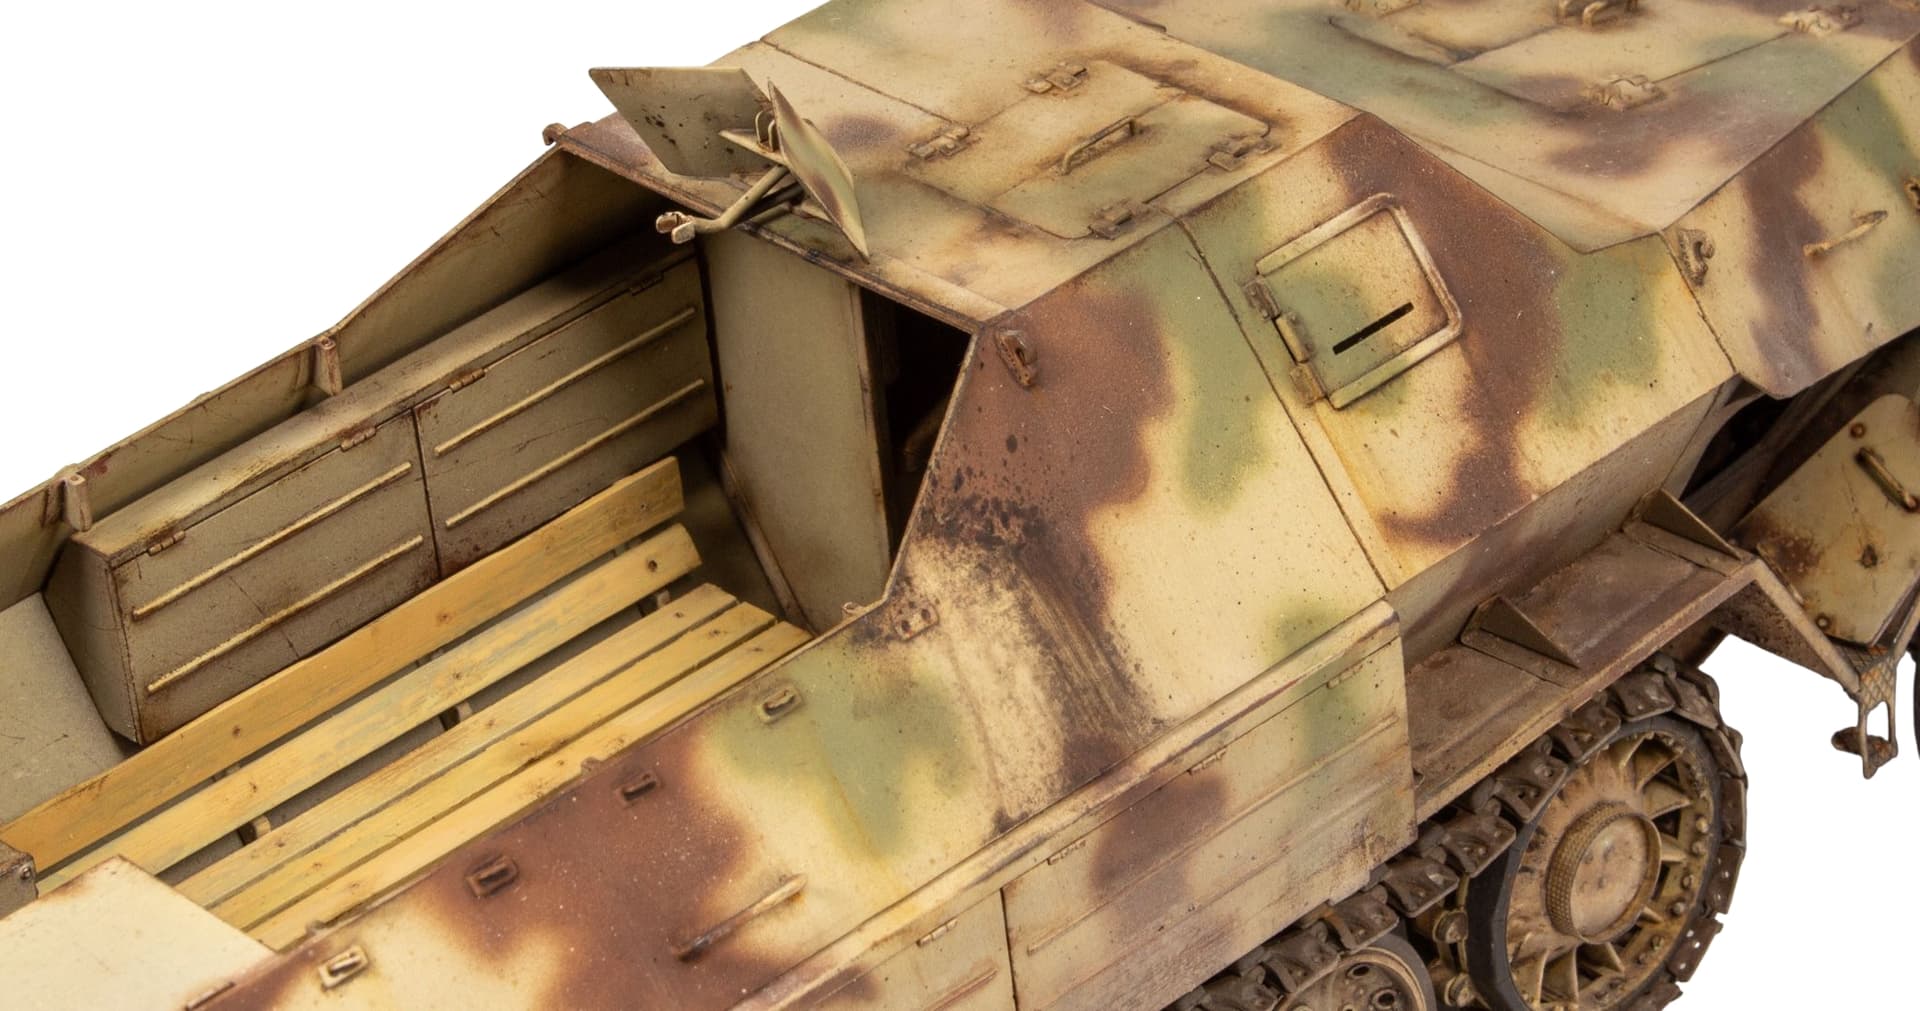
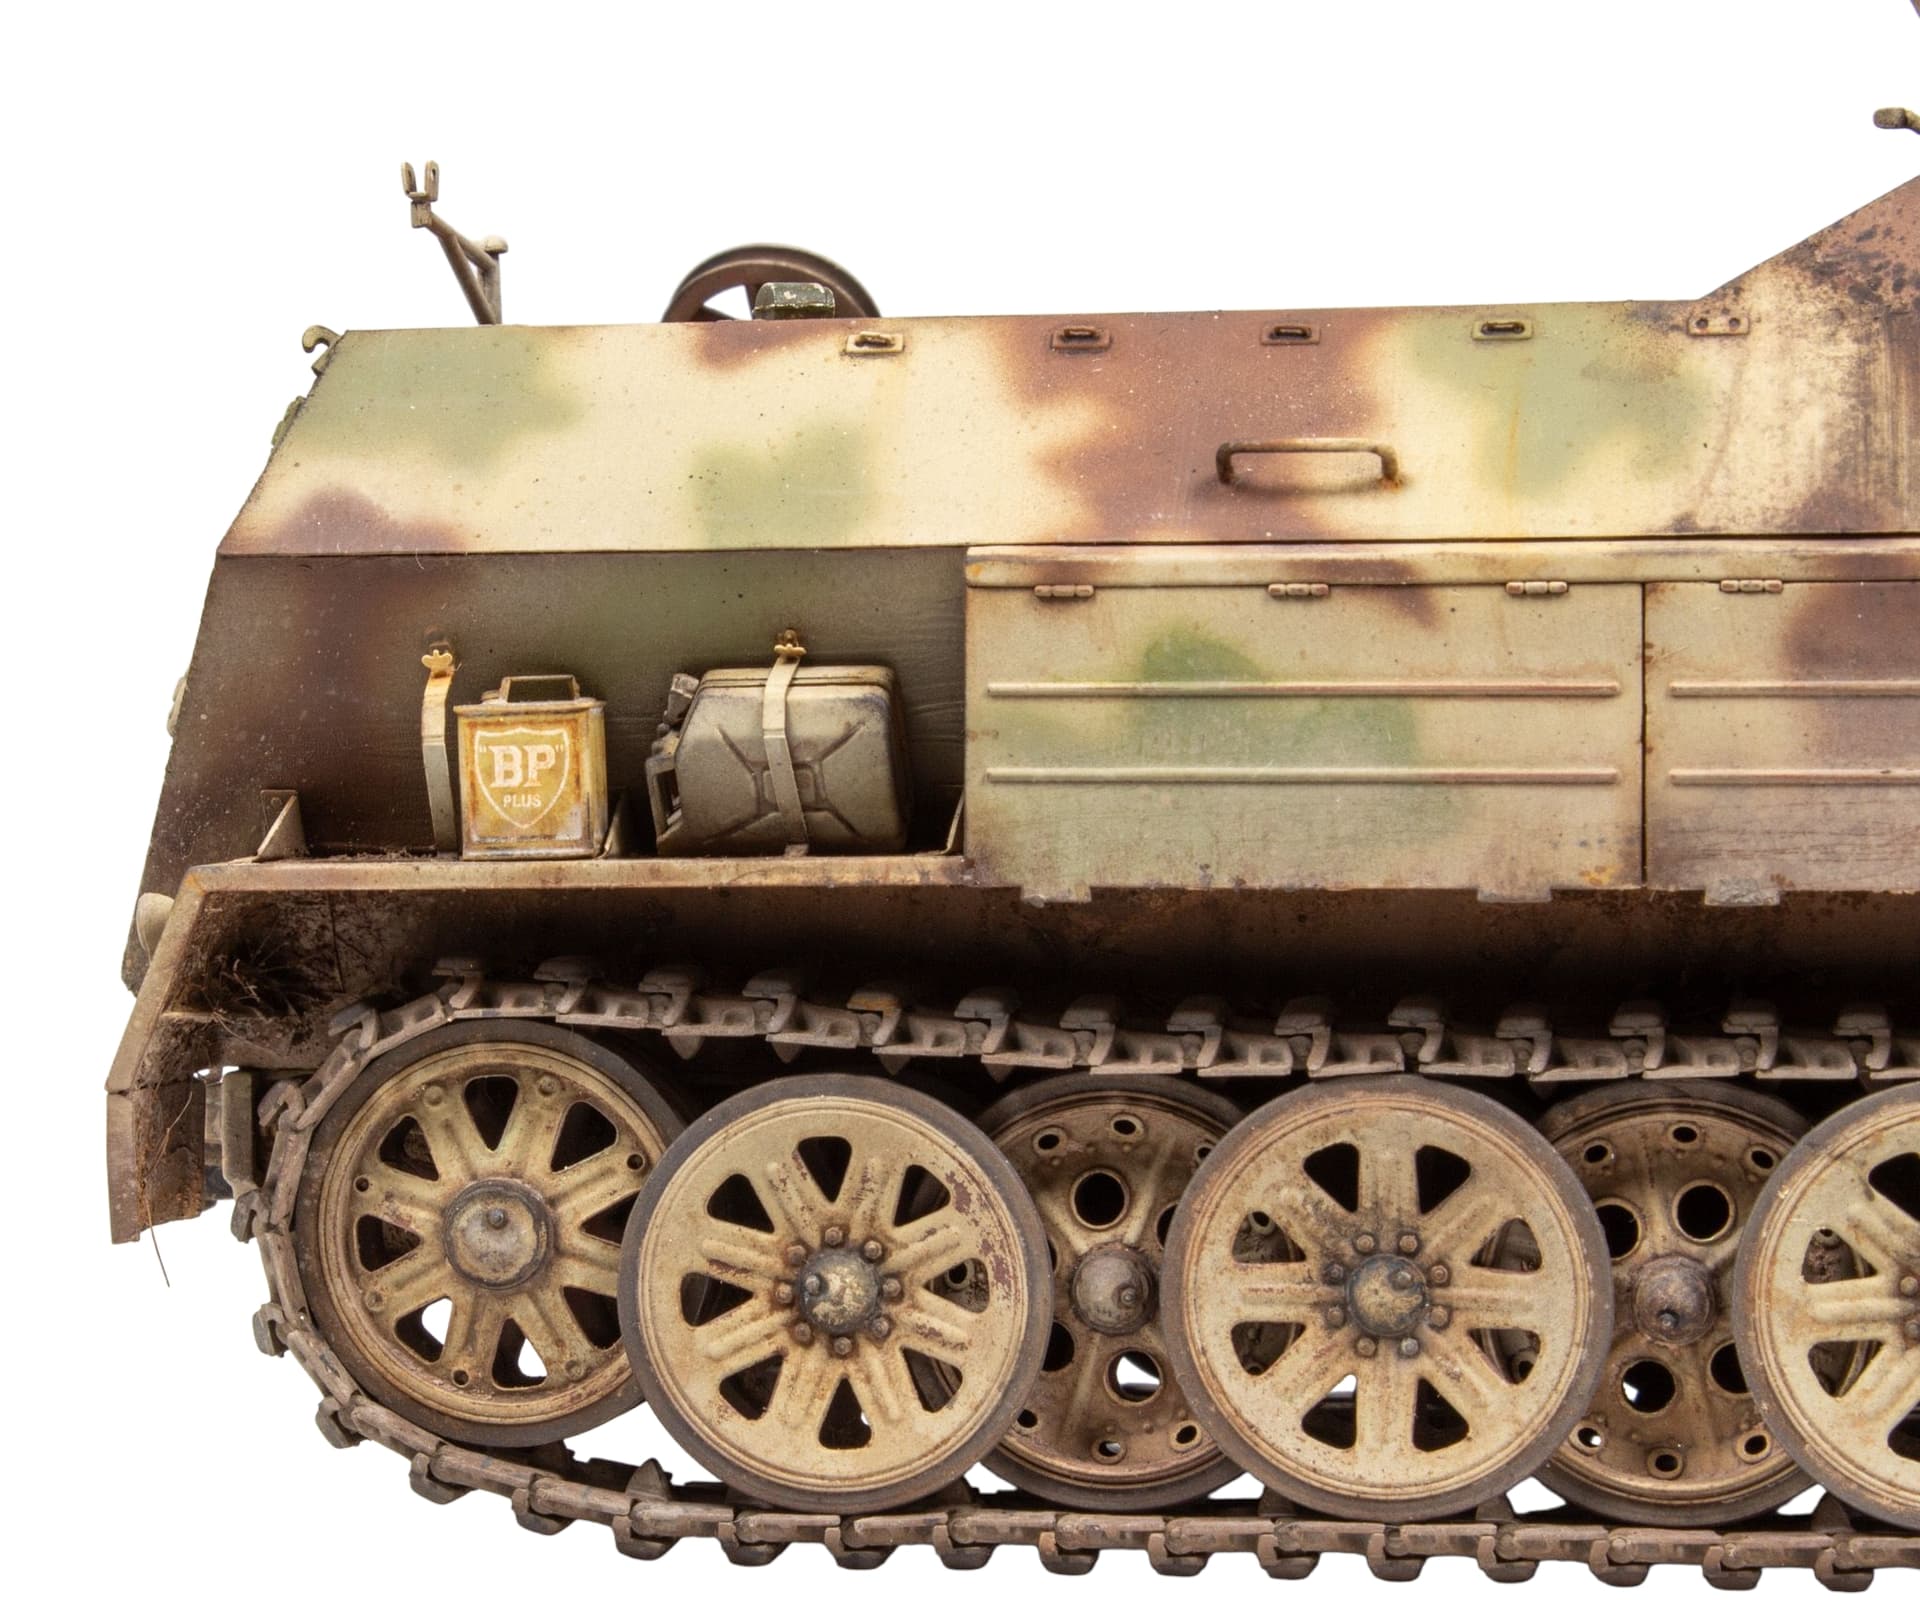
I was on a roll (for me😊) and was now ready to add the upper and lower hull together. In early July the interior was 99% complete, and the two bodywork mouldings were fixed permanently. It was now finally ready to receive all the exterior fixings. Remarkably these were all still present so were added along with some better represented 3D items. I also re-scribed panel lines, added some welding, made copper handles, and replaced the kit jerry cans with Bronco items.


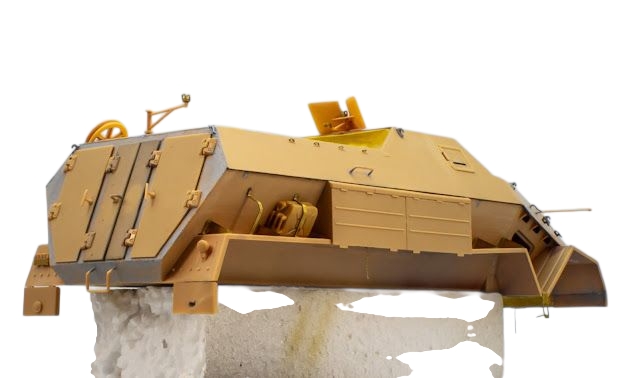
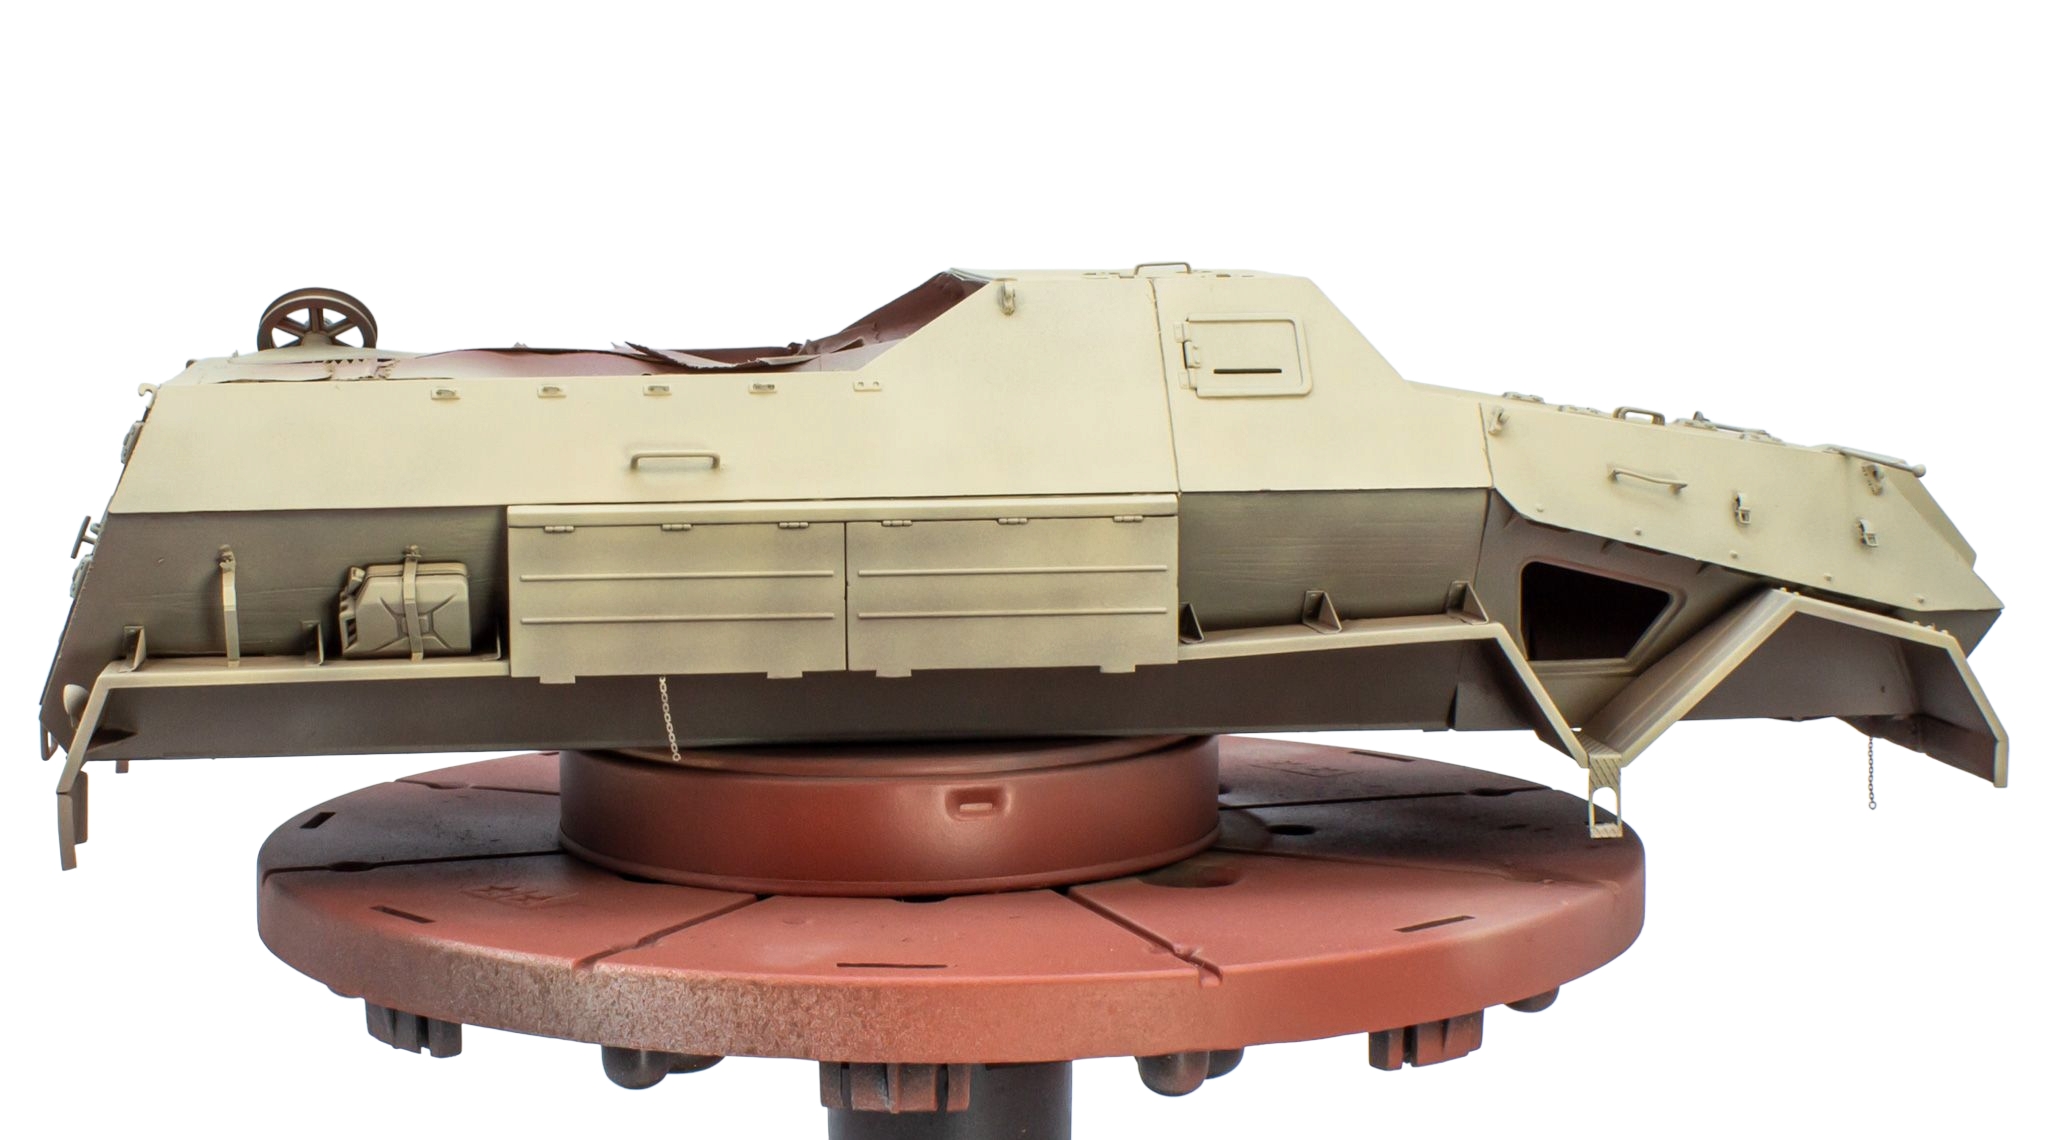
So, the time was finally coming to prep for paint. :hugs:

19 Likes

Looking very nice and an unusual vehicle :+1:

4 Likes

Nice comprehensive build log on an interesting beast. That new Photo booth is getting a work out! Good to see you’re heading this one towards completion

2 Likes

Great work!

3 Likes

REALLY NICE BUILD. Can’t wait to see it completed

2 Likes

I love the German half tracks and this one is truly unique. Well done! I can not wait to see it after paint.

3 Likes

Cheers guys, it certainly is unusual

Continuing where we left off, and after a delicate exterior only clean with white spirit, it was time to mask up the interior and get some paint on.

It’s difficult to ascertain from the rescue images a clear paint finish, but it’s almost certain it would have originally received a dark yellow base coat. As to whether it had any traces of camo, I have not read of any evidence that it had. The Polish resto team never added any, which leads me to believe that it didn’t, but with only the one surviving vehicle its always possible.

My chassis and running gear were painted over red oxide primer with Tamiya acrylic dark yellow XF60 but as to whether buff or deck tan was thrown into the final mix to lighten it I’m still experimenting.

I added buff when painting the new sprockets and solid tyred aftermarket wheels and it was interesting to note on the difference in the final tone using different primer coats. Whilst both the solid tyred road wheels and the new sprockets were already primed in grey and came out in a far creamier finish, the central hubs already primed in red oxide came out in an almost perfect match to the chassis. It is always worth bearing in mind the colour shift you get when airbrushing over different primer colours.

With the interior and the chassis connecting points also masked off, the body was treated to two light coats of Tamiya fine, rattle can red oxide primer.

Switching to my airbrush to get more control over paint coverage and using Mr Mahogany surfacer 1000, any remaining bare surfaces were covered. This also served as a rough pre-shade.

For the Dunkelgelb base coat layers I used a mix of both lacquer and acrylic Tamiya paints. Each mix received a few drops of LP55 and was thinned with Mr Hobby levelling thinner.

I went with a very slight modulation effect. Starting with equal parts Mahogany surfacer and LP55.

Then getting progressively lighter as I moved higher up the model, first with just LP55, then lightened with XF75. LP4 was added to the final coat and applied from above over the horizontal surfaces.

At this point I could envisage a fairly straightforward process to complete the simple paint scheme as per the restored vehicle, but that would be playing safe. I paint so many of my axis AFVs in a simple monochromatic Dunkelgelb finish that I figured it deserved some ‘spongebob’ inspired what if camo.

With some late 1944 hard edge schemes above my paygrade to consider, not to mention the masking nightmare with all the delicate fixings in place, a tight soft edge scheme it would have to be. Imagine for a minute - the maintenance crew paint sprayer was having a good day, he’d had one too many schnapps, and had plenty of time to be artistic :blush: So, with reference pics to hand the green pattern was added first. This comprised a mix of Tamiya LP31 and LP26. This was followed by the red brown which was a mix of LP57 and Mr Hobby chocolate brown with drop of XF64.


6 Likes

After a wet coat of VMS satin varnish with a drop of the base coat colour to unify the trio of colours, it was time to break out the decals. What’s provided in the kit is unsurprisingly limited. In addition to the instrument dials only a pair of licence plates along with a ‘prototype’ plate are included. Interestingly they don’t copy the ones that are found on the restored vehicle! Both licence plates were added and sealed with varnish. I did search for unit ID insignia for Luftwaffe units serving in Poland in the last months of the war but drew a blank.

Body test fitted to the chassis and running gear along with the ‘chunky tyred’ allied front wheel option

As regards to wheel options I’m not a fan of the kit’s vinyl tyres on the plastic late DB10 wheels and to date I have still not found anybody producing a 1/35 aftermarket set. This is one of the reasons I originally purchased Modellbau’s resin solid tyred wheels. I have however found another set that could work. This aftermarket set is made for the larger Sd.Kfz.9 (FAMO) and although I have no proof of whether the hub bolt pattern was compatible, to be honest it’s not visually obvious if not.

I adapted the fixing points on all three front wheel sets so as they will fit snugly onto the kit axle without the need to be fixed permanently. I can then easily interchange and display them should I wish to.

Multi spoke, deep dish or large rim low profile solid tyre options

5 Likes

That looks excellent! I might have to get one of these….

2 Likes

I like the top pic for the front wheels best.

2 Likes

I’ve had one of these on my ebay watch list for quite some time.

2 Likes

Before commencing the first weathering stages of the build, and before I connected the body to the chassis there were a few areas of the model that I wasn’t 100% happy with. Firstly, the paint colour on the re-worked sprockets still wasn’t a great match to the rest of the running gear. Rather than masking and re-spraying paint I found another solution. Abteilung buff oil paint was carefully stippled on and blended out from the centre. Left for 48hrs to cure I then sealed with VMS matt varnish. This was essential as I would need to use both enamels, pigments and oils again to weathering them.

Secondly, I felt the paintwork on the frontal MG shield was not up to the job. I set about respraying all three camo colours again but this time utilised some chipping fluid so I could lightly distress any overlying paint.

Finally, I had to add matching dirt and dust weathering tones to the visible underside portions of the bodywork assembly. This had to be done before the two main sub-assemblies could be fixed together. I had weathered the chassis many, many years ago but I could not recollect 100% what I had used. There was a small amount of greyish-brown dirt texture build up, but by the look of it I had mainly applied dust-coloured pigments and oils. A cocktail of textured AK light and dark mud was mixed and added first. Once dry the vehicle was turned on its side and pigments were added dry and sealed with VMS ballast freeze. This was followed by an airbrushed post shade mix of matching dust-toned acrylics. The final step was to apply speckling and streaking of darker oil tones.

So, after being kept apart for so long it was finally time to permanently fix both sub-assemblies together. They are mated by way of small, keyed connections. You fix them together early on in the build as instructed if you do not intend to keep the two main assemblies separate. You simply turn the body upside down and align all the keyed connections and fix the chassis down onto the body. I left my test fit a little late and the connection is not at all precise. It requires a little work to achieve a clean flush fit between the two assemblies which I thankfully accomplished before the main painting steps began.

With the vehicle fully built up it was time to put a personal stamp on the project. For this first stage of weathering here are the steps I followed:

  1. Highlighting raised detail with a fine paintbrush and buff and Iraqi sand acrylics.
  2. Application of a neutral grey toned oil pin wash.
  3. Flat brush applied dust-coloured enamel filter. This was carefully dragged down vertical surfaces to simulating rain staining.
  4. Speckling. Using the same colour palette as the weathering tones on the chassis, mixes of oils and pigments were fine speckled over the bodywork to add tiny stain marks.
  5. Finely chopped sea grass and dry earth toned pigments pushed into recesses on the track guards. This was sealed with VMS ballast freeze and any tide lines masked with VMS matt varnish.


Oil paint rendering

Beauty is in the eye of the beholder. This process is not for everyone but as soon as I saw Mike Rinaldi’s work in his Tank Art books this was something that very much appealed to me. The richness, depth and versatility that working with oils brings is unparalleled in my opinion and has now become an important step in many of my projects. In my pursuit of in scale realism I will happily spend days going back and forth adding tiny effects to try and compliment the overall look, often spending hours on one particular feature. I love the results that can be achieved and find the whole process enormously therapeutic.

I always have some reference pictures to hand which allows me to try and replicate the surface textures, and general effects that I’m trying to achieve. Sometimes it doesn’t always work out, but the beauty of oils is they are very forgiving. You can easily remove them and start again


9 Likes

Beautiful finish! I know how you feel with using oils to weather vehicles, the tones are rich and things like dirt and grease and grime can be accurately applied.

2 Likes

Cheers man. they are a great addition to any modelling toolbox

1 Like

I’m getting close to the finish line and it’s been a fun project to re-visit. I might yet place it on a simple base as I’ve got a few that I started without any clear vision of where they were heading. I have also finally tracked down an aftermarket resin copy of the kit’s vinyl tyred DB10 front wheels as until just the other day, they remained elusive to me. A kind fellow on the book of faces pointed out that Panzerart do actually offer some. For some bizarre reason, together with many online retailers, even their own website has them mislabelled as Sd.Kfz.9 wheels! If they don’t end up on this version, they will definitely come in handy for Trumpeter’s unarmoured DB10.

Continuously taking images allows me to see things my 60 year old faceballs can no longer manage to observe with any great clarity, even with an LED light with built in magnifier. I can better understand how things are progressing, and it enables me to remove, add to, or better any existing effects. Looking at the pics below there still remains some subtle weathering tweekage, the Notek light needs popping back on after clumsy knuckles here knocked it off, and I somehow keep forgetting to complete the MG ammo box :face_with_peeking_eye:

Progress after another oil paint mapping session


6 Likes

Superb work, meticulous weathering – the close-ups in particular make it hard to believe it isn’t 1:1. Given you’re laser-attention to detail, maybe you’ve already fixed it but in your 31/7 post/ first image (6356a) the foremost roadwheel (port side) doesn’t look like it’s quite sitting on the track…it’s only looks like half a millimetre but well, y’know PITAs like me are bound to notice. But all up, outstanding :trophy:

3 Likes

Thanks Martin

Well spotted. You are correct ref the floating first road wheel. :face_with_peeking_eye: There is a bit of movement in all the swingarms and this one seems to be more prone at not returning back down after working on the model without any front wheels fitted.

I have since made sure its sits down on the track before taking pics😉

3 Likes

Done and dusted


6 Likes


10 Likes

Really excellent, some of the best painting weathering I’ve ever seen on an AFV. Nice touch that BP can. The alternative front wheels look great :trophy:

4 Likes