Thanks Rick! Those years were very special and I really enjoyed all the aspects of Cannon Gunnery. Being an engineer by profession made the math and physics much easier. Given how manual and analog the whole process was back then (except for the primitive FADAC) the whole process was virtually unchanged from how it was done in WWII. I wonder now how well our redlegs of today would do if all the digital commo, GPS and laser rangefinders went down.
Perishable skills. Like map reading and a compass for land nav. You better teach and occasionally practice it to stay competent, because systems do fail.
Yes they do! BTW, I put the antenna base in the mail to you today. Let’s see how good our USPS is!
I was at Ft Sill in 2018 for a couple of days to take photos of the pieces at the Artillery Museum and stayed in the BOQ. The 2nd Lieutenants were still swarming the area with their big bags of charts, darts, and sticks. Hopefully they can maintain that proficiency. A firm understanding of manual gunnery allows you to solve any artillery firing problem.
Rick
That’s good to hear and you are exactly correct. As long as you can use the Mk 1 eyeball and stick a pin in a 1:50,000 map within 400 meters of anything you can SEE, and the FDC has the TFT or GFT and a good chart with an RDP, you can bring steel on target!!!
Another difference between the Infantry/Armor and the FA is map reading. For 99% of the time the only thing an Infantryman or Tanker needs to know is “where exactly am I on this thing”. But an artilleryman has to figure out at least a 6 digit grid for anyplace within a 3-5 km visual range and be within 400 meters. Where YOU are is the LEAST of the issue. Sure wish I had a dollar for every time I had to tell some Company Commander, “Uh, no sir that’s not where we are, we’re in this grid square over here.” Like my Gunnery instructor used to say, “The only thing it takes to be a good map reader is to be smarter than the map.”
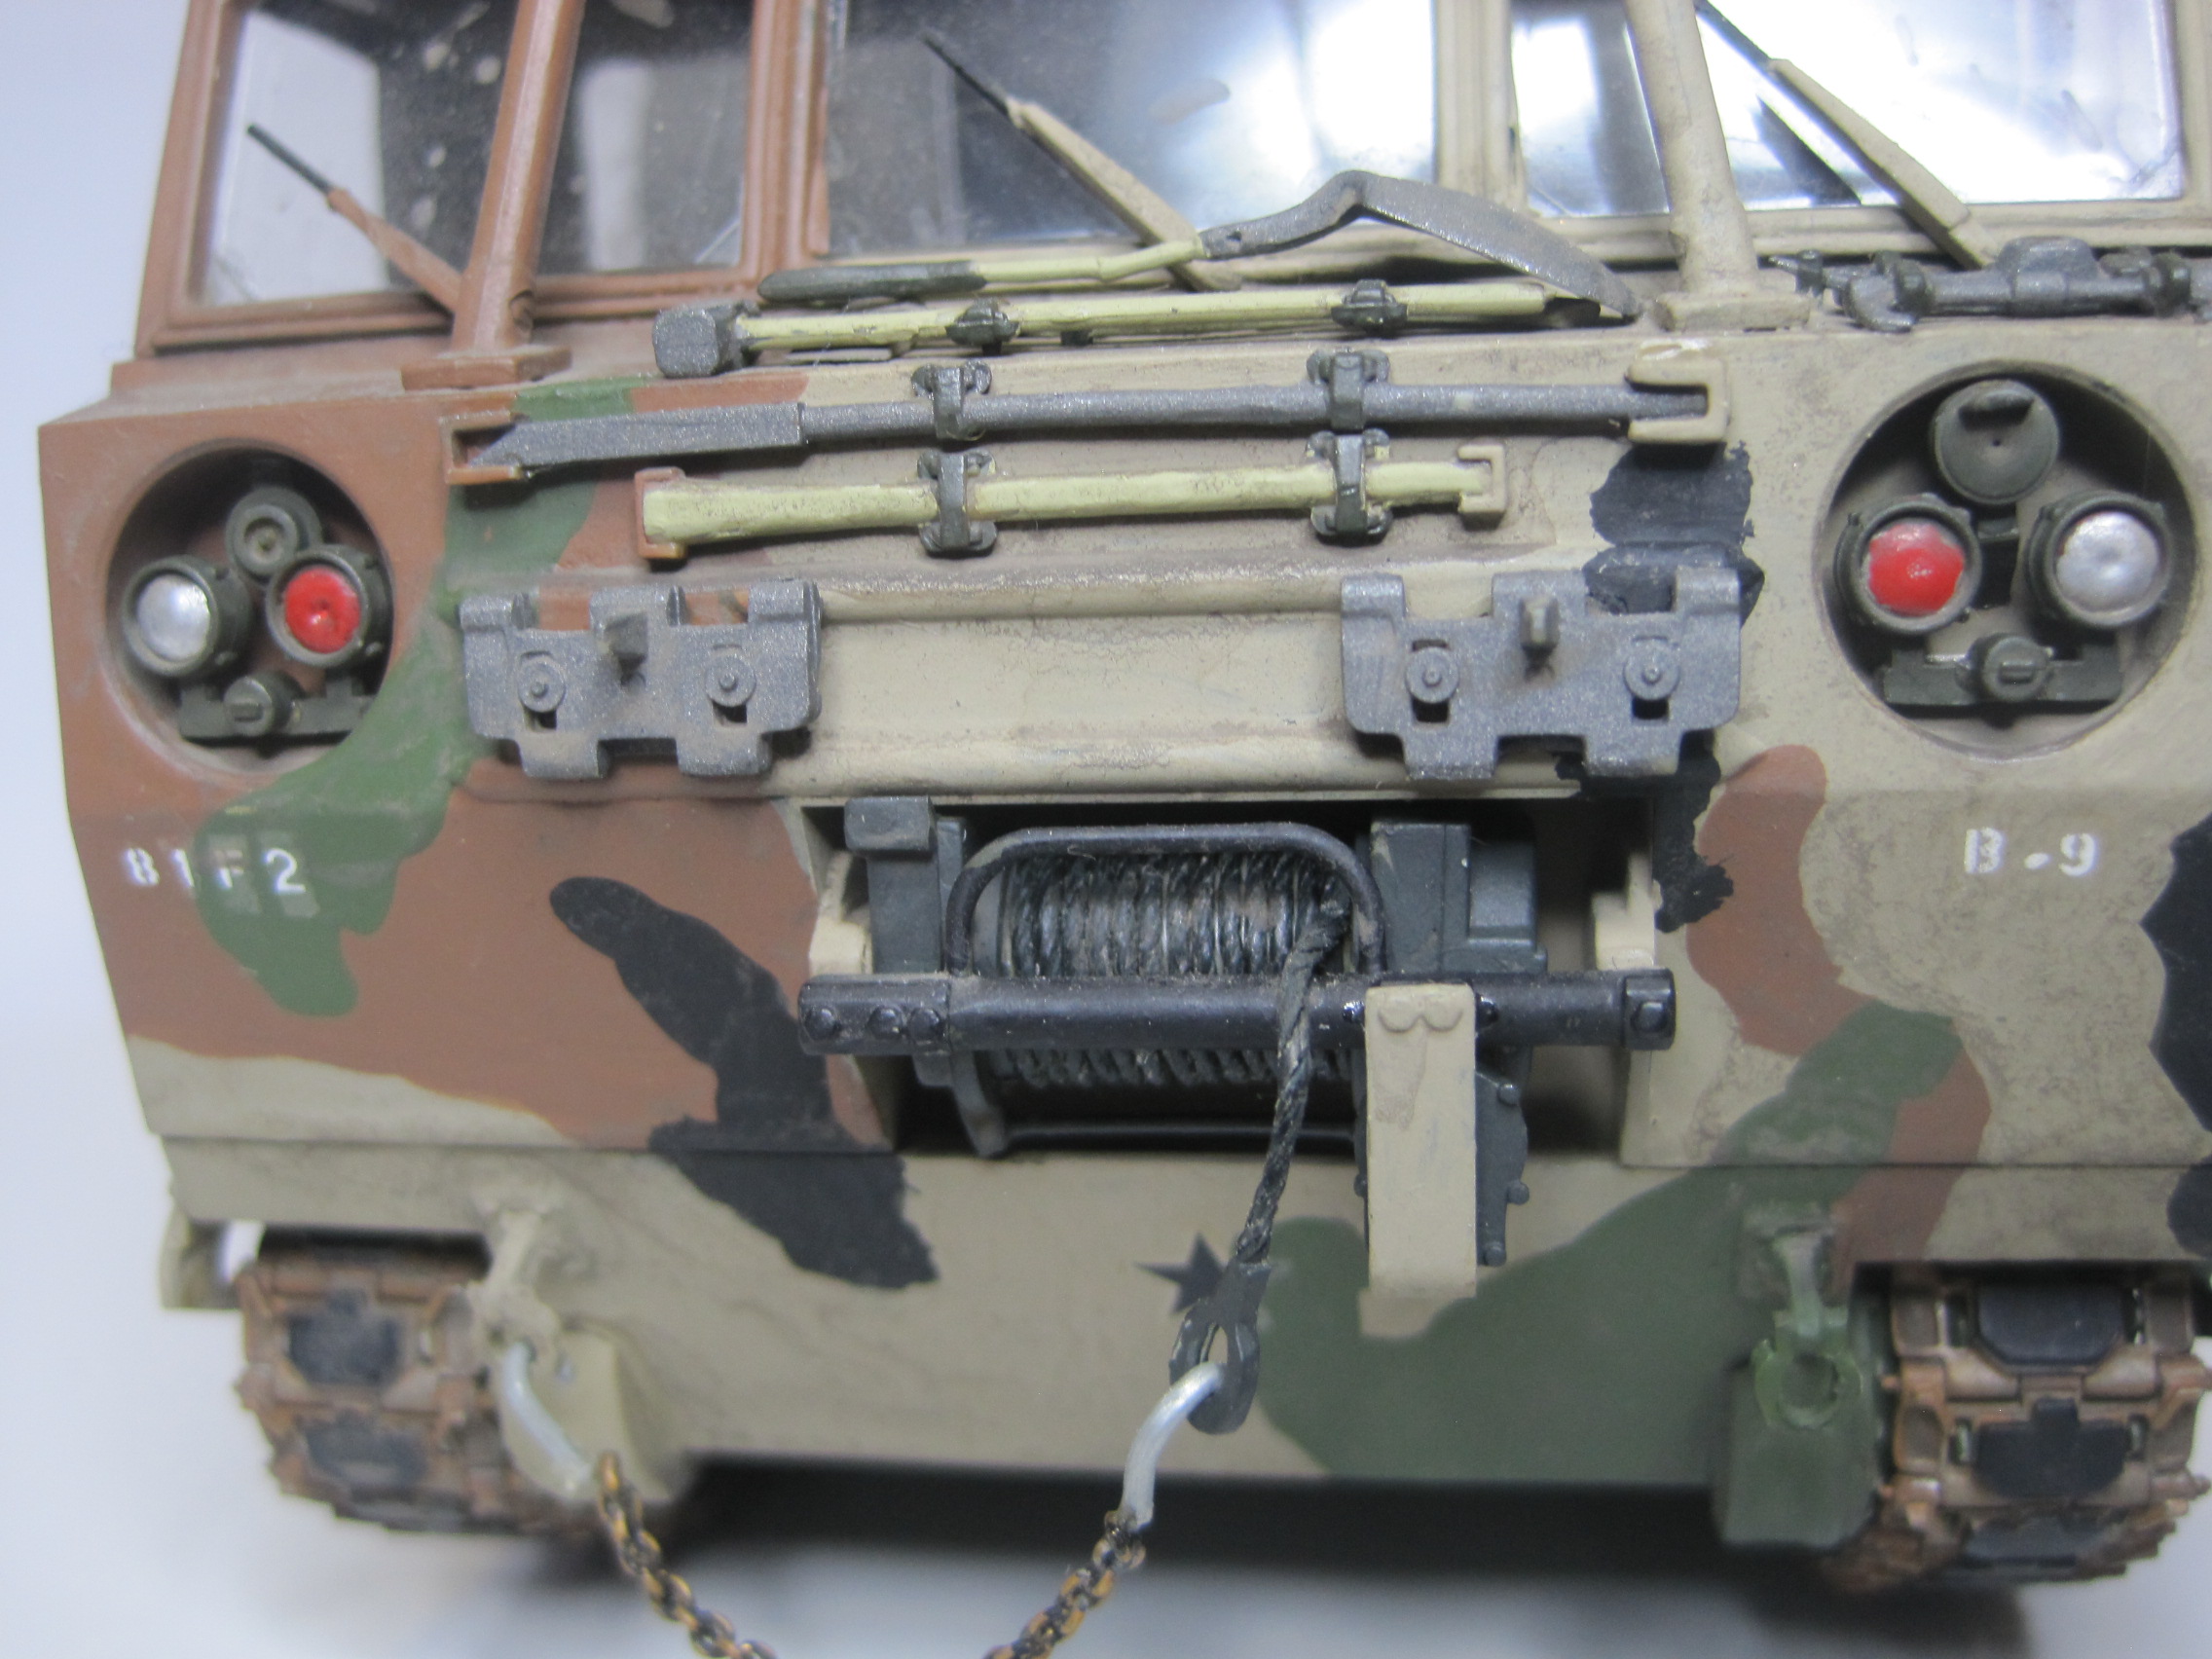
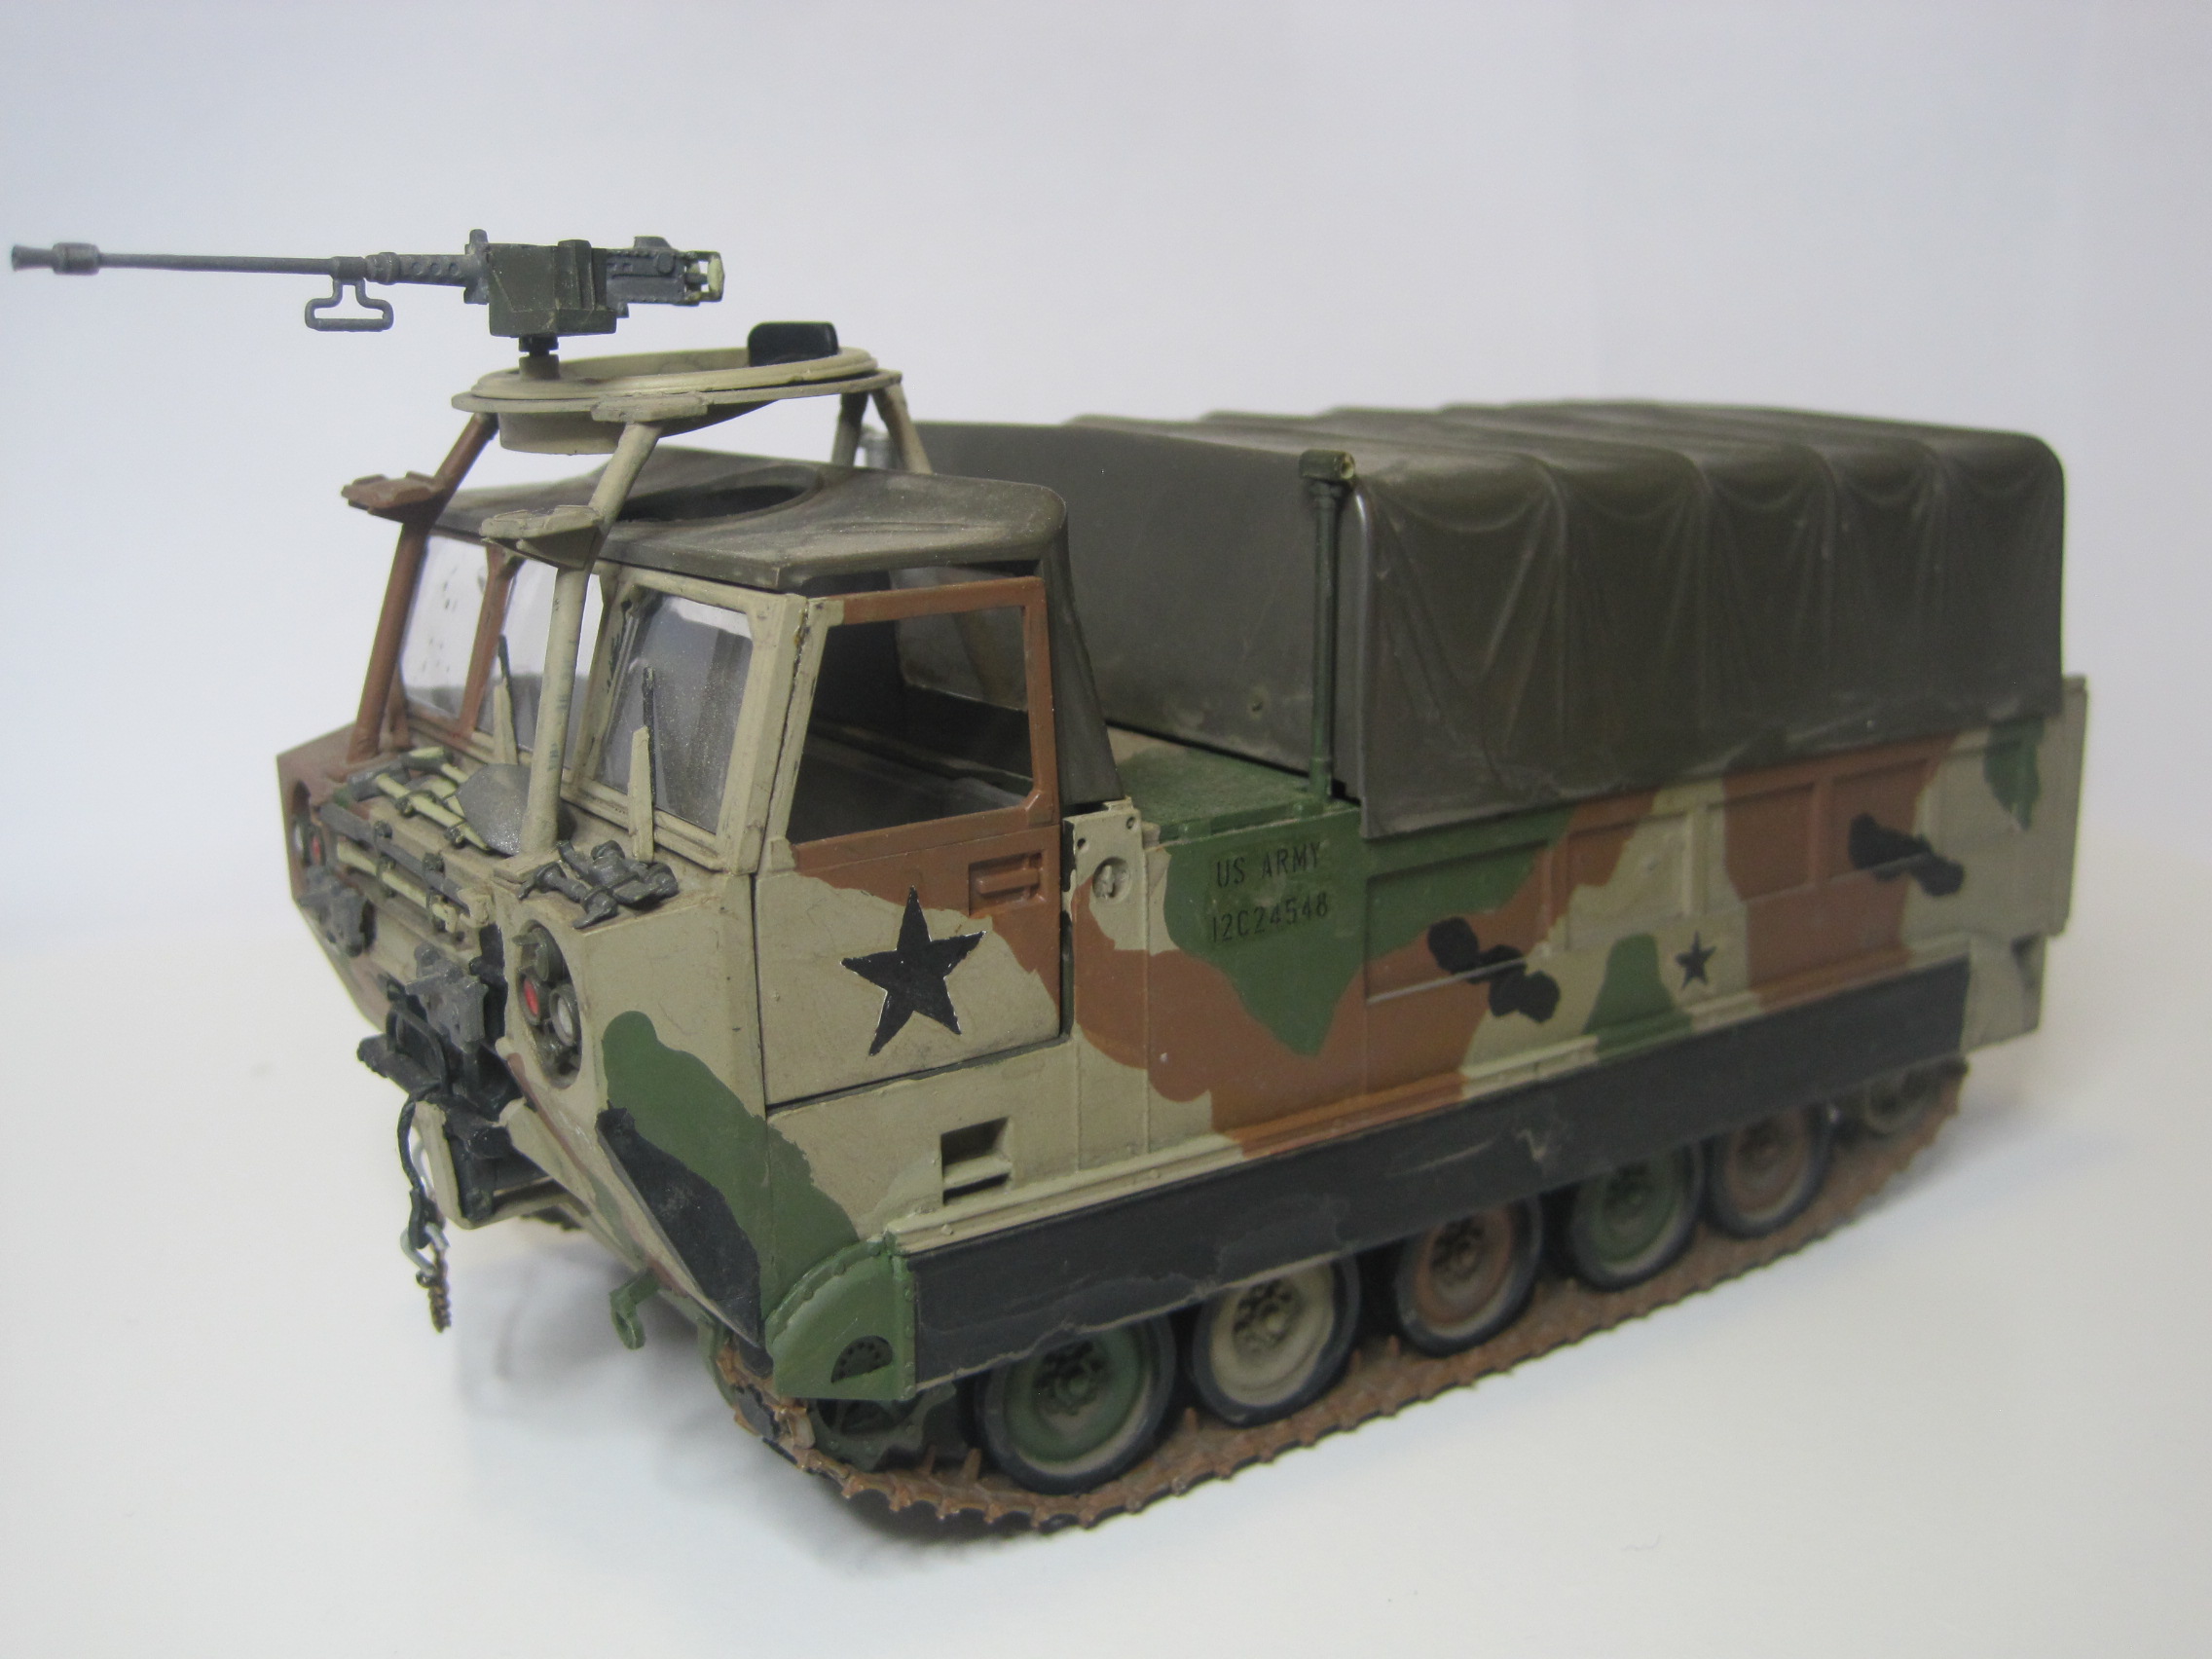
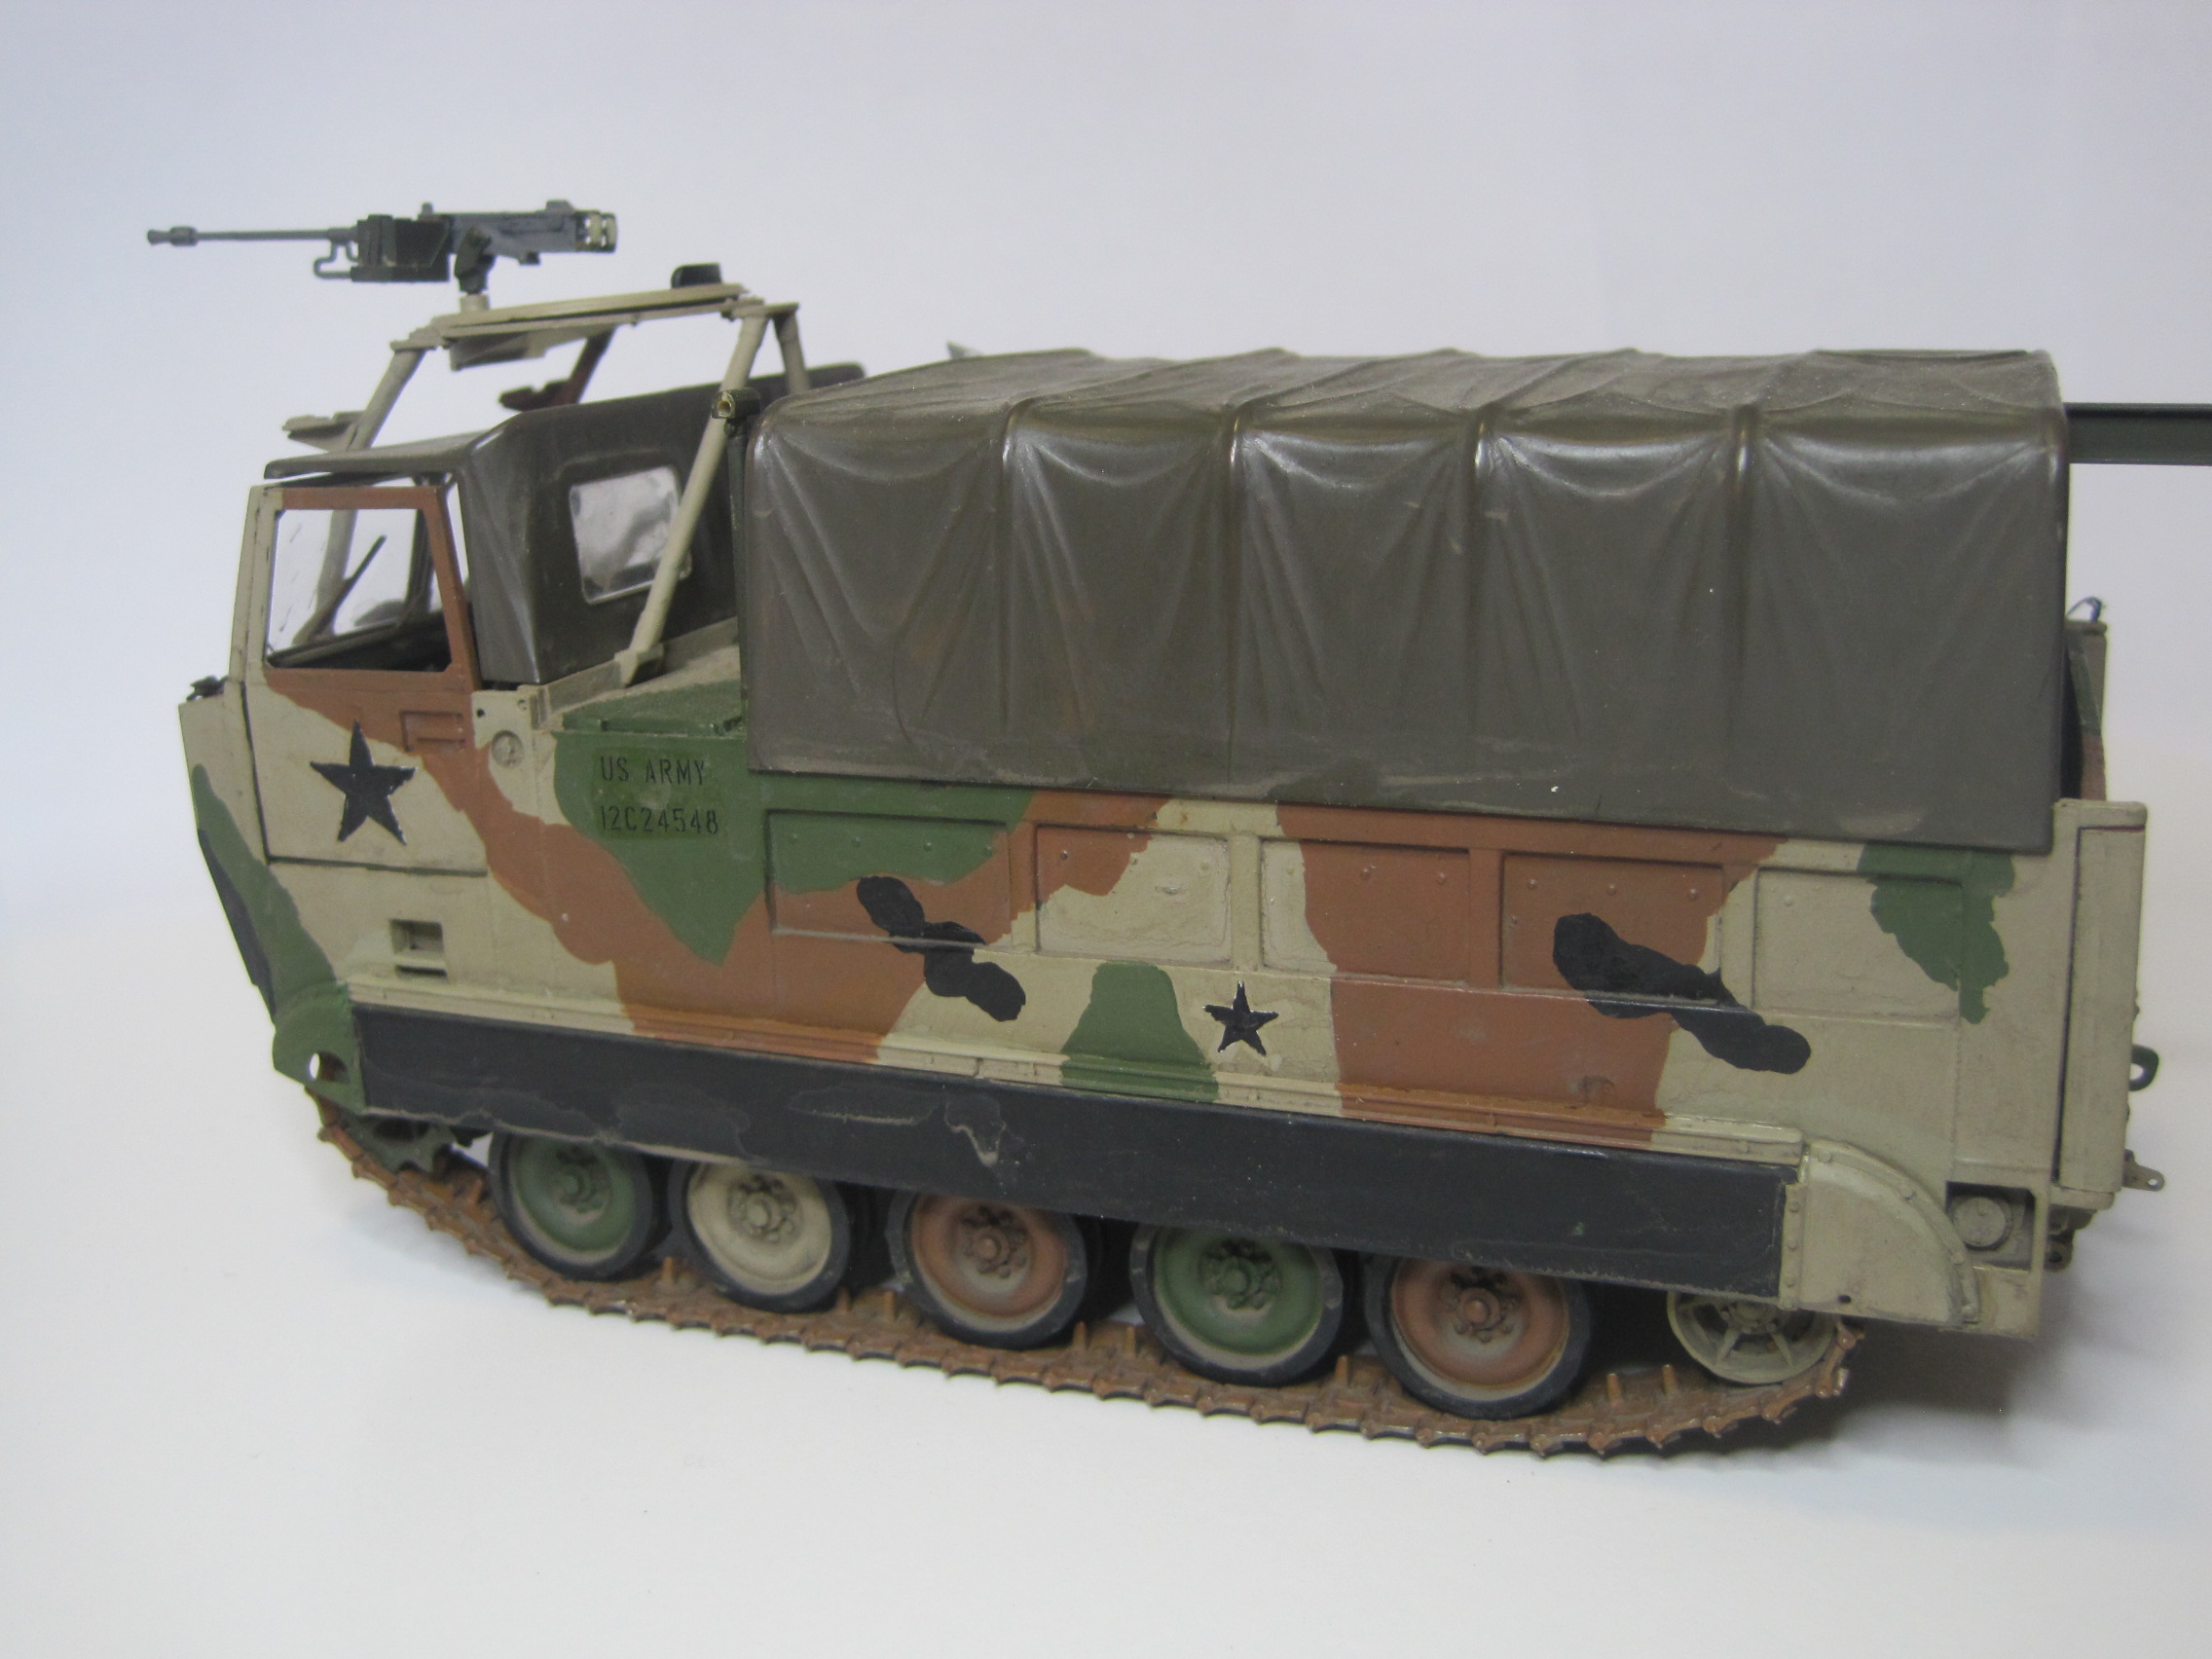
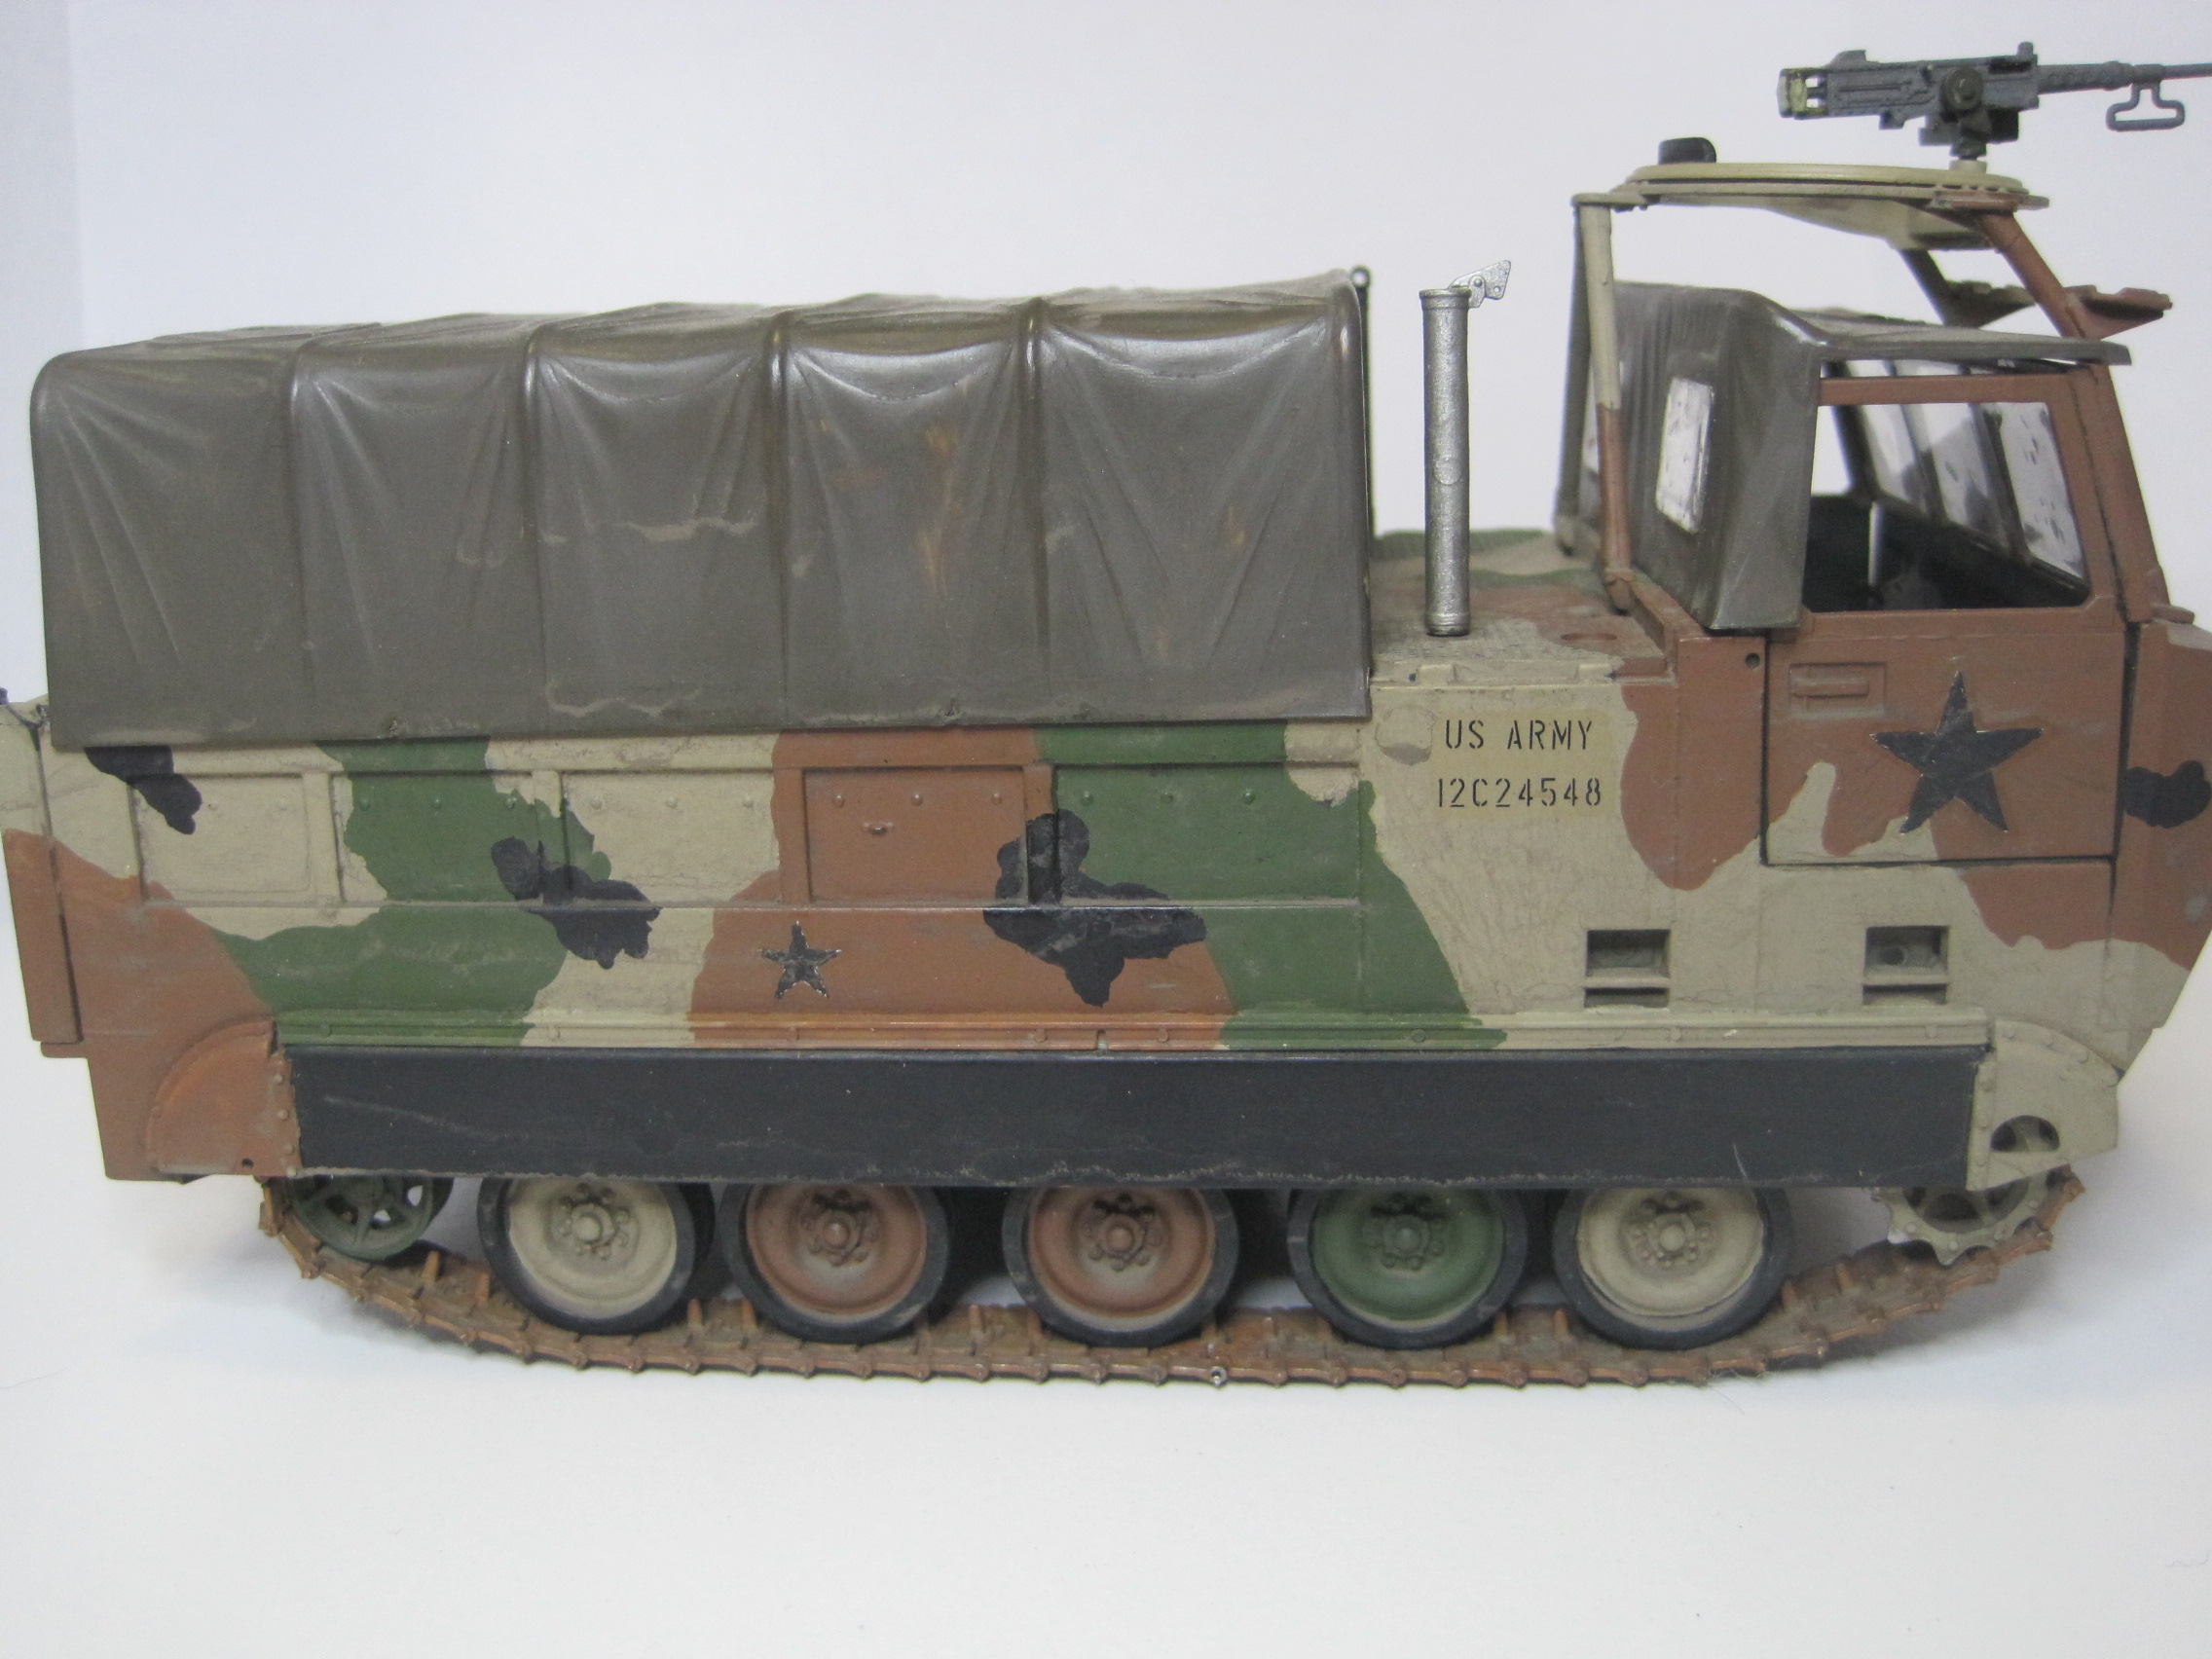
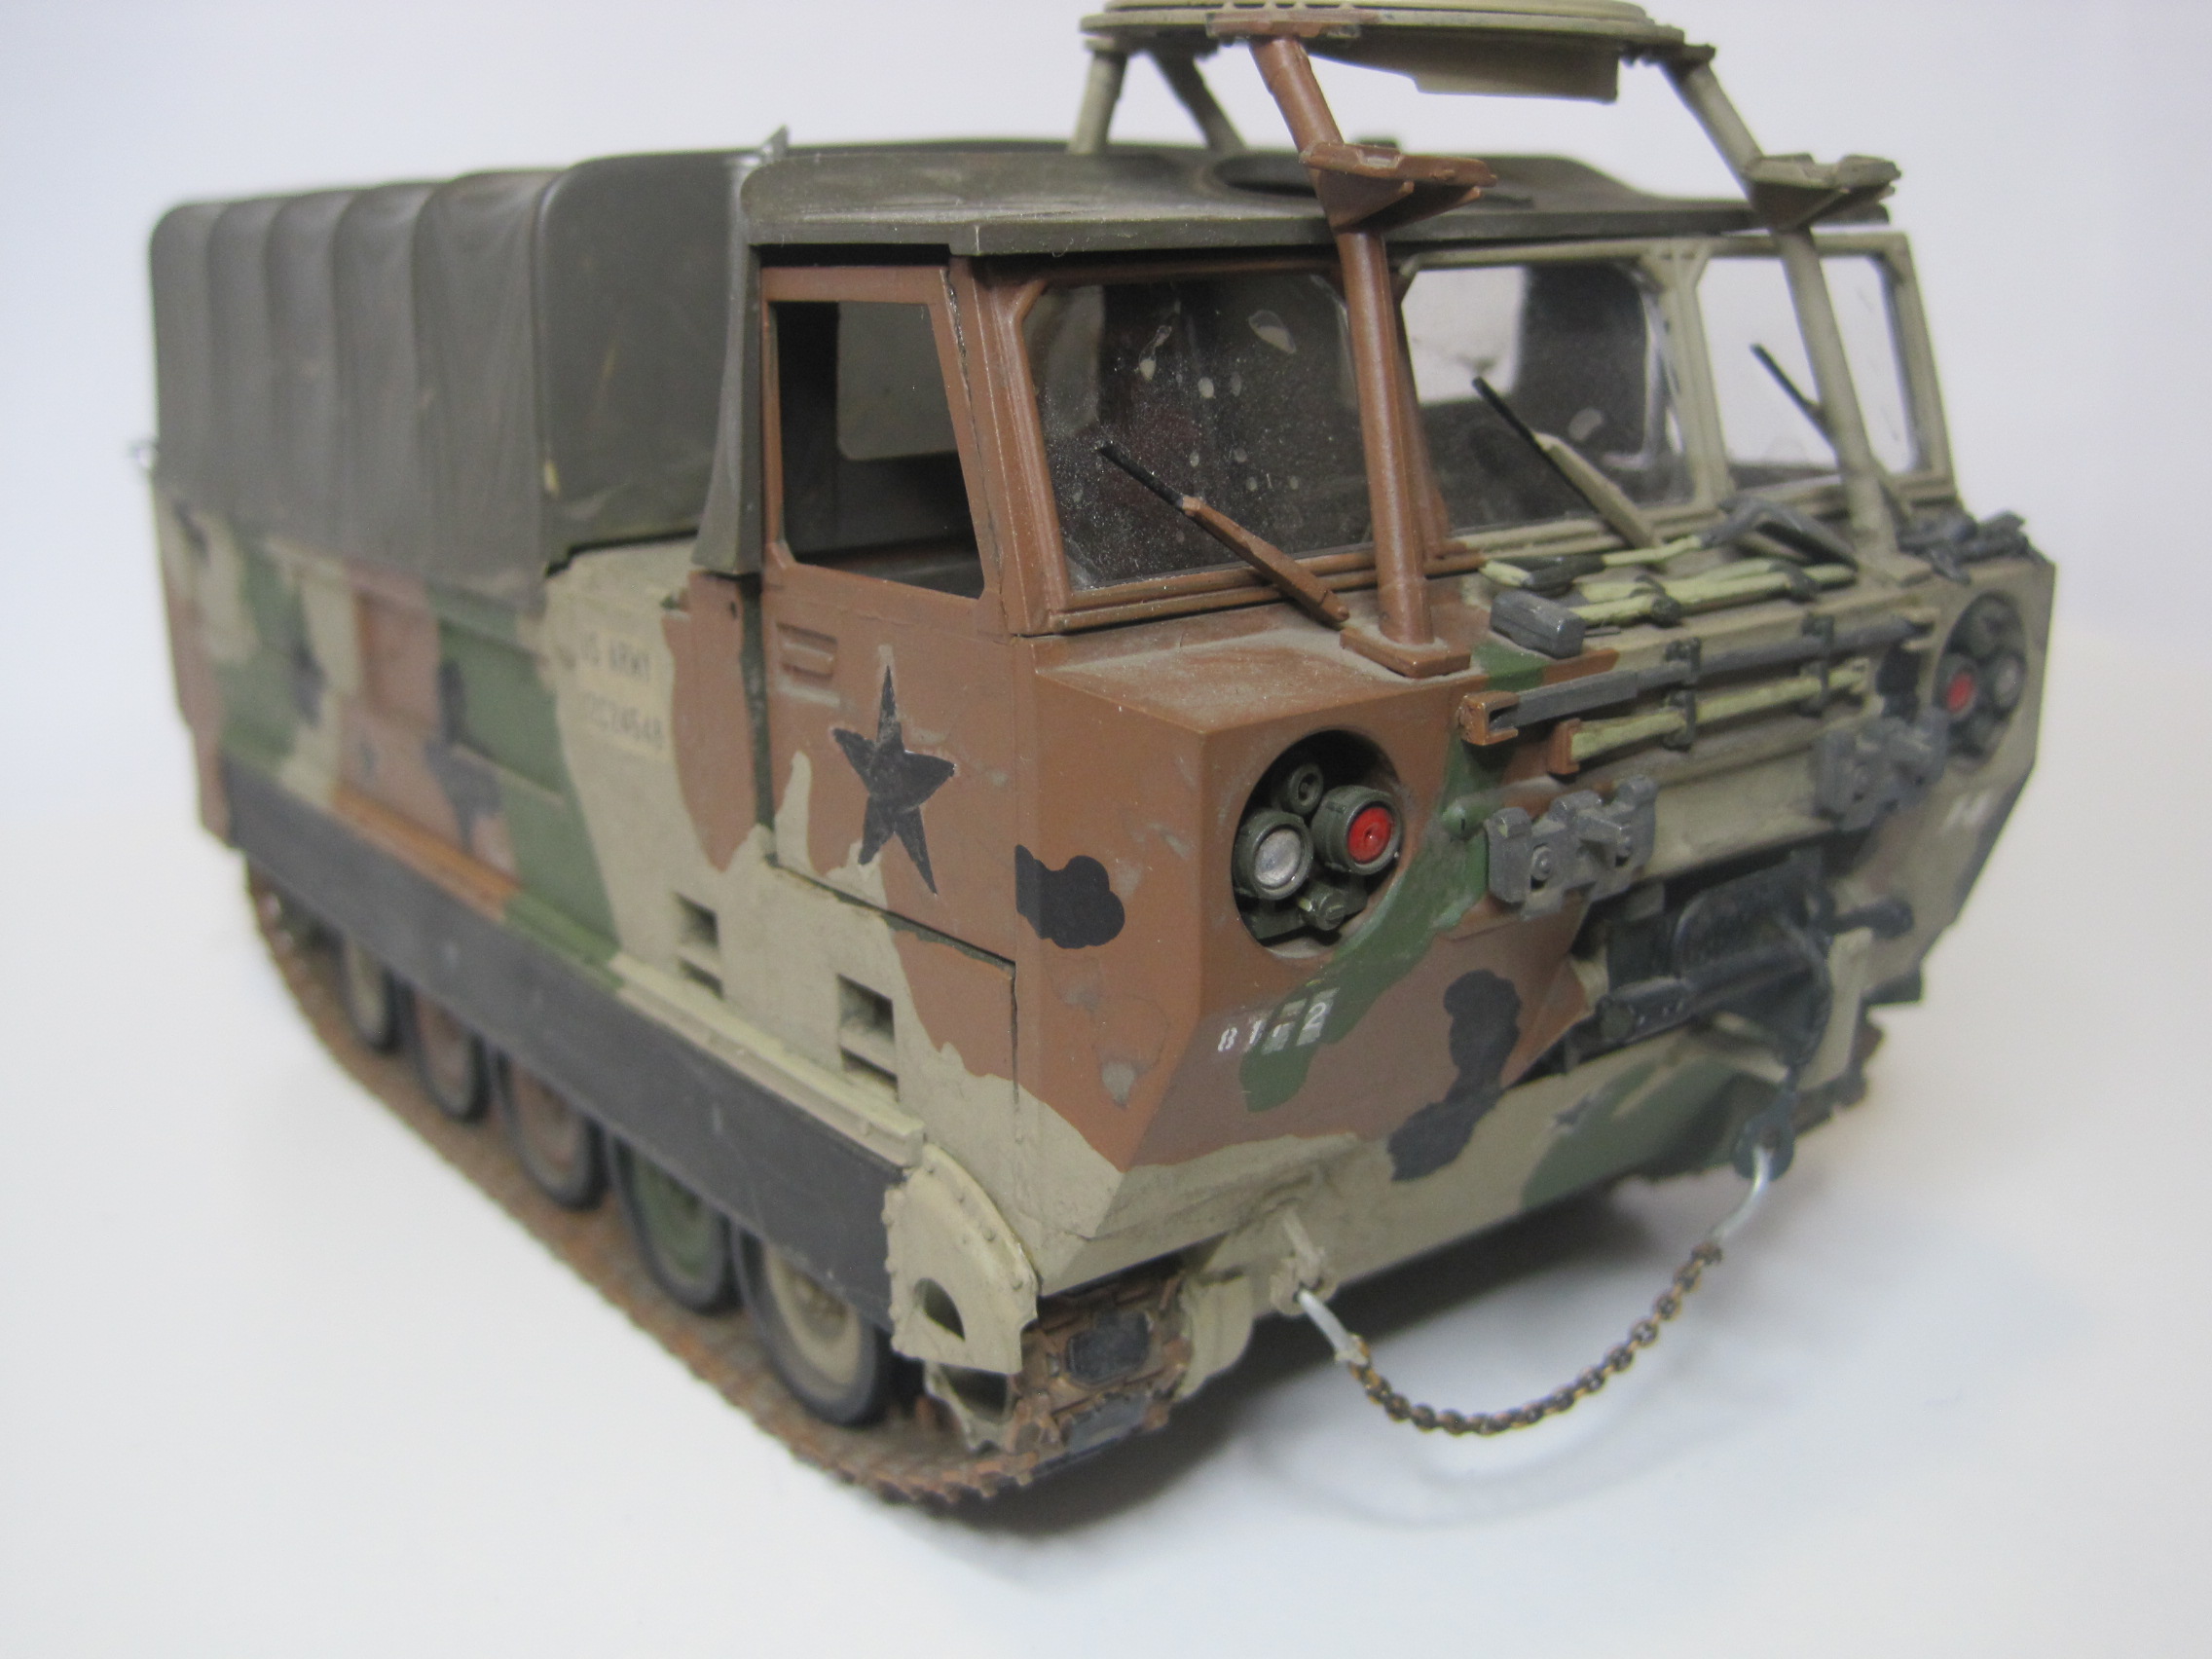
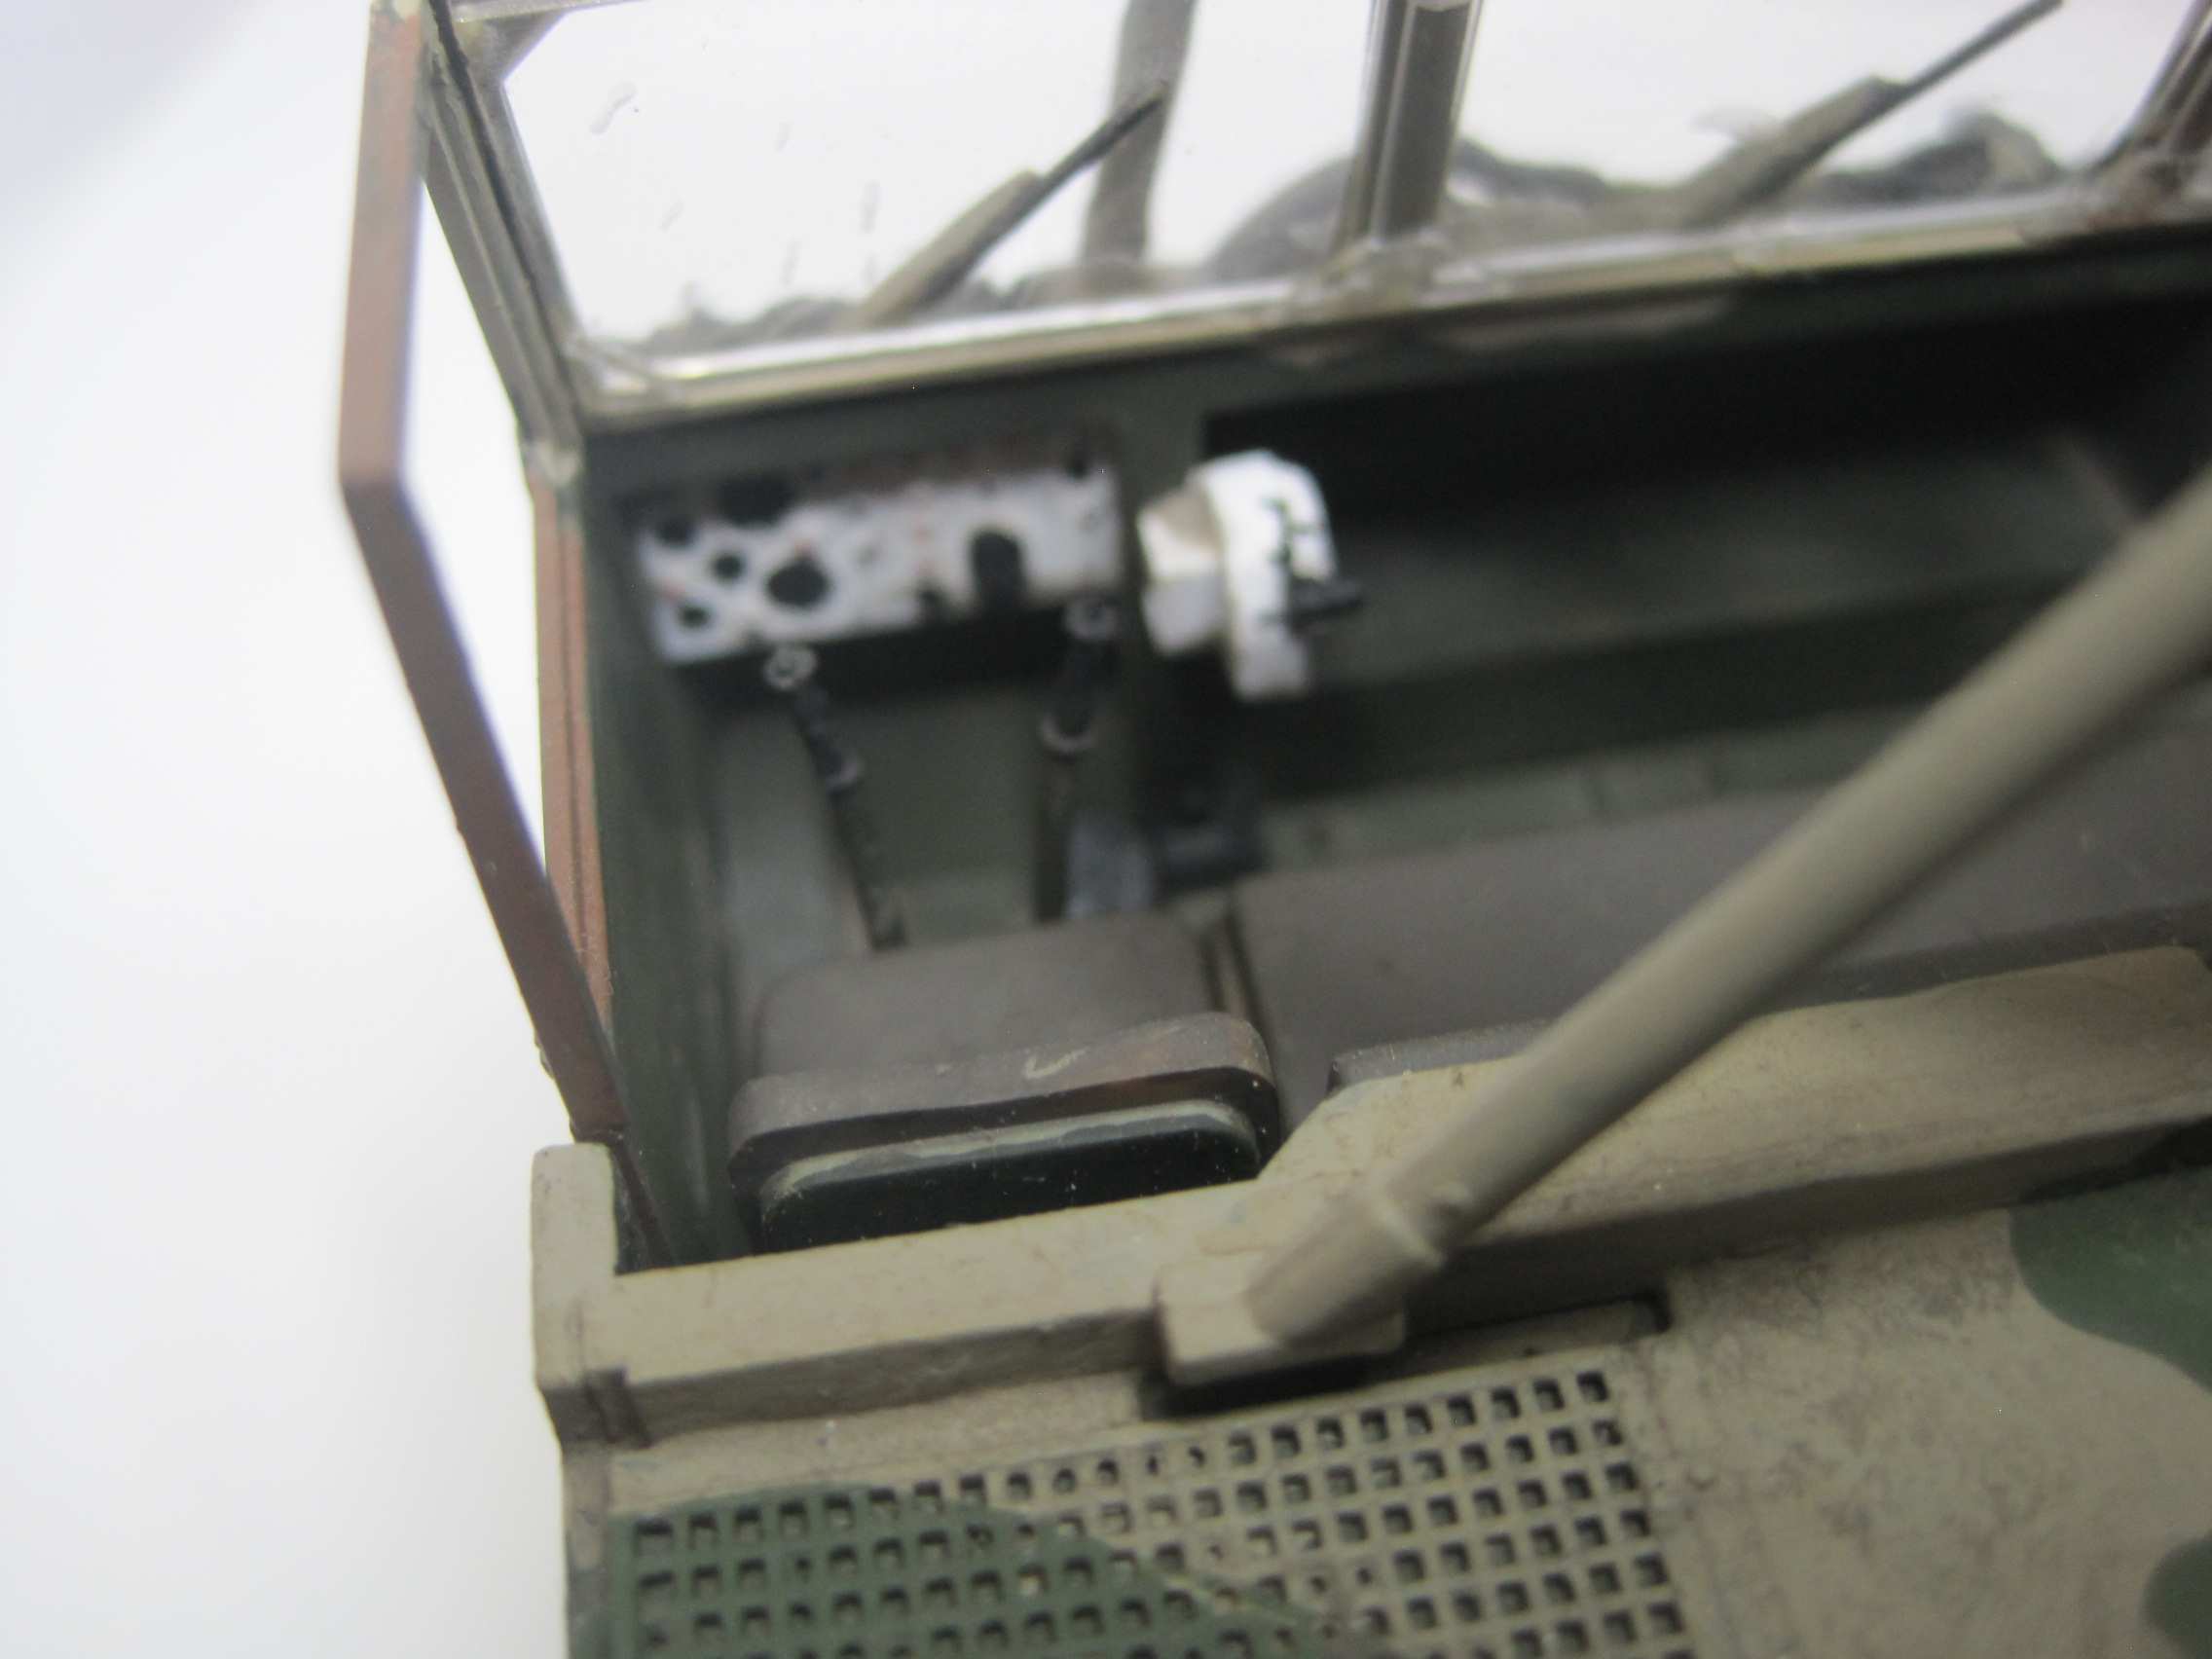
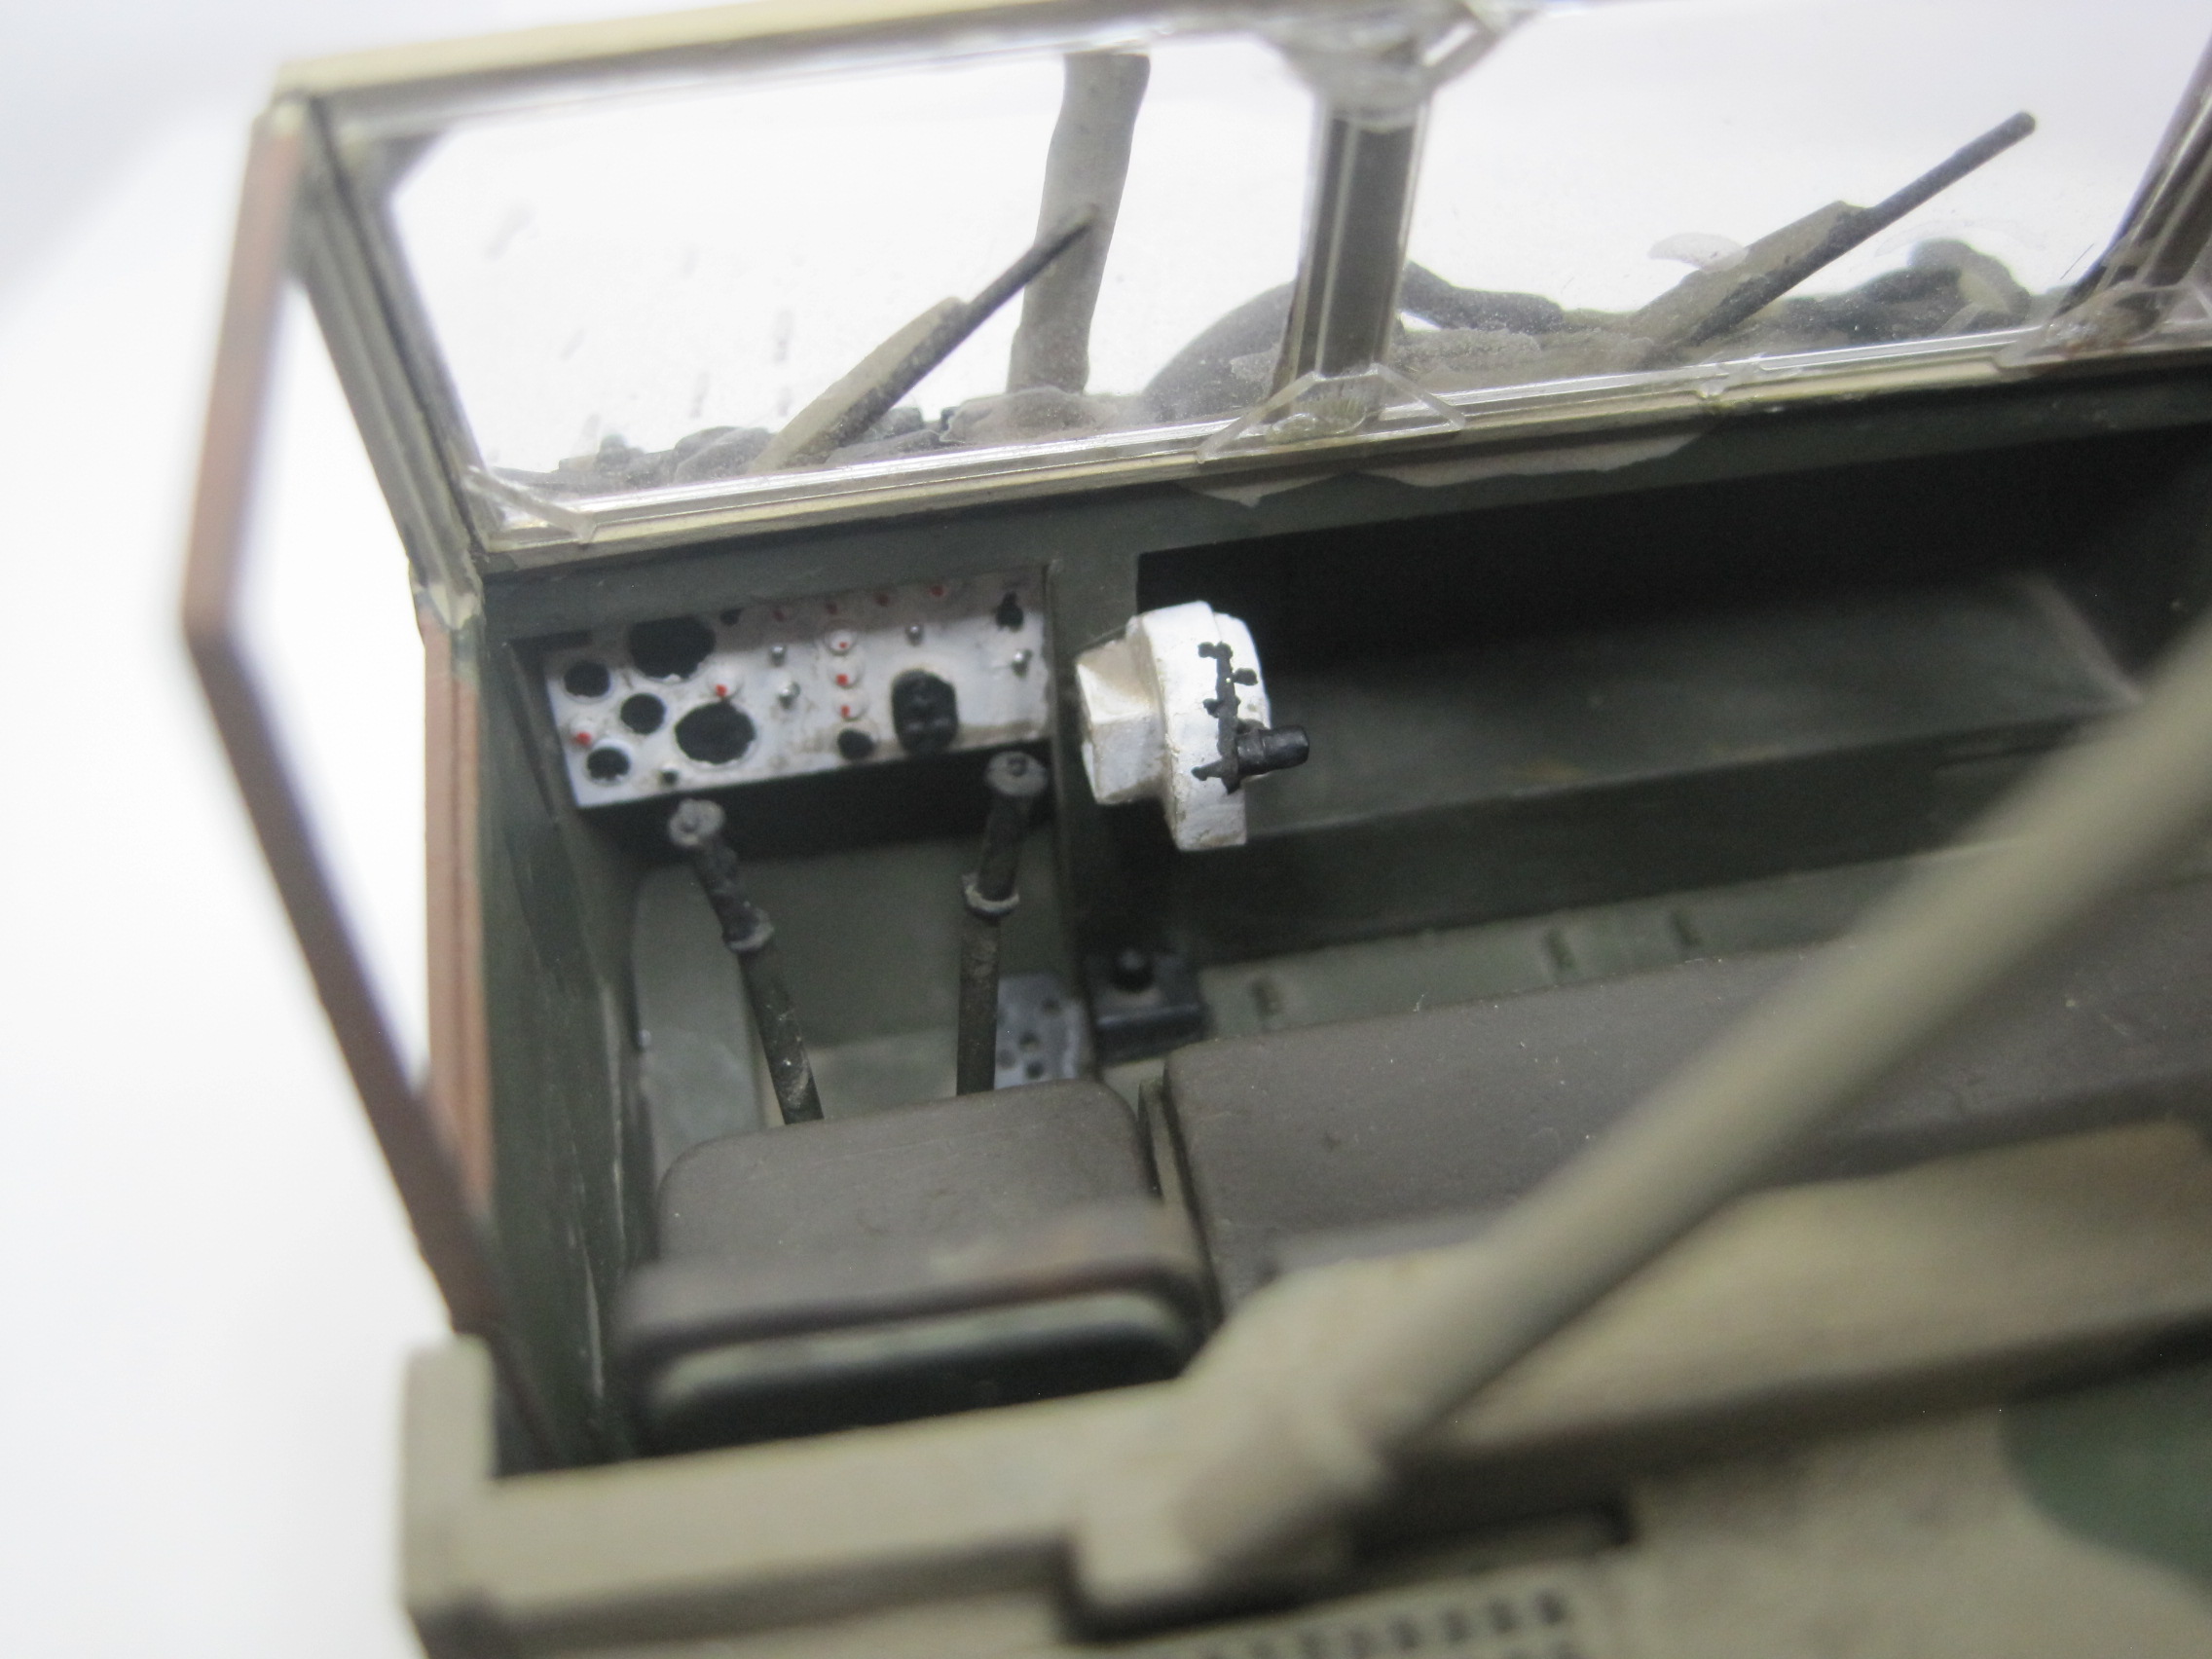
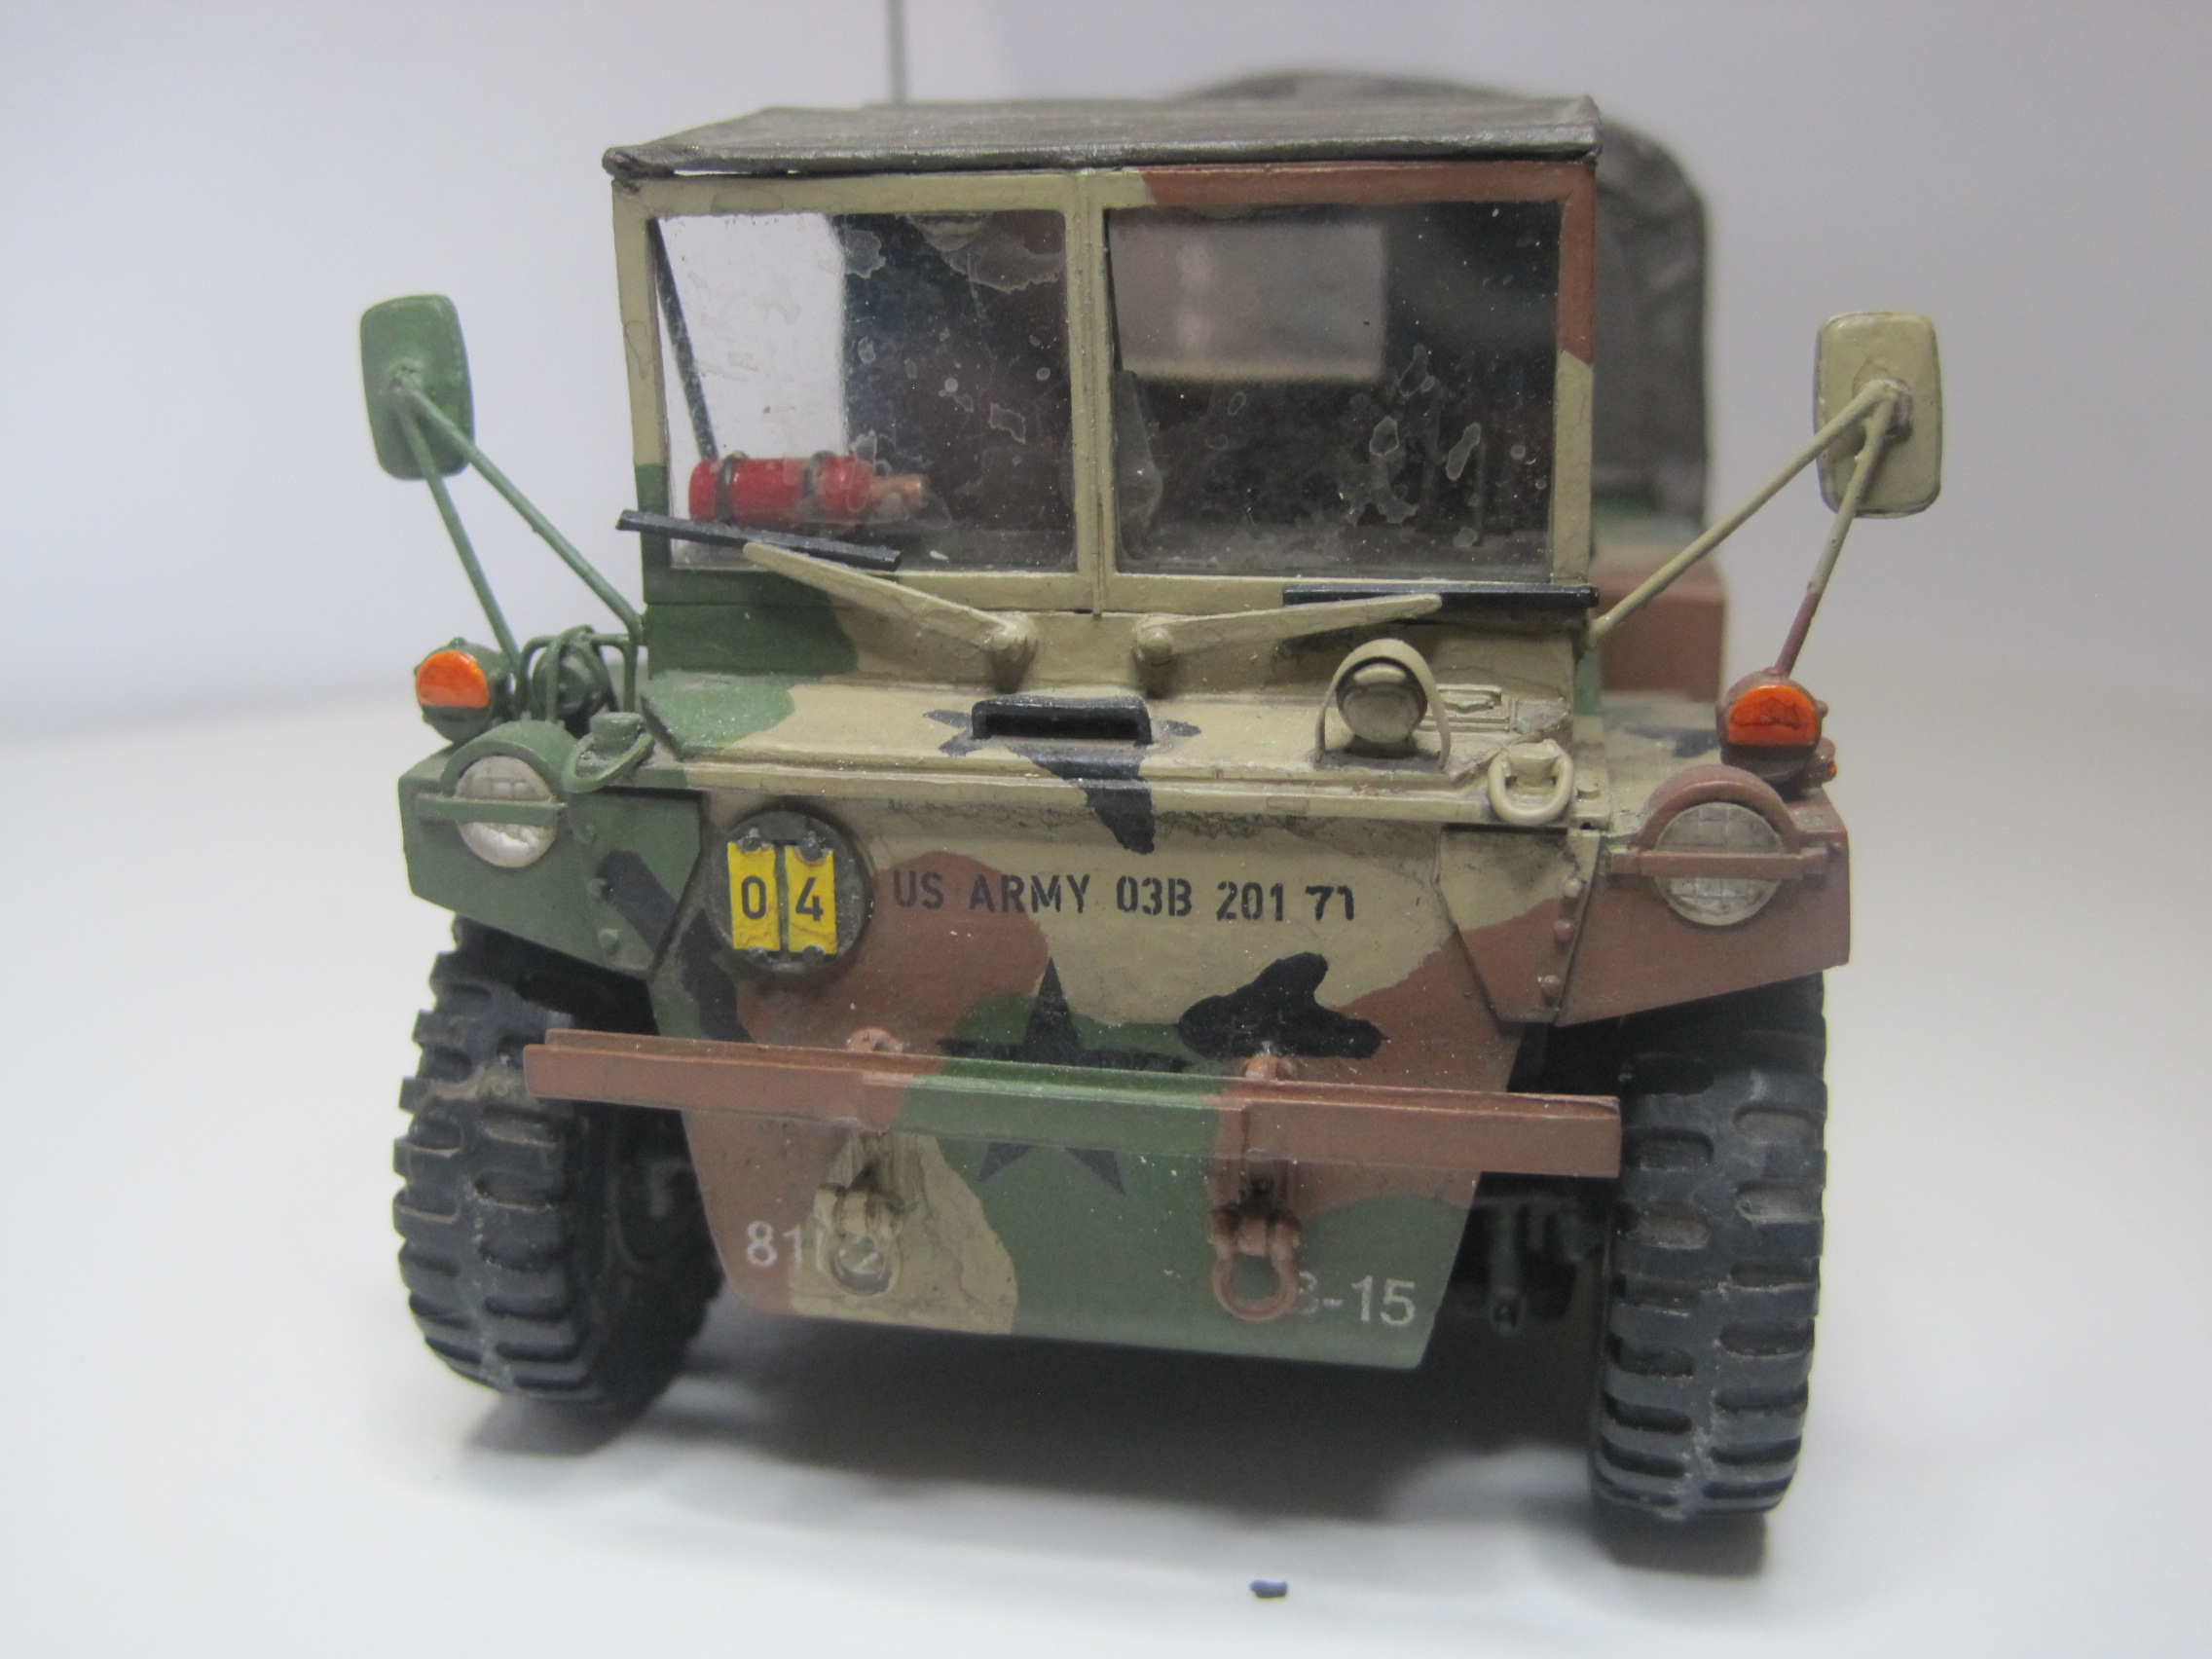
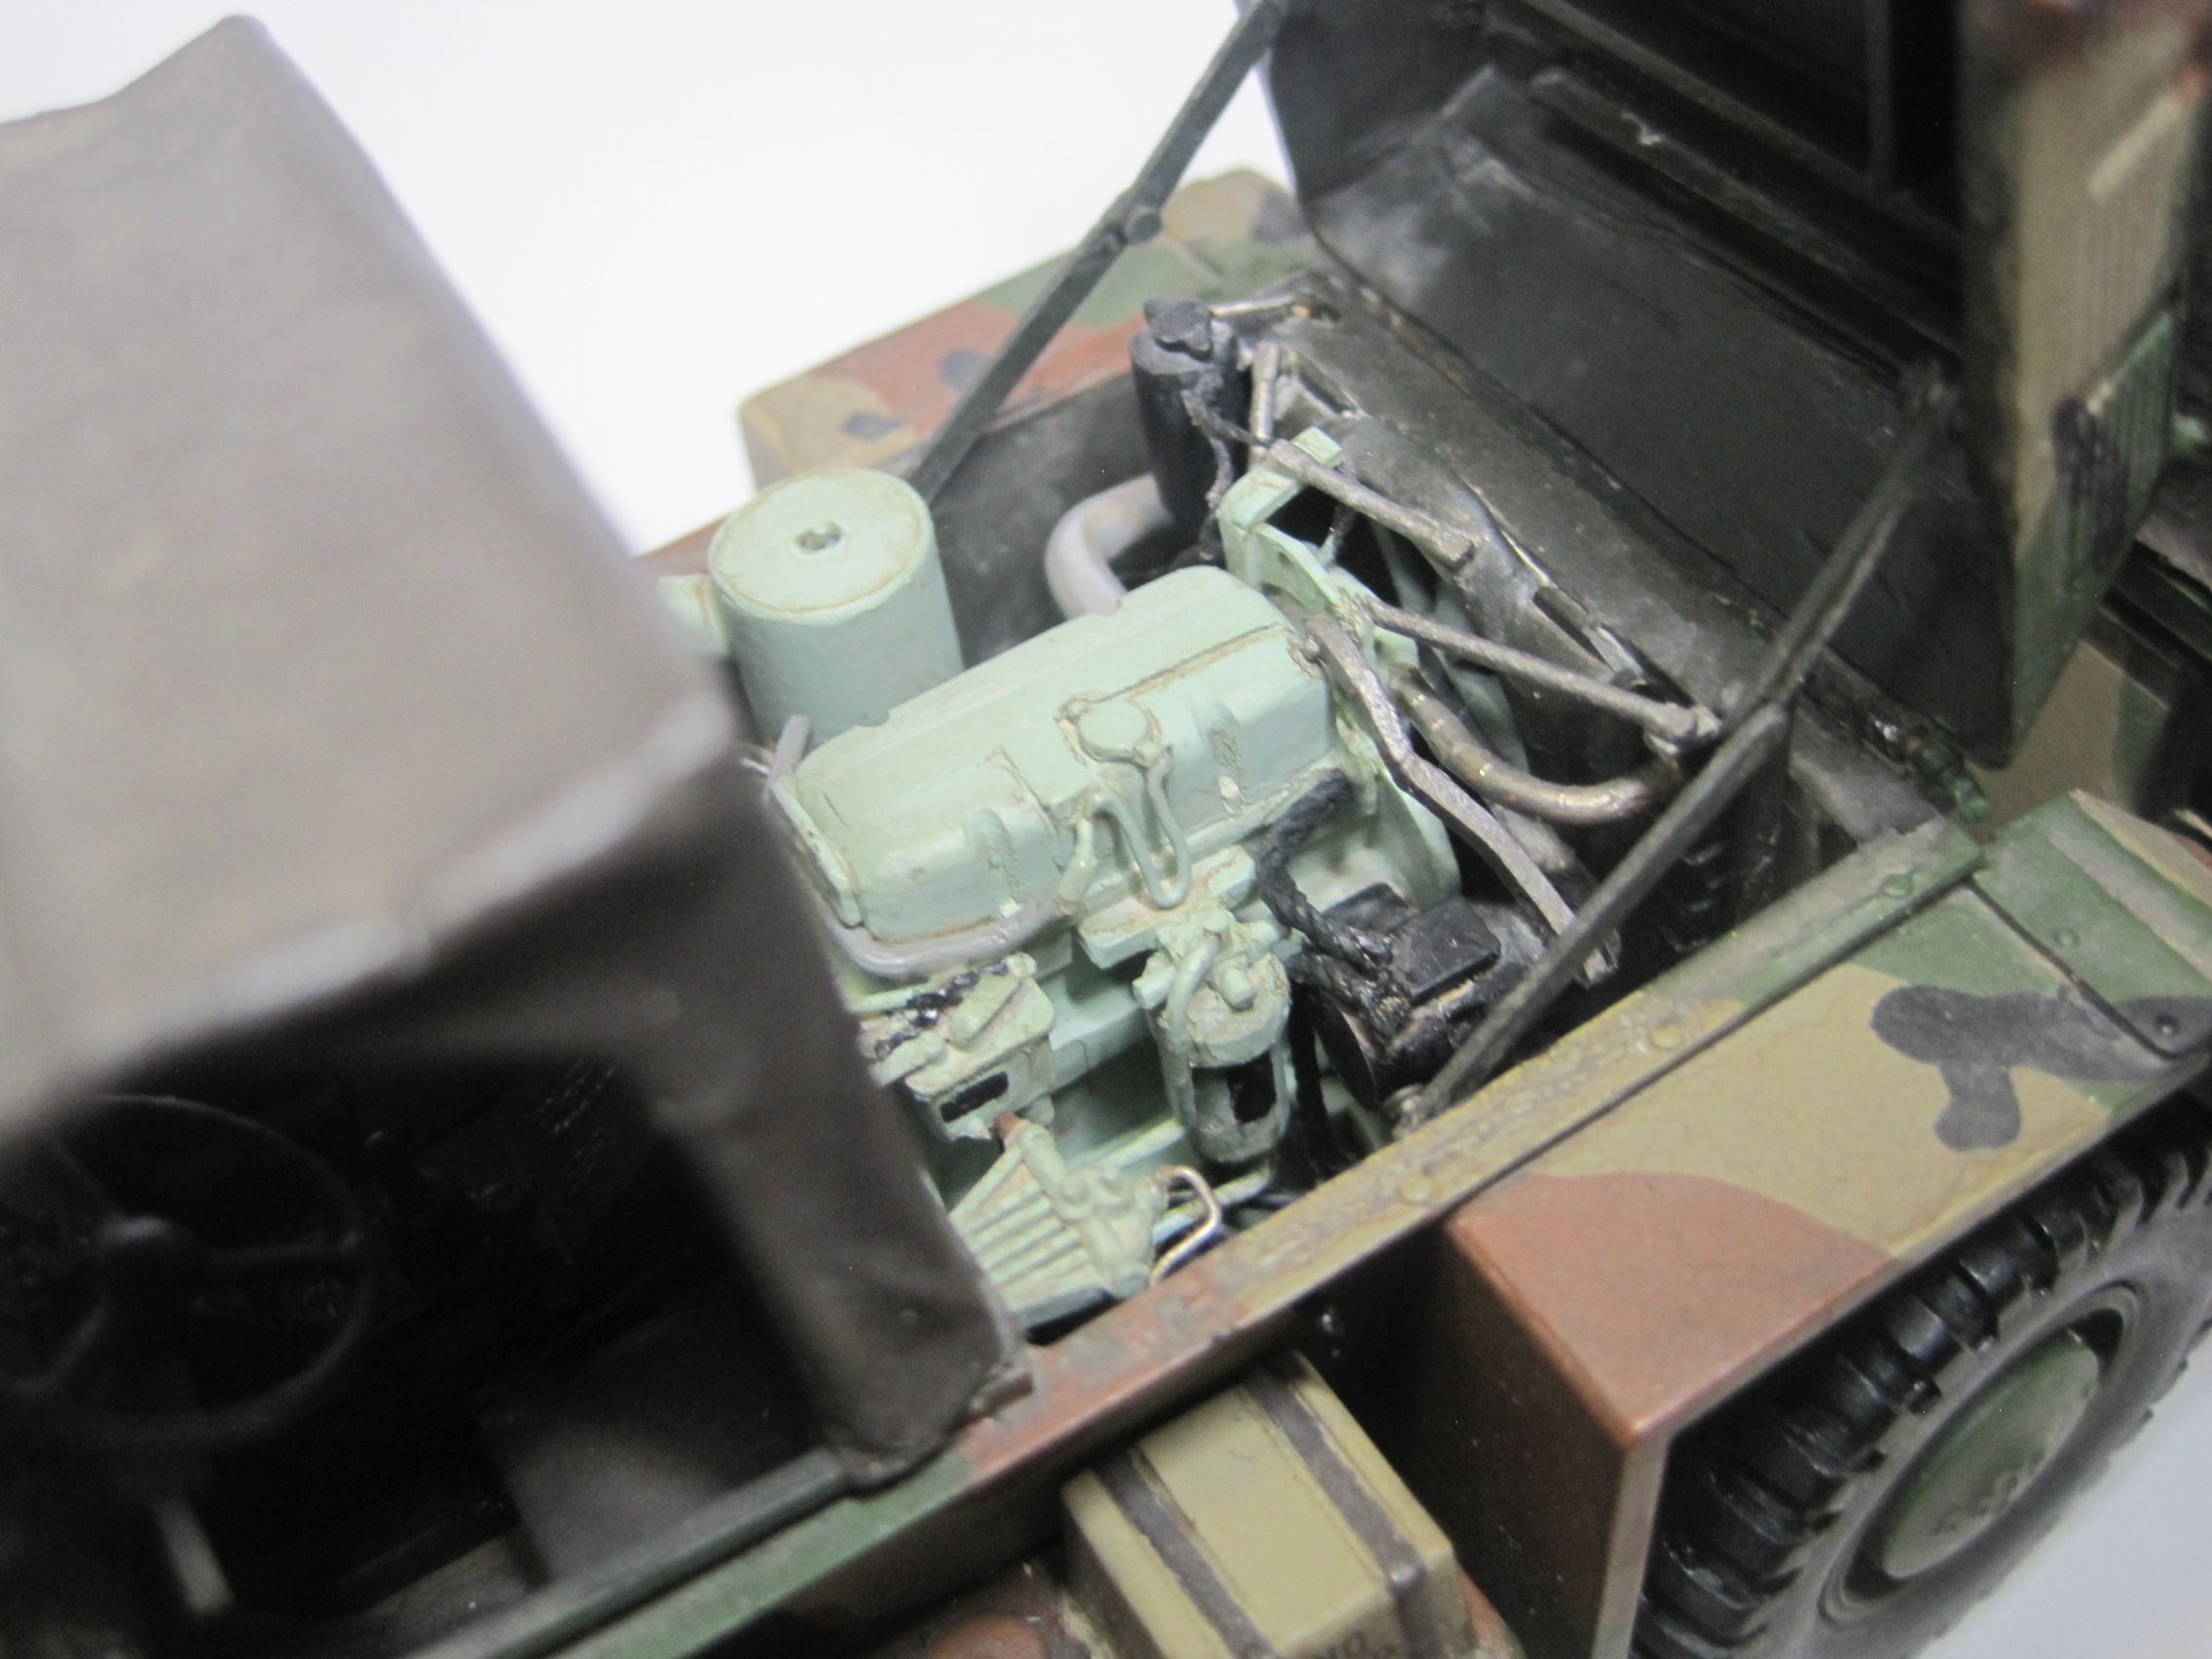
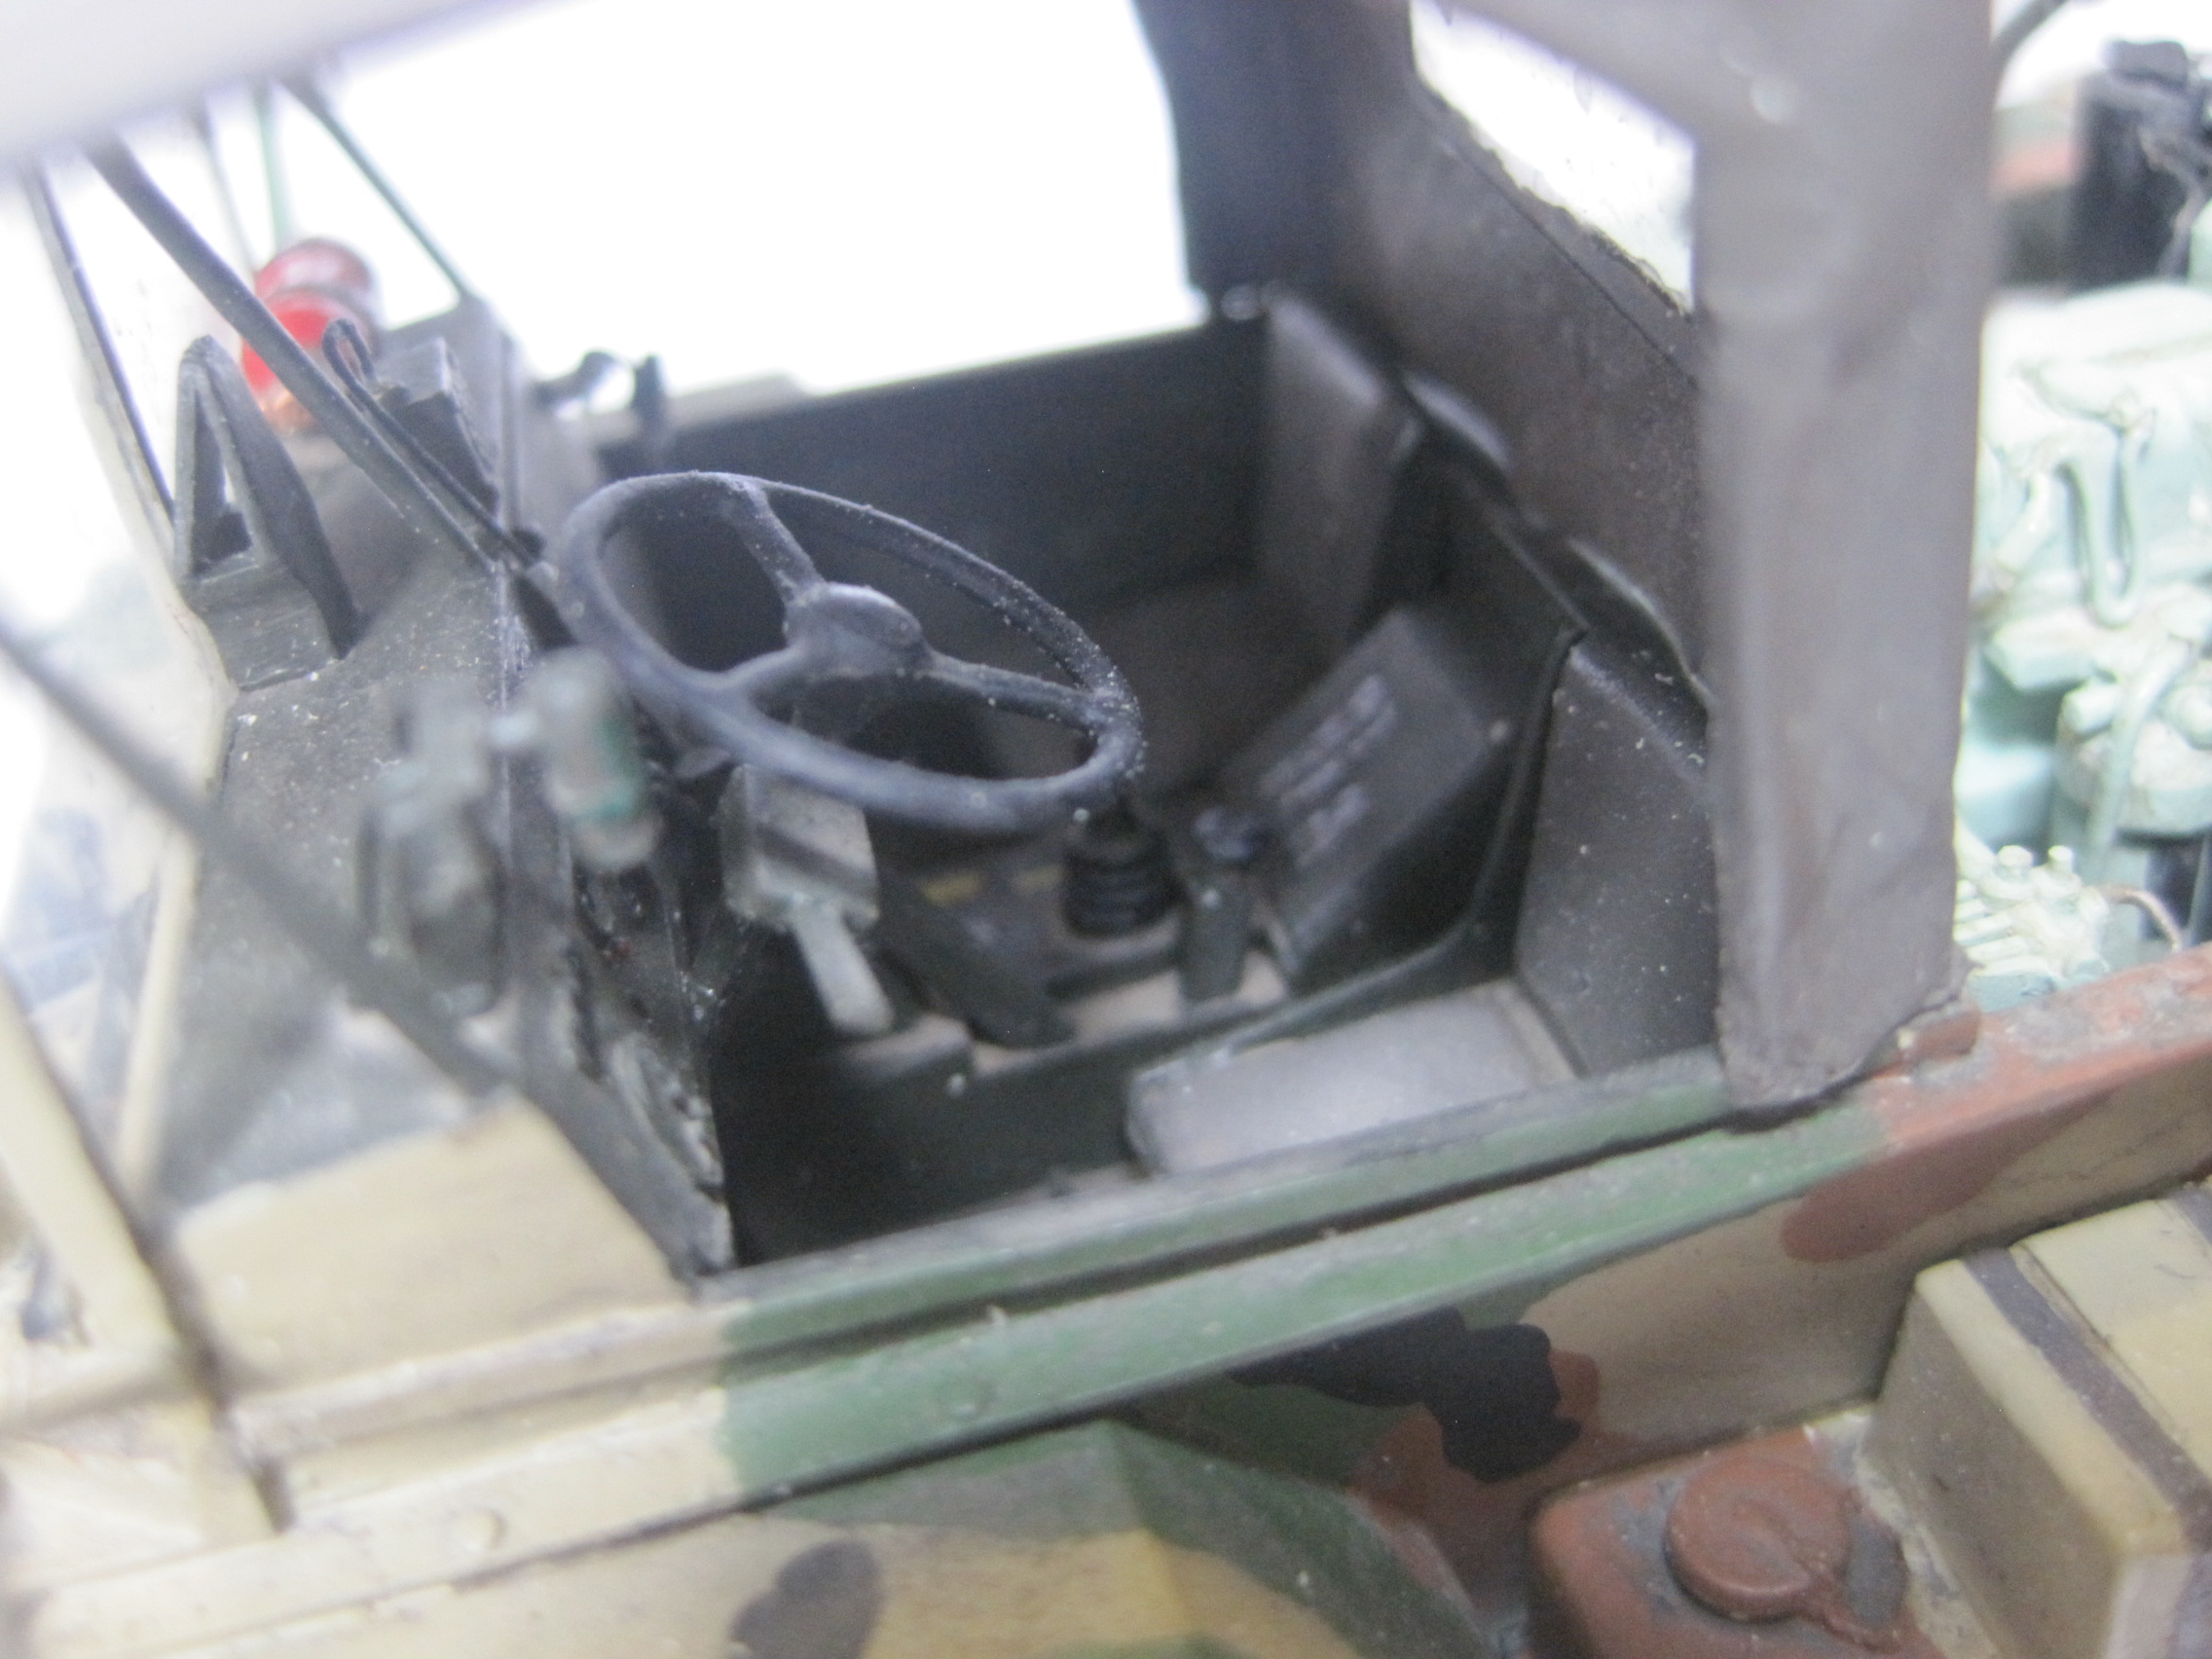
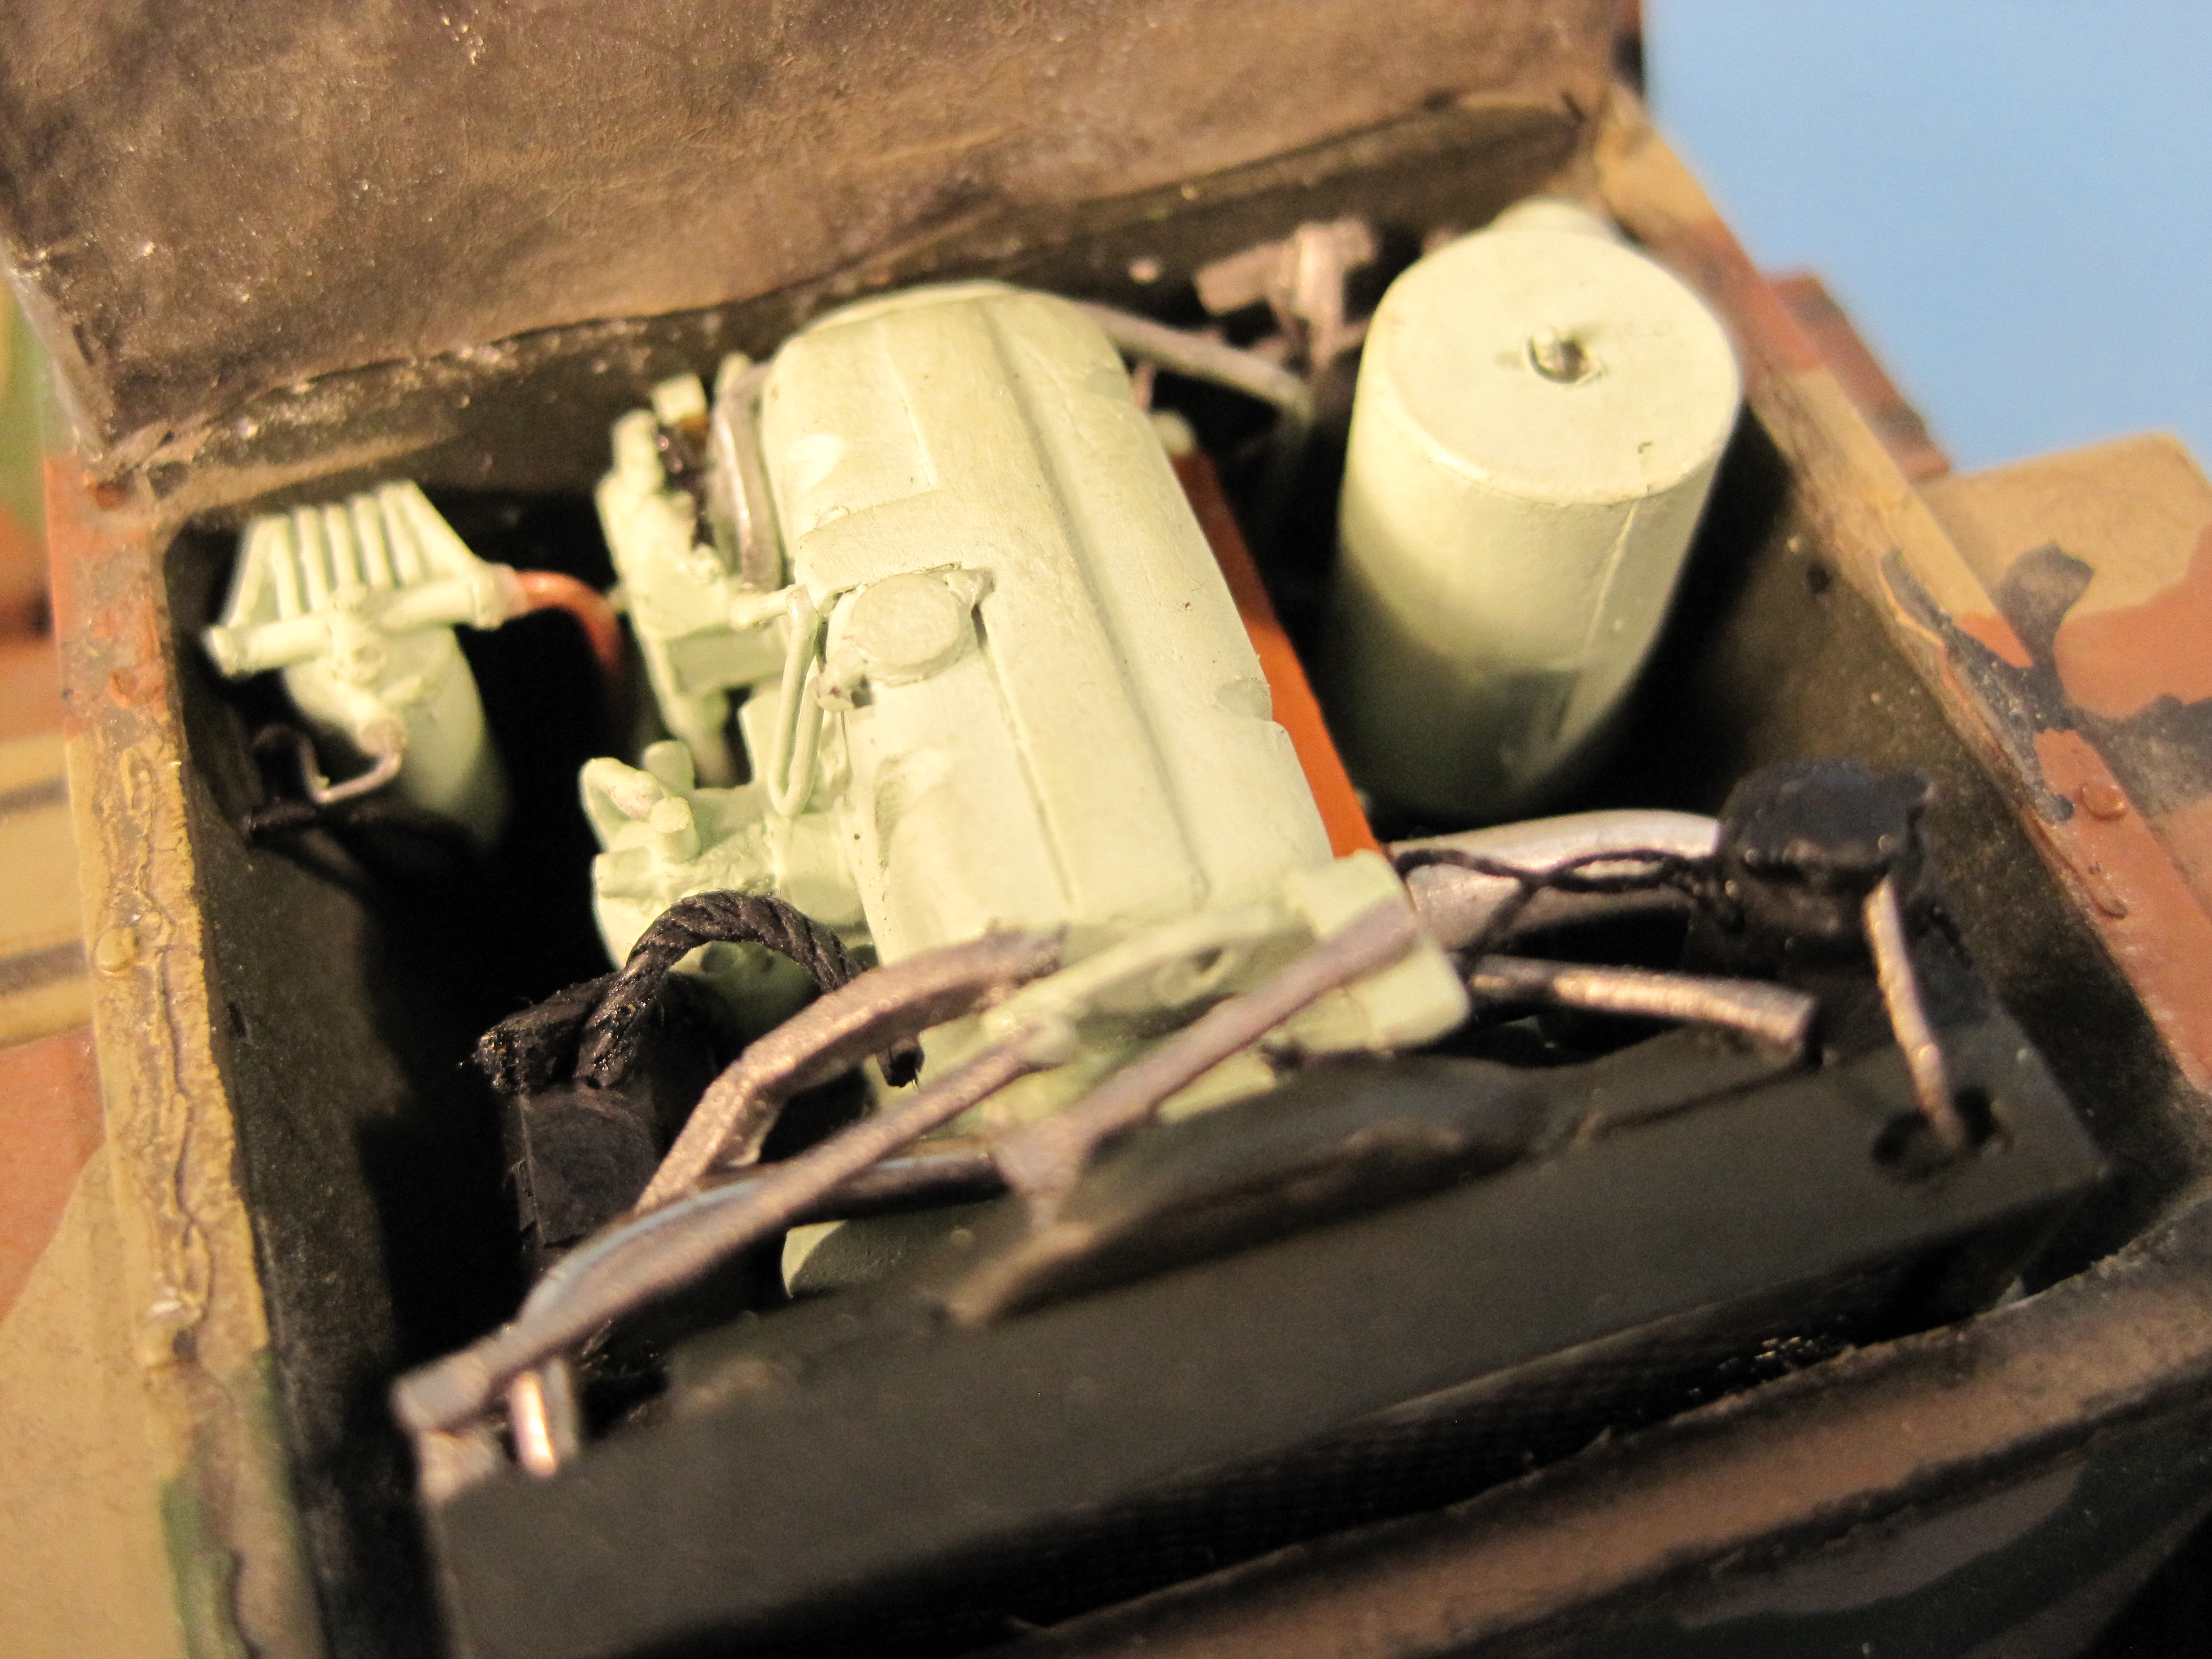
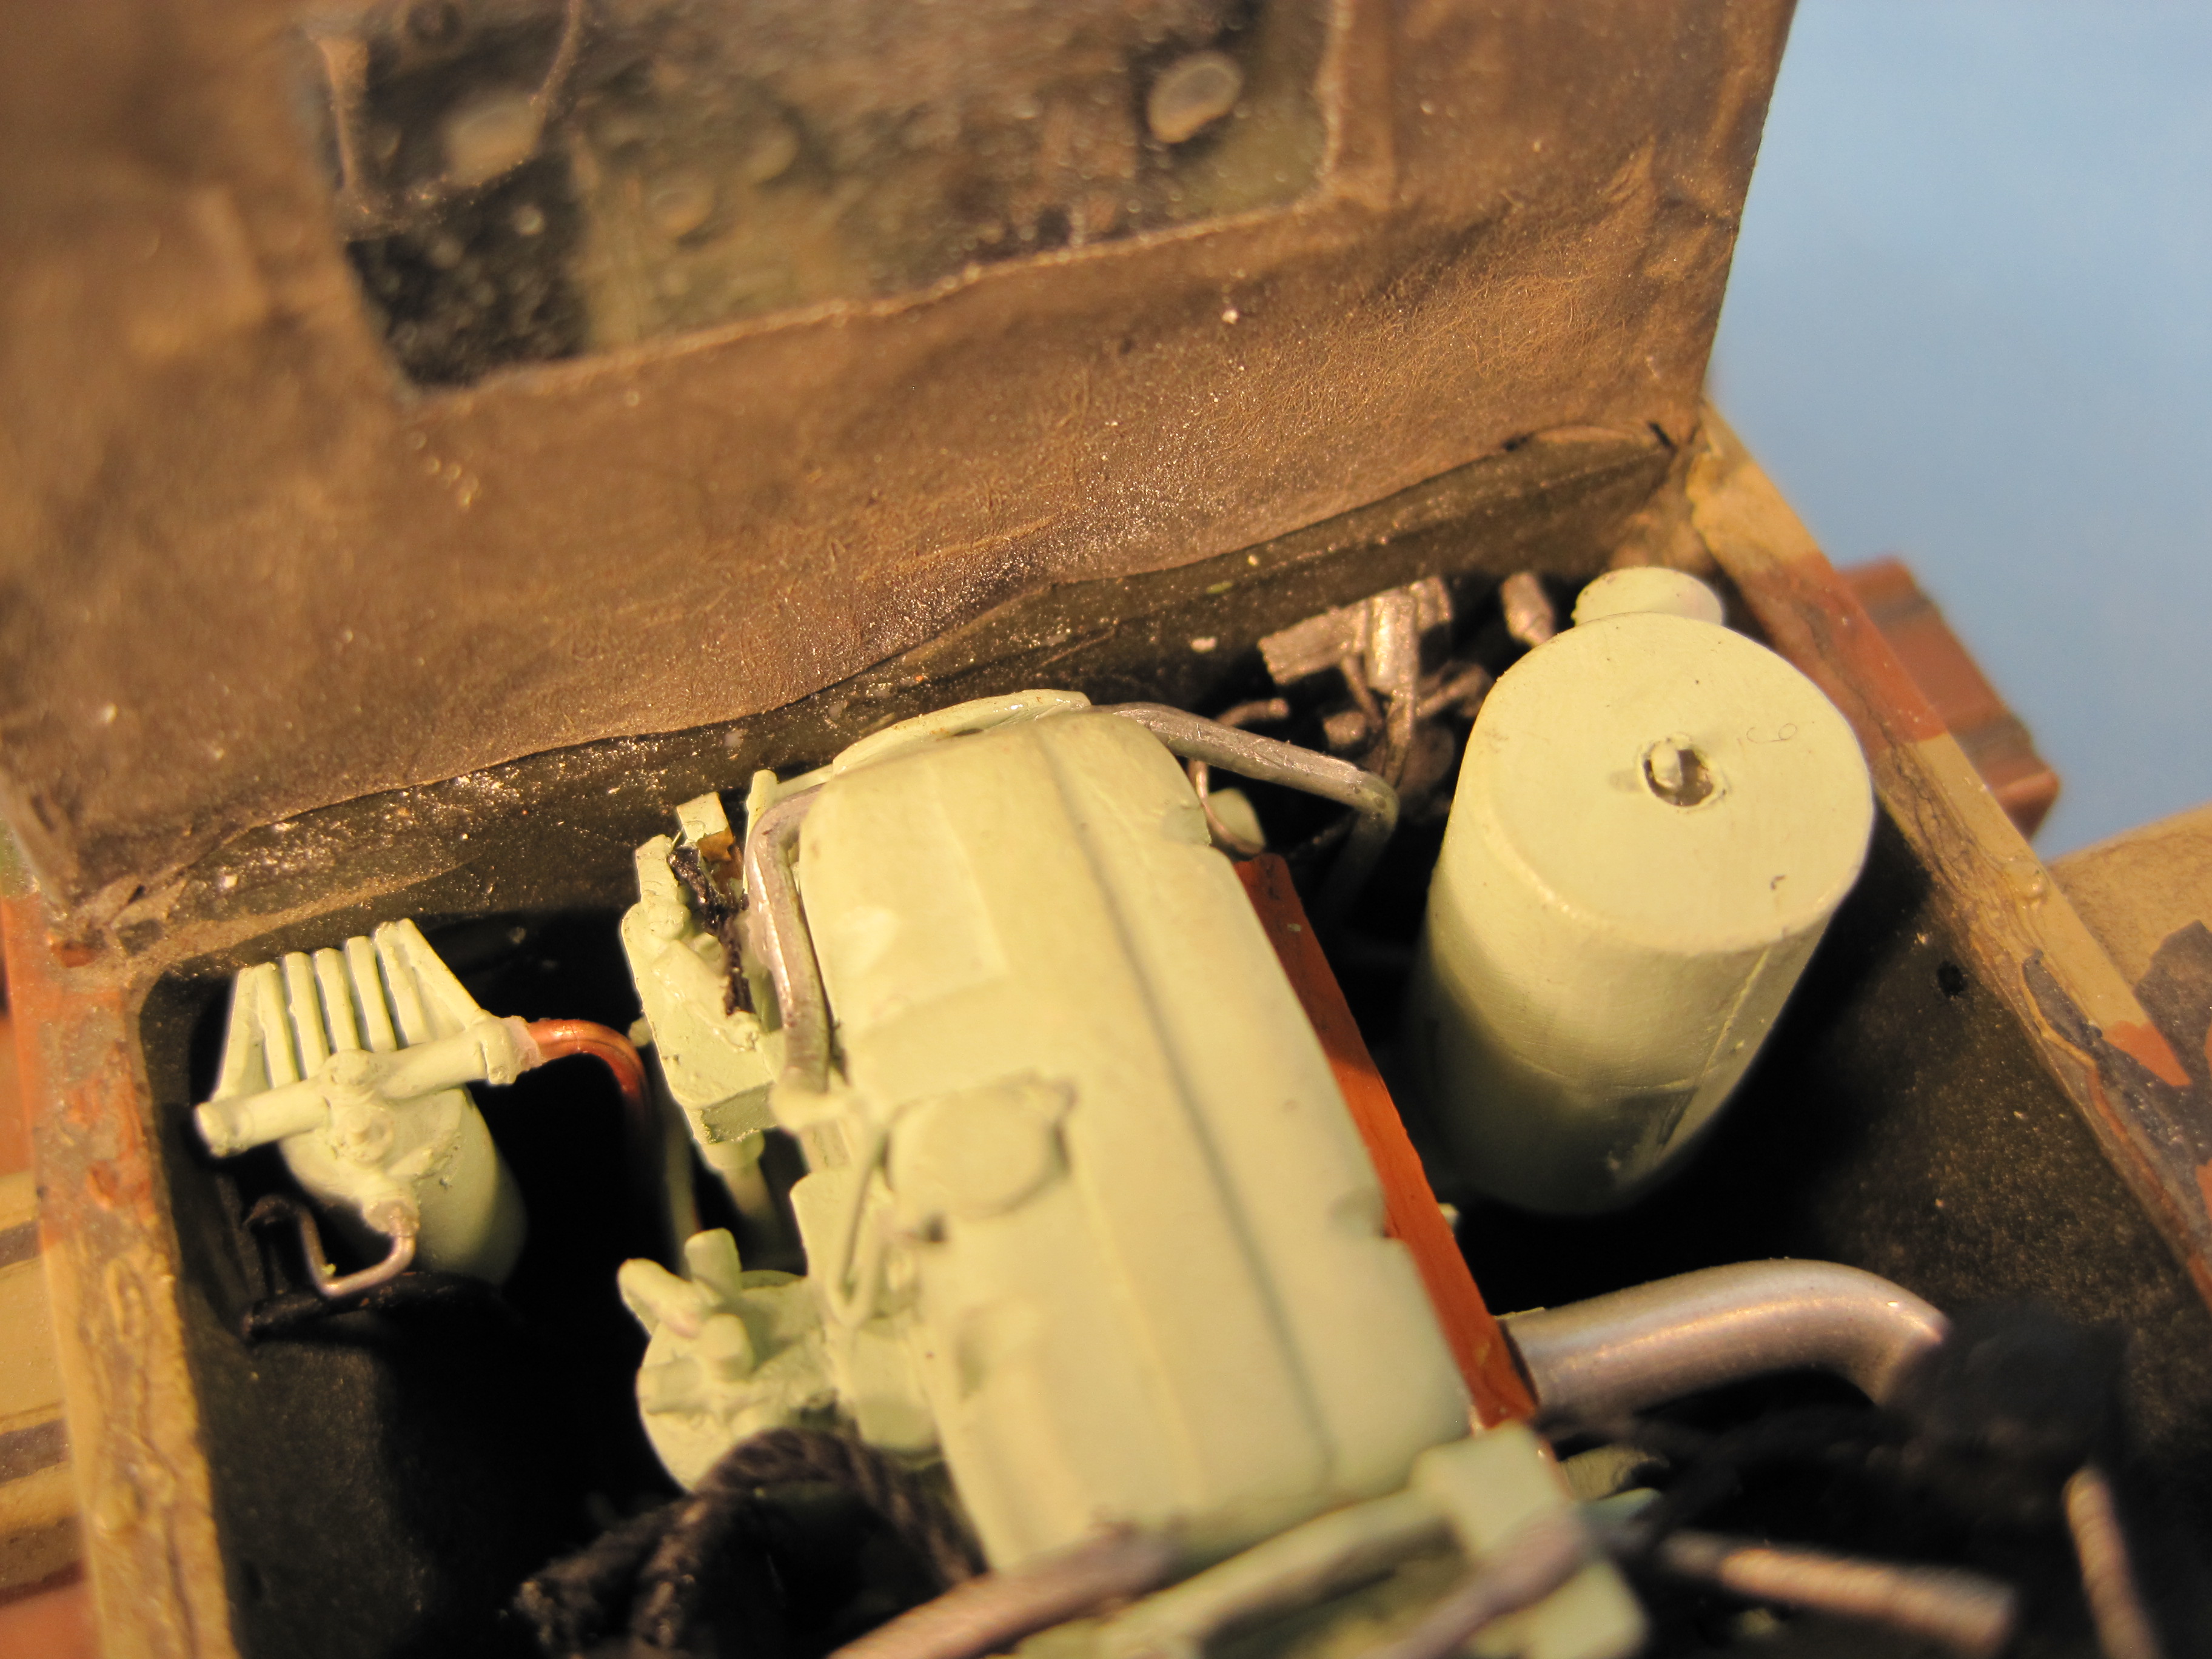
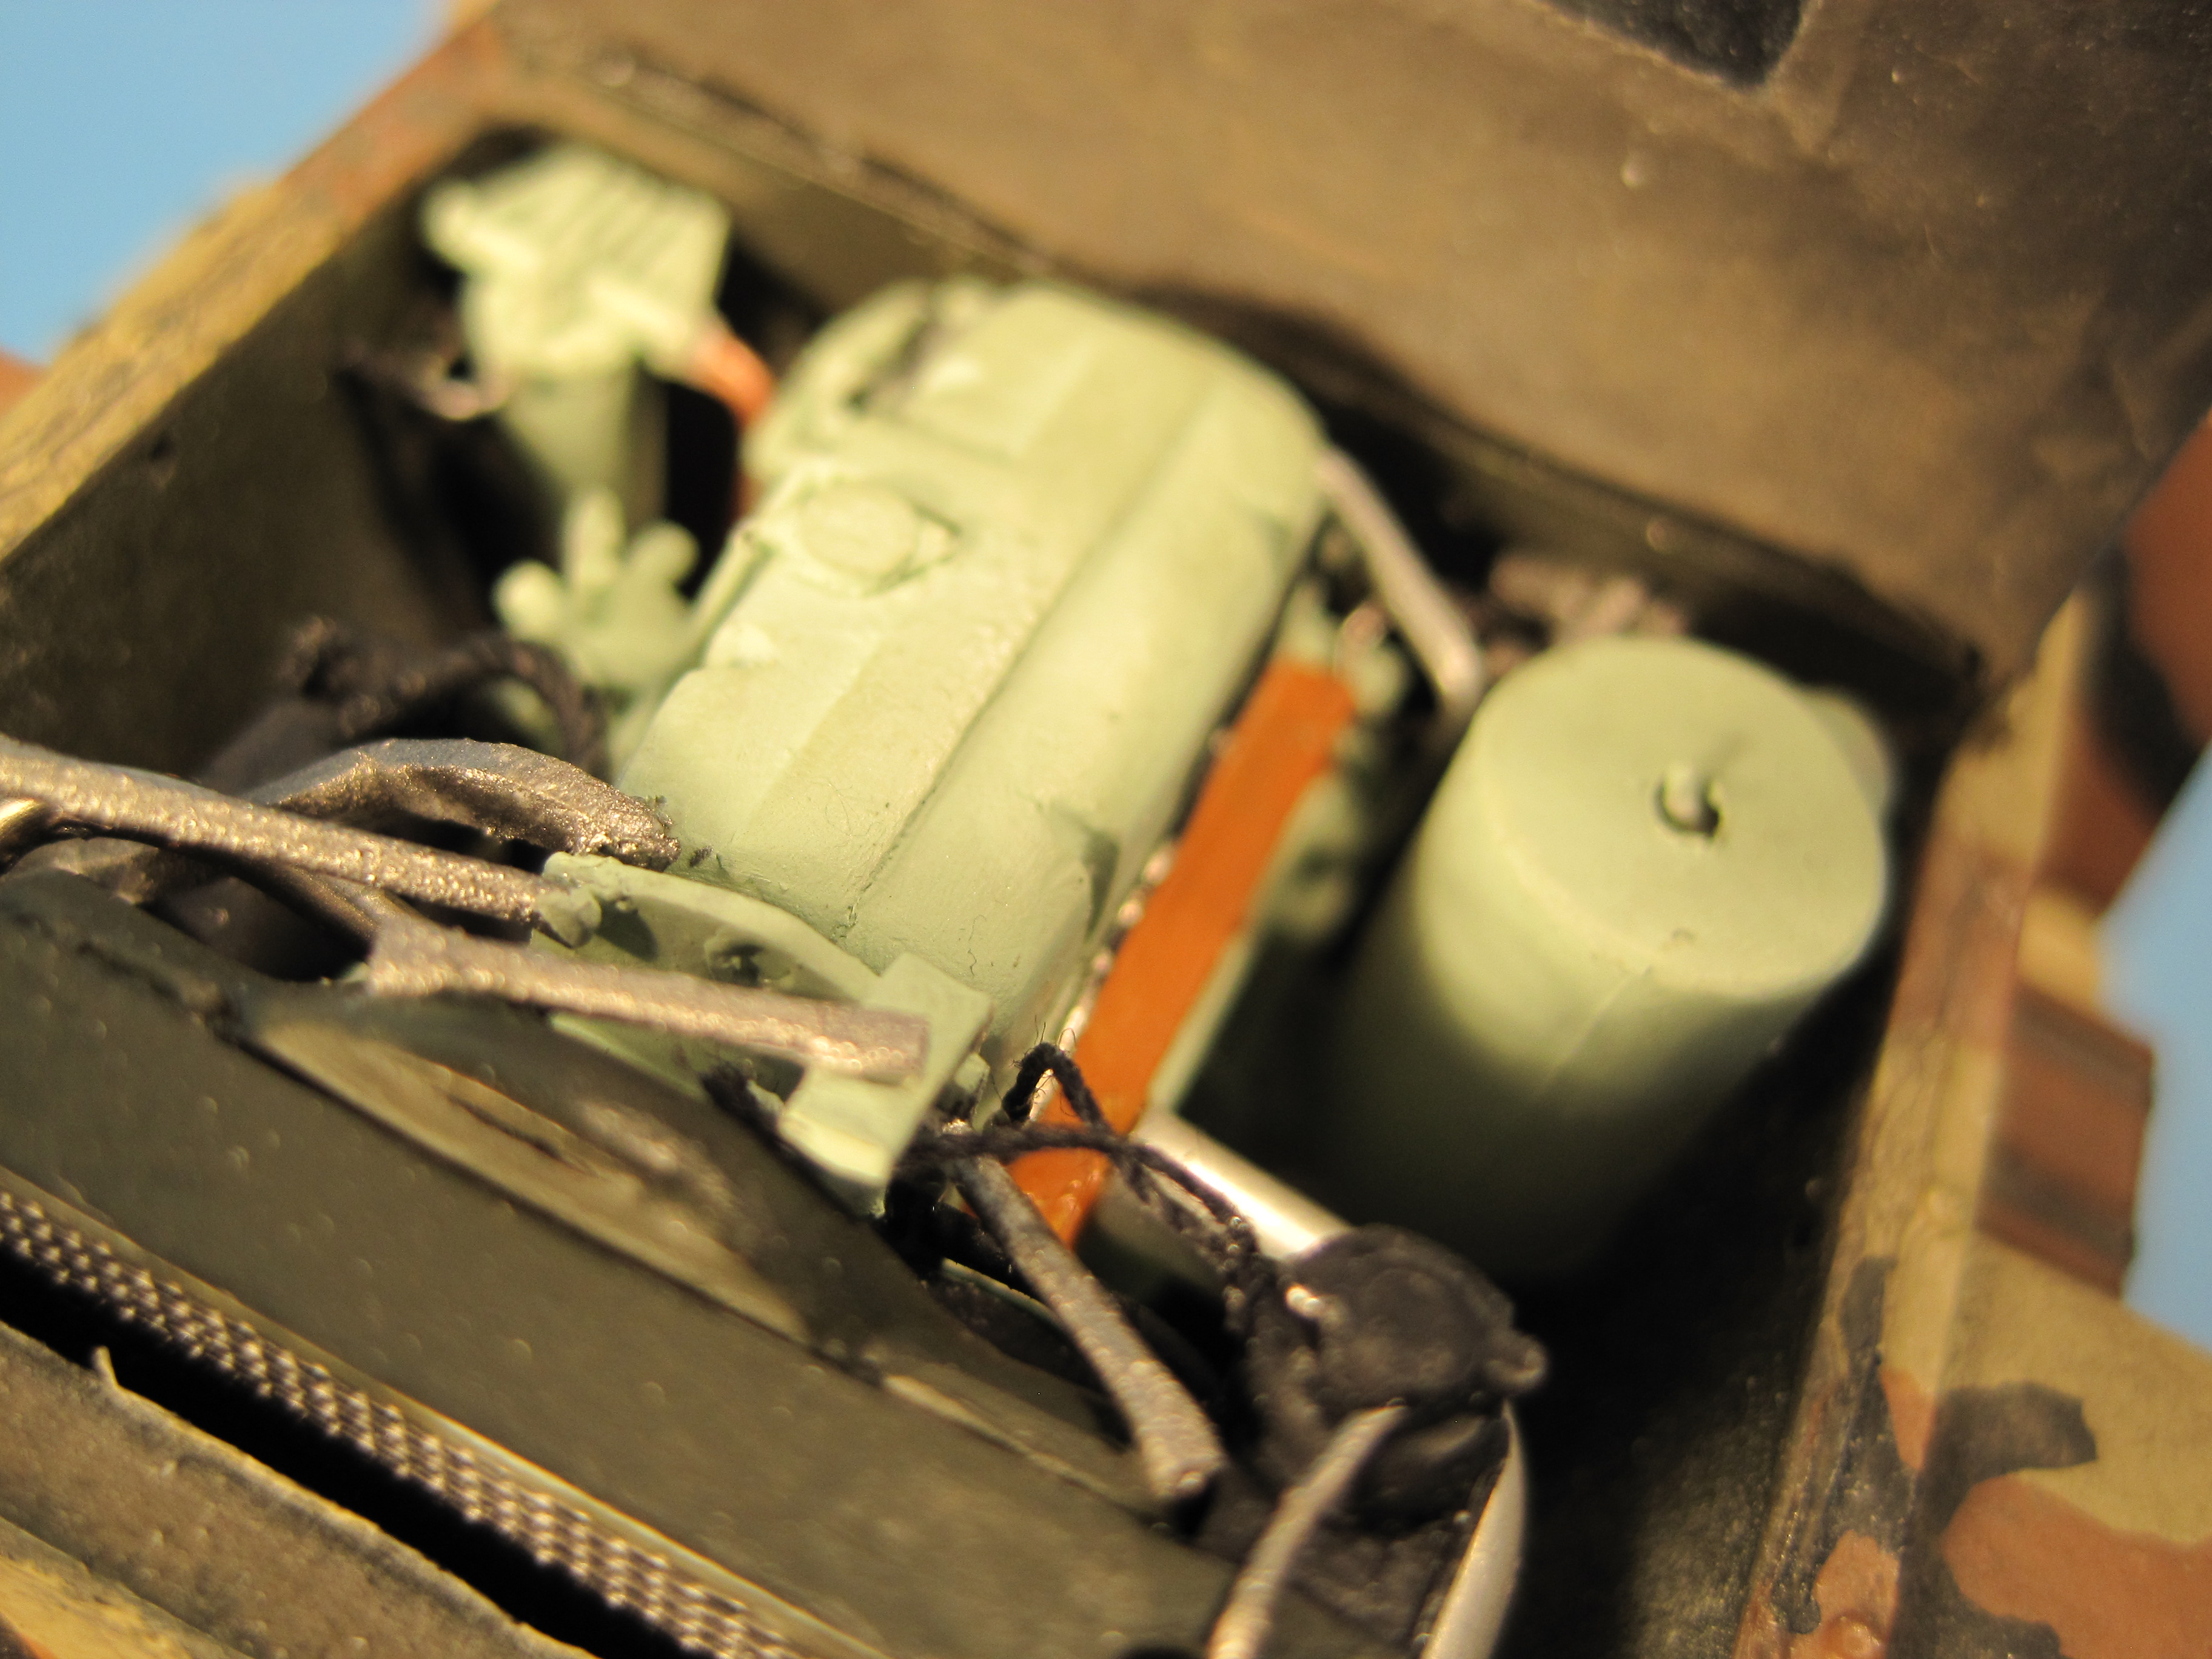
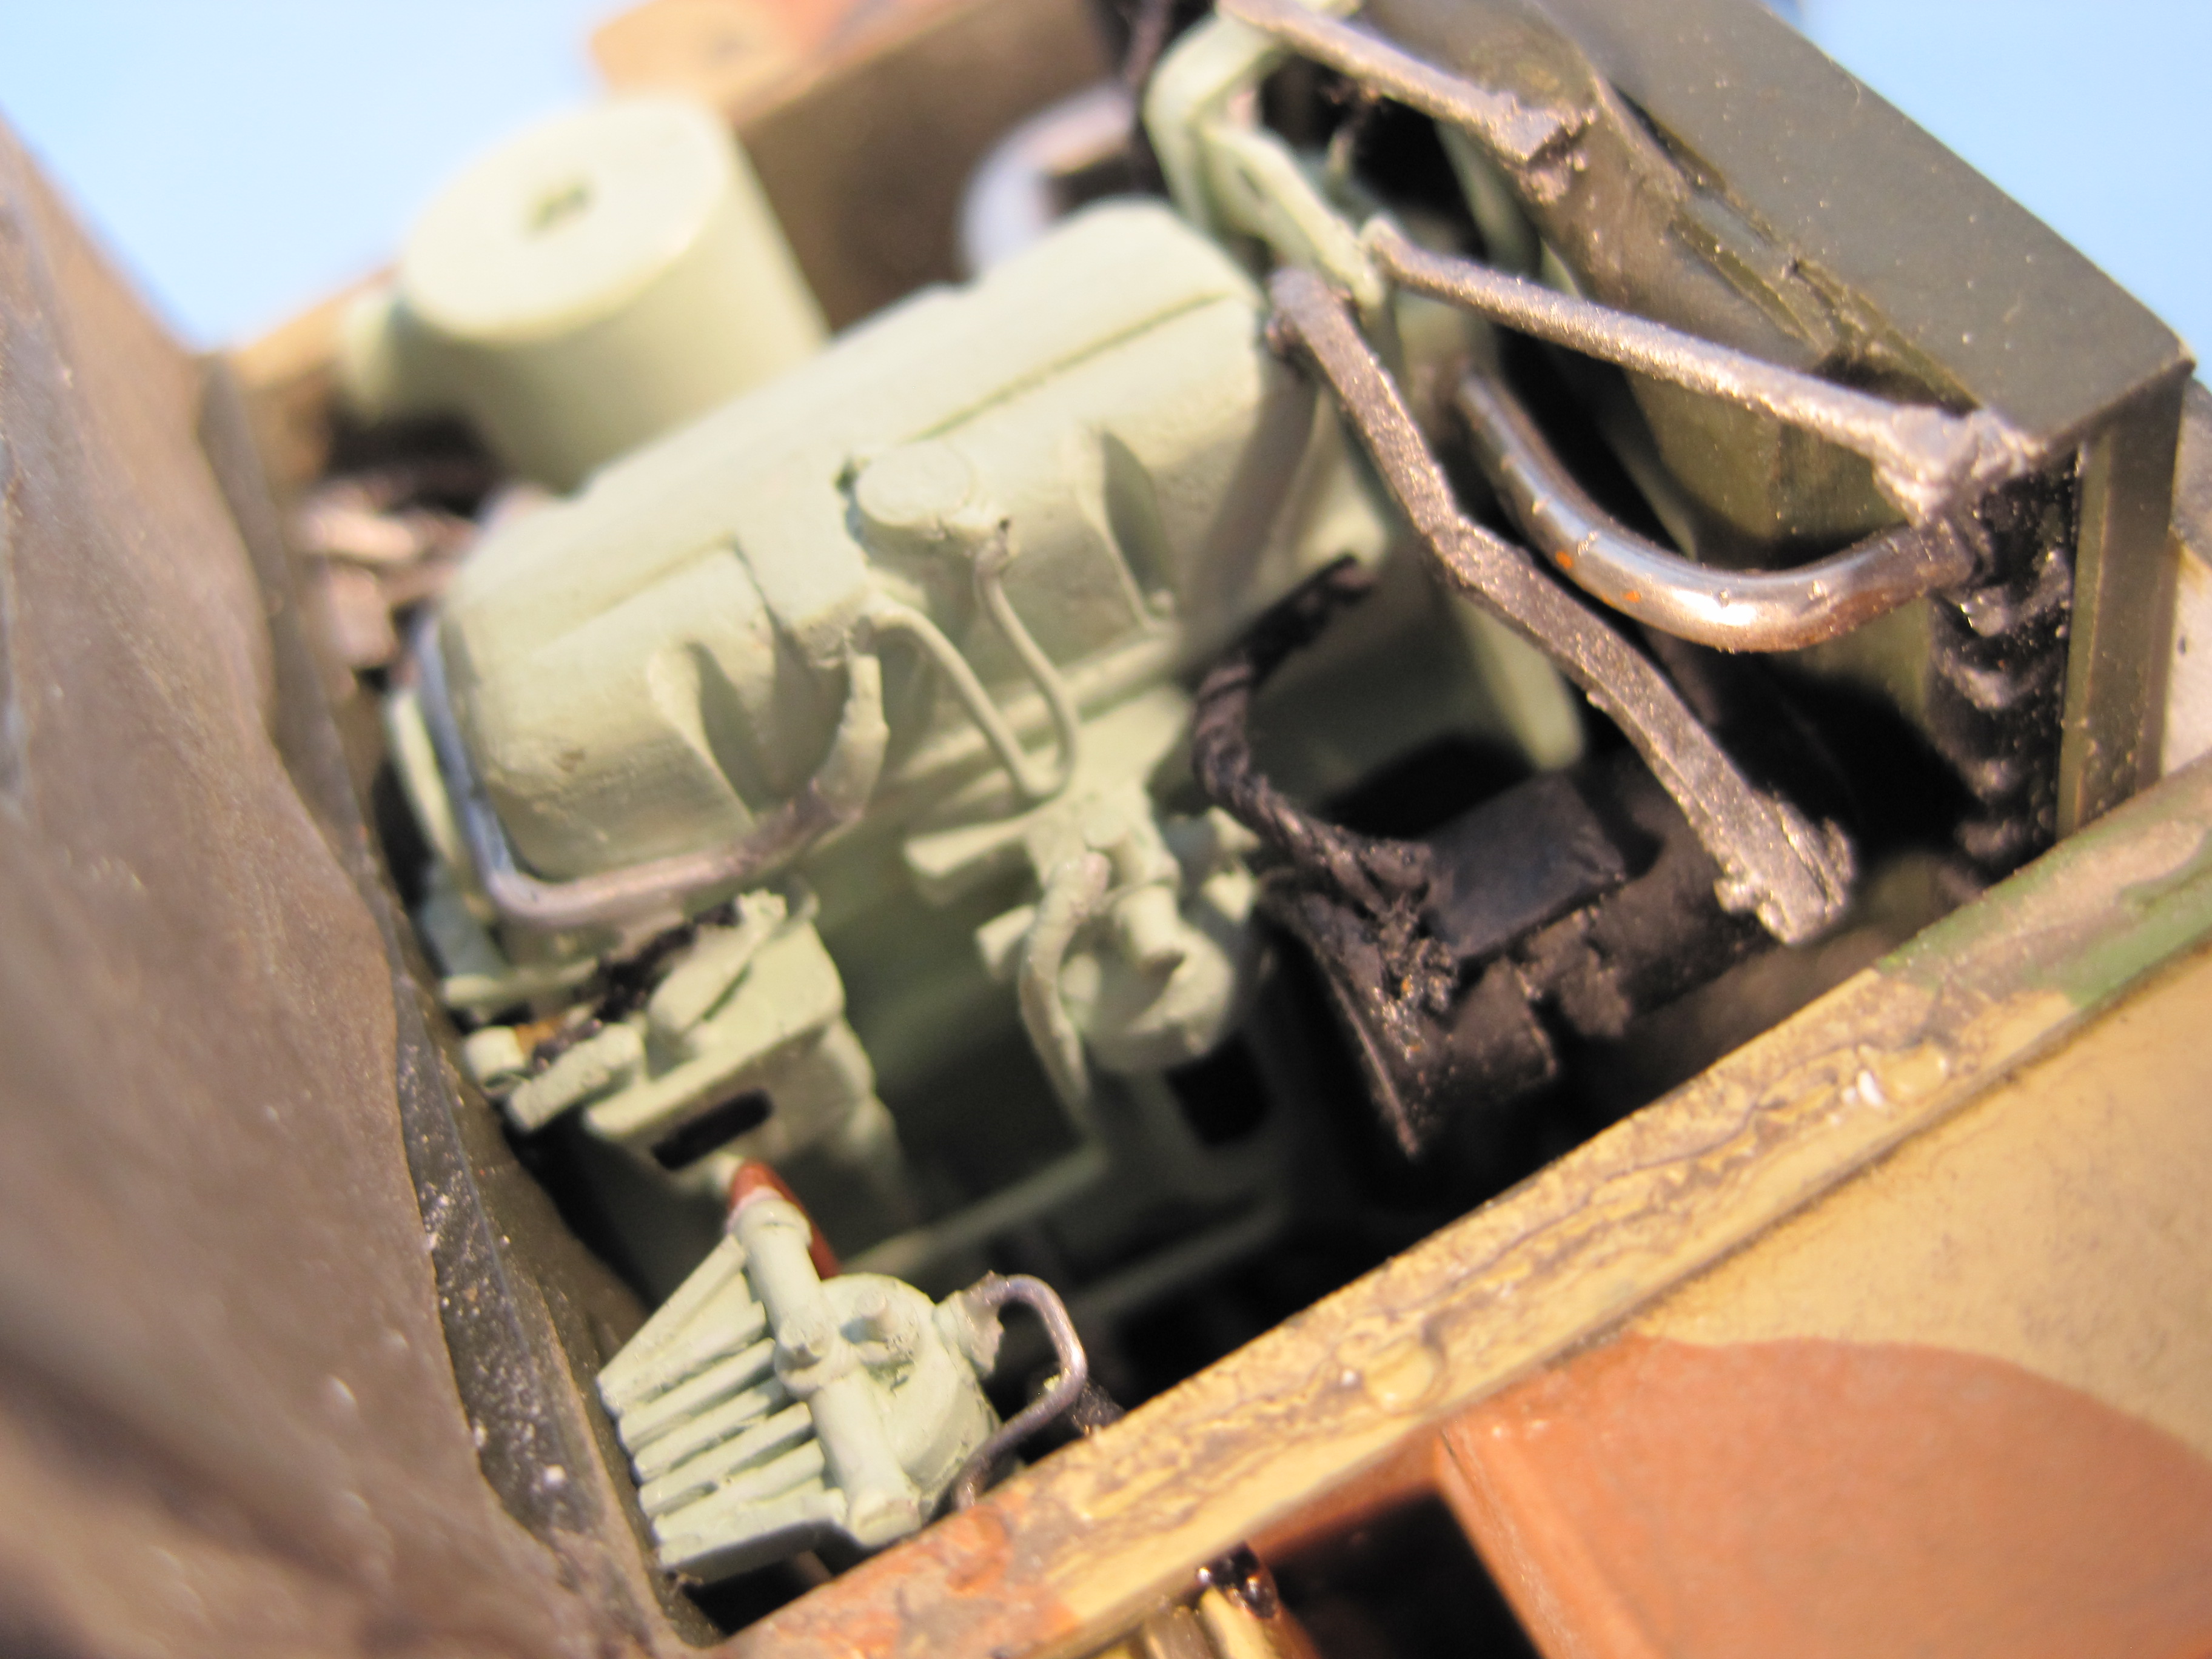
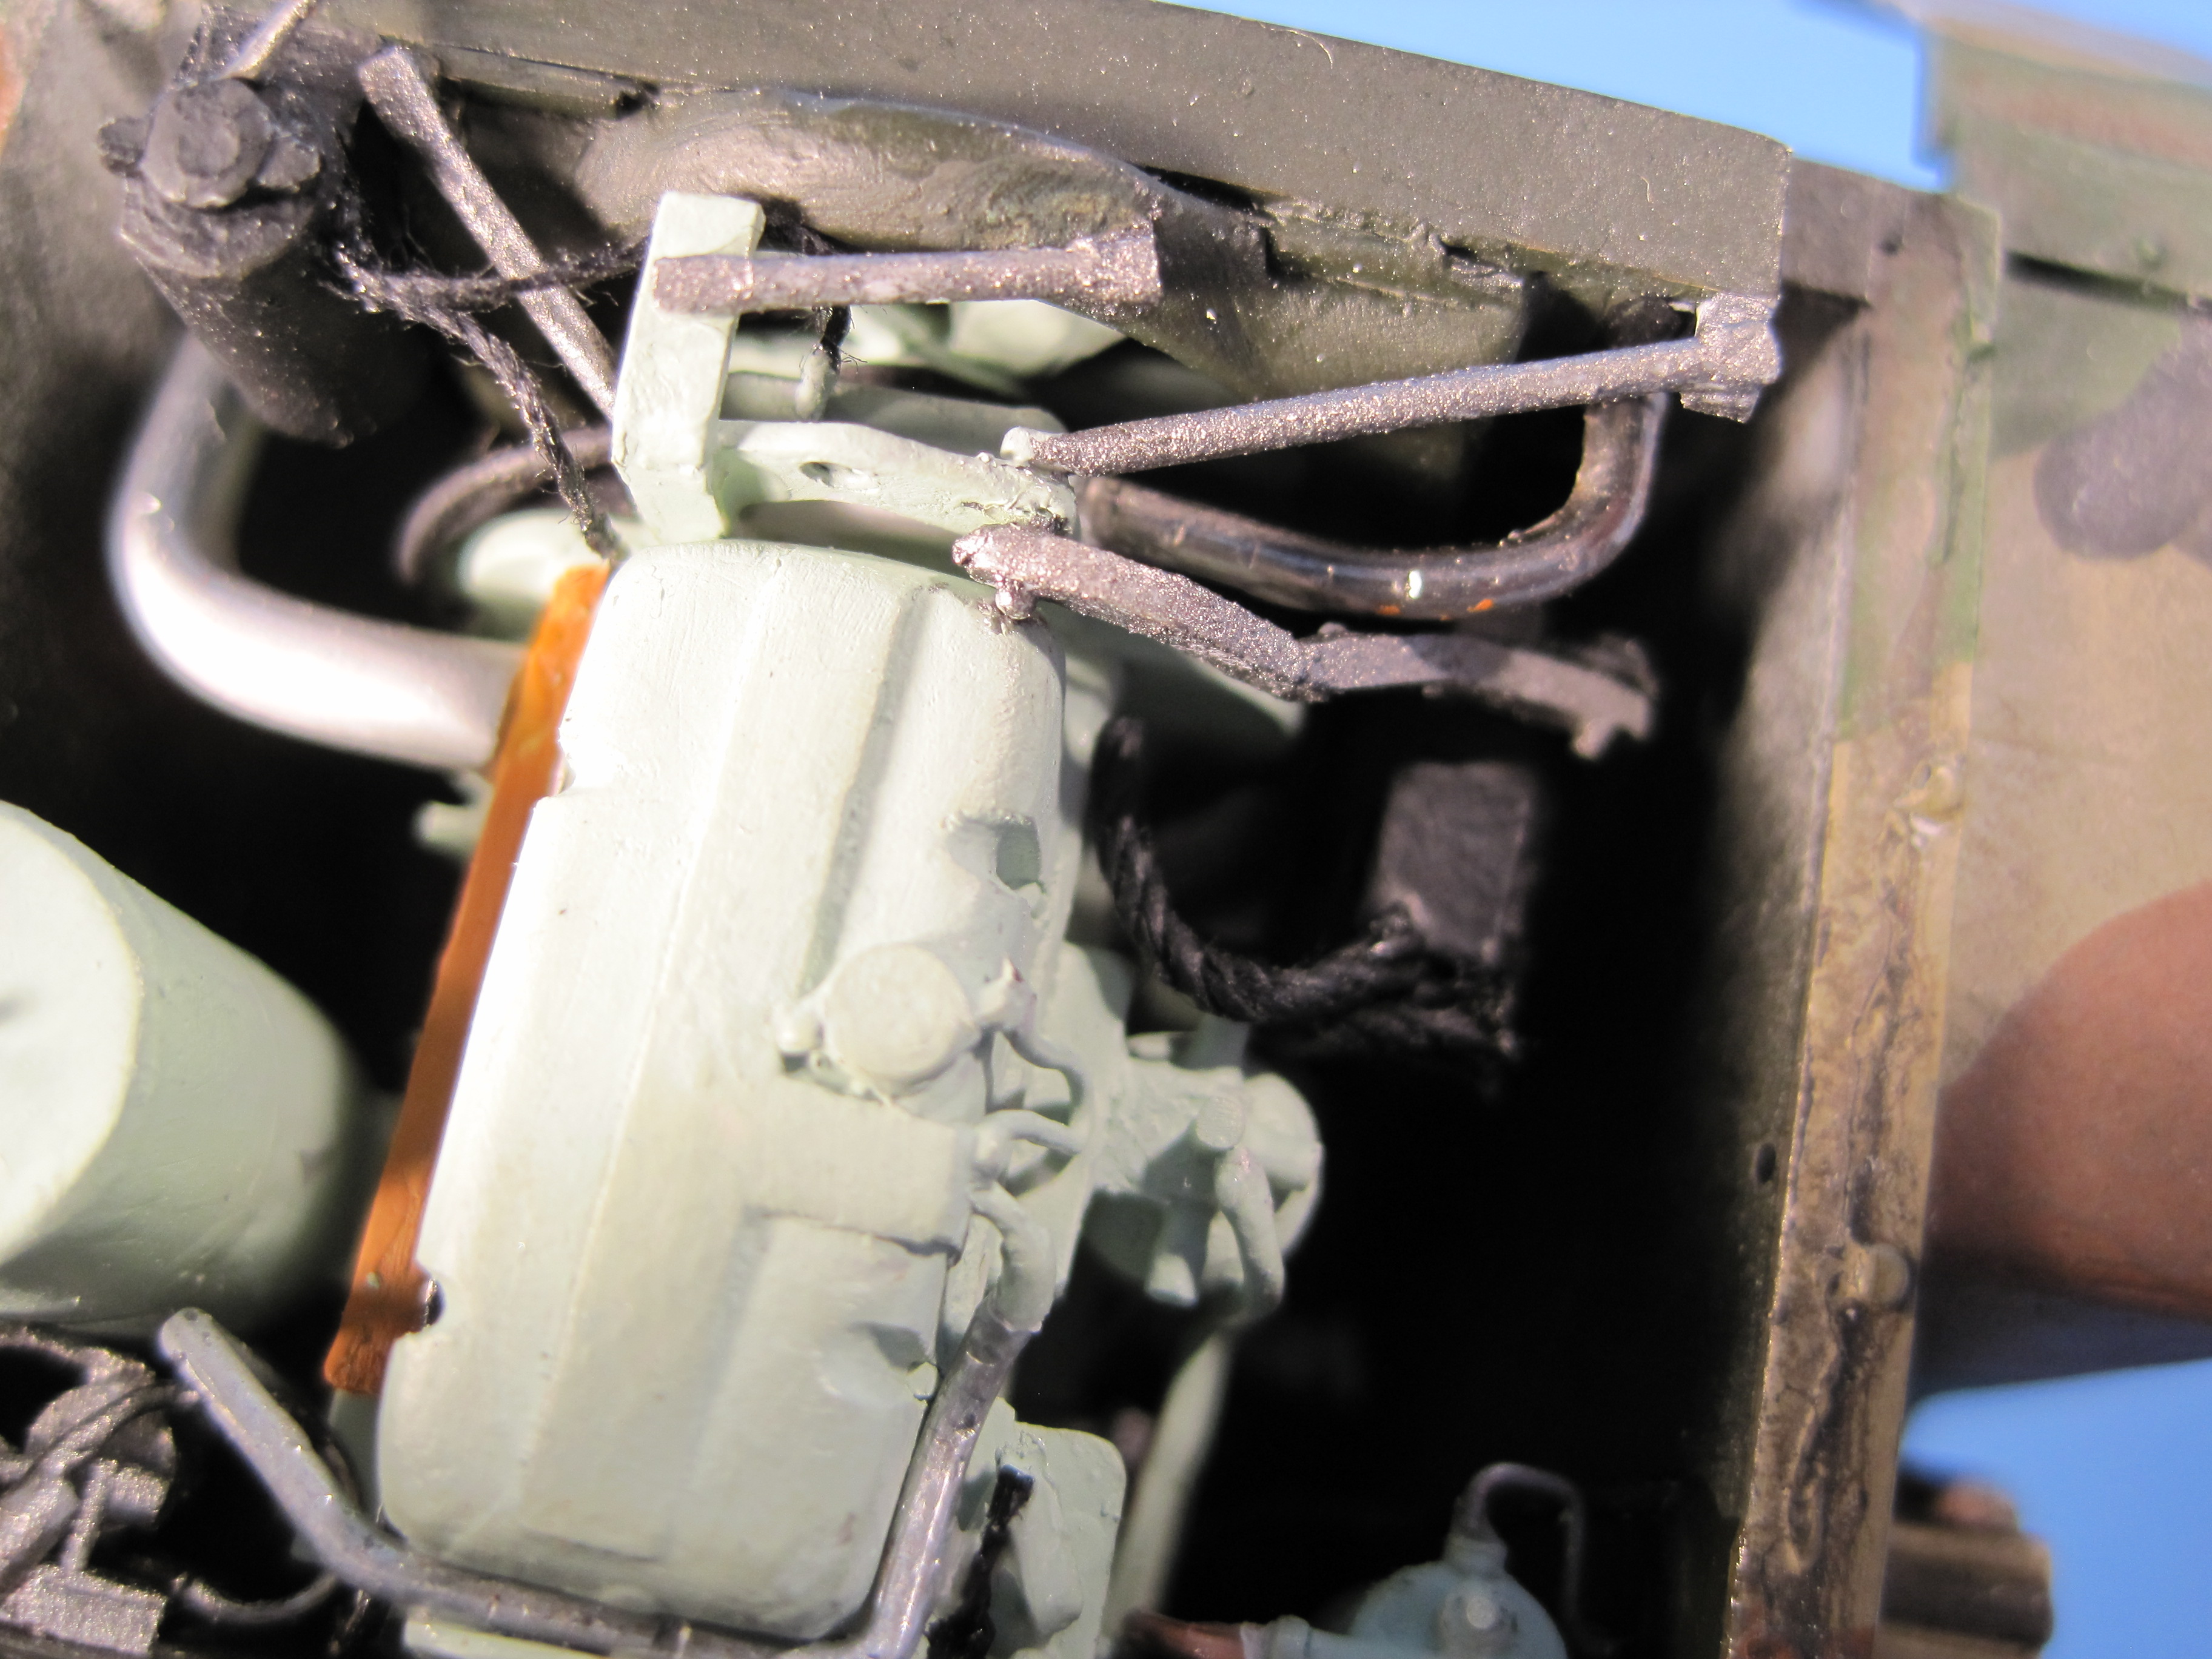
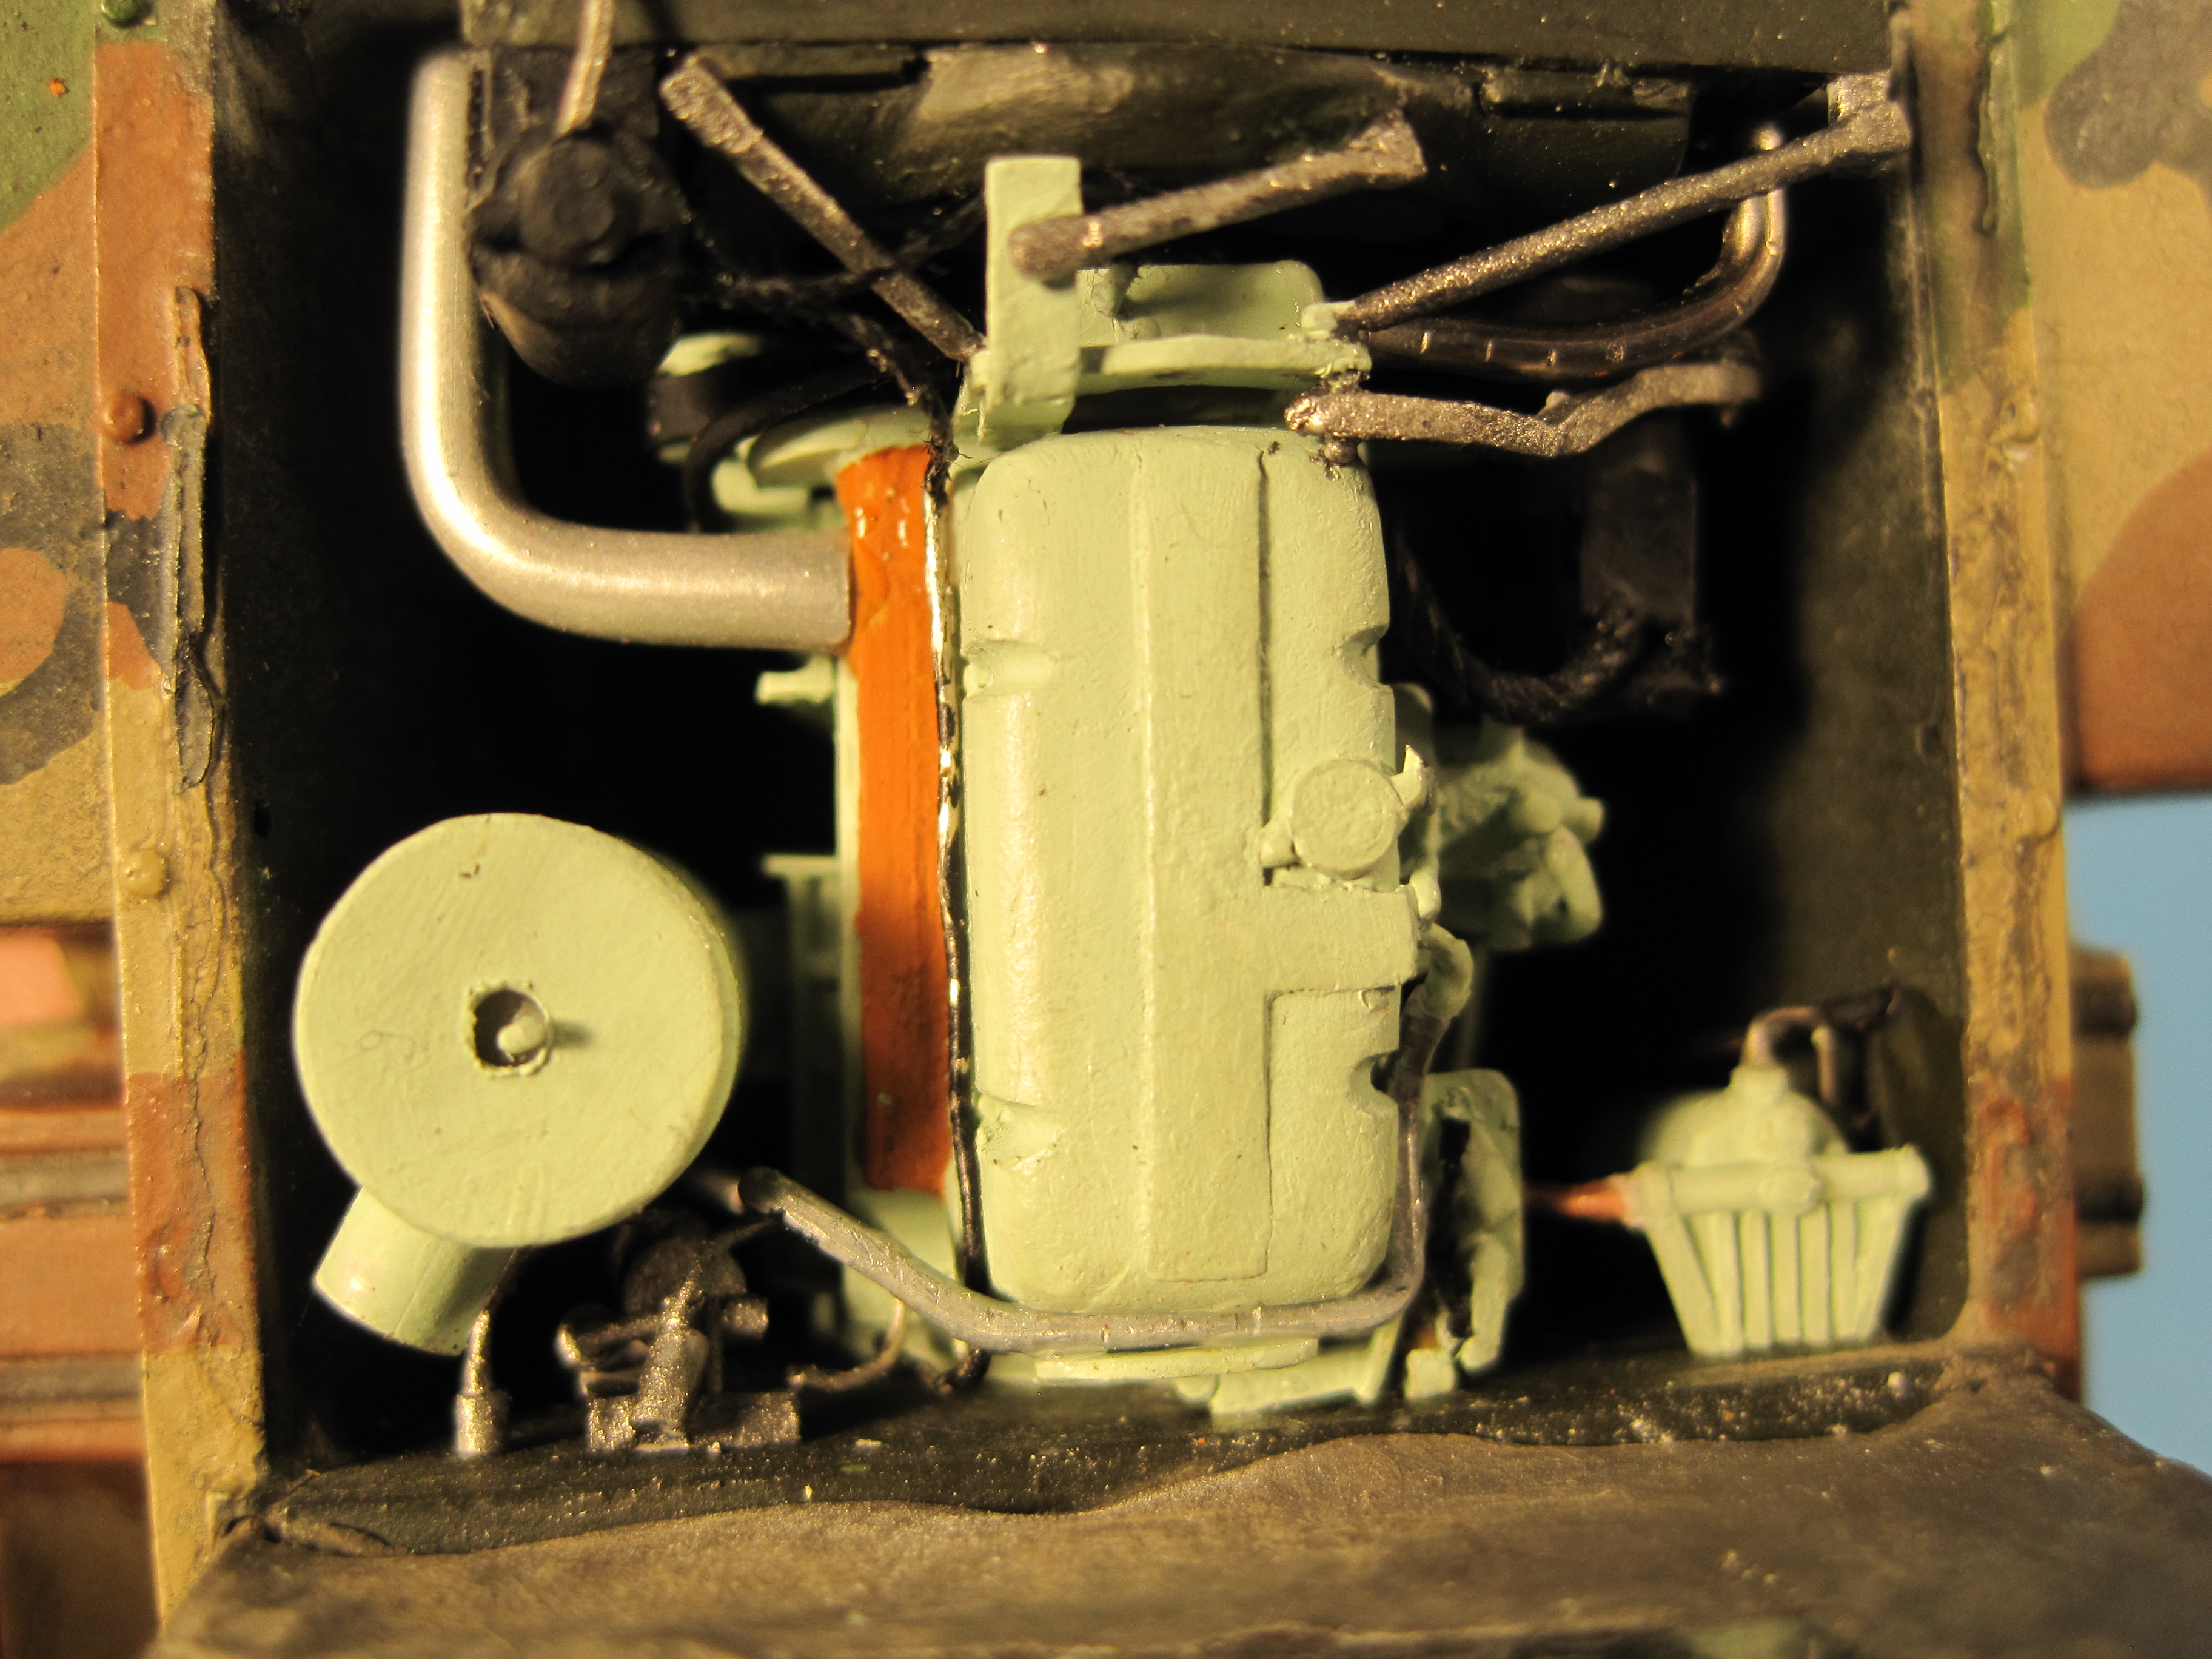
And today’s installment, as Carlos predicted is the M548, the ammo carrier. Each of the 6 howitzer sections had an assigned M548. The older version of the M109 had limited ammo storage capacity, so other than a few rounds and powder charges to be available if the battery had to stop on the move for an emergency mission, or “hip shoot”, the M548 was responsible for carrying the bulk of the ammo each gun was issued.
In our battalion the 6 guns were numbered 3-8, and the assigned M548s were numbered 9-14, so in this case B-9 and B-3 were in the same section.
Standard practice at that time was to place the guns 50 meters apart in a formation known as the “lazy W” with every other gun staggered ahead or behind the next one. The idea was with a 50 meter bursting radius of the 155mm projectile, the placement of the guns on the ground would duplicate the impact pattern of a battery volley and maximize coverage. Guns were “numbered” (Gun 1, Gun 2 etc) from Right to left as you faced forward and while howitzers always kept their bumper number, WHERE they were placed in the line had nothing to do with bumper number. There was always a competition within sections for the honor of being the “base piece” which was usually Gun 3 across the front. Guns 3 and 4 were designated “center platoon”. The two best sections were generally placed in Center Platoon, because at that time, when a fire mission came in, until the final data to hit the target was reached, we would shoot two guns (from the middle of the battery) and keep adjusting until they were on target, and then the entire battery would all fire on the same data. For that reason, those two sections always had more ammo than the others, and were expected to be the best performing sections.


11 Likes
Another nice piece. Great job on all of them.
1 Like
Thanks Gino!
That looks great! Do you have MASSTER patterns for most all vehicle types in the battalion? And some other types as well?
And be nice about us grunts and map reading. It was more than just “WTF am I?” 
And thanks in advance for the antenna base. I’ll let you know when it arrives.
Carlos, you know I’m only pulling your chain!
The answer to your question about patterns is yes, there is a 38 page document with patterns covering 12 different vehicles and a couple of trailers, which I will be happy to make available to anyone who’d like it.
But the story of MASSTER and this set of patterns is a lot more involved than you’d expect, and I find it interesting. For those of you who have heard this story before, I apologize but I’m sure some of you haven’t heard it before.
USAREUR issued a document in April of 1966 directing tactical vehicles be painted. The initial instructions were pretty vague telling commanders to basically design their own patterns consisting of three or four color combinations with a “large dark pattern area” of color number 30045 (think Tamiya XF 10 Brown) a “large light” pattern area" of color 30219 for fall and winter, (think Tamiya XF 52 Earth) and color number 34127 for spring and summer (think Testors 1714 Forrest Green) meaning repainting one area twice a year, and “one or two disruptive pattern areas” one of color number 34102 (think Tamiya XF 58 Olive Green) and color number 34052 optional (!), (think Model Master Acrylic 4724 Marine Corps Green).
These are nothing like what MASSTER wound up like and these directions would have resulted in a HUGE variety of shapes and designs! And nothing was done with this for a while.
The next step came in November of 1966 when another directive was issued by USAREUR which now specified that there were to be Color 1 (large dark with a formula for mixing several colors but pretty much a dark brown), Color 2 (large light again with a mixing formula but pretty much a light/med green), Color 3 a small green, and Color 4 as small black. The idea of changing one area on a seasonal basis was now “being studied”. The letter goes on to specify the percentage of the vehicle to be covered with each color as follows: Color 1 34%, Color 2 37%, Color 3 20 % and Color 4 9%.
How are you supposed to figure THAT out??? It gets BETTER. The letter goes on to provide the following pattern,
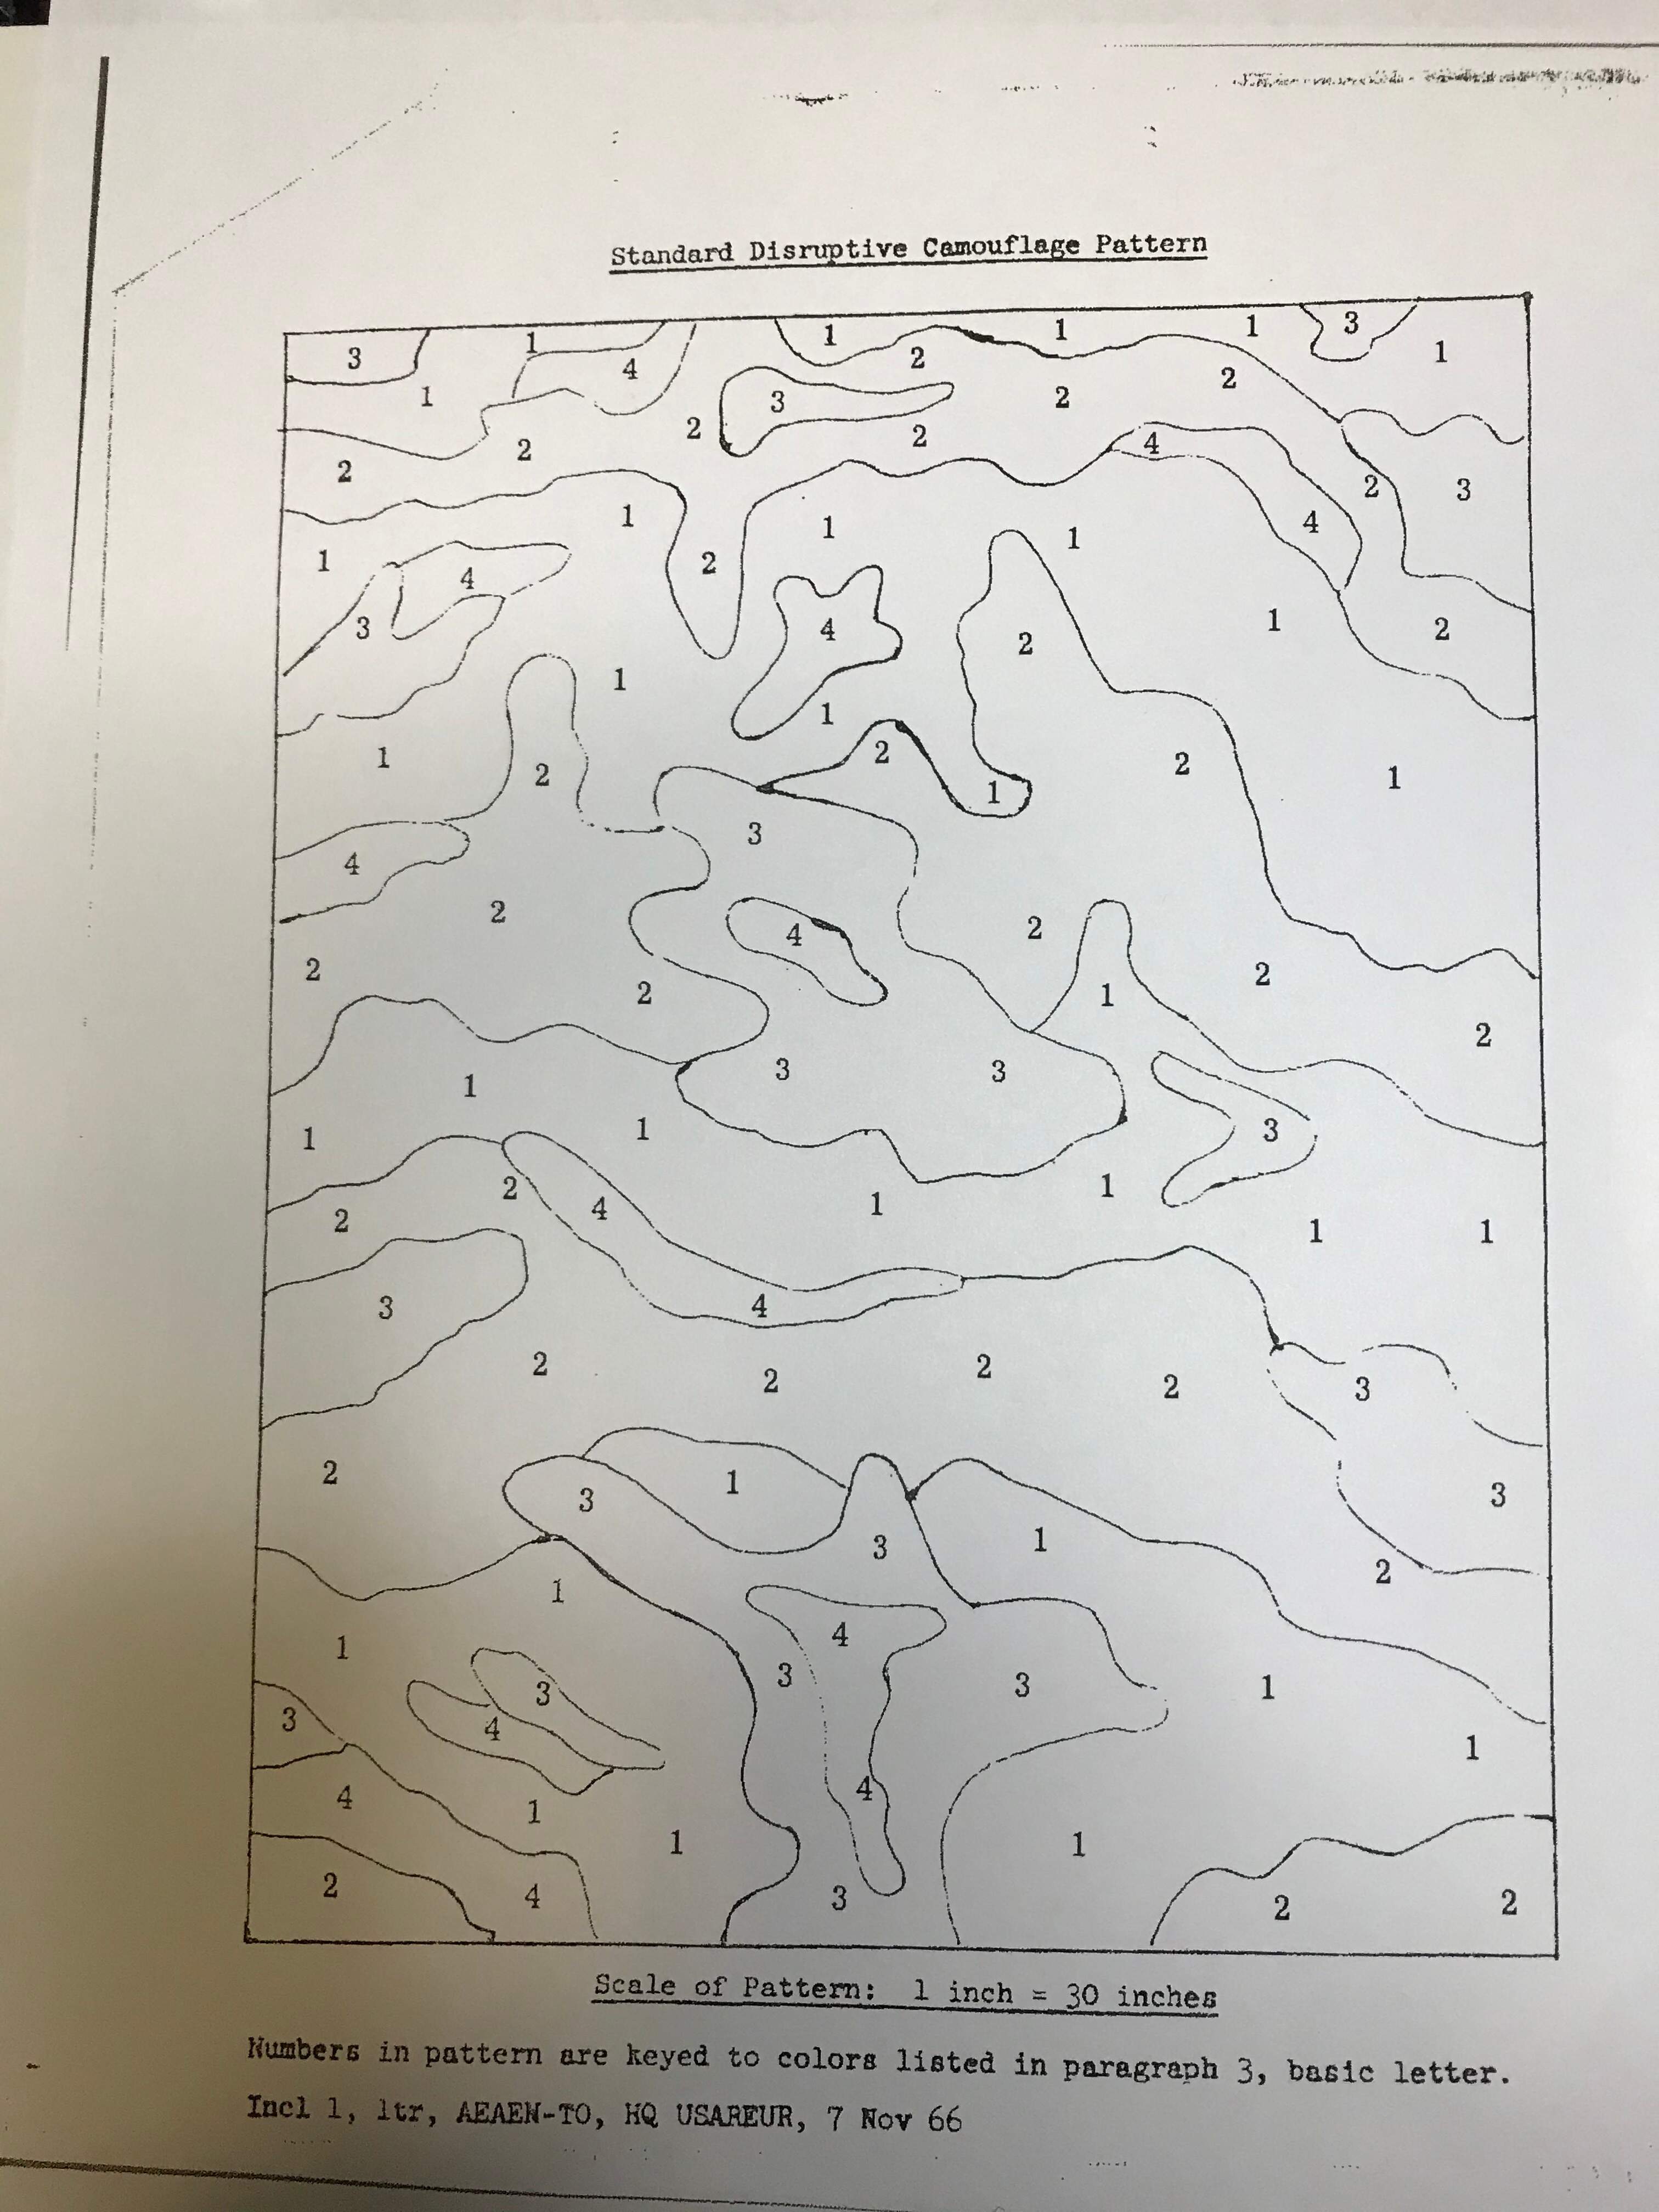
Along with the following directions:
1 Prepare a 1 inch equals 30 inches scale drawing of the vehicle to be painted.
2 Superimpose the pattern (above) on the scale drawing
3 Using the scale drawing as a guide, draw chalk outlines freehand on the vehicle or equipment surface.
Can you imagine the reaction in the field to those instructions???
It must have been a real uproar, because not quite one month later the afore mentioned set of drawings was created and distributed with a note stating that these were to be used to save time and effort.
Ya THINK???
So the DRAWINGS were created, but what about MASSTER???
This whole effort had been the result of a visit by the then Deputy Chief of Staff of the Army (some guy named Abrams) to the Commander of USAREUR back in the summer of 1966 but finally was put on hold in March of 1967 to conduct “further studies” with the Corps of Engineers back in CONUS who were also working with the “Modern Army Selected Systems Test Evaluation and Review” group.
There was some back and forth correspondence during early 1967 on finalizing things when everything simply stops in June 1967. Why? I have two suspicions. First of all the 6 Day war happened and USAREUR was suddenly worried about bigger things. And second USAREUR got a brand new CG. Painting wasn’t his baby and I’m sure he told his staff, “Work on something important!”
So the whole thing goes away until late 1972 when NATO decides it’s time to do this again and USAREUR decides to kick things off again in mid 1973. In the MEANTIME, the COLOR scheme got changed to the familiar Sand, Earth Brown, Green and Black, which the MASSTER folks had decided on.
But when they issued the regulation, some smart staff officer at USAREUR found the 38 page, 12 vehicle patterns issued back in December 1966 and decided, hey, let’s just use these.
Sorry for the long involved story, but it just goes to show how funny the process of doing things often works in the Army!!
3 Likes
Excellent work all round Tom; what’s next?
Yeah I figured that you were yanking us grunts’ chain. It’s all good.
Sounds like the folks who designed the original pattern were involved with the old “paint by numbers” sets that they used to sell when I was a kid. Lol! But IIRC, the MERDC patterns were governed in the same manner, depending upon the particular scheme as to which color went with which number.
And I would love to get those vehicle and trailer patterns, if it’s not too much trouble for you. I have several more MASSTER schemes to do on kits in my stash, and the only patterns that I have are for the M151 and the M60.
Now if I can find the experimental patterns that were tested in the 80’s for use as the NATO scheme, I’ll be golden. The best that I can do for those is approximate.
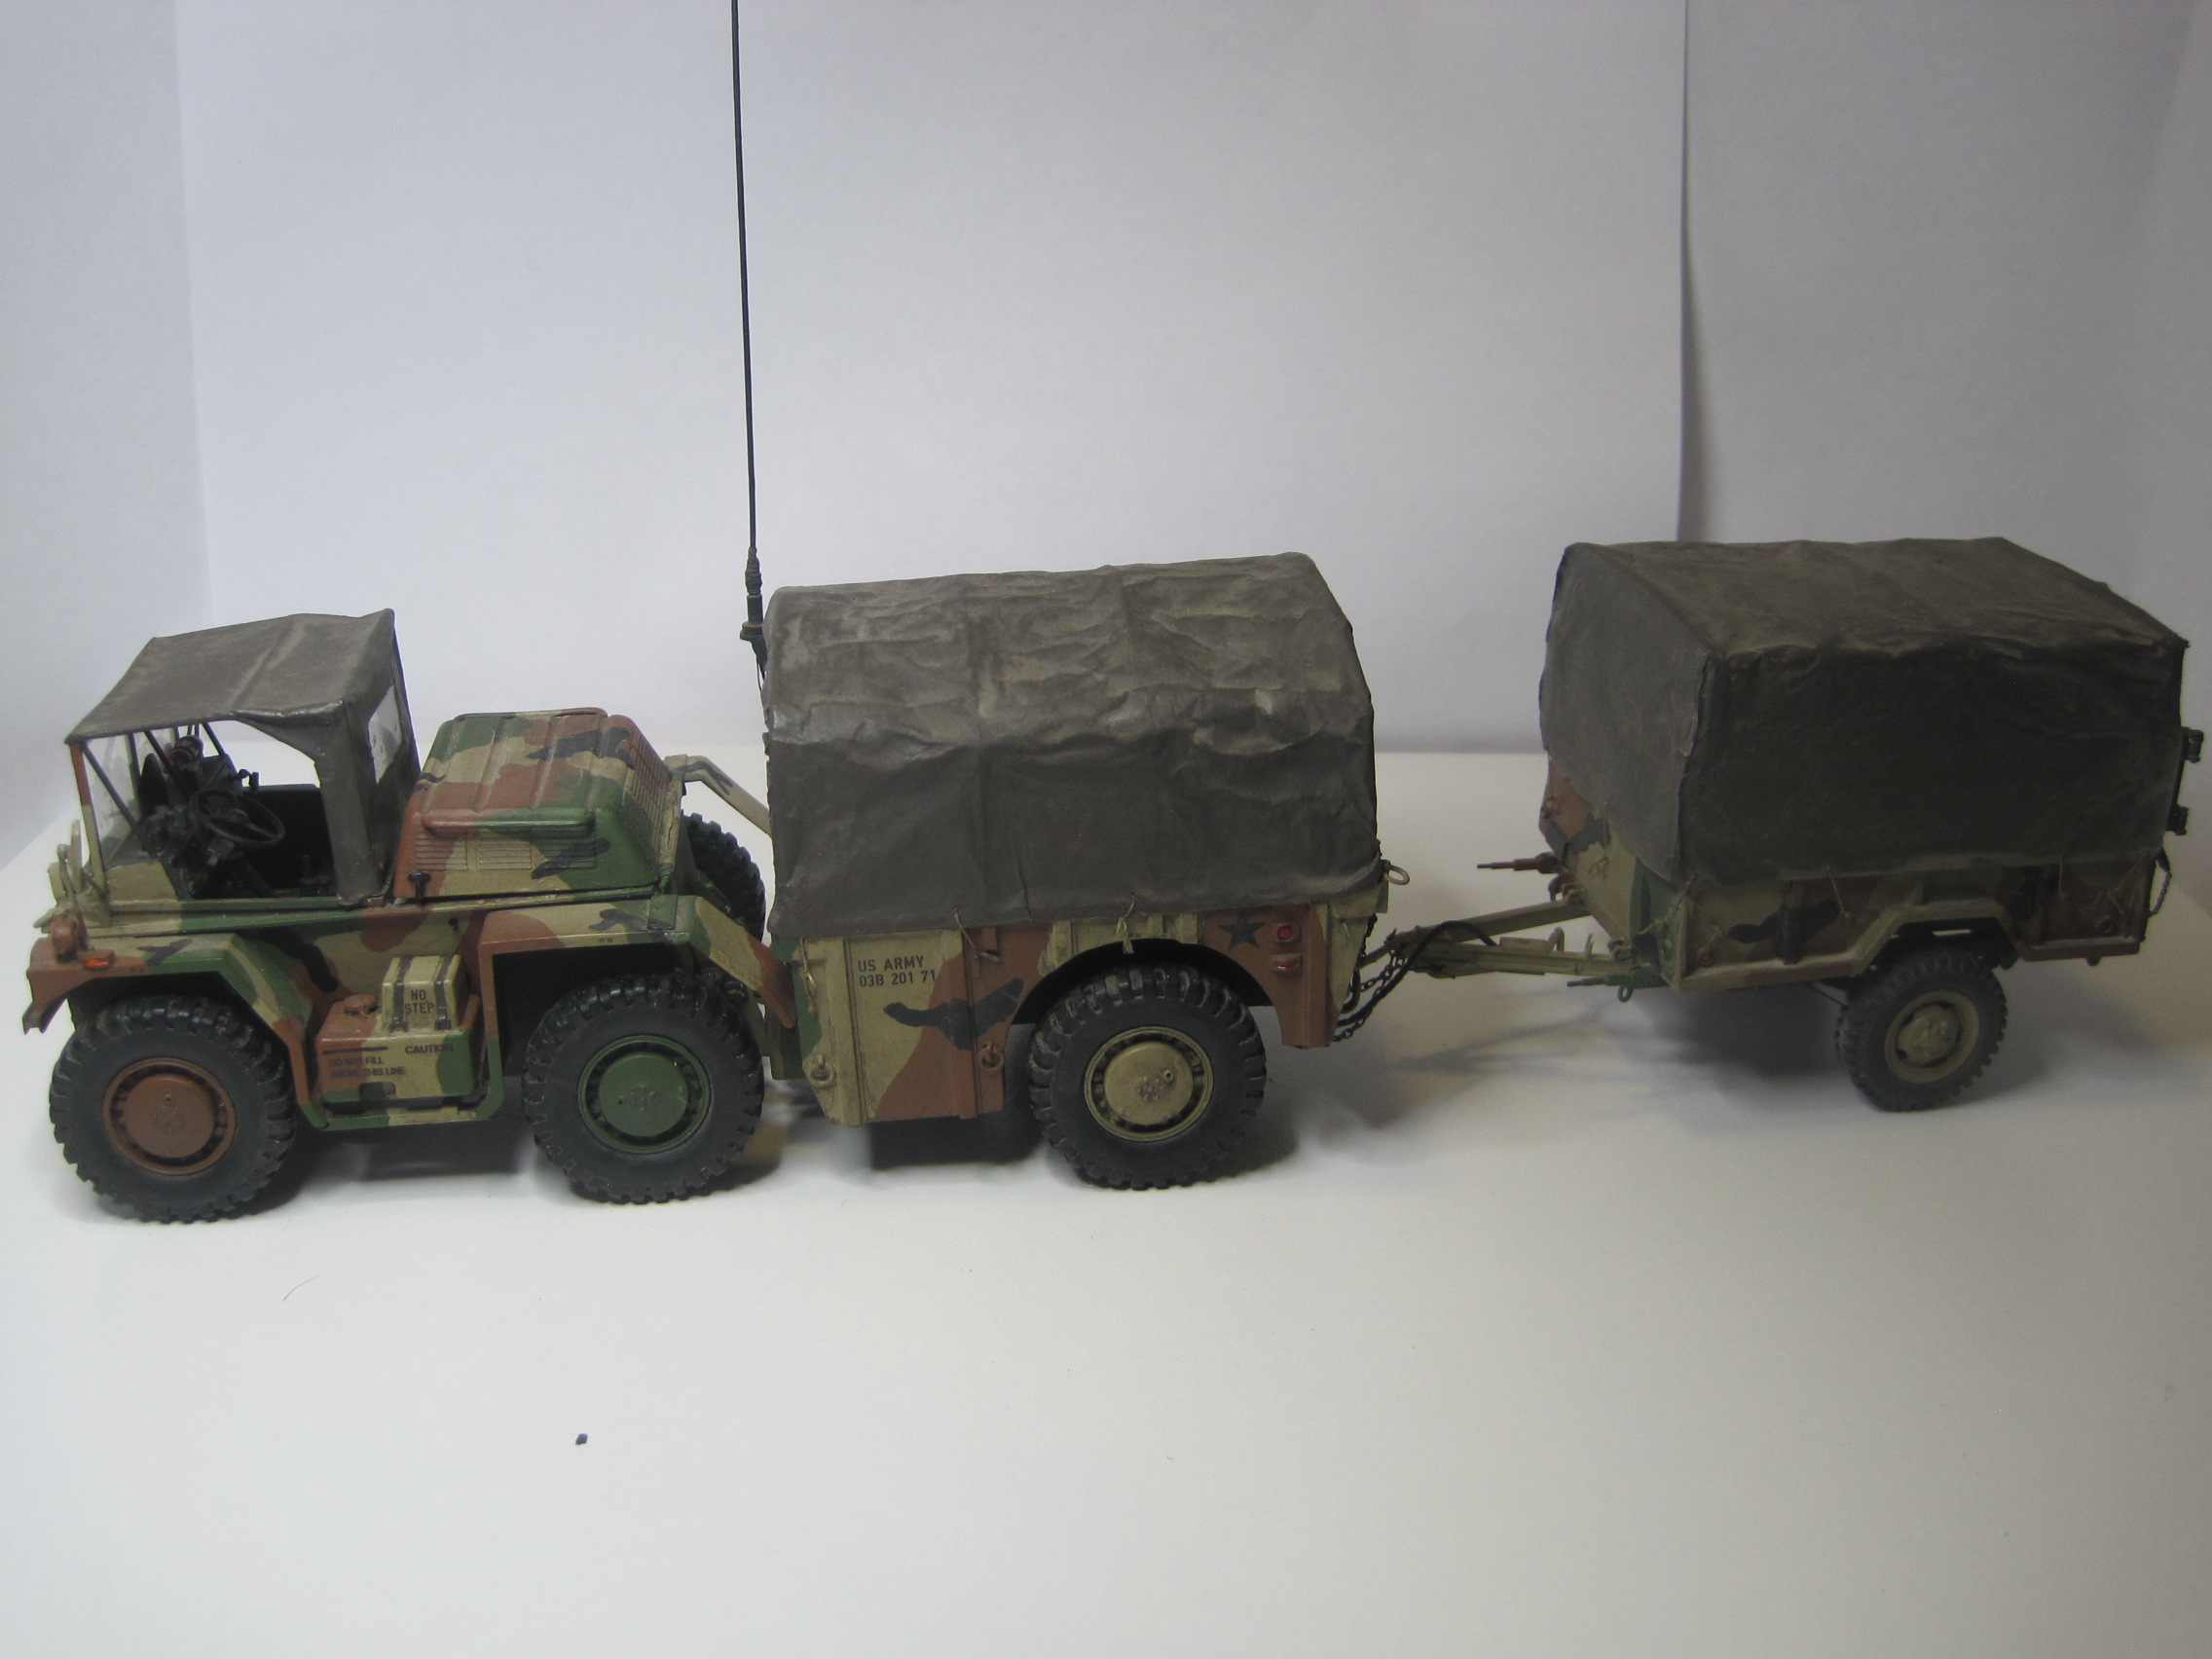
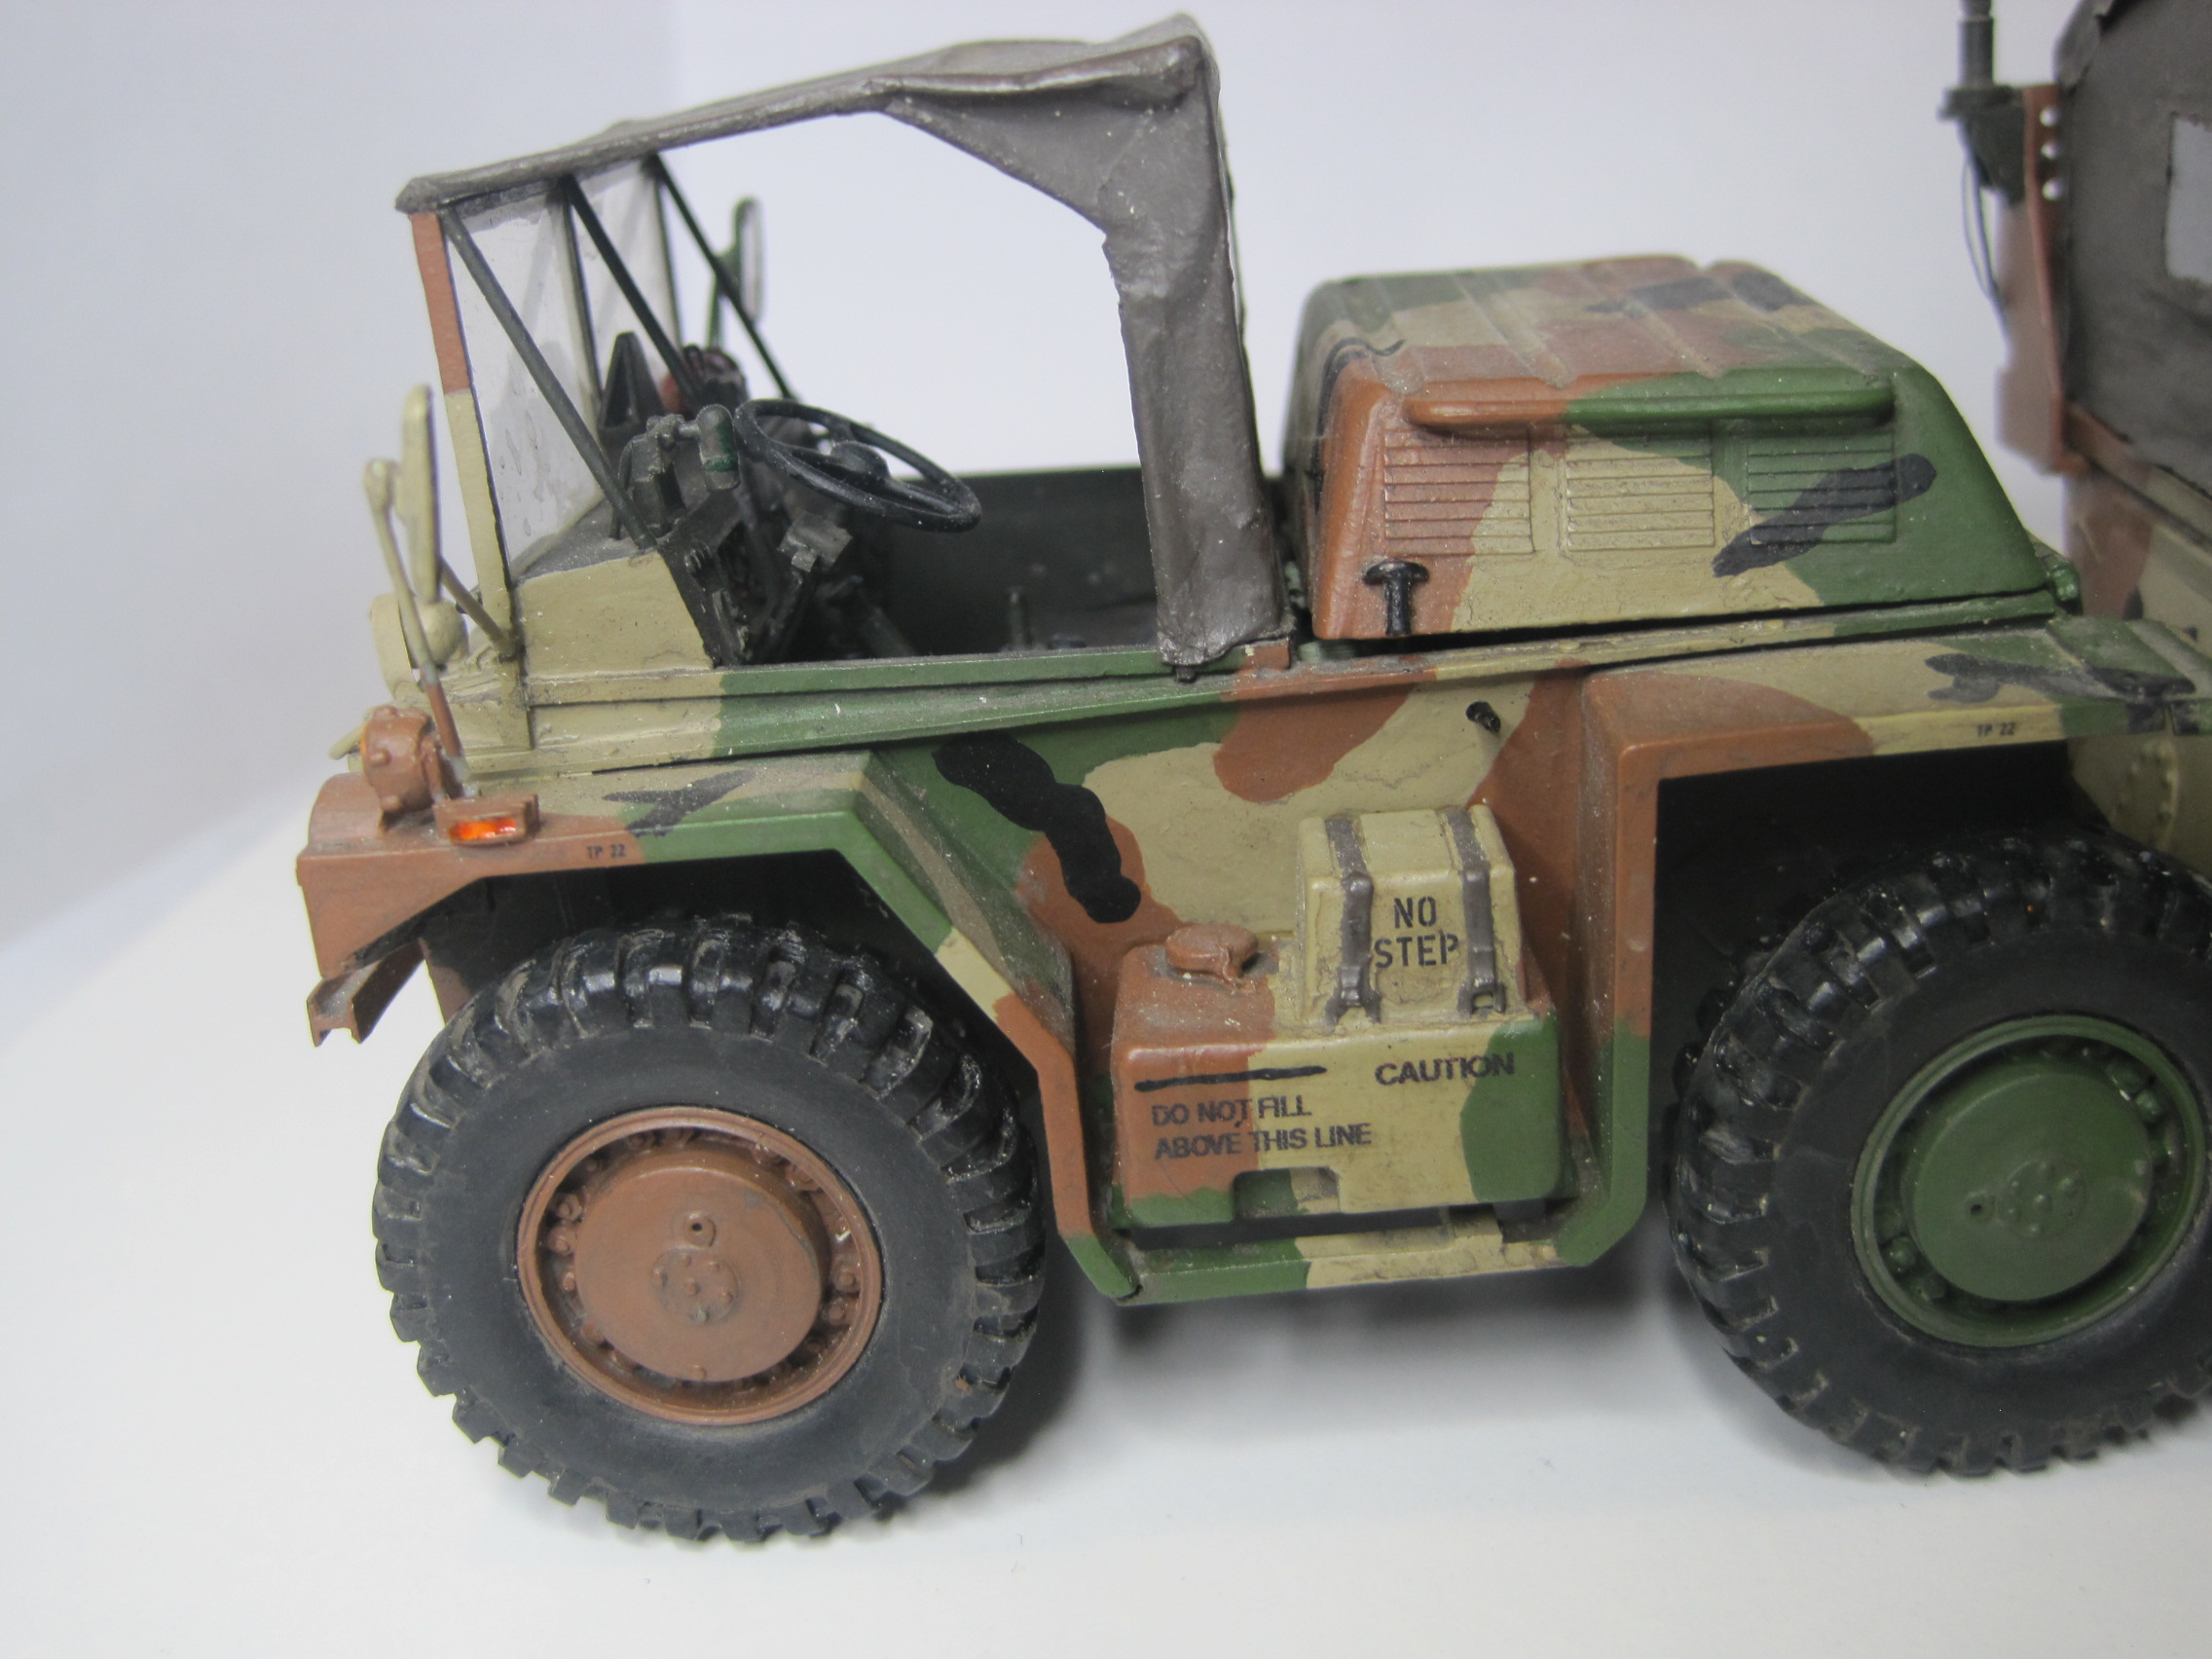
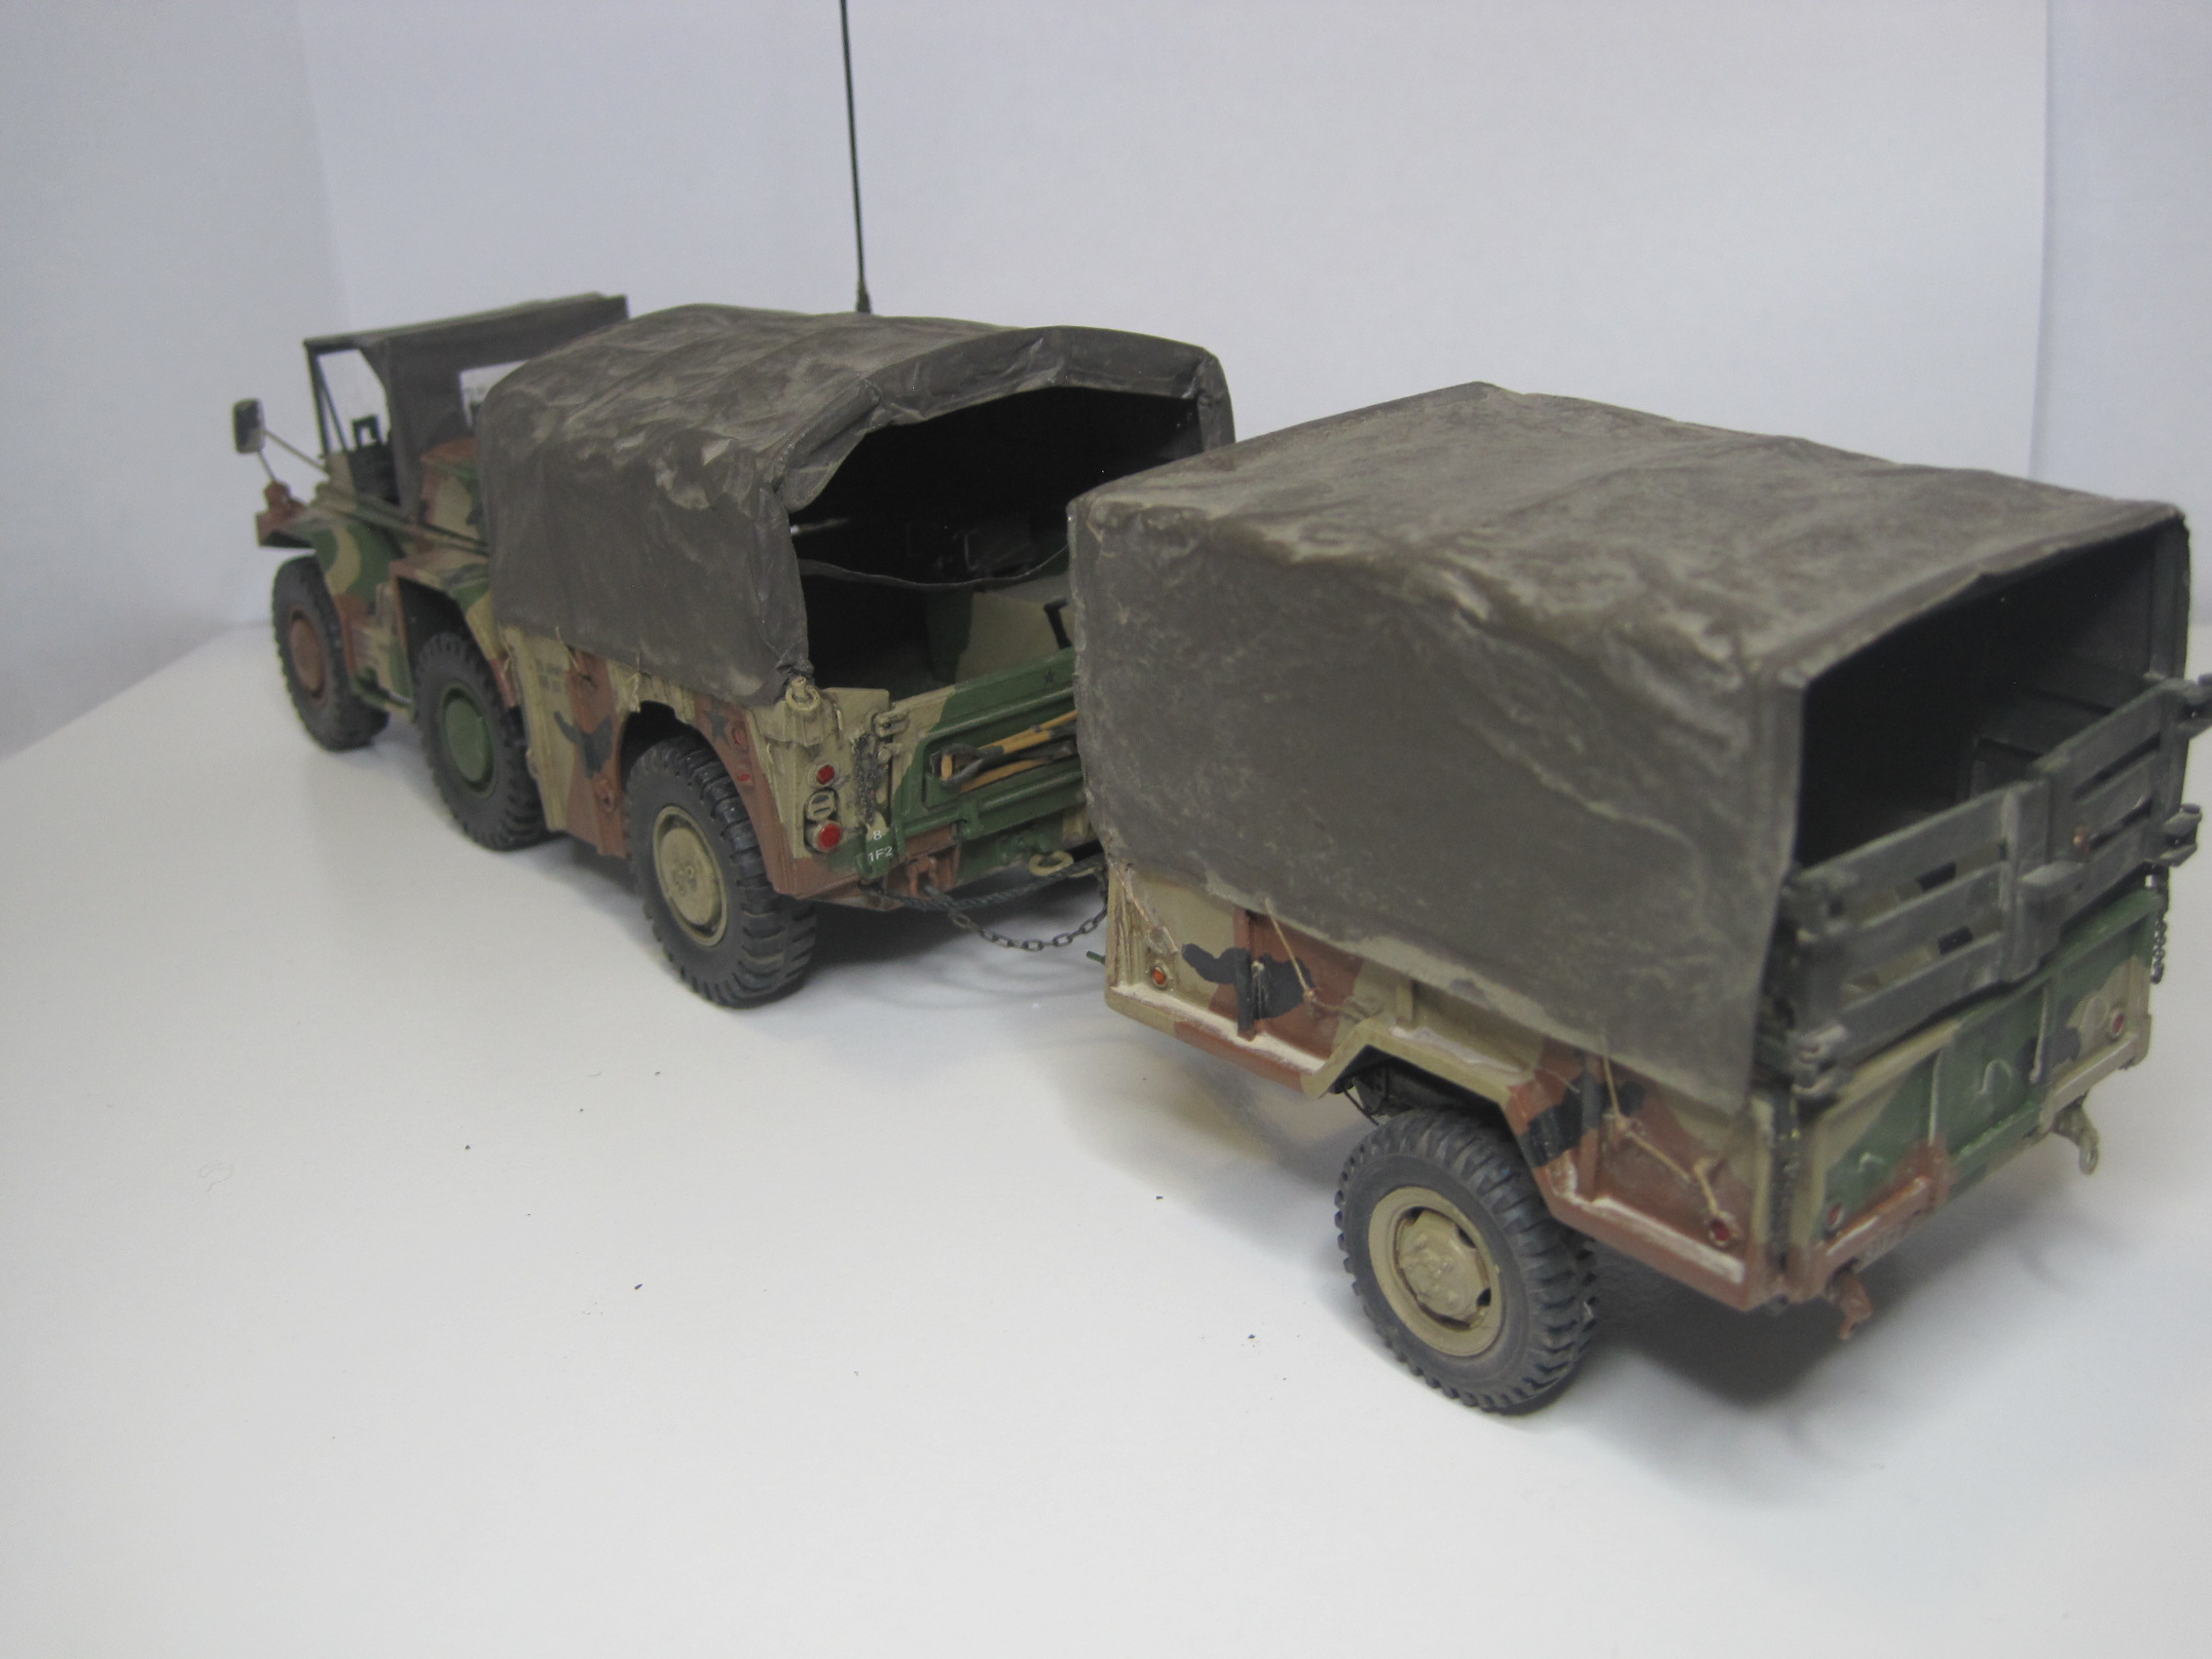
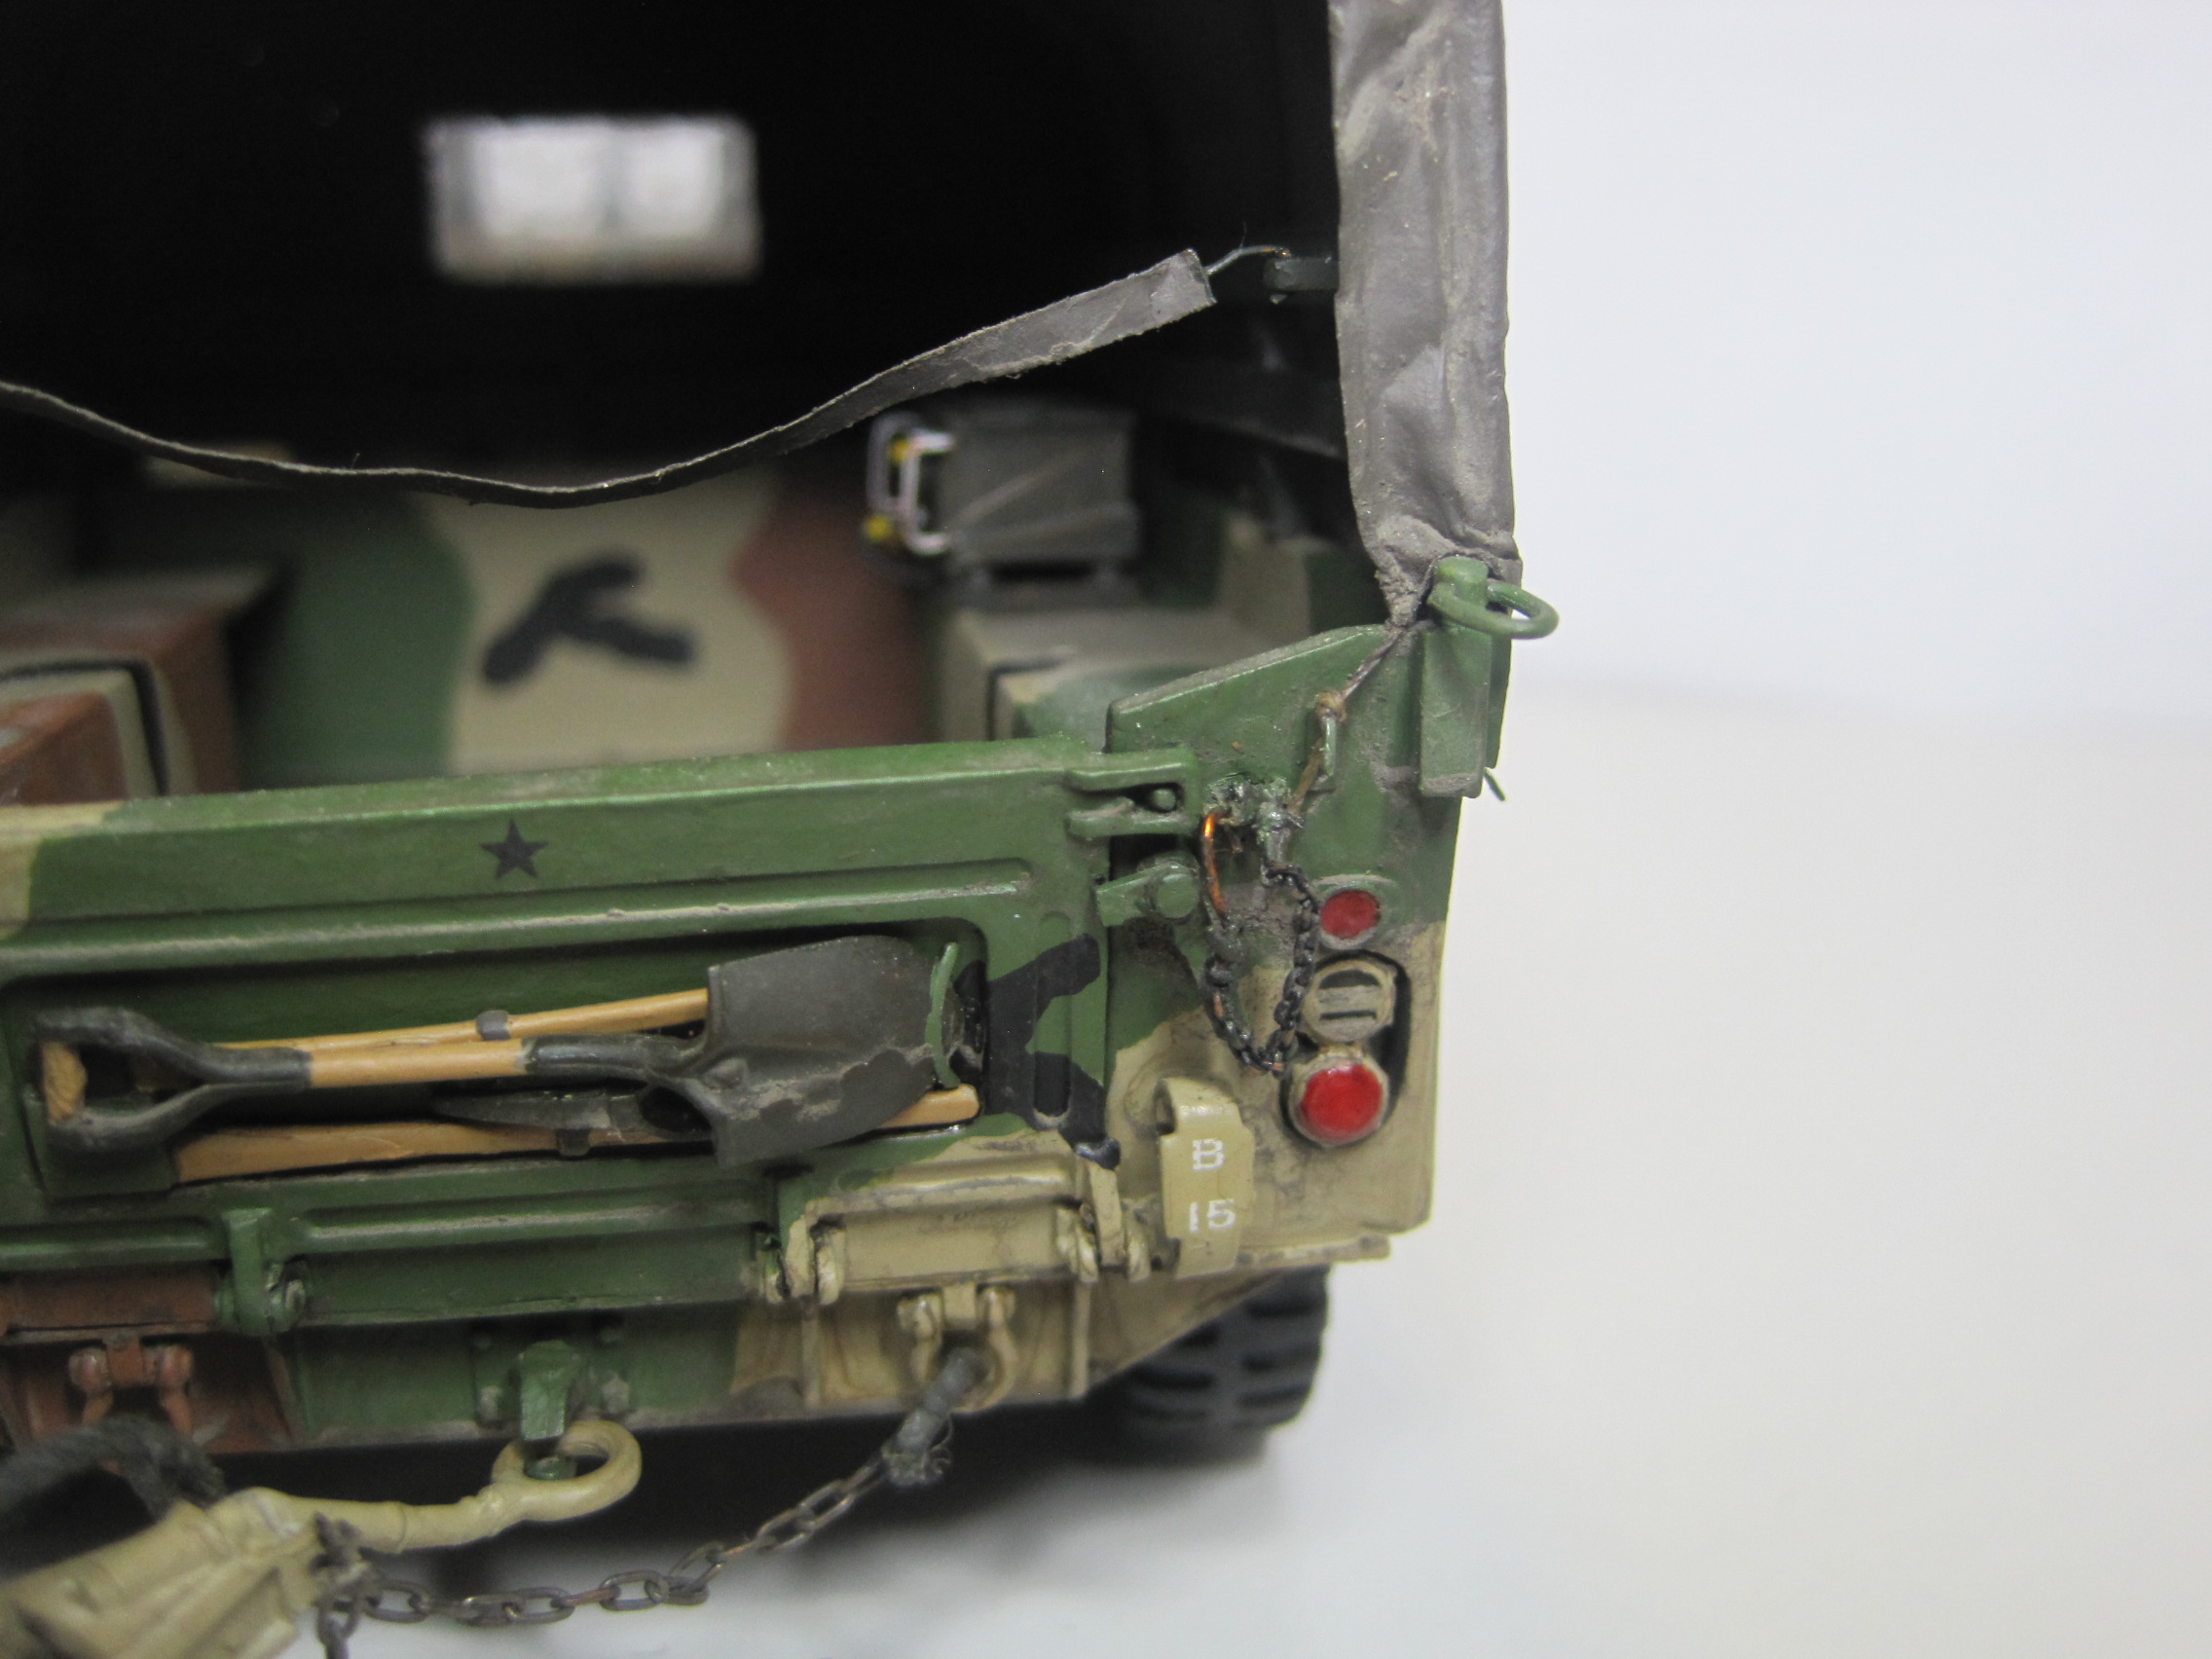
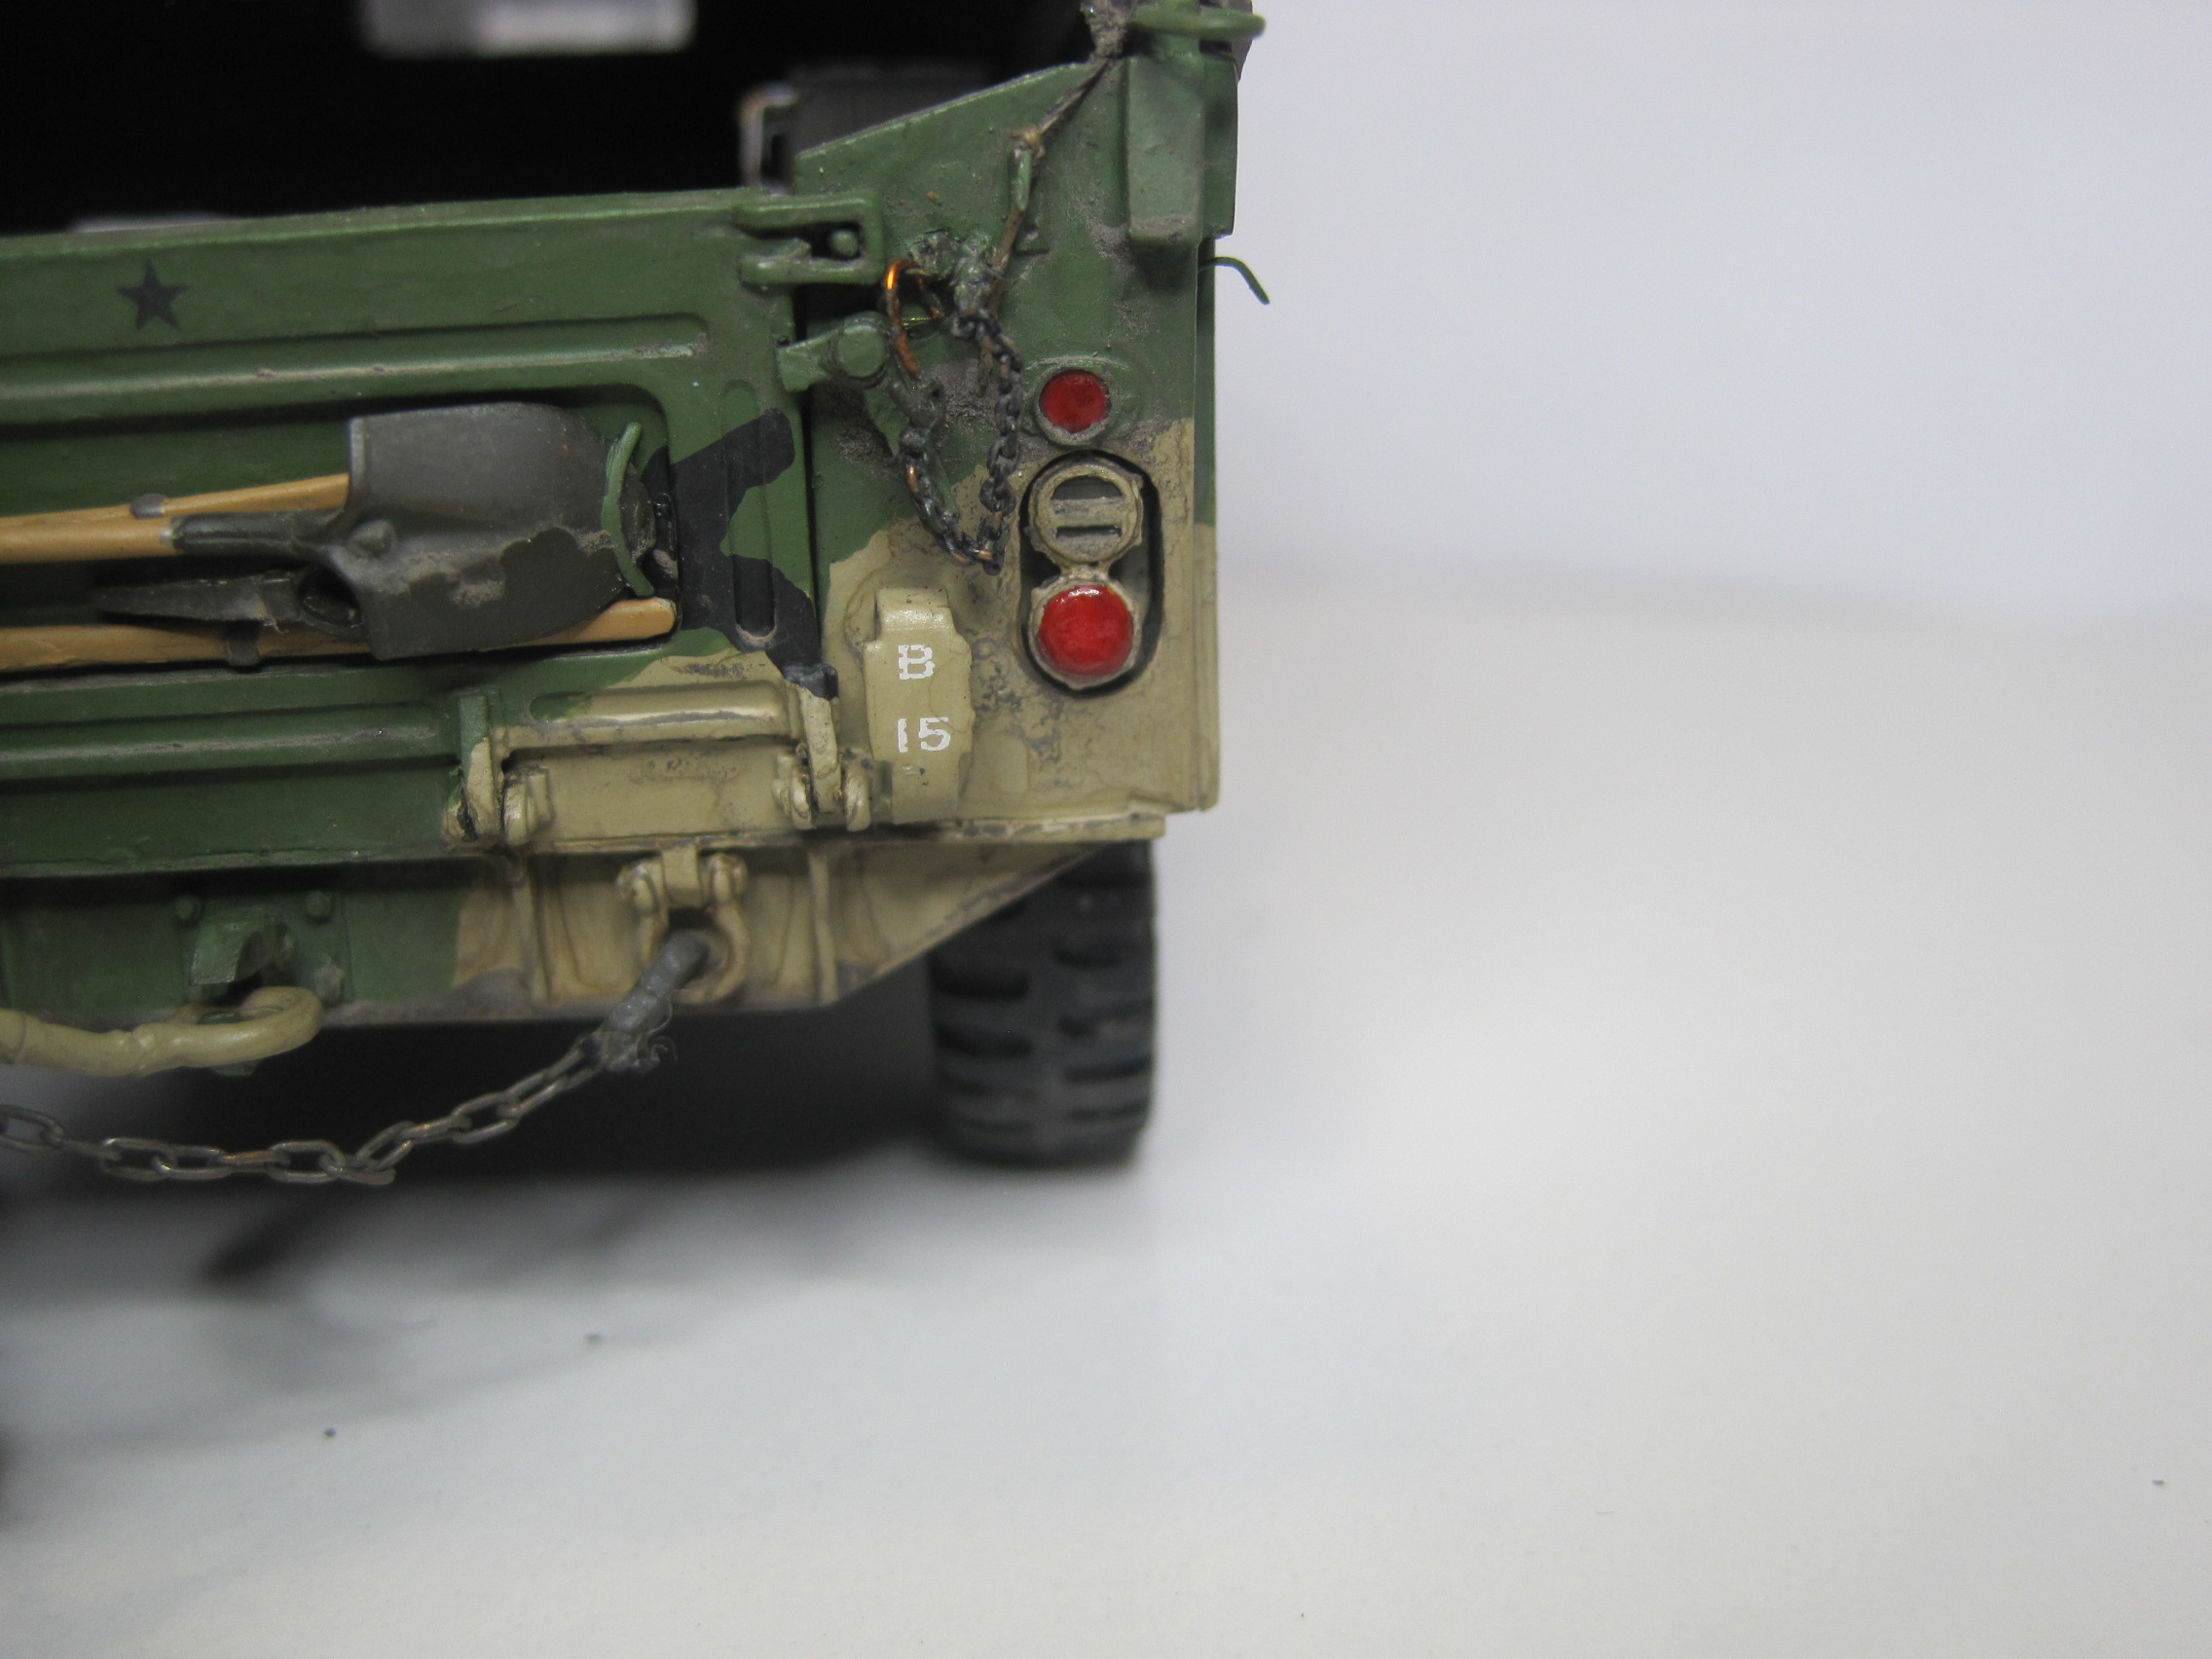
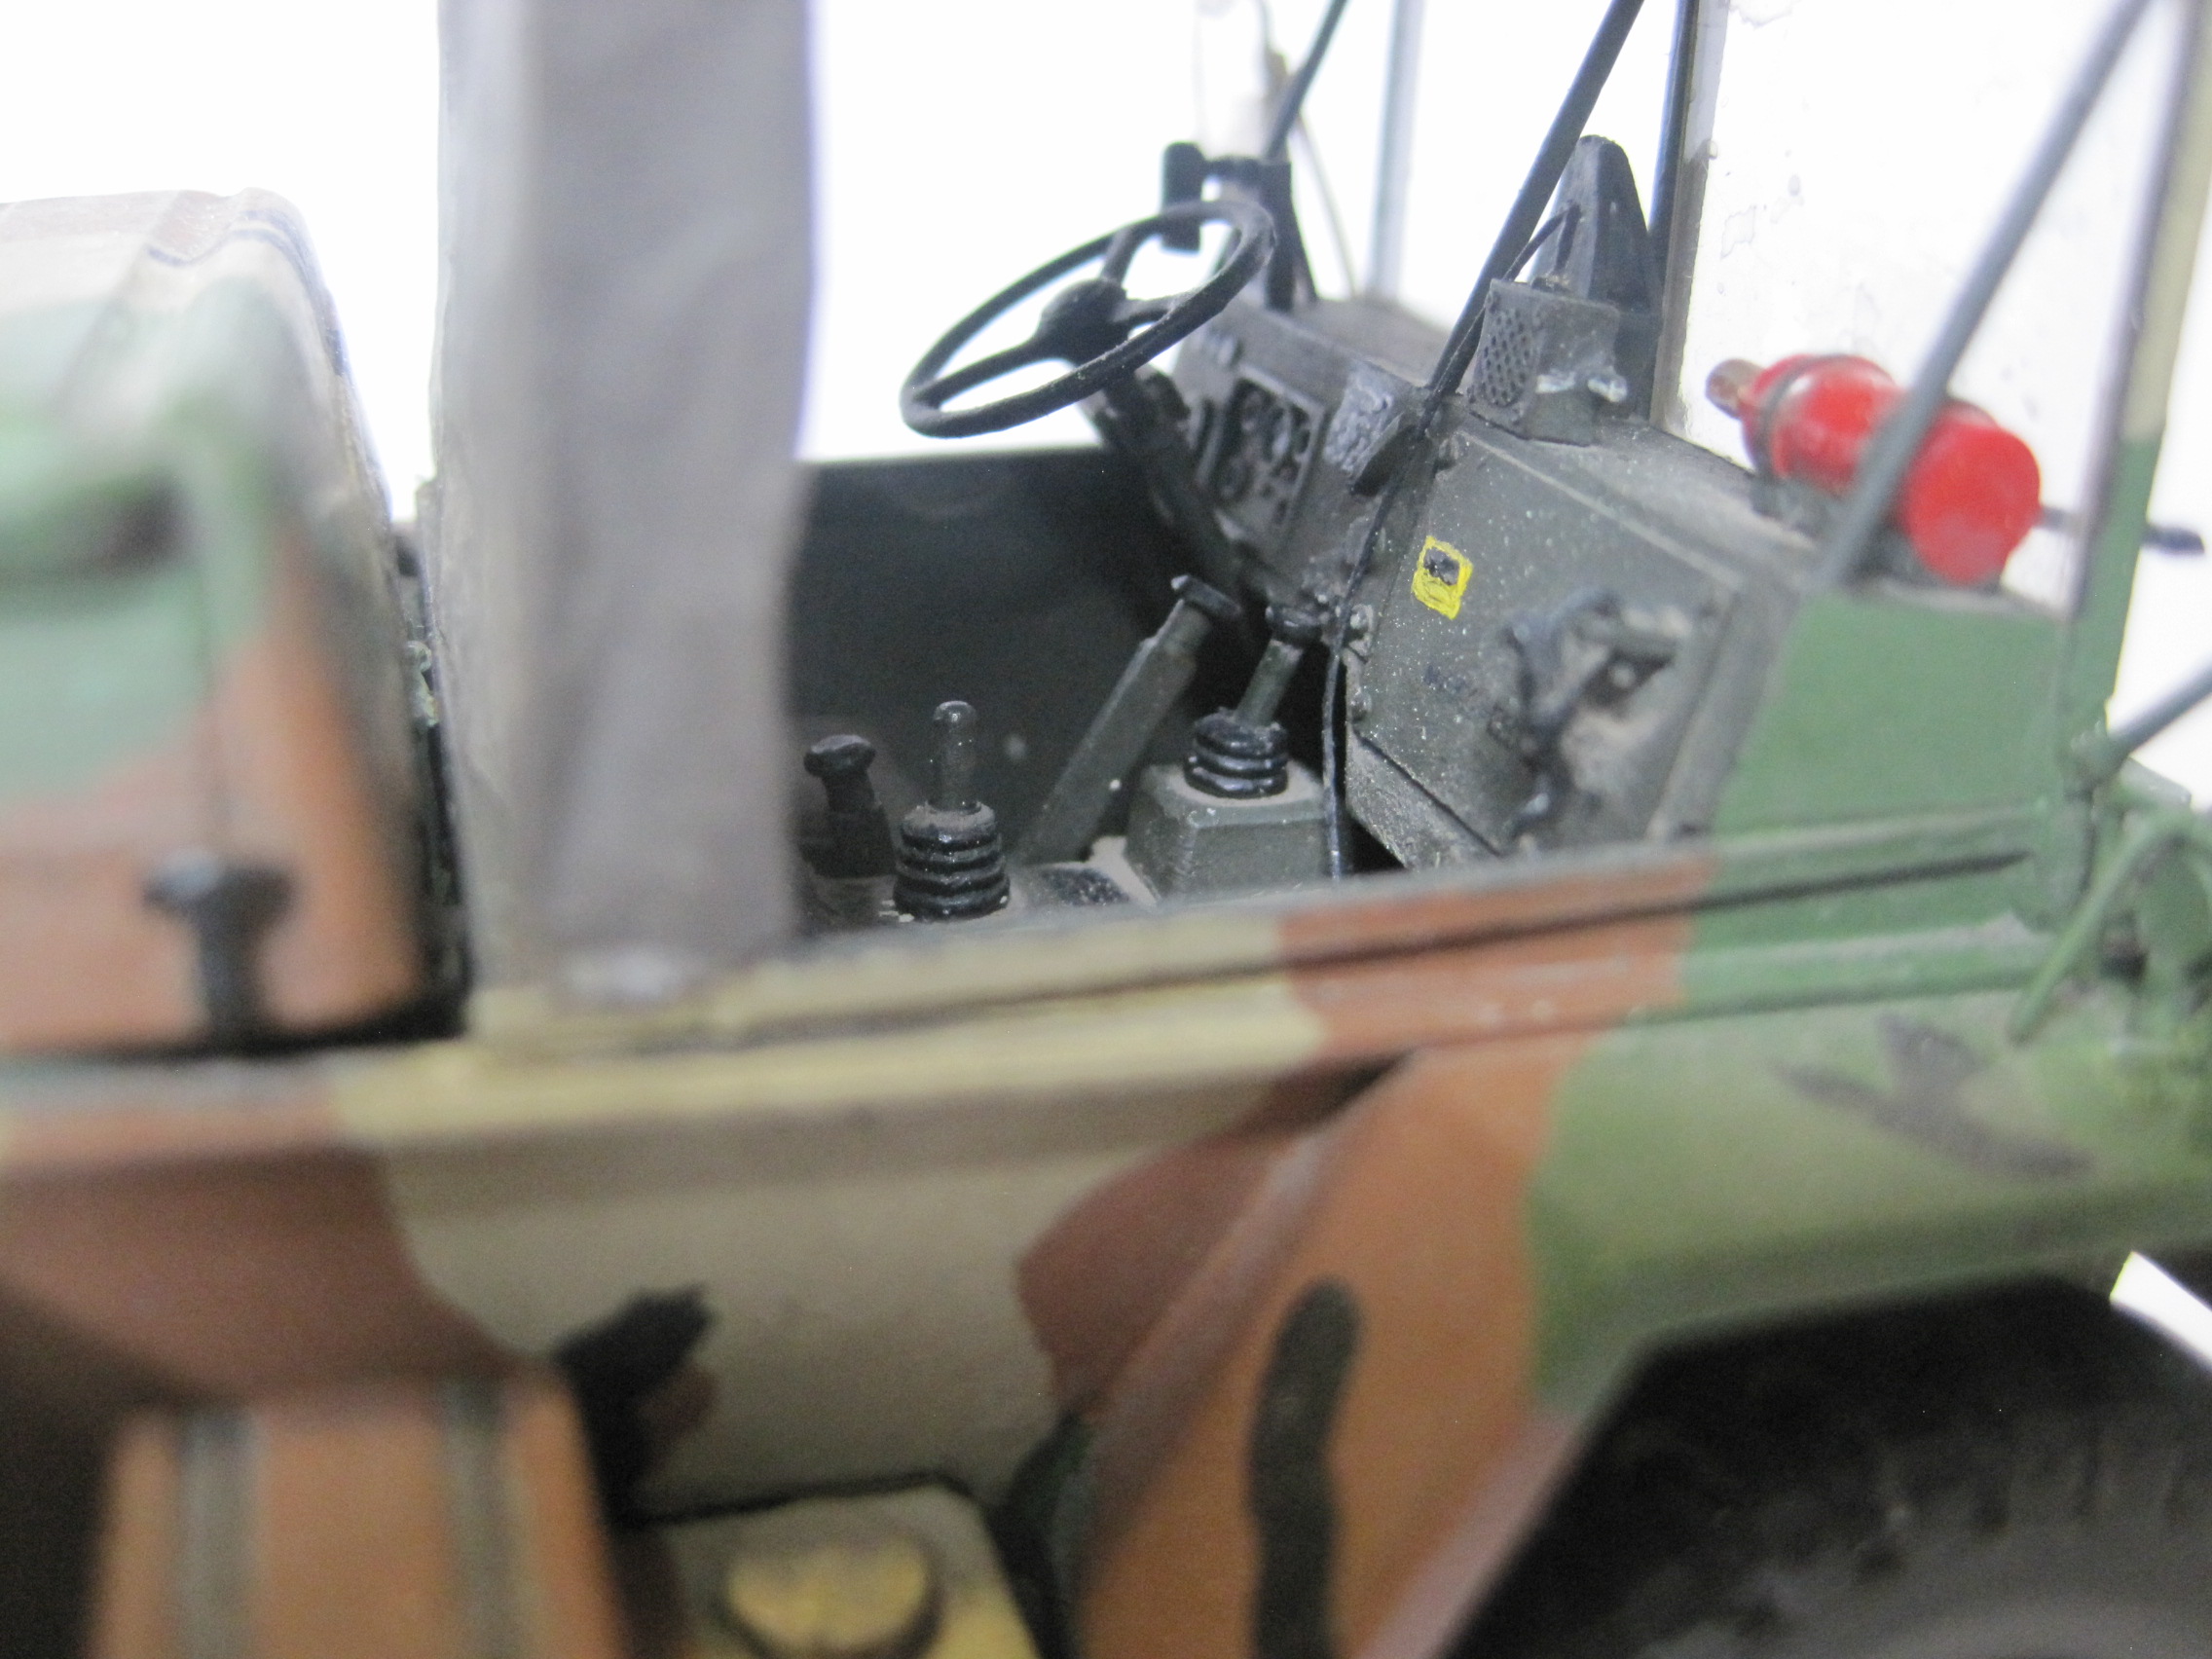
So the next installment in the series is B-15, an M561 Gama Goat, this one assigned as the Battery XO’s vehicle. When I first arrived in the battalion in October of 1972 we were in the midst of a TO&E change and just getting these issued. Originally the XO had been assigned an M151 1/4 ton and in many ways was a more convenient vehicle, but the TO&E took that away and equipped the XO with a Gama Goat.
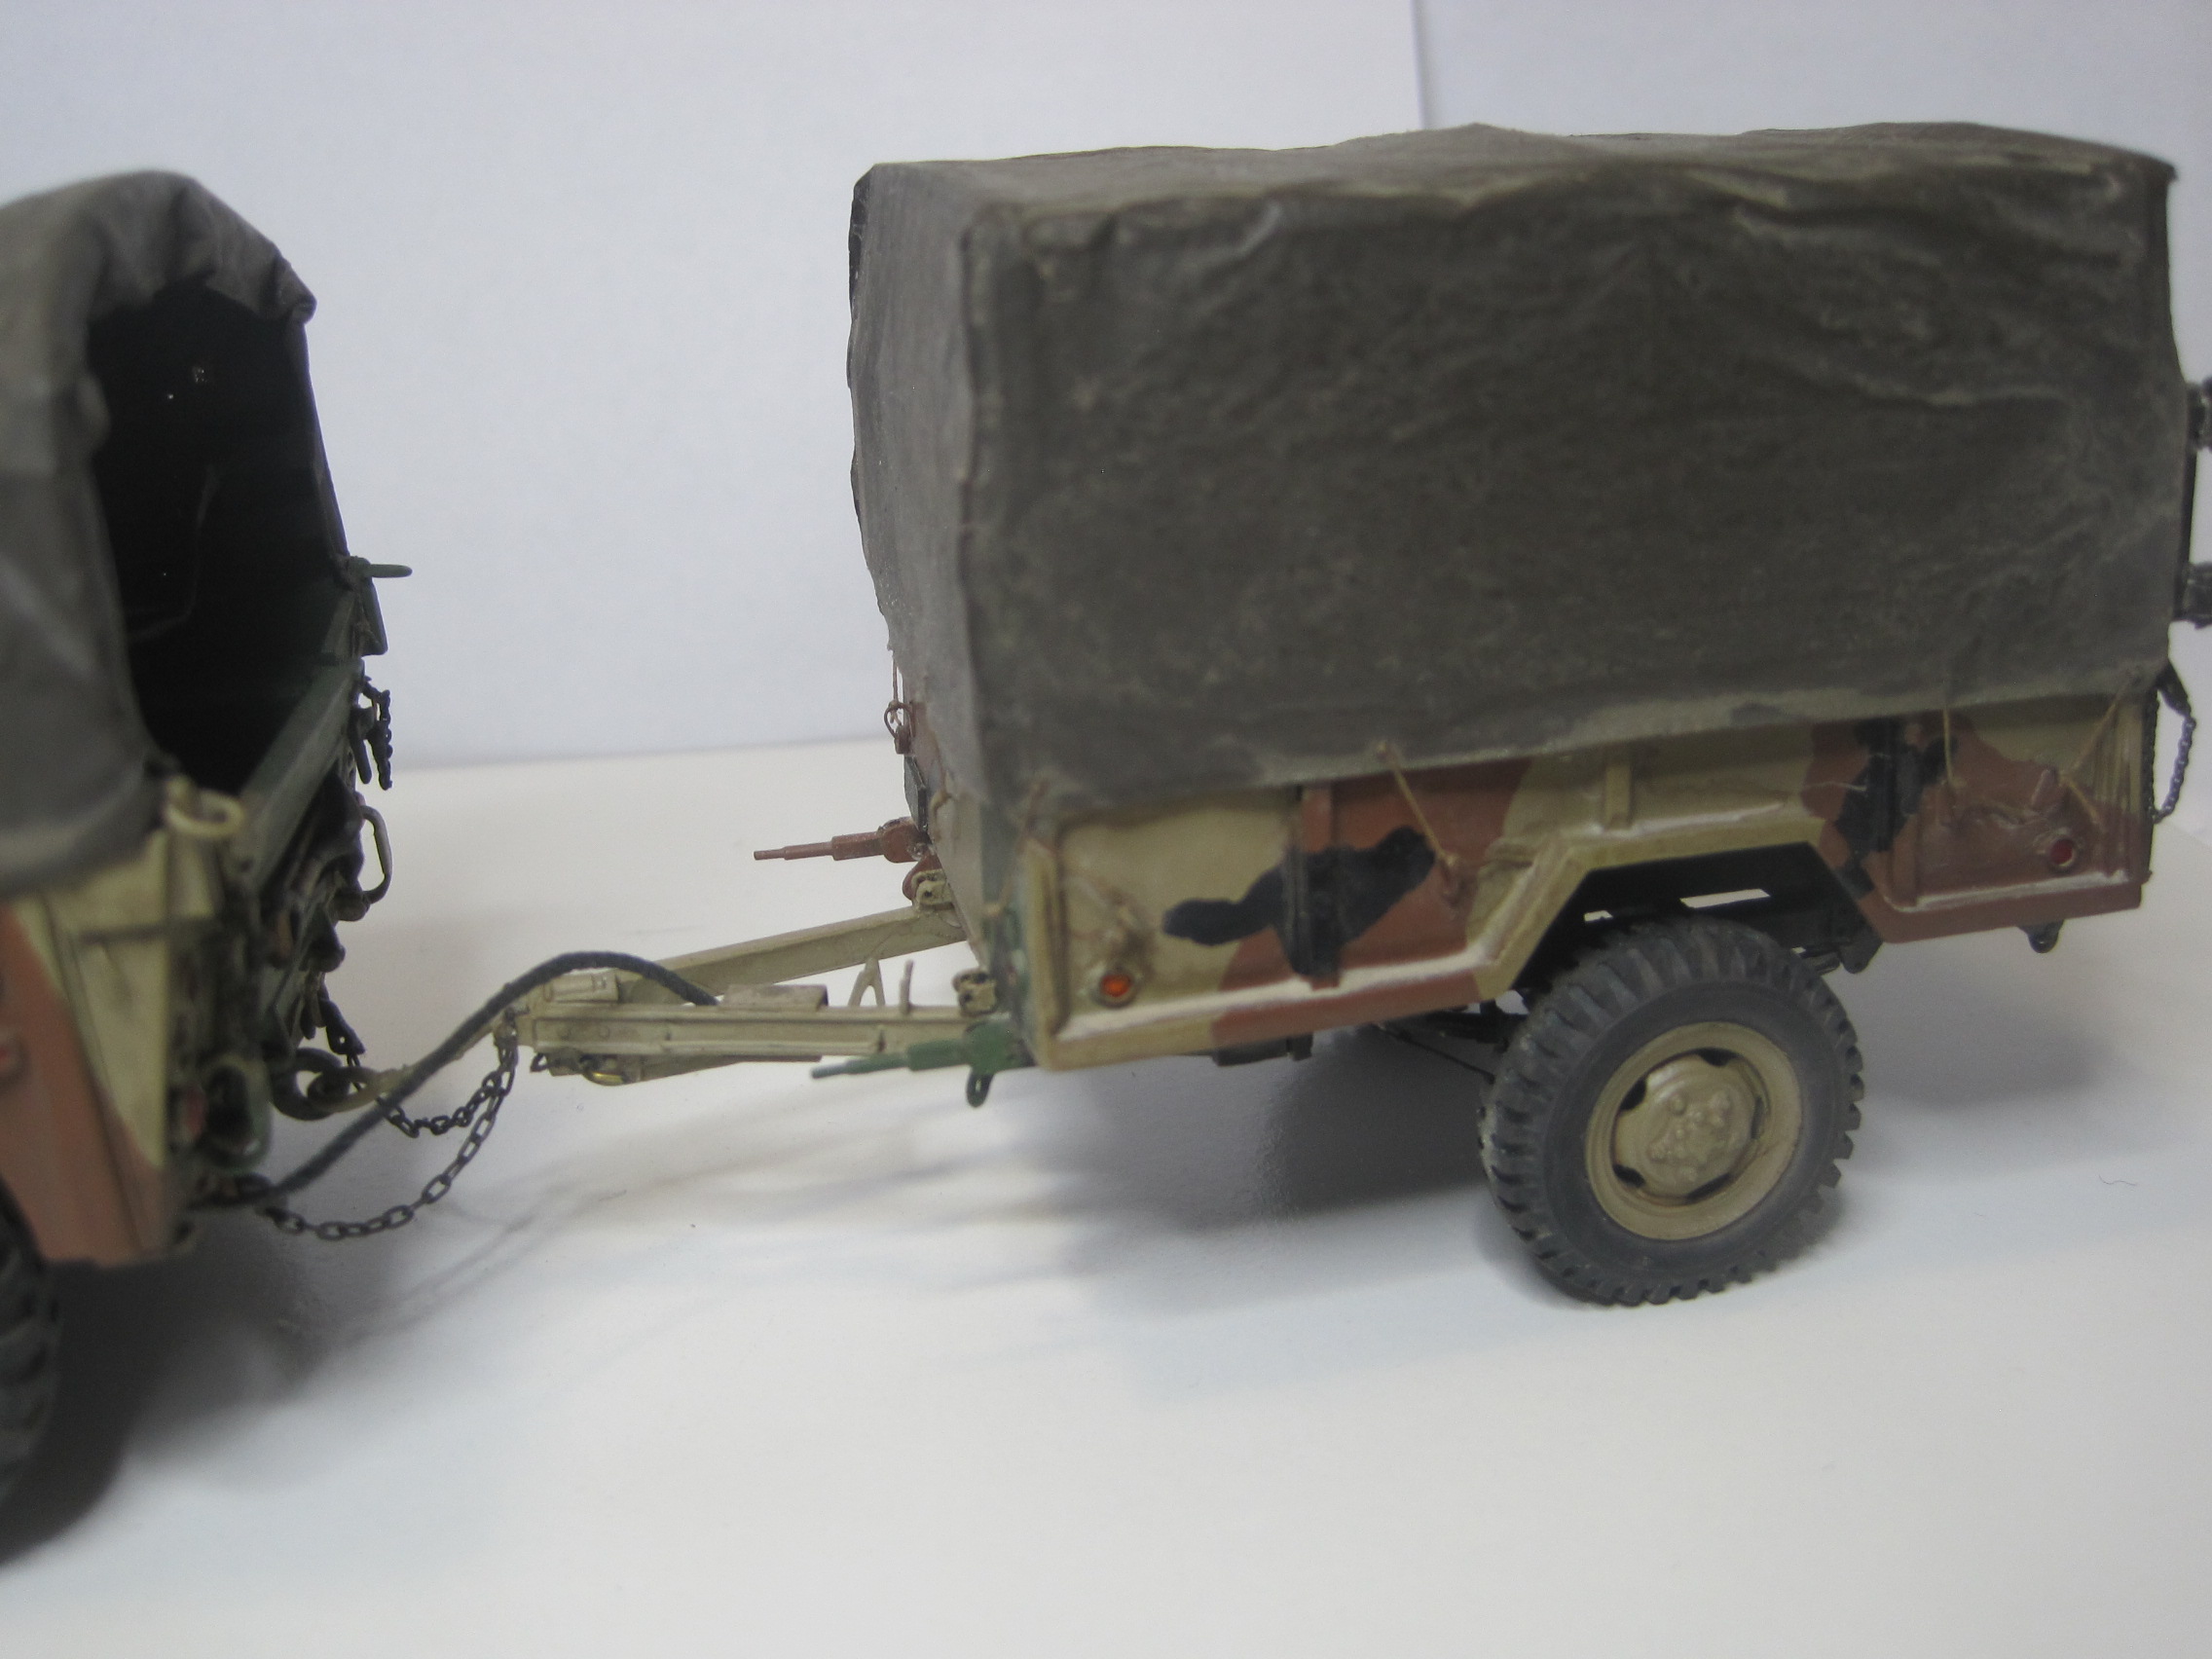
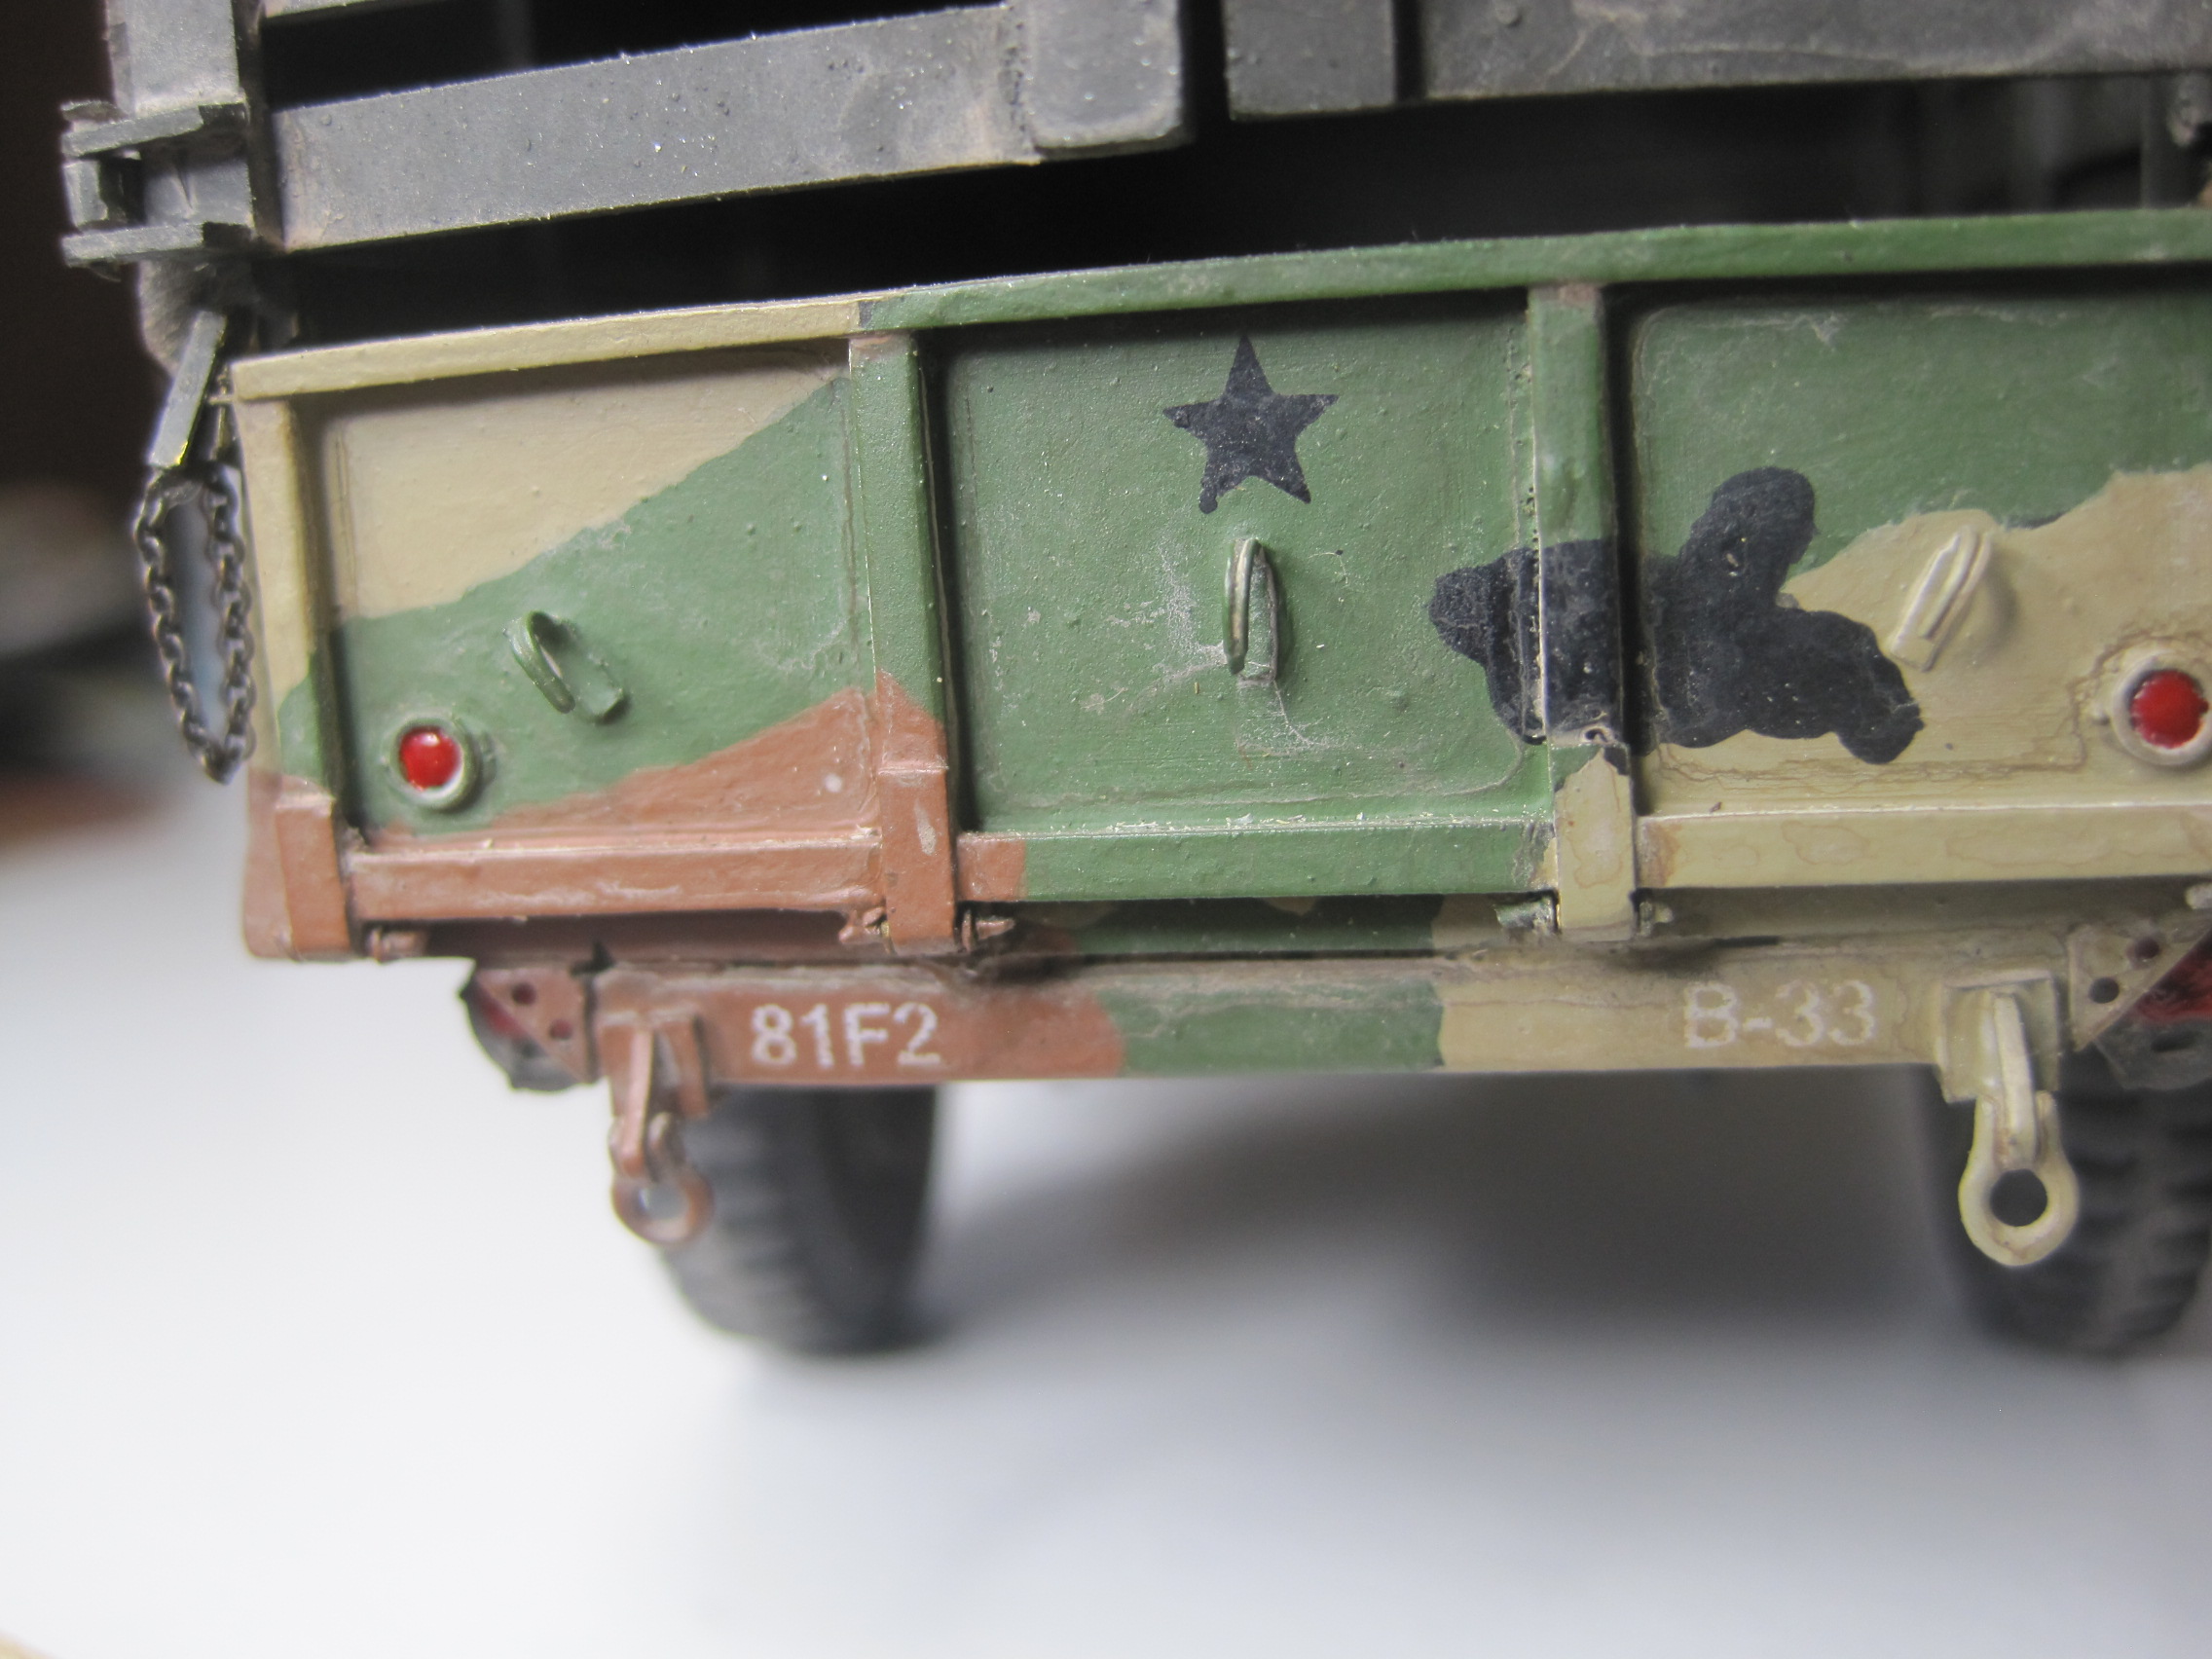
Which he HATED! But despite the fact that there were a couple of “spare jeeps” in the motor pool due to the fact that we were authorized three FOs, (who WERE authorized jeeps), but only had one assigned, the BC said to the XO that’s your vehicle and you’re using it. Eventually the XO figured out that all the sutff he had to take to the field made the Goat a better choice. SO much so that he decided that he needed a TRAILER which he WASN’T authorized. So you’ll notice that his trailer, B-33, is NOT the bumper number that would “normally” be assigned to B-15. So whose trailer was it? The Commo Section. They were authorized two Gama Goats, numbered B-30 and B-32, with trailers, B-31 and B-33, and the Commo section lost out on one of its trailers. You can’t make this stuff up!!
So here’s the XO’s vehicle.
Uploading: IMG_0466.jpg…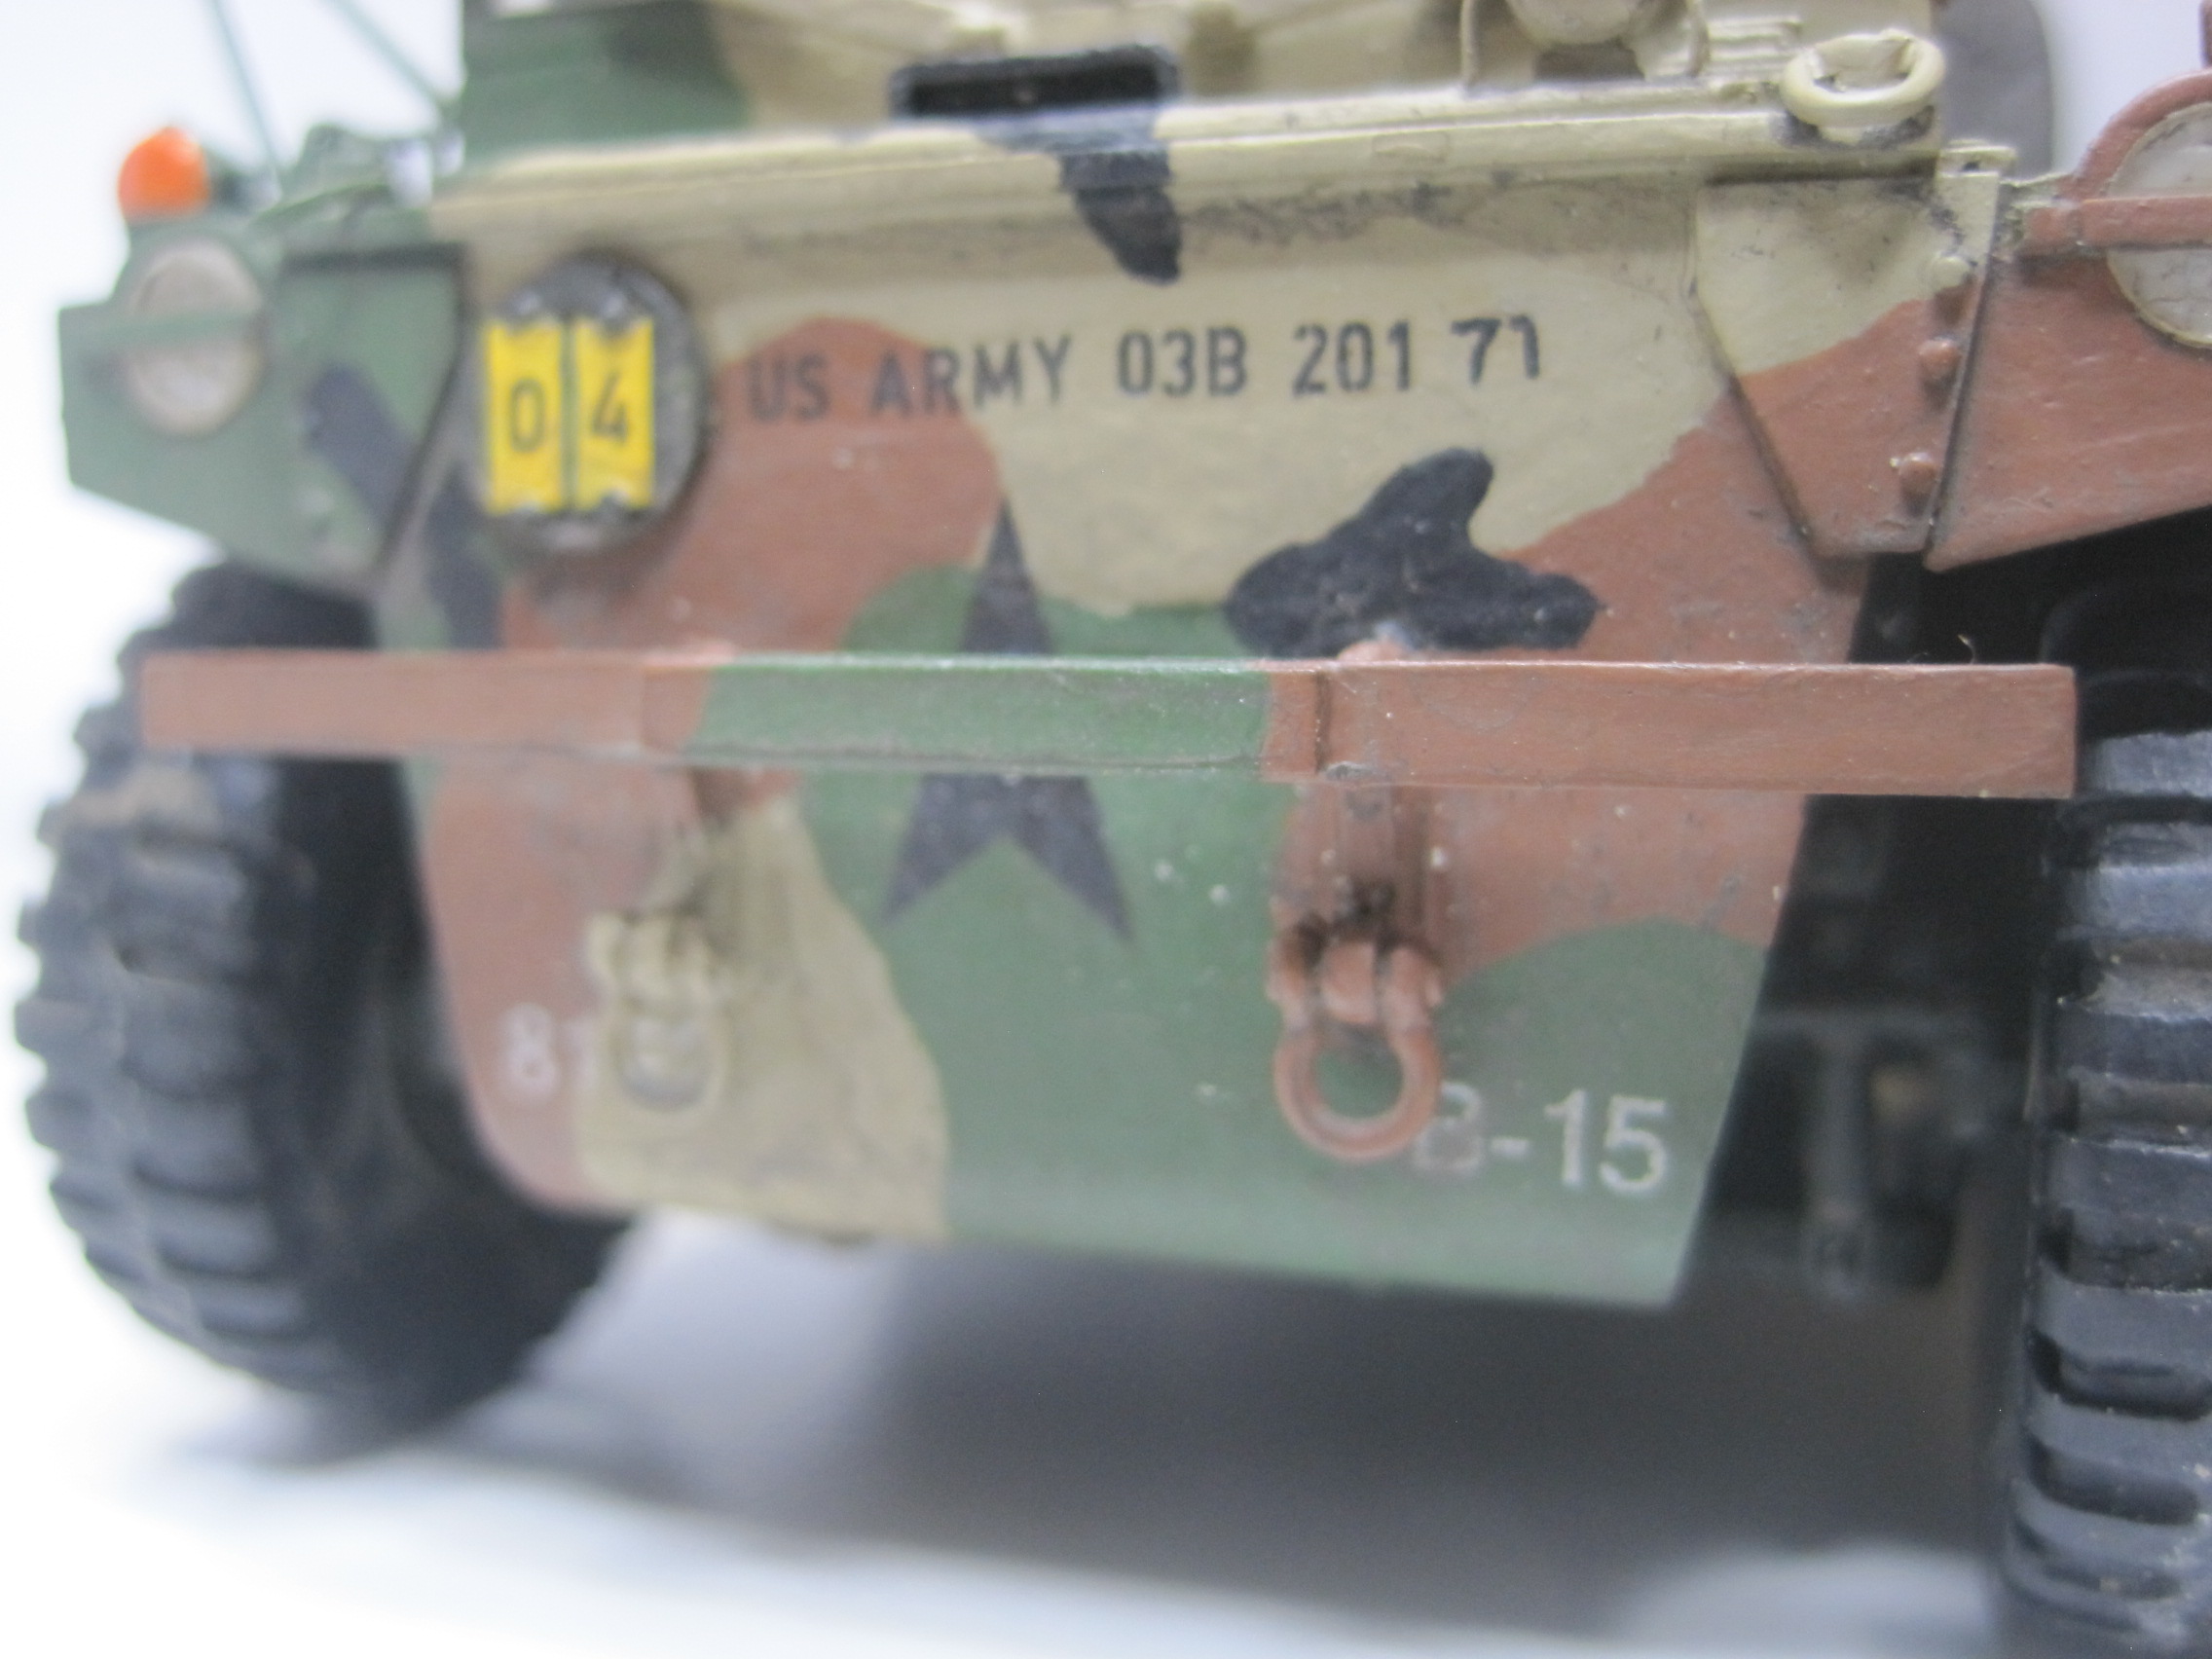


9 Likes
Great work on the Goat! I love all of the associated tales that go with each build! Gives a great bit of context to each vehicle.
Excellent attention to detail, just beautiful work! Thank You Sir! 
Regards Dave
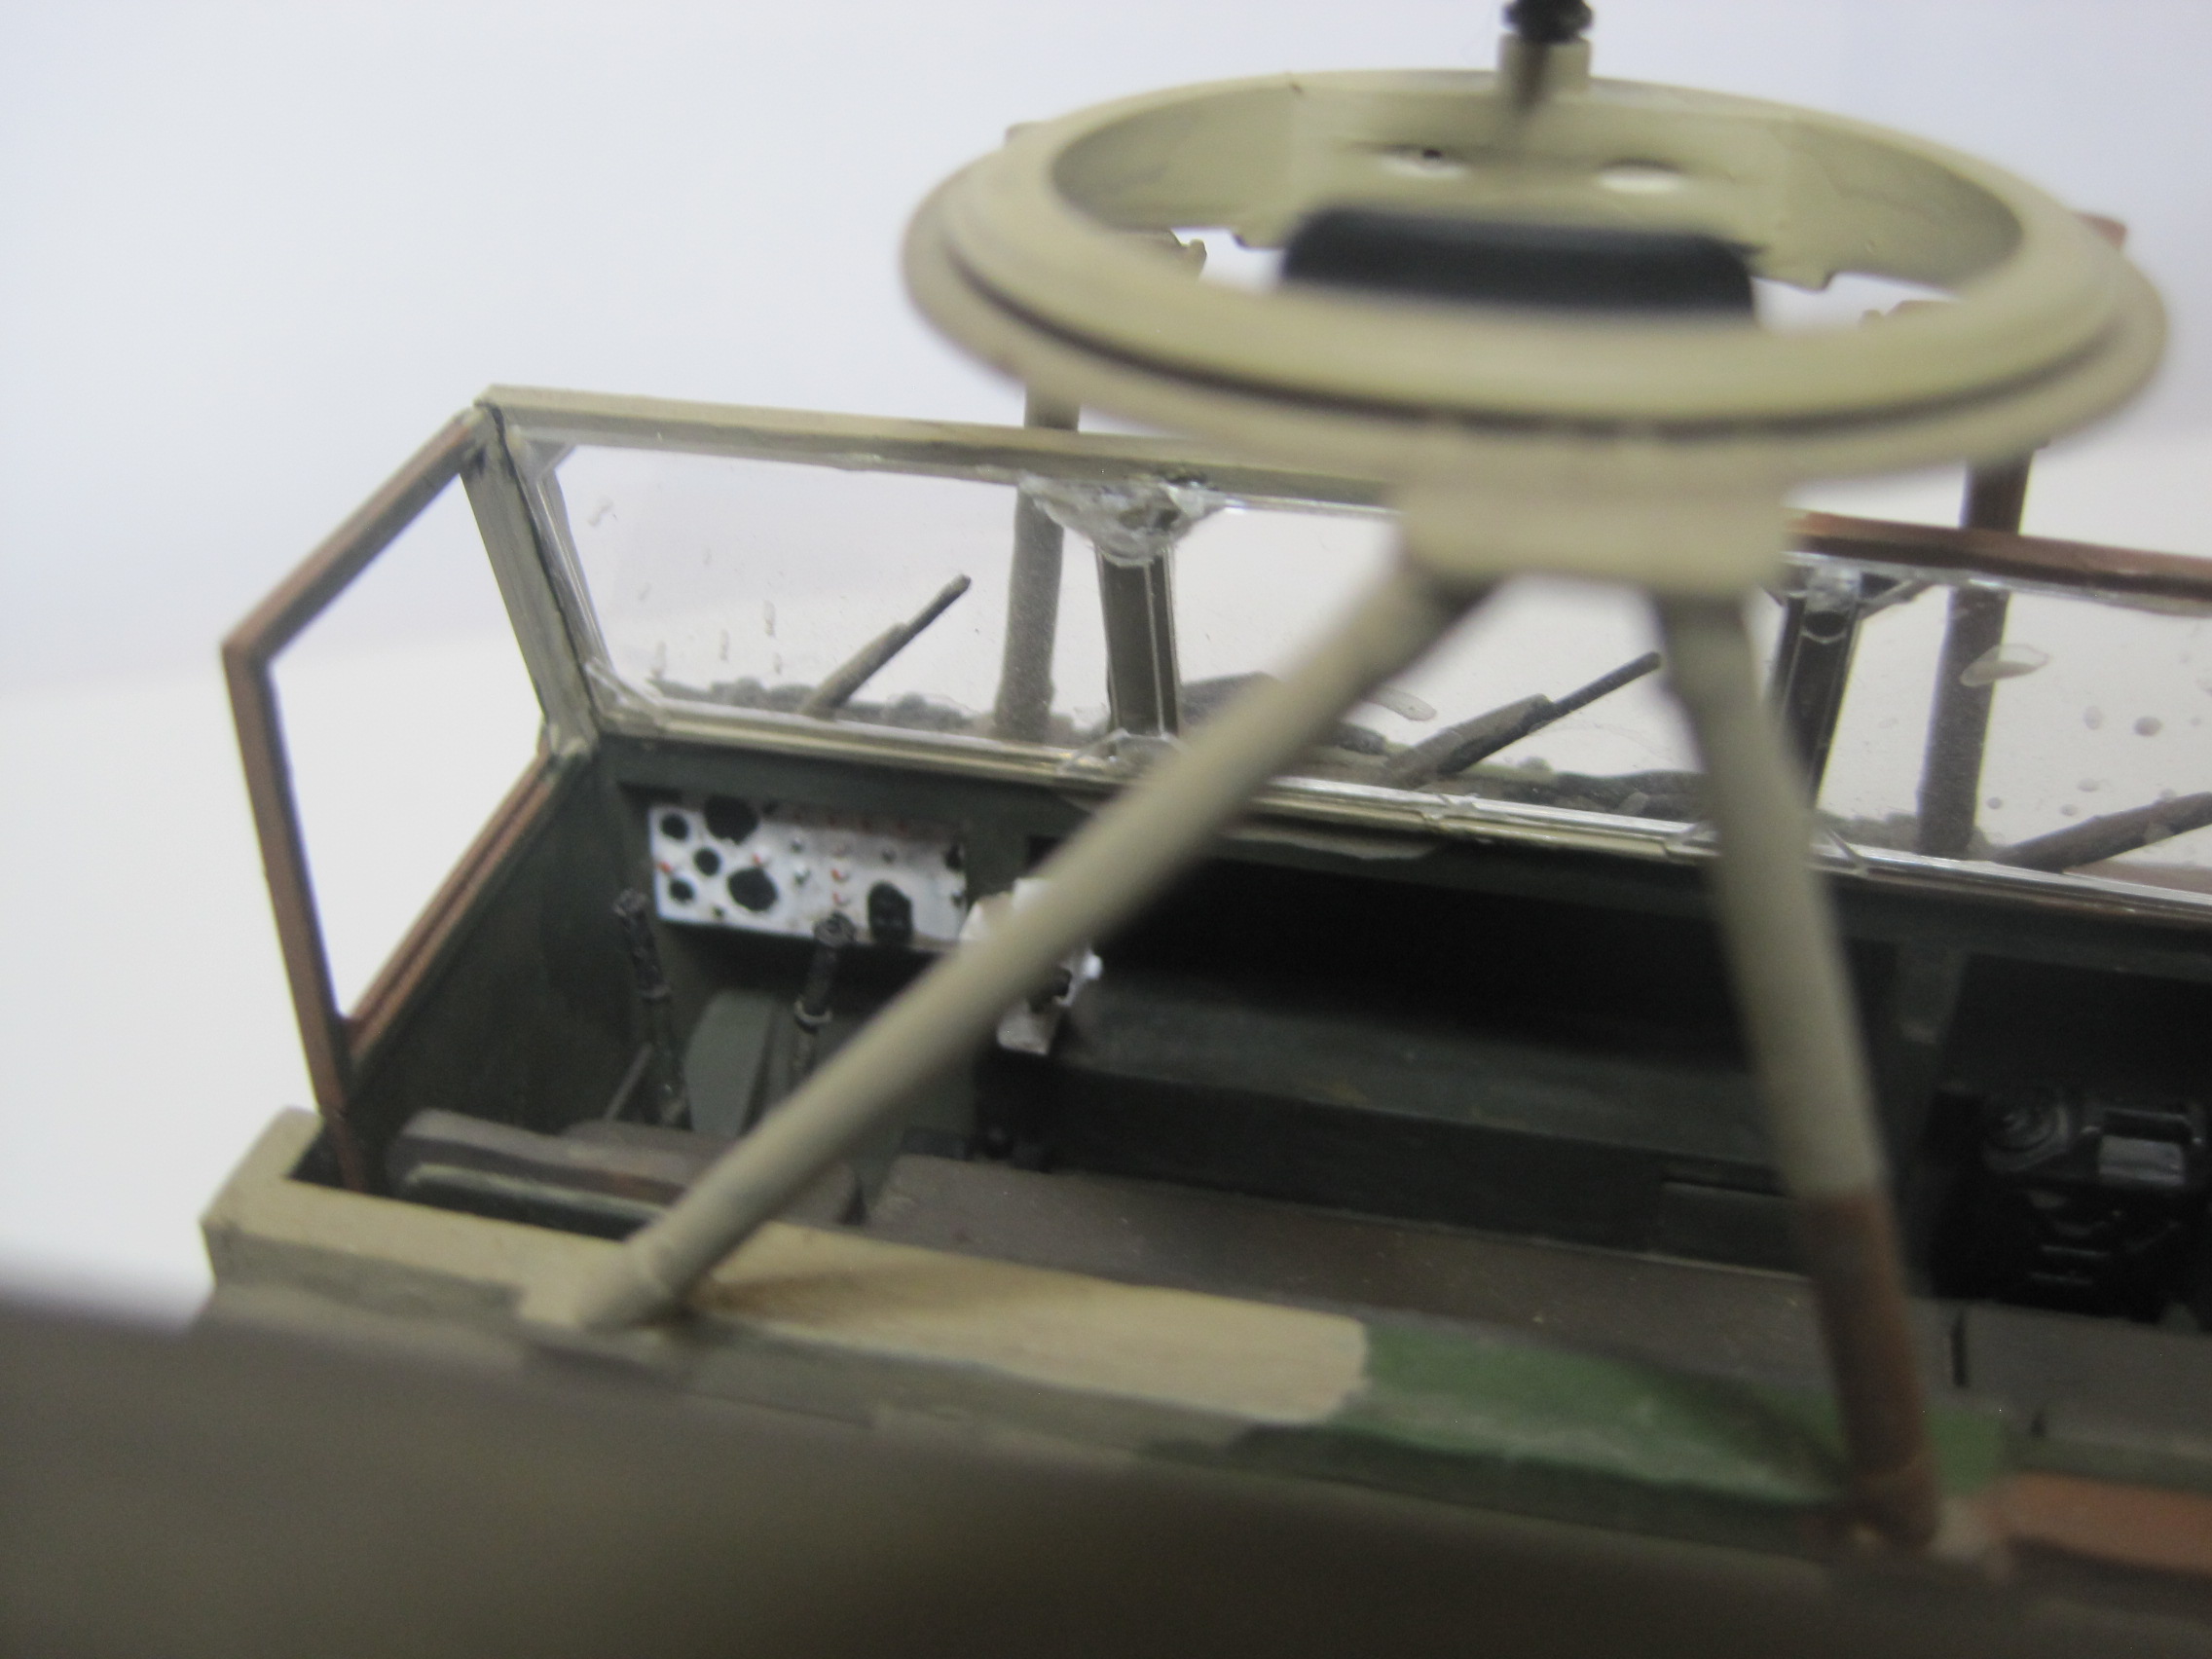
Continues to inspire and educate Tom; fantastic. I note that even the interior of cargo beds on both the Goat and the Trailer were also painted in the scheme - what a chore that must have been!
Just a thought, as a tanker,75-78,The IR headlight would be more of a dark purple on the 548. Very dark.
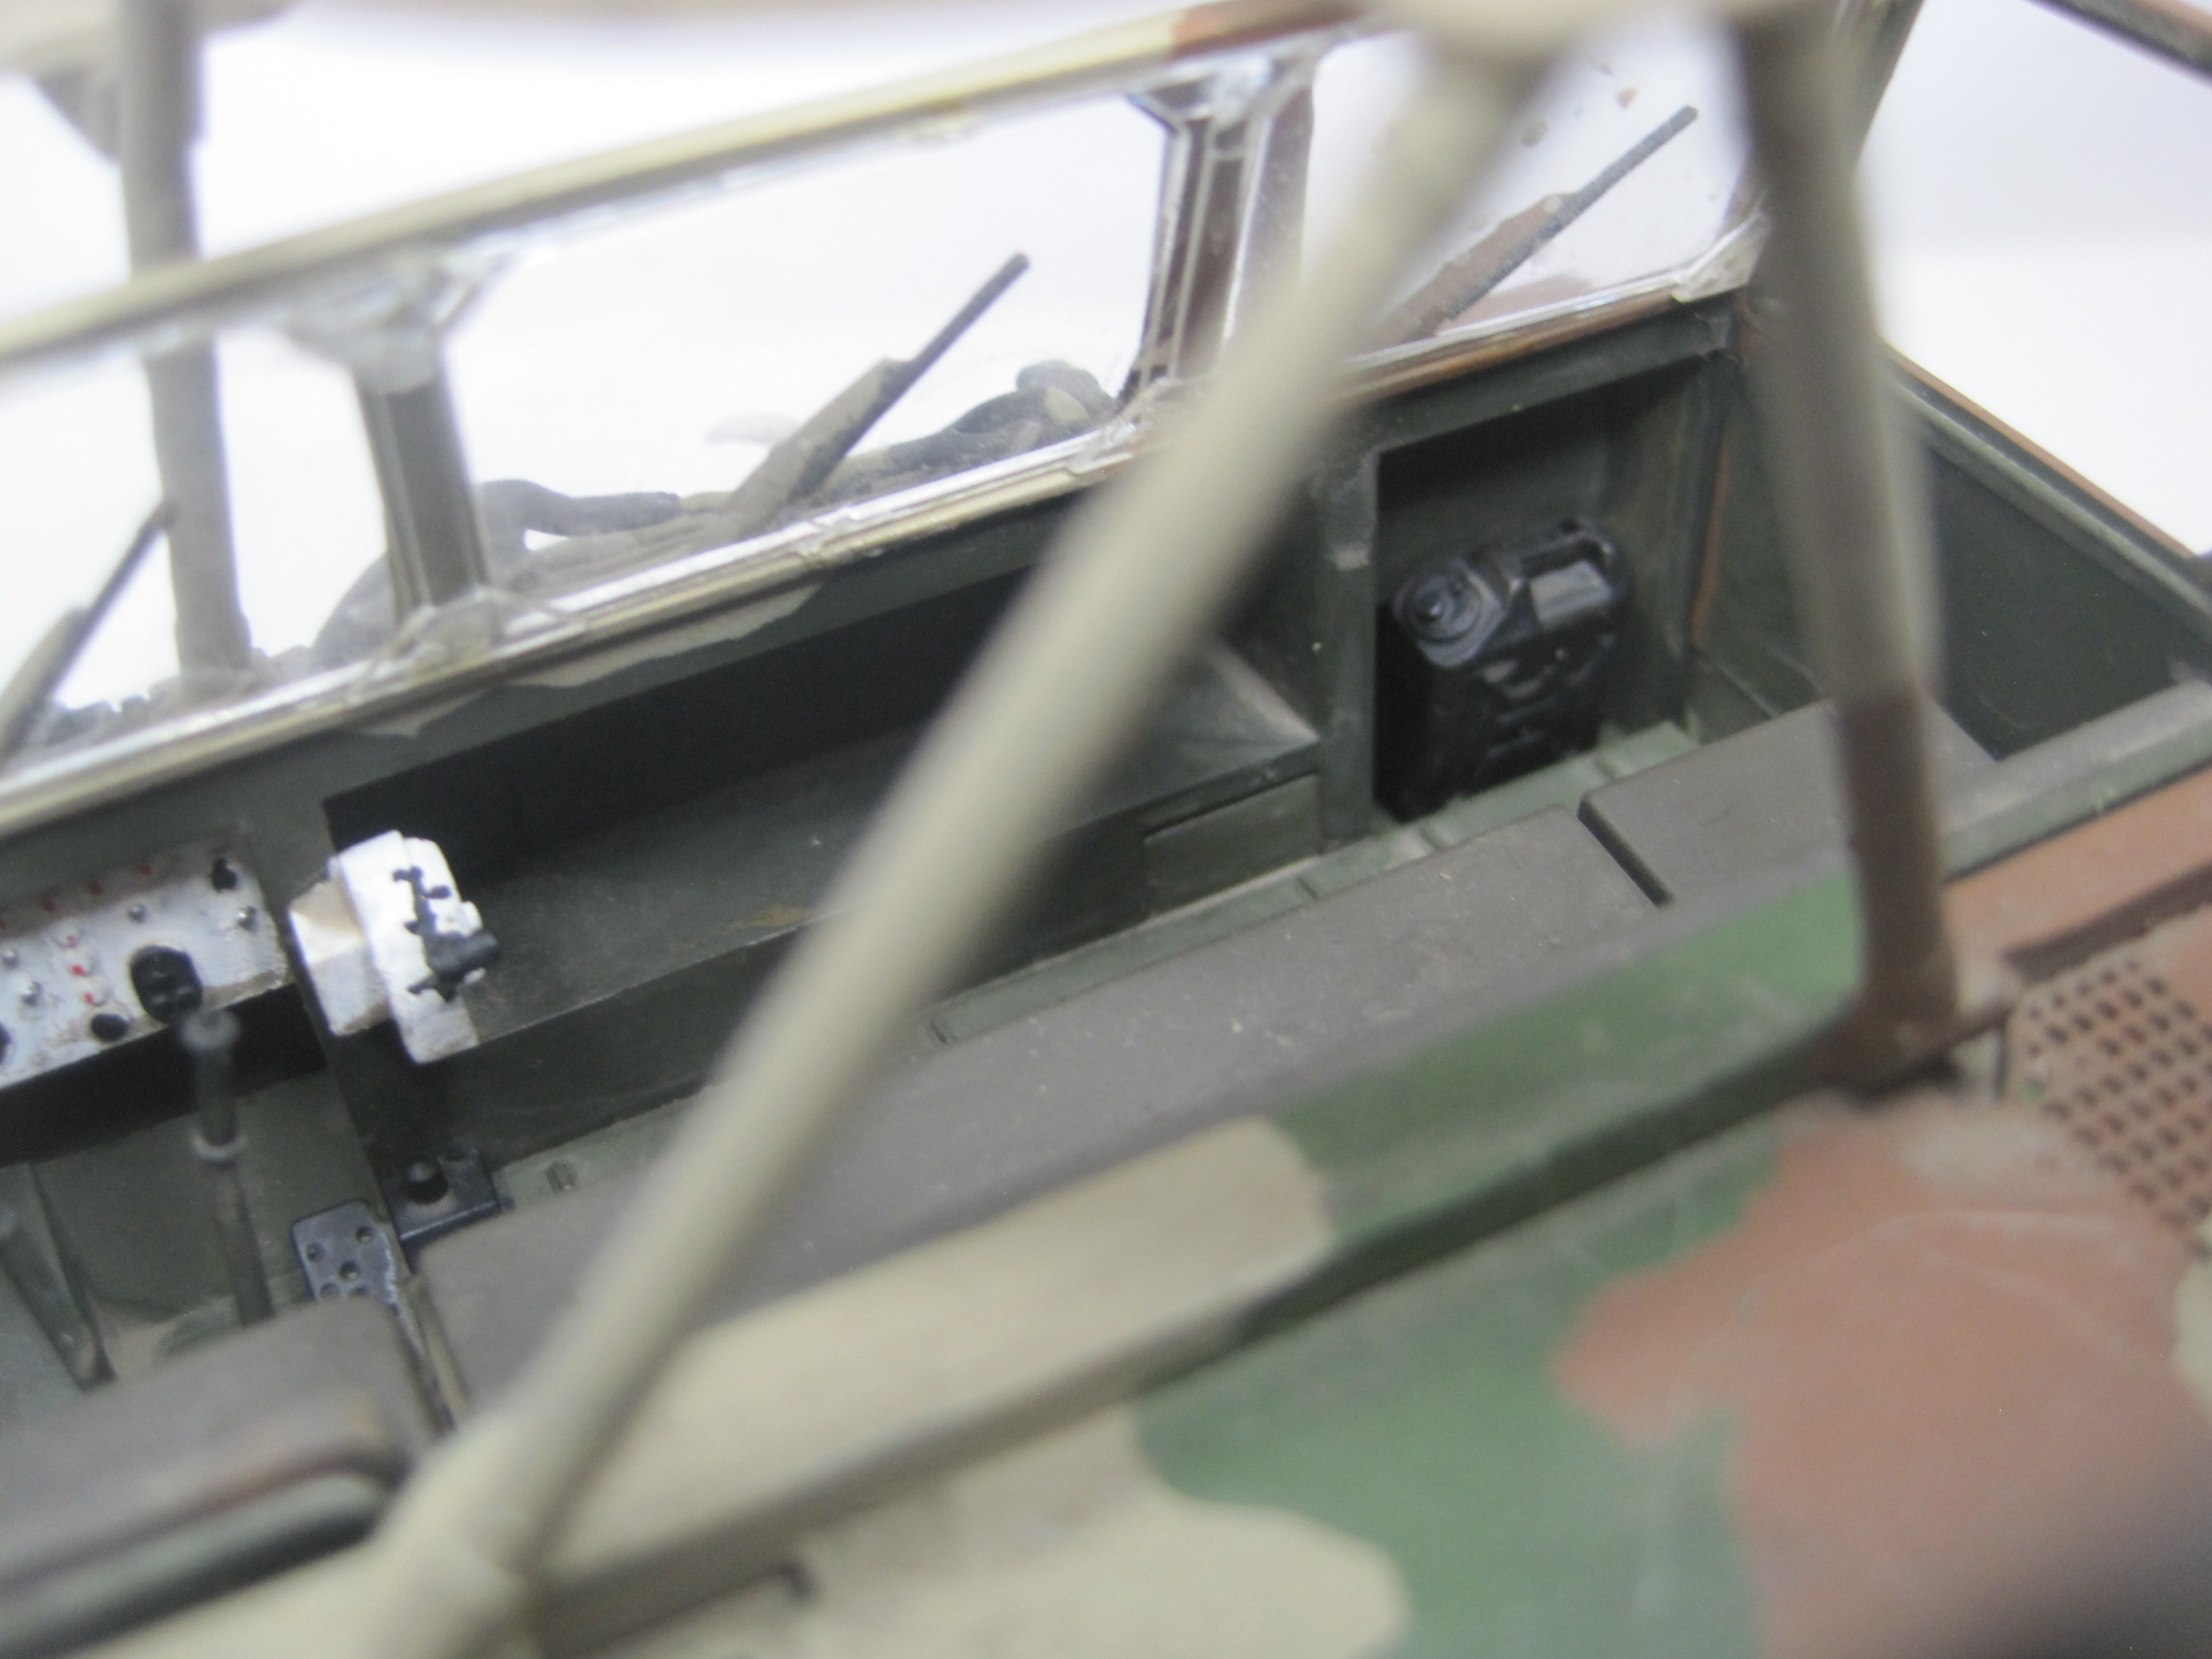
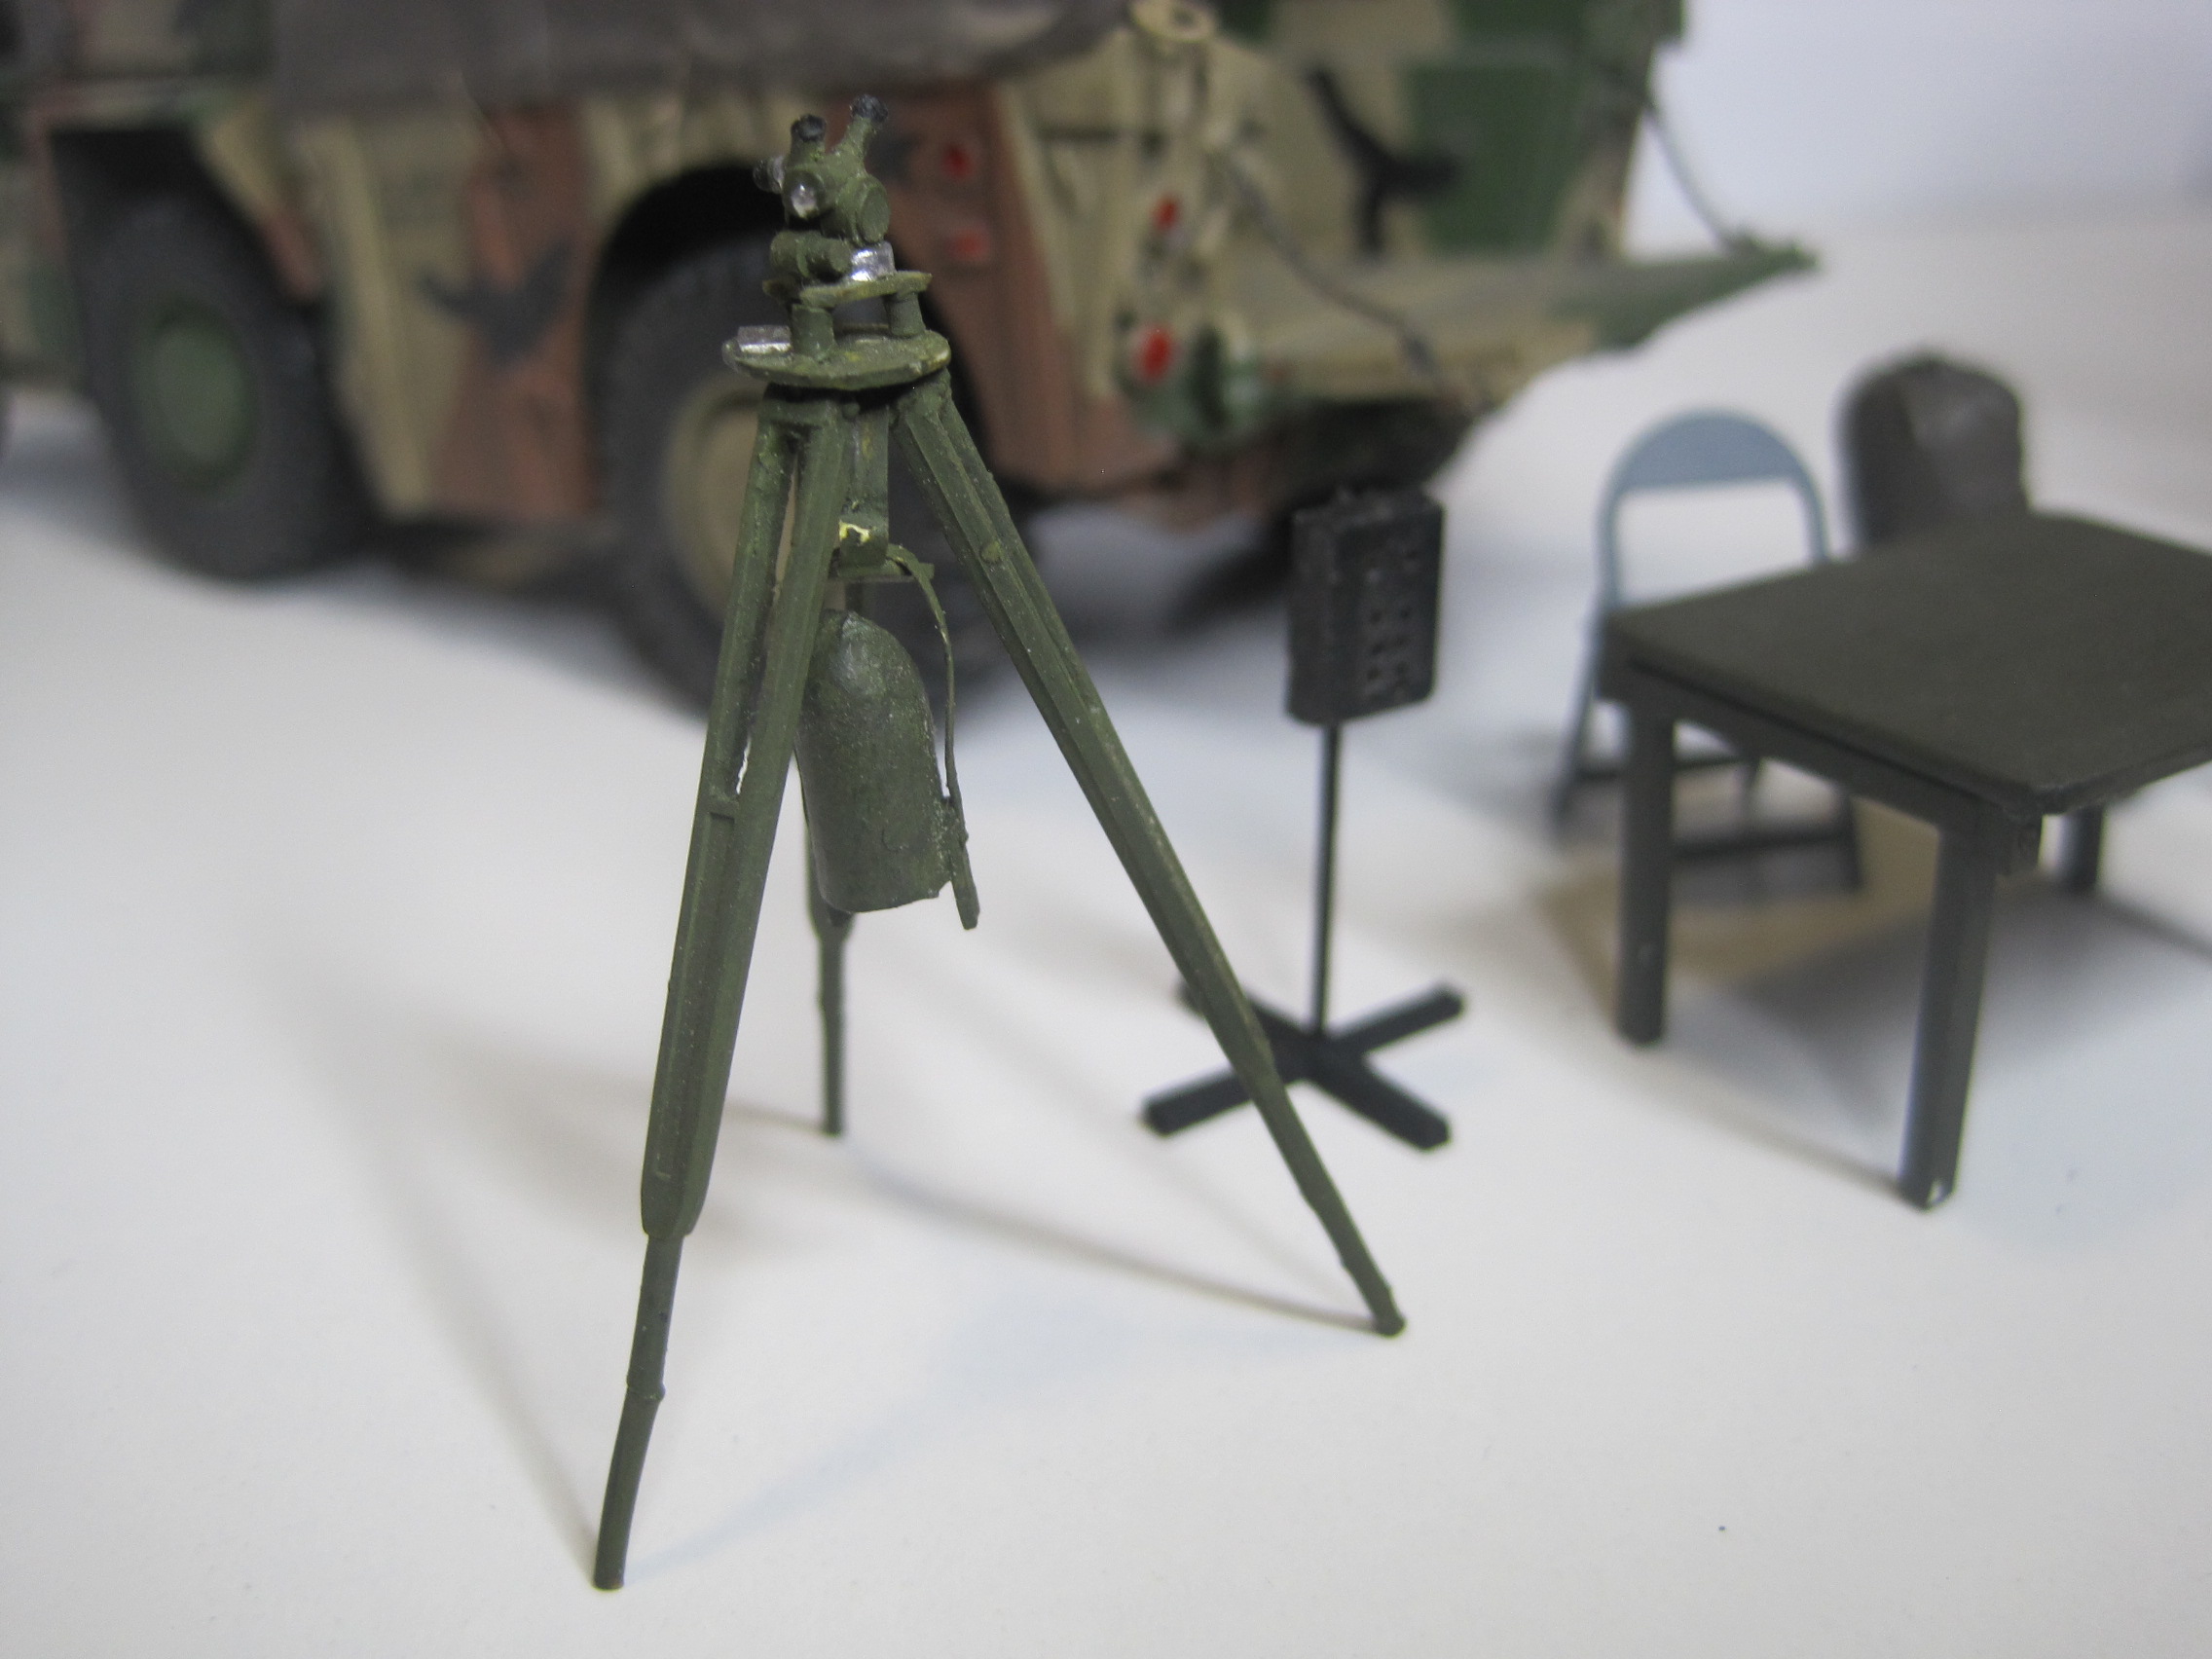
I love the scratch built aiming circle. I’ll bet that is the only one in existence in 1:35.
Great attention to detail in the artillery accessories.
Rick
Thanks for all the kind words and comments. That’s a great point about the IR headlight. I’ll take a look at some photos and see if I can come up with a better color. Also on a number of later vehicles, I discovered the “clear” red and orange for the reflectors which I didn’t use on earlier vehicles. I’ll probably go back and fix that as well.
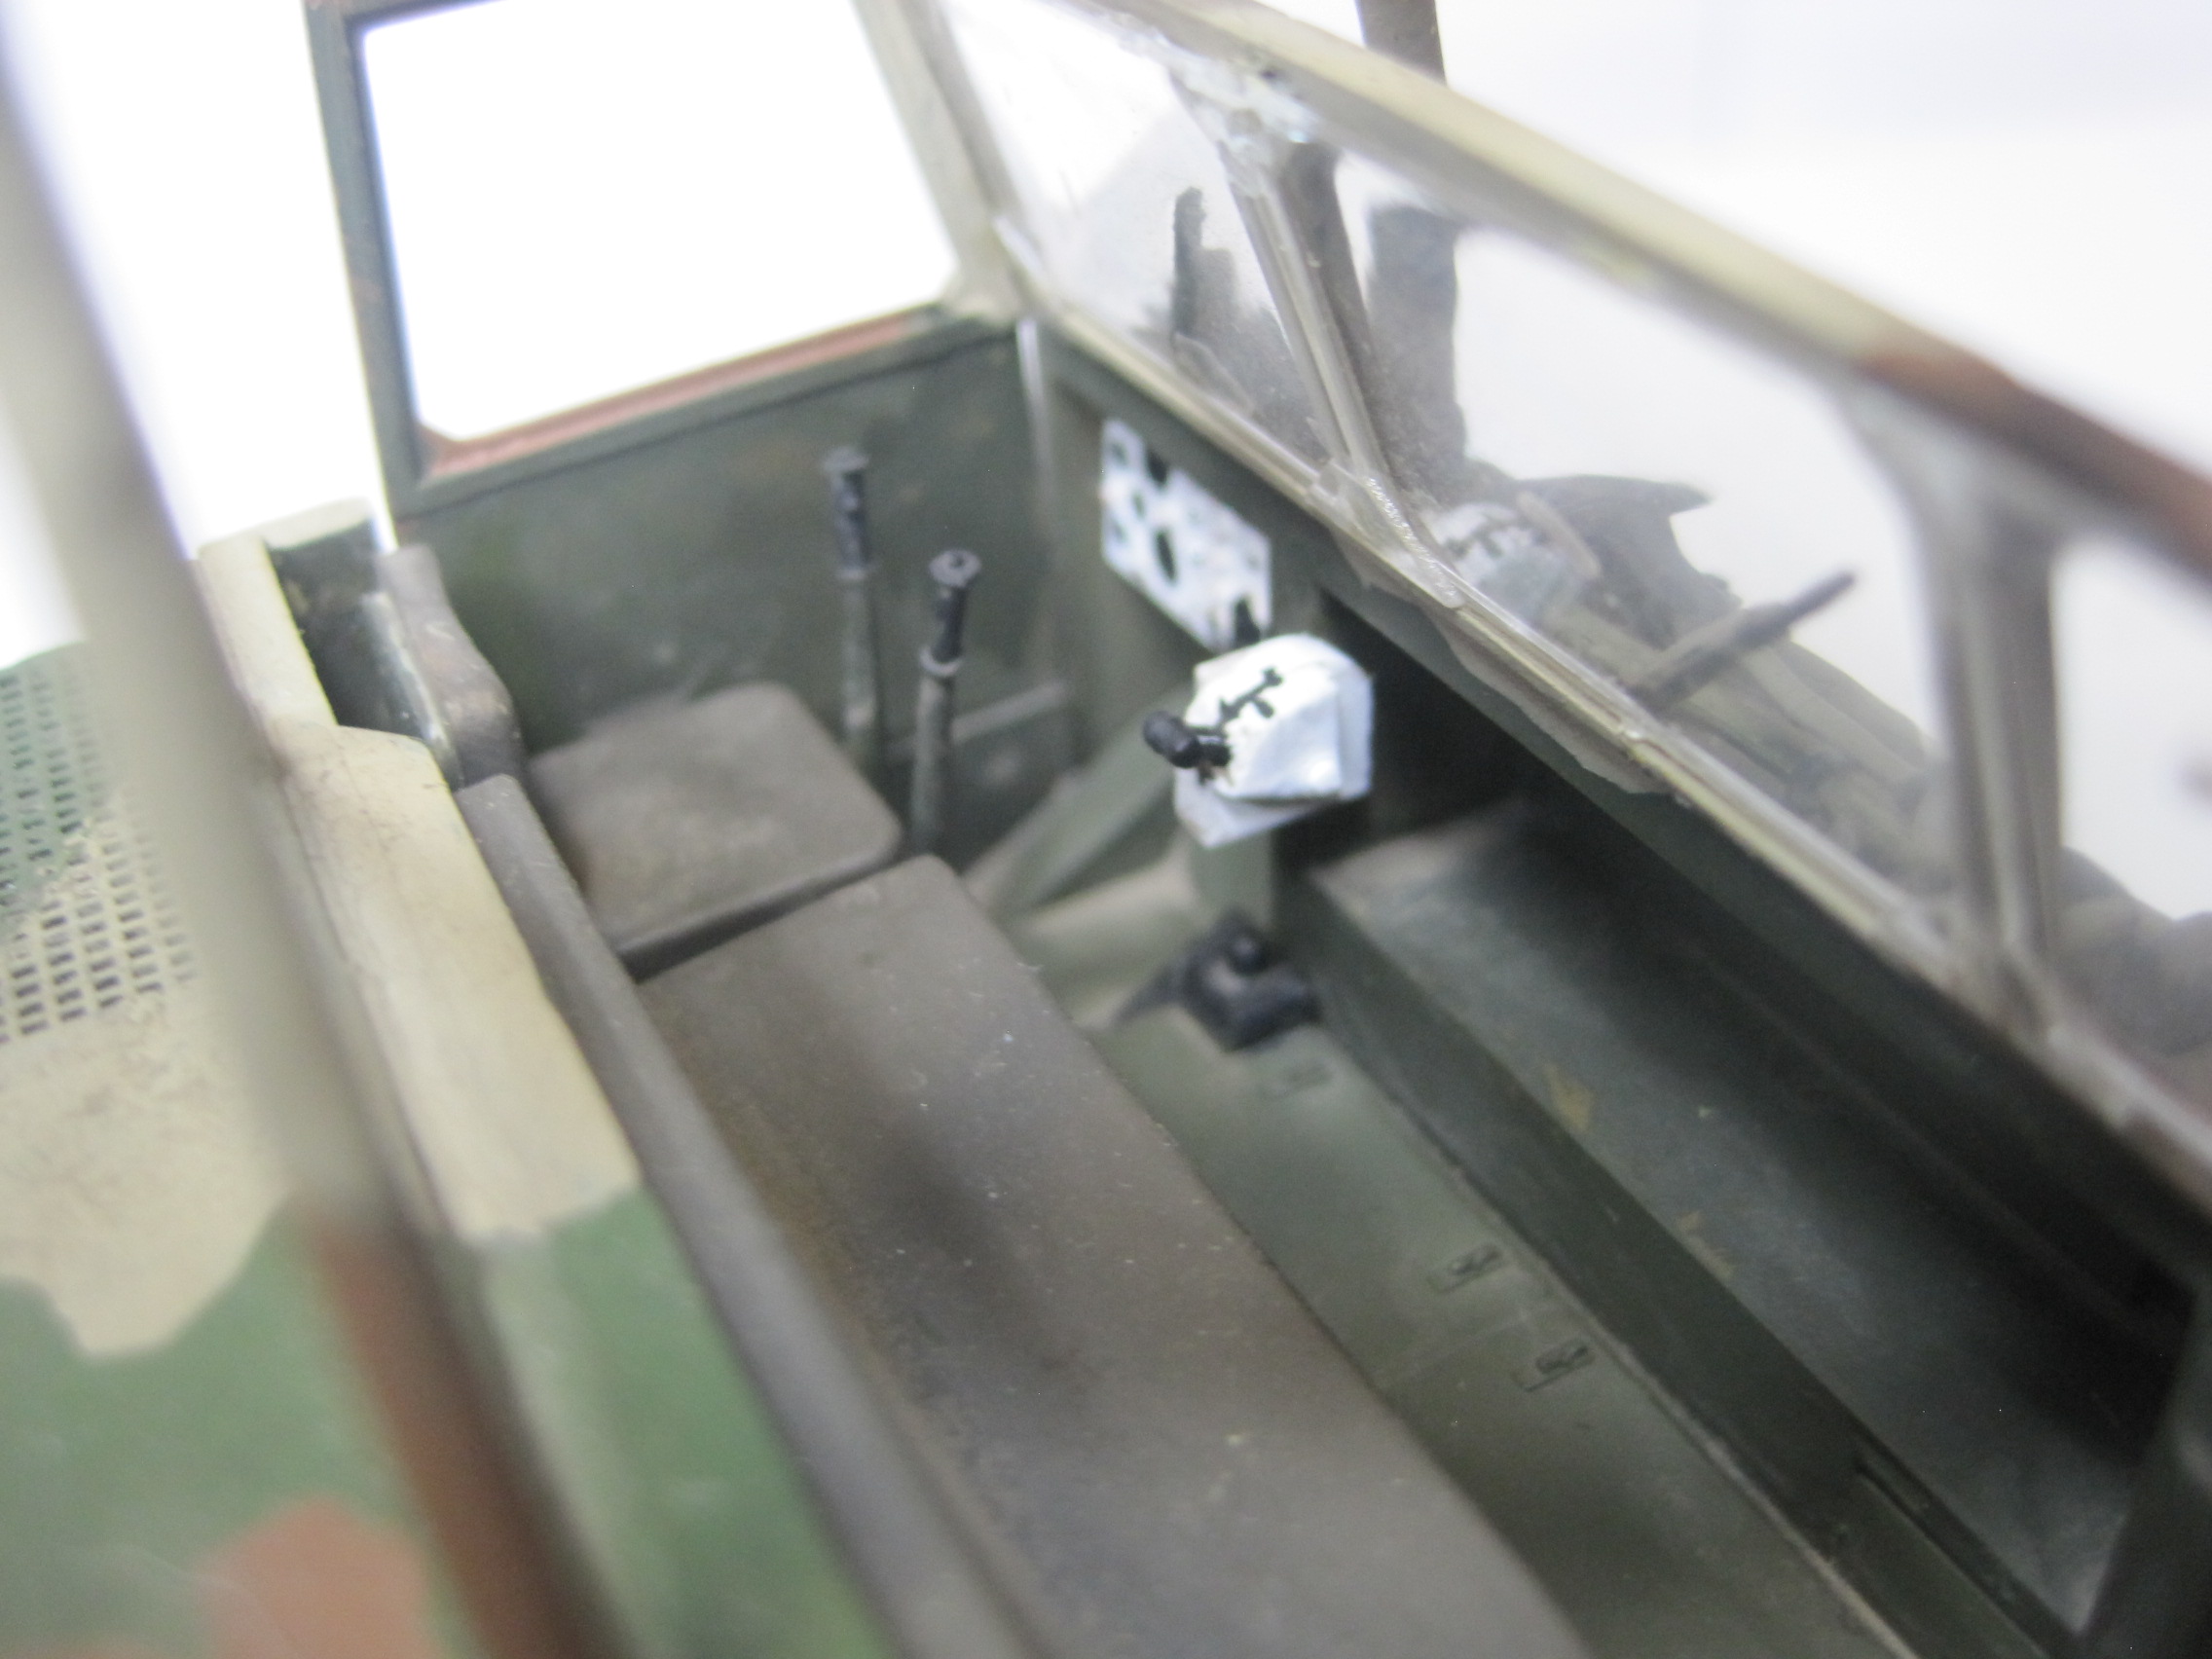
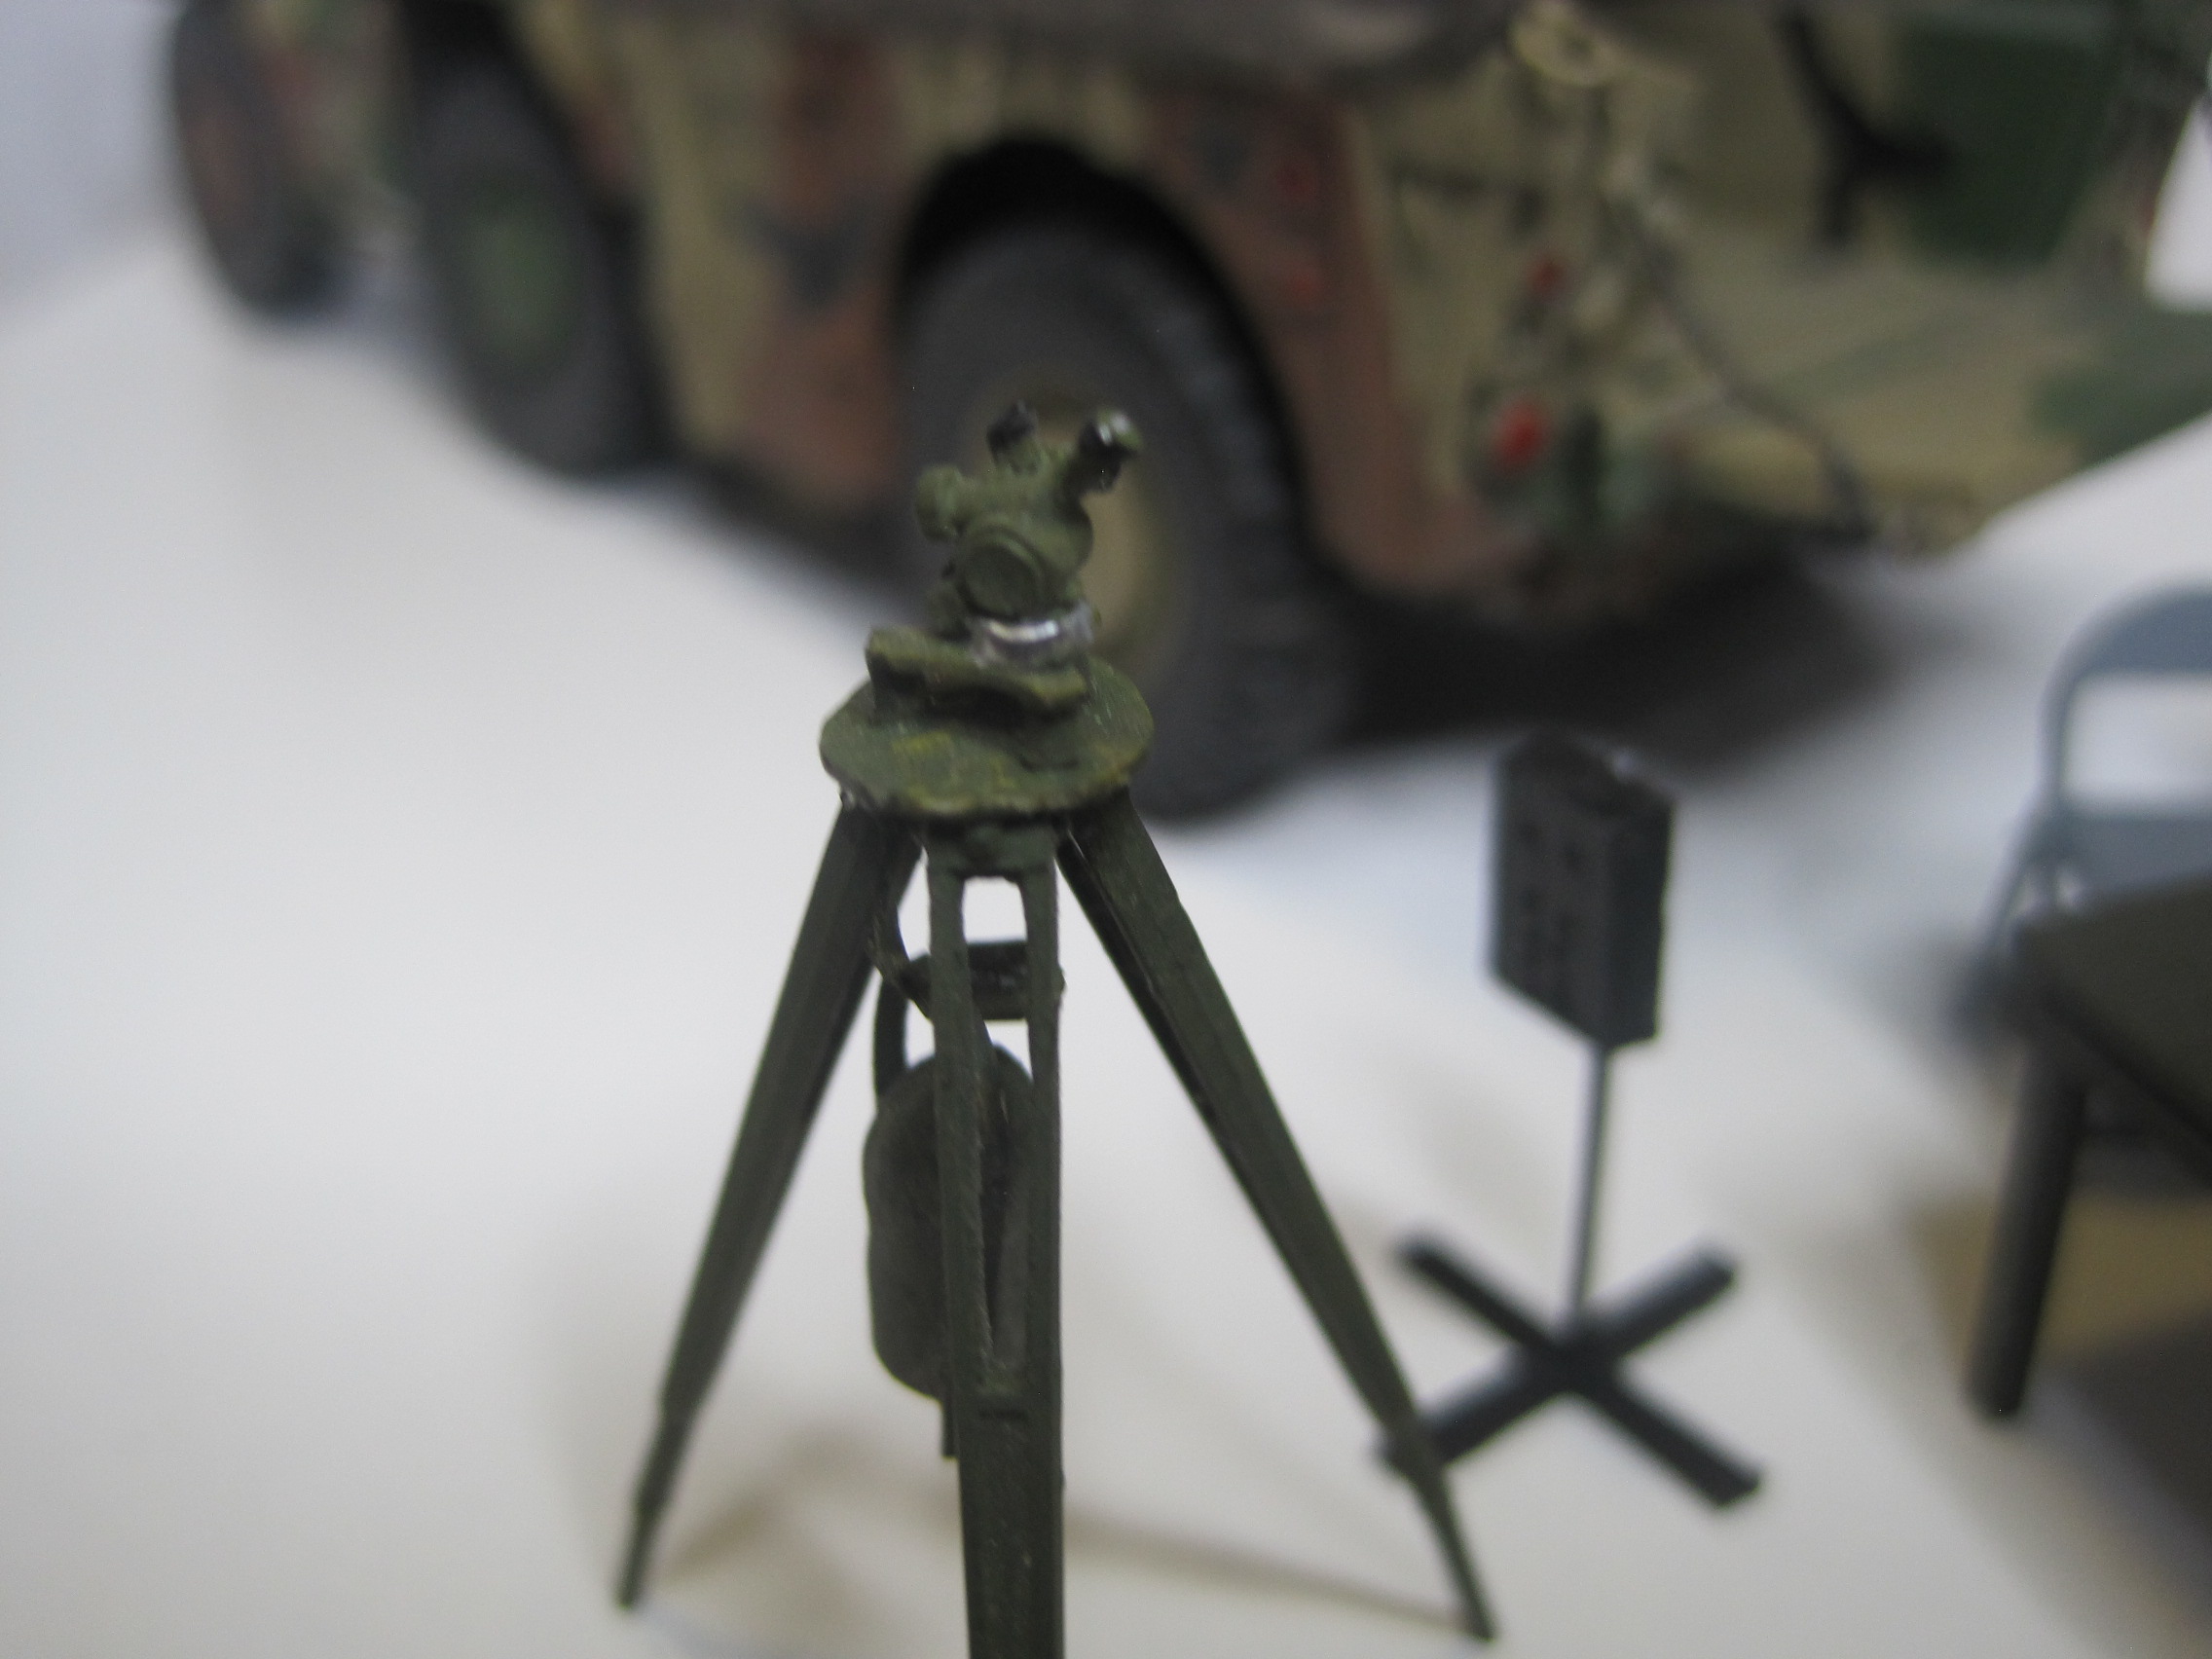
Rick, glad you noticed the aiming circle. Such an important item in the Field Artillery, yet nobody makes one! We had two in the Battery, the XO had one and the Battery Commander had one. The BC would take his on the advance party and if there was time, set up some initial deflections to the spot where each howitzer would be placed when they arrived. Then on arrival the XO would separately set his up, check against the BCs and then use his to lay the battery.
There were also two M2s as part of the Survey Section in Headquarters Battery. We used them as a surveying theodolite and if time permitted that would allow us to “extend control” to the batteries. Before the days of GPS, that was how you determined an accurate grid location for the battery.
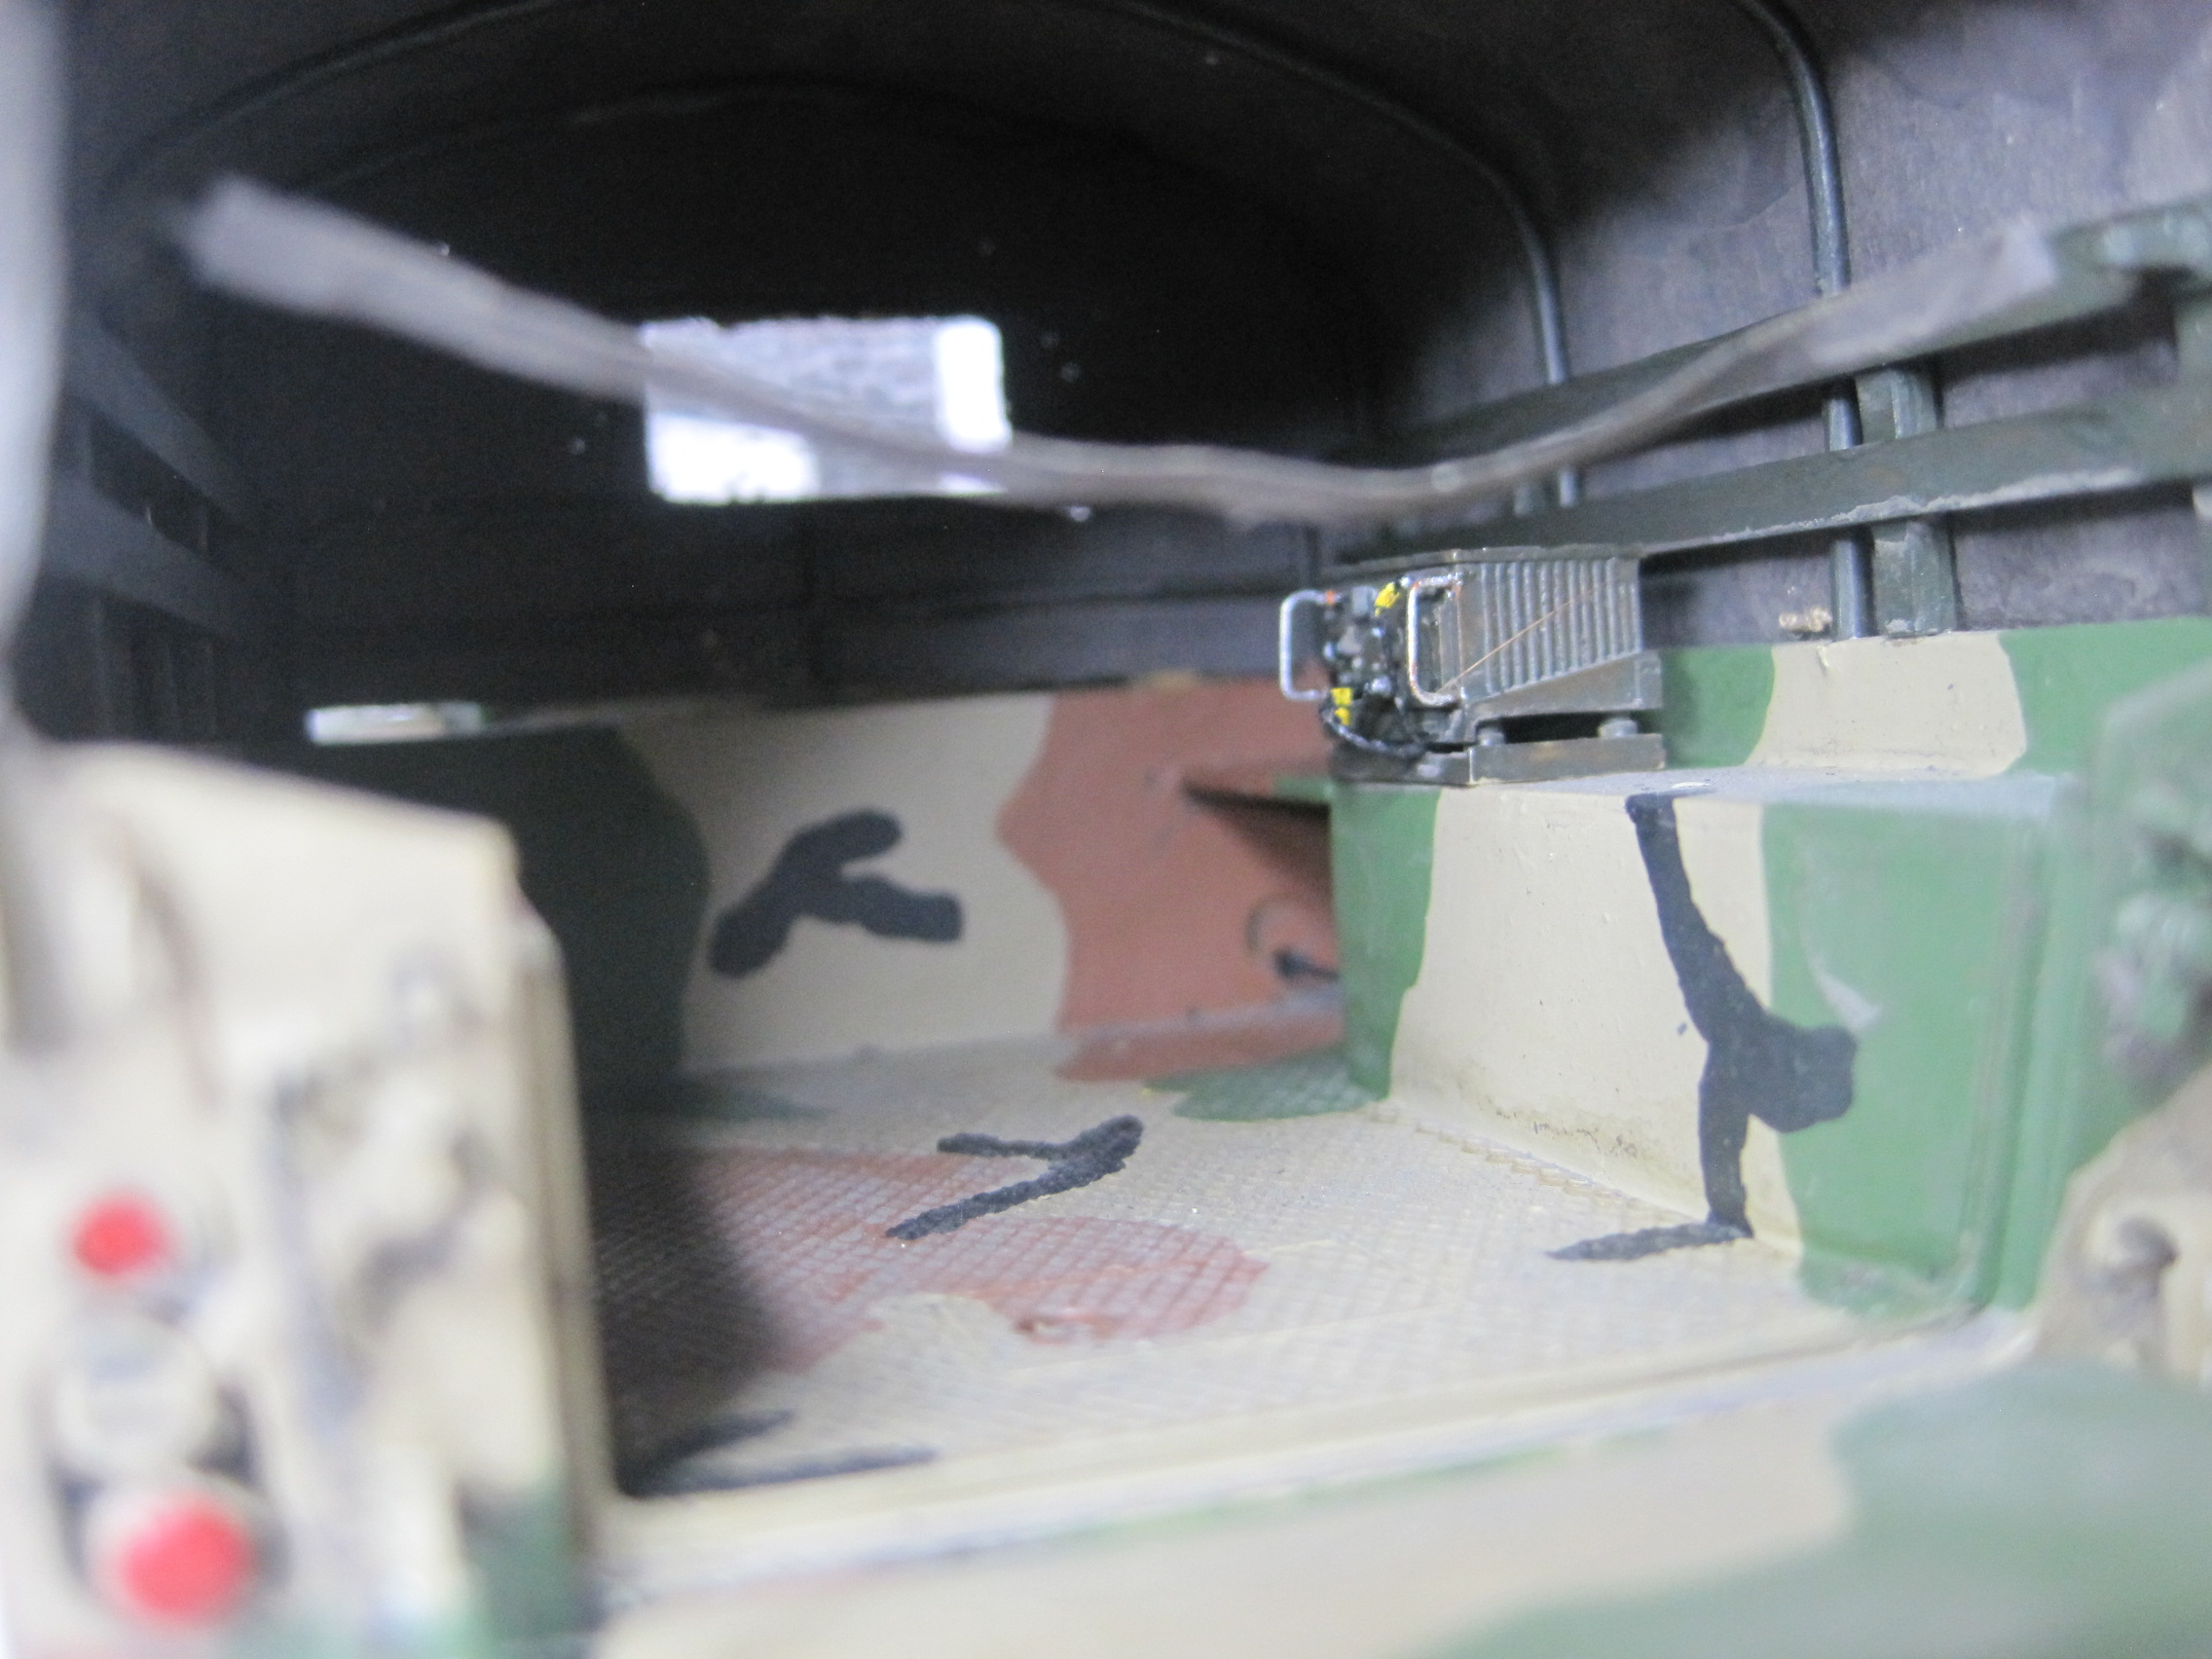
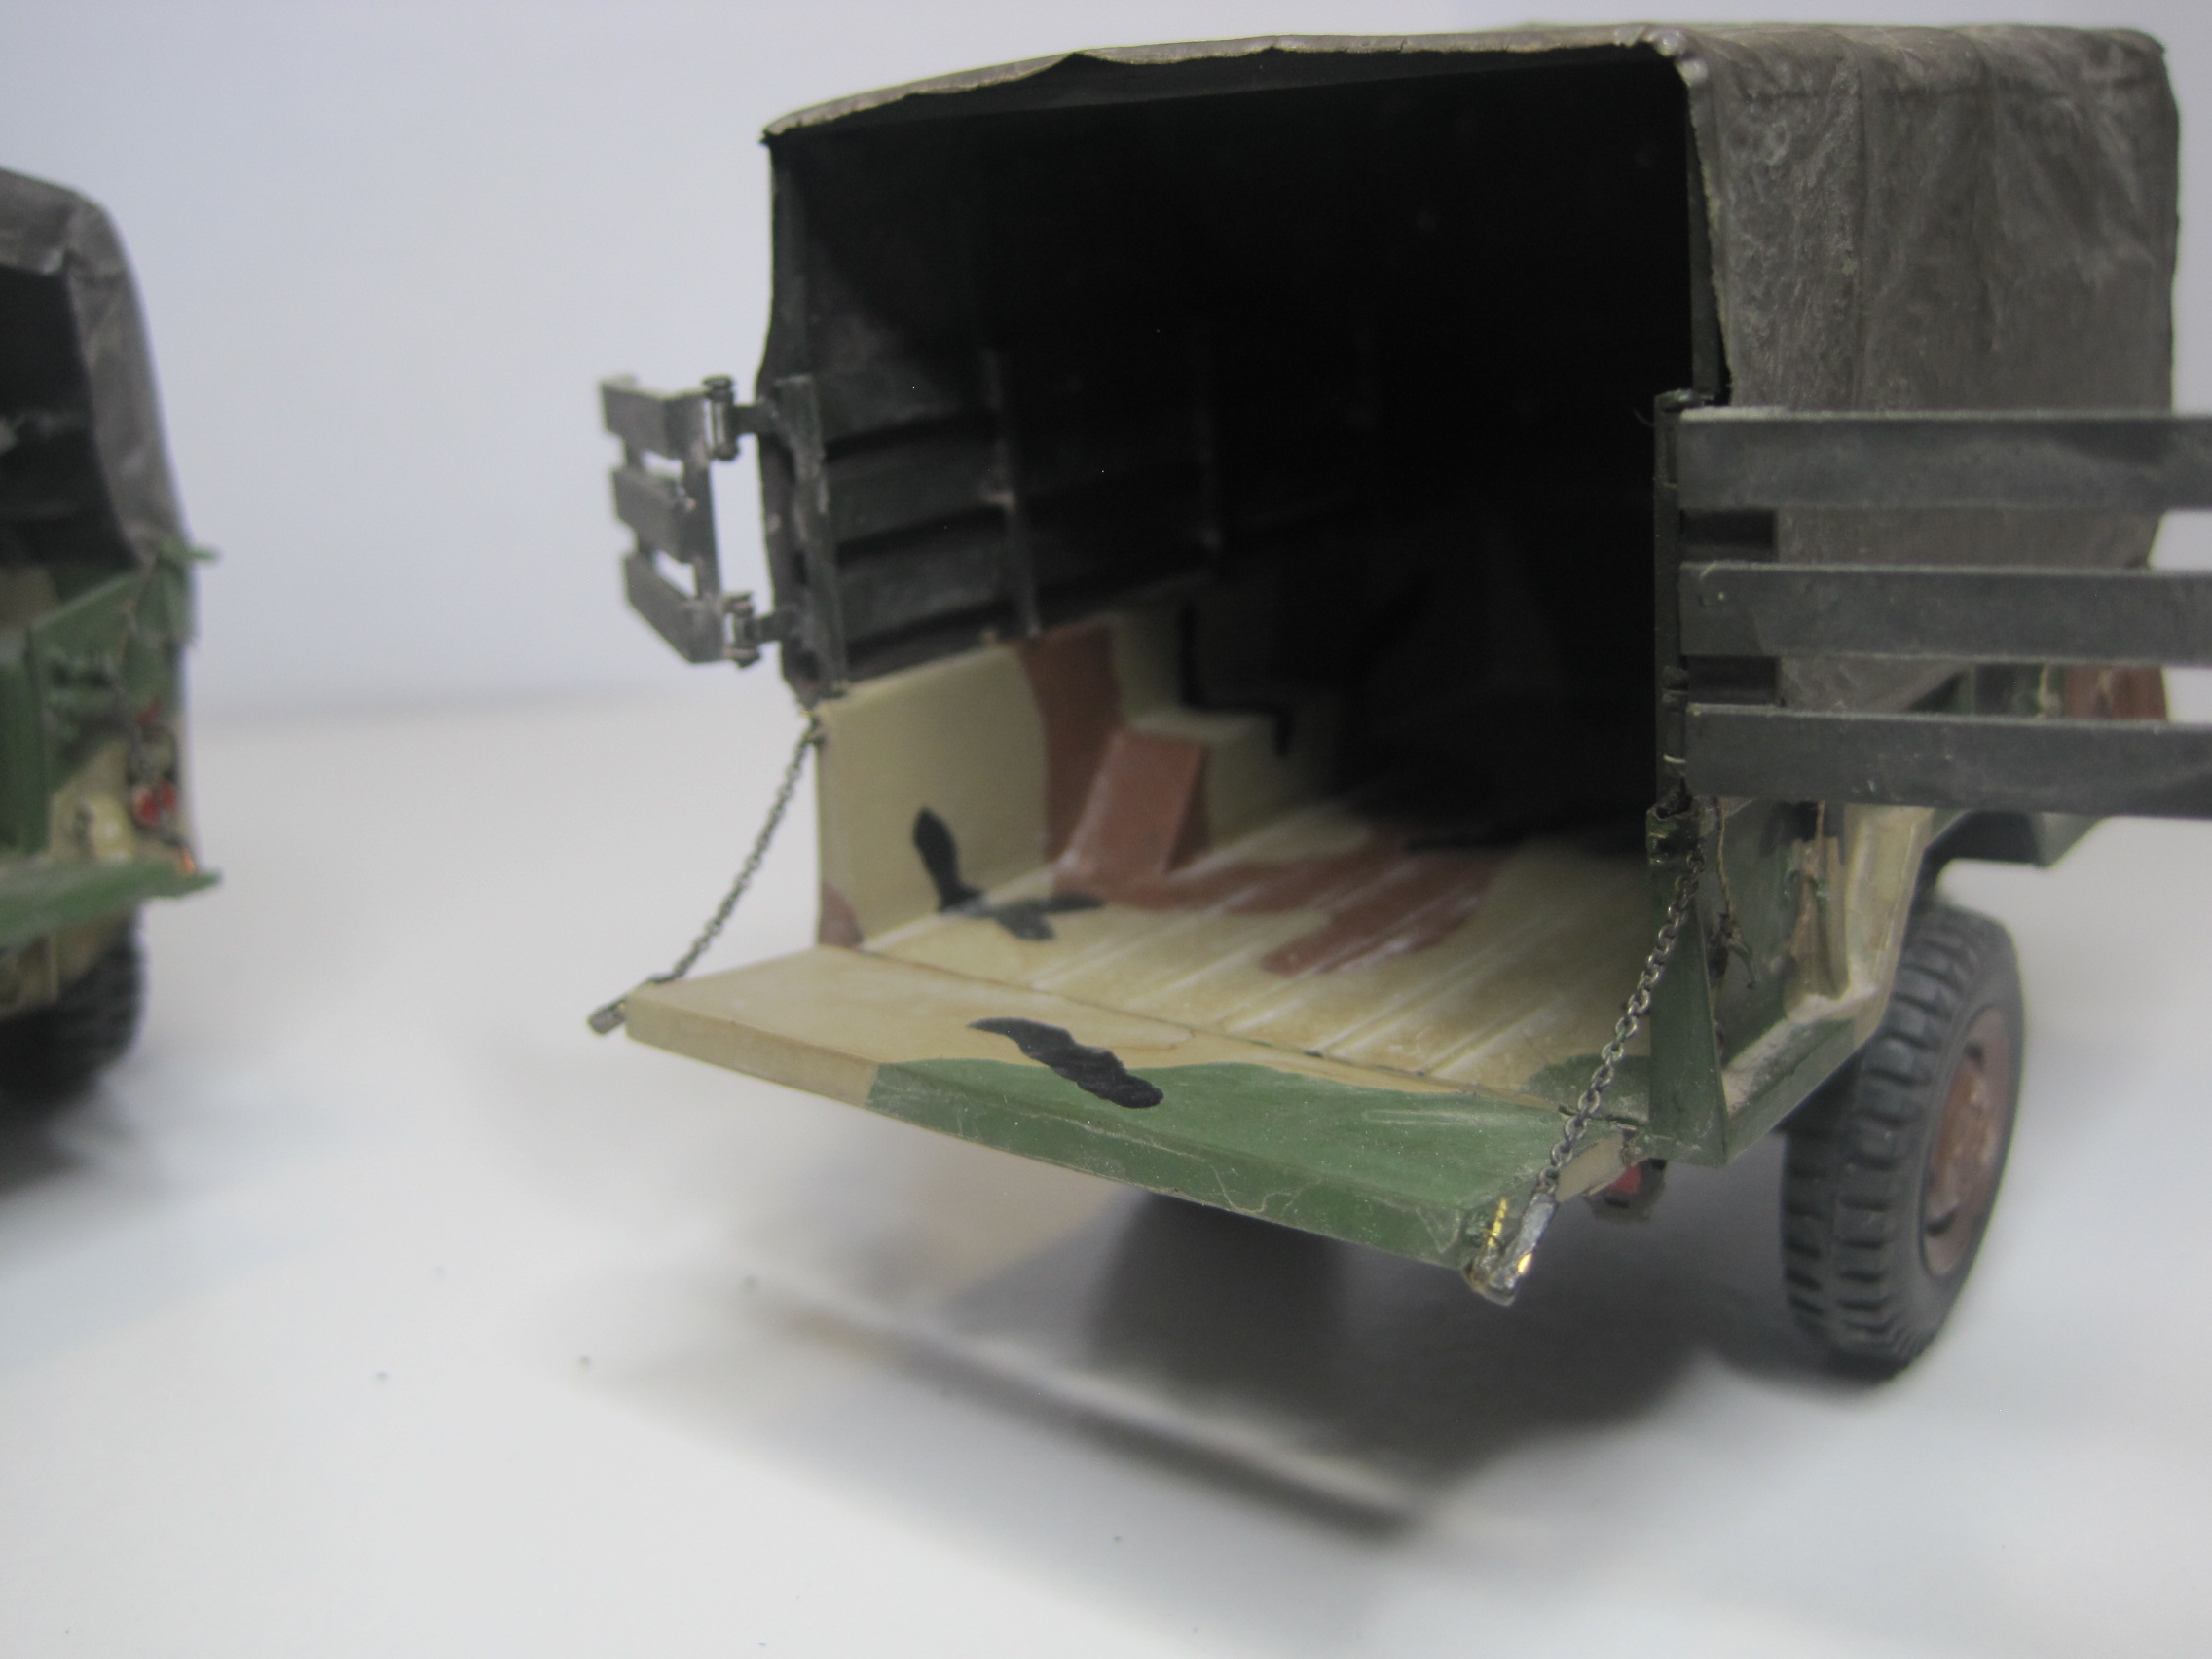
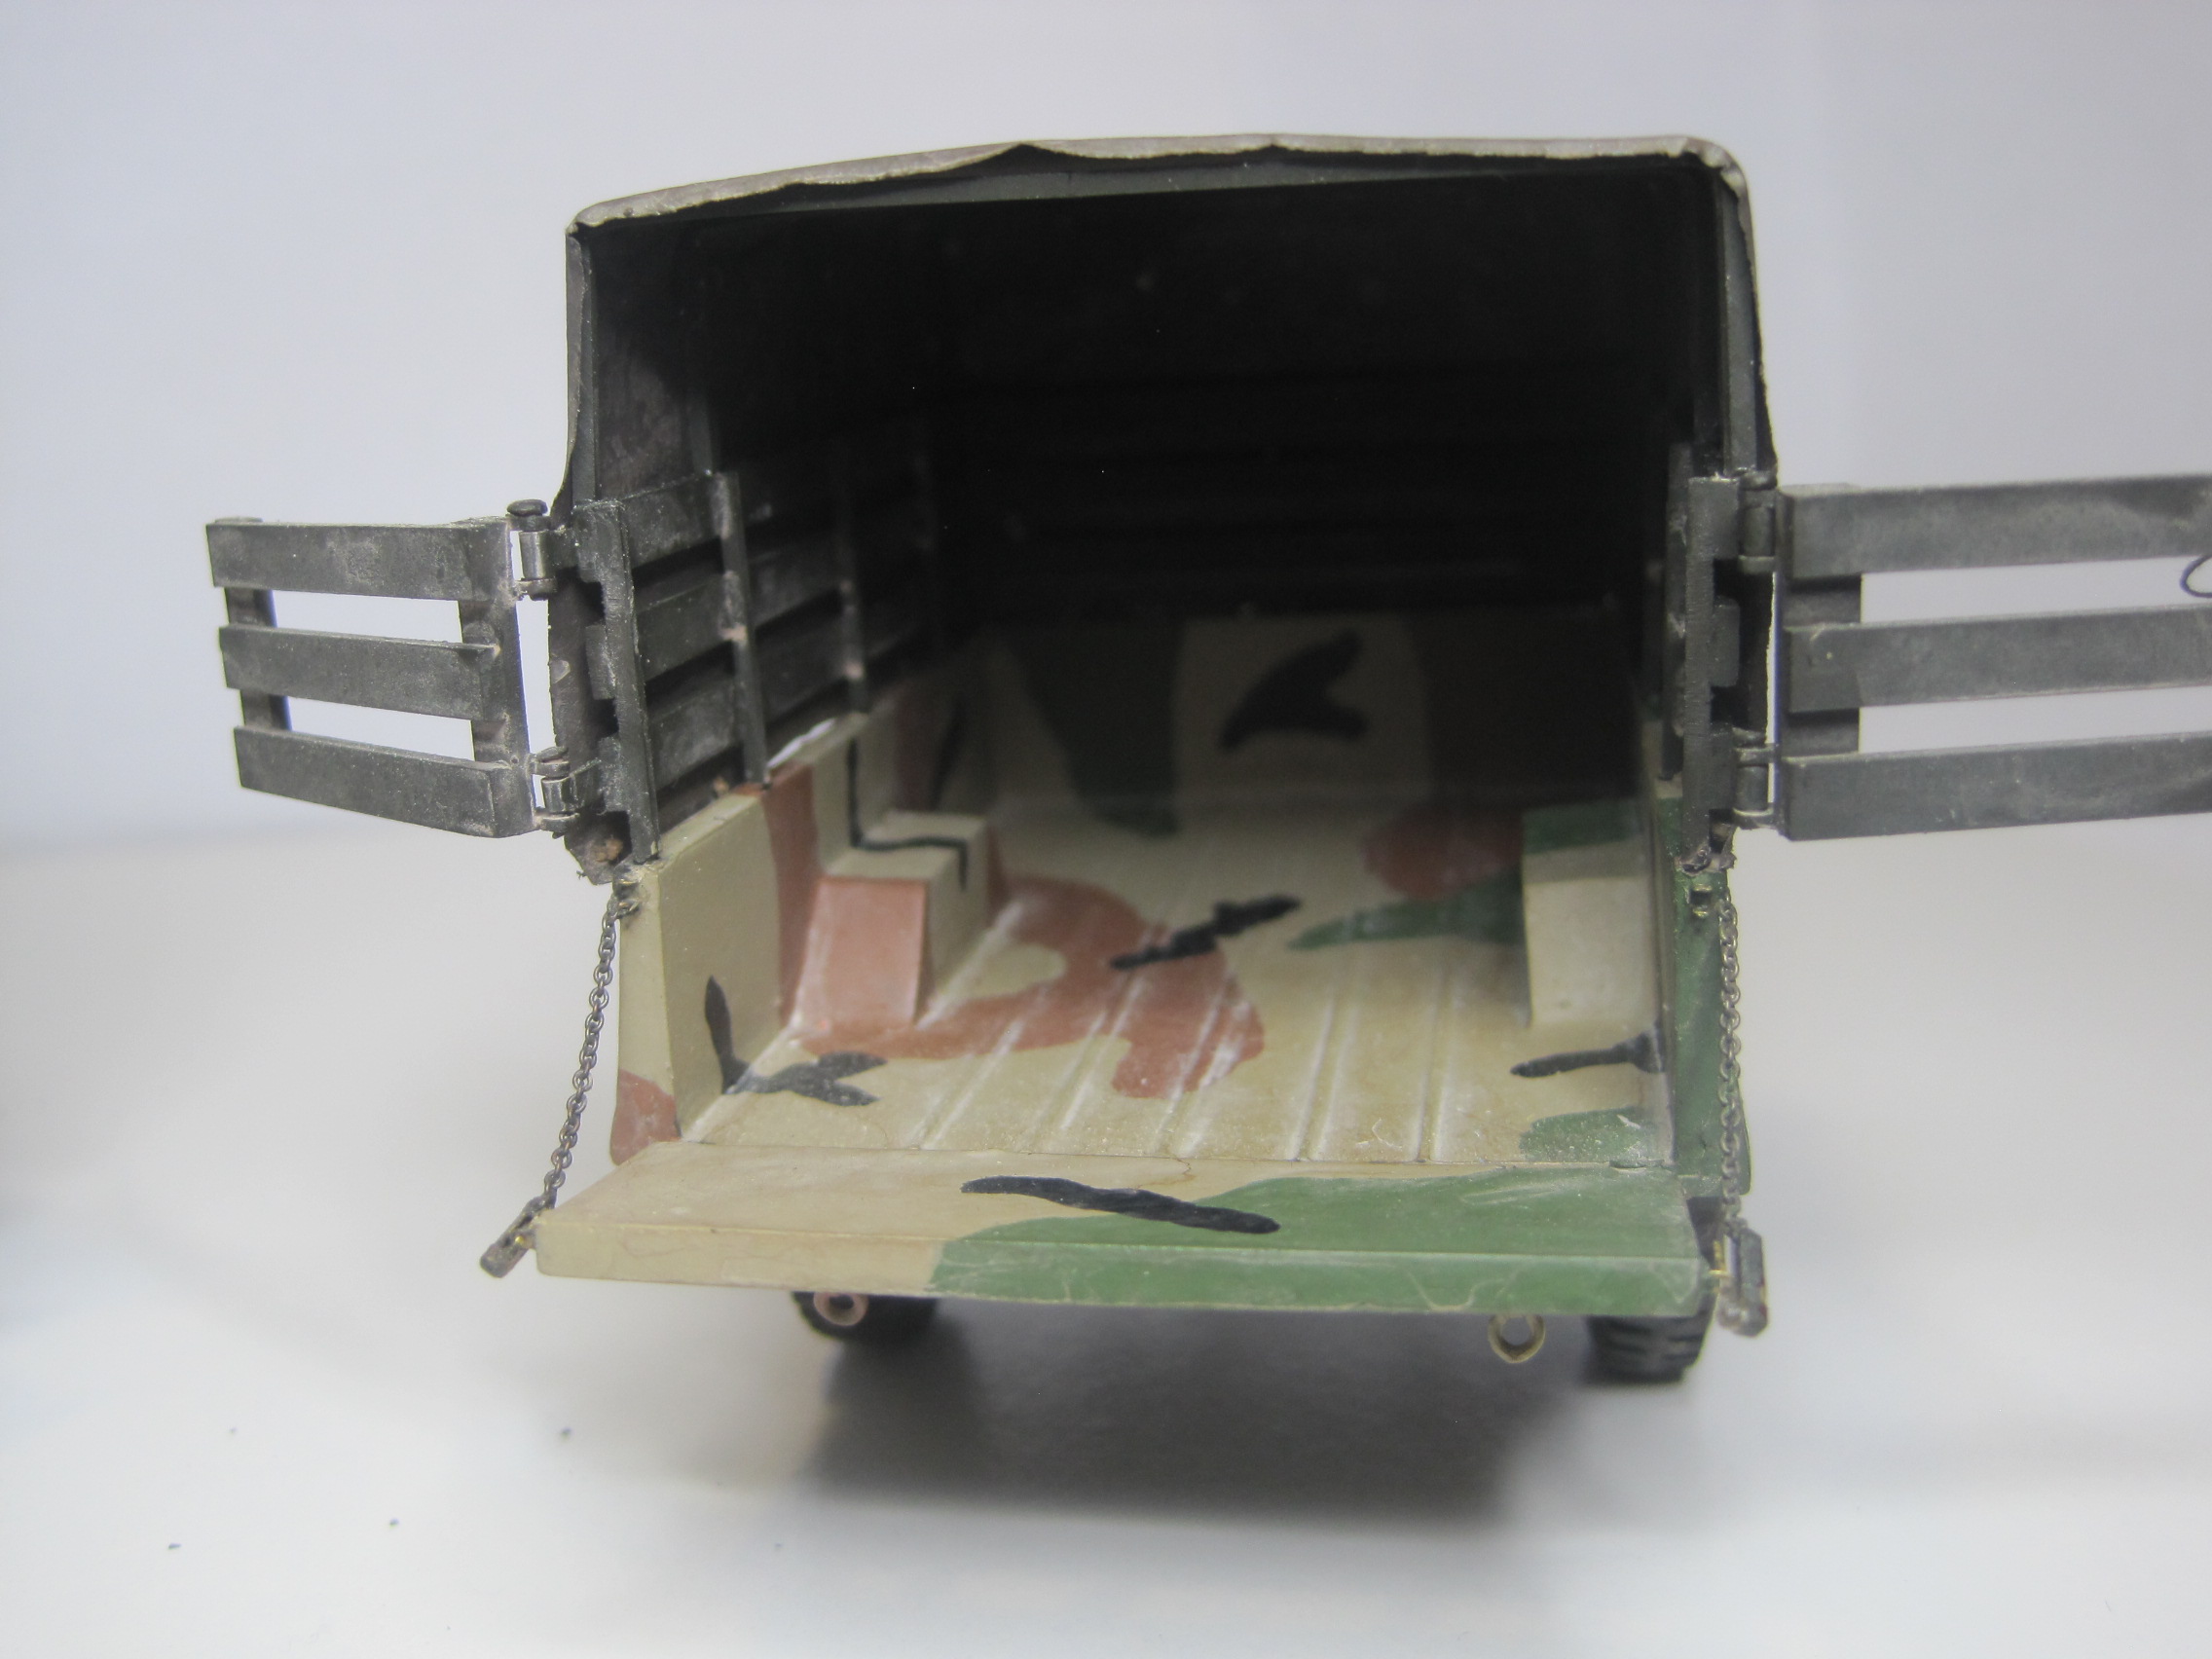
And it was a pain to paint the interior of the beds. Putting stuff in and taking it out all the time put a lot of wear and tear on that. But that was our unit SOP, and it made sense because sometimes the vehicles would operate without a tarp, so the surface was supposed to be painted. Not sure if every other unit did that or not.
1 Like
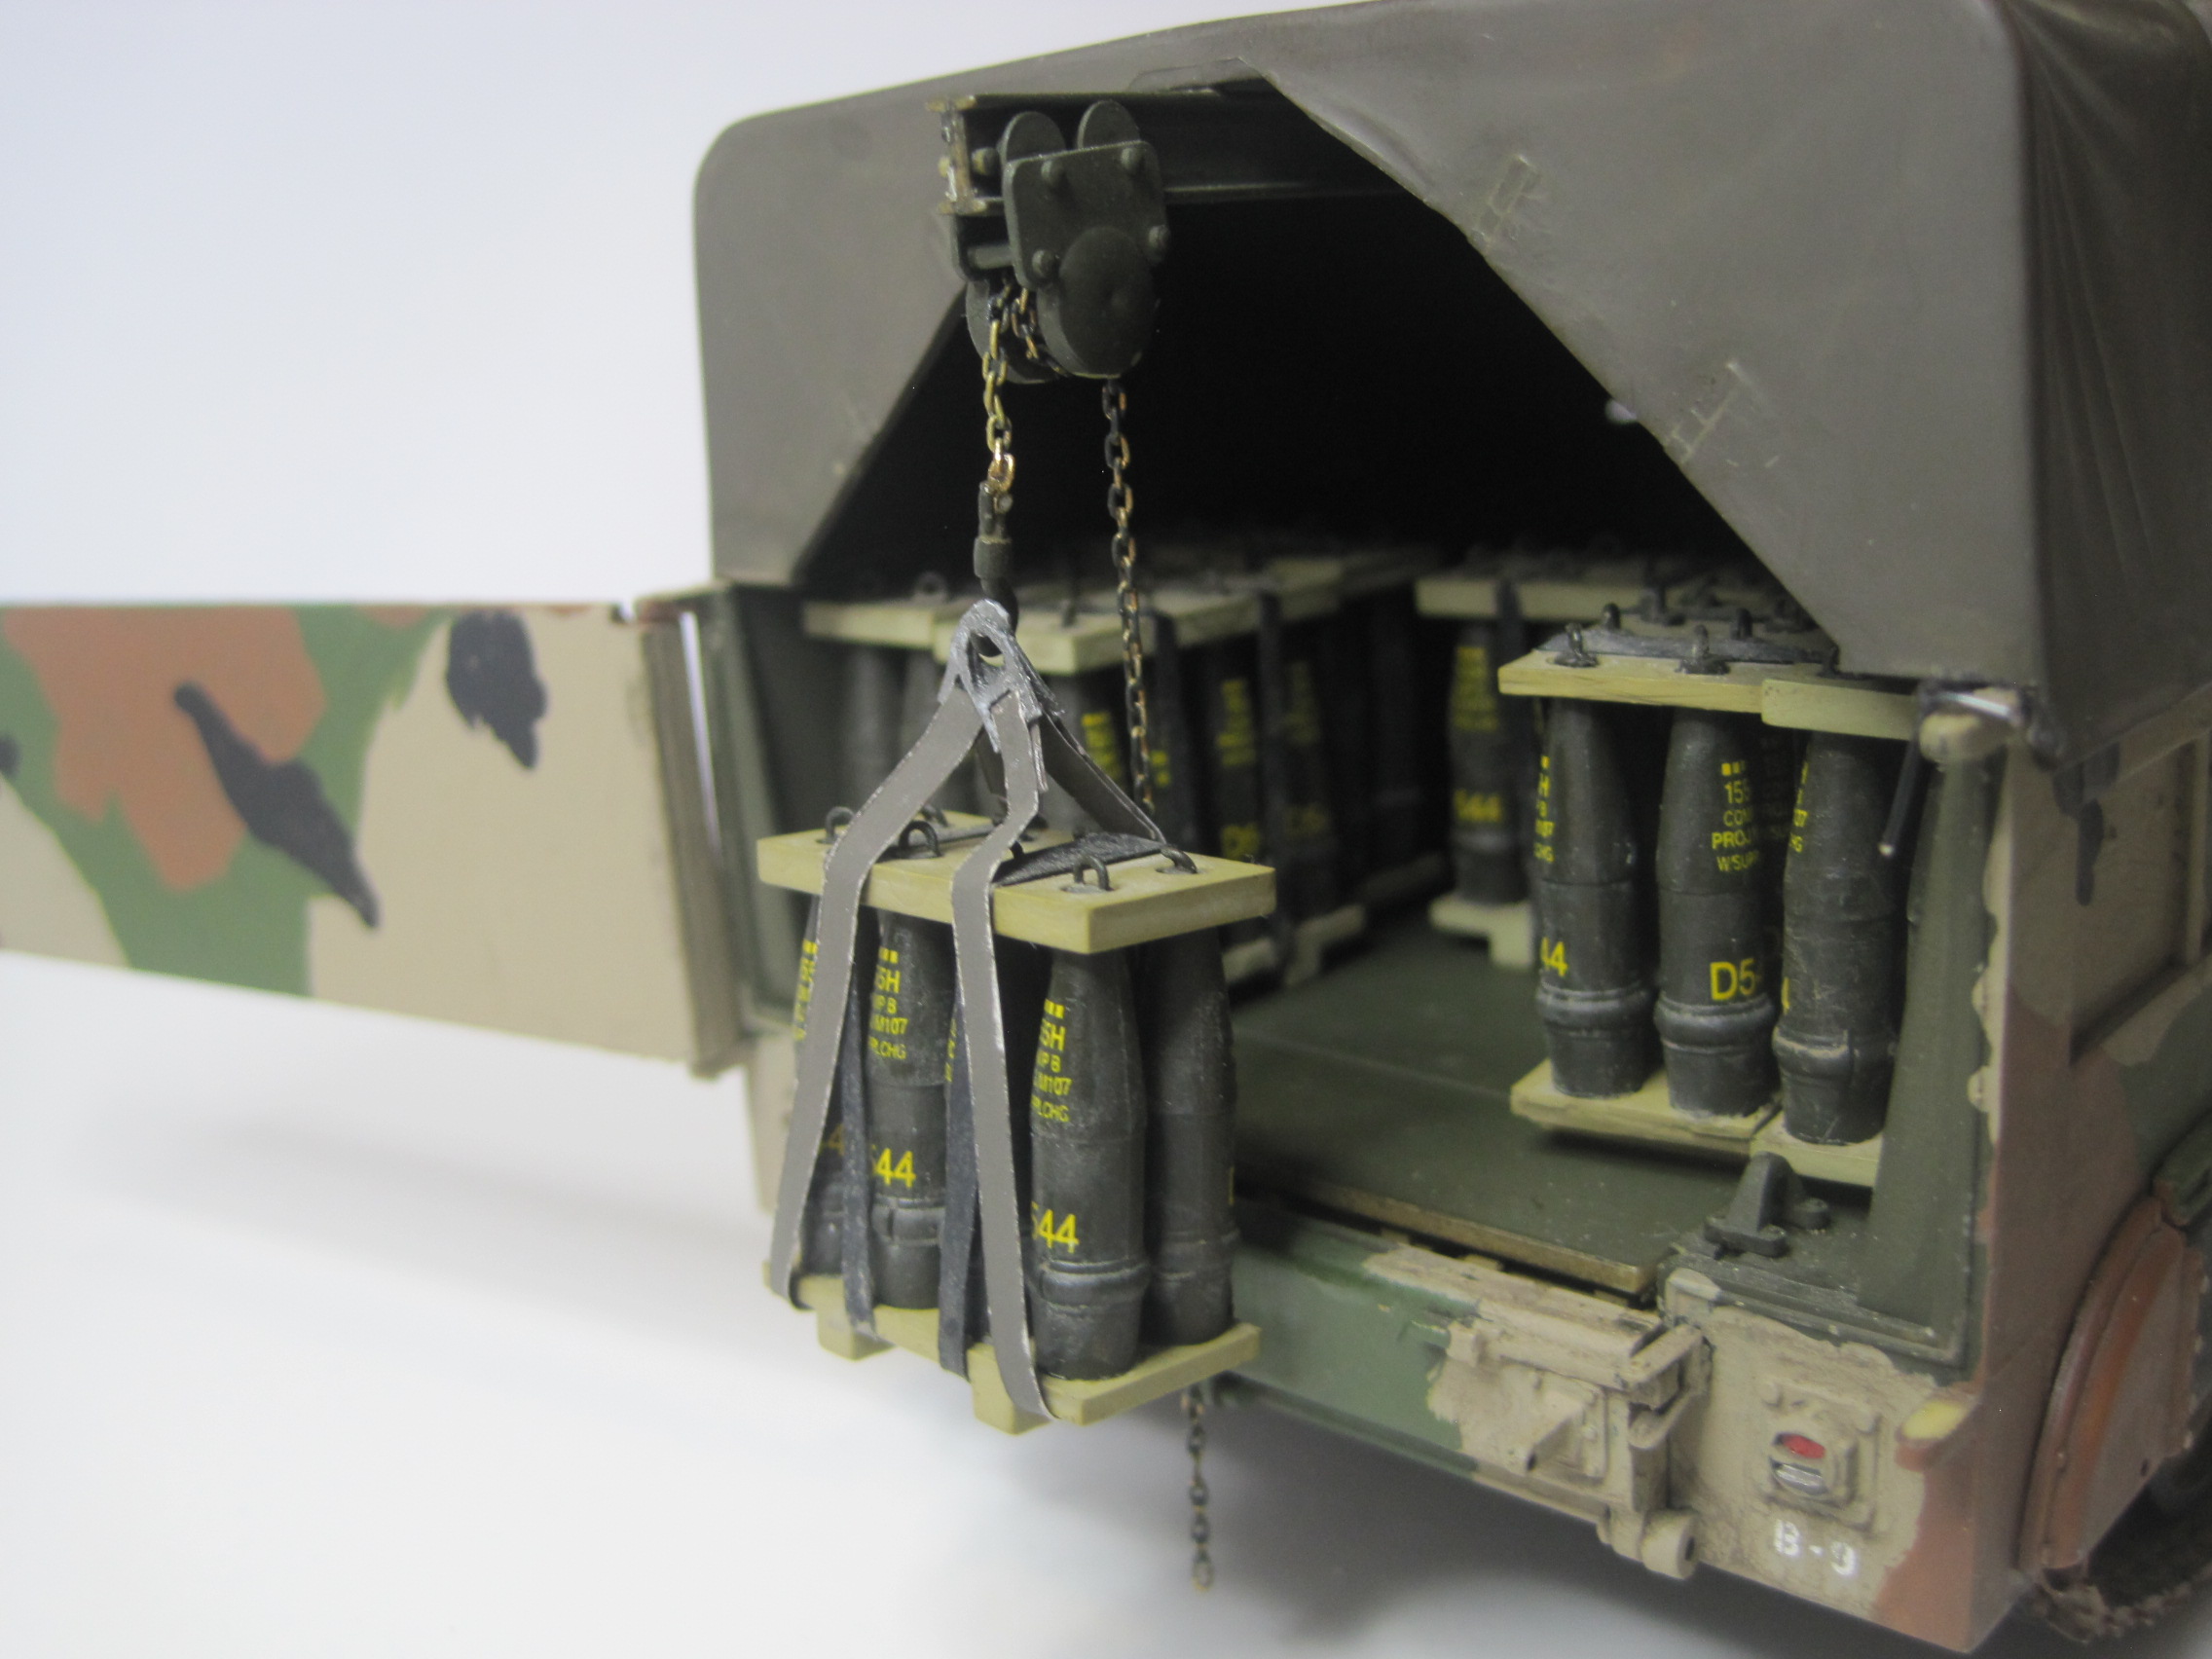
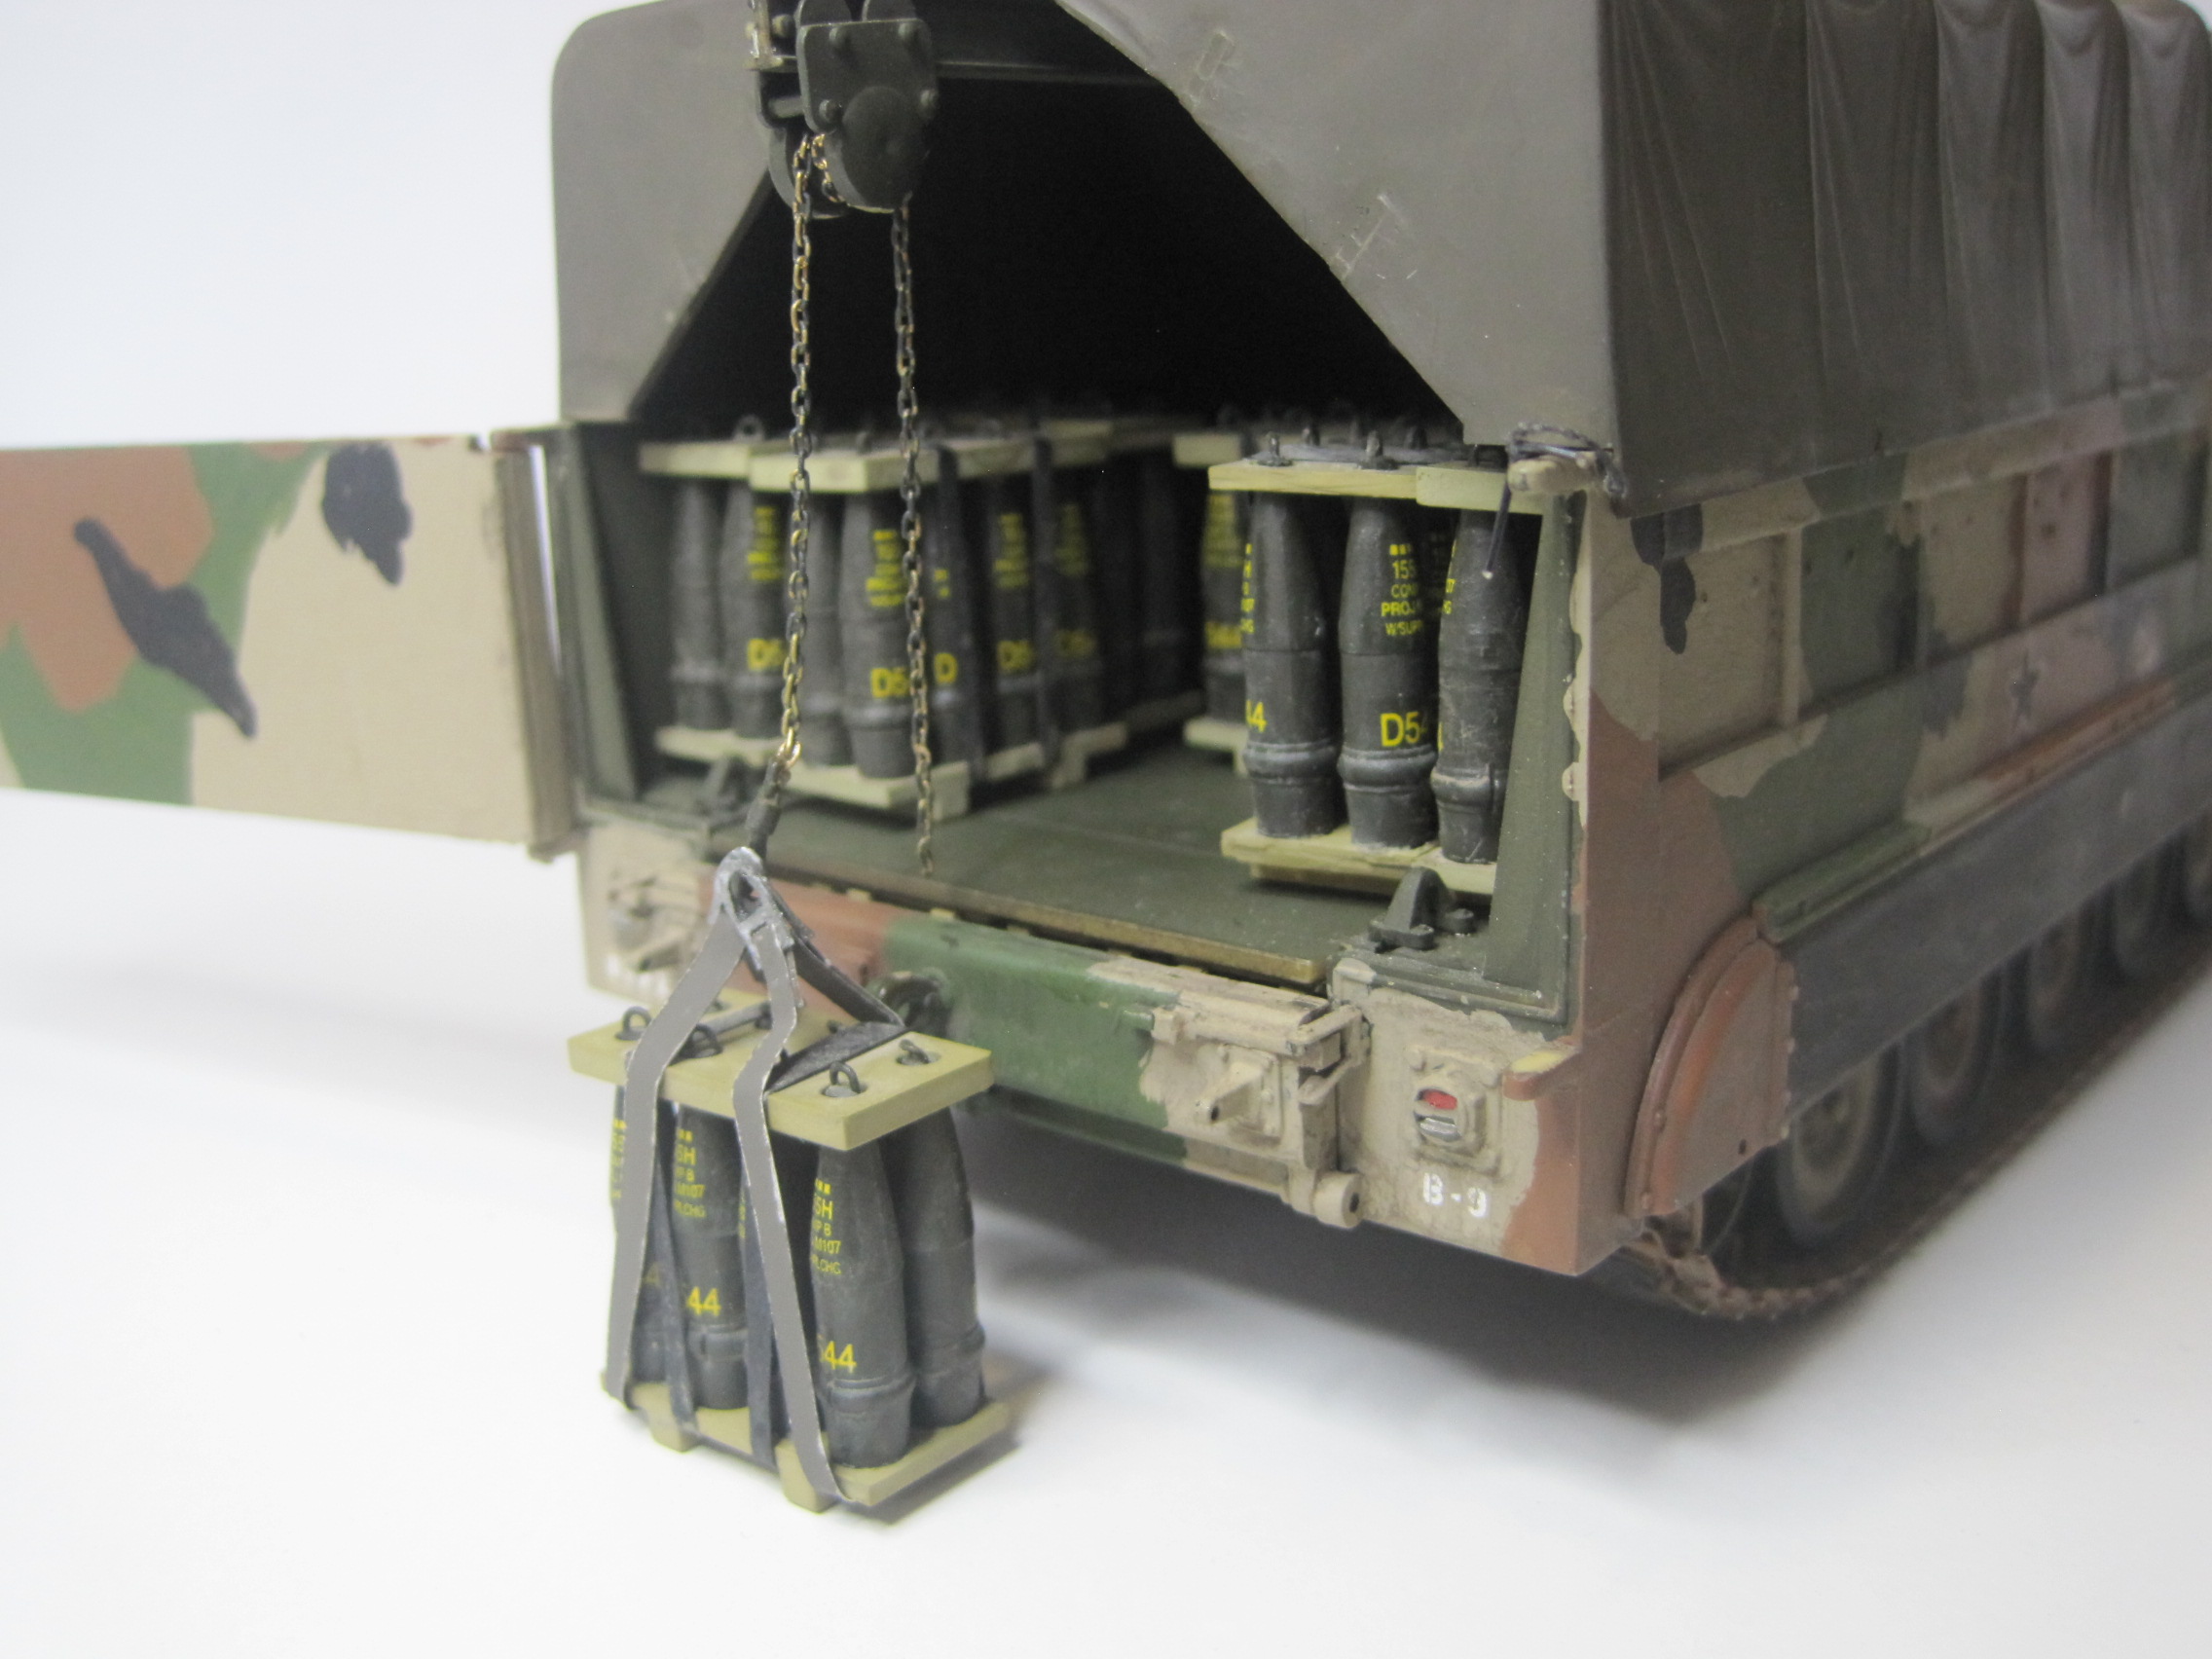
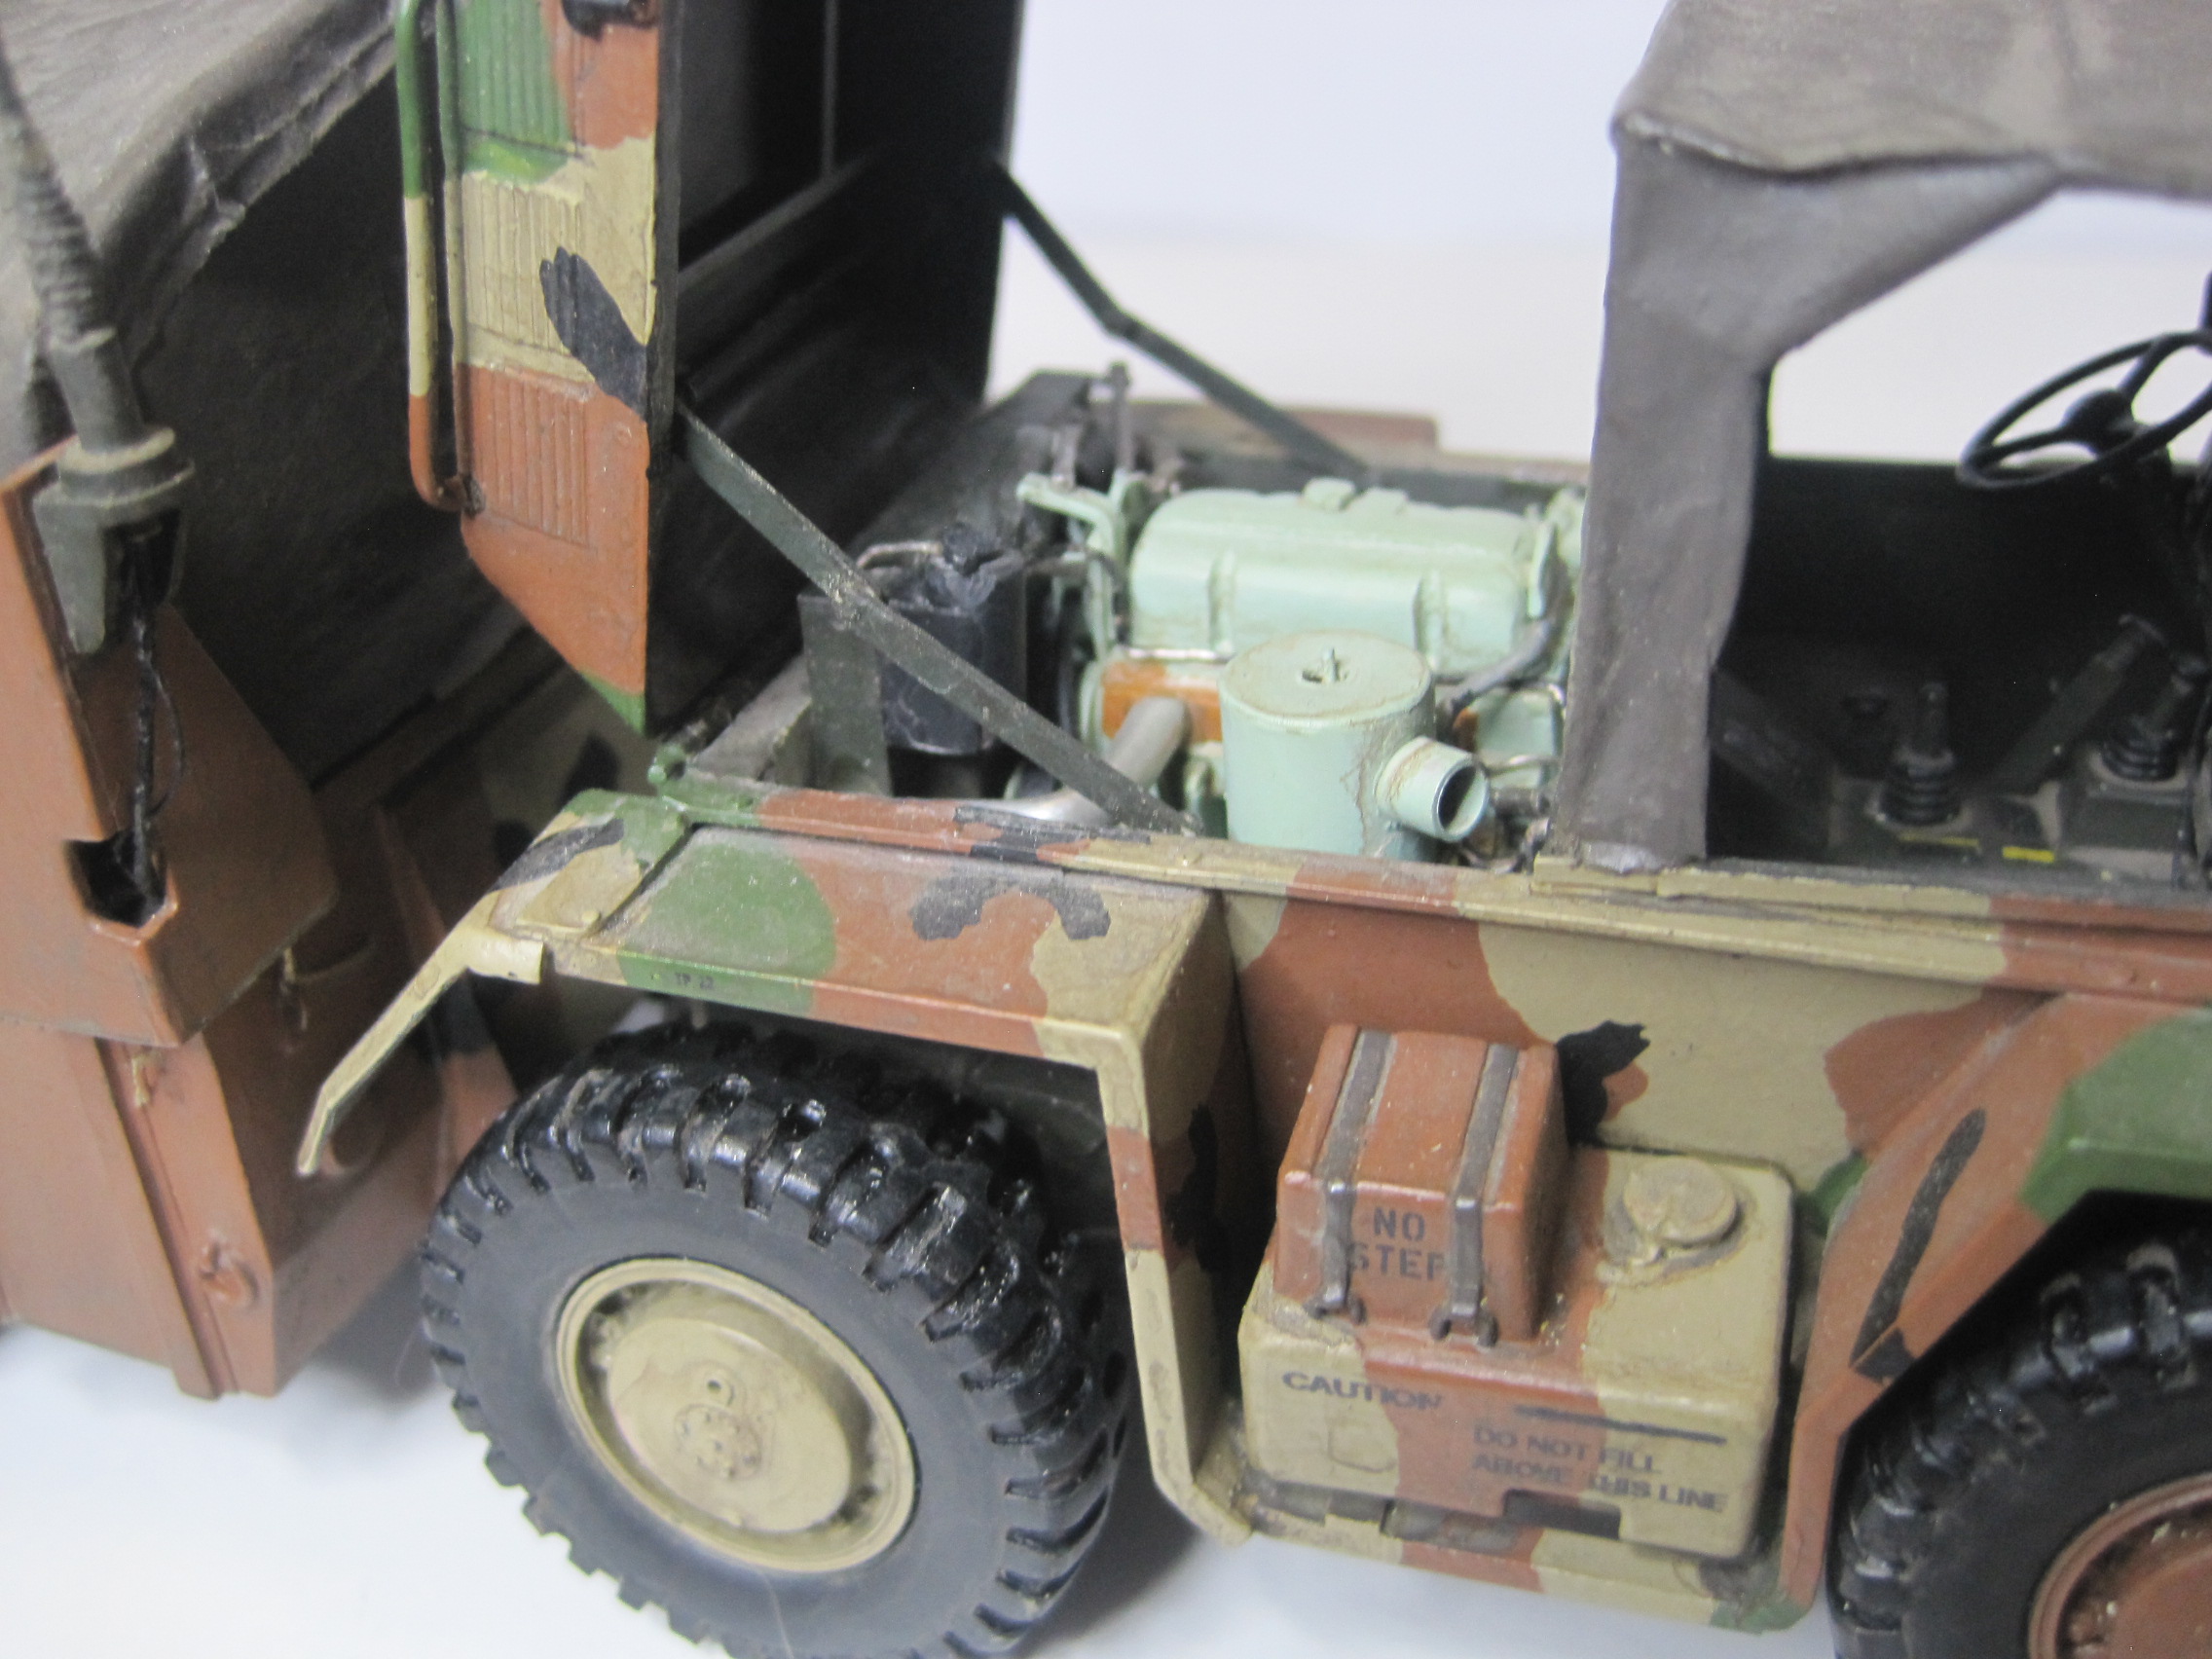
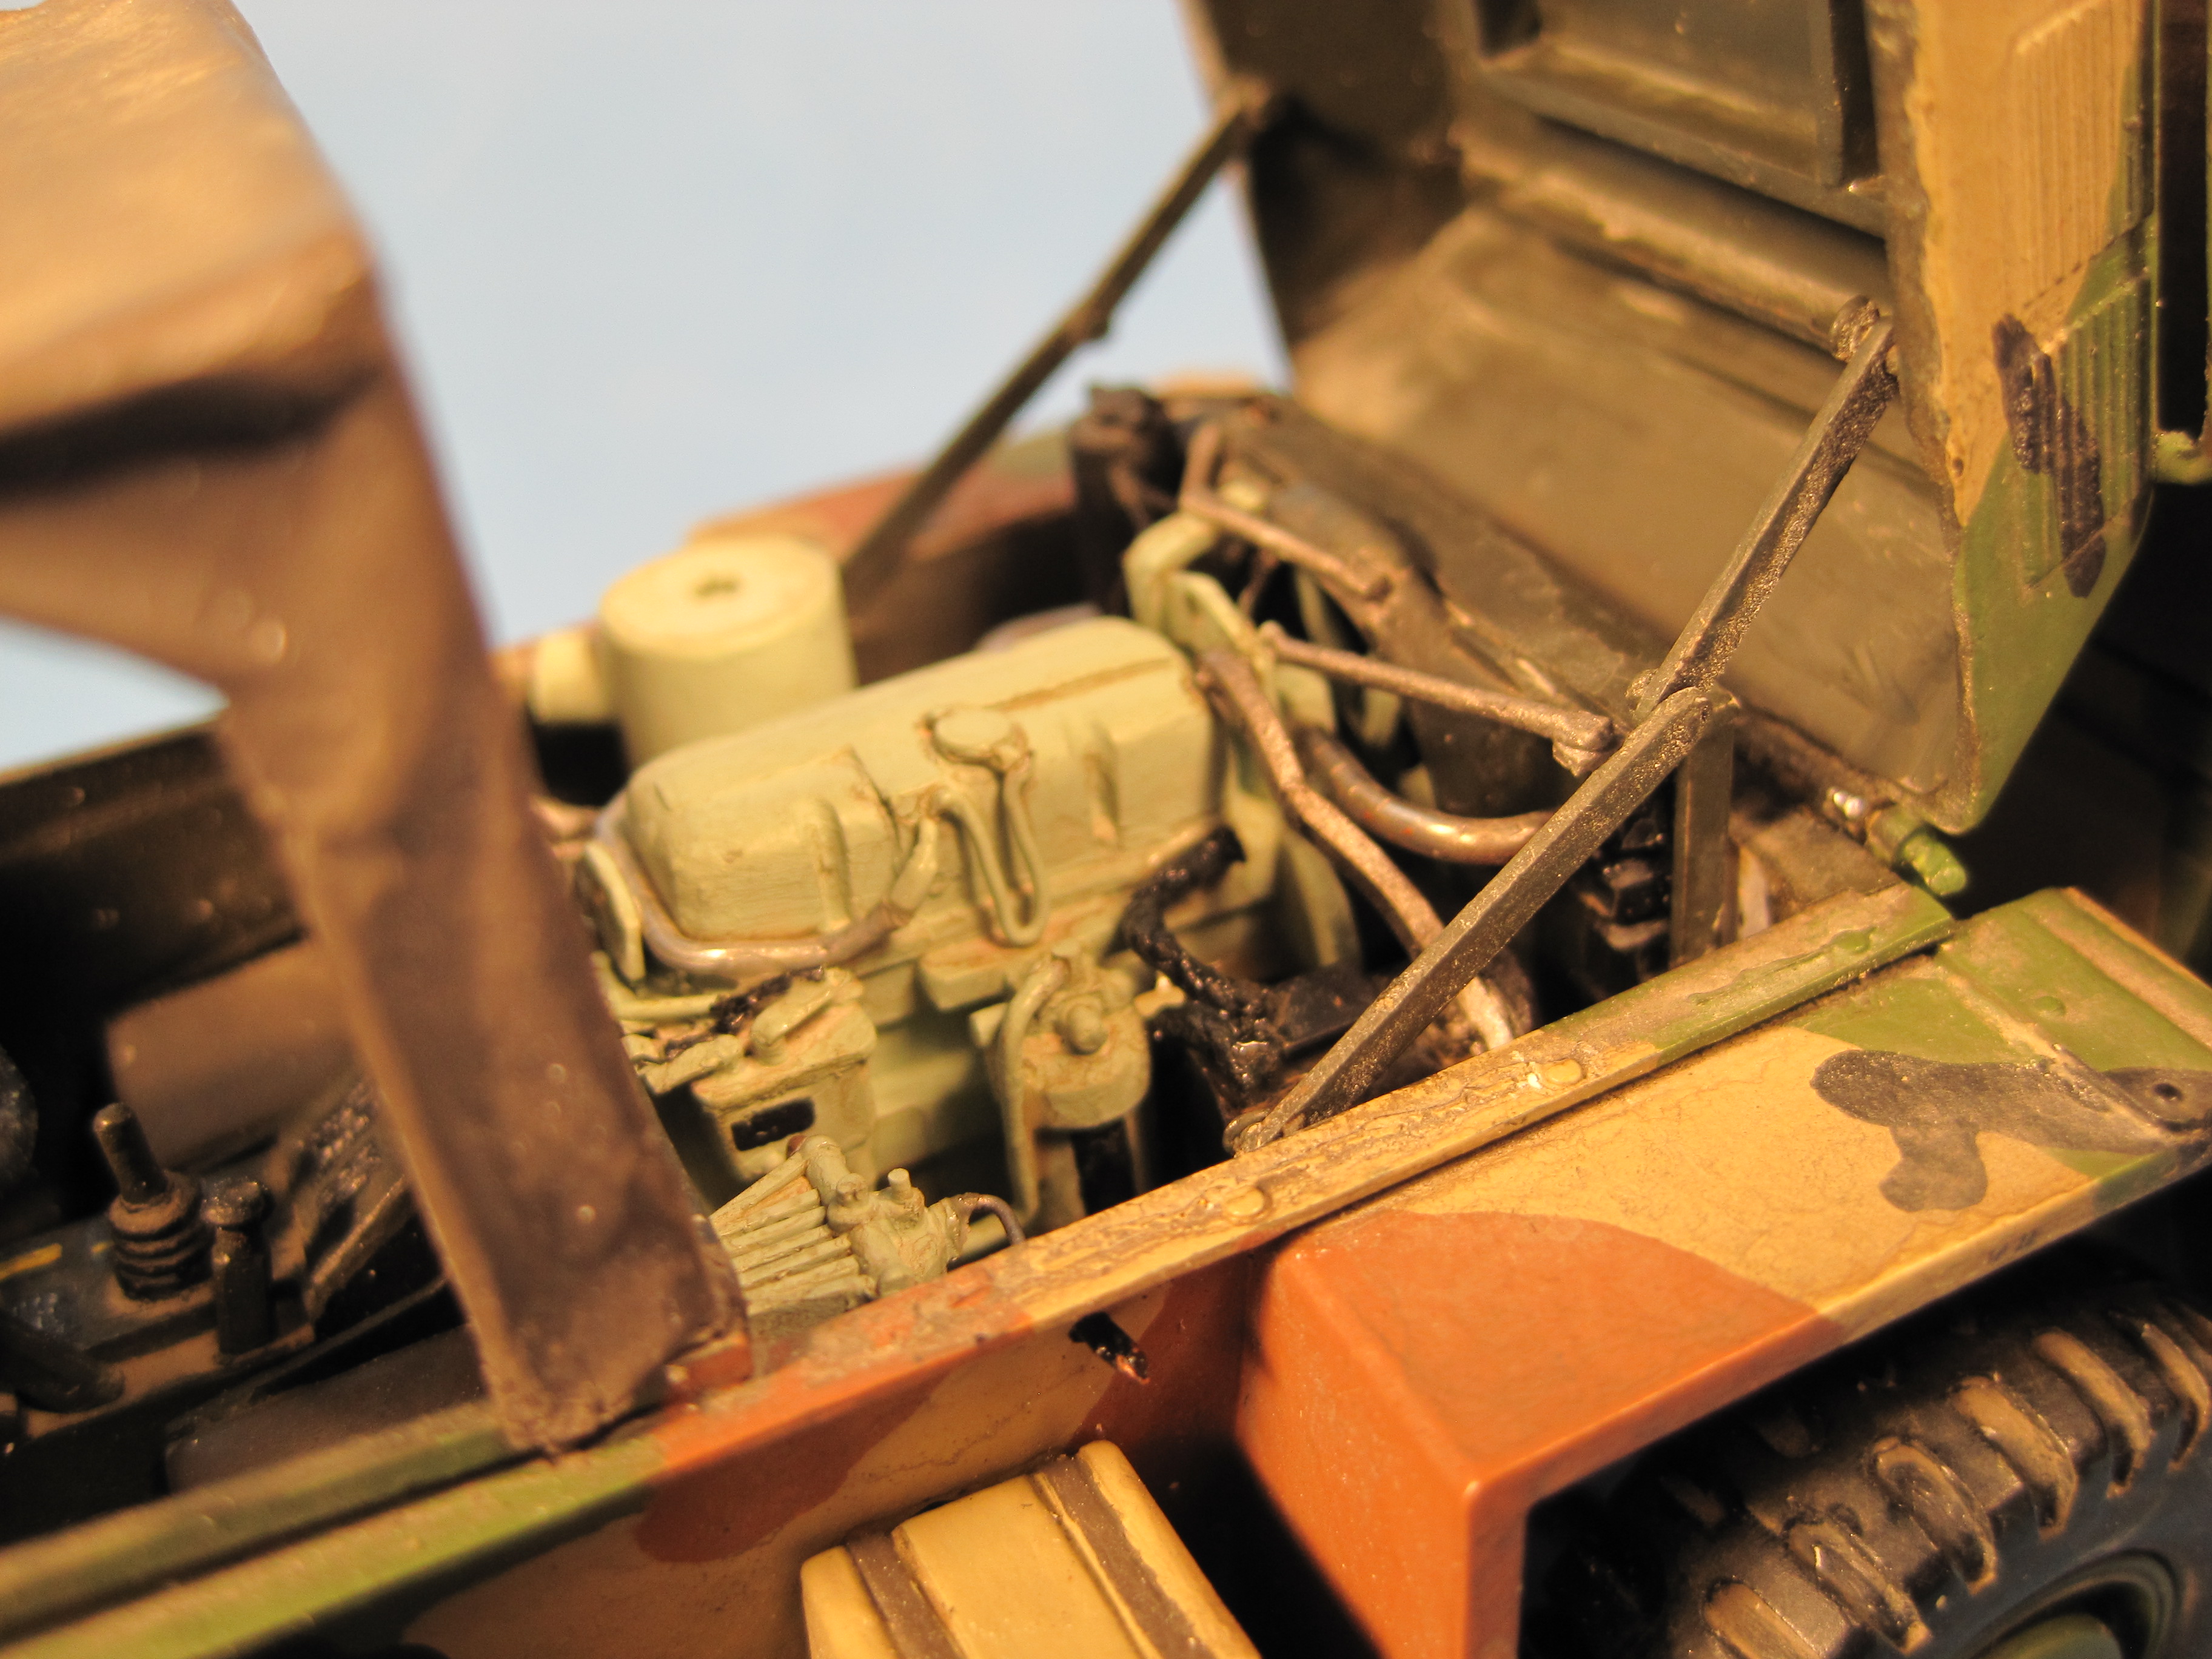
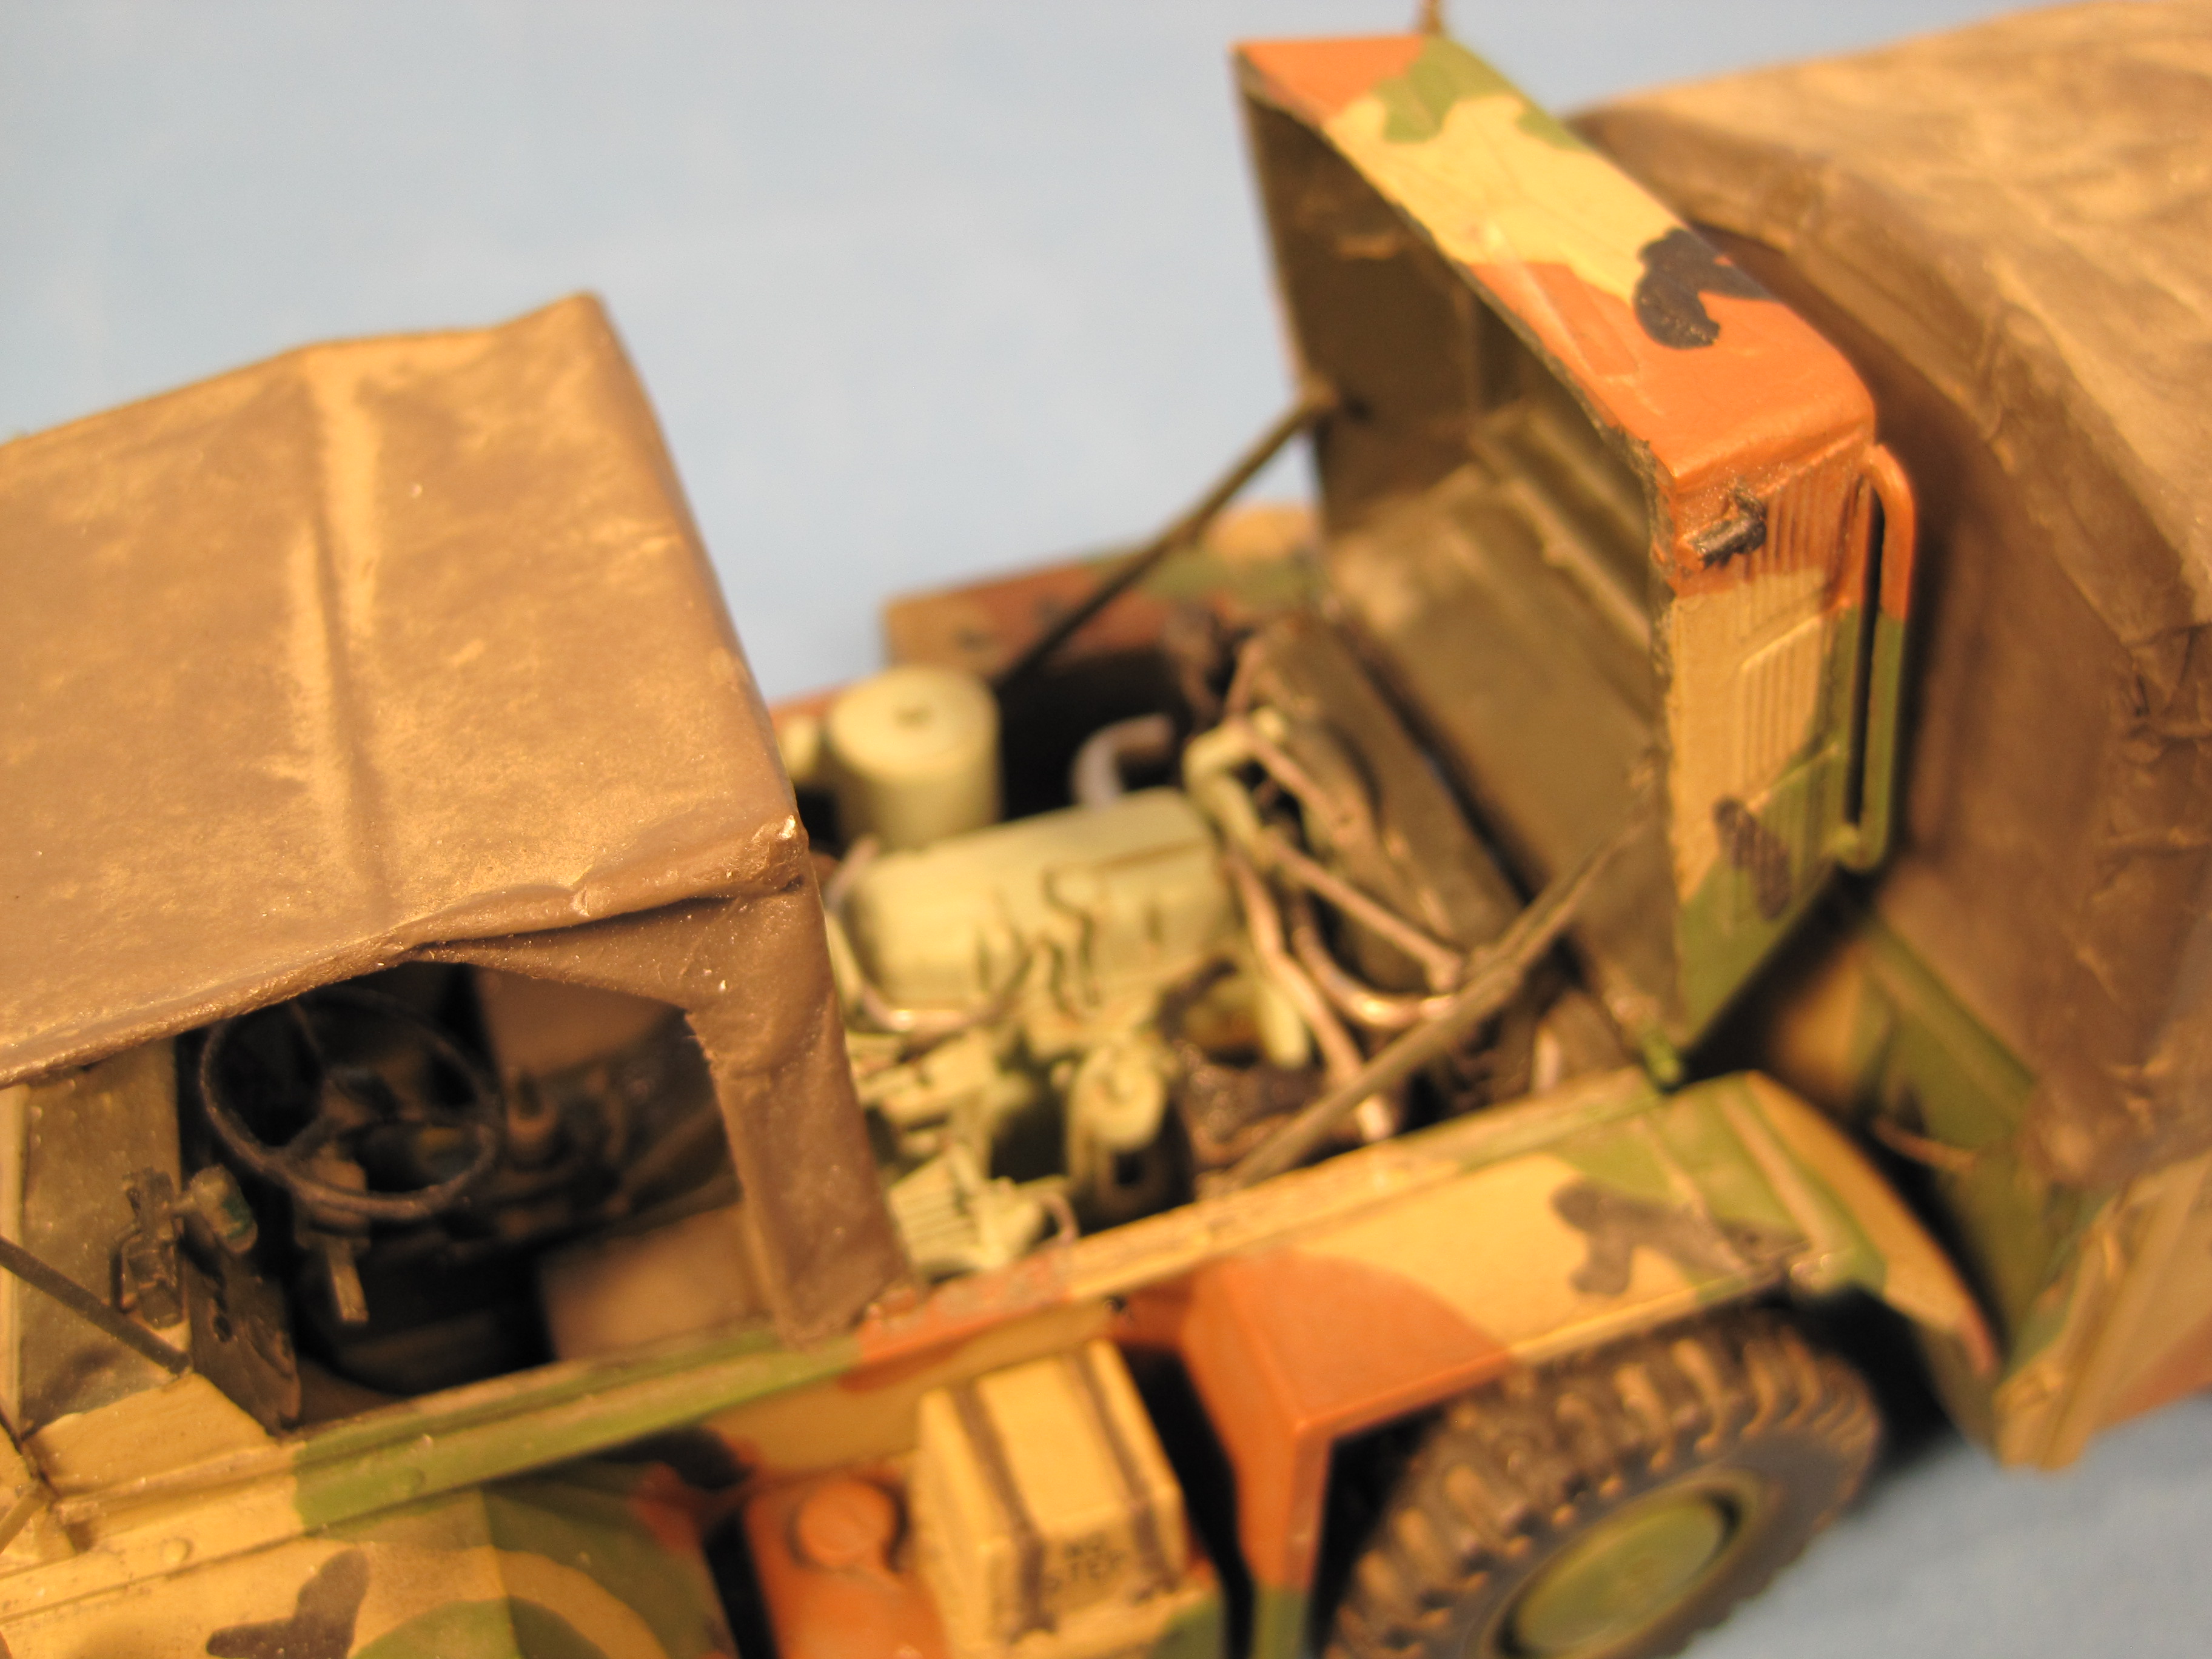
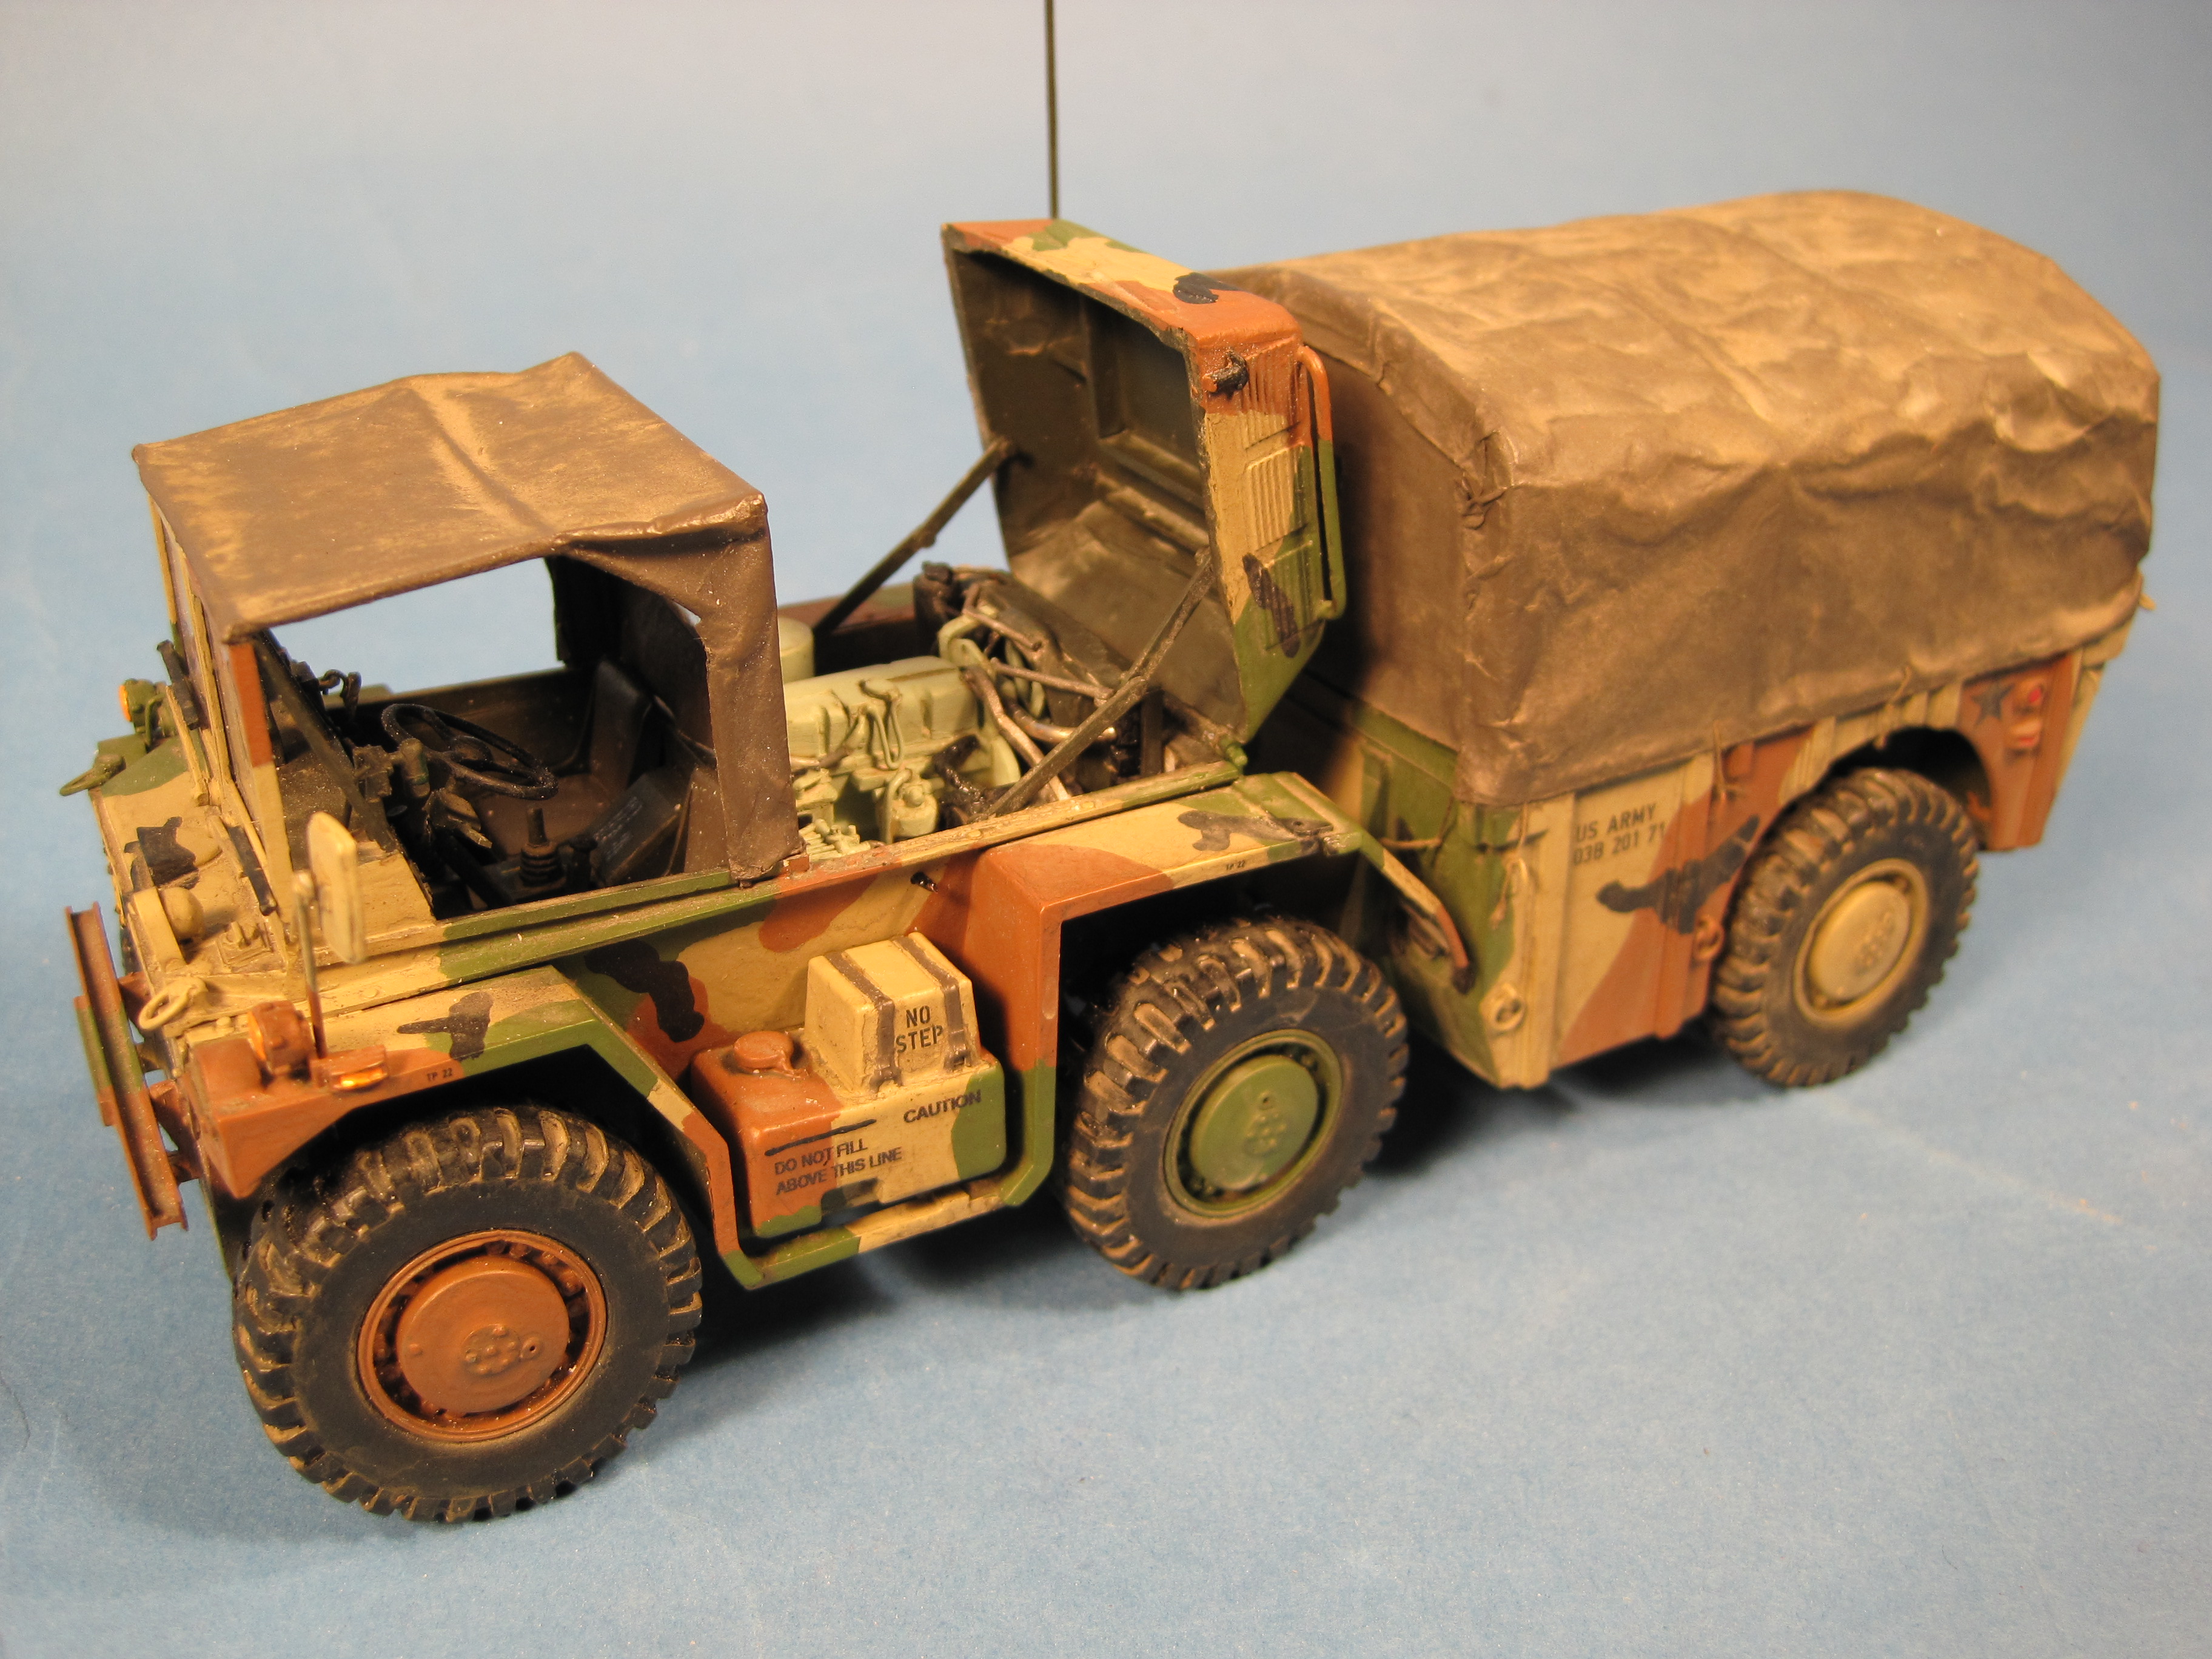
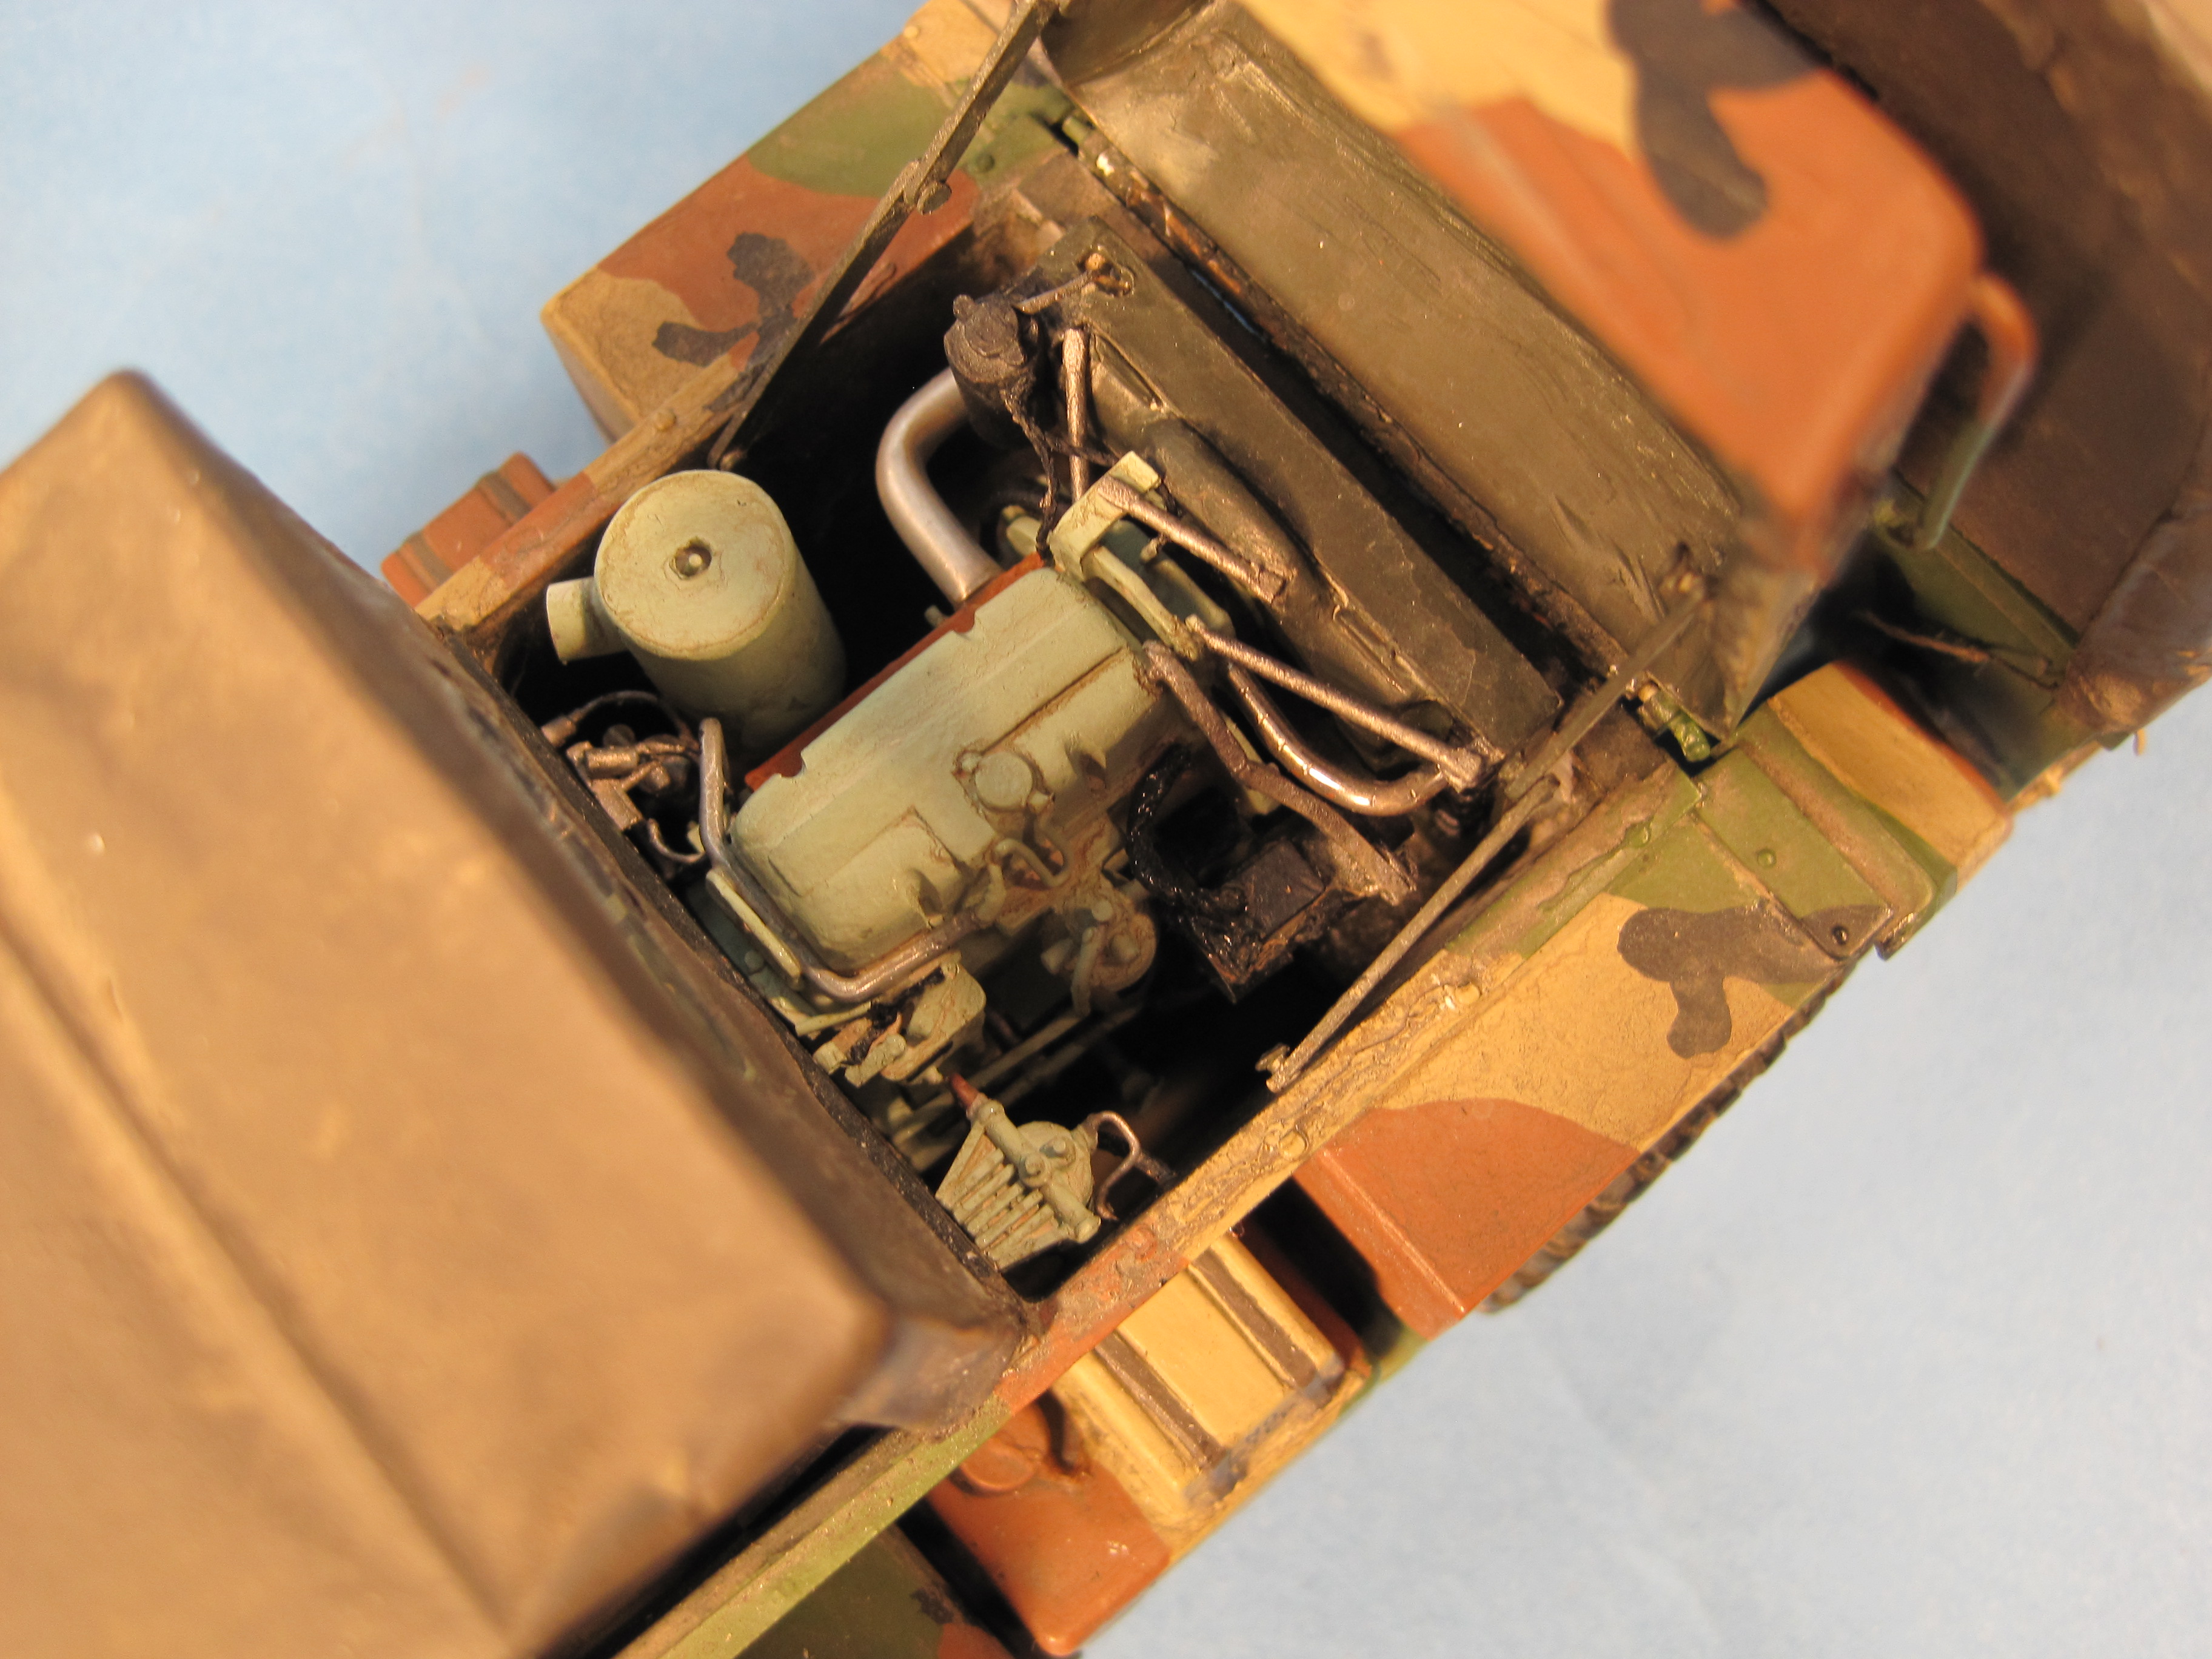
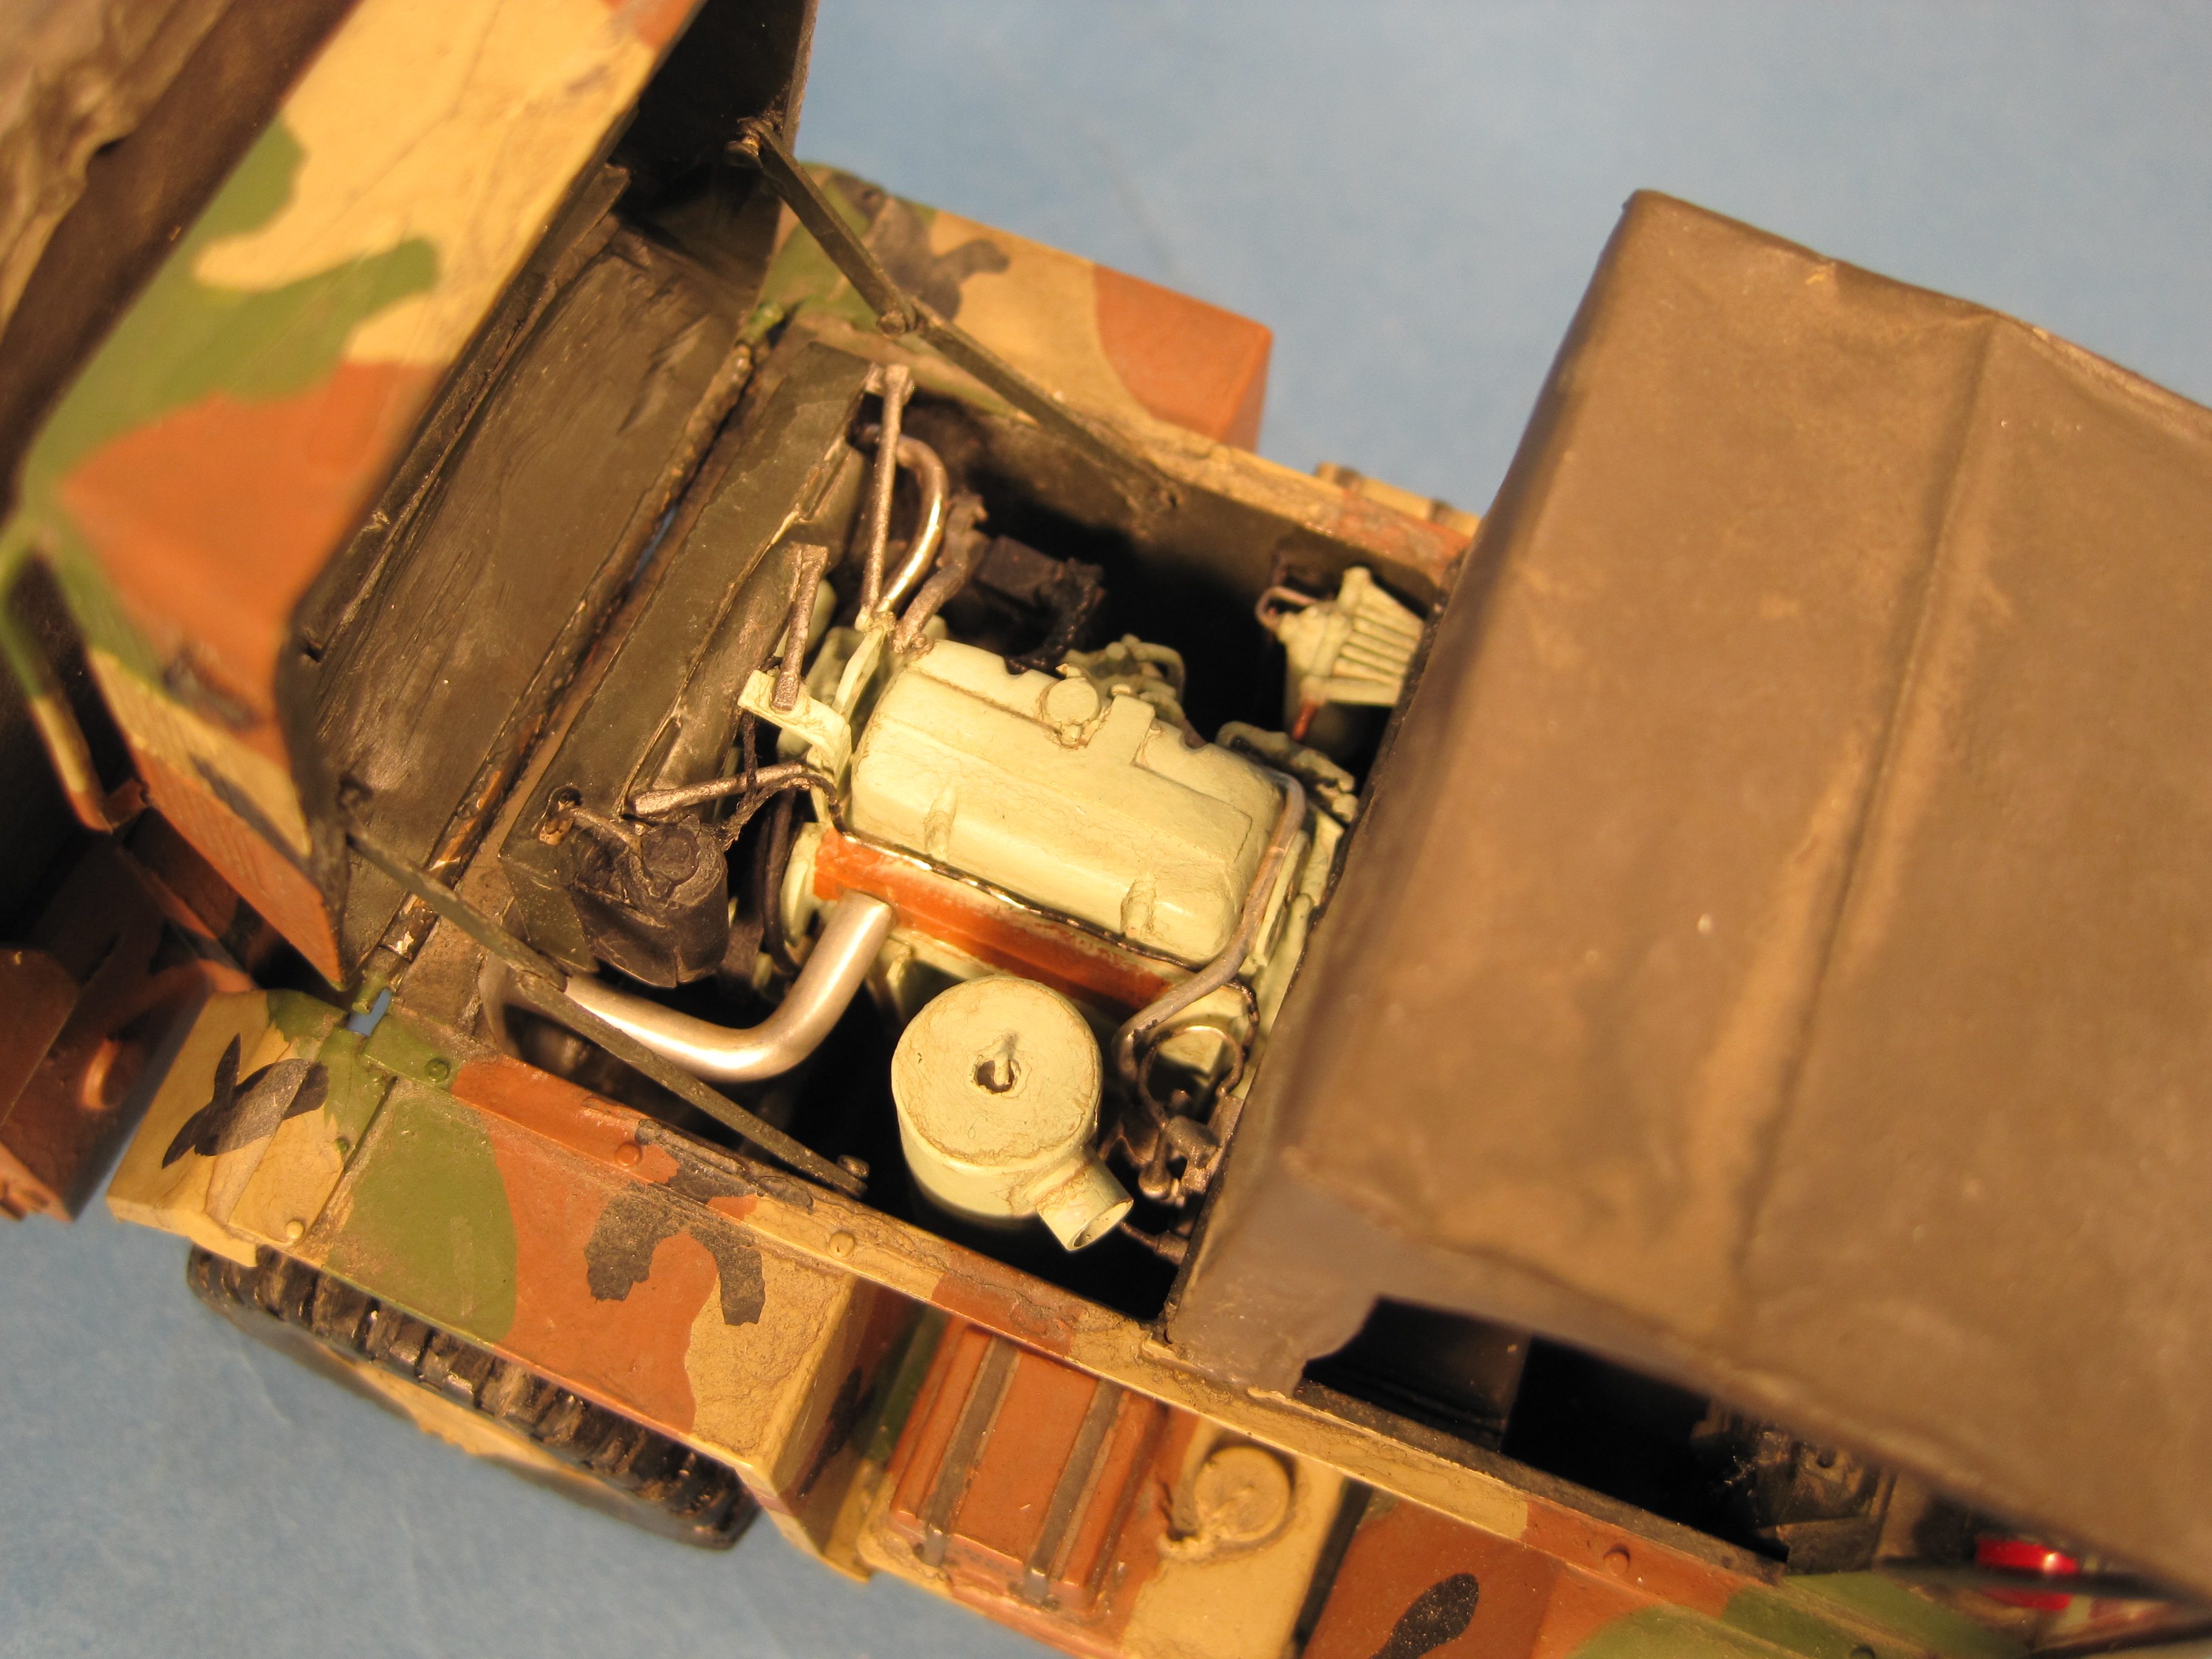
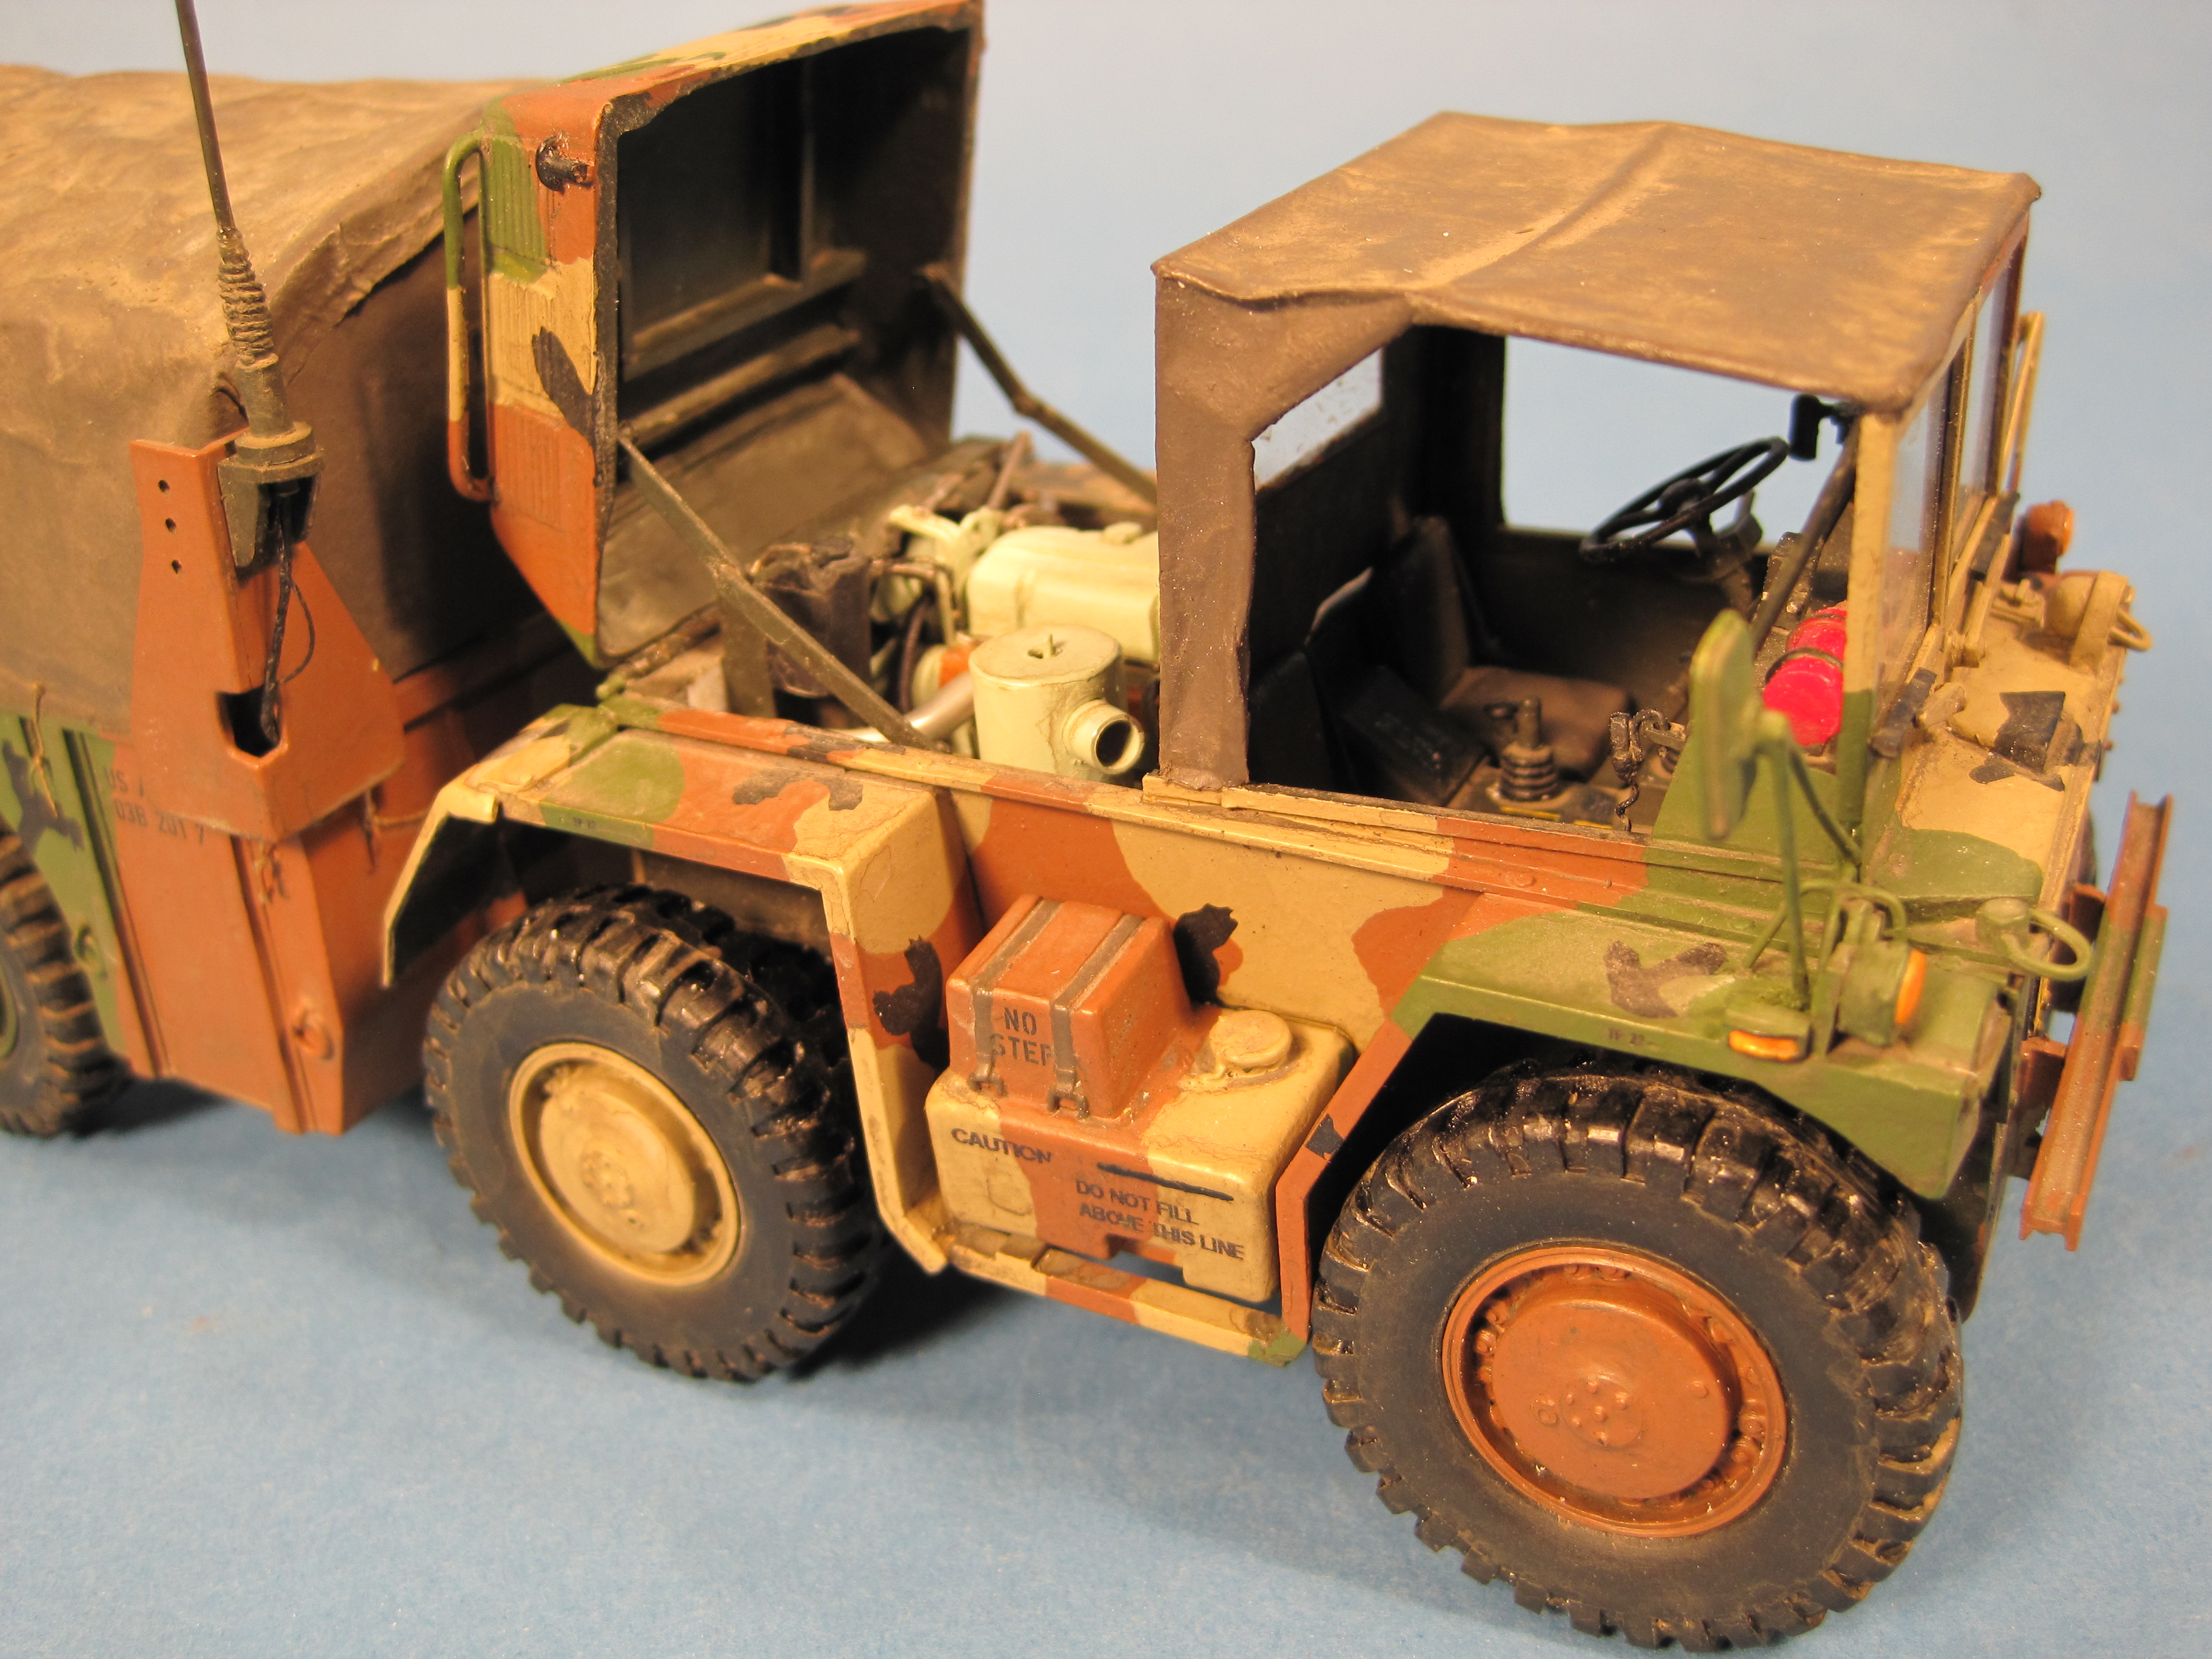
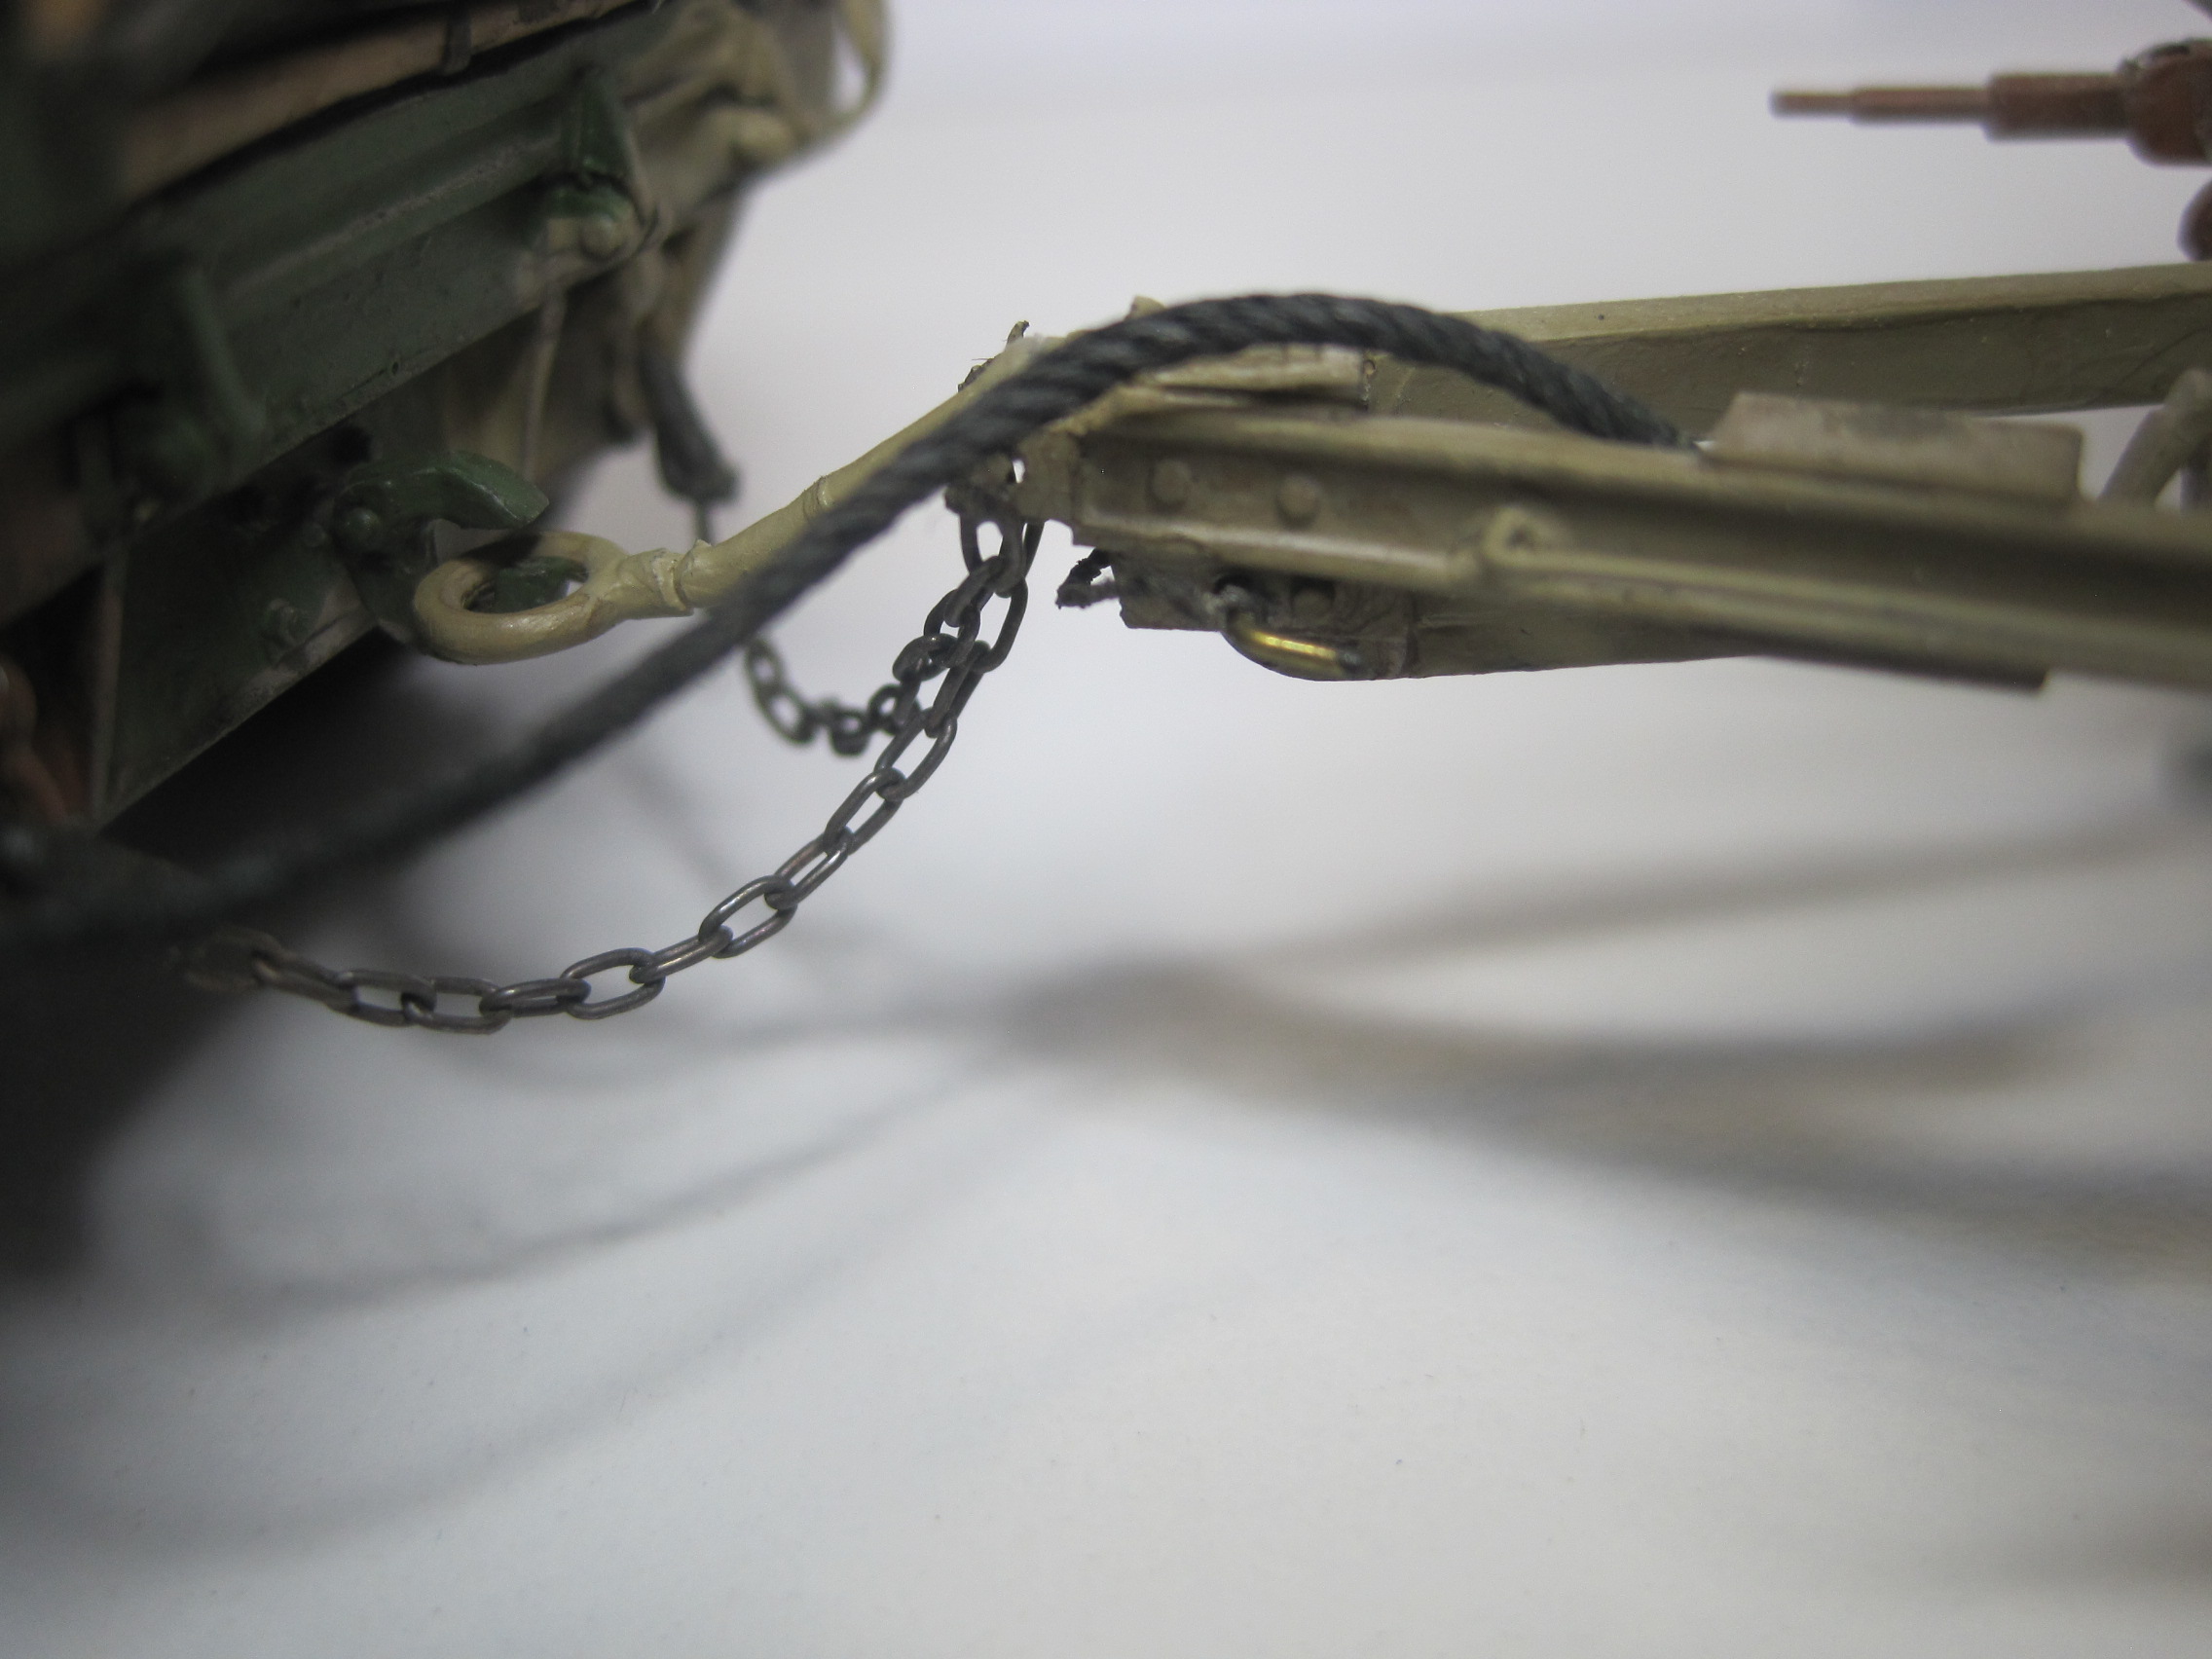
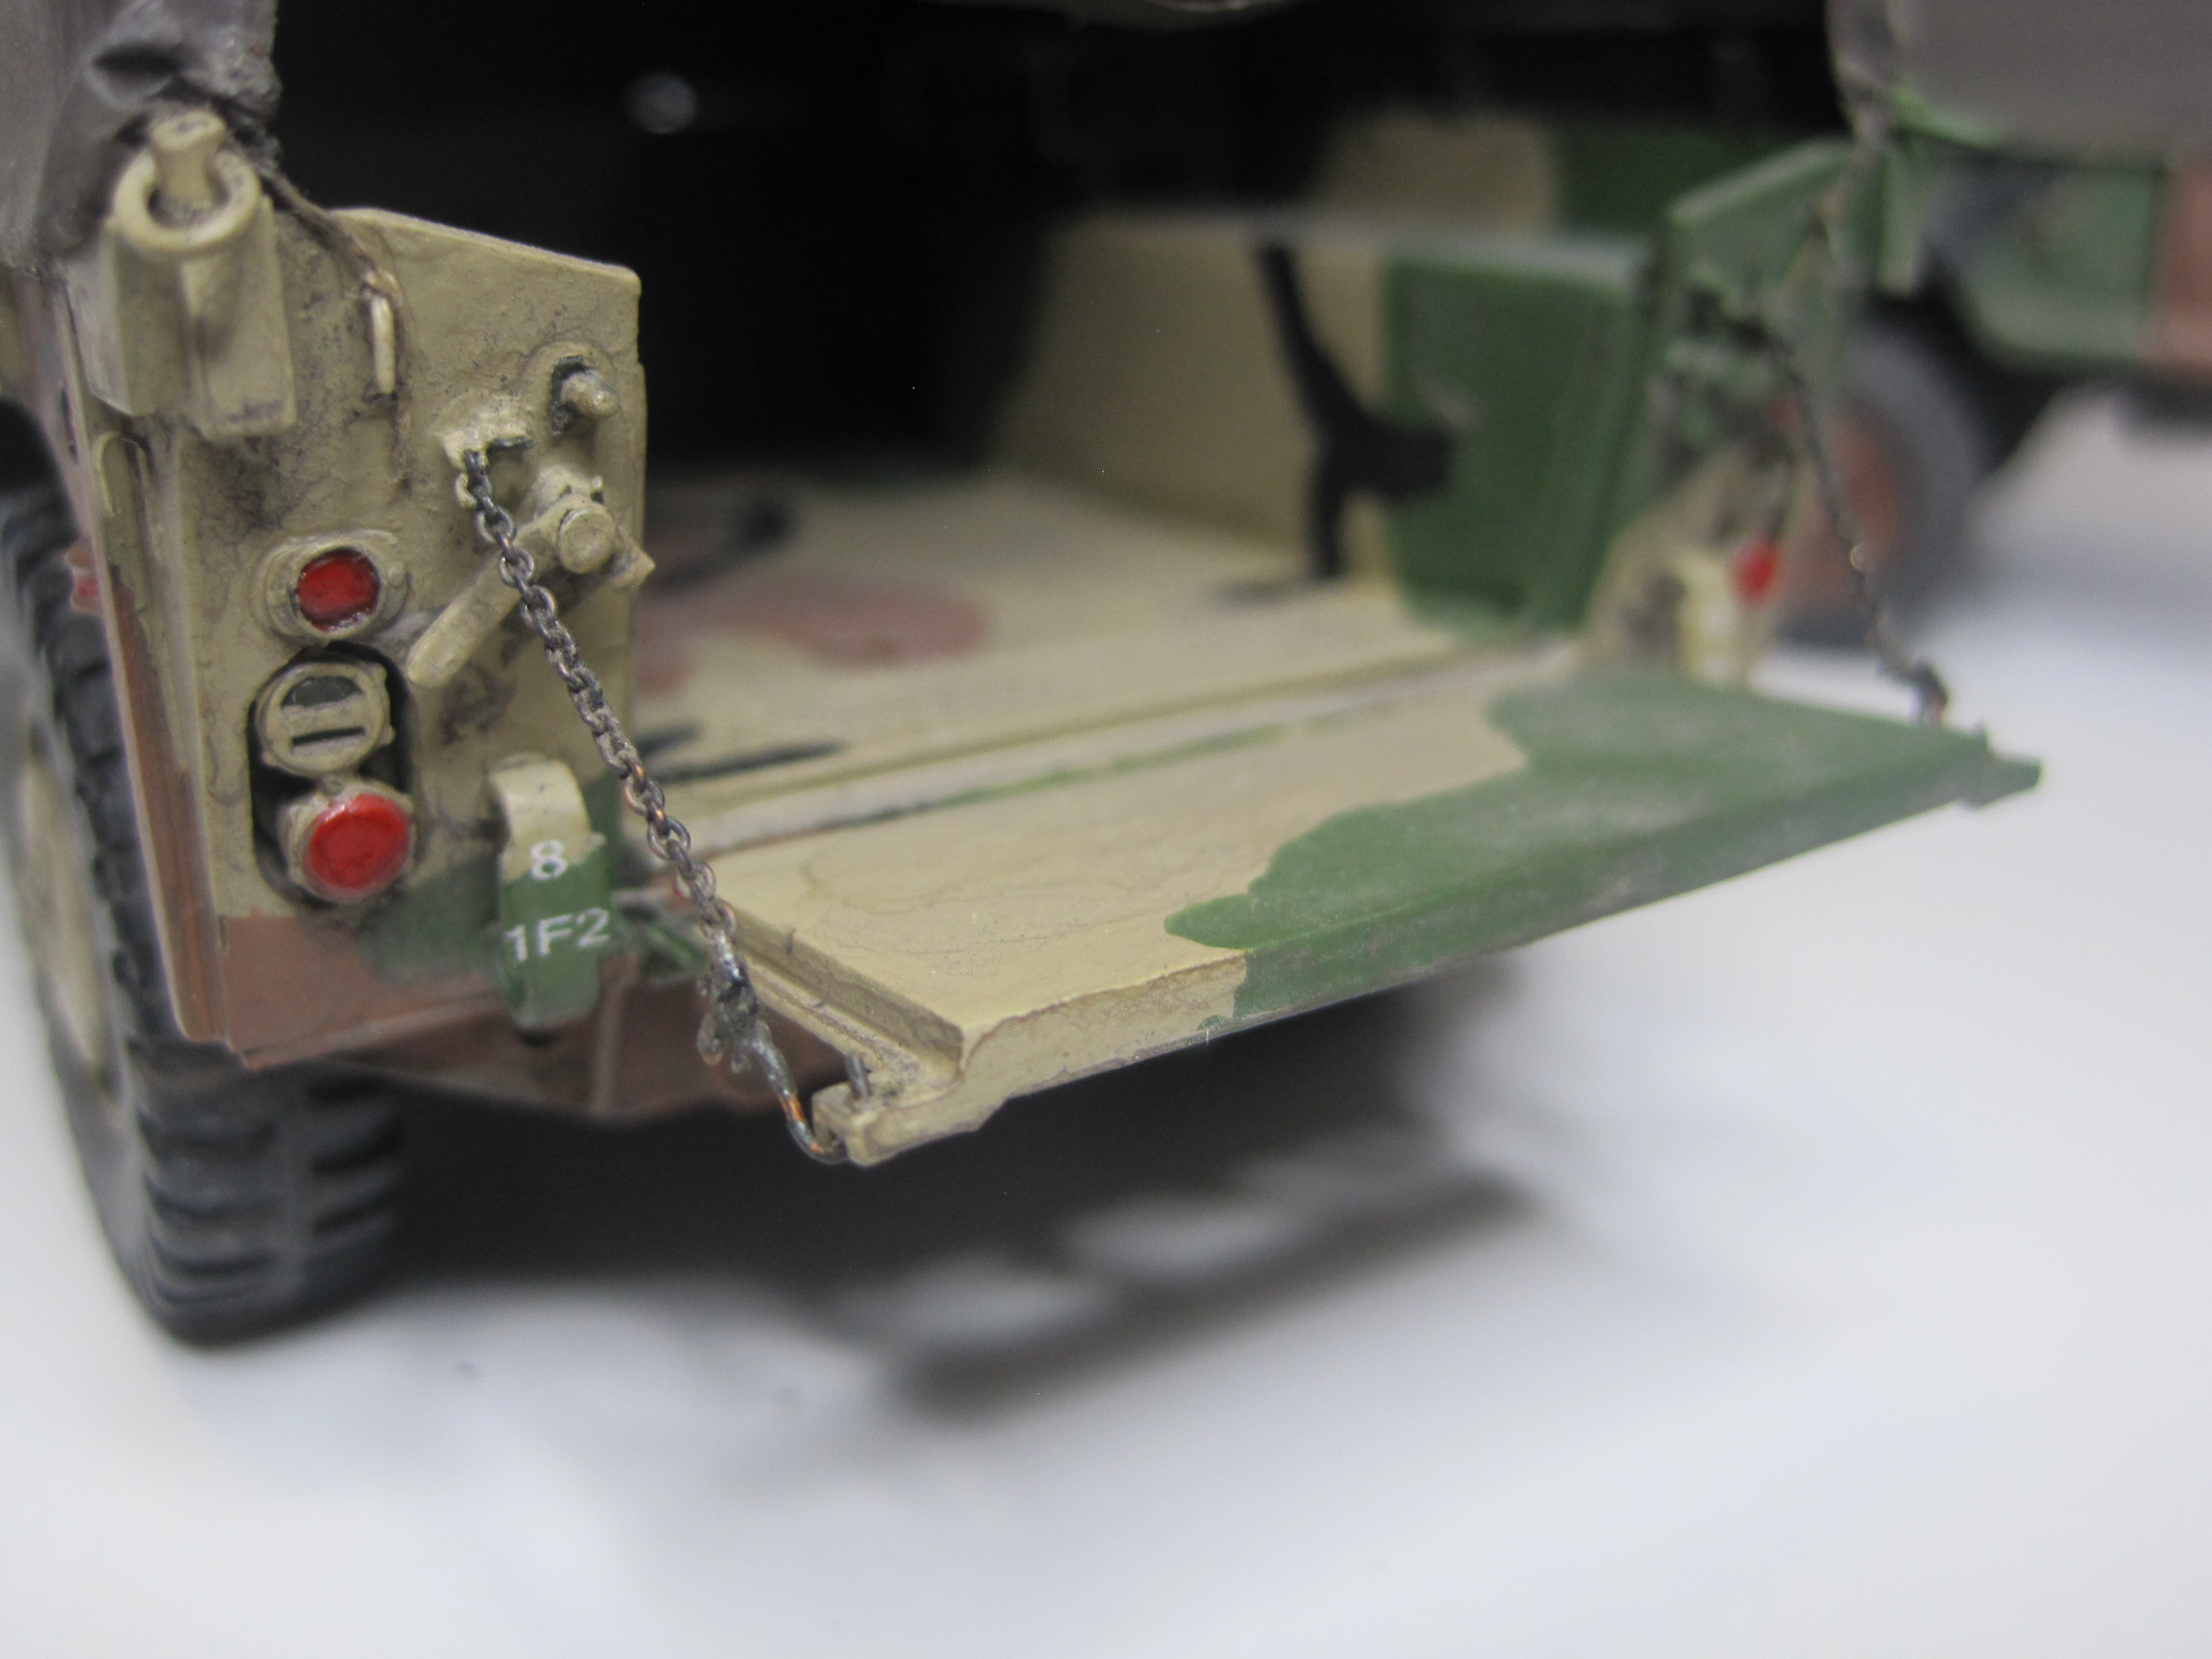
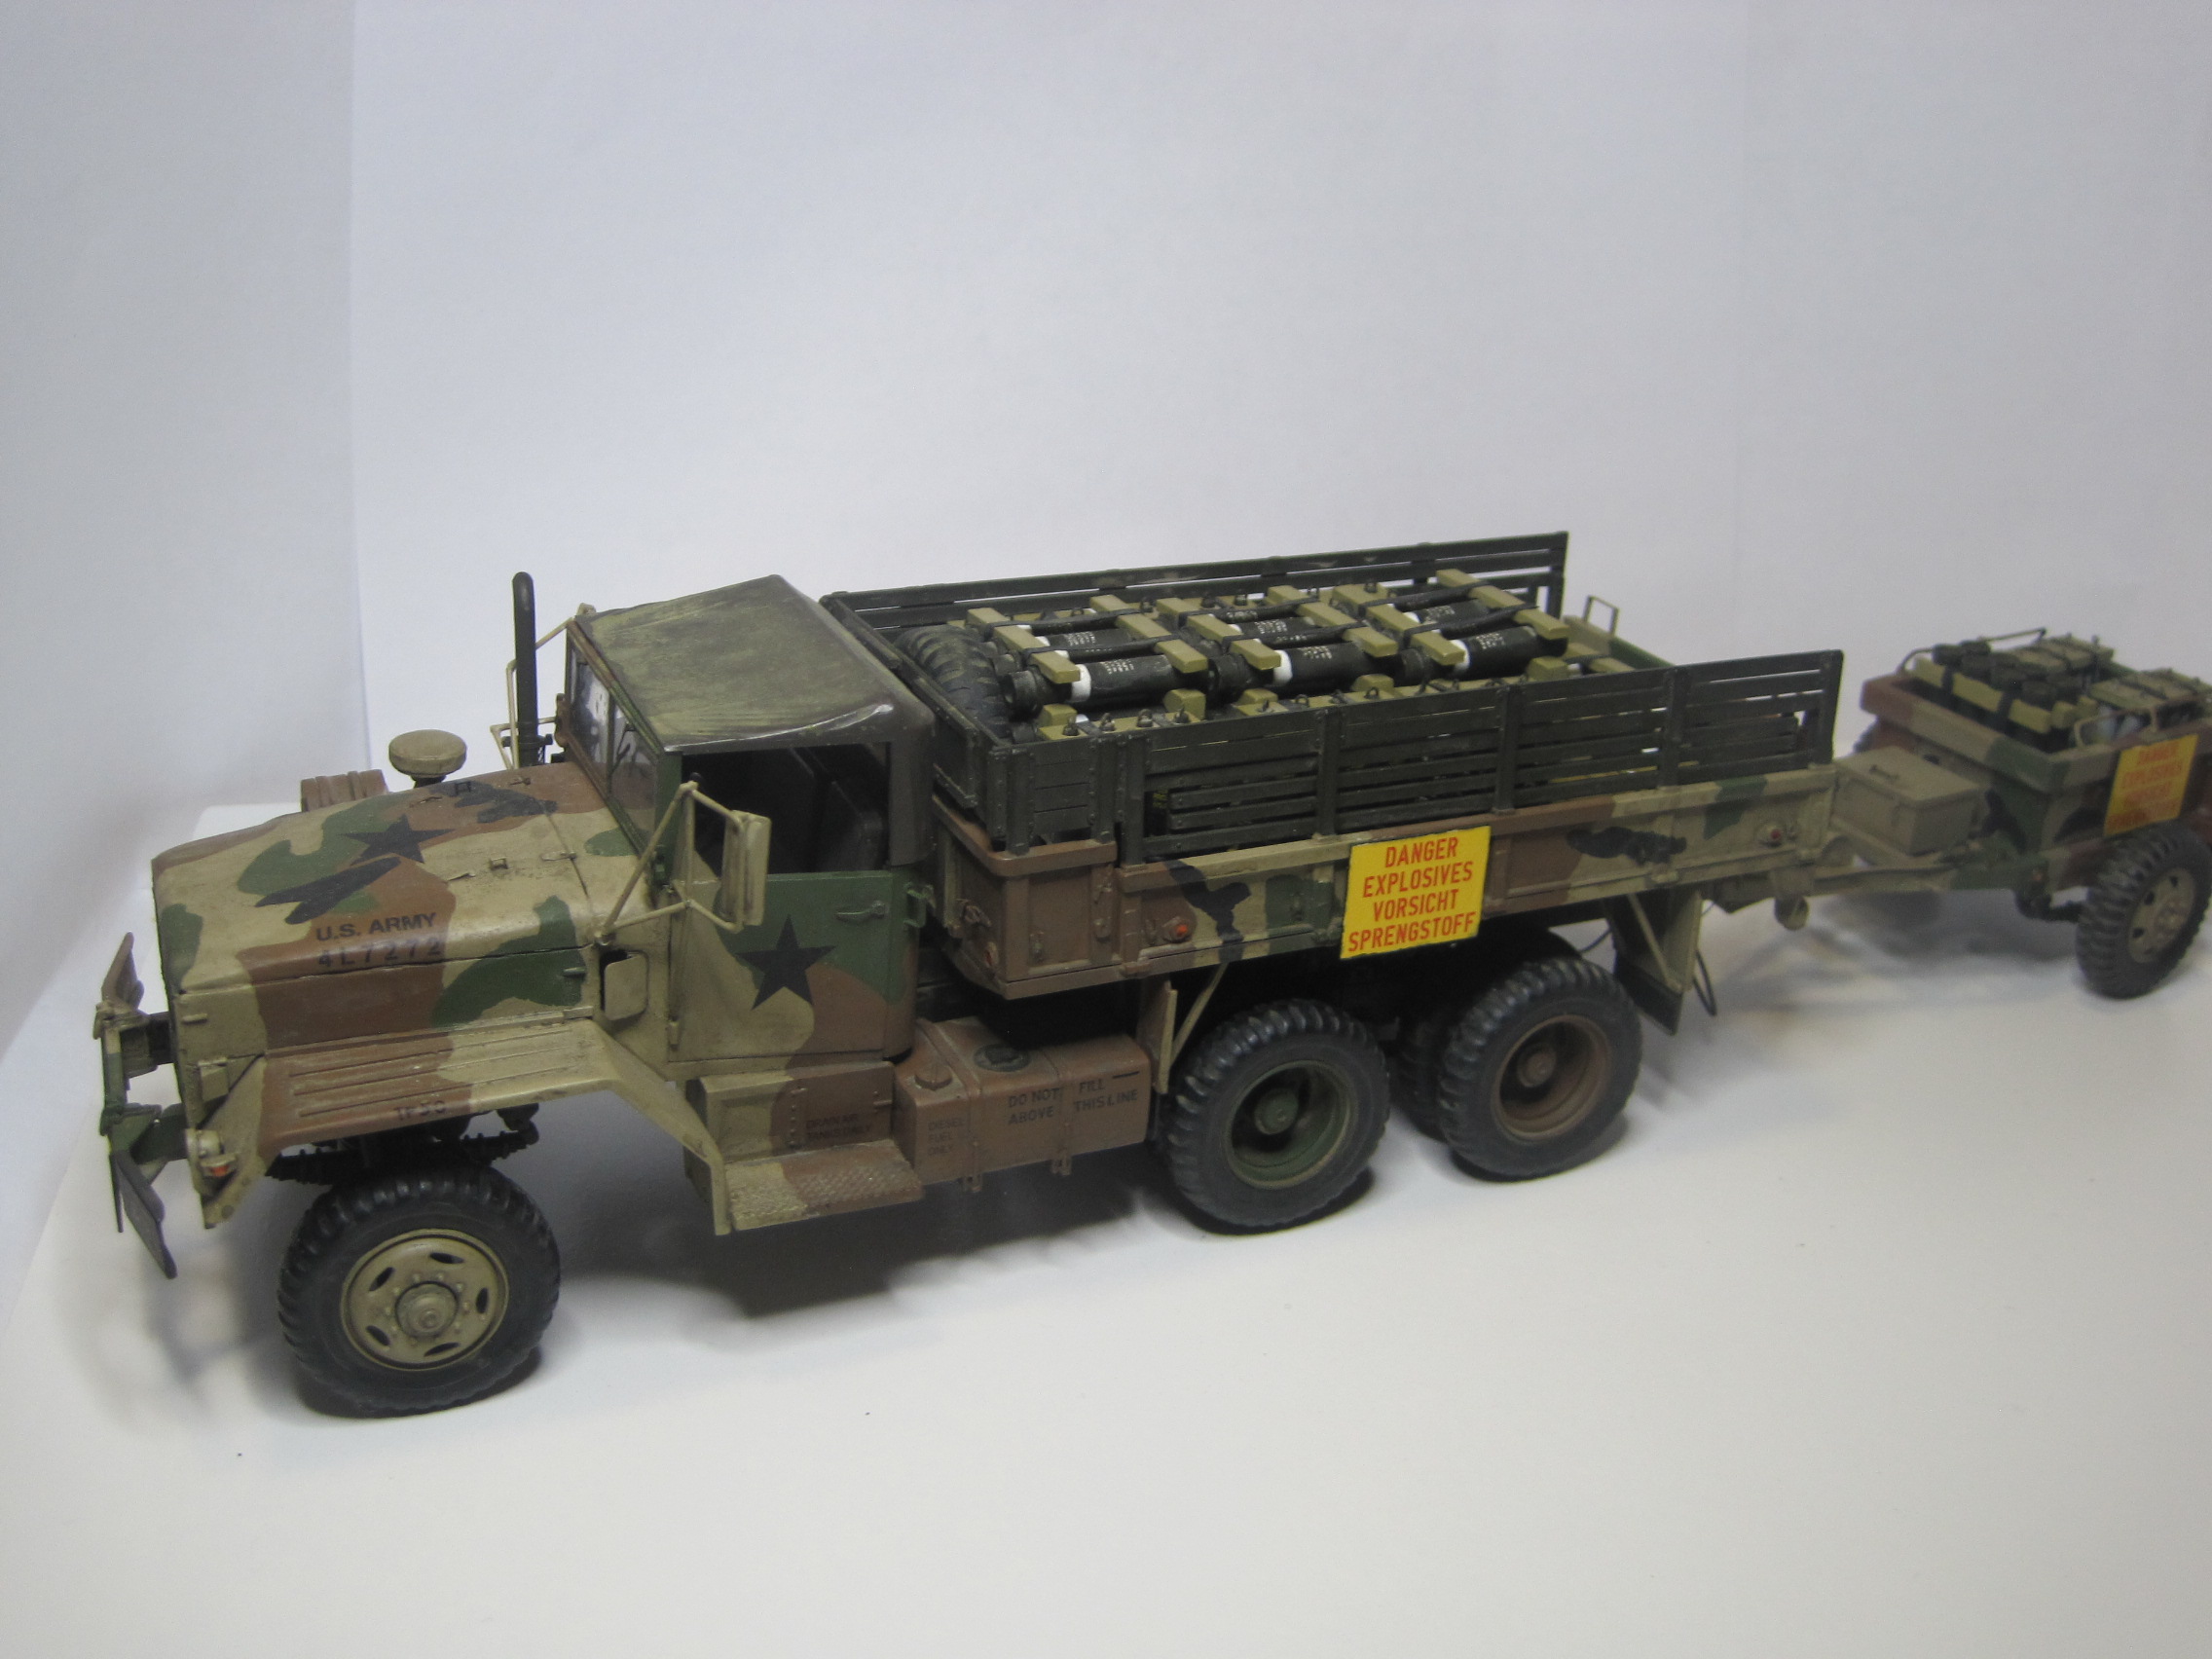
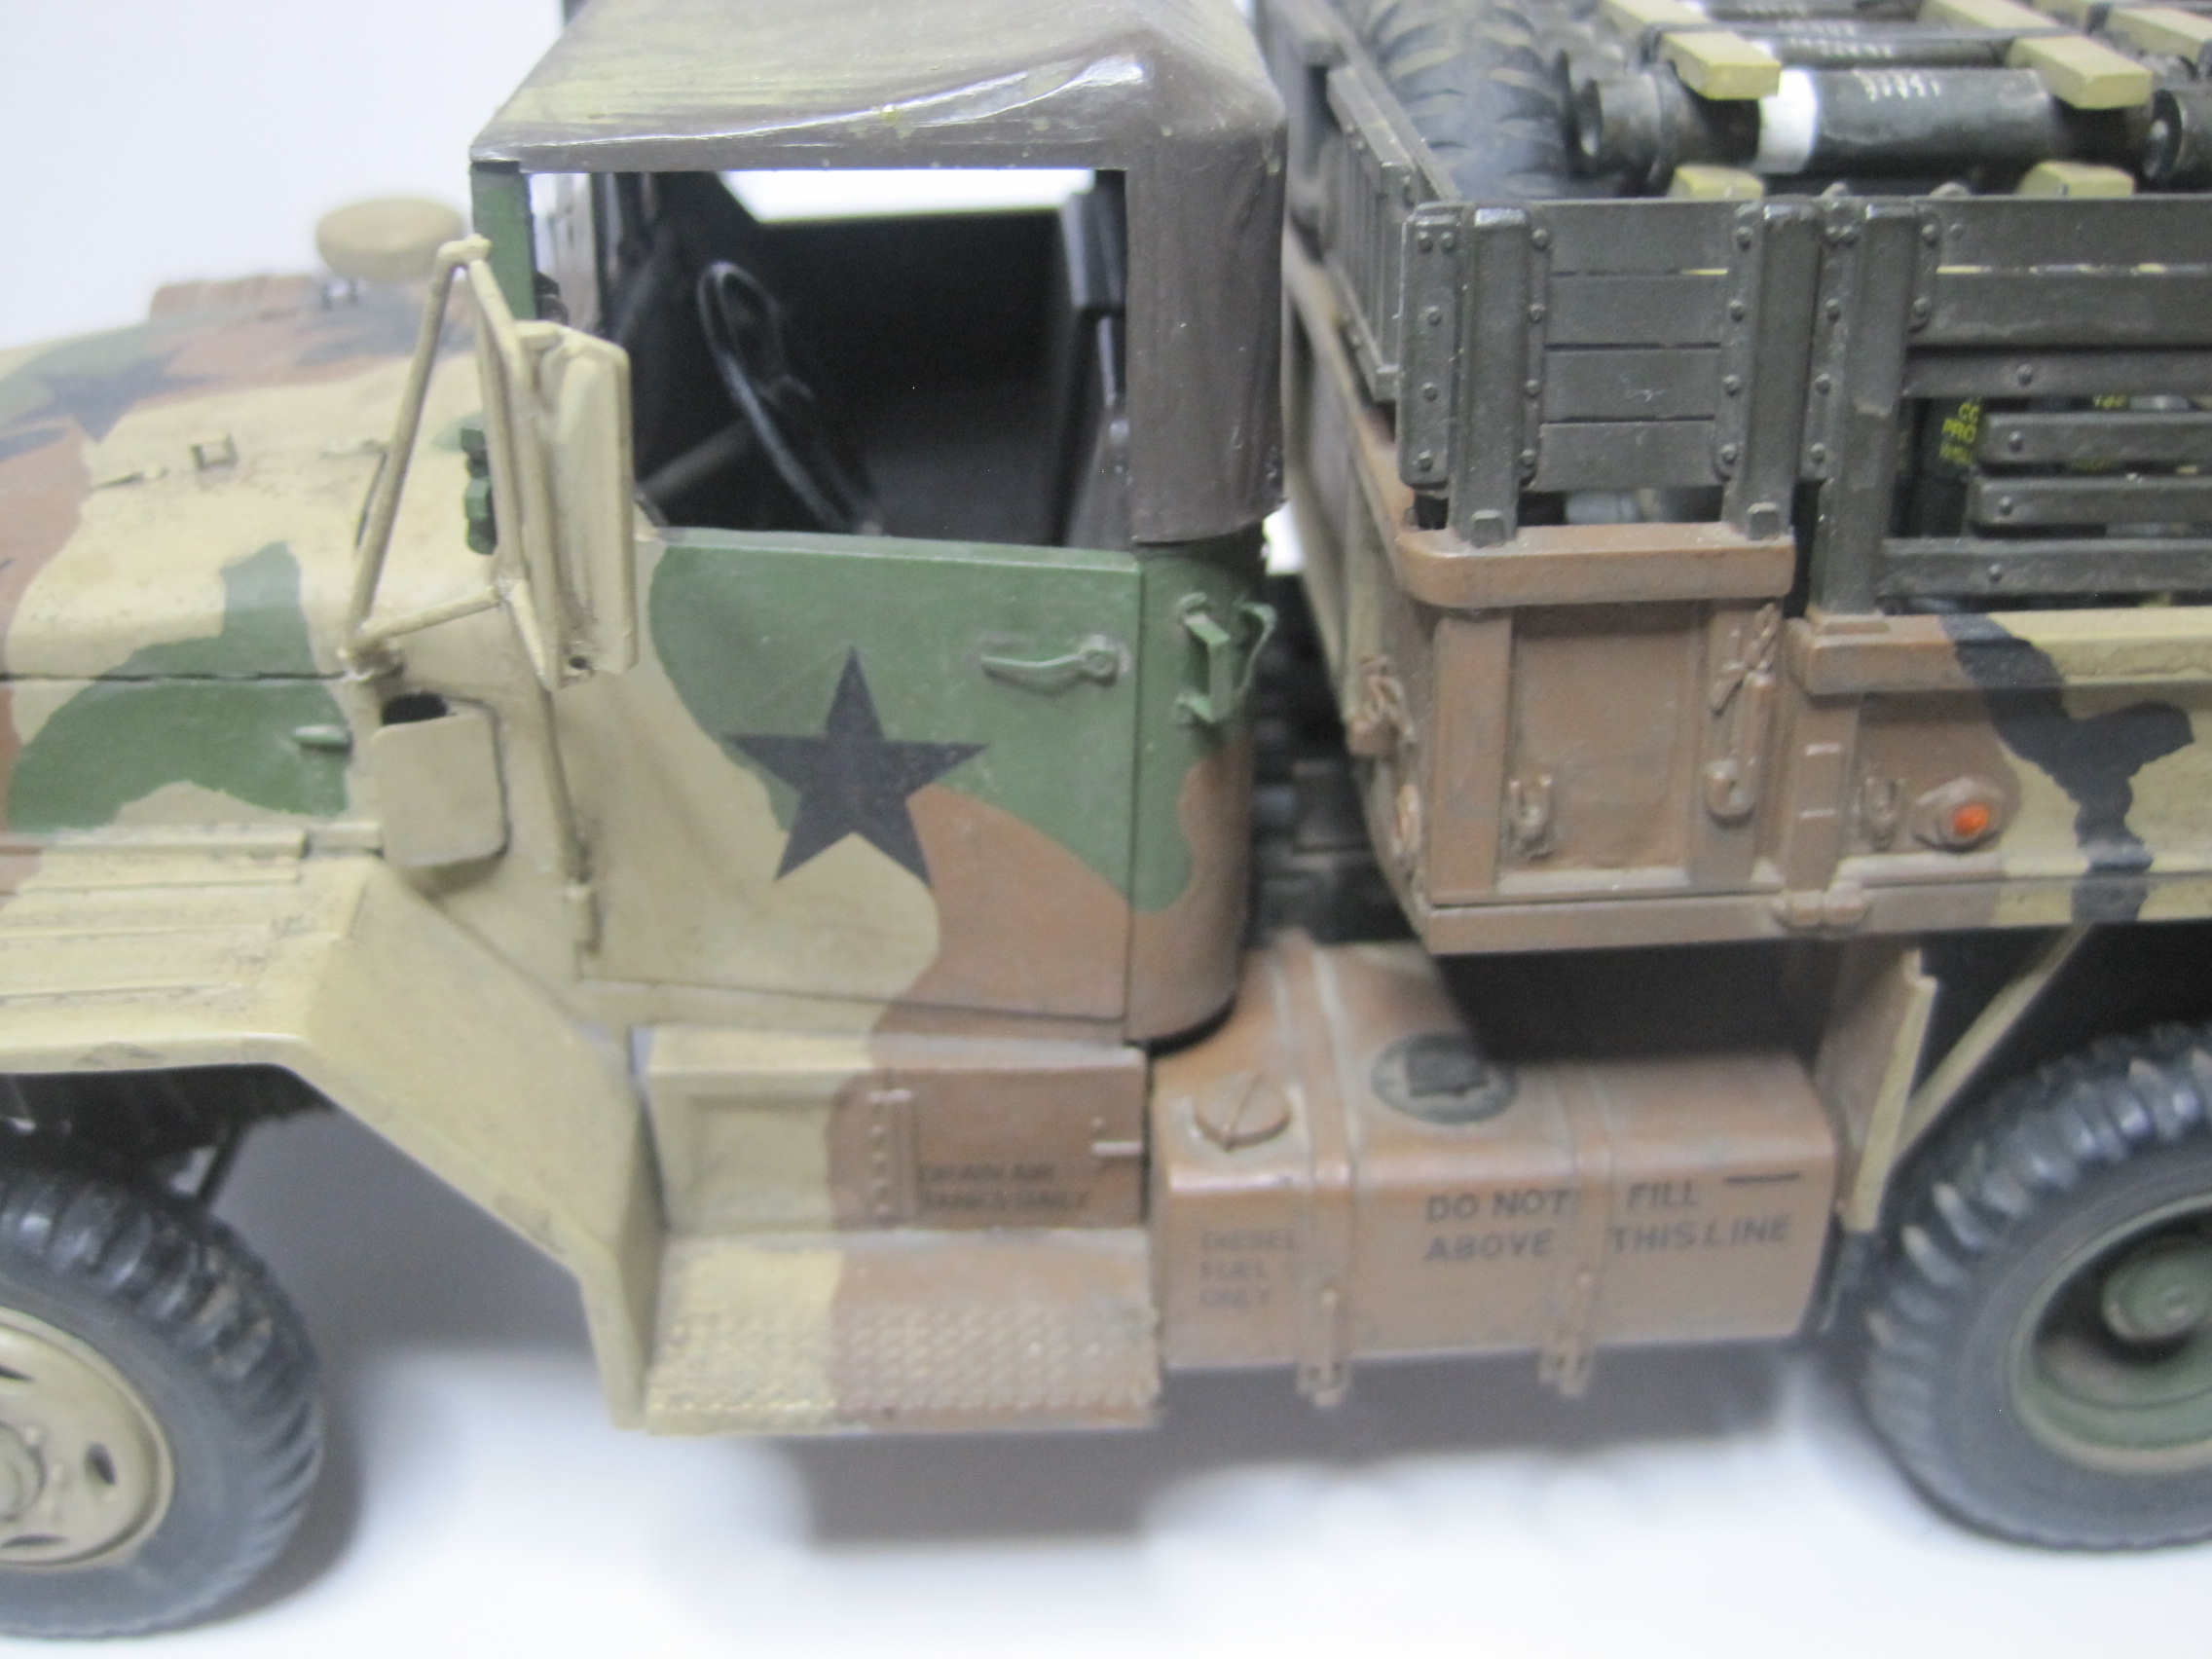
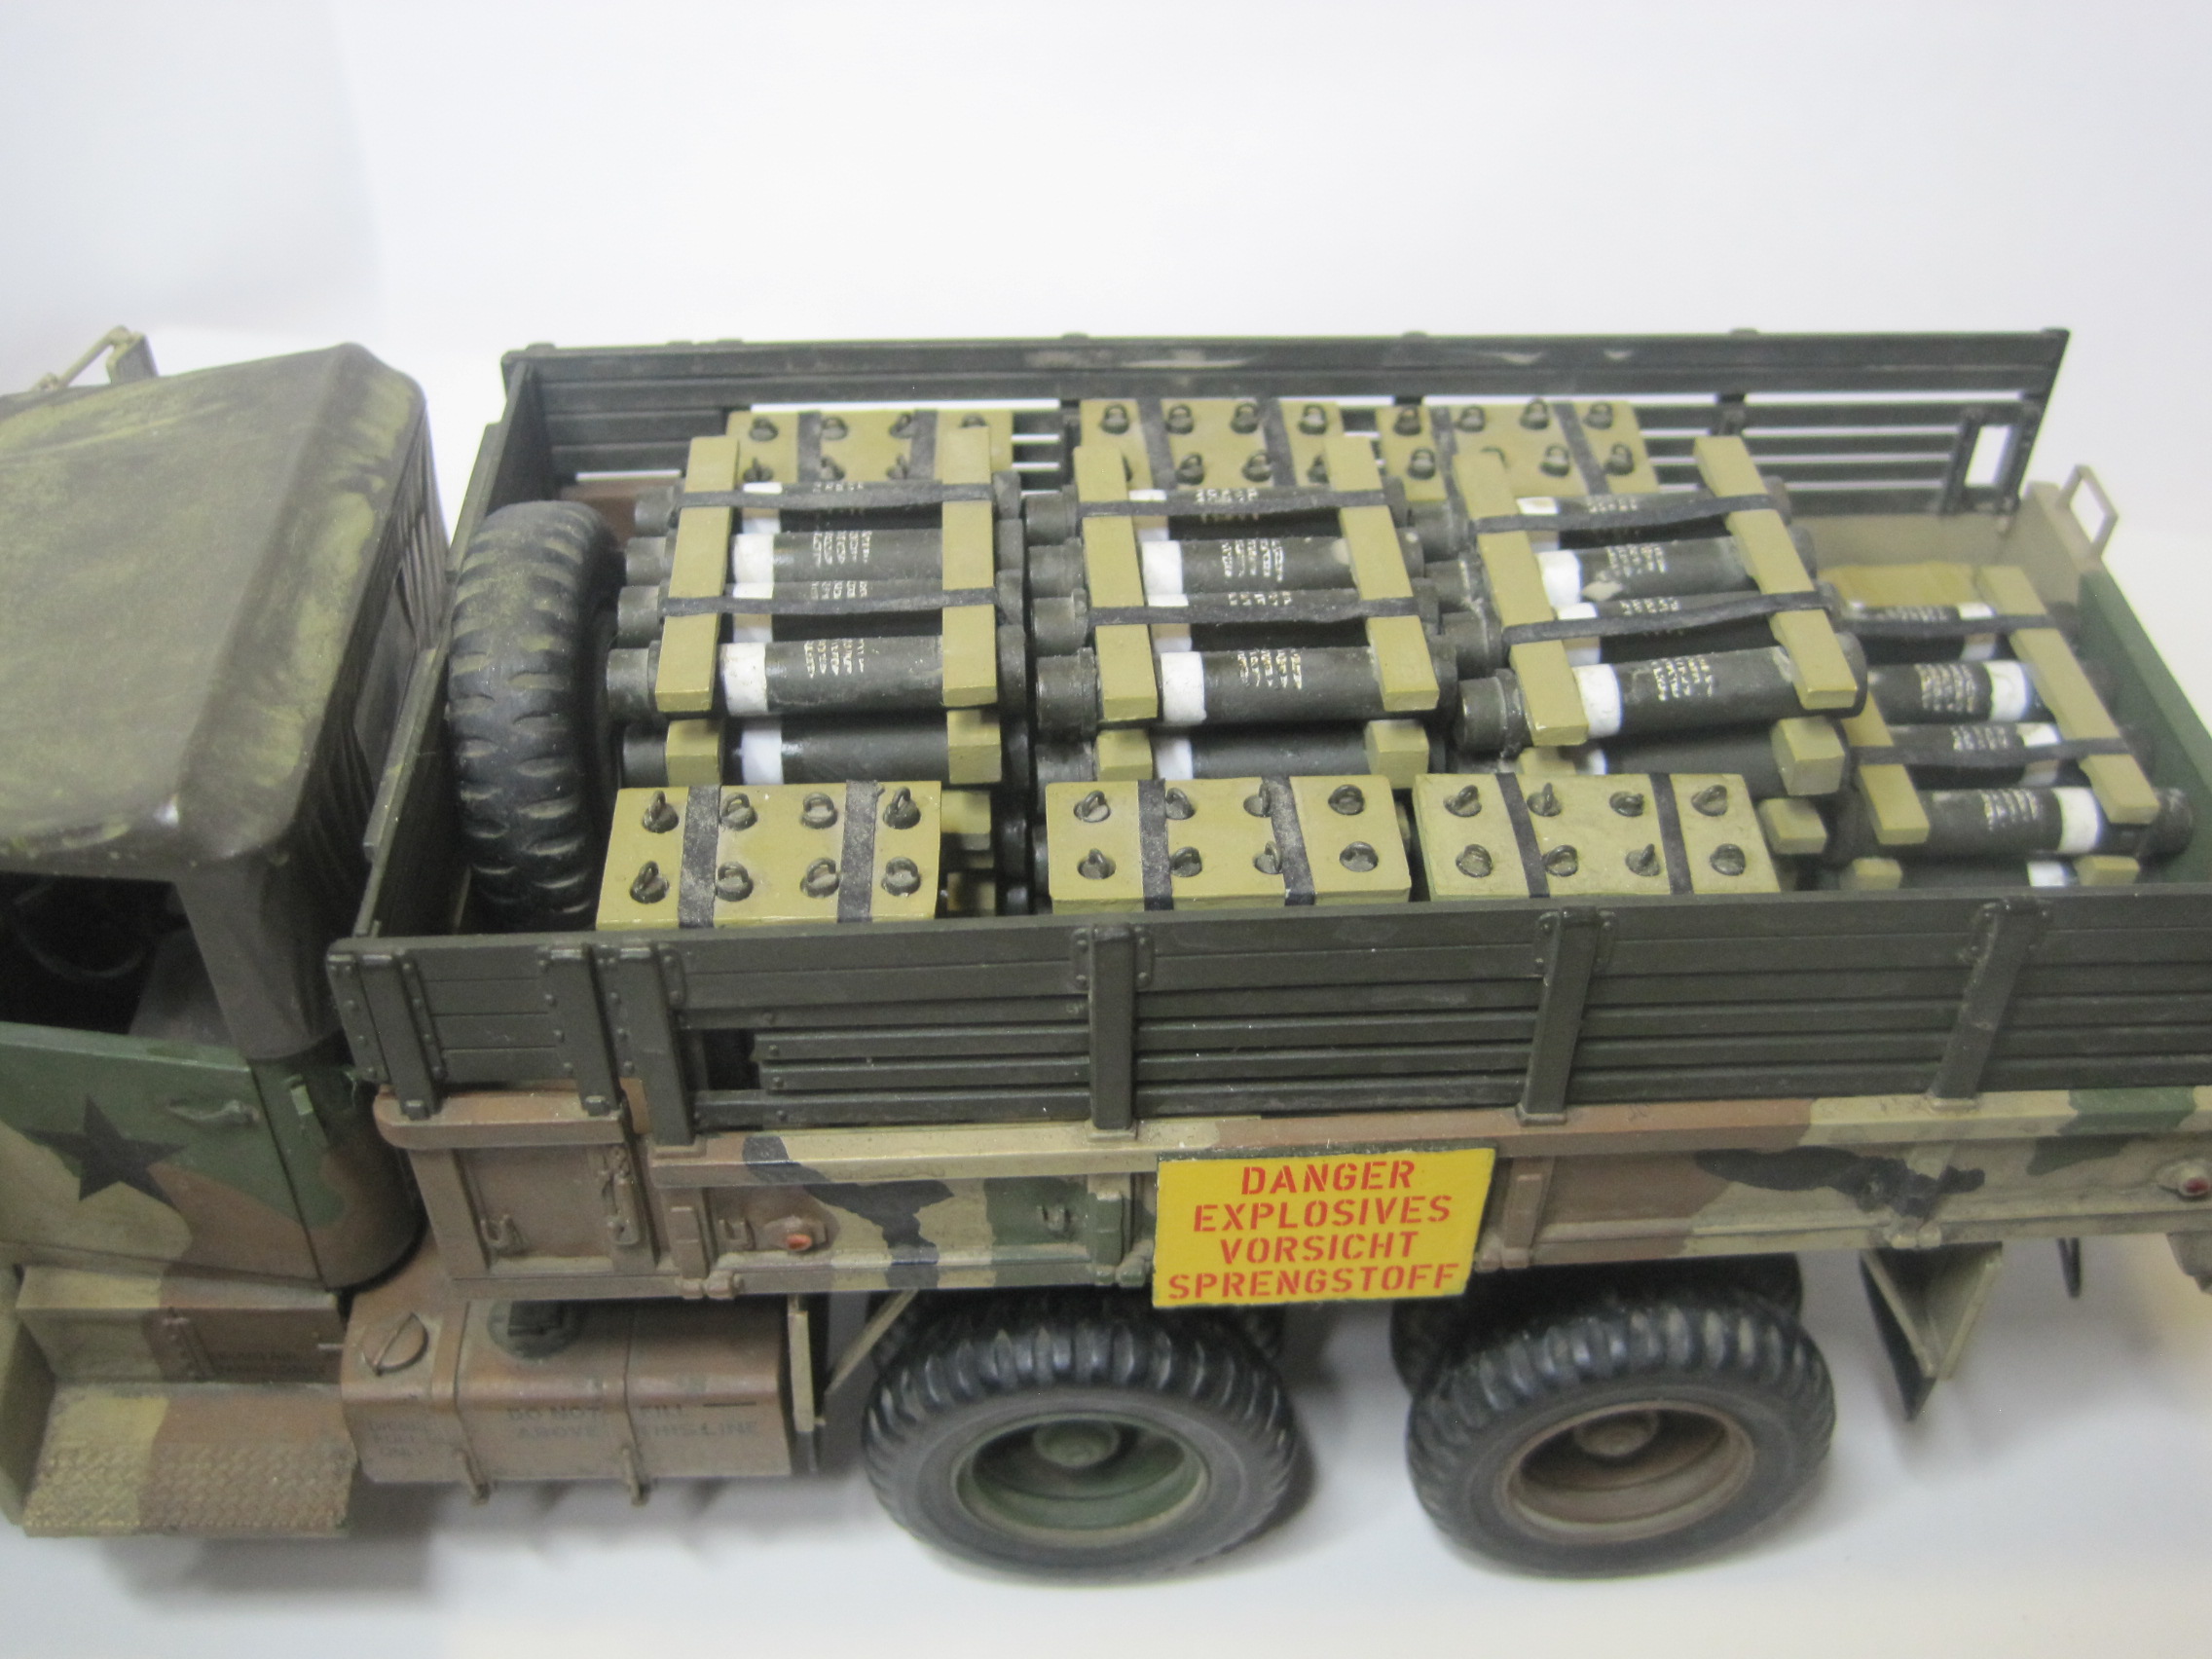
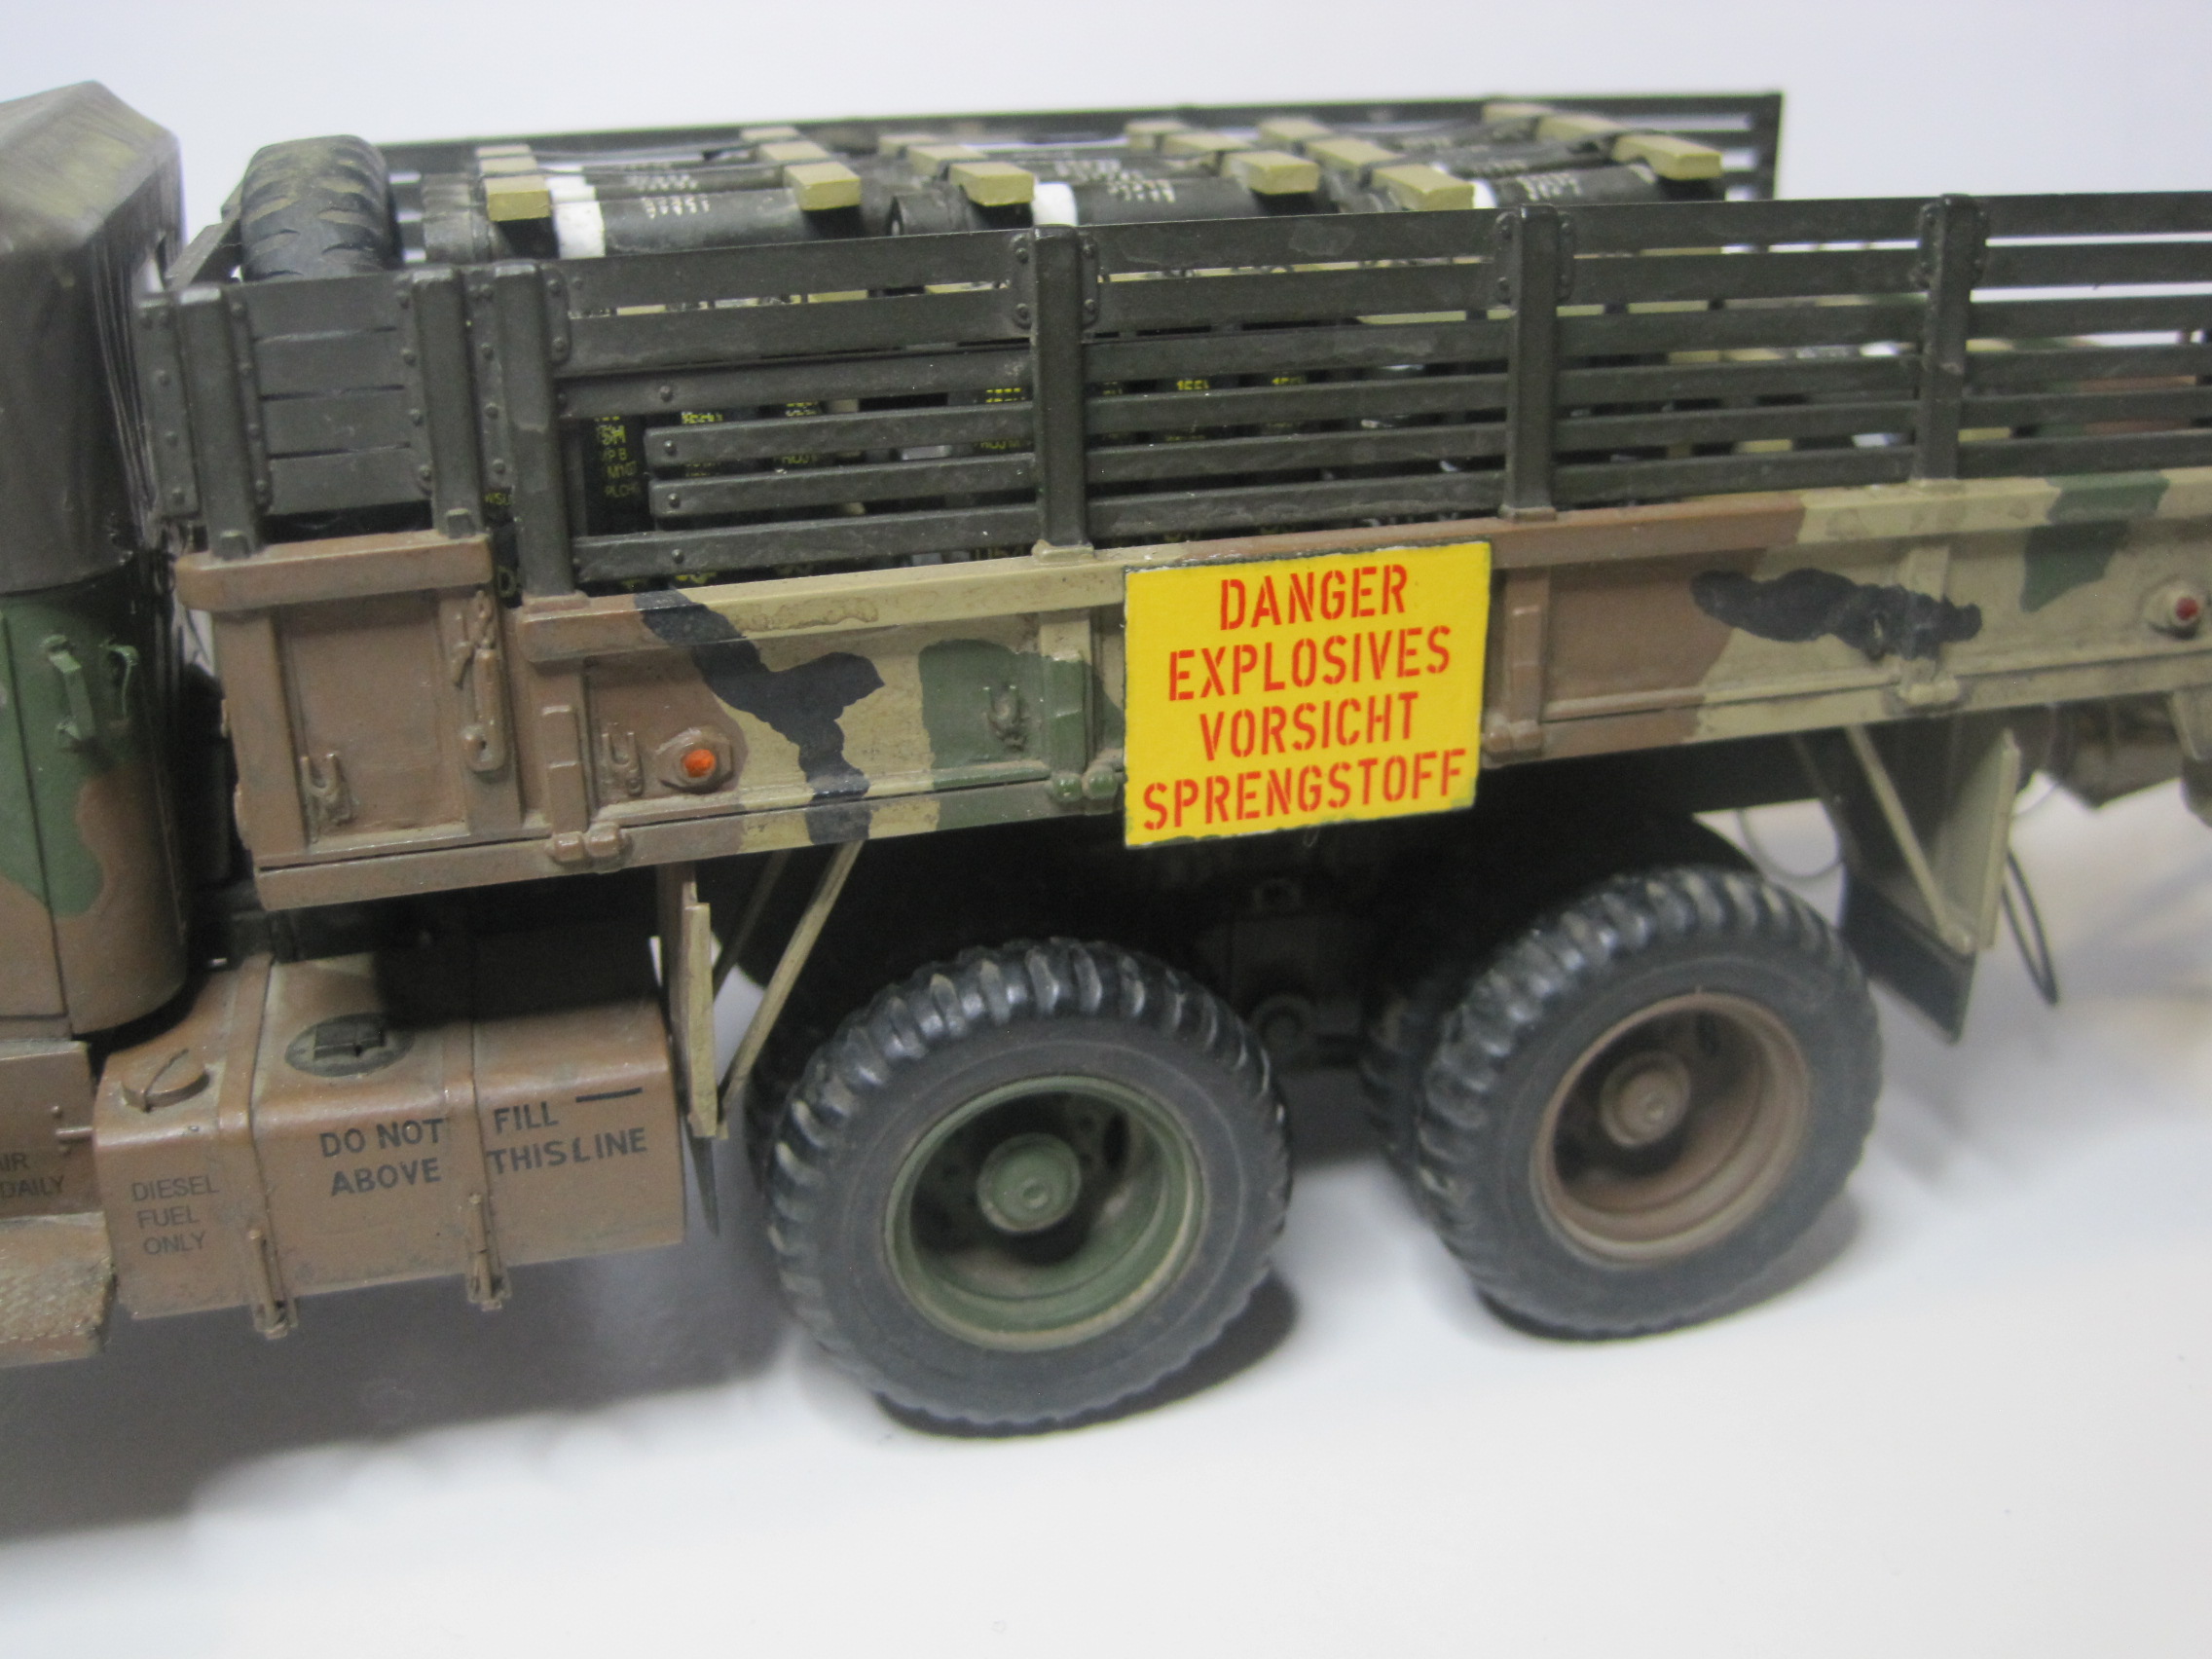
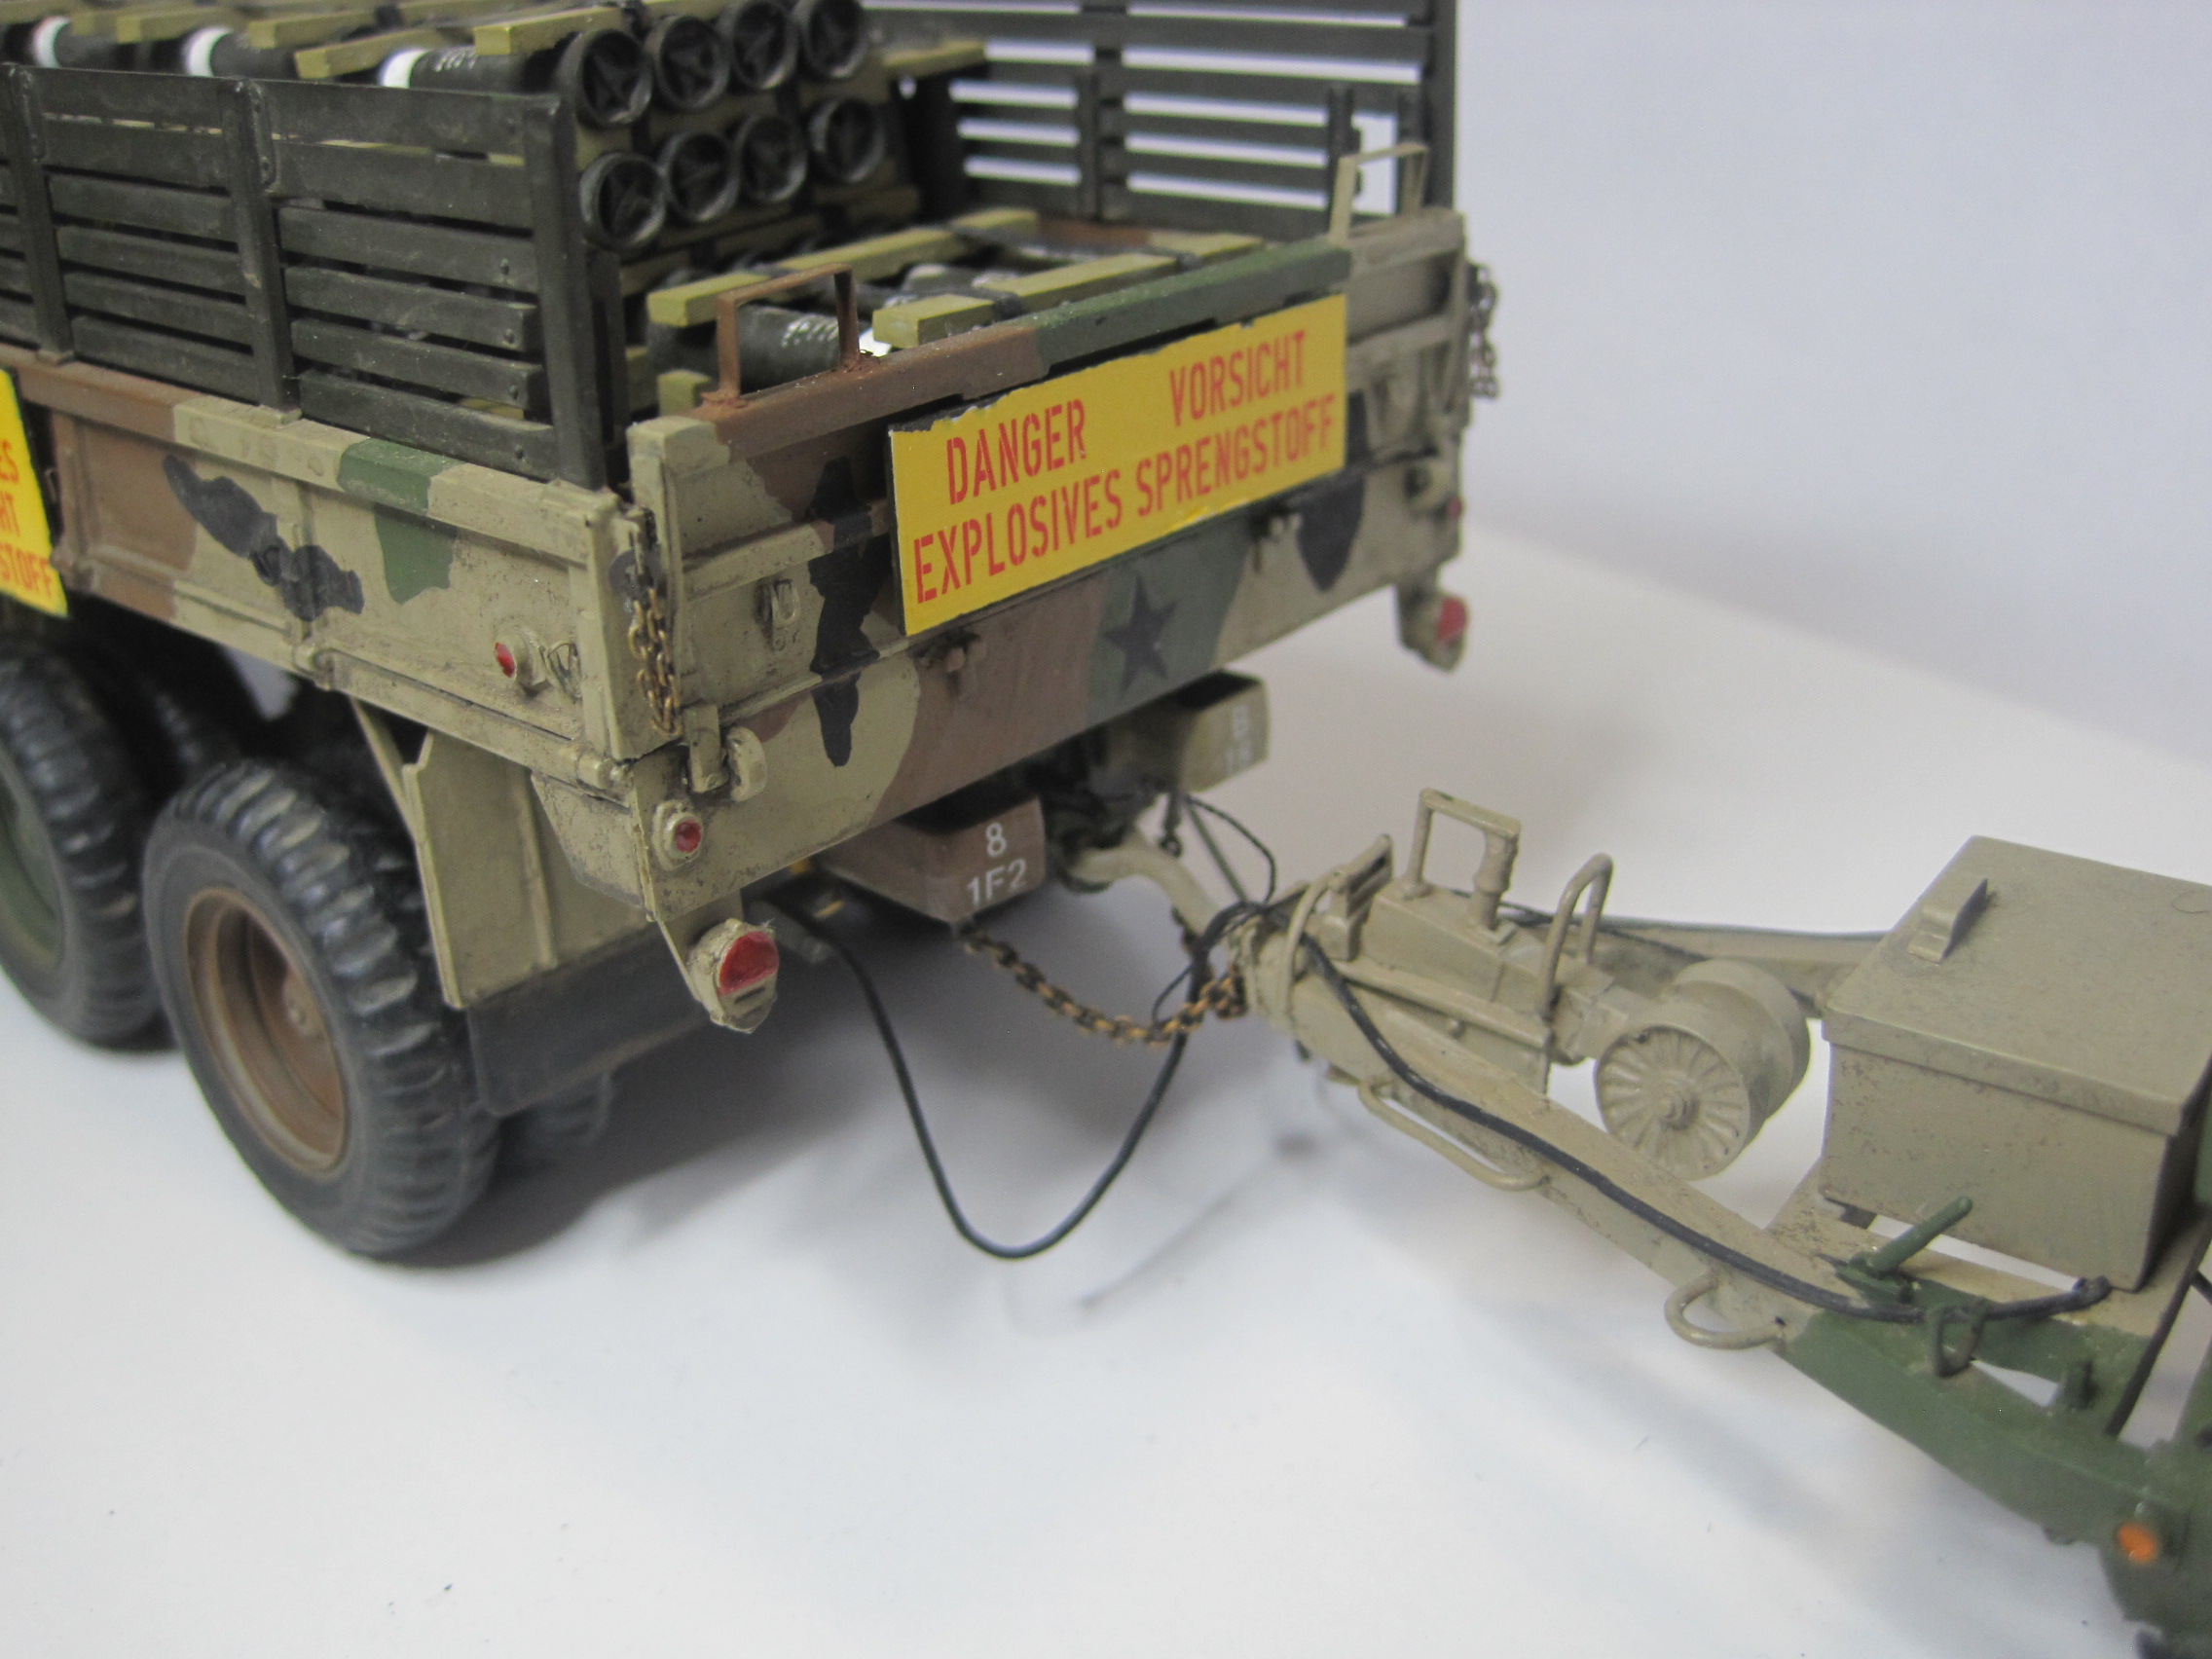
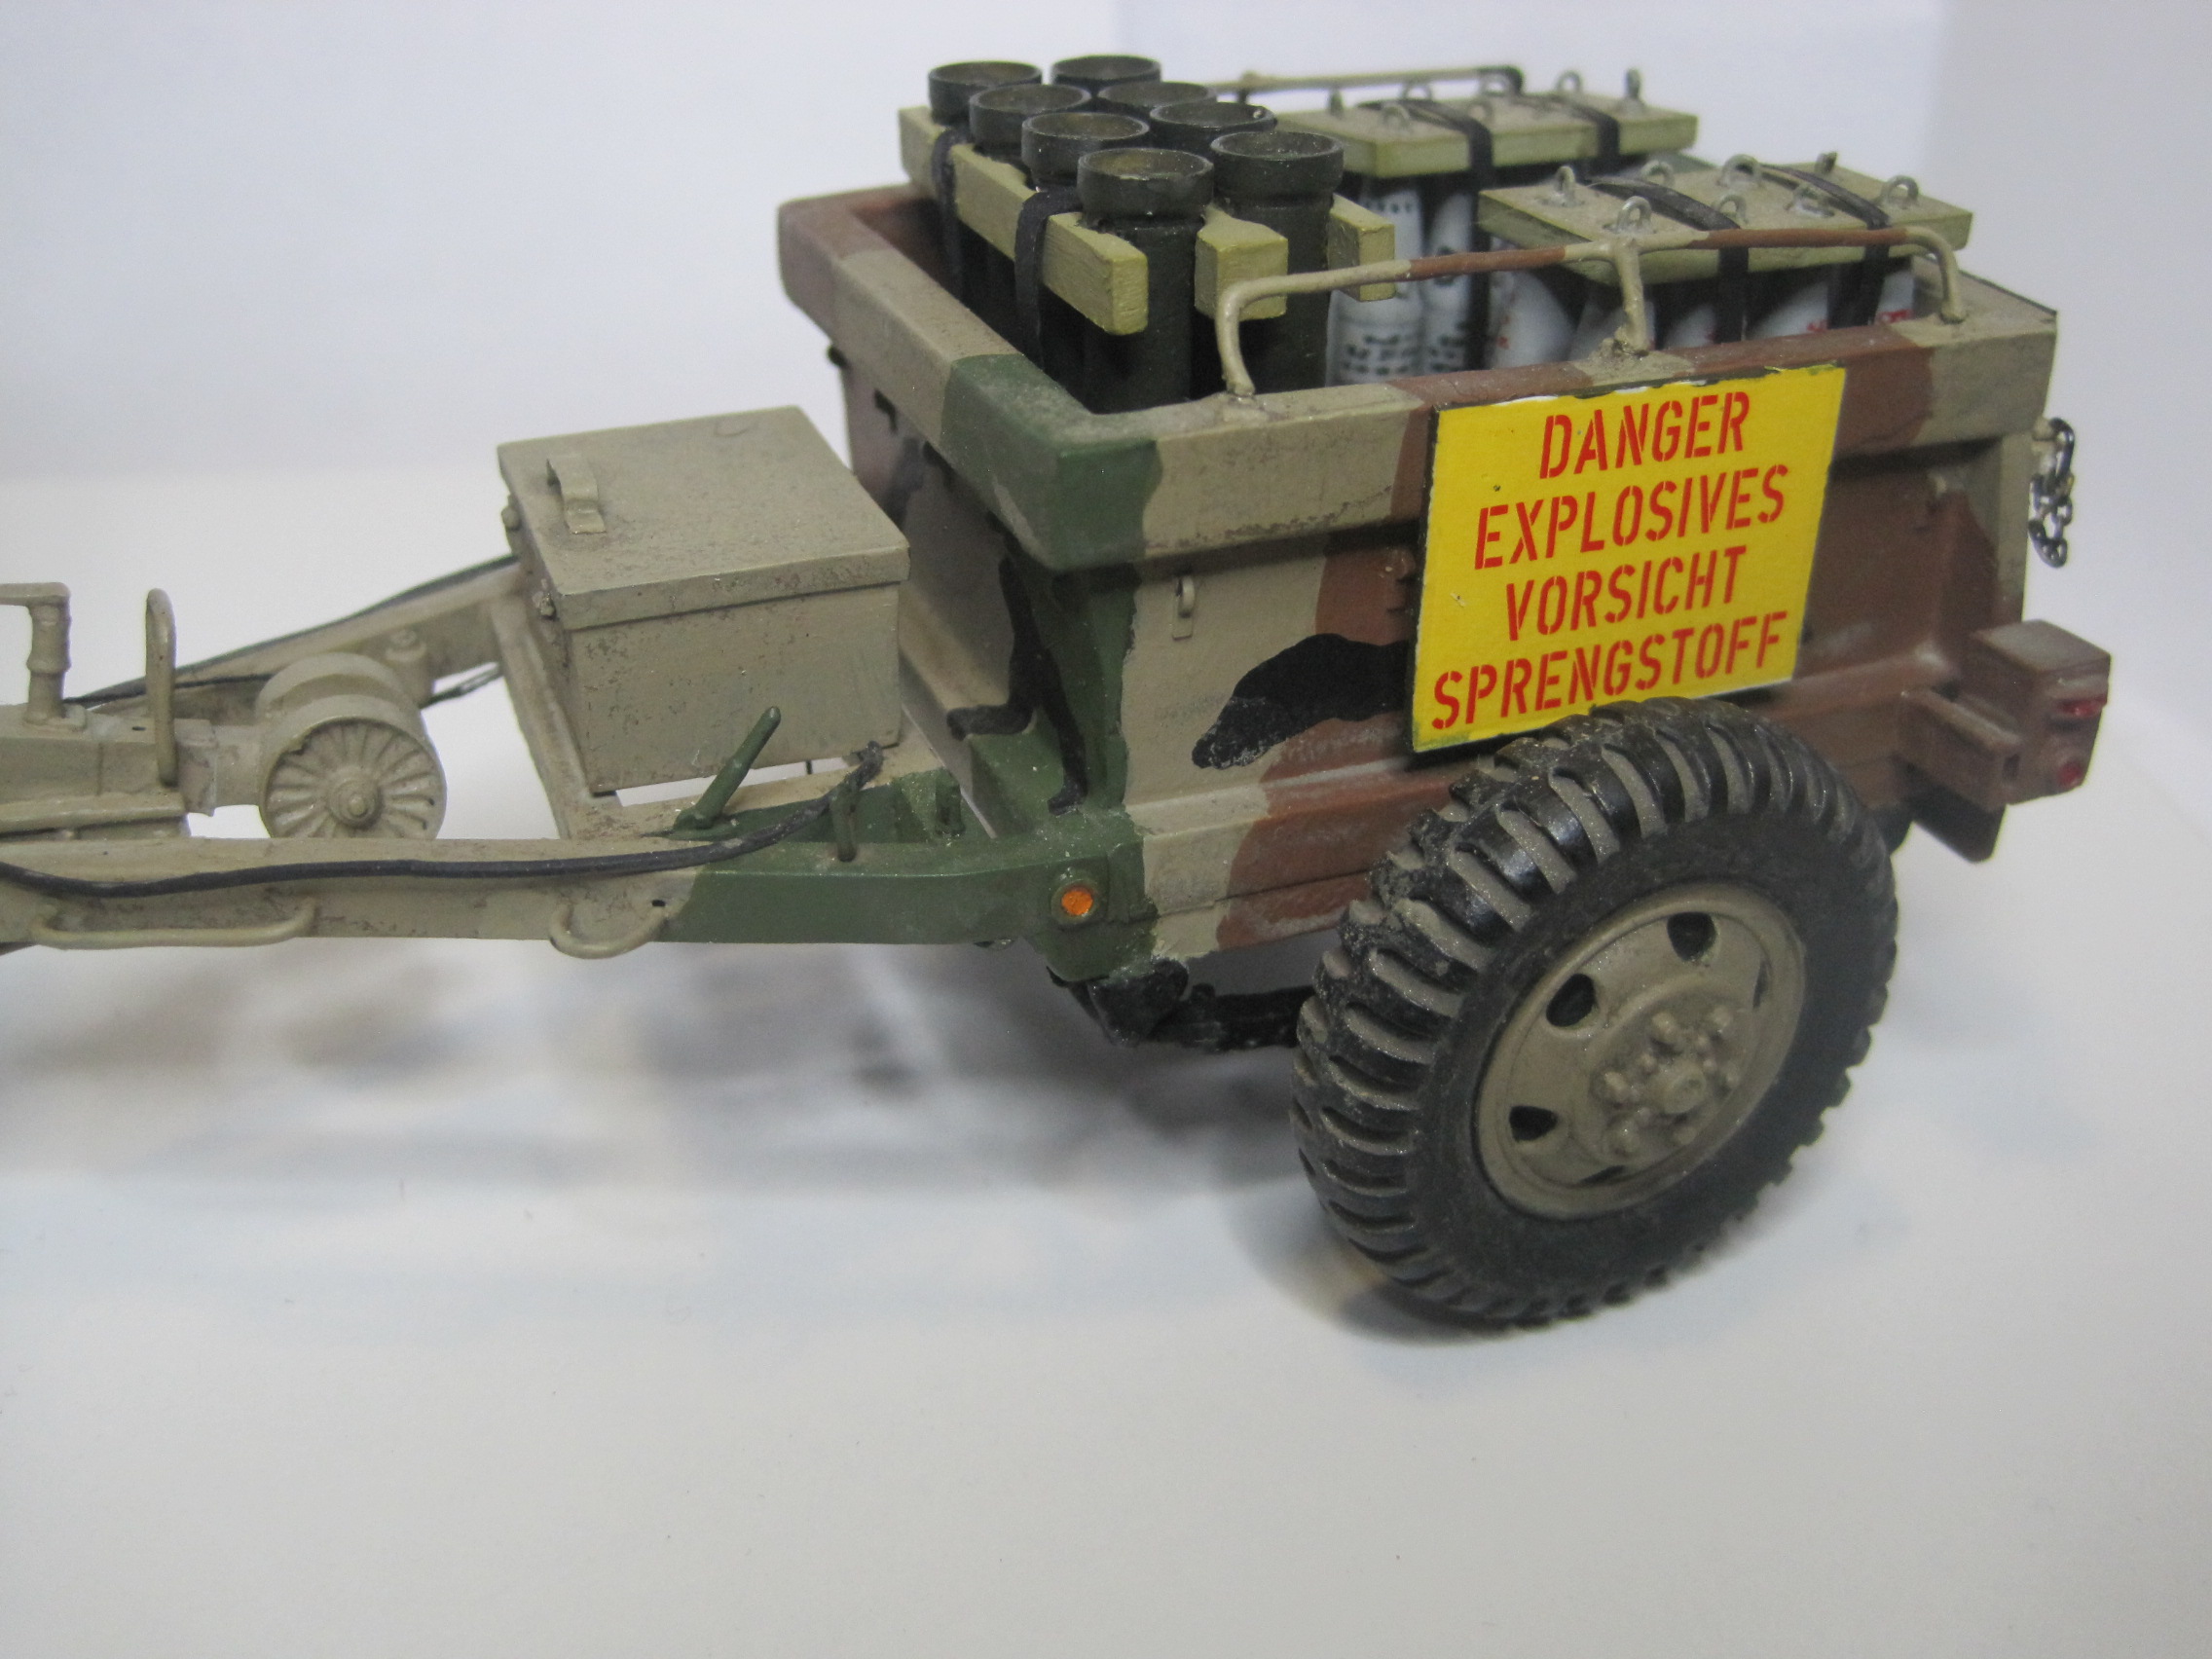
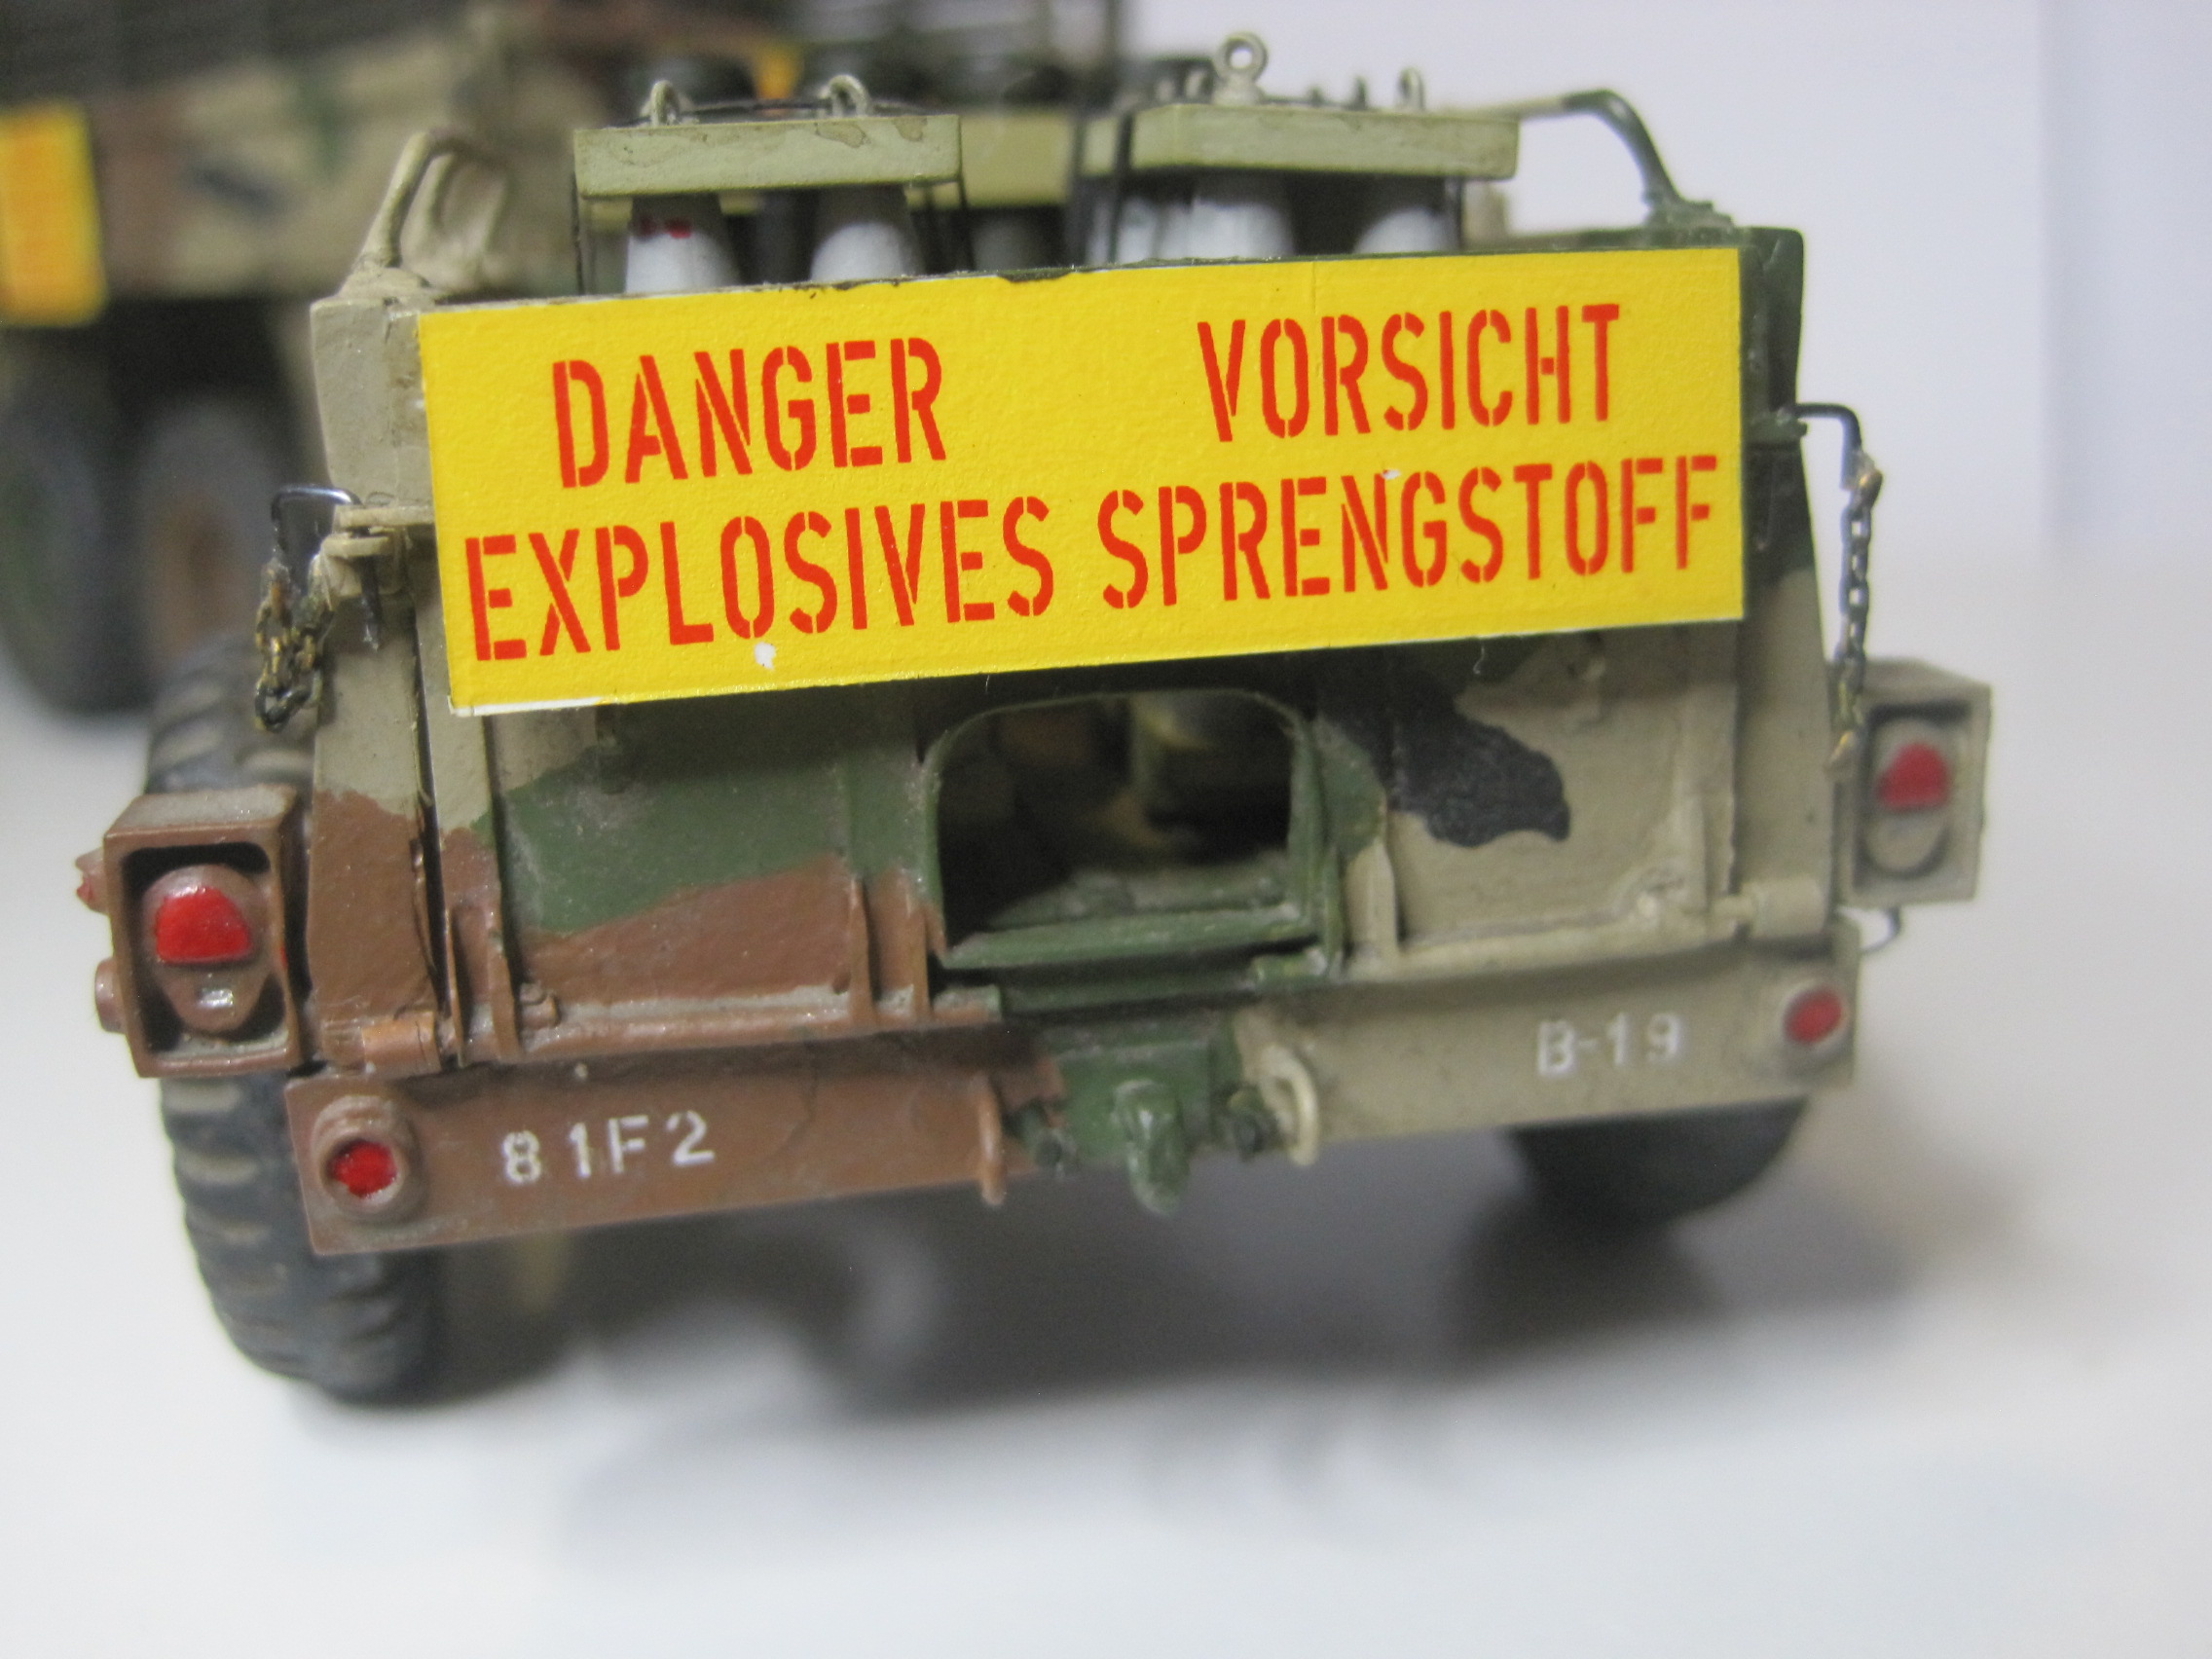
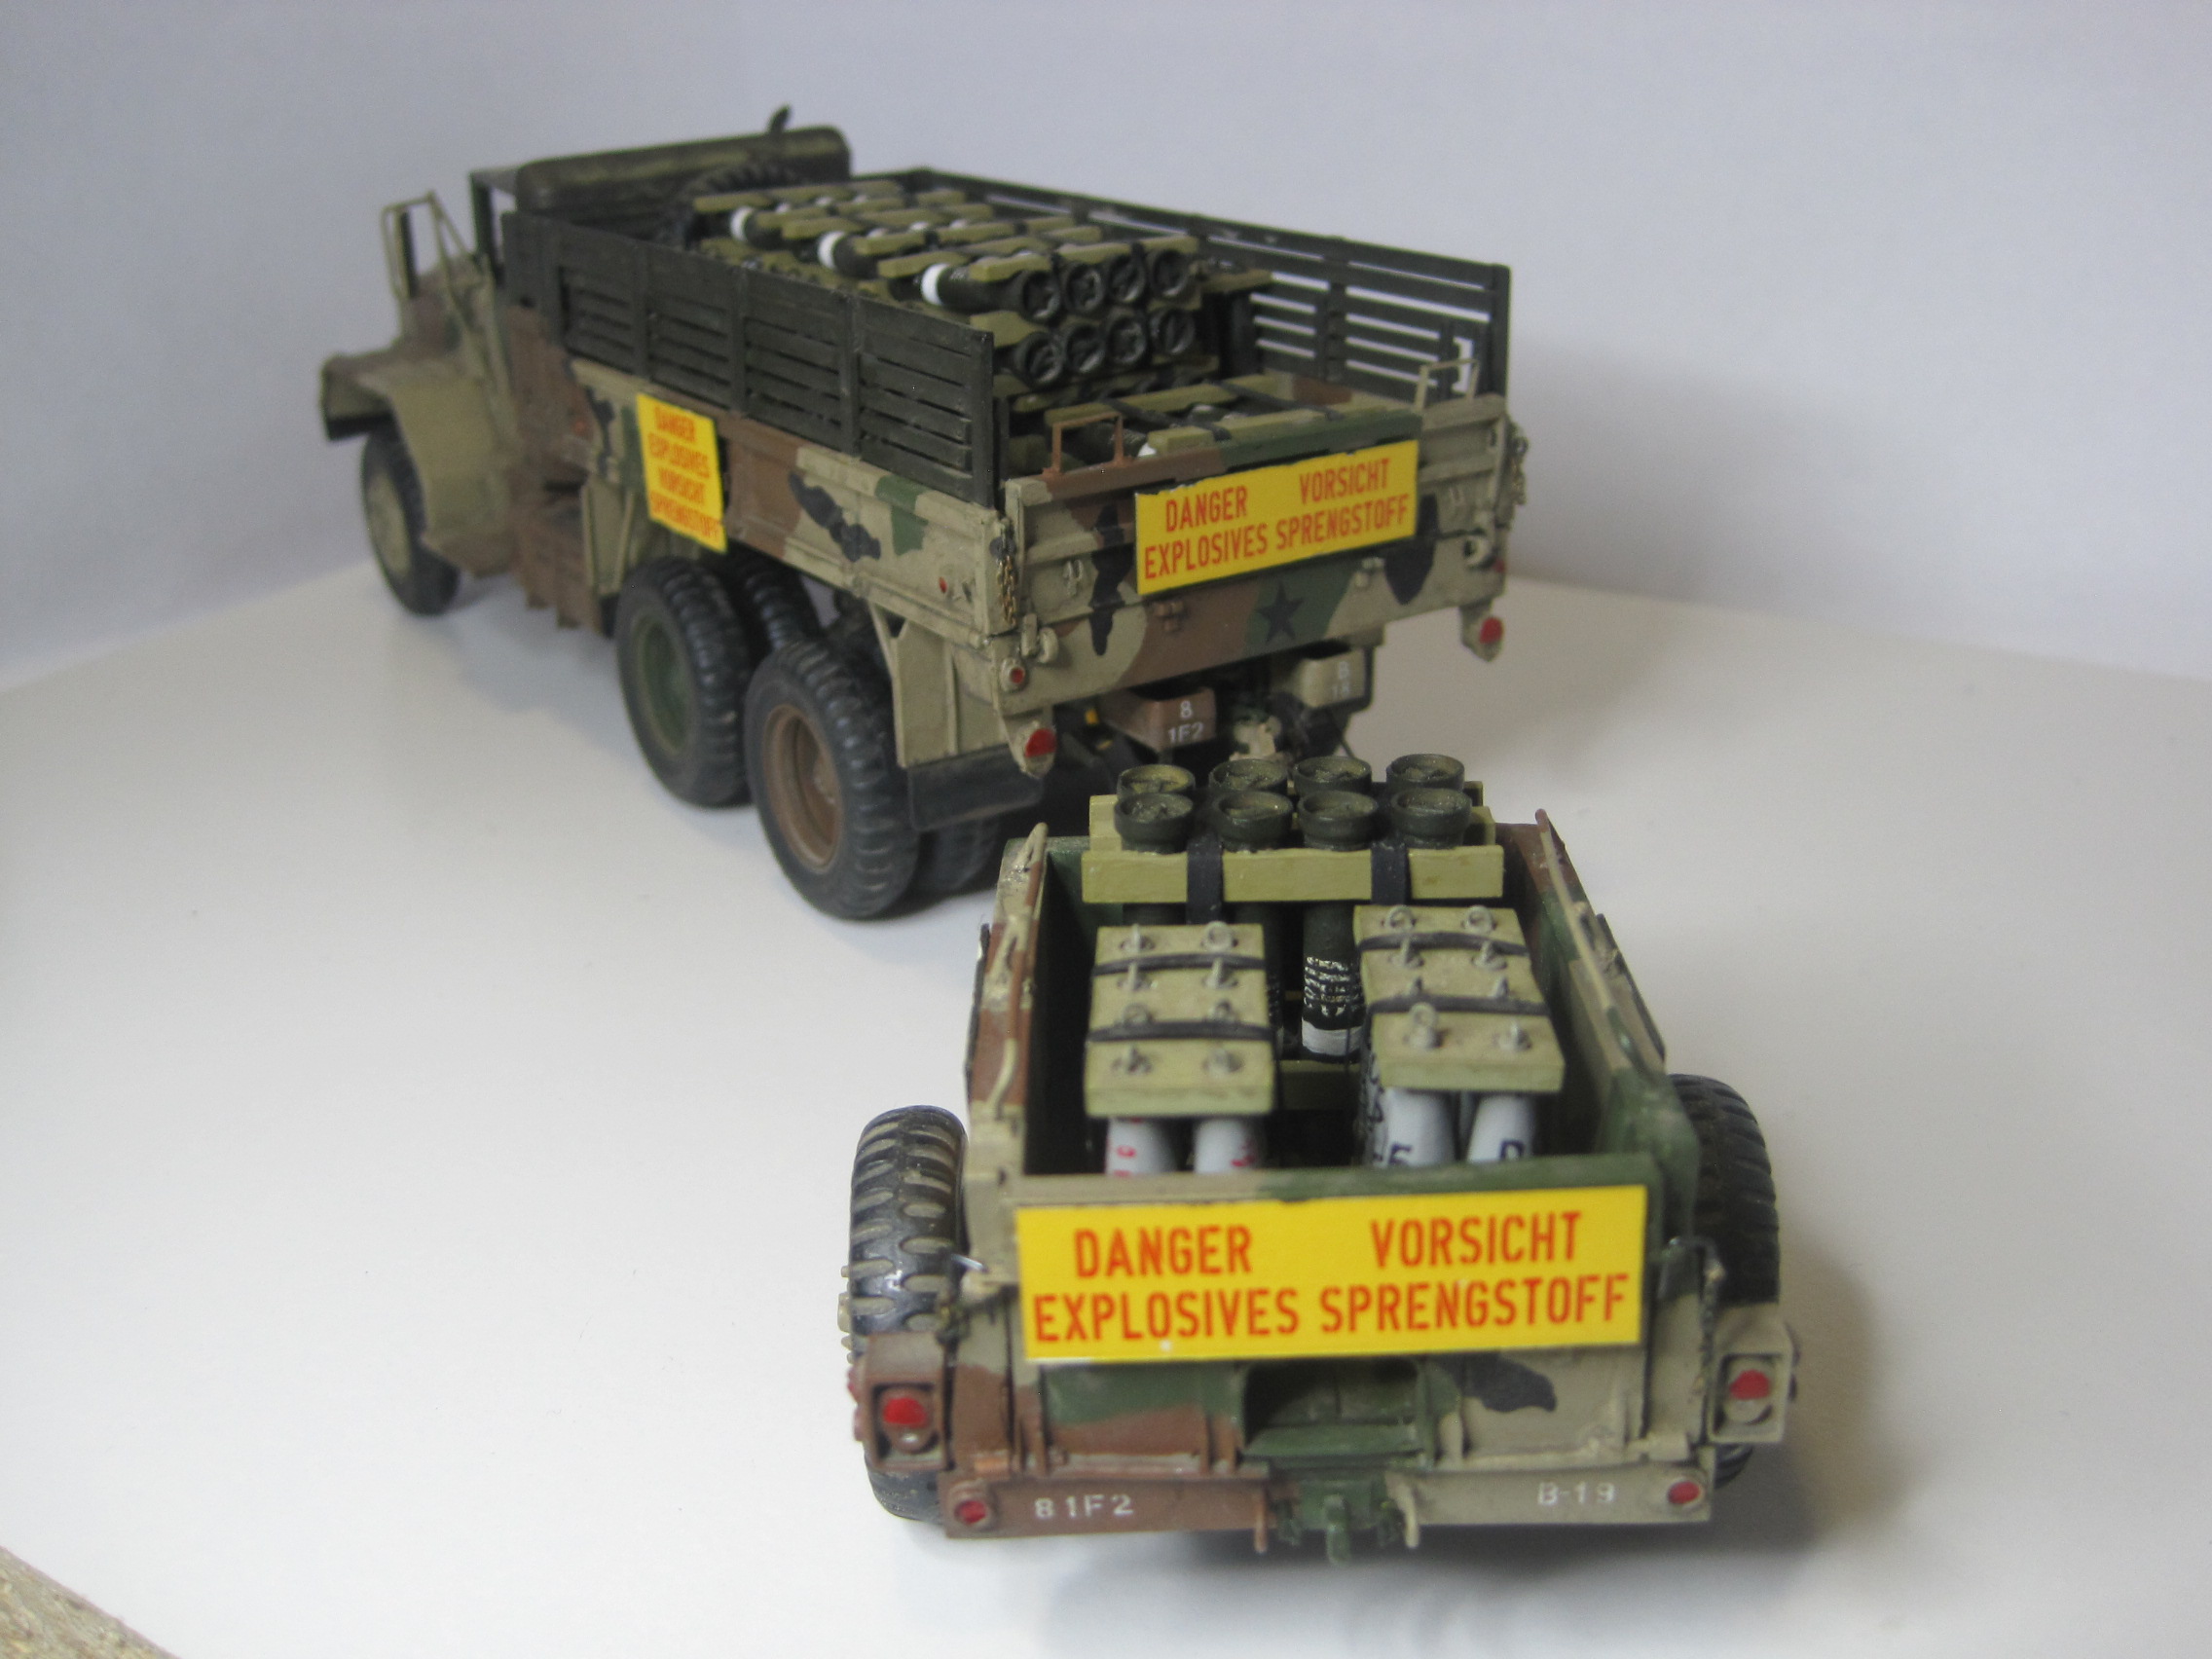
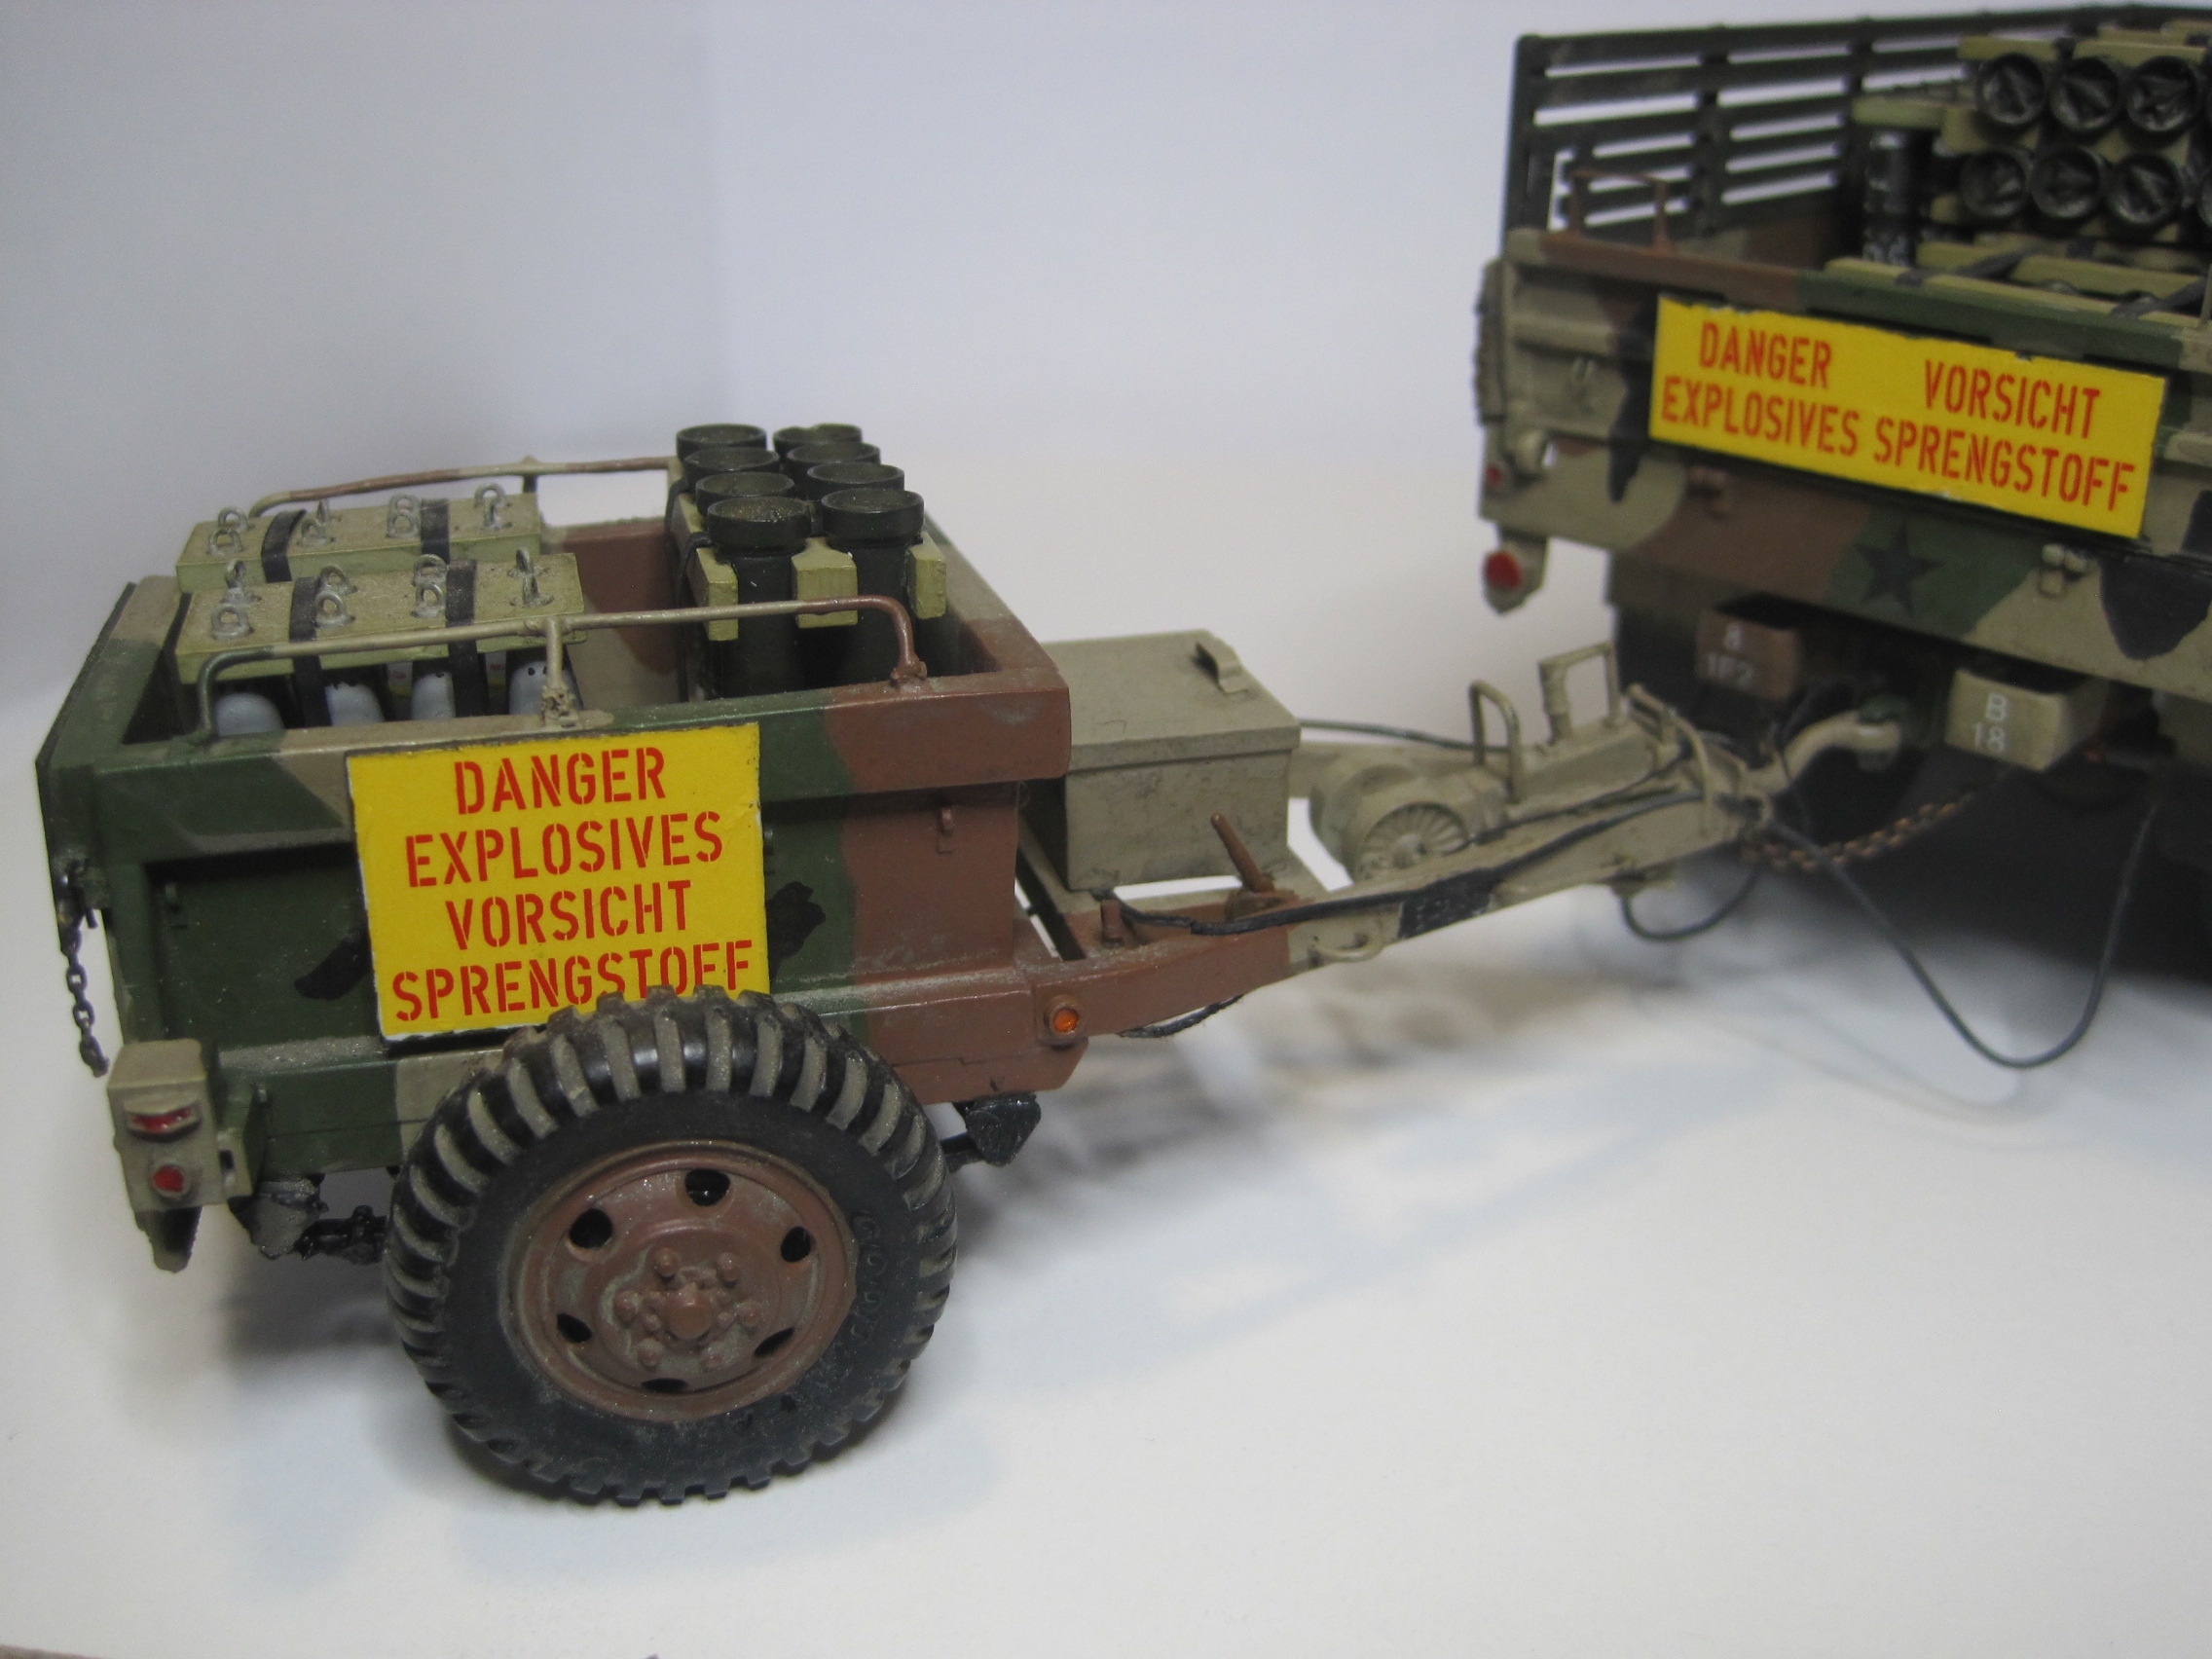
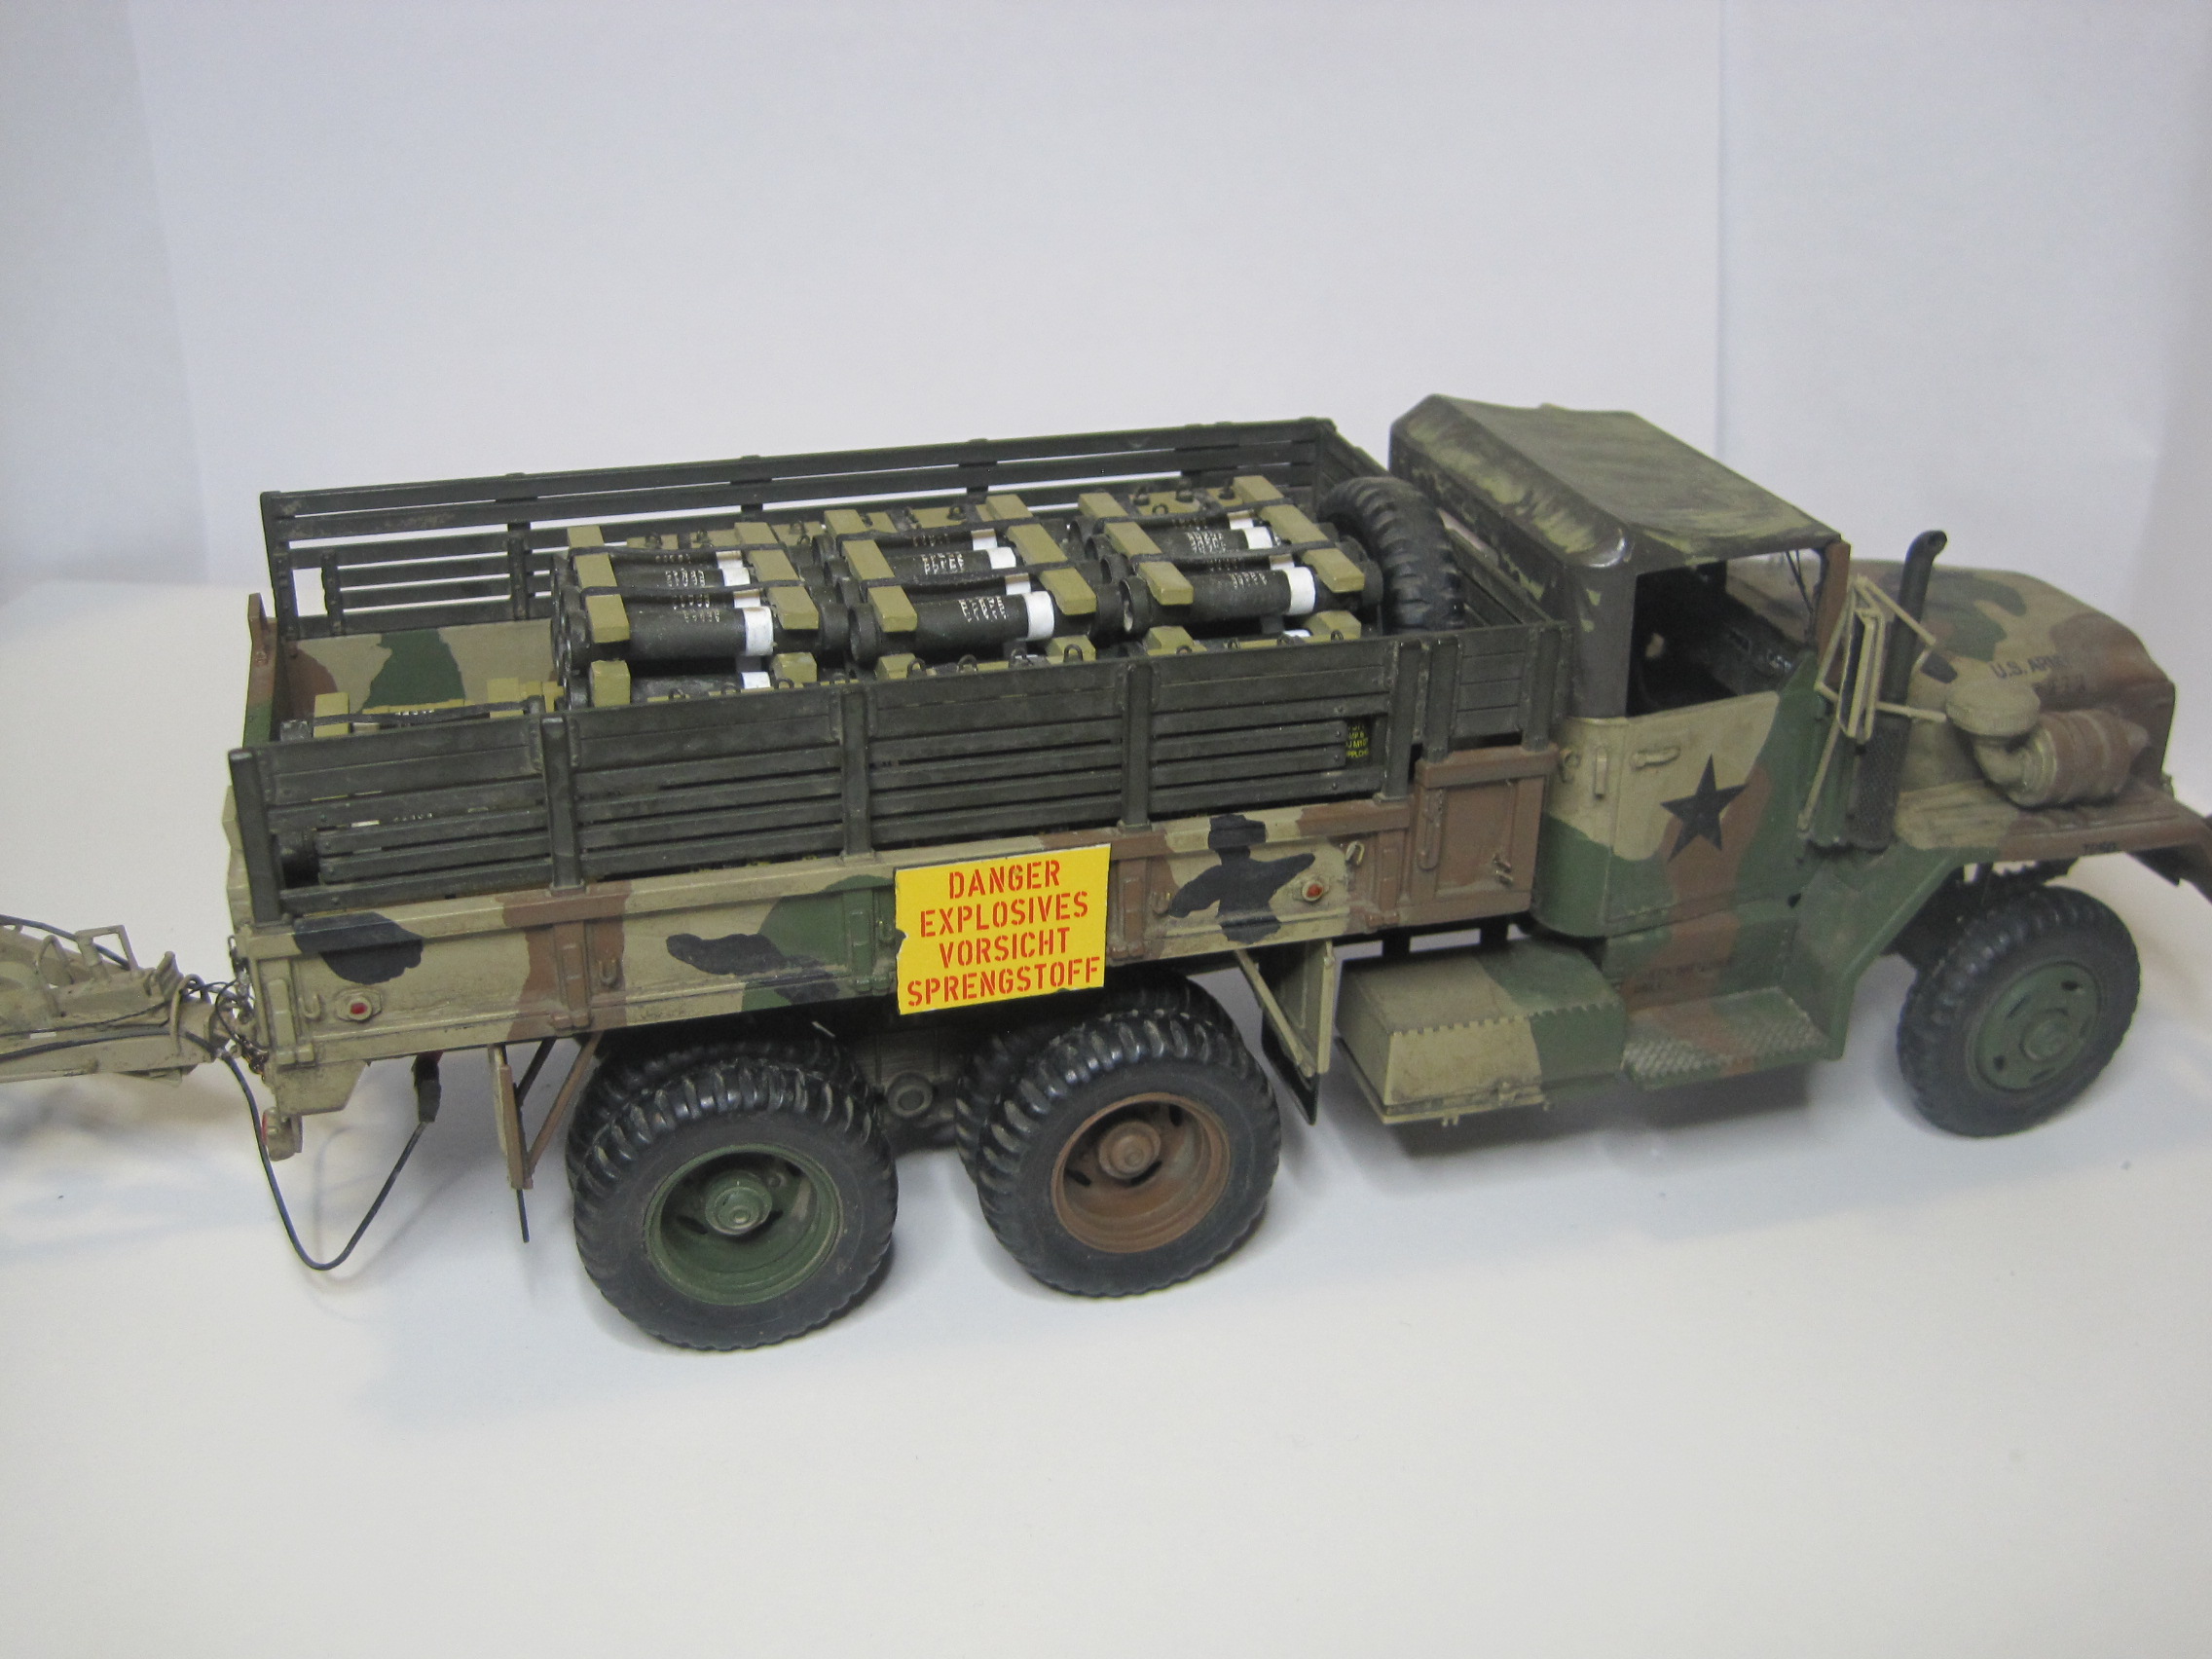
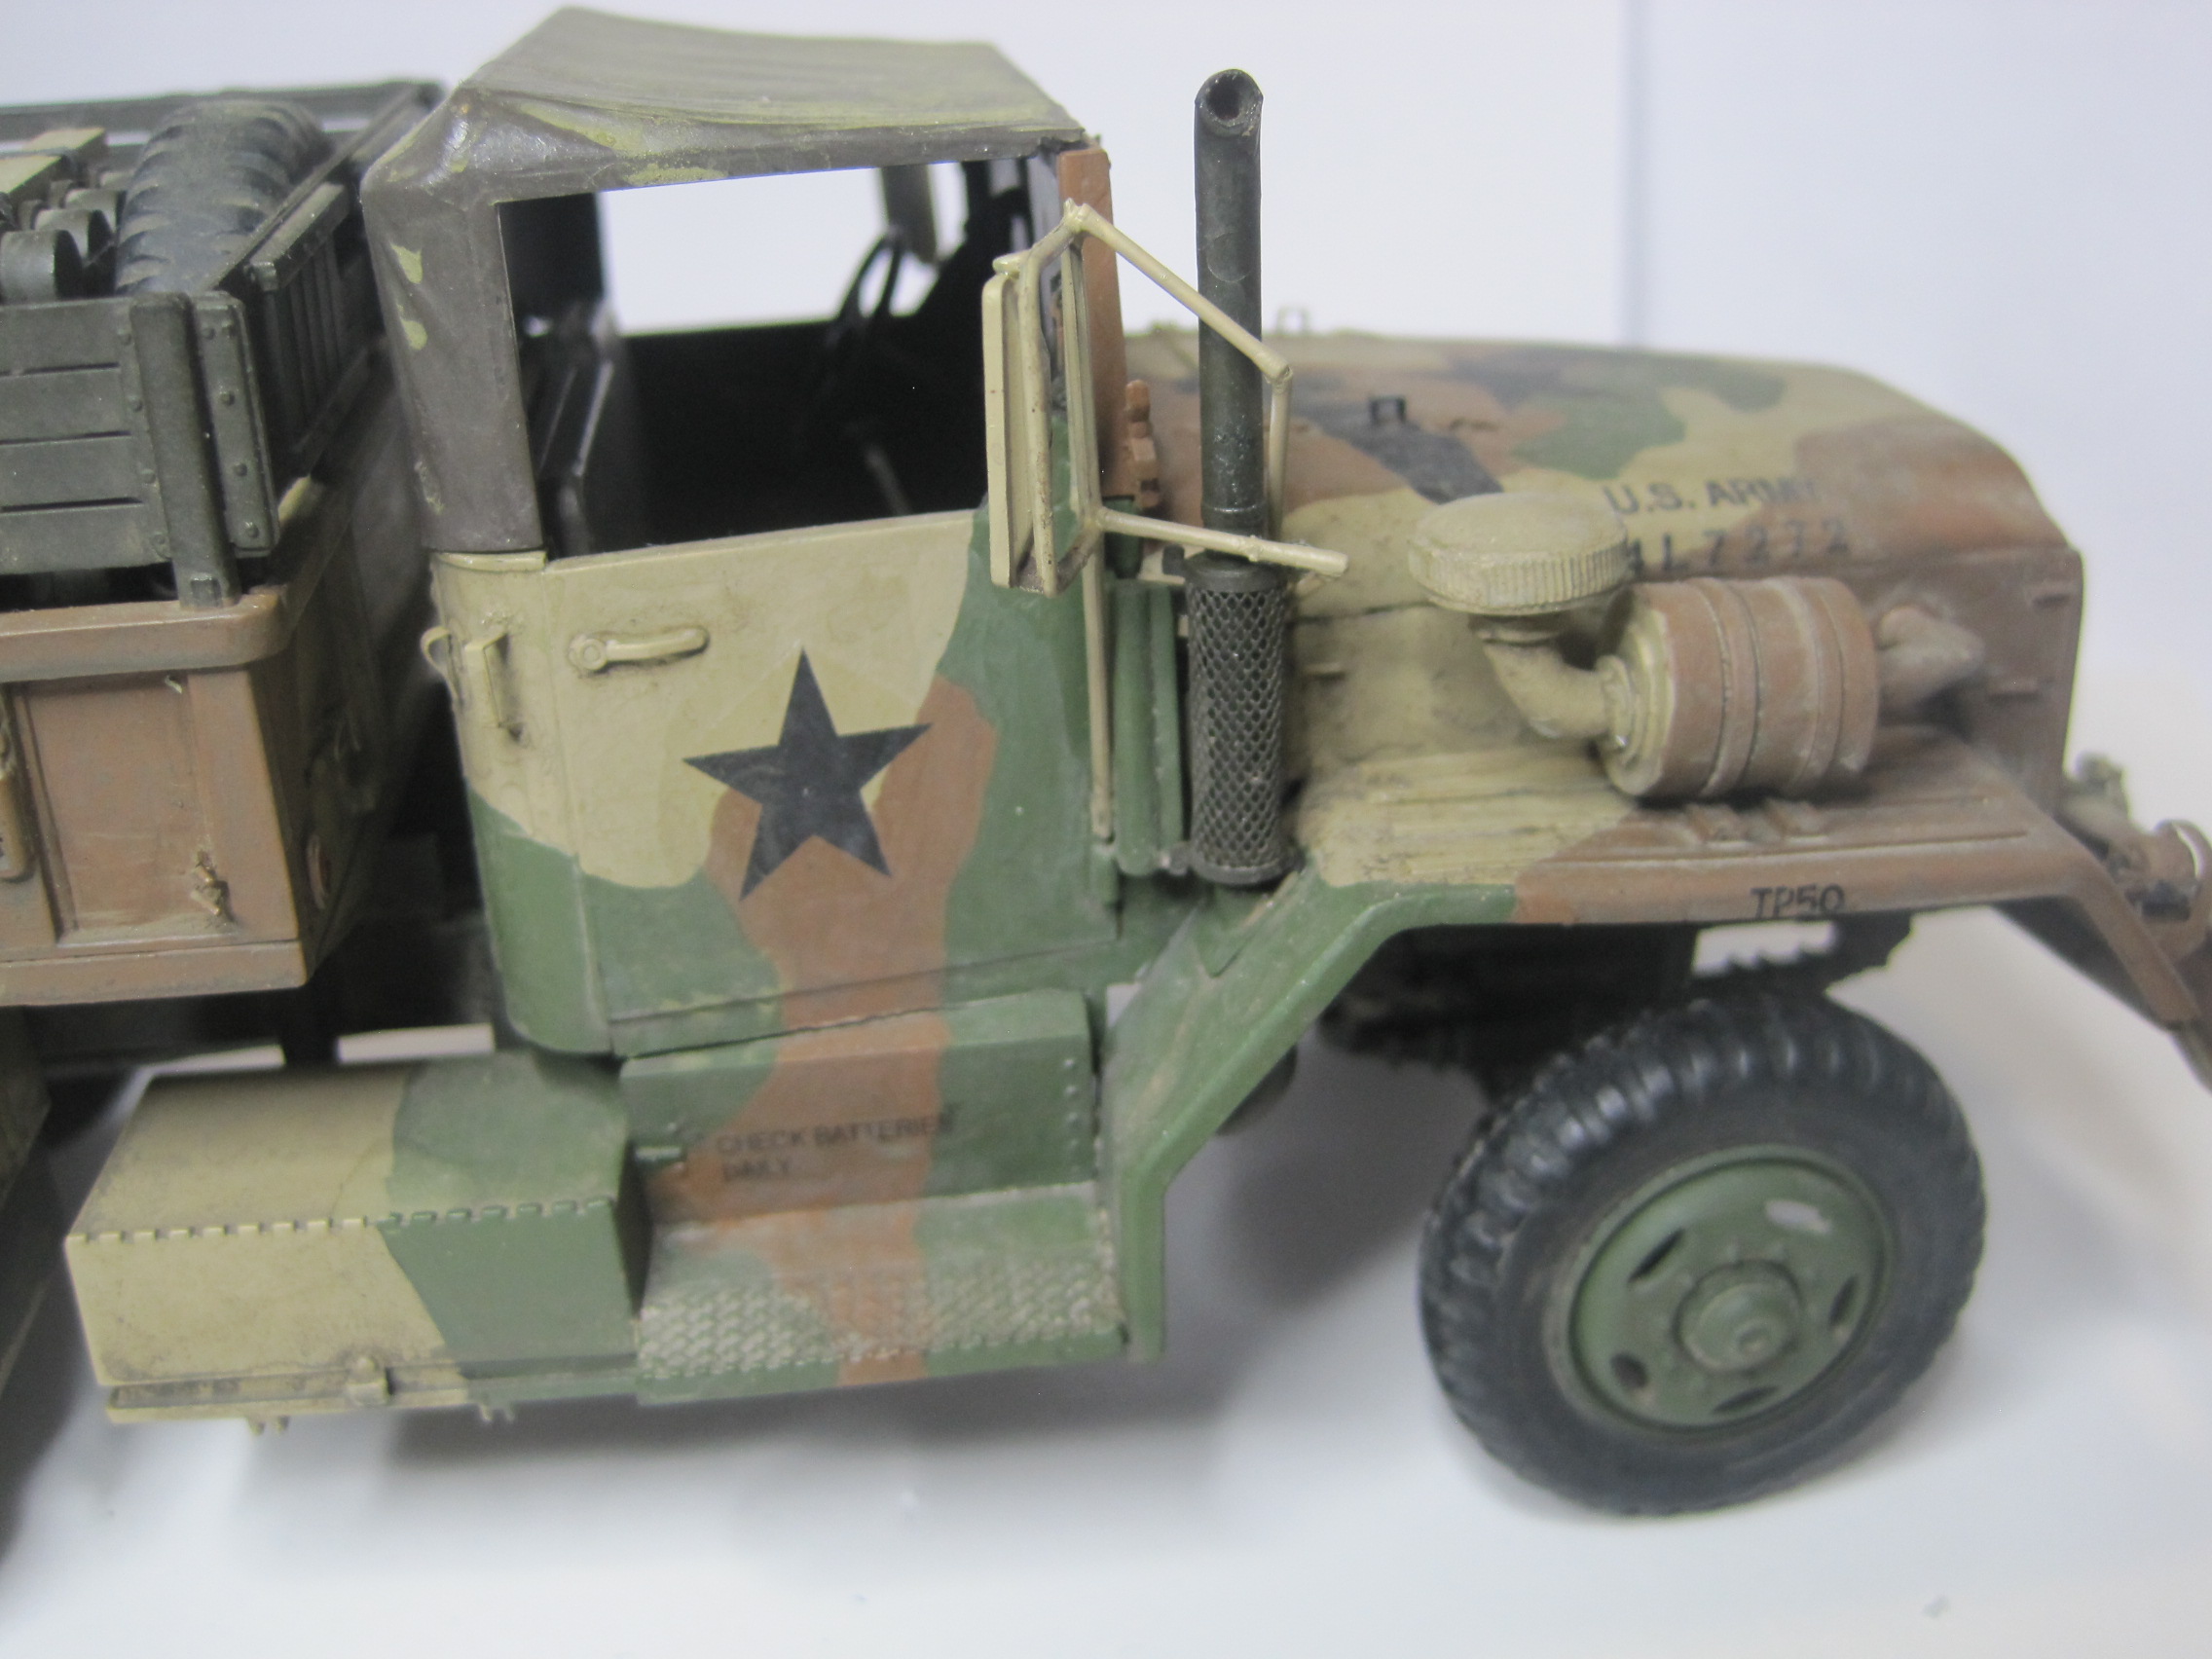
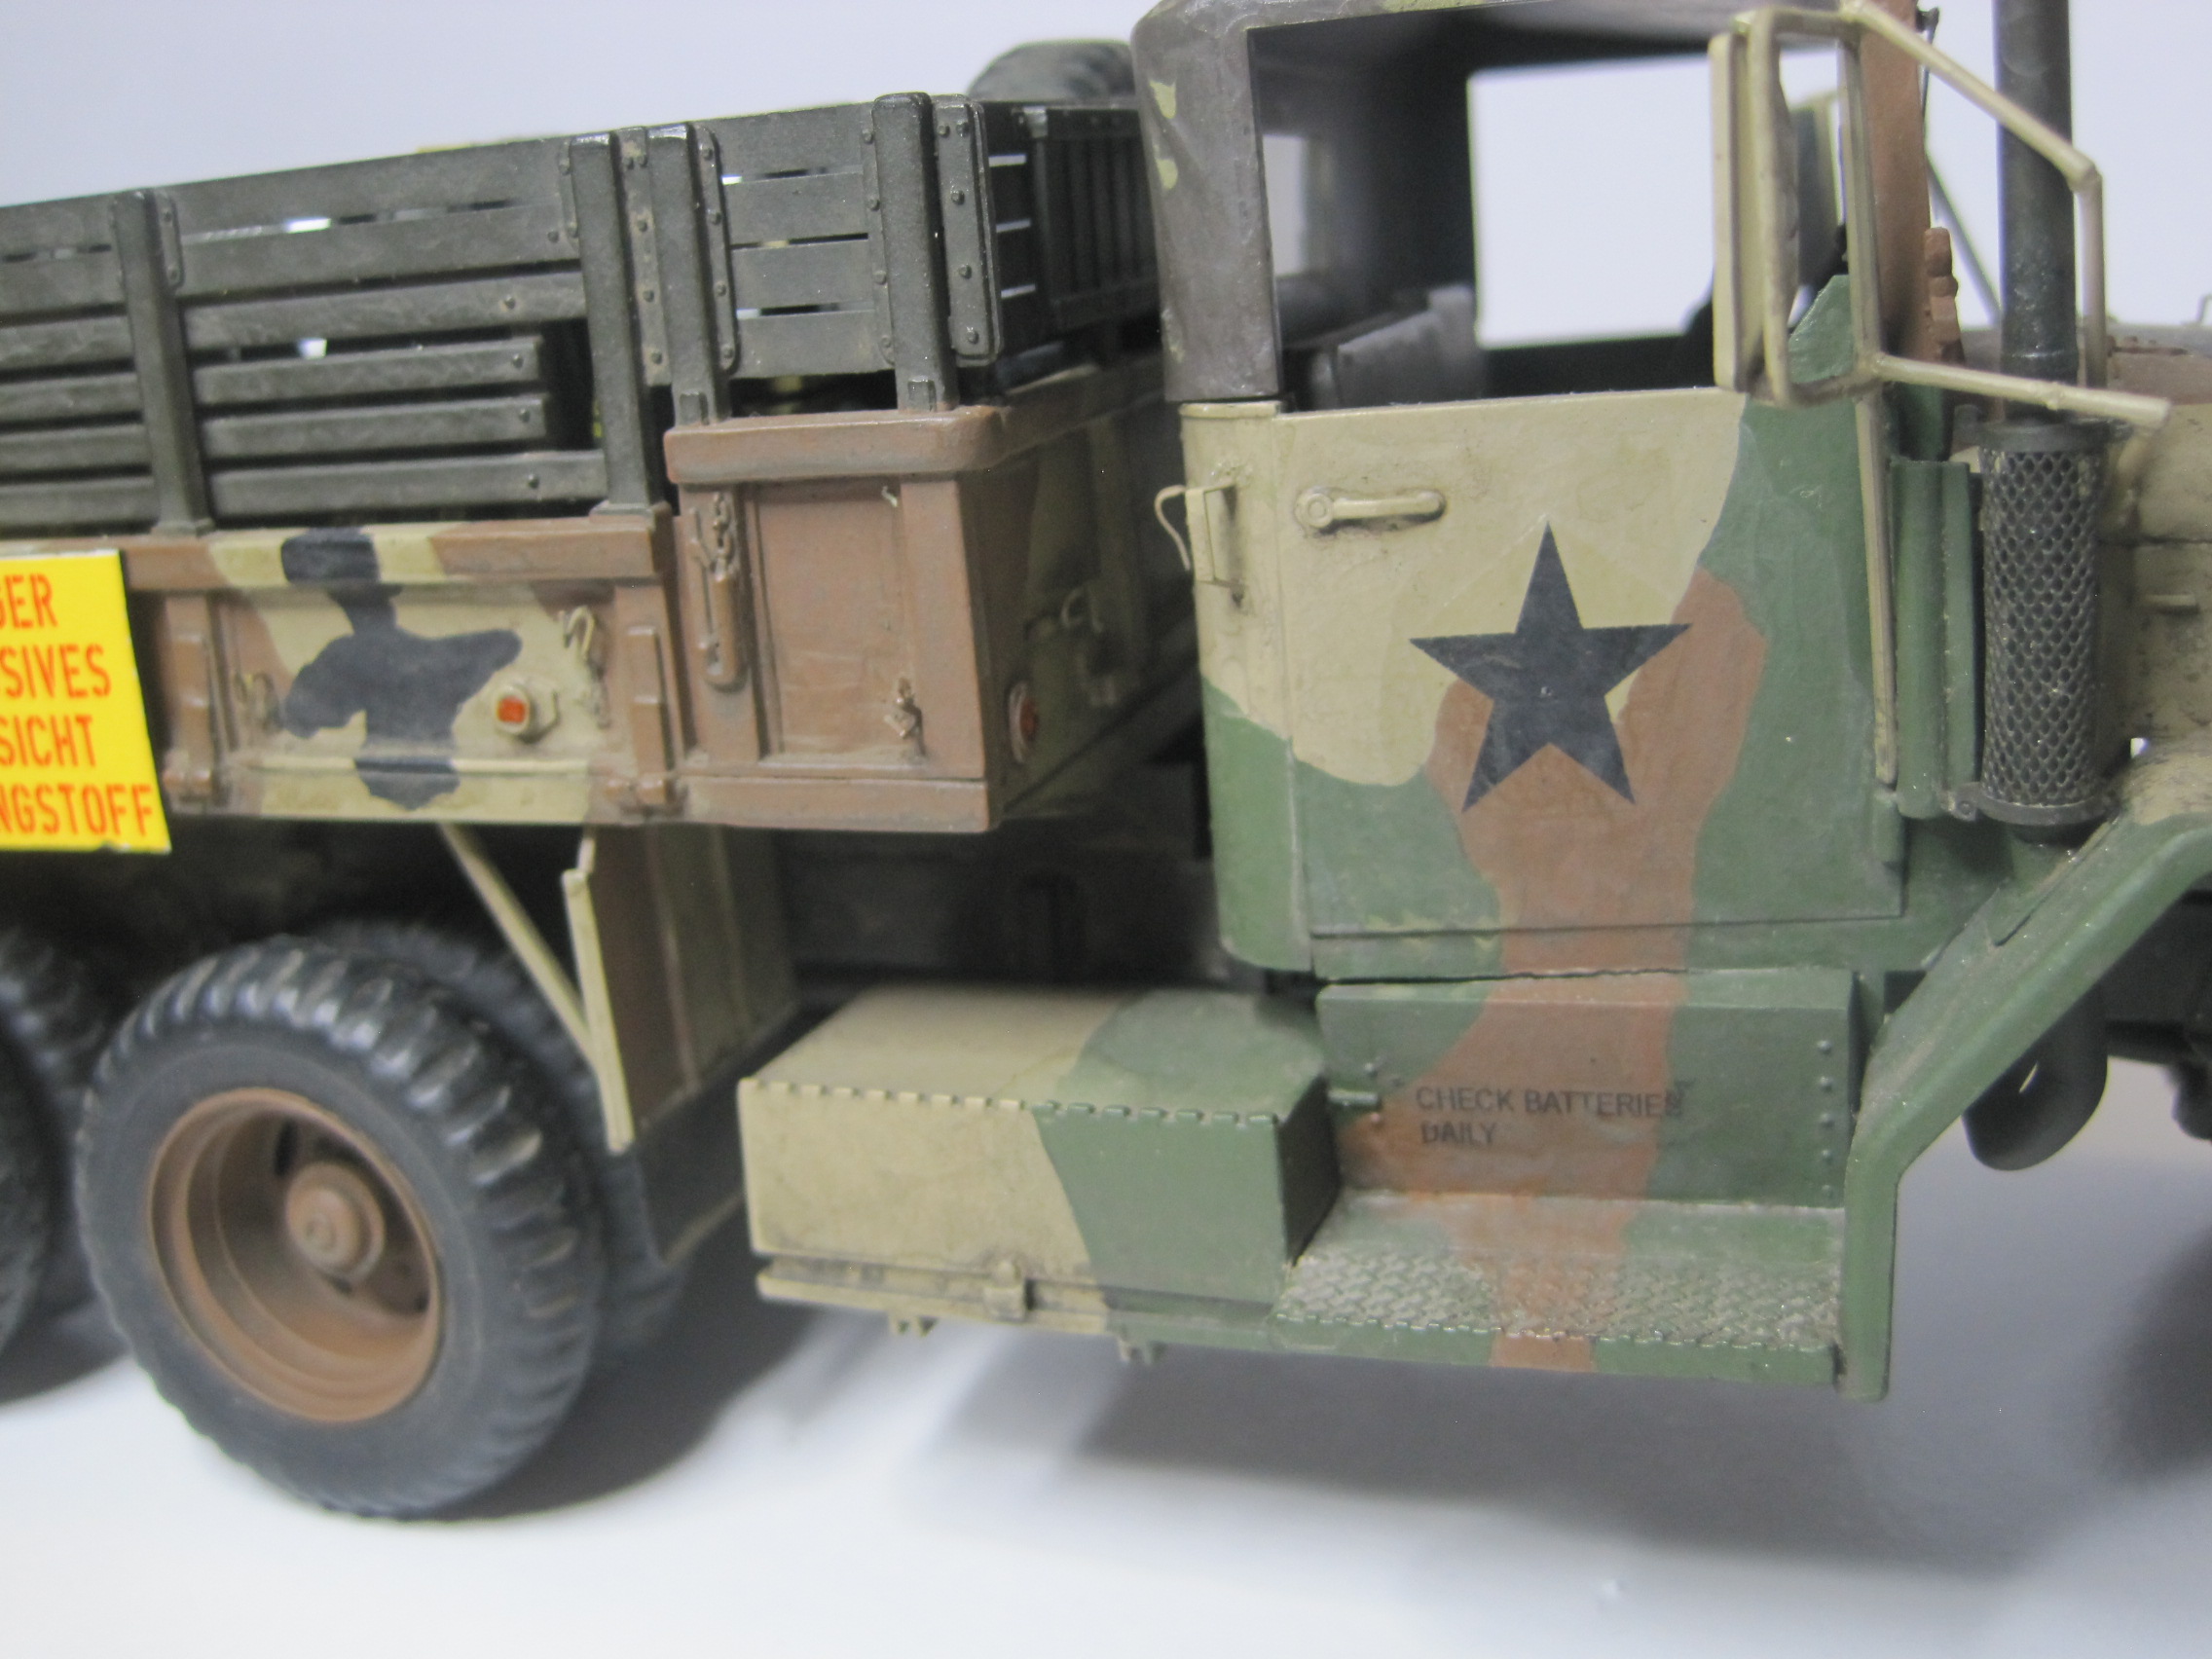
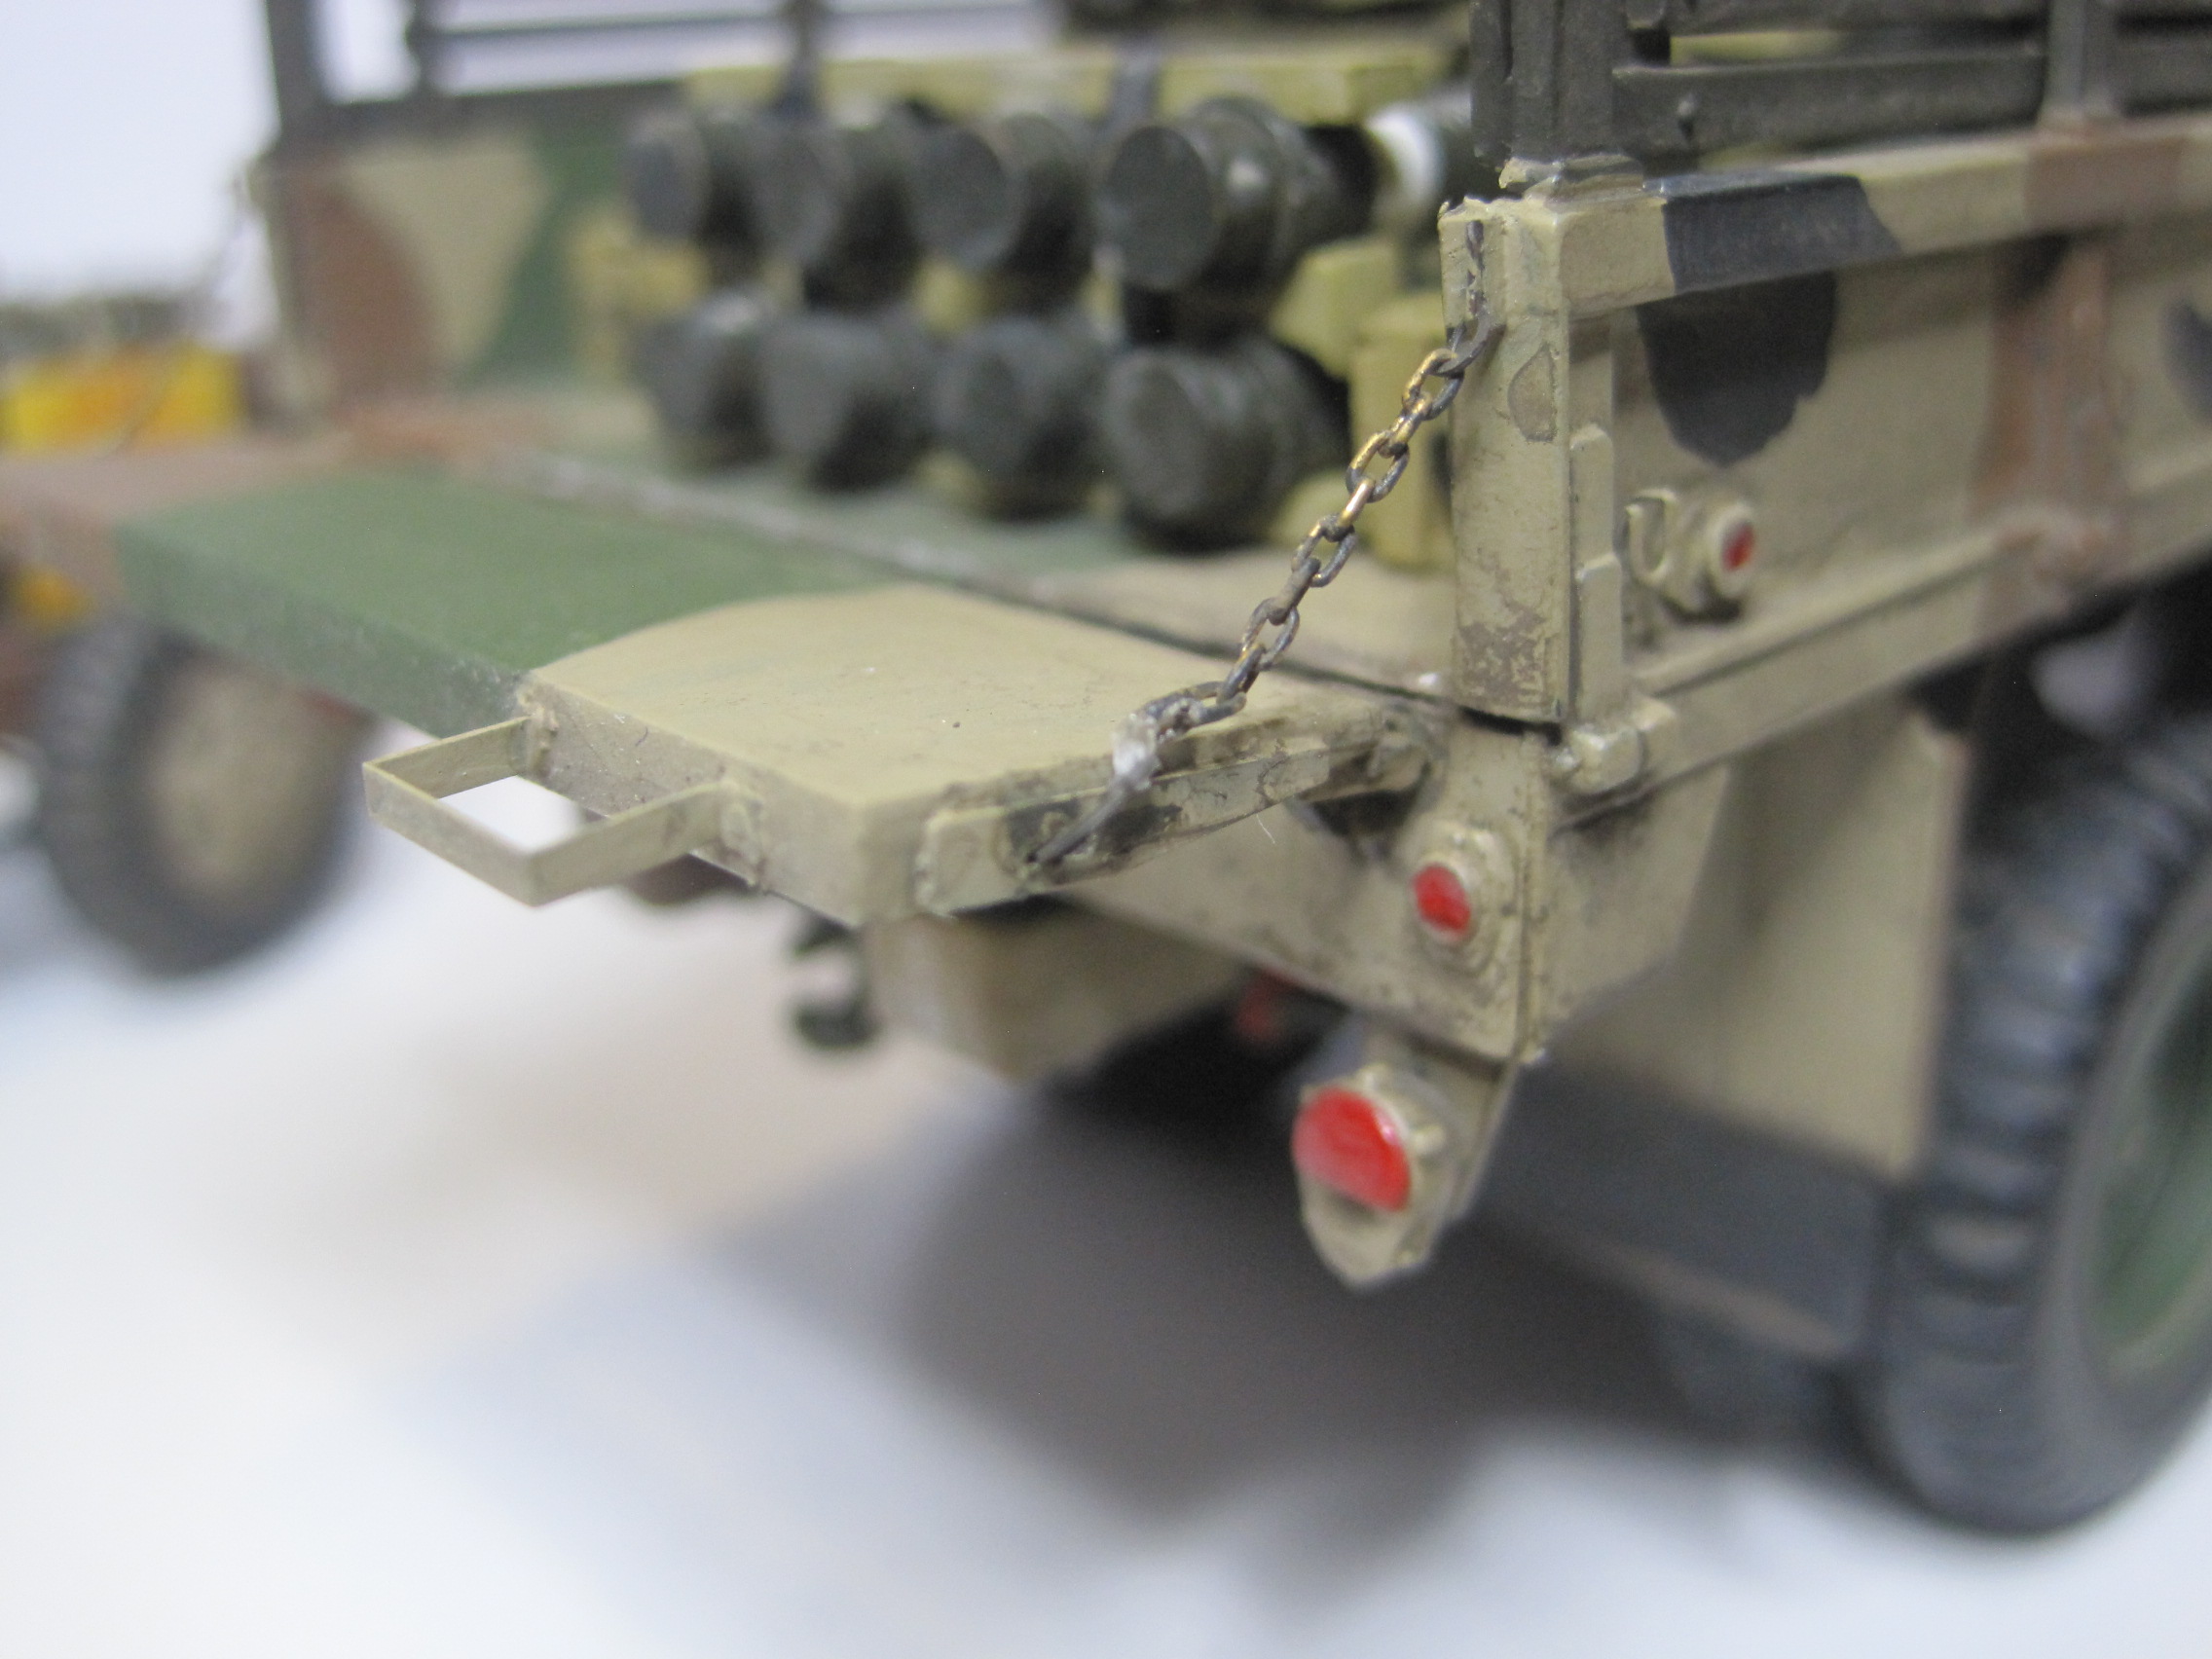
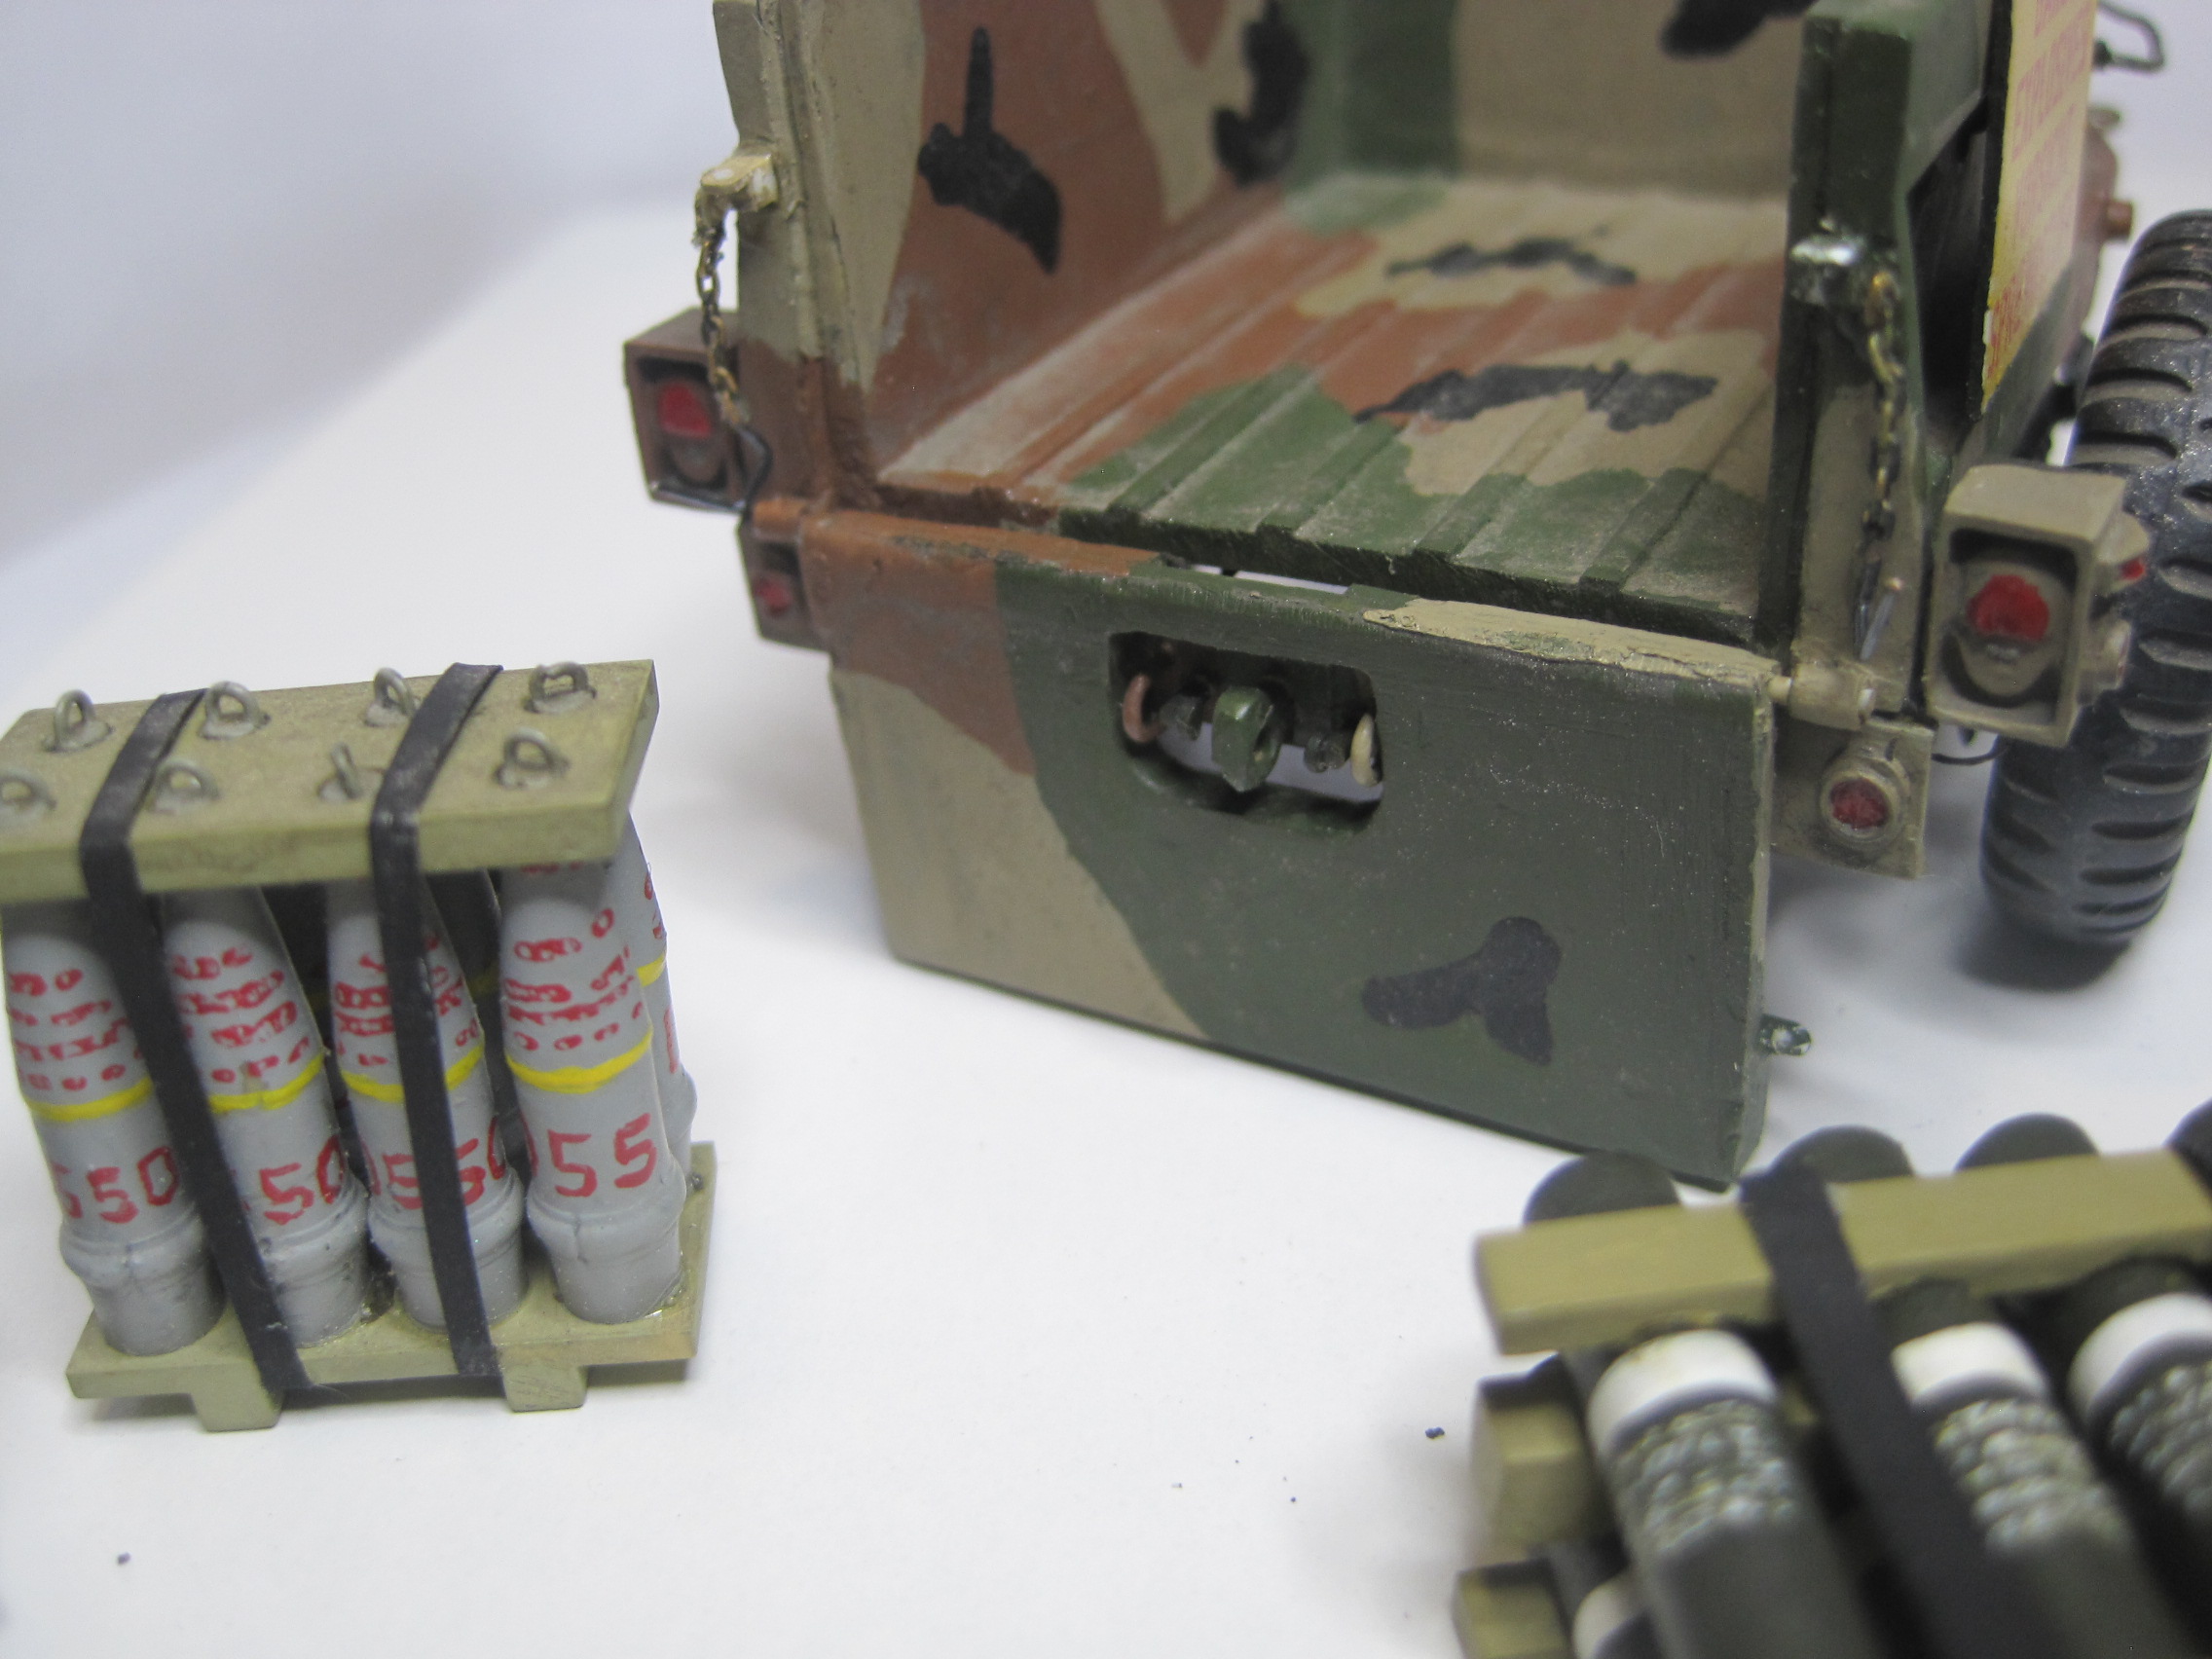
Here’s today’s installment: This is B-18, one of three M54 5 ton Cargo trucks assigned to the battery,each pulling an M332 1 1/2 ton ammo trailer. The main function for these vehicles was to shuttle back and forth to the Ammo Supply Point (ASP) and pickup and deliver ammo so we always had what we needed. And to provide the extra capacity to carry that ammo around until we could shoot it up.
Our three vehicles were numbered B-16, B-18 and B-20 with trailers B-17, B-19 and B-21. The only difference was that one of the vehicles in the section, B-16, was equipped with a winch, and I chose to build without, so B-18 and B-19 it is. These were normally considered a “battery” asset, but in practice, especially when they were accompanying the entire battery in convoy, each of these vehicles worked with a specific “two gun platoon”, either left, center or right. Proper distribution of ammo throughout the battery was always a challenge, and since the center platoon usually fired all the adjustment volleys, they usually used more rounds. But having each one work with a specific pair of guns made things much easier to park each vehicle in the right spot when you pulled into an unfamiliar position to set up, especially at night.
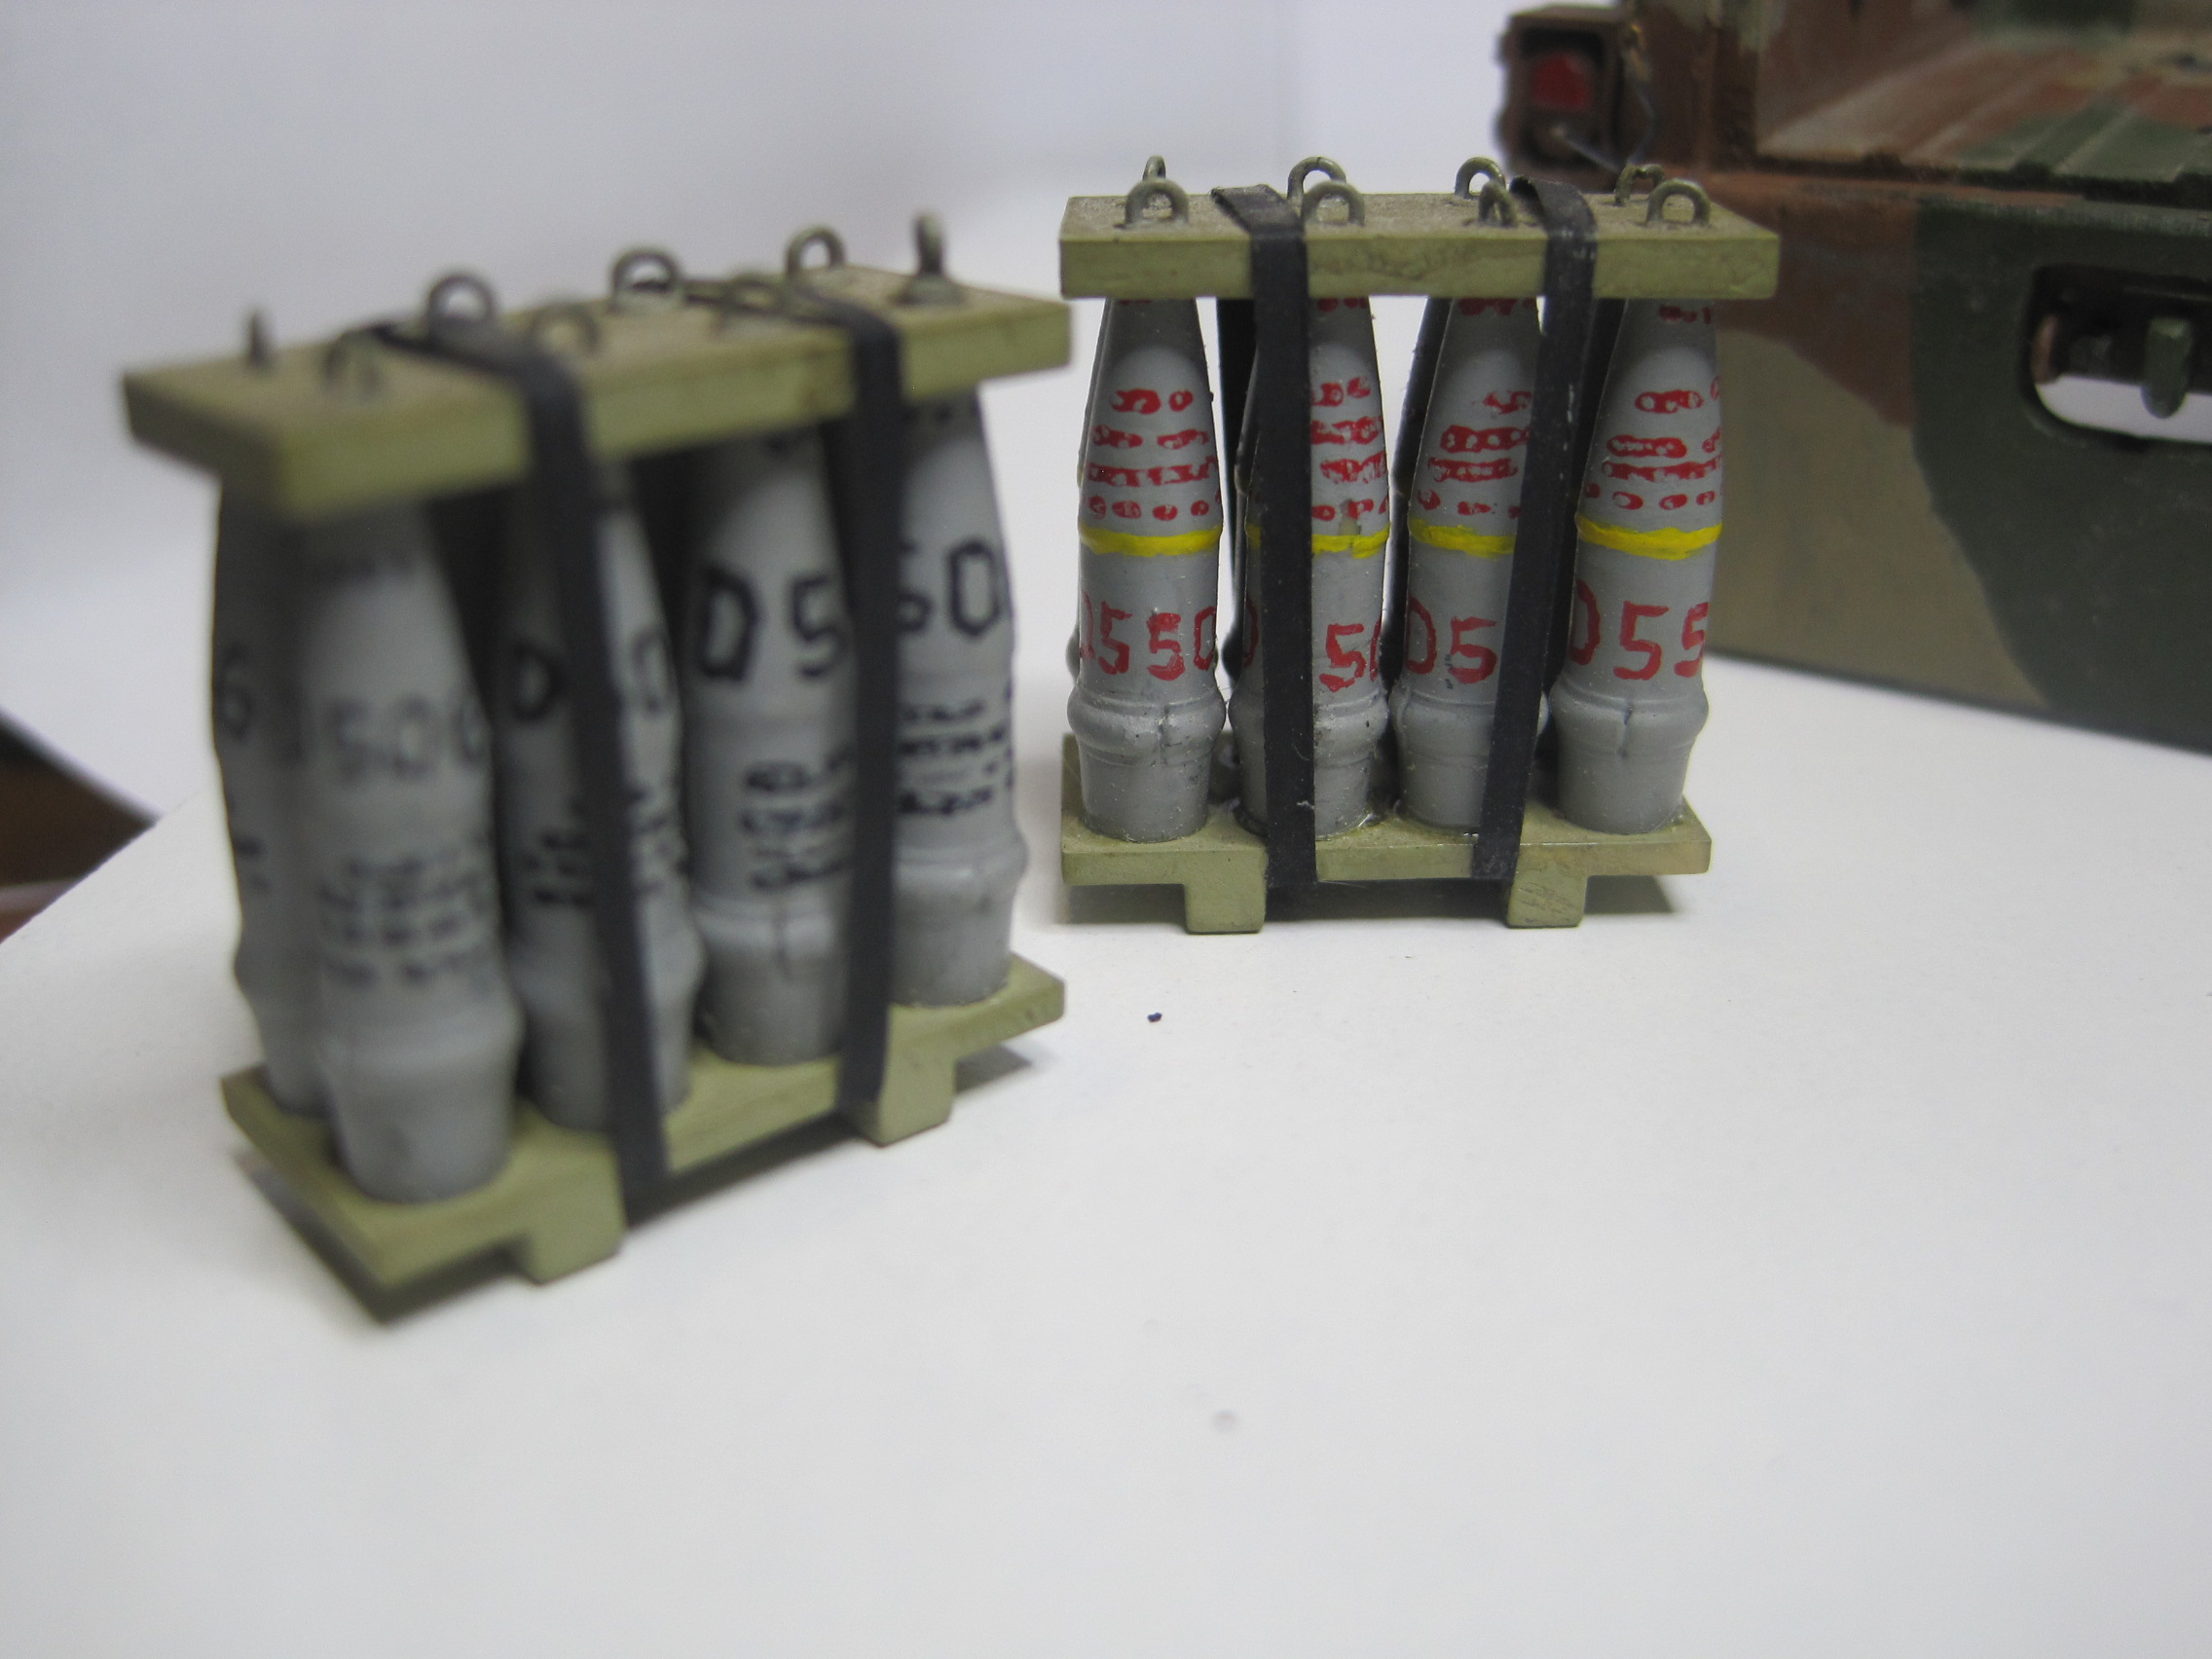
There were a limited number of personnel who went forward on the advance party with the BC to recon, select and set up the forward position, and only one soldier per howitzer section. So with each ammo truck following a specific pair of guns, it was easier to get them in the right place in the dark. These guys had the difficult task of going from the battery to the ASP and if we moved, to the new location, and there were no radios in any of the vehicles! Map reading skills a definite plus! Keeping us supplied with ammo was a tough job, and a lot of hard work, especially when you consider that each one of those pallets, with 8 155mm shells each weighing almost 100 lbs adds up to around 800lbs. That backbreaking work is what’s known in artilleryspeak as “humpin’ jo’s” short for projos or projectiles.


9 Likes