Nice, I used Alclad Chrome on my Samba.
That looks the biz!![]()
Nice, I used Alclad Chrome on my Samba.
That looks the biz!![]()
Unmasked !
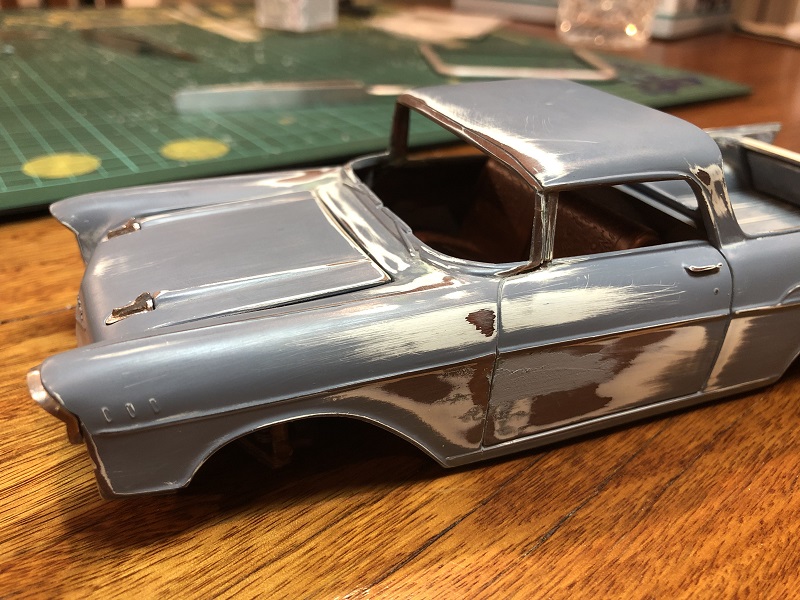
As always, a couple of touch-ups to do where the Aqua Gloss managed to bleed under the masking, but overall I’m really happy with this so far when you look back at what I started with ![]()
Cheers, D
Wow D! You’ve outdone yourself with this one - Looks great! All the painting, sanding, taping and repainting really paid off
Cheers
Nick
D,
Finally getting a chance to catch up on the site. Outstanding save on the El Camino. With your TLC, I’m sure that it will be more then just an old work horse.
joel
Yes, great result on this build, D! Well done so far ![]()
Oh, that is beautifully done!
Excellent work!
@Joel_W great to see you back mate, it’s been way too long! Thanks for checking in, I hope all is well at your end! I assume that you have immersed yourself in your railroad layout? Hopefully you can share some photos, maybe in the Railroad Modeling forum here.
Nick, Torsten, Gavin, many thanks for the feedback guys, very much appreciated as always!
Cheers, D
D,
You hit it right on the head. I had no idea of how complex and time consuming it would take to get my dream Model Railroad up and running through the basics. Still years and years of work left, but the journey should be fun.
As for not car modeling, just no time, but now I have the time to do both.
joel
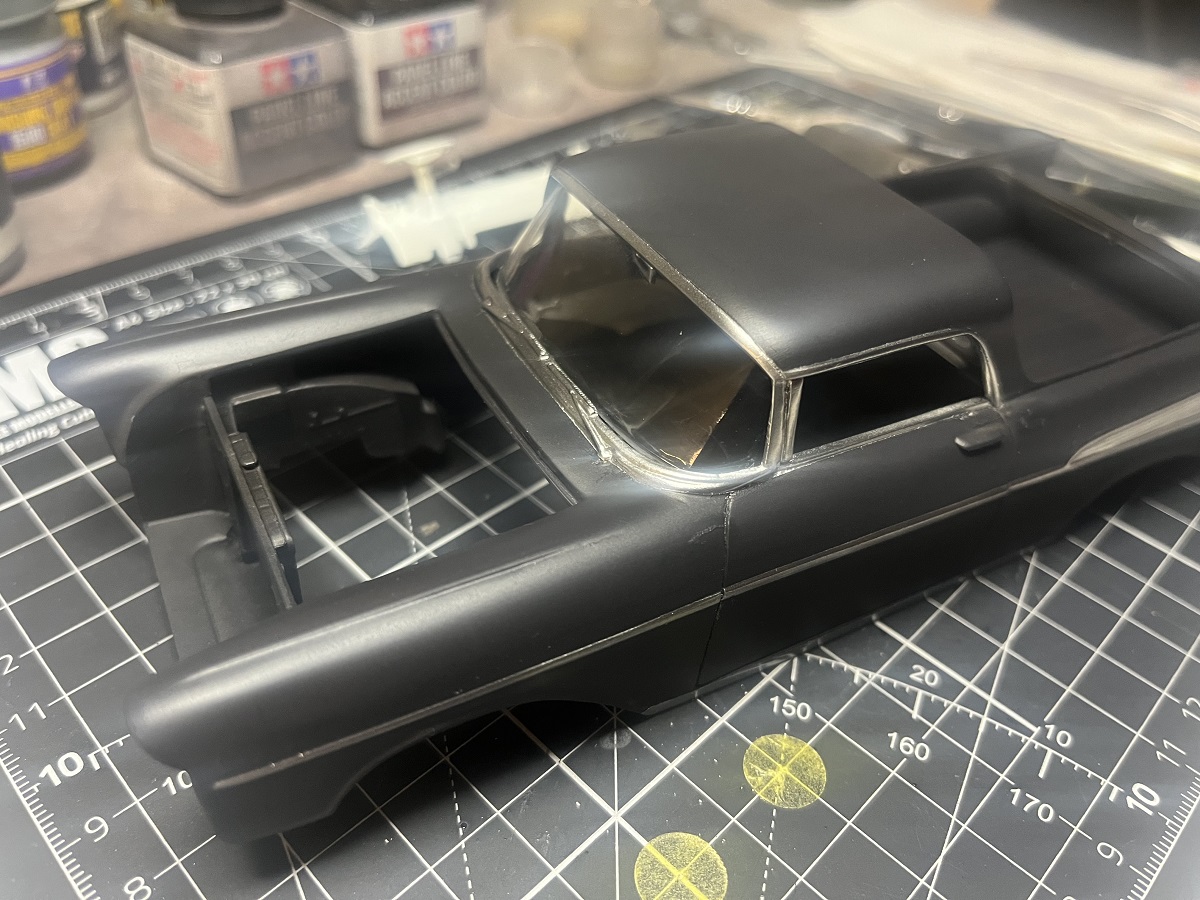
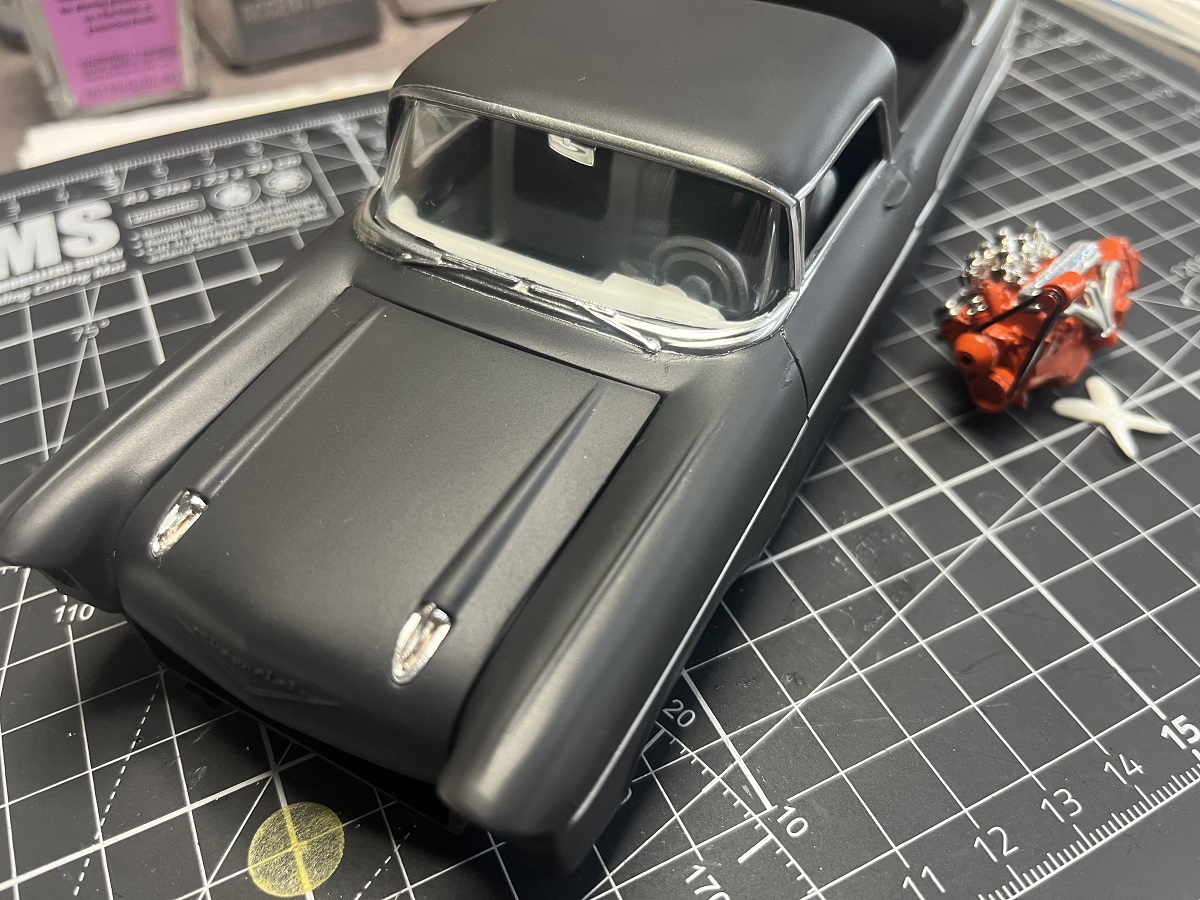
I gotta say I’m not much on the flat black finish you see on so many retro restos nowdays but your little Chevy looks pretty darn good. Can’t wait to see the interior (as long as it’s not red ![]() )
)
Cajun ![]()
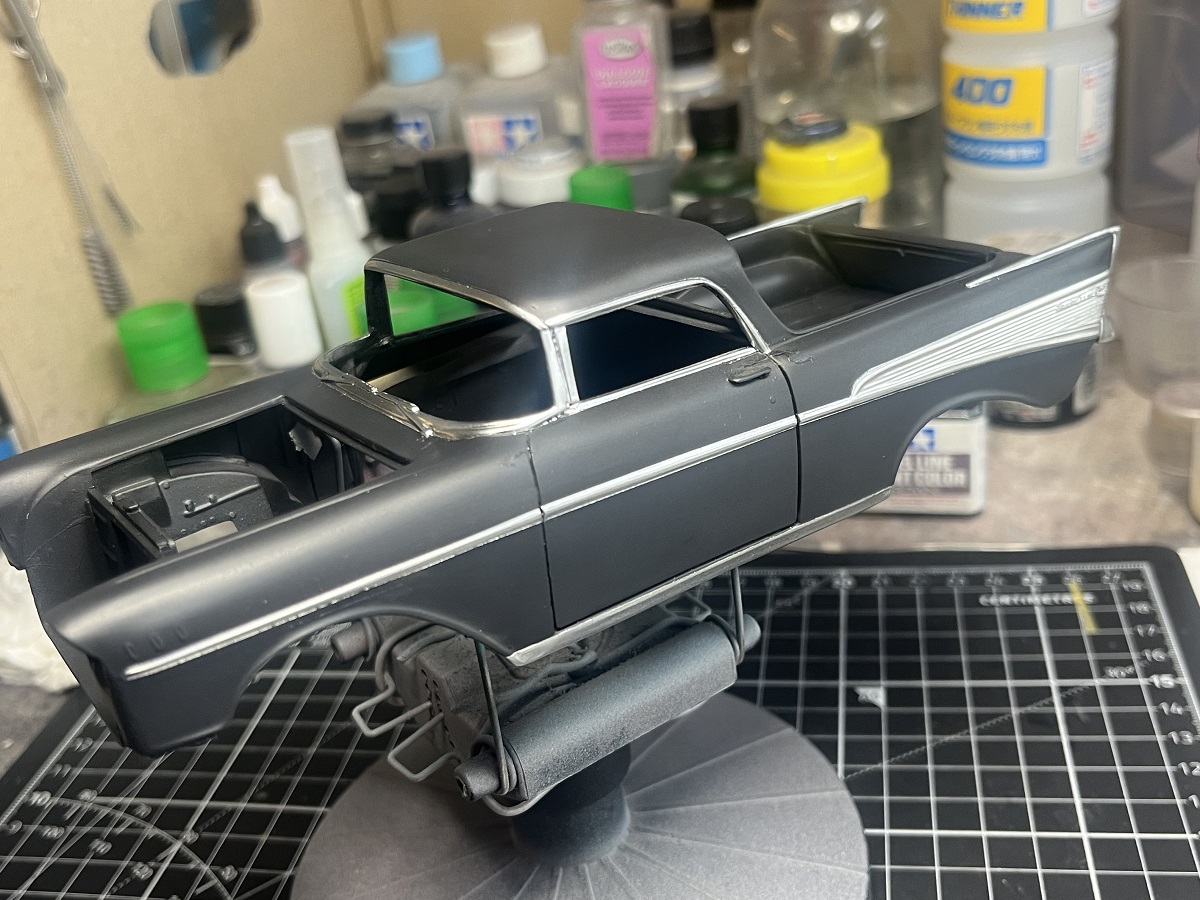
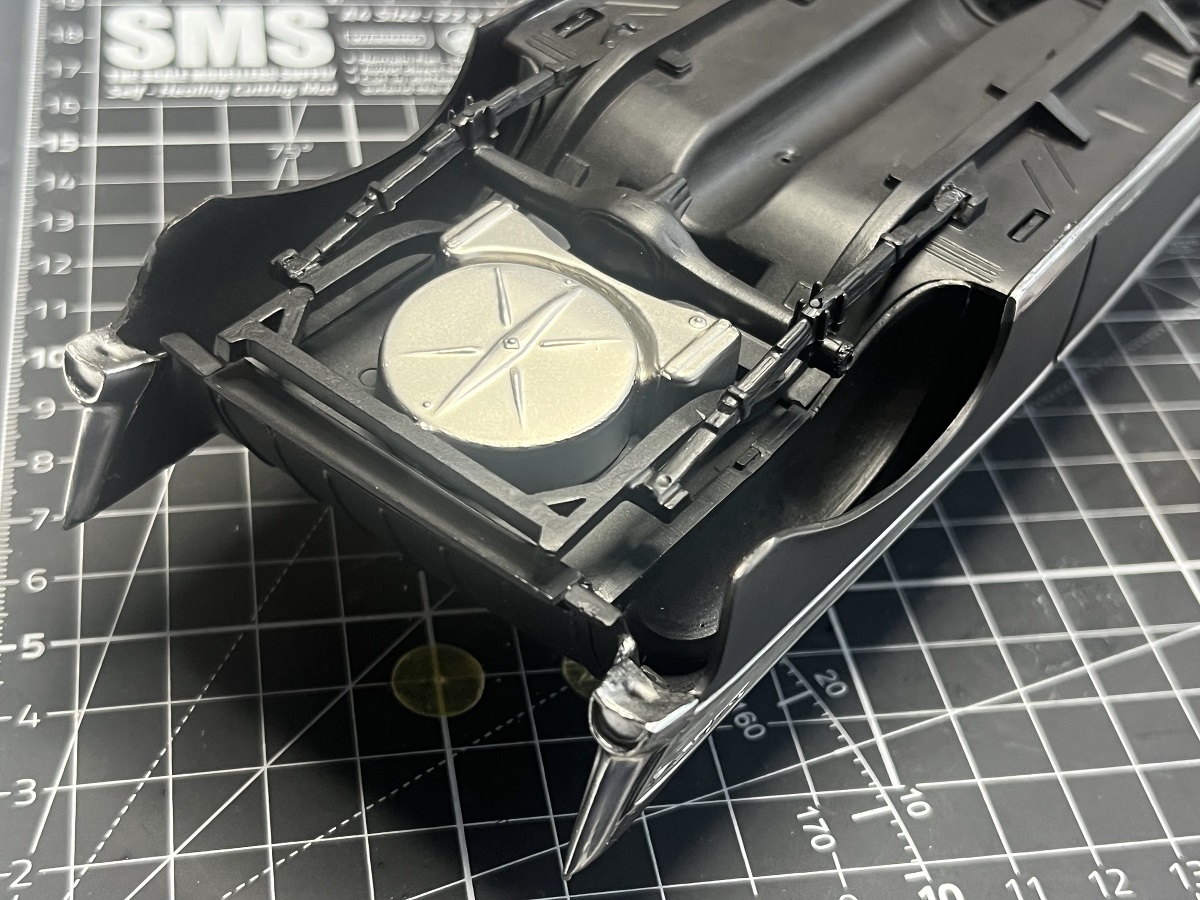
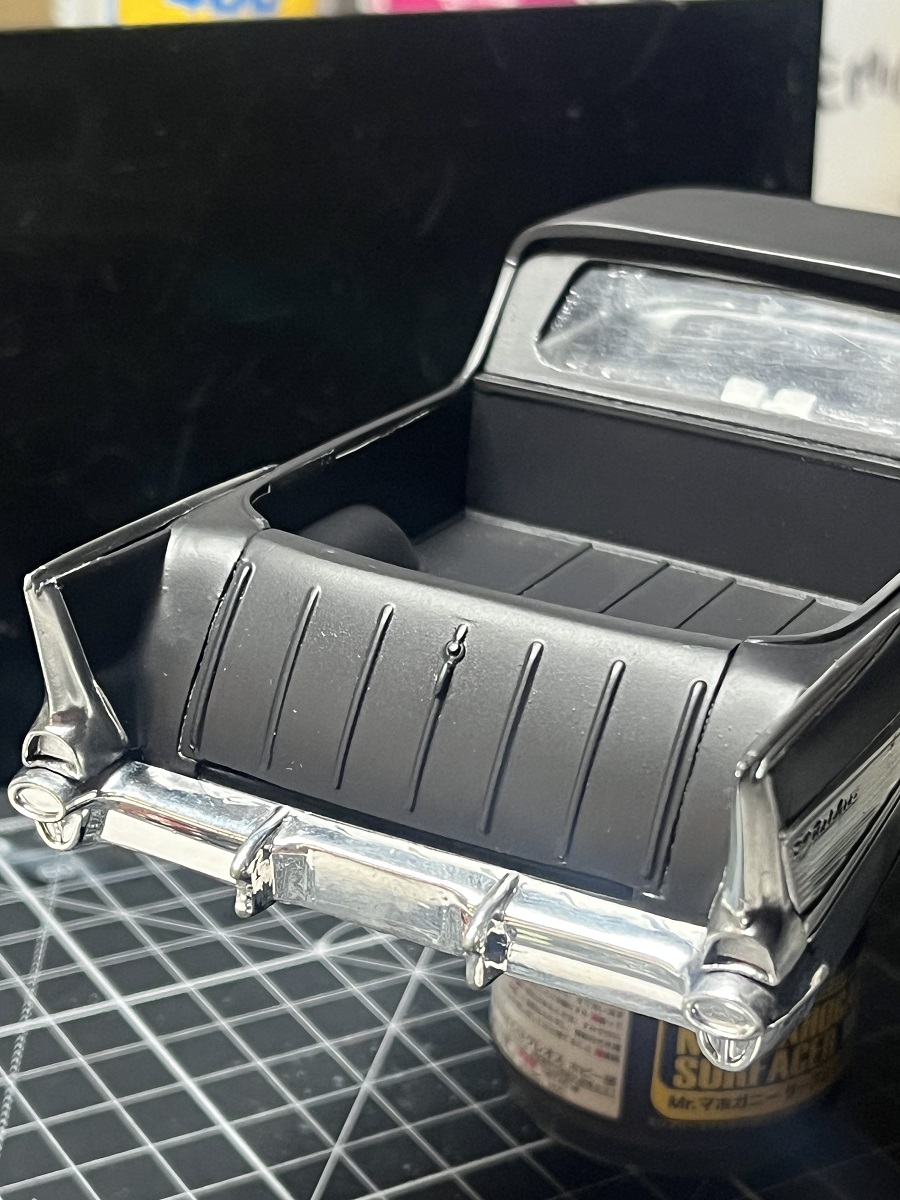
Ok, this one is fighting me now. The really old plastic is quite brittle and a few joins have popped and required more cement and clamping. I’m going to push it through without too much attention to detail now just to get it off the bench, then I might practice some dirt effects on it with oils and pigments.
Front and rear glass is in place, the front glass has 2mm gaps around the bottom corners. The rear glass is just a strip of flat plastic from a kids toy package.
Inner door cards have been detailed and fixed in place.
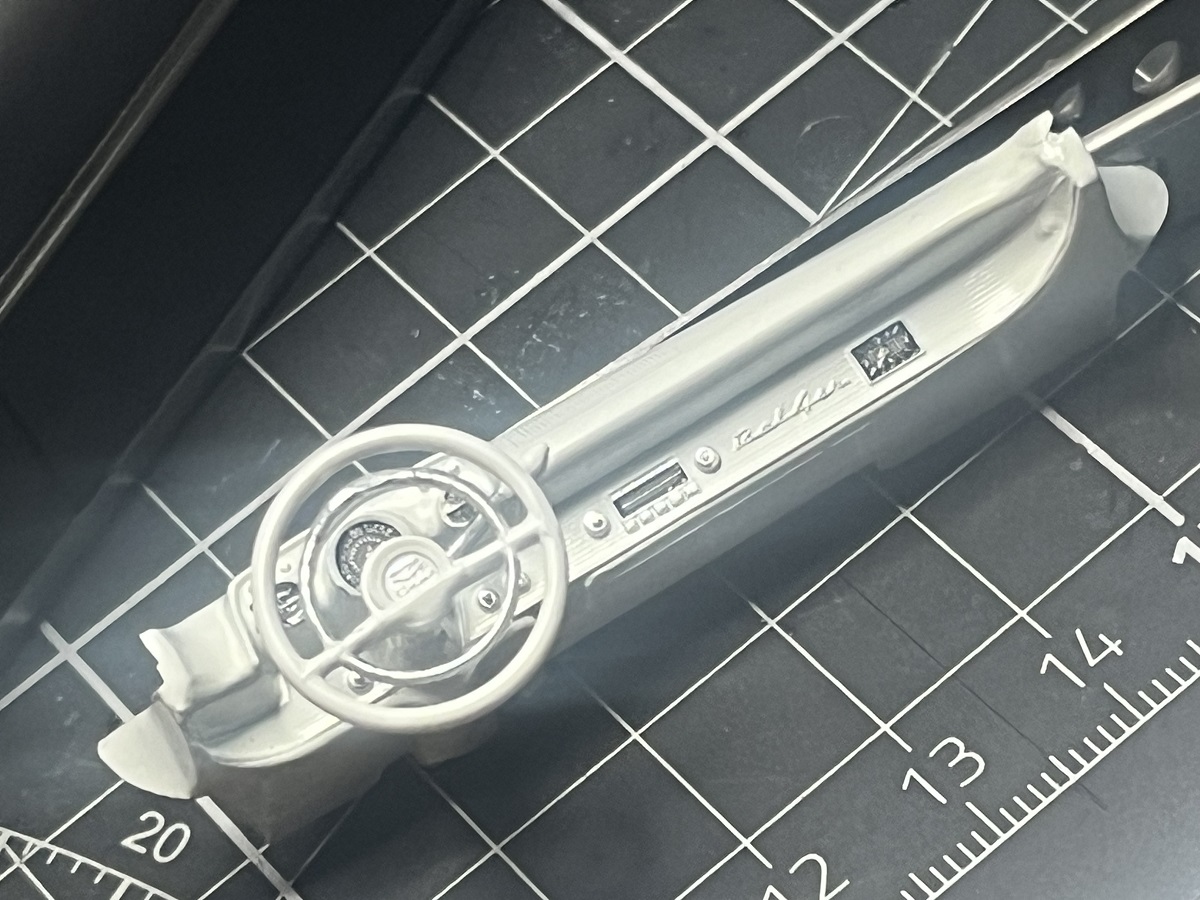
Dashboard is assembled, painted and detailed.
Cheers, D
D,
Sorry to read of all the issues you’re having. One reason why I tend to avoid old kits. I just got lucky with the Monogram IMSA Mustang GTP car. Only issues there was the poor fit of the front windshield.
The dash and door cards came out looking great.
joel
Thanks Joel, this one is certainly testing my resolve but I’m pushing on and really want to see it done!
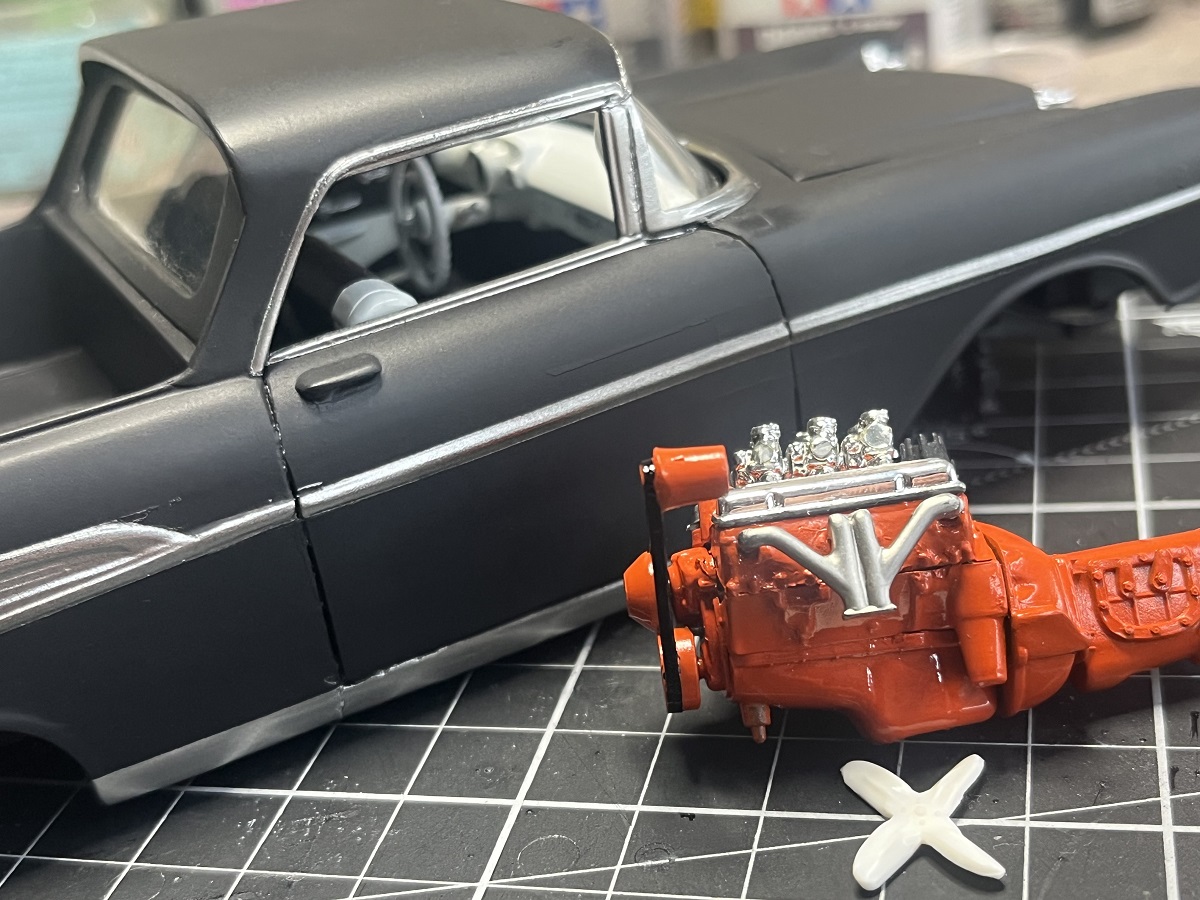
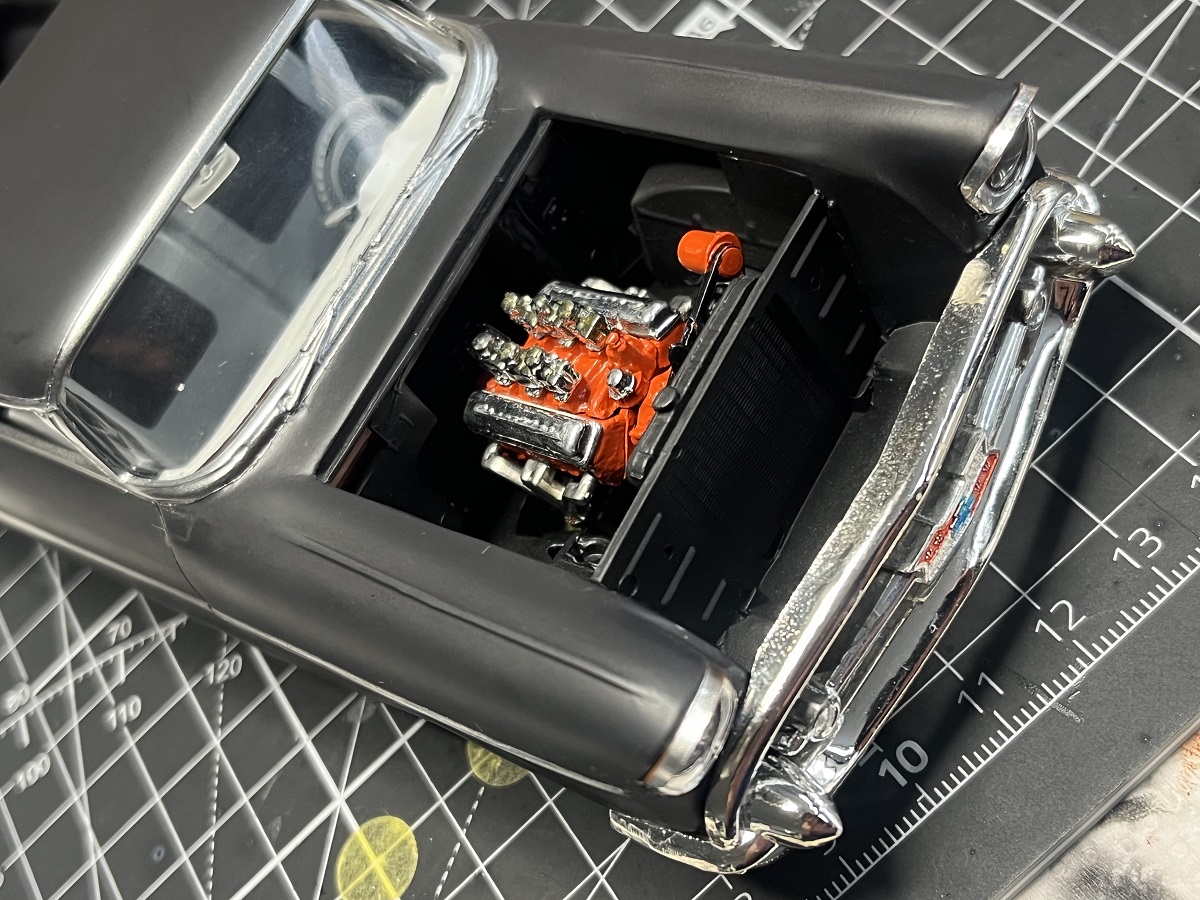
I got the dashboard installed last night and the chassis assembly in place today. The fan went AWOL so I’ve stolen one from another kit (no shortage there ![]() ) and will paint it up and fit to the engine later. I also put the bullets in place on the hood.
) and will paint it up and fit to the engine later. I also put the bullets in place on the hood.
It’s looking ok in the photos but up close its a bit messy ![]()
Cheers, D
All considering, that is looking great. Excellent recovery on the back glass. I wouldn’t have guessed if you didn’t say.
Keep up the great work. ![]()
Gavin
D,
I’ll 2nd that on the rear glass. You’re making excellent progress on one heck of a difficult build.
joel
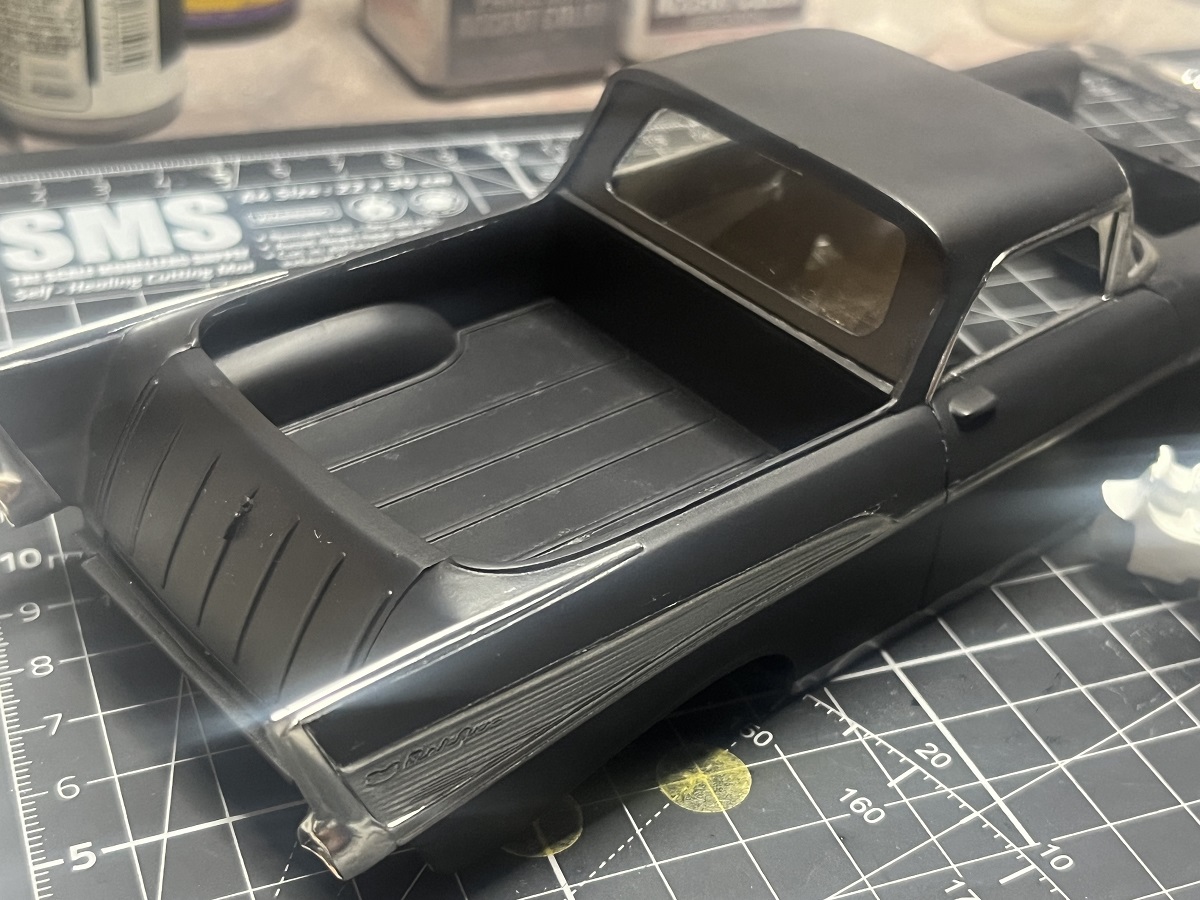
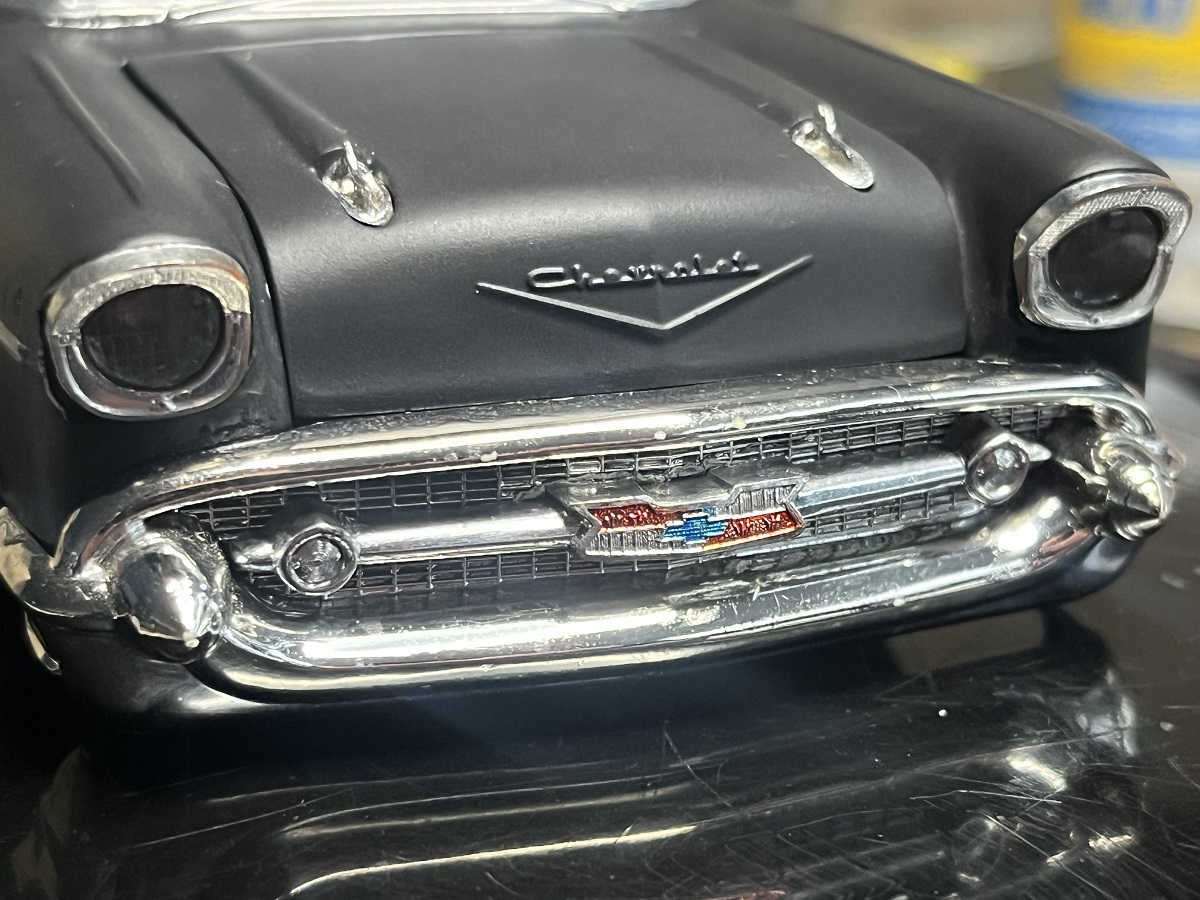
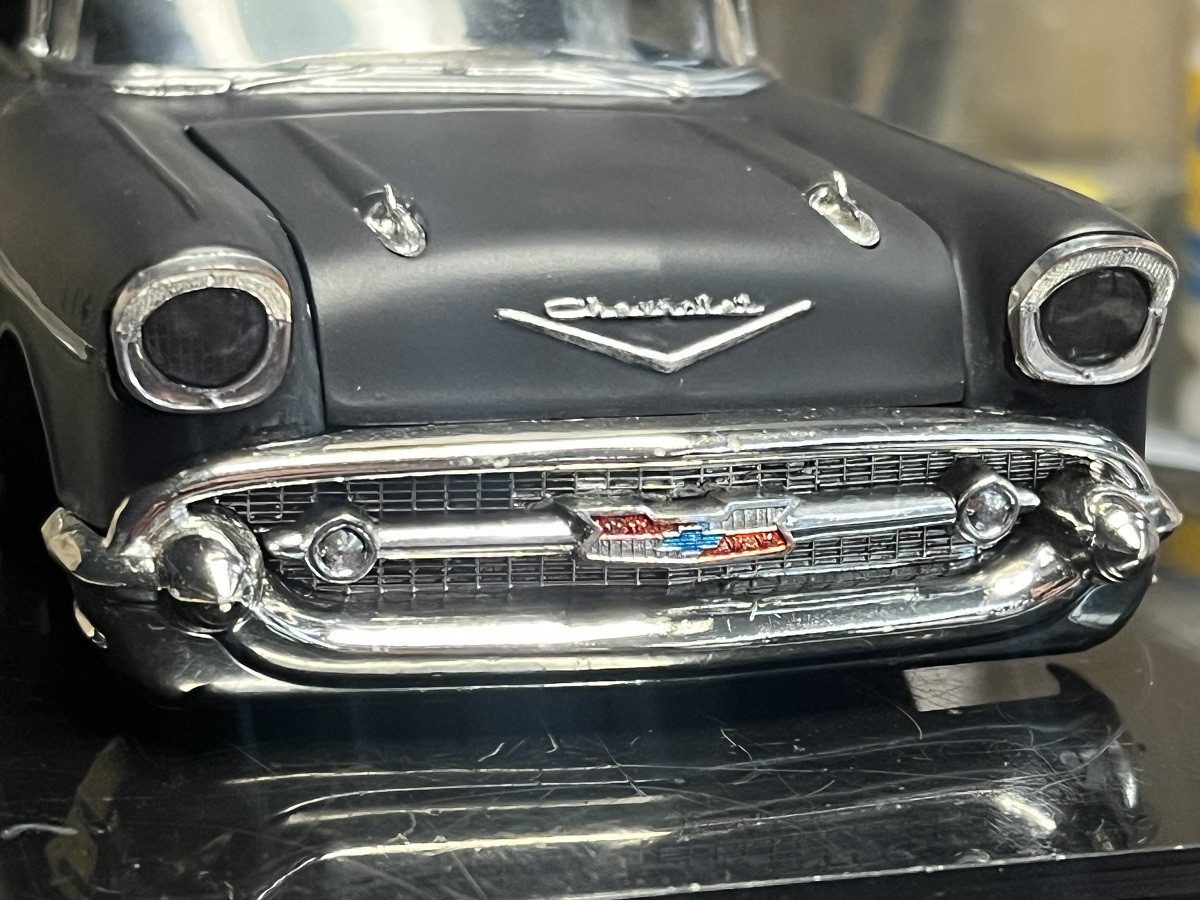
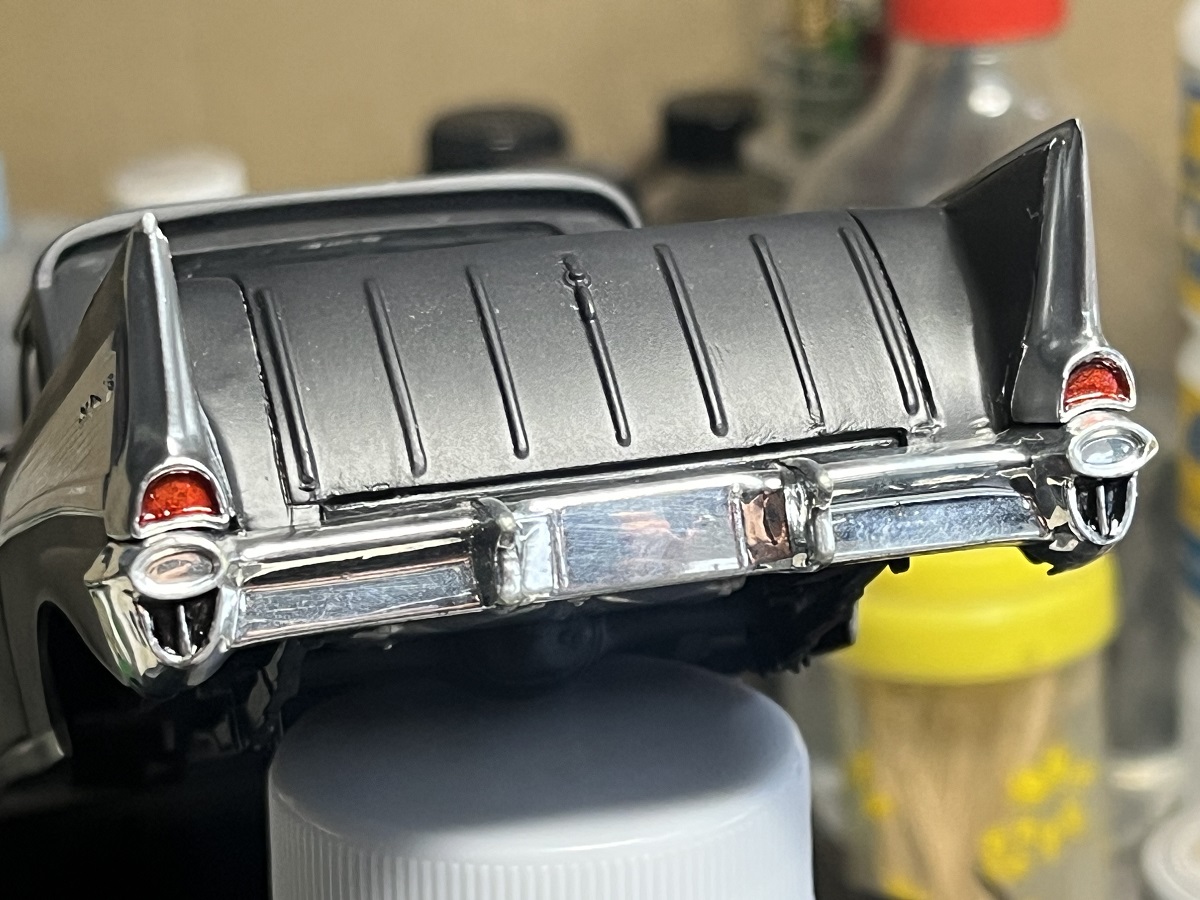
Well tonight was all about that big toothy Chevy grin. A couple of hours of carving, trimming, test fitting, scattered expletives, beer, but here we are! Front and rear chrome done. A bit of detail painting and some black PLW to give it more life, then see how I go getting the engine in place.
Cheers, D
D,
Nice job on the front and rear chrome. I’d say that you’re making excellent progress on the build.
joel
Sweet!!
Steady hand you have there, matey!
Nicely done ![]()
D,
Nice job on the Bow Tie.
joel