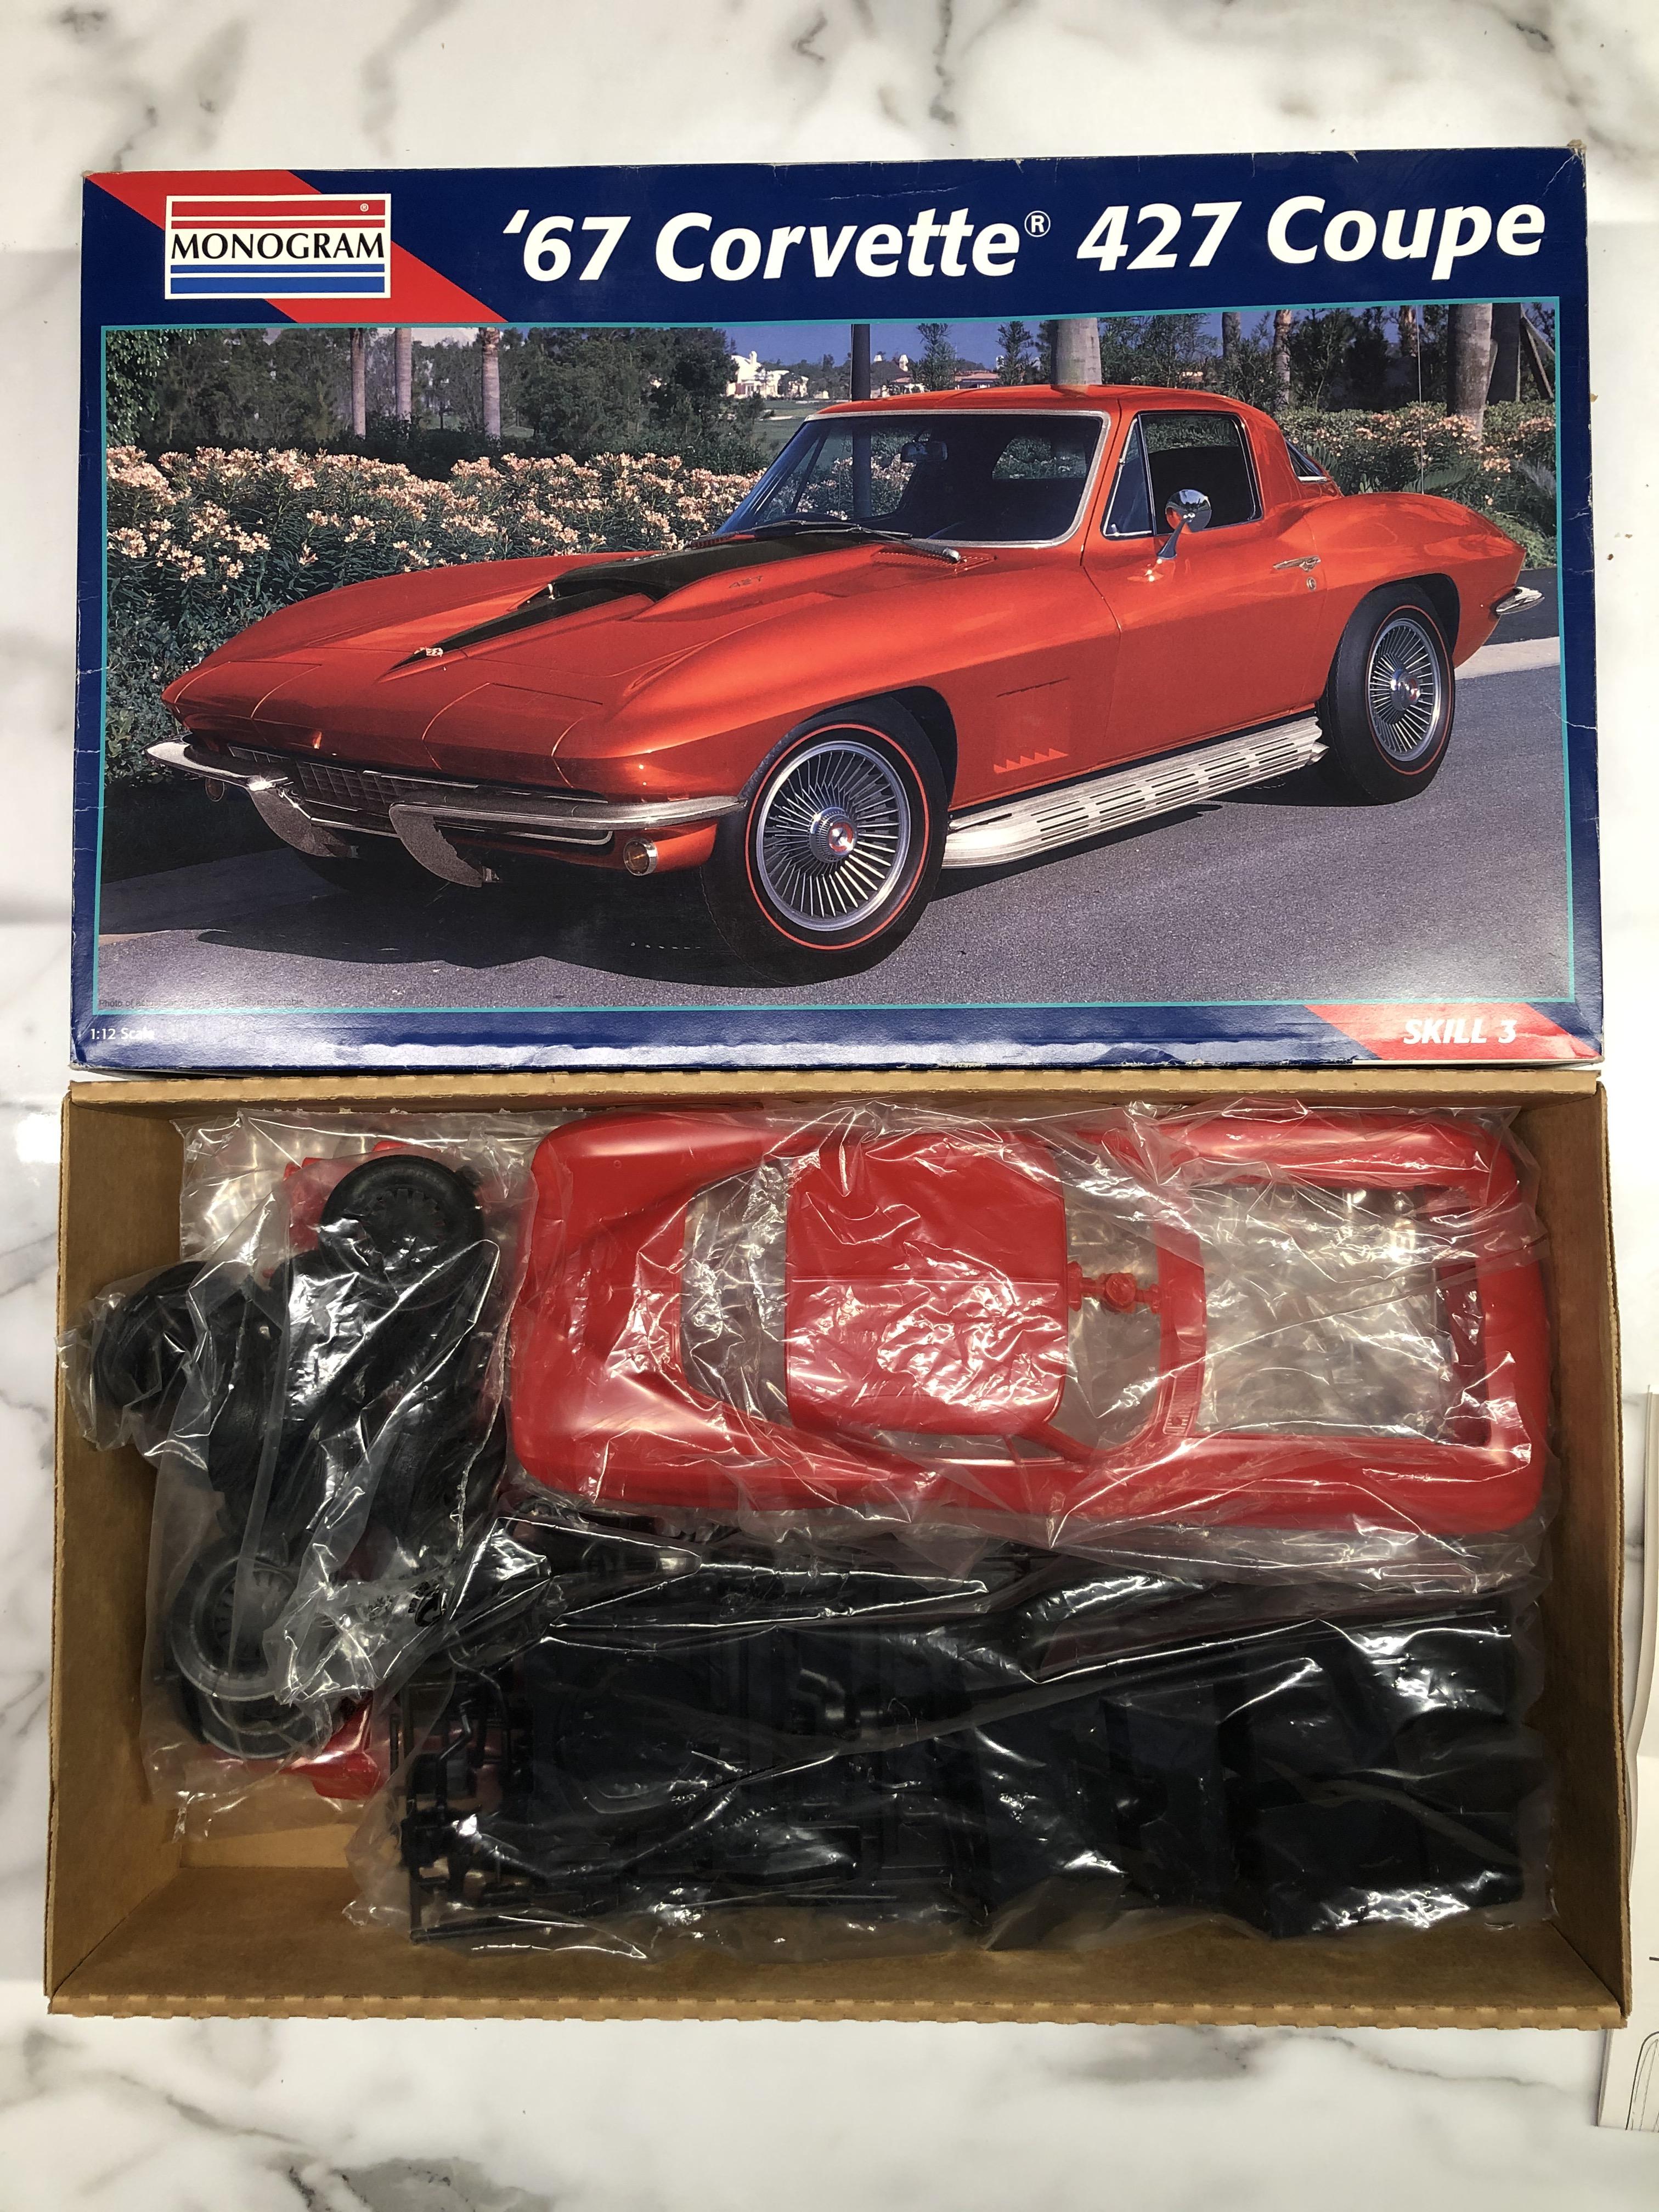
67 Corvette Large Scale Project

June 8, 2020

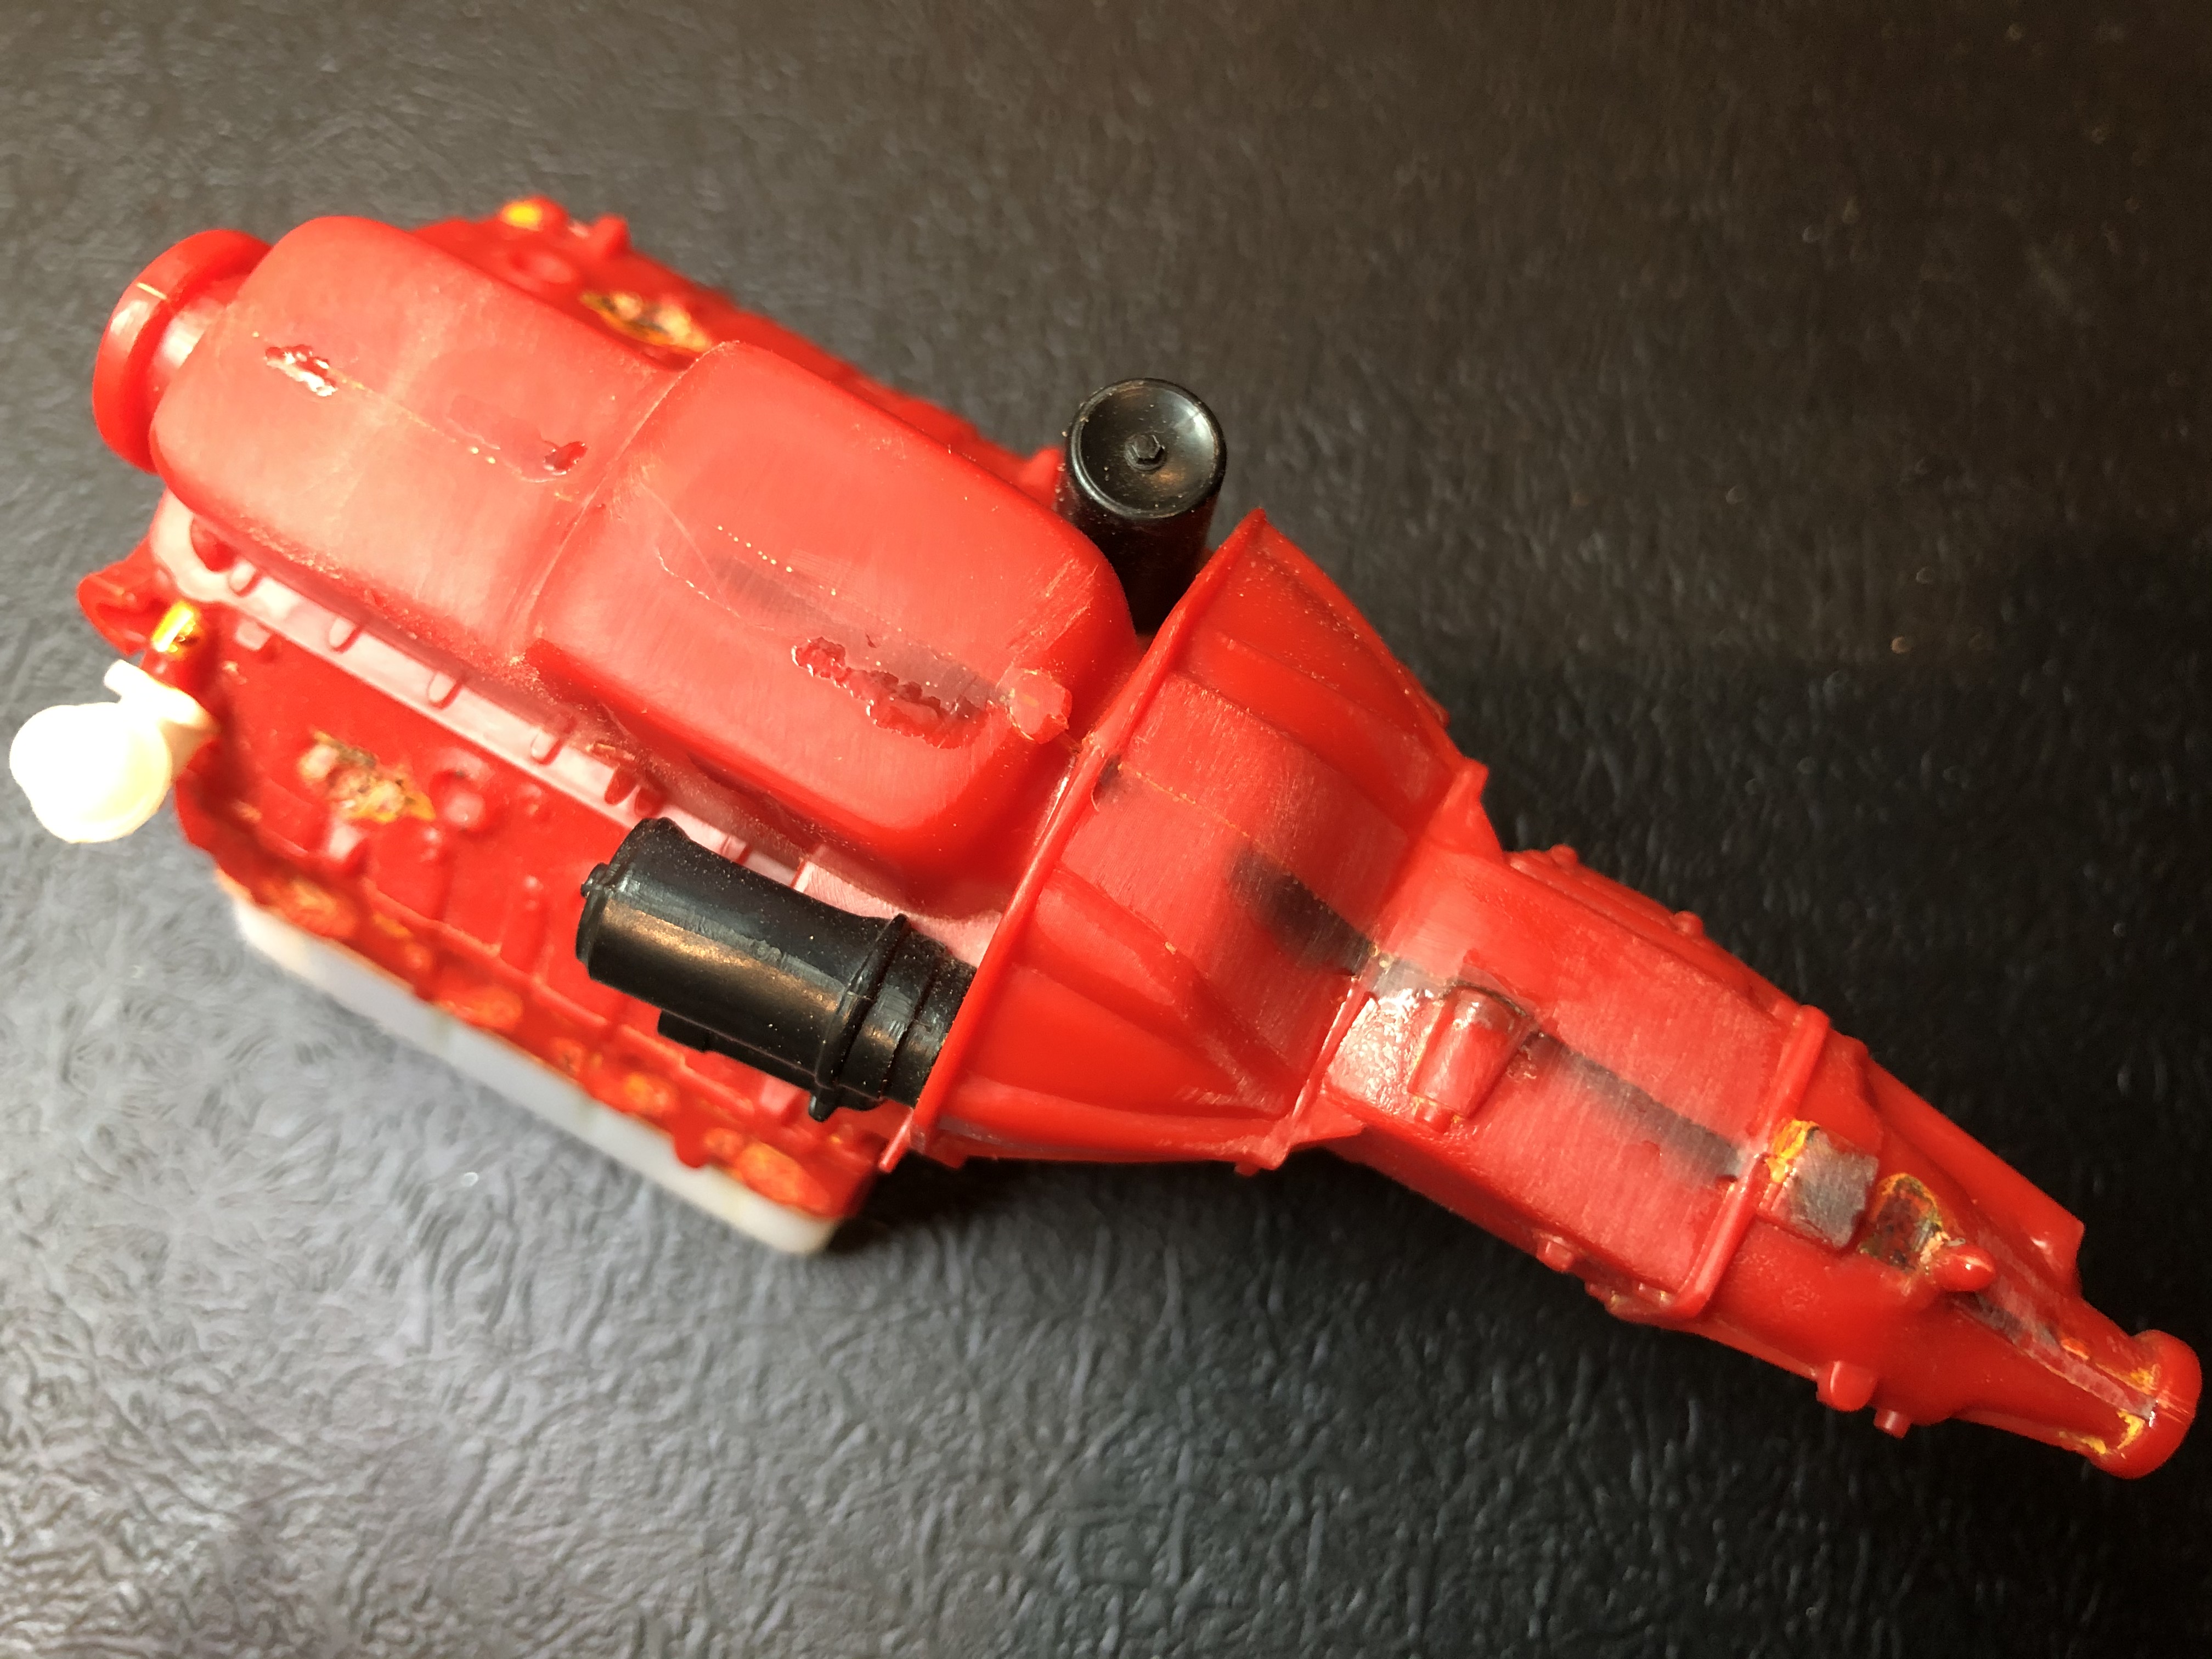
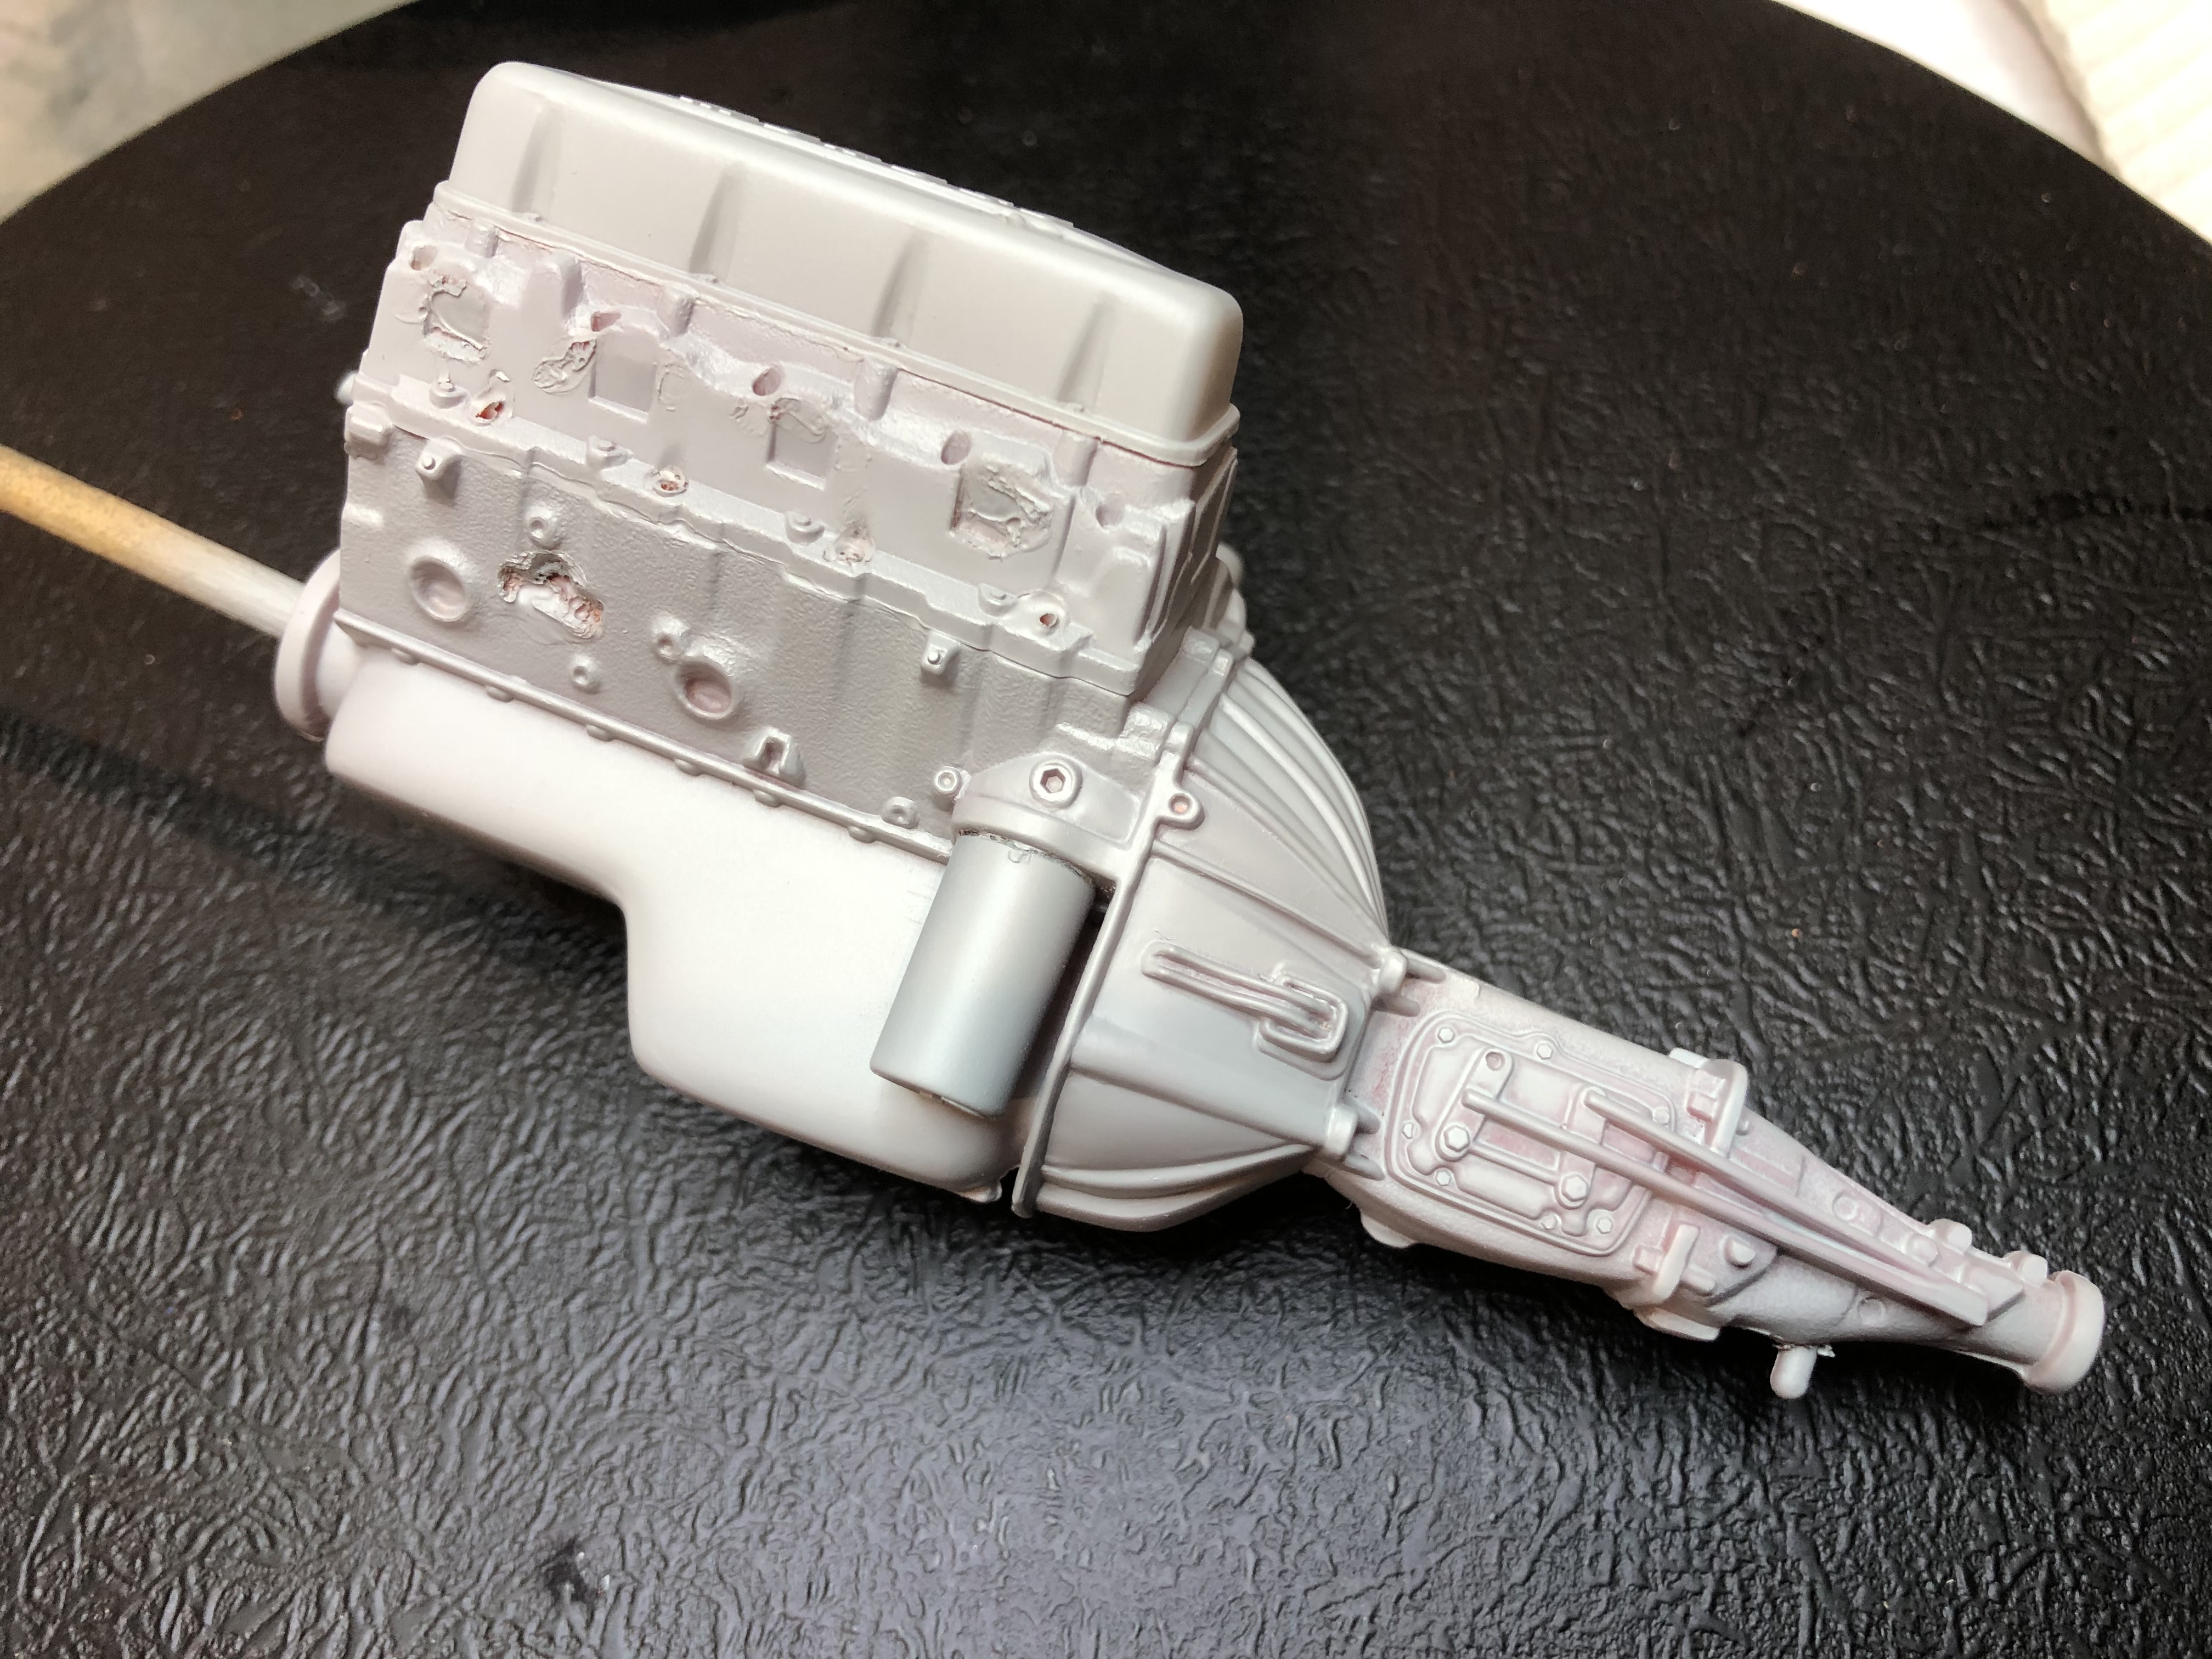
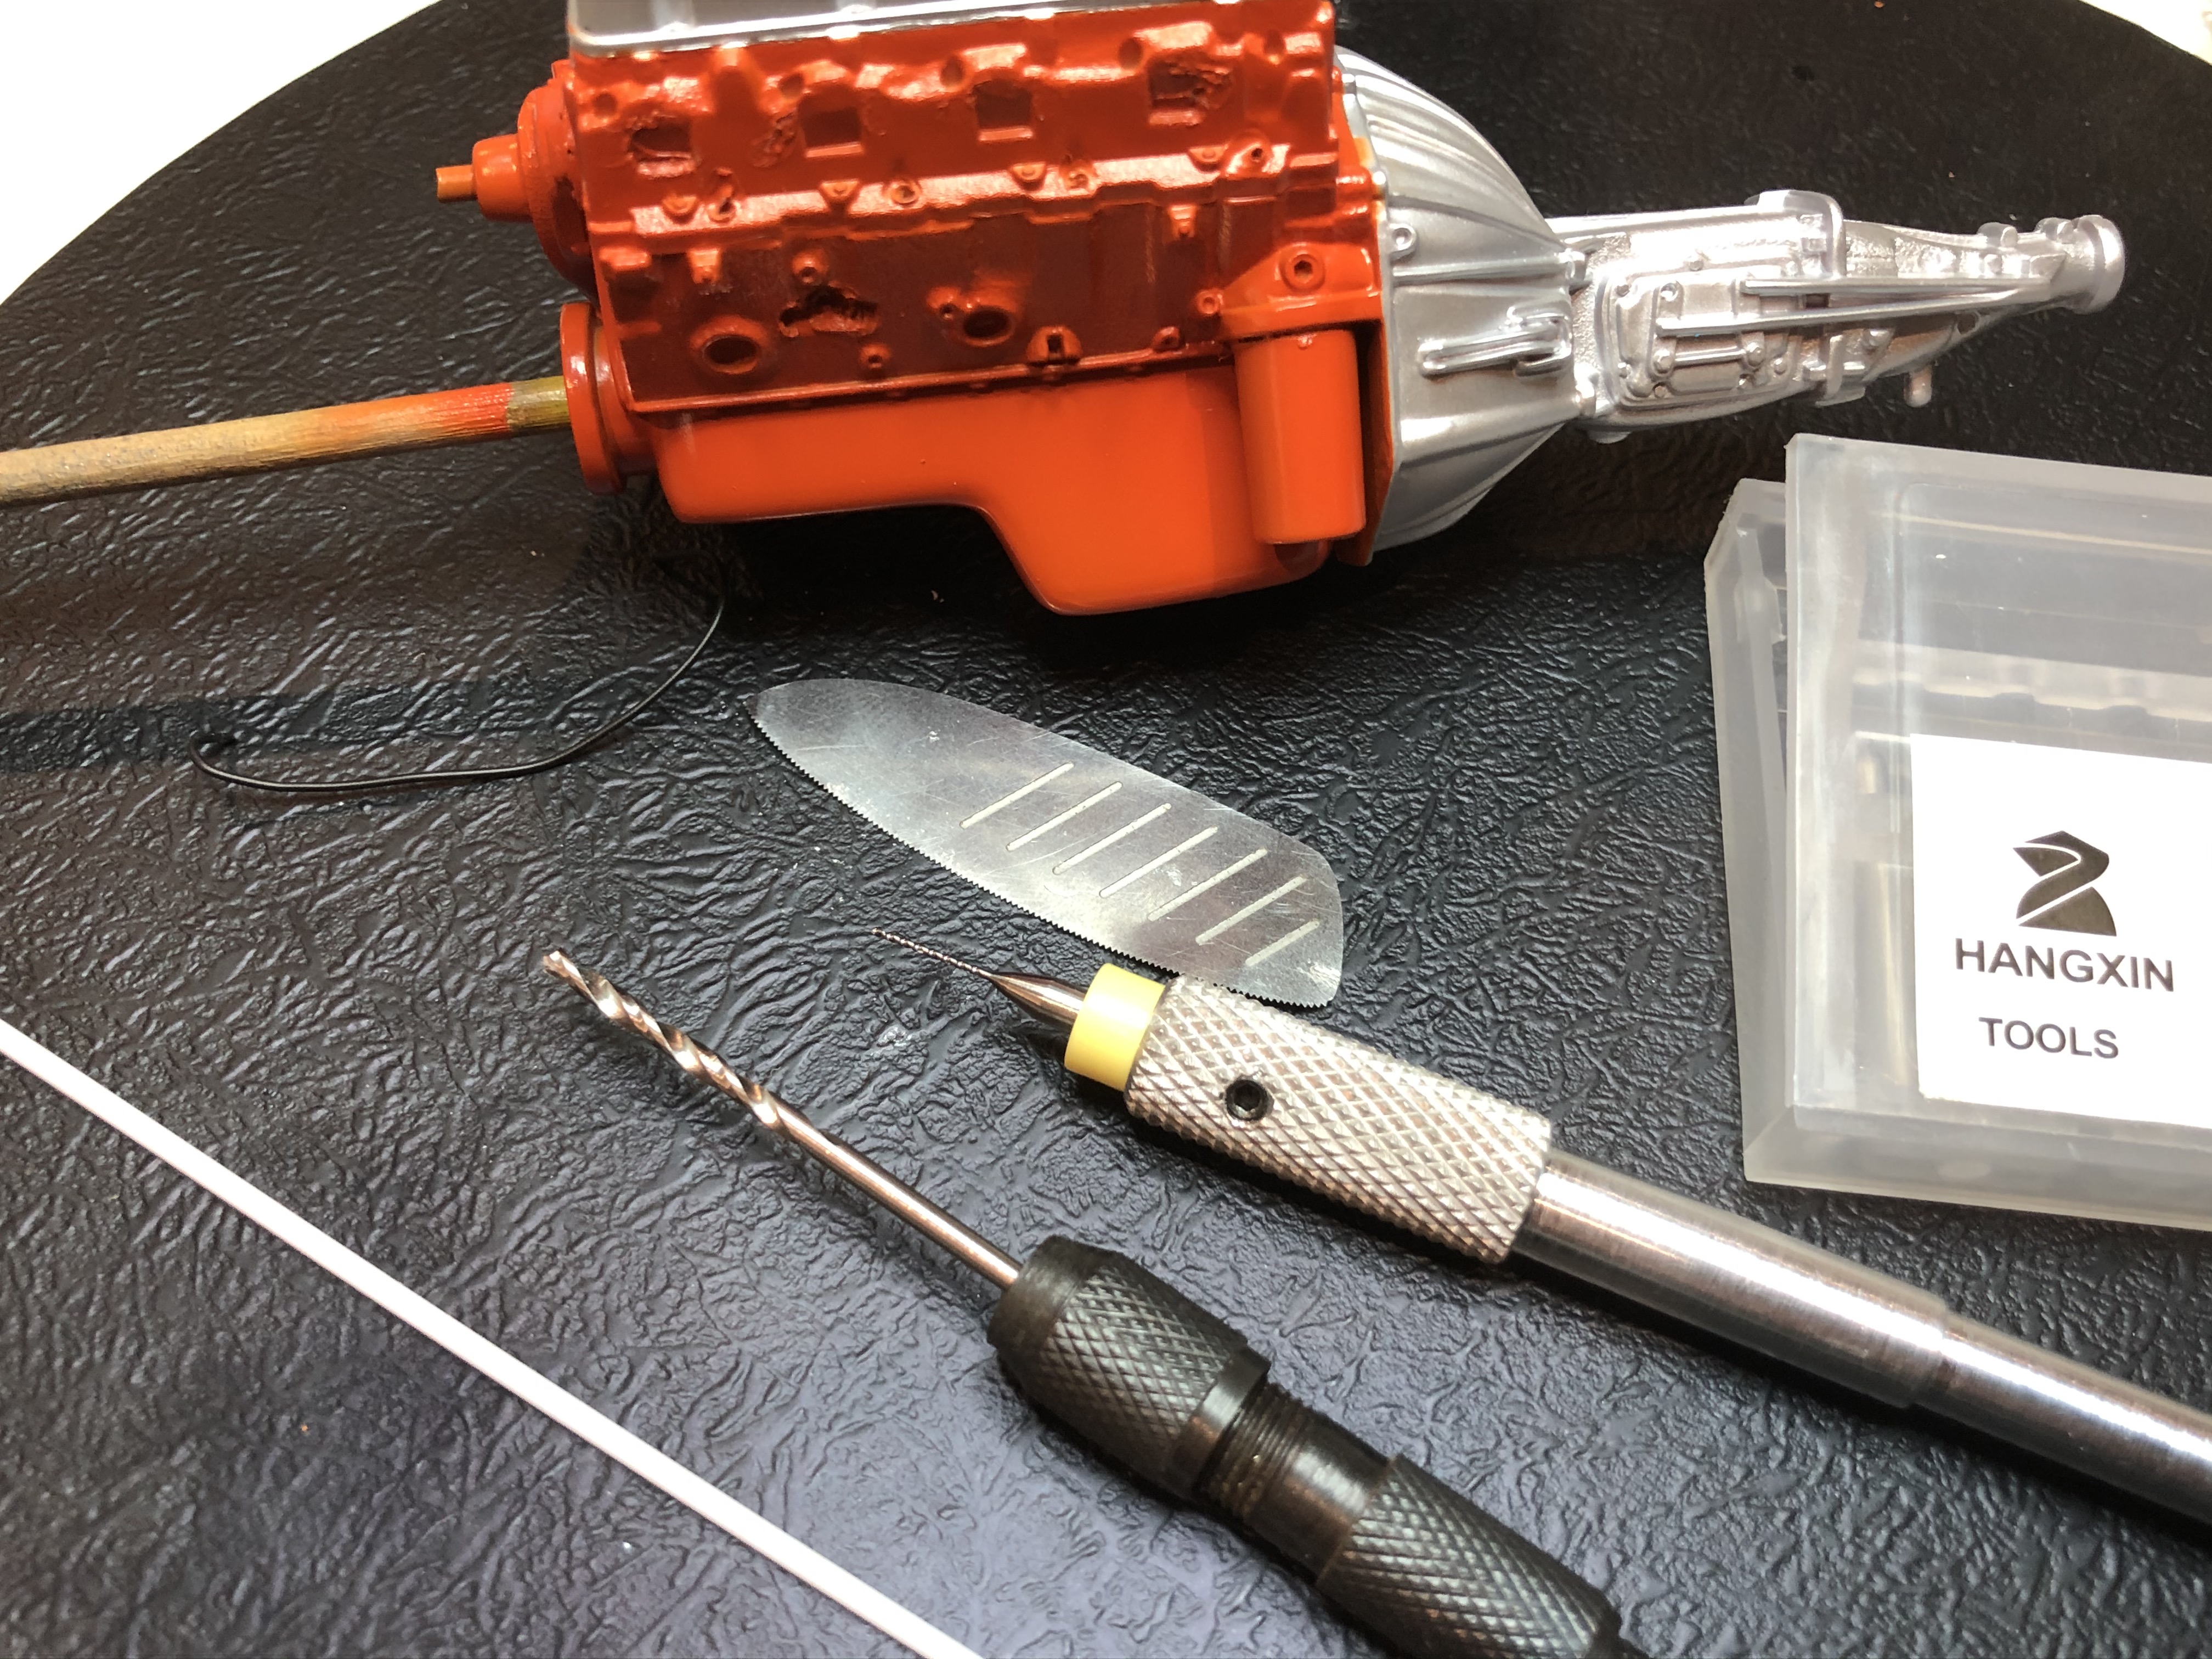
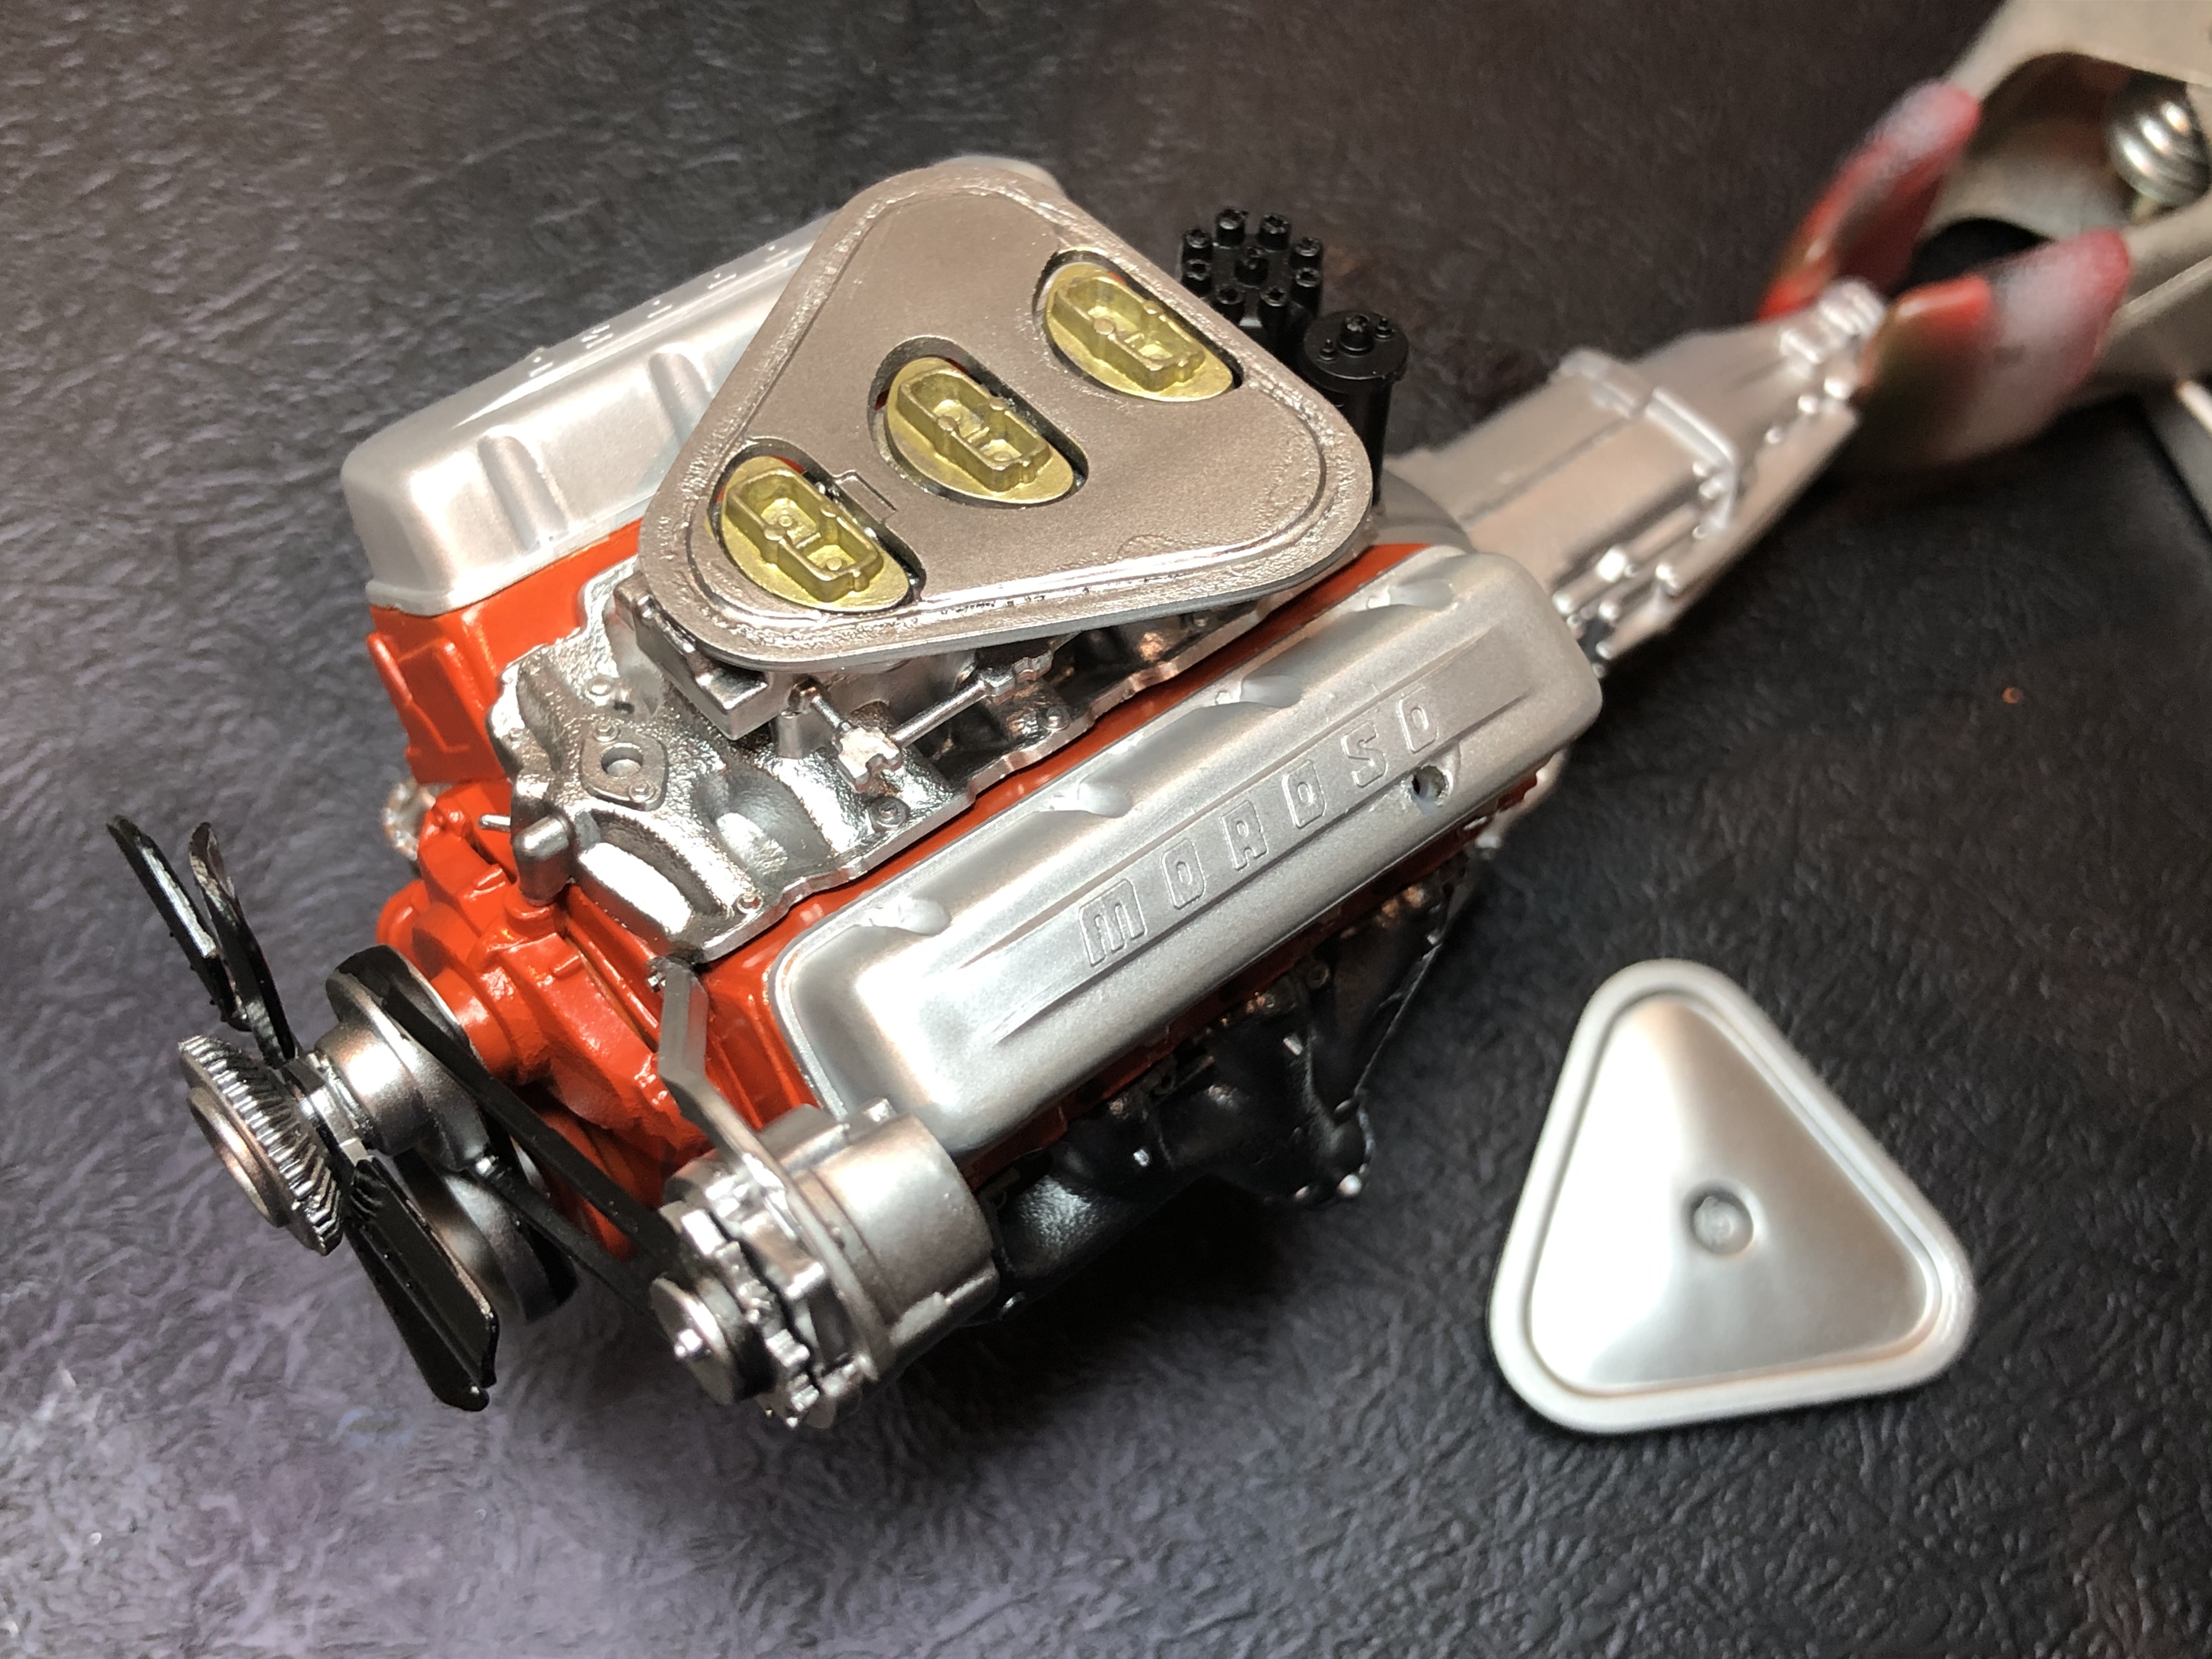
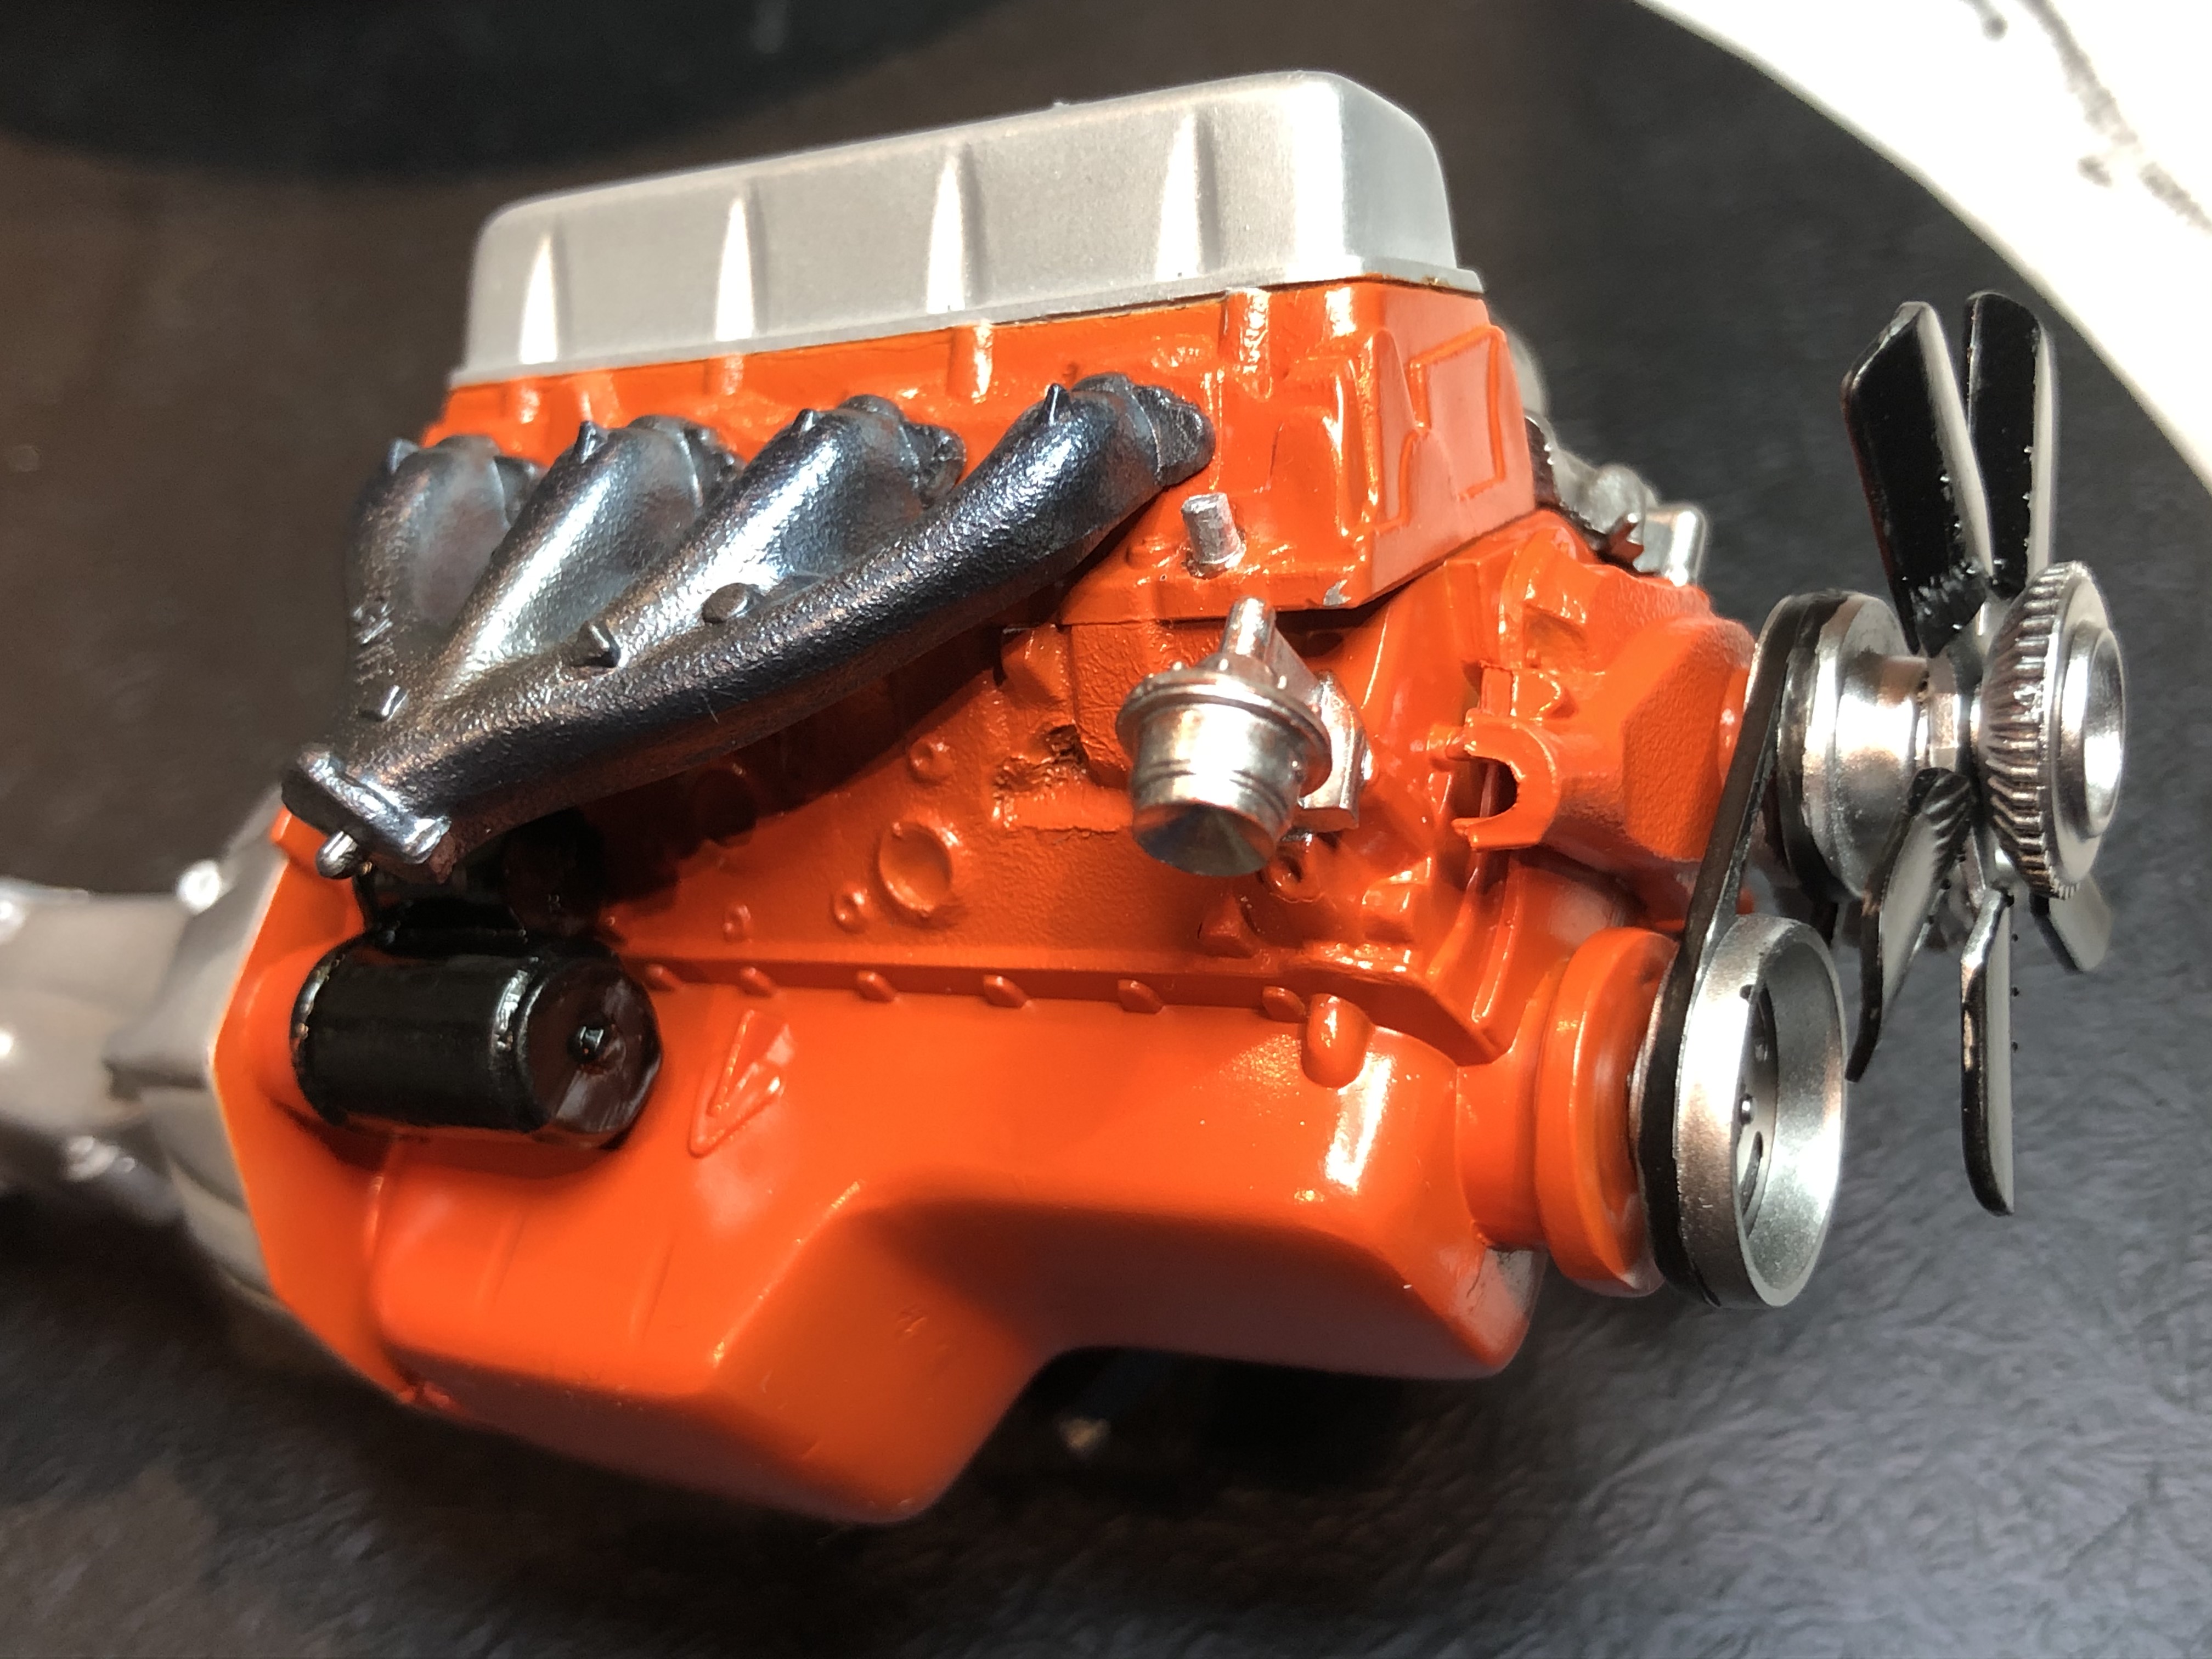
I started this build probably 25 years ago, when my ambitions far exceeded my abilities both as a builder and painter. Luckily I had the smarts back then to realise this after putting the engine together, and shelved it!

Fast forward 25 (ish) years, and a number of outstanding large scale builds in the threads at the moment has rekindled the fire, so I dragged this one out of hibernation to revisit and tinker as a distraction and relief from the Group Builds.

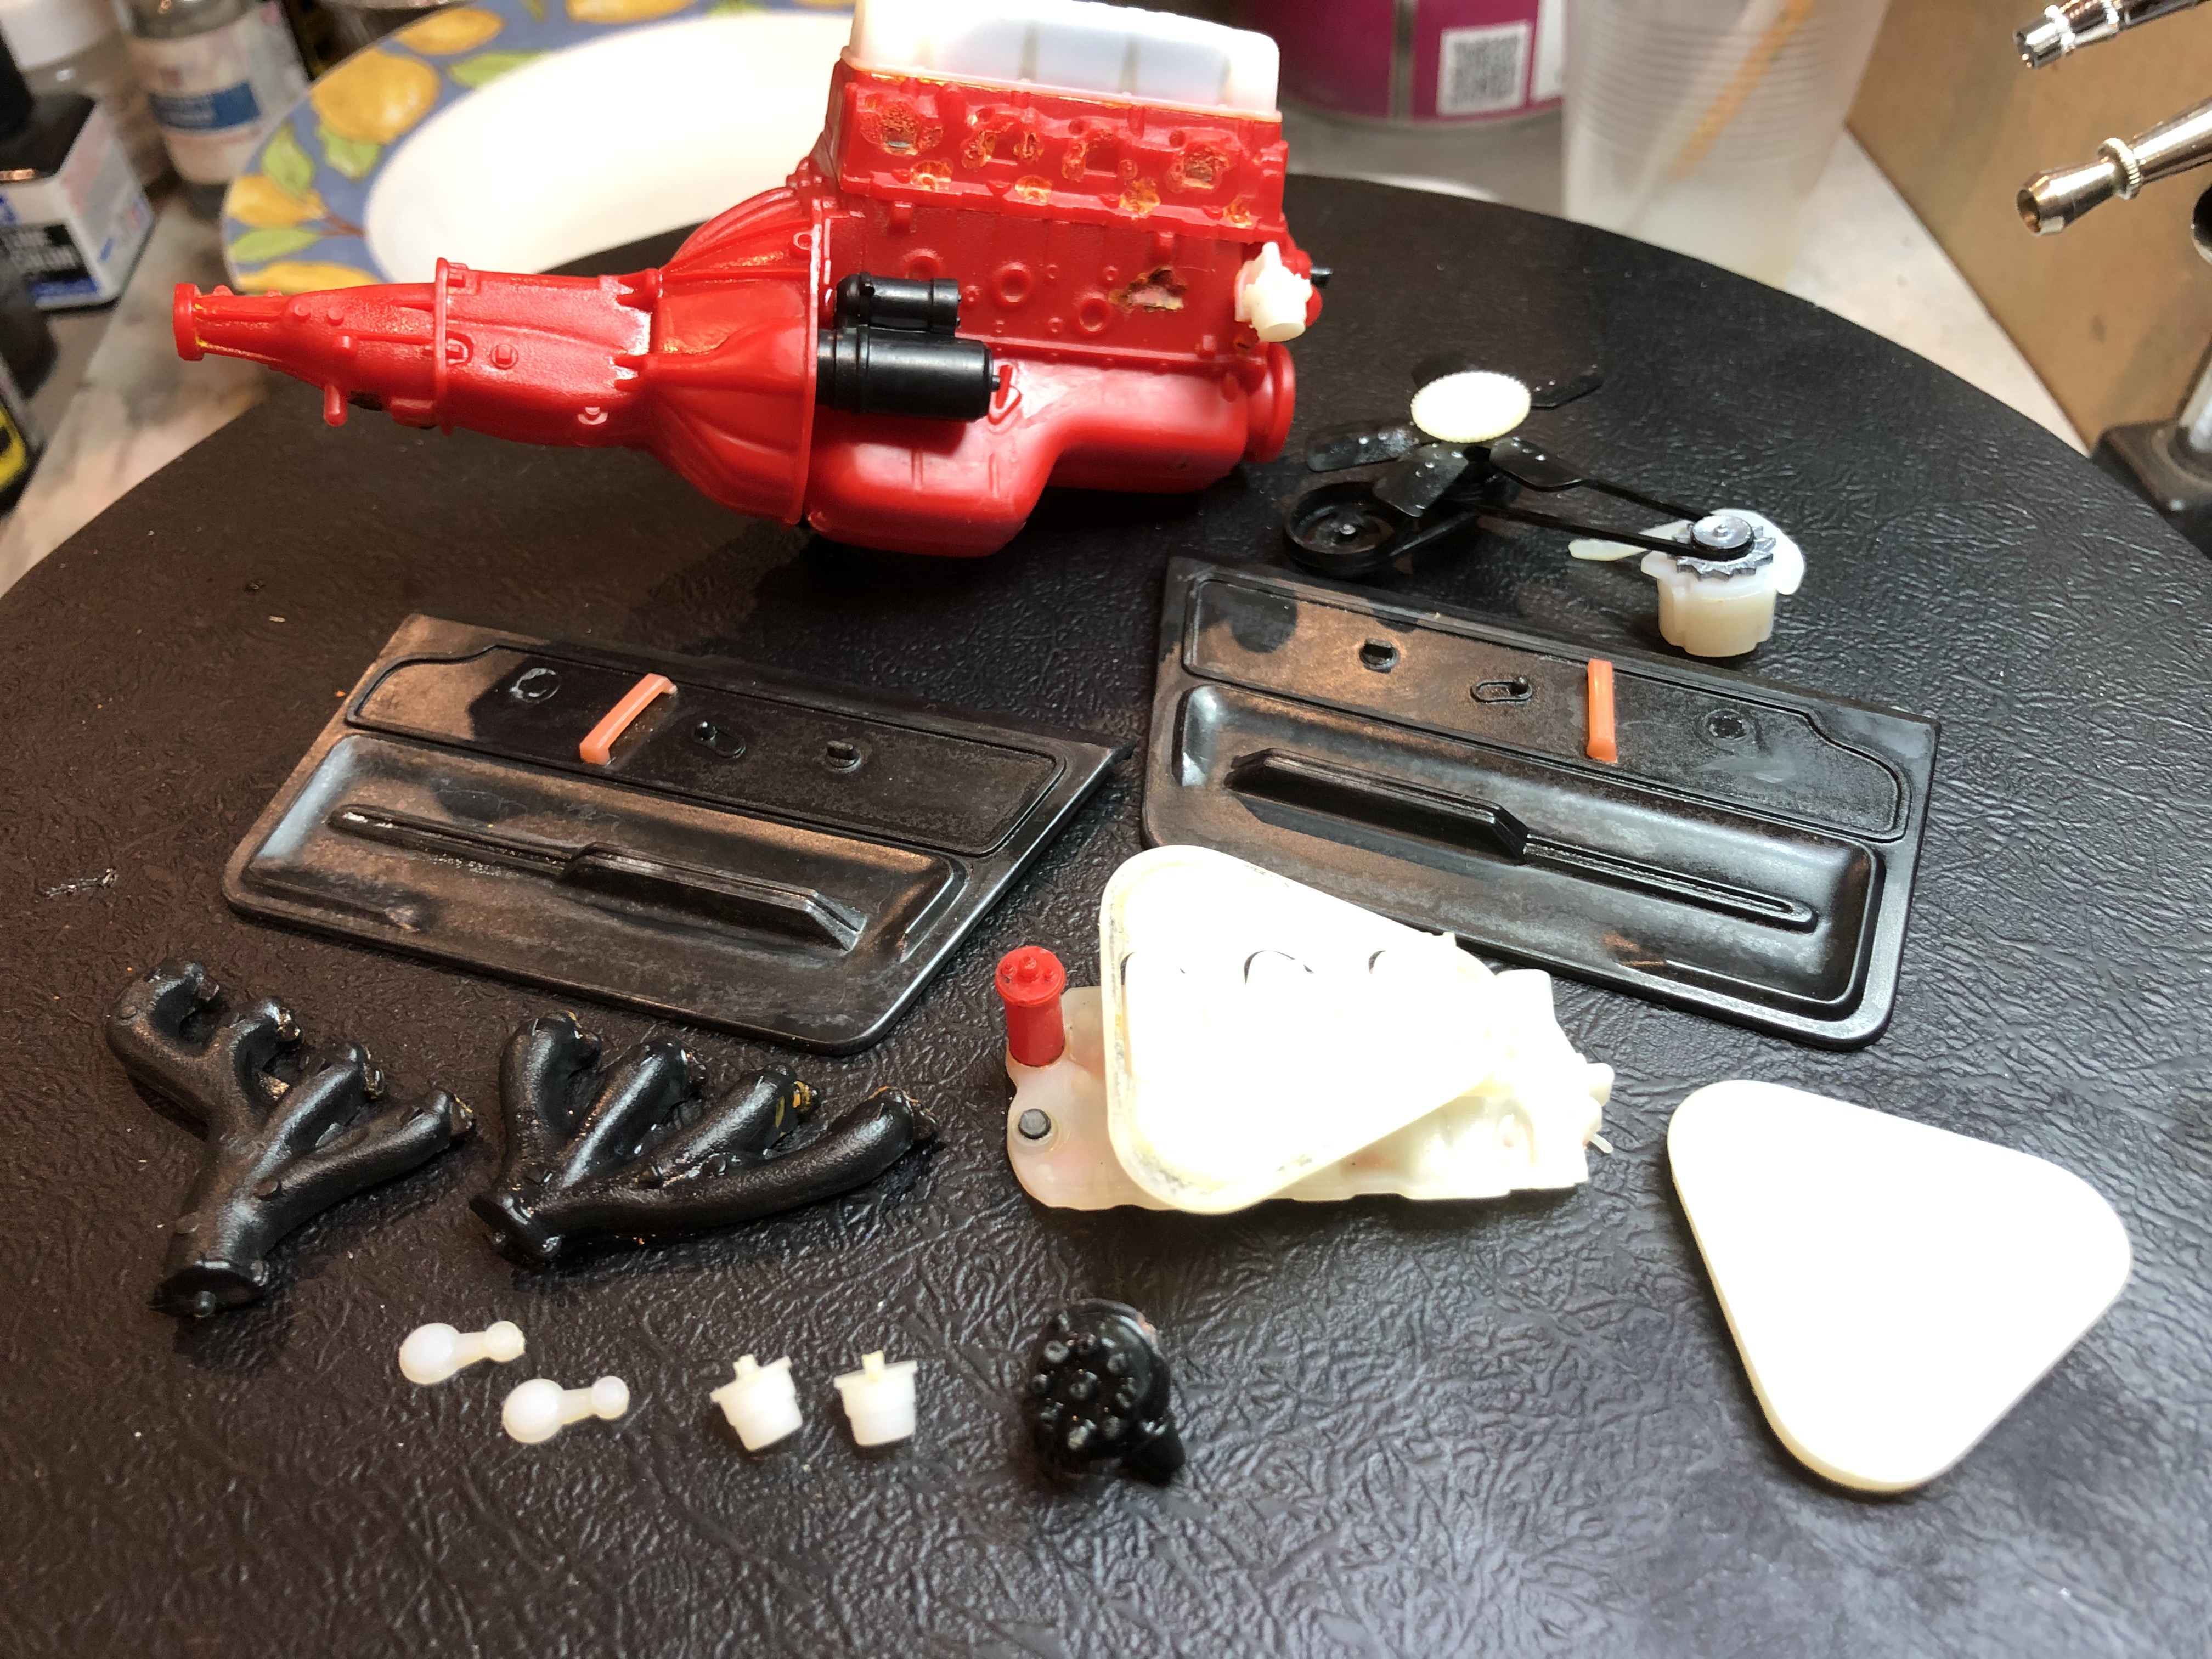
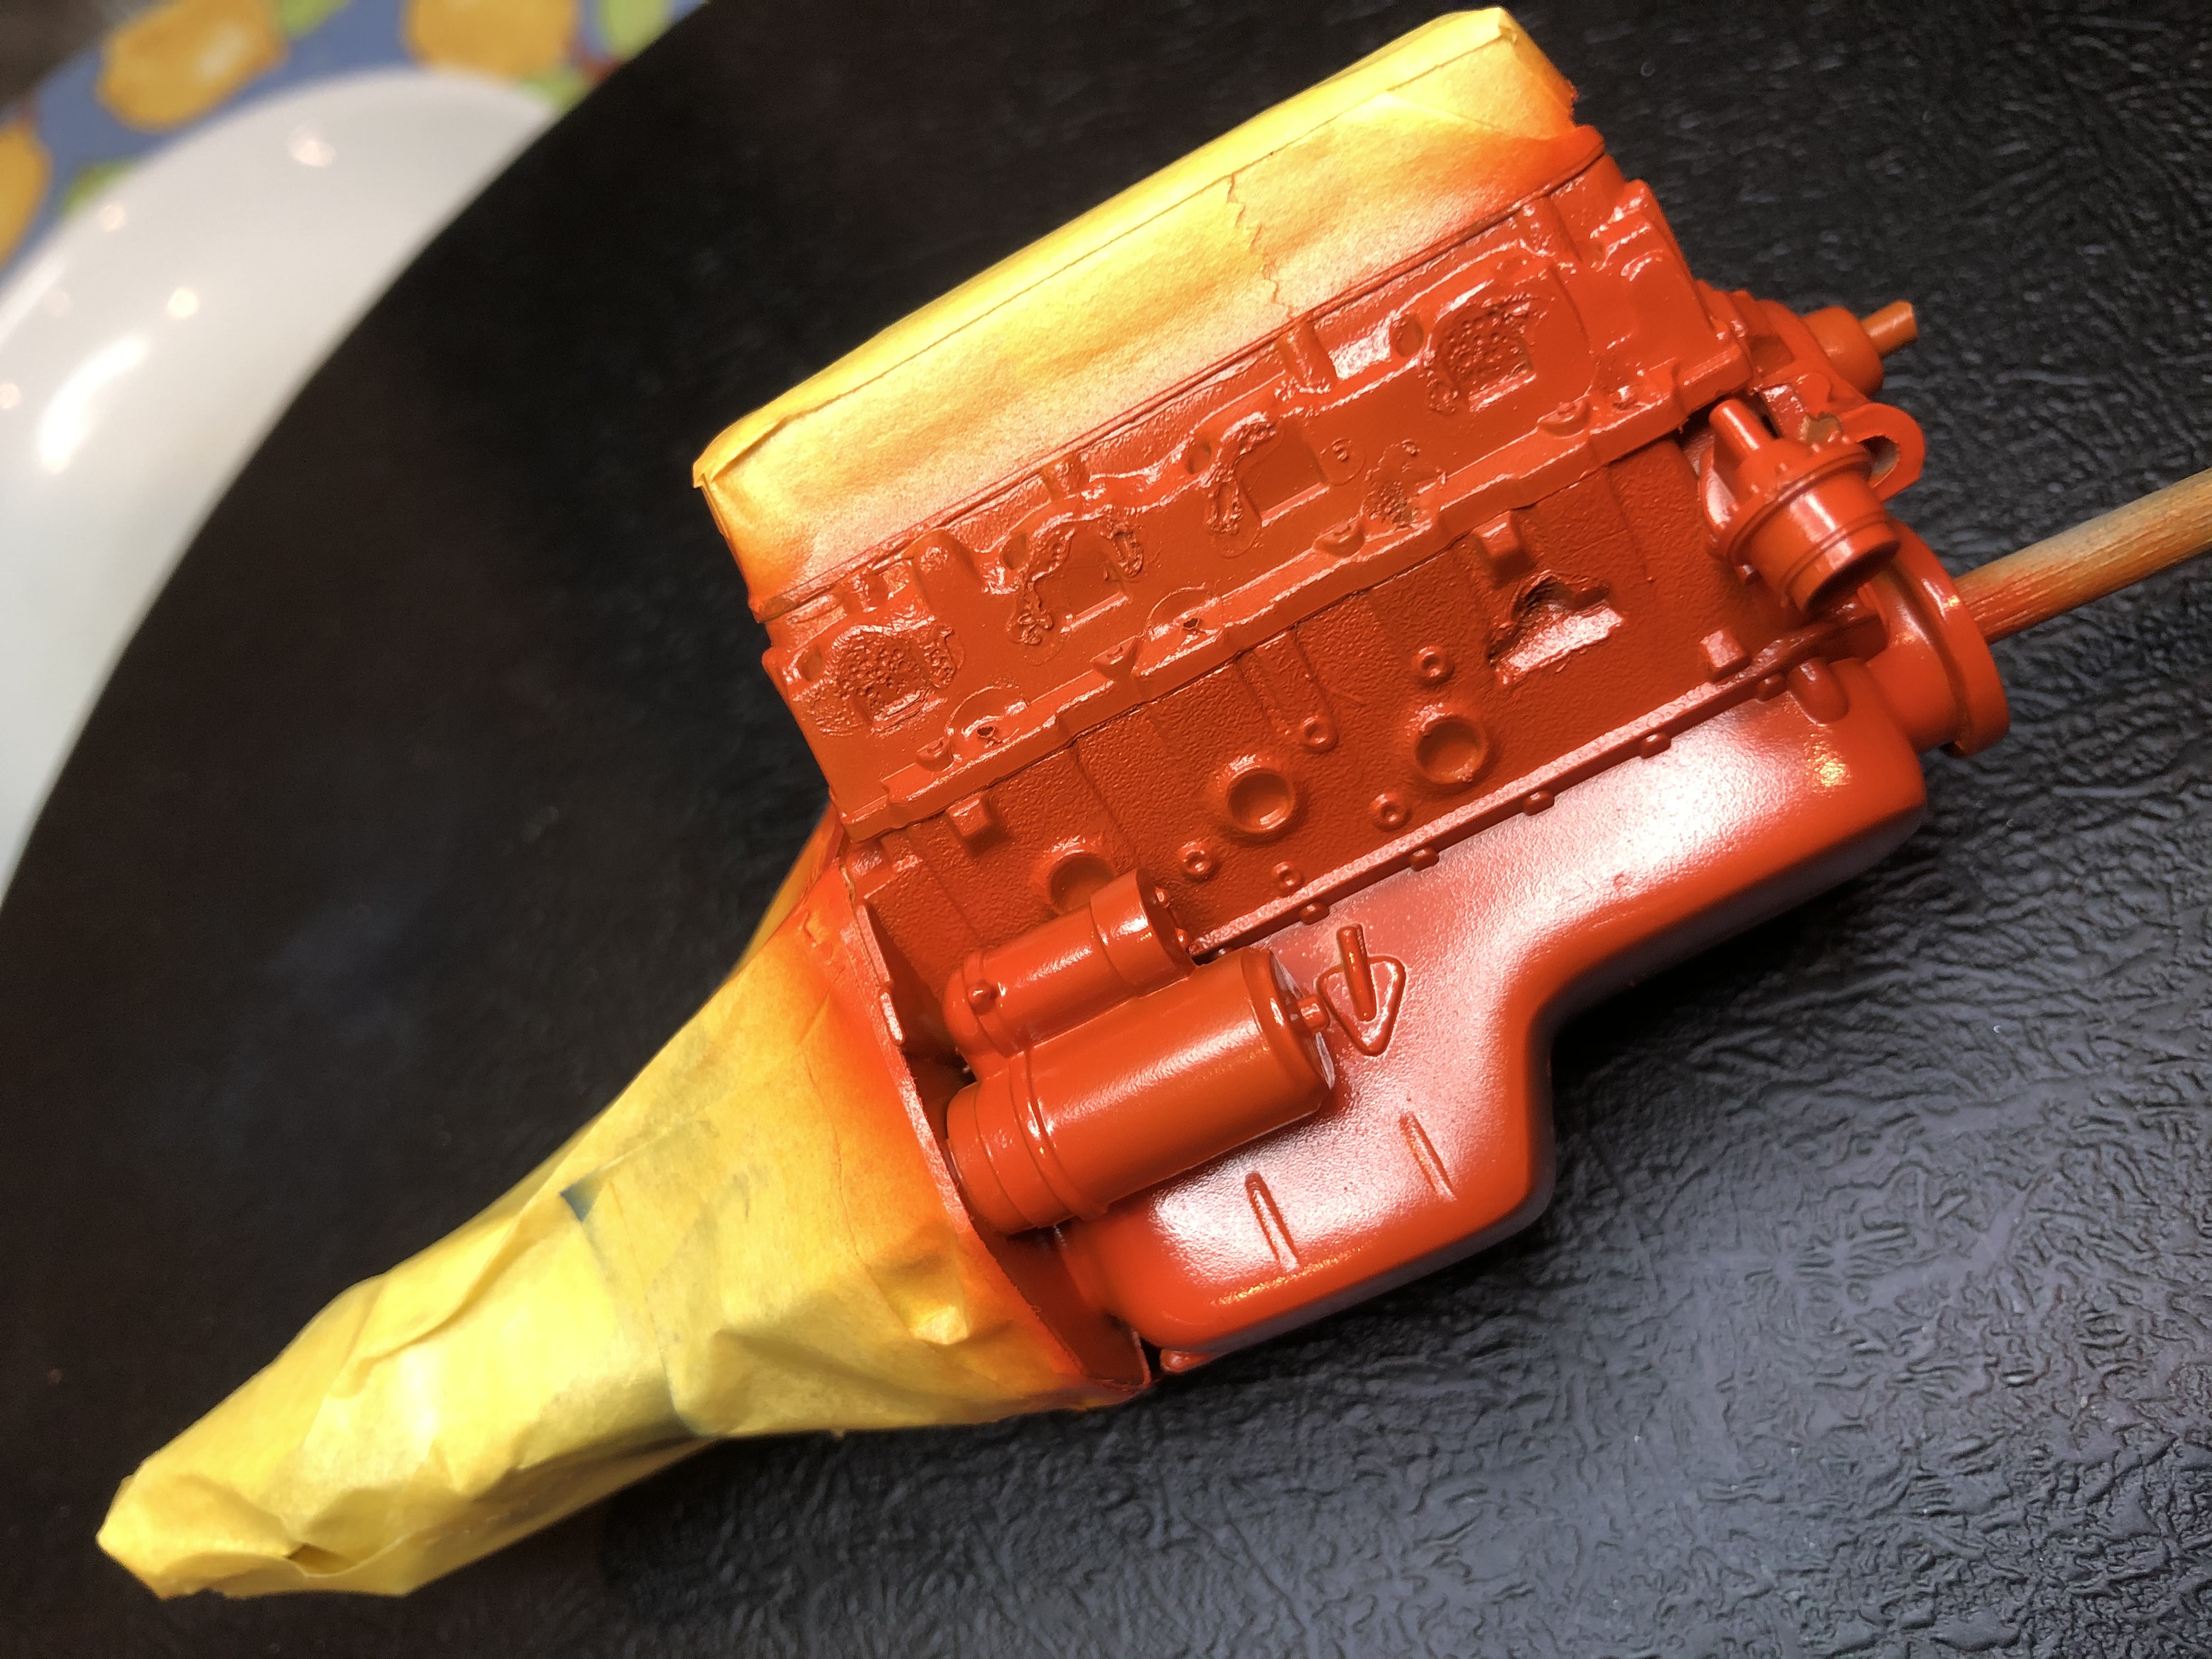
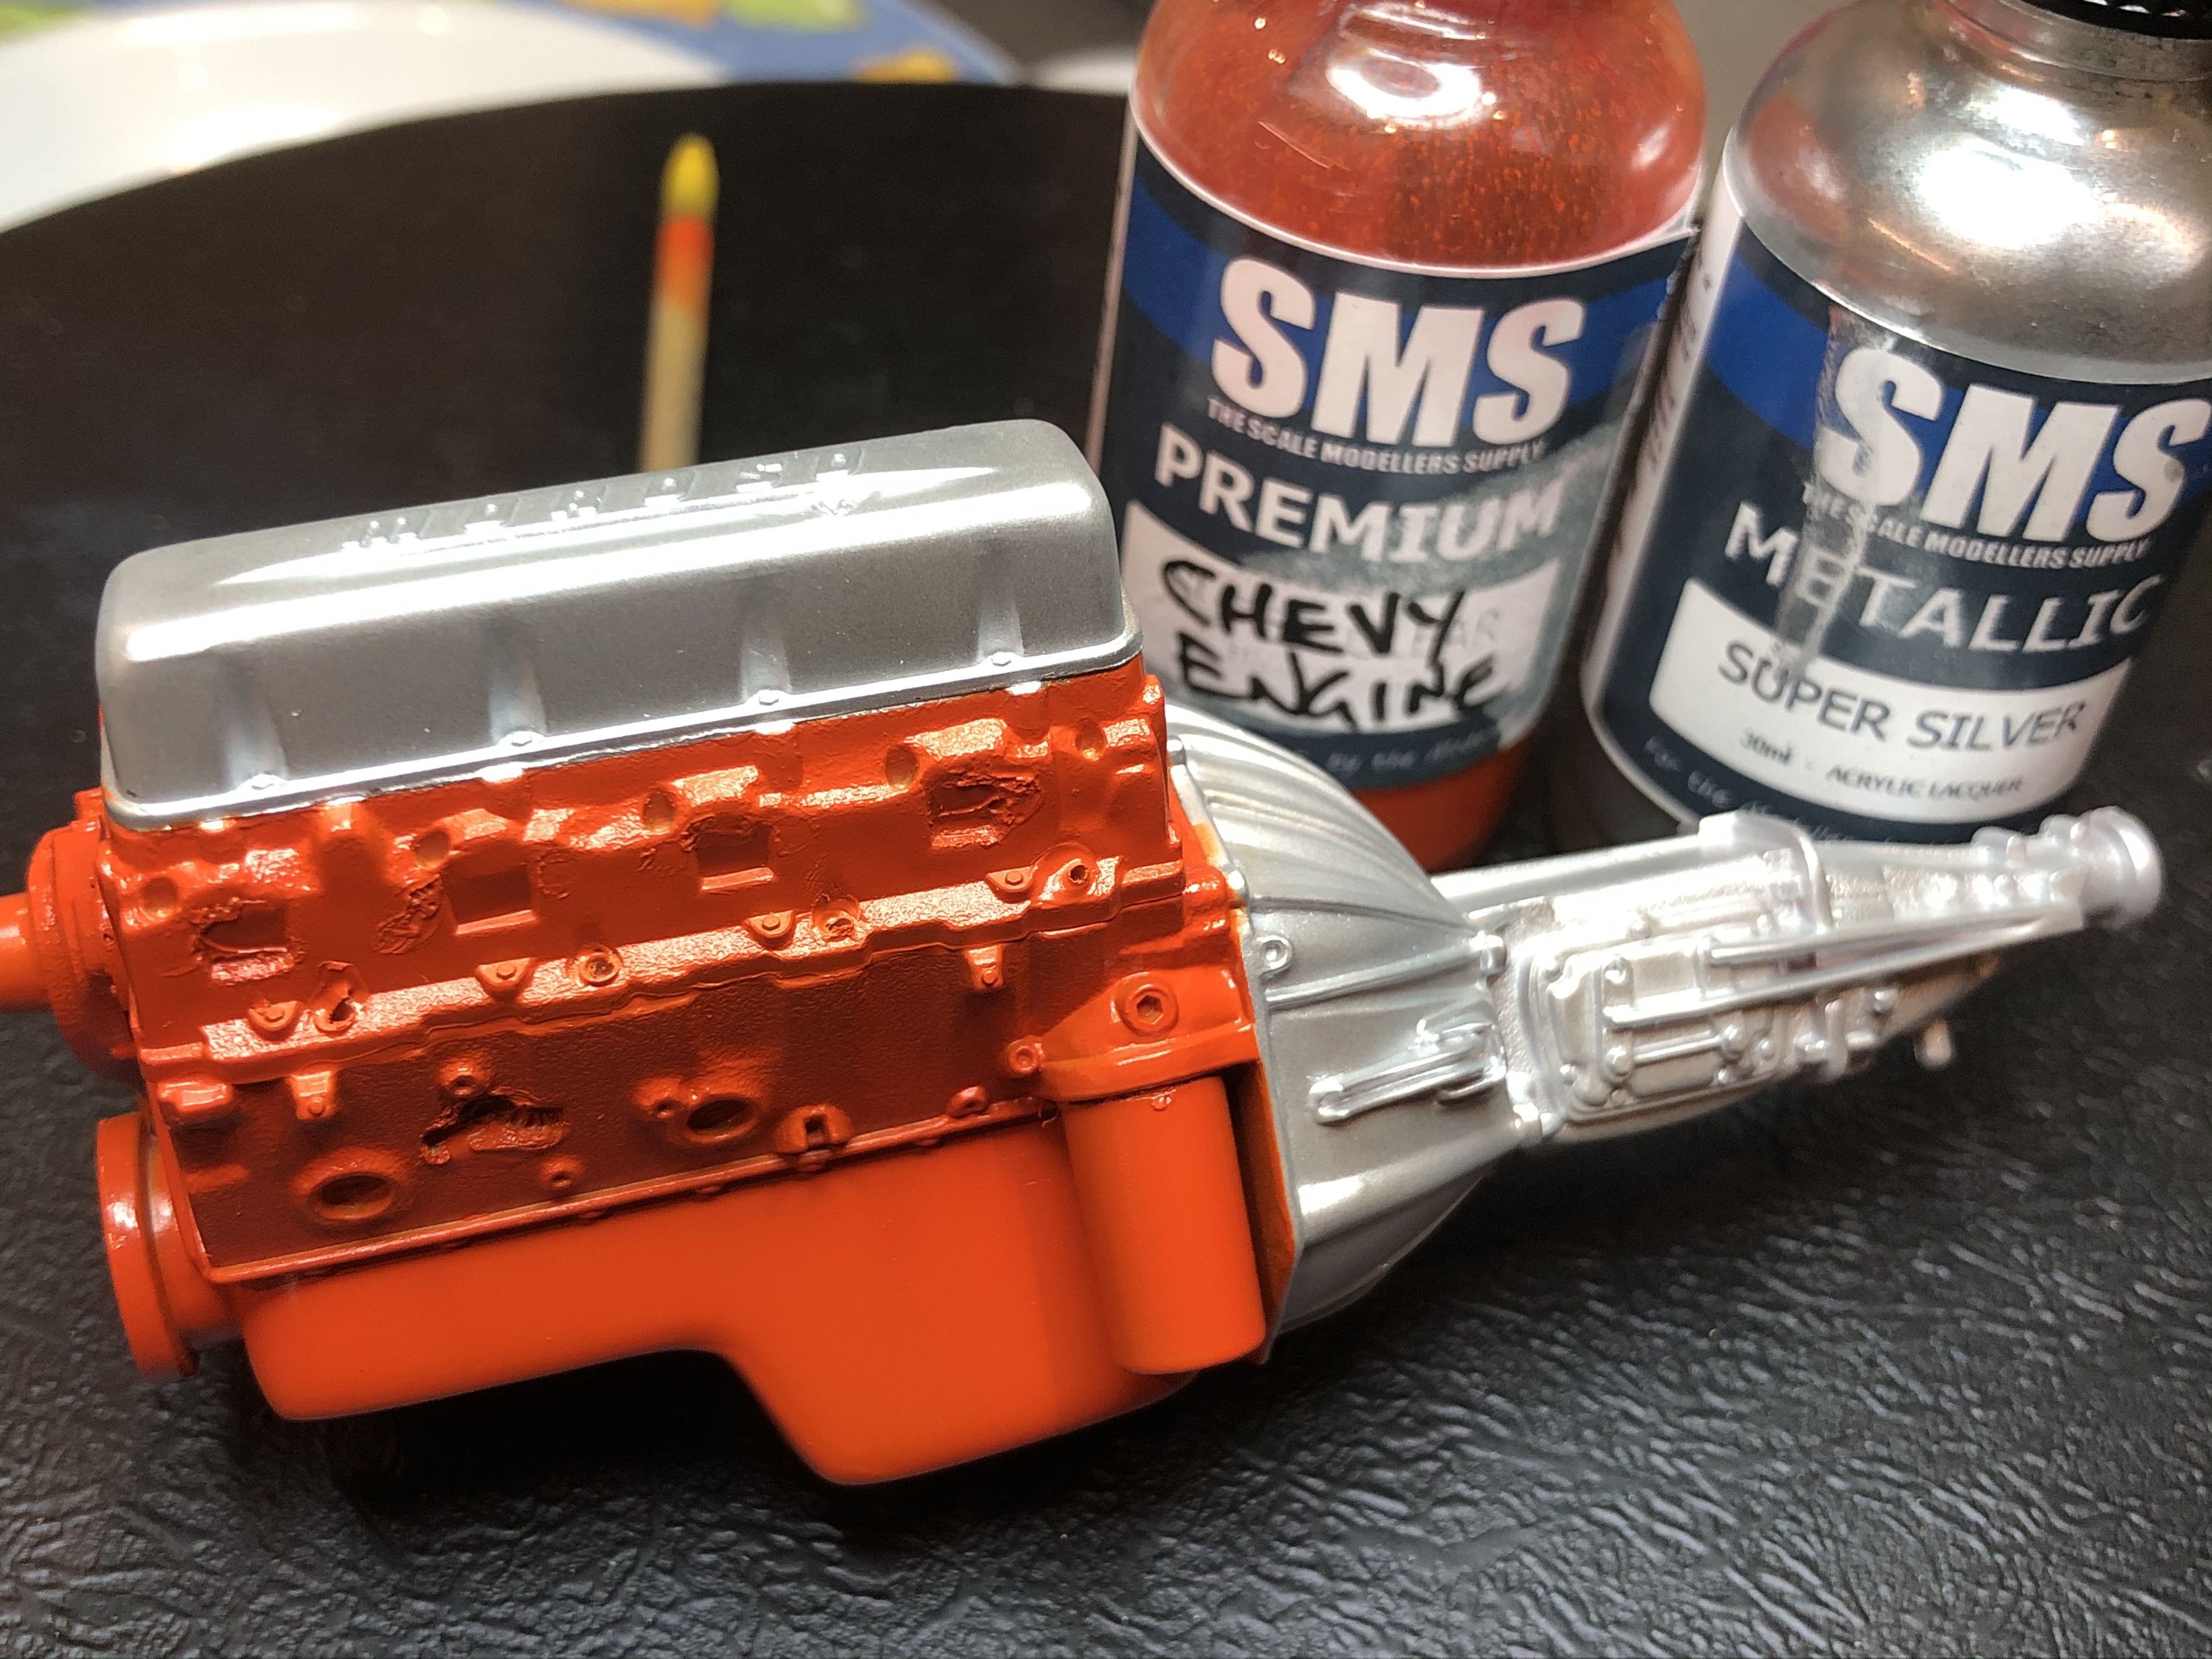
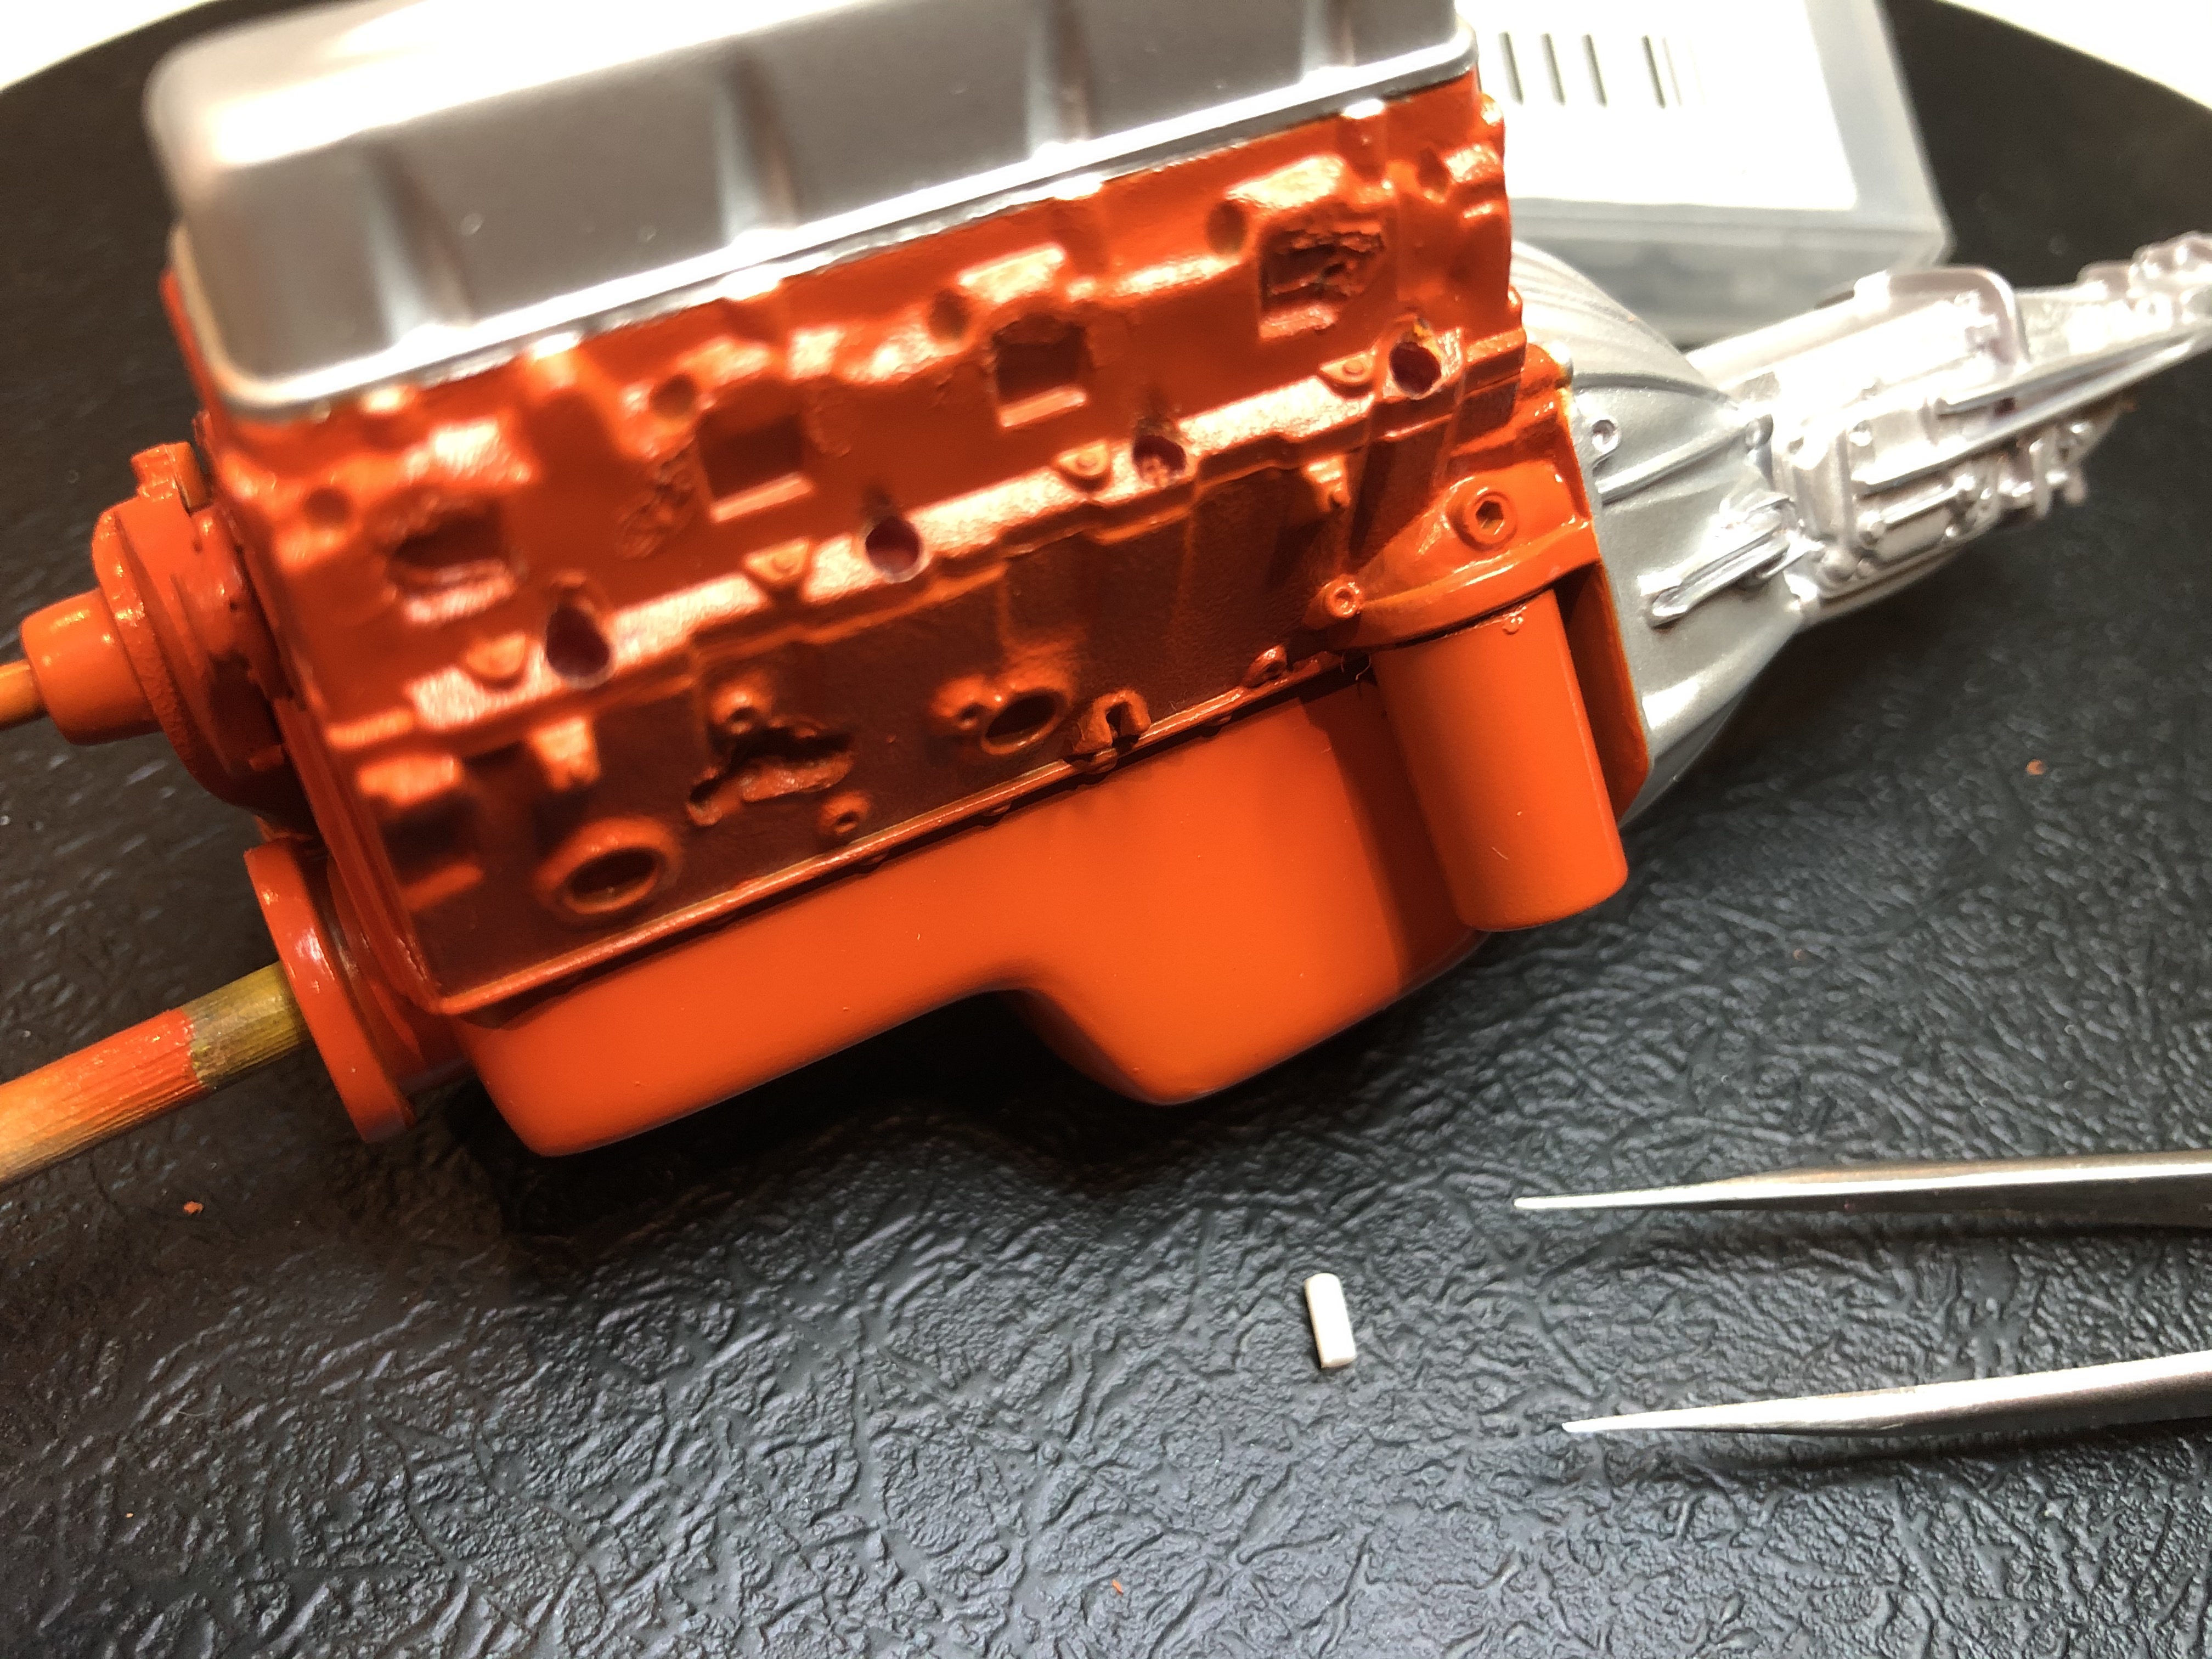
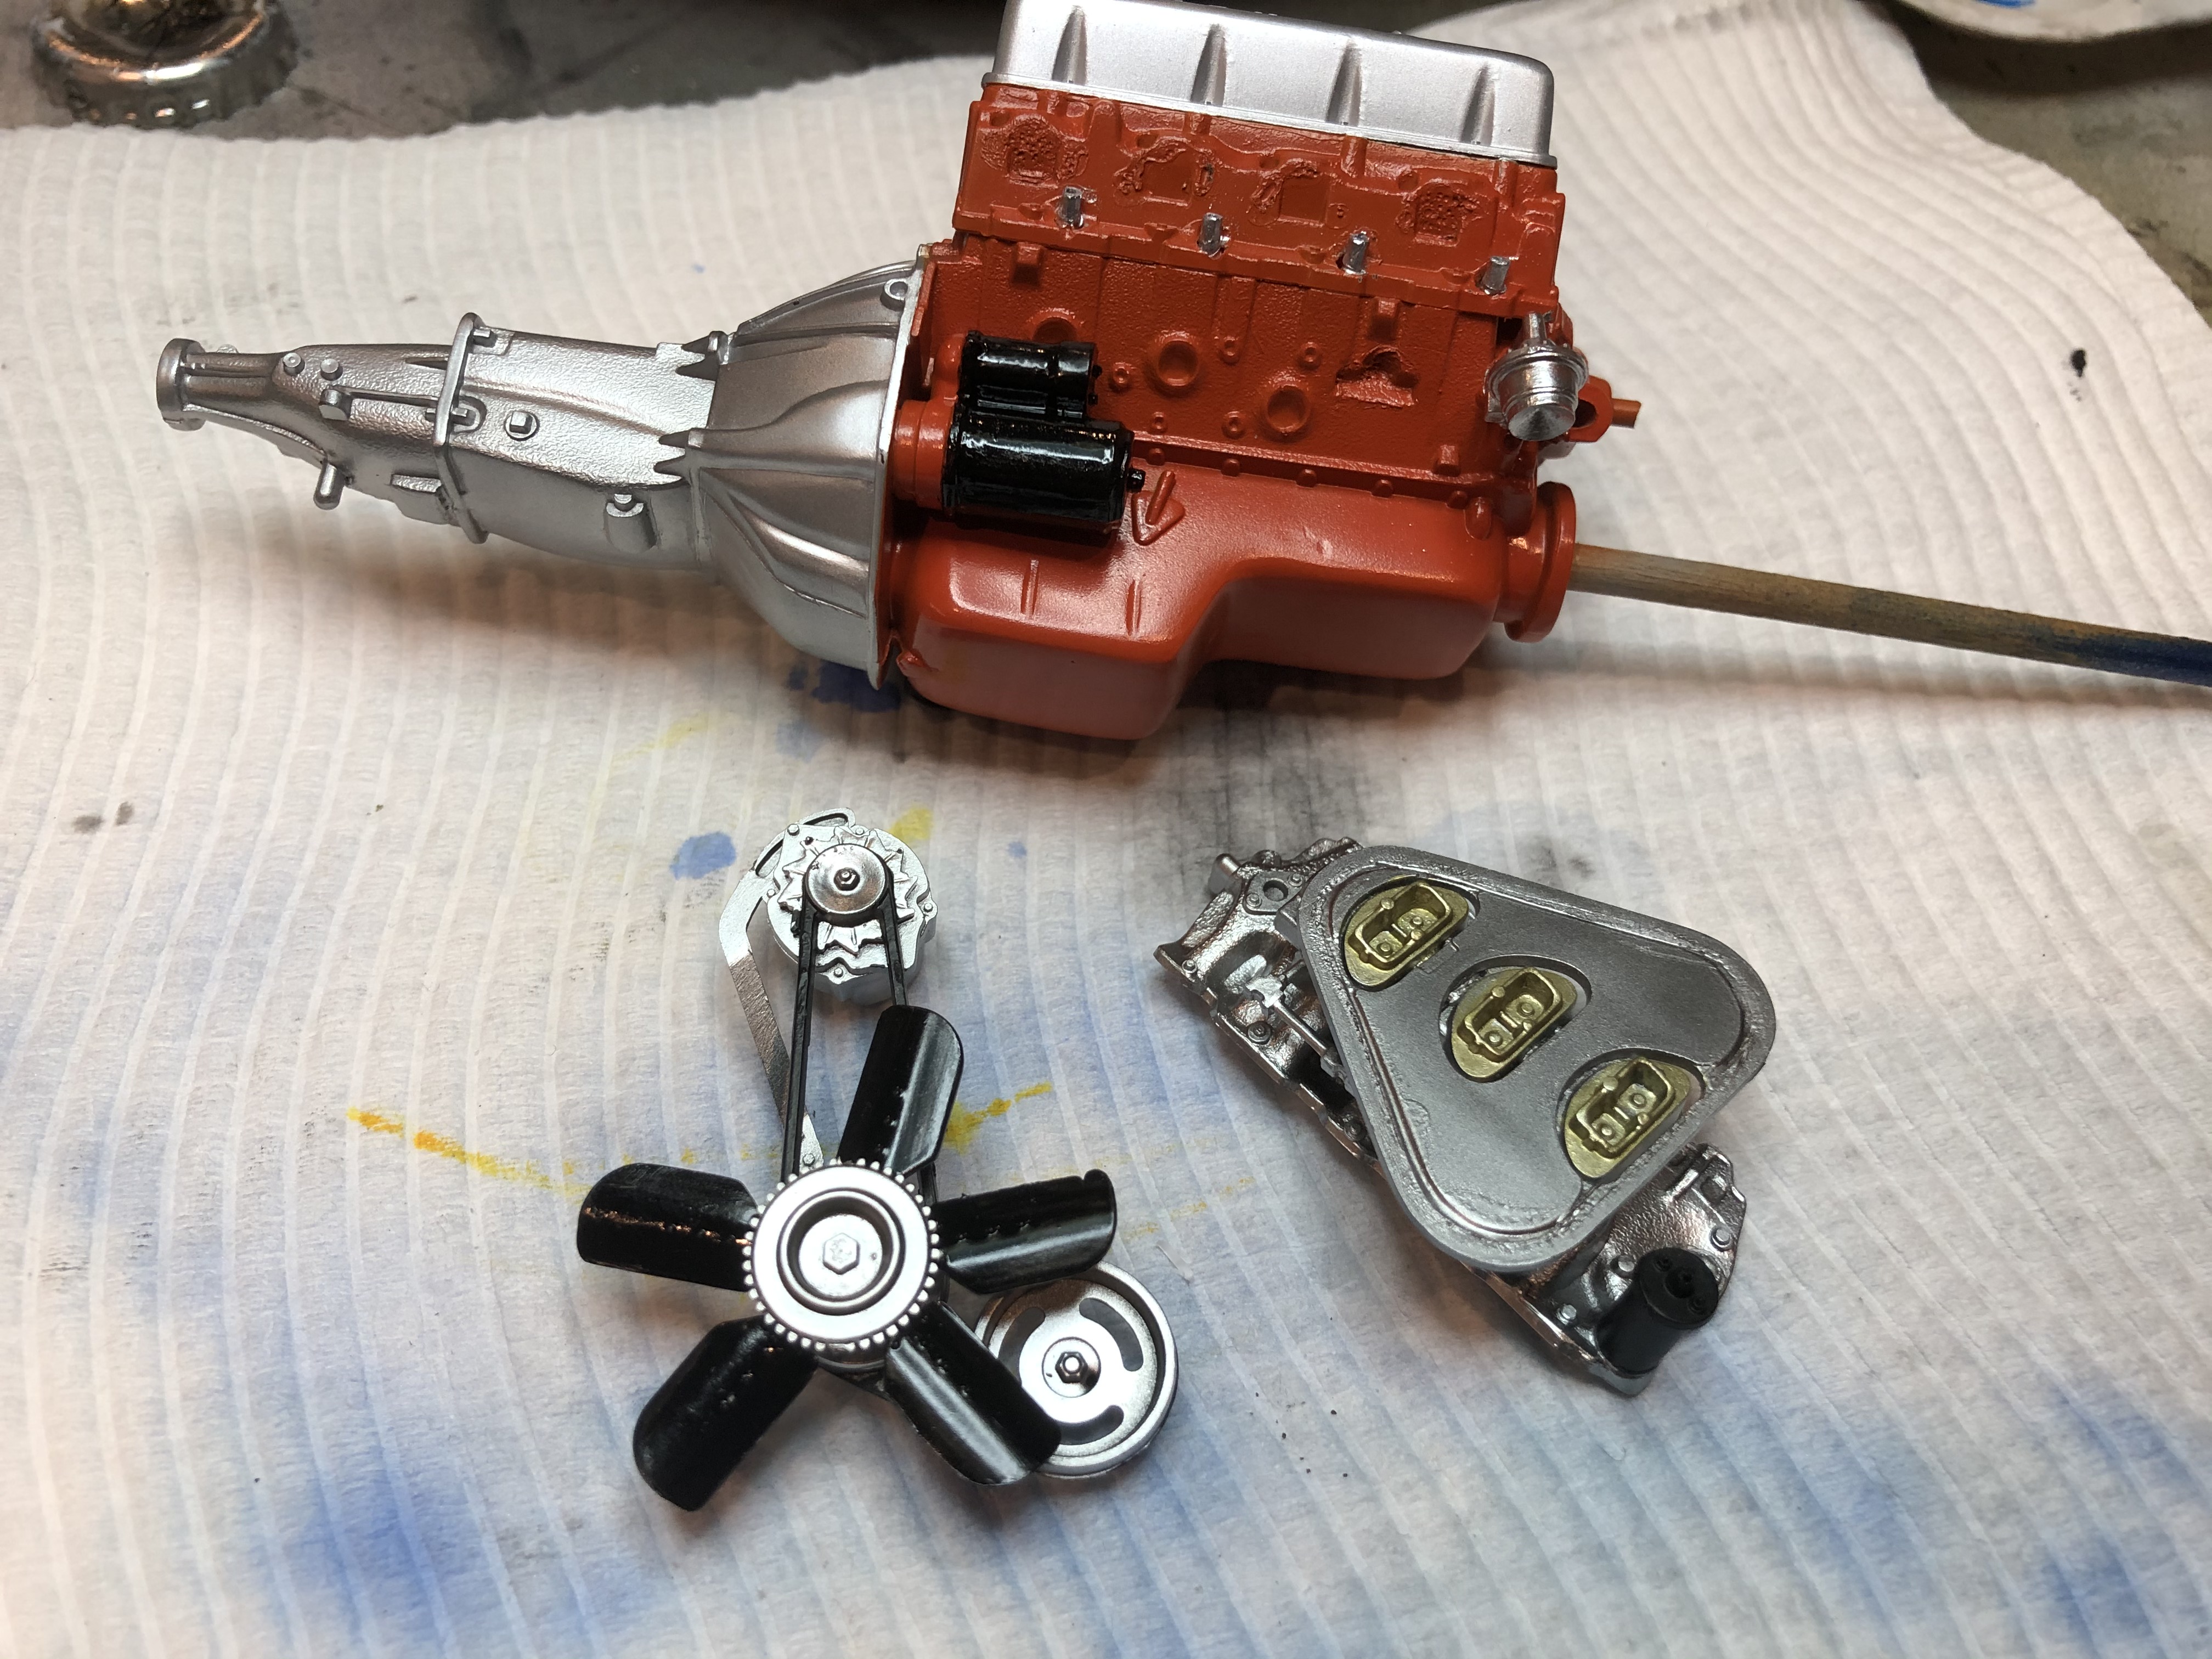
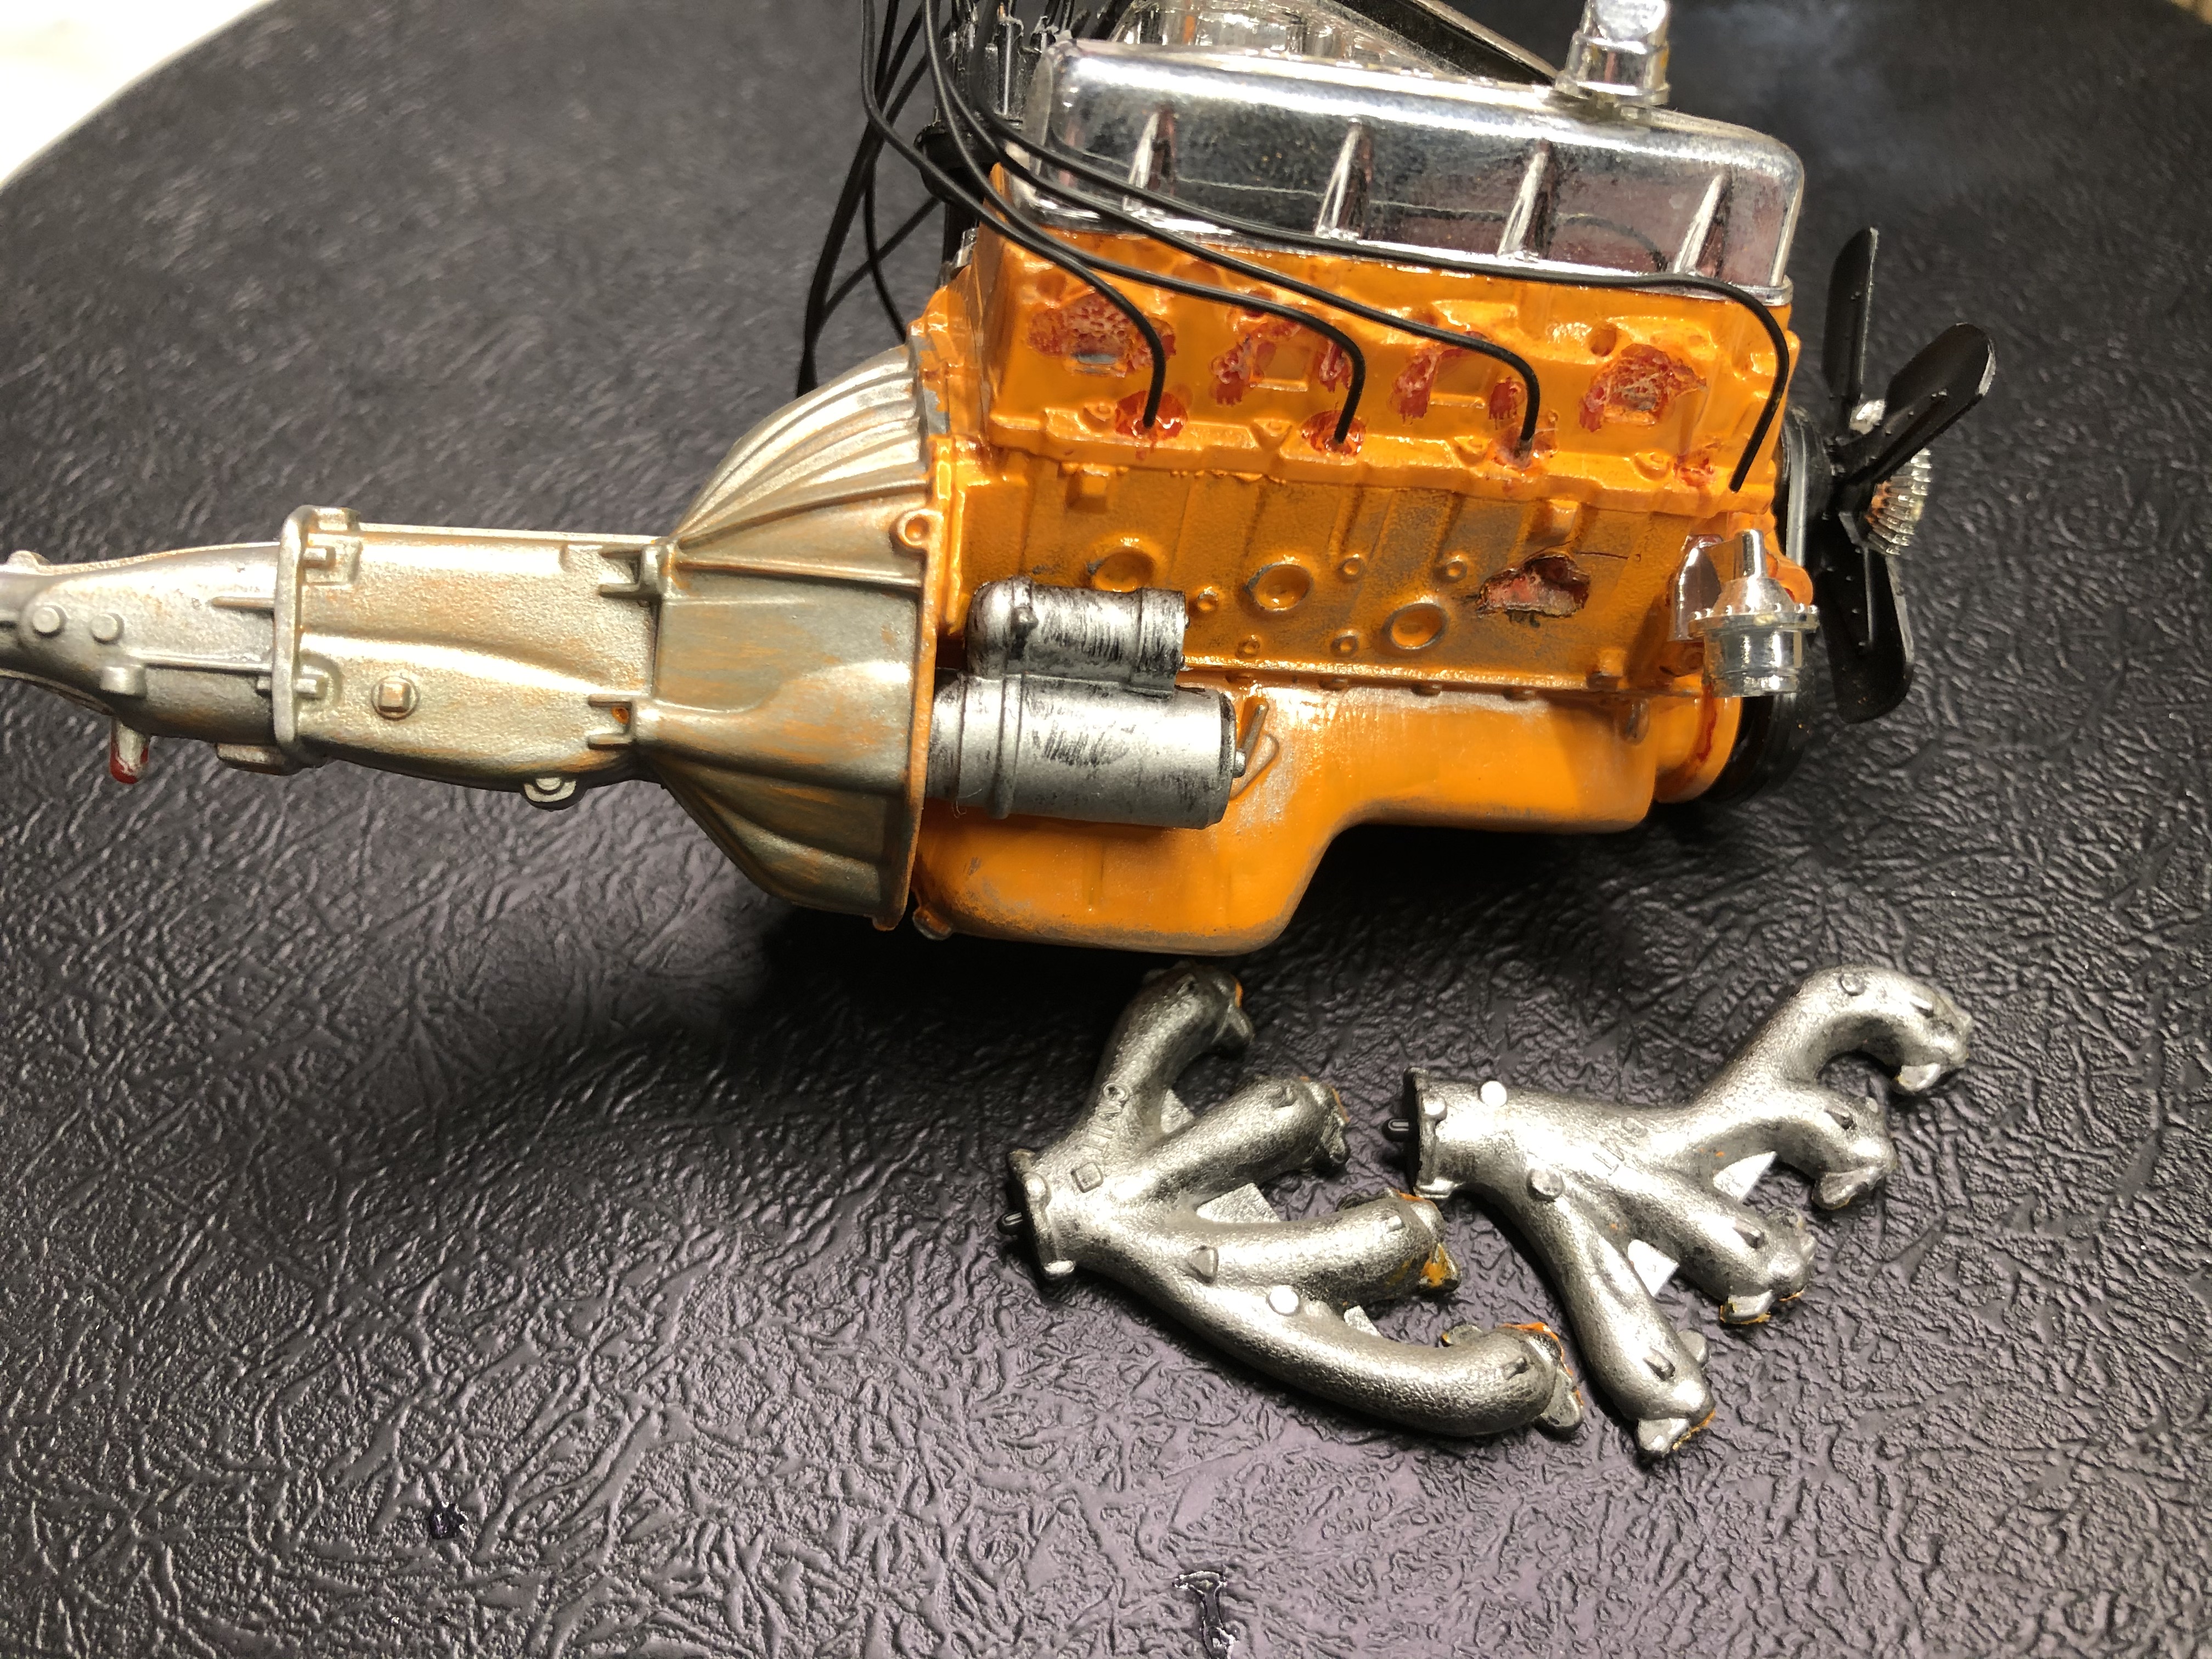
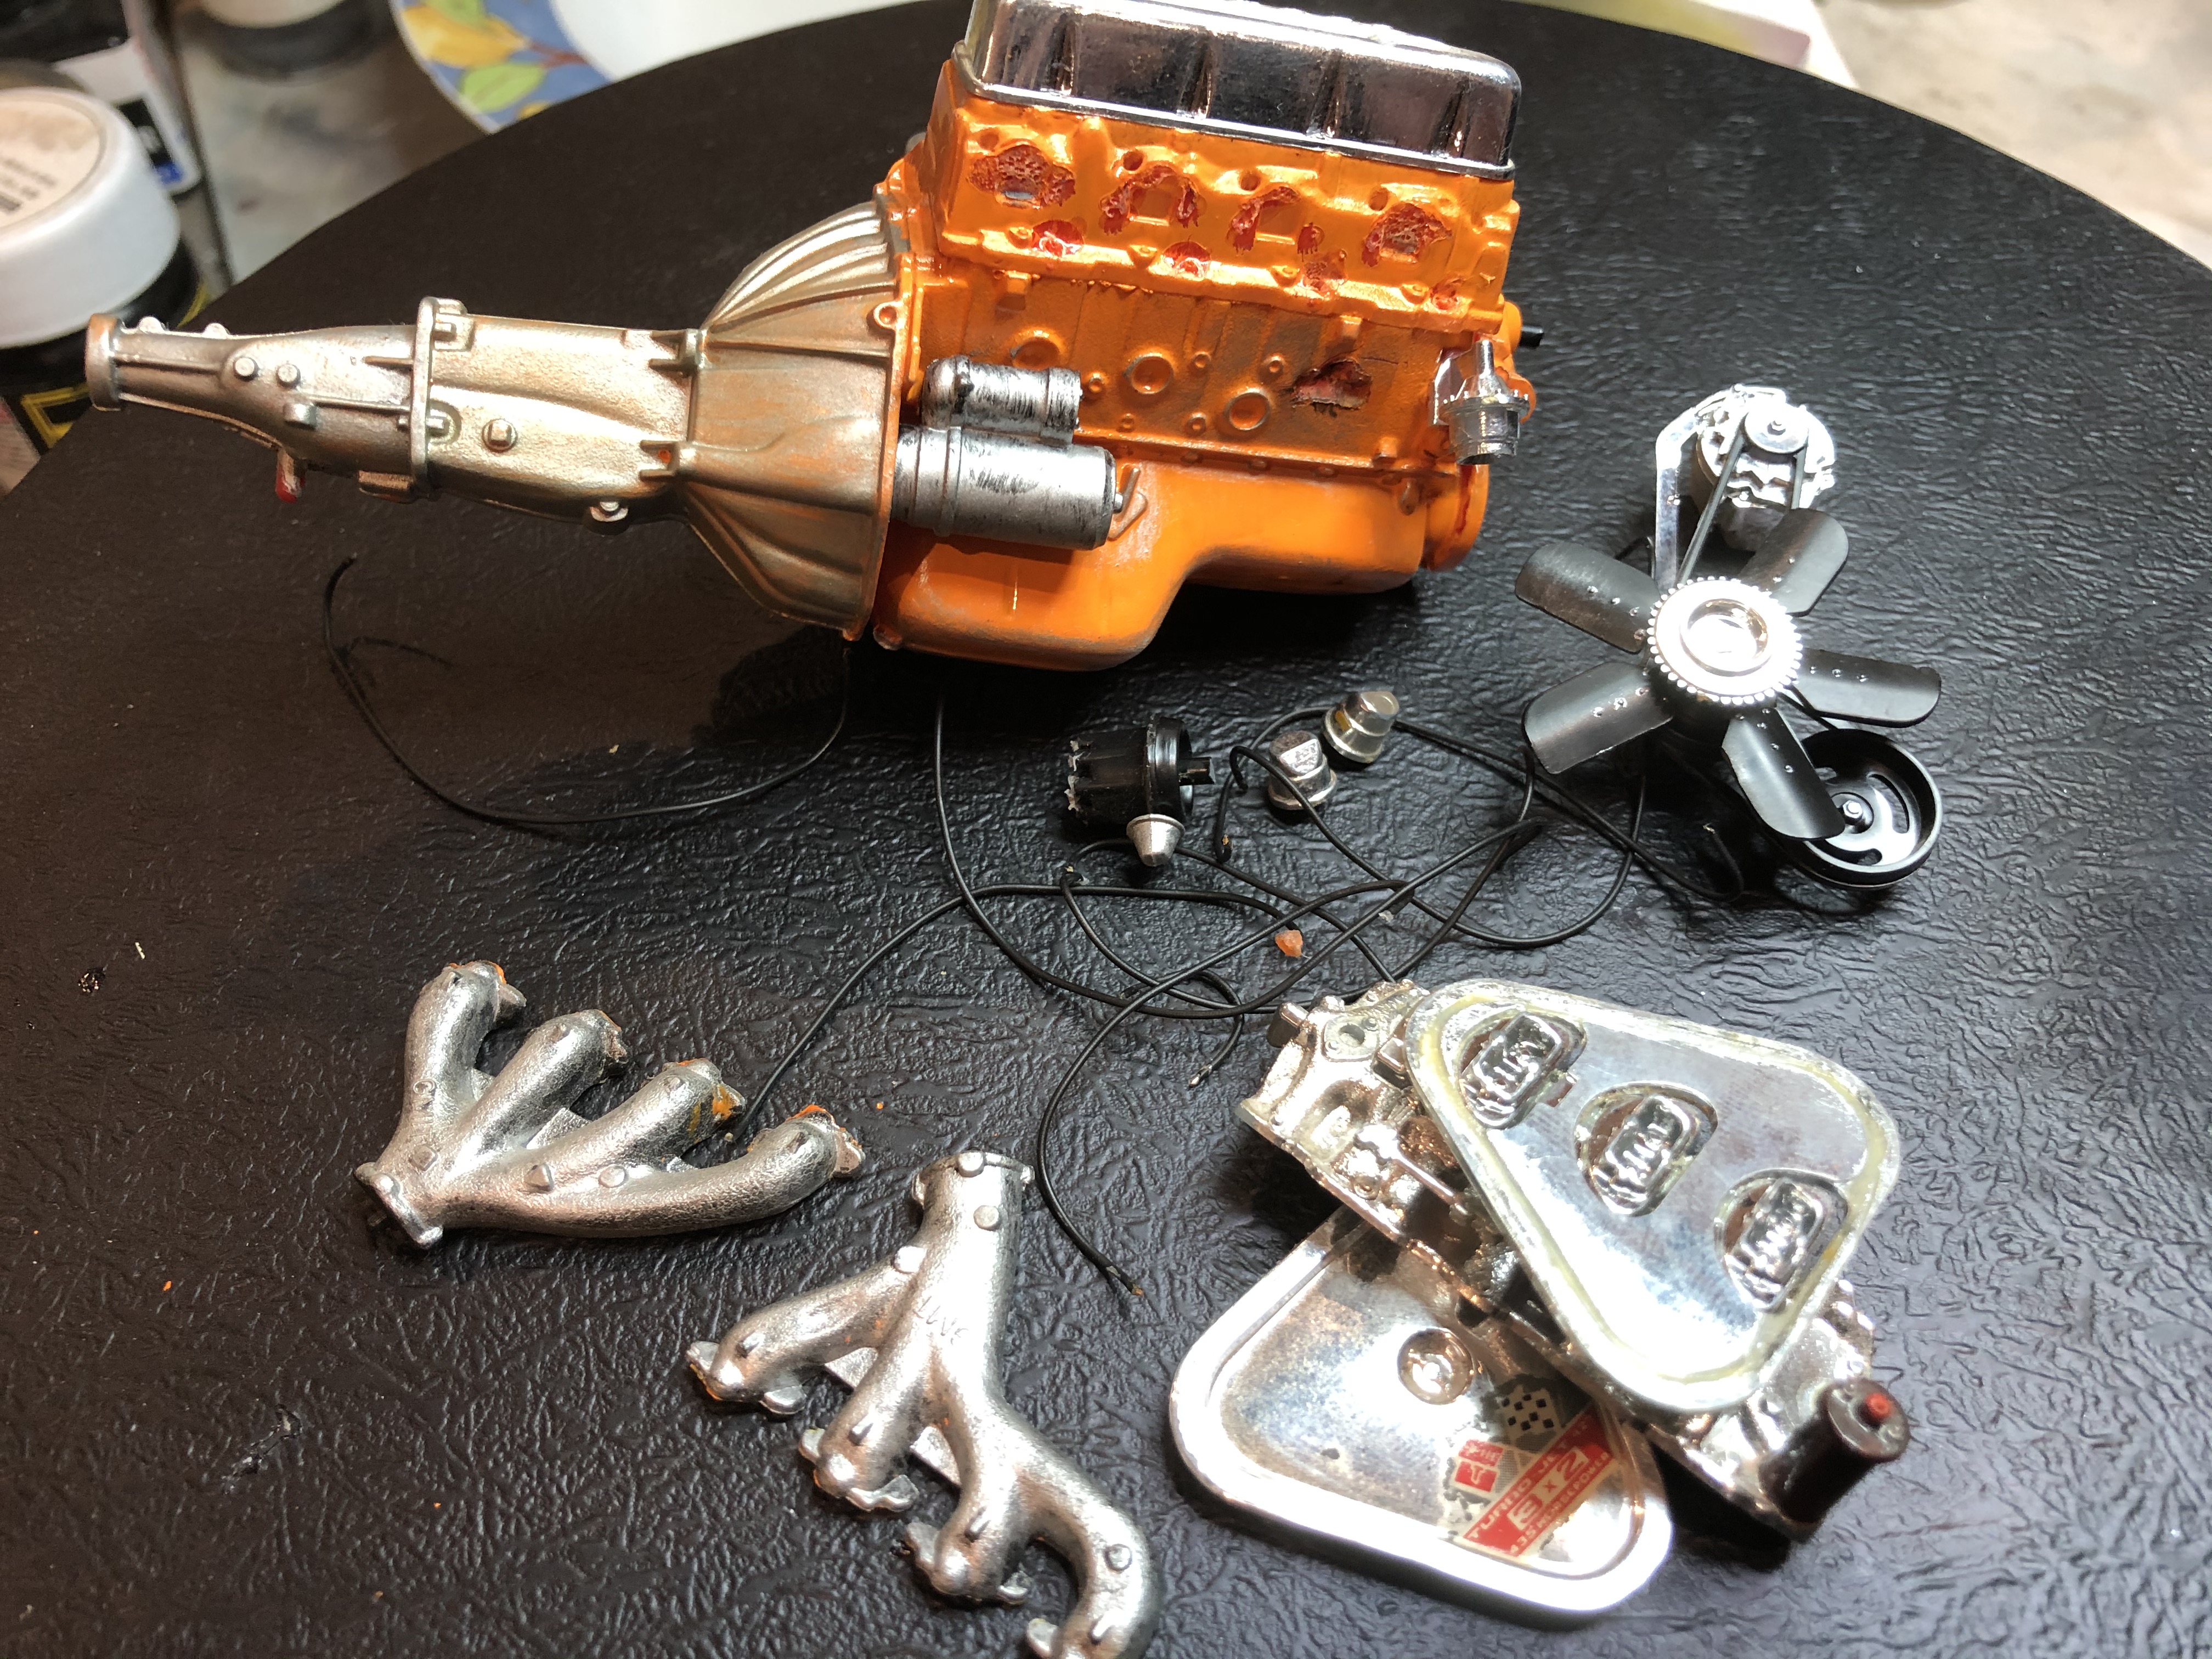
The engine as it was when the build was halted -


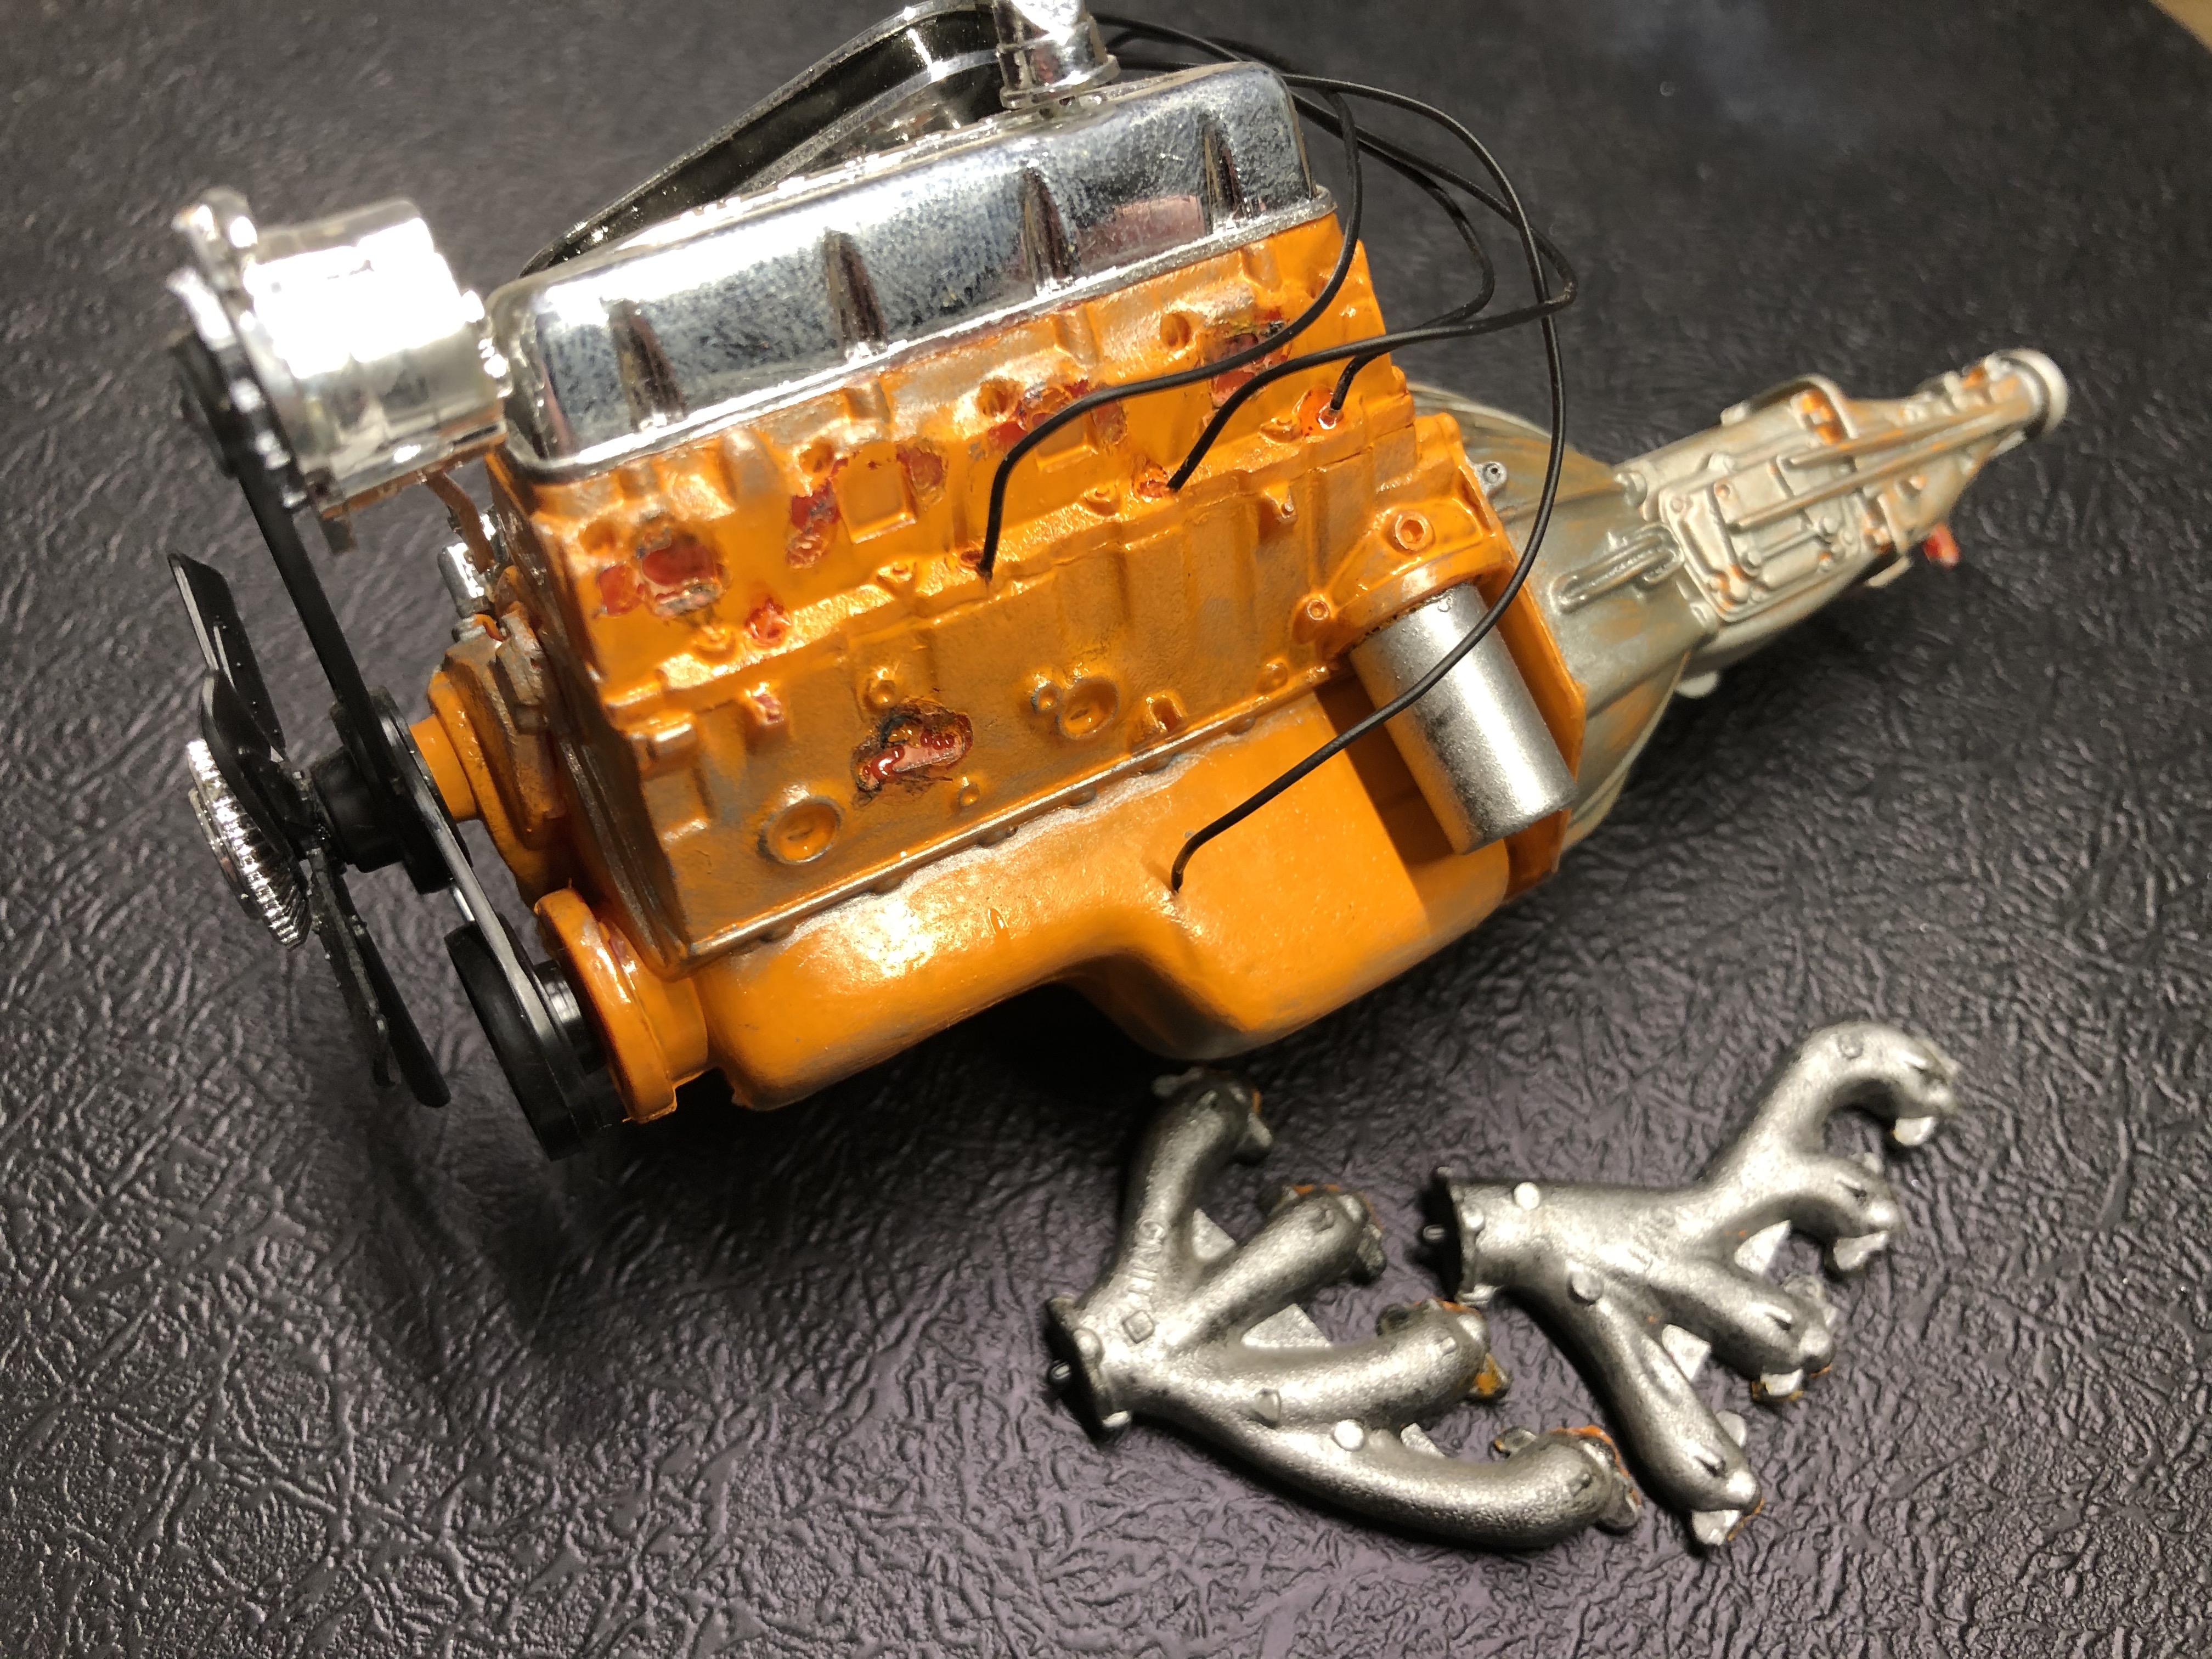
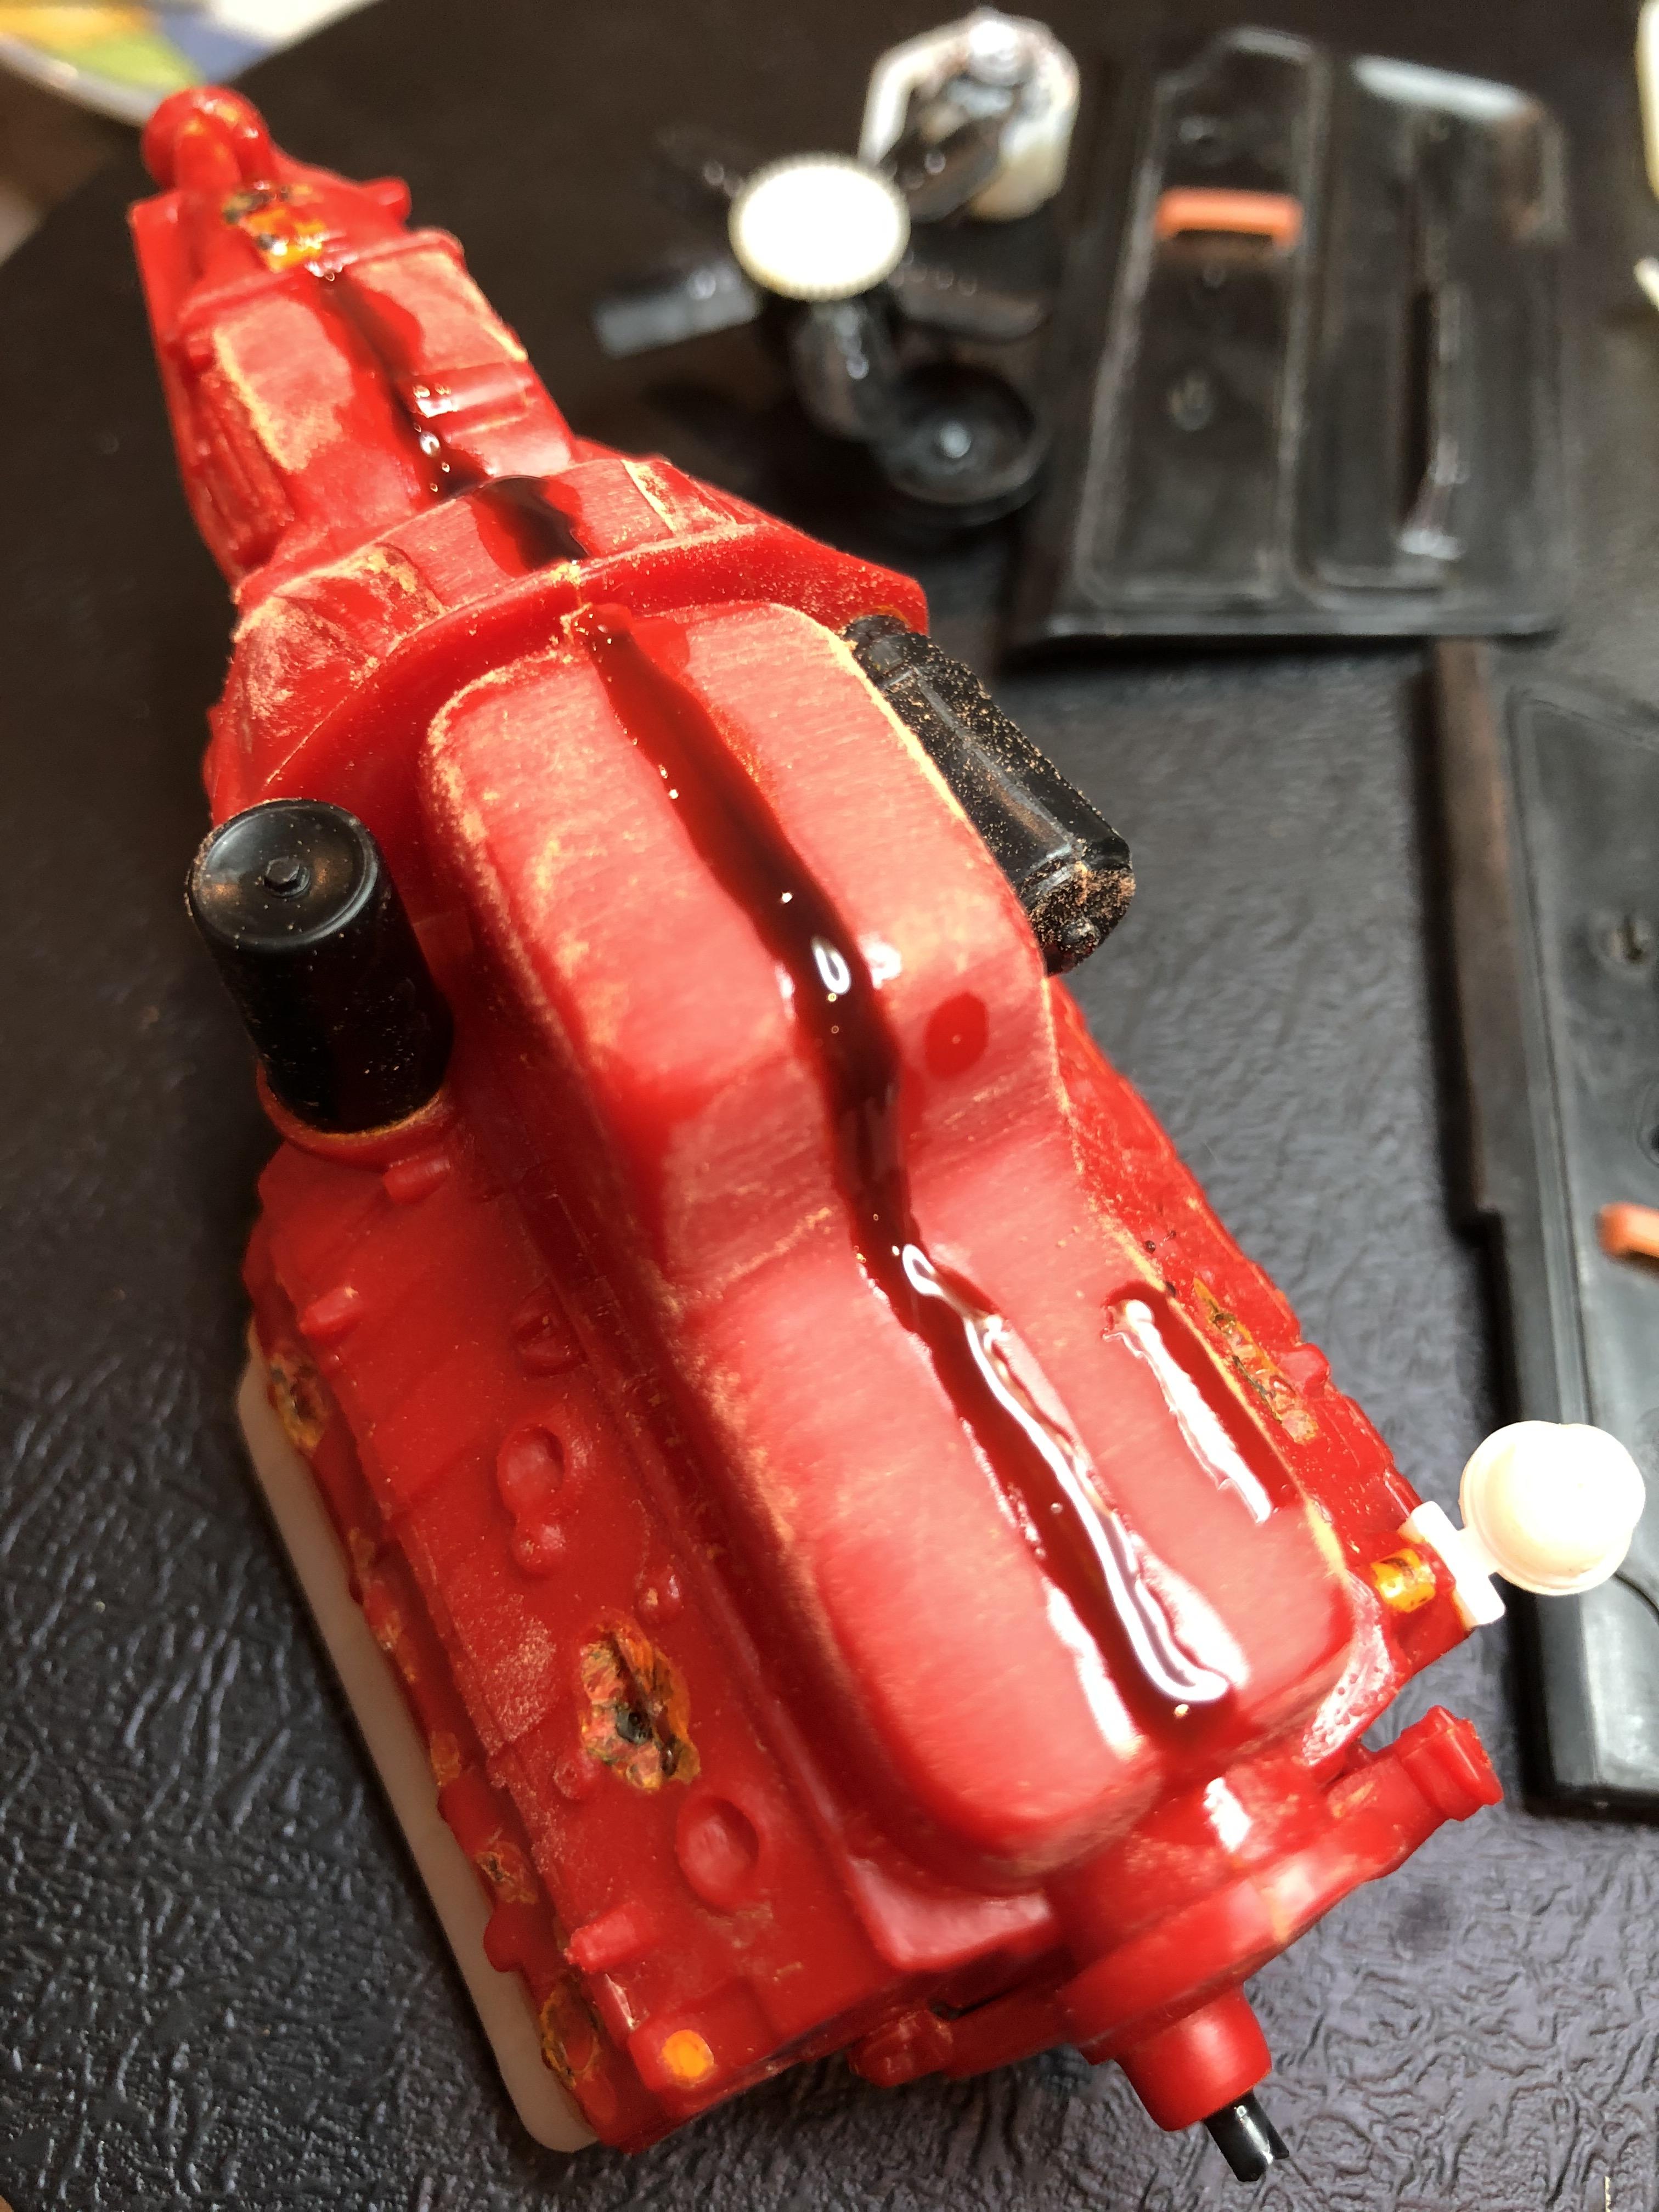
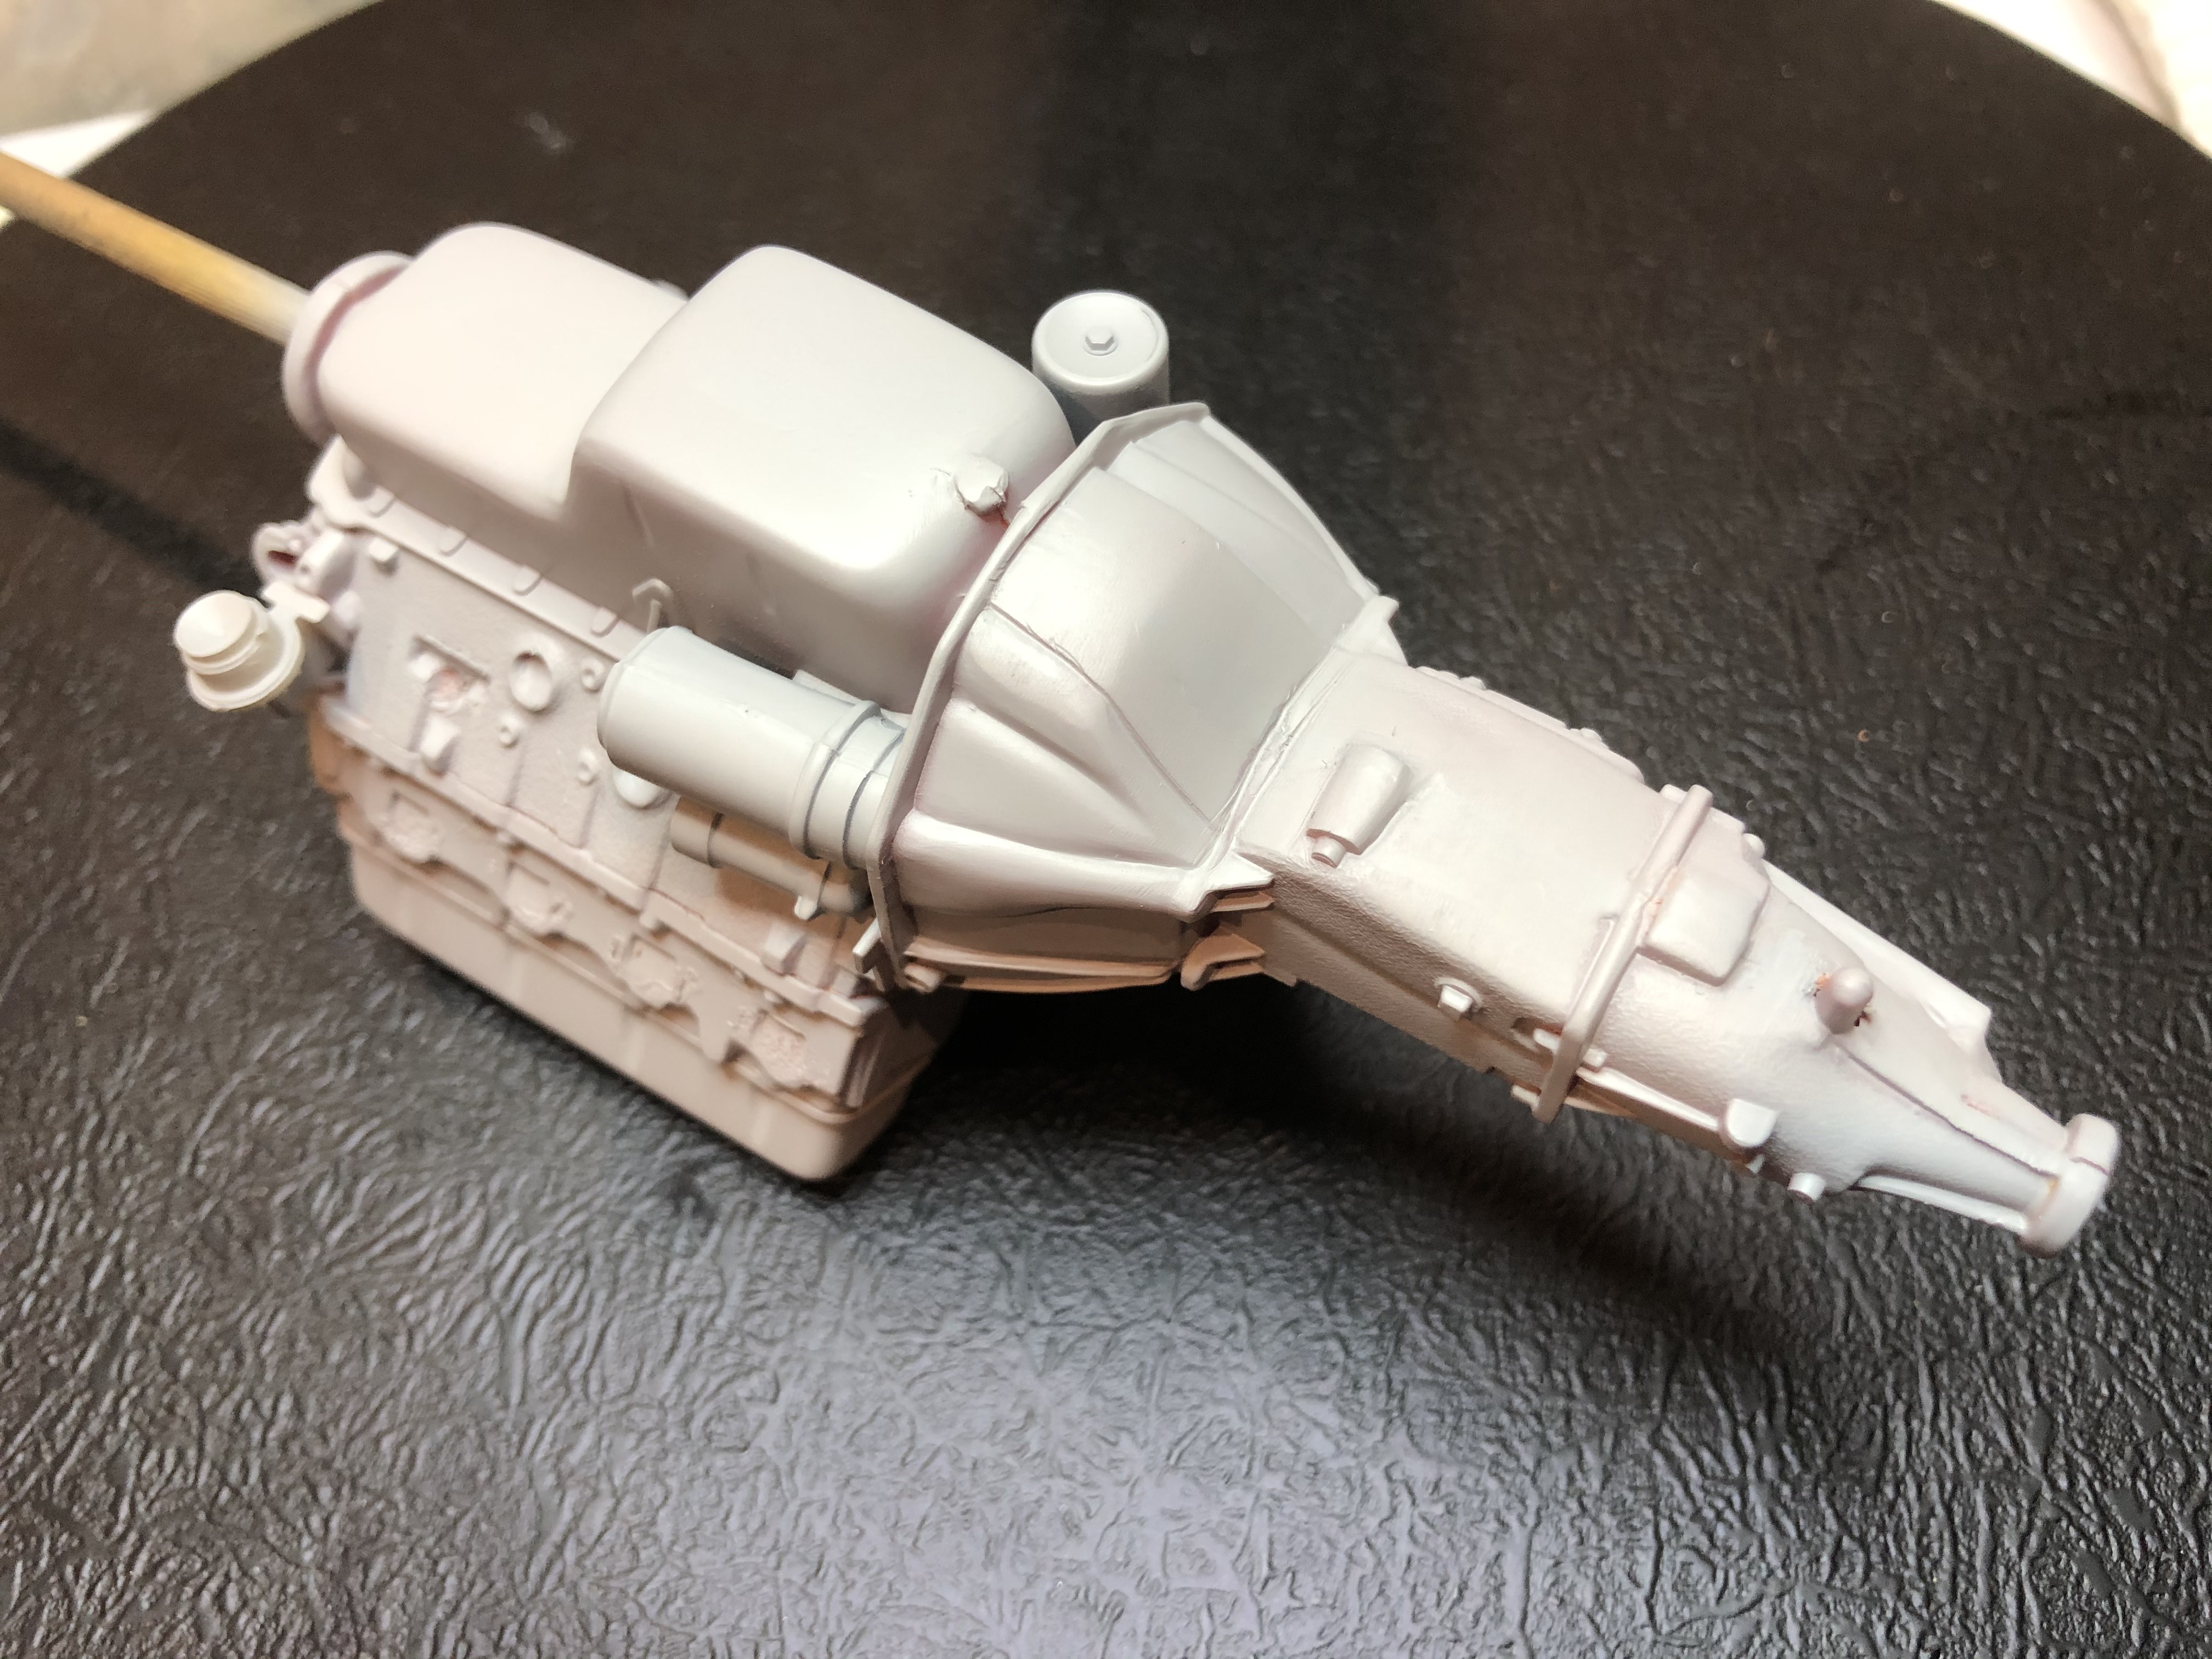
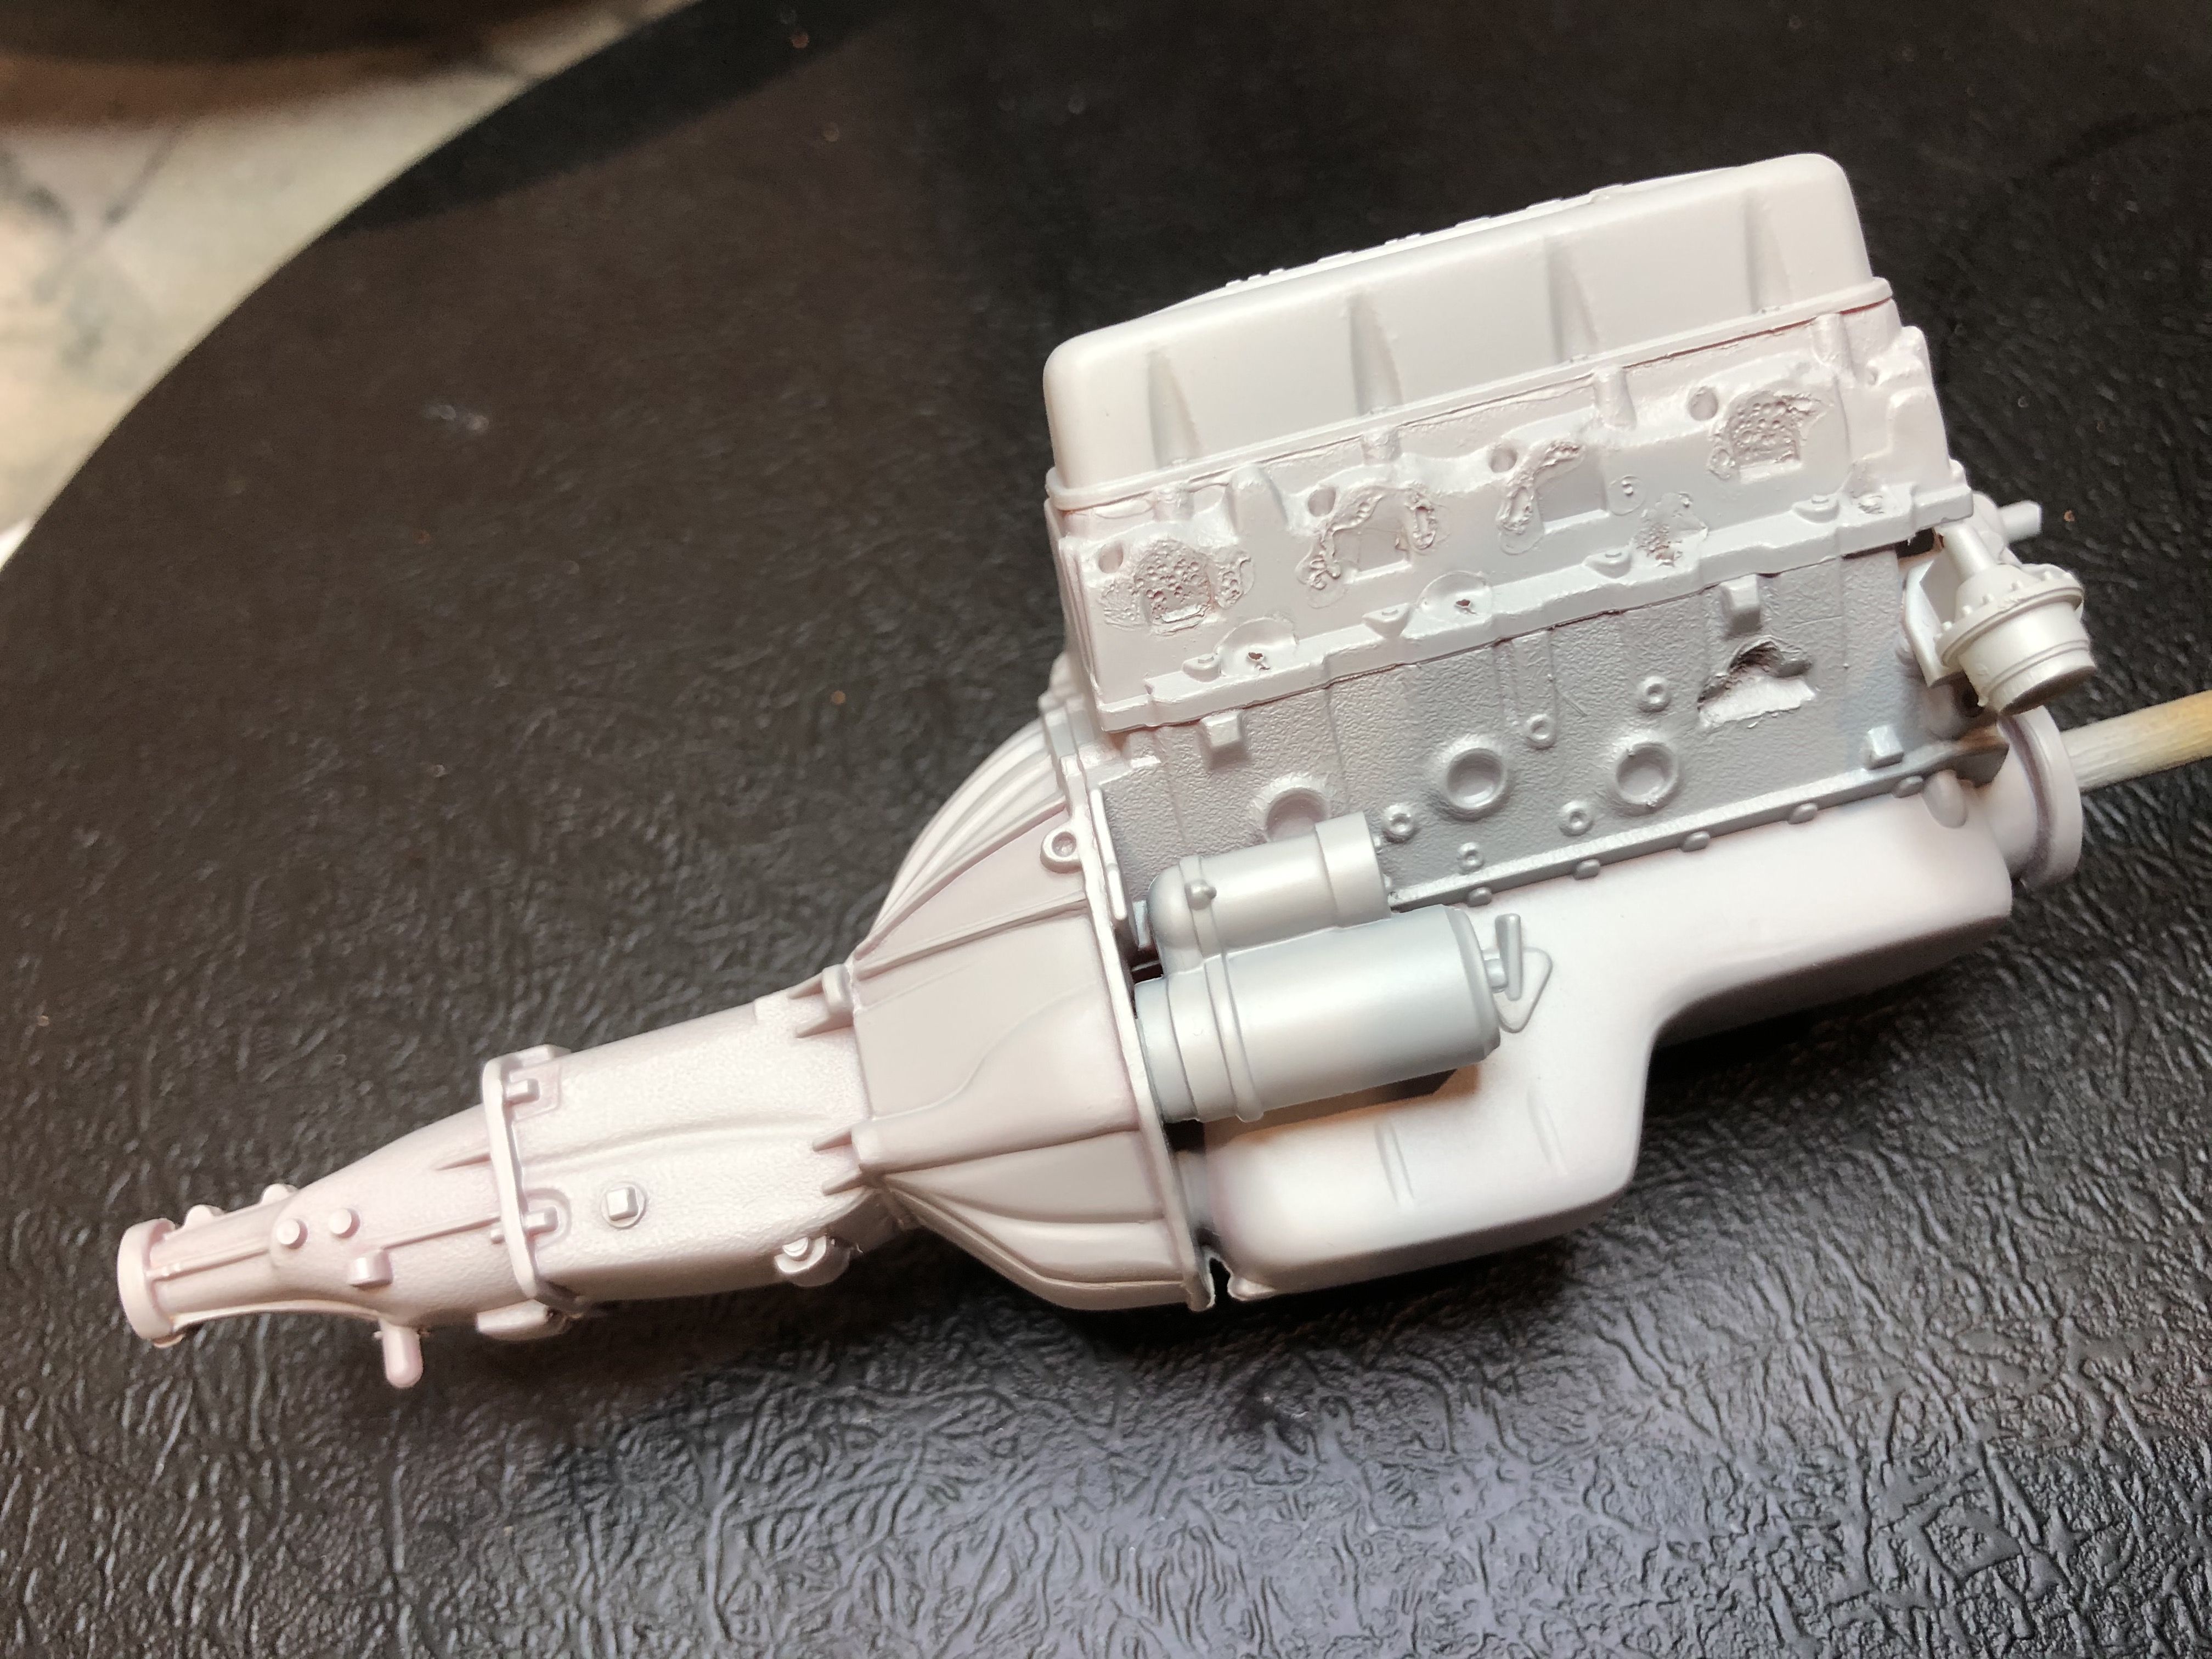
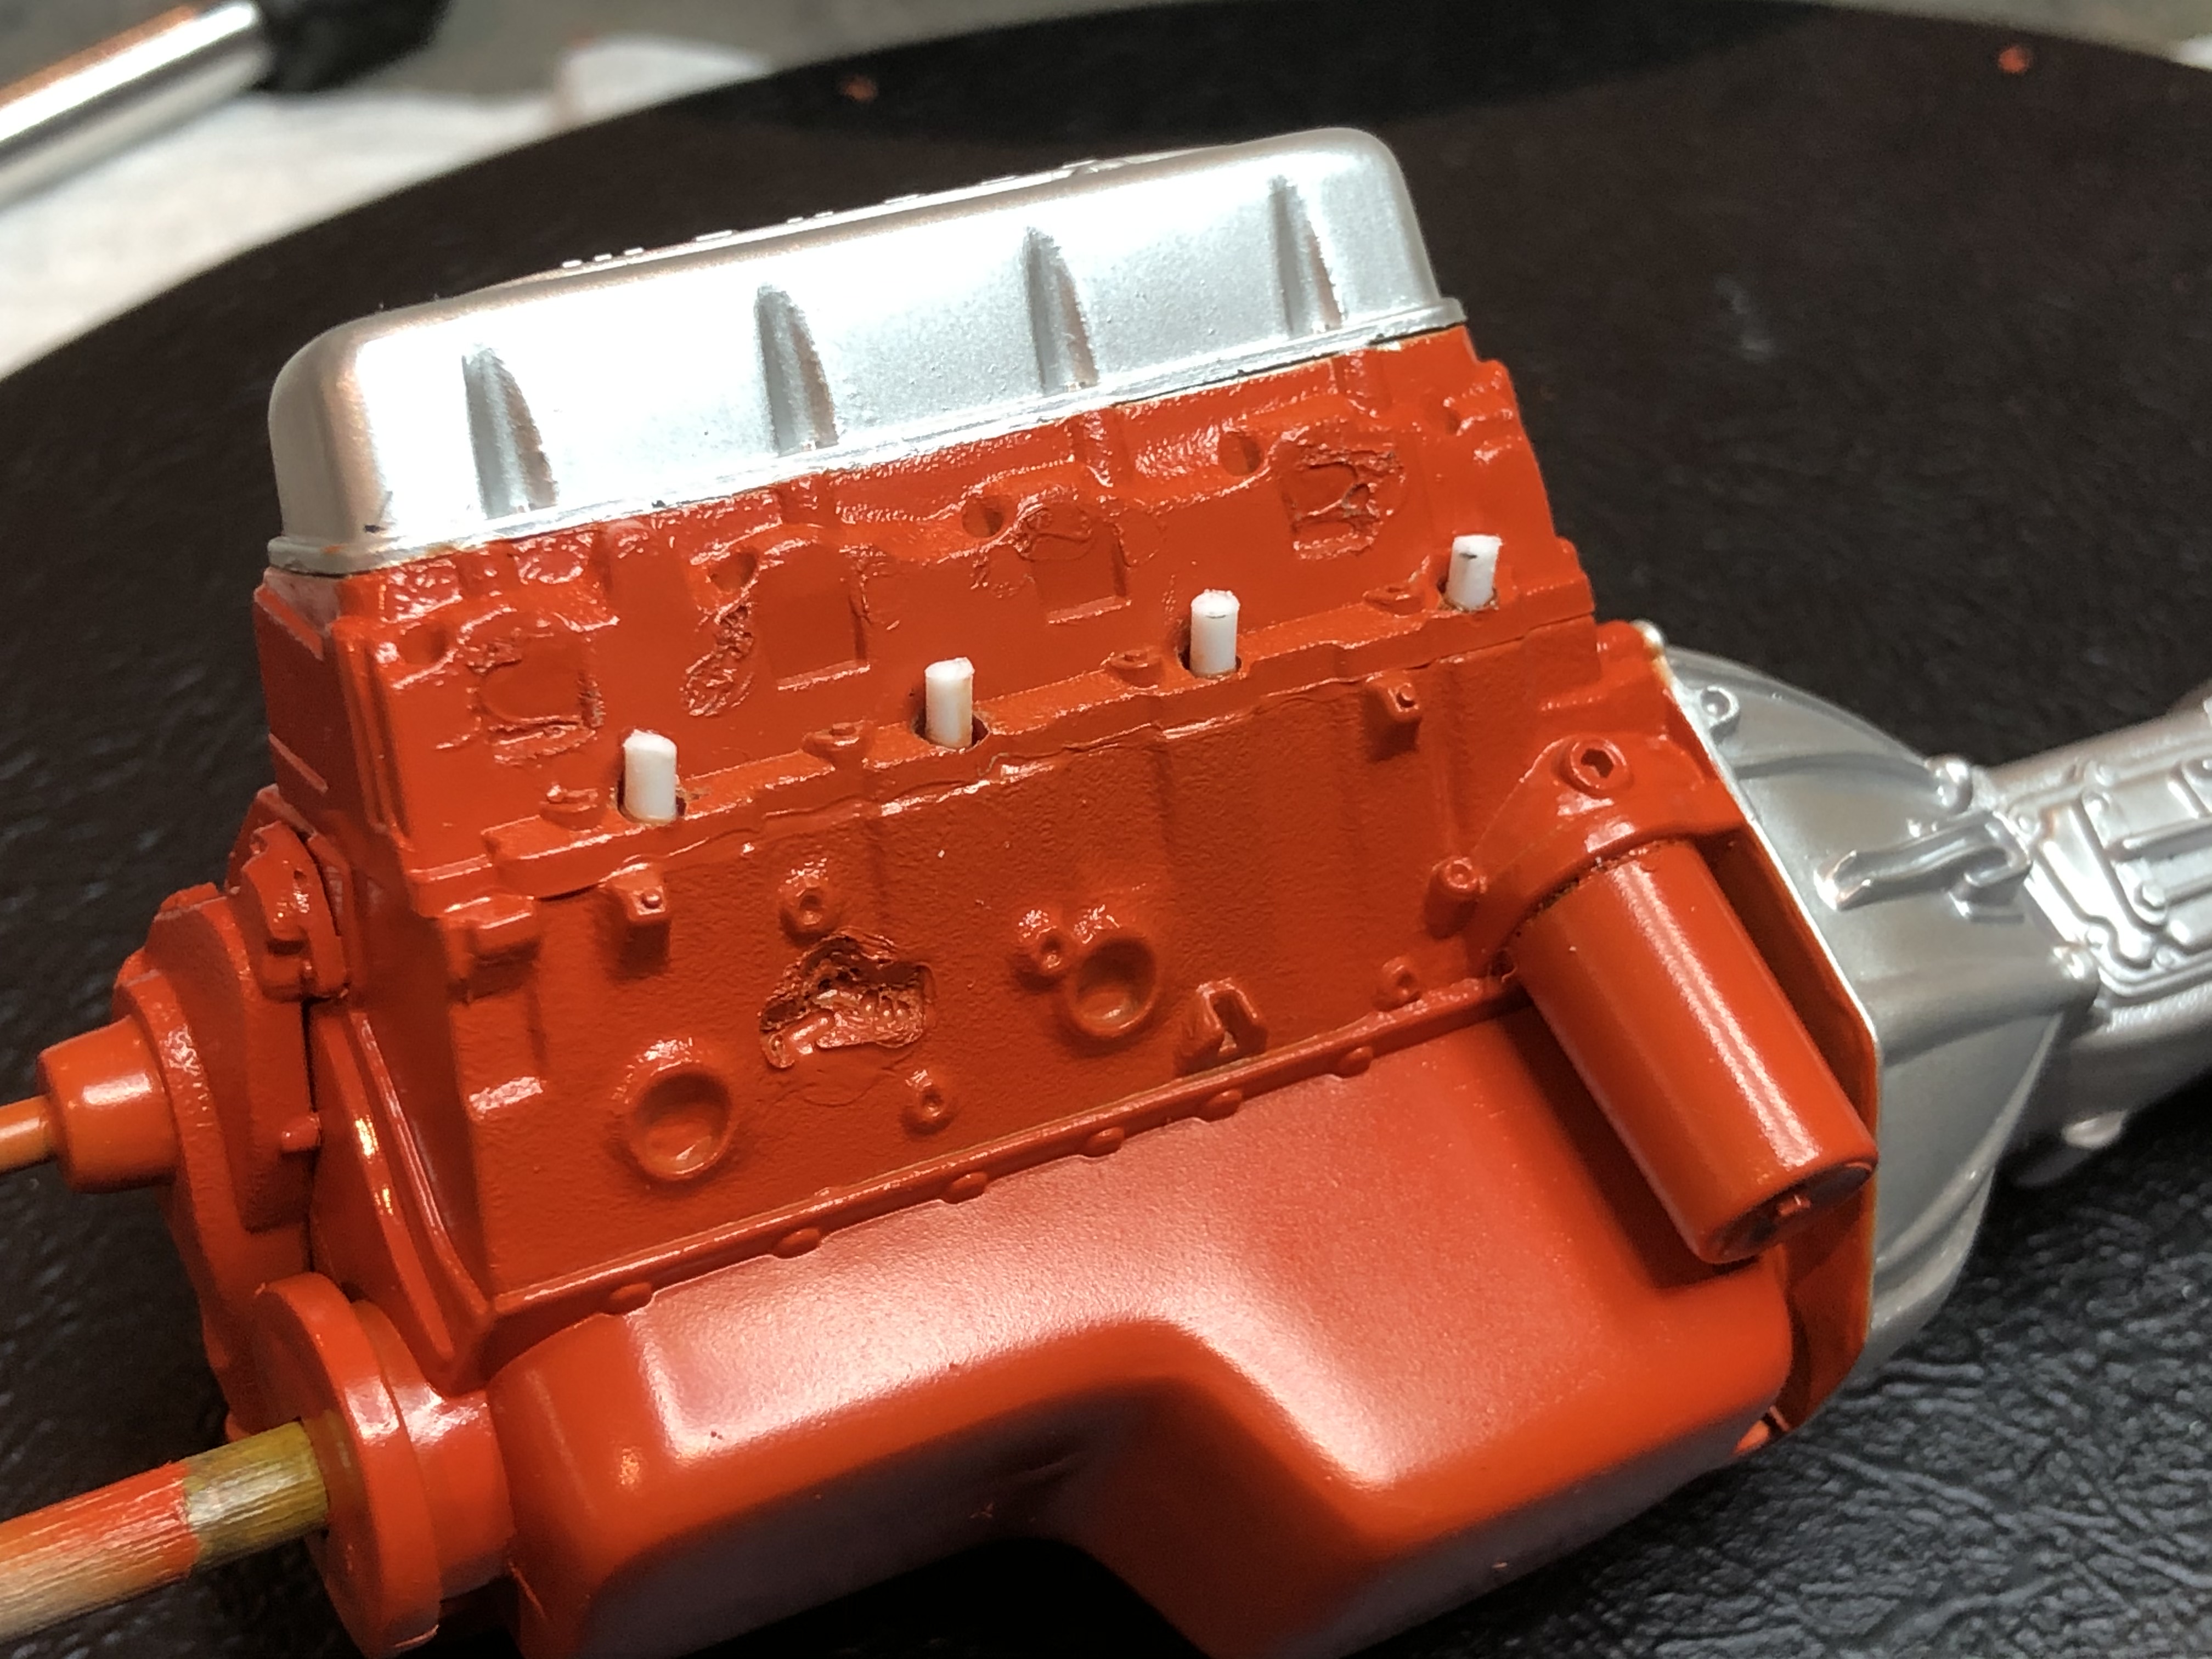
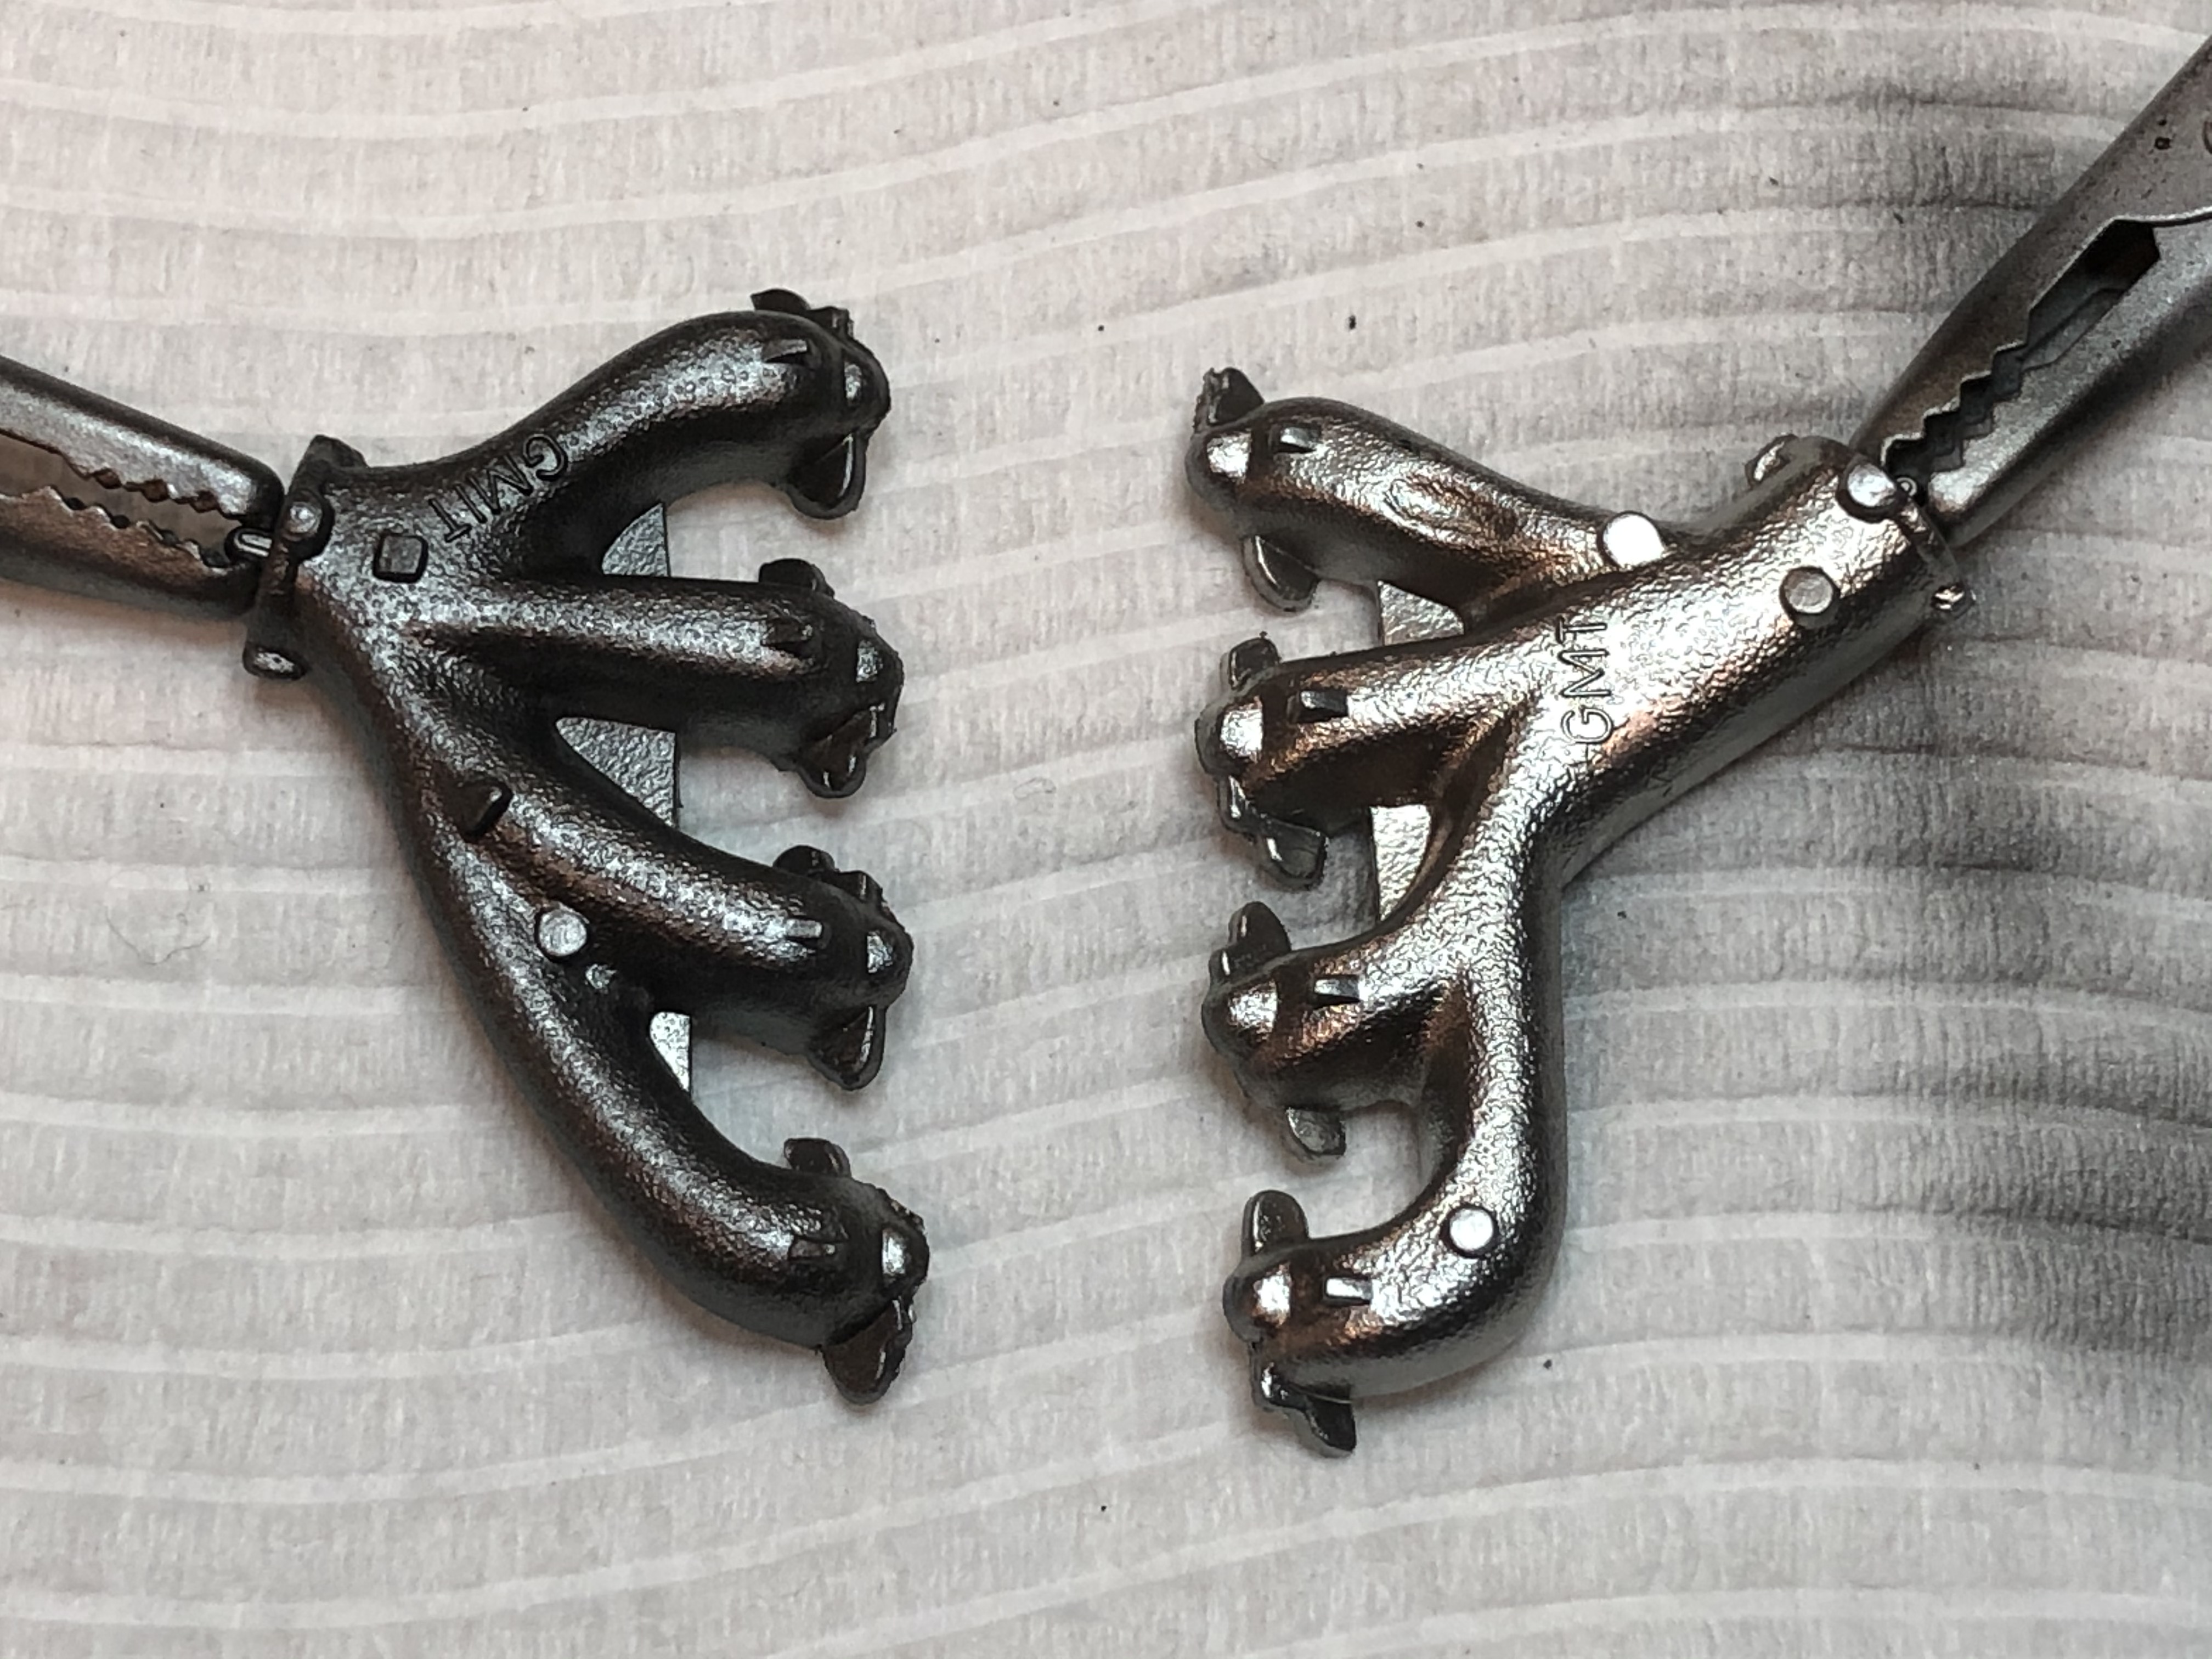
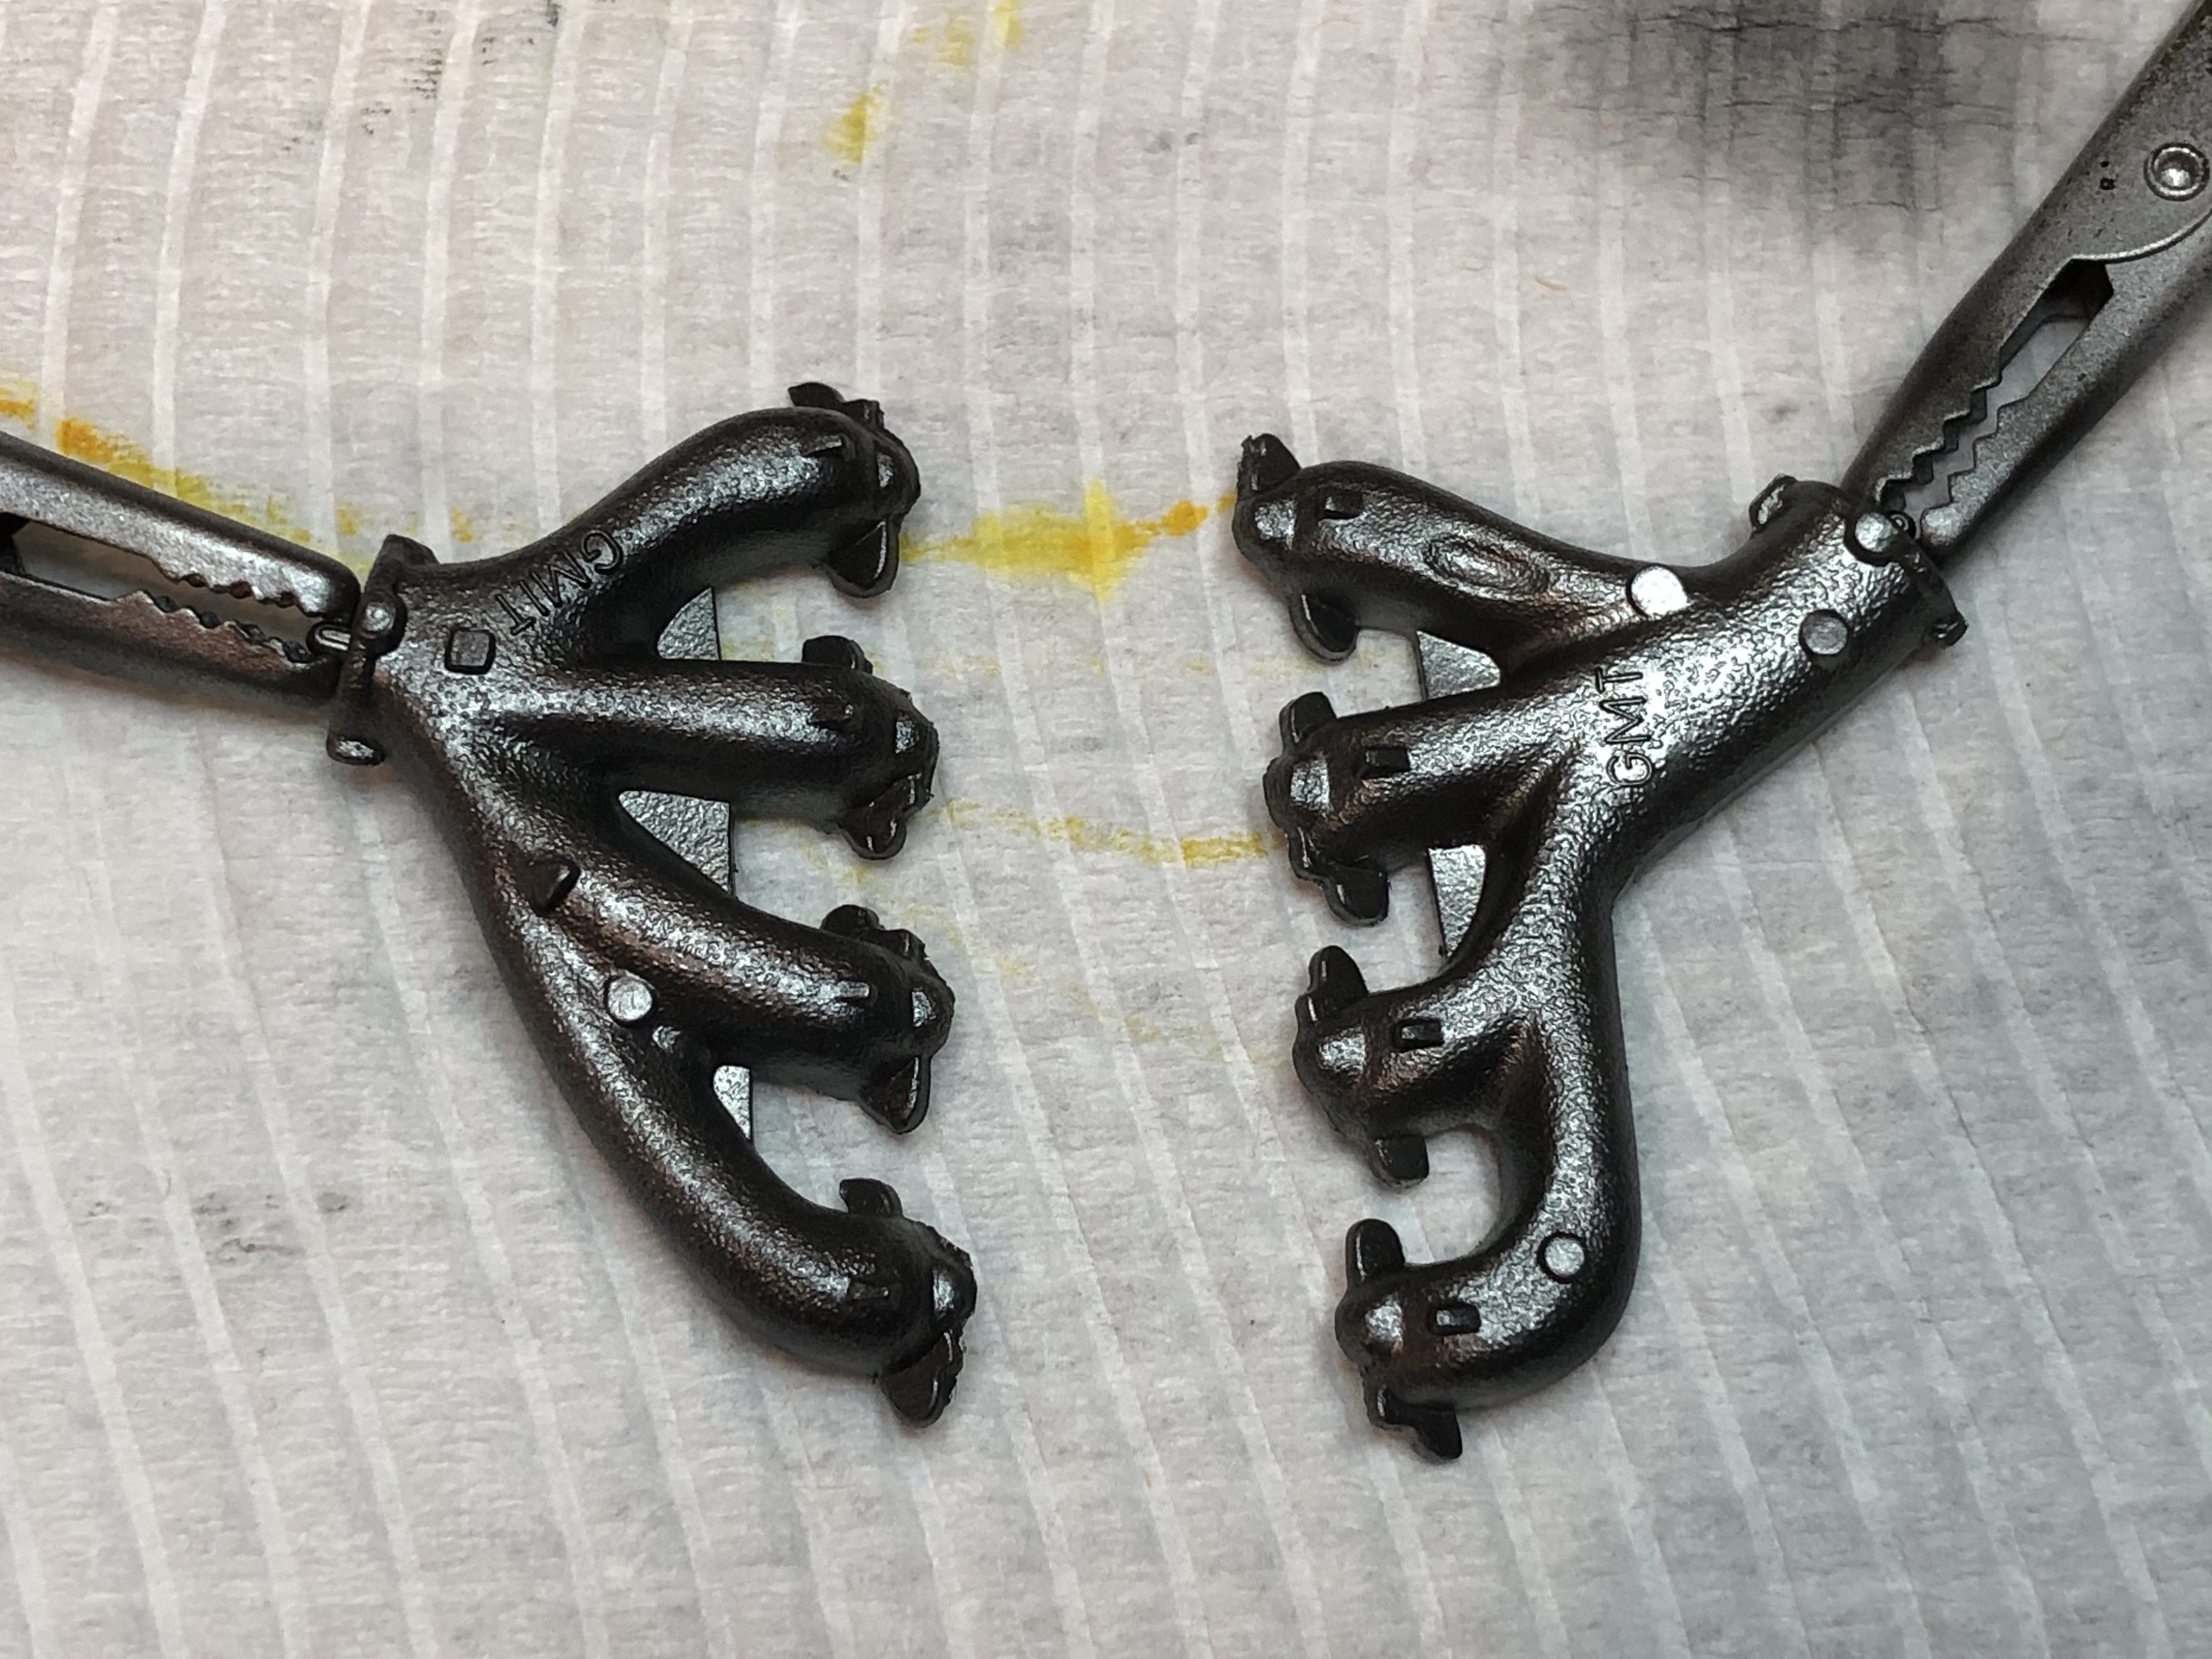
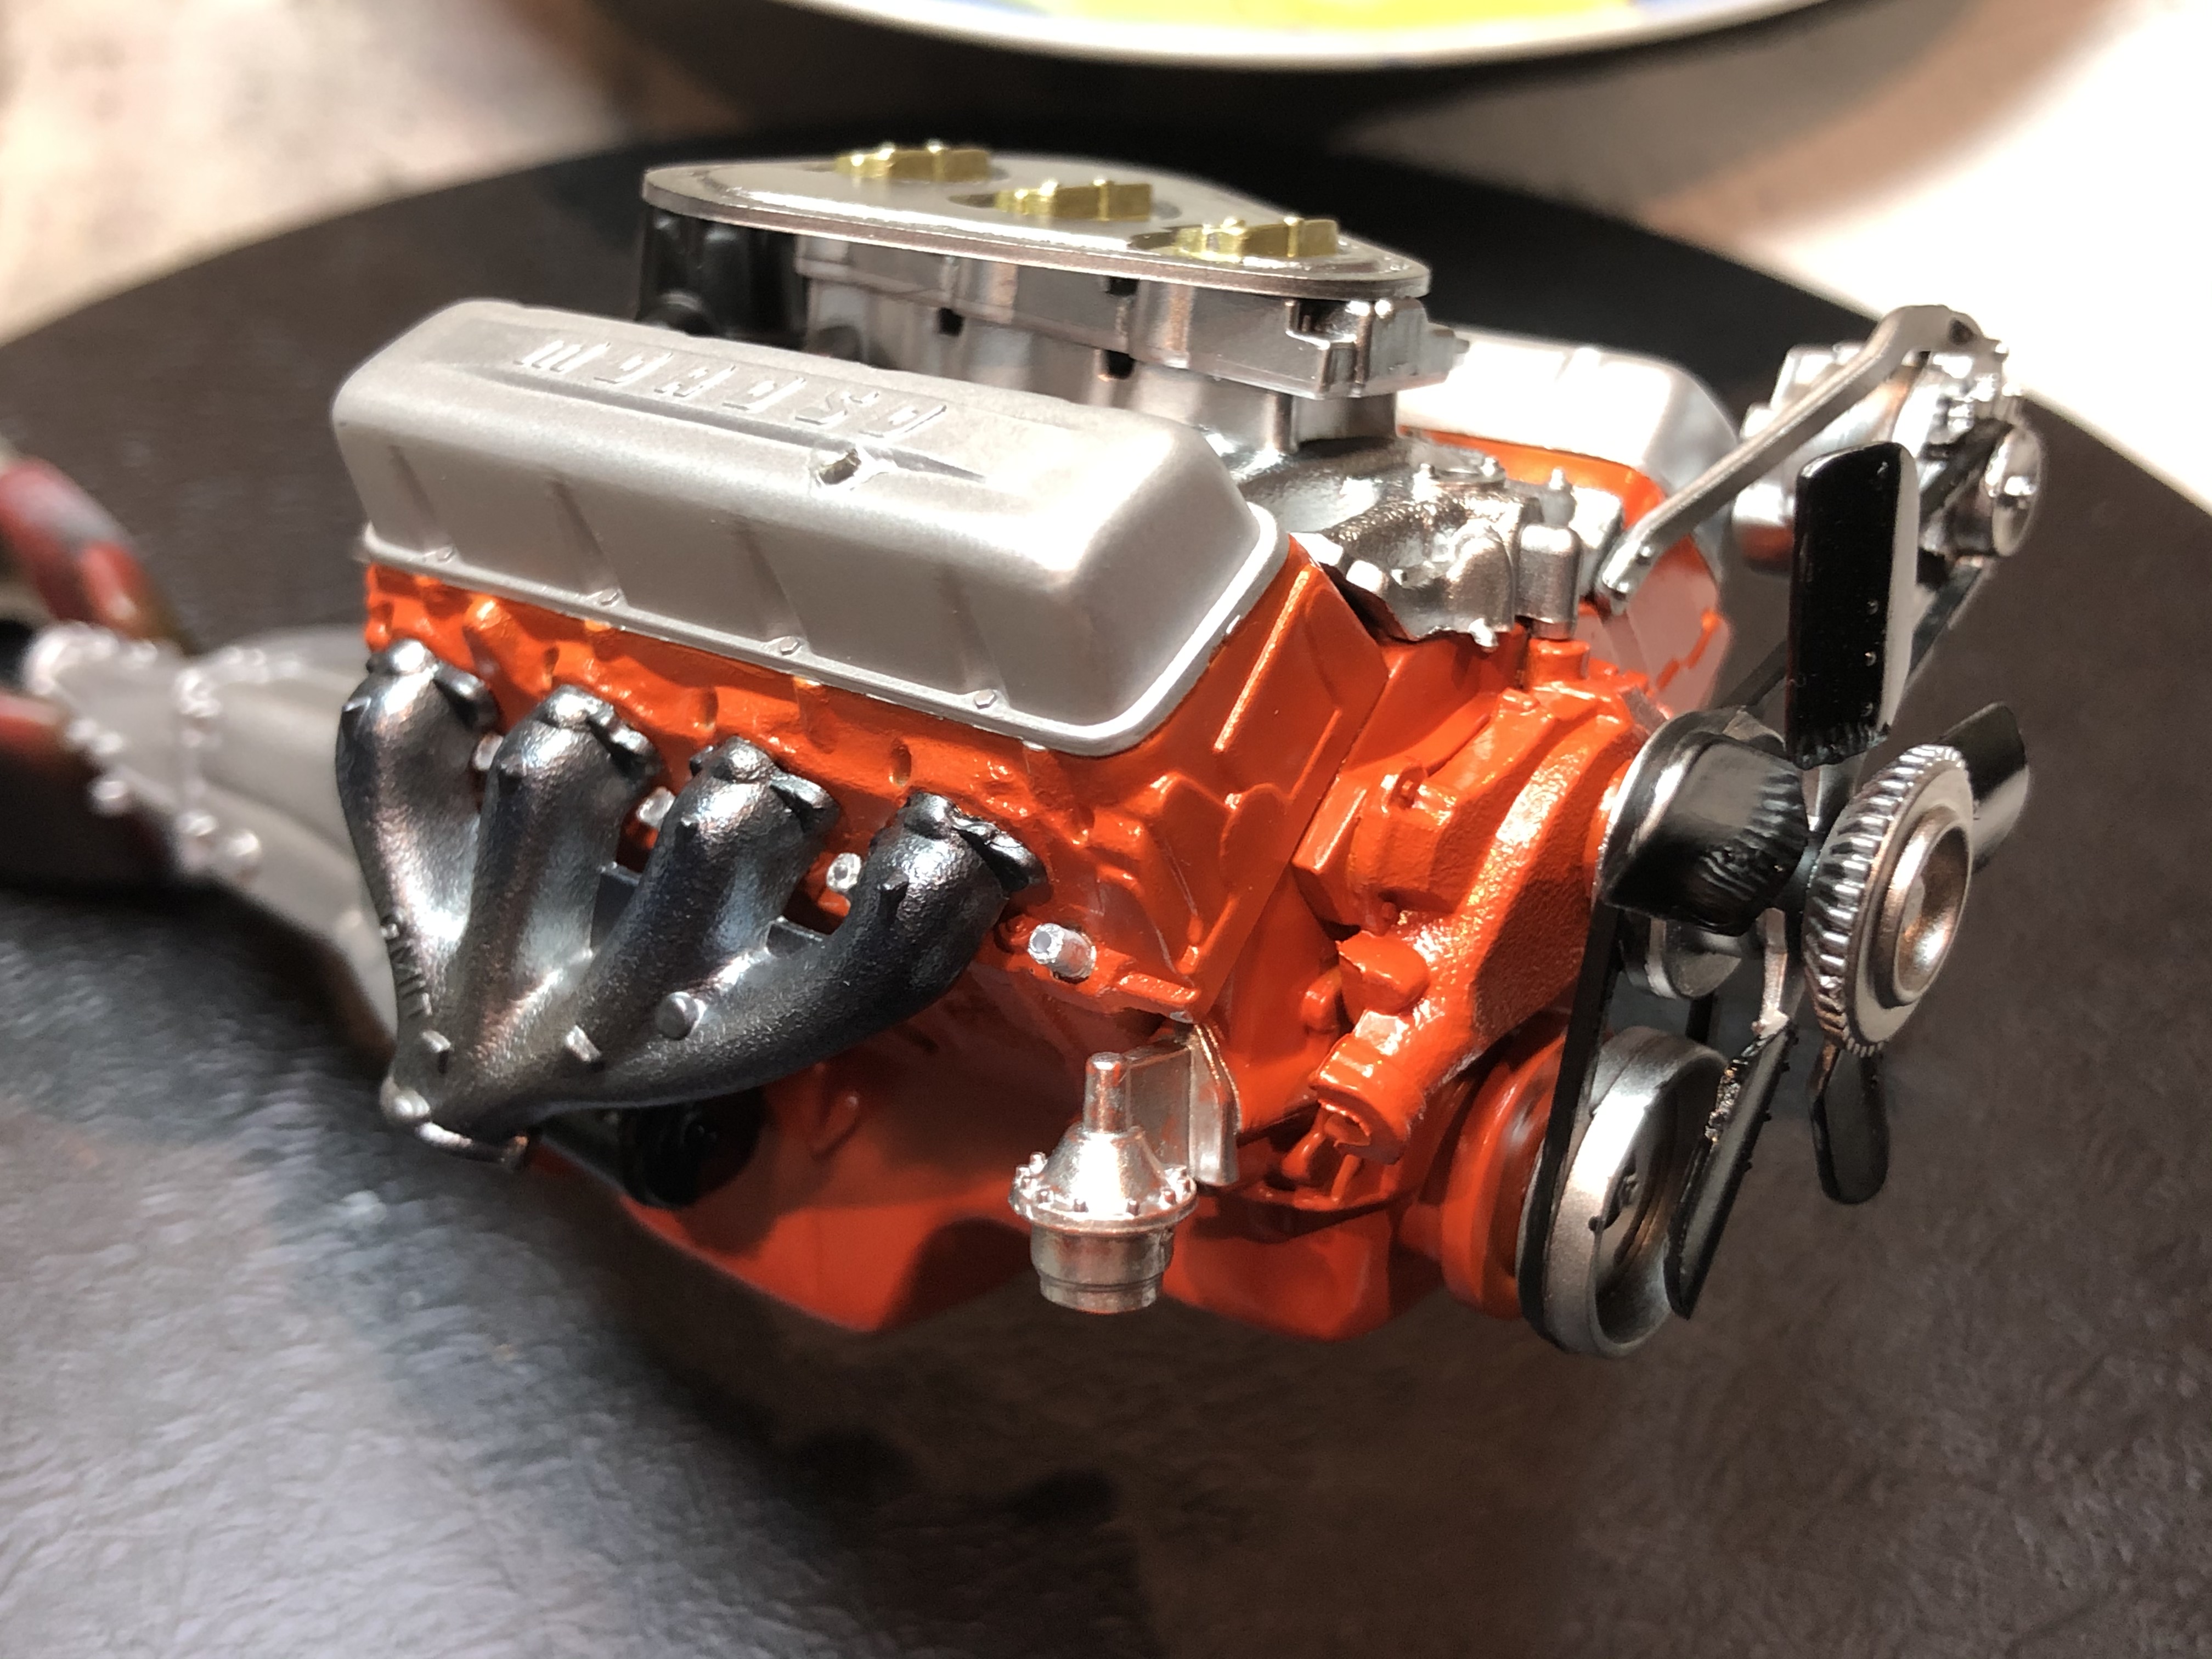
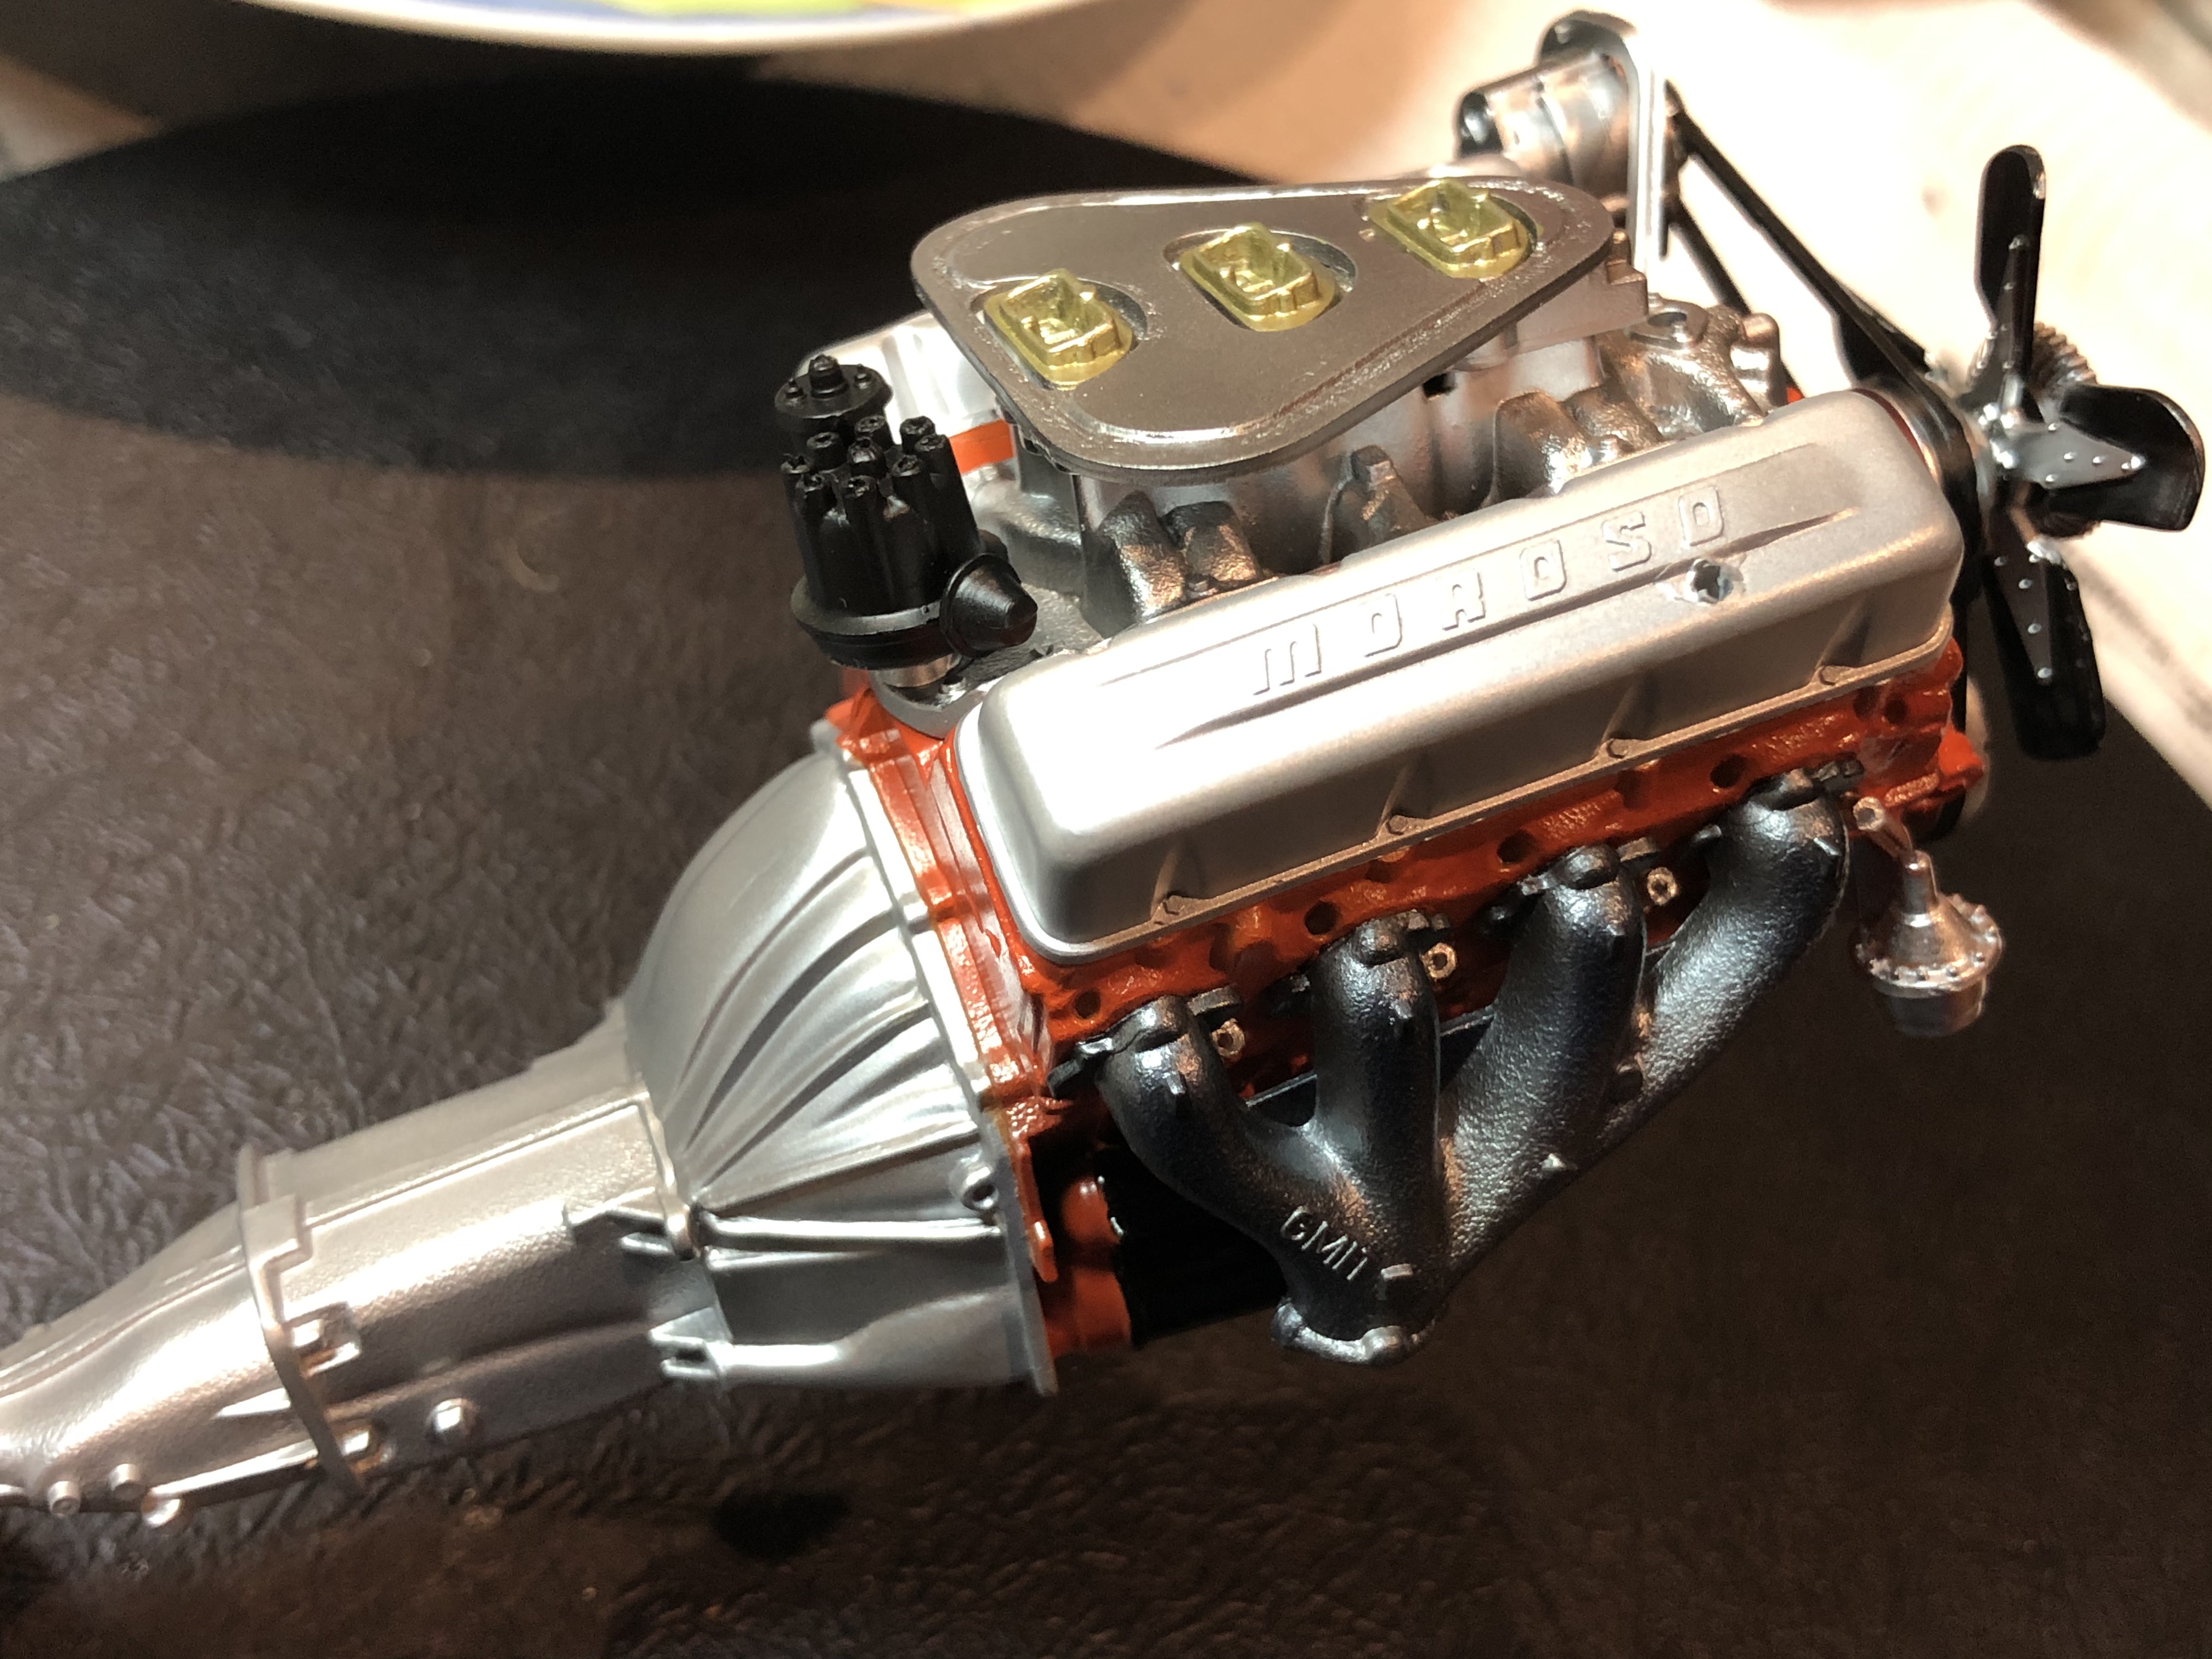
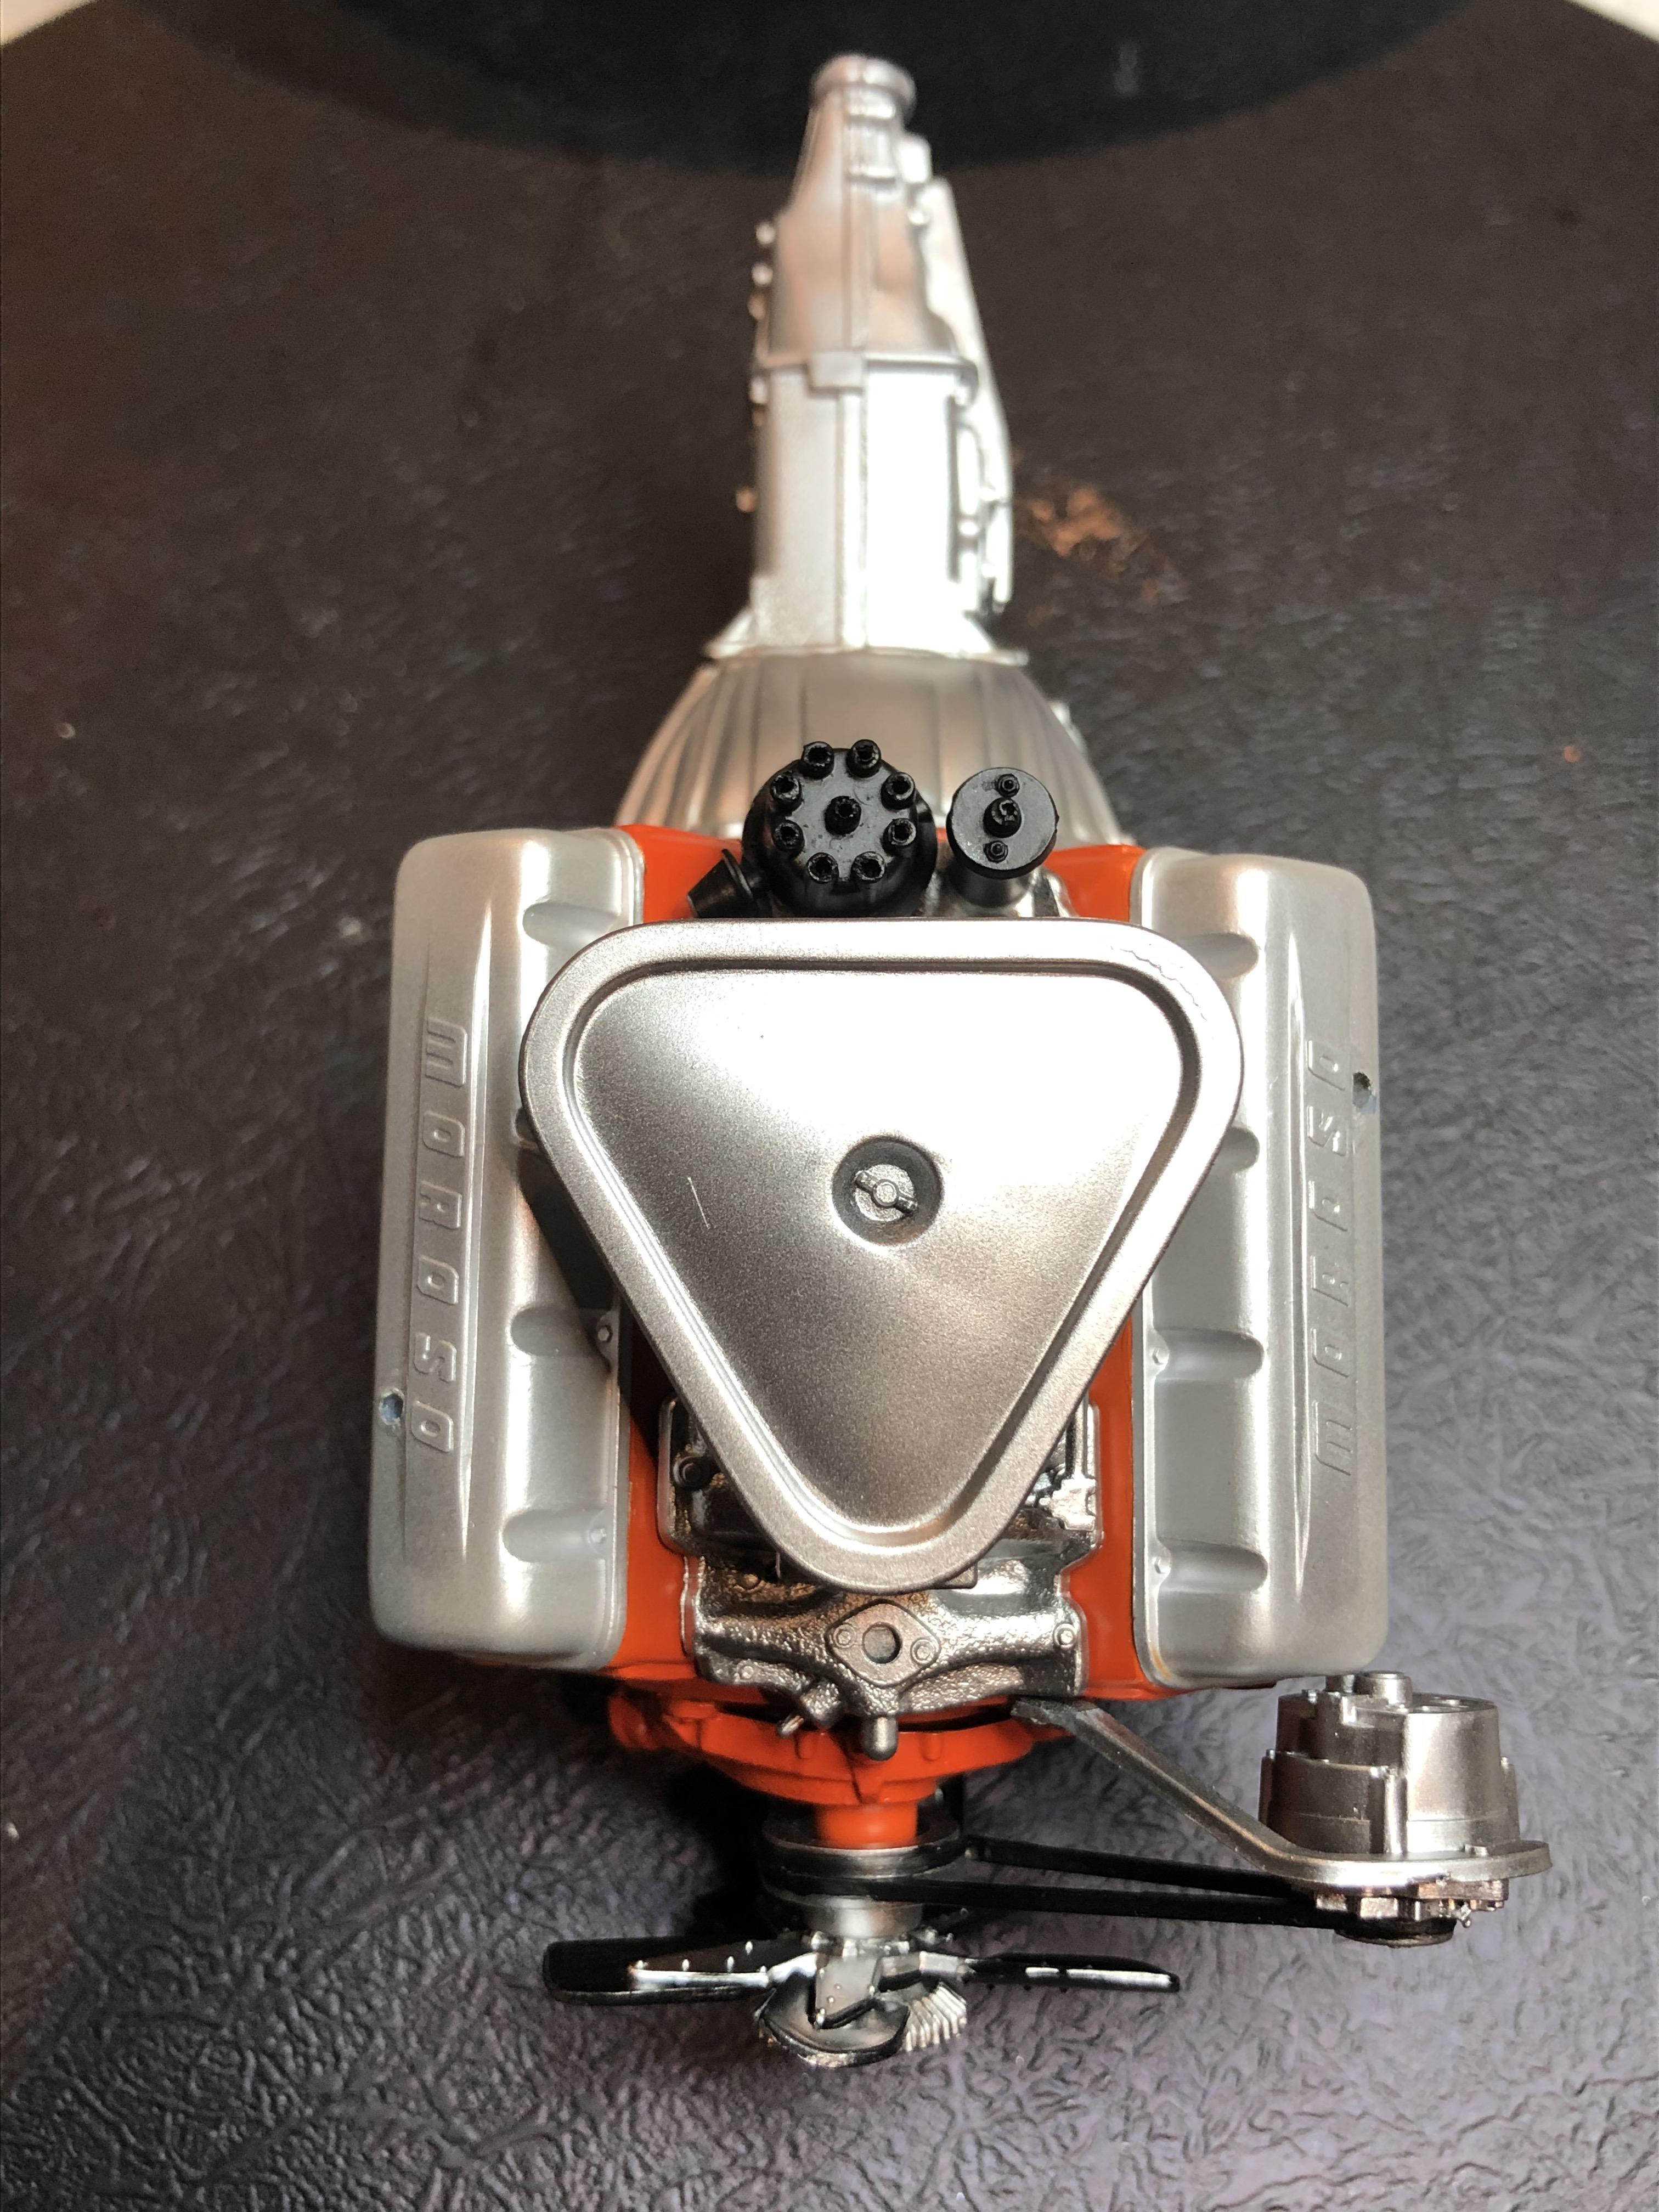
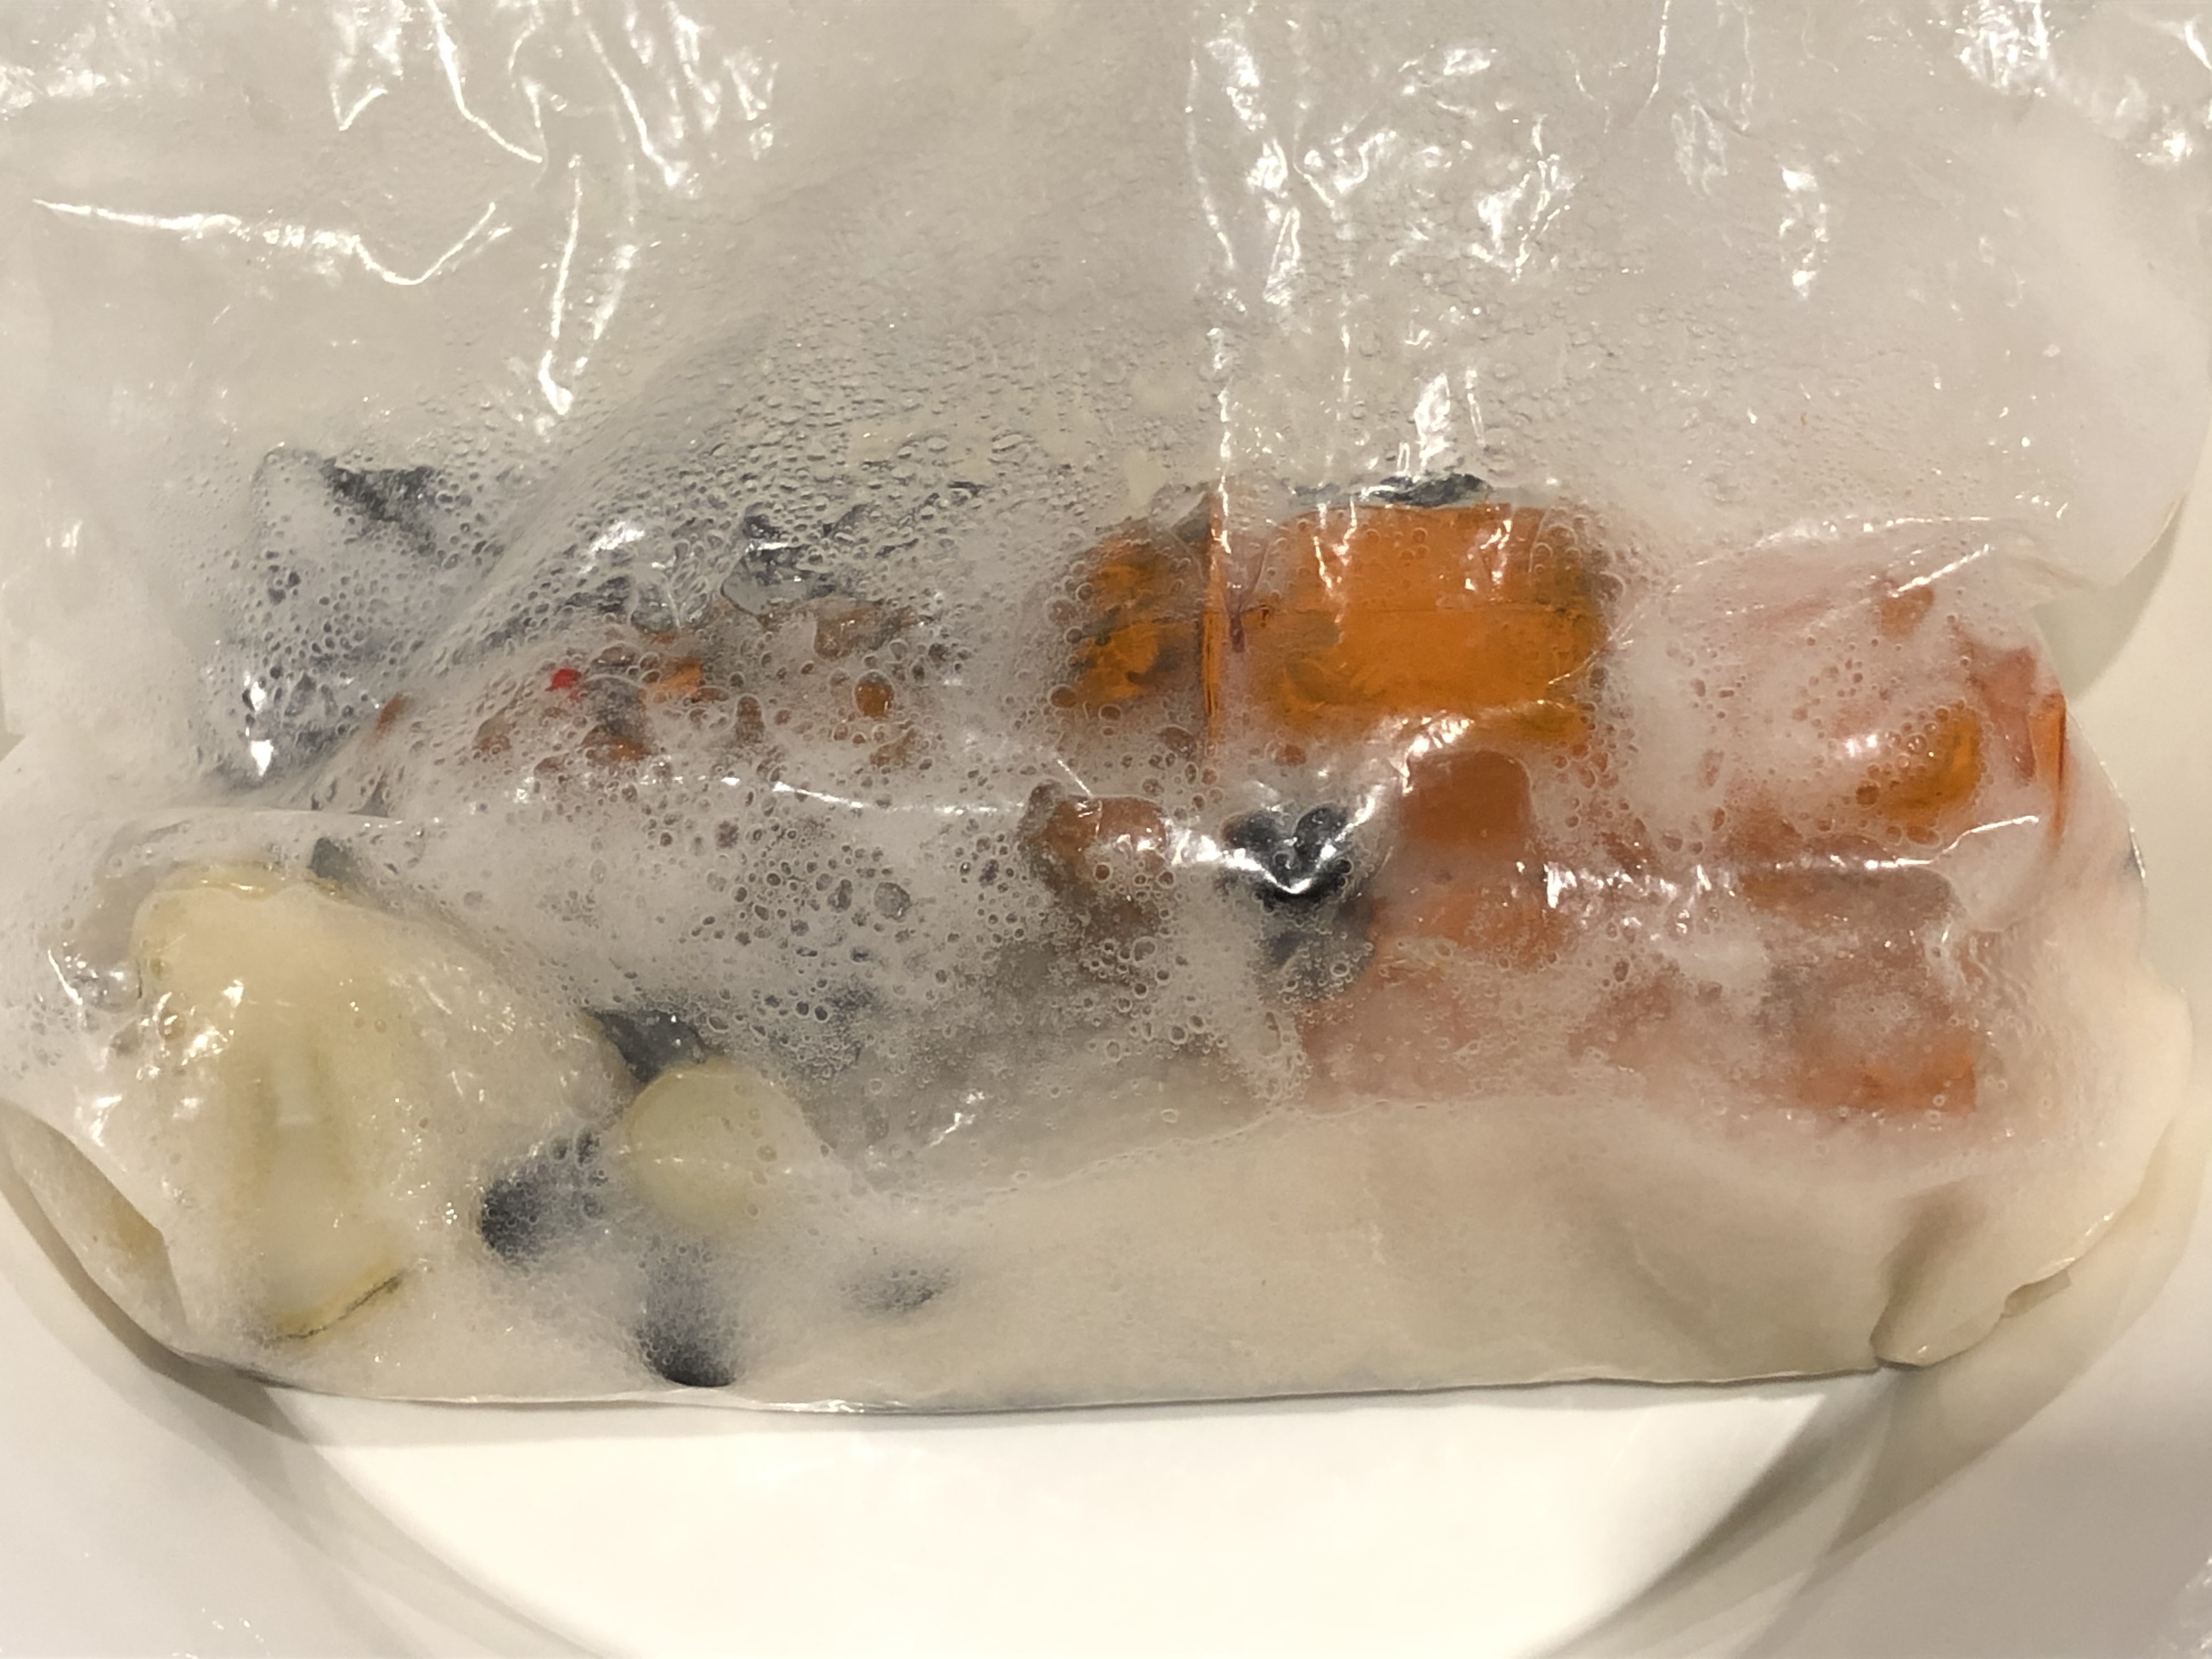
After a few minutes with a razor saw and Xacto -


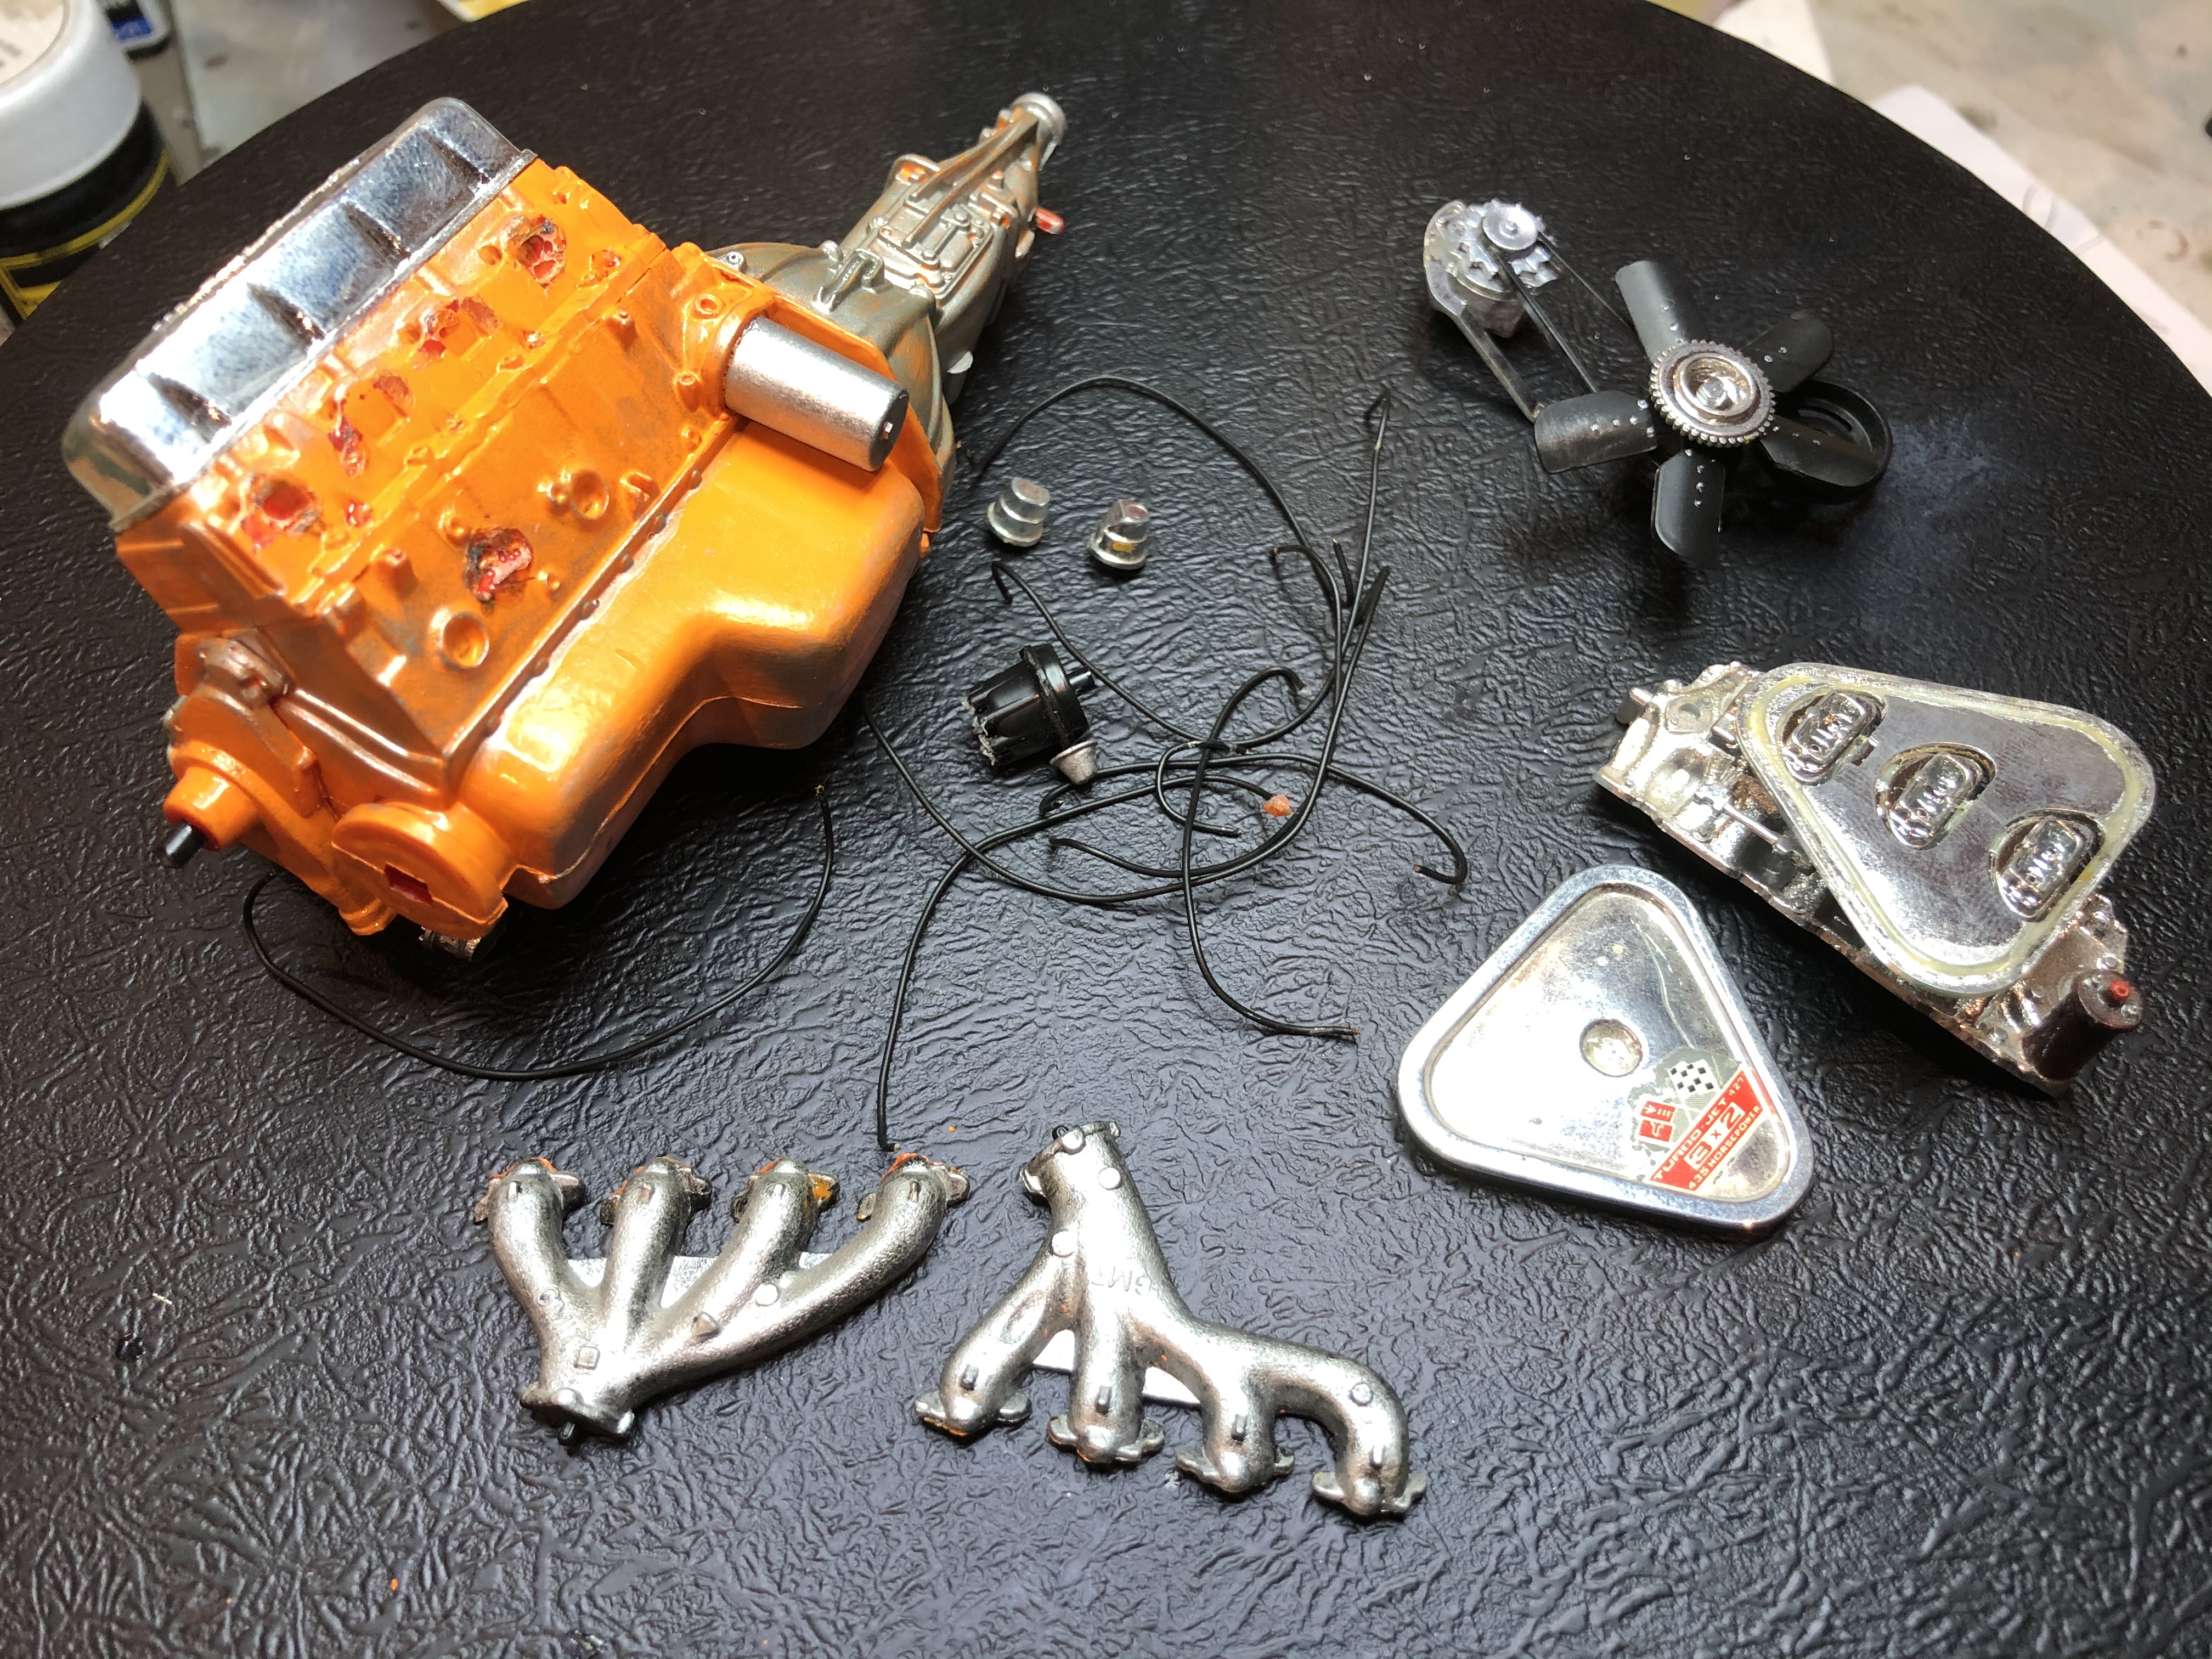
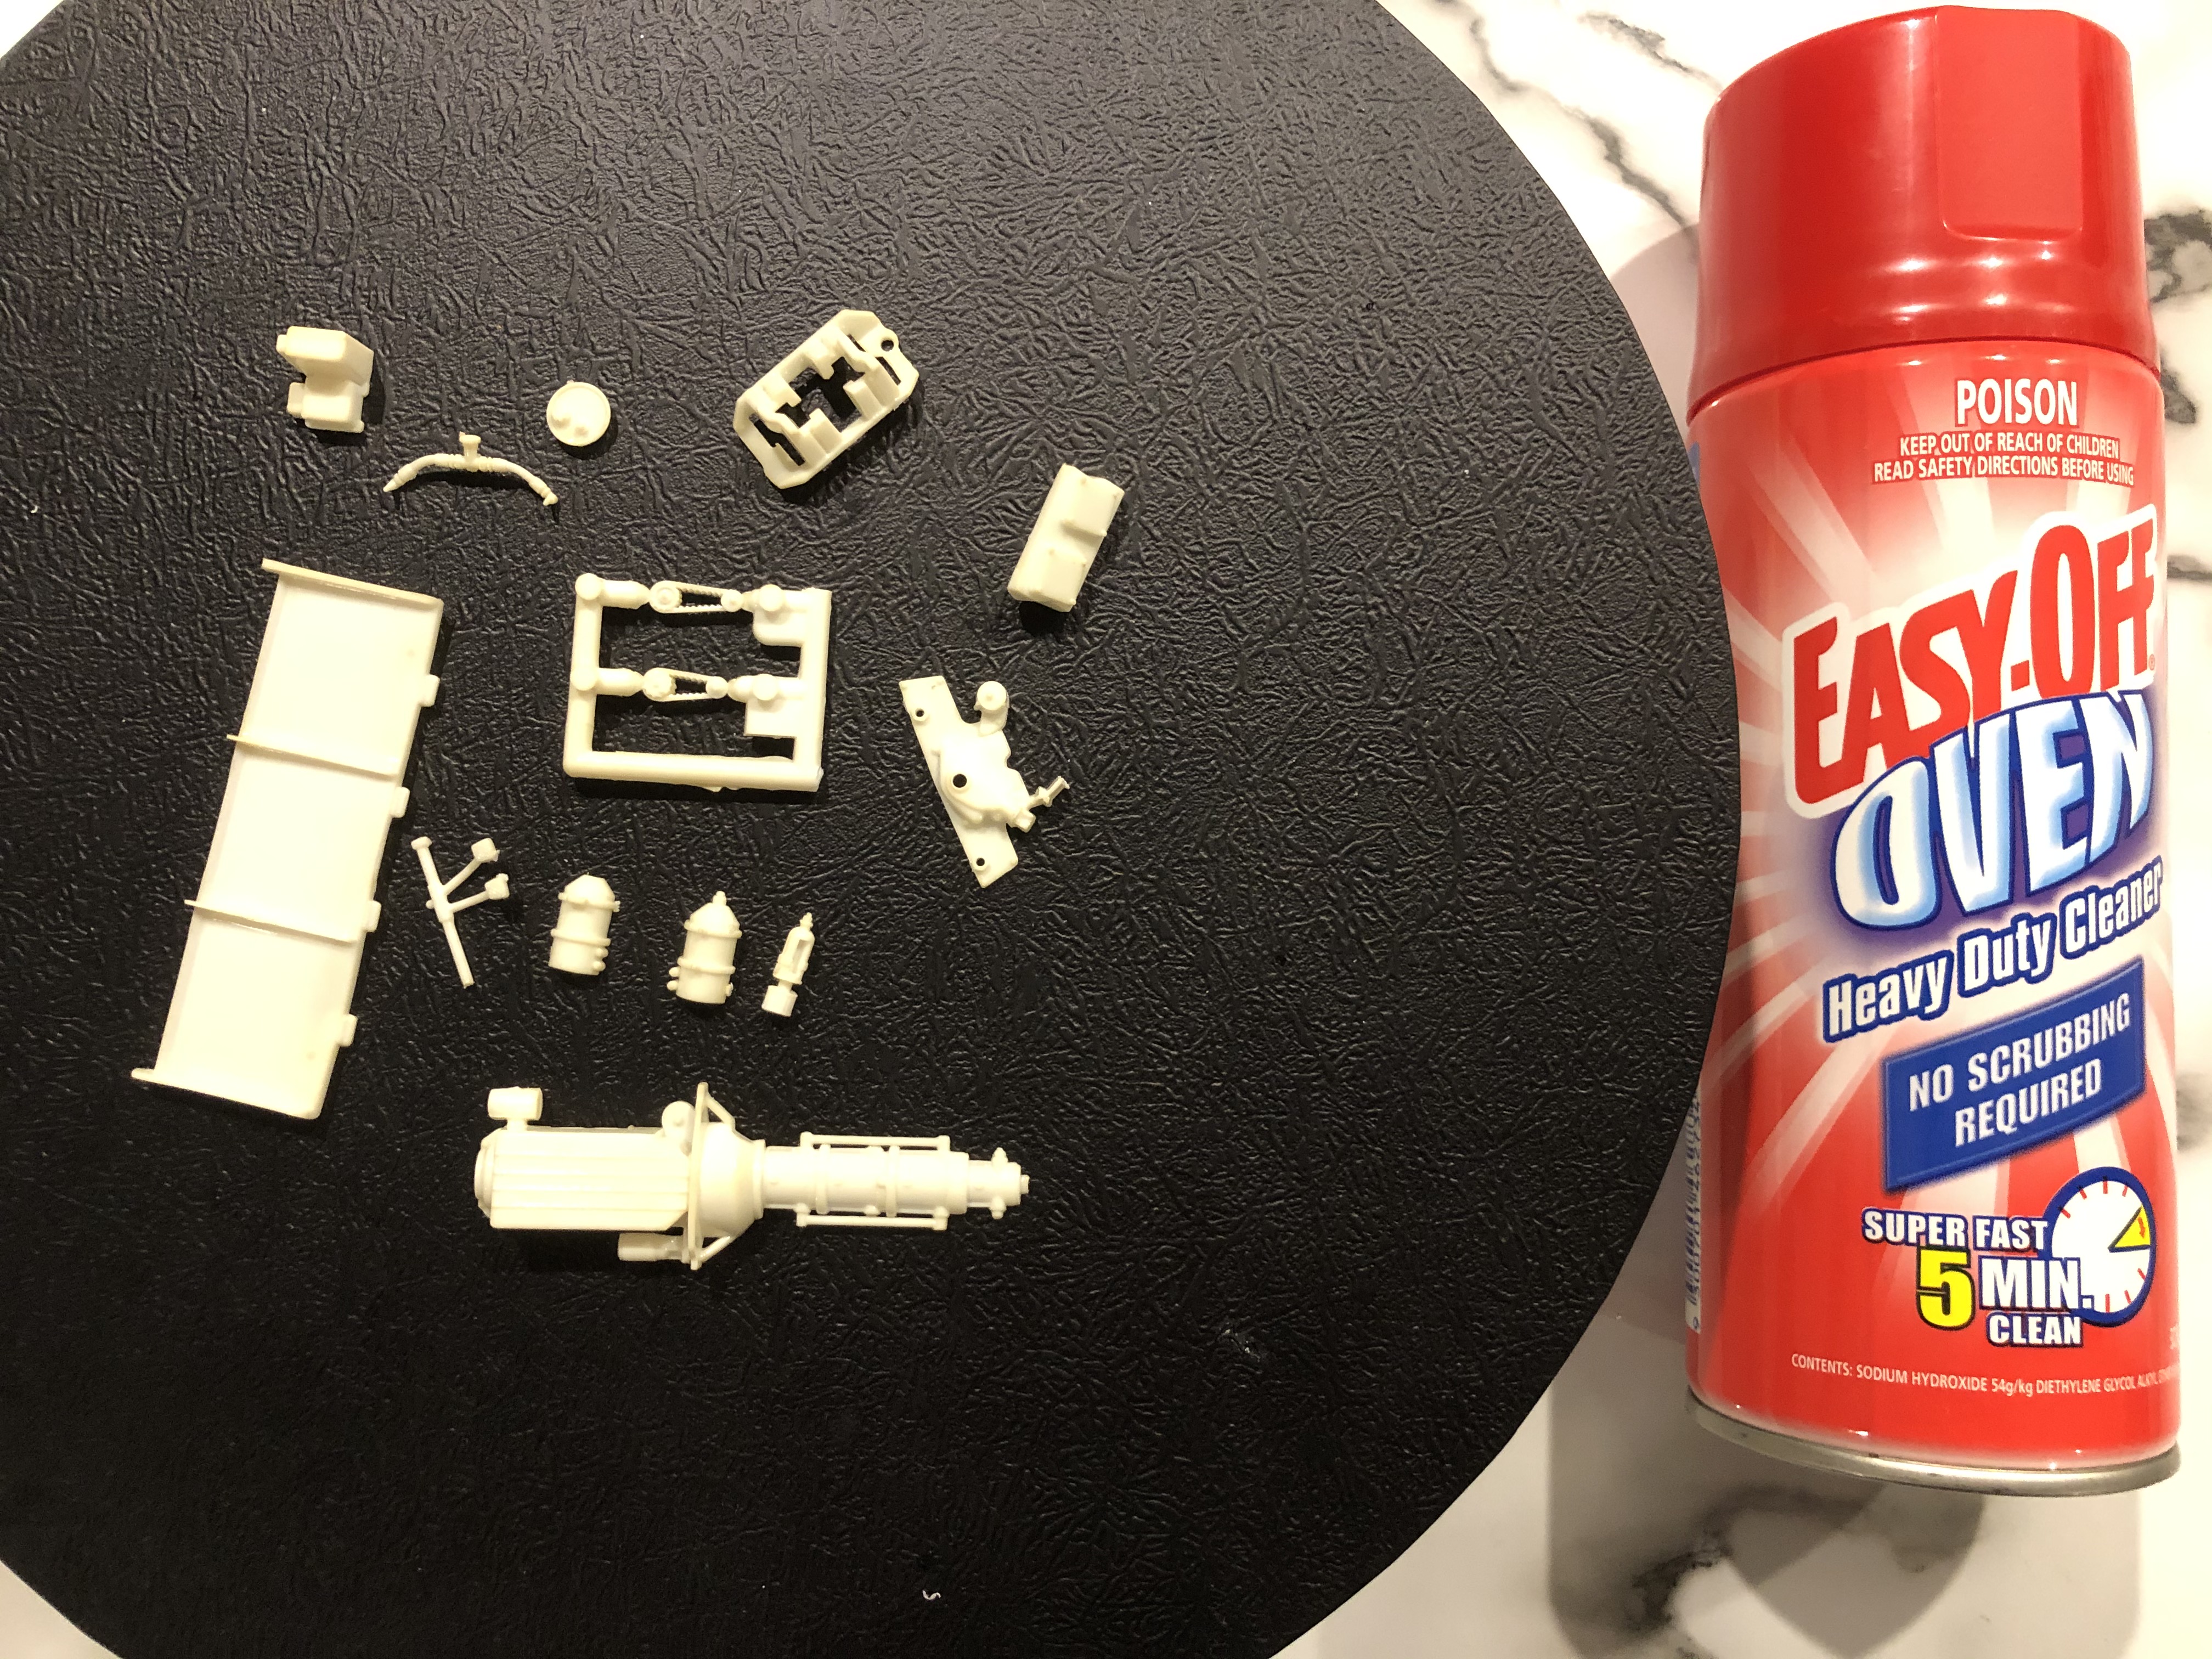
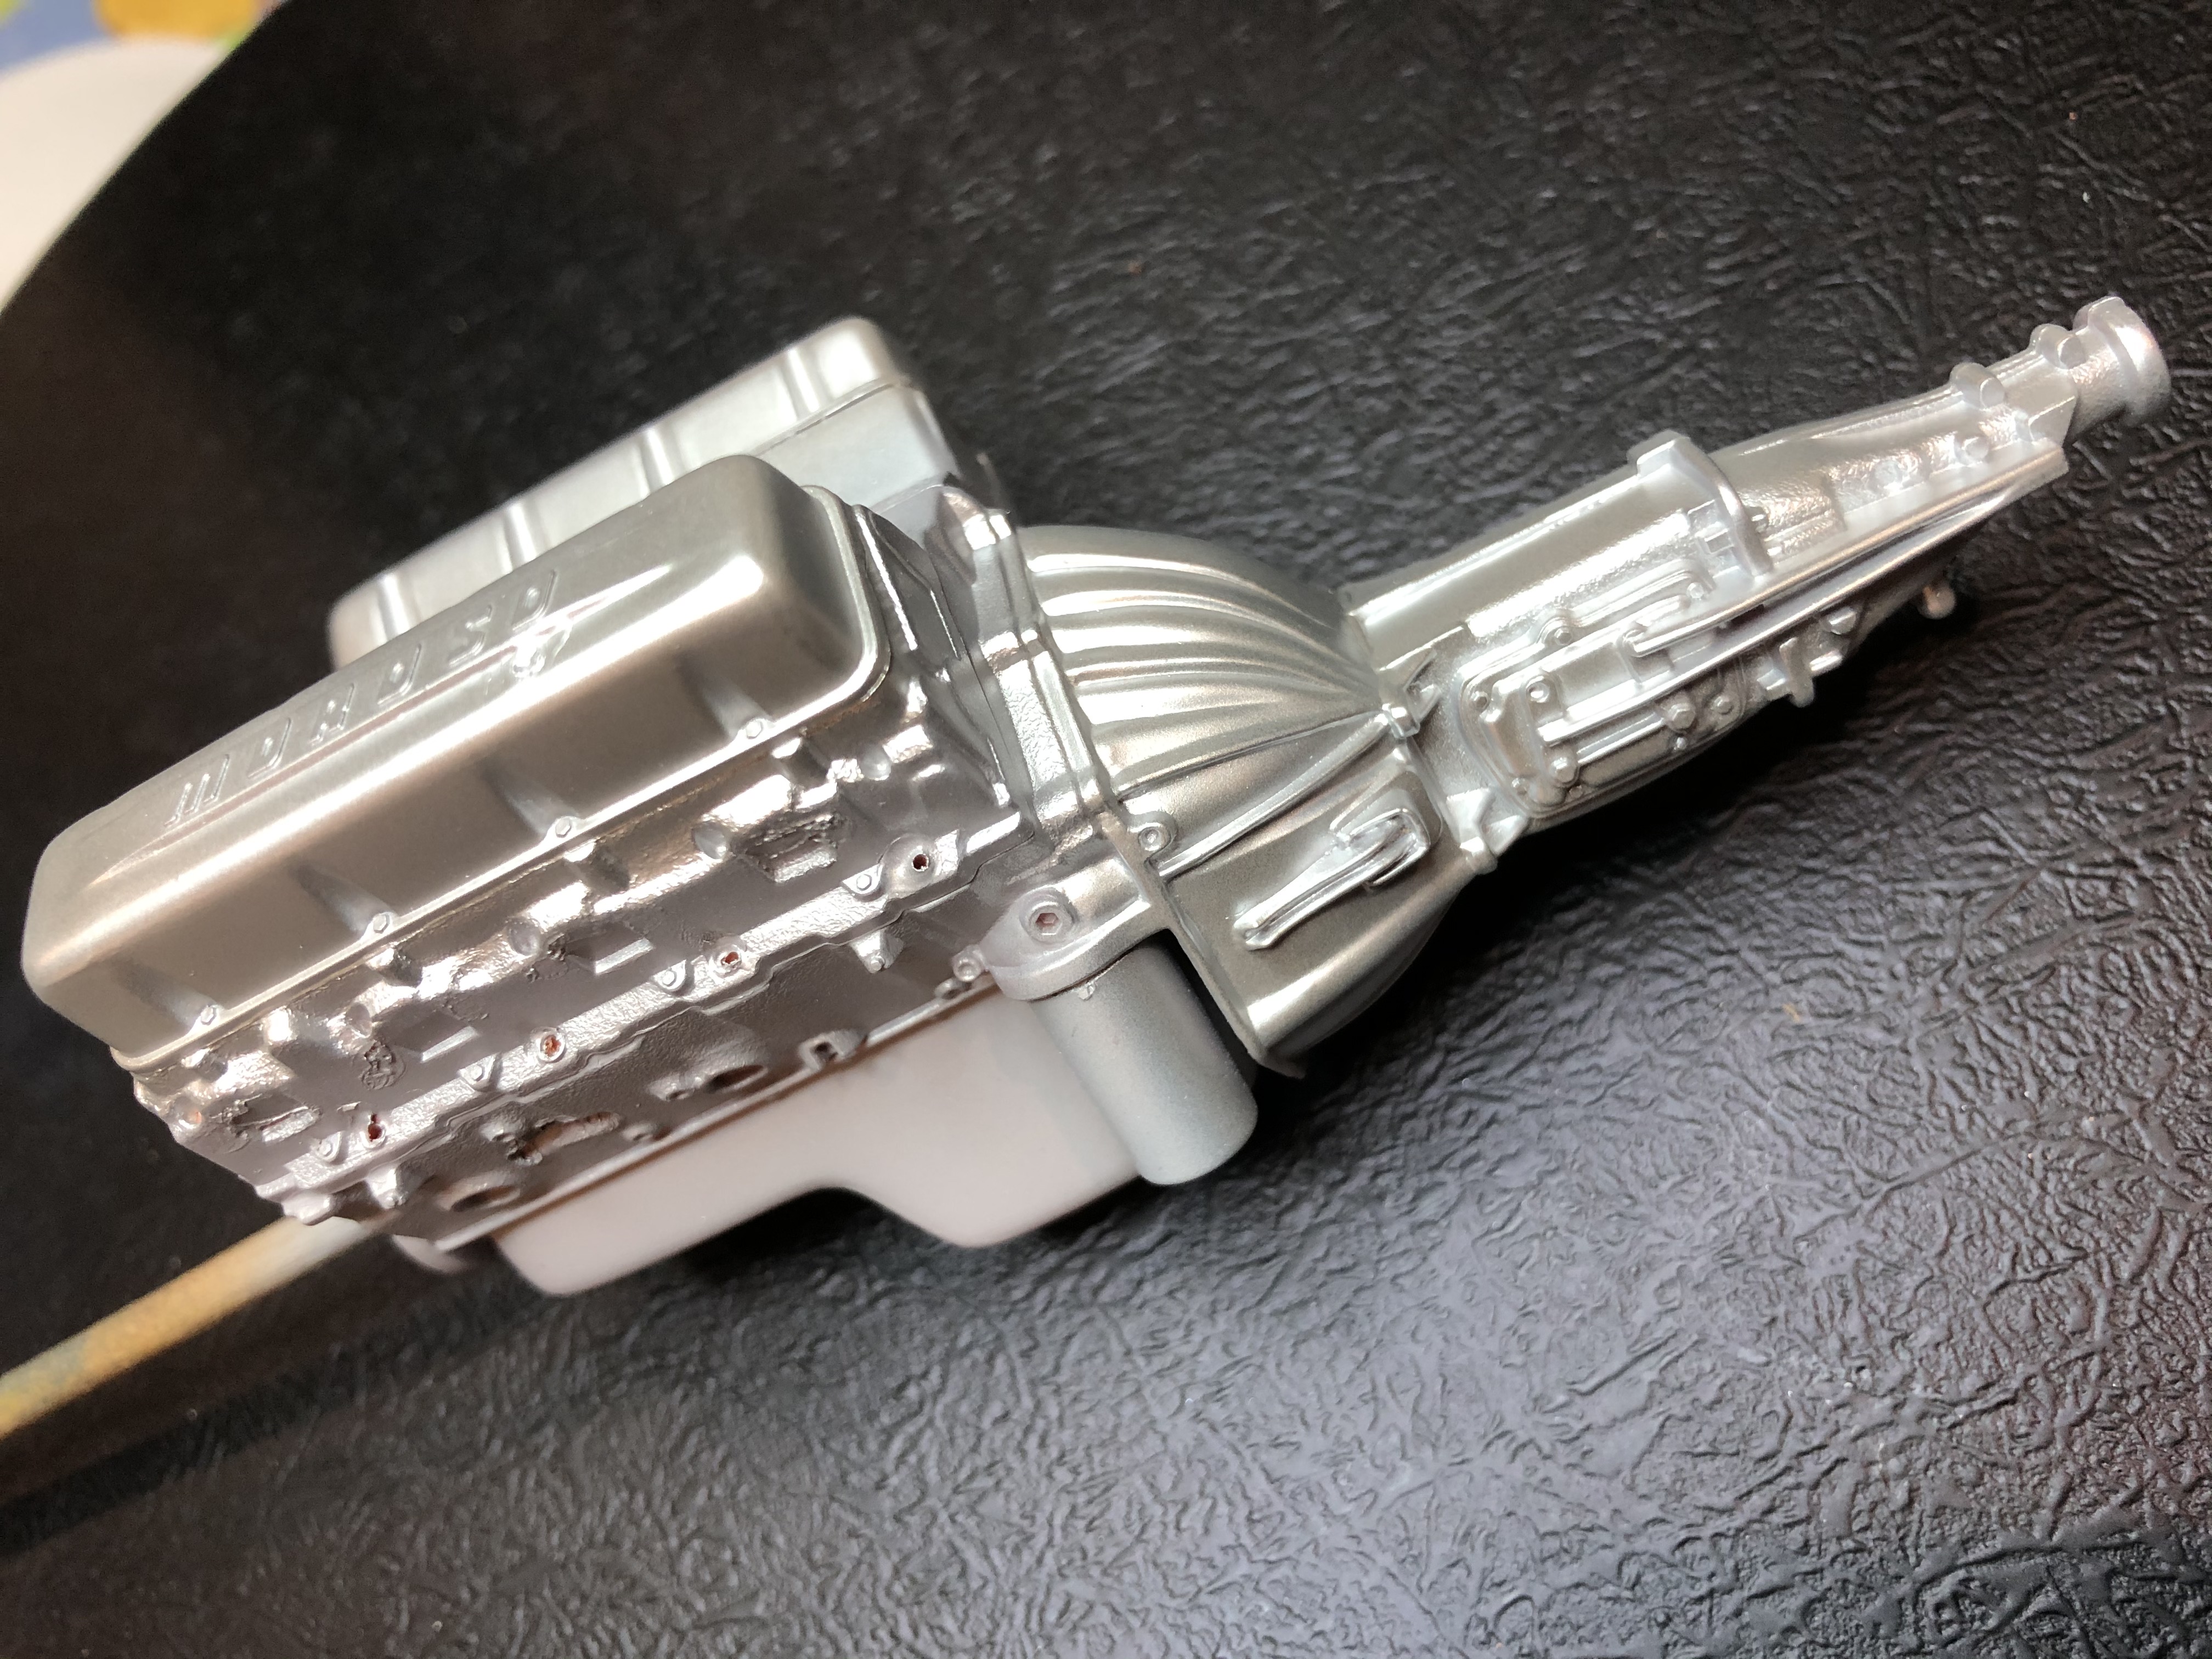
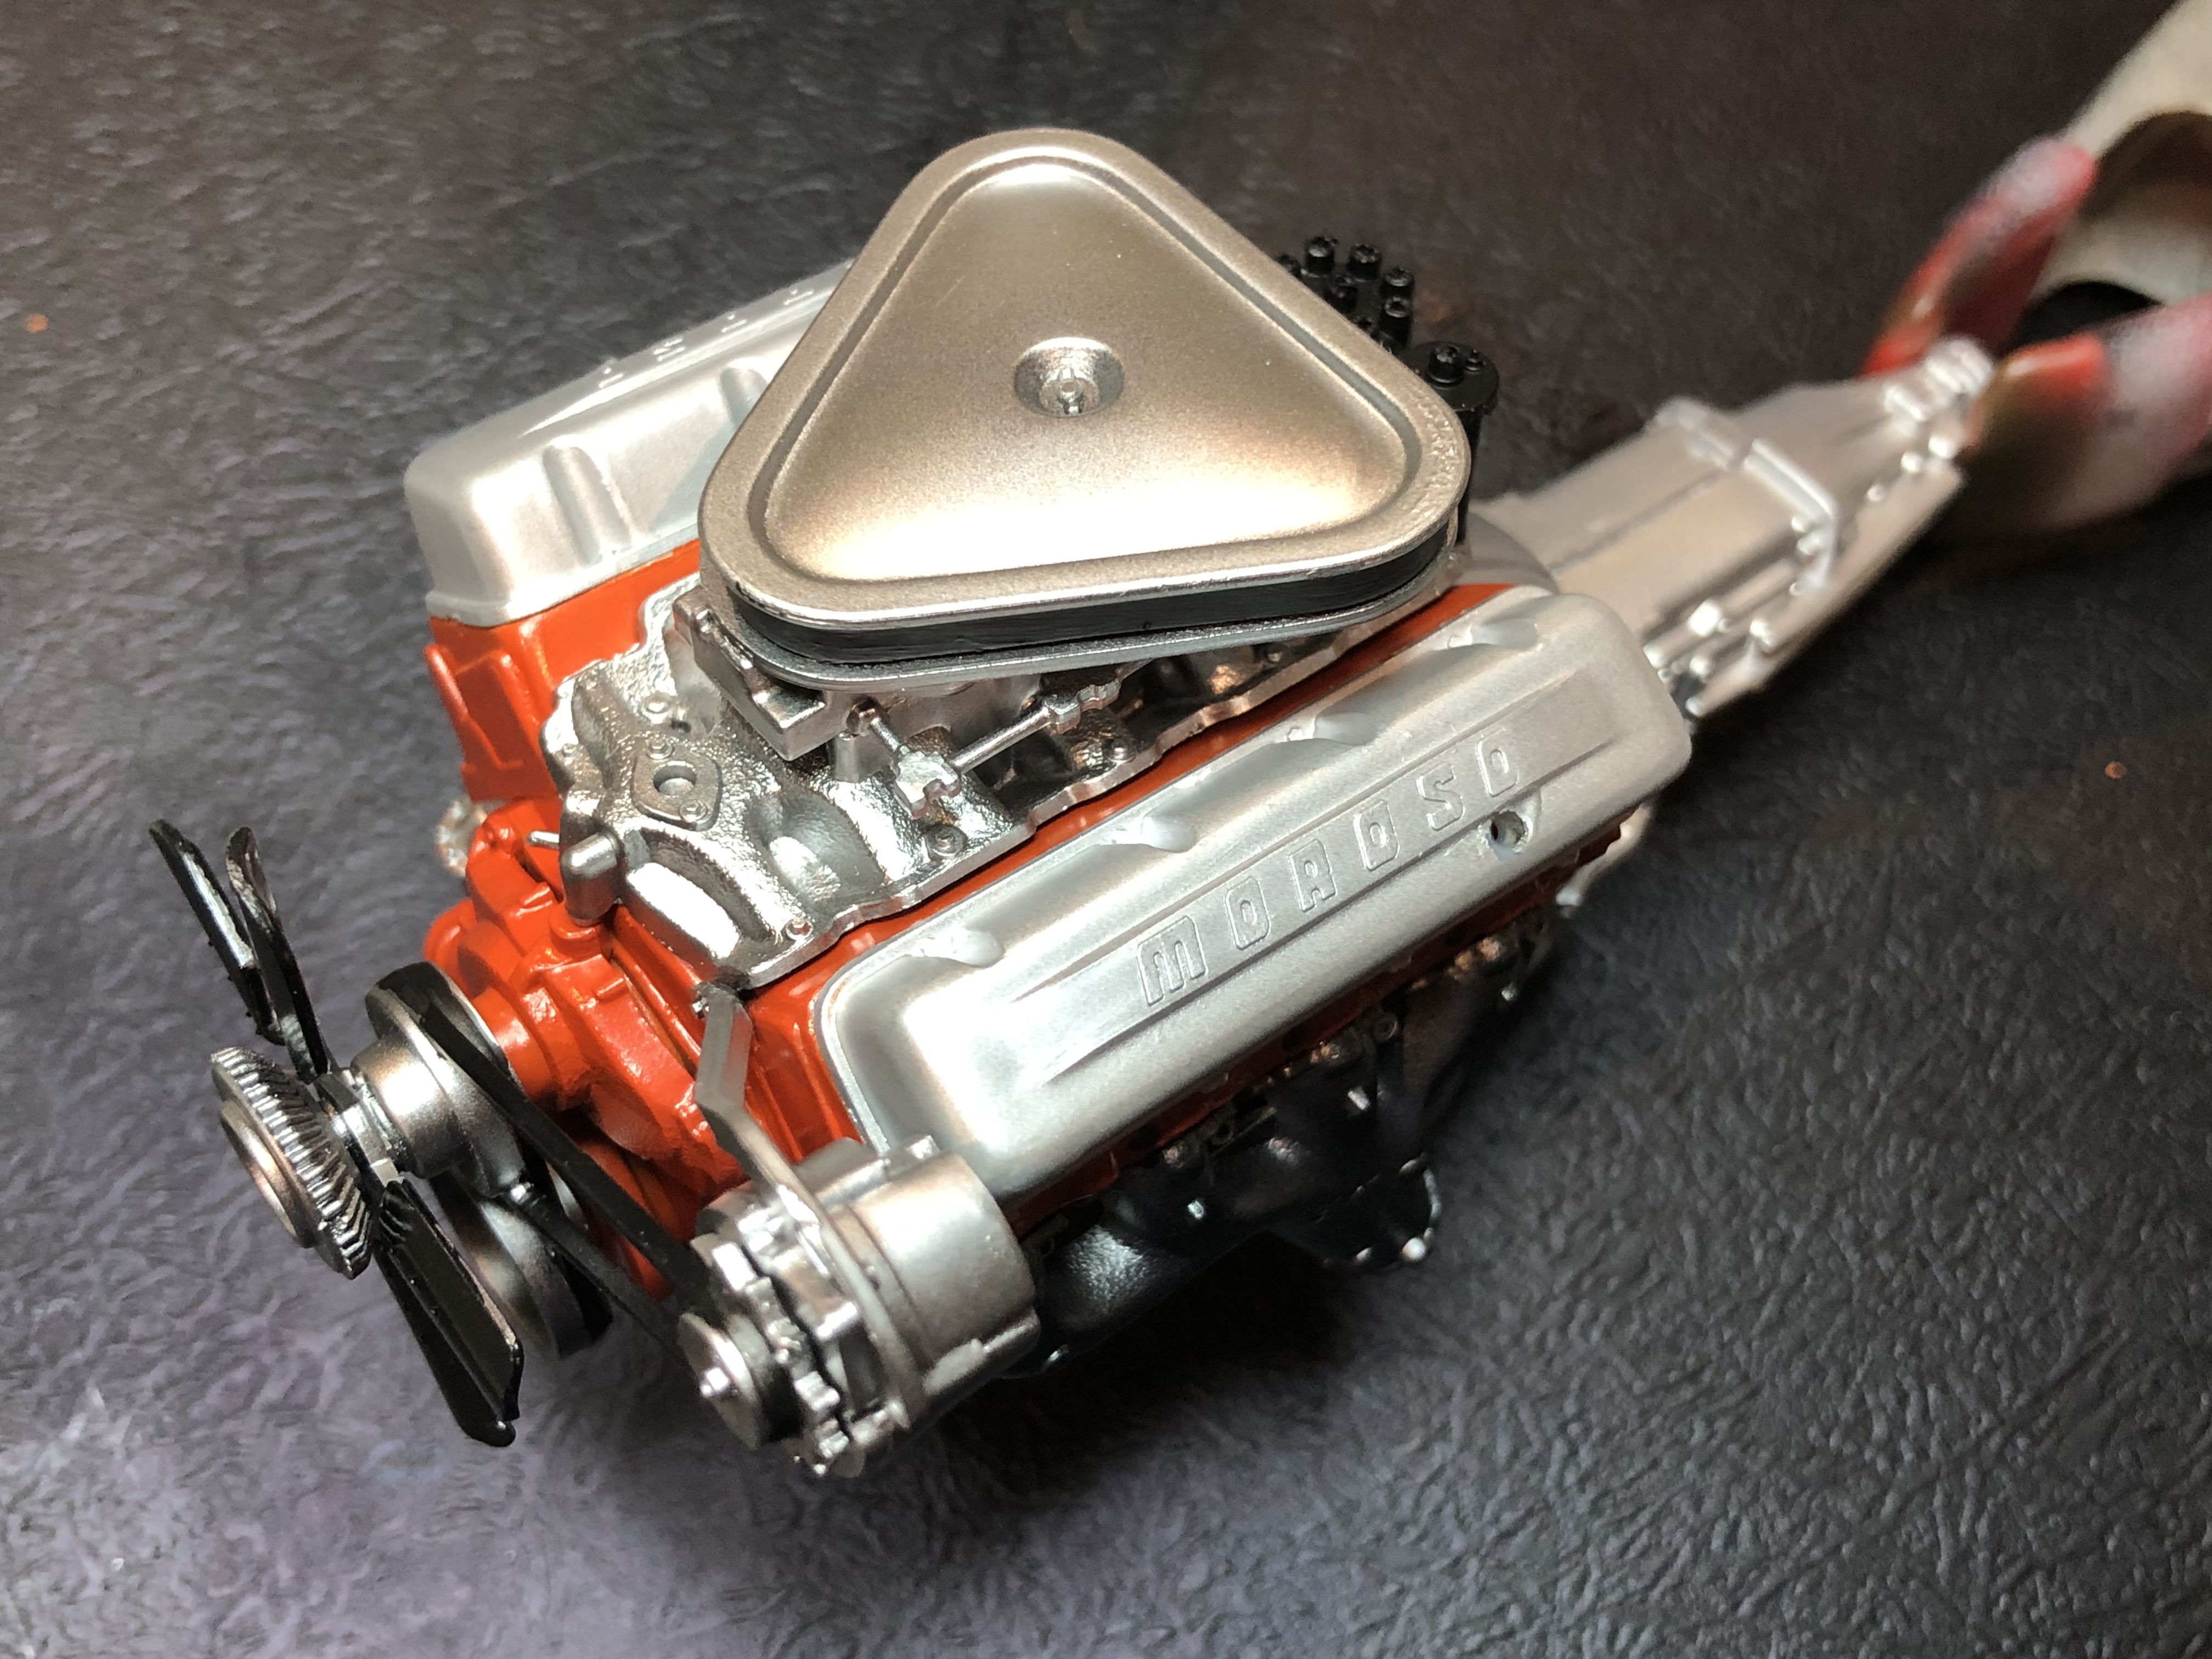
And where it resides now for a day or so -

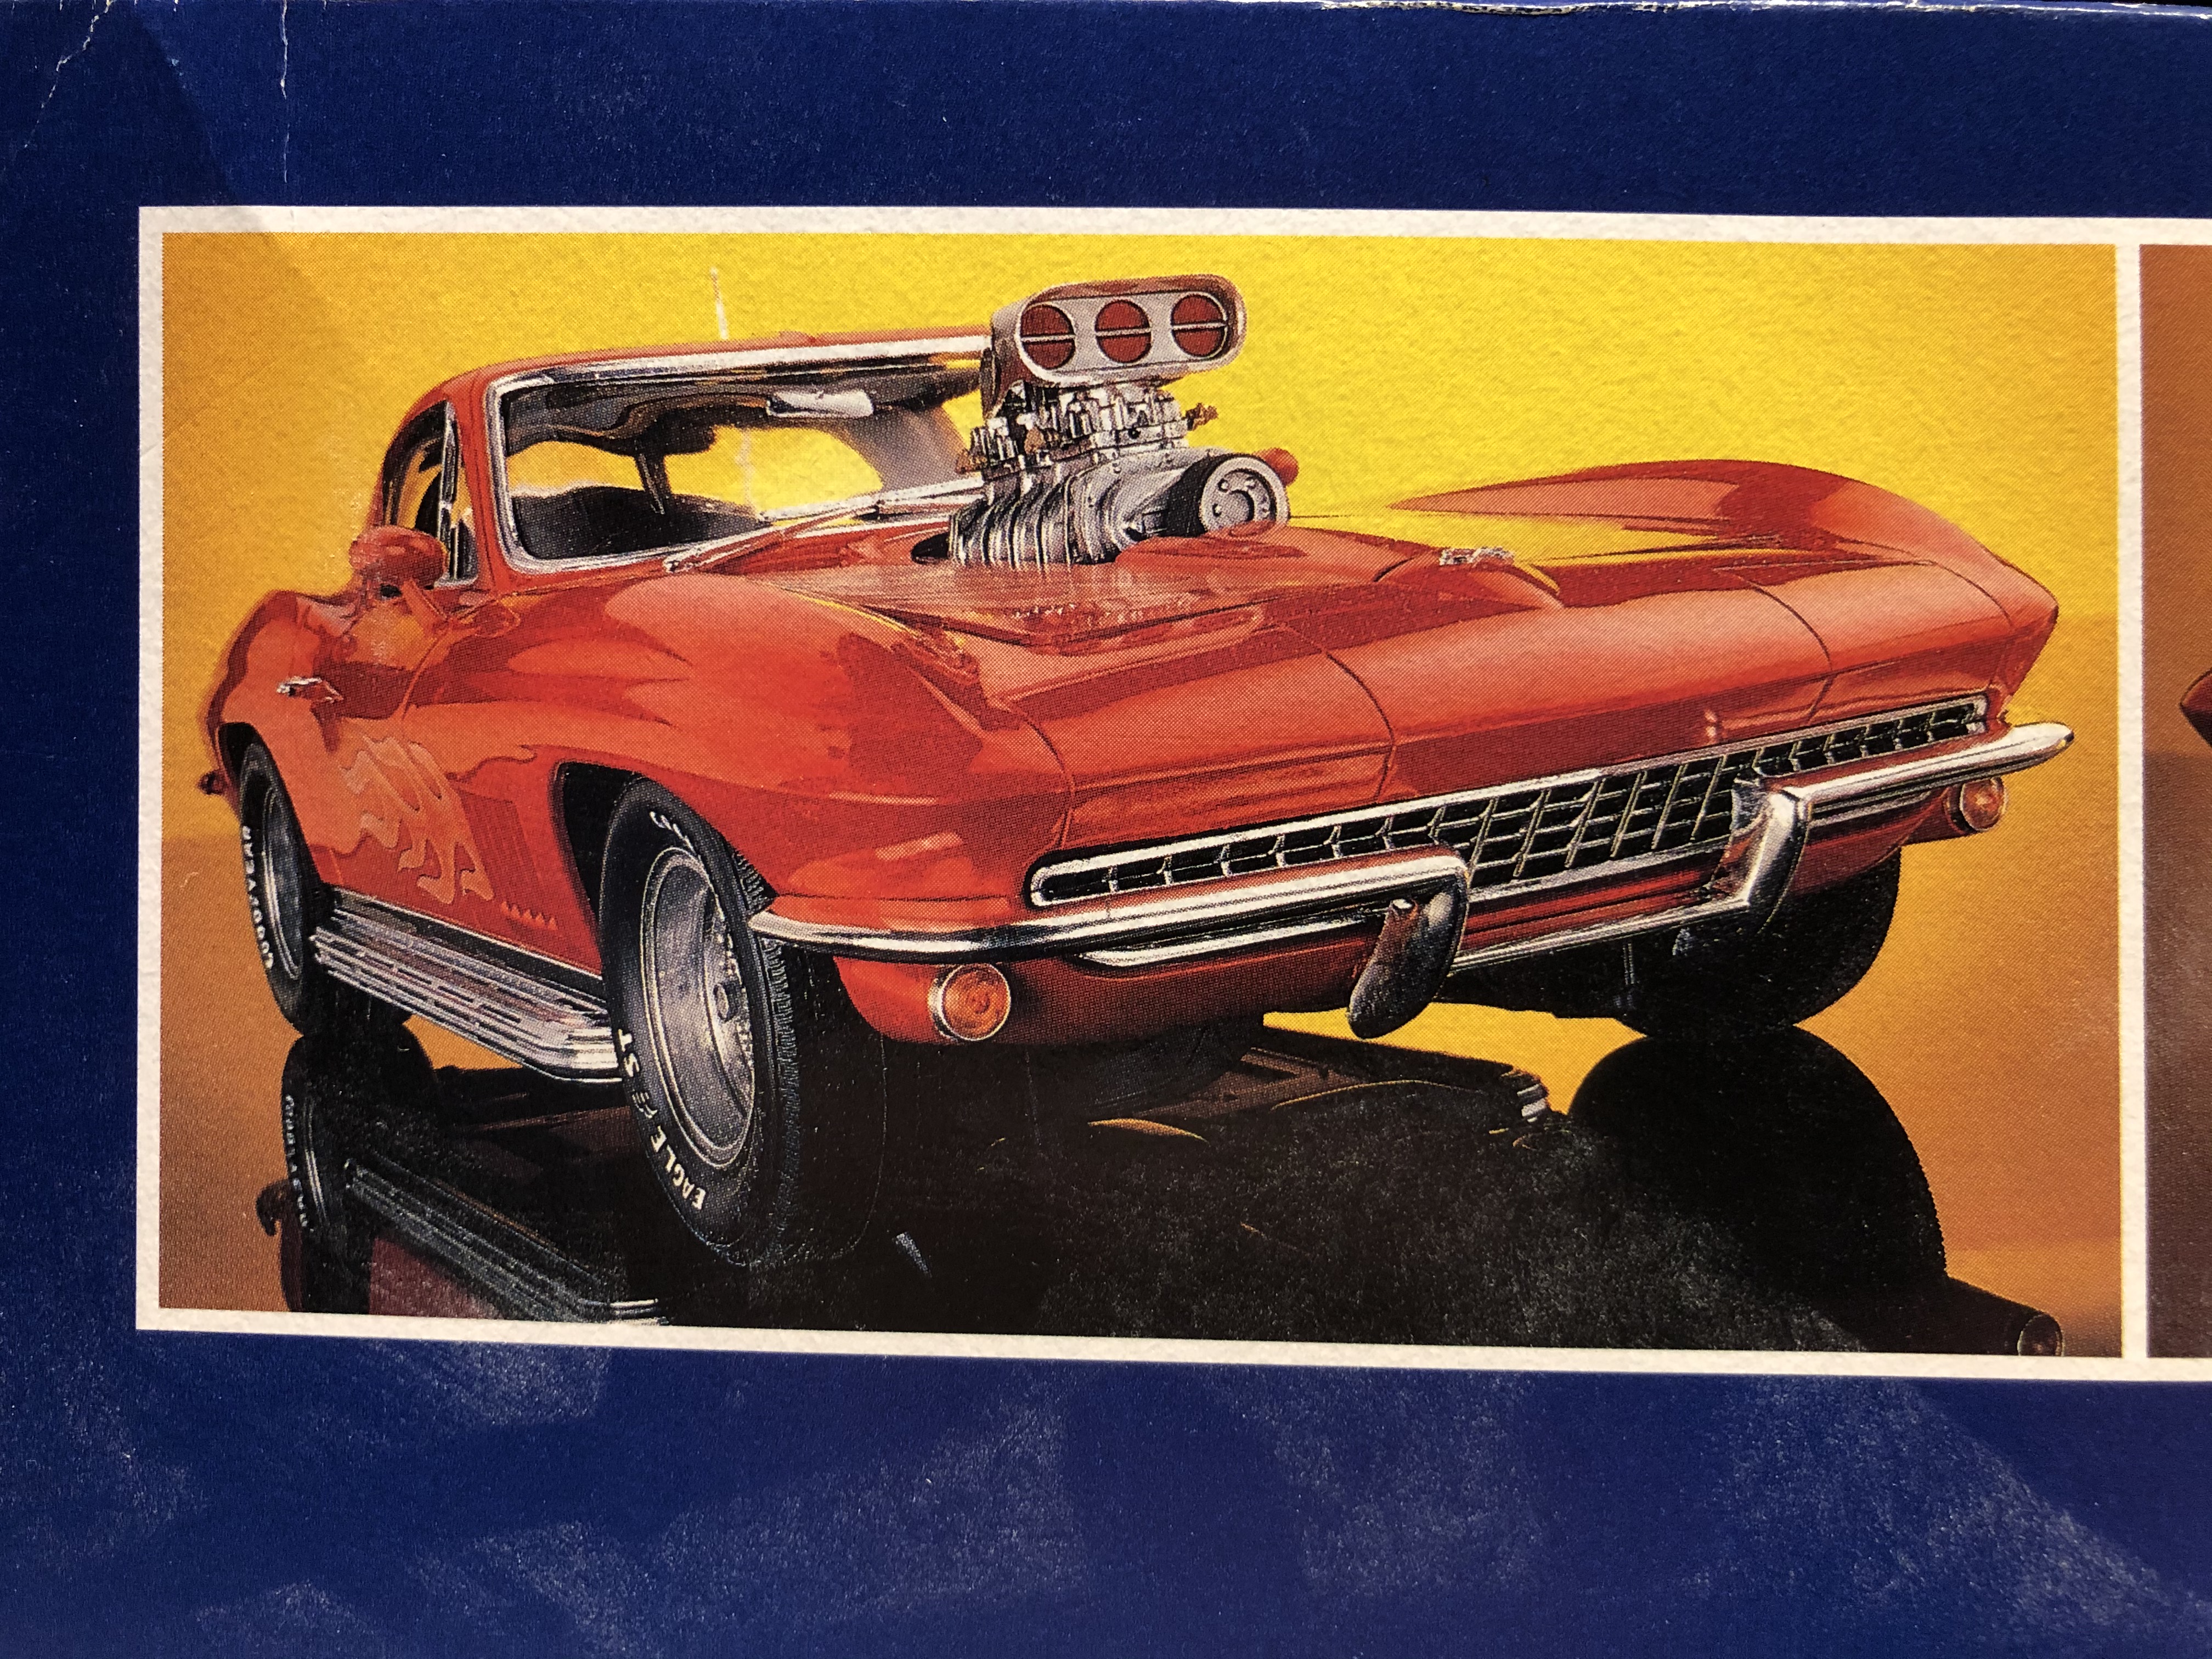
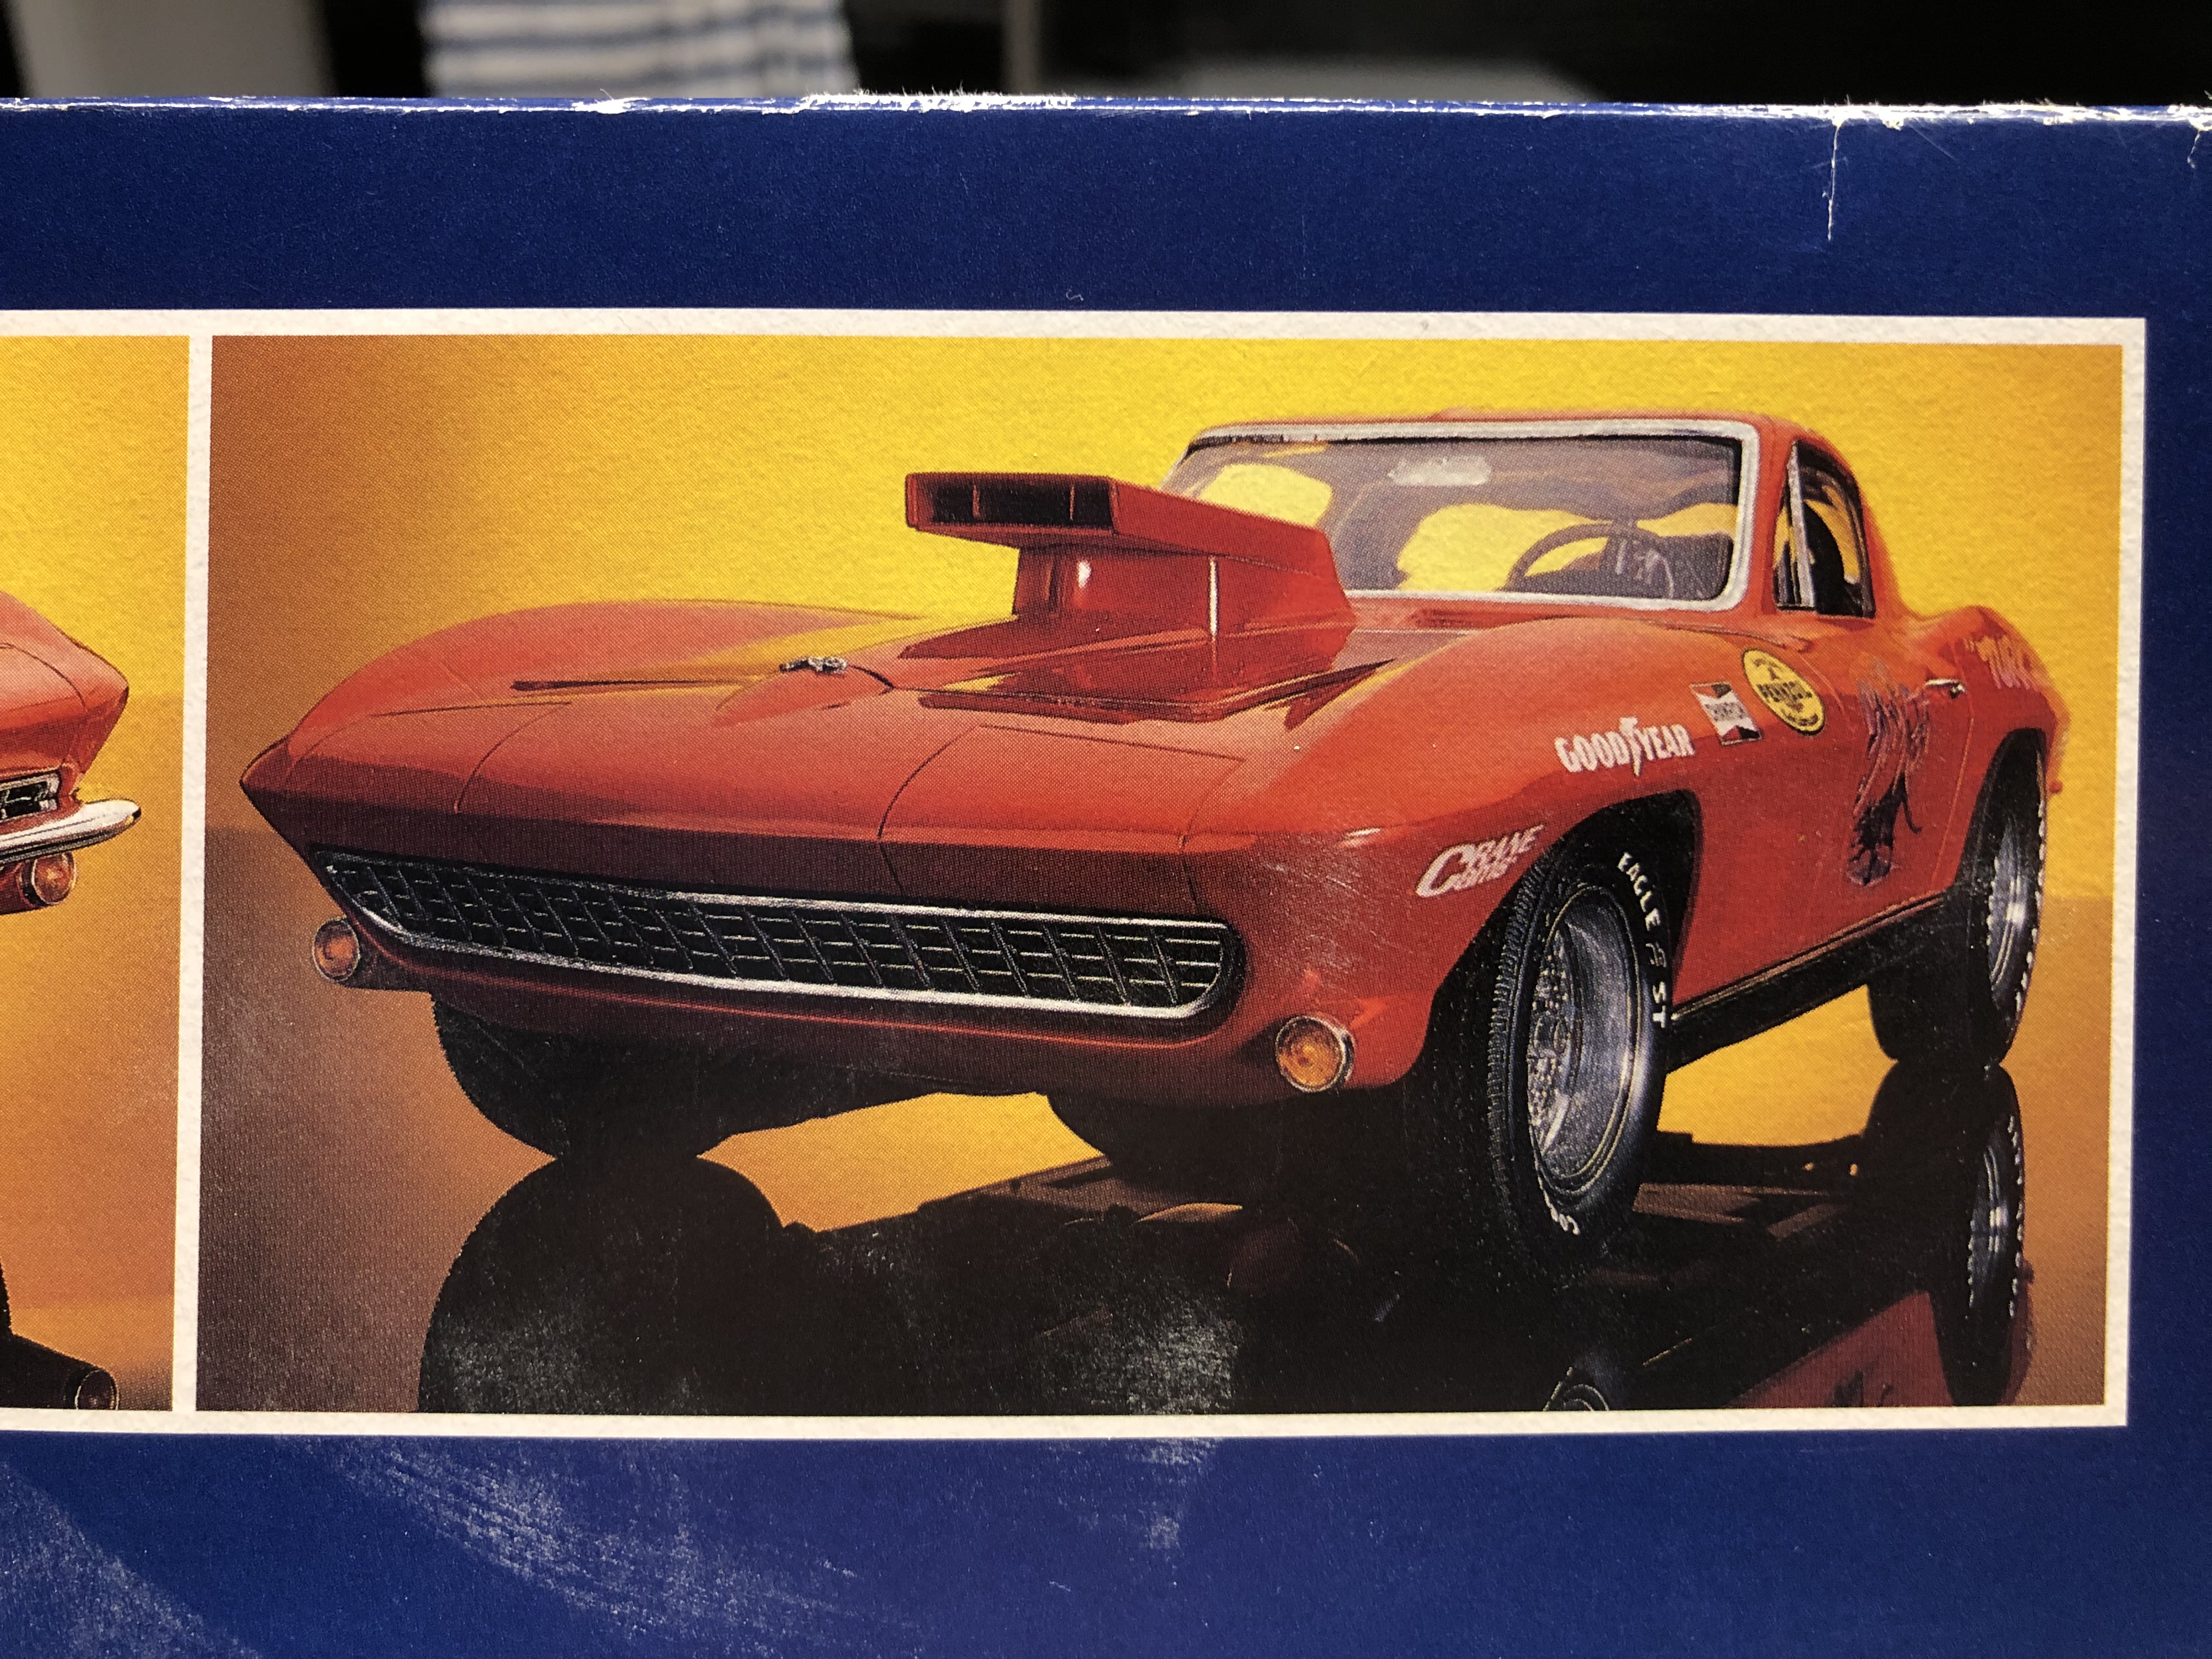
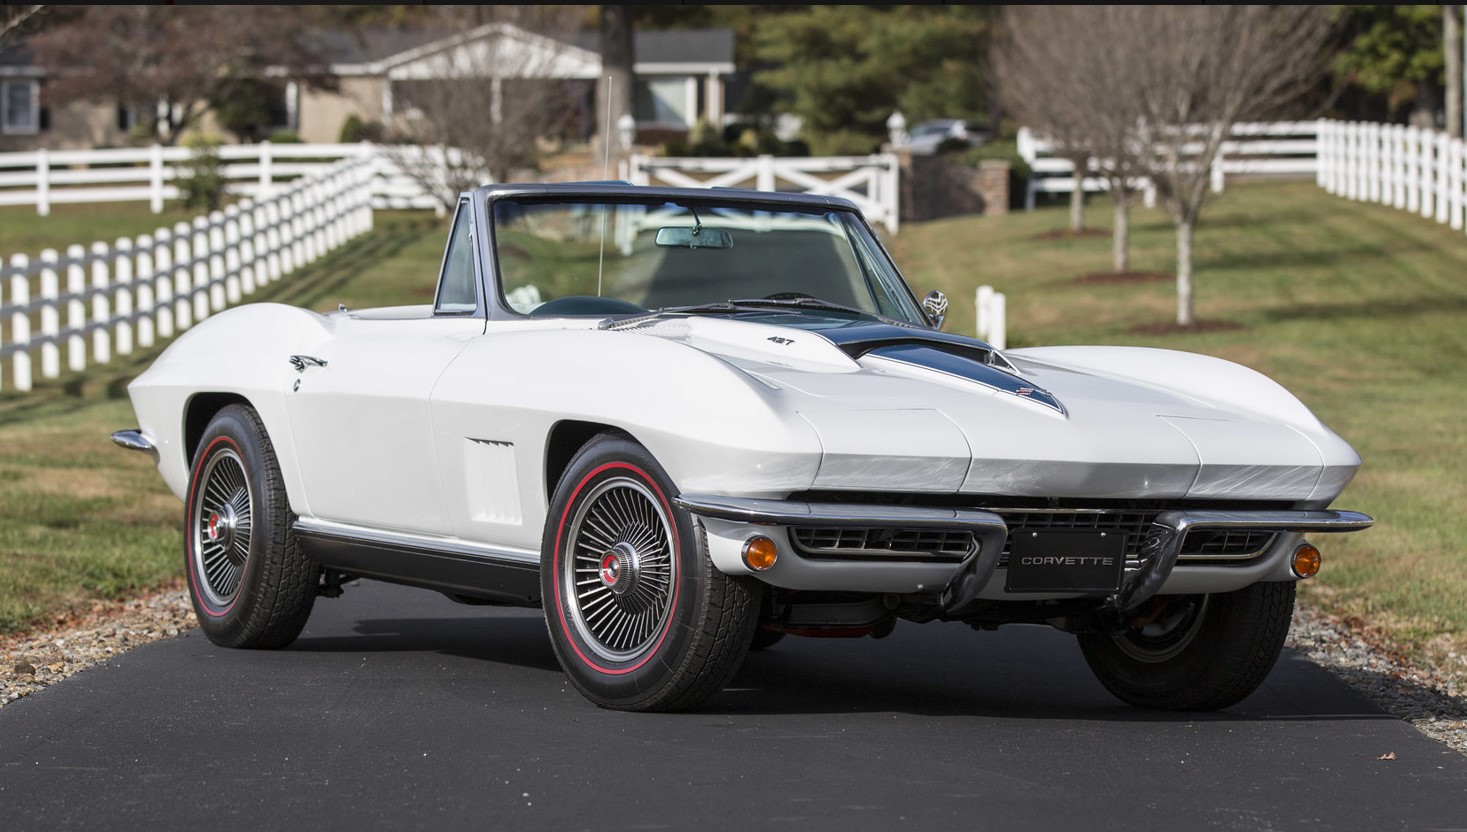
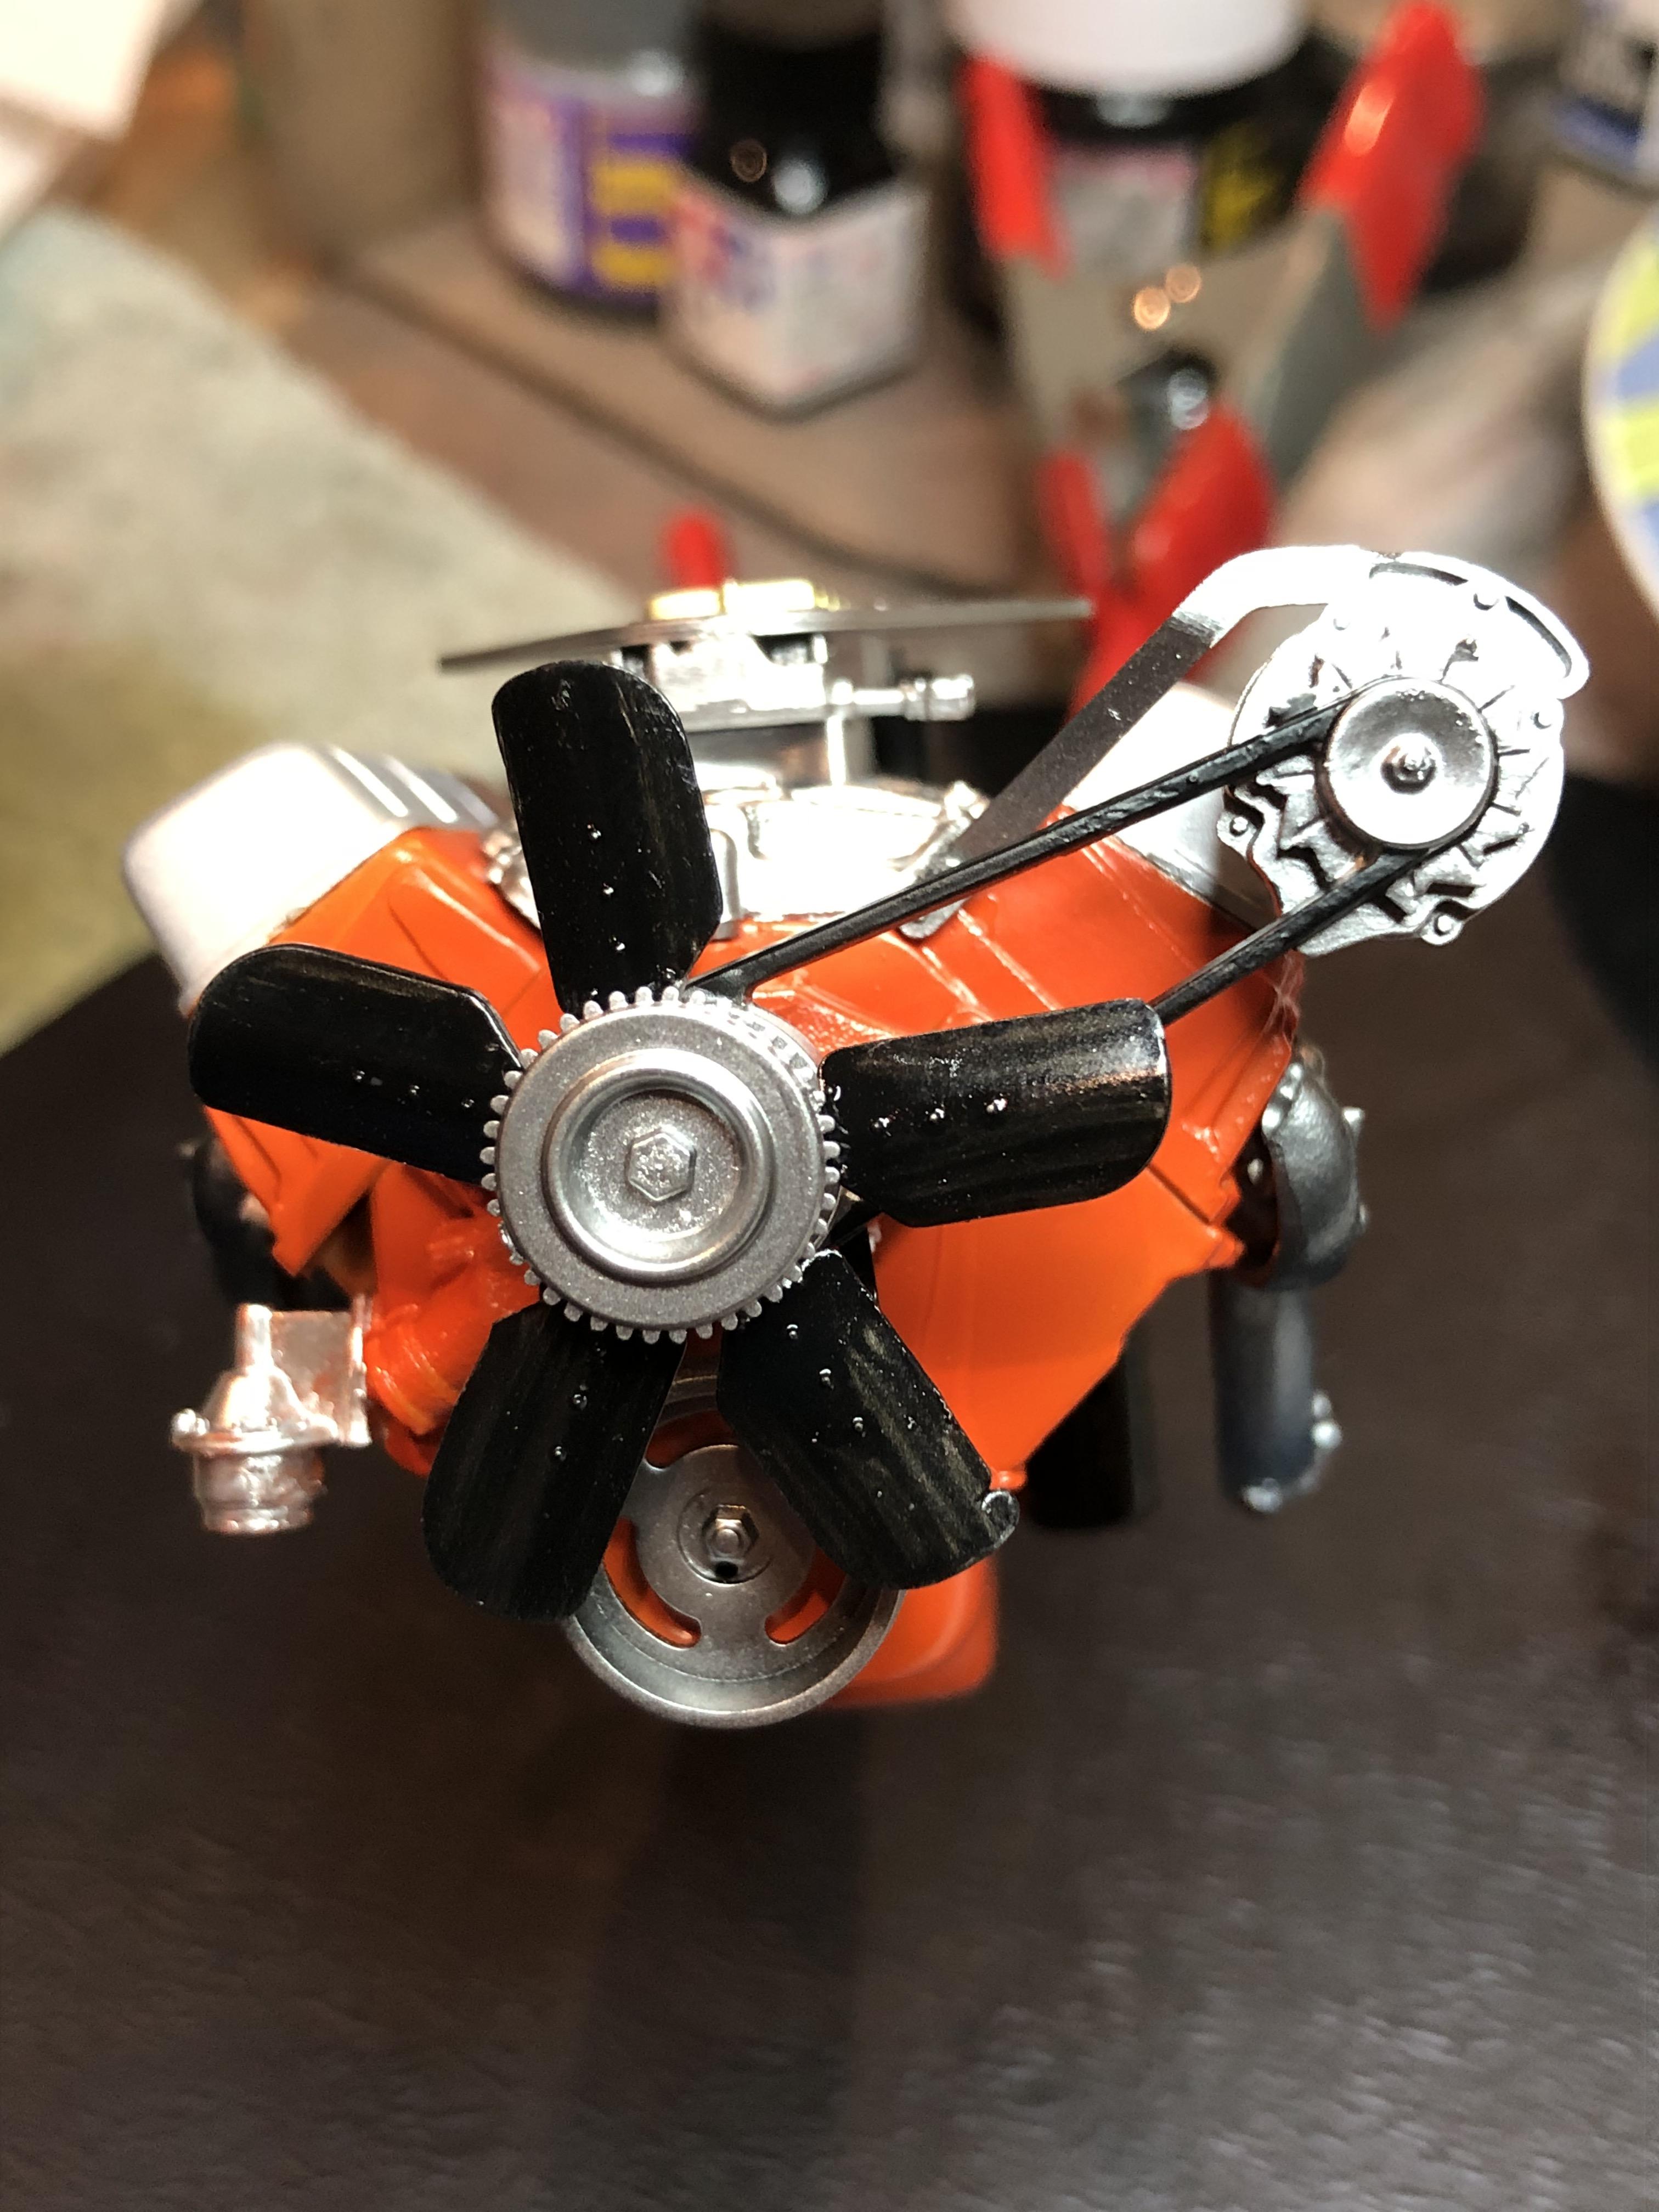
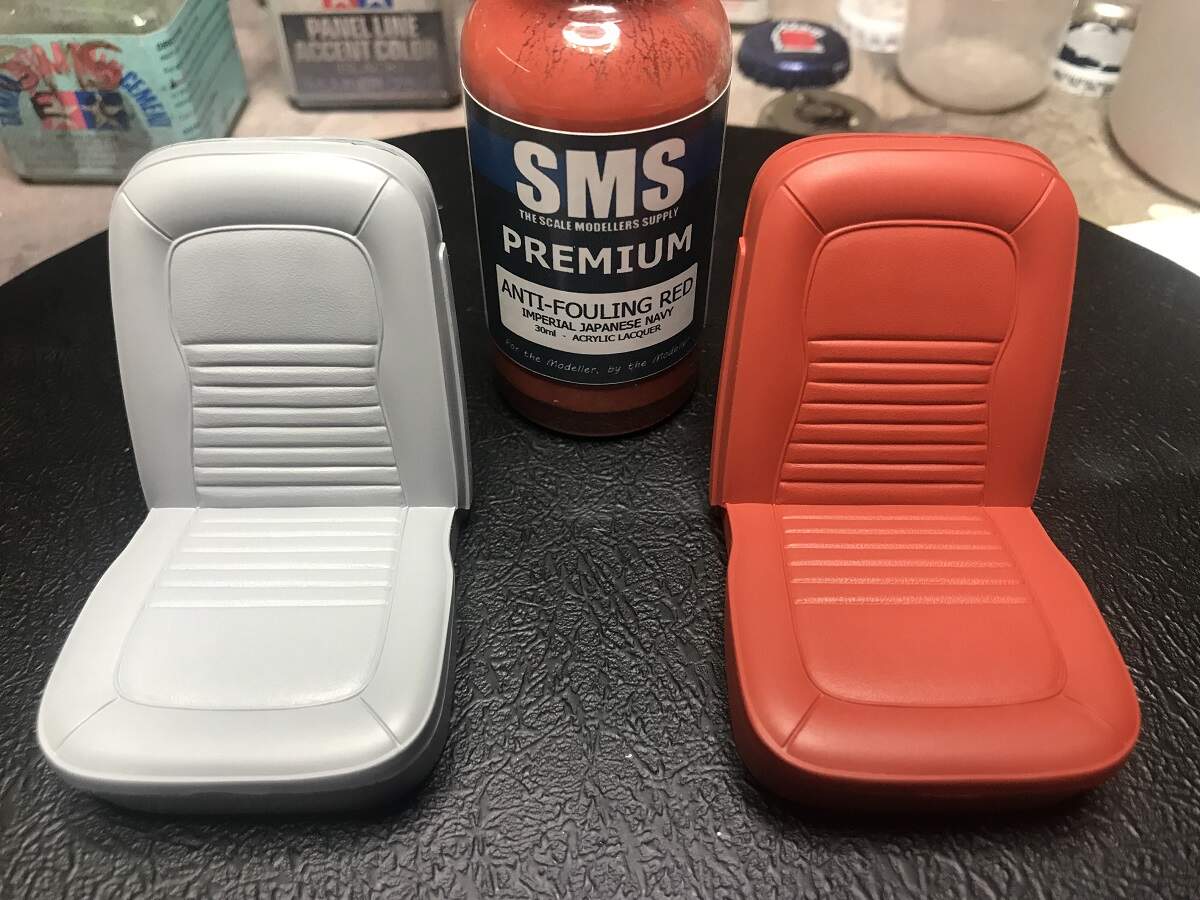
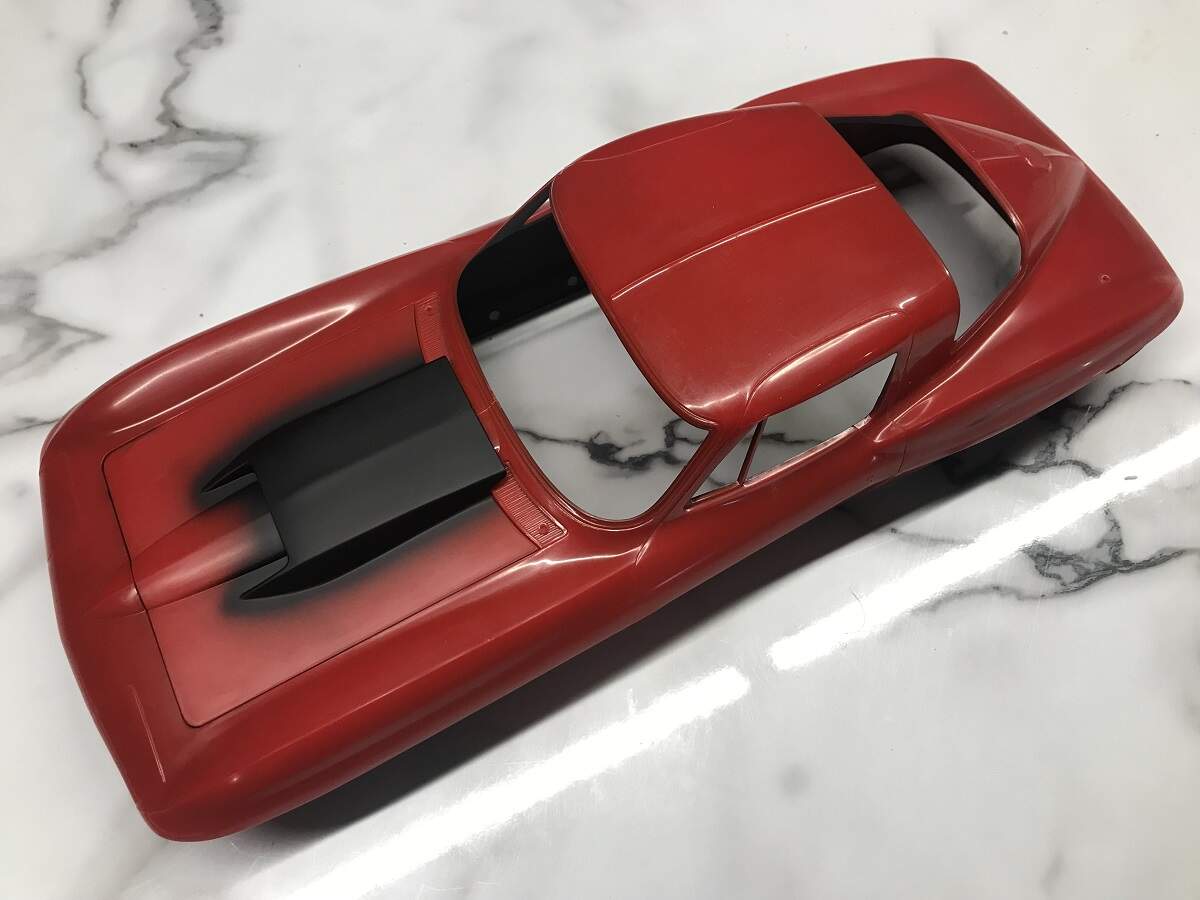
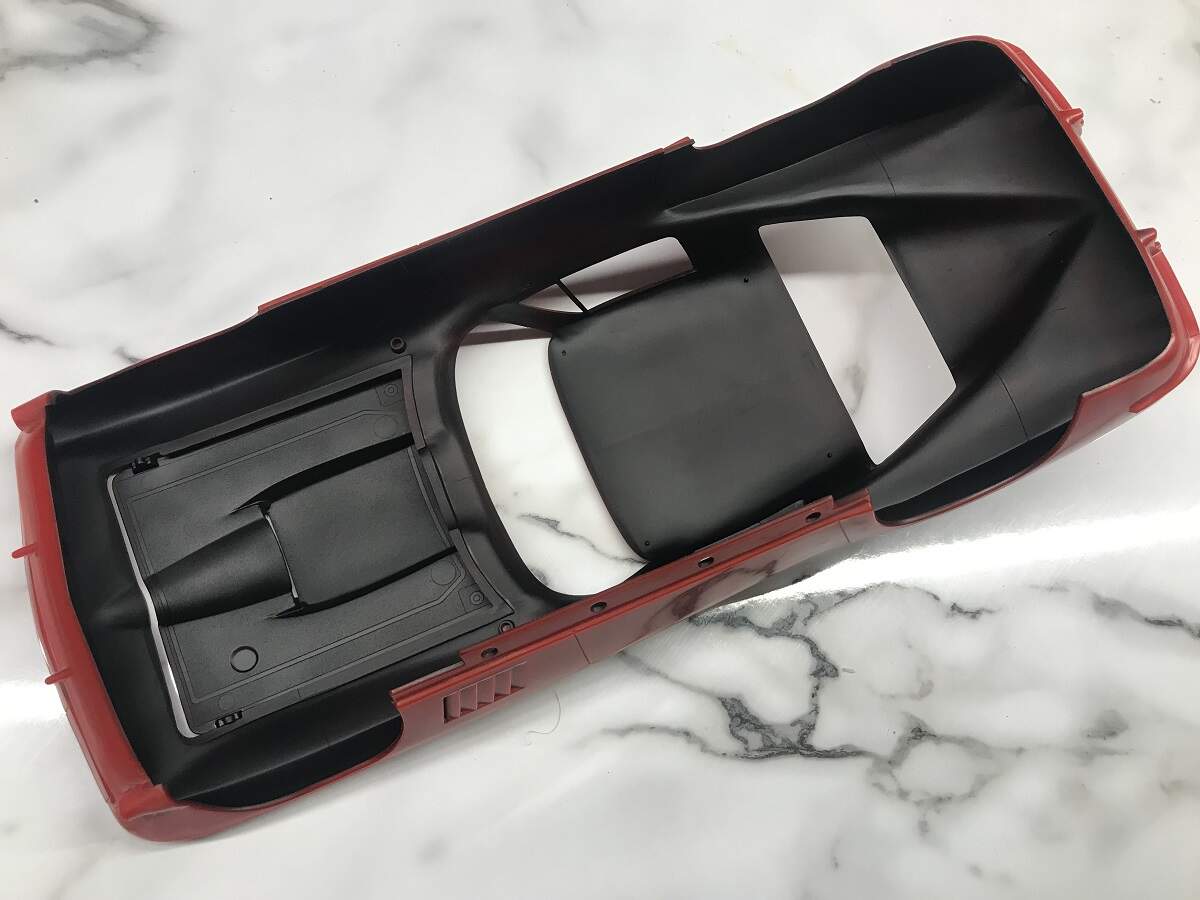
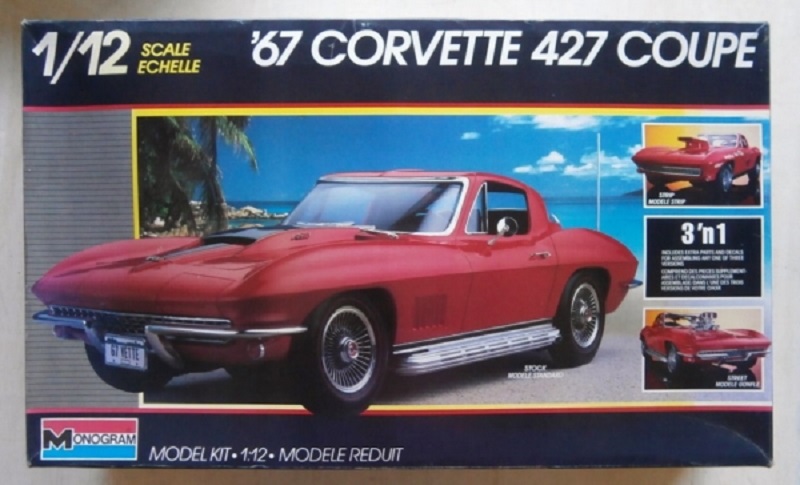
This one will be a stock build, undecided on colour but leaning towards White Pearl with Black trims. As usual for me, I have a second kit hiding away in the stash to build up as a modified street version.

Don’t expect regular updates on this one, I’m taking my time and fitting small sessions between other builds. As always, feedback, comments and constructive critique are gratefully accepted.

D, I’m really looking forward to following your adventures with this kit, especially since it’s 1/12 scale. I’ve thought about buying a few 1/12 scale F1 kits, but still haven’t gotten up the nerve. Not even sure that I can build one as they’re super detailed to the nth degree. - Joel
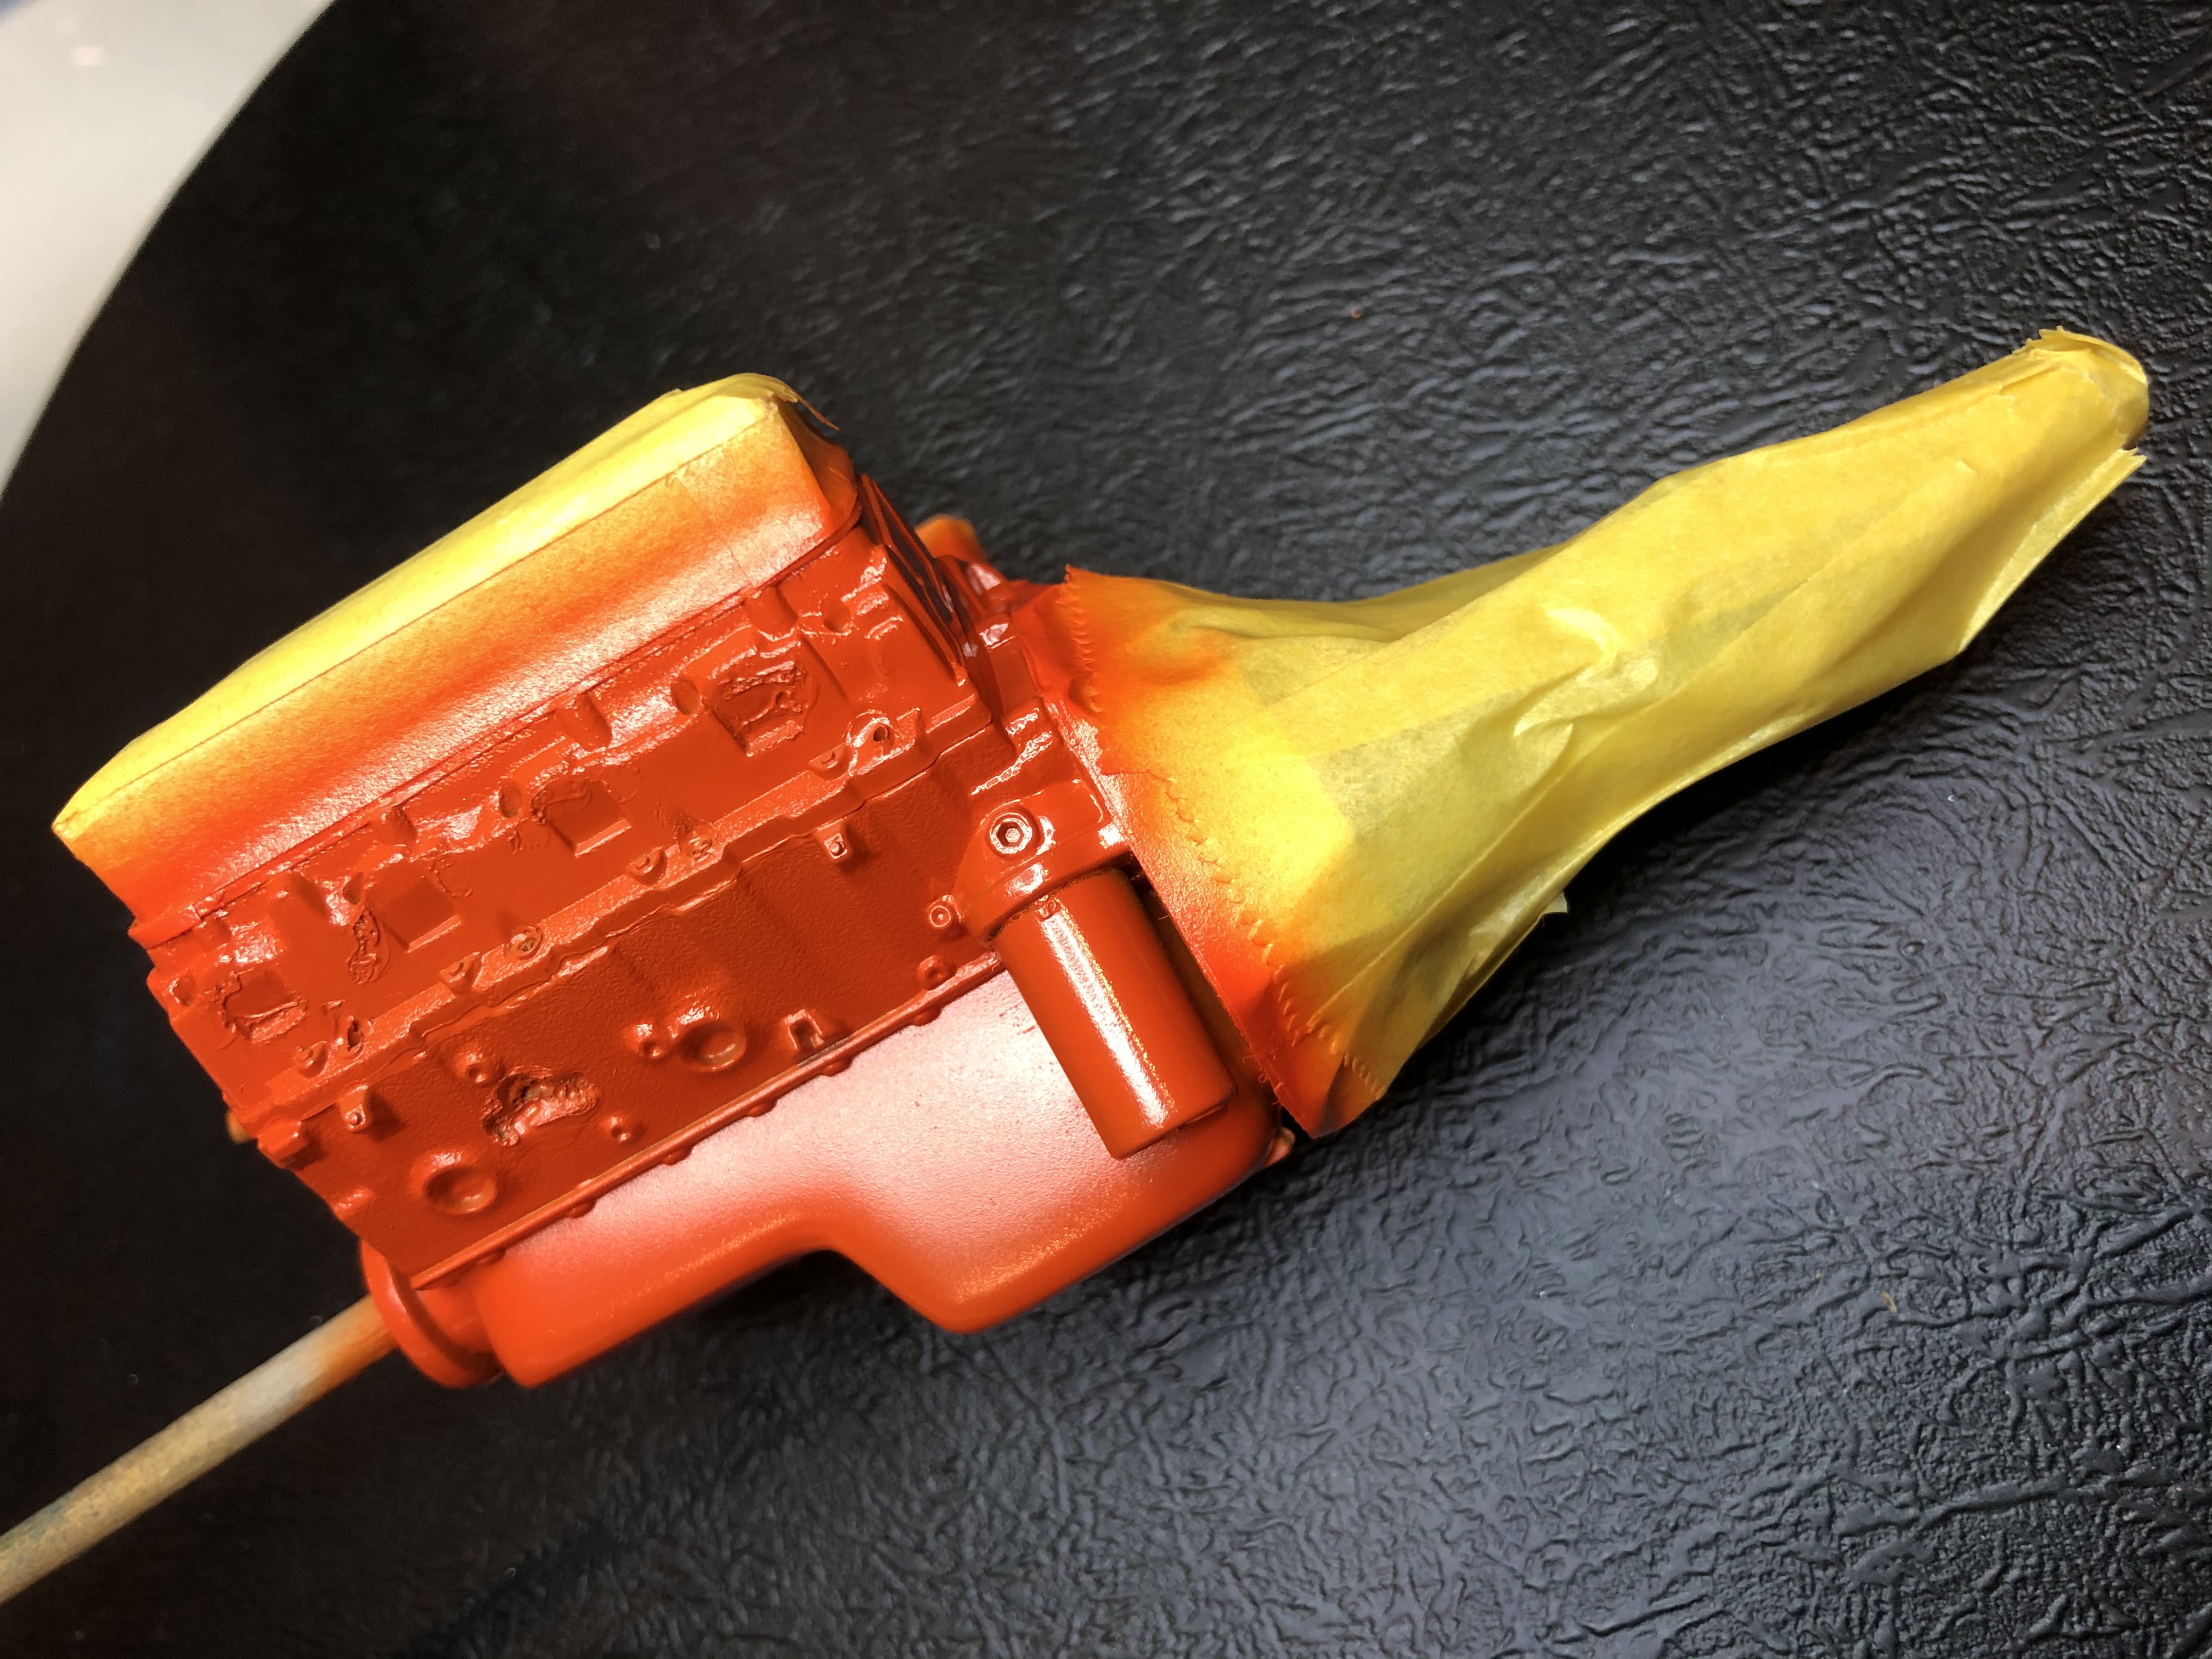
Bring out the big boys. The engine definitely needs to be redone. Your “25 years later” skills are way better than that. - Jesper
25 years! That’s impressive. I do like the version with the blower, which looks pretty impressive. I always wondered how people saw past them. Does the kit come with plenty of detail or are you going to have to scratch up your own? Anyways, looking forward to the restoration work on the engine. Cheers - Michael
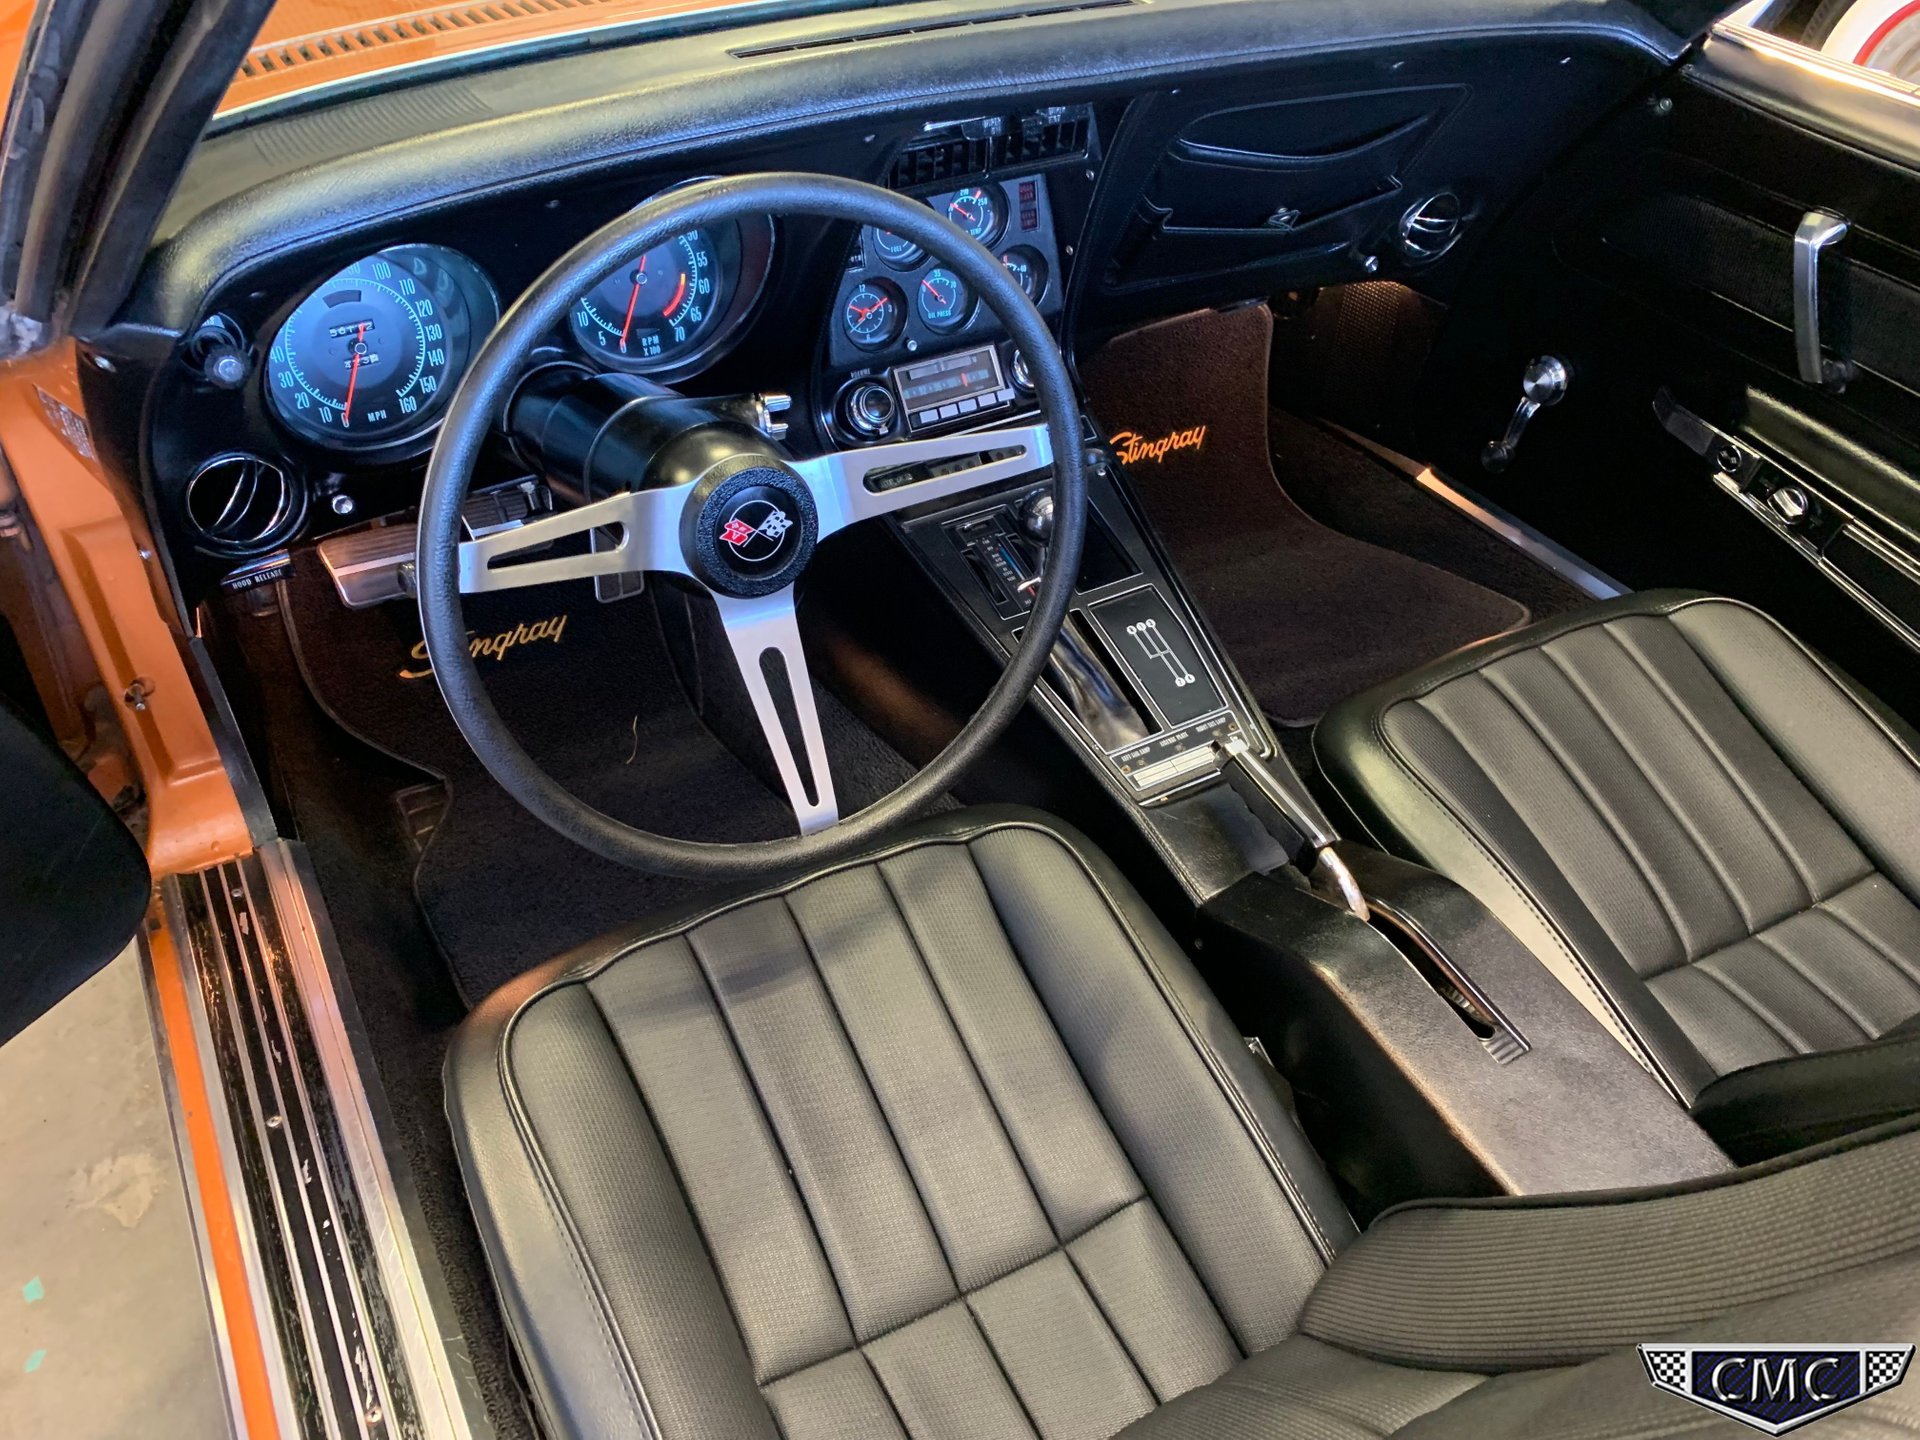
So strange to realize a car I used to ride in the trunk with my brother when my mom and dad went to the drive-in is now a museum display. - Shell

Thanks for the encouragement guys, much appreciated.

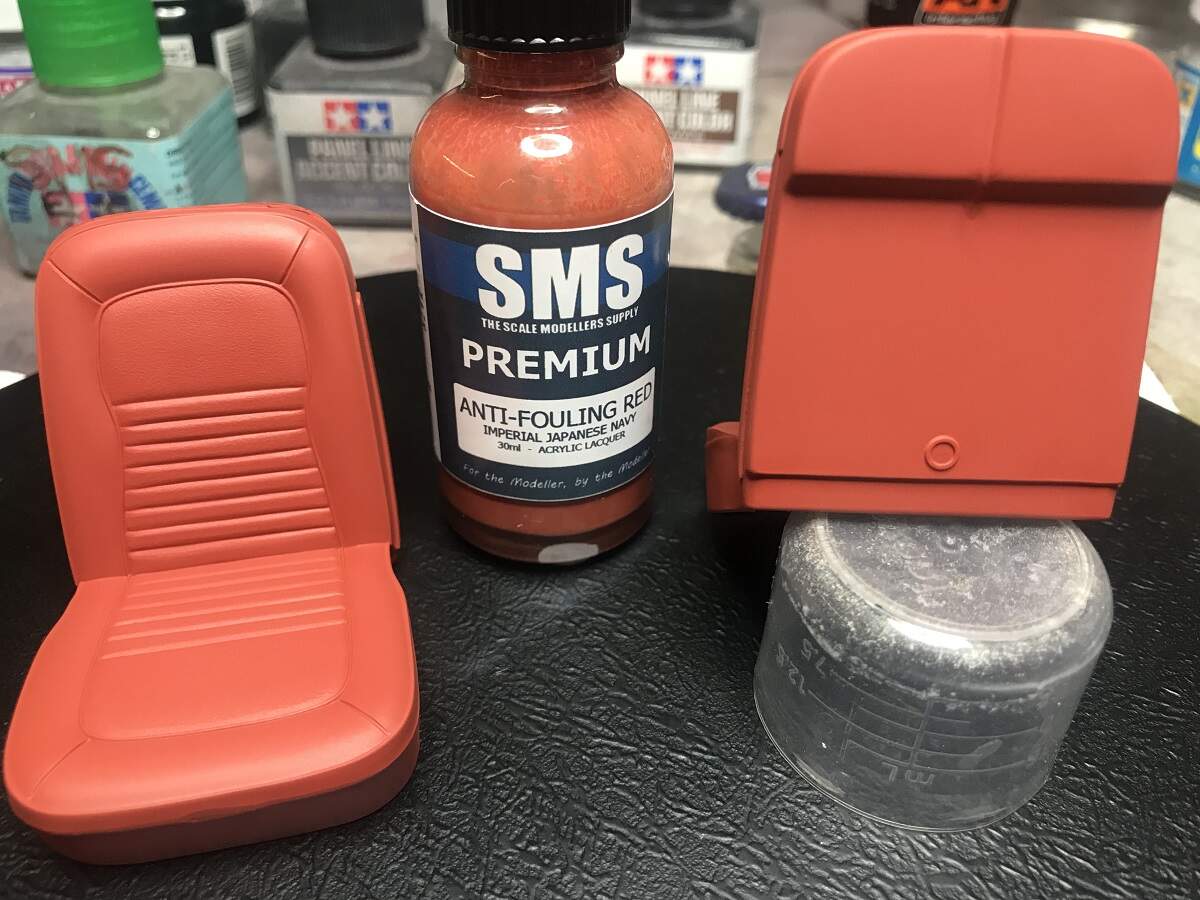
Michael, the kit comes with ignition wiring and a couple of flexible tubes for heater hoses, but that’s it. I will be having a go at adding some cables and linkages and fuel lines etc myself.
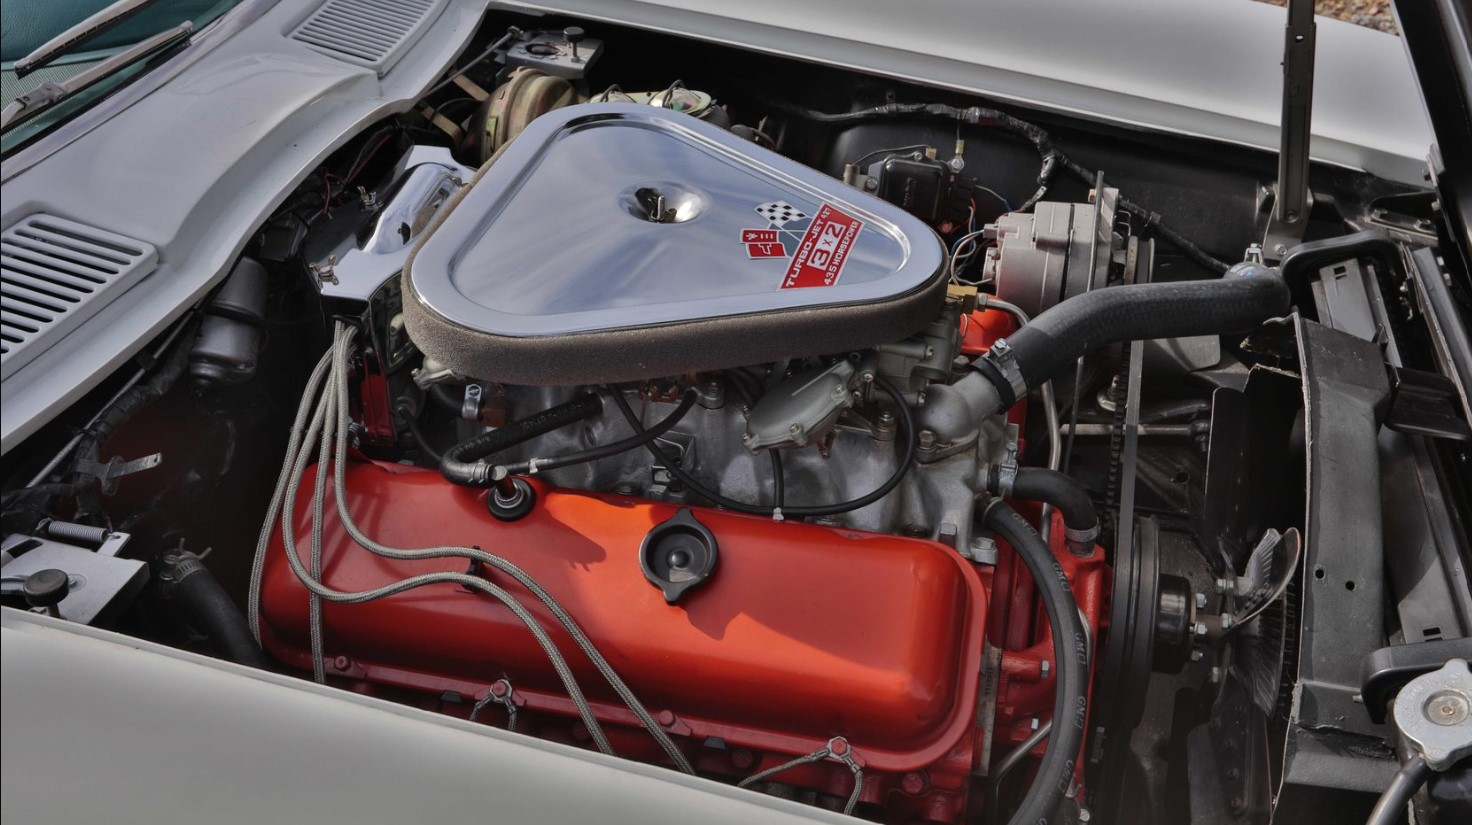
The second build will definitely be using the blower set-up!

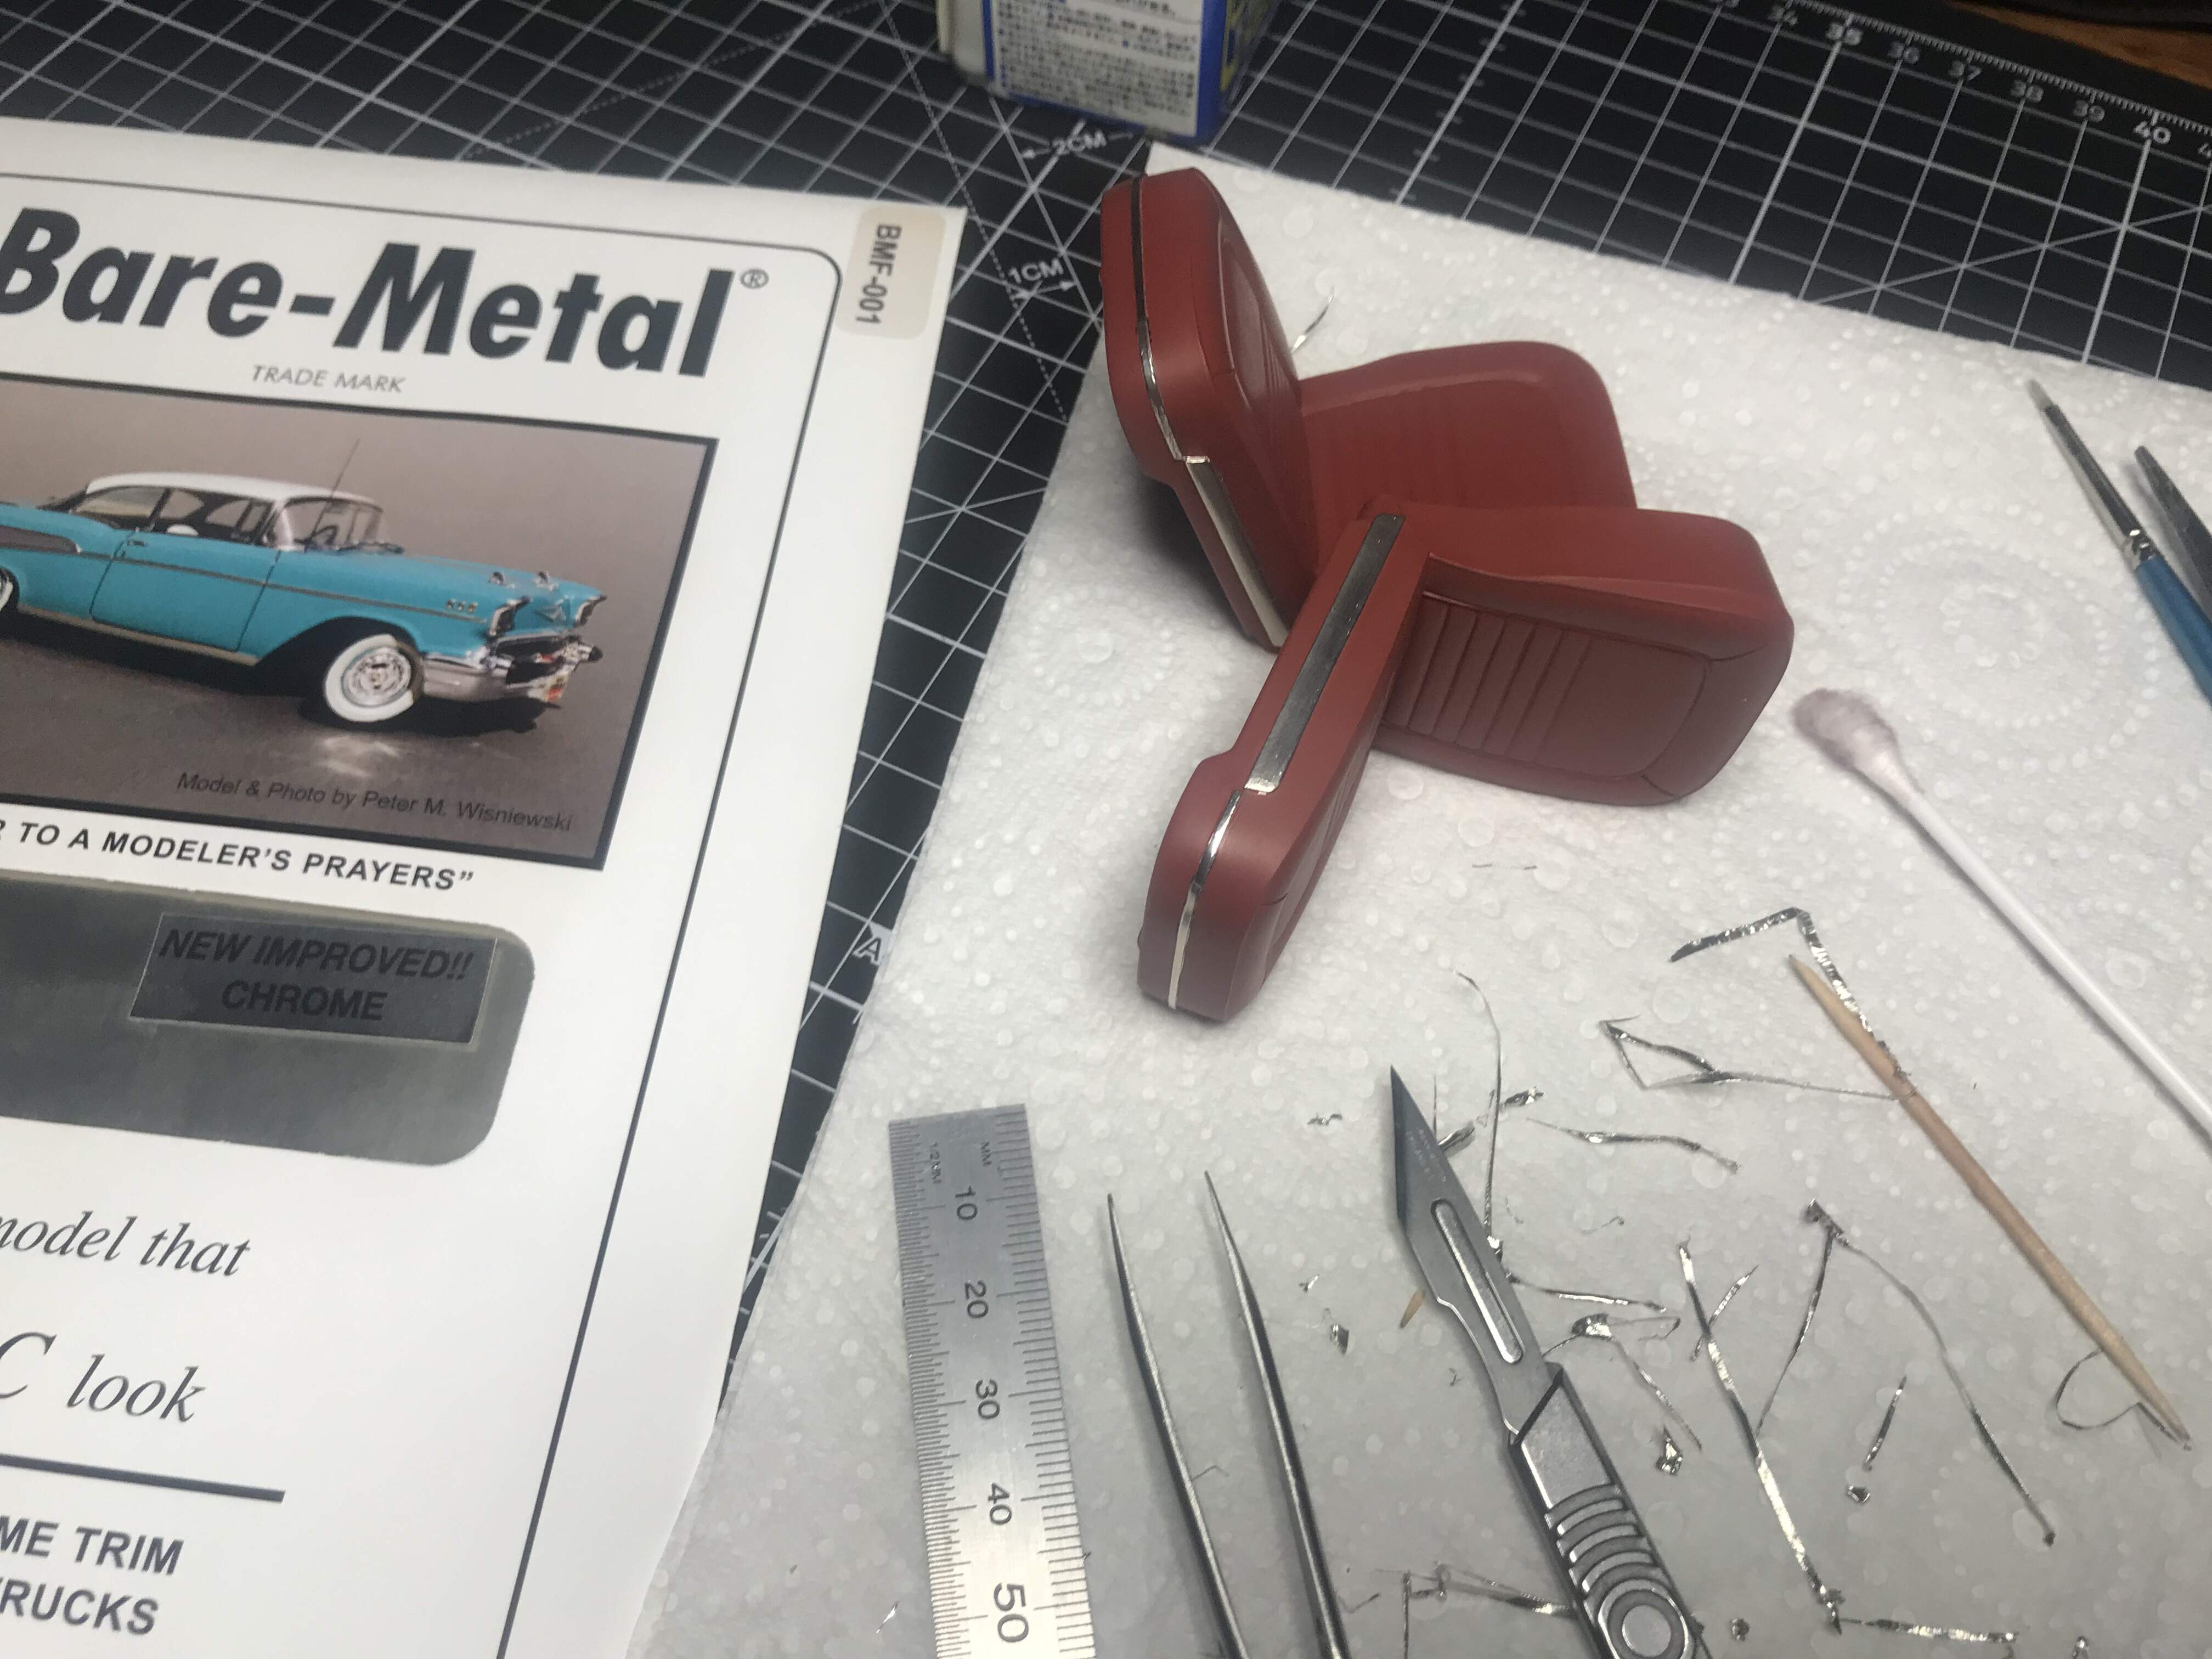
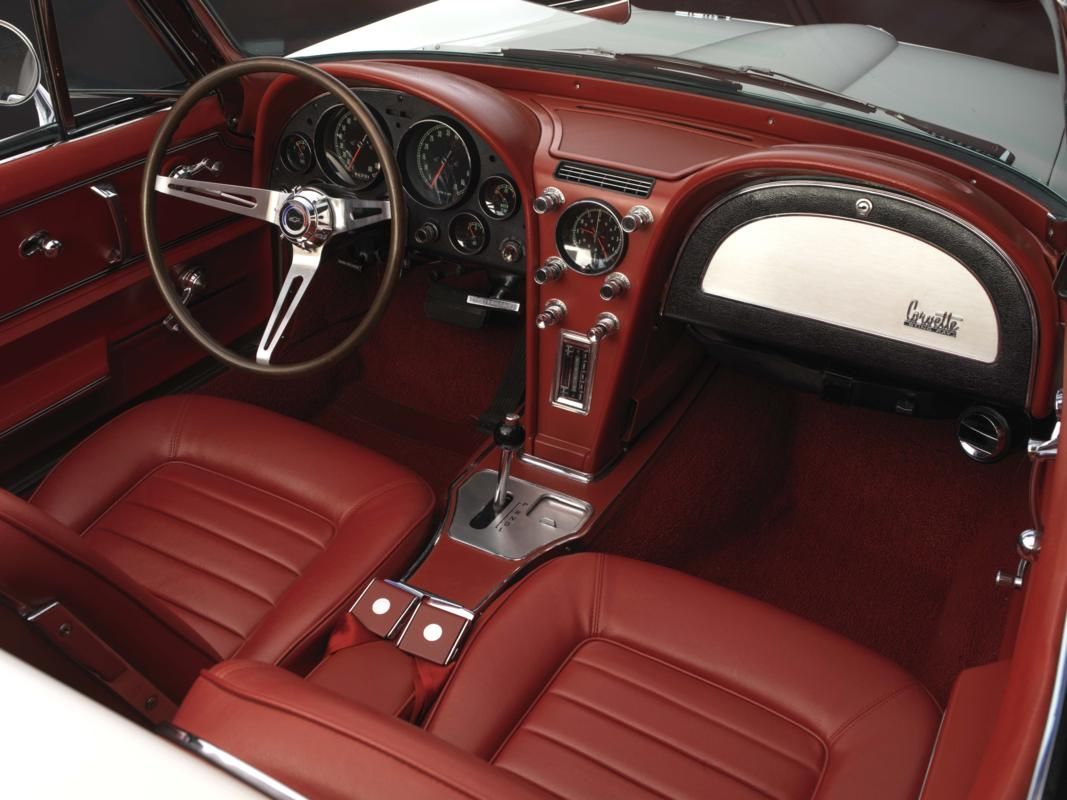
This image is of a '66, at the Wellborn Museum, but this is the interior I will try to replicate. Classy!

Cheers, D

June 09, 2020

A 15 minute session with a toothbrush and some warm soapy water thismorning before I headed out to work, then tonight I hit it with a flat stiff paintbrush and some 90% IPA to get me back to this.

I started work on the nasty step on the bottom of the oil pan and transmission, where I failed to line the halves up properly. I took it back a bit with a sanding stick, then gave it a hit with some TET and a good drop of Sprue Goo to build up the low side.


This will get a day to cure then another hit with the sanding stick.

Cheers, D

Damian. Well that was fast the engine looks better already, what did you use to strip the paint? - Robert (rv1963)

Hi Robert. I use caustic oven cleaner in a ziplock bag.

It strips the chrome clean off in a few minutes, and given a few hours it softens the acrylic paint to the point where it can be easily and cleanly removed with a soft toothbrush. I don’t generally use enamels, so I don’t know how it performs there. Interestingly, the silver paint is intact on the pulley on the front of the alternator. I can’t remember what I used there, but suspect that it might have been an old tin of Humbrol enamel from my dad’s stash.

Cheers, D

Thanks i use oven cleaner for chrome also doesn’t work to well on enamel paint as i remember. - Robert (rv1963)

June 10, 2020

I dug through the stash cupboard tonight out of interest and dragged out the other, older boxing of this kit. After all of these years I have managed to resist temptation, and this one is still in sealed bags and the decals look very good. A few images from the box top:


June 12, 2020

A couple of sanding sessions and a little more sprue goo, then tonight was repaint time for the 427 c.i. block.

Grey primer is MS1500, engine orange/red is an eyeballed mix of orange and red.


Cheers, D

Nice color mix up Damian, looks the part quite well. How far are you taking it? An engine that big screams to be hosed and wired. - David (Dixon66)

Thanks David! I will definitely be adding as much detail as I can on these large-scale builds. The kit comes with ignition wires and flexible tube for the heater hoses, but I want to add fuel lines and linkages and other electrical where I can.


Great colour on that engine block Damian. A big improvement. I’m sure in that scale the more detail you can add the better it will look and least with Corvettes there must be a million pictures. - Michael (Cosimodo)

June 13, 2020

Thanks Michael!

And yes, no shortage of reference material for me here! This is the one I’m using for the body and engine reference, but I’m not a big fan of the blue interior.


I will definitely go with the red/brown scheme.

The ignition wires are shown to be inserted into a simple hole in the block, beside the head bolts. Tonights mission is to clear out the holes and glue in some 1.75mm styrene rod to give some semblance of a spark plug/lead cap. They will be hidden down between the exhaust manifold ports and barely visible, and I am planning to use some silver grey braid over the ignition wires to add some bling to the engine bay. I will also route the ignition leads over the top of the rocker covers as per the reference image, instead of around under the headers as per the instructions.


Cheers, D

June 17, 2020

Damian, Nice work on that rather large engine, i like how the instruction sheet gives you the firing order pretty cool. - Robert
You had me at Corvette, Large Scale Project. Following with interest D - Russell

June 25, 2020

Things you find when you’re browsing the supplier websites!


June 26, 2020

A bit of detail painting tonight waiting for Group Build progress to cure. I hand painted the starter, fuel pump, oil filter and “spark plugs” on the main engine assembly, and the belts, fan blades and carburettors on the other assemblies.

The exhaust manifolds were primed with MS1500 Black, then shot with SMS Stainless Steel, which was a bit too bright (on the RHS here).

I shot some SMS Gunmetal in an uneven thin coat over the Stainless Steel, then some SMS Clear Blue over that on the elbows and joins.


Reassembly soon :-)–<

Cheers, D

Looking great mate. I’ve never tried pulling one apart and redoing it. - David
Nice recovery on the Engine, D - Russell

June 30, 2020

Well I did a bit of re-assembly tonight and got a bit snap-happy because I’m pretty pleased with how this has turned out so far!


Still plenty to do here but a huge improvement on where I started out.

Cheers, D

That looks great D! It will look even better in the chassis. - David
Killer engine. I had to Google “Anti fouling” had no clue, what that was Great match for the interior. - Jesper
D., That engine looks great! You can really put a lot of detail into something this size. I like the red interior. Very '60s! - Jim
D, I’m just catching up on a lot of builds, can’t believe that I’ve missed your 1/12 Vette build.
Outstanding effort on the engine for sure. The block color is absolutely dead on. Great save on the exhaust manifolds. The finally color and heat staining really came out looking great. The addition of the spark plugs really will add a lot to an engine of this size.
- Joel
HI Damian, Wow, you sure have done a great job with that engine! It’s a real beauty - I really like your mix of colors, and of course, the texture on the “cast” parts sure looks good - wow - Looking forward to seeing what’s next! Cheers - NIck

July 12, 2020

Thanks for checking in Nick, as always your feedback is very much appreciated. I’m very glad that pre-30 year old me had the sense to put this kit back in the stash to wait until post-50 year old me built up some skills. The problem now is that post-50 year old me tends to get overly ambitious with project scope and is now trying to hold back on opening up the second kit and building them side-by-side

Next up for this is an engine oil pin wash to highlight the surface details, then ignition wiring and maybe fuel lines.

Cheers, D

D, I’m just amazed that you had these kits in your stash for more then 20 years. - Joel
Looks very good D! Just like a real LS! - Russell

1 Like

Such a difference between the 1966 dash and that of a 1970 model.

But I am stuck building what my dad owned.

The trickle has become a flood as more of us move our threads to the new site: great to see you move this one over too D :slightly_smiling_face:

1 Like

Resistance is futile! There will be plenty of moaning and groaning as people generally don’t like change, especially with something that has been a constant in their lives for so many years, but I’m liking this new platform more and more as I explore and check out the mechanics of it.

Cheers, D

2 Likes

Yep, me too. The Old forum was great, but it has reached the end of its serviceable life, especially the photo hosting :slightly_smiling_face:

1 Like

D,
Just noticed that you moved your 1/12 Vette over to the new site.

Gotta say that the big V8 is really looking spectacular. Any new updates since June, or is the build still in between your other current builds?
Joel

That is one big A$$ kit right there!!! You’re doin’ right by Chevrolet on this one.

1 Like

Strange but I noticed that the red interior photo does not have an parking break and the blue one does.

1 Like

Greg, I think the red interior car has a t-bar pull style handbrake under the dash rasther than lever style on the console.

Cheers, D

D,
Nice find on that handle. Just as a guess could it be the engine hood release as I can barely make out looking through the steering wheel towards the floor under the dash that sure looks like the T grip for the parking brake release that was foot activated, common setup back in those days.

joel

I keep circling around this build, I don’t know why I’m a bit hesitant to dive in. Working on the small-scale C1 series has got me fired up a bit, so I got the seats out and cleaned them up, a shot of grey MS1500, then some of the SMS paint that I picked up for them a while back. The bright fluoro light washes the colour out a bit, but I think I might add a drop or two of Wine Red to the airbrush cup for the next layer to richen it up a bit.


Cheers, D

D,
I’m right there with you when it comes to stepping out of my comfort zone. Whether it be scale, type, level of detail, or just trying to kick it up a notch after seeing a build at a level that we don’t model at. It’s a little scary for sure.

But you’ve already been there and done that with the '55 Chevy. so have no fears my friend. Your skill set is way more then enough to turn out a winner.

As for the seats, the leather looks a little to Pinkish for my tastes as well. The planned few drops of Wine Red will make a big difference.

joel

1 Like

Some precision mixing in action! Small cup on the DragonAir 3.0 airbrush was about 3/4 full with IJN Anti-Fouling Red, I added 12 drops of Wine Red and 4 drops of MLT and it looked good. Before and after shot against the straight IJN Anti-Fouling Red.

Cheers, D

1 Like

D
The darker color with the Wine Red is a sure winner!! Now write down the formula for future use.

joel

I blame you for this Joel!
I had the airbrush out for a run so the scoop and the interior got a shot of MS1500. The body will be white, so I will mask up the scoop and it will stay protected while I prime and paint the body. I might even leave it Flat Black to contrast with the body. I will mask up the inside of the shell carefully so the black coat doesn’t get any MS1500 Grey Primer or White paint during the process.


Cheers, D

1 Like

D,
One of my friends way back in my post High School days got a 1967 427 ci Vette in Metallic Blue and it had a flat Black intake scoop on the hood that really worked. Interior was all Black. The car lasted just 2 weeks as he drove it to college every day in Brooklyn and it got stolen ASAP.

Your scoop can out perfect outside and inside. 

joel

1 Like

No paint tonight, just added some bling to the seats!

Cheers, D

2 Likes