I have already started my next project after the starliner. Bobby Isaac was the Grand National champion in 1970 and at this point in the build i have not decided if i will build his championship car or another year hence the 70-73 in the topic header. I really don’t need to decide till I get to the decal point since all three years it had the same paint job.
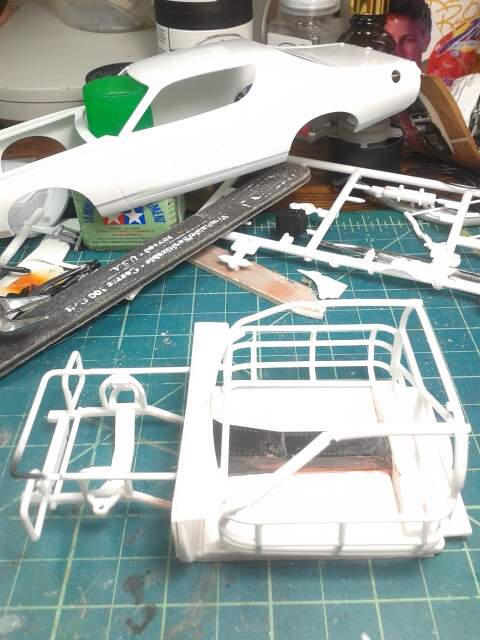
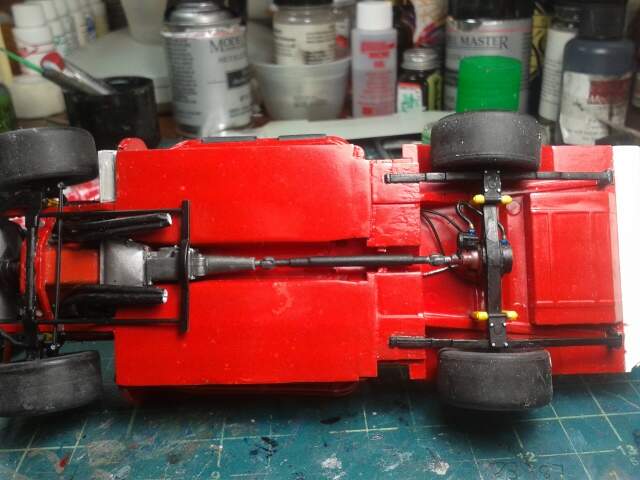
This is the first Salvinos kit I am building. I have not been impressed with the quality and lack of attention to detail in their previous kits. They even managed to screw up the monogram molds they bought. But this kit had decent reviews from some good nascar modelers so i bought a couple of the kits. This kit shares the same chassis as their other kits which is almost an exact copy of the MPC southern stockers in that it has a two piece adjustable chassis which does not leave the finished chassis as an accurate working chassis but i decided to use it on this build.
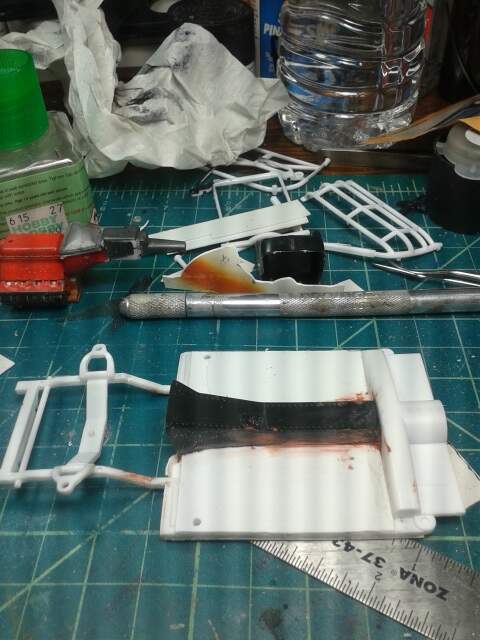
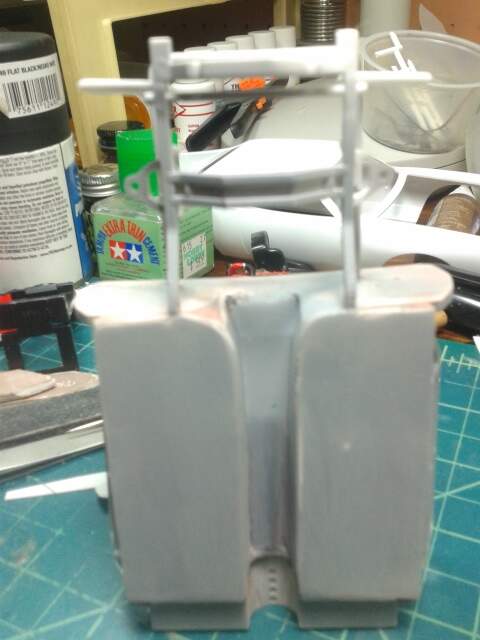
Now I say almost a exact copy because for some reason salvinos decided to put a GINORMOUS trans hump on it. I decided to cut out that trans hump and drive shaft tunnel and replace it with of all things the trans and tunnel from one of those southern stockers.
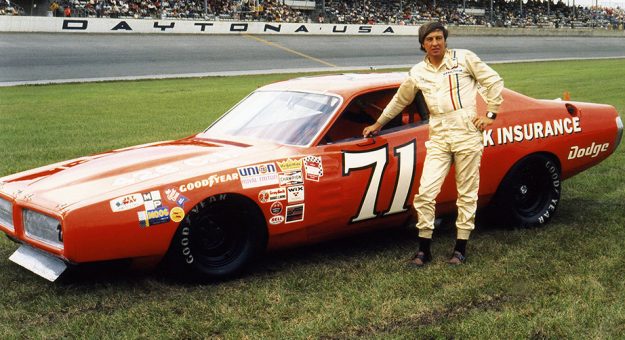
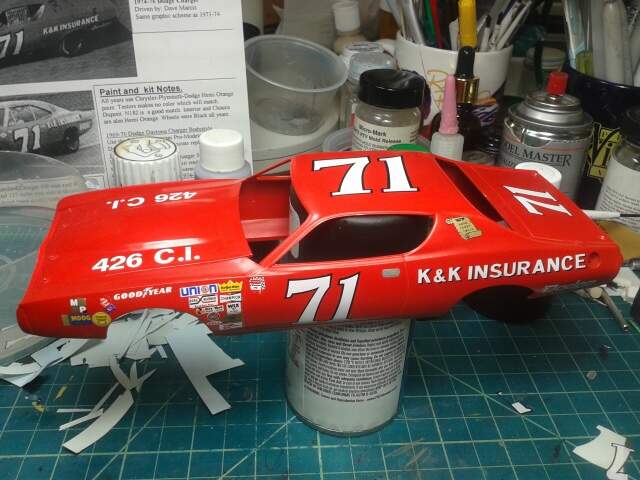
Here is the actual car I am attempting to build. I do not have the paint yet which is poppy red, but I have plenty to do as I wait for it to be delivered, … if I ever get around to finding it.
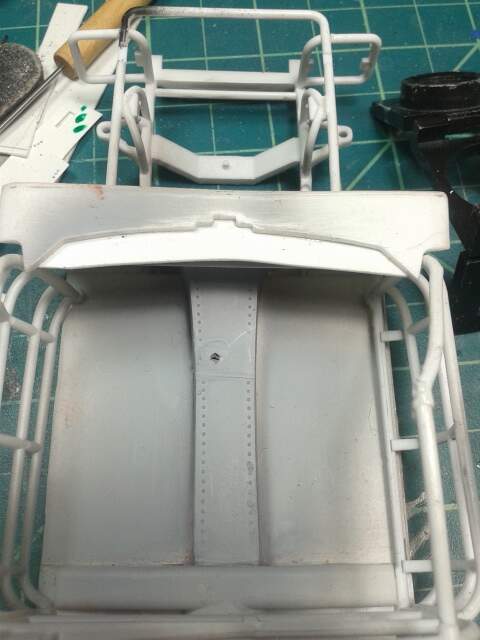
My progress. I was almost to the point of scrapping this idea and finding another chassis to use but i managed to so far solve some of the issues I was having.
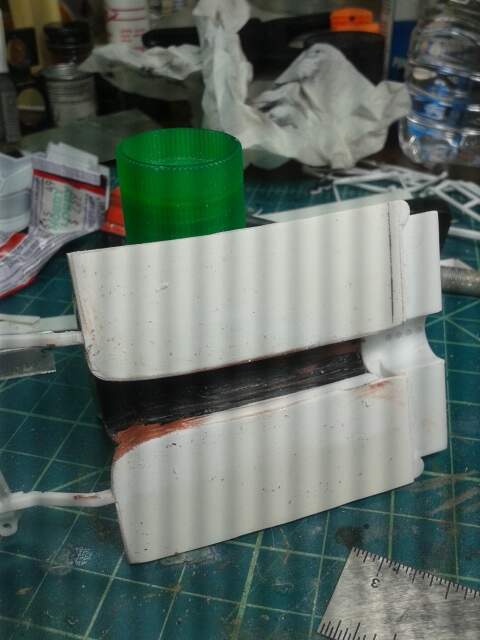
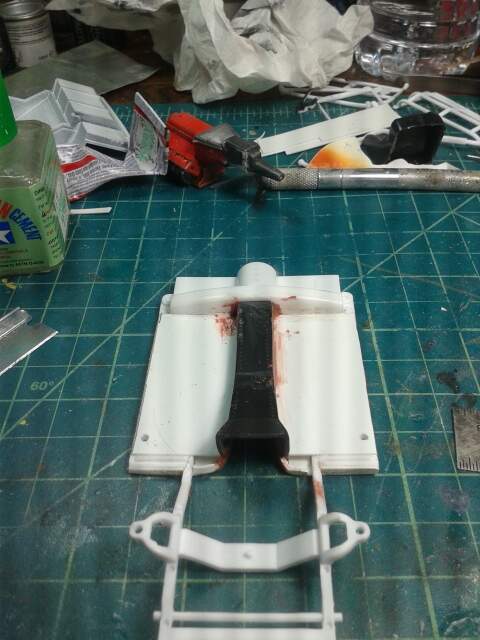
This may not be completely accurate but it is much better than what was there before. I used sheet plastic on the top and underside of the chassis after cutting out the tunnel. I used filler and some strips of plastic to cover up the gaps between the tunnel and bottom of the chassis and now I have ti sand and shape it. The trans of the engine is going to be a tight fit.
thanks. i did some more work on it tonight. i think it is going to work. it will be a tight squeeze for the engine though. we will see.
joe.
Ok so last night I got some more work done. i’m starting to get my mojo going on this build. it was sitting in the box on my bench for a couple of months because i was focused on a 109 build on my military bench.
Update:
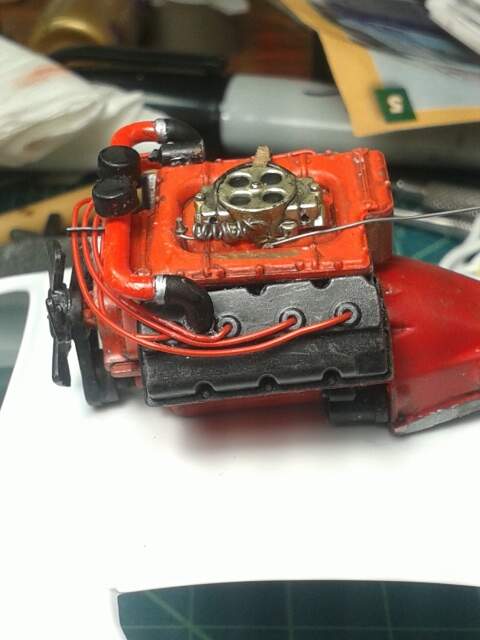
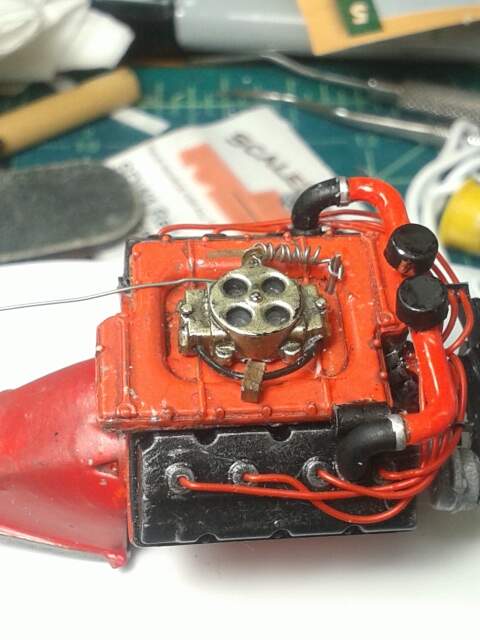
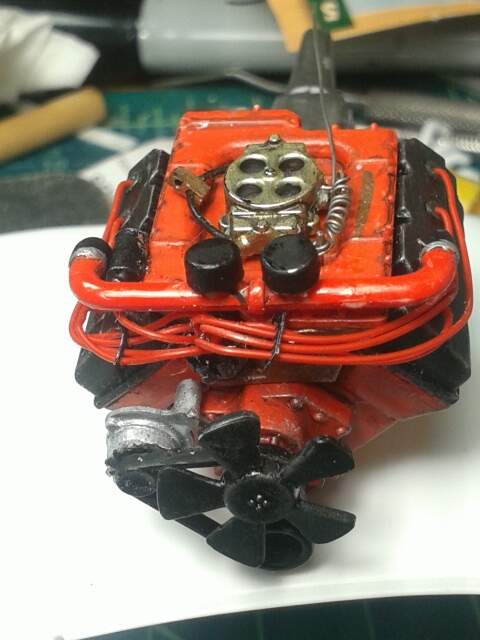
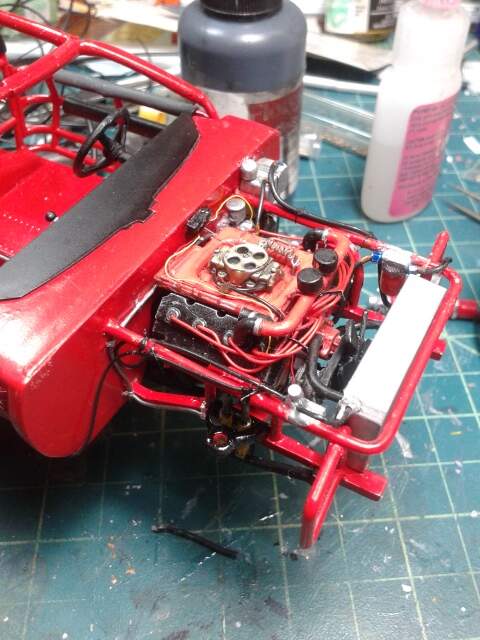
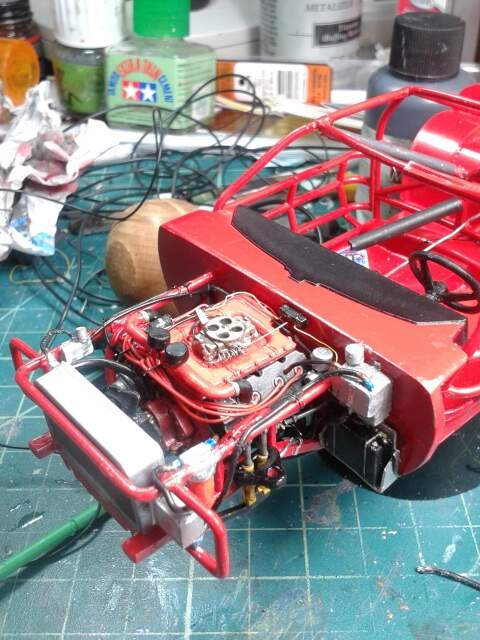
got the engine mostly done. i will wait to put the headers on when i am ready to install the engine. i need to put a fuel pump from my parts box and finish the line. i scratch made some wire looms for the plug wires and, for the very first time i scratch made the throttle linkage, not perfect but not bad for the first attempt… what do you guys think, did i forget anything? i am not really sure what route the linkage to the gas peddle takes i was just going to run it through the fire wall. i also pretty much finished the modifications to the tranny tunnel and the chassis pan. i ordered poppy red from gravity paints and can’t really do much more until the paint gets here so i can paint the chassis.
Joe,
Just saw your build blog on the K & K Dodge Charger. Excellent modification on tranny tunnel. Why in hell the Salvino’s decided on making modifications to both the Monogram and AMT kits is beyond me. I bought two kits, started one and benched it. The other is still wearing it’s shrink wrap. The reviews on the Nascar boards are mixed with some guys loving the kits, but most others finding major issues like the windshield now falls right through the opening as the head Salvino Brother insisted on enlarging it. I’m waiting and waiting for the Ford kits and praying that with these molds, if they do indeed actually have them, just leave them as is.
Nice job detailing the big block V8. Your wire looms look excellent as does the throttle linkage. I’m no expert by any means on Nascar but there must be dozens and dozens of pictures of the engine compartment for that exact car on the Net.
Gravity ships their paints DHL and you almost always get it within 3 business days. Can’t wait to see how the body looks wearing its Poppy Red paint.
got the engine in finally. it’ a tight fit with the new trany tunnel but i got it in. typical salvinos poor engineering, the drive shaft does not fit thru the opening of the tunnel where the shaft retainer is molded. i had to trim some plastic to allow it to fit thru.
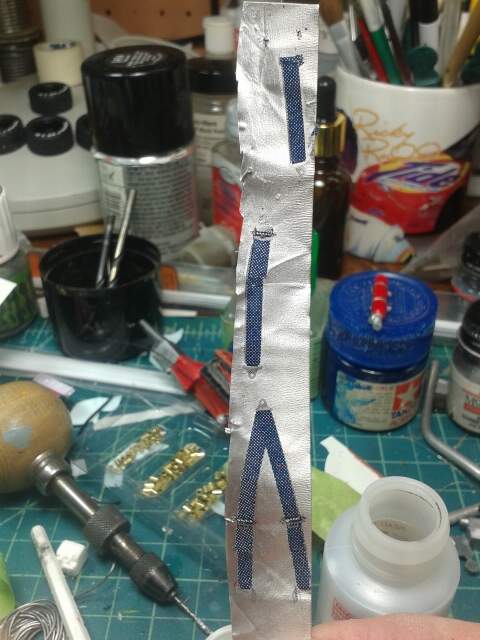
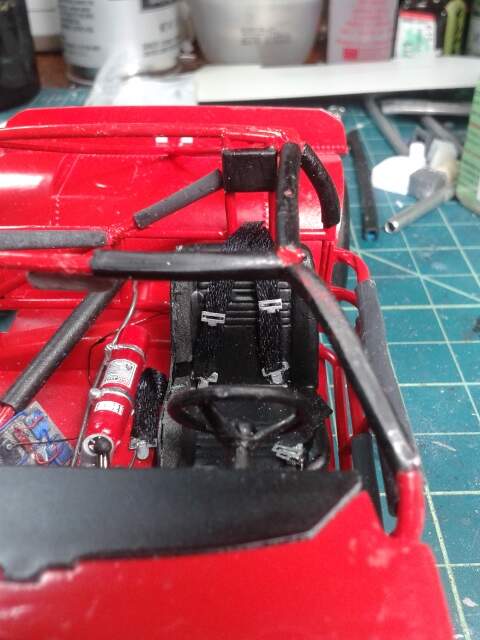
I tried something new with the seat harness. i applied seat harness decals to some aluminum and tried to cut them out but they flaked off even after i applied flat clear to them.
thanks joel. for all the good reviews this kit got i found some flaws that really were avoidable. poor design on the rear suspension, flimsy rpll cage ( i don’t know how many times i snapped a piece off) of course theway oversized tran tunnel and i can’t stand that real chrome crap. errors in the direction sheet, example they have the front shocks part numbers reversed. tires should have a light tread on them.
well as you probably guessed i’m one of the guys on the other boards with issues about how these kits were designed. their first release, the Oldsmobile they totally missed the accent line going down the side and swooping up at the rear window and had the wrong rear suspension. i only have two other kits from them, the 2+2 grand prix and an early monte. don’t know why they messed with the monogram molds either.
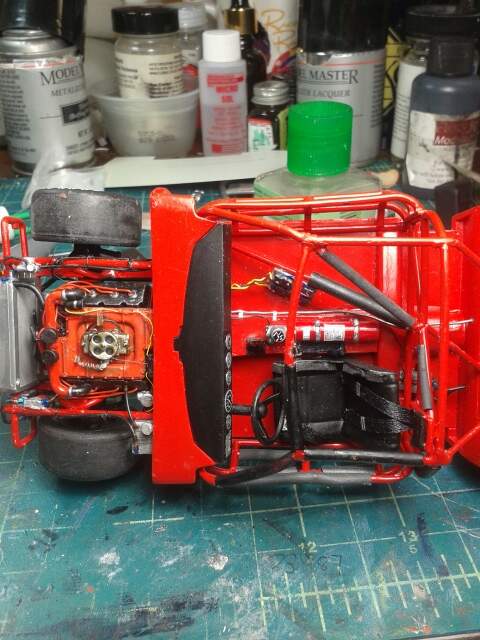
got some more work done this week. finished plumbing the oil lines and radiator overflow. i messed up the kit oil filter so had to cast a new one. actually the resin filter i cast is better than the kits.
sorry the photos are a little washed out.
BTW joel unfortunately there wasn’t dozens of photos of this engine. i went with some advice from a friend and my own knowledge of more modern systems and a few photos i could find to plumb the engine.one thing i did know was to delete the oil tank that the kit had mounted behind the right front bumper. the oil for the sump would not have been mounted there. last thing you would need is to take a hit there and dump 12 or more quarts of oil all over the track. my friend tom mooty advised me to mount the tank (also cast by me) on the left fire wall along with the battery.
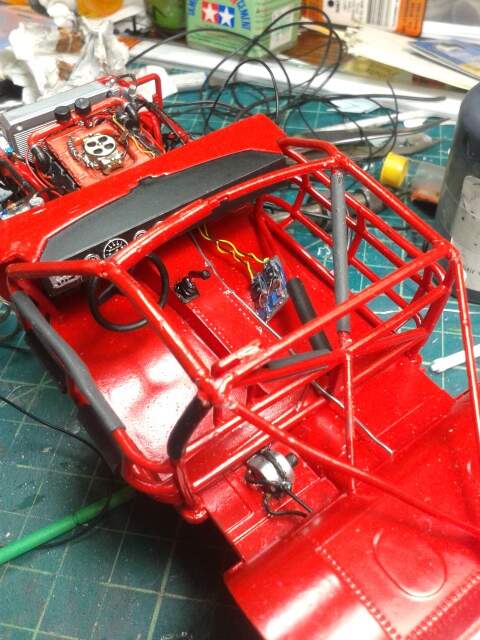
got most of the drivers office space done too. wired the ignition boxes and ran them out to, well where ever and plumbed the rear end cooler. i forgot to get photos of the rear suspension, next time.
I replaced the kit seat with a seat from my parts box that is a better representation than the kit seat.i just need to make a harness and it will be installed.
getting close to painting time. the body is primed and i received my paint from gravity USA rather quickly and should be ready as soon as i get some time.
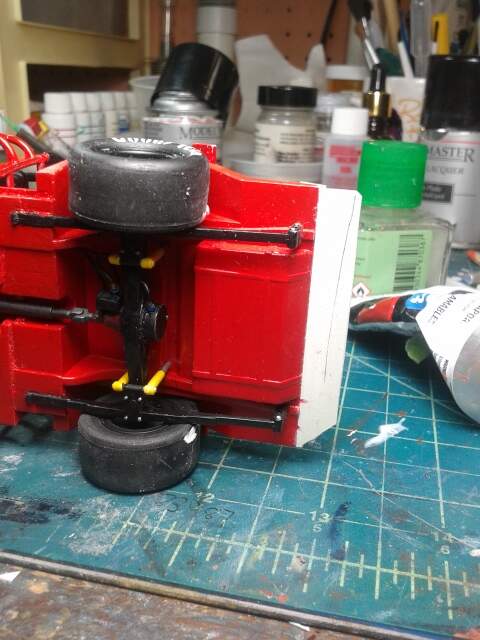
thanks. if i get a chance today i will finish up the rear suspension and then the front and see if the chassis sits square. i usually do not attach the tires yet but being i have not built this kit before it is better to check it now than after i finish all the little touchups. the the body on to the paint booth.
finished the chassis and painted the body’s base coat. just need to wet sand and clear.
here’s the chassis, i’ll try to get photos of the body once it’s done.
all four tires had holes in them, i had to fill with putty and paint them.
the harness i made out of a soft material ribbon. it was blue but i didn’t like it so i colored it black with a marker and added the photo etch.
the chassis in this kit is a shameless copy of the mpc southern stocker chassis from the 80’s which is an adjustable chassis. it is meant to adjust to different body sizes so there would not be any need to tool chassis for different kits, as a result it is no where accurate nor does it fit the body in that it is too short and in salvinos other kits too narrow too. what i did was add some sheet stock to the end to close up the underside. and of course you know about the drive shaft tunnel swap.
Coming along very nicely considering how bad this kit is. I really like all the details that you’re putting into this.
I’ve seen it built up by a good friend of mine elsewhere and he played the devil building it but it turned out good. This one looks like it’ll wrap up well too.
Gonna be following this one Joe.
thanks joel and mustang. yeah it has it’s issues, i think i listed some at the begining. another thing i recently noticed is they forgot to mold in the cowl vents in the top of the hood. any way i could add them? are there any cowl vent decals out there? the other thing is the hood just slides off the body with the slightest touch. no pins or tabs to hold it.
Joe,
As far as the hood vents go, I can’t really see if the hood has them or not in the opening picture. I would think that they most likely didn’t as the hood is basically just hammered sheet Aluminum back then.