Looking swell Joe!! Great work on the spindle reposition. It seems that dang near every automotive build I tackle, I have to reset the stance from OOB.
2 Likes
Thanks mustang. it has been a fun build so far.
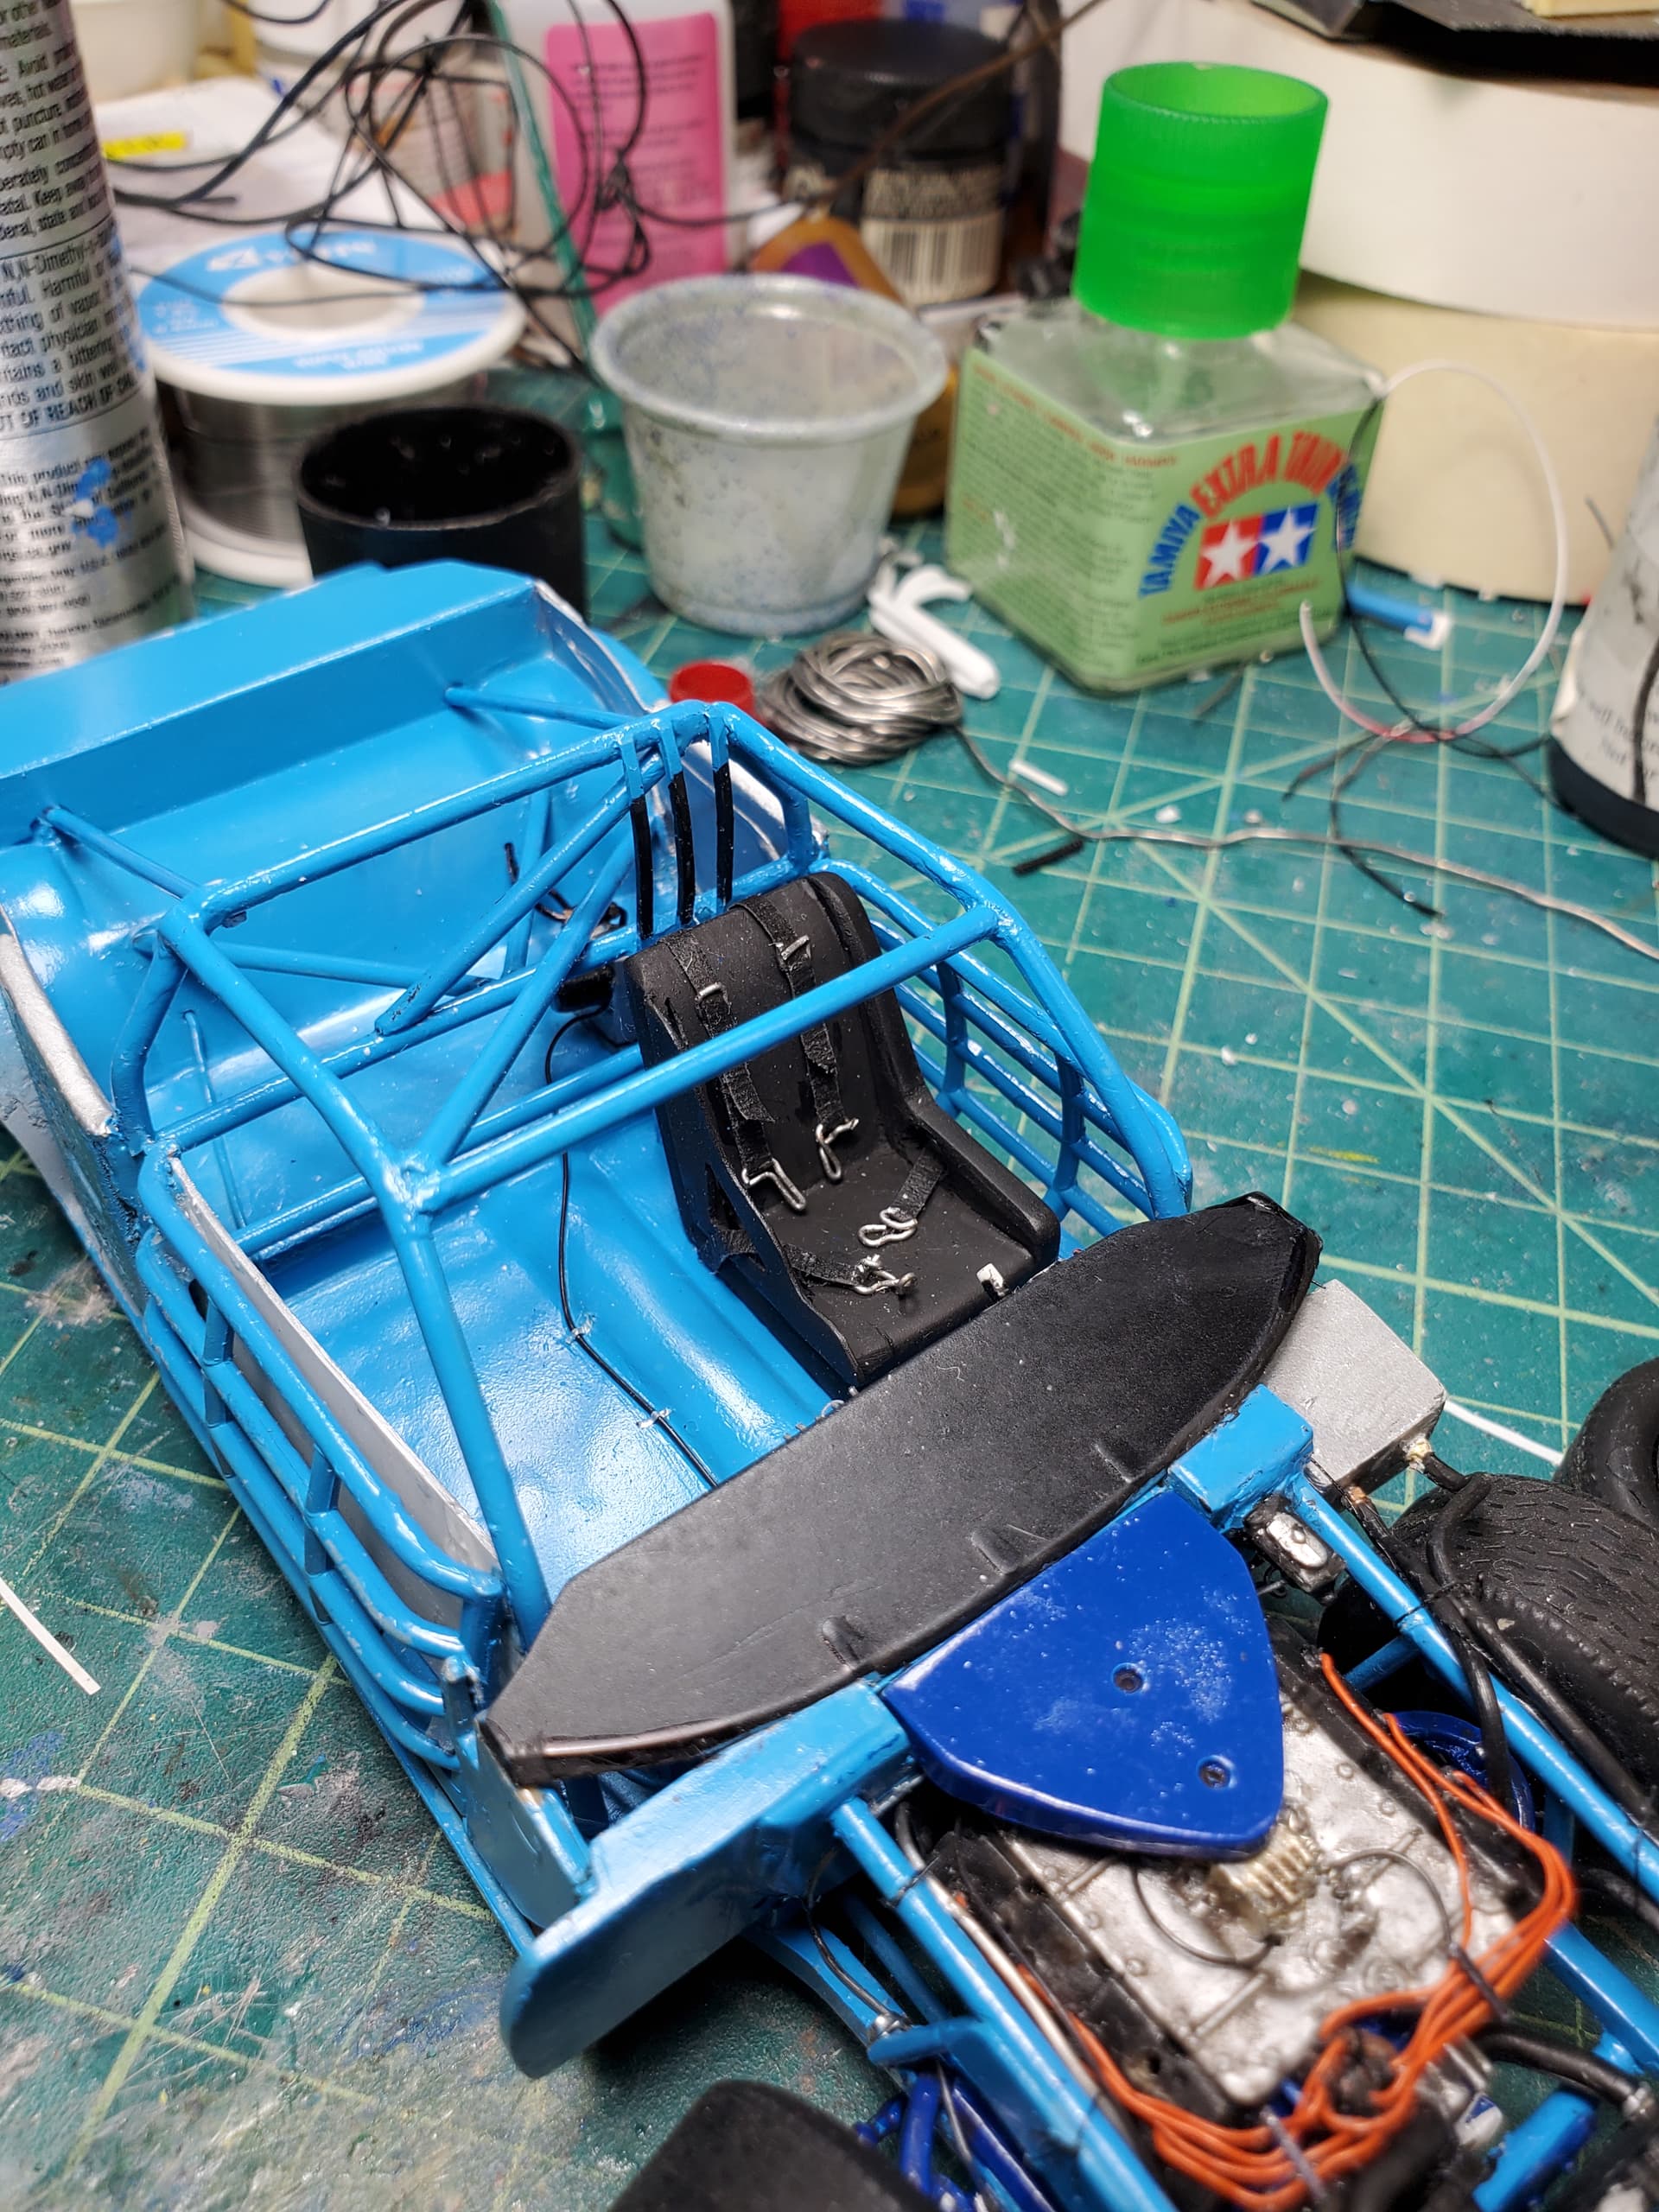
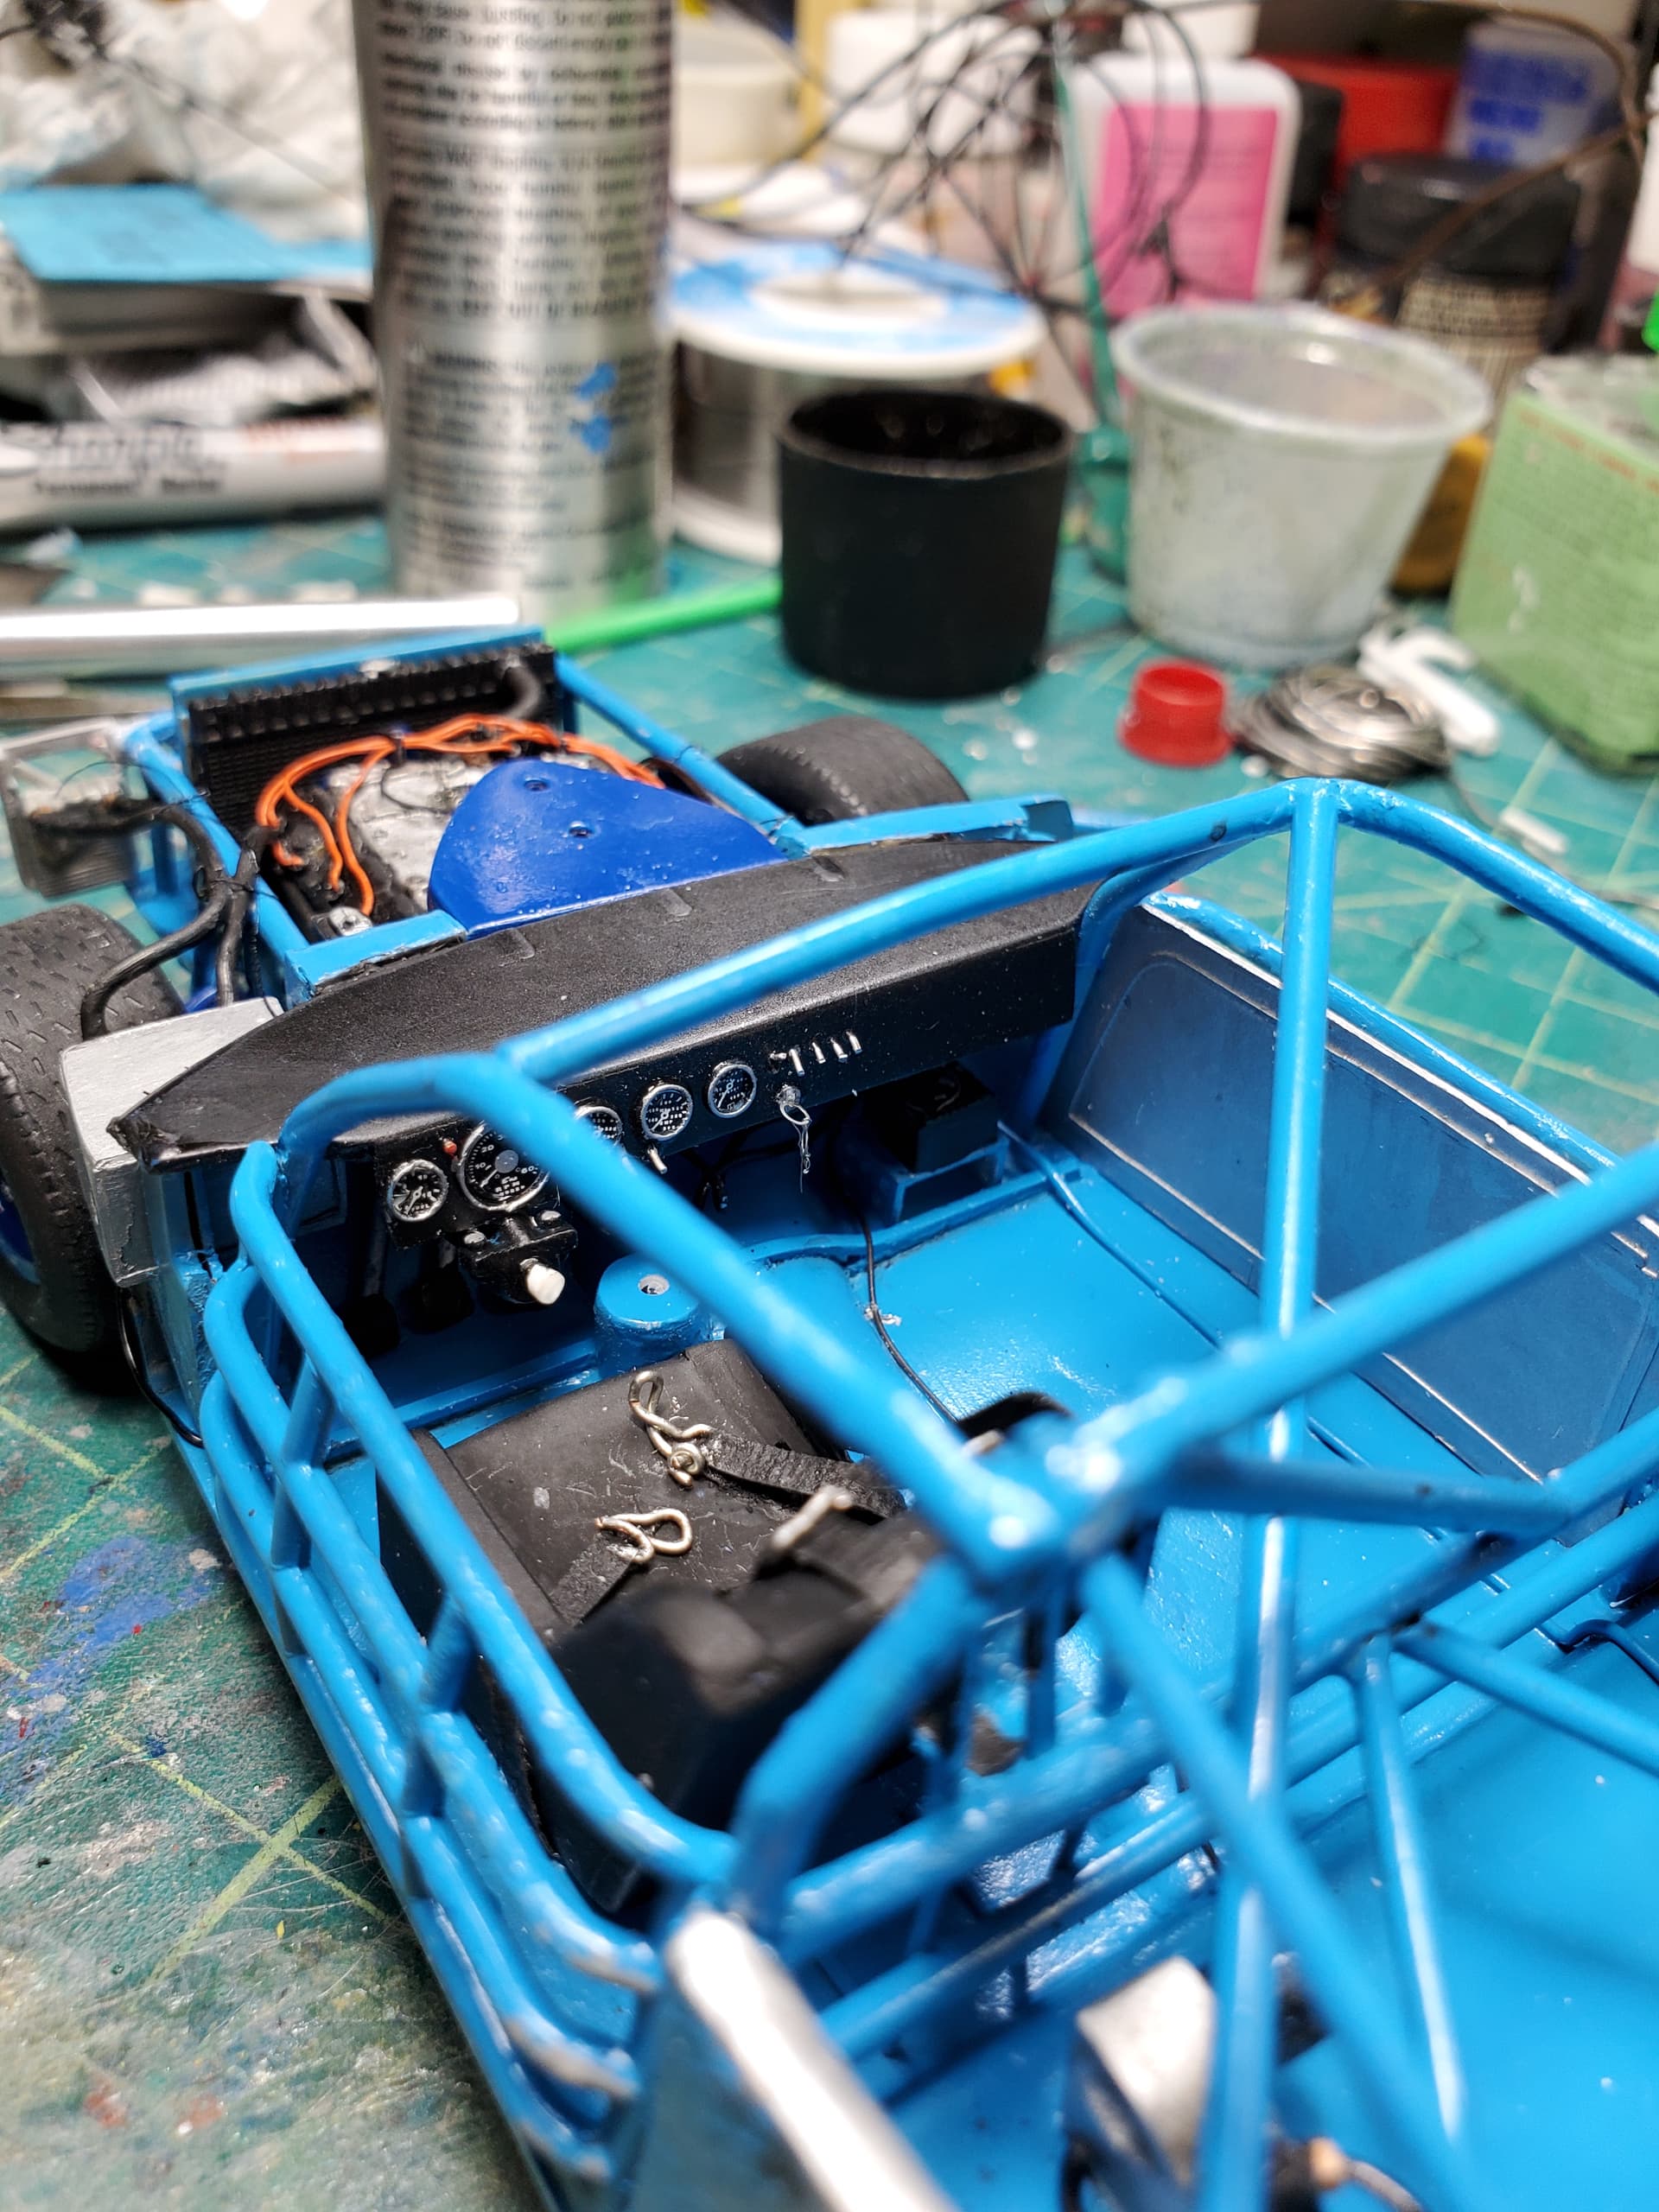
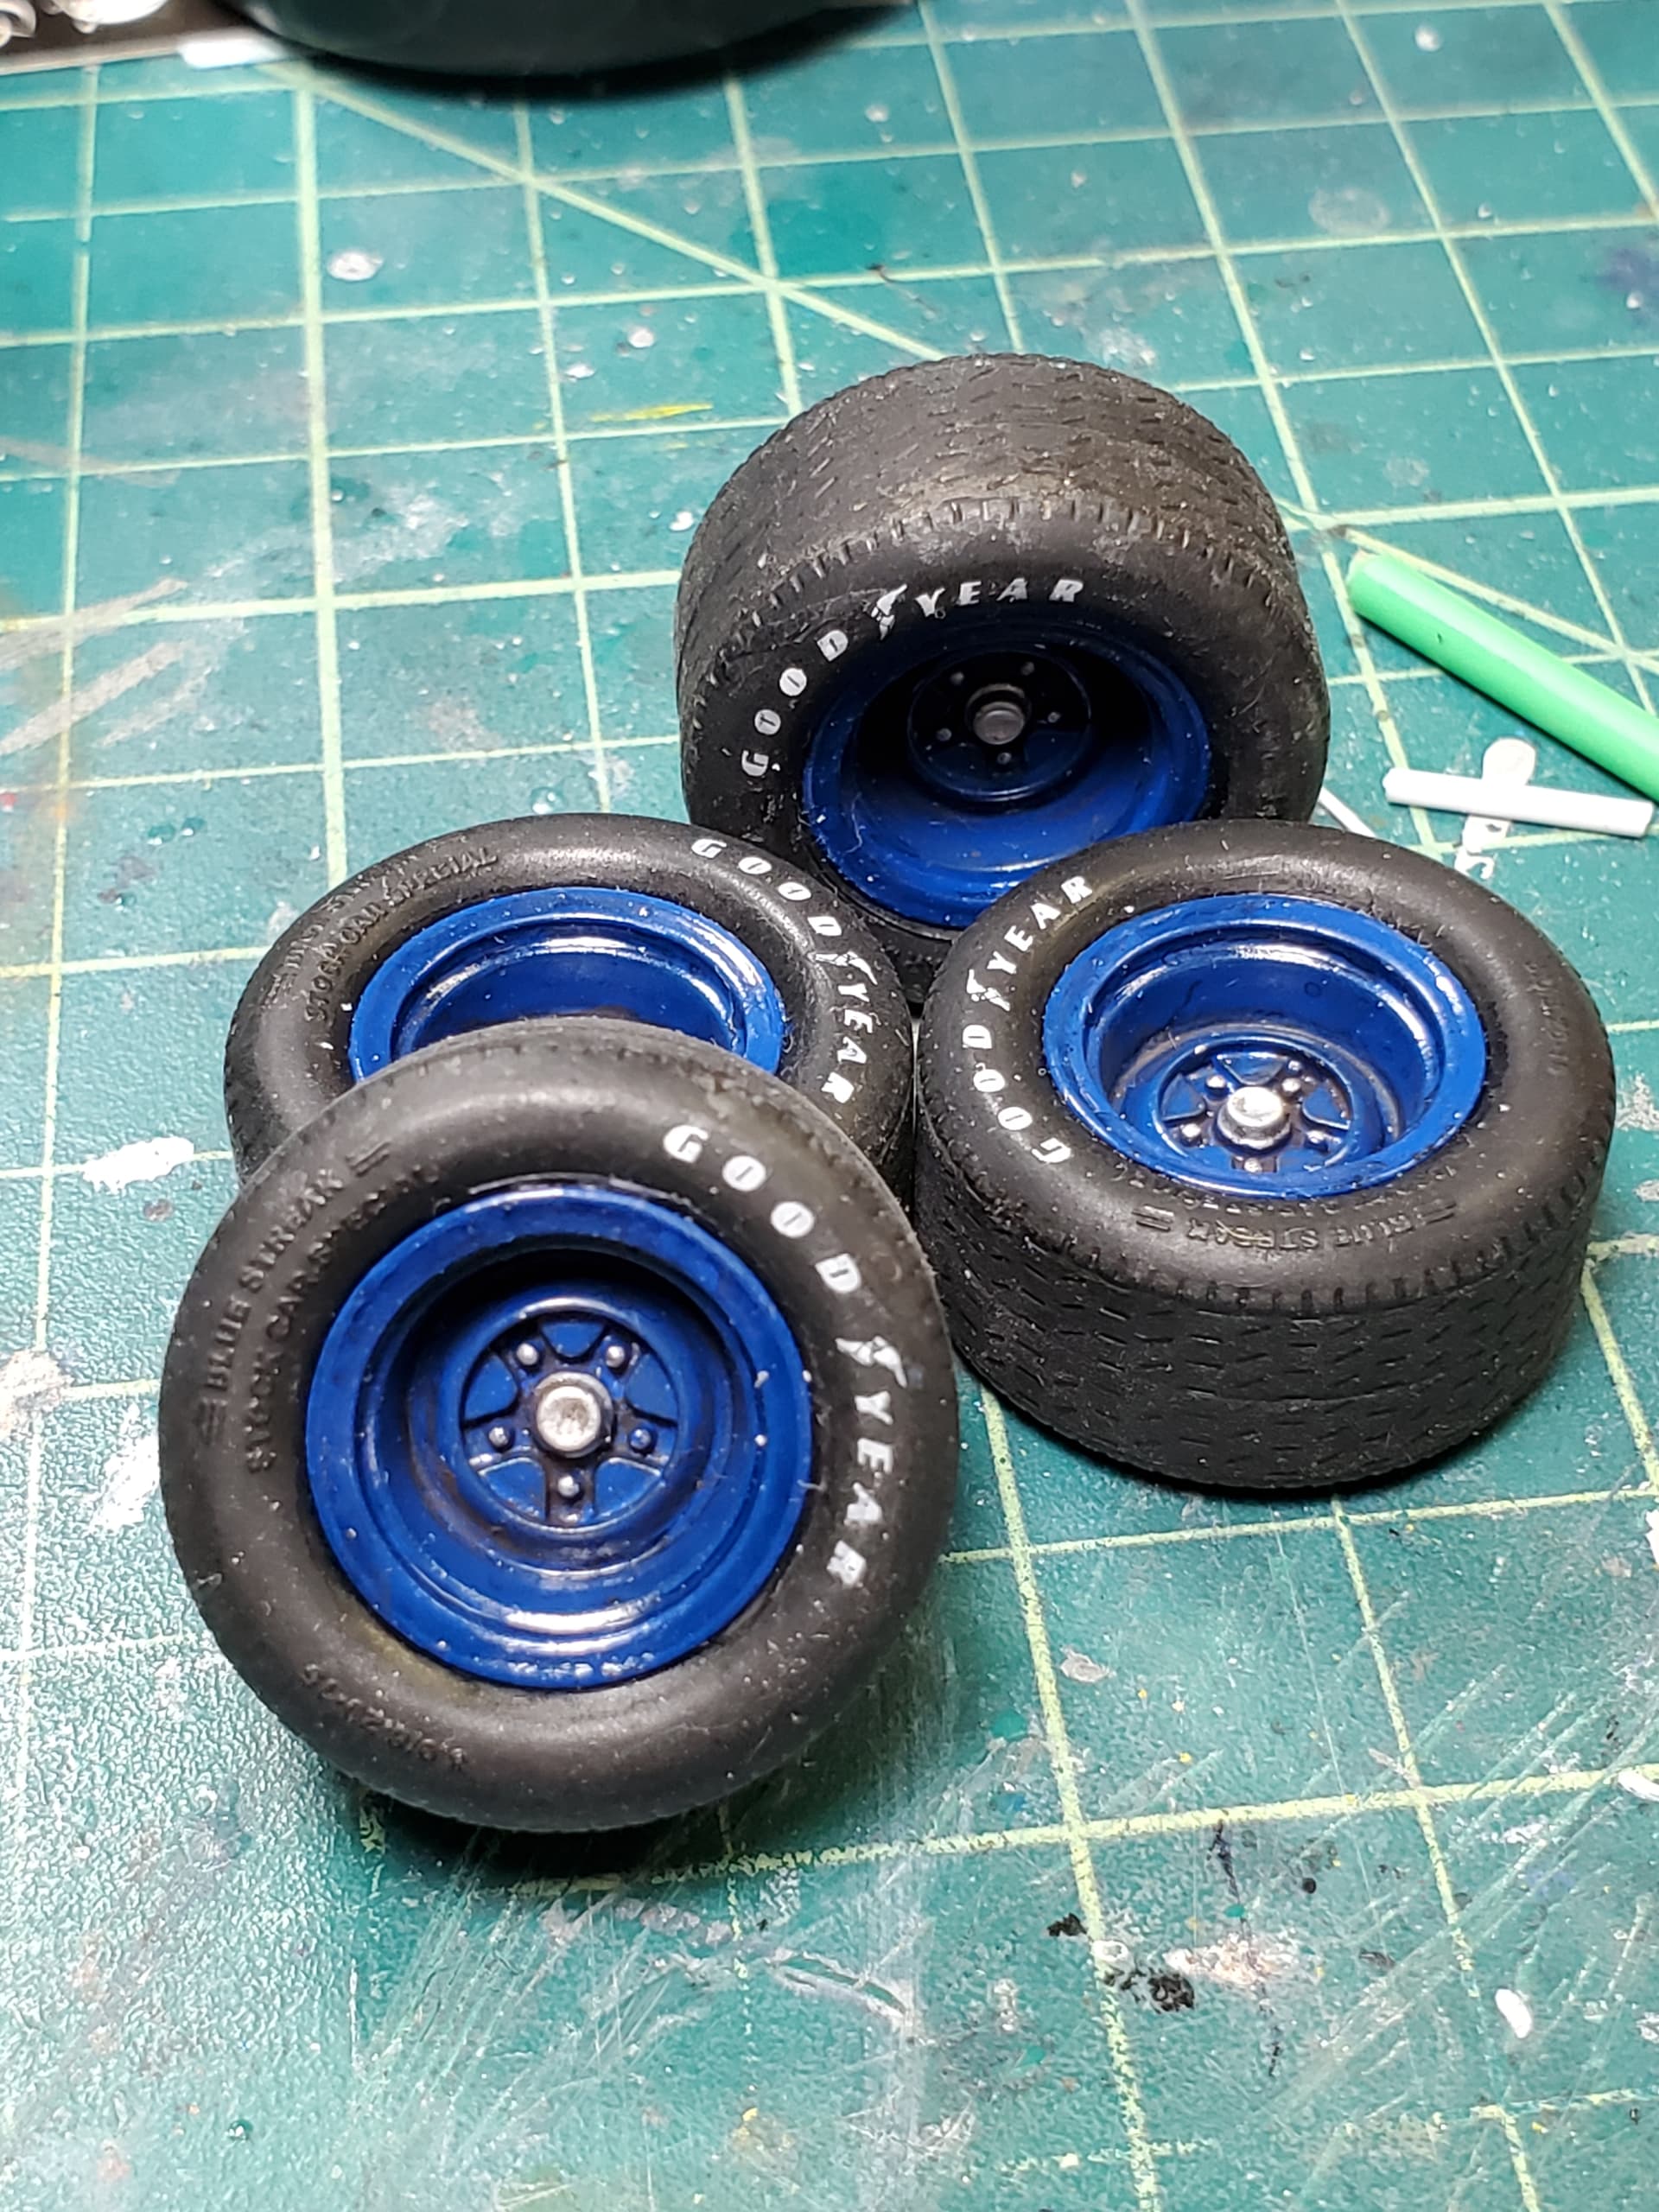
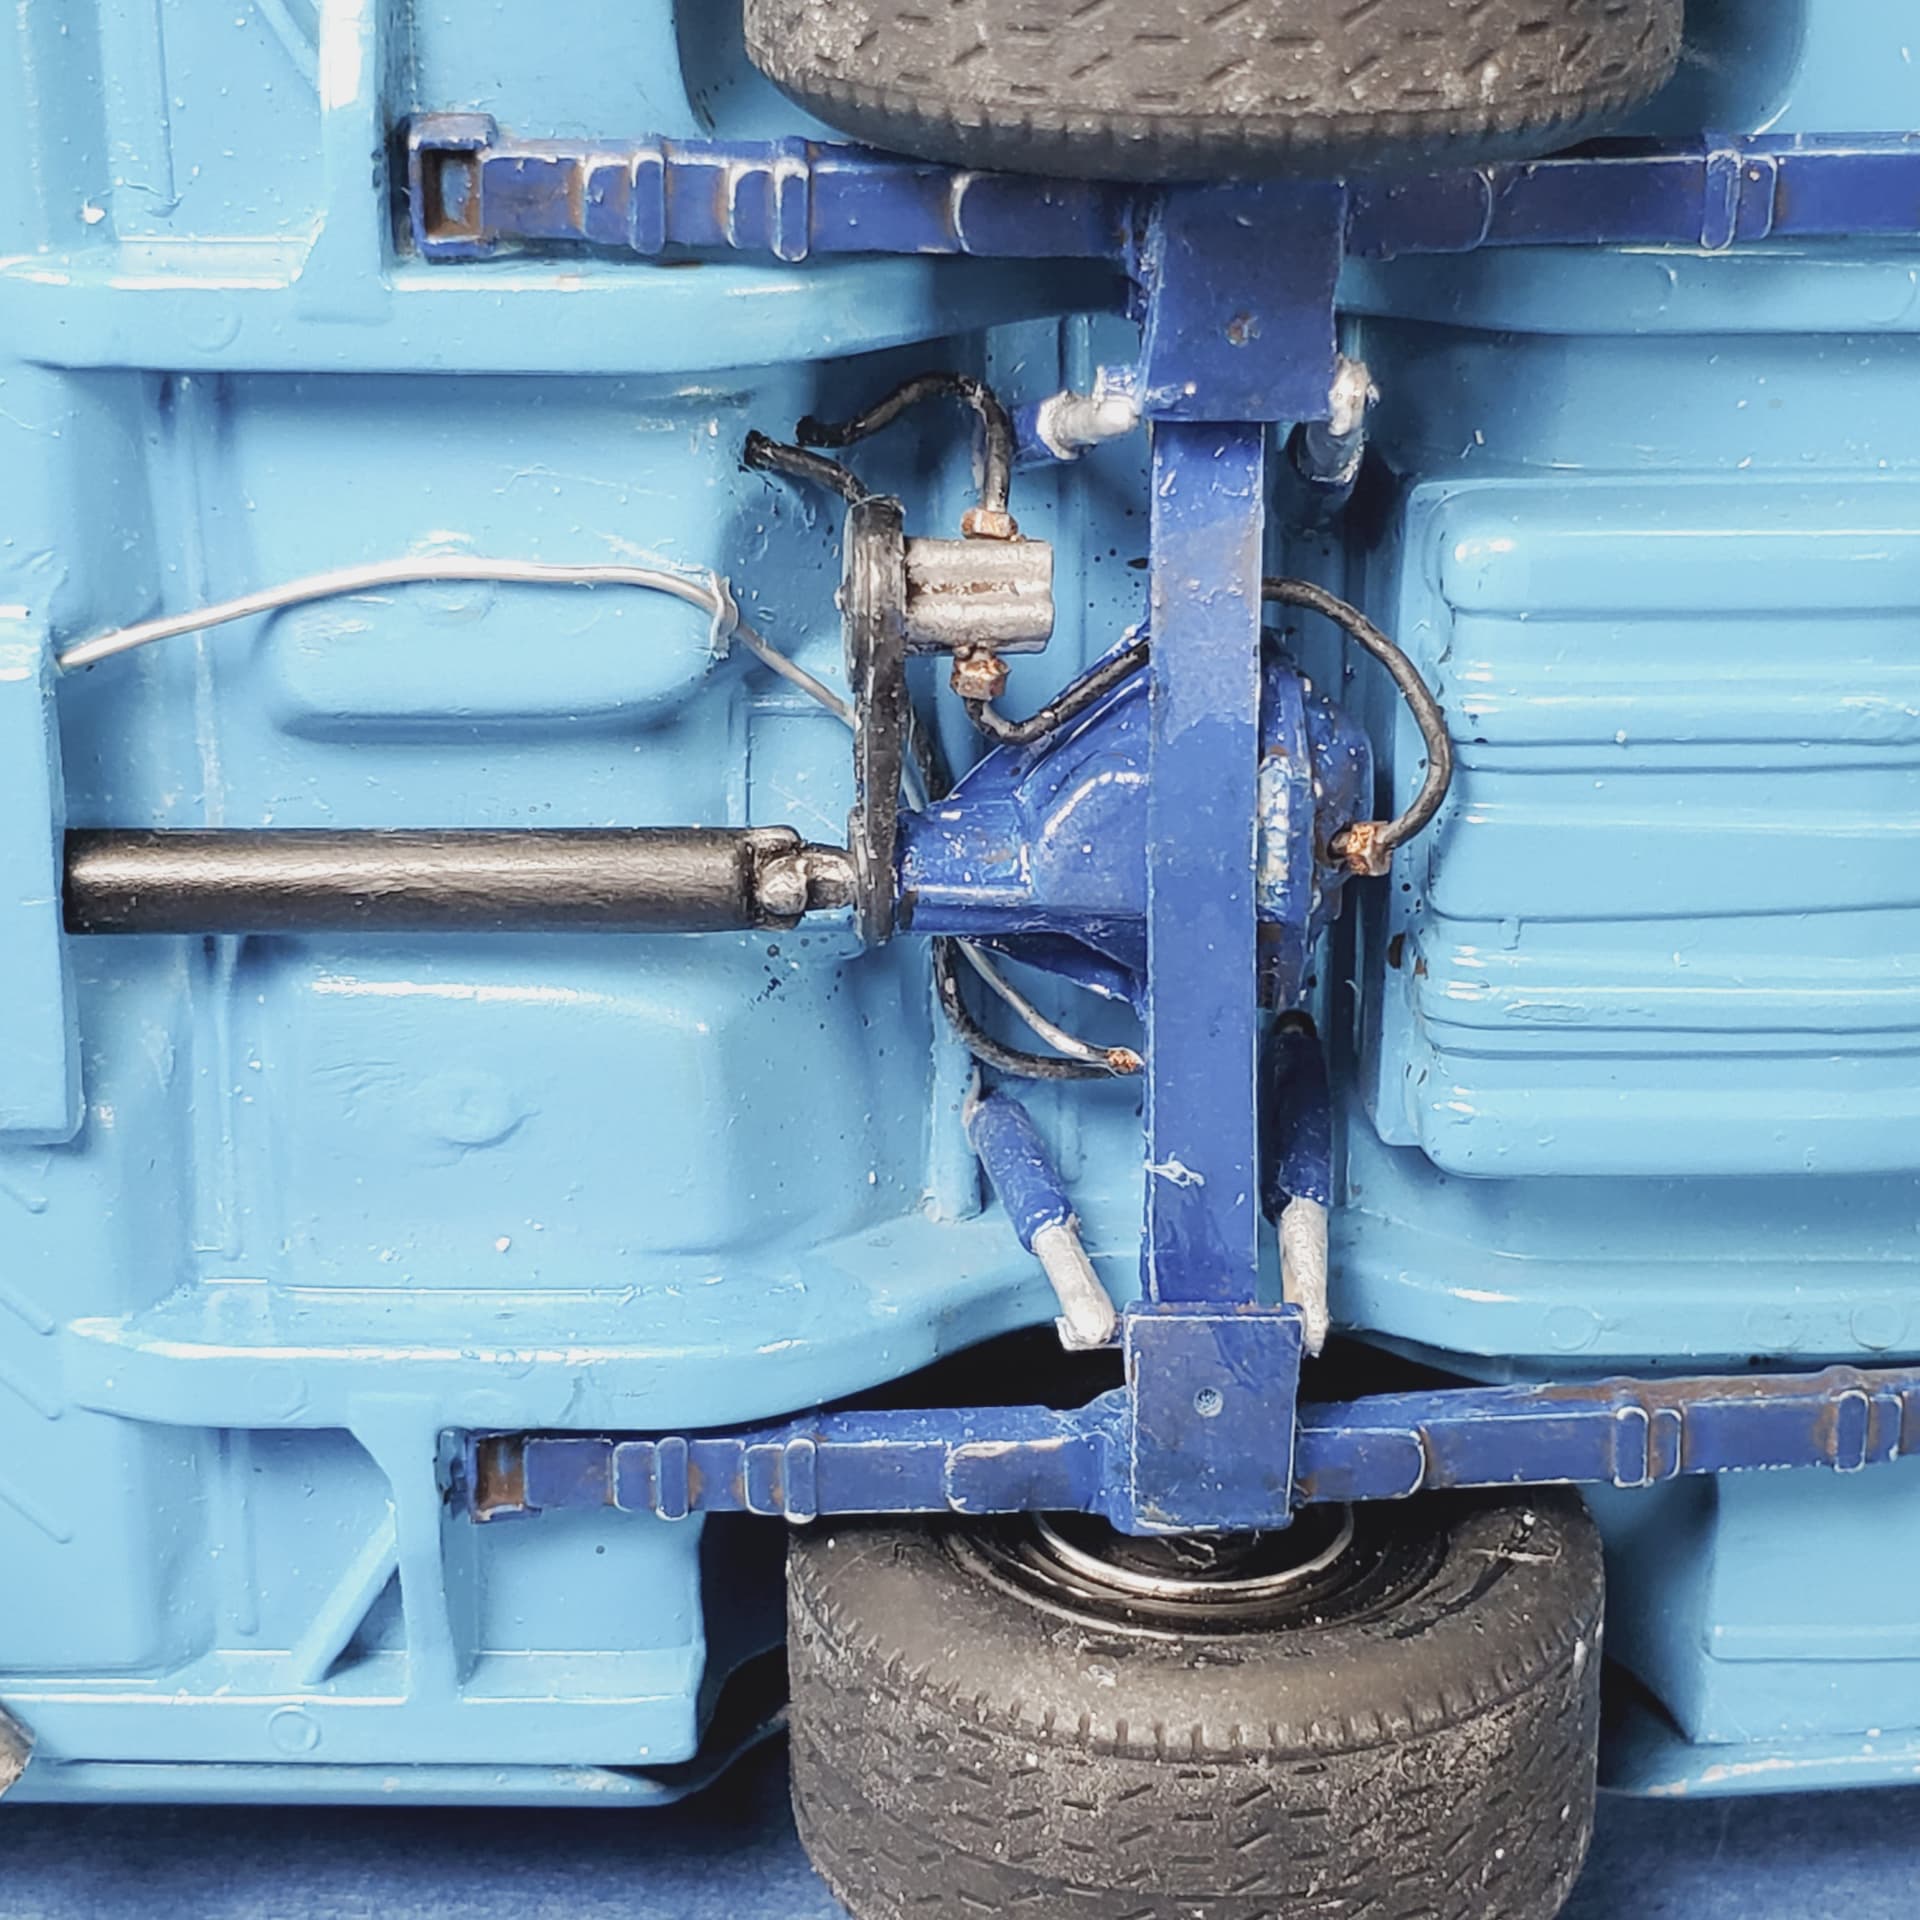
No recent posts but that doesn’t mean no progress. got the chassis rolling and fitted out with engine and plumbing. still need a few bits to finish but most of the work is done. on to the body paint now. MCW paints for the chassis and body. i may add a touch of white to the paint, to my eye the painted chassis looks a little too blue, needs to be a little creamy.resin wheels cast by a friend and the triangular air box is cast by me along with the rear end cooler. amt chassis, monogram dash with pe keys in the ignition, salvinos seat corrected with the bolster on the correct (right)side of seat. don’t know why salvino put it on the left side but that’s typical od their poor attention to detail.
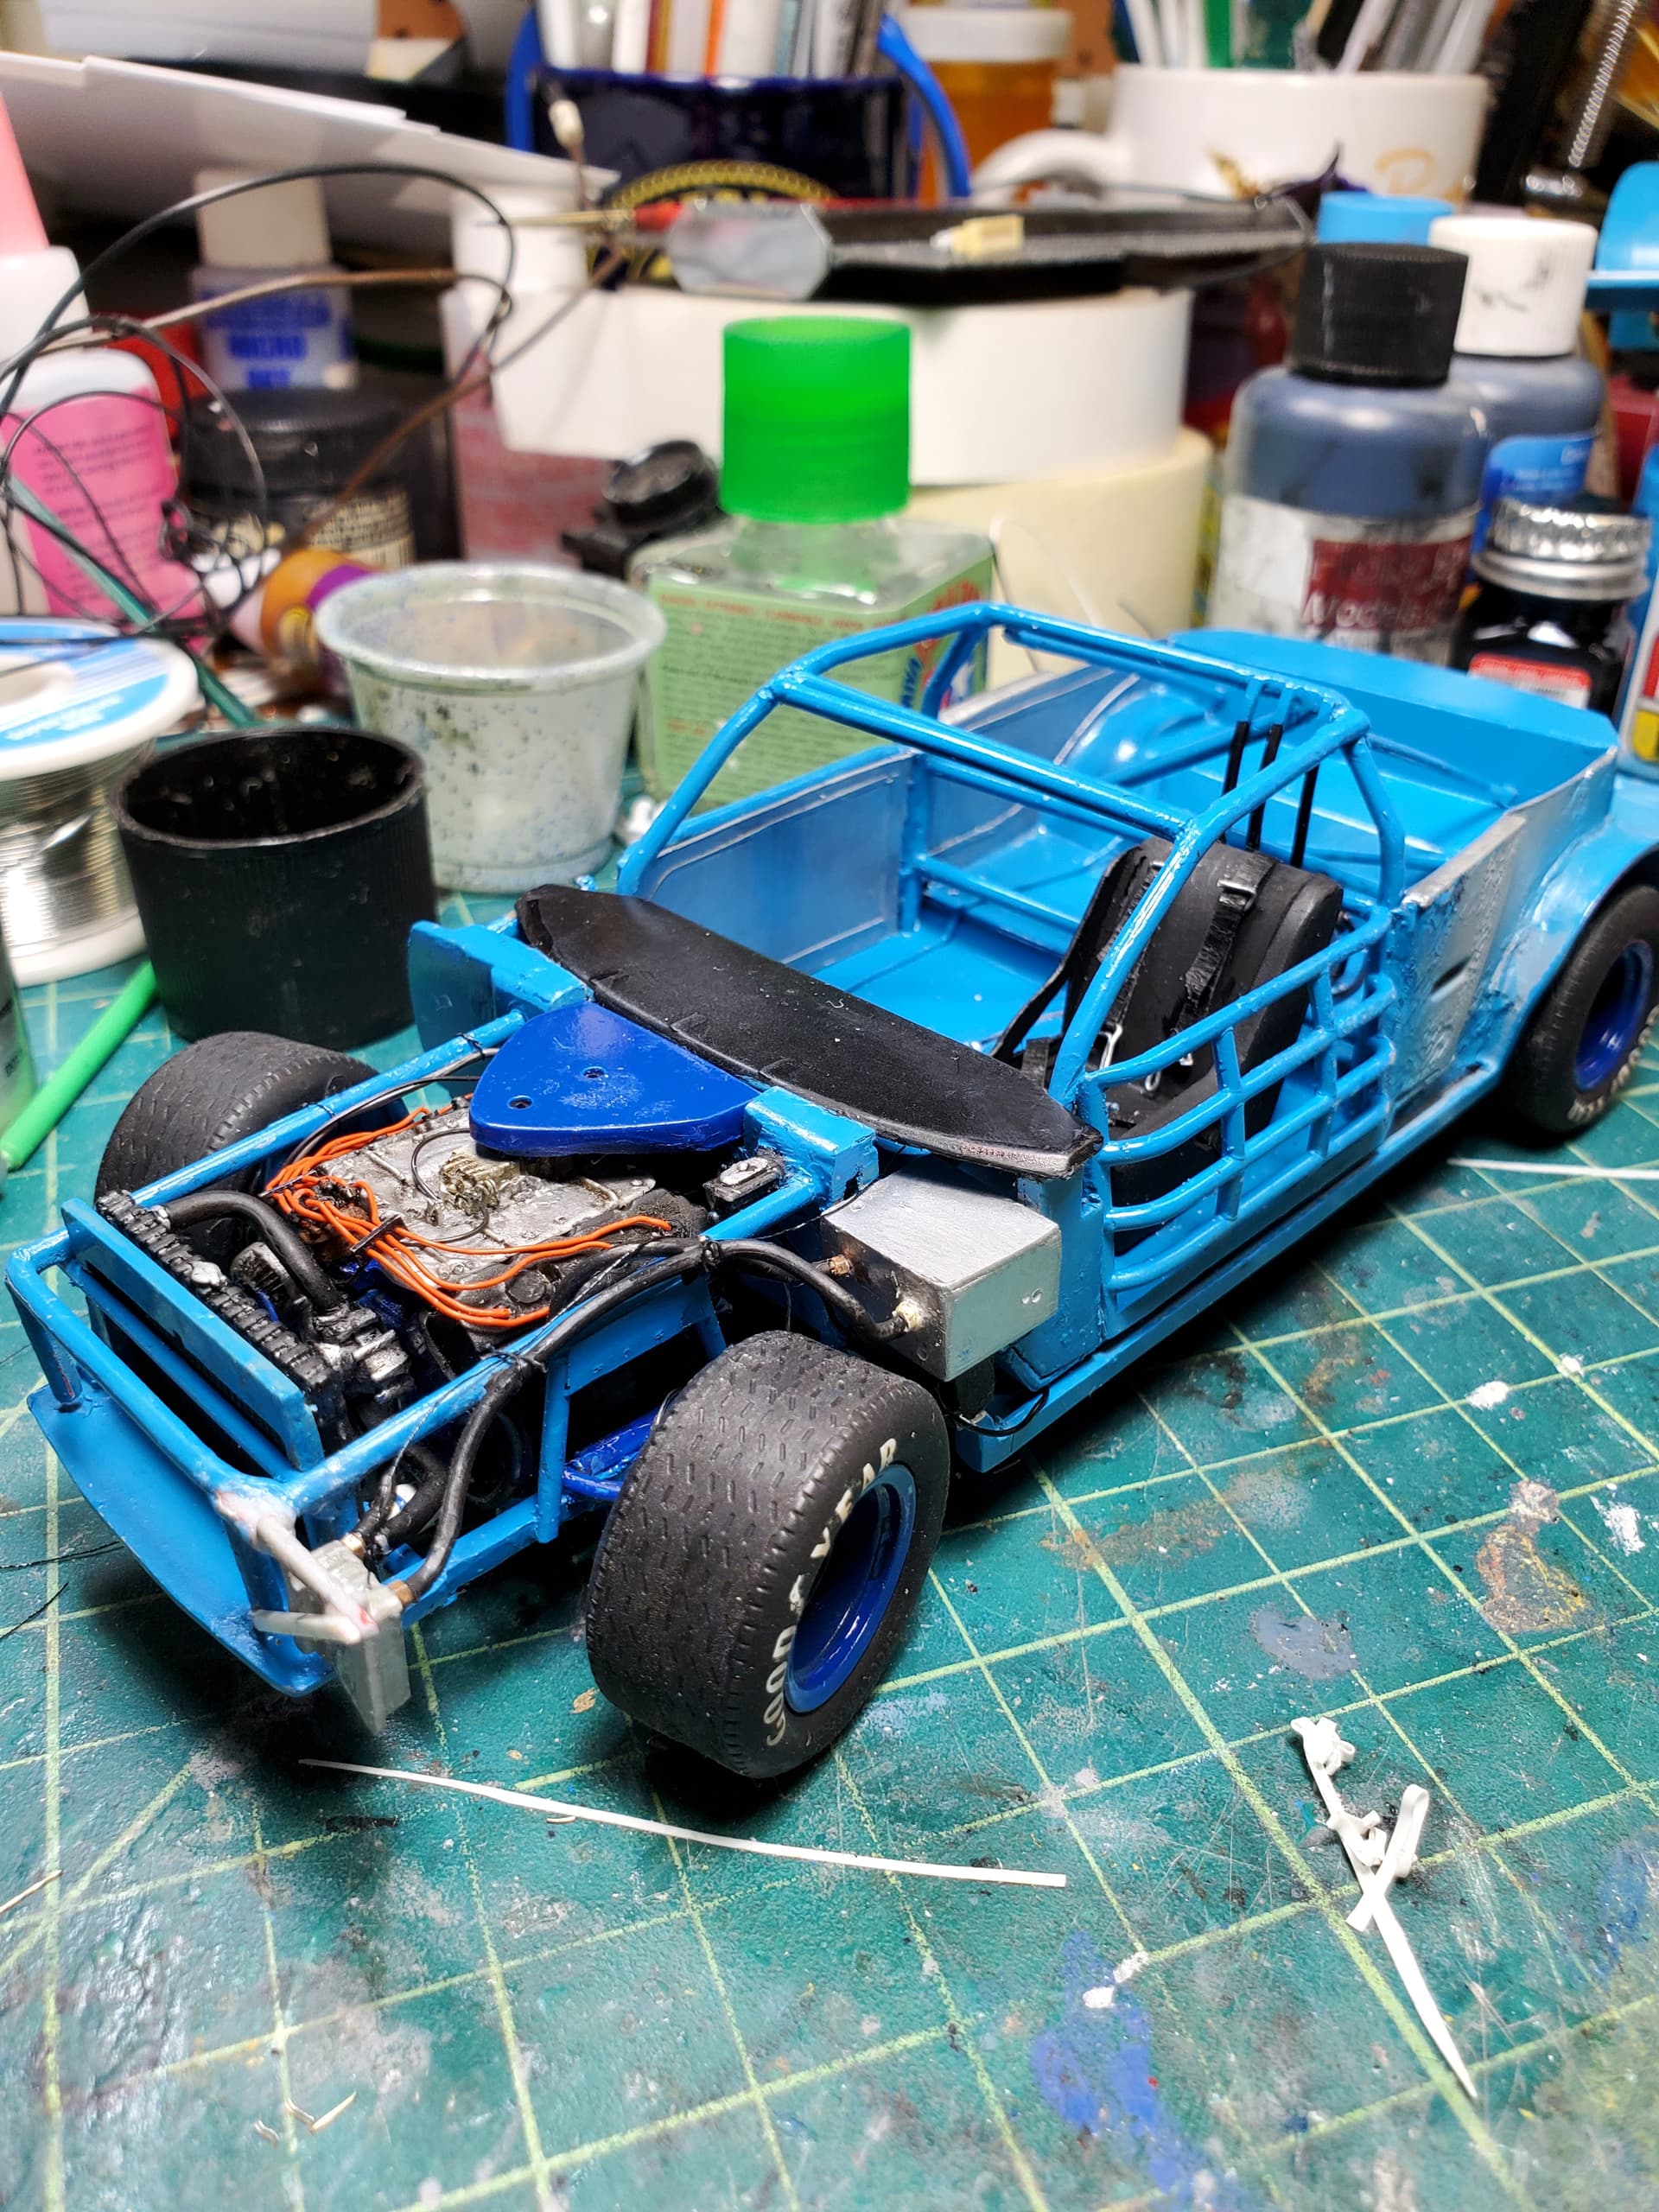

will have to post the rest later. computer not cooperating right now.
5 Likes
Joe,
Just another one of your outstanding NASCAR rolling chassis. Your attention to details certainly kicks it up a few notches.
joel
1 Like
That is super impressive work, bub!
Loving the detail.
1 Like
Thanks, this build is put on hold for now as i have to tend to complete other builds but it will be back soon. keep eye out.
Joe
1 Like
I hear you on that. Pretty much everything I’ve got going on in modeling world got put on hold the last month or so while I tended to my truck. First it was a transmission that lost 3rd and 4th gear so in went a new tranny…then my 406 small block Chevrolet developed…a rod knock!!! That’s almost a thread of its own to explain all of that but I had to swap my spare 383 stroker motor into the truck. When it rains…it pours.
The progress shots you posted look nothing short of awesome and am looking forward to continued progress on this Joe.
1 Like
I just got back from visiting my wife’s family in Peru on the 14th for the hollidays and now I have to play catch up with everything from bills to models.
3 Likes
Man do I ever feel your pain brother. I haven’t left the frickin’ city let alone a country and I’m playing catch up with modeling…and bills.
Looking forward to your continued progress here Joe.
3 Likes
One thing I’ve learned is that the bills just never stop. Even after passing the bills seem to keep on coming for years on end.
As for catching up with modeling, I’m right there with you guys for sure, but that’s going to be way better and a lot more fun then paying all those pesky bills.
joel
4 Likes
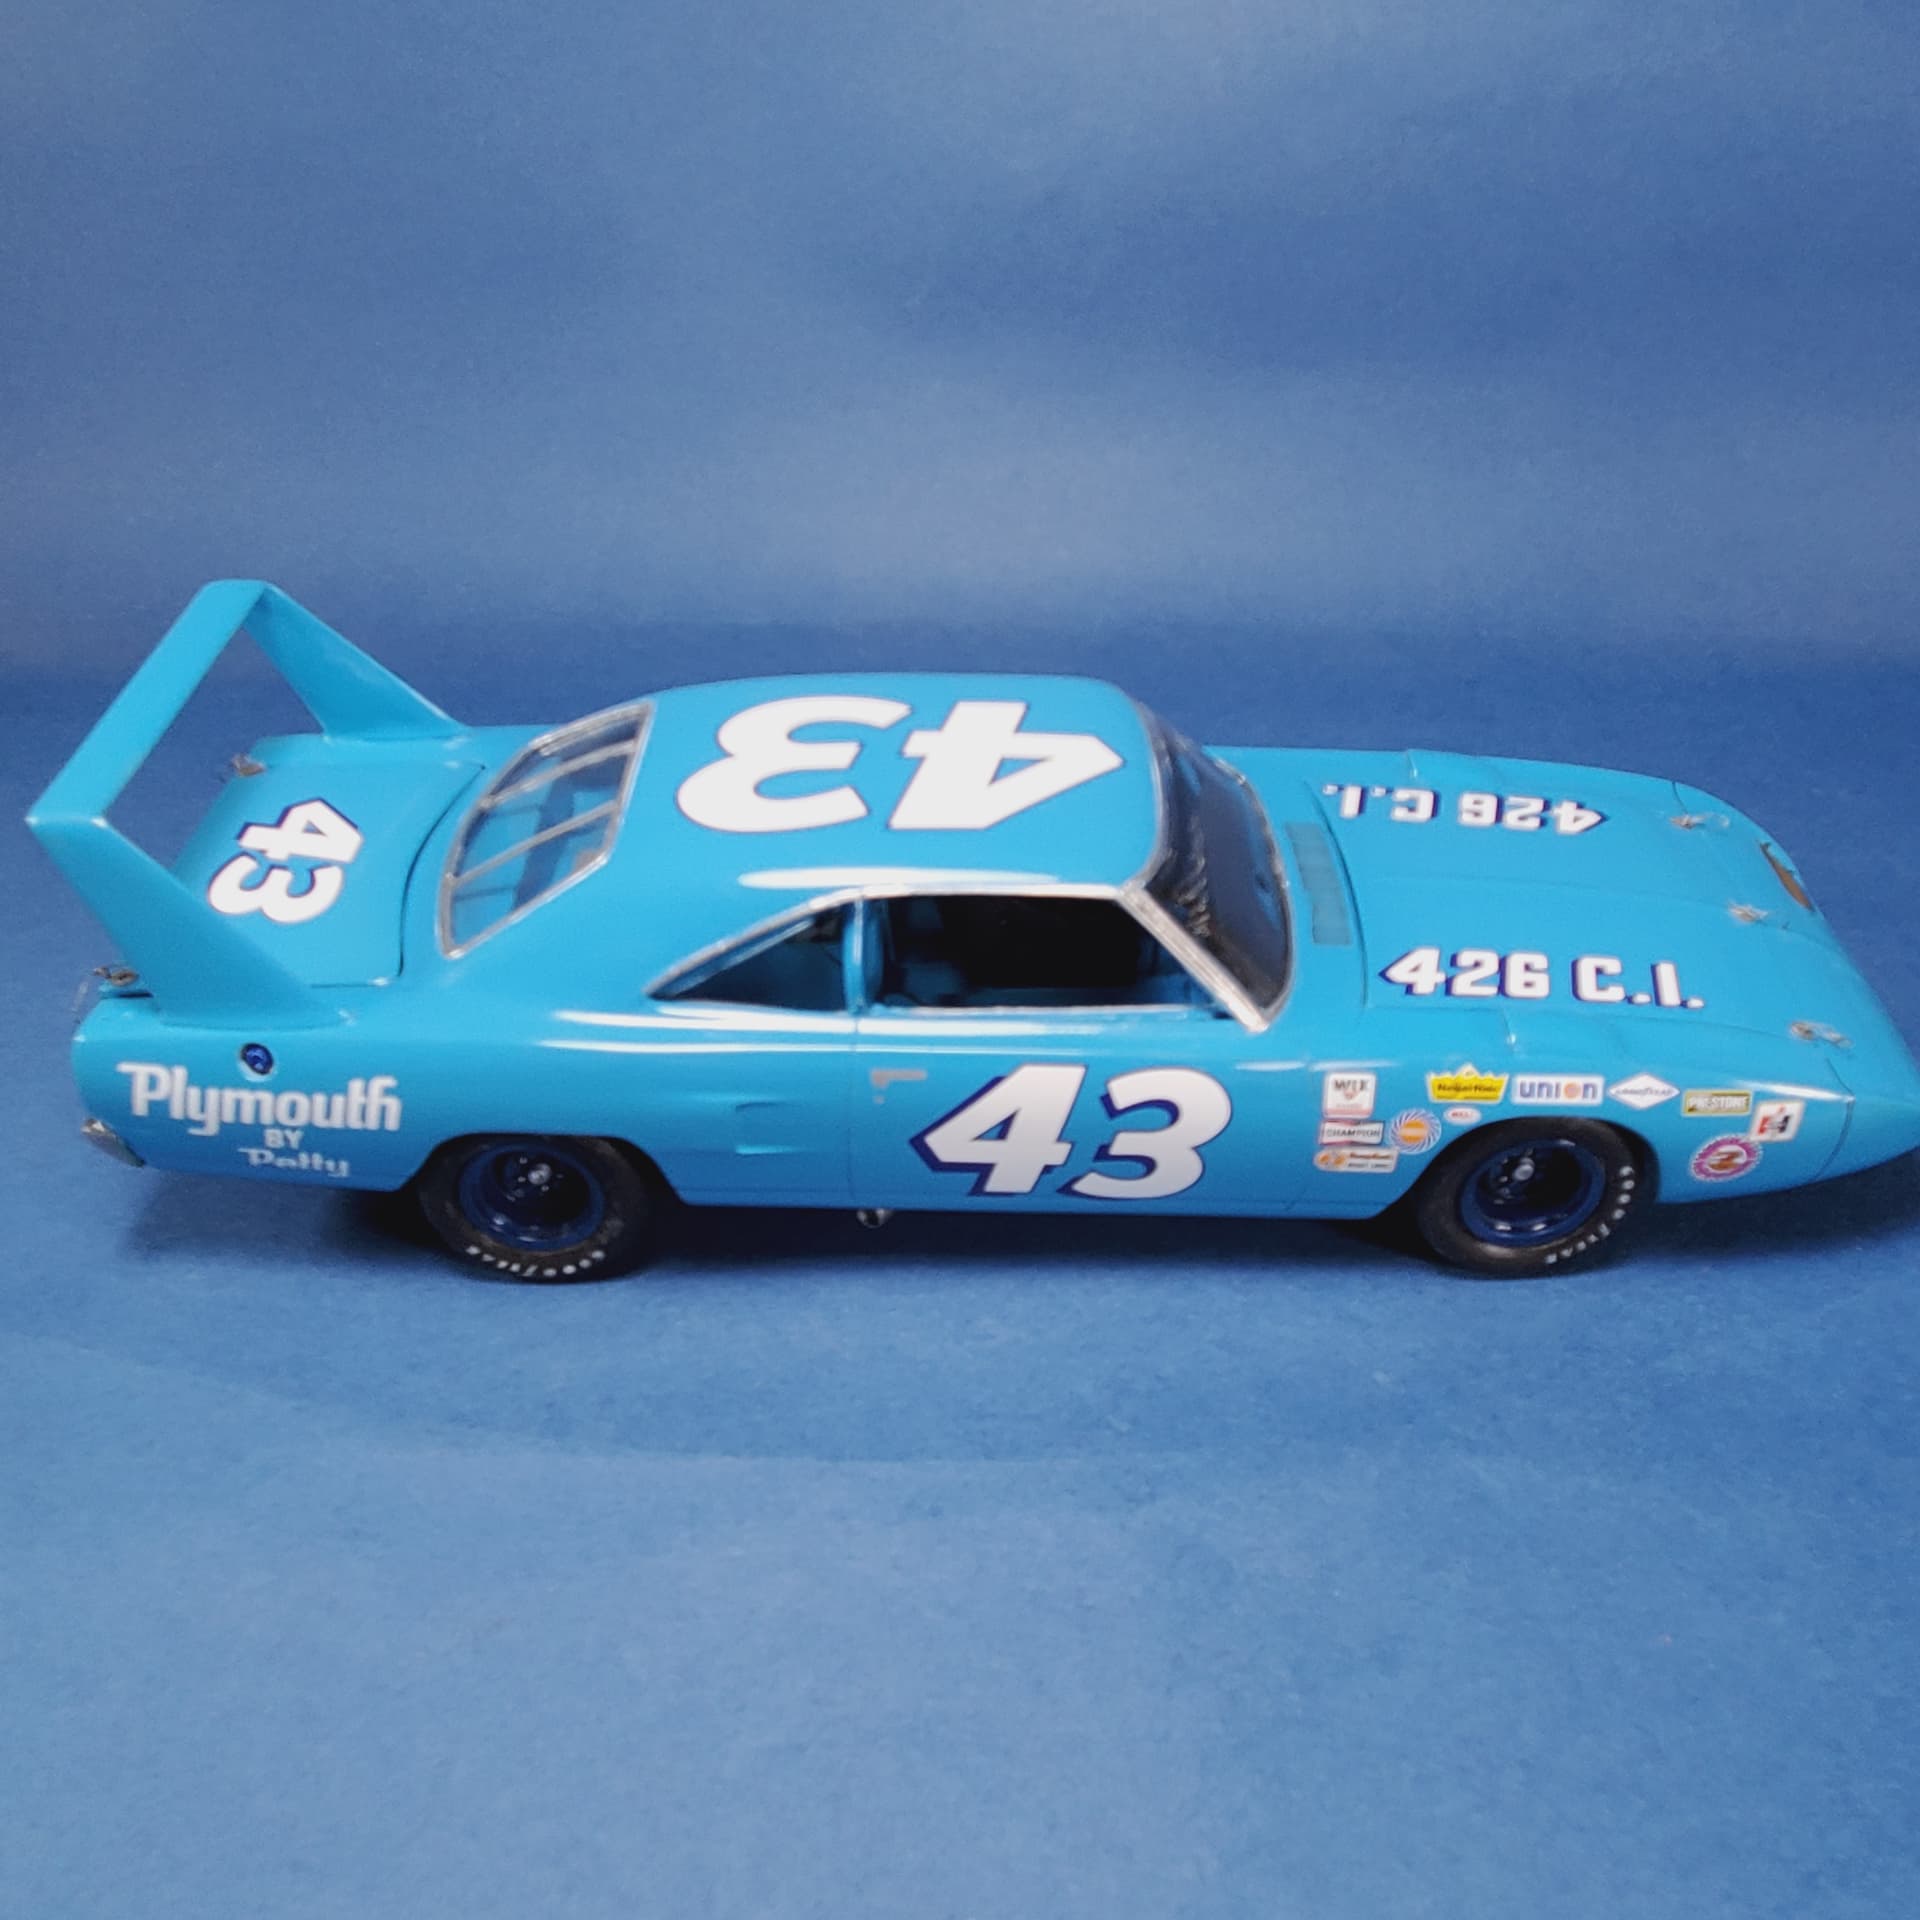
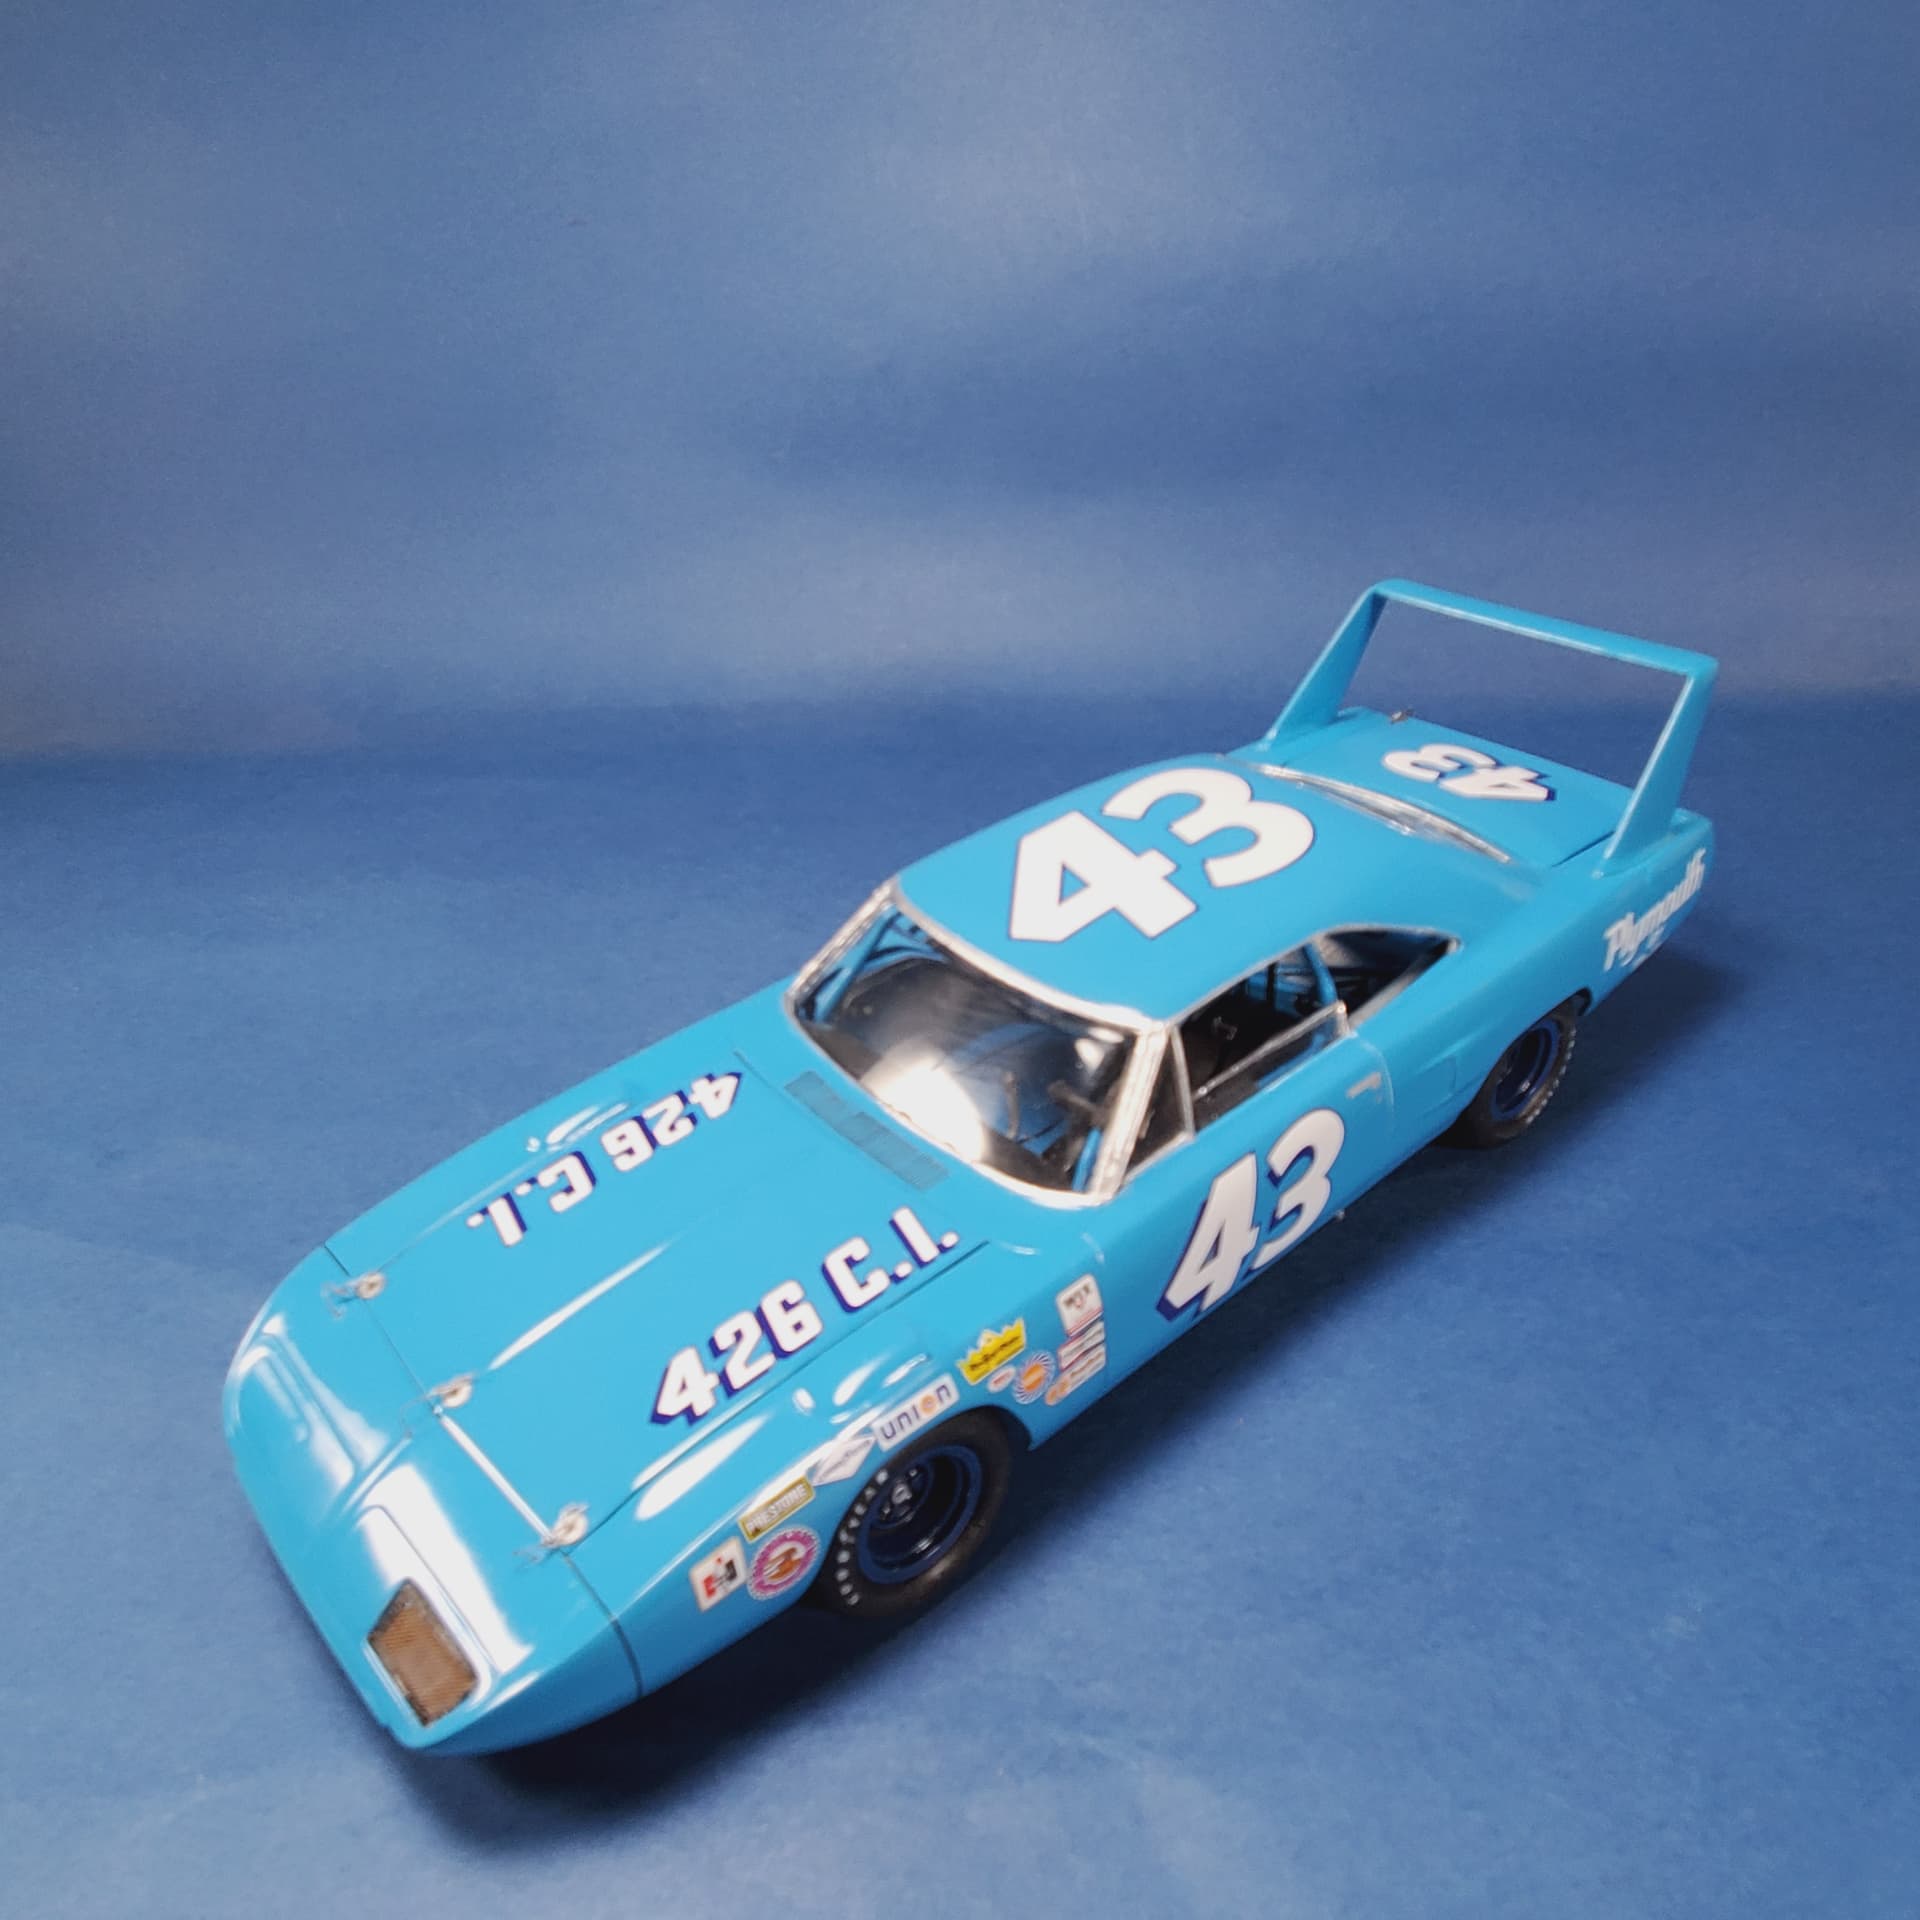
The superbird is back on the bench
The body is painted, wet sanded. Chassis is just about done, time for a mockup

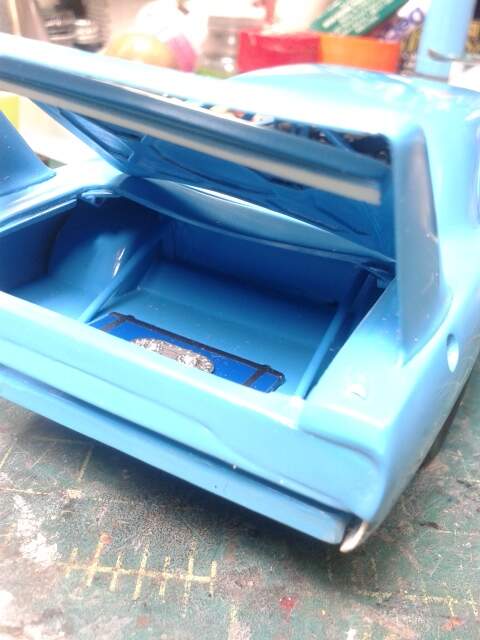
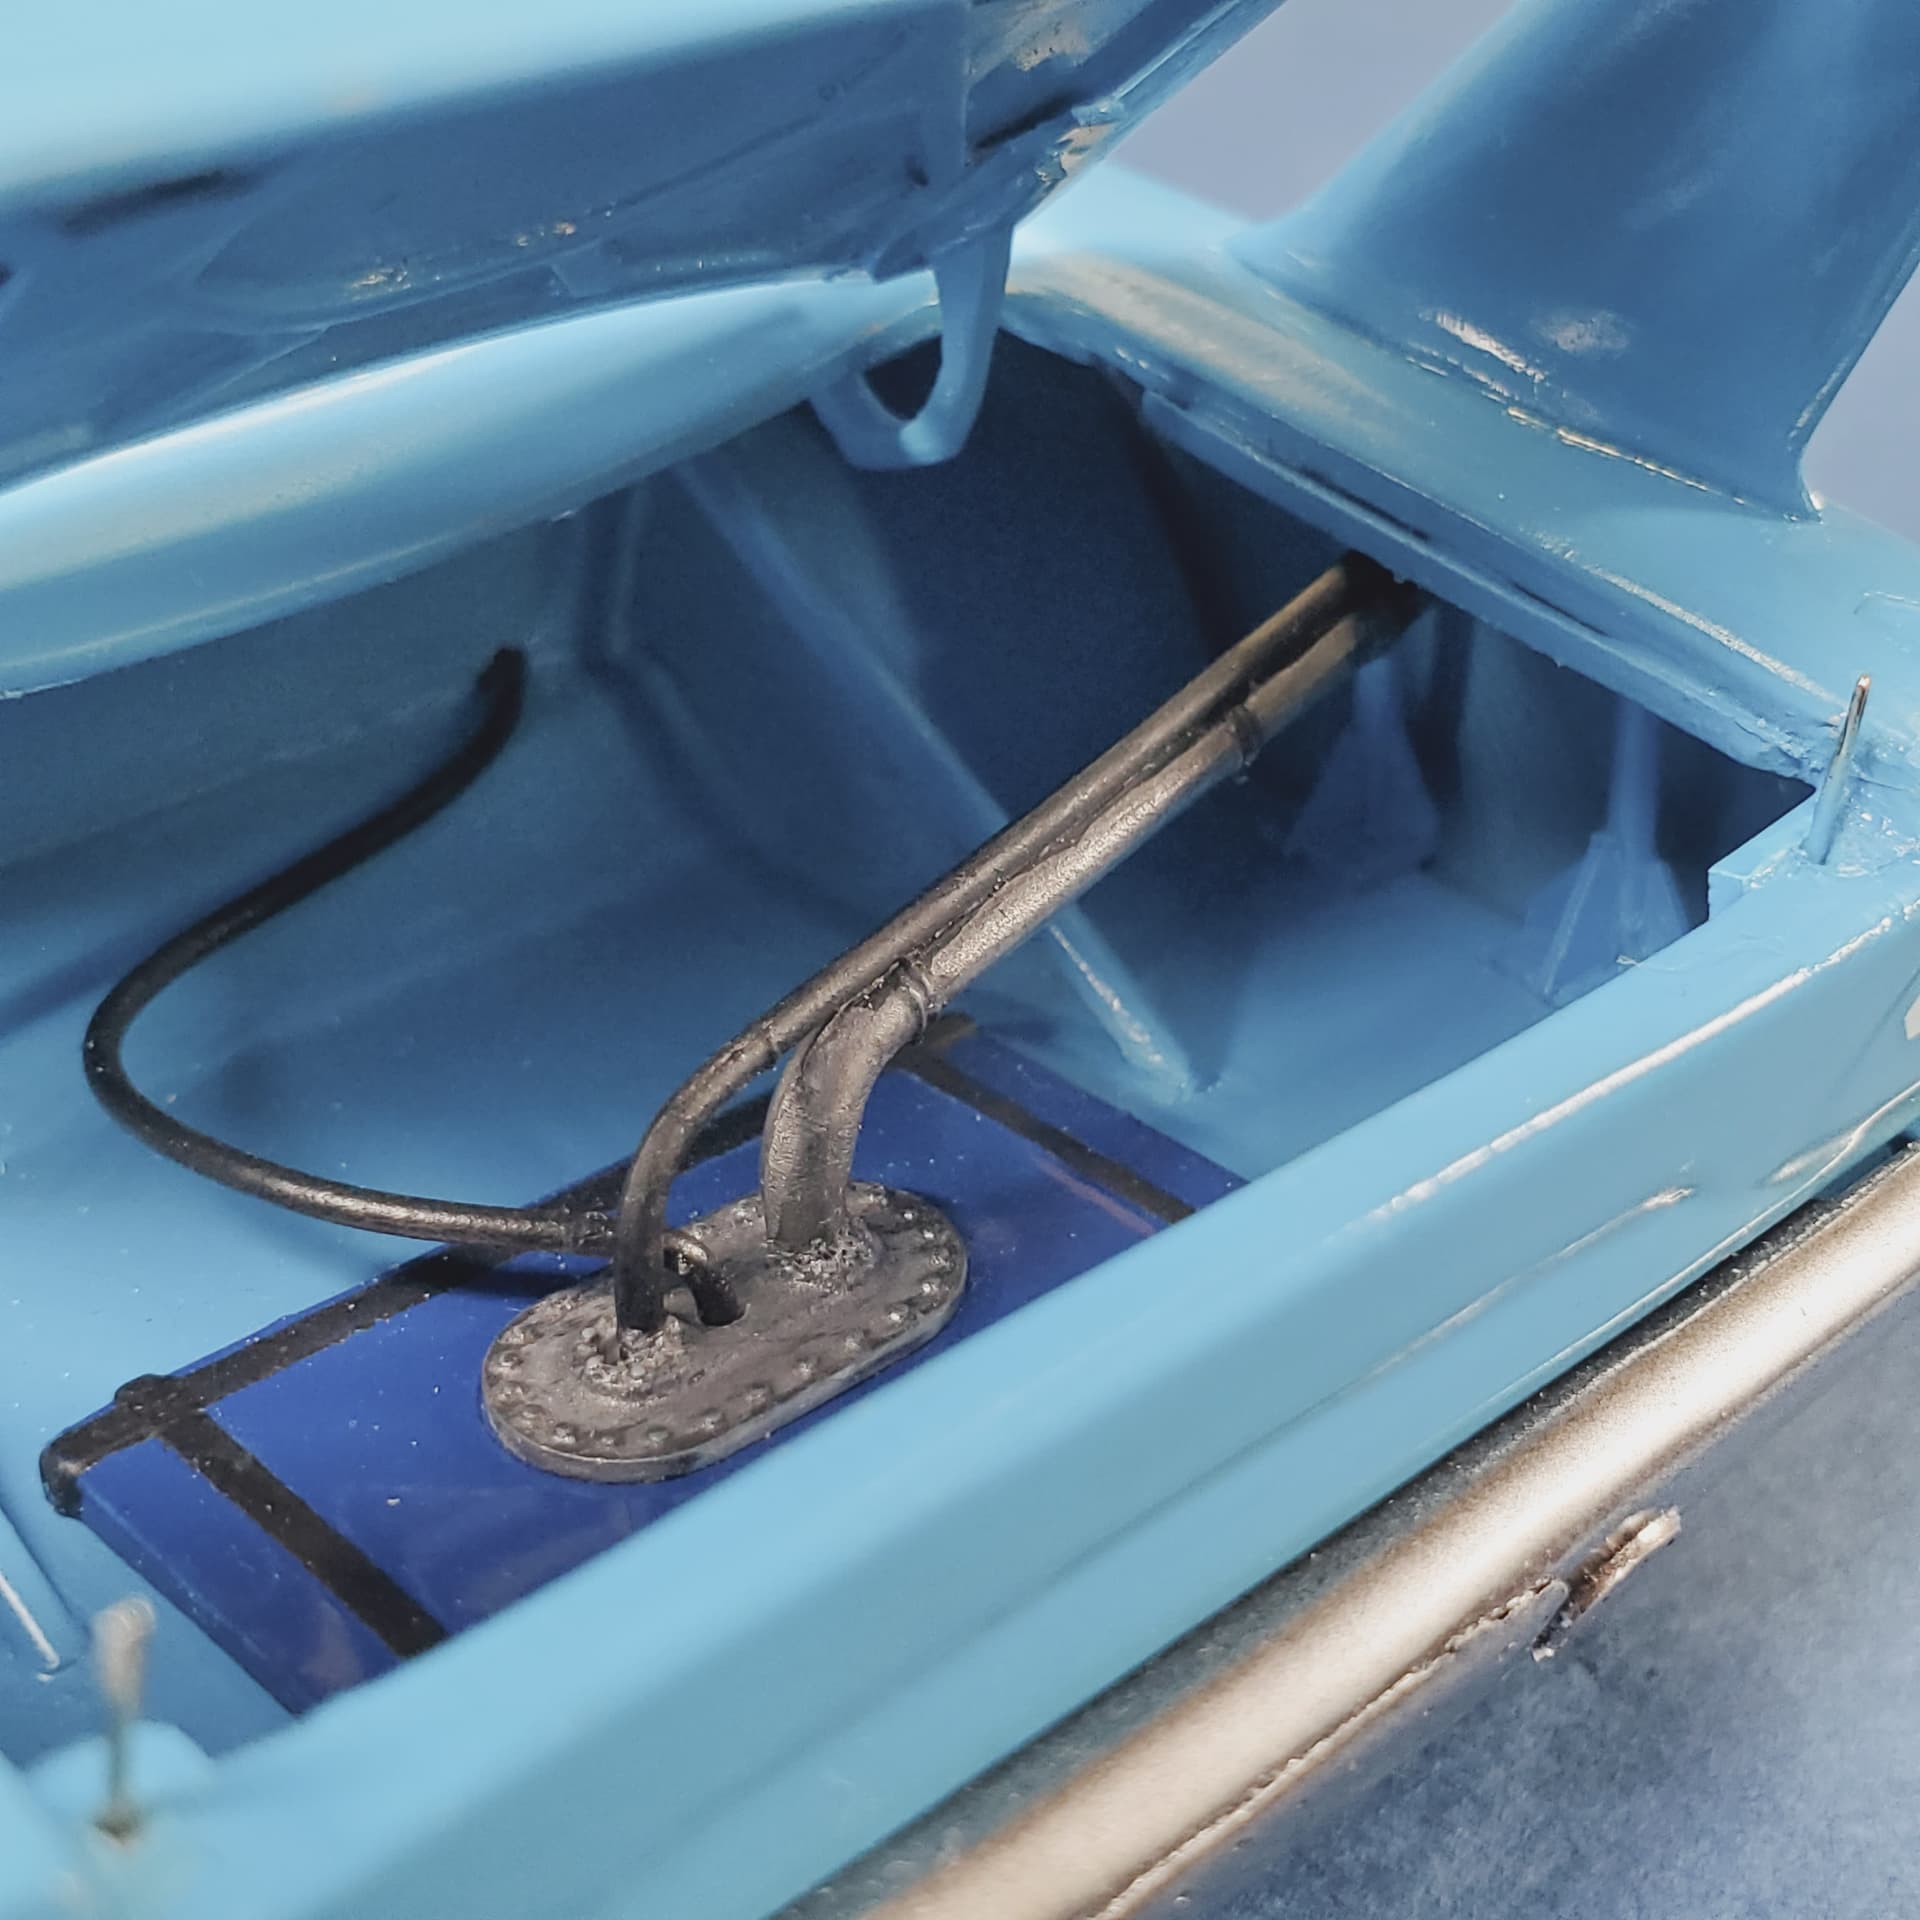
fuel cell from the parts box and deck lid is ready, i matched the underside stamping to a picture of a street car the best i could. it will be hinged once everything else is done
Then when i pushed the body down to the top of the firewall to see how my stance is(i am going to need clamps to glue the chassis in) this is what i got-
you can see me pushing down on the body in the picture. when constructing the engine cage i was careful to chech that it would be below the fender height … but i forgot about the radiator height.
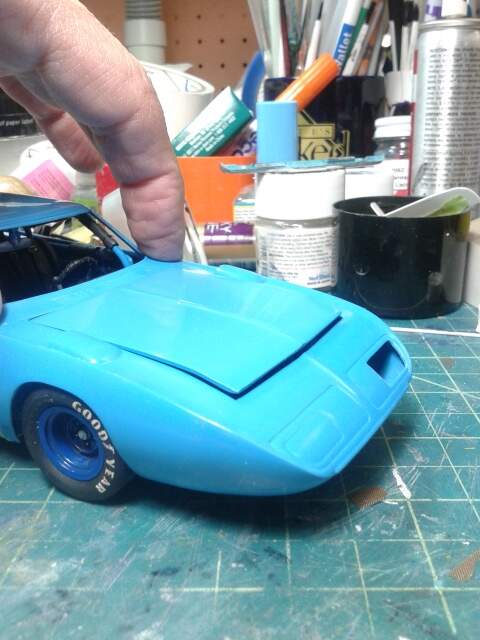
i managed to pry it out and did a little surgery on it, should be fine. i also just realized i have the wrong size goodyear markings on the tires so i will have to re due them.
4 Likes
One step forward and two steps back Joe. Story of my modeling life!!! lololol
1 Like
Sometimes three steps back-lol
Well while battling the one step/ two step issues i made quite a bit of progress, although i can tell you the modeling gods are fighting me to the very end. i must have gotten superglue smudges on the body like four times already while installing the hood pins. luckily and thanks to wet sanding and tamiya polish i was able to get most of it polished out with not too much scarring of the finish. found out also that future floor polish does not like to be wet sanded. anyone have a tip on sanding it?
on to the photos, got the decals on. i wasn’t going to
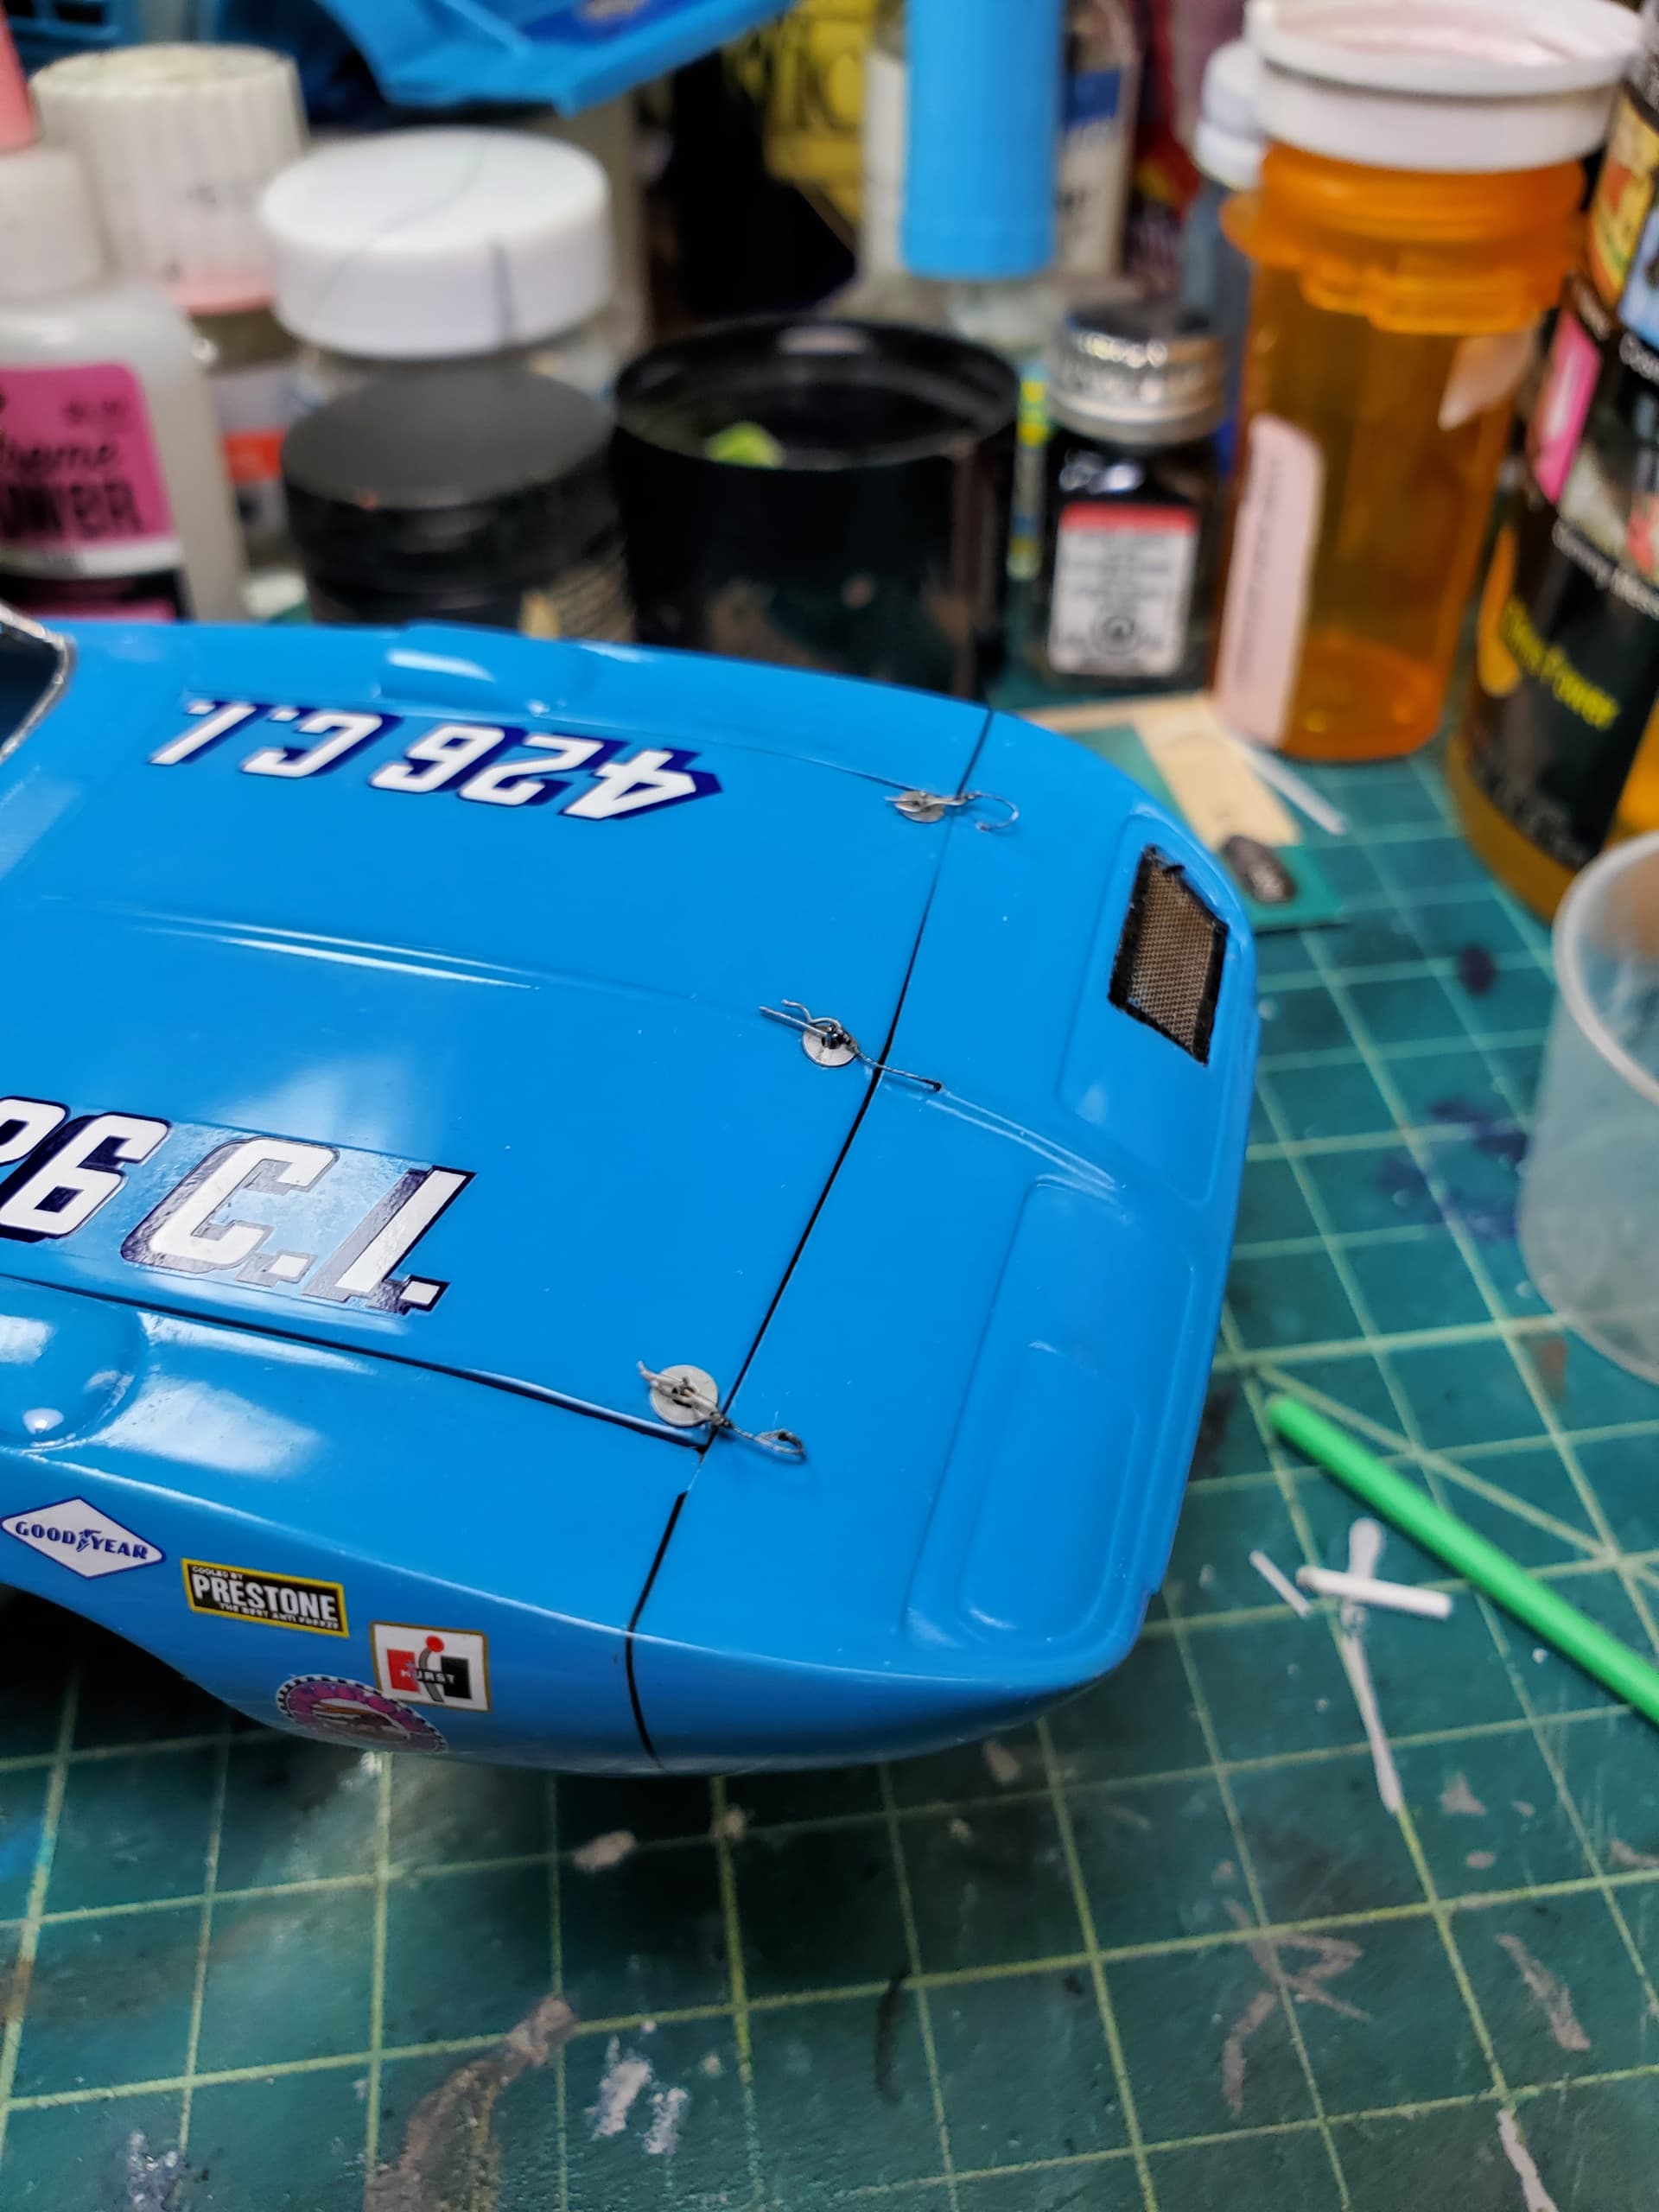
gloss over the decals for realism but i damaged a few spots of the paint that needed tough up so out came the airbrush and petty blue again for about the fifth time to fix the paint. since i had the grills in already i went with future and a foam brush as to avoid covering the grills with polish, then the bare metal aluminum. Oh i also forgot to mention i installed the hinges for the rear deck.

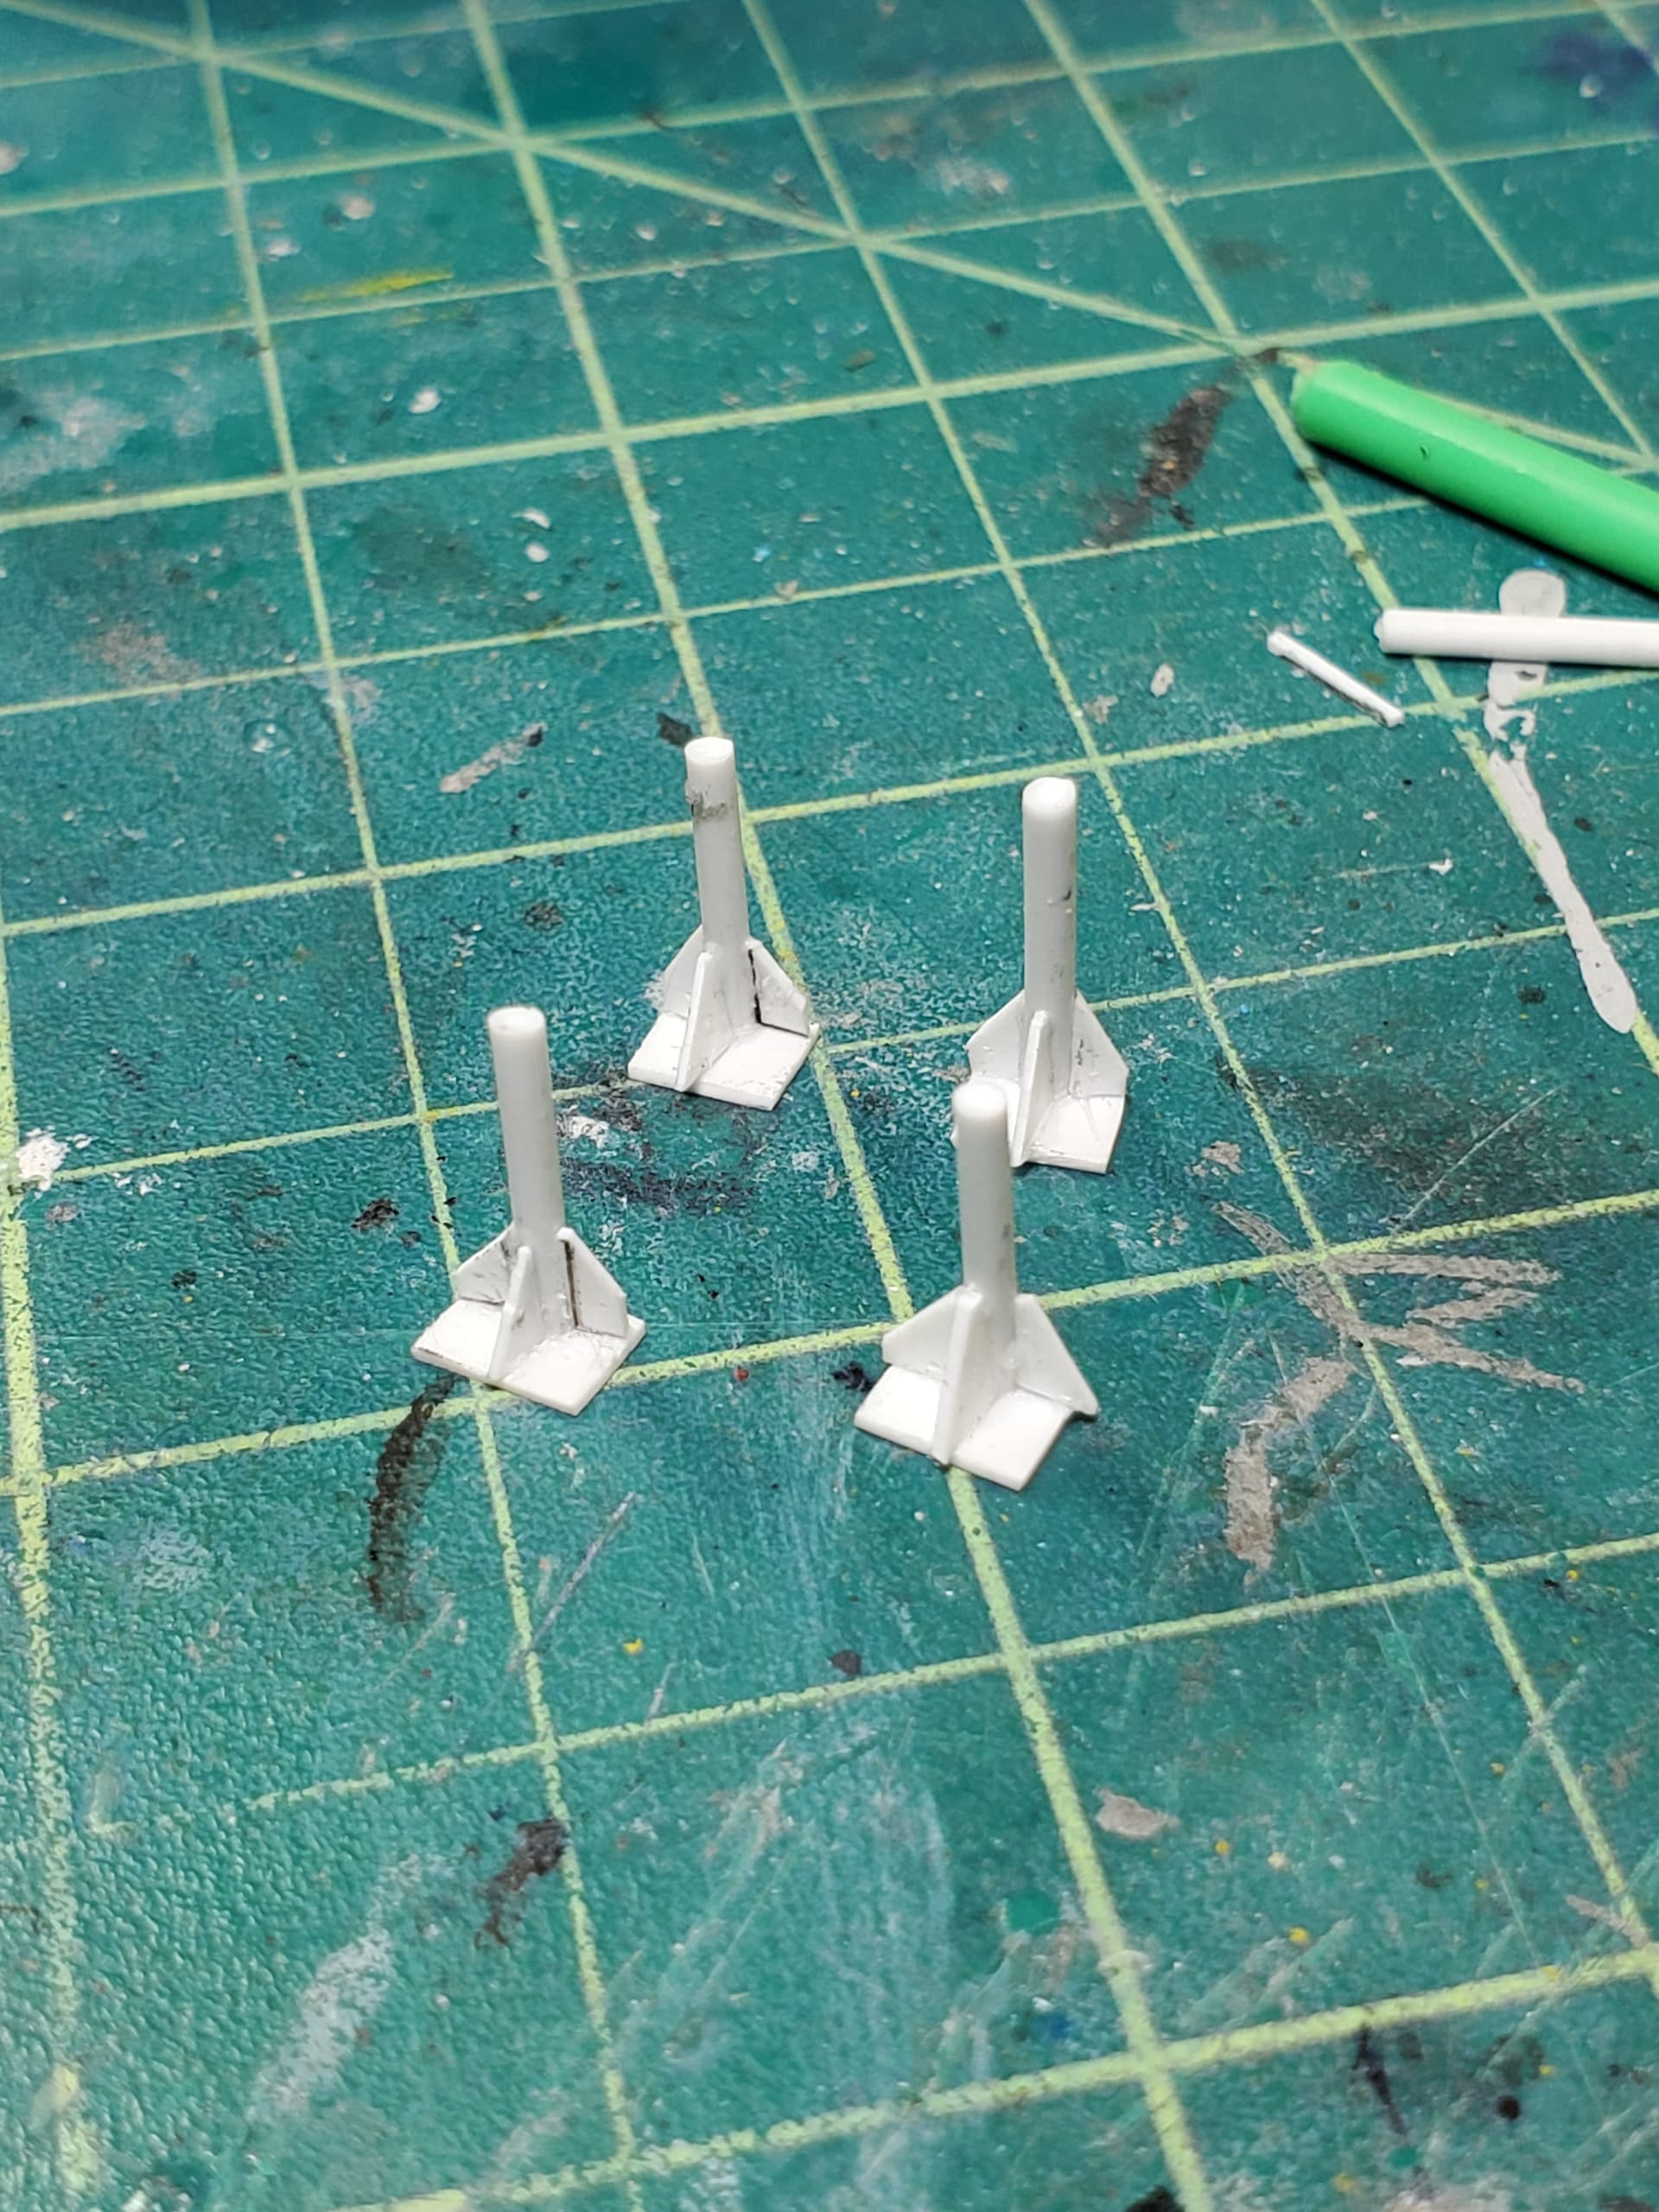
After that, completely scratch made hood pins and clips. i raided my wife’s craft materials for the scuff plates, shhh, don’t tell her!
Chassis is done, just have to cast another air intake box since i somehow lost the first one and tires are done.


Then i made up some spoiler supports for the trunk, out comes the airbrush again, plus i have a little rub through on the nose from wet sanding the glue off that i would like to fix if i can and some other touchups.
Sorry for the lengthy update but i did a lot of work with out an update. going to get back on it tonight, still have the windows to install and headers, glue the body/chassis and make exhaust dumps plus some other things iam not thinking of right now. still a lot of work to be done and i am anxious to finish.
Joe
7 Likes
Great work Joe, super detailing going on there!
Cheers, D
WOW ![]()
![]()
![]()
I love Nascar kits and your it is perfect.
Congratulations!!!
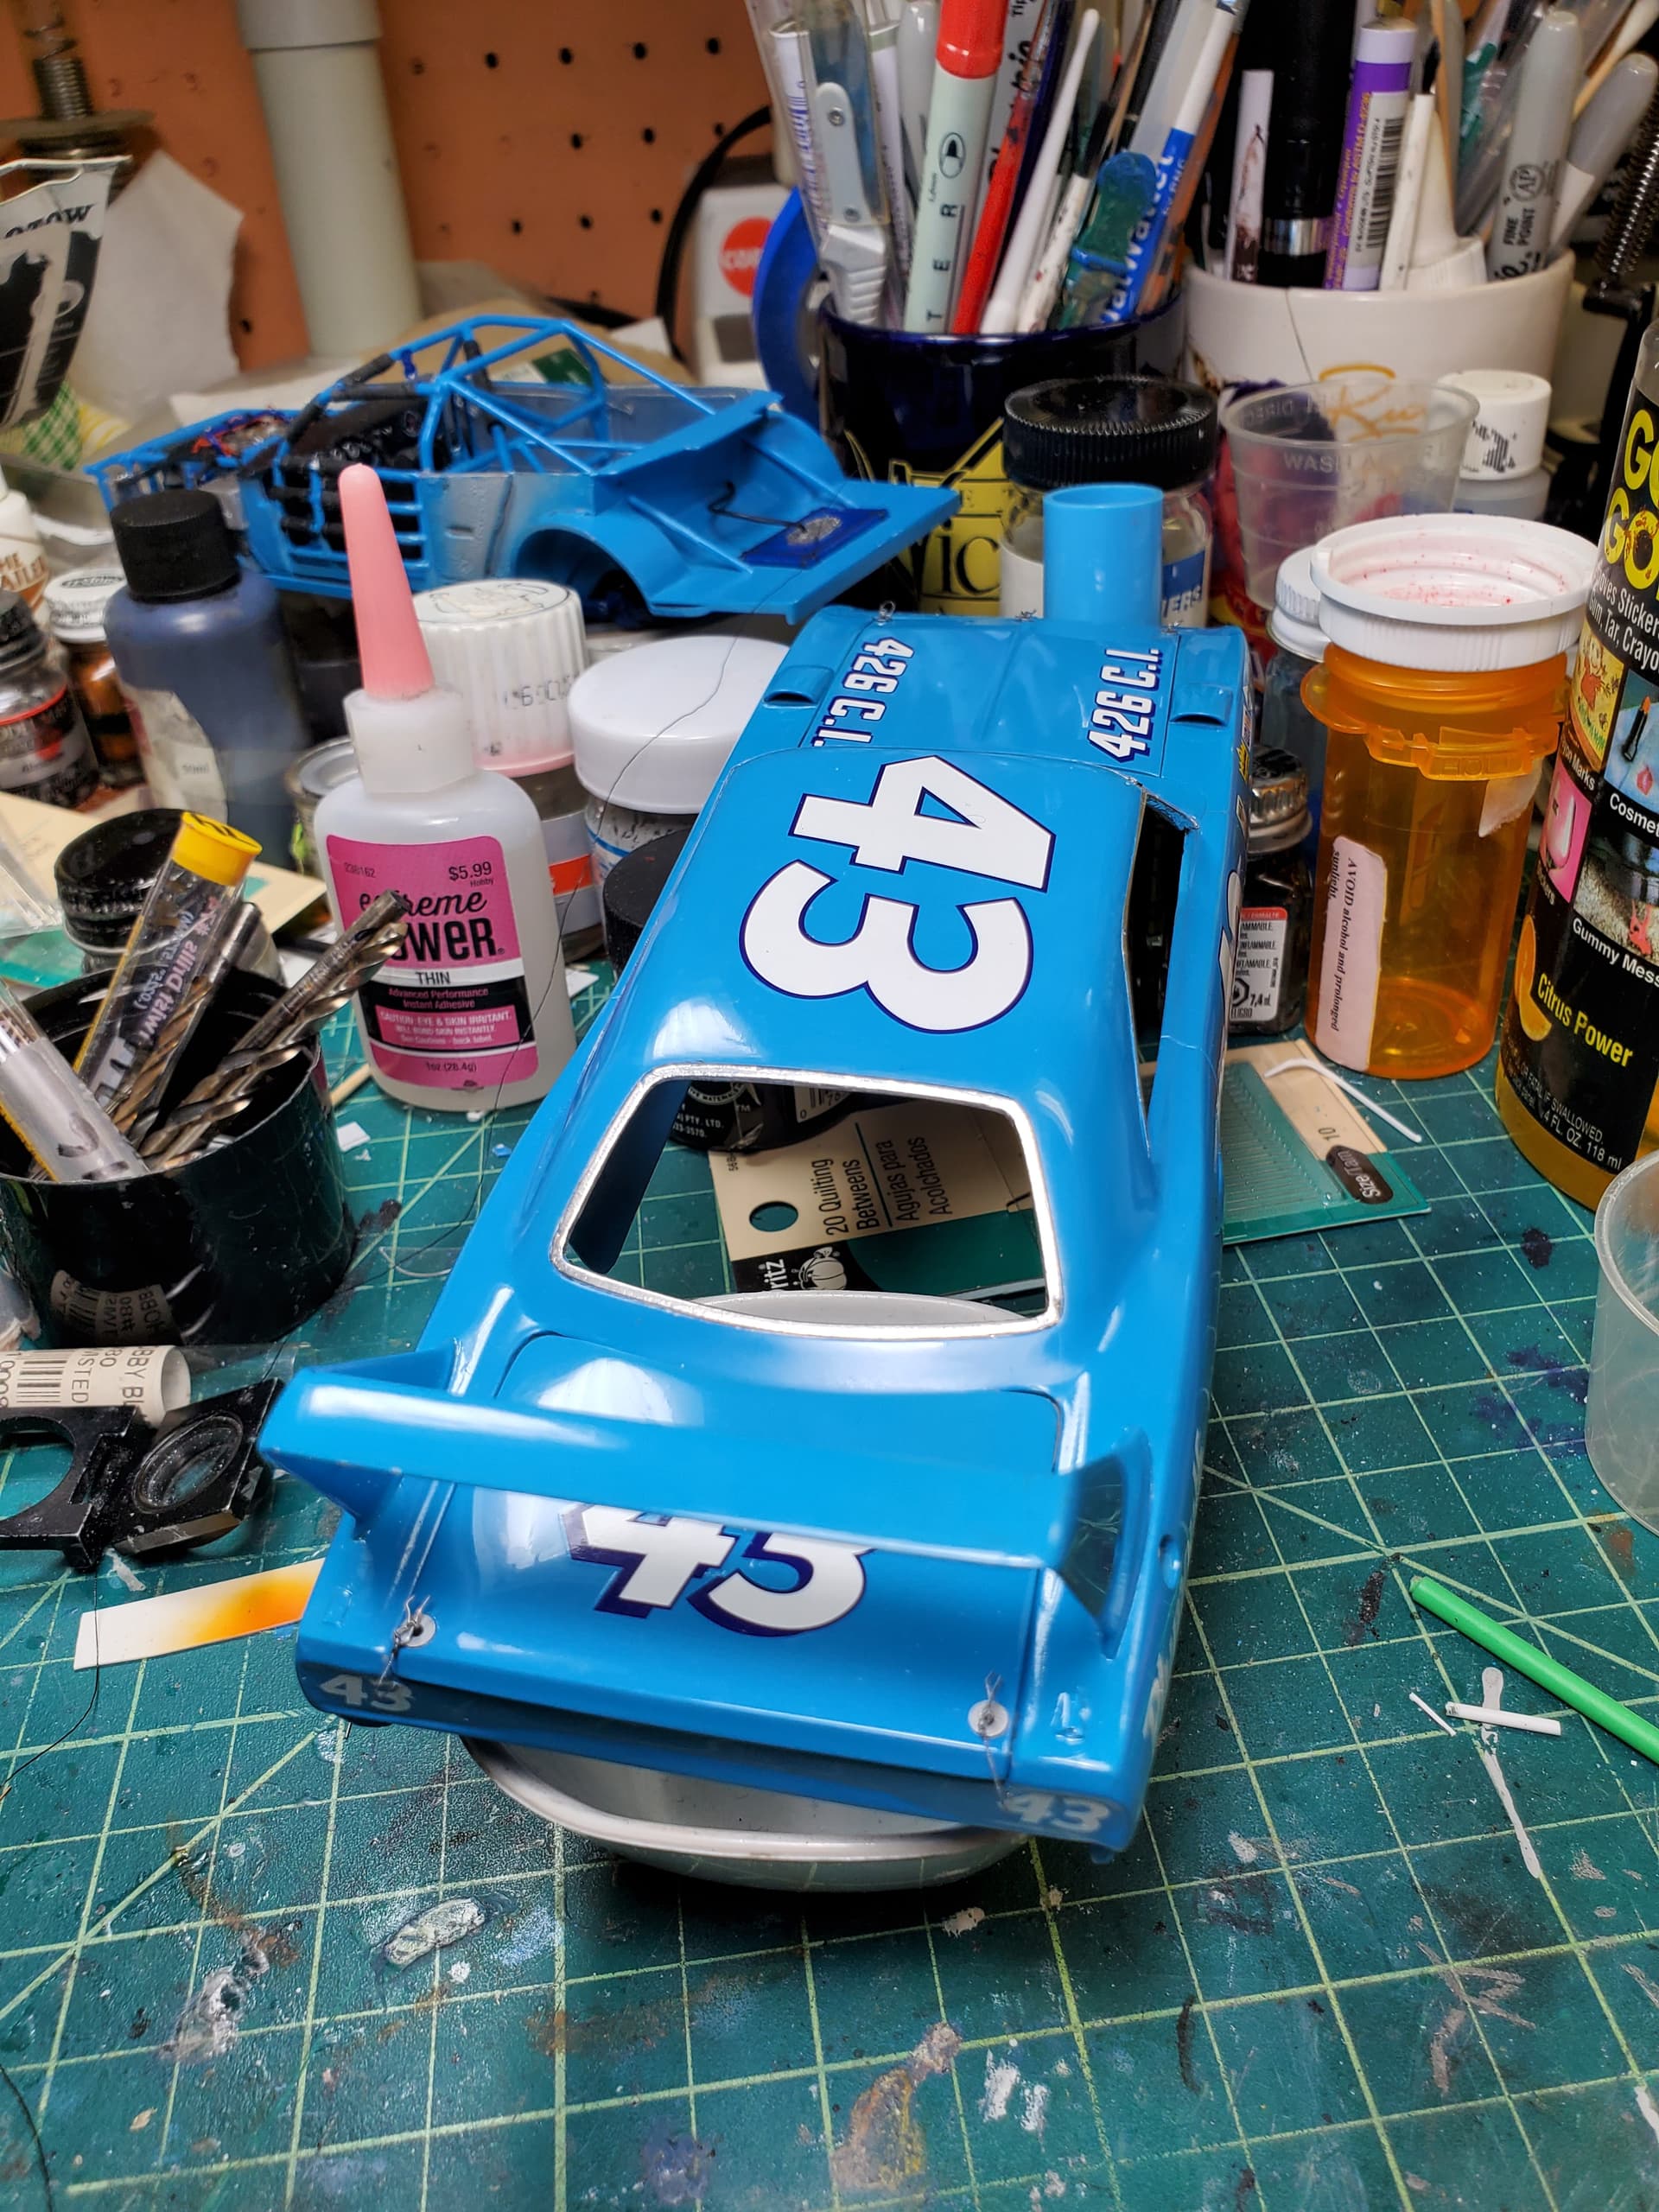
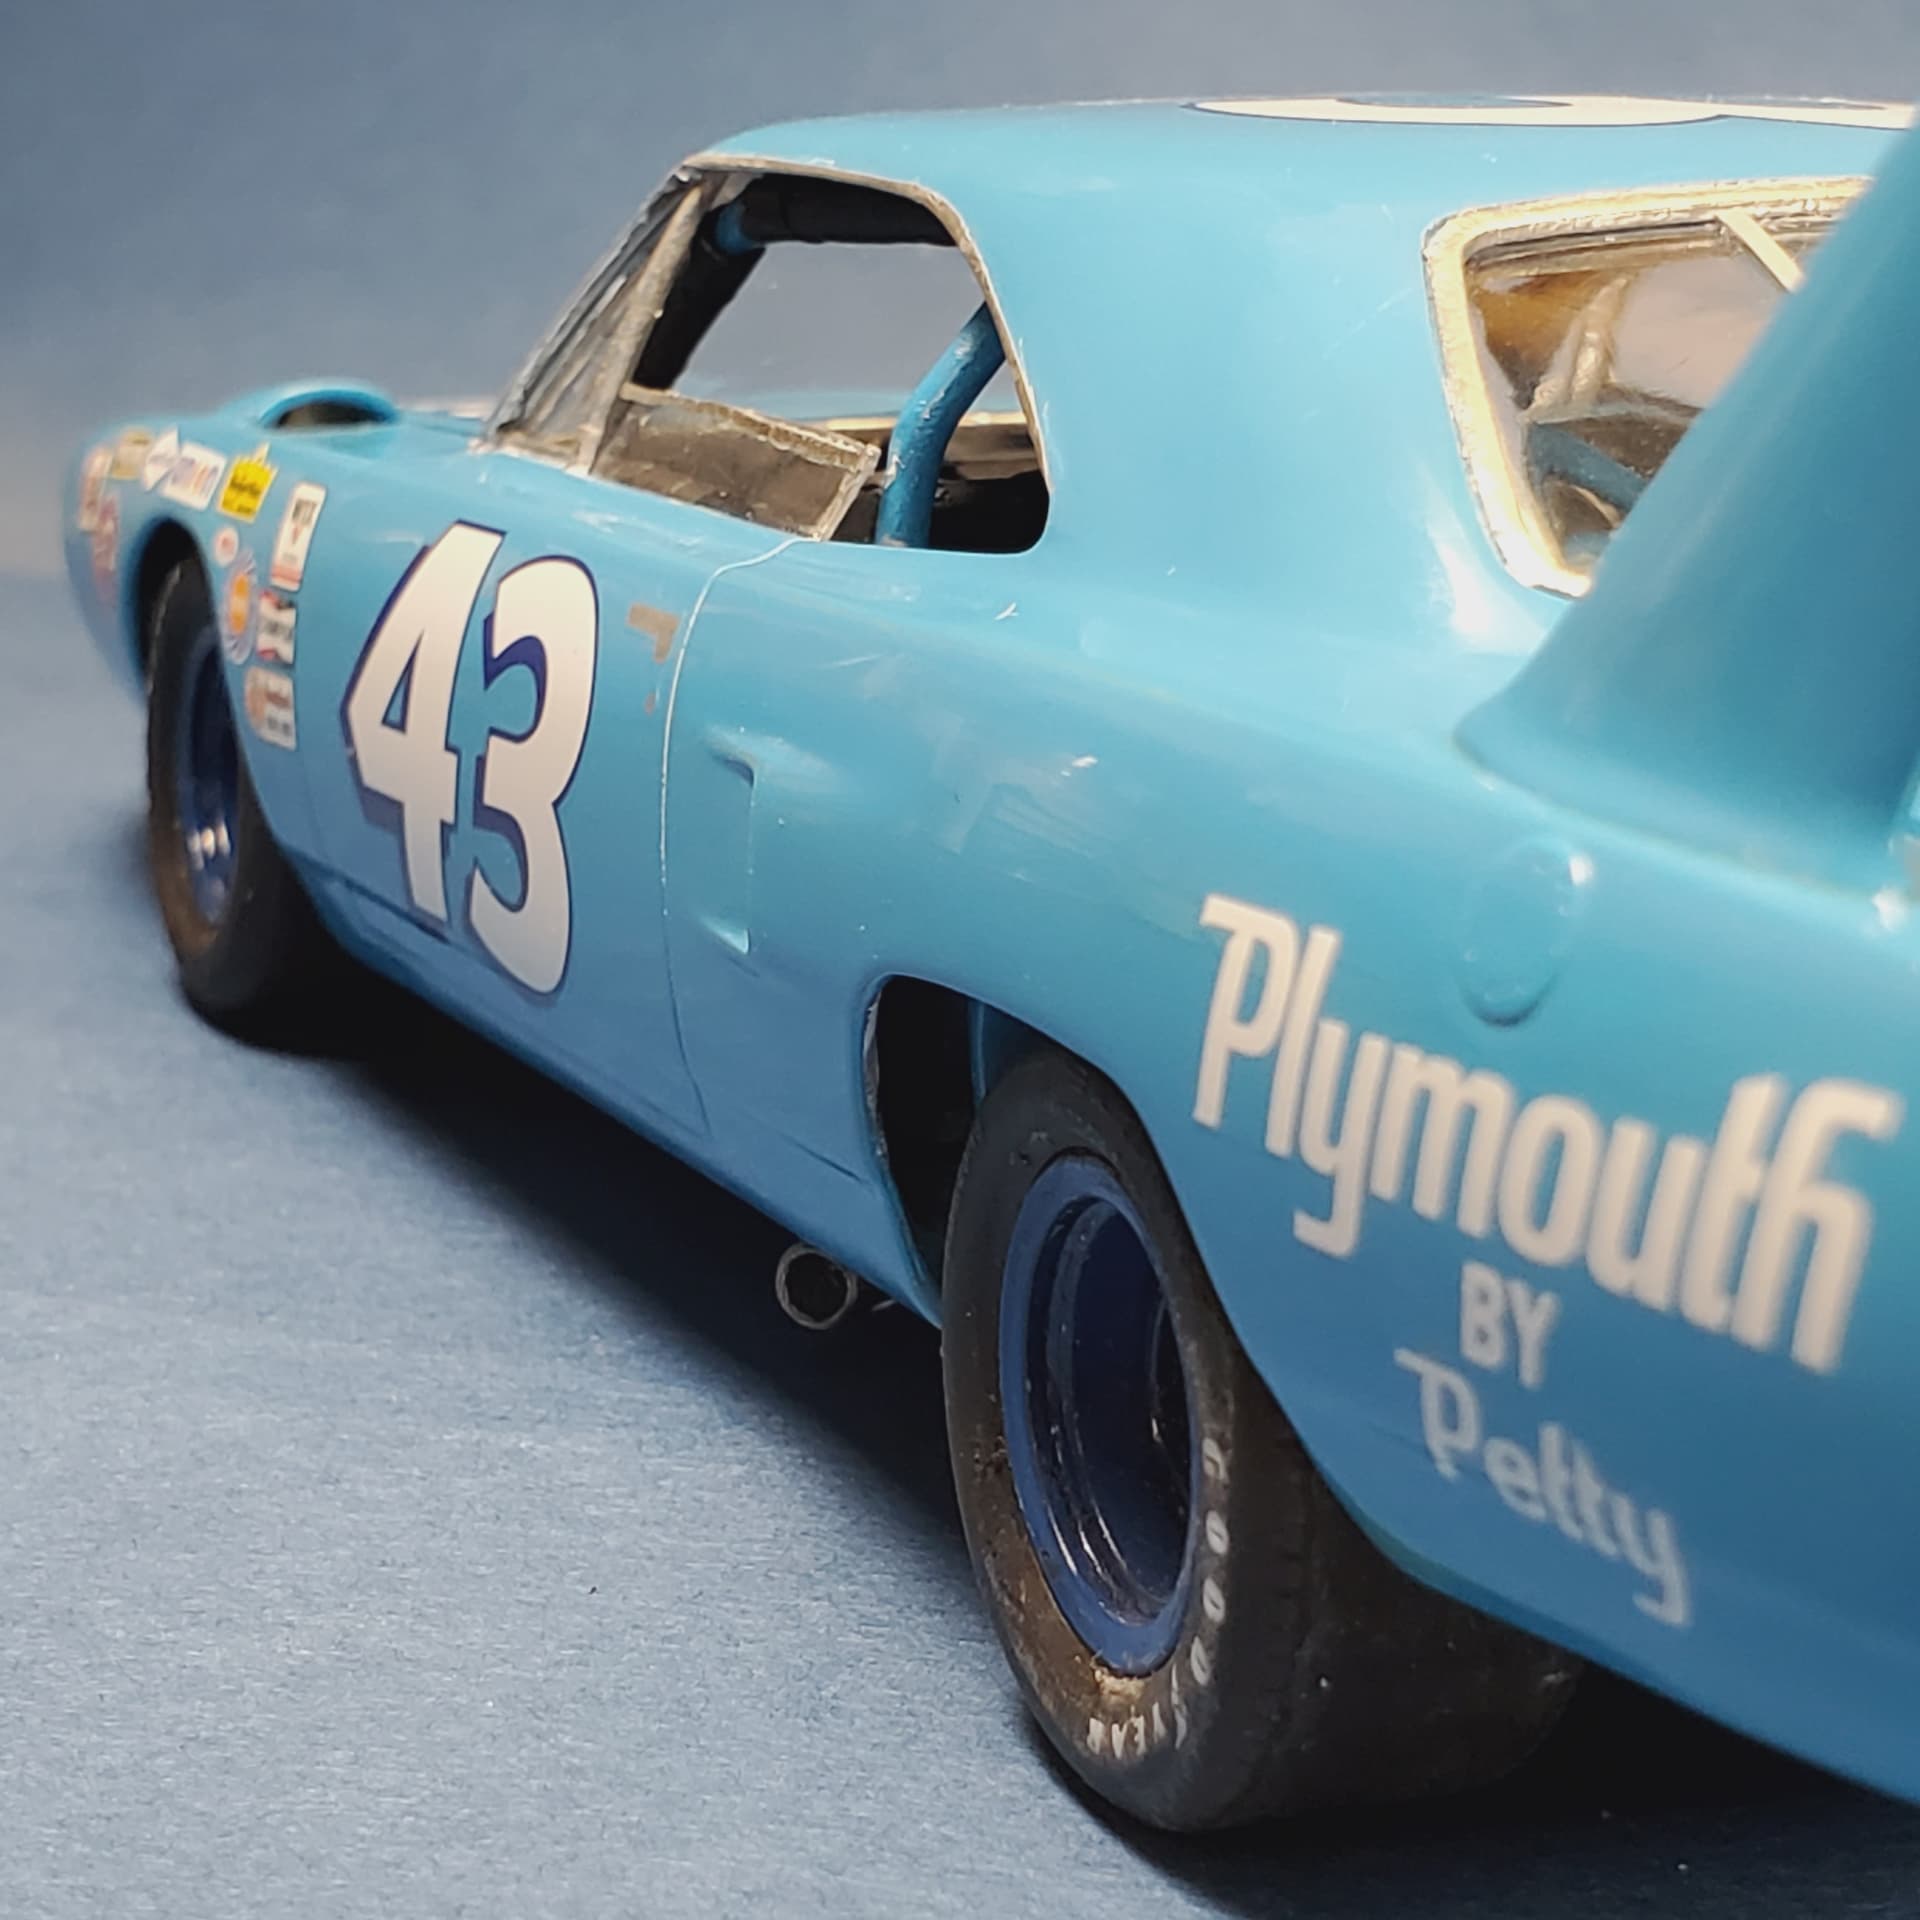
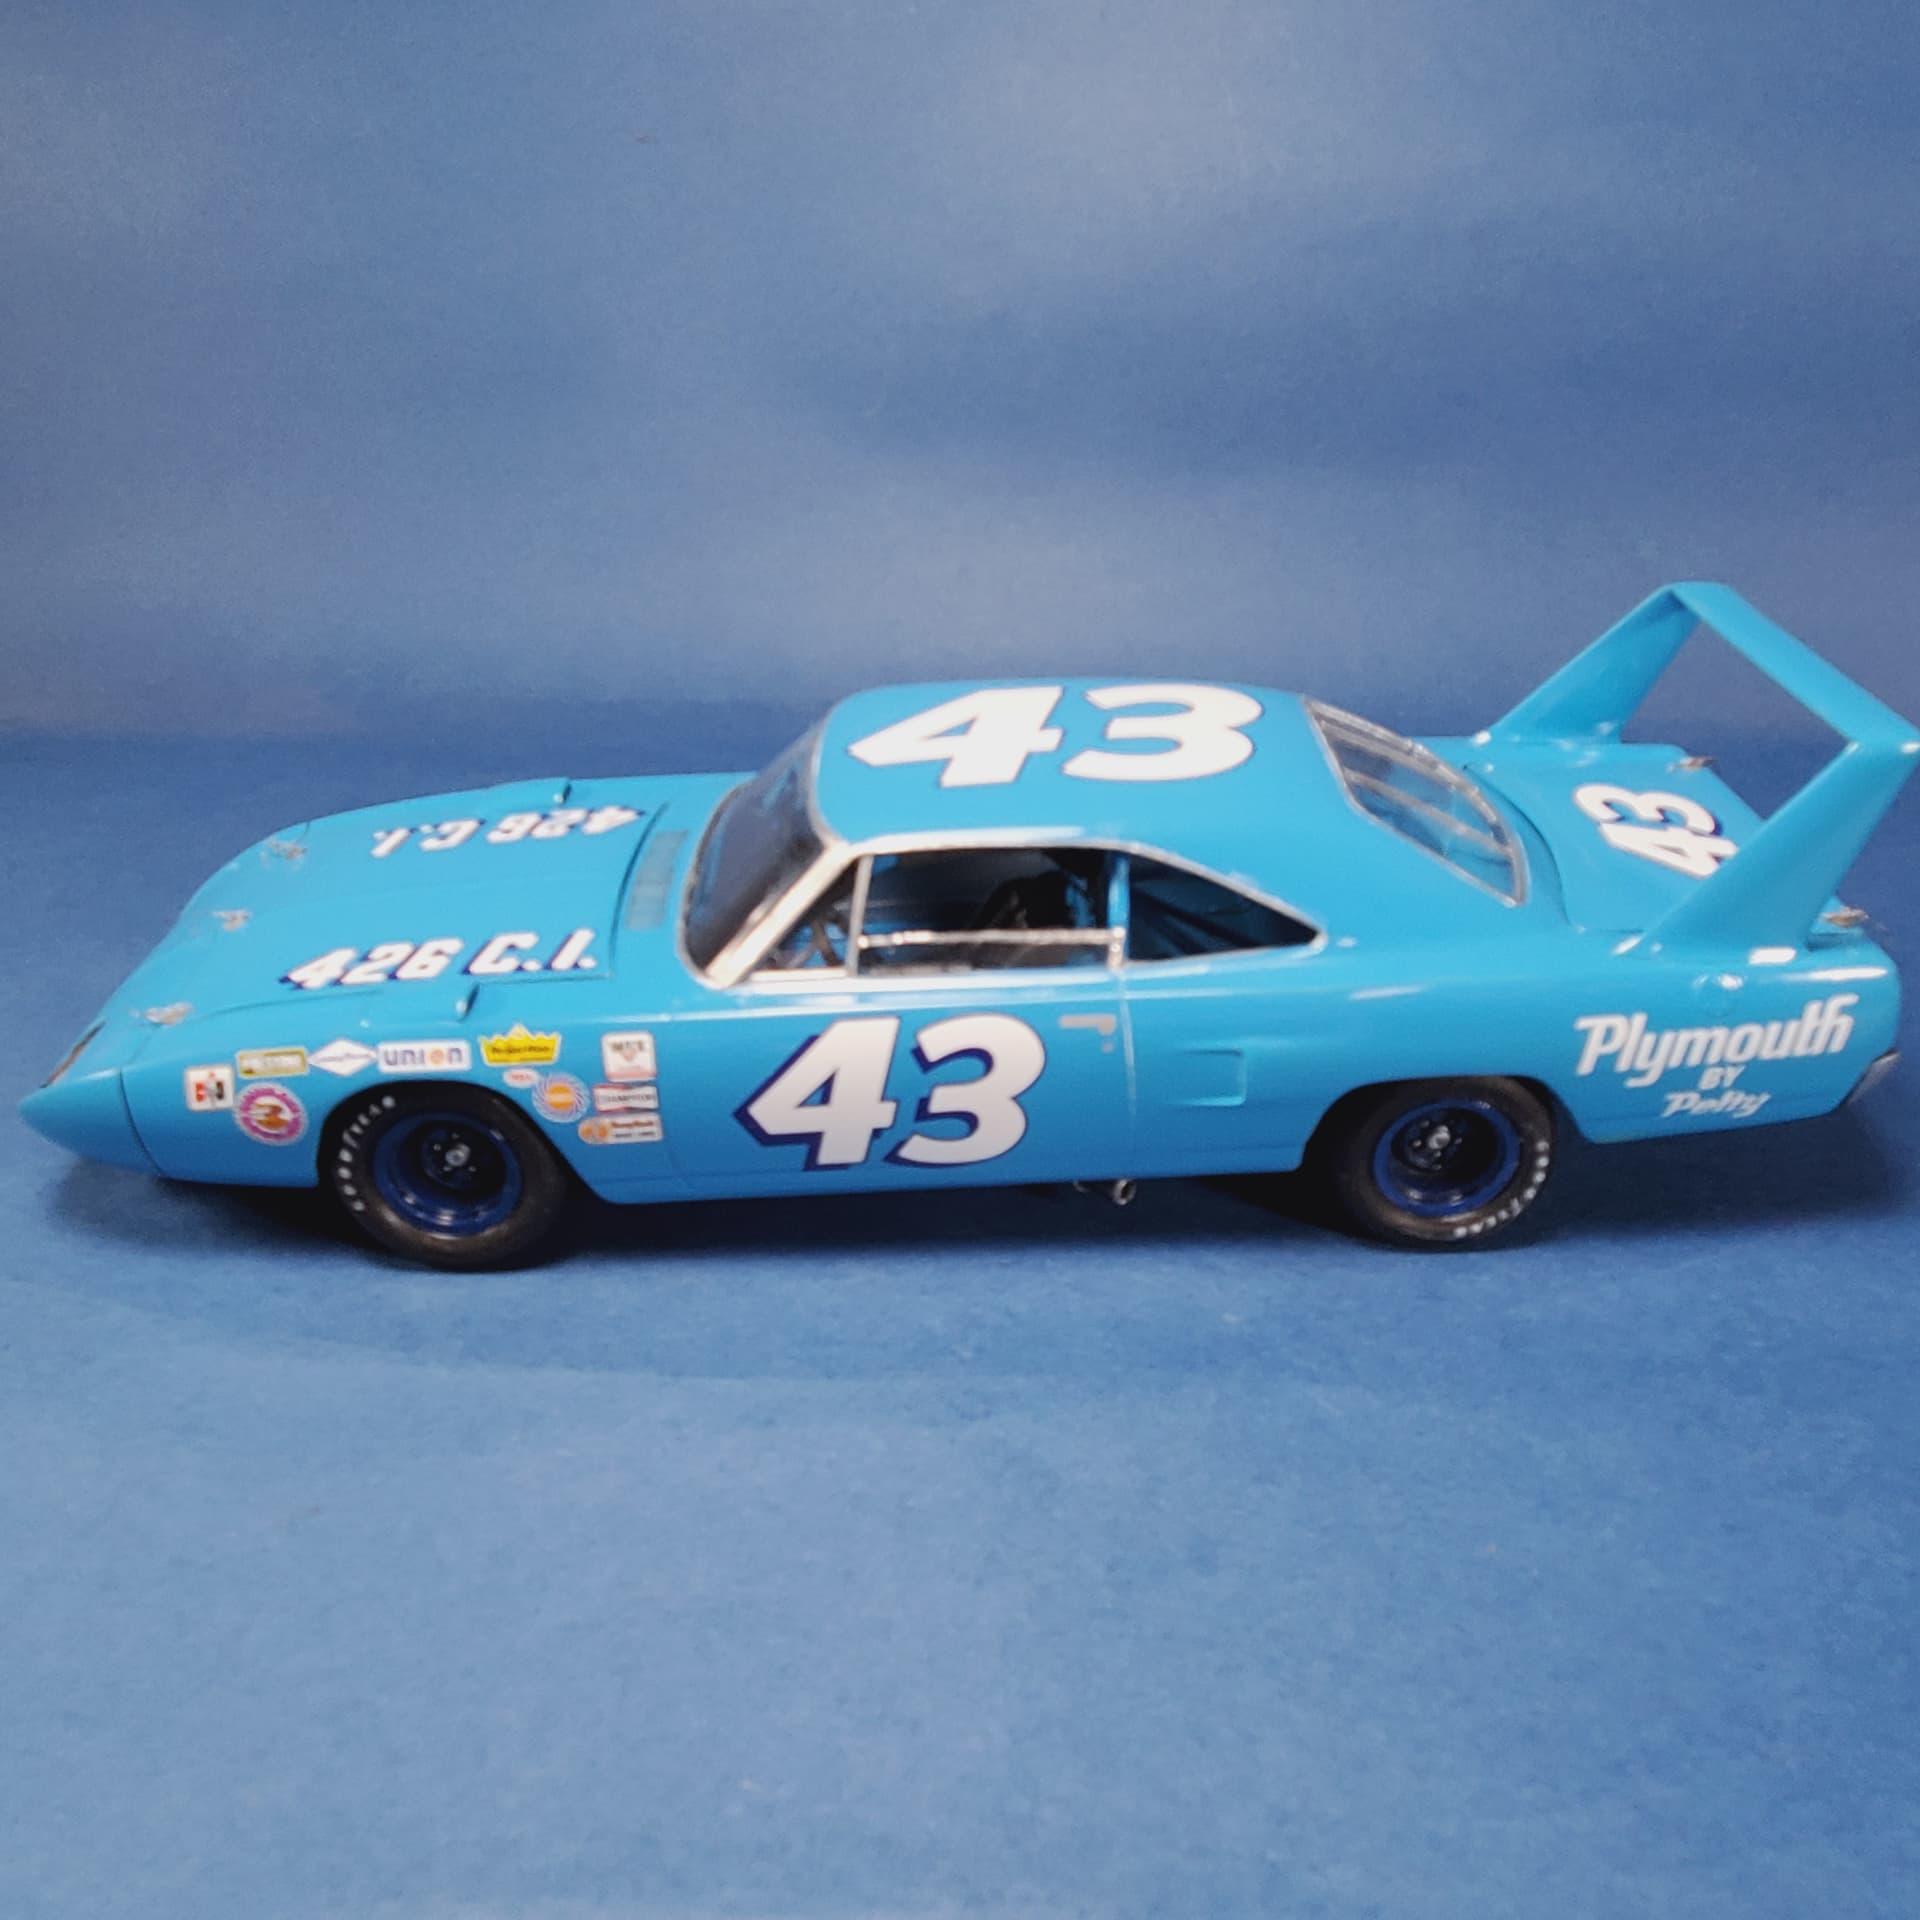
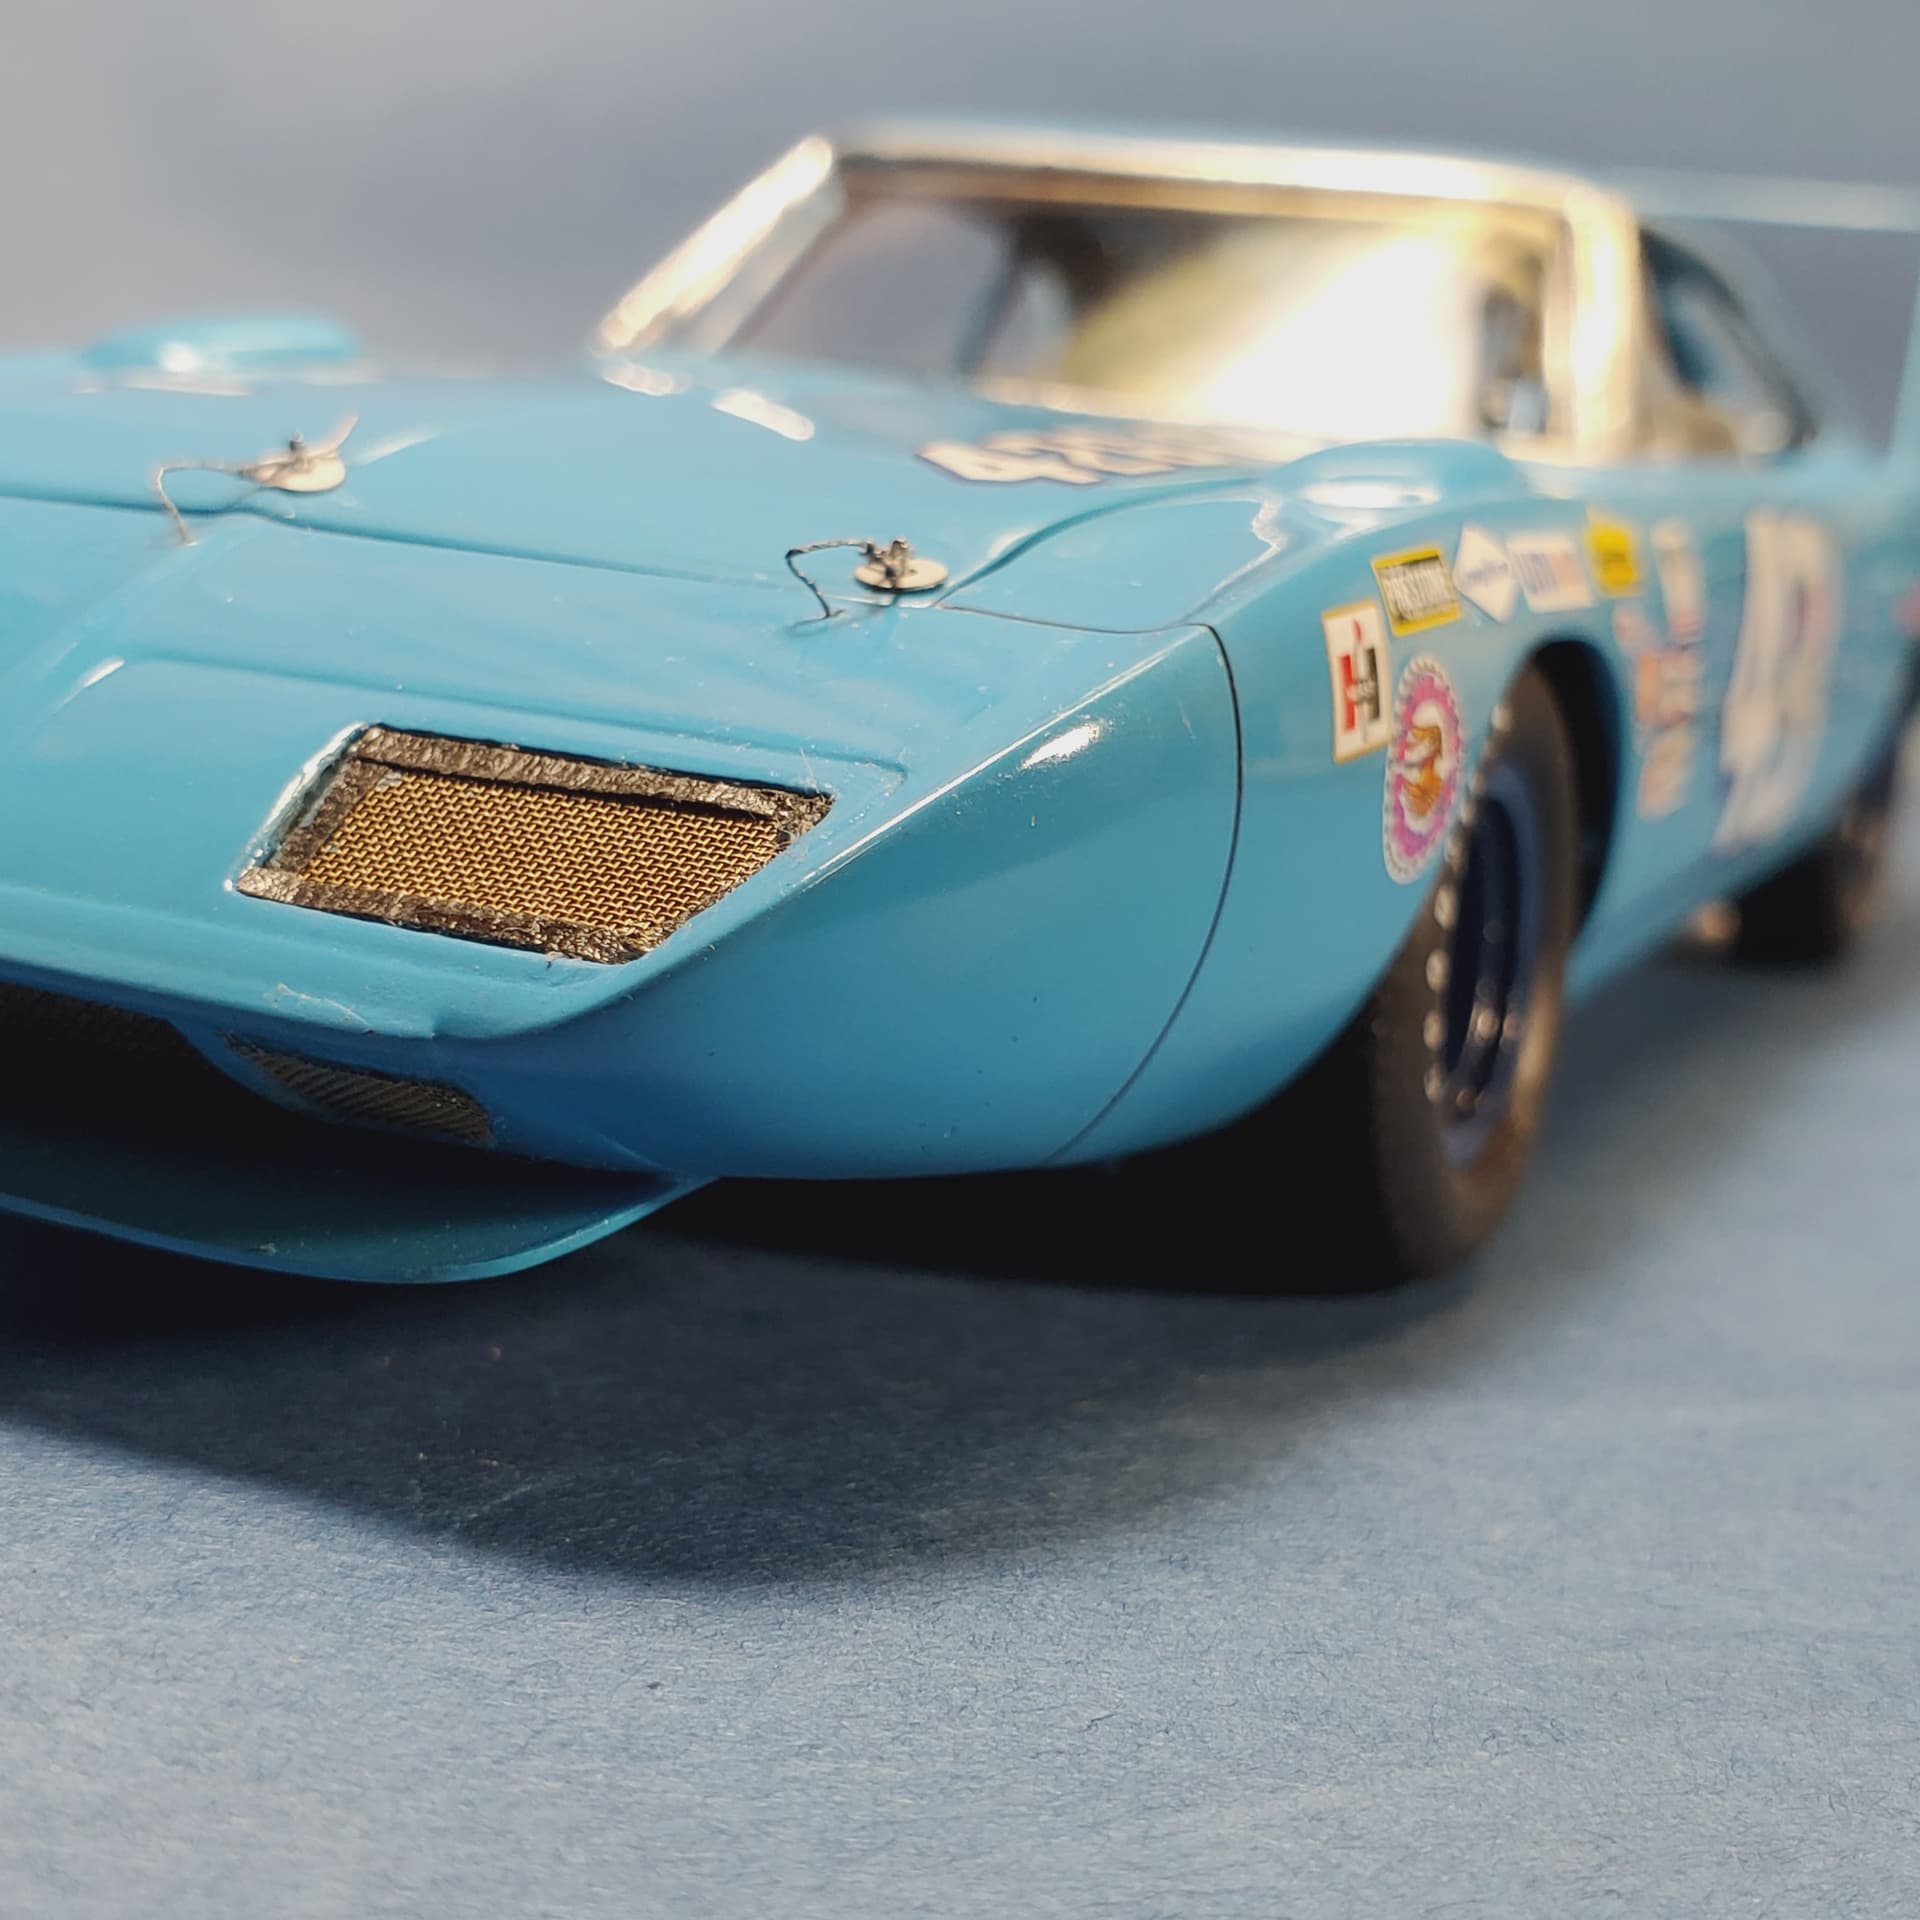
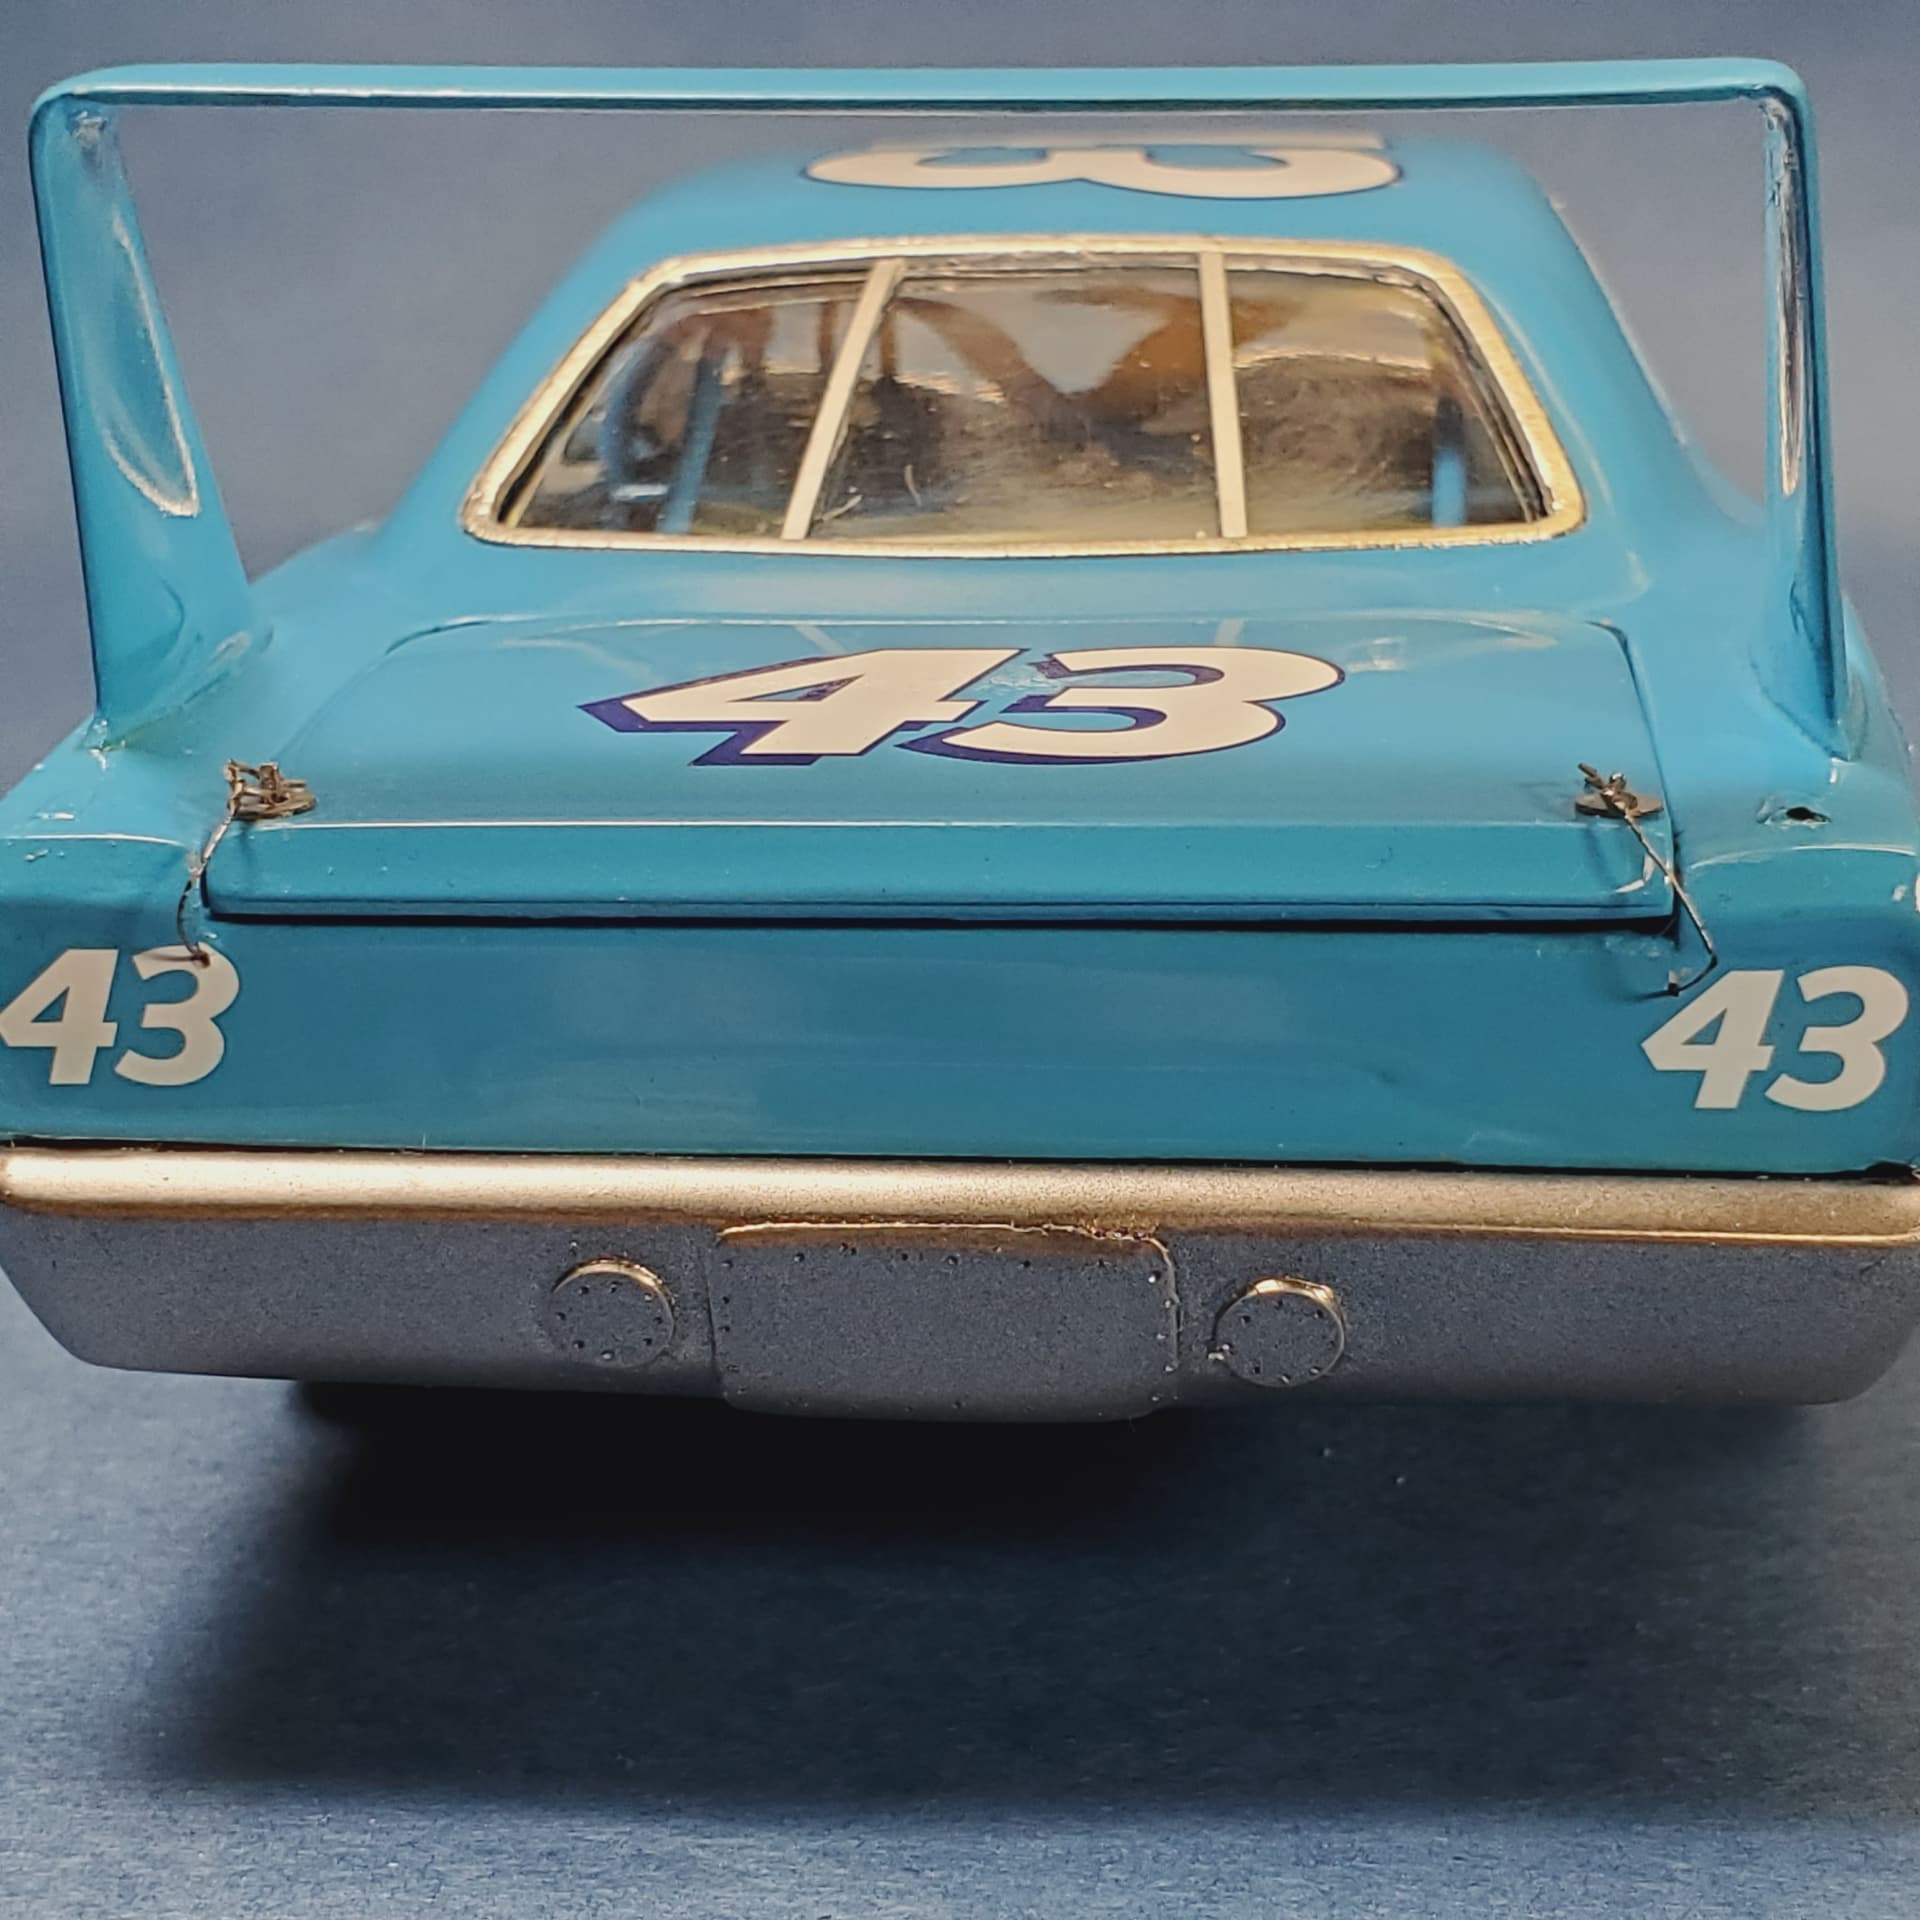
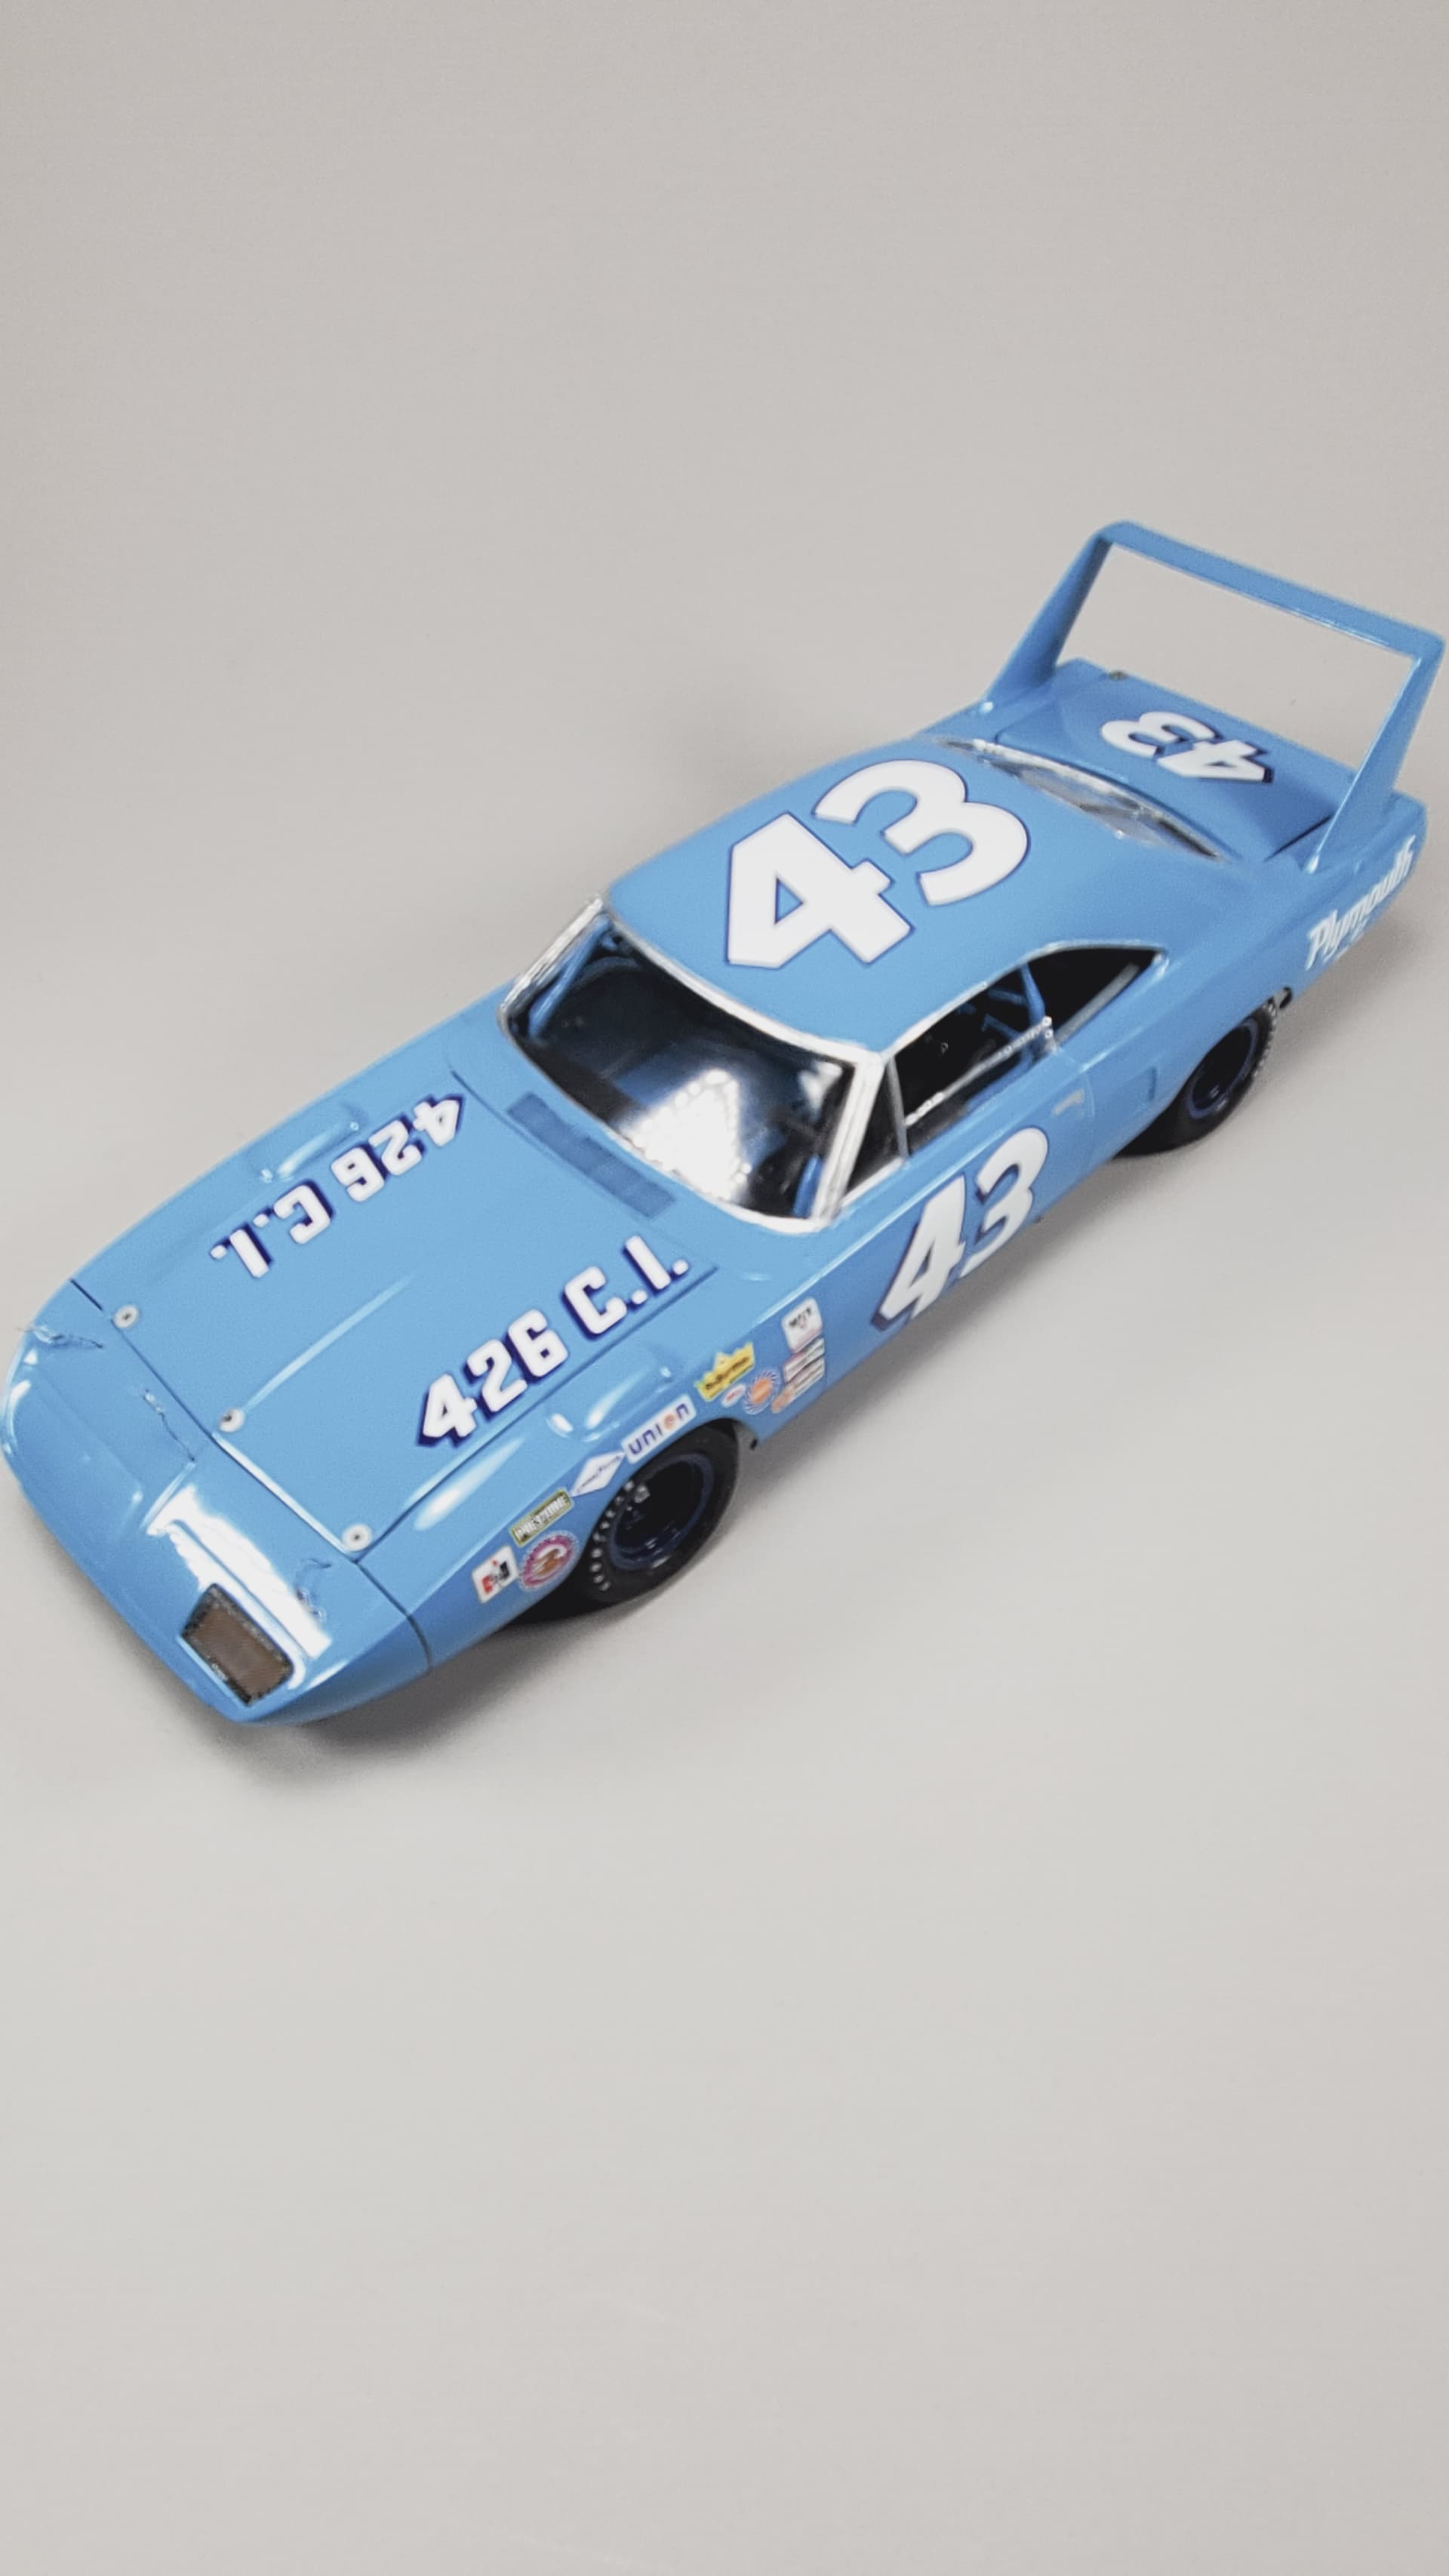
My Petty superbird has been finish a couple months now but just got around to photographing it. This is his first race in the SB and it was at the riverside road course so I switched the fuel filler to the right side. I used a johan body i got from a junk box vender at the nnl east a while ago. the trunk and hole in the nose for the oil cooler were cut out already. it was pretty rough job so i cleaned them up as best i could. The rest of the work done on it is as follows:
Body- johan
Chassis/engine, suspension- used the amt 68 roadrunner kit including the front window. i screwed up the johan window cutting the side vent windows off.
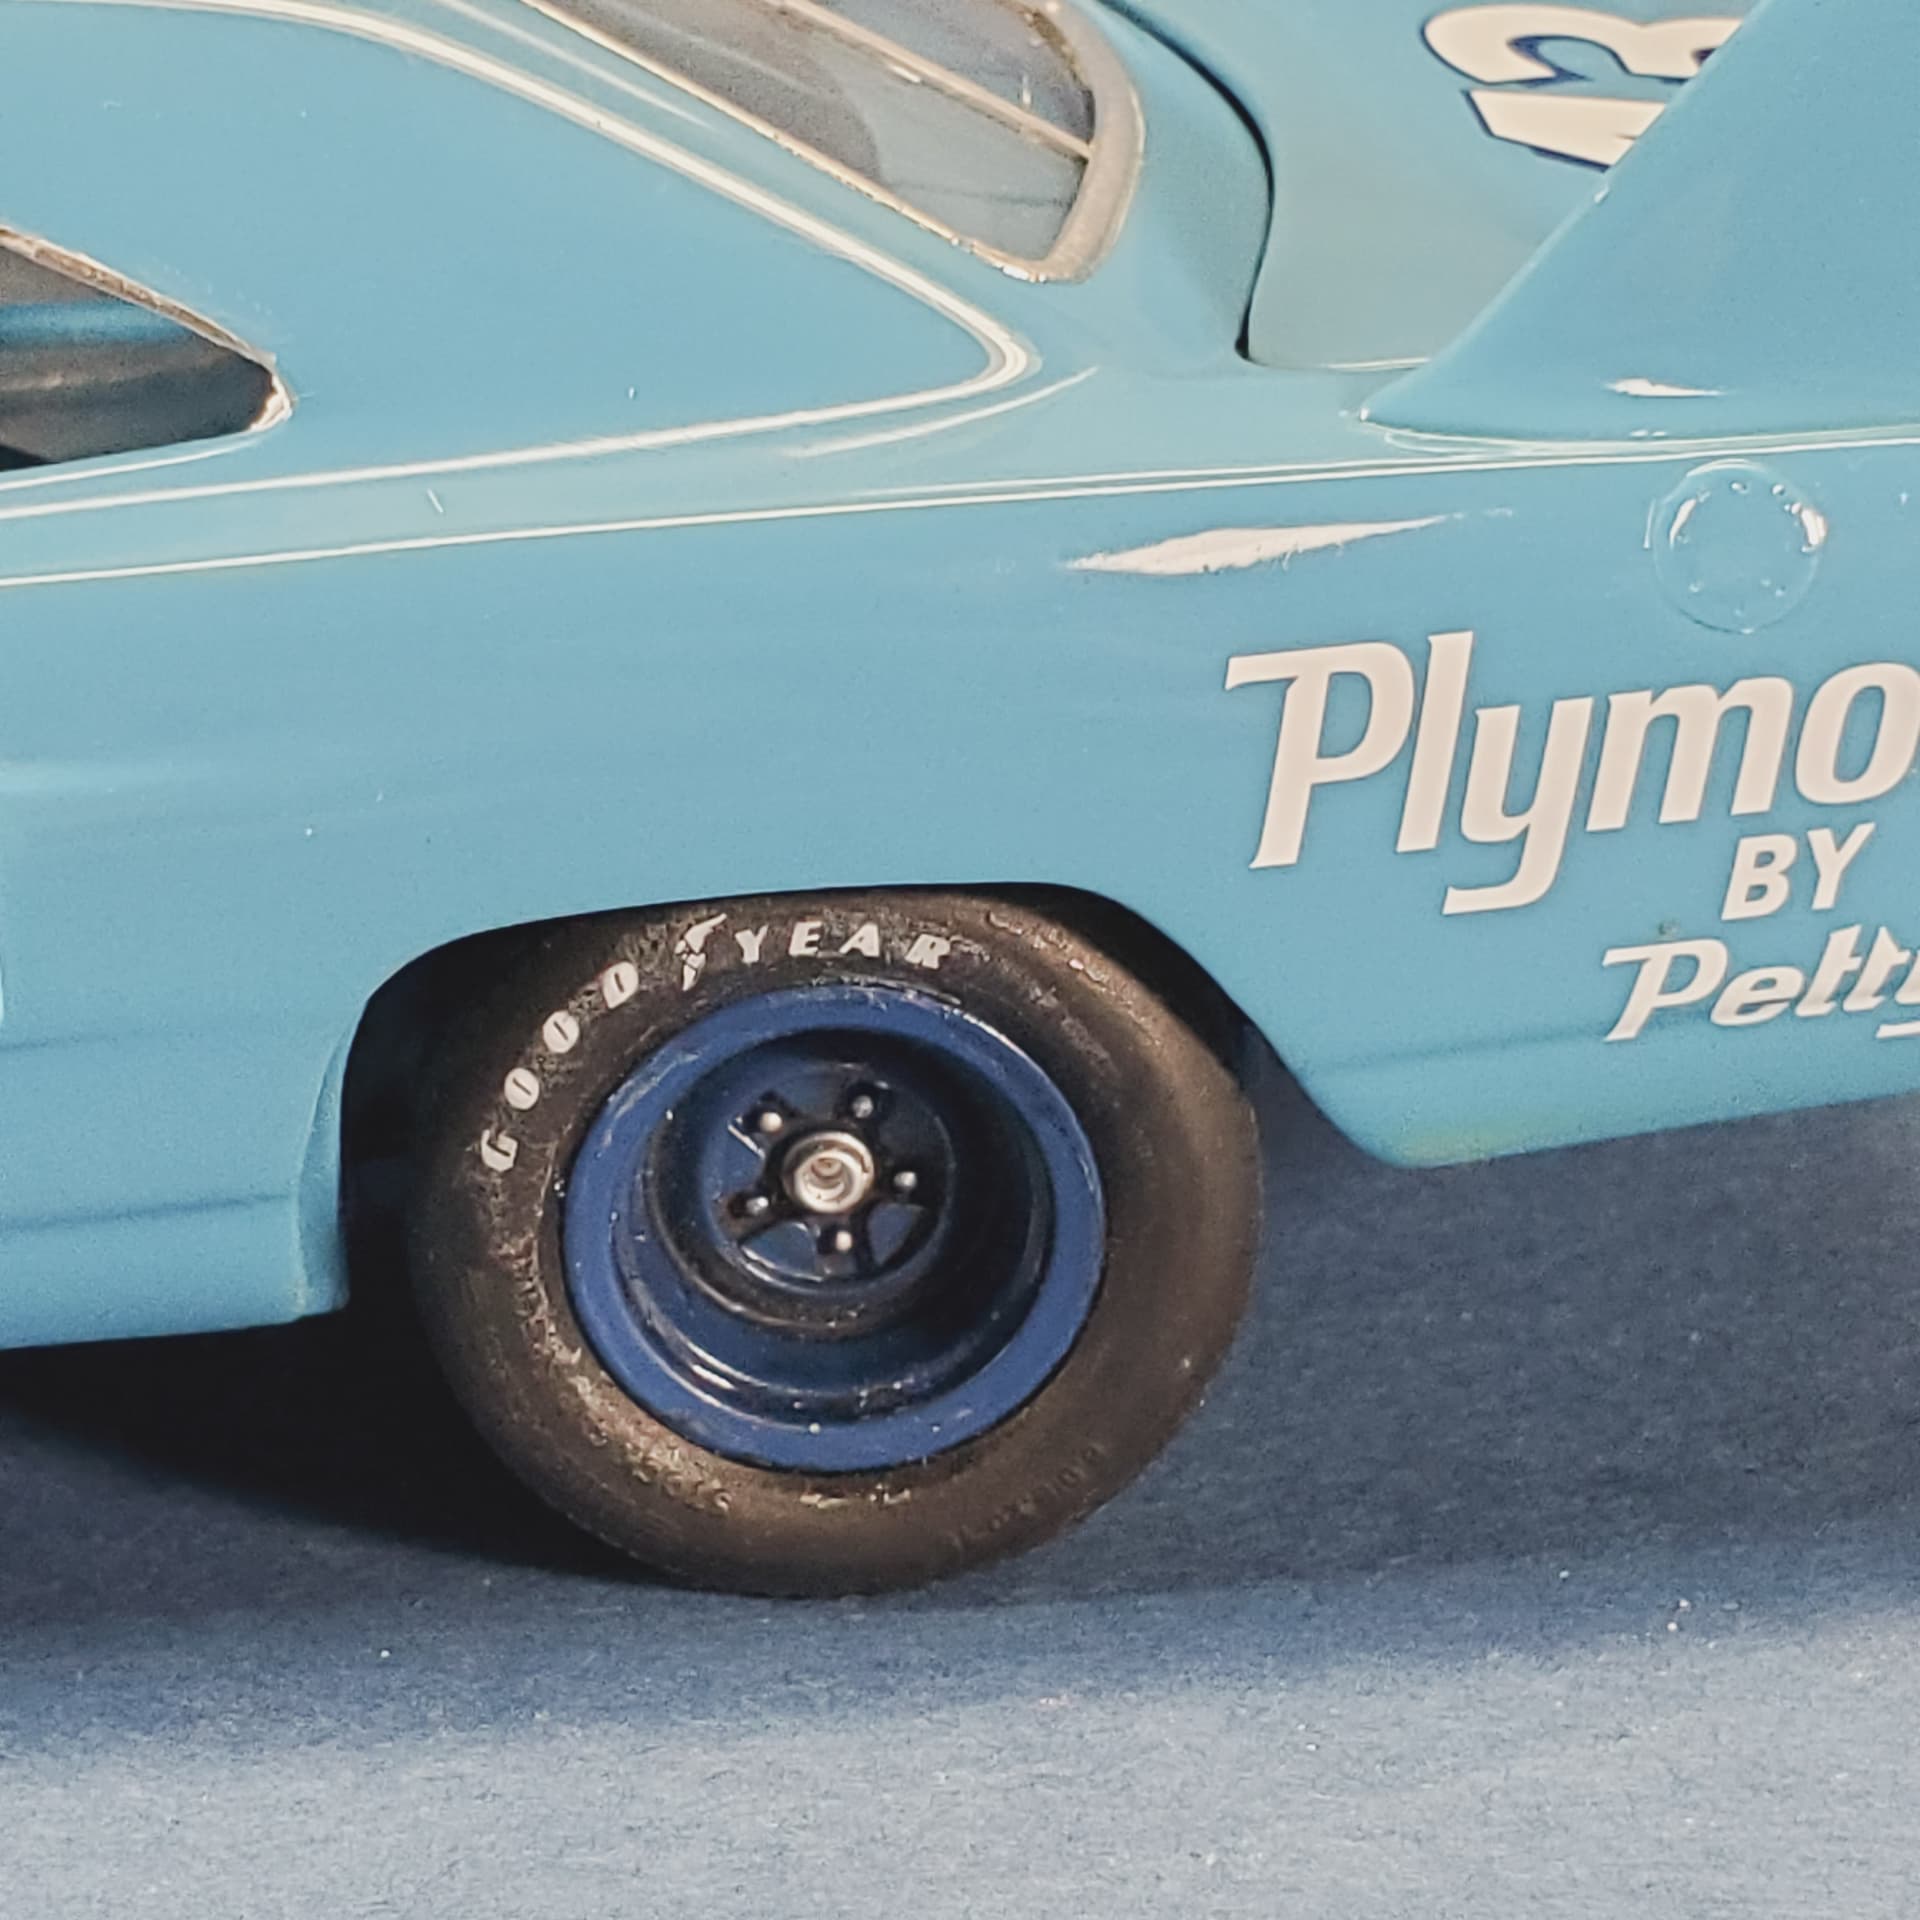
Tires- PPP, wheels resin from robert bishop
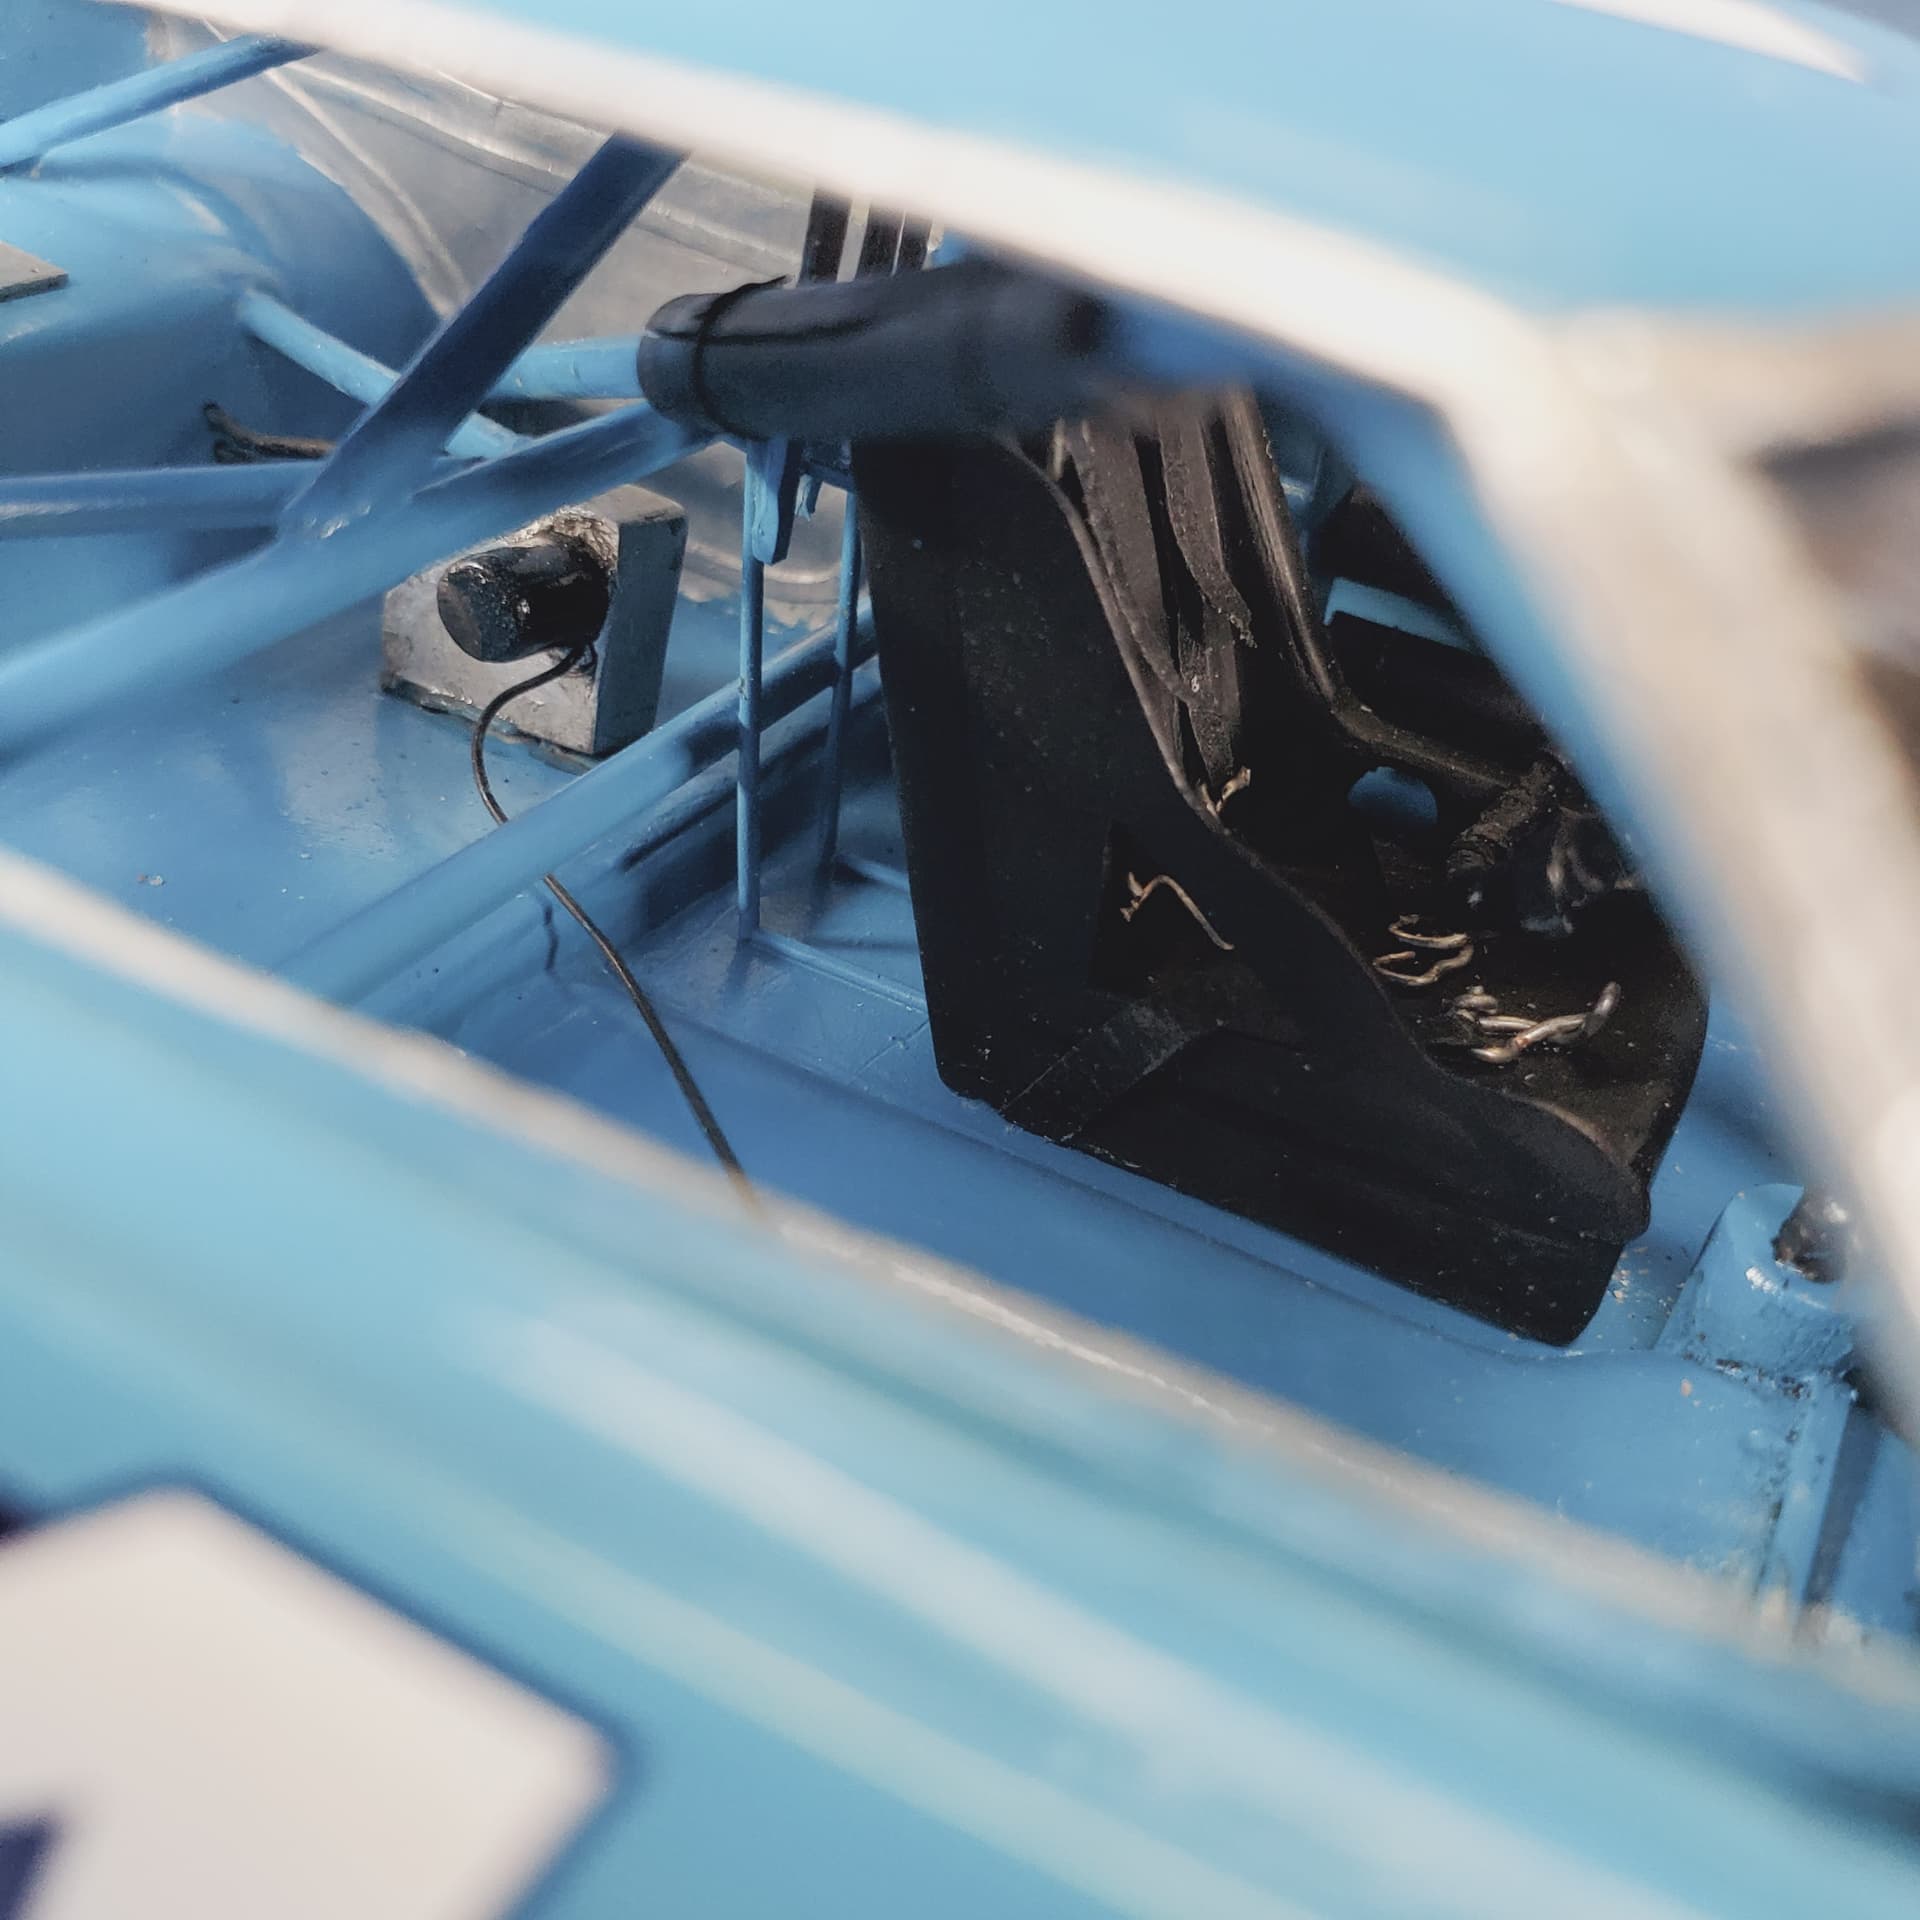
Scratch- cage (except the side bars from an amt t bird kit) rear firewall/package shelf, upper A arms, side window, seat harness, hood pins(robbed my wife’s craft box for the scuff plates, clips bent from fine wire) front spoiler, oil tank, rear spoiler supports in trunk, exhaust dumps.
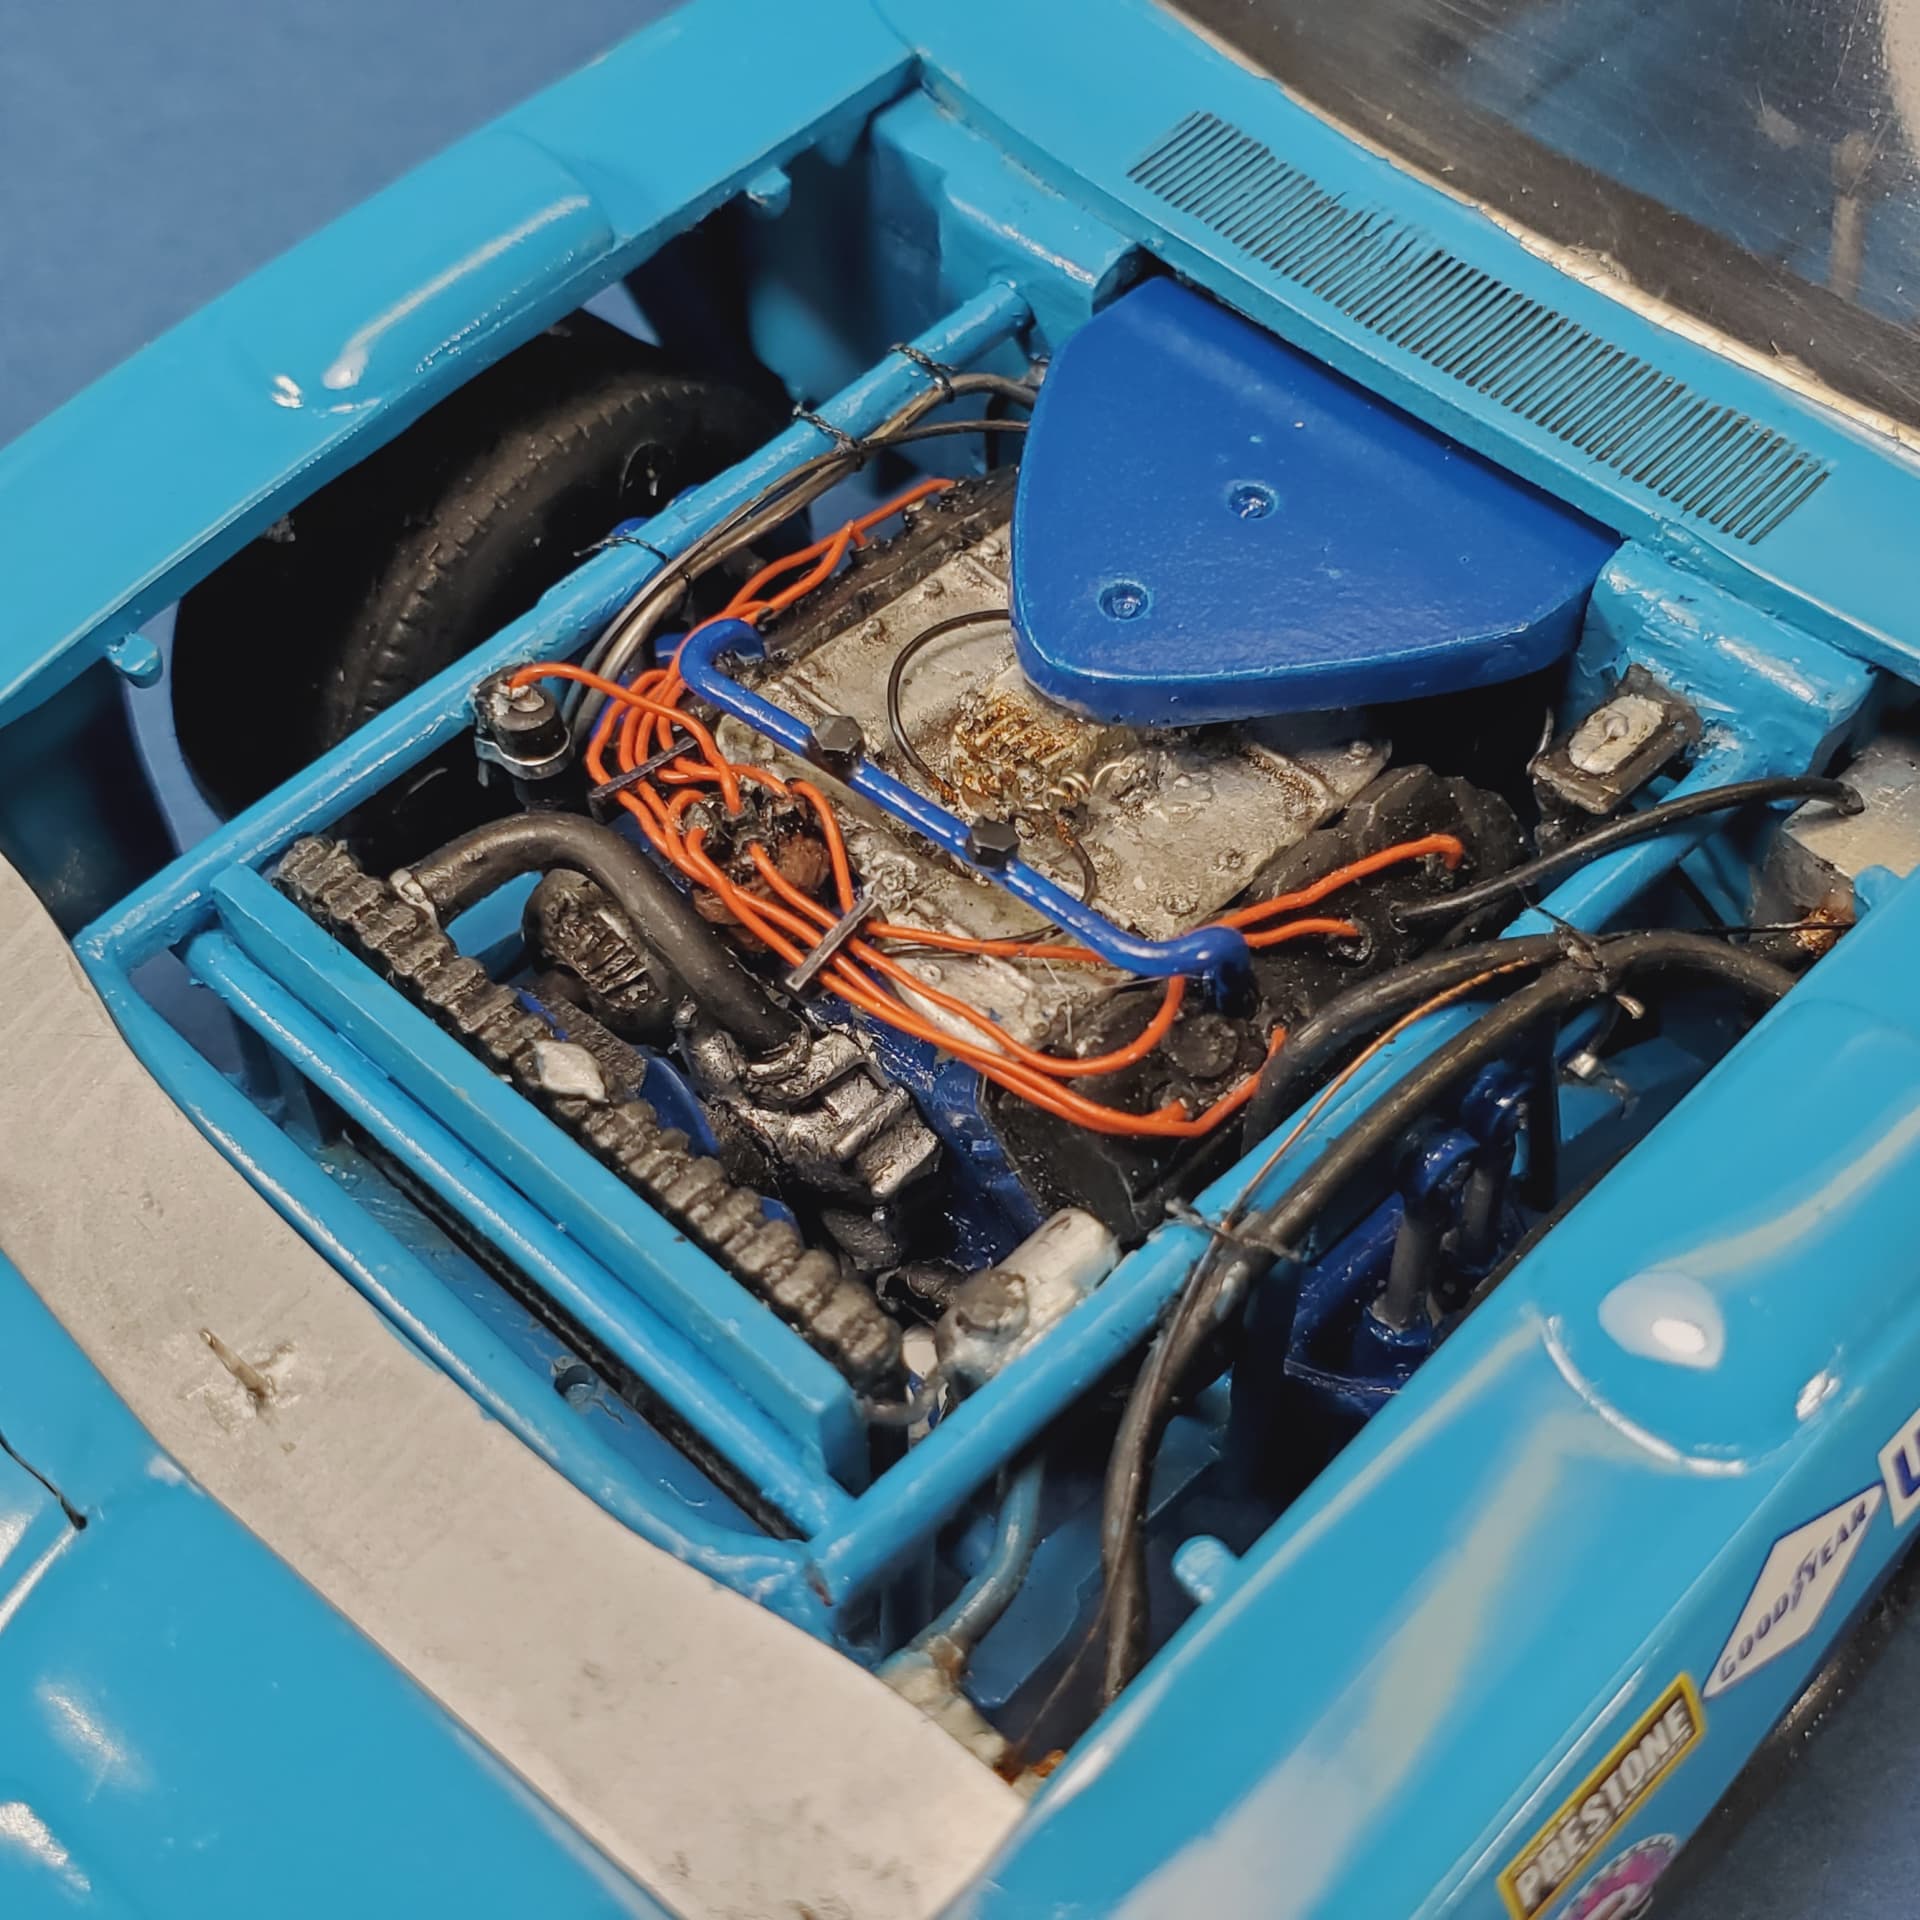
Resin- I cast the air cleaner, intake bath manifold, rear end oil cooler. Aftermarket ignition box, wheels by Robert Bishop.
Parts box- seat (modified salvinos) shocks, engine oil cooler (amt t bird) fuel cell and filler/overflow, trunk hinges, shifter, dash (mon petty pontiac) headers, rear drive shaft iol pump.
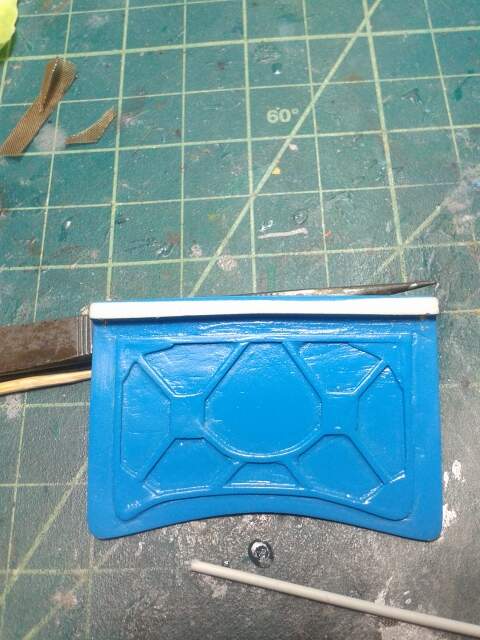
Body work-cleaned up trunk opening scratch made underside trunk lid framing, opened up wheel wells and mildly flared front fenders above wheel. opened brake/radiator ducts- used mesh from old coffee filter as grills, lowered stance, stripped and re chromed the rear bumper.
Paints- MCW with some white added to paint the body.
Decals- Powerslide mostly, yesterdays.


8 Likes
The King would be proud. Great looking car!
1 Like
Very cool Joe, lovely build!
Joe,
Just a fantastic build. I especially love all the details you’ve added just about every where. The rear end is a perfect example.
As Michael said, the King Richard would be really proud of your build.
joel
1 Like