No problem. The exhaust looks good. ![]()
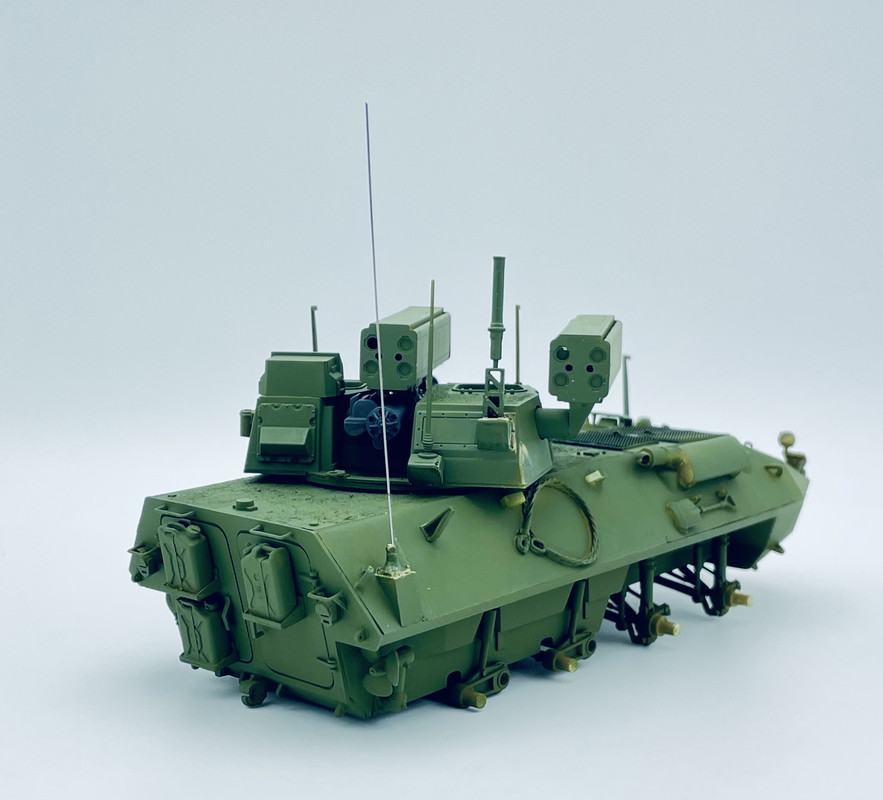
So I am just about done with construction on this. A couple of weeks ago I finished up the storage shelf for the fuel & water cans, and used some AM plastic cans in place of the metal type that came with the kit
Then today I finished adding the last of the brackets and thingamajigs on the right side of the hull that the kit neglected to include
Yesterday I did most of the painting on the turret, plus adding the smoke grenade launchers. Today I painted the Gatling gun and gave it a test fit
I also recently worked on some of the stowage painting, some covered rucksacks, using a combination of Vallejo acrylics and AK Paint Markers. The markers work great for doing the camo pattern over a solid base color
I still need to add a few more items to the turret and hull rear, then I can start main painting. More to come soon…
Nice update Carlos … looking very nice !!
Excellent detailing Carlos! Those AK markers do a great job!
Looking great. ![]()
@Johnnych01, @SSGToms, @Tank_1812
Thanks for looking in and your kind feedback. I can finally see the finish line approaching on this one! A bit longer than planned for, but at least coming up soon.
Well, today was a short day at work, so I was not wiped out when I got home and I was able to get some bench time in on this project in the early afternoon.
First up I added the brush guard to the rear lights. I also scratch built a missing foot step rail using some .020 music wire
Then I added the headlights and cut some brass screen to size for the engine grilles
I also selected an antenna base from my spares for the hull antenna mount and started prepping that for installation at final assembly after painting
Now I can get the base painting done finally
Over the past couple of days I finally made some good progress on this
On Sunday I was able to get most of a base coat of CARC Green on the hull and missile pods. Yesterday, I got the missile pods and Gatling gun glued into place on the turret.
Today after work I was able to get the final bits like the crew hatch wire cutter bars and antennas onto the turret rear and hull side glued into place.
I need to do some final areas of green, paint and add the wheels, then I can start the finishing such as stowage and weathering
She is looking good Carlos. ![]()
Very nice !
It looks like something out of a Mechwarrior game. Nicely done!
@Tank_1812, @Johnnych01, @loncray,
Thanks guys! It’s finally starting to look the part.
With all the stuff now sprouting out of the turret it does look a bit wicked and sci fi… like a Skynet HK…
Awesome looking kit and great work on it Carlos. You’ve taken a very basic kit and really detailed the snots out of it and turned it into a real stunner. Excellent work all around. That turret looks mean and like it’s ready to do business.
Thank you! I don’t feel like I’ve added that much detail. Just the main stuff that Italeri neglected, or was changed from the prototype vehicle. Let’s see what the next few weekends have in store for this beast for progress.
A real mean looking machine!
Thank you Karl. It sure does look mean now that it’s armed. I’m sure once it all stowed it’ll really look pretty mean.
Can’t wait to see this one finished, still love LAV’s…
It’s looking really great.
Cheers,
Ralph
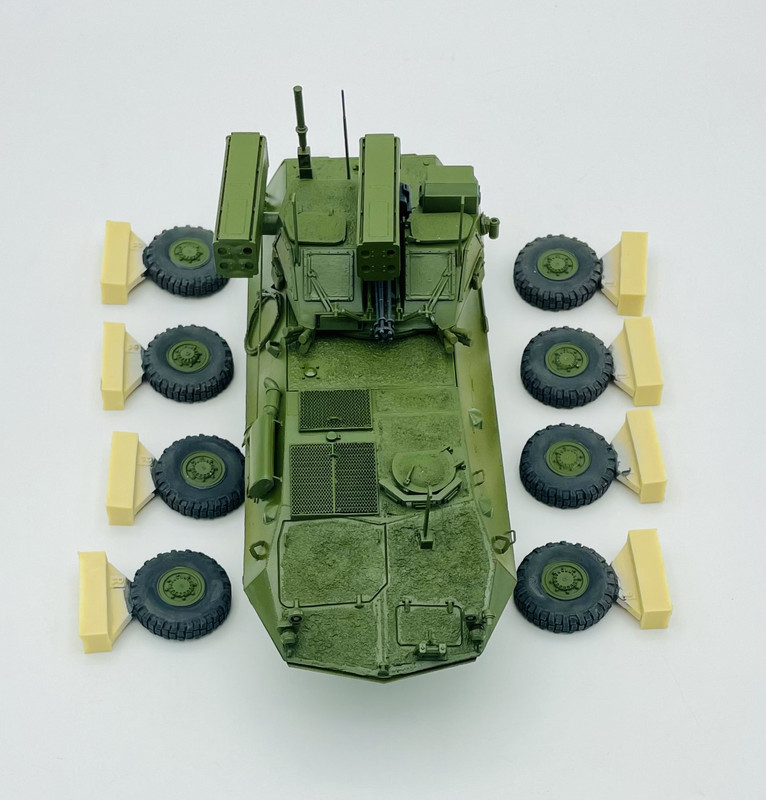
During the week I’ve been working on this one. I painted up the resin replacement wheels and finished that up today. Then I airbrushed on a gloss coat getting this ready for decals
Then I had to do some test fitting of the resin replacement wheels
Getting this one closer to the finish line
I also resumed work on this beast today, after my time off/away. I applied the decals… all three or six if you count that I had to cut them in half and stack them…. These things have minimal markings, just the serial numbers… although during OIF 1 and the drive to Bagdhad they did have some tactical numeral applied as well… still trying to figure out how to do those…
Serial numbers are on each front 1/4 and on one of the rear doors… blink and you might miss them….


