And you didn’t use crayons …
I’m impressed Bootie ![]()
![]()
6 Likes
GTG, let know if you need anything else. ![]()
1 Like
I’m now looking for good photos of the spare tire mount on the right front of the upper hull.
2 Likes
There is a topic about that on this site: click here with [quote=“bwilt, post:7, topic:6352”]
Wish I had found this site earlier, nice sets for Strykers and LAV’s
[/quote]
4 Likes
I was going to post a link that Bert did. Watching the video Gino posted I grabbed these stills.
I think the camo netting covered spare tire was done with straps like above in Gino OIF photos #2.
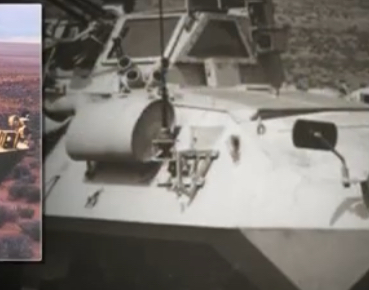
This looks more like what might have been used on Gino’s OIF photo #1, as the tire sits higher and there is no cargo straps visible. Still not 100% convinced as I think the tire size might interfere with the exhaust. OIF pic #4 shows something similar, might be enough to bolt the tire through that and hang the rim on the lifting ring.
Maybe @white4doc can help explain how they might have rigged a spare tire that high.
The good news is you have options and more than likely unless you get a AD crewman no can really prove you wrong.
3 Likes
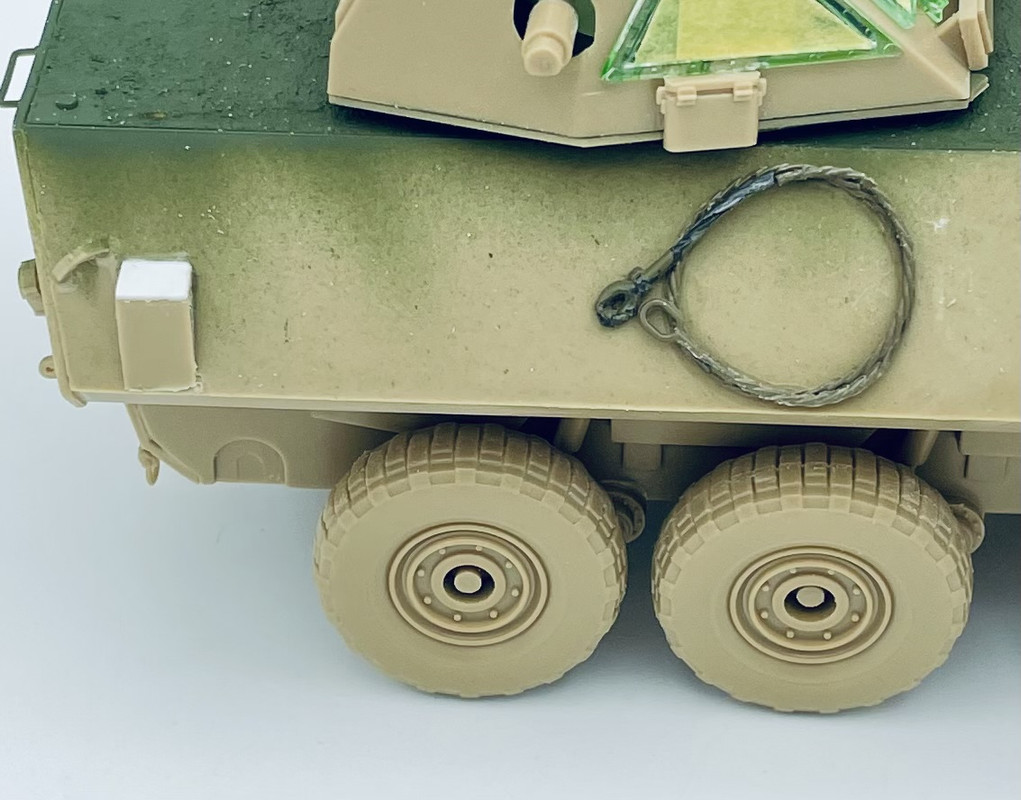
From your first photo I guess the spare wheel is only strapped to the lifting eye welded on the hull.
Olivier
2 Likes
Yeah, I’m kinda leaning towards the spare being strapped to the lifting eye… I like the camo net draped over the wheel also.
2 Likes
Earlier in the week I finished up the suspension work… I left off the swimming props and rudders until I get some mud texture work done down there, so that I don’t break them off during that process, and will install them afterwards.

And I glued the upper hull piece in place
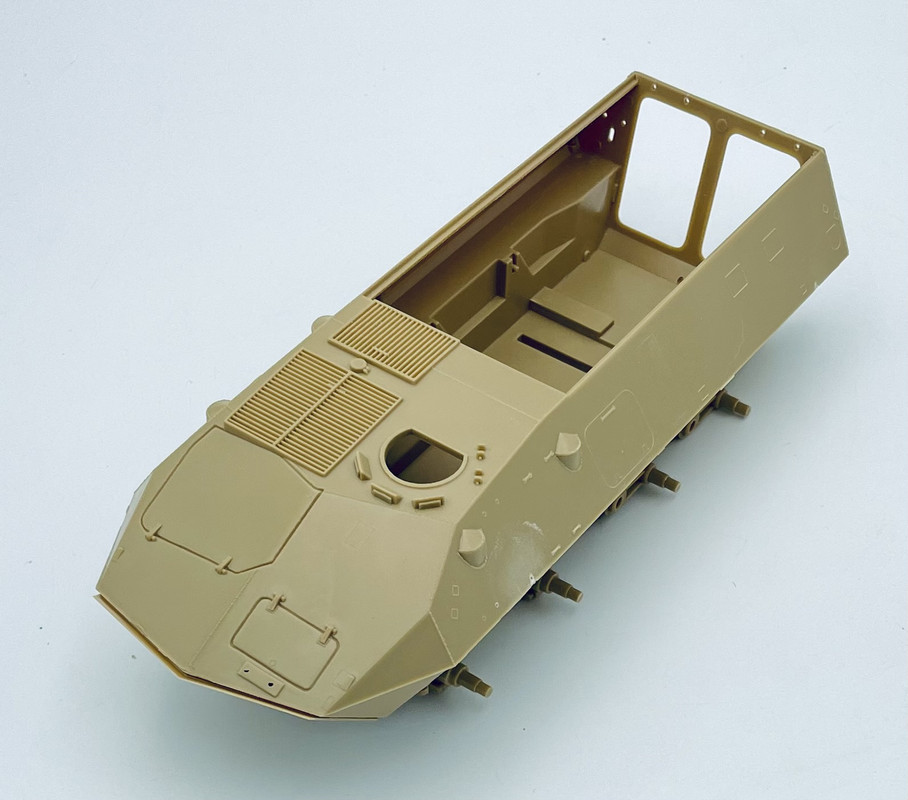
Next up I need to start adding some hull fittings.
Thanks again for all of the photos to help with that configuration, as it looks like Italeri kinda blew it there…
4 Likes
Yes/No….if you watch the video there is a few shots of traditional exhaust with an AD turret. Like many kits it could be Italeri got photos for the prototype and gave it a go. They did that with the V-22. Course this it what we can see today, must have been more difficult back then.
Still would love to see an interior of the turret.
1 Like
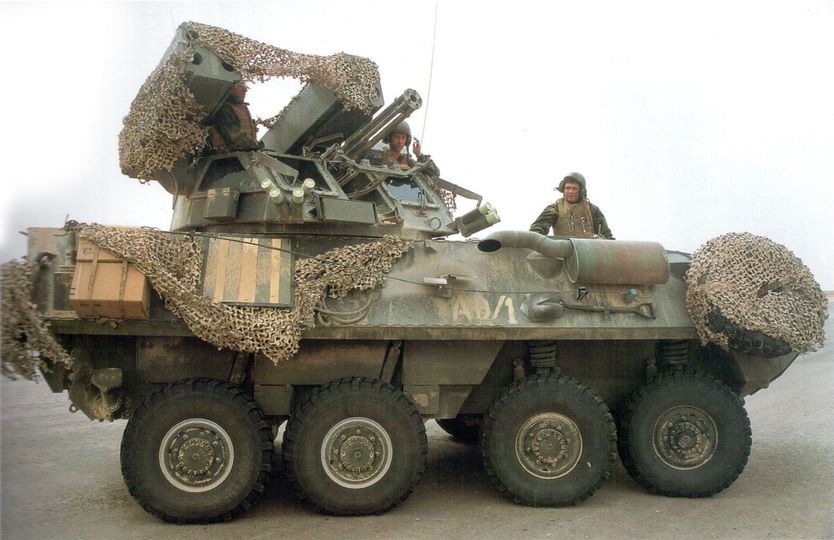
The -AD variants were all on the books of 4th LAR so they lived on our ramp until they went away. It looks like in the first picture that the spare is lashed there, there is a green band through the rim and tire. There were always lashing straps available if you knew where to
‘acquire’ them from. We also used to use the towing shackles to secure things to the vehicle, any fitting you could attach something to we used to carry gear, spares, etc.
5 Likes
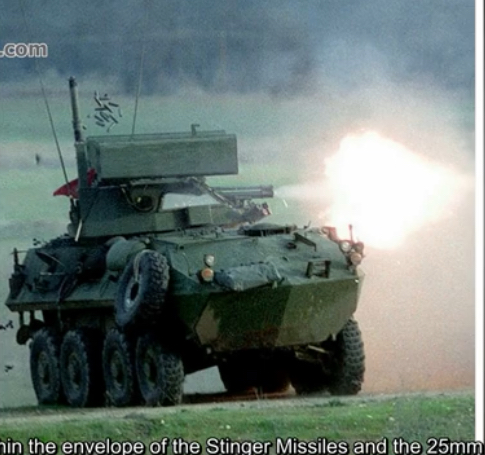
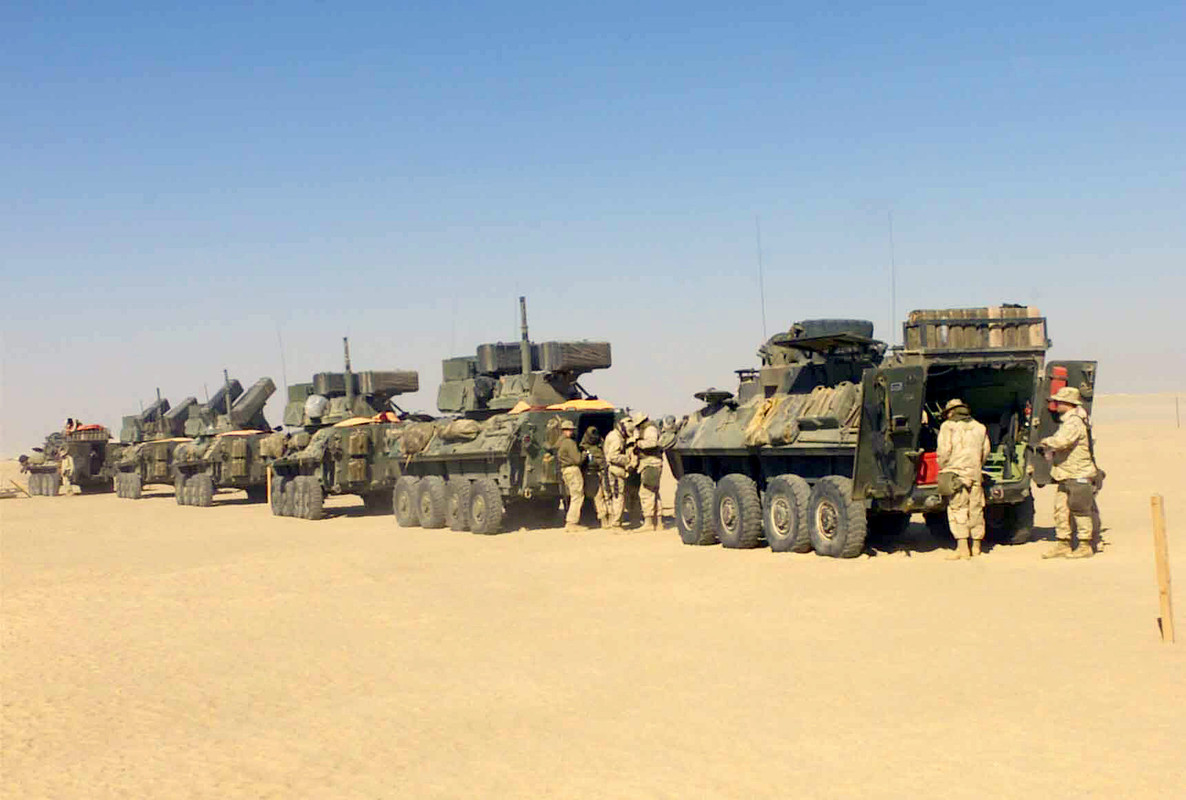
Apparently they operated in platoons of four with each LAR. I found this photo of them in Kuwait right before OIF kicked off…
4 Likes
That was taken at LSA Matilda not long before the 1st MARDIV stepped off to move north for the invasion. A typical platoon is four vehicles in two sections. 4th LAR was broken up into individual companies which were attached to the three AD LAR Bns. to round them out (1 LAR Bn. per RCT). The battalion minus C Co. (sent to Oki on a UDP to relieve an AD company) was reconstituted during the retrograde, but the -AD’s went back stateside, they were gone from the ramp by the time we returned in September. They were great to have when you were escorting convoys, that 20mm was an attention getter, we could have used them with TF Scorpion.
3 Likes
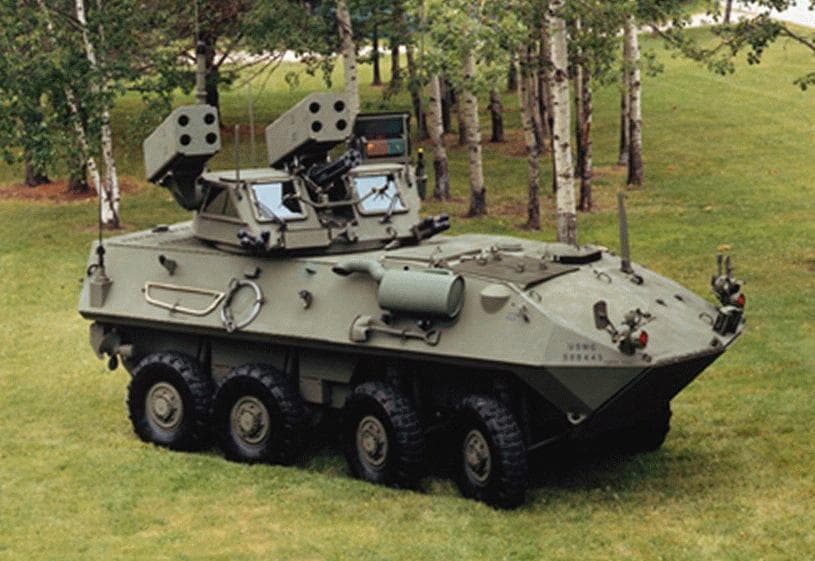
LAV-AD used a 25mm gatling gun and two 4-shot Stinger pods. Targeting was optical passive with FLIR and TV camera sights and the human eyeballs…no radar at the time although the LAV-AD “Blazer” turret had a rotating radar that the USMC didn’t opt for. The LAV-AD turret windows were armored.
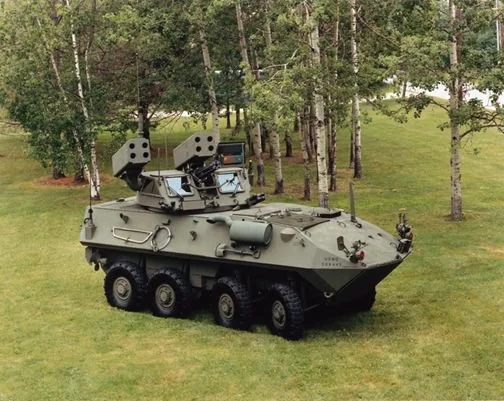
Radar on the “Blazer” turret.
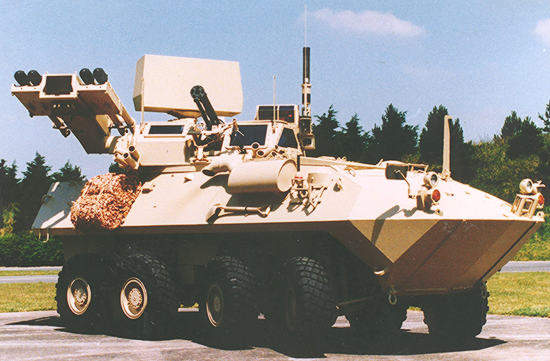
LAV-AD was an USMC capability that was pretty unique for its time. LAV-AD can also mount a 7-shot 2.75" rocket pod over the gatling gun, but I never saw the Marines do this.
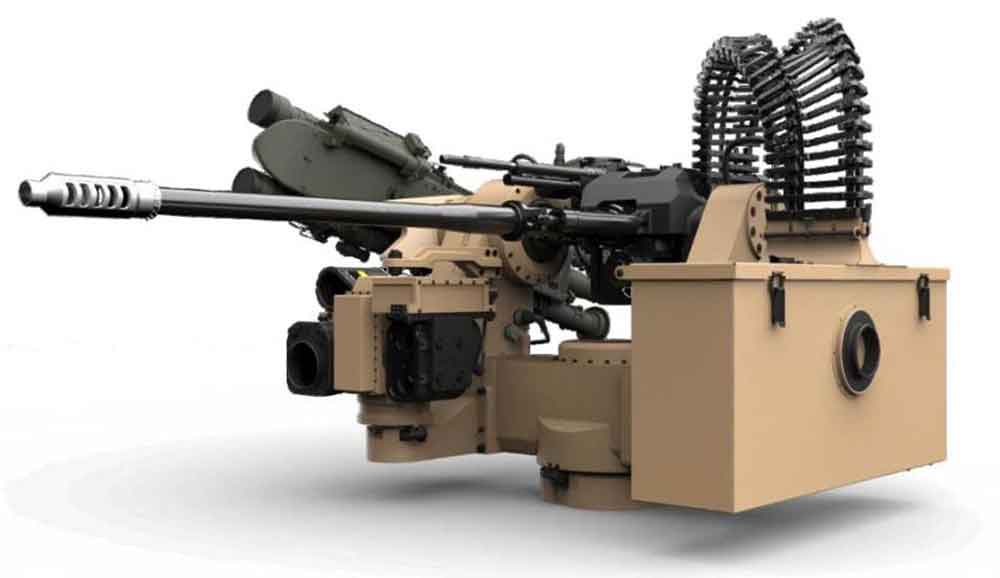
Now the Moog or Kongsberg SHORAD turret is out for the USMC MADIS JLTVs that use a two (Kongsberg) or four-shot (Moog) Stinger mount/pod, 30mm autocannon, and 7.62mm COAX and radars although Moog turret can mount two four-shot Stinger pods…I haven’t seen two 4-shot Stinger pods mounted on a USMC MADIS JLTVs.
Kongsberg photo of 30mm and 7.62mm COAX RS6 RWS turret with two Stinger SHORAD mount.
4 Likes

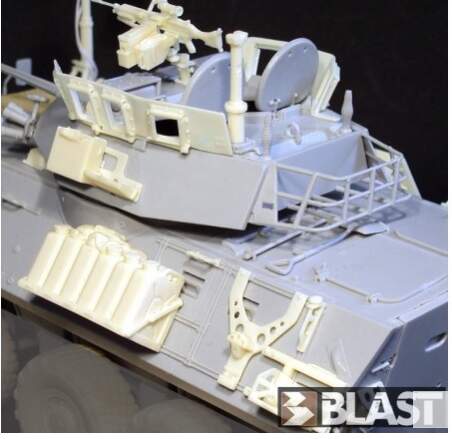
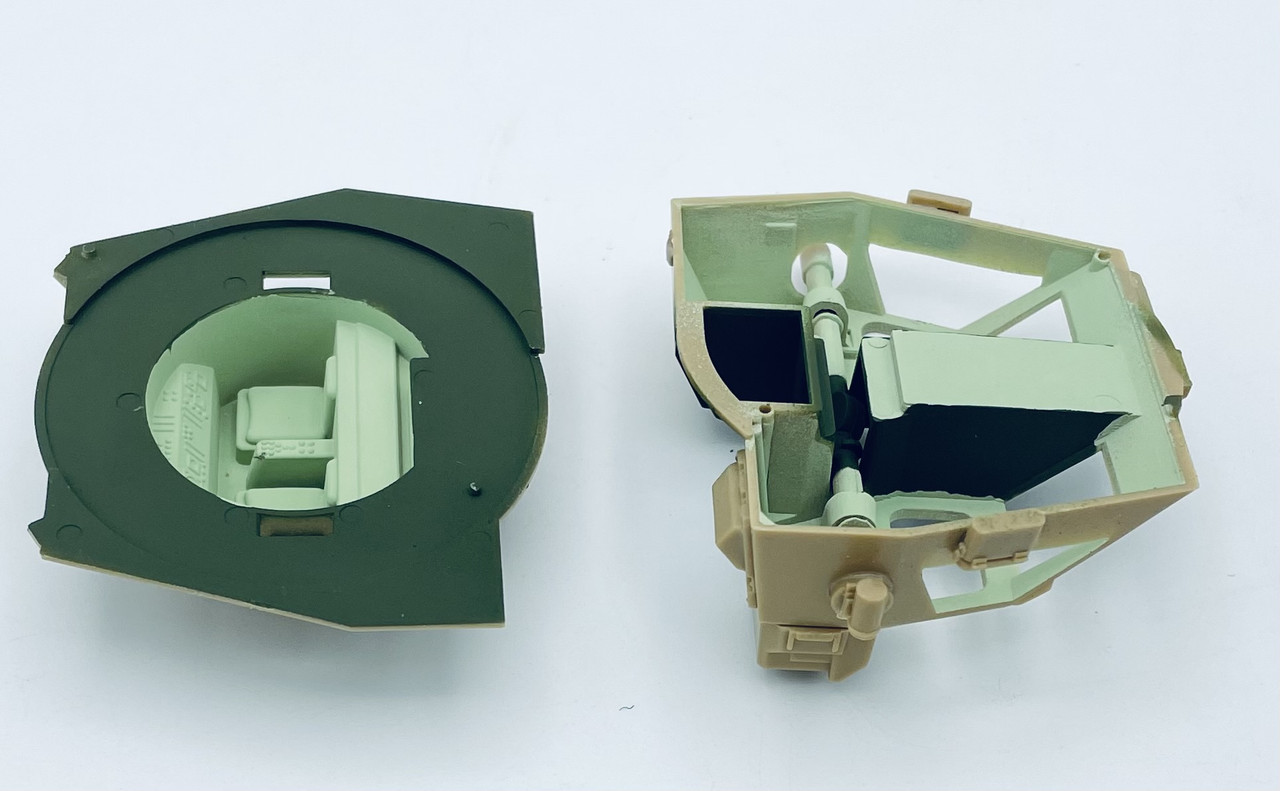
Well I guess I forgot to update this build after our last build session at AMPS a couple of weeks before… and I have been working at this a bit when I can get some bench time, which I finally have had over the past week…

I have most of the turret sub assemblies built and based paint done onto the turret interior…
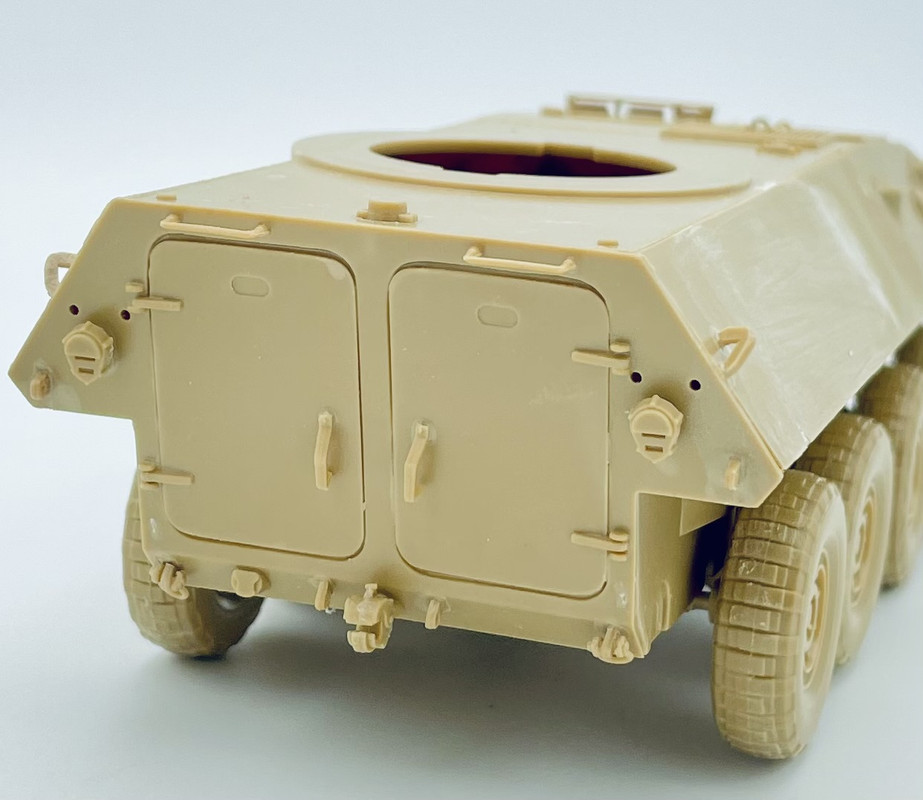
and I’ve added most of the small detail items onto the hull front & rear… I still have the tail light brush guards to add on here…
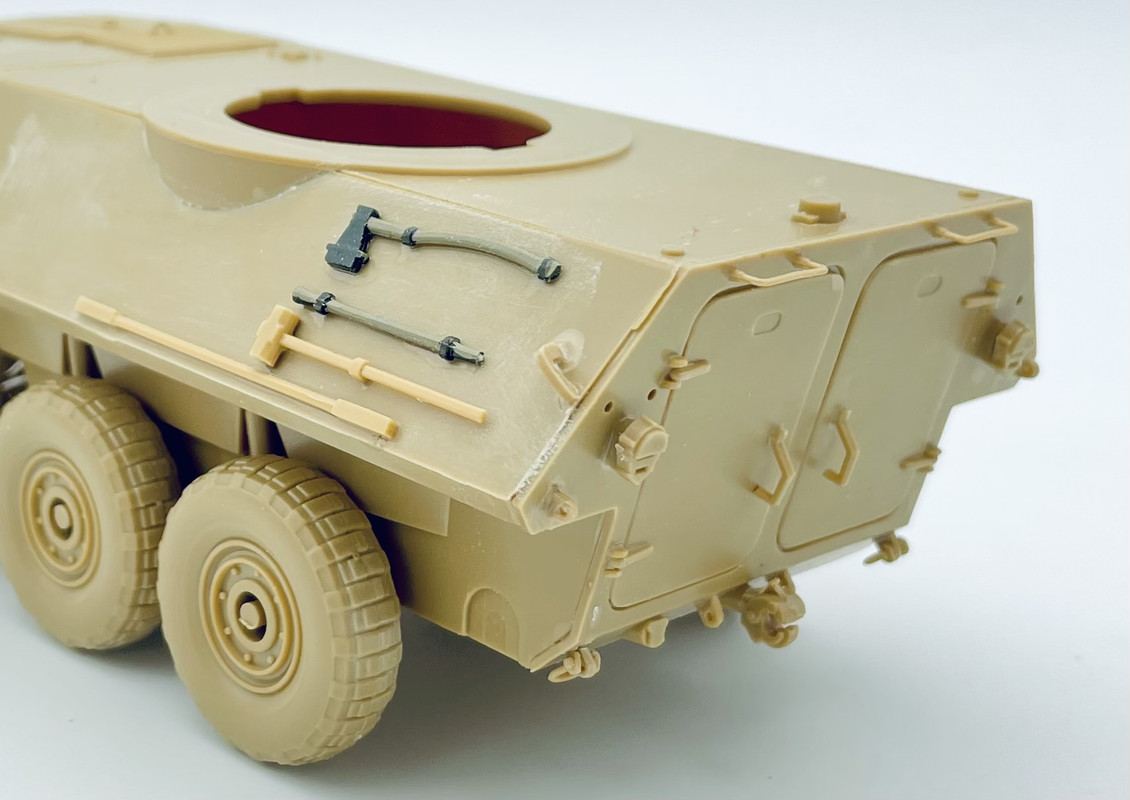
and I added the pioneer tools from my spares which Italeri neglected to include in this kit… I still need to scratch up some brackets for the tools
a few weeks back I picked up some Mig Ammo non slip paste, so I started adding that to the top surfaces. I still need to do another coat to get the proper texture

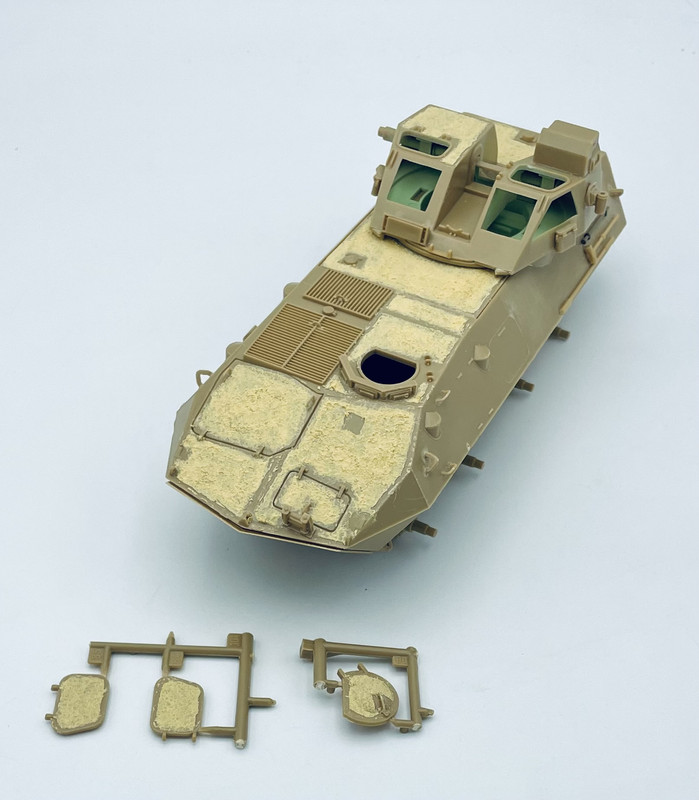
and lastly a test fit of all items built so far. I won’t be using these tires, except one as a spare stowed on the hull side. I have some nice resin AM tires to use for the rest, but they didn’t include a spare…
thats all for now…
6 Likes
The USMC told me that the LAV-AD program was canceled a long time ago. I asked what happened to the 18 LAV-ADs and no response was posted. So the mystery remains as to the fate of all 18 LAV-ADs.
2 Likes
With the proliferation of drones now, I think a gun/missile system like this would be ideal. Missiles alone are not a cost effective defense, and the one way attack drones have to close to within gun range to strike their targets.
4 Likes
A bit of progress on this one during my days off…
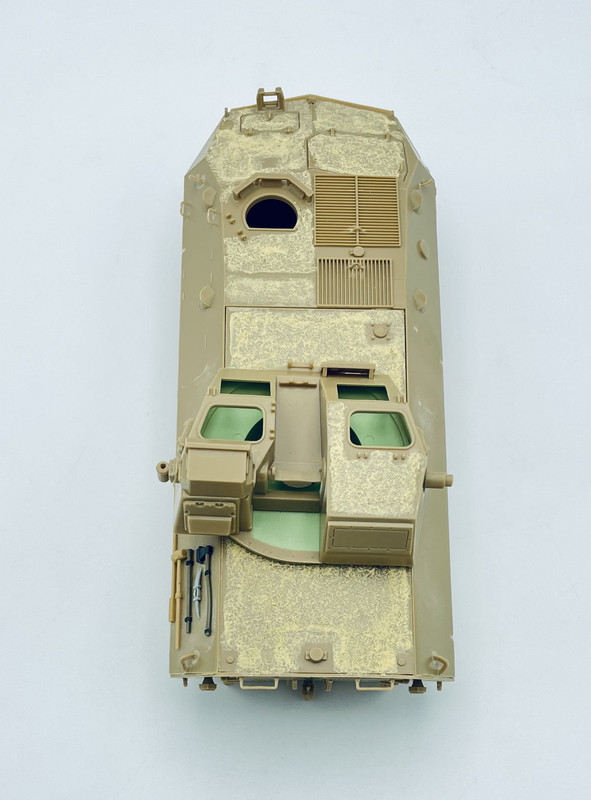
I applied a second coat of the non slip paste to all areas previously coated
here are a couple of close ups to show how it looks once dried
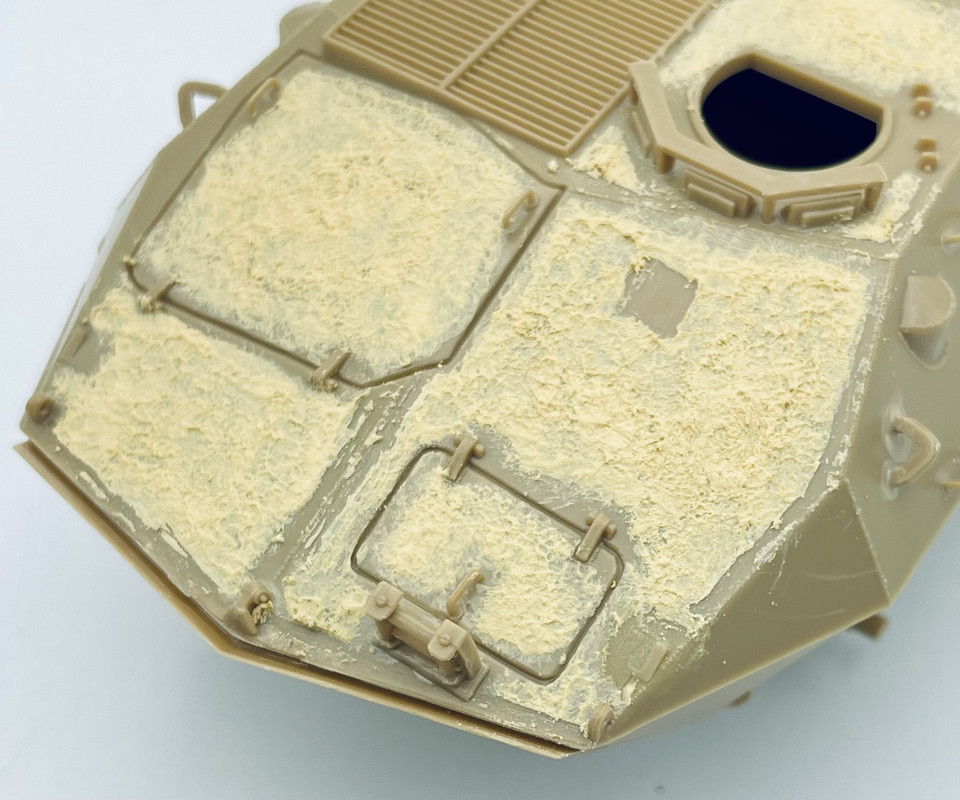
then since I was going to be airbrushing on some CARC/NATO Green on the turret interior areas, I also hit some of the decking areas with the excess to get a good idea of how it looks under a coat of paint…
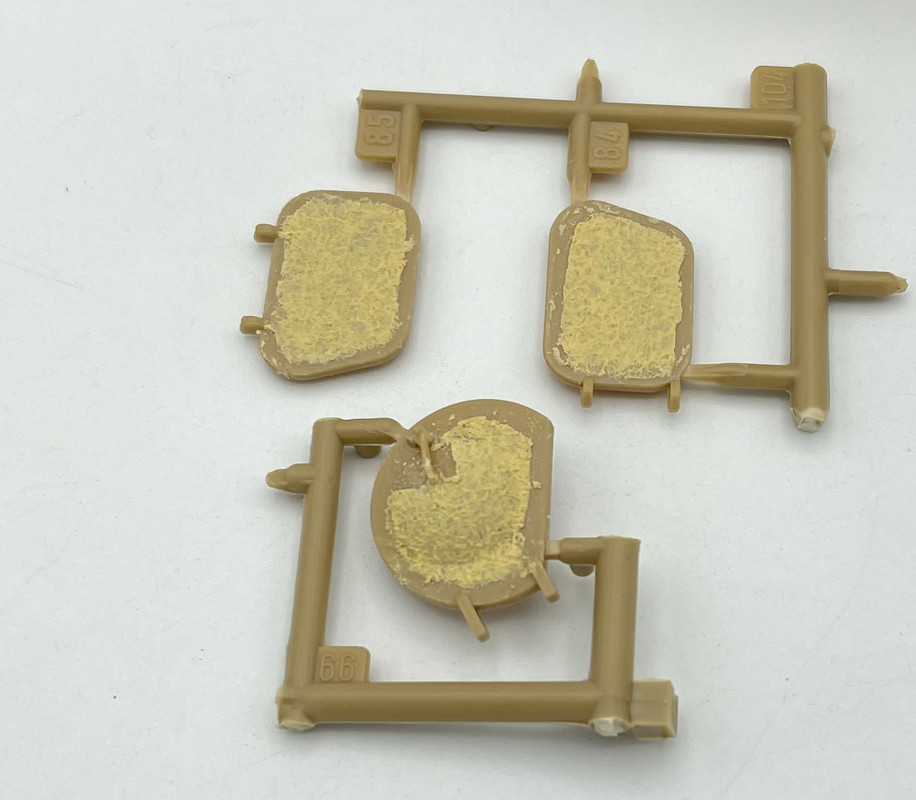
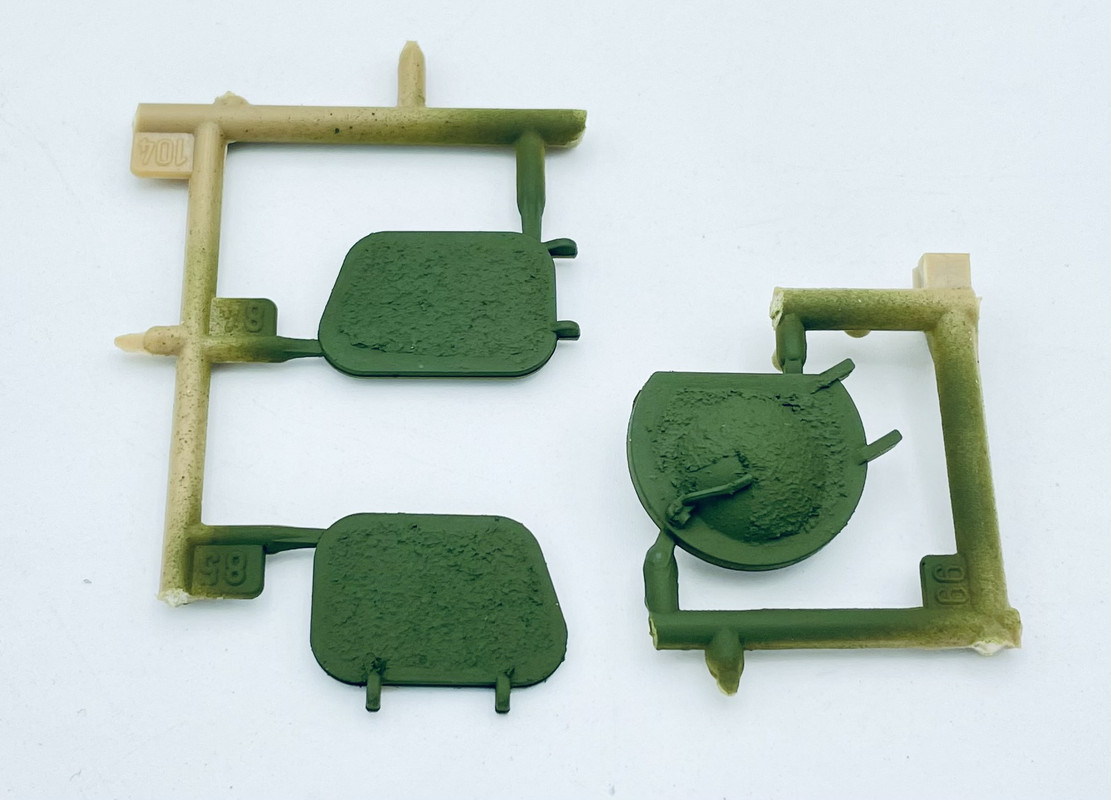
Outer surfaces of the hatches before & after paint
and the rear top deck area… I really like how it looks once painted…
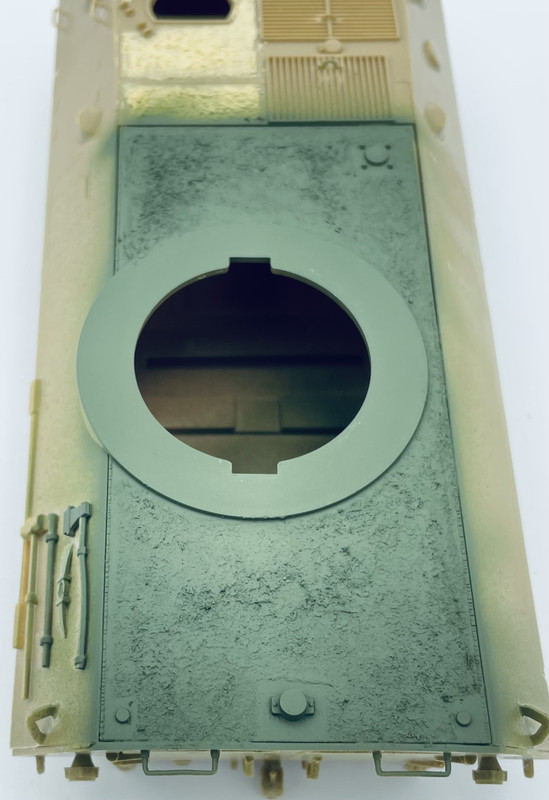
lastly I got some areas of the turret interior painted in the CARC/NATO Green that would be highly visible through the turret windows. the upper center portion I’ve seen in some video footage, but the lower portions are just an educated guess.
more to come by the end of the week…
7 Likes
Yesterday during our monthly online So.Cal.AMPS Zoom meeting I made some progress on this.
I modified the kit muffler part into the correct configuration.
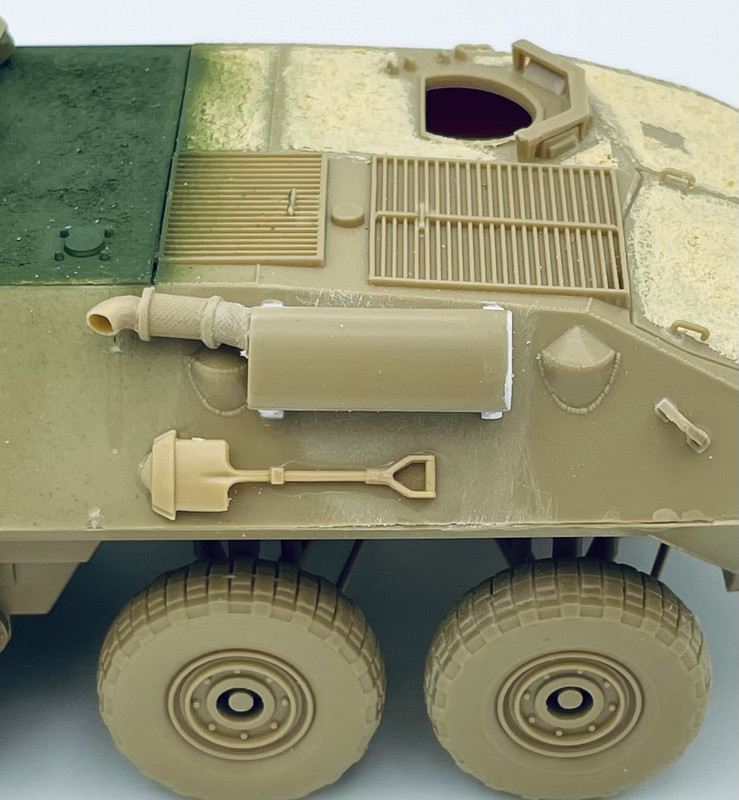
Its not an exact match to what photos show, but it’s close enough for government work ![]() I also added the shover underneath as shown in photos
I also added the shover underneath as shown in photos
I also modified the radio antenna base to the proper size and installed it on the side, as well as adding a tow cable from my spares bin that Italeri neglected to include
and here is a photo of where it all stands now
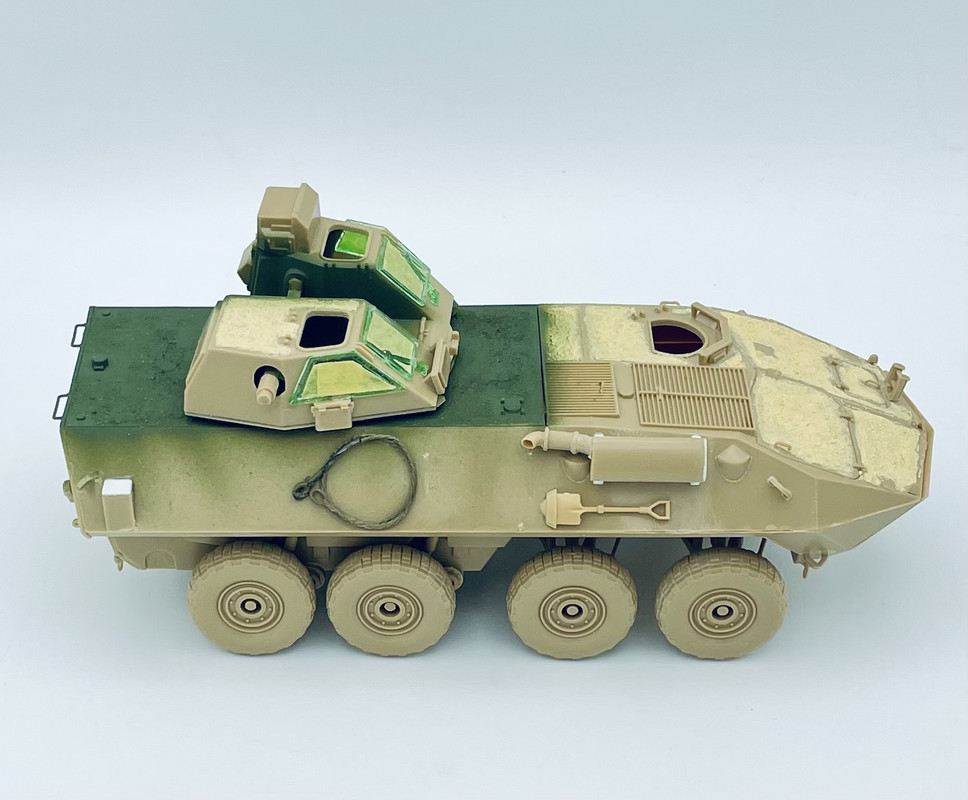
I need to add a few small fittings to the right side, plus scratch up the jerry can racks on the rear troop doors. But not too much farther to go on this now…
@Tank_1812, thanks for the measurements on the exhaust ![]()
6 Likes
Thanks Sable! I need to scratch up and add those small fittings. you can see on the right side of the hull below the turret
I’ll be using this one as my stowage guide, since it is a combat vehicle from OIF. At least for the right side. I have another reference photo for the left side stowage during OIF.
5 Likes