I gave already a hint in my previous blog: It will be a big bird.
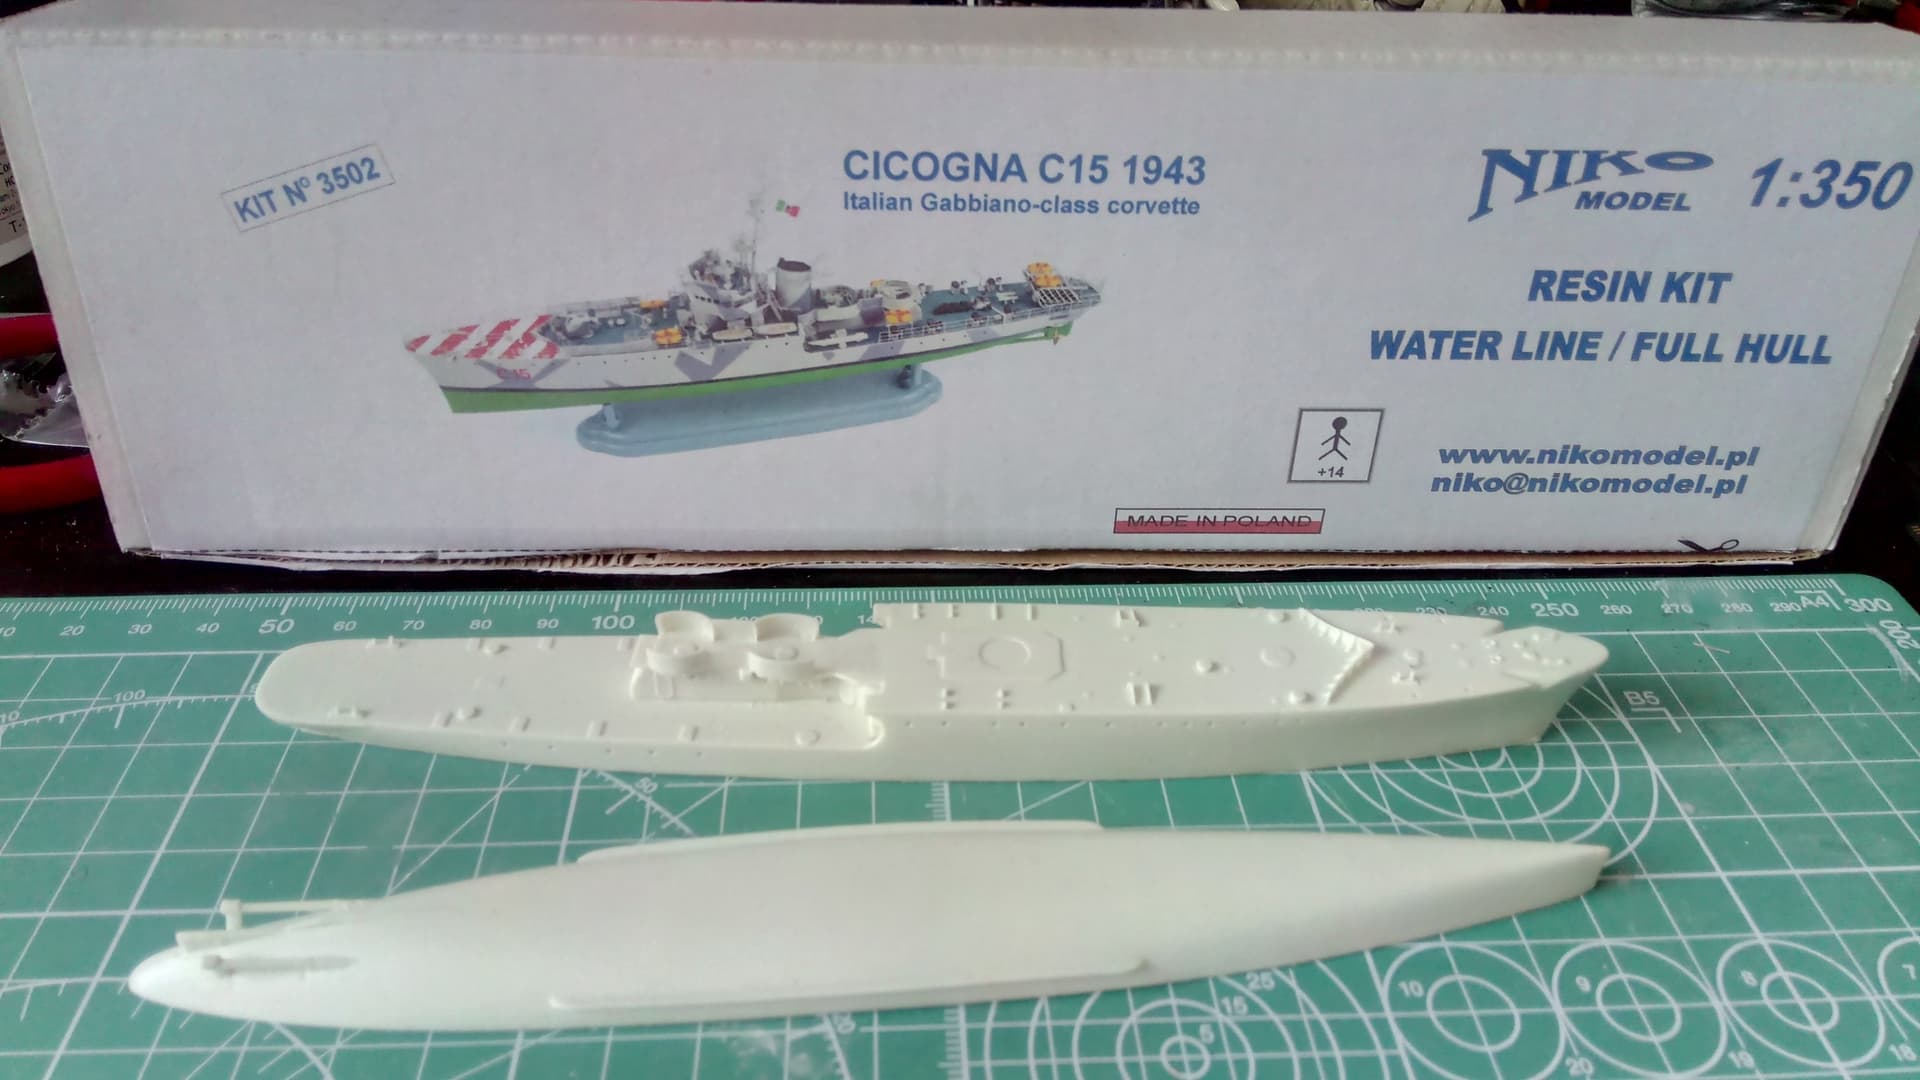
But it is no plane, it is the italian corvette RN CICOGNA (Stork) in 1:350 from Niko. She was one of a class of 59 similar corvettes and distinguished her by sinking the sub HMS THUNDERBOLT (ex THETIS)
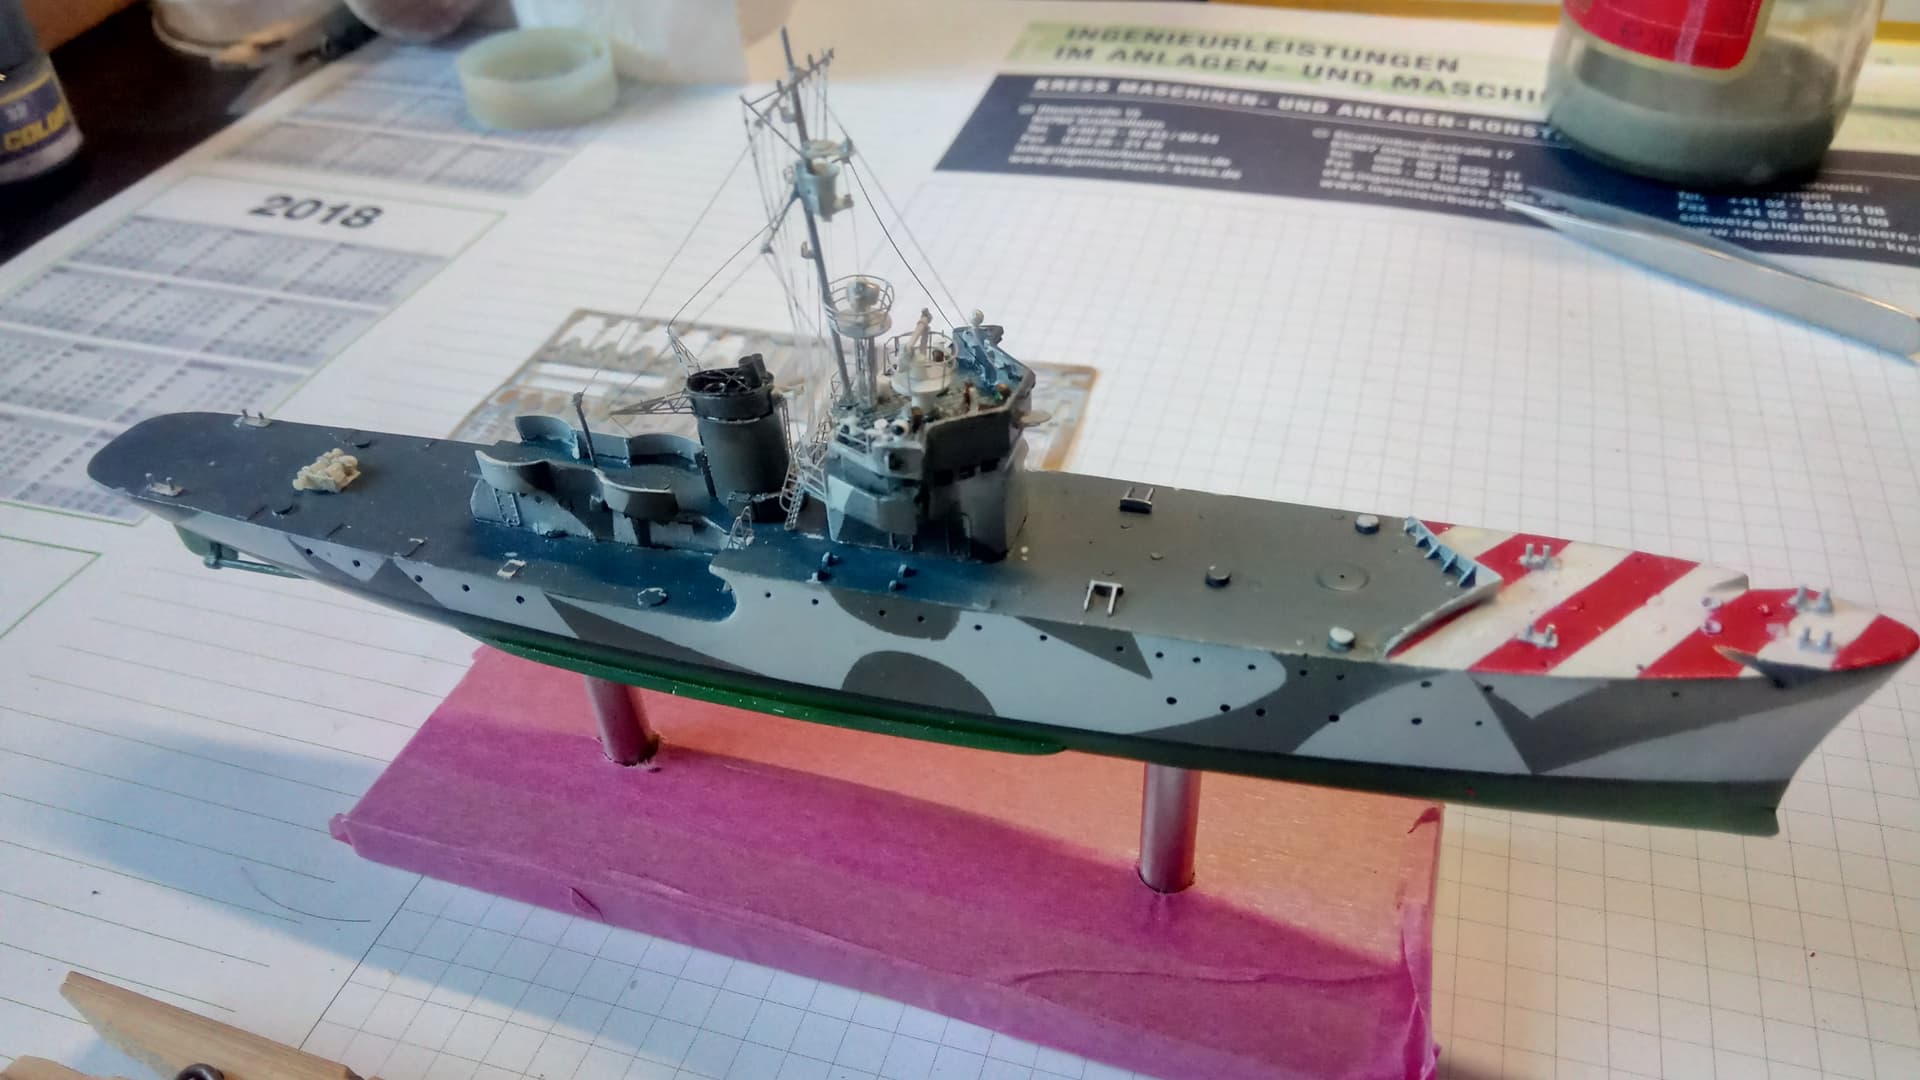
I will this time do no corrections as i do not have so much references and the kit is quite comprehensive. Its my first resin ship and I just want to make her looking nice. She has a very attractive paint scheme with 2 grays, green underwater color and the red and white identification stripes on the foc’sle.
Its not a lot of parts, but the hull will require some sanding as the underwater hull was abt 1 mm too wide.
I glued the halves together with 2k glue too give it maximum strength.
Next will be sanding and sanding and sanding.
I hope you find this little bird as interesting as me. Its a nice contrast to a Flower class
Sorry for the slow updates but real life and some traveling kept me busy. I didt not make photos from the hull, its anyway only 2 pieces which fit together after a bit of sanding quite well.
I had the idea of glueing in some pins to get the upper and lower hull better aligned,but it did not help much. I used just slow 2k glue and it was fine.
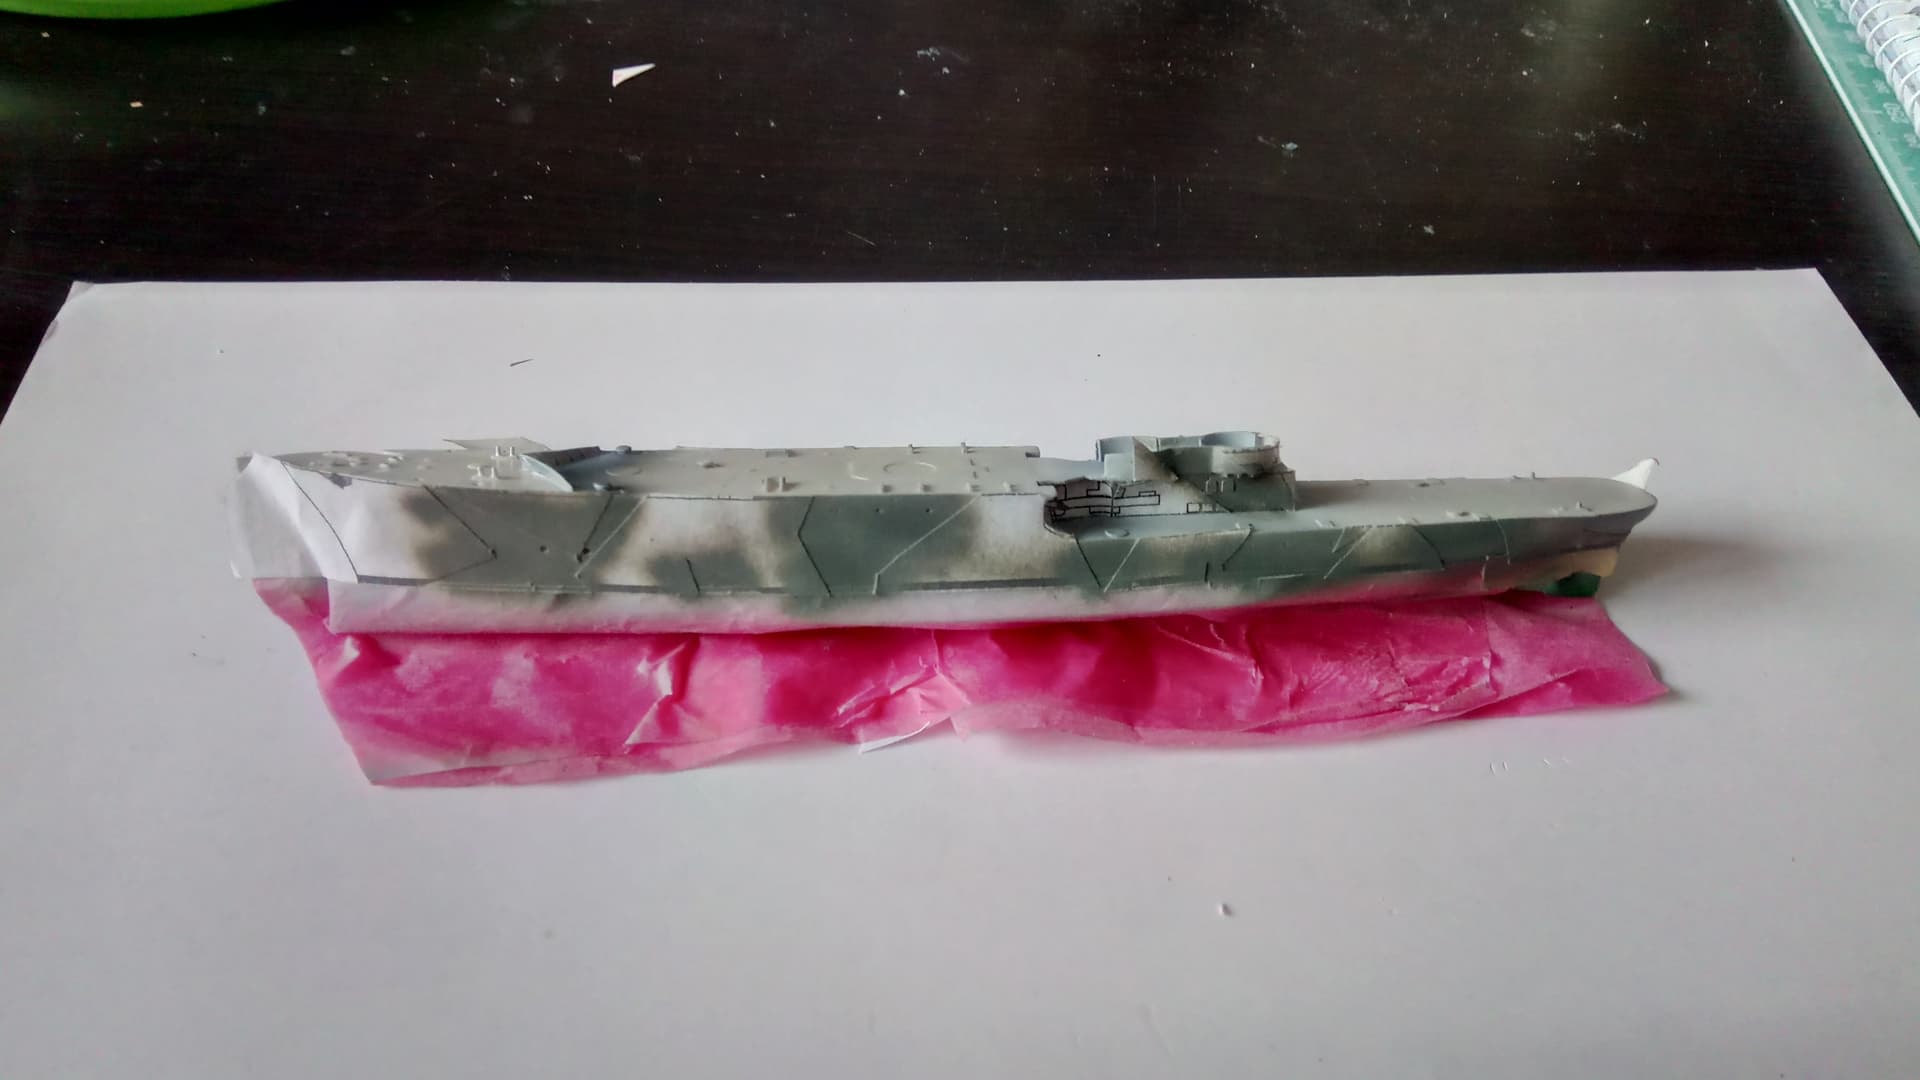
A little bit of sanding was required in the waterline and for sharpening and restoring the bow.
After a little searching in the net I decided to restore the angled piece at the forefoot. The Littorios had it , the KGV`s had it too. Its for guinding the wires for minesweepeing paravanes. And it looks better
I copied the camouflage on adhesive paper and just cut it out and struck it on the hull. Came out quiete well. I am using the Gunze C colors which stick quite well.
Nice one Tom, one of these has been sitting in the stash for too long.
Bit of interest, these were quite a successful ship and had a interesting feature for their time of electric motors for hunting subs so they would be very quiet and a diesel engine for cruising.
Yes, seems they were quite good in their job Cigogna even sunk a british sub.
I like her design and i would be curious how they would have compared with a Flower Class.
The hull looks quite seaworthy and diesel drive is for sure much better than the trips expansion. Maybe they would need a bit more draught…
I hop to get more done today.
Stay tuned
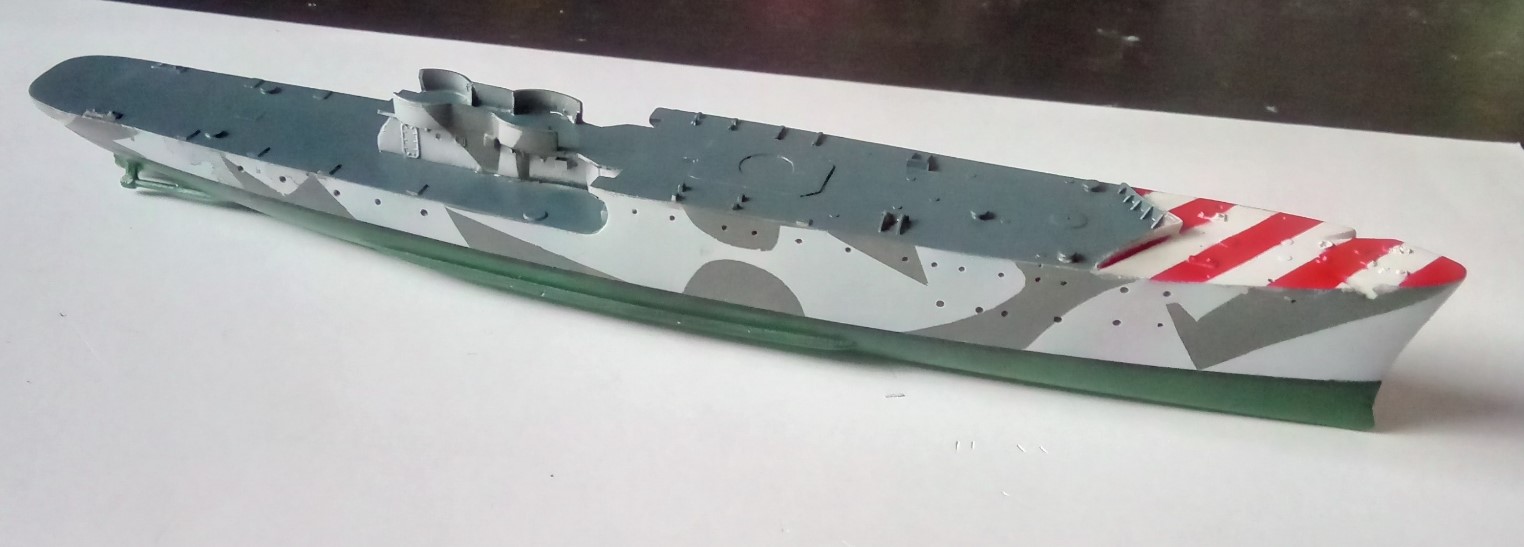
Never had such a colorfol ship, but its very attractive.
I need to repair a bit overspray and then its already time for a stand to avoid scratching the green bottom.
I start to like resin kits
Sorry for the slow update. Real life took a heavy toll on my modeling time. Holiday, good weather and another italian bird (hint: it has 2 wheels).
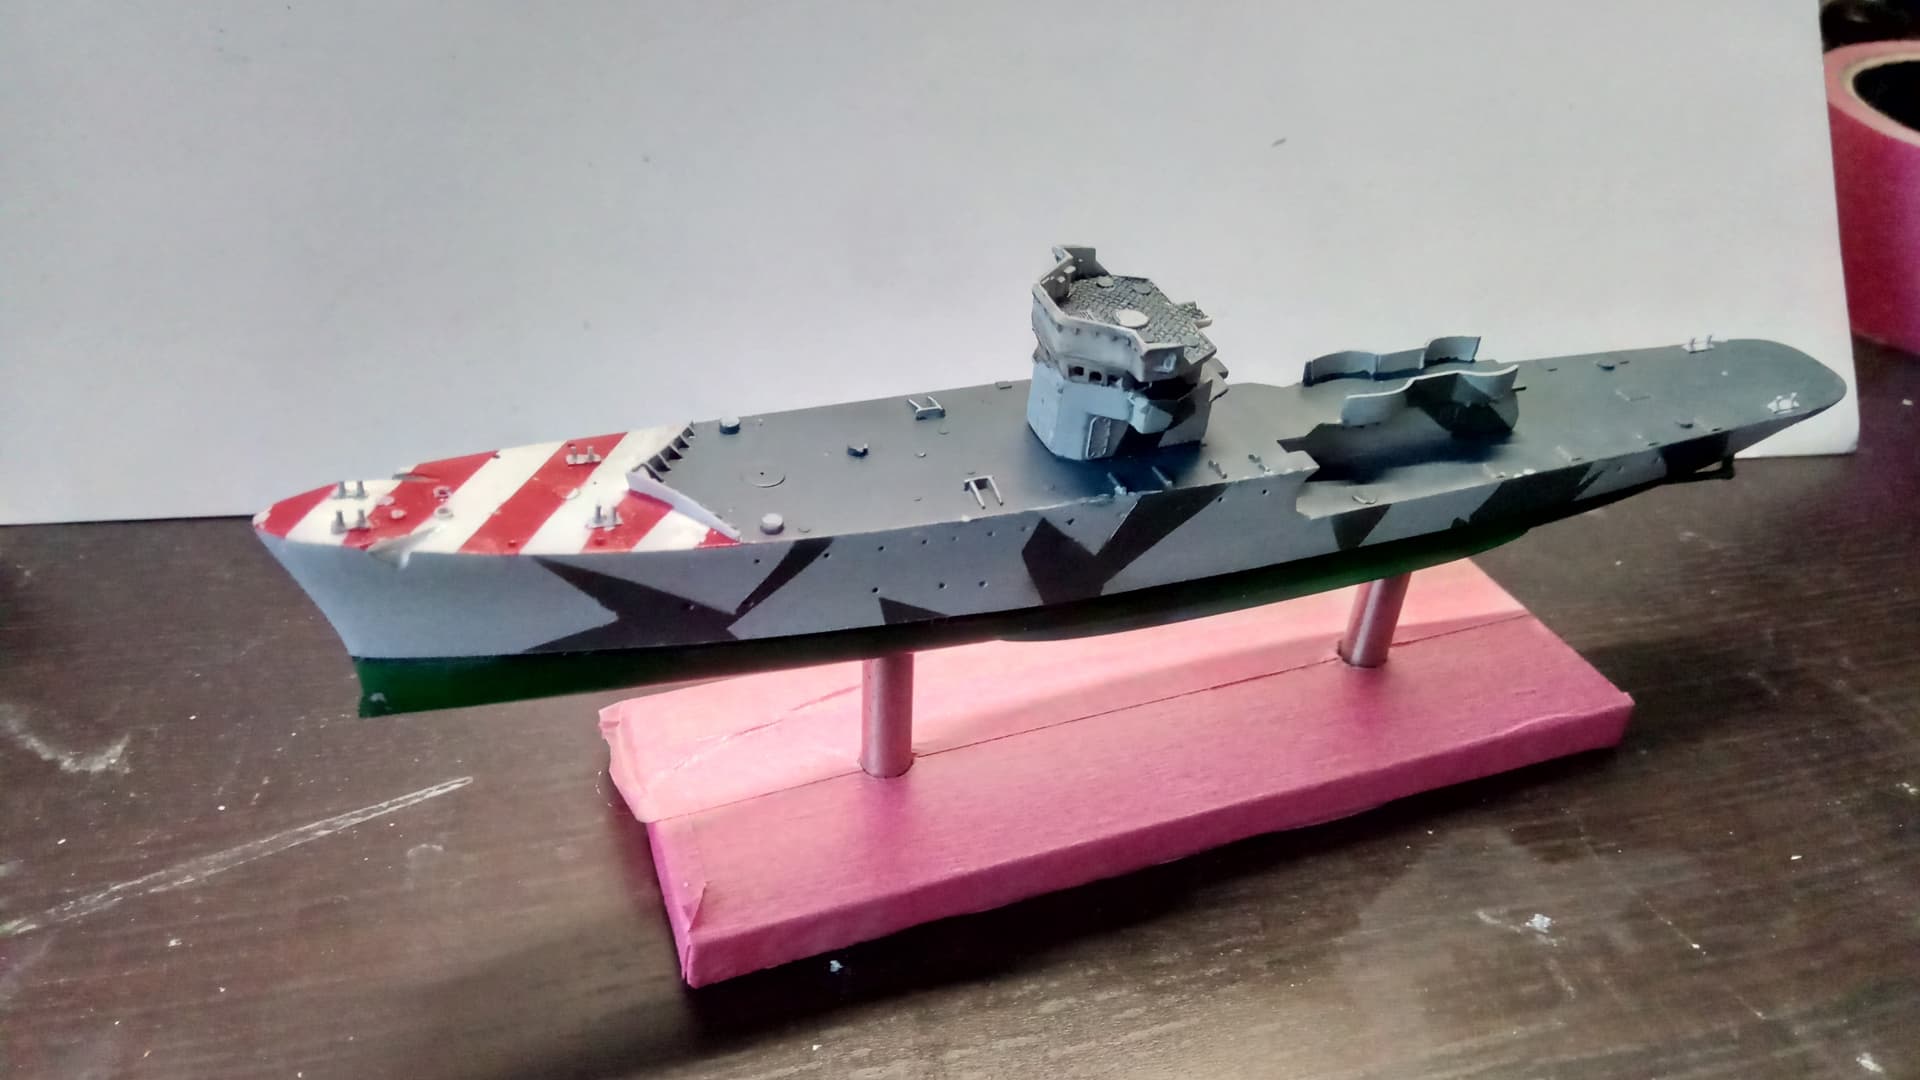
So i just managed to build the stand from some small oak strip which was part of some furniture packing.
I took two 10 mm roundbars which were originall holding the boards on an Ikea shelf, drilled 4 holes and voilá: a real wood stand (albeit covered in protective tape).
The superstructure are only 2 parts fitting quiete well. Tehre si just a littel gap between the bridge and the open bridge, nothin what a little surfacer cannot handle.
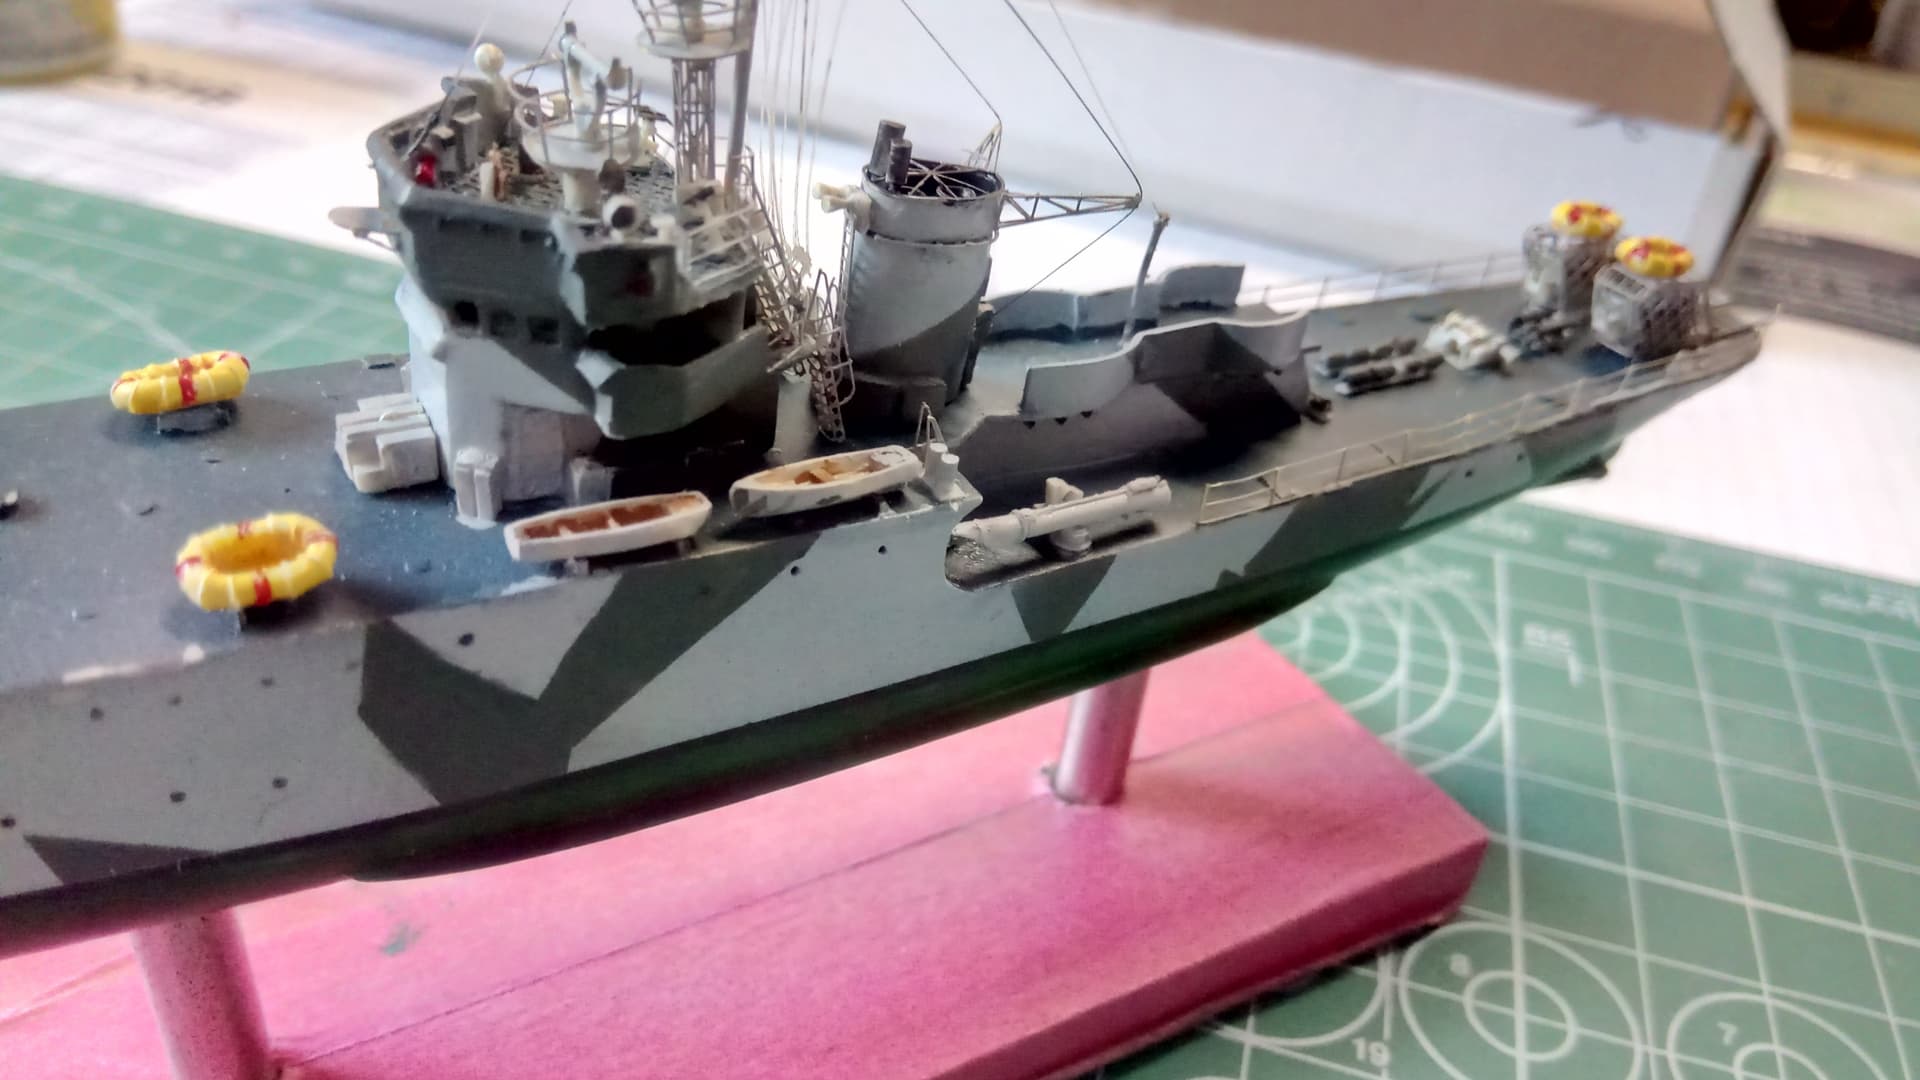
As usual I broke on or two bollards and and replaced them with 0,5mm wire. Looks much sharper now.
Now on to the funnel and that was it already with the big parts. Resin kits are simple
After a long time busy with work and my italian motorcycle (weather was still too good) I hope now to spend some more more time with my the other italian bird.
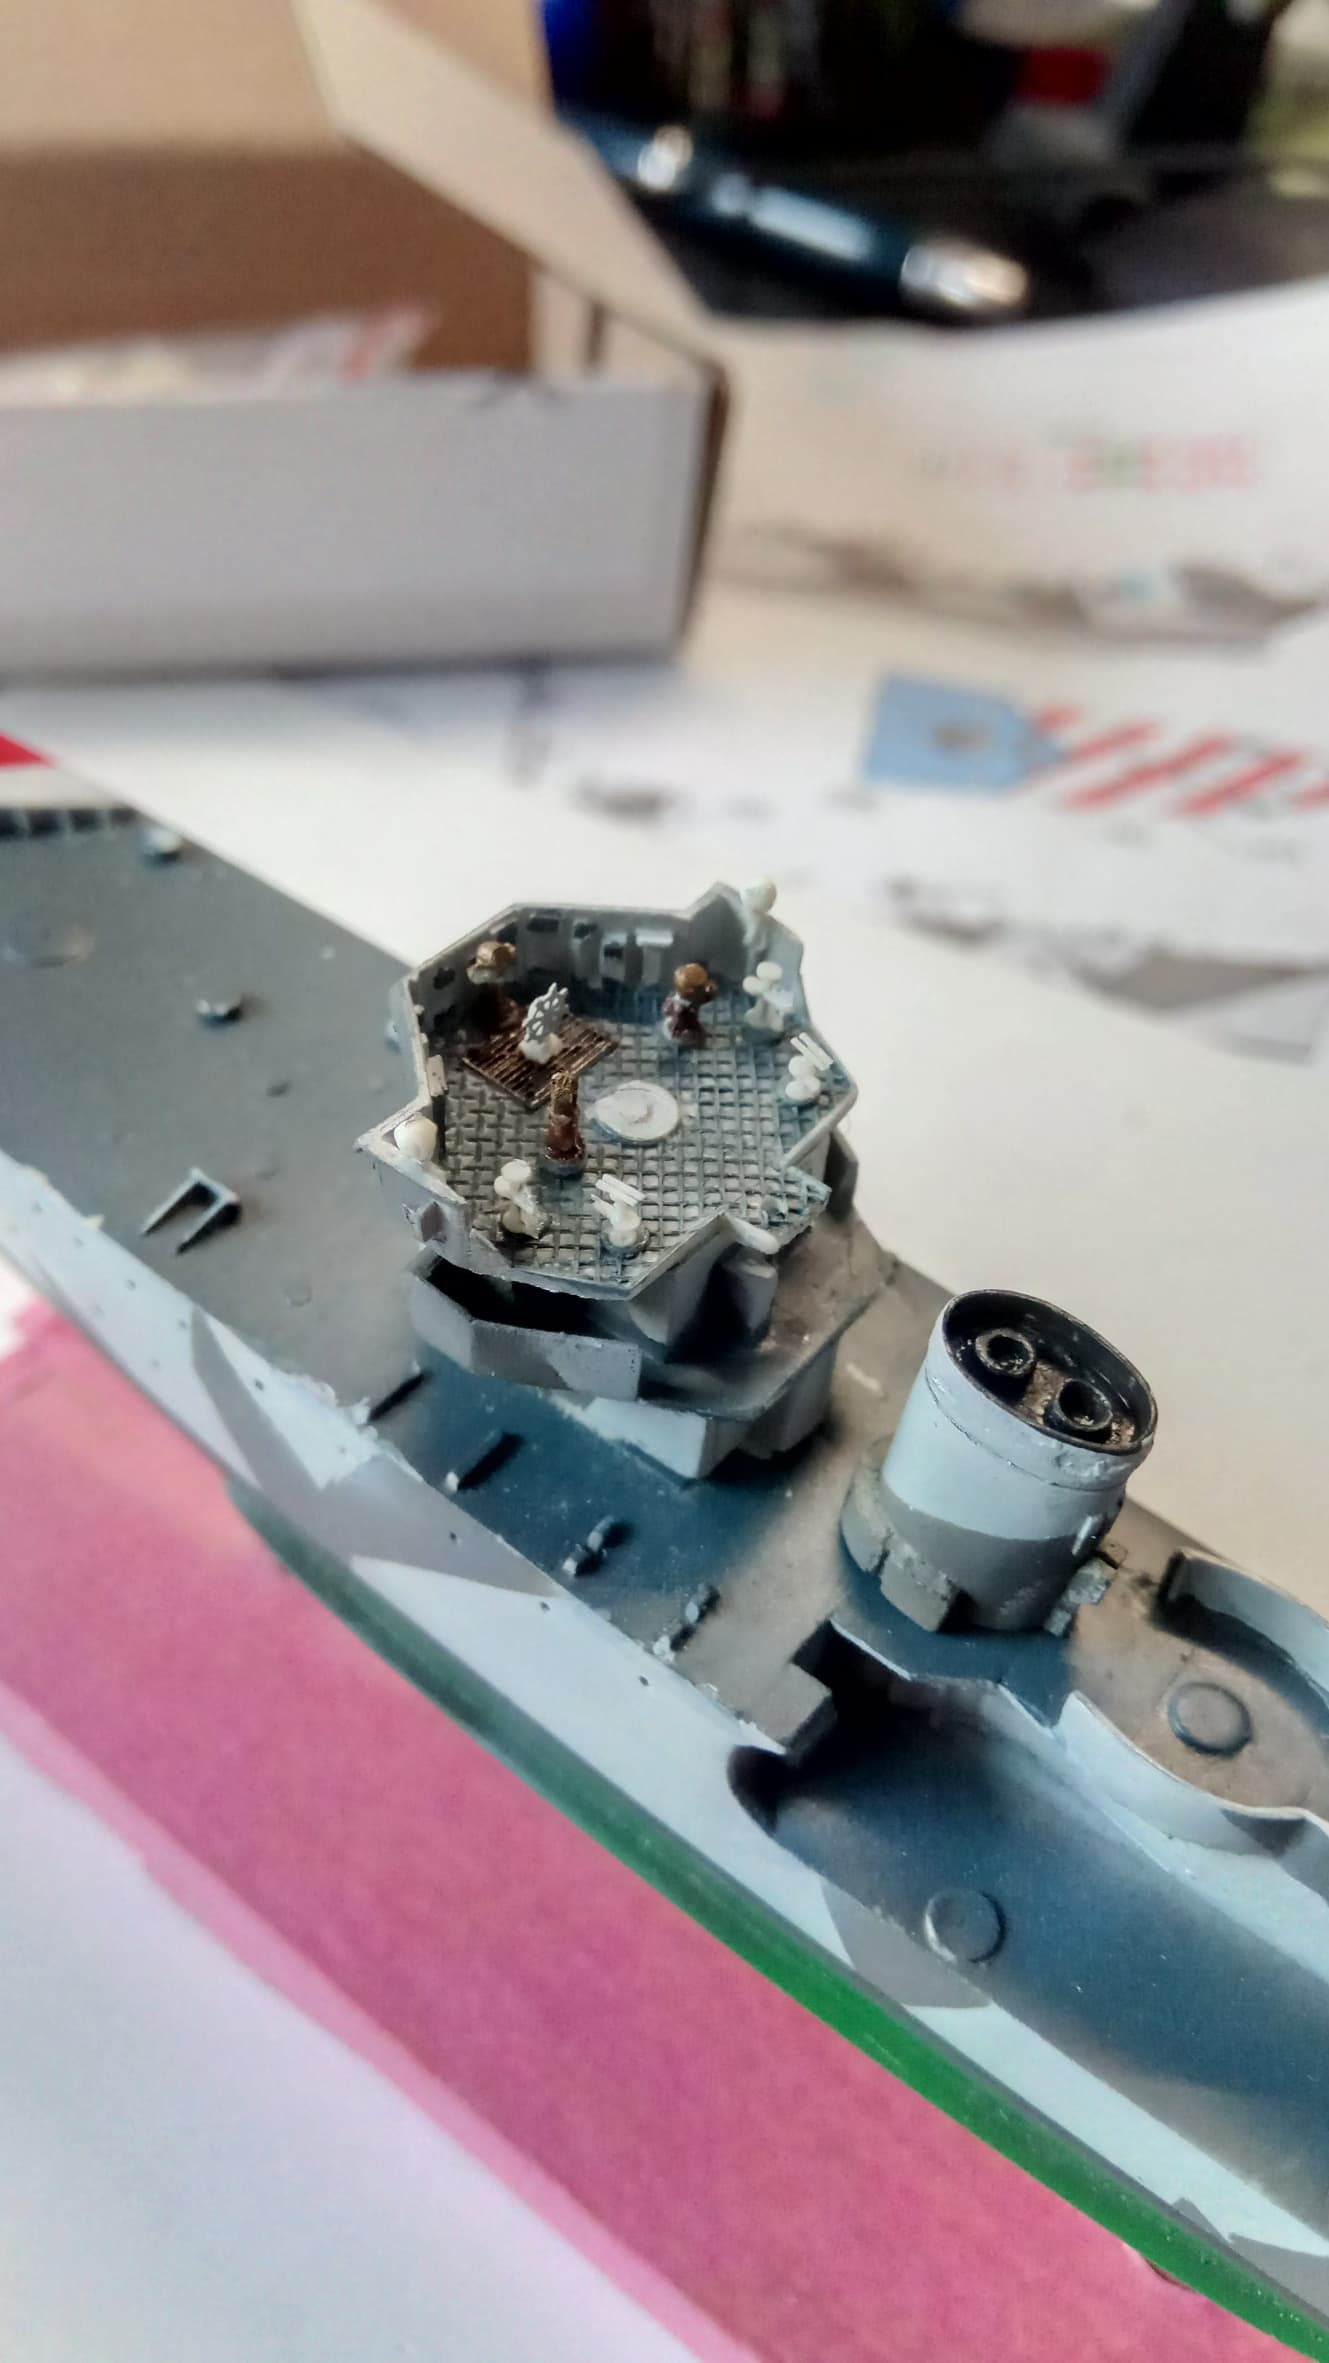
There are a lot of tiny things like compass, steering, searchlights and directors (?) to make the open bridge busy.
Because she has only one mast I will this time start top down and install mast and rigging first and then work from the middle to bow and stern. By this way i have still something to grab while working.
Brass parts and PE for Mast and yards are included. I soldered to topmast to the lower mast to get more strenght, but i made a mistake in using the PE yards, I will use wire for strenghening as the PE bends much too easy making retightening of the rigging difficult.
I am not sure if it can be seen, but I use 2 different lines, a very thin invisible fishing line for flag lines and black one (actually black hair) for the antennas.
If i could only tighten it…
I will enhance it a bit with some flags. Does anybody have an idea about the Regia Marina’s flag signals? Did they use the the international flag code or did they have their own?
Really nice work on the bridge Tom, Glad to see you’re back at it with this build. Not sure about the flags, although I would assume they used the International Code of Signals. As far as I know, ICS was adopted as a standard by everybody in the late 1800s, since it was the best system invented to date.
Nice job with the rigging - it looks just right. It is interesting watching your build come together, as my own sequence is usually to do the masts and rigging last. Your results speak for themselves, though!
Thanks! My sequece depends a bit on the vessel. The Cicogna has only comparably small midship superstructure so I decided to finish the superstructure completely this time. The reason for the rigging is simple: I sometimes have to drill holes for rigging and fix it on one or tow rails (which i glue very carefully). I am just too afraid to kock off too many part by drilling or rigging, while i rarely cut rigging while istalling small parts.
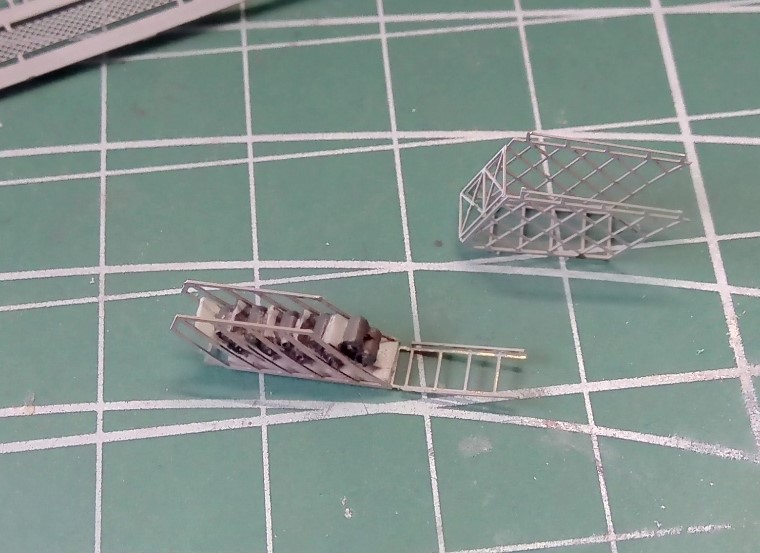
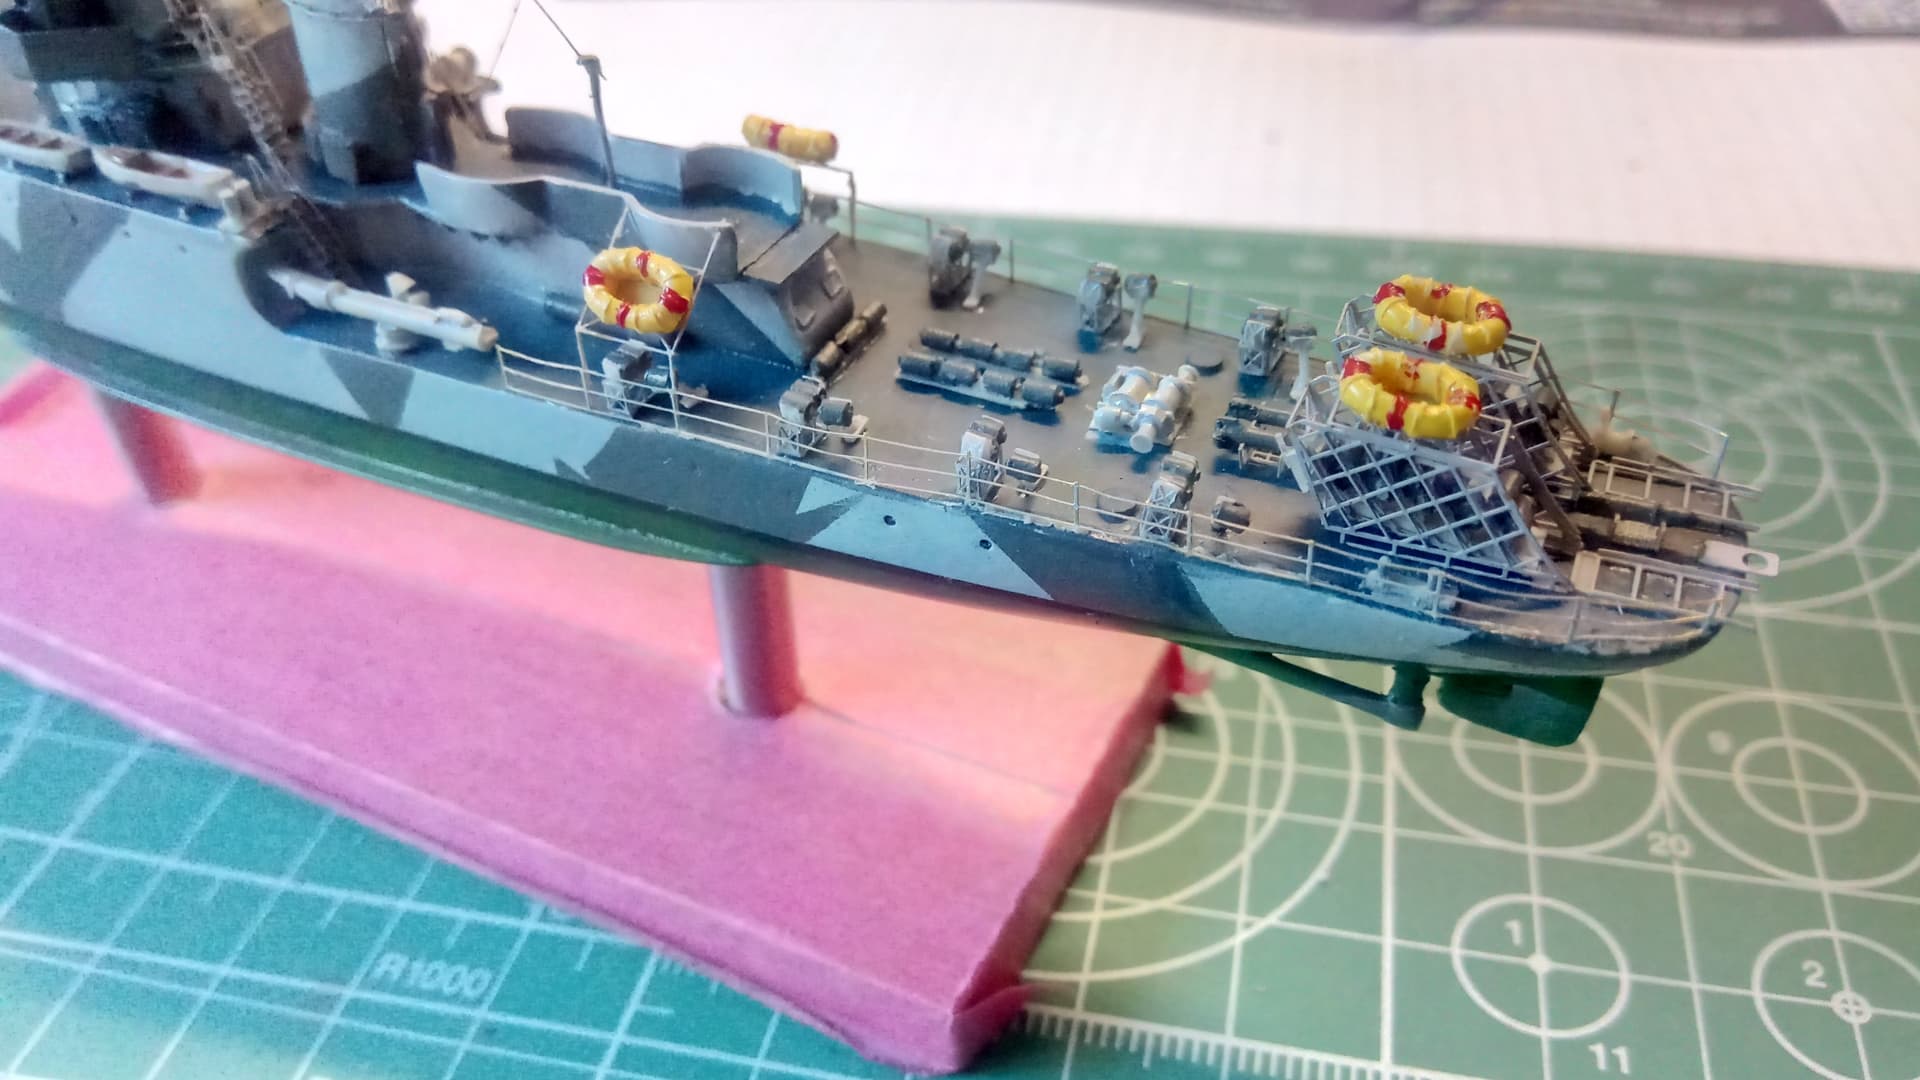
Finishing now the aft part with all the depth charges and minesweeping gear.
The dept charg rack looks quite complicate but the parts are quite large and its only 4 or 5 totally.
I am leaving the tiny AA guns and some small davits out for last, after retouching some paint.
Altogether this is a quite pleasurable experience. Nobody need to be afraid of resin models. The biggest challenge is not to lose or break some of the tiny parts, otherwise its a quite simple assembly.
On the net are a lot of reference pictures which can help. The crazy thing is, that EVERY ship of the class had a slightly different camouflage. However there are slight differences in detail between vessels from different yards so, I stuck with Cicogna.