Amazing!!!
Keep them coming, Nick,

Amazing!!!
Keep them coming, Nick,
Well guys, here we go - an update.
@Petro, yes, I think I figured it out, but we’ll soon see! The one time picture icon is now something else!
@JRutman, hi Jerry, thanks very much! I have fun with the scratch built parts, now, if I could do the same with figures! haha
@Dioramartin, Hi Tim, I just couldn’t give up on the figure - I think he’s from Evolution Miniatures - very nice, high quality - so much so, that even a hack like me can paint them up to look pretty good! Hahha- glad you like the images! lets hope to see some realism when this is farther along!
@Seanmcandrews, yes - the mill is based on one I found on-line. It’s (supposed to be  ) a Sharp Knee Mill - it’s as close as I could guess using junk box extras! You’ll see below, added a drill press and bench grinder. I’m thinking about making a valve spring remover - it seems adequately complicated and tedious to scratch! and it would look nice on the workbench - thanks!
@maartenboersma, thanks and nice to hear from you! I recall more than a couple of your mega builds!
@golikell yep, they work great! I’ll need to toss the xacto, pliers, files, and tiny drills!
@ayovtshev Angel, hi! great to hear from you! I still enjoy thinking about the scratch campaign - that was a fun project! and you made one of the trucks much easier for me to build with the info you shared - the KRAZ pile driver! I still have that truck - under a thick coat of dust, but it’s here, and not broken - 
Ok, on to the update. For this project I’ve been jumping back and forth from race cars to the dio. Cars are being posted on Automodeller and dios, here - I don’t want to push my luck on either site!
This dio was not well planned by me, as I didn’t anticipate building it, so various amateur problems are arising that needed to be addressed - first, the base was getting too flexible, so I stiffened it up by adding more basswood bracing, which while slow, was the right thing to do.
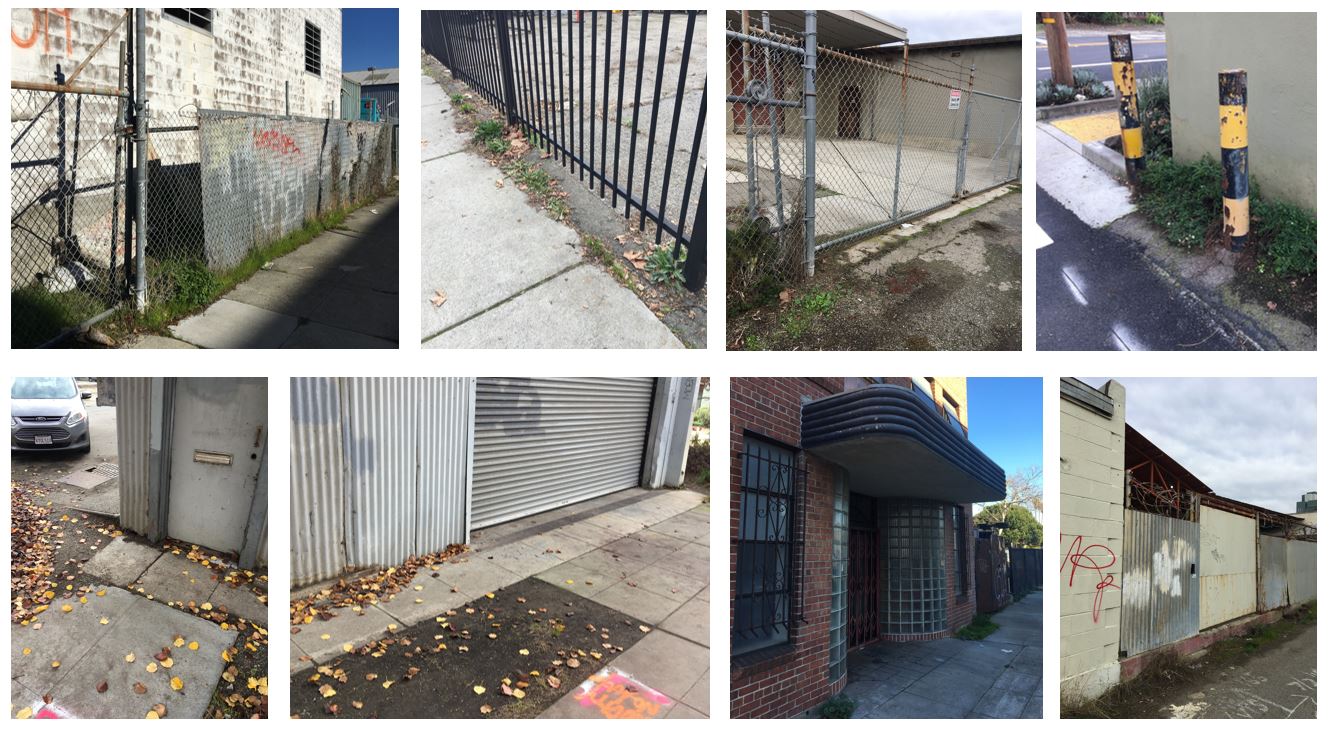
It’s been rainy, foggy, and sunny here in no predicable order, but as I’ve been sheltered in place now for months, I go out for walks paying attention to possible ideas for the project:
This is a compilation of recent walks - I like the truss in the upper left corner, and might try to do the same over the side drive. Also glad to see the glorious yellow shed - adequately almost-worn out!
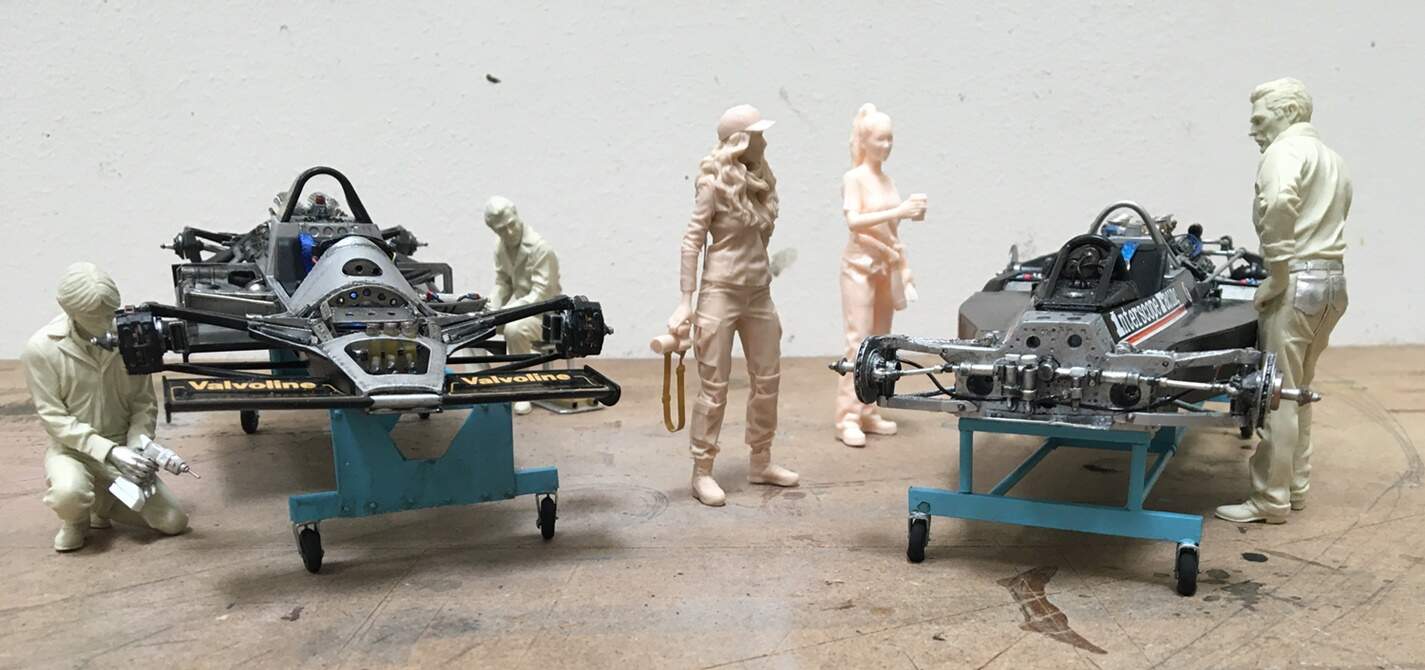
As for visible things on the project, an update on figures:
1/20 is apparently not a common dio scale, so I’ve had limited success finding dio parts or figures - so I took what I could get. The idea that the photographer has run by the shop for a story. Now, if I could do what Jerry can do, I’d try to address her posture/position, as she seems a bit confrontational or tense - I’m hoping that attribute goes unnoticed, because I don’t have the skill required to modify her in a convincing way -
On to the dio, and a failure:
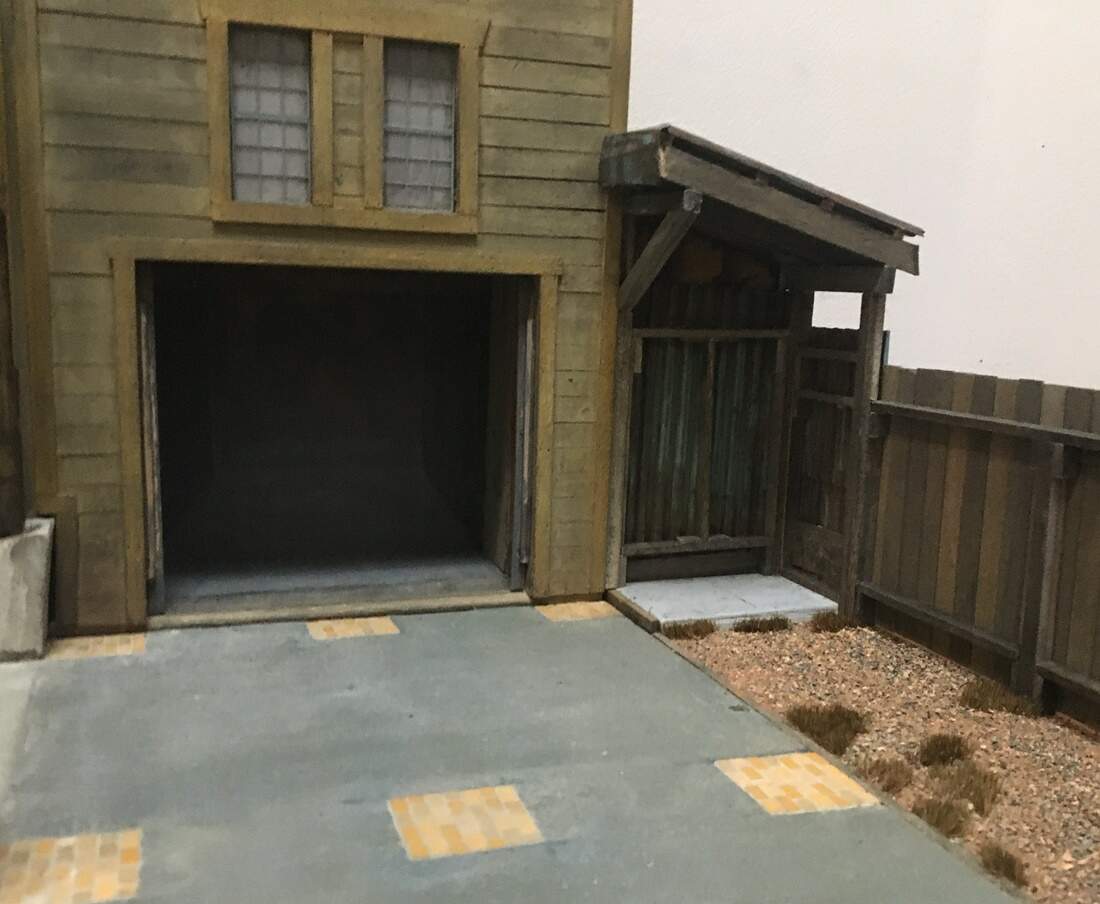
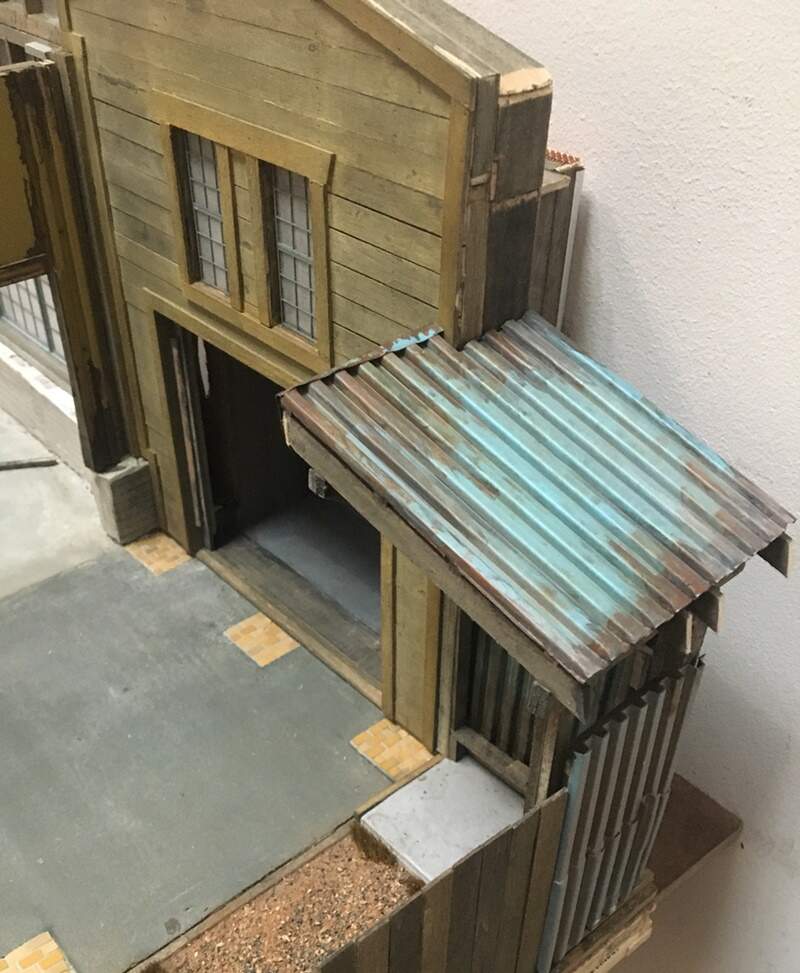
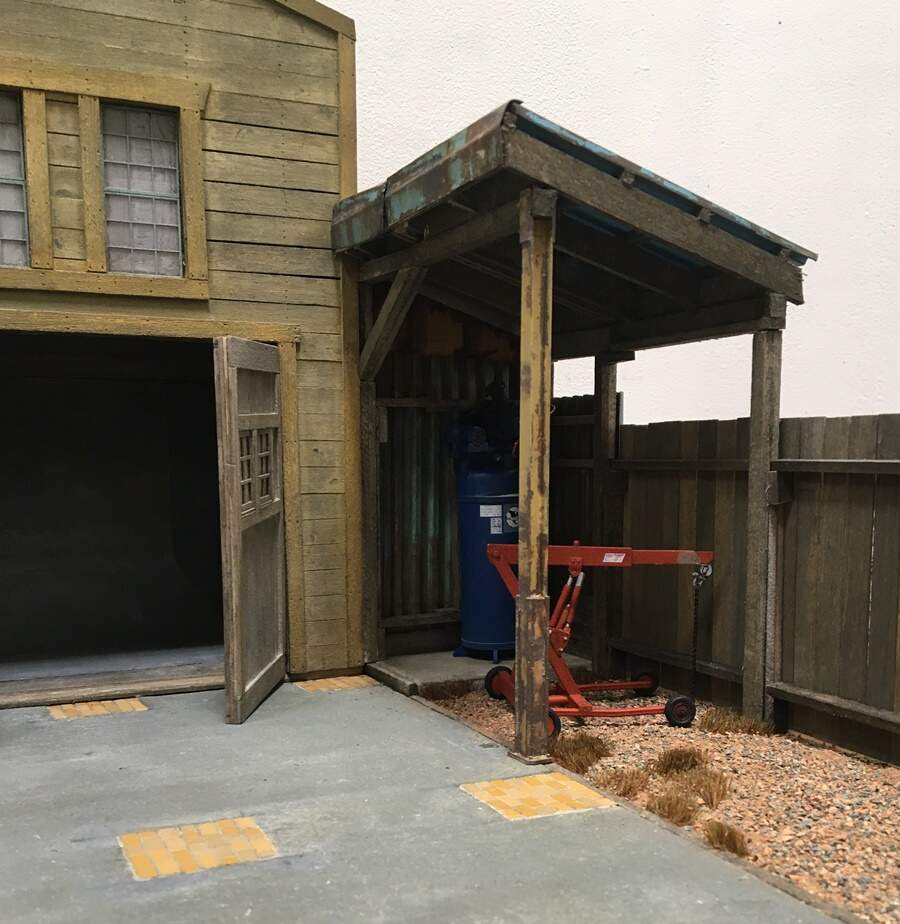
So, the little lean-to next to the shed - uhhh…not great. I was hoping to do something clever, using the outrigger (diagonal brace from the building) to make this work - what a dud - the materials and weathering are fine, but the piece itself looks heavy and clunky, like it’s about to collapse. So, rather than tear is down, I added to it!
Added a “metal” post and extended it out - which seems more convincing to me!
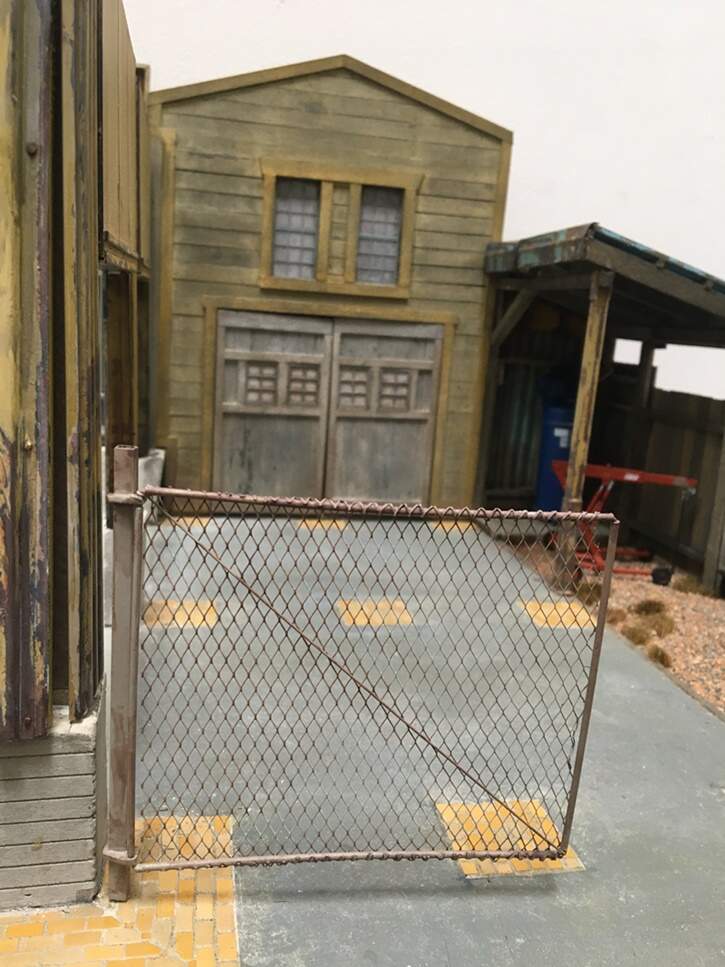
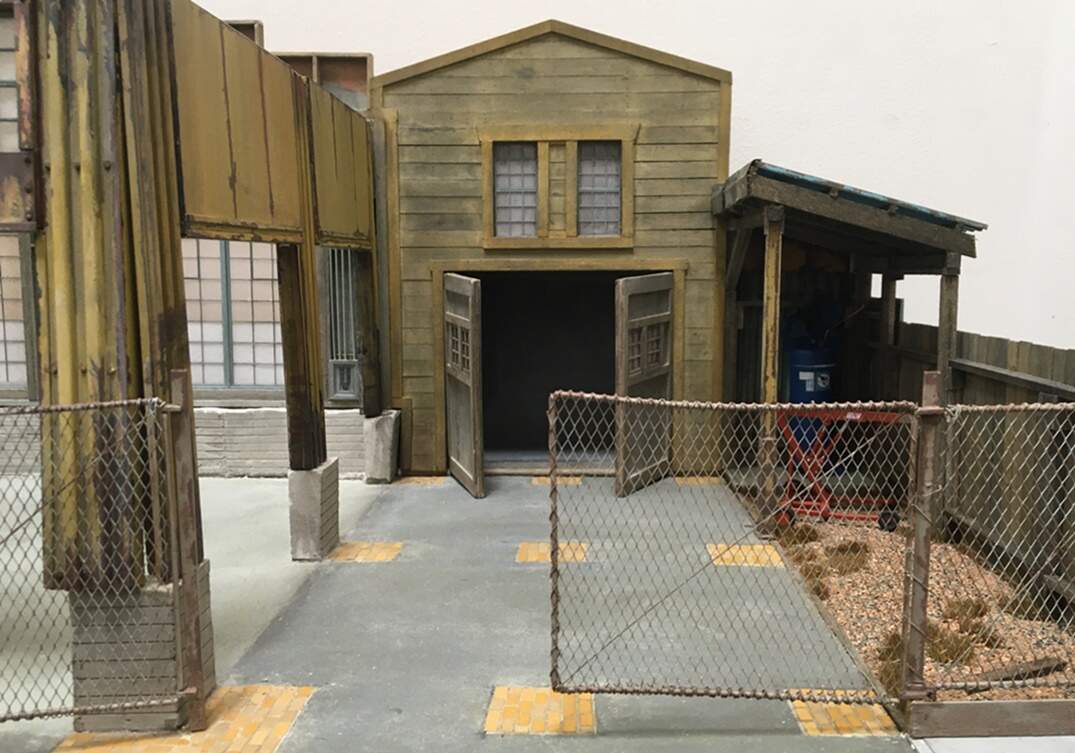
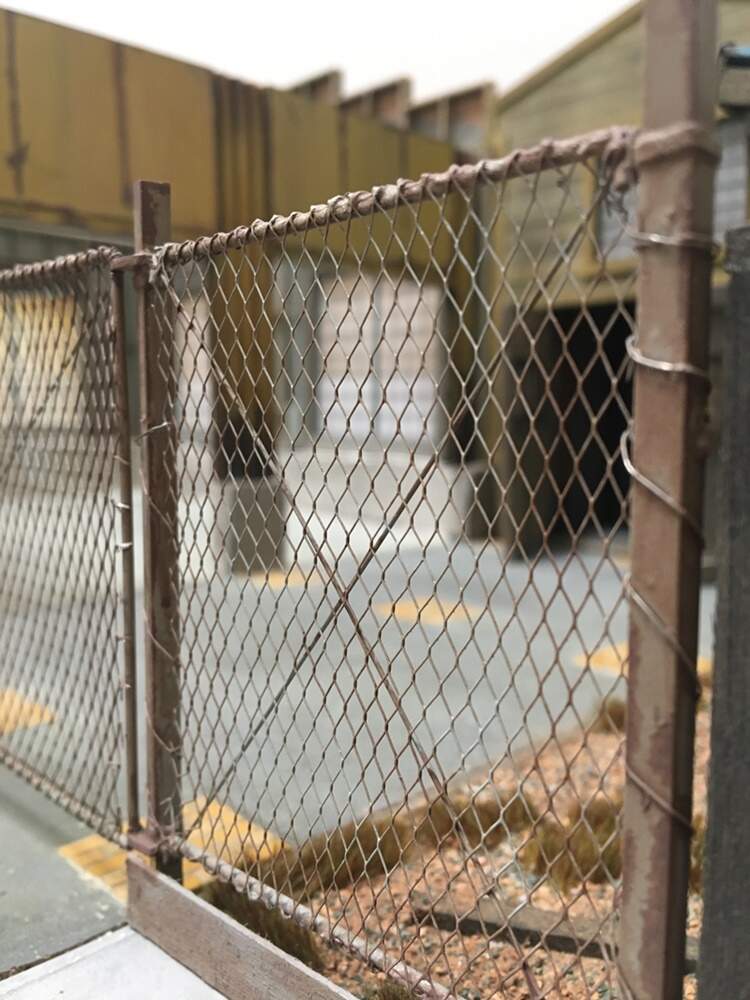
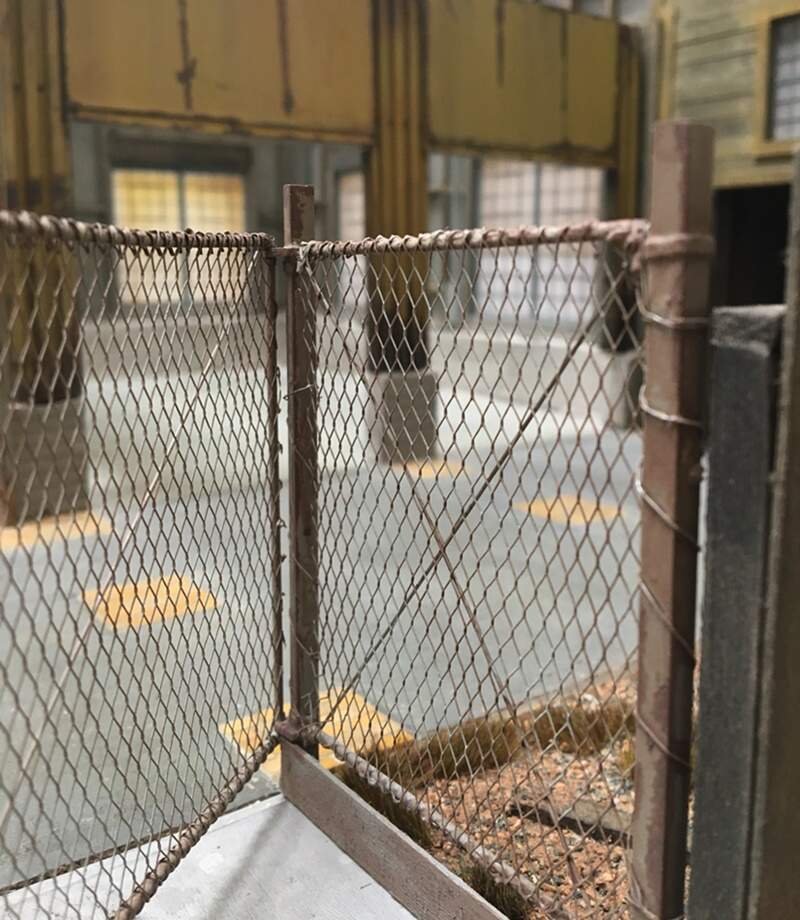
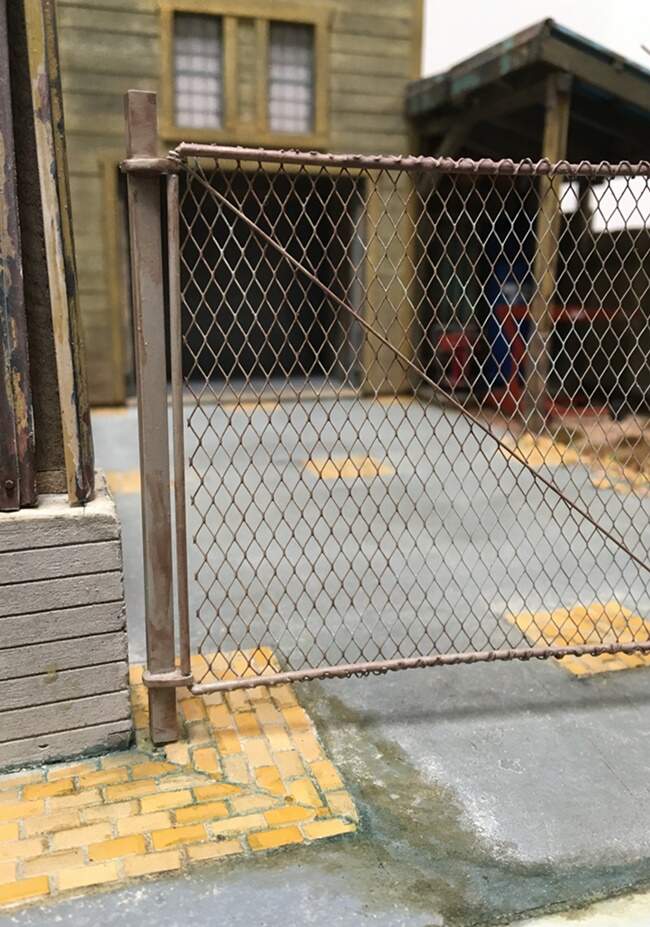
Next the chain link fence and double gate. This is dryfit, but you’ll get the point:
Seems adequately abused, rusty and functional -
On the inside, slowly getting the shop elements together, and an engine on a stand:
None of this is glued down, but it’s helpful to see how it lays out. This guy also received free head surgery - decapitation and repositioning. The detail on these guys is good, but their faces were hard to see.
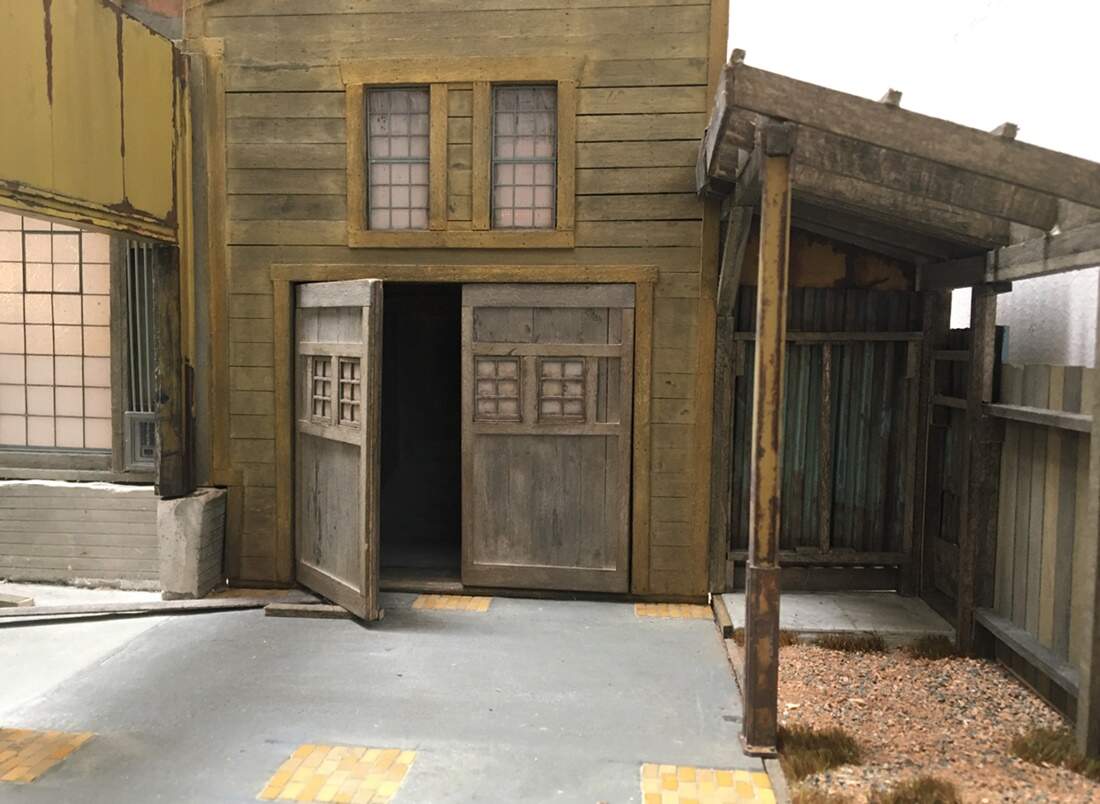
Next up, I was told that Cosworth (the engine race car builder, who along with Ford, built the real engines I’m basing this on) worked out of a small wooden shed through much of the 70’s and saw a photo of the shed - which is/was (?) similar to mine, but it was long and narrow. So, for fun, I decided to fake some depth into my shed. Added a couple of inches to the back, and painted the interior various shades of grey, to help make the appearance of some depth:
I’m not sure how successful this opening is, or about what to do with it now, though it’s been suggested to show someone coming out the doors with some parts - I’m not sure yet -
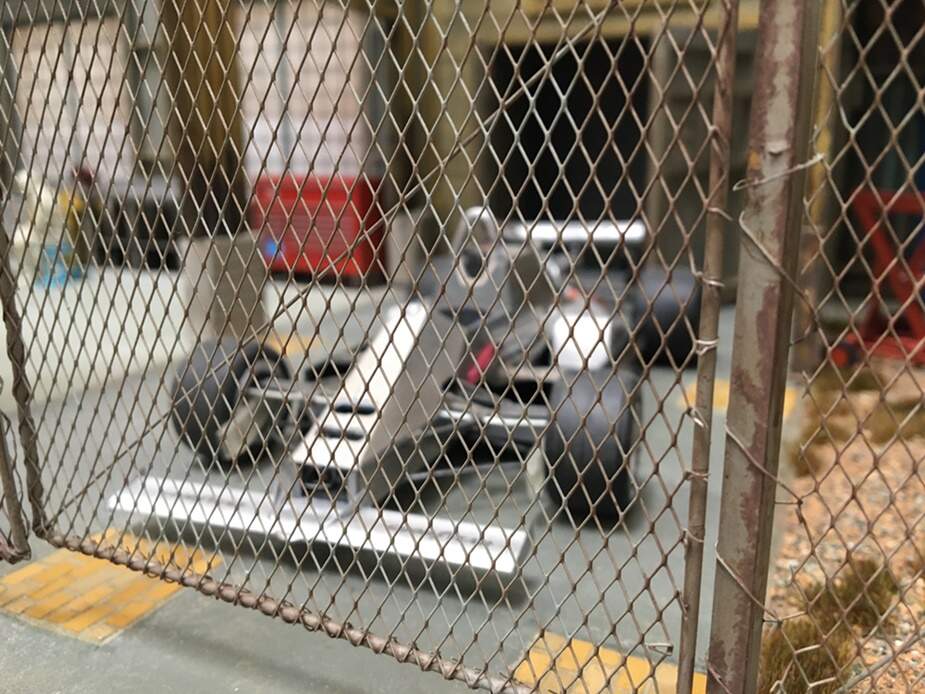
Finally, this sets the tone for where this is going:
This car won’t be used, but it illustrates the intent -
I think next will be work on the ground plane - my dirt and gravel looks way too clean!
Ok gents, thanks for having a look and stay well -
Cheers
Nick
Pretty damn amazing … I like others loved the non bladerunner build … that was a work of art … you saw something new every time you relooked at a part of it. This one looks equally cool. You have a great eye for being able to transfer real world into the model world. Little details like the gate and its mesh, the way the fence is broken in places but its been fixed with strands of wire with little gaps still present. - Exceptional work. 
Yes, this is exceptional work, wow! Love looking at your pictures. /Erik
Excellent stuff as usual man. Nice fix on the outbuilding as well. Love the way the sitting guy in your first pic is checking the photogs butt.
J
Hey Nick , how’s it goin man ? Good to see your fantastic architectural genius back here at work !!
Lookin good Nick unusual scale [ well for me ] but preem results !!
Wow…just…wow Nick, and you found chain-link in 1:20 scale?? Strangest thing, in my LHS this morning I noticed one box of Hasegawa mechanics…labelled “Box A” …in 1:20 scale! Never seen/heard anything about them before, are your figs from Box B by any chance? Thanks for the street-crossing guy i/d, as you say by Evolution - even better he’s one of a pair of NKVD officers (# EM35116) & the other guy looks handy too (if pricey) but my on-line source has ‘em in stock…not for long.
Hello guys,
Hope you’re all doing fine - and building good stuff.
@Johnnych01, thanks and glad you like that build - one day…hmm - I’ve now been saying that for a couple of years! I’ll finish it! Glad you noticed that wire on the fence!
@DIOWORK, hi Eric - thanks very much - As much as I like building all sorts of things, I think I enjoy dios most -
@JRutman, Haha! Which would you rather be looking at? the rearend of the car or…??
@Cheyenne, hey Glenn, I’m doing all right- hope you are too - and appreciate the words! About the scale…yeah…But, like anything else, just another interesting challenge - and I know you build all sorts of stuff. I think the variety keeps it fun
@Dioramartin, hi Tim - haha! that fence - it’s some sort of aluminum mesh artist’s use to form the base for clay sculpting - and good for dios! I visit a local art store every few weeks - the kids with the green hair working there - they like their art, and are happy to share ideas and materials - been very helpful over the years. 1/20 does not seem to be all that common a dio scale, which is fair enough, compared to 1/35 it’s giant! Only in this scale because the cars are - but, I like them because they’re big enough to do some fun detailing on, yet not huge like the 1/12, 1/8 scale monsters…though, I do have one 1/12 kit in the stash, one day, but not likely a dio for it -
OK, only a relatively small update today. Made some progress on some parts of the ground plane. First up, some more real life pictures. The shelter in place…well, good I suppose for health reasons, but, well, most of you know, stuck at home, is stuck at home. That said, being stuck here most of the time, I’ve been going for walks around my nhood. Pretty interesting place, featuring new, fancy town homes, new paths, parks, restaurants - and plenty of decrepitude. For today, some more pictures of the latter:
Thinking about what places actually look like, versus what I think they look like. I’ve found the two not always to be the same. By this measure, a walk is not only healthy, but a good way to see what some things look like.
On to serious matters:
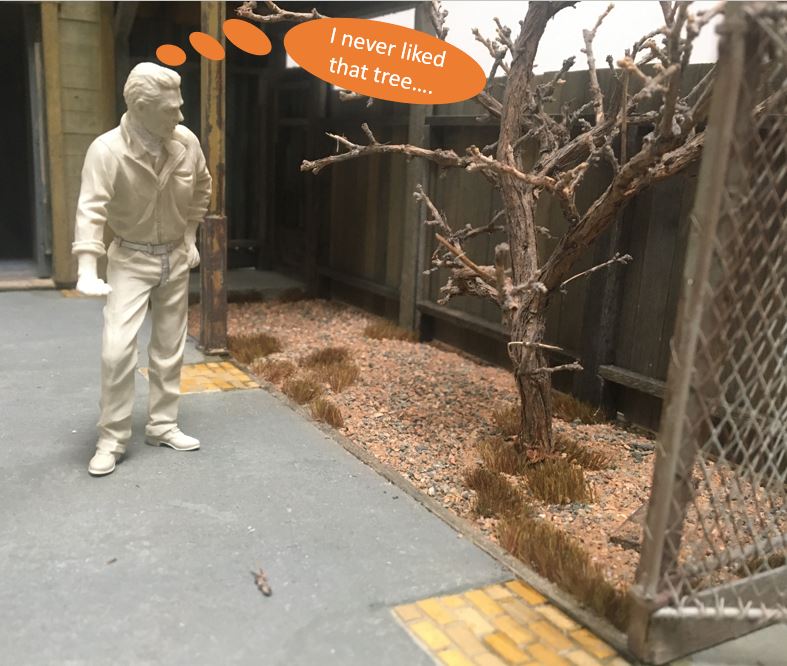
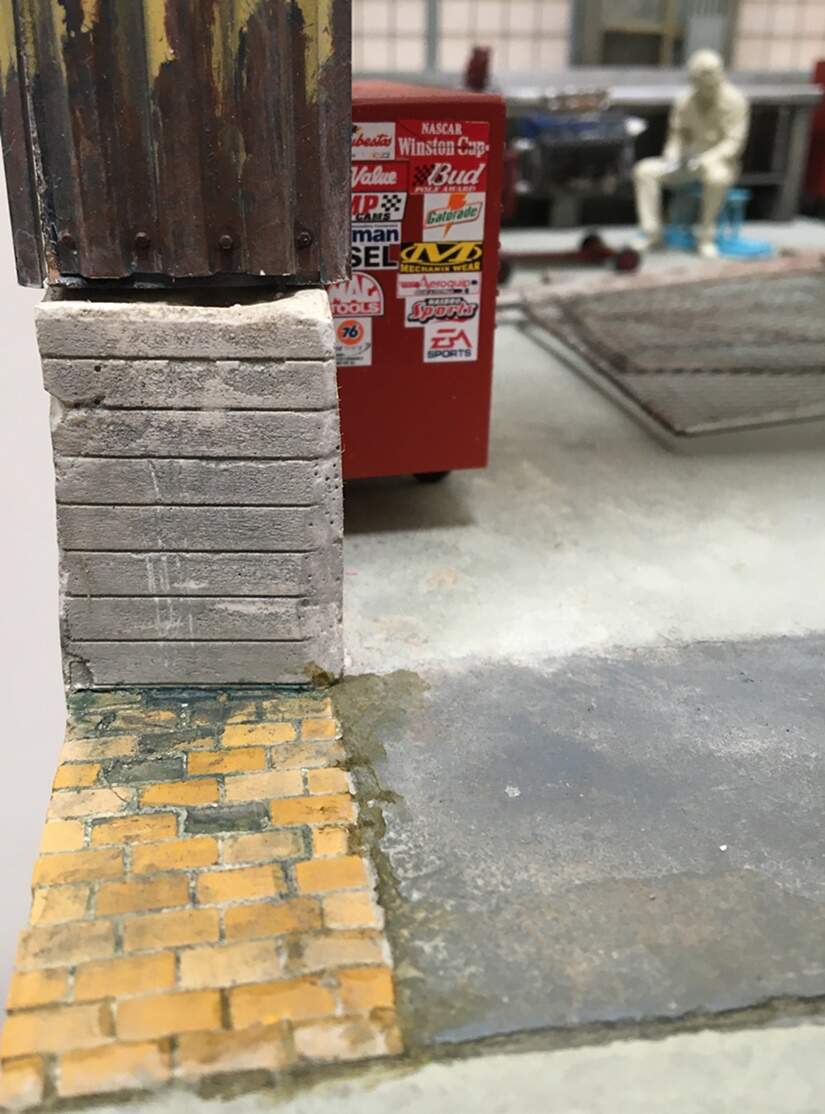
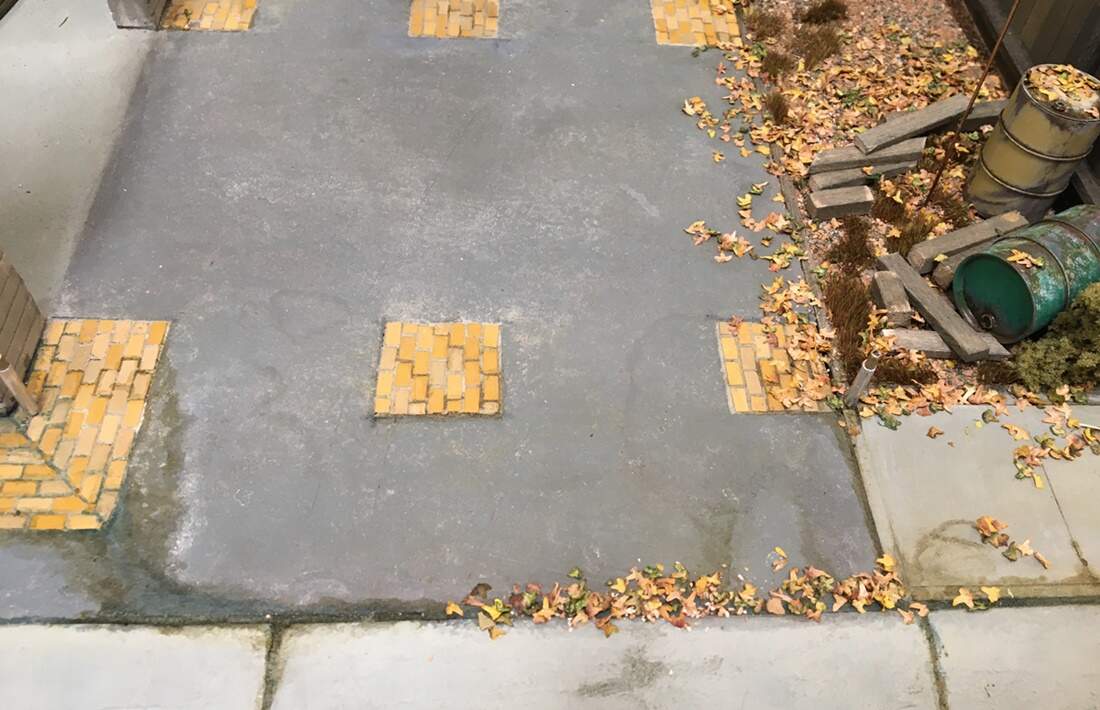
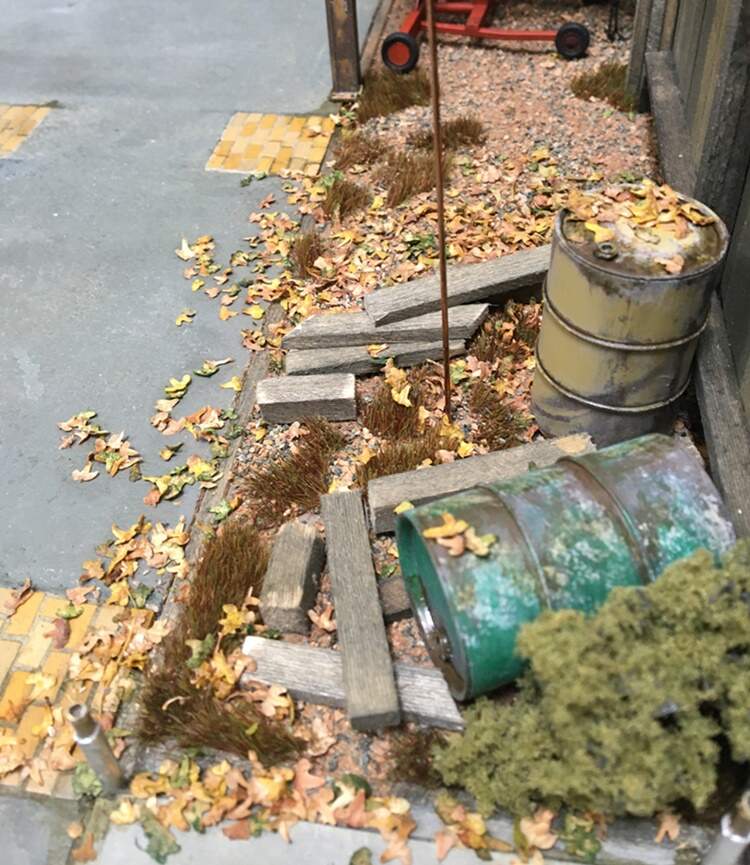
Thinking about the ground along the fence. Yes, a small, scraggly tree from my model rr days. And below, you’ll see the first layer of grime, and some natural debris. First the grime:
There was no way the paved area would remain pristine - so, in went some runoff and grime. I also added a concrete curb and gutter - using strips of pink rigid foam insulation, cut into strips, glued together with wood glue, sculpted, sanded, lightweight fill added to smooth it out, primed, painted, and weathered - long sentence. And, long, slow process - but, it does the trick.
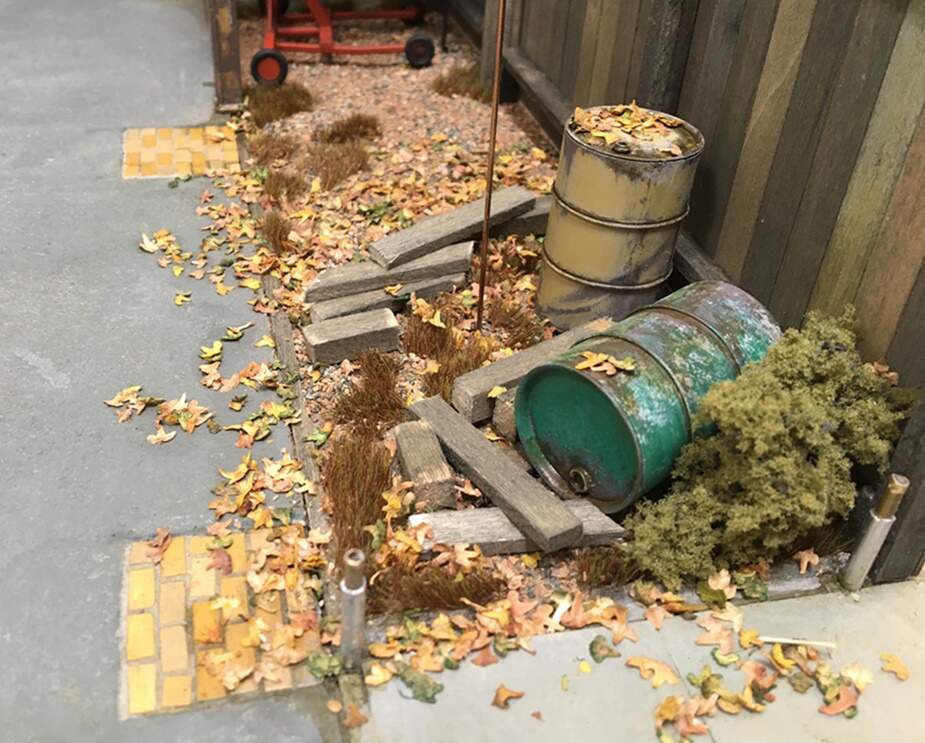
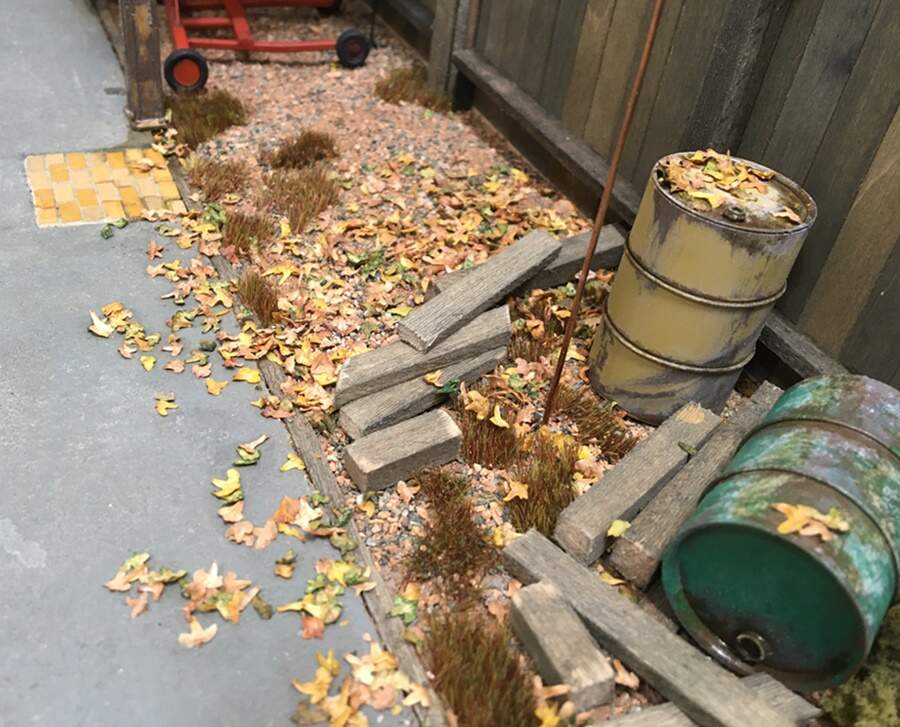
Now back to the fence, debris area:
I think it was Jerry, who years ago pointed out the importance of randomness when adding: rubble, debris, weathering patterns, or, in this case, leaves. He also pointed out, it’s easier said than done - and I agree! I didn’t want to overdo these - just leaves skirting the edge of the drive aisle, but “enough” over the barrels and wood and to look convincing. The rod sticking up is where the tree will eventually go.
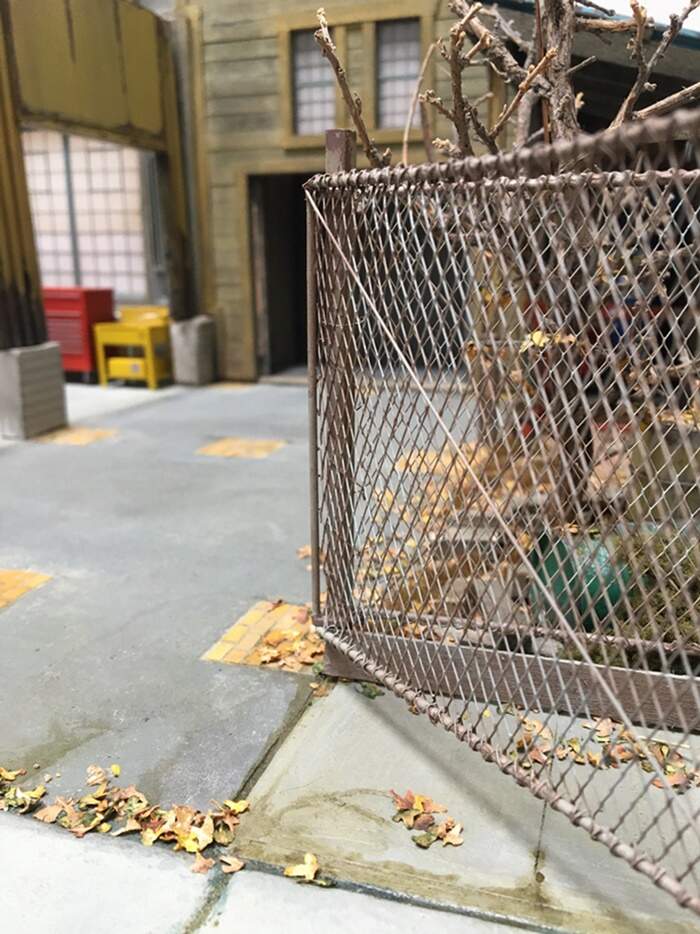
And with the gate:
The gate is still dryfit, as I can almost guarantee, that if I glue it this early, I will destroy it as the build goes on.
Speaking of the build, You’ll notice the gap between the tree area and the little lean to shed. I was going to fill that area with derelict auto parts, scrap metal etc - but - well, how about something more of PITA to make??? Like an old race car aluminum monocoque???
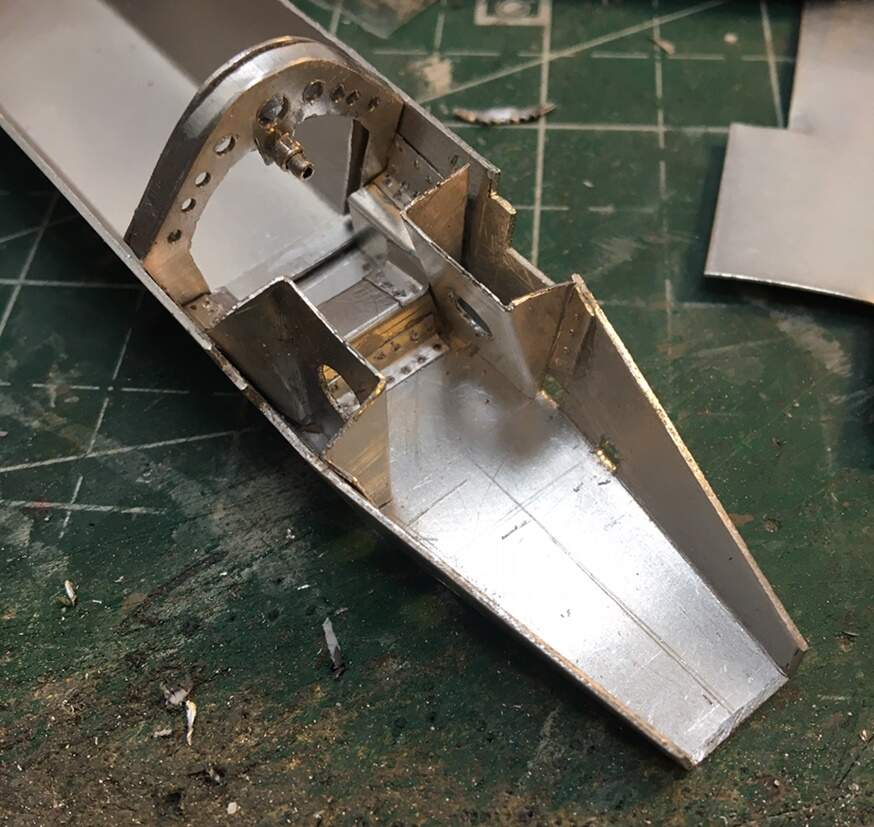
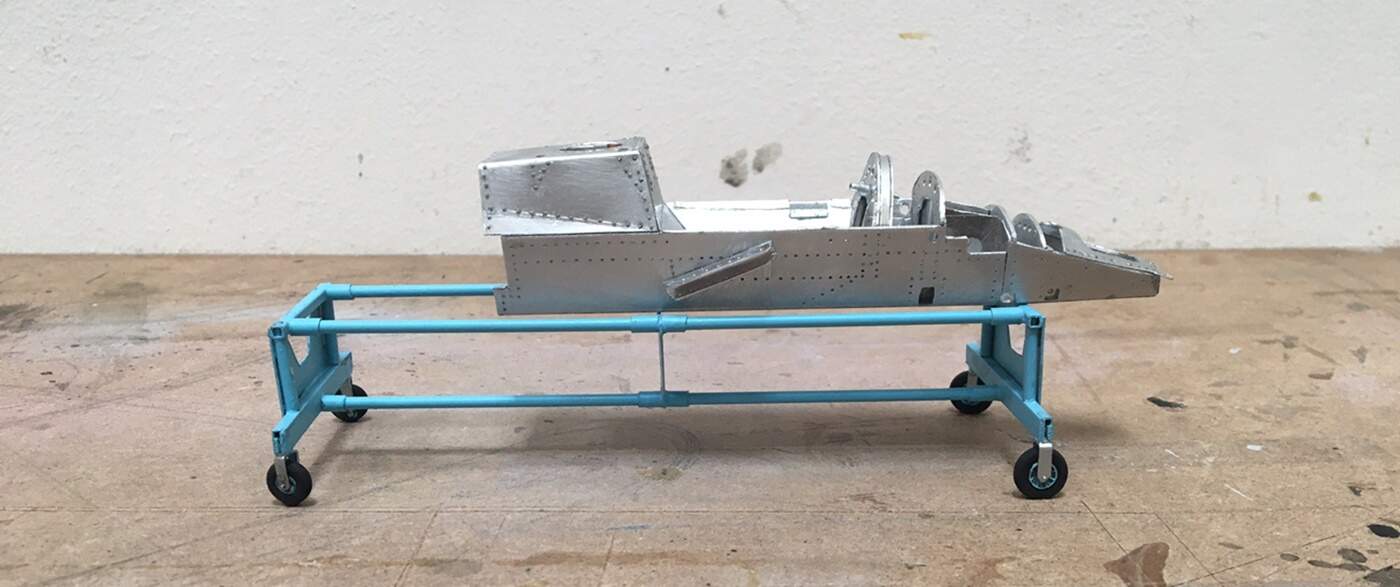
In the 70’s, which is the vintage of these cars, the chassis was essentially an aircraft inspired, rigid aluminum box, with a hole cut in the top, for a driver’s seat, in their entirety, called a “monocoque”. I’m not an F1 enthusiast, so this has been a learning experience for me. If you look carefully at the cars posted above, you can see what the structure looks like. It turns out, some pretty smart guys figured out how to make these, and bolt a powerful engine on the back.
Because the cars have all sorts of horsepower, torque, and went very fast, they had to be designed to withstand the load. So, aluminum panels were riveted together, and interestingly, the non-aluminum metal parts were also riveted on. In reality, it is nowhere nearly that simple, and is pretty interesting. For the dio, instead of using a remnant kit monocoque, I decided to try and build one using thin aluminum sheets.
The plan is to build as much of it as I can figure how to with: no shop drawings or personal experience with race cars, and only hand tools - pin vice, knife, files, pliers, etc. I’ll build it as far as I can, then go about weathering it - make it look like a used chassis sent to the scrap heap. So far so good, I’m about halfway through the construction.
The aluminum poses some unique problems, like cutting curved shapes, especially the inner side of a curved opening, but I developed a method for doing so. I’m using .032" and .016" thick material. While it sounds and is very thin and bends easily, cutting it - has been a real challenge. I’ll post some WIP and the finished product.
OK gents, stay well, thanks for having a look,
Cheers
Nick
Loving the process and the path this is taking… Superb skills👍
![]() Top !
Top !
Yep,nice and random! Love it.
In that batch of ref. pics you showed I am in love with that art deco entrance. Awesome.
J
Nick, I love it! This is really outstanding! Great details, but not only that, also which details you choose and how you place them. Very very realistic!
As you probably have understood I also love diorama, therefore I really enjoy following your work.
And, I also notice that you are a great photographer and show us high quality all over! Thanks for sharing:)
/Erik
That’s a very valid and sometimes missed point, the photo presentation is spot on… Great depth and perspective ![]()
Great stuff Nick, love the thought process and planning is definitely key on a project of this scale.
Cheers, D
Hey NIck, great stuff there!!
It’s nice to see a different dio over here. As a motorcycle service worker, I’m very pleased with your work. In fact, you gave me an idea to work on a Mitsubishi Pajero I’ve on the shelf to build with my 6yo son.
Keep on!
Well guys,
Back with an update - really a two part update. First, showing the construction of the monocoque, and then, denting it up!
I really glad you folks are OK with this dio - a bit out of the ordinary, fun project though, and I appreciate the positive words!
Before I get into the update, Jerry, you do have a great eye! which goes without saying, as your work always reflects it. In this case, that entry you noticed. An interesting, brick two story building, which might be from the early 1900’s, but, it also has the deco entry?? Maybe added later? who knows - but, a bigger picture:
The curved awning and those curved, glass block walls - nice! Next time I walk by there, if the building is in full sunlight I’ll get a picture of the whole facade.
Now, back to the project. First, trying to build a monocoque, using .032" and .016" aluminum sheet, lead foil and CA. Before we get into photos, some thoughts on scratch building with these sheets.
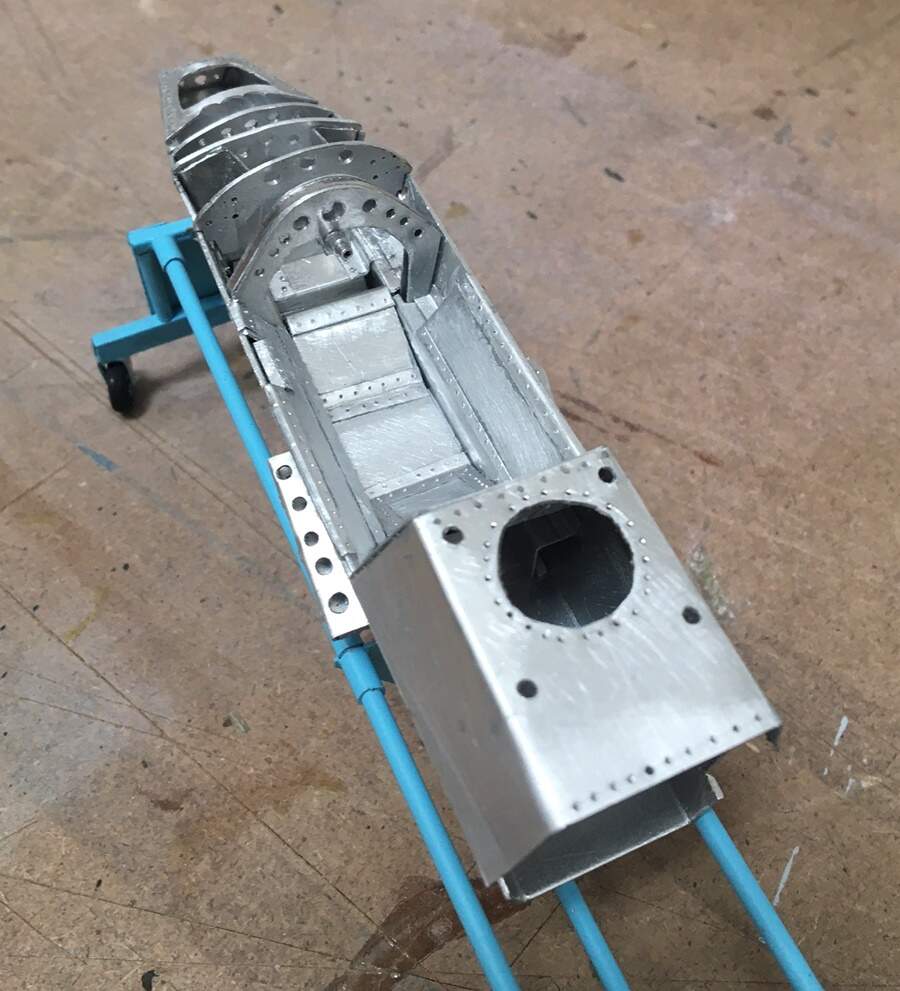
First, while the material is relatively flexible, it is not necessarily easy to work with (using my hand tools), and cutting the underside of curves is not an easy task. With that said, the .032" material is thick enough that it can be built with some structural integrity, and some shapes, like the overall hull (can be made from a single sheet. For this, a pattern was scribed onto the overall sheet, showing both cut lines, and fold lines. By slightly scribing on the outside of the fold line, the material will bend continuously, but not snap when folding. This is helpful, as the part is relatively stable and uniform.
Next, as the sheet is relatively thick, filing opposing cut/fold lines to complimentary angles/miters along the inside edges which will be mated, is helpful, both for eliminating big/awkward seam lines, and for providing a good (CA) gluing surface.
Consider pre cut/drill holes, weird/complex patterns, etc before you cut the part being fabricated out of a bigger sheet of material. As the aluminum is fairly hard (more so than styrene) you’ll need to use some force to get the job done. If you try this with small, or oddly shaped pieces, you can pretty easily bend or destroy the part/piece you are trying to make.
OK, enough of Nick’s (amateur) thoughts on working with alu! and on to some results:
As a completely unqualified speaker on behalf of alu monocoque design and construction, I did some homework - to figure out how these work and how to make a representation, not a duplicate.
I scaled one of the two cars used in this build, and looked at many pictures, and guessed from there.
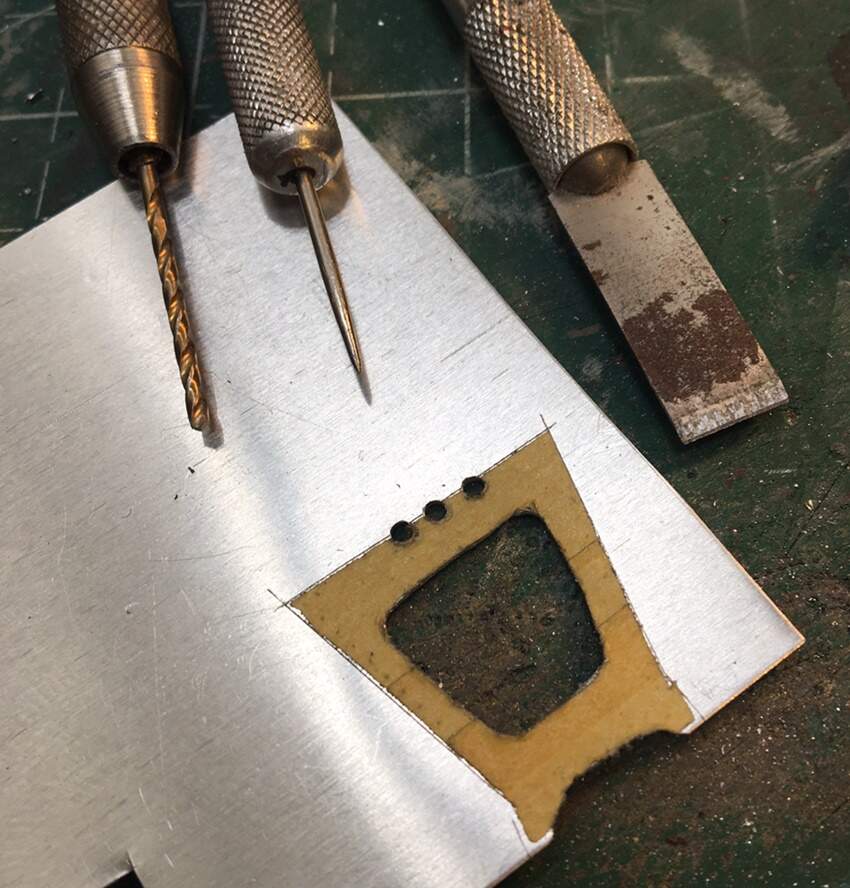
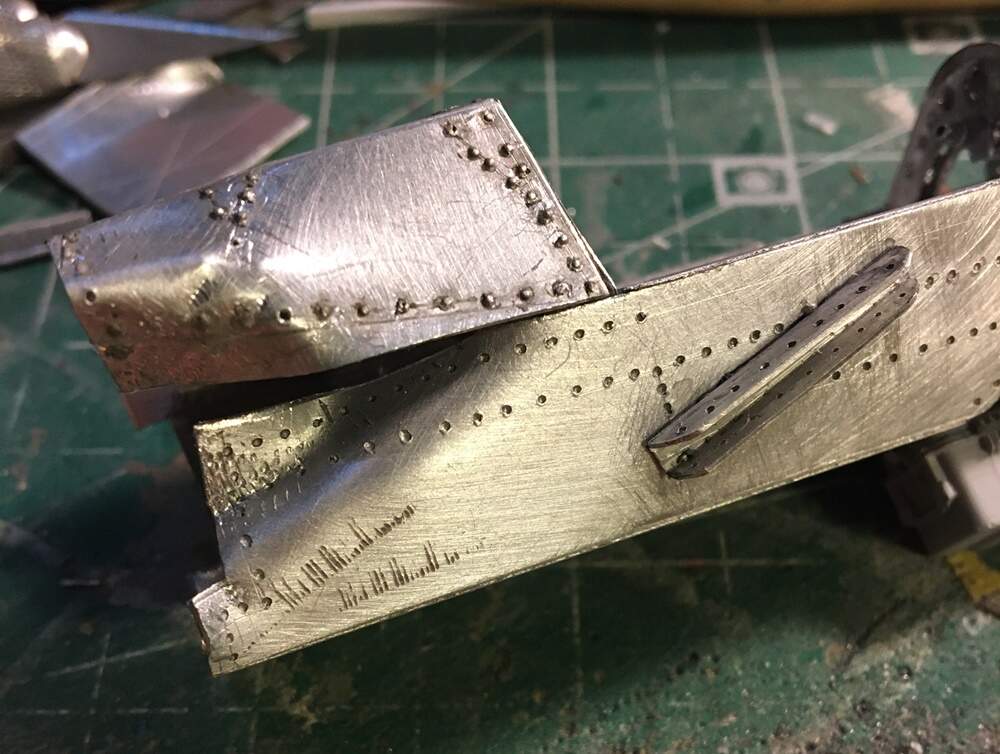
Above, and example of modifying the shape, before cutting it out of a larger sheet. The big opening was done by, in order, scribing, punching, cutting with the Xacto chisel, snipping with cutters, and filing. The template is three or four strips of tamiya tape on the kit part.
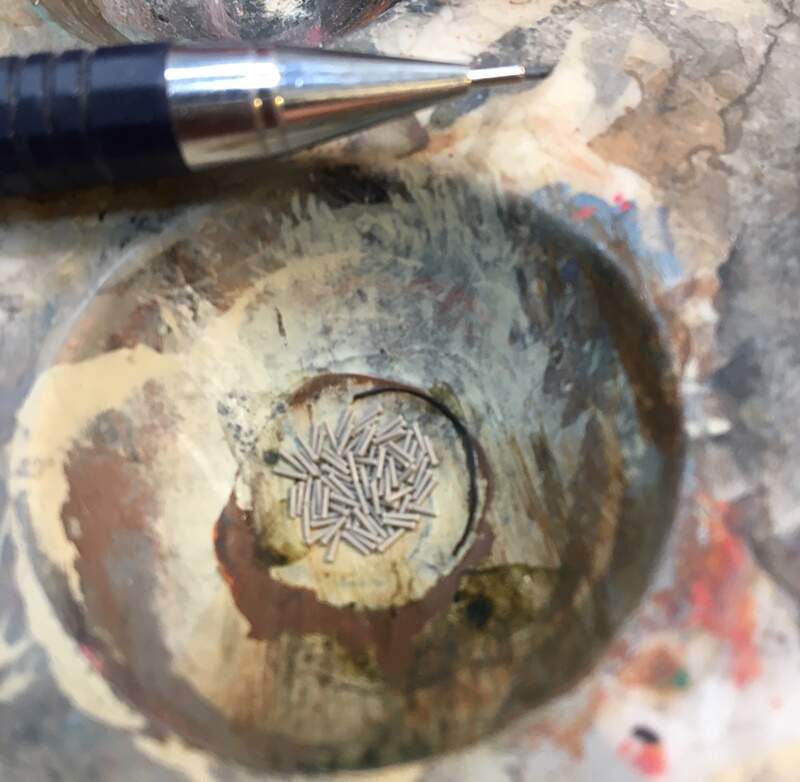
The optivsor stayed attached to my head - these are small rivets! require use of a #78 bit - 
 The pencil is .7 mm. Slow, but it worked:
All things considered, not bad.
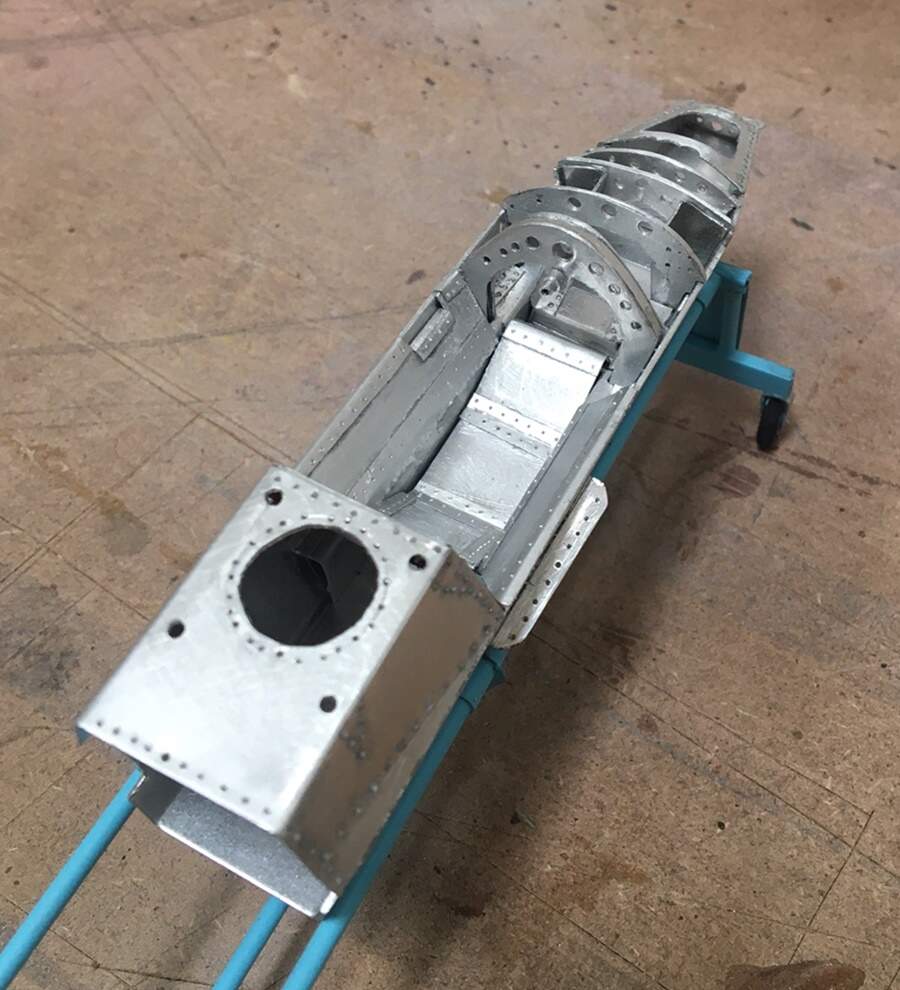
For construction I followed a mirrored process - build part A left, then part A right, so I could remember dimensions and process:
Along the way, it occurred to me this method should probably work ok for doing an interior of an AFV if you wanted something sturdier than styrene - but, it might be more work than it’s worth - the (a) reason for doing this is to have a final product that looks like, aluminum, or, another metal that you could paint to suit. You can easily countersink holes, and file and form in some ways that look a bit more convincing than styrene, if that matters to your project.
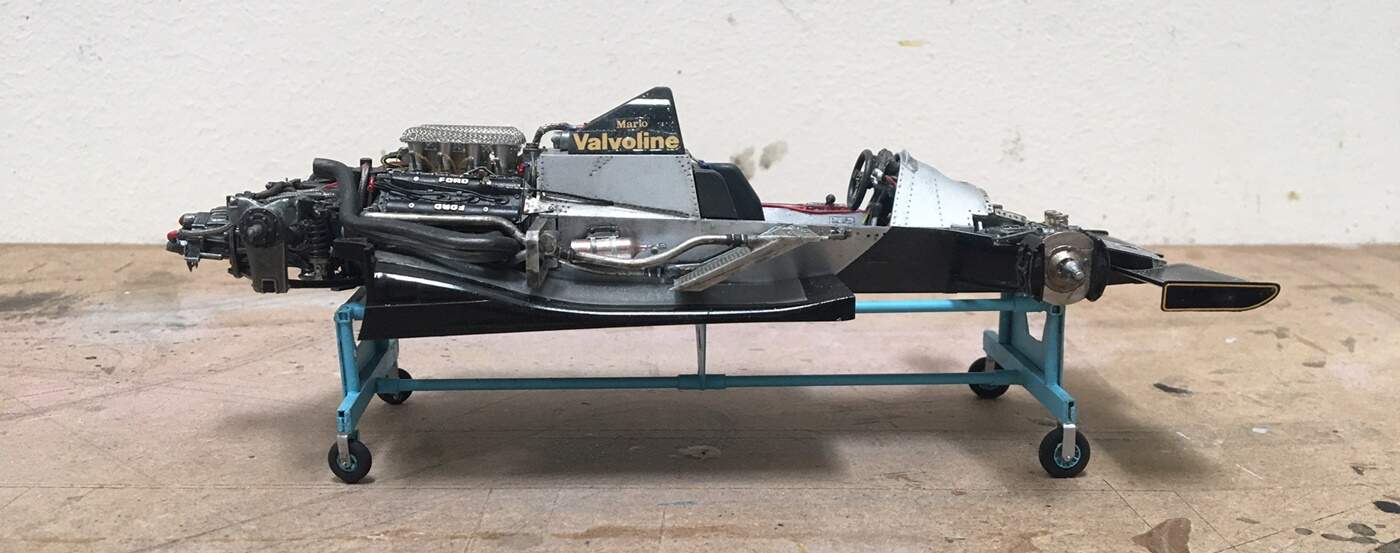
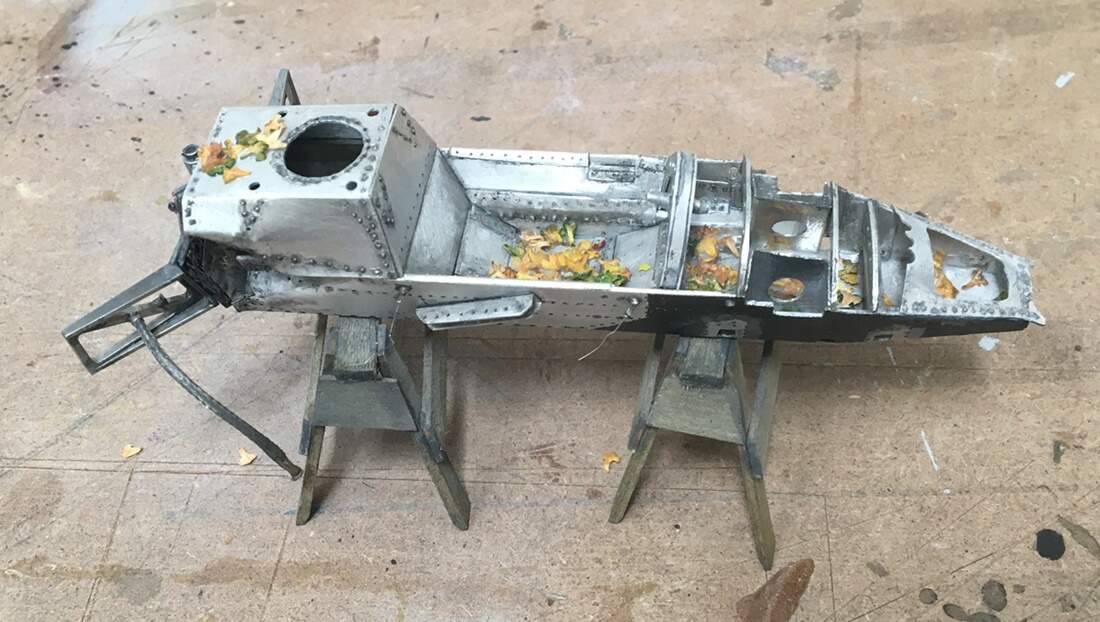
The picture above is the prototype race car I used, and is in this dio - and below, my pre-weathered version:
Dare I say, pretty good? Not sure how soon I’ll make another of these, but this was an interesting experience.
But, remember, this is supposed to be in a scrap area - and as is, while not a perfect representation of the real thing, it doesn’t look damaged either. If it’s not damaged, why would it be in the scrap heap?
This question caused me to do some head scratching - and to learn more about F1 design of the mid 70s and what actually happened if you smashed them up. While intriguing stuff, it seemed a bit late for me to start doing drastic damage, as I’d likely get the look of a broken model, and not a damaged race car. Bottom line, I experimented and came up with a method.
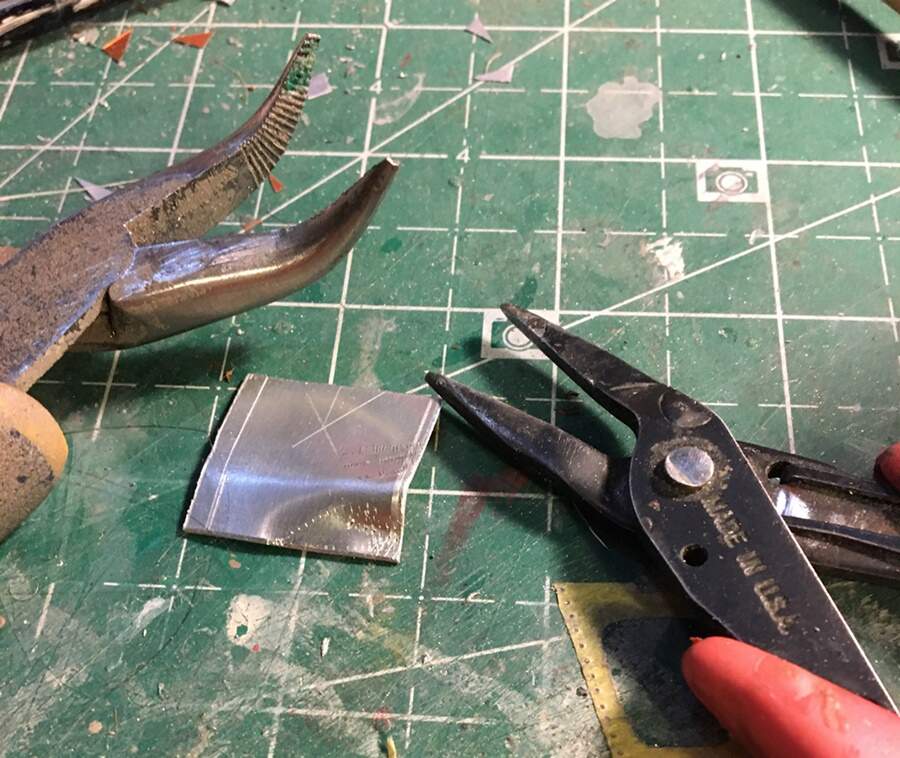
Starting with a test, using the .032" alu:
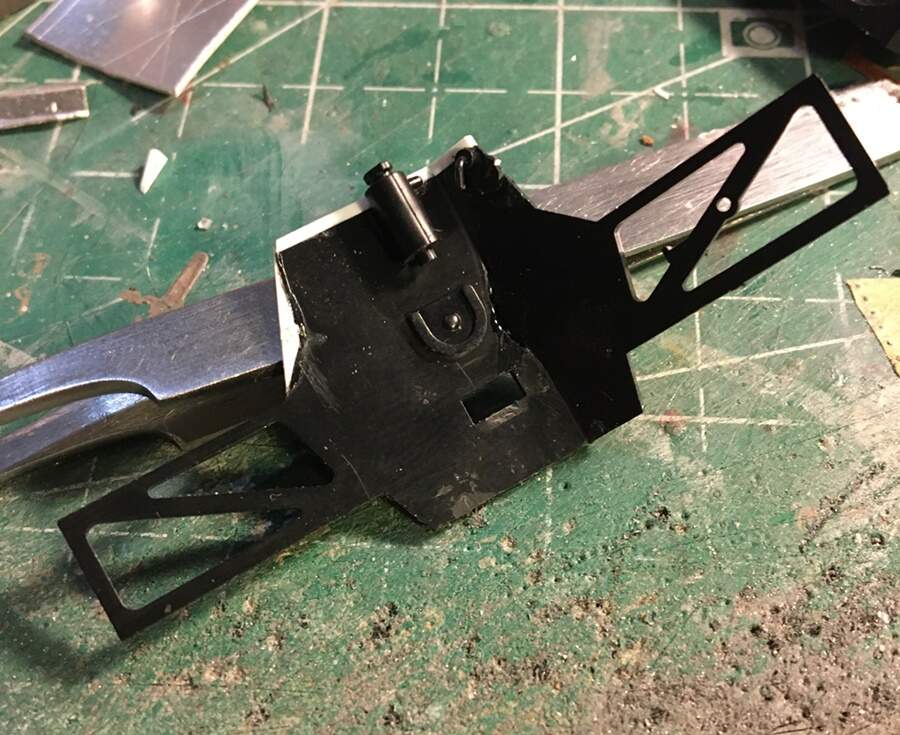
Tools of destruction! even leaving a nice tooling mark on the sheet. Then to the extras box for a remnant firewall/bulkhead:
Fitted/adapted and then damaged, and on to the monocoque:
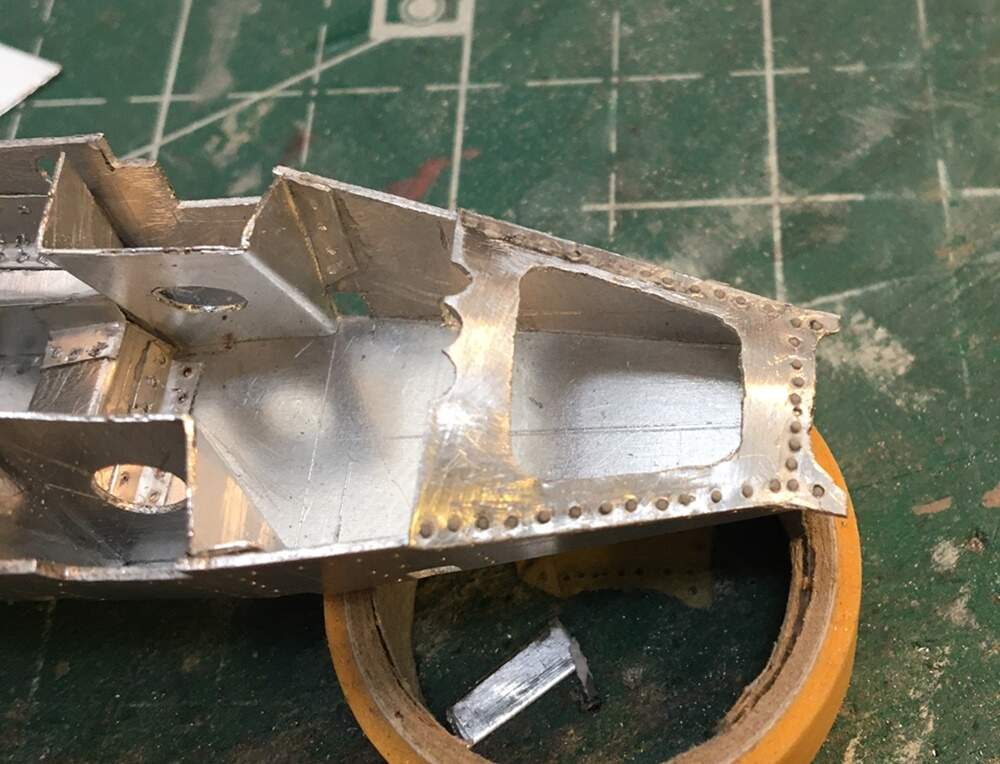
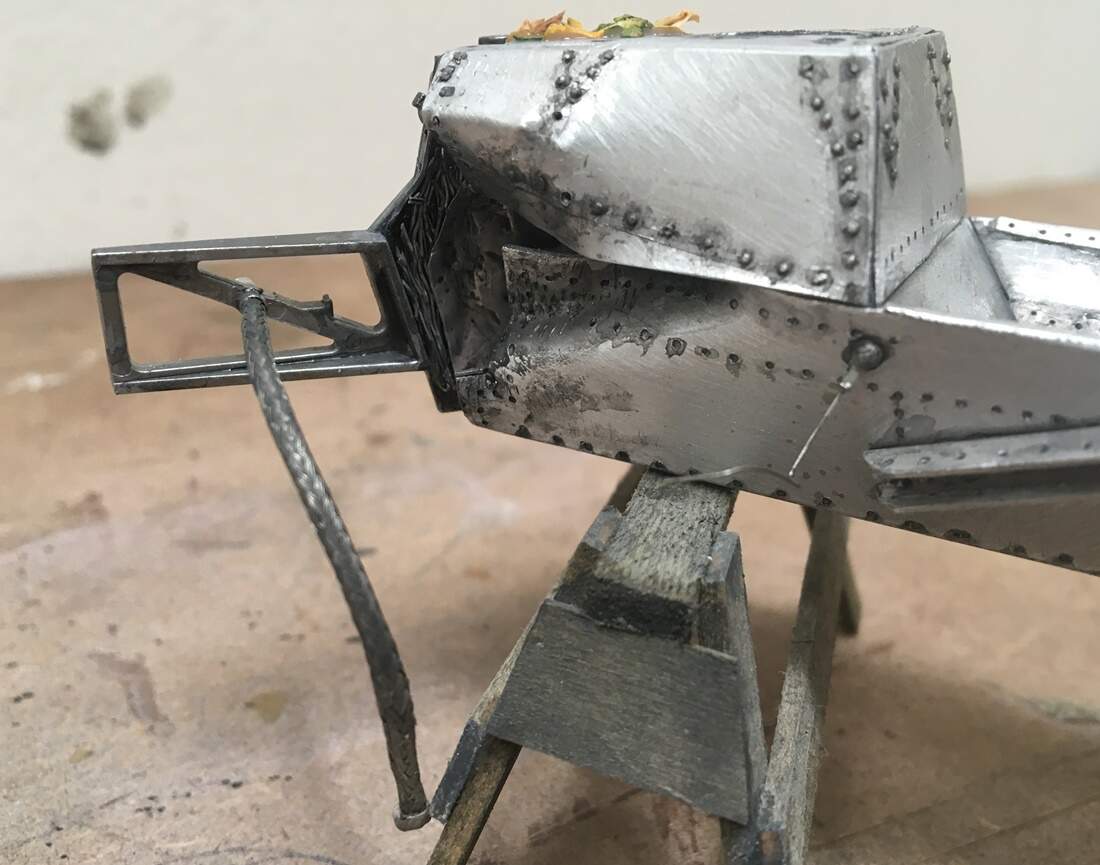
For this, I cut out the lead foil I used to reinforce the joint, and went at it with the pliers - I lucked out with the tooling marks!
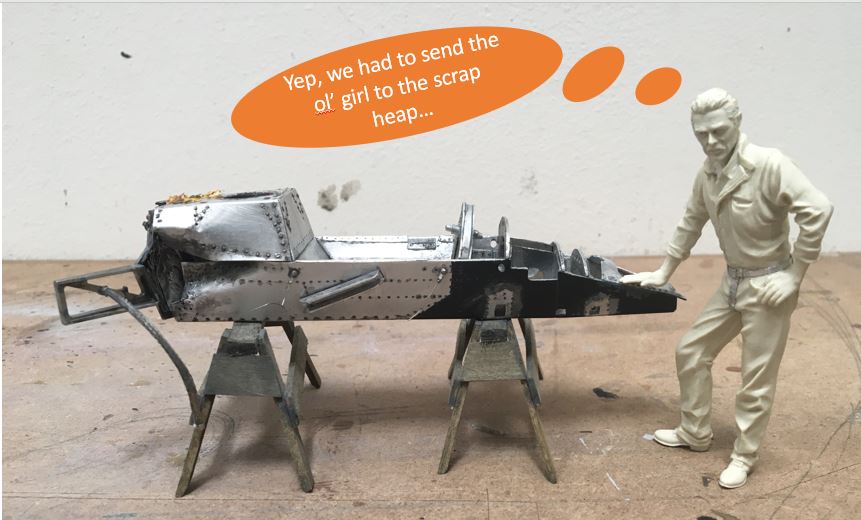
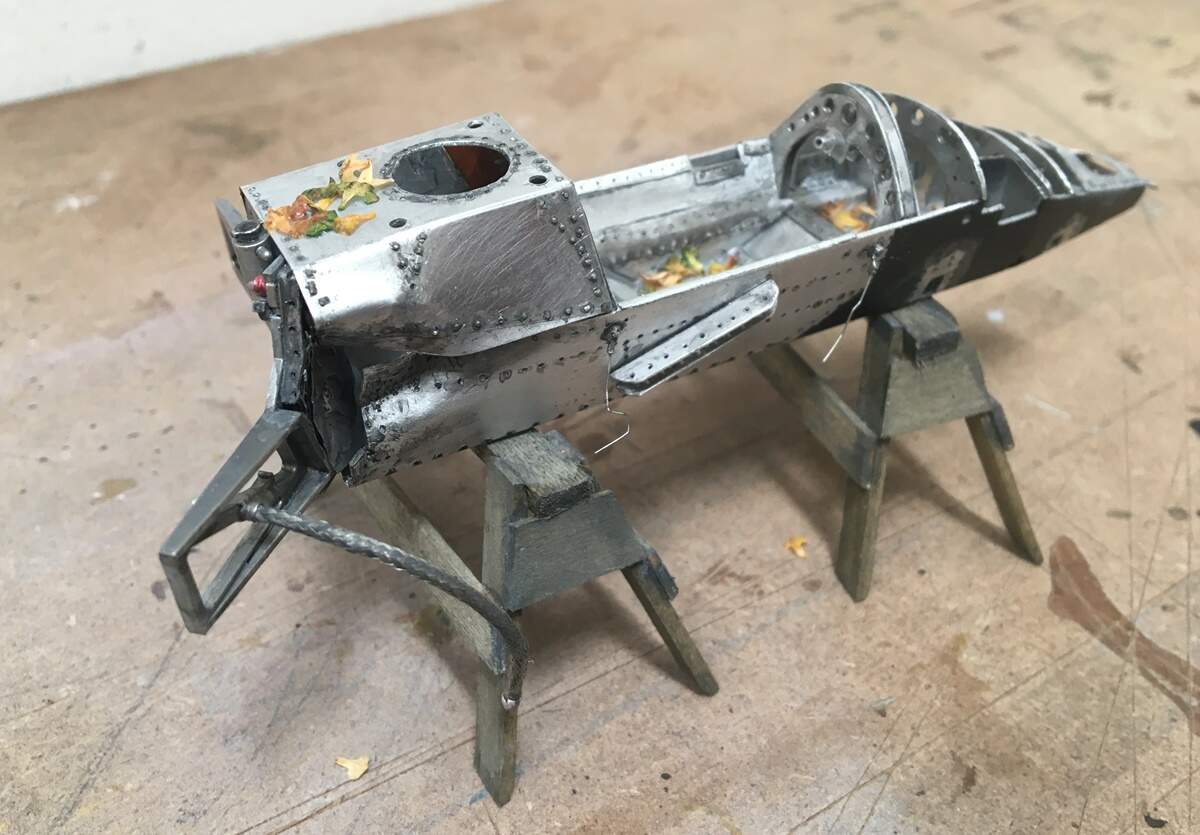
Above, the final - with some weathering, and added elements - radiator hose, leaves, snapped outriggers, some paint (taken from a prototype photos), and some saw horses!
Quite a learning experience for me. In the pick below, if you look at the exposed inside of the firewall, you can sort of make out that there is smashed aluminumm honeycomb, which was used for structural integrity. You don’t see fire stains because, by this time, F1 was using fuel cells/bladders, which were tough, and could take a beating - I decided my car was in a wreck but didn’t burn.
OK - thanks for having a look and for putting up with a long post.
Cheers and stay well,
Nick
WOW — Followed closely by an amazing !!
That is some beautiful and so very intricate detailing.
I have not seen this build before I have to say that it is incredibly nice
Yep, cool building for sure. Hard to tell if the entry way was added later or not.
Mad skills building the metal body. Have you ever looked at Printers’ aluminum ? It is nice and thin and would work well for smaller thinner bits. Unforgiving though as it’s so flimsy. I used to know a guy that did model airplane bits with it and it looks the bees knees.
J
I’m just blown away every time I revisit this thread Nick. So much to see and everything relevant and such high quality.
Love your work!
Cheers, D