I’m about to build my first ship model, I’m used to armor and aircraft so I have basic build technique down, but with all the small parts and nooks and crannies on a ship I know I’ll have to take some different approaches especially when it comes to painting. Throw your best tips and tricks for a new ship builder at me
Dramamine…
3 Likes
 need my sea legs
What in Neptune’s Relm got you to do this?
Thought I’d be fun to try something different. Hope I don’t regret it
I got interested in the pre-Dreadnought battleships, kinda steampunkish in design. I have picked up a IJN and a Russian one so far. The suprising thing to me is in 1/350 scale they are only about 13 inches long.
Don’t tell anyone what we are doing or we might get banned from the armor forum… 
1 Like
I’ve been thinking of eventually getting the USS Texas pre-dreadnought, defintlely cool look to them.
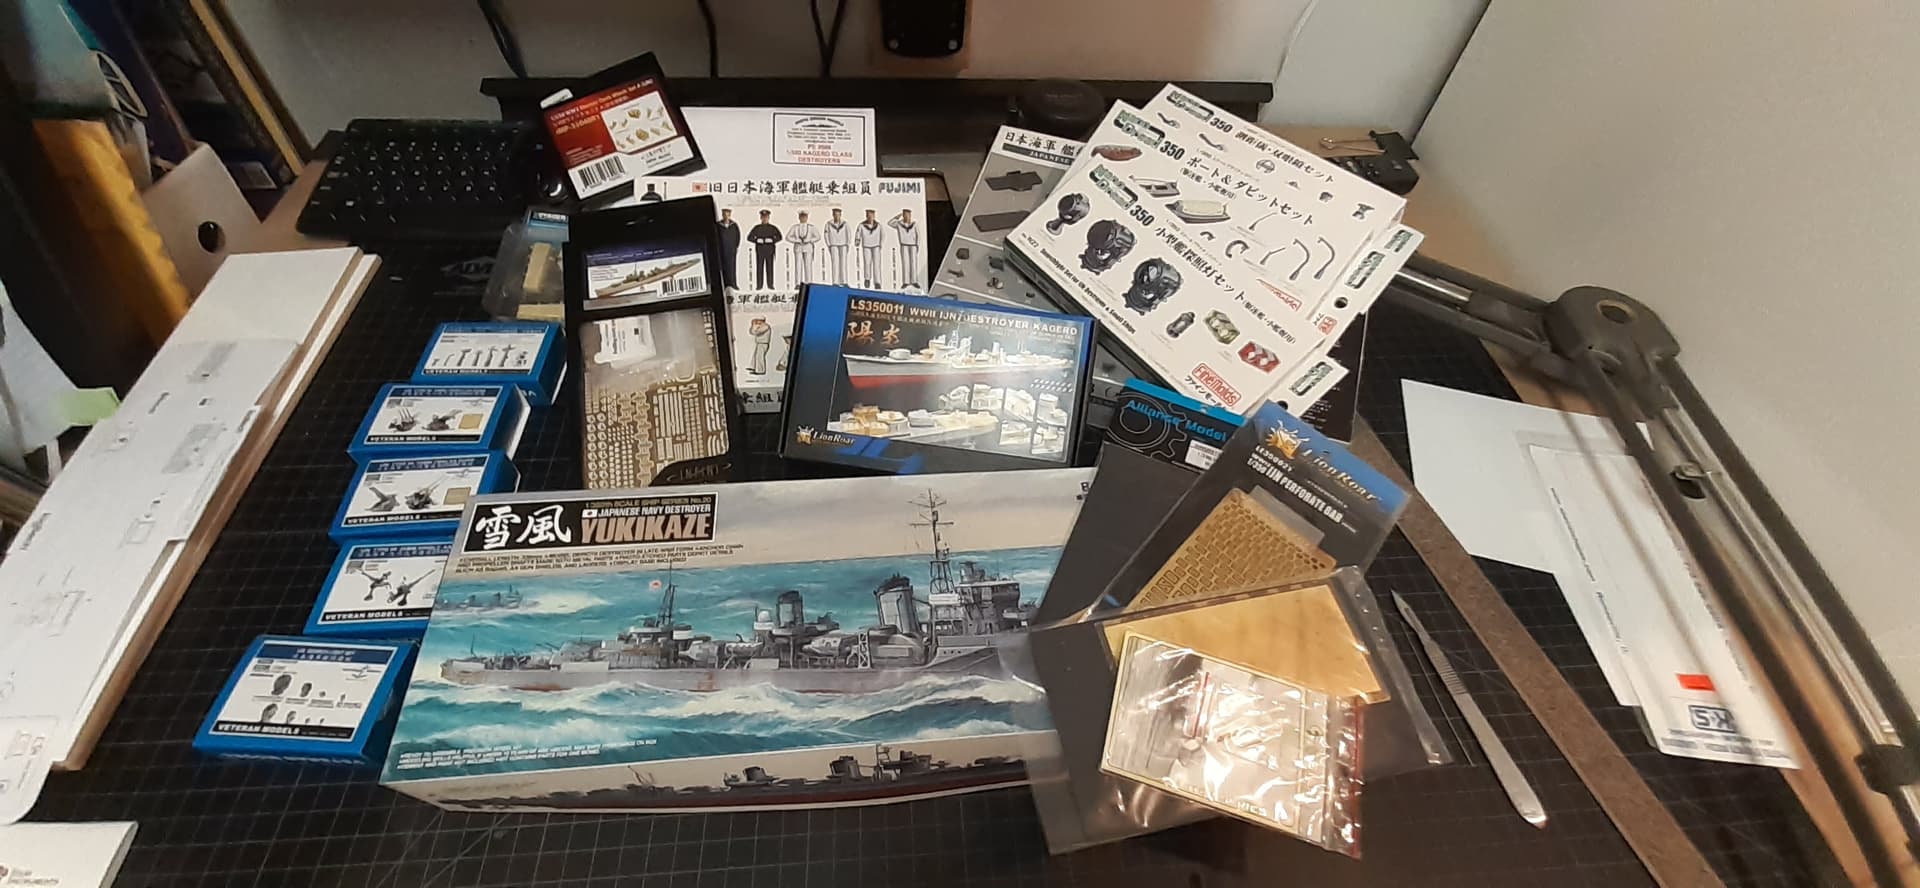
So far I have the uss england which I’ll be building first, (that thing is tiny, probably 9 inches). The Graf spee and the uss Indianapolis
2 Likes
Yes, I like the Texas. I find the detail is not the same as some of the better armor kits though.
1 Like
One thing I’ve found deflating about ships is all the AM you have to add to bring the detail up to standard. Armor kits come pretty well ready to go
I feel ya. The Mikasa kit was $80 something and the Pontos detail set was over $100… 
Think about the ship guys who want to build a tank and end up with a full interior. indy track beast with 1300 parts.
3 Likes

Deflating?..DEFLATING?..YOU CAN’T HANDLE DEFLATING!
When I consider that my current build can’t have much more than 20 parts and I’m already 5 weeks in, I’m not sure this will ever happen…
maybe I’ll start and let my future grandchildren finish it. 
Don’t get addicted to those floaty sinky things there are too many armour kits that require your undivided attention.
Good luck with your sacrilegious build. 
Cheers,
Colin
2 Likes
Deflating? This about ships. Don’t mix your metaphors at me.
Having said that, I ordered this recently:
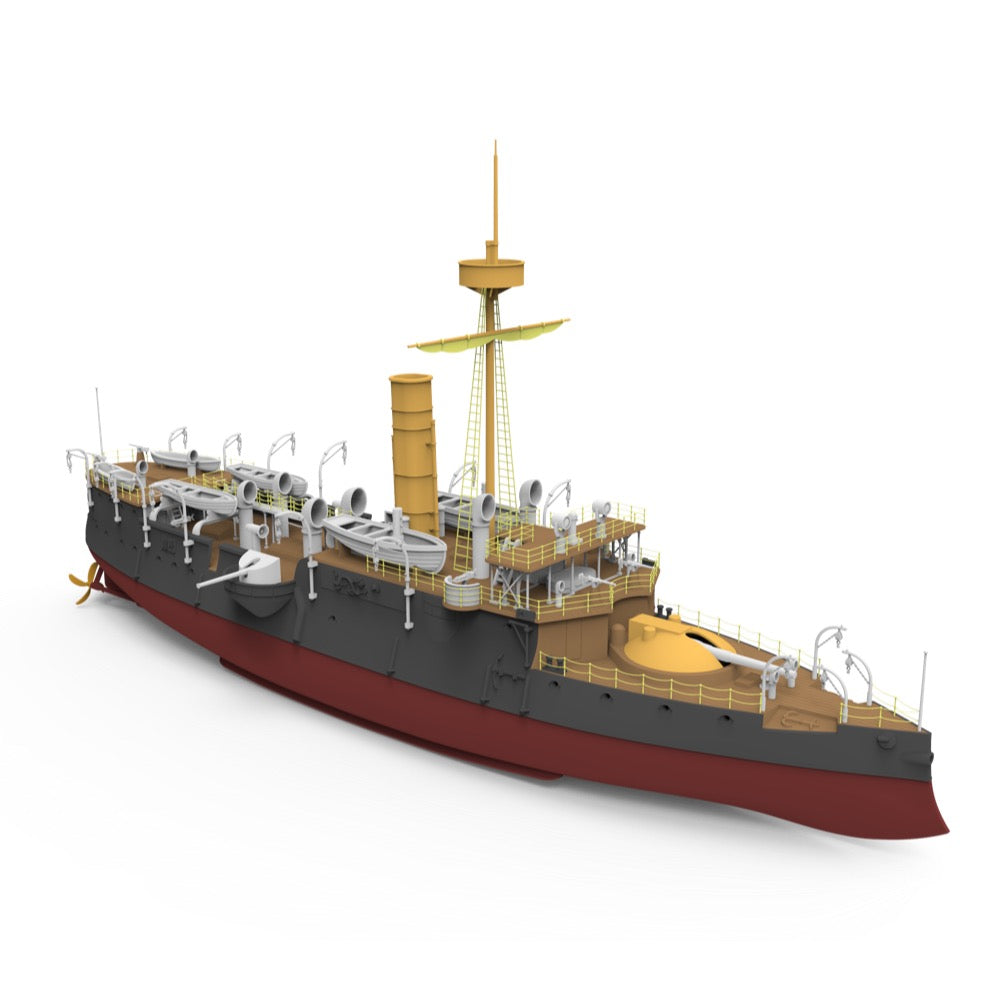
Which is a bit awesome. By all accounts, the kit is a bit ordinary, and will need some help. I’ve ordered some decks and some brass gun barrels, but there doesn’t seem to be much else available as far as aftermarket goes.
2 Likes
I won the Tamiya 1/700 CV-6 at a contest raffle and just ordered some pe and decals.
The club ship builders like to start with mounting the hull to a base of some kind to give you that third hand. I believe they are painting the bits as they go along but the paint scheme is a big factor in that decision. After the basic structure is in place then they add pe. They work inside out and deck up that way your not going over previous work and knocking bits off. They use stretched sprue do the cables, so instead of heating the plastic in the middle of the sprue and pulling apart with both hands, they will warm one end and stick it to say the box top and pull in one direction at a speed needed to get the desired thickness. You can pull a super thin line well over your wingspan (like 12’ or more) and it be more consistent diameter with this method. Doing it many times you can varies thickness to show the different types of lines used. Attach semi loose and using a low heat source like a punk stick you can tighten the lines up. Another method like this one for airplane rigging, starting at 22:07 using the heated up element of a hair drier turned off.

HTH
1 Like
Which kit are you planning to build? Depending on the kit and its engineering your build approach might change. e.g. using a wooden deck on a battleship kit changes how you can assemble/paint the kit.
I’ll be starting with trumpeters uss england with WEM PE and some infini oerlikons and BCM bofors
I C U …
Your activity has been noted in my little black book …
Great choice for a first kit. Buit it some time ago with the WEM set as well.
Assemble the hull (complete hull, above and below the waterline) trying to avoid installling bits and pieces that will make painting the deck difficult (armament, debth charges, ammo boxes etc). Paint the hull, deck and whatever details you could not leave off.
Then the superstructure, again leaving off detail that makes painting difficult. Add the ready painted superstructure to the hull.
If you plan to weather the model you can do it on parts separately or after full assembly. But you can just do a pinwash and some panelin/highlights and it will look great, especially if you are doing a full hull model.
Prepare all the pieces you left off like armament, boxes, boats etc separately. Usually the best way to install details is from top to bottom, and from closer to the center line out. (eg higher deck details first, main deck detais last)
The last thing you want to do is rigging. You may want to leave off some details off until you have completed the rigging, depending how they affect access to parts of the model. Avoid using knots and tying your rigging, super glue is your friend here.
Photoetch parts like the rails are usually better to be painted first then added to the model.
Yeah I think it’s a great size to start on. I had considered starting with academy Indy but I think it’s a bit big and complex for a first build.
Thanks for the great advice! Do people normally build ships in sub assemblies? Like am I good to build up the hull and deck, then the superstructure, then the other main assemblies and paint them?
Or should I build up the hull and main deck, paint. One layer of superstructure, paint. Another level, paint?
It depends on the engineering of the kit and the fit of the parts. In this case: assemble the bridge part completely (pages 4 and 7). The middle part of the superstructure should be one subassembly too, plus the rear gun part, step 13.
1 Like
Hoping it’ll help distract the locals from your accent?
2 Likes