Well I’m not gonna fret about the angle of the bogie arms. That well over my level of DILLIGAF kicking in. I was up late last night looking at photos of welded hull M3A1s checking that lower hull welded-riveted join. And of course I found plenty of photos with the riveted lower with a welded upper, so the rivets stay. It’s too late for me to address the rounded vs flat plates on the rear engine deck. But looking at the Hunnicut Stuart book, it looks as if a few had the older flat plate style rear. The line drawings in there show it that way. But I do appreciate all of the input. Perhaps someone such as Miniart or Tamiya will come out with a proper M3A1 welded hull kit in the future.
3 Likes
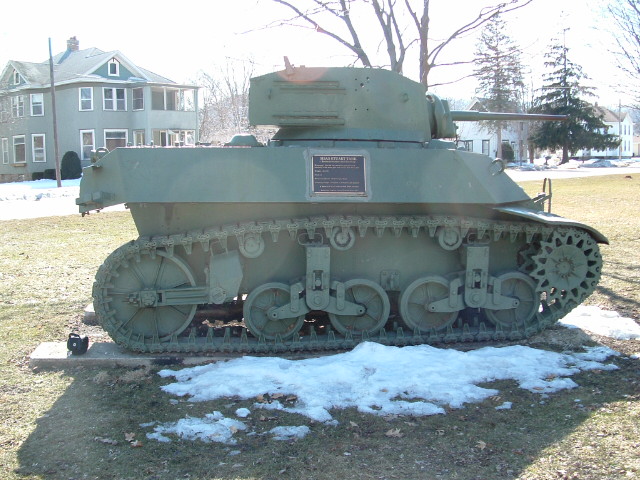
Fort Worth Aviation Museum.
KL
1 Like
Regarding Hunnicutt, the photos on pp152-153 are of the pilot M3A1, RN 306923, SN 3571, accepted as an M3 in February, 1942. The first true M3A1 would have been in the SN range of 4314-4805.
The tank shown on page 160 was a diesel built at a different AC&F plant (St Charles, MO) the same month as the first gas M3A1, but the first acceptance of an M3A1 there did not happen until August 1942. This may have been something of a pilot vehicle as well, and not indicative of actual M3A1 production. There may have been production M3A1s made with a two-piece rear end, but if there were, it was only a small number.
The four-view drawings in the Hunnicutt book series are, in many cases, tracings of the Ordnance general arrangement drawings, with some tweaking by DP Dyer. These are the actual Ordnance M3A1 drawings:
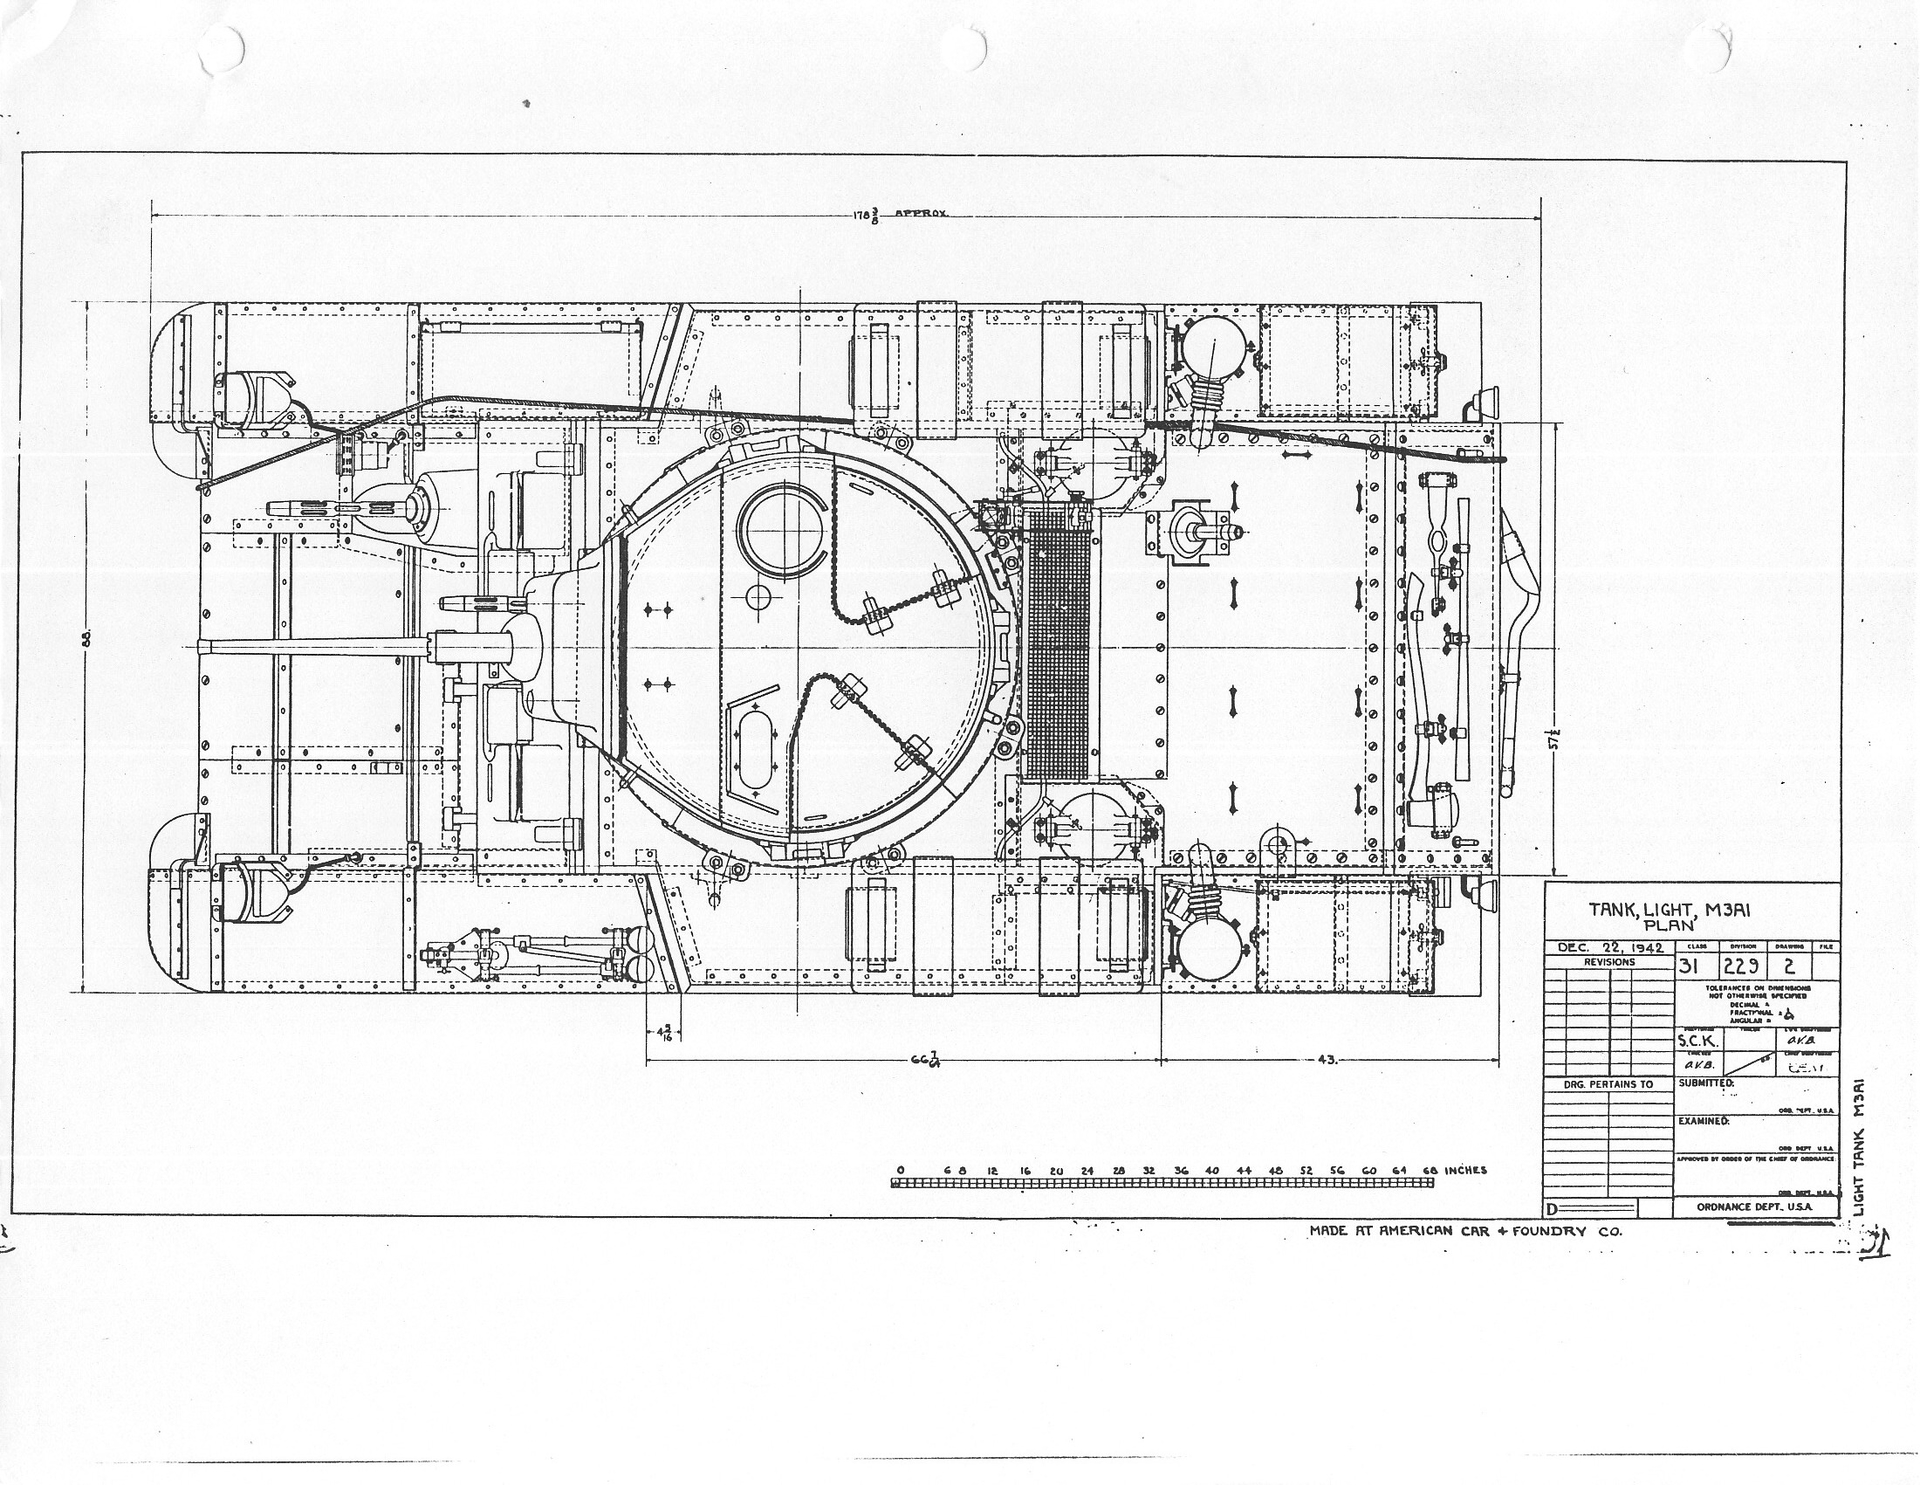

and you can see that they have the single piece, formed rear hull.
The sectional drawing on page 154 is an illustration from the technical manual, and those are known to be literal cut-and-paste jobs of existing drawings and illustrations, often prepared quickly and before the actual vehicle had been completed.
KL
4 Likes
Like many of my projects… the information turns up after the point of no return/diminishing returns. Worst case scenario, this is a reason to fill another gap in my collection.
4 Likes
Not every project needs to be fixed to the nines. Between ability (not speaking of yours) and project desires, just not needed.
Keeping moving forward. ![]()
3 Likes
My comments were about Academy’s kit and Hunnicutt’s book, not your model. What we do with our models is our own business.
KL
3 Likes
Agreed. Some projects are a deep dive, and some are not. This one is closer to the shallow end dive.
Still moving forward.
3 Likes


Someone has been ignoring the “Please don’t fall off of our tank and kill yourself” sign.
5 Likes
Damn kids!
4 Likes
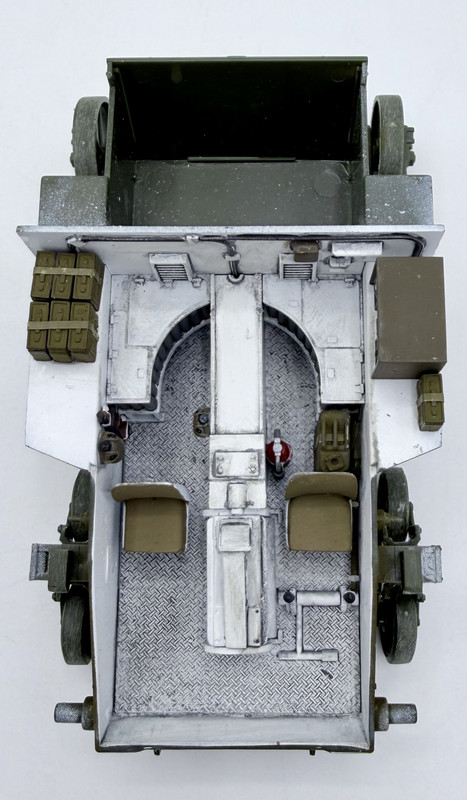
I’ve made progress on the hull interior
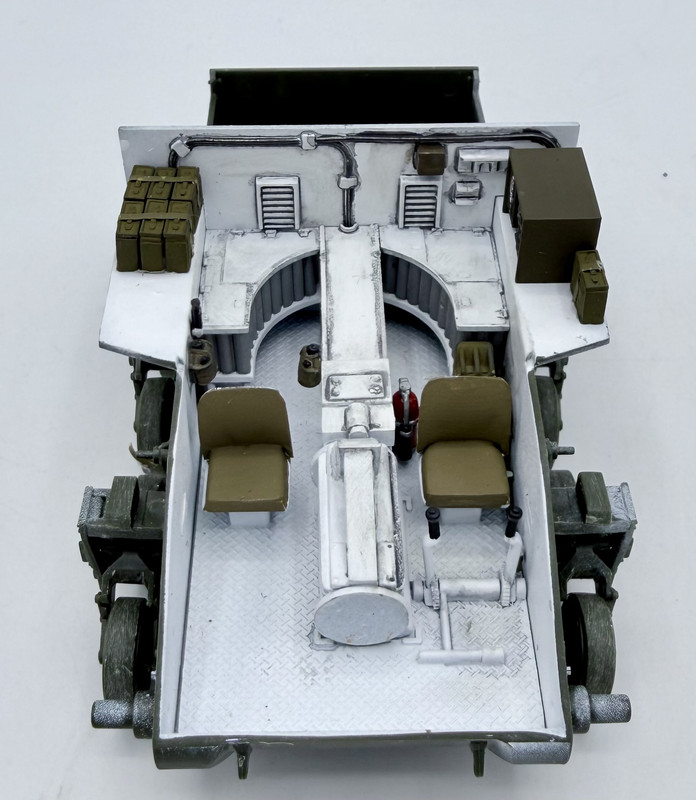
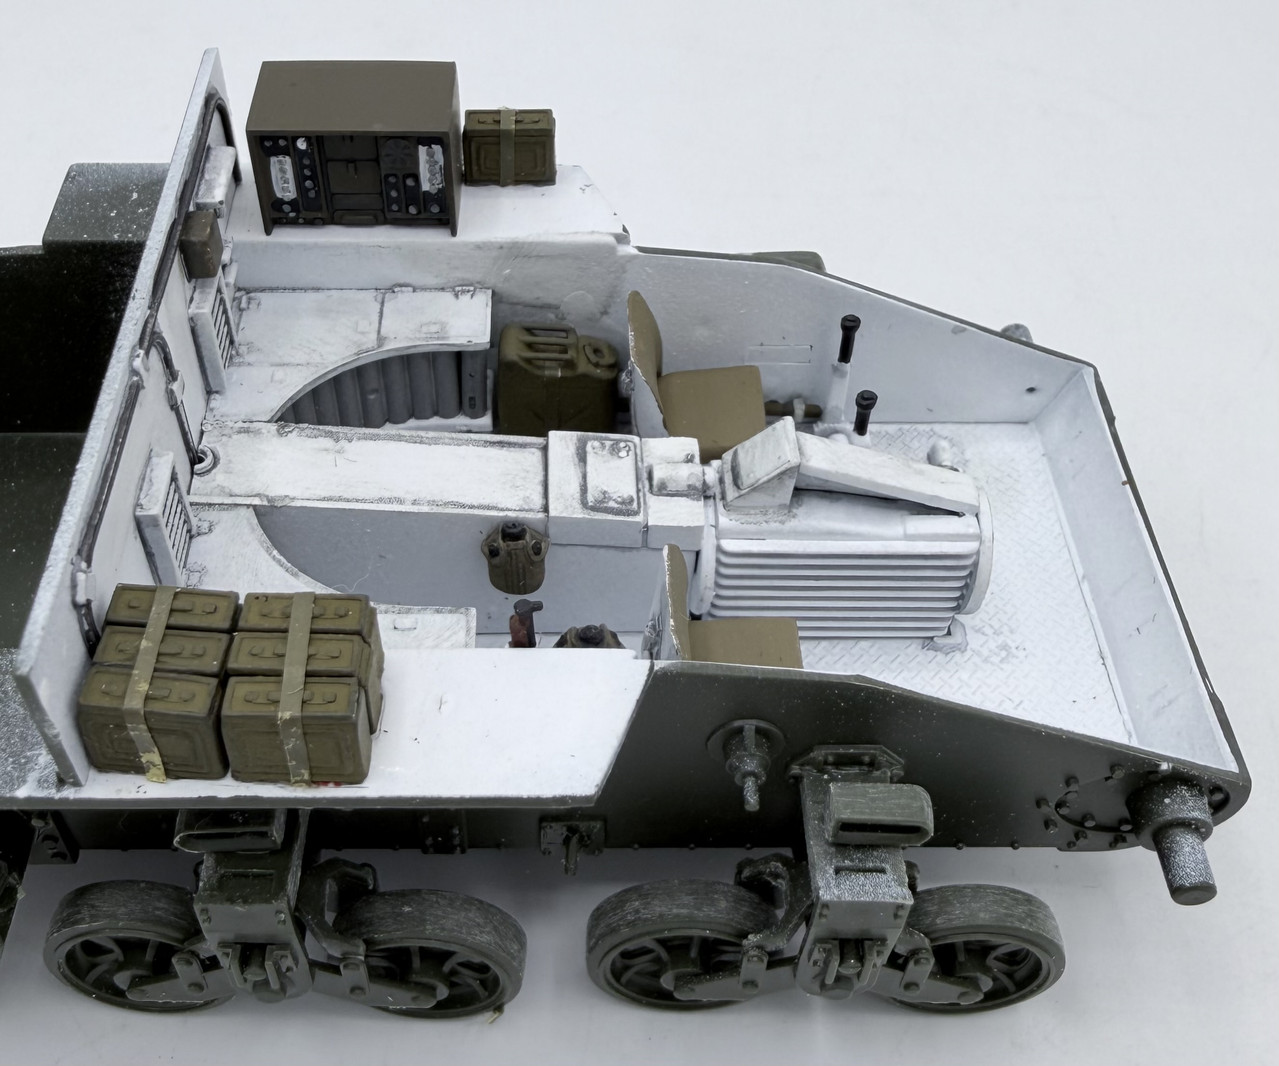
I added a few bits such as the canteens, Thompson, water can, amd tie down straps for the ammo cans that were not included in the kit. I need to do a bit more weathering in there, then I can close it up. The upper hull has a bit more painting and a couple of 3D printed items to add…
8 Likes
Still there, bent down ![]()
3 Likes
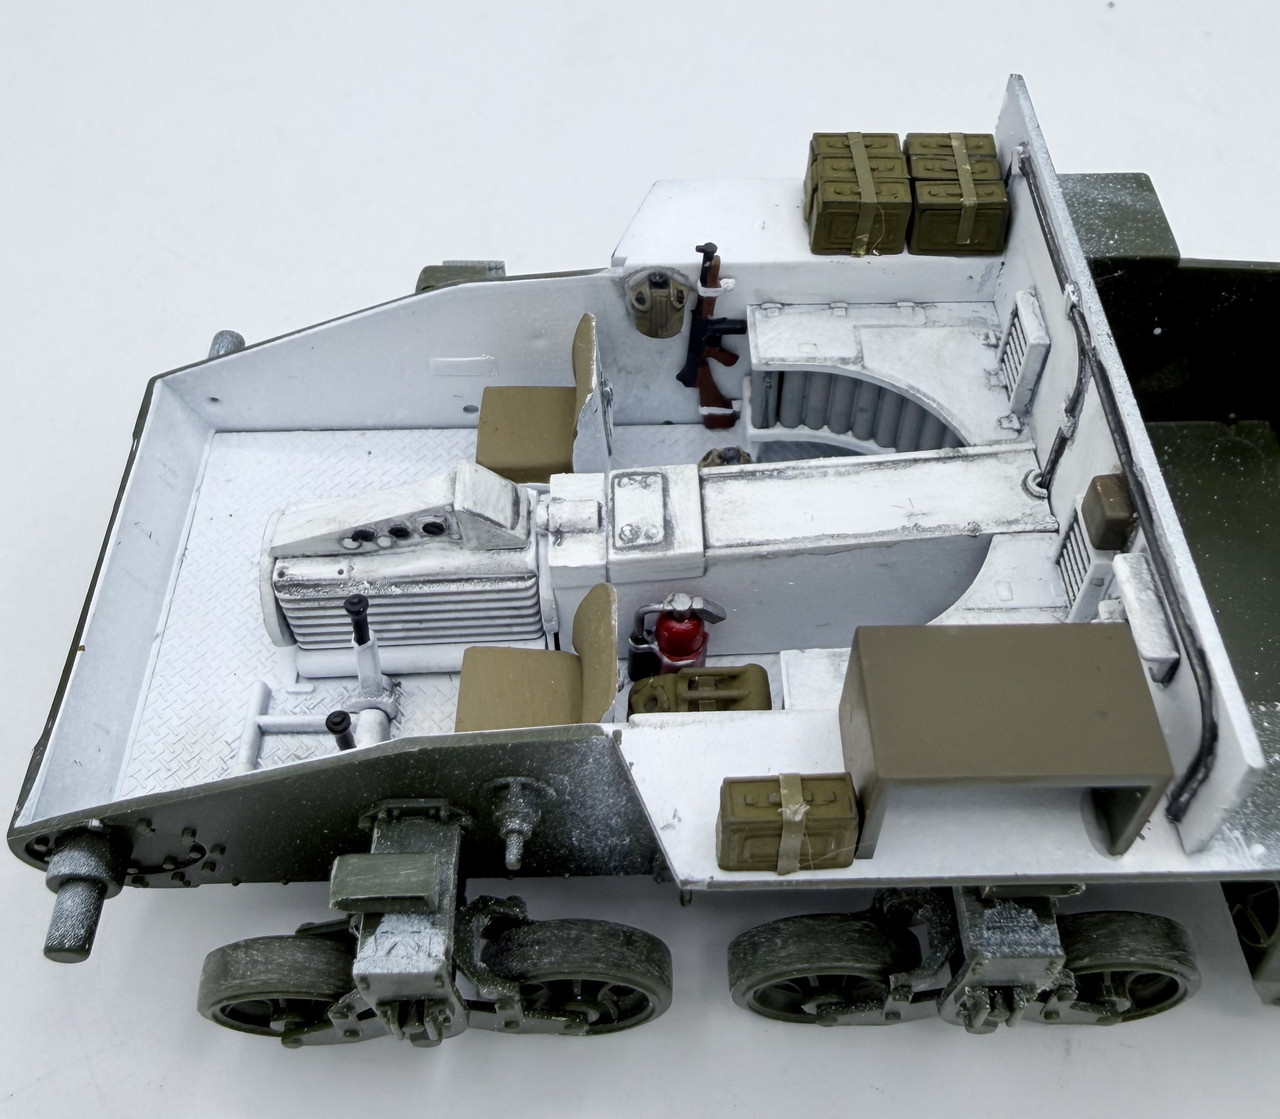
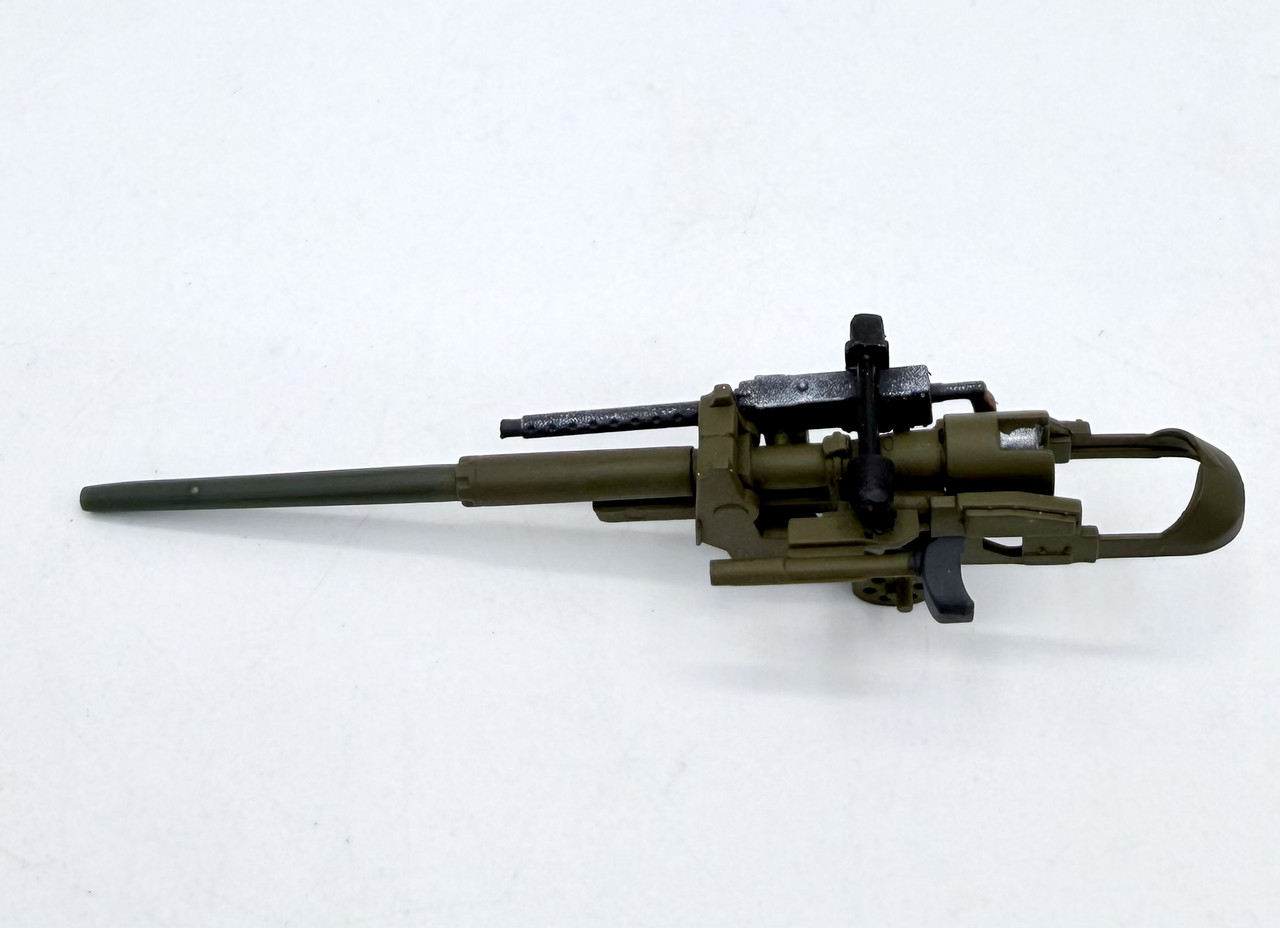
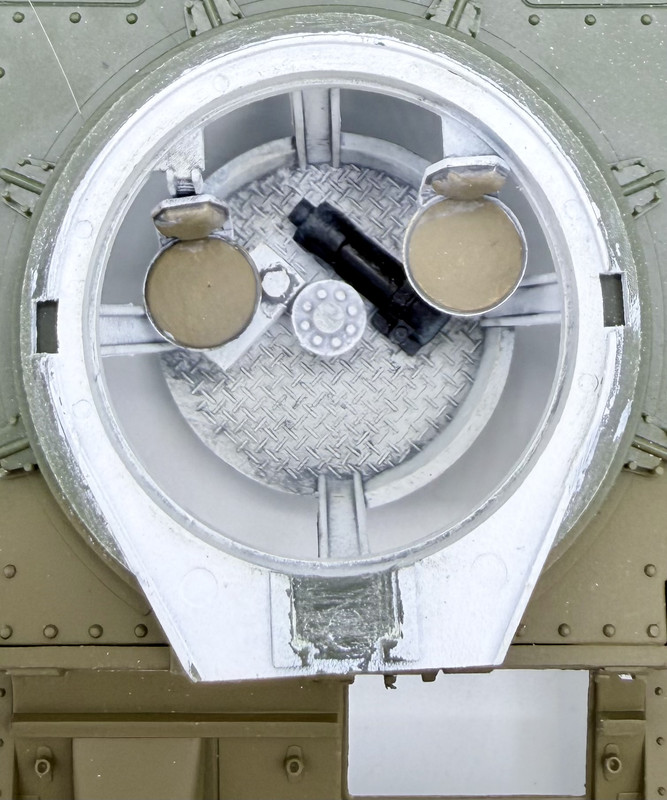
Looking at AFV Database for reference, I saw that the floor of the turret basket had a hydraulic pump and reservoir so I scratched up something resembling those items to be visible in their appropriate locations.
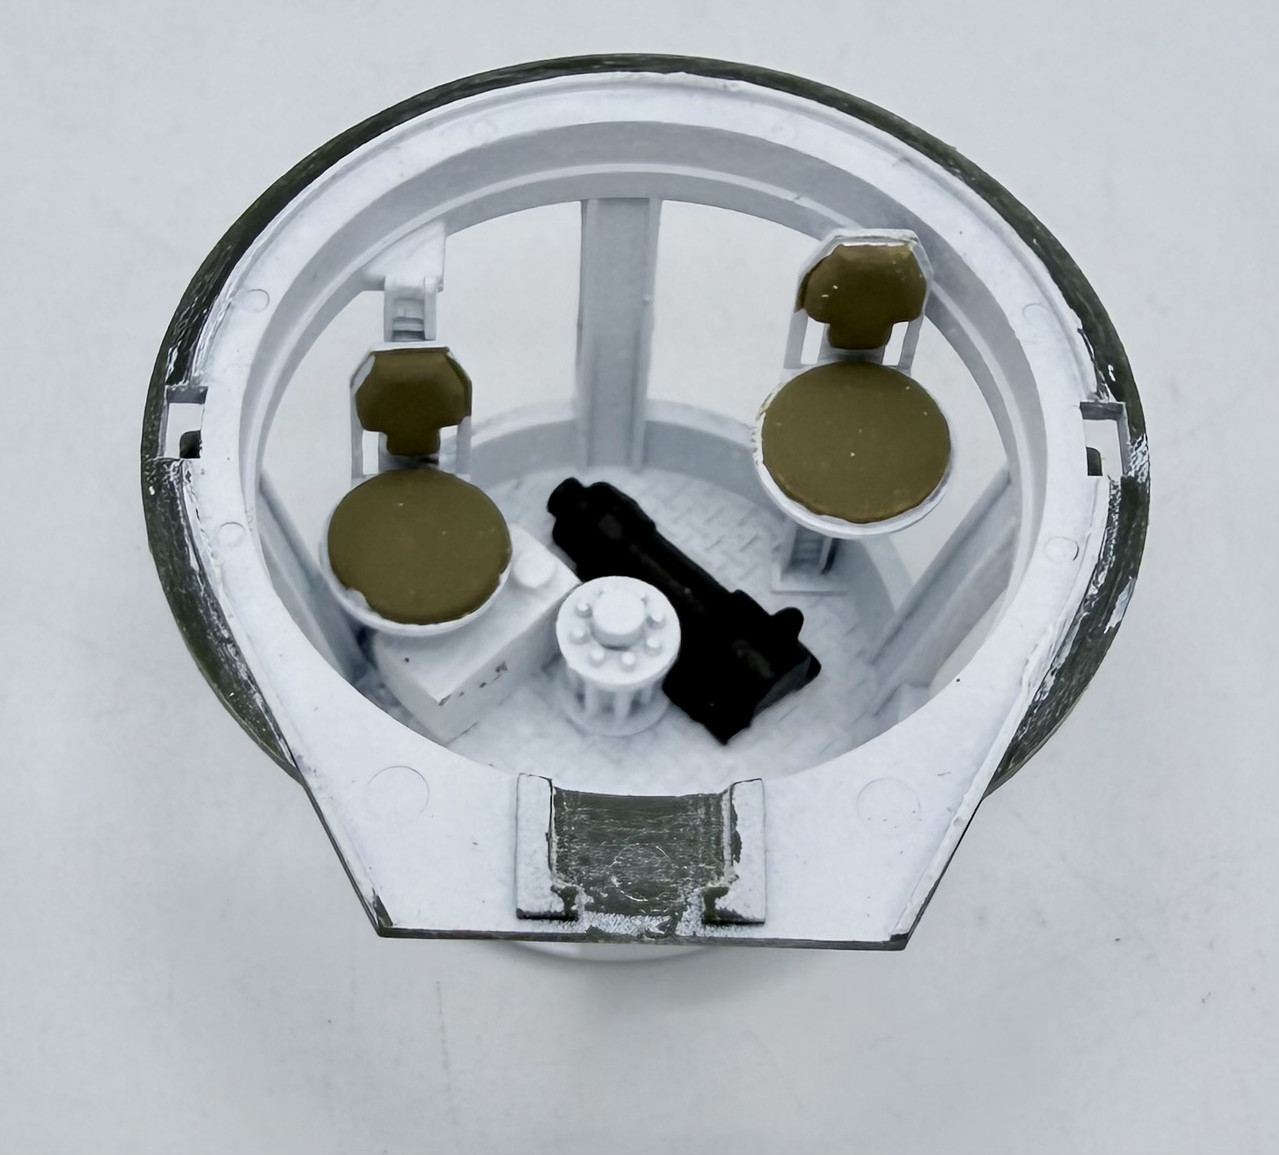
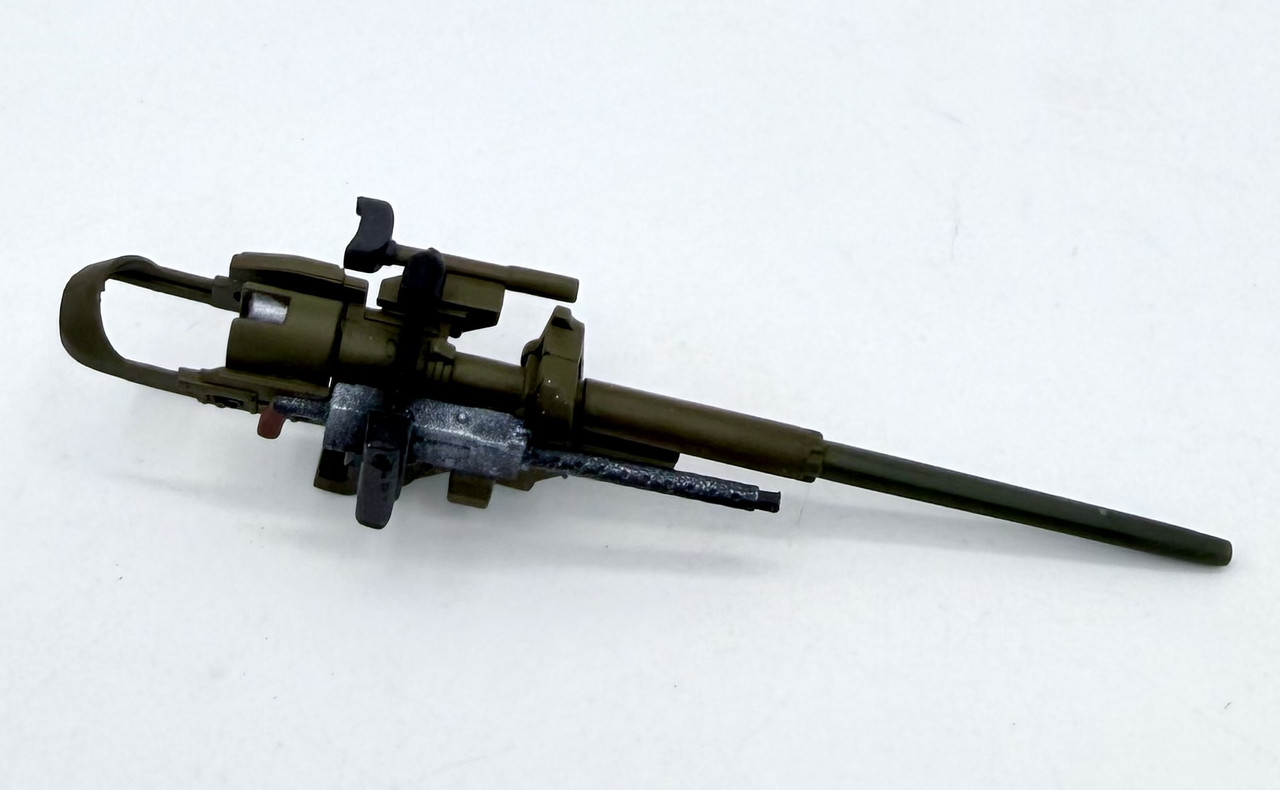
Then I saw that the kit’s main gun was missing the gyro stabilizer, so I scratched up some items to resemble those pieces
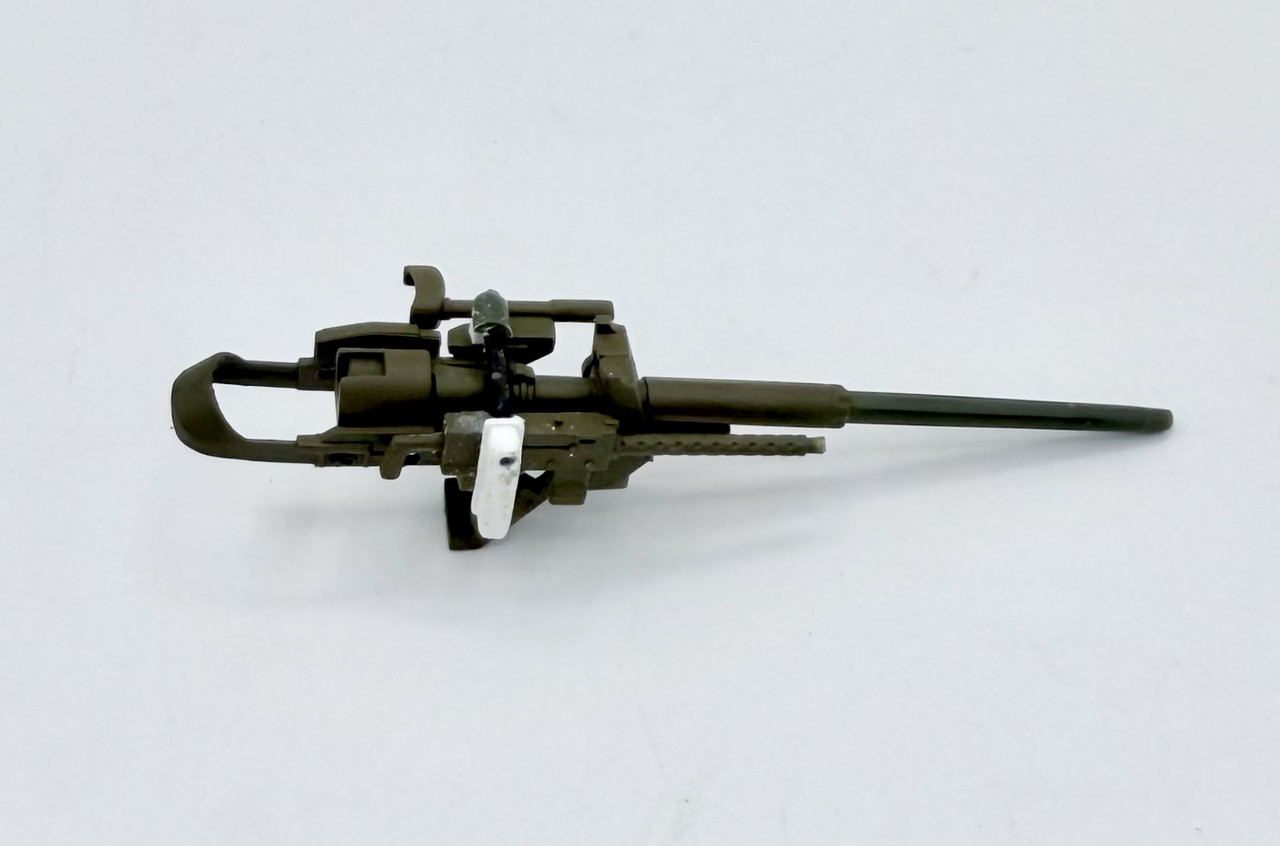
and after painting to match the B&W photos in the TM… ![]()
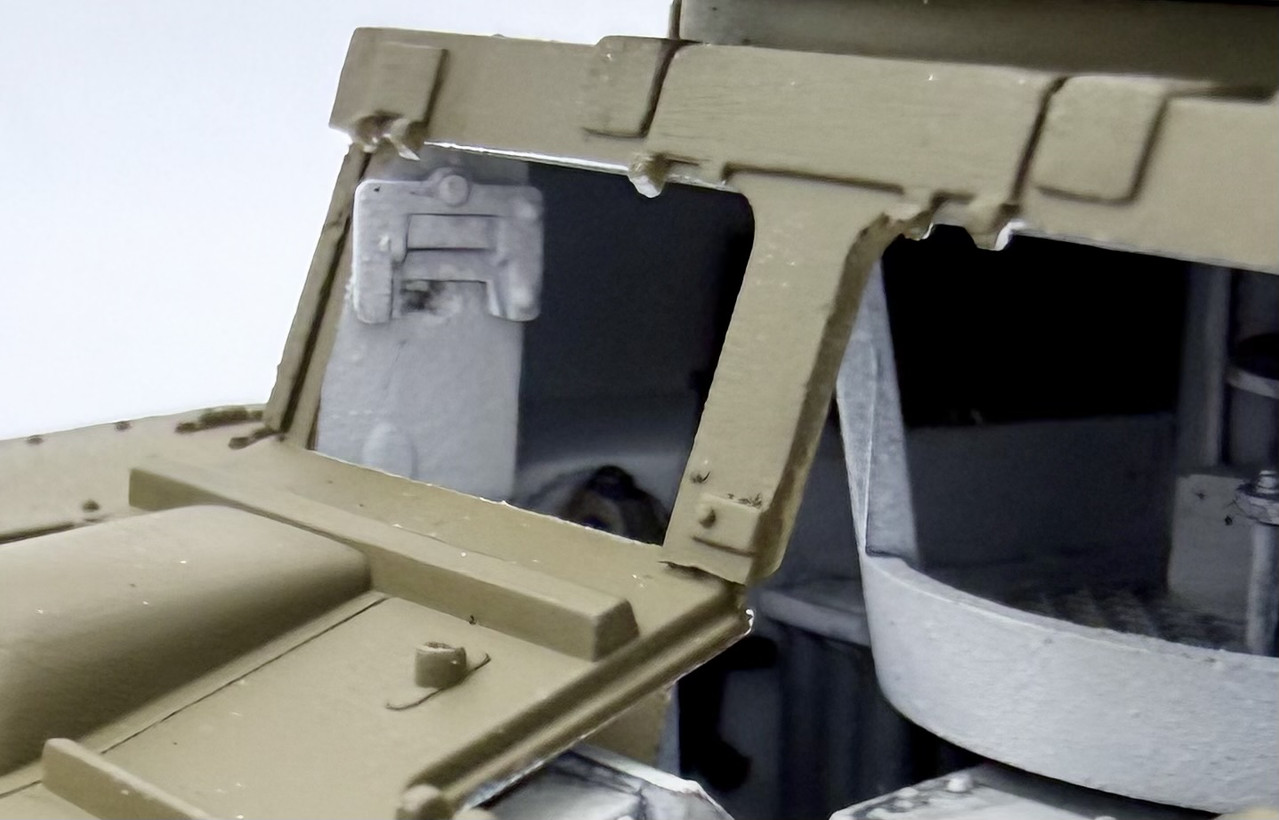
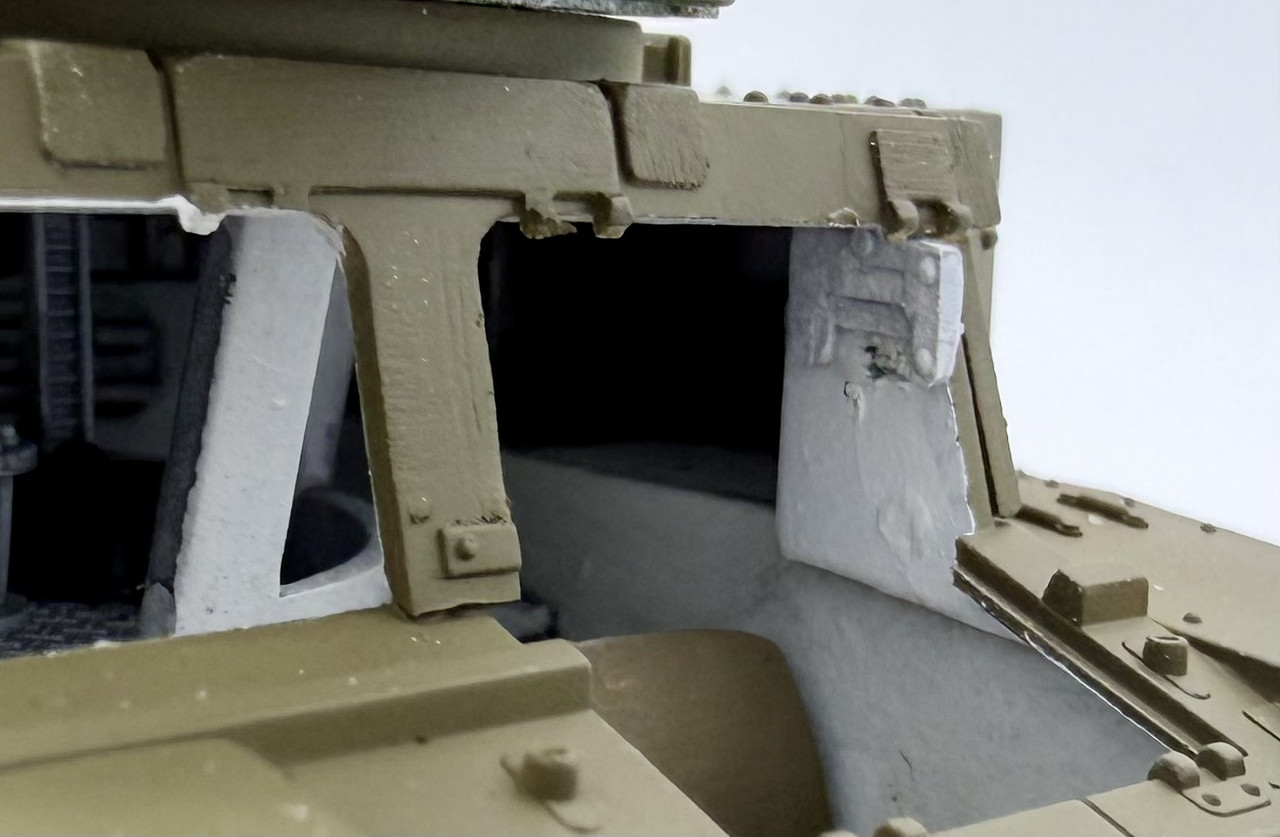
Next on the hull I drilled out the side vision ports for the driver and assistant driver… note to self, on my M3 Honey build it will be easier to do that drilling earlier in assembly…
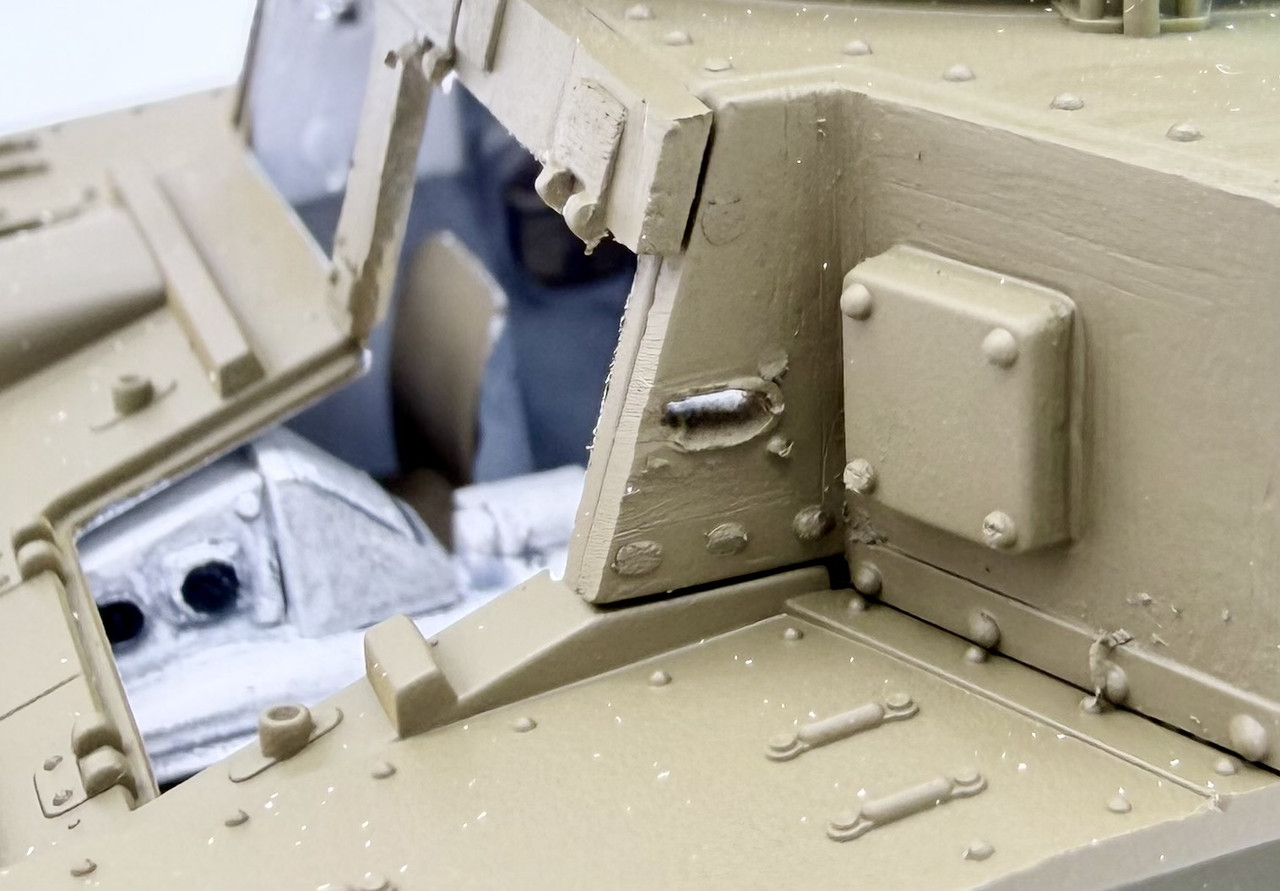
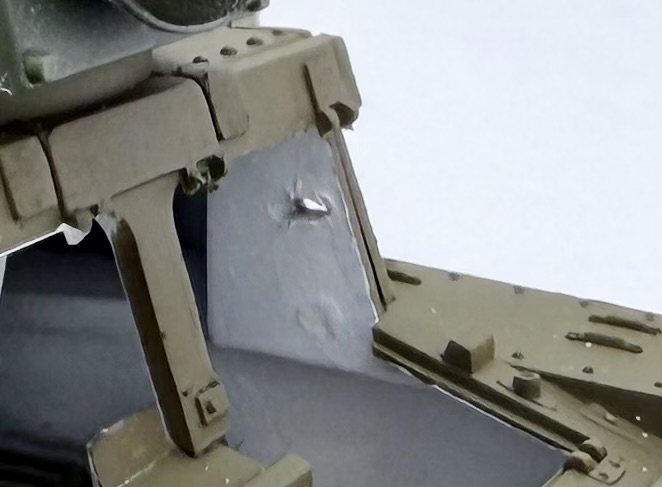
Driver’s side
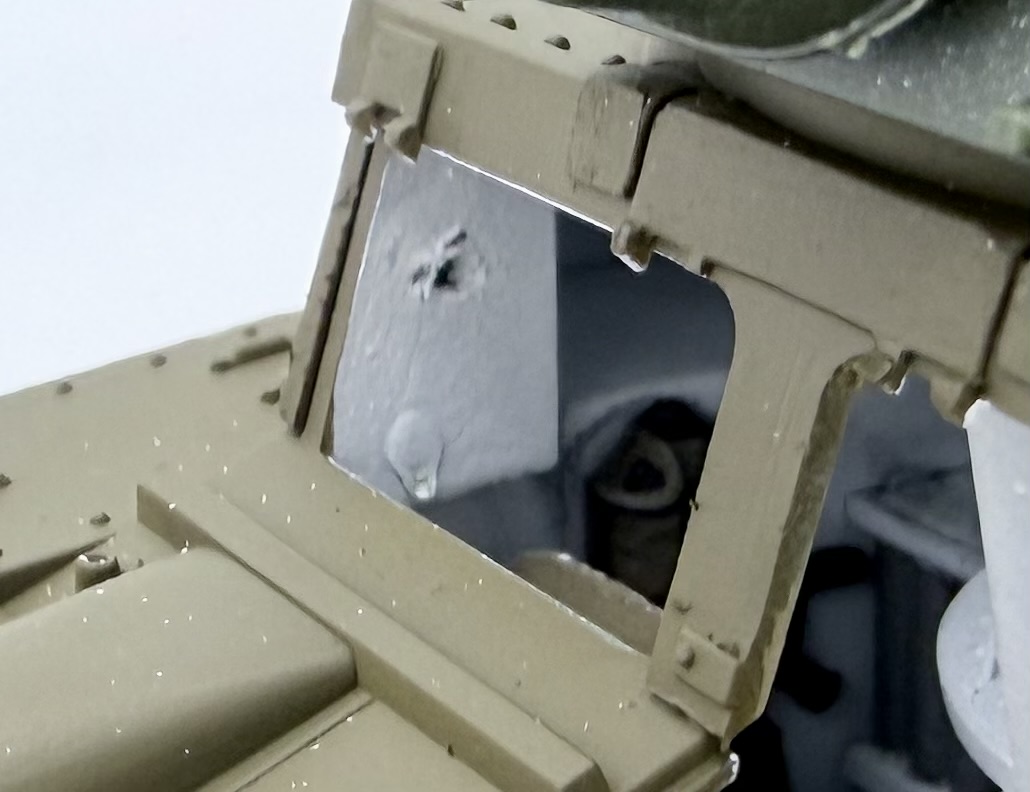
Assistant driver’s side
Lastly I 3D printed up these parts for the inner surface of those side vision ports
I’m just about ready to close up the hull… just a bit more work to do in there
7 Likes
Lots of progress over the past few days and especially today…
On the interior floor areas I added a wash, some dry brushing, and lastly some pigments
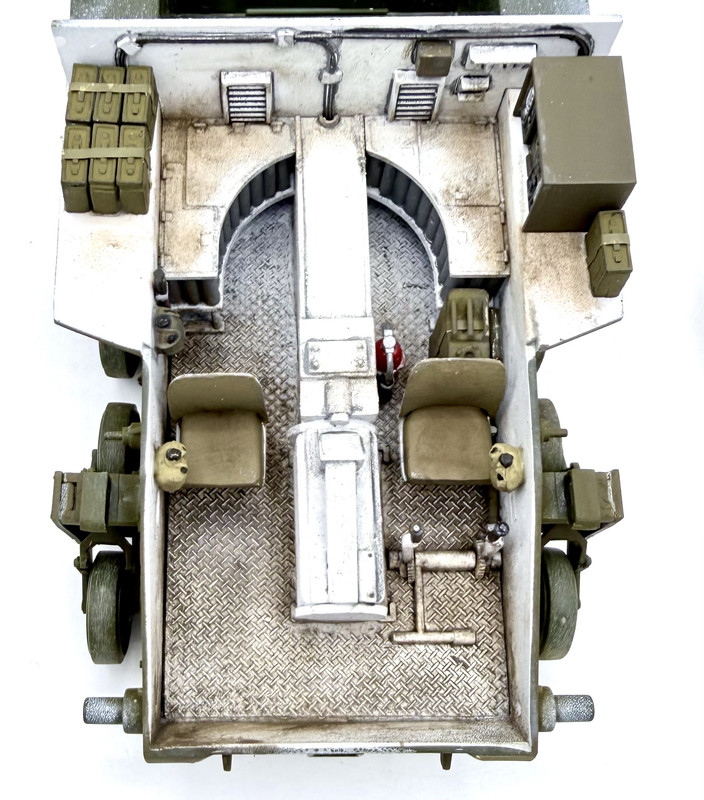
I also glued the main gun in place on the turret base

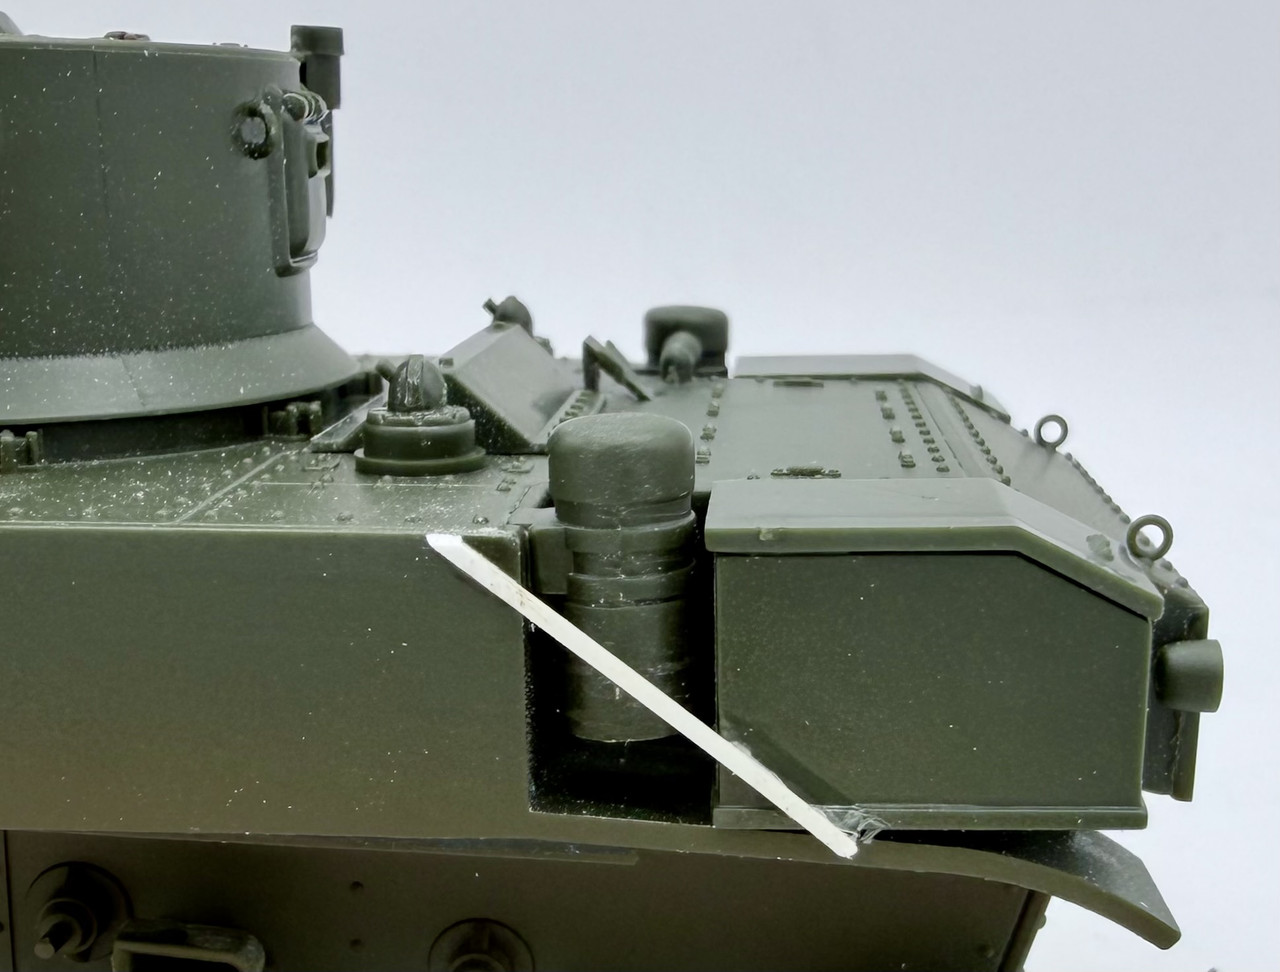
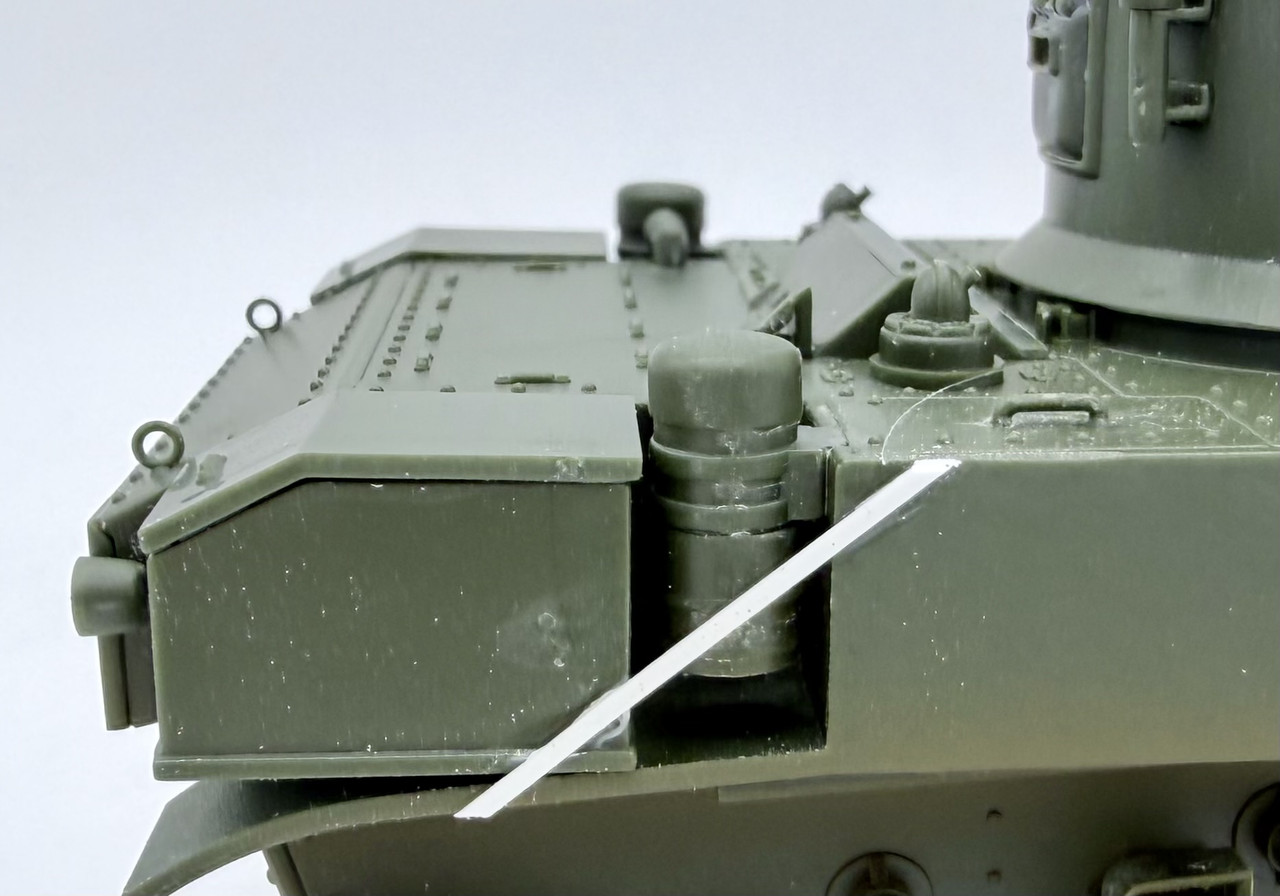
The tank that I’m modeling had some added bars on the rear hull near the stowage boxes, so I used some strip styrene to represent those
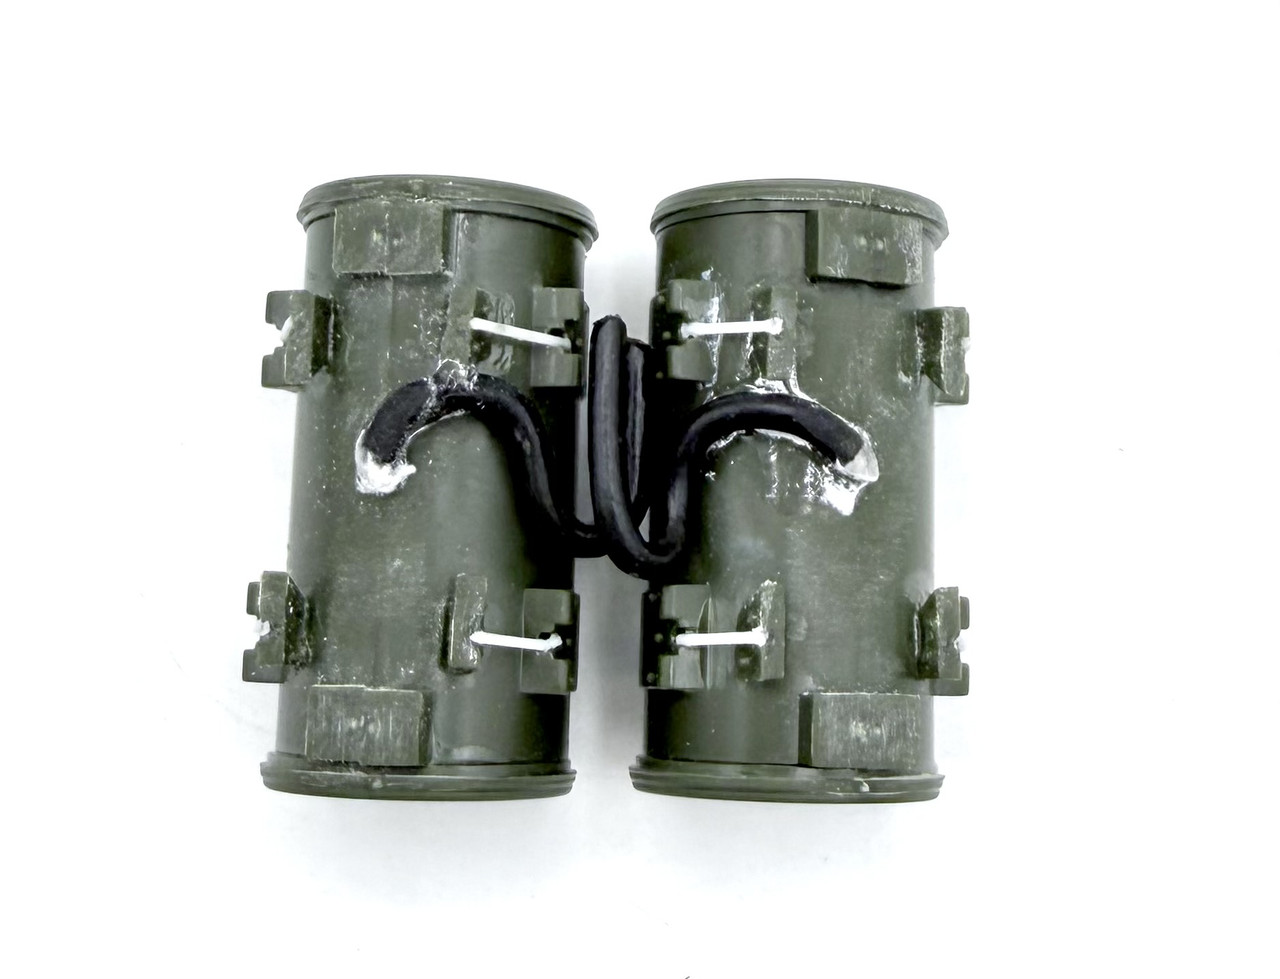
I had built the auxiliary external 25 gallon fuel tanks, but they were missing a few details. I added the bars for the quick releases using some Evergreen rod, amd then I added the fuel lines with insulated wire
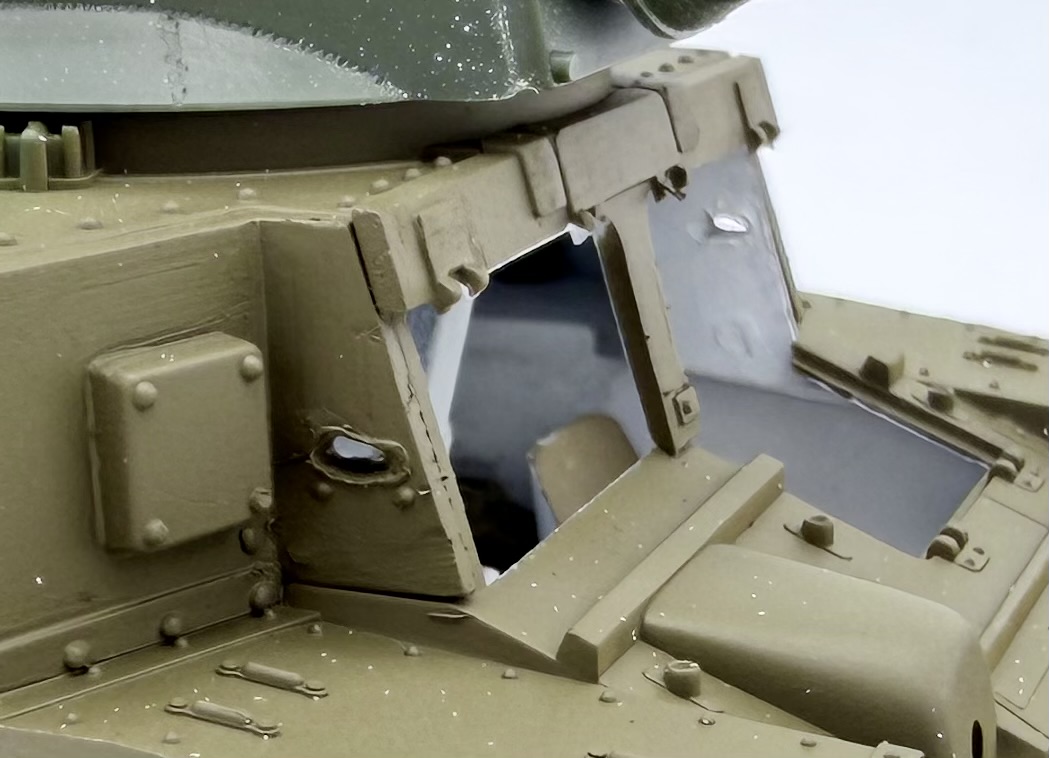
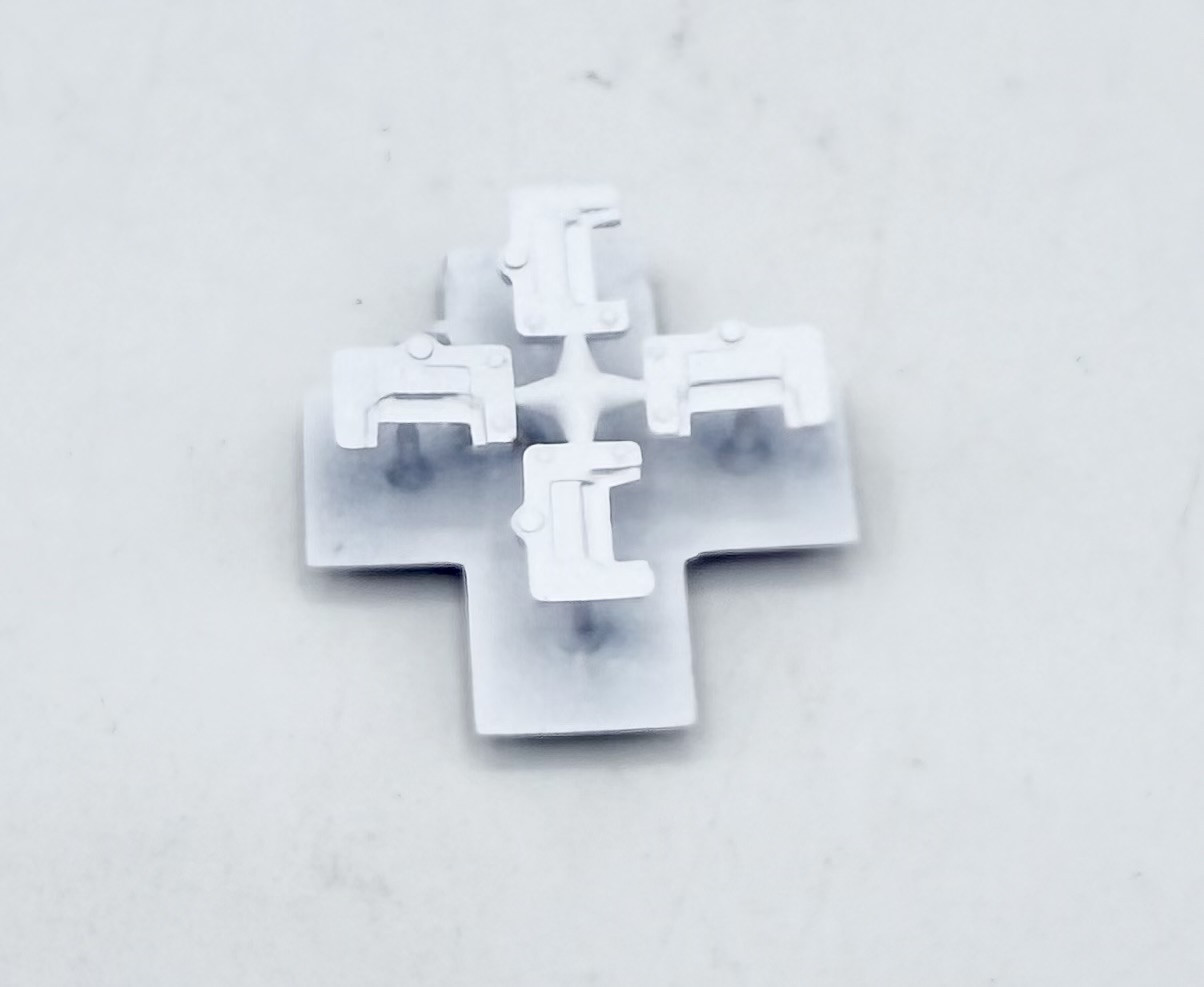
I added the vision slot internal protective flaps from 3D parts that I printed up
and lastly I glued the auxiliary fuel tanks, most of the hatches, and a few other bits in place.
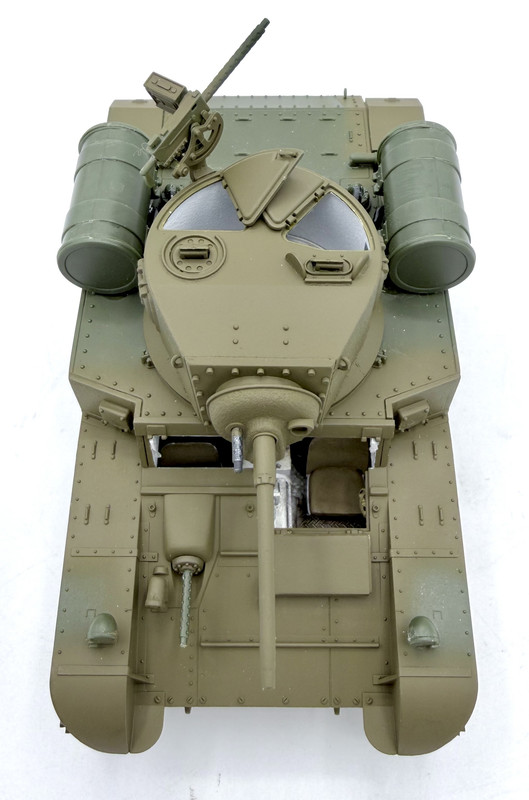
I still have a few more bits to add, but it’s nearing completion of construction now…
7 Likes
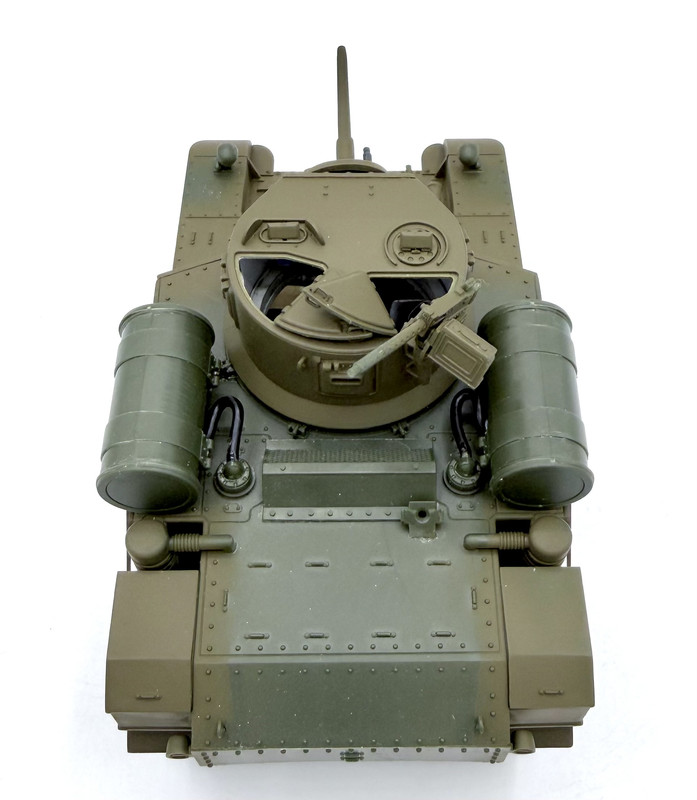
It’s been a busy last couple of weeks here with a couple of road trips a d some other family business going on, but in between all that I did make some progress on this build…
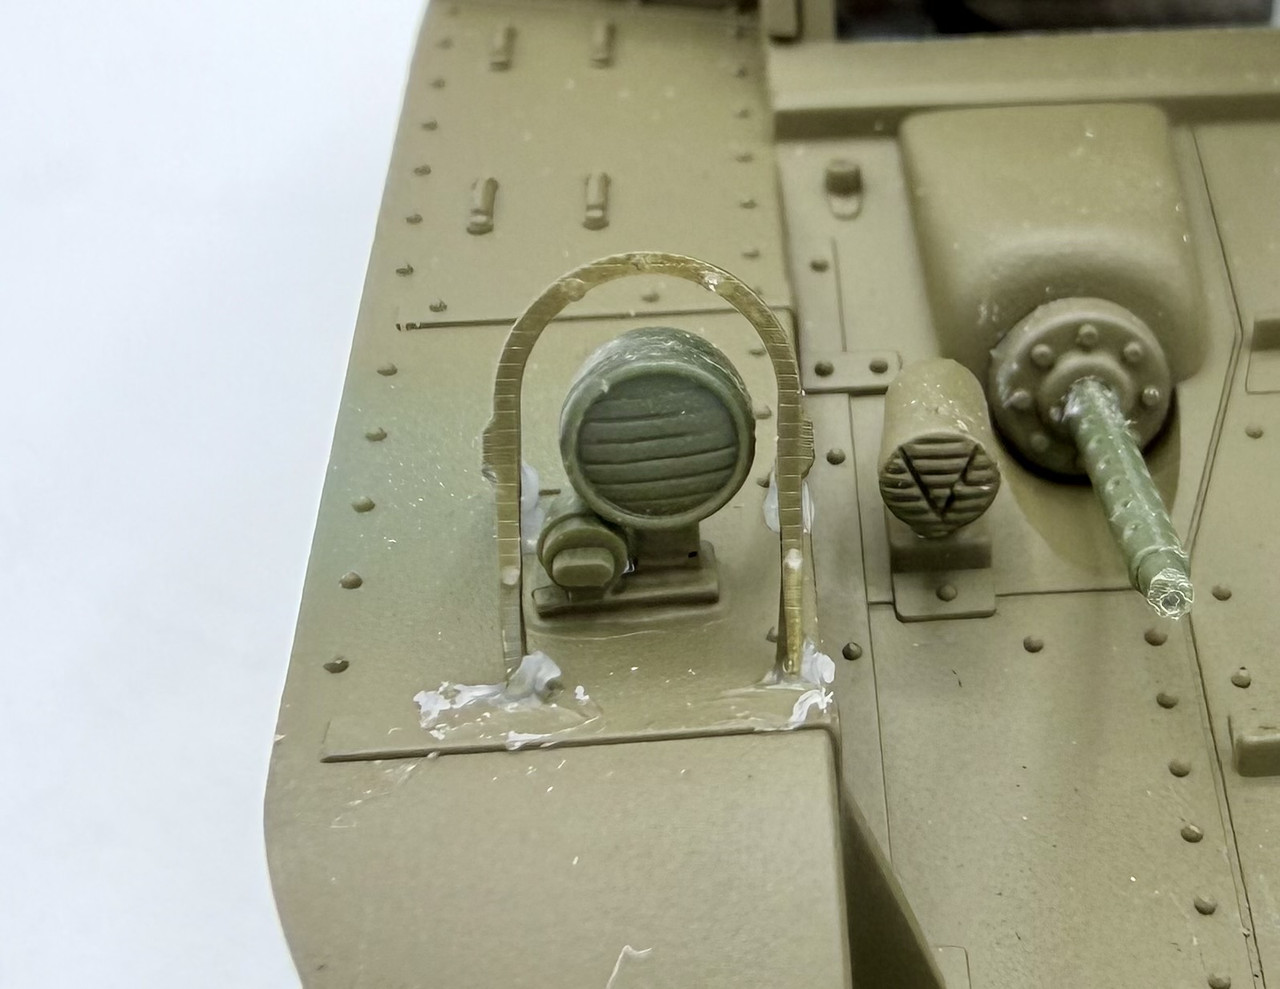
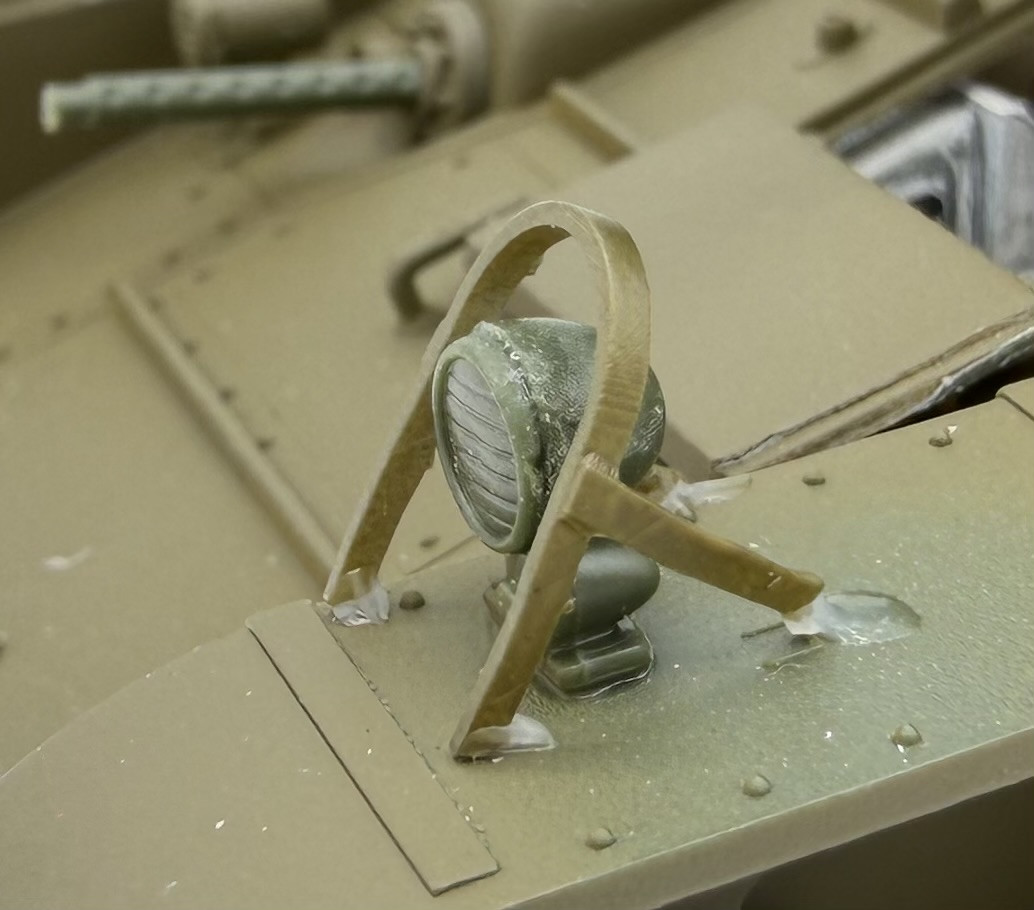
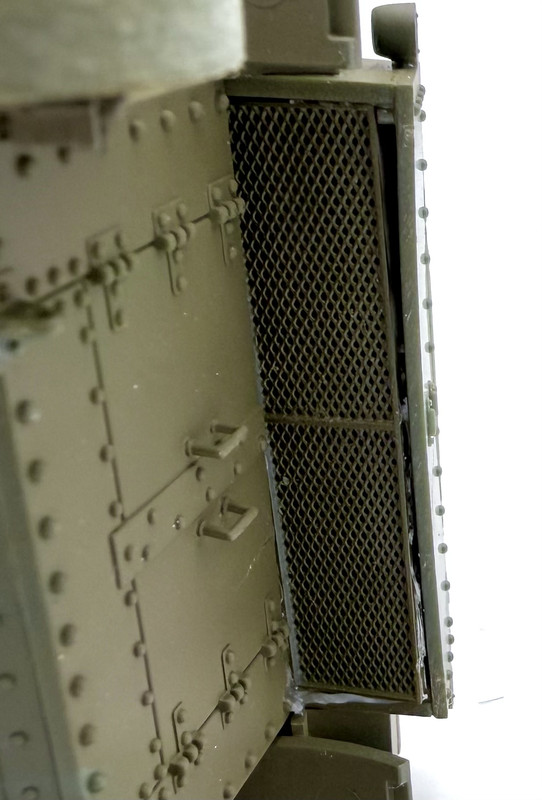
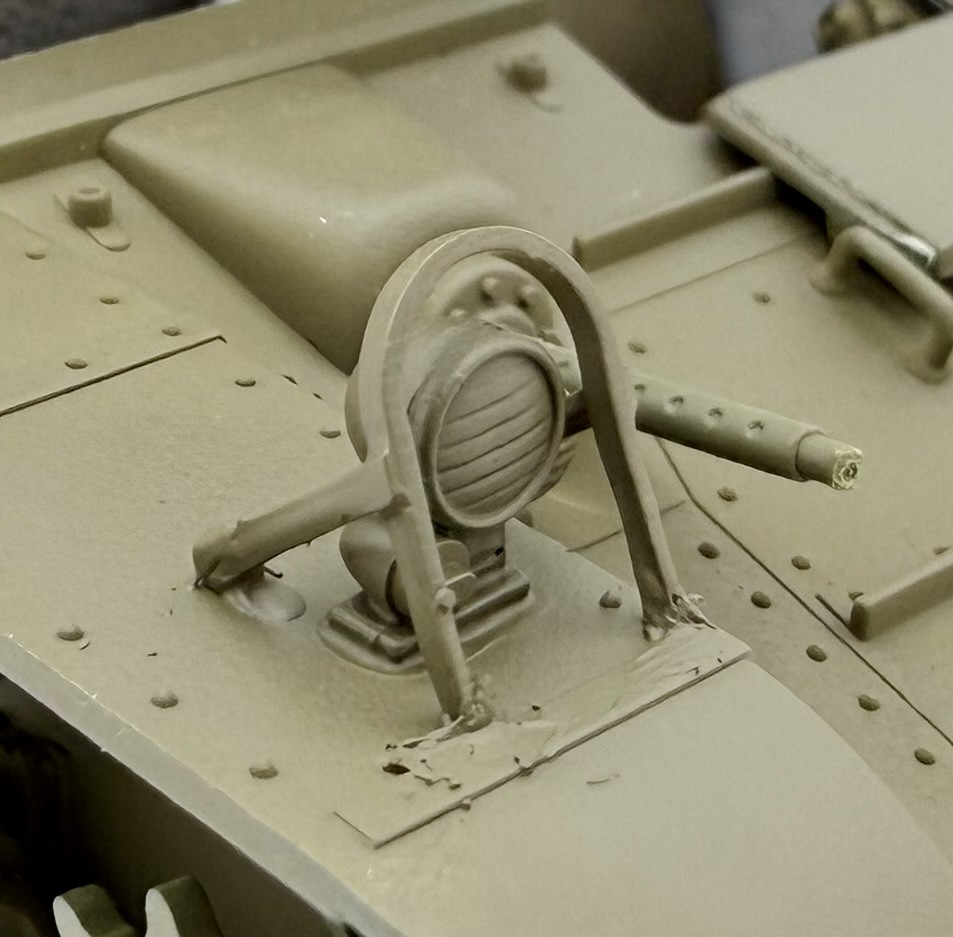
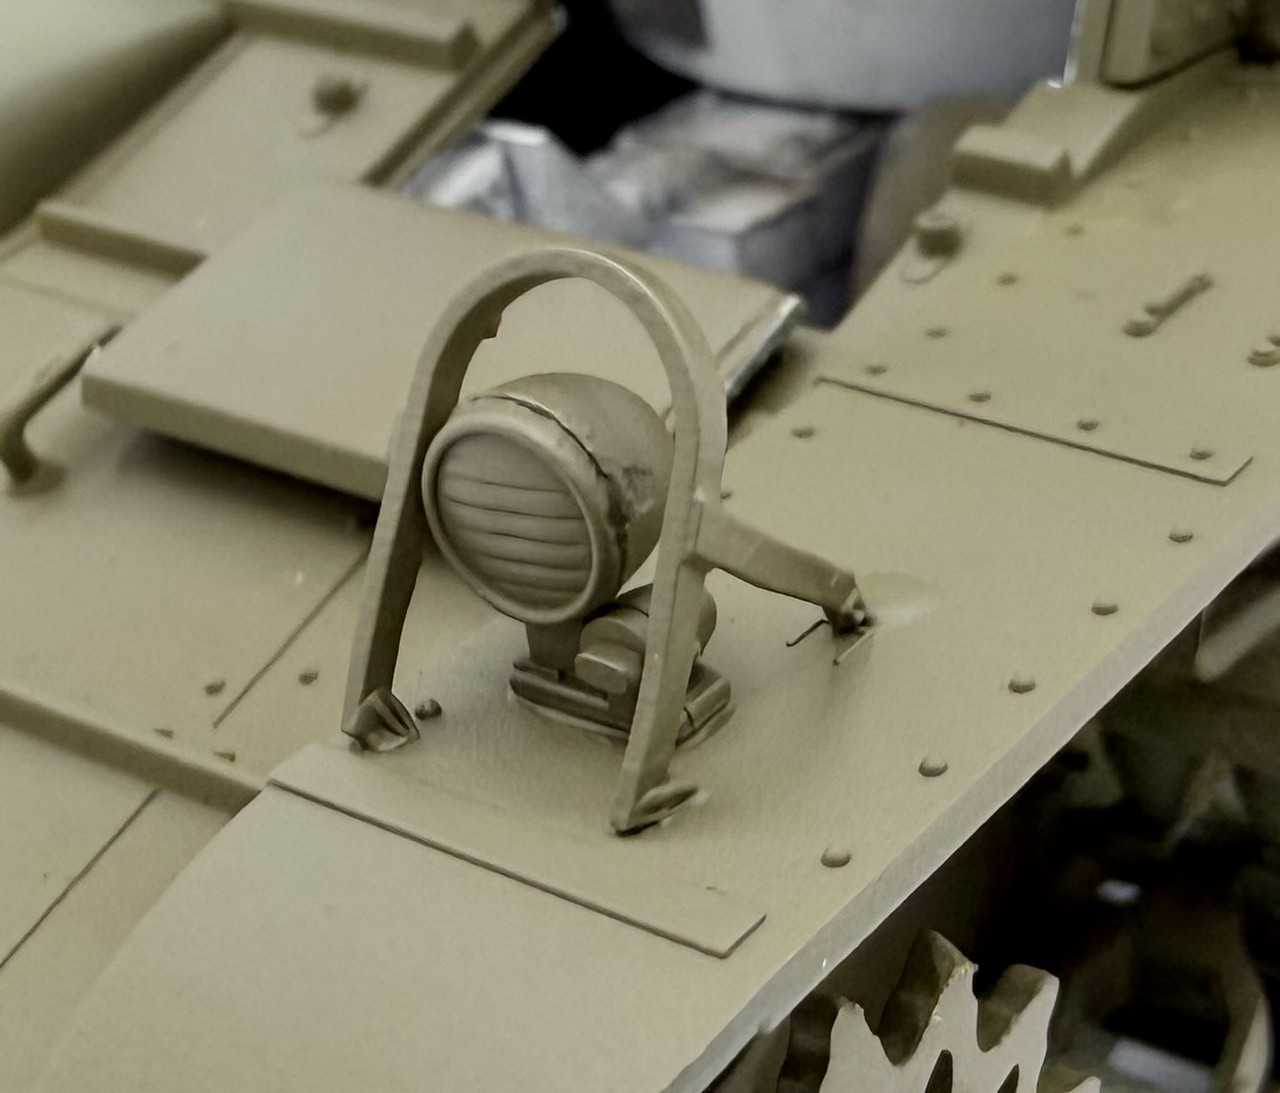
I added the 3D printed headlight brush guards and engine exhaust screen into place…. Note to self, the engine screen is better installed before the hull is glued together top to bottom on my next M3 build… some weathering mud should address the worst of this..
Then later in the week I finished up adding the Real Colors OD base color
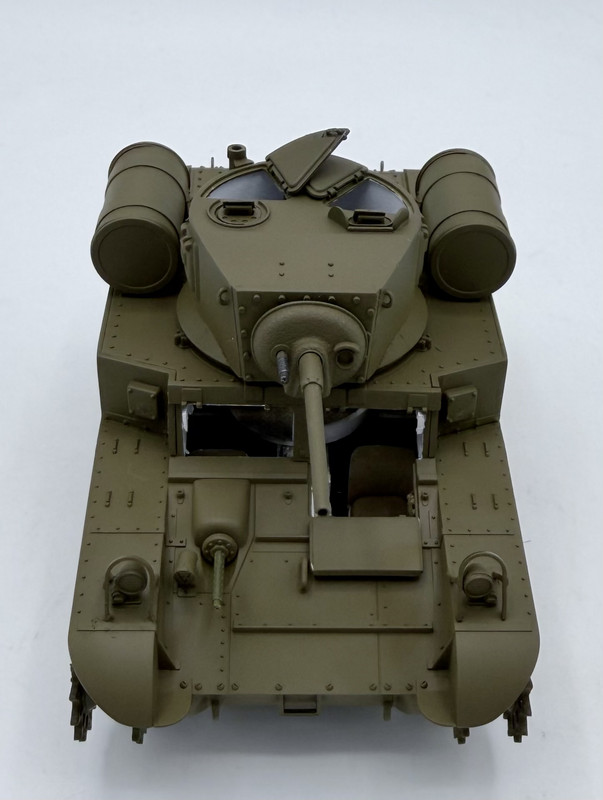
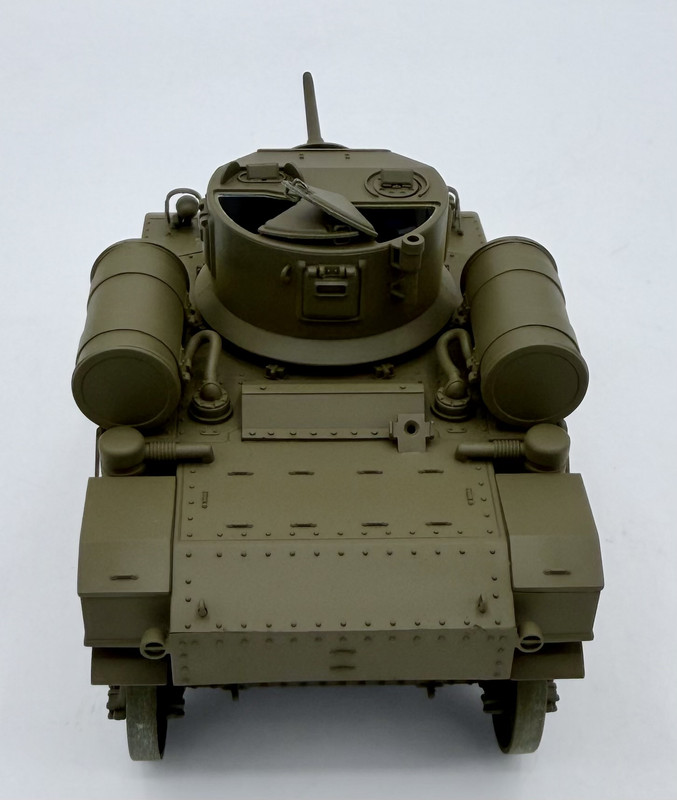
I only need to install the front armored flaps, then I can start on weathering and markings….
7 Likes