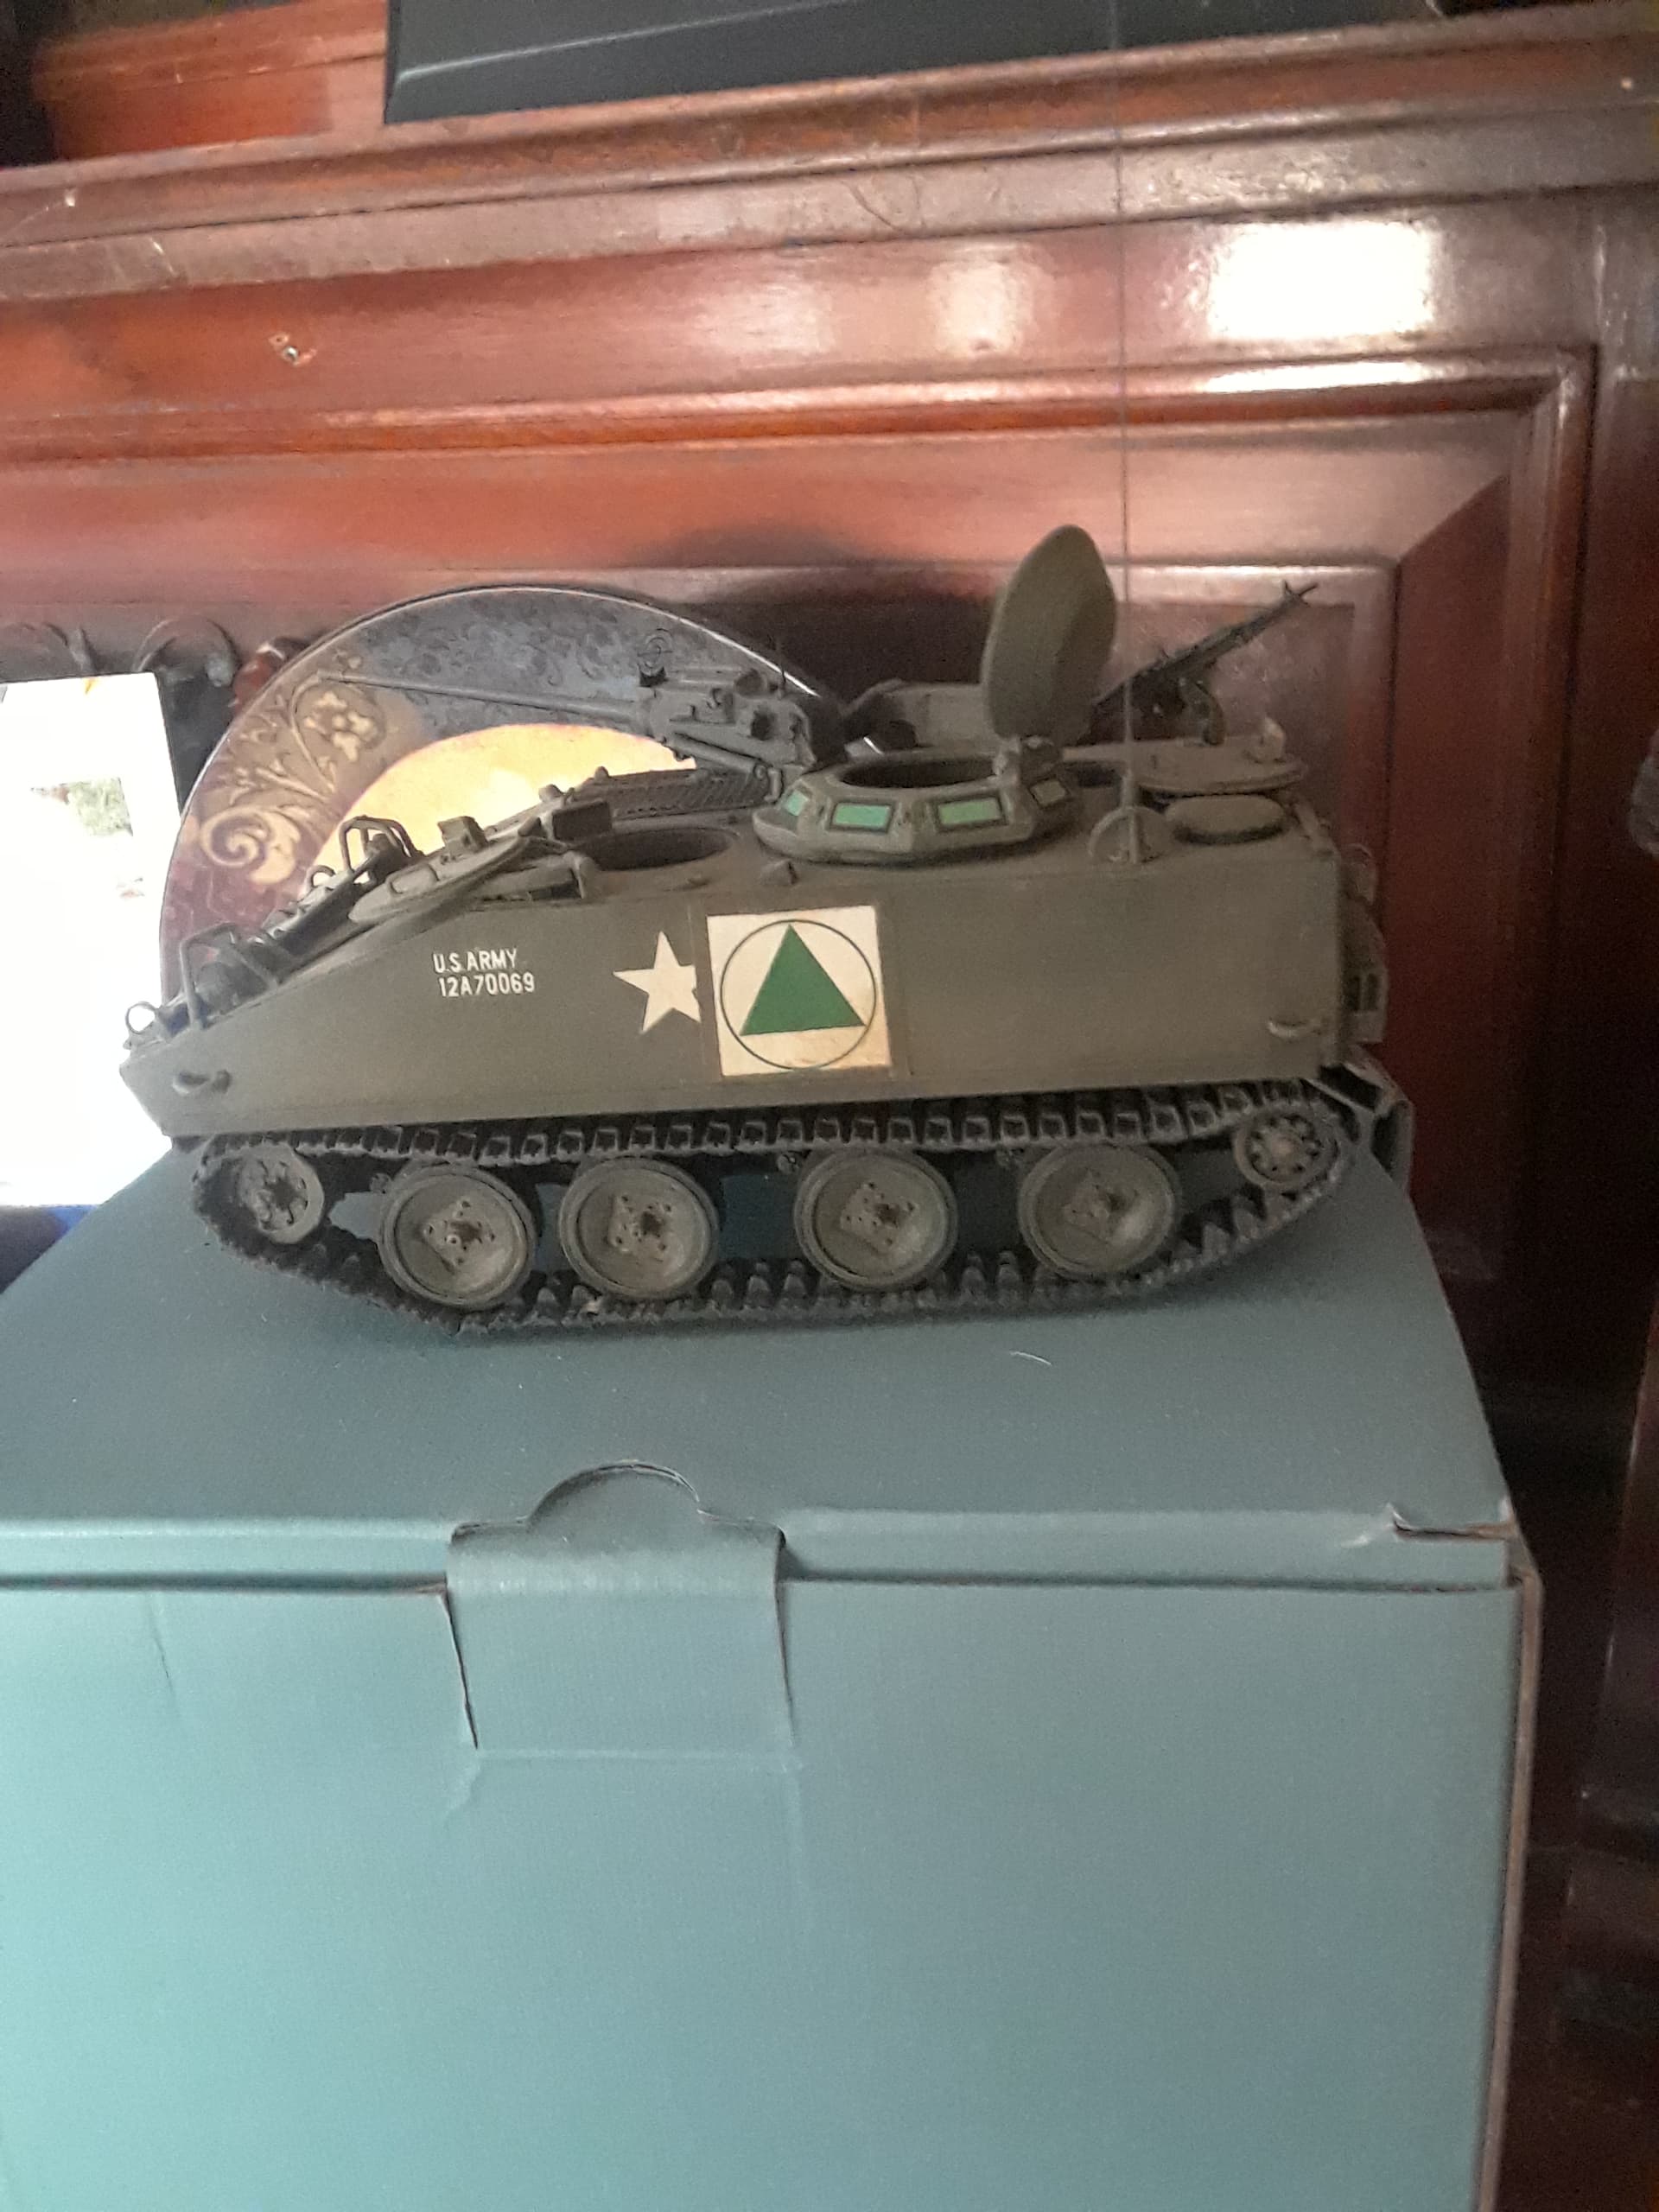
Picking this project up somewhere in the middle I suppose, I had planned on wrapping this one up by the end of this weekend but not to be apparently.
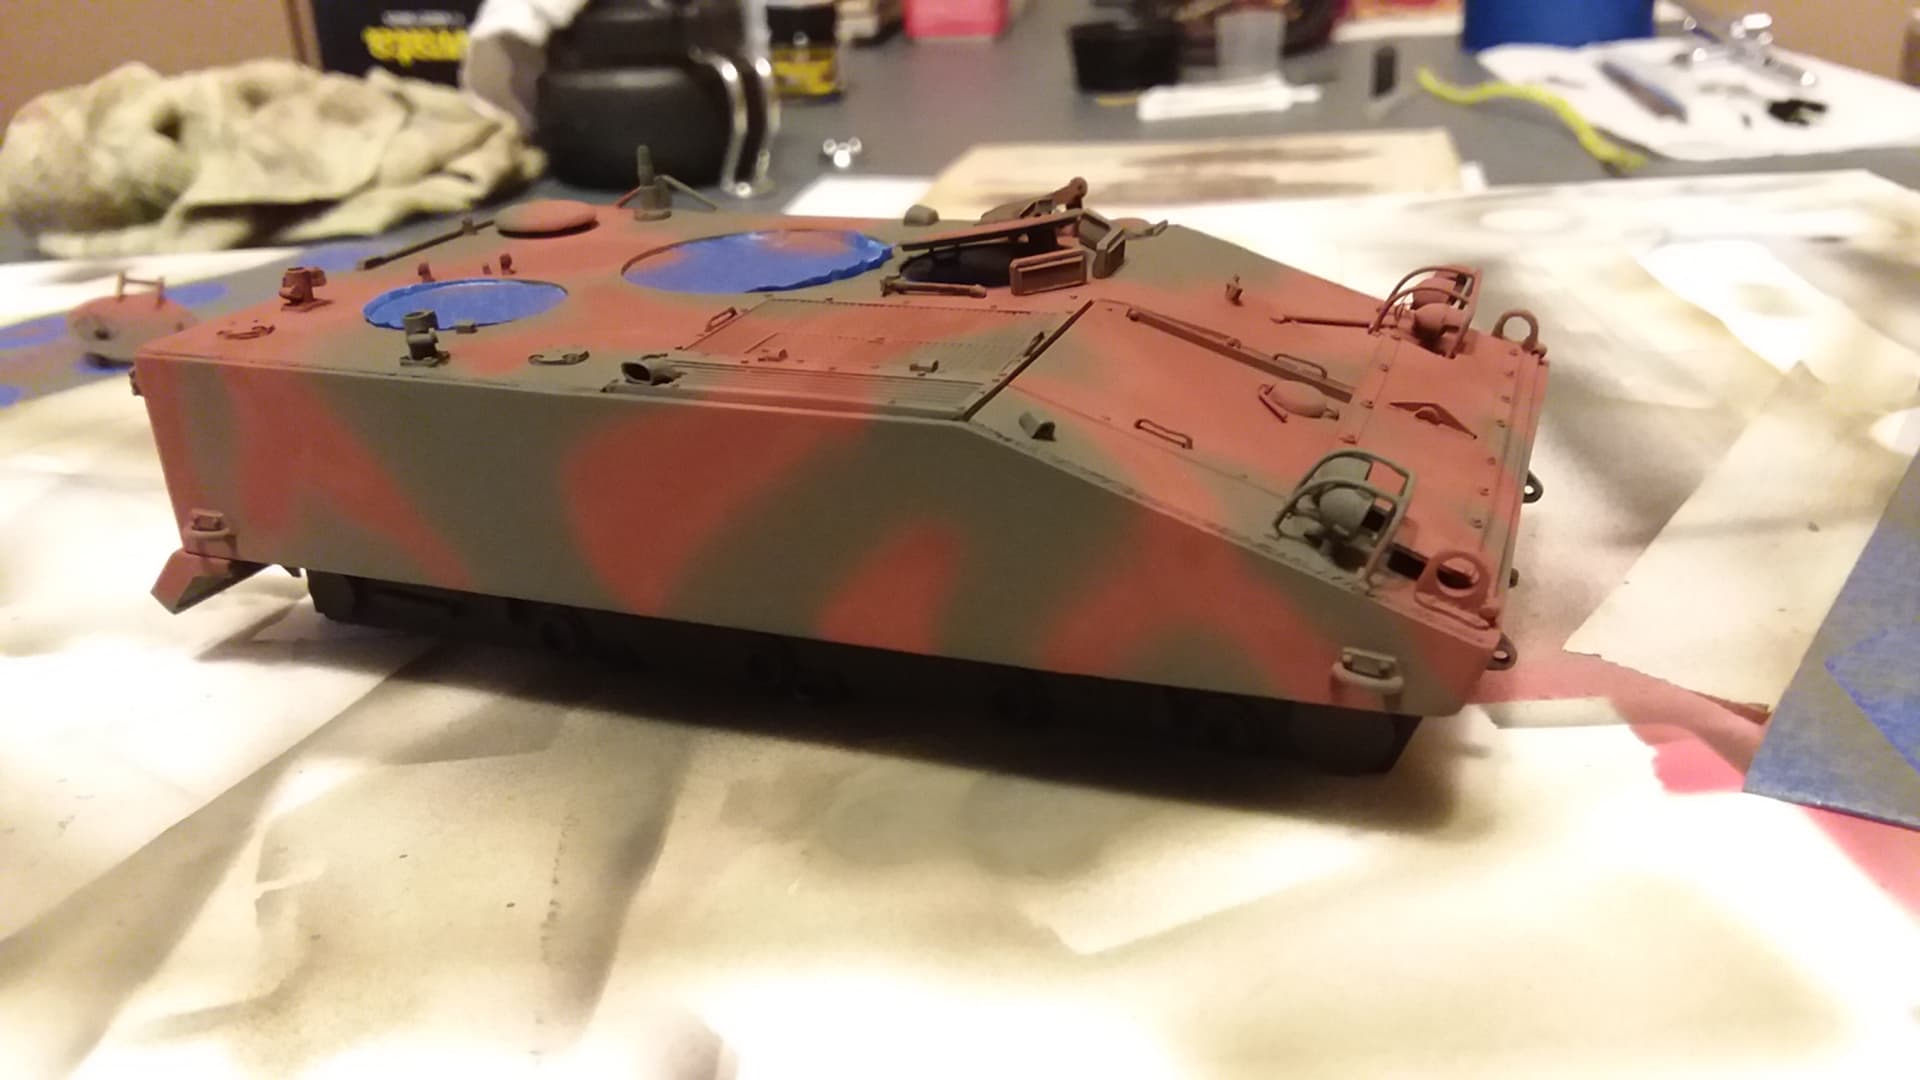
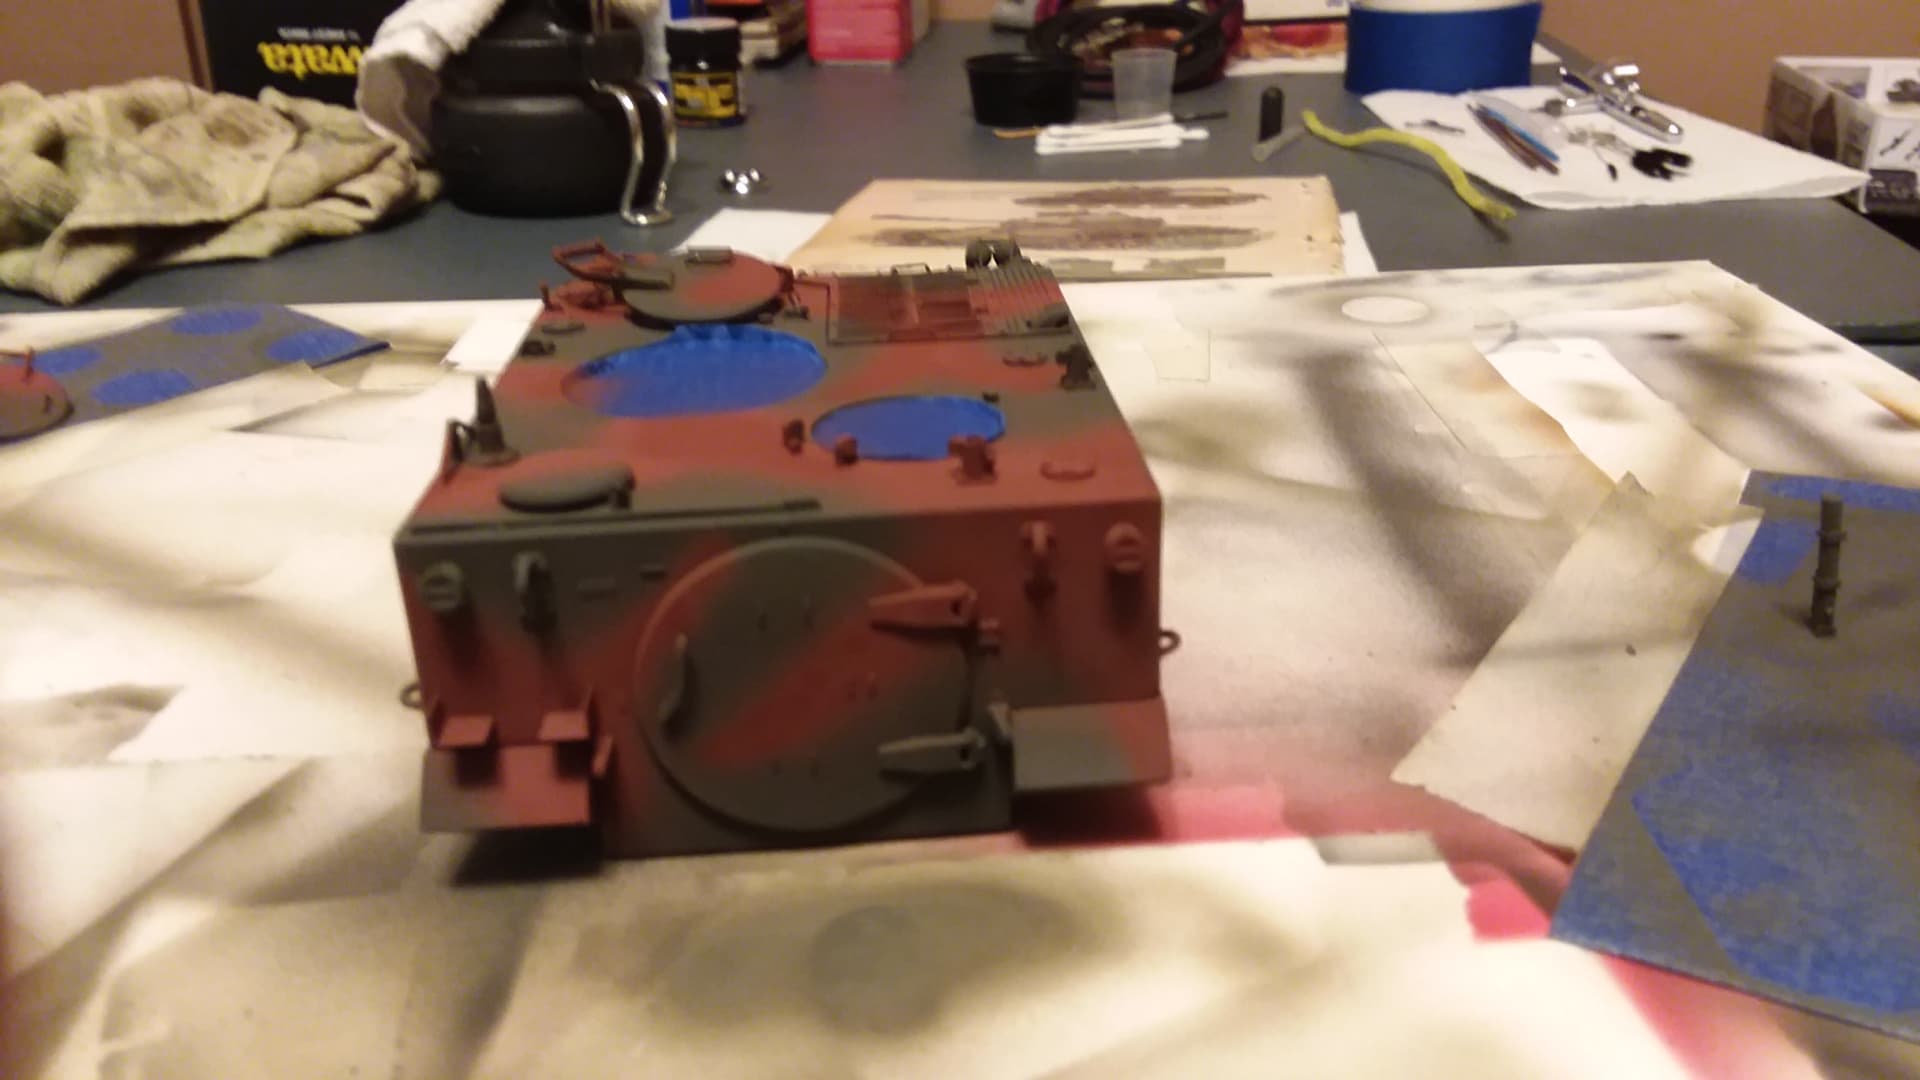
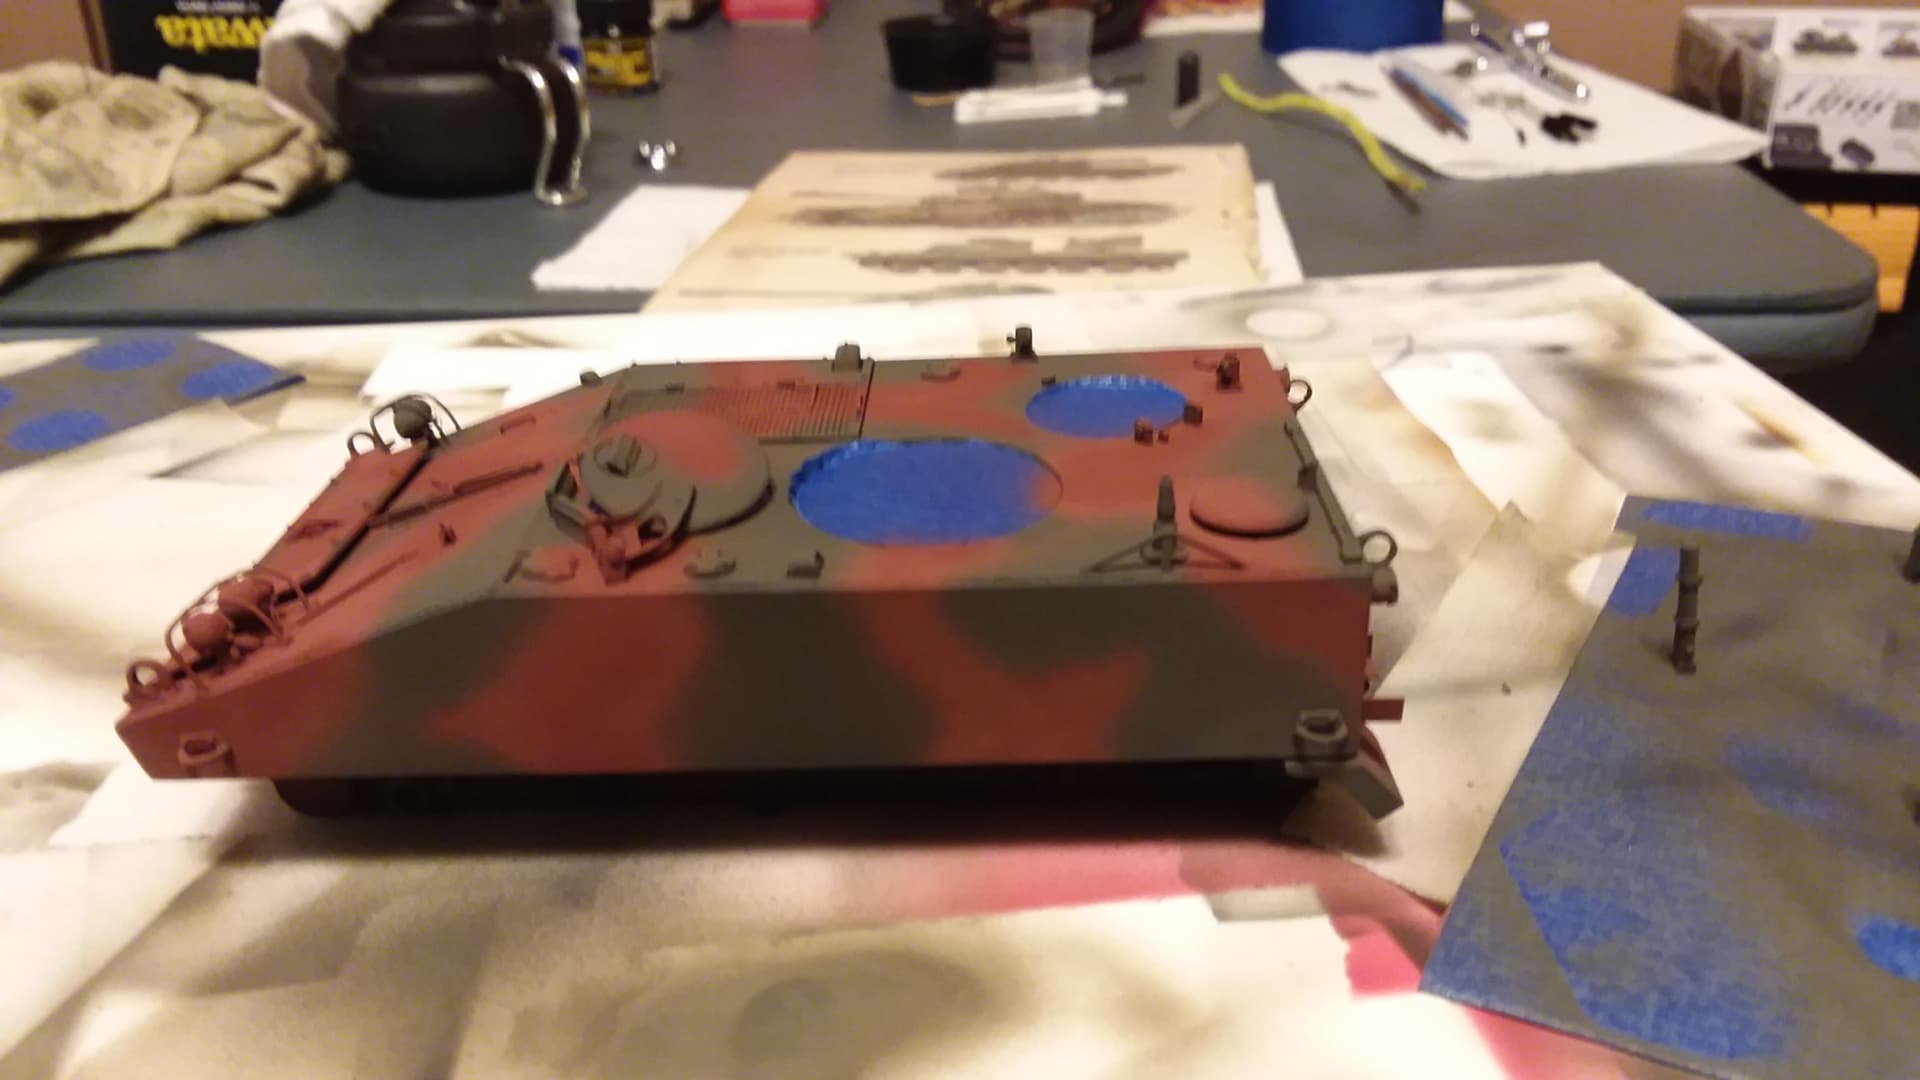
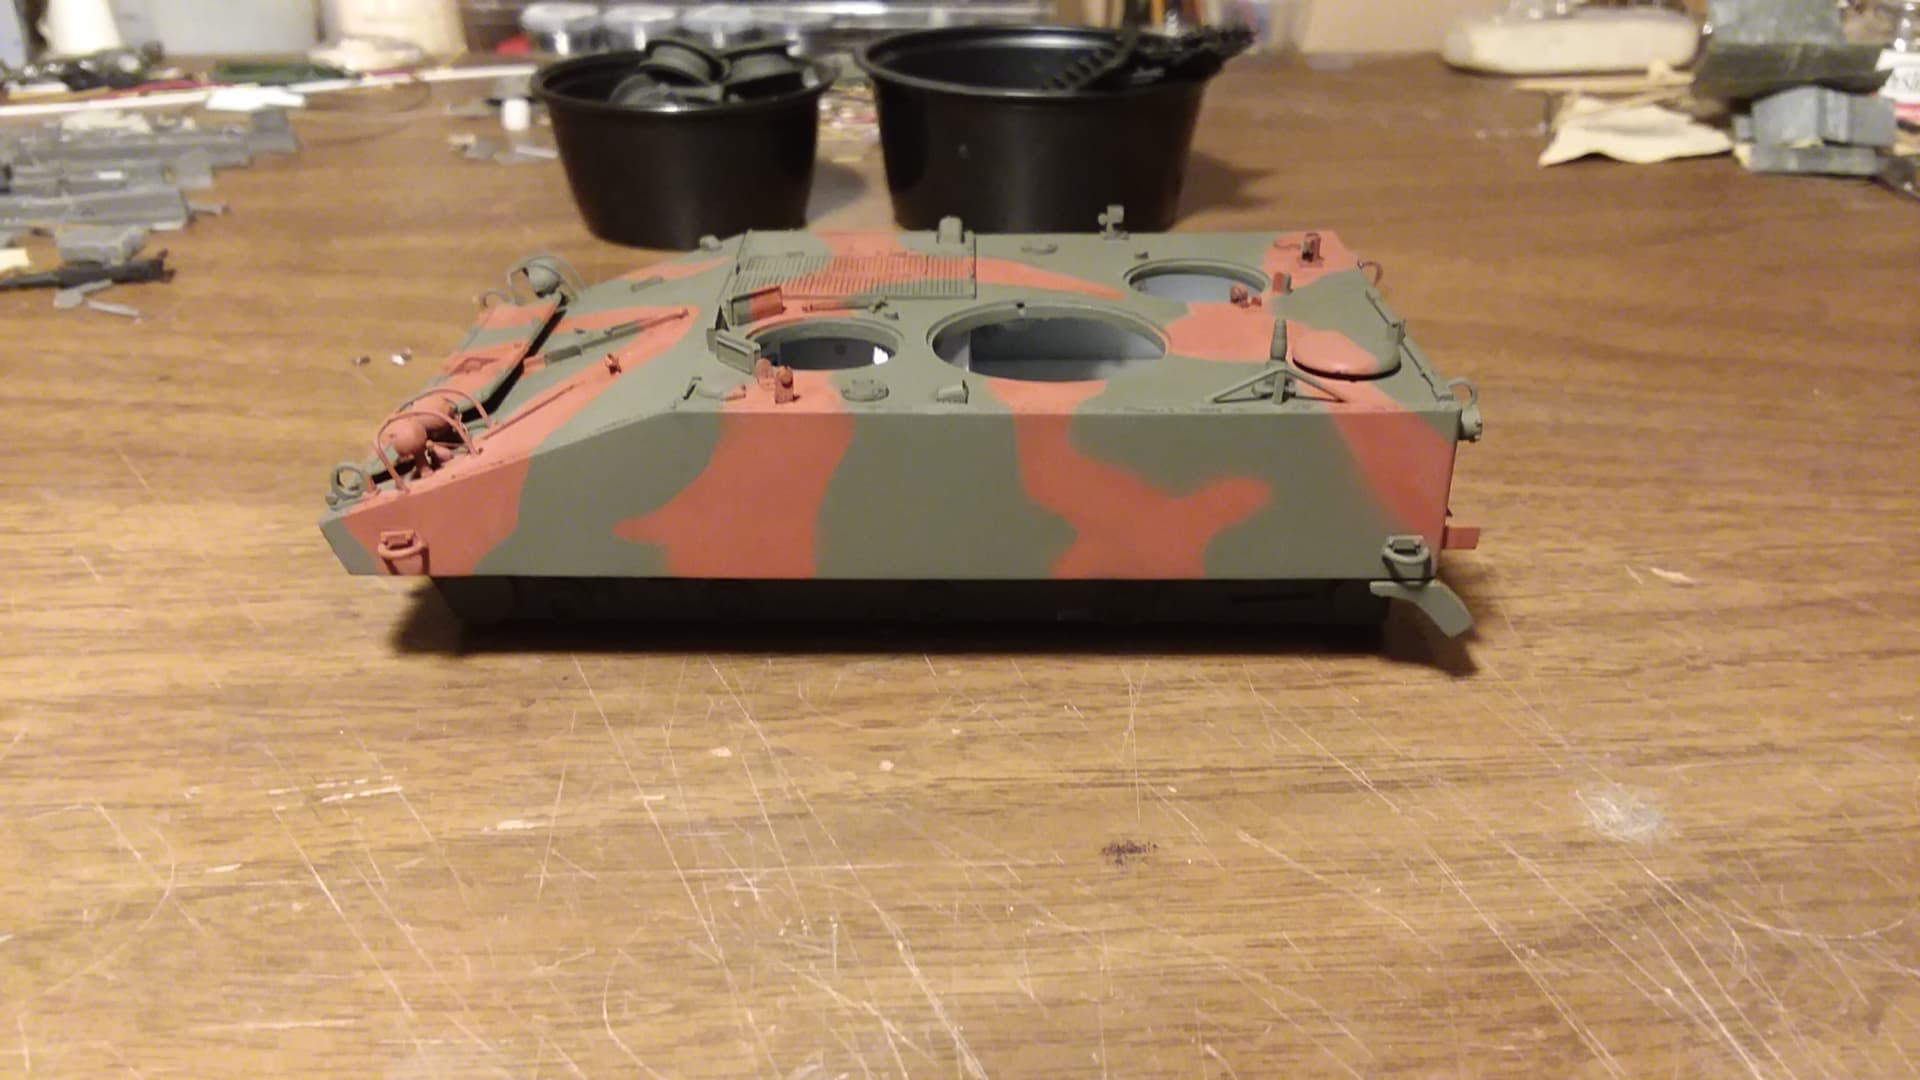
A week ago I was finally at the point of spraying the exterior primer then base coat and started to mask with tape using the old technique of rolling the edges to get a feathered edge on the camo pattern . . . this is where things started to go off course, let me explain by saying with this being a resin cast kit the peripheral parts are finely detailed (read fragile), while handleing the model I’ve managed to break a couple parts either off or in two so it’s been a tedious process, applying tape over or around these parts was gonna be risky so I convinced myself I could shoot the contrasting color freehand. Well here I go, turn down the airpressure to about 5lbs, thin the AK rotbraun real good and got busy . .
. . . well it didn’t look bad but it didn’t look good either. In fact it didn’t look right to me, even though I have no real reference for an ARVN camo pattern for the M114 I was at least trying to mimmick the pattern typically seen on their M113’s. Problem was the overspray even at low pressure was too obvious, my little Iwata can spray a remarkably fine line but regardless how much I tried to stabilize my hand and the model it wasn’t effective to produce the desired effect.
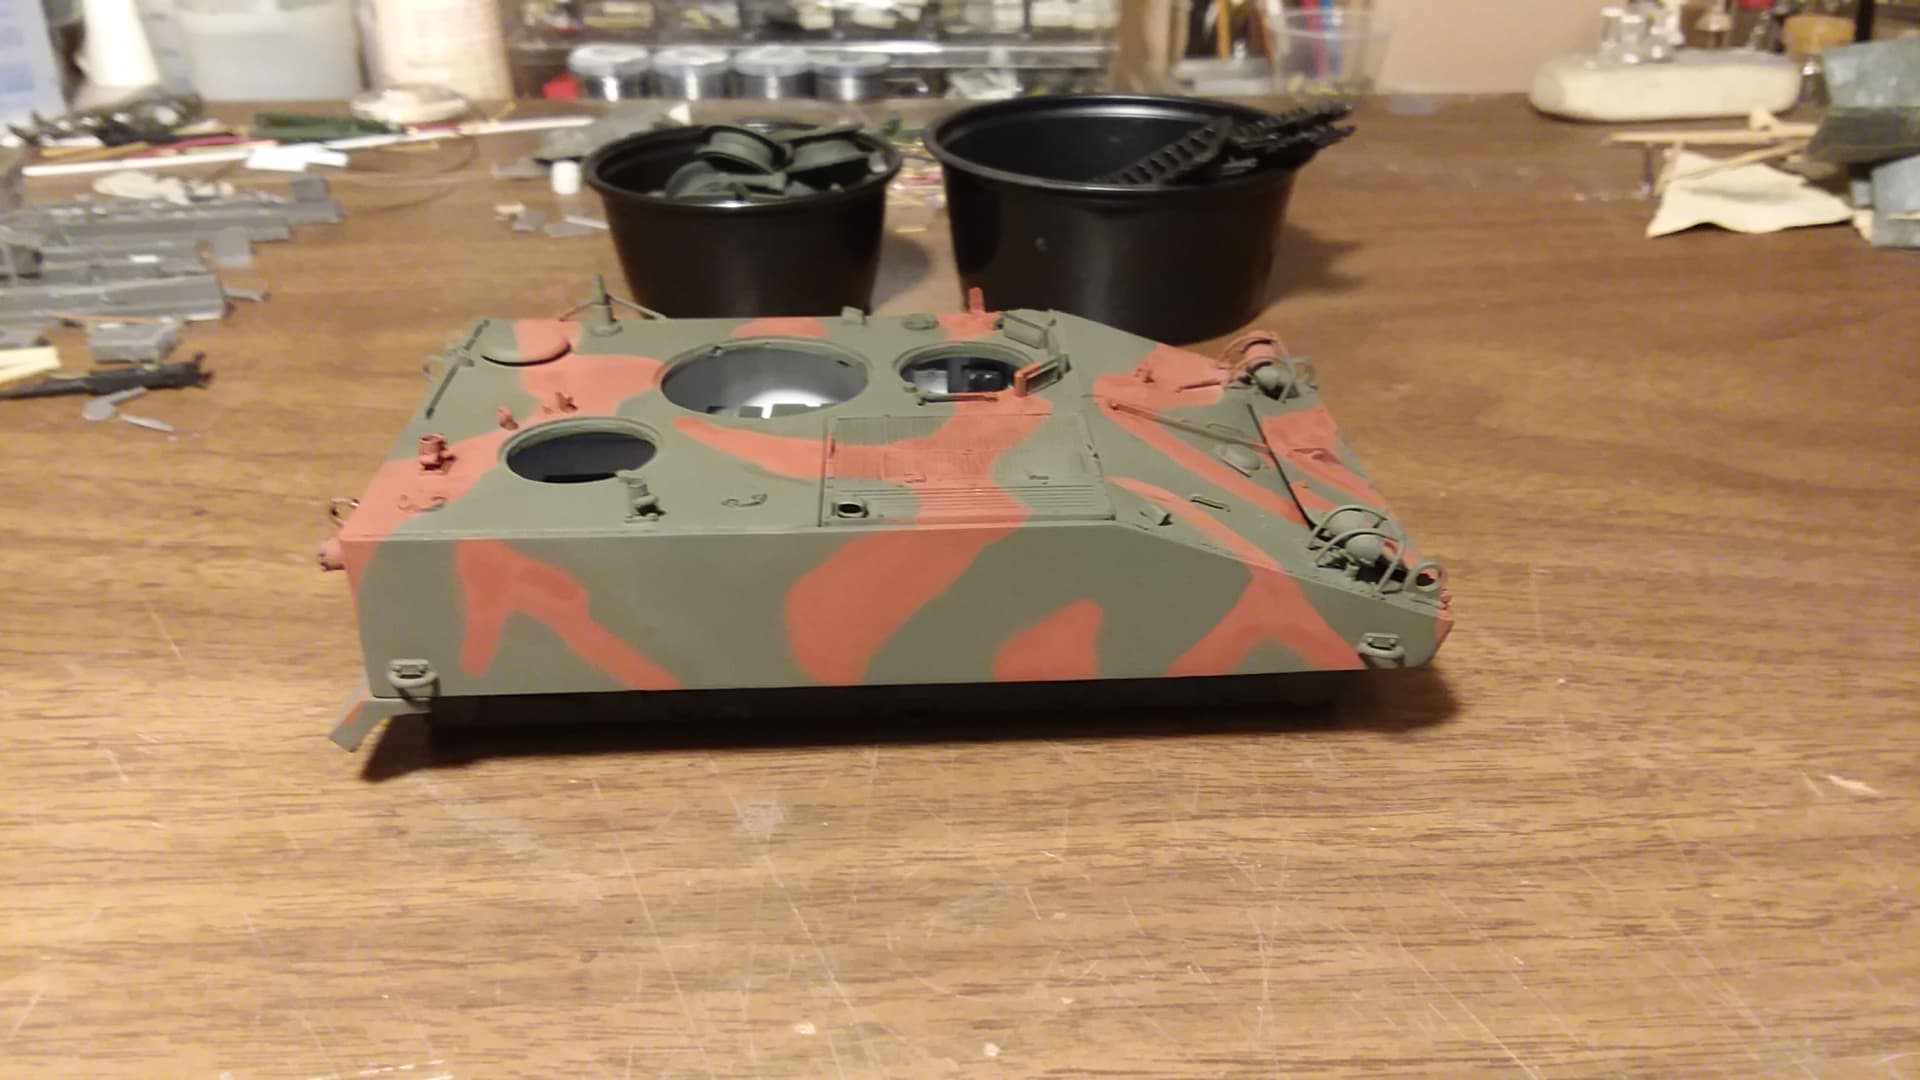
Okay new plan, ordered the AK Masking putty from Scalehobbyiest, got it late Friday and rolled it out in strings like play-doh and laid out the pattern I wanted to “save”. Well this stuff is intresting to work with, given enough time it sorta sinks into itself, rather than sustaining a raised edge it levels out so I didn’t get the feathered edge I want. BTW unlike as advertised it wiil pull up the base coat (and primer even though the model was washed) and it will leave behind residue that can be troublesome to remove from crevices or areas like hatch springs. Anyway looks a bit better than my freehand attempt . . .
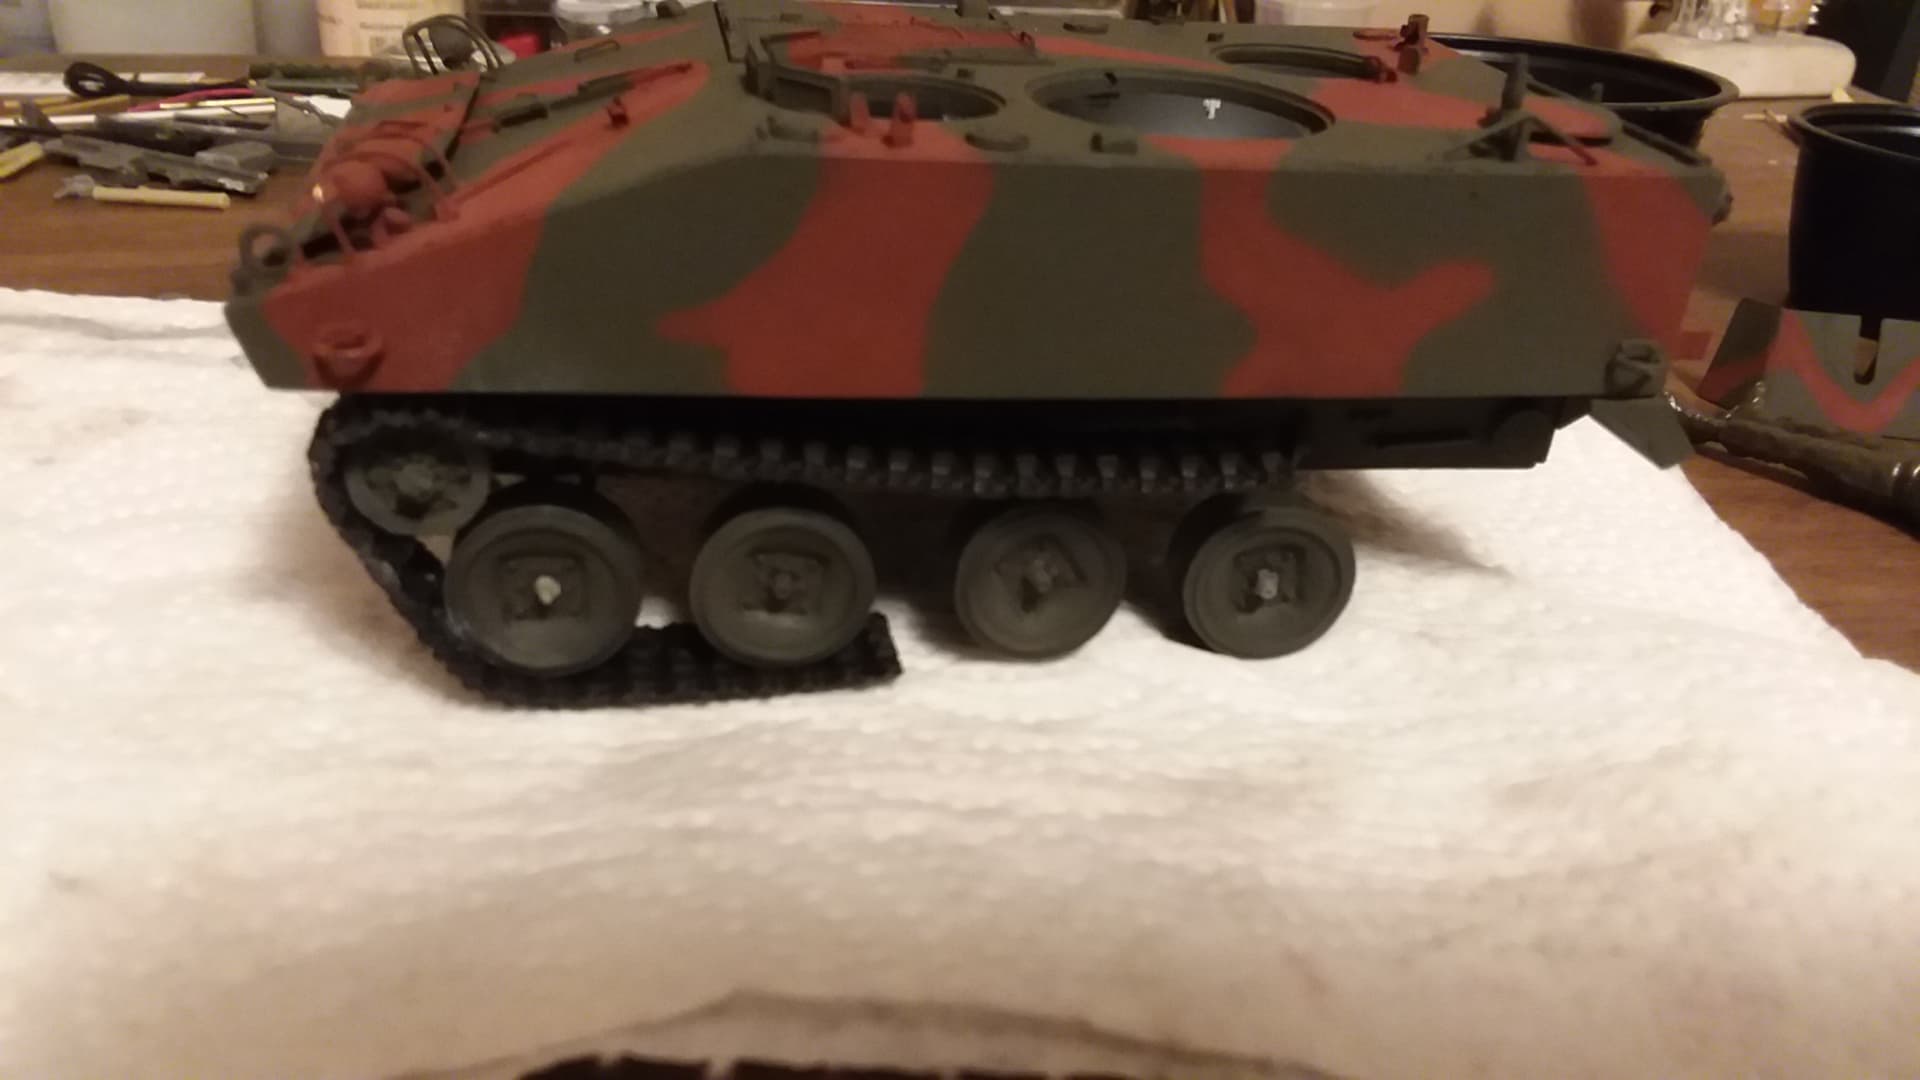
Ah things are moving along now. It’s time to start adding the road wheels and track lengths, I’ve been dreading this since I opened the box on this kit.
The directions per usual are sparse on directing but do suggest some means to assemble the running gear at a 10mm ride height. This is where I drove the bus off the cliff, I instead used the shocks to determine the position of the front and rear road wheels then attached the two middle wheels to match the pevious, then began the process of dipping the track length in boiled water and wrapping the track around the drive sprocket and then glueing the track to the sprocket and sprocket to the hull. This process of dipping, bending and argueing with the CA glue went on for about four hours switching from one side to the other until I had the right side complete. Early on in the process I thought “sure does sit kinda high” but I kept going with it until I referenced some pics and realized the front wheels and track angle is just wrong . . .
The paint looks really good! That really is unfortunate about the running gear and tracks, I hope you can fix it easily!
When finished does this go in your huge awesome dio?
Absolutely young Jedi, it’s had a spot from the begining. That’s the neat thing about this hobby, if you screw it up you can generally fix it . . . or disguise it. Kinda like you’re doing with your guntruck rite.
Sadly, I’m learning at your expense; I’ve had one of these in my stash for something like 15 years or so and being mortally afraid of resin tracks and especially the fitting of them, this is extremely useful. I’m desperately keen to build it (though not for Vietnam) but have been deterred by the tracks. It’s not as though anyone makes after-market ones, or at least that I’m aware of.
It is a well detailed little model though; keep at it please!
Actually, Accurate Armour’s M114 kit comes with an interior. I have their M114A1E1 kit. Unfortunately mine was missing important pieces. I bought it about 15 years ago but only found out not that many years ago.
I knew the running gear was going to be an issue on my Accurate Armour Striker as well Terry, Thats why at the very beginning I opted for the surgery approach and the use of the lover hull & running gear complete from a donor AFV club Scimitar kit I had. Very thankful I did that now. I also had it on very good advice that even with the tracks living in boiling water until you could reshape them and setting them on the wagon how you want them, over a period of time, they just spring back into what ever shape they want, sometimes snapping. Keep up the great work and dont let it beat you …
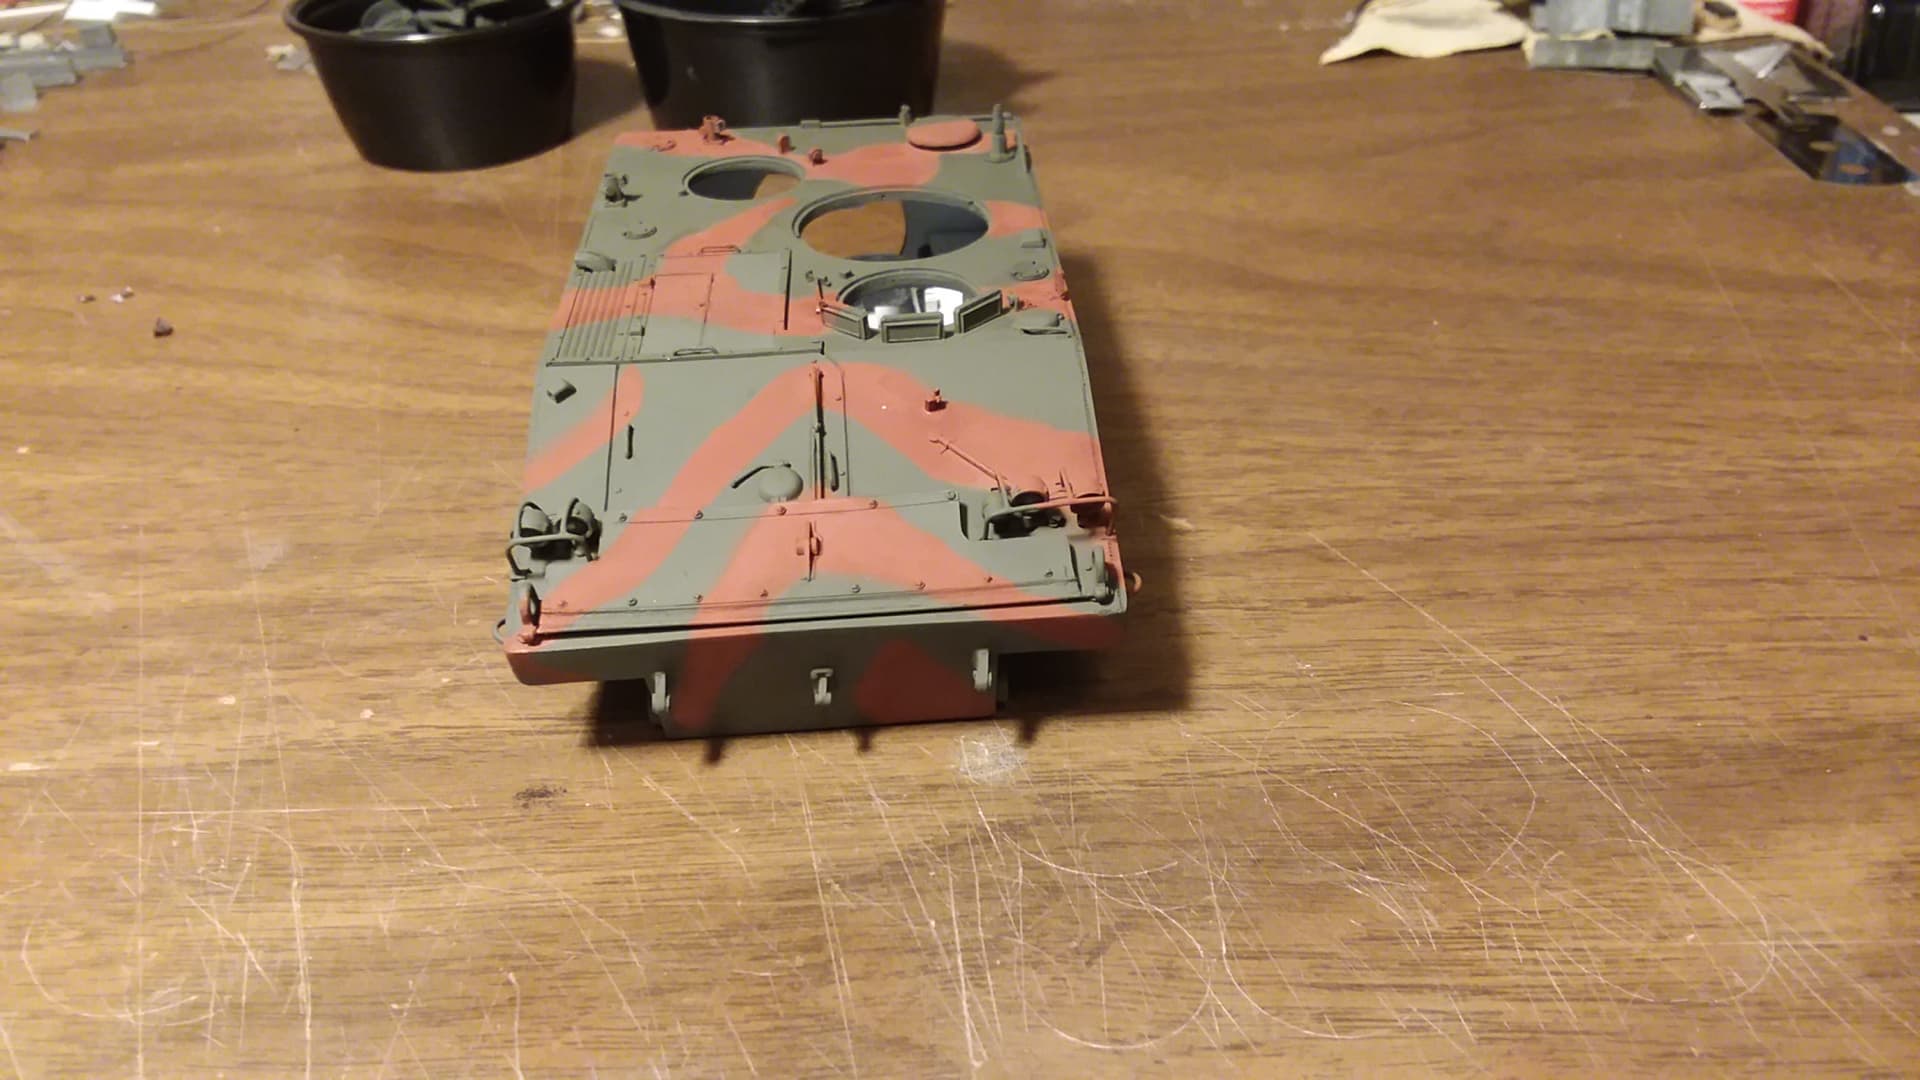
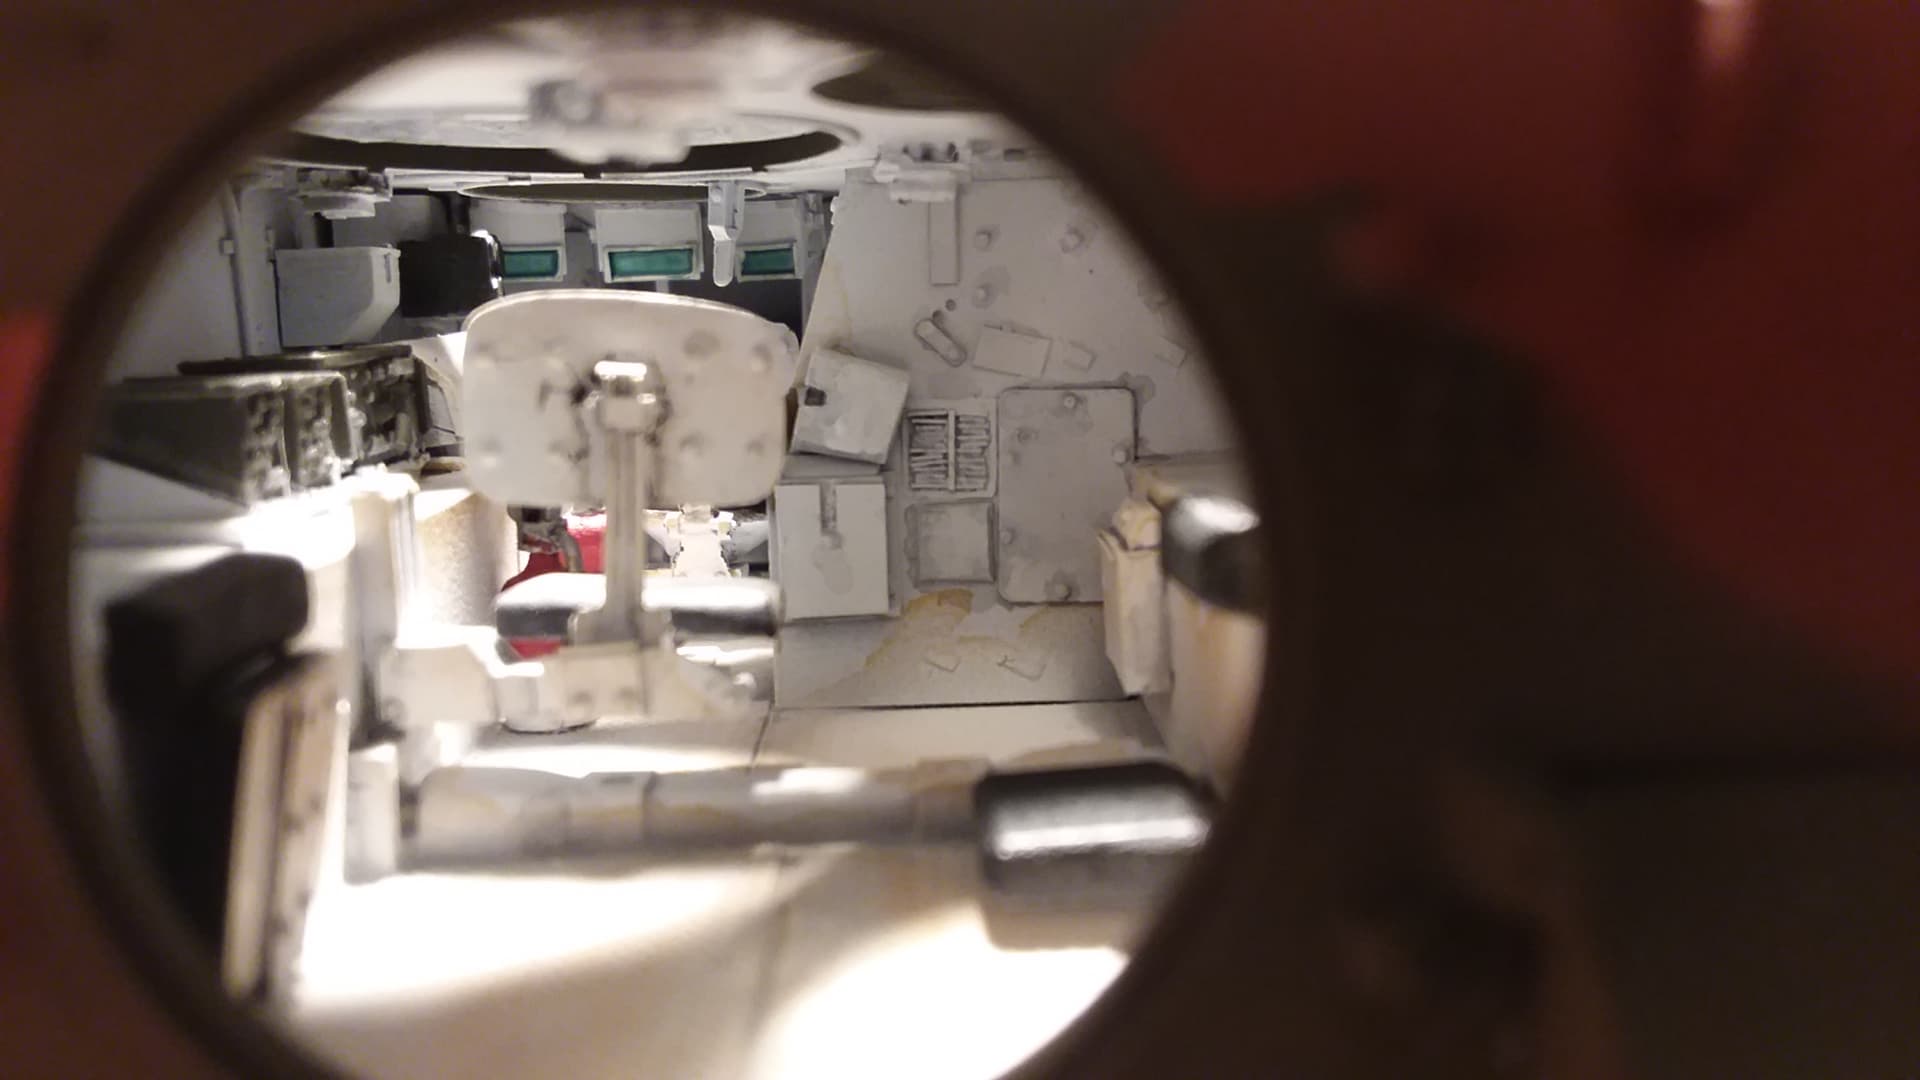
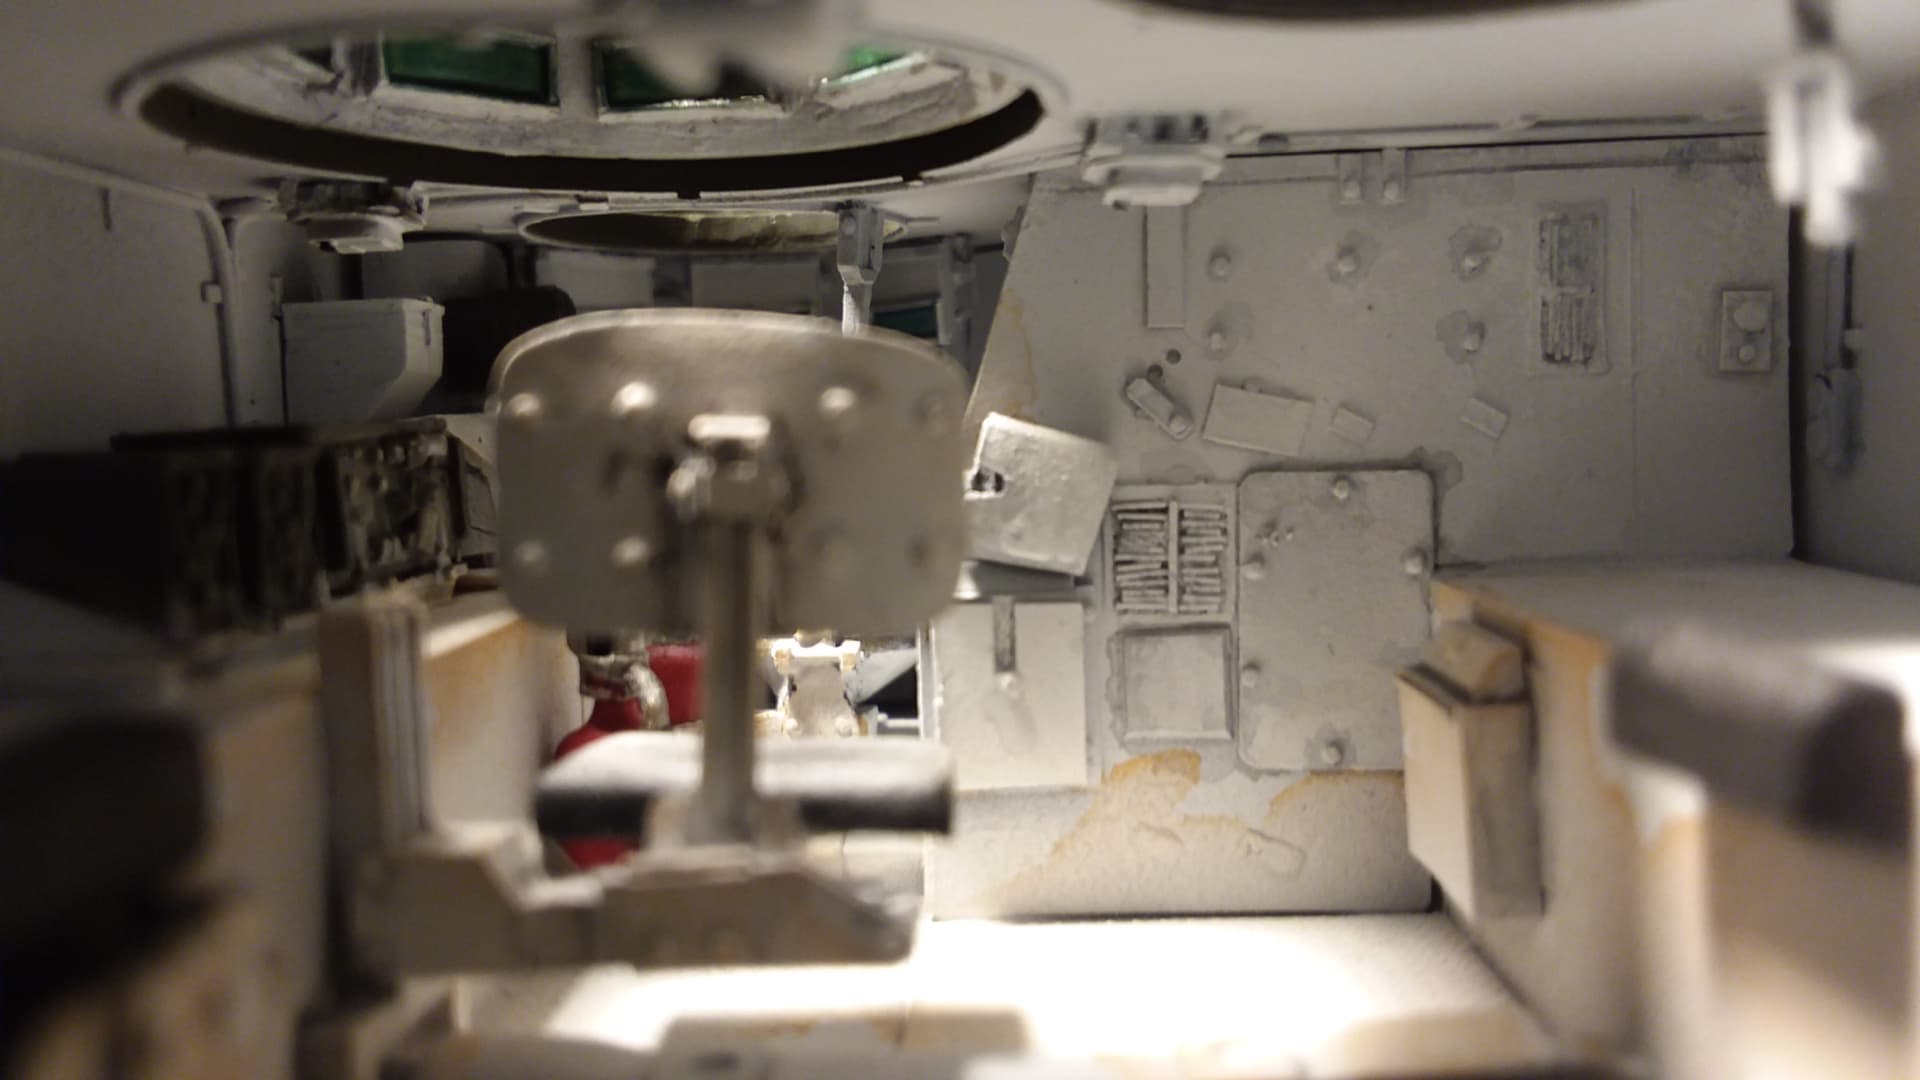
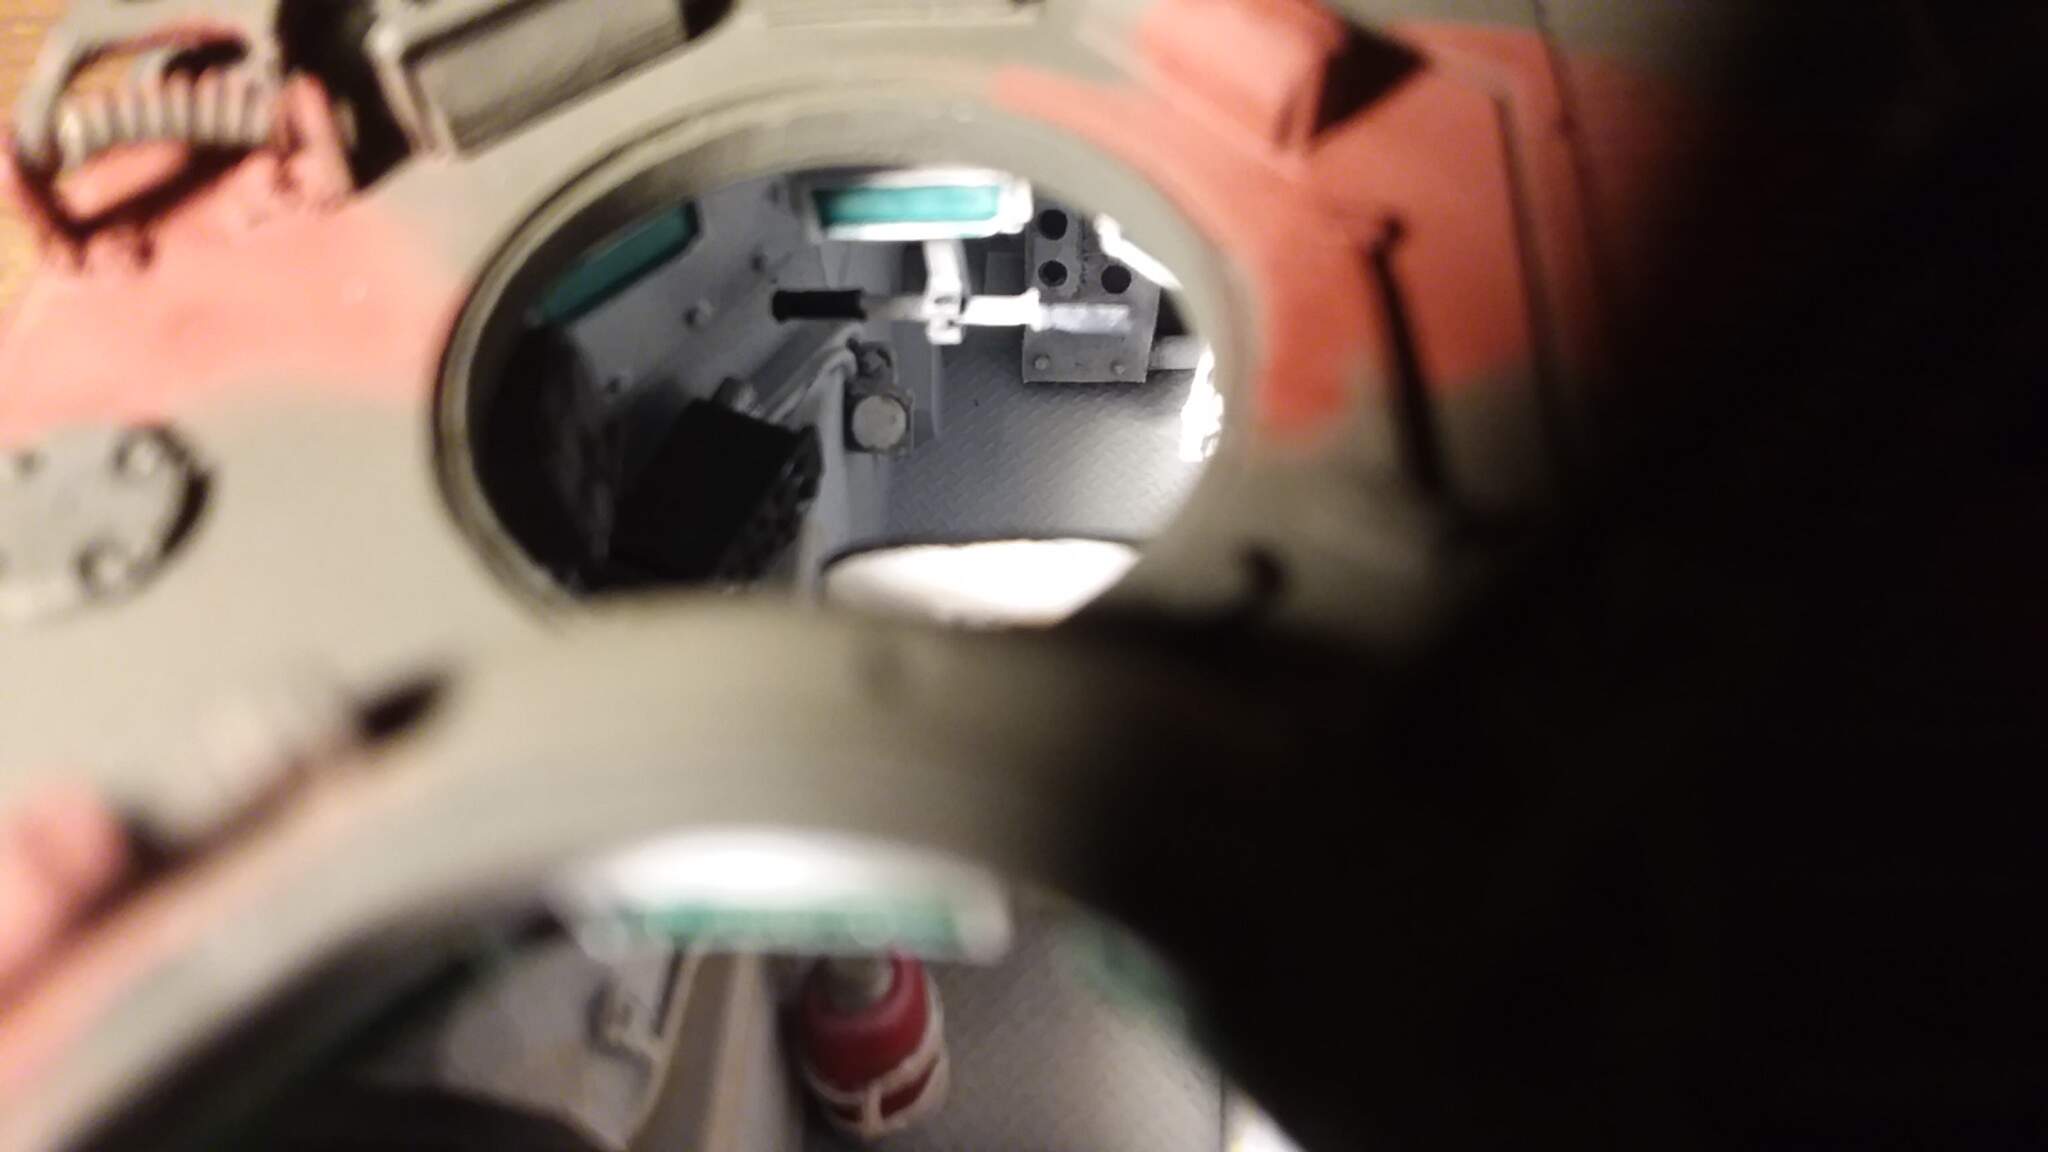
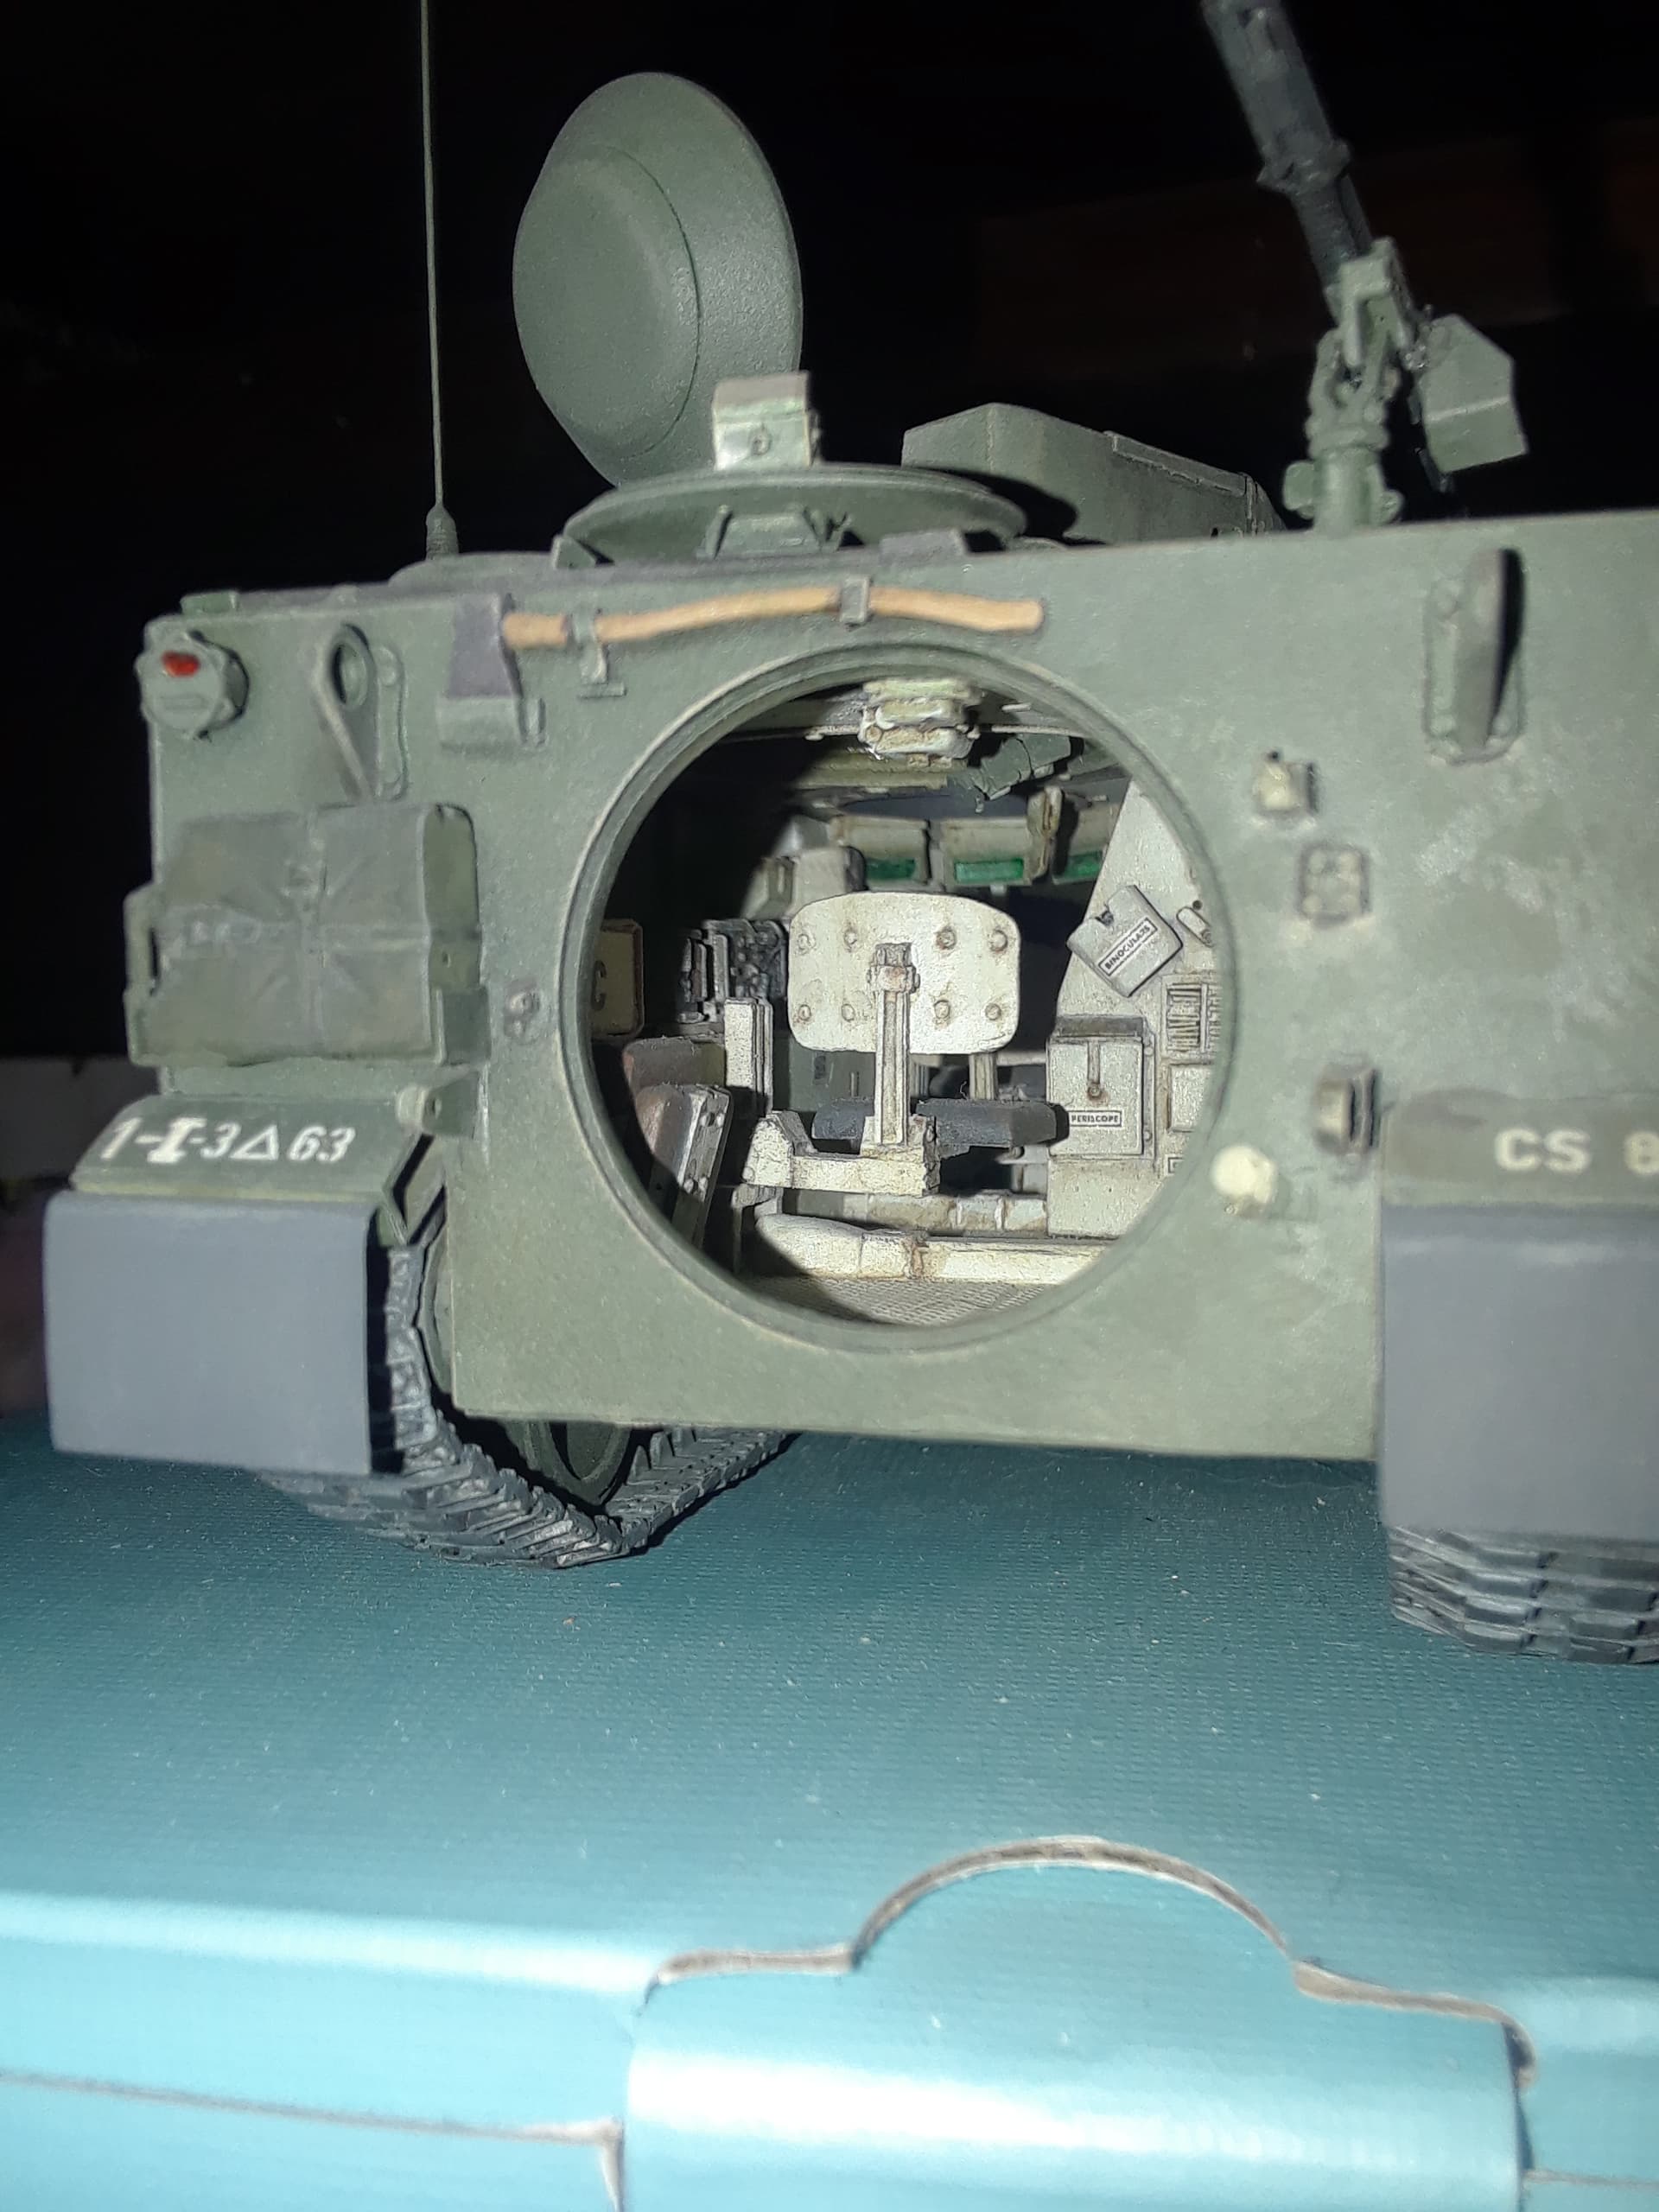
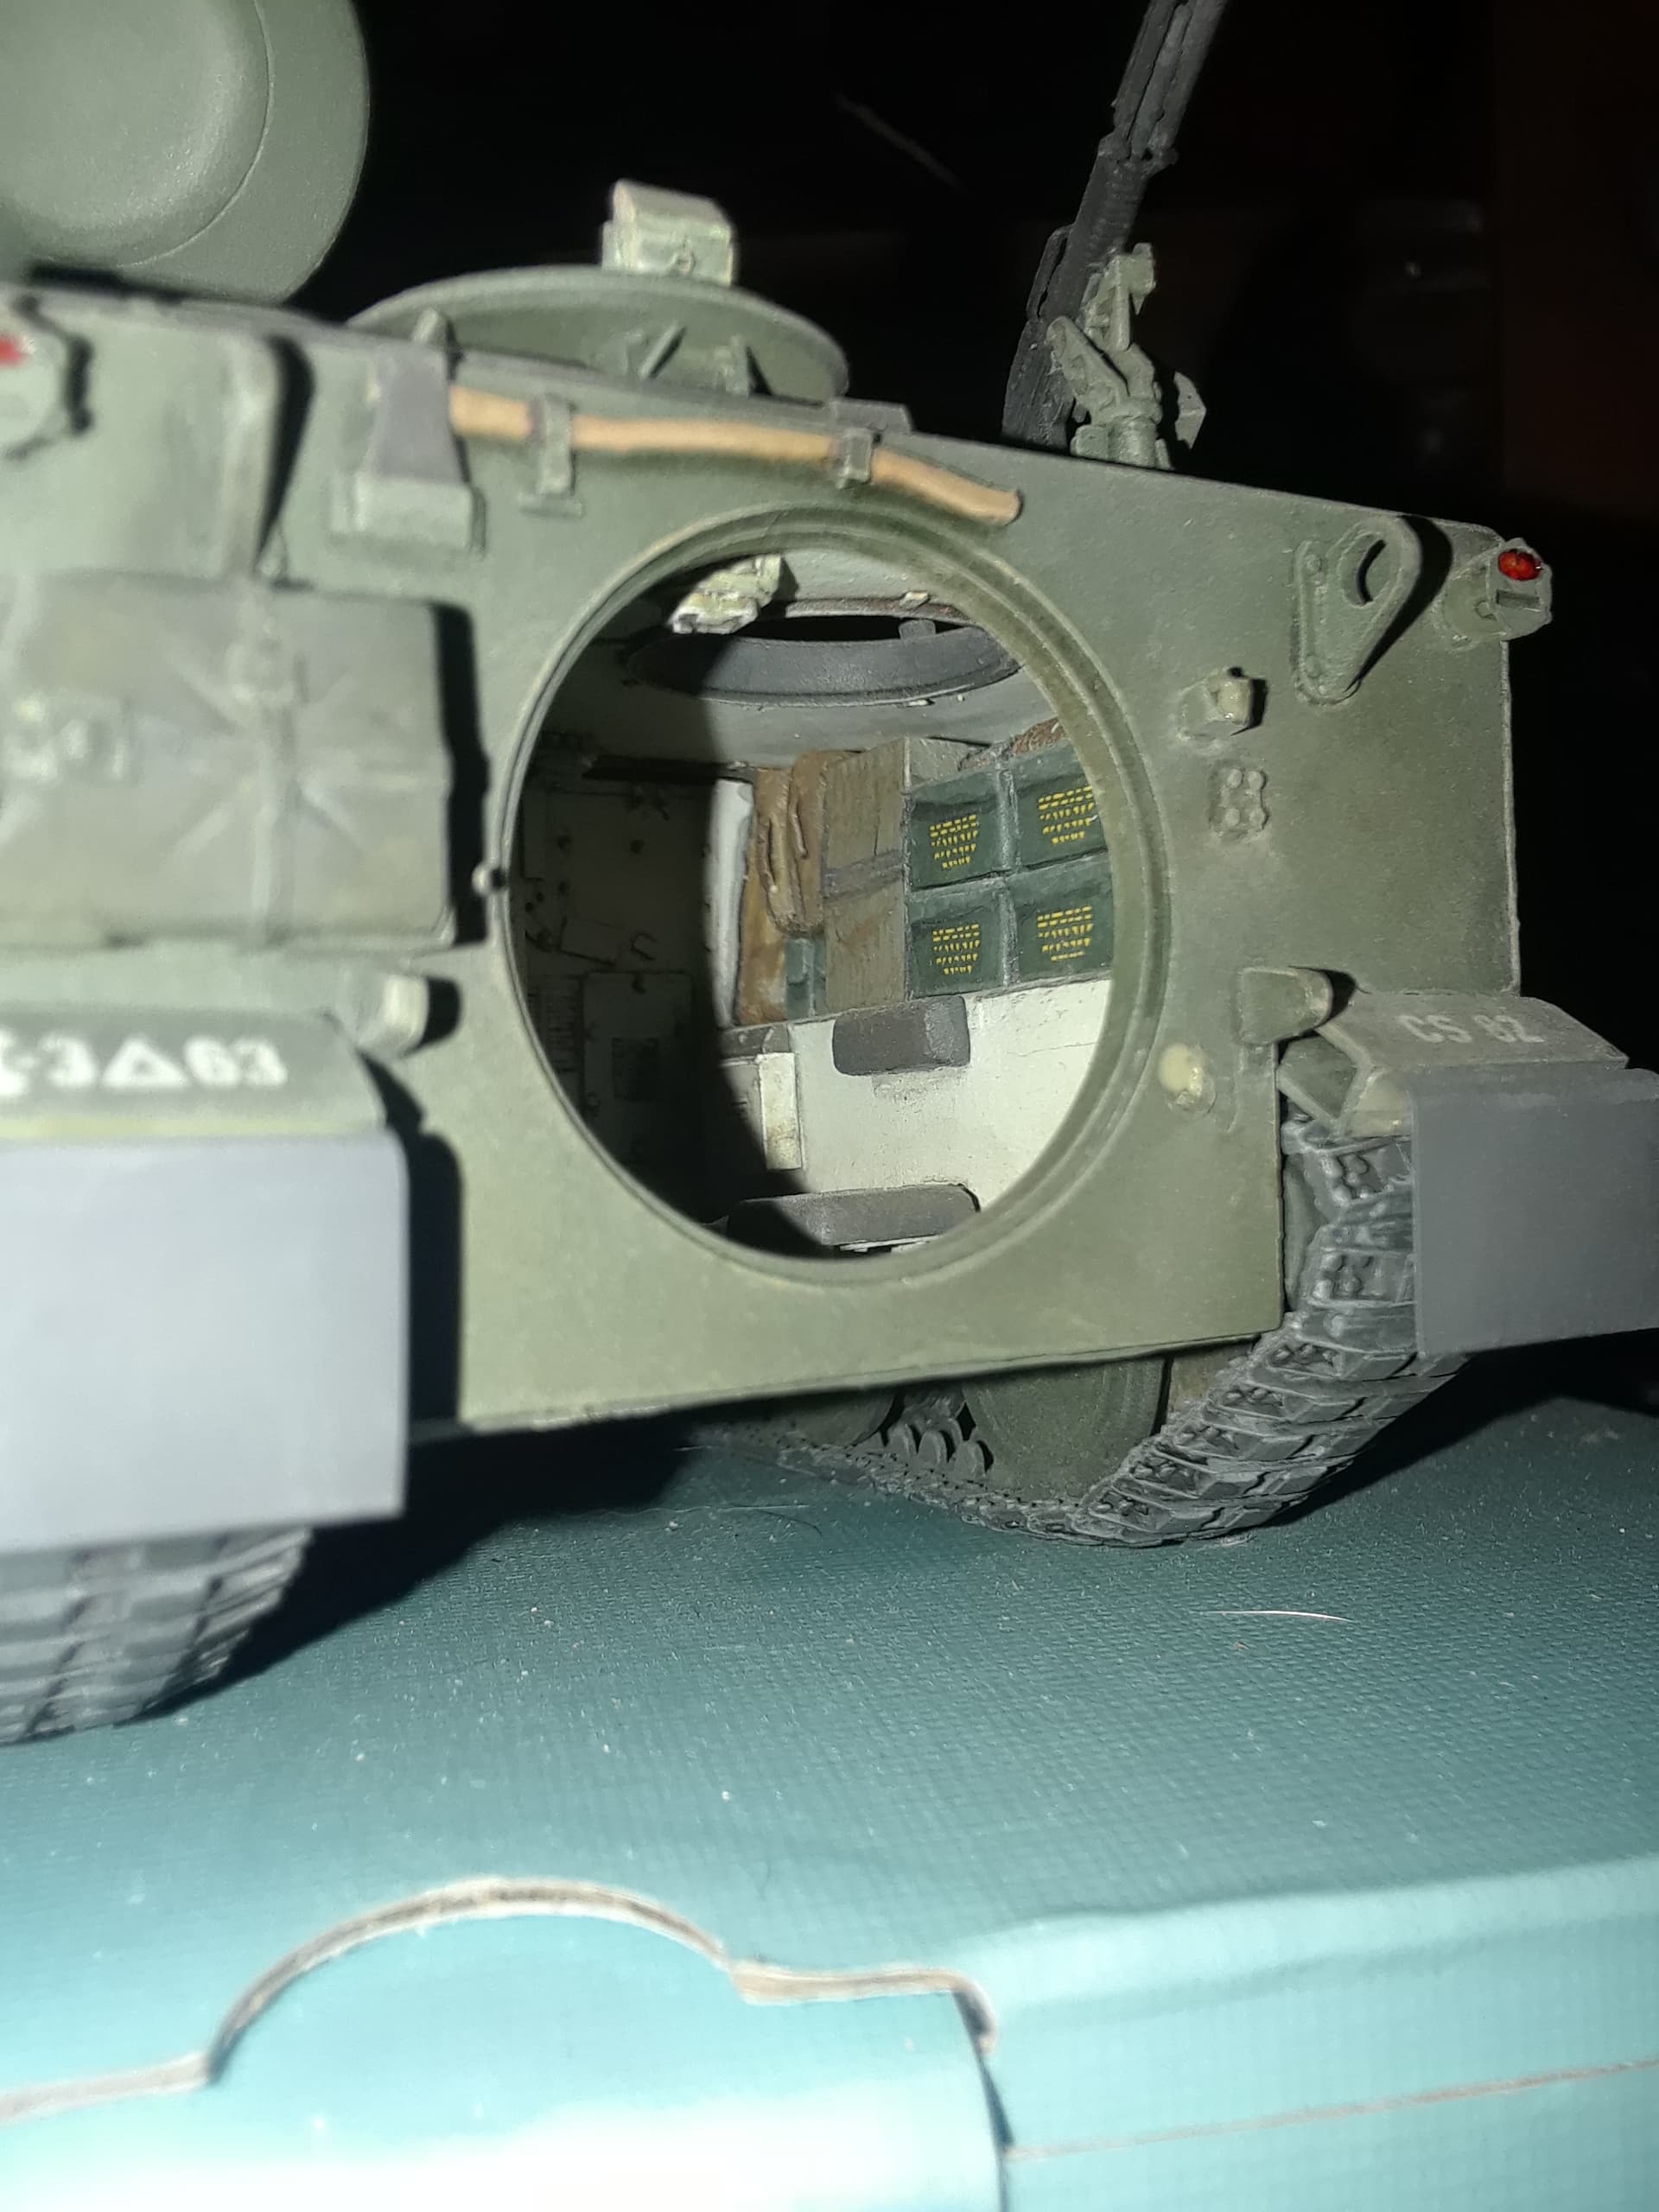
Gary you just nailed the reason I (prematurely) started this topic, knowing I’ll have to side track this build yet another week waiting for CA de-solver I figured I’d get started on the Gecko LARC V, I was looking at the parts trees and suddenly realized " wait a minute, where’s the tires?", well crap, now I’ve got to go through that hassle now, so this weekend was a wash. As far as the interior . . it’s more visible than I thought it would be (this is a rather small AFV) so I didn’t get too involved in detailing the crew cabin . . .
SCREEEECH! STOP THE BUS! This is a new developement, I haven’t heard this before, that’s a MAJOR concern!
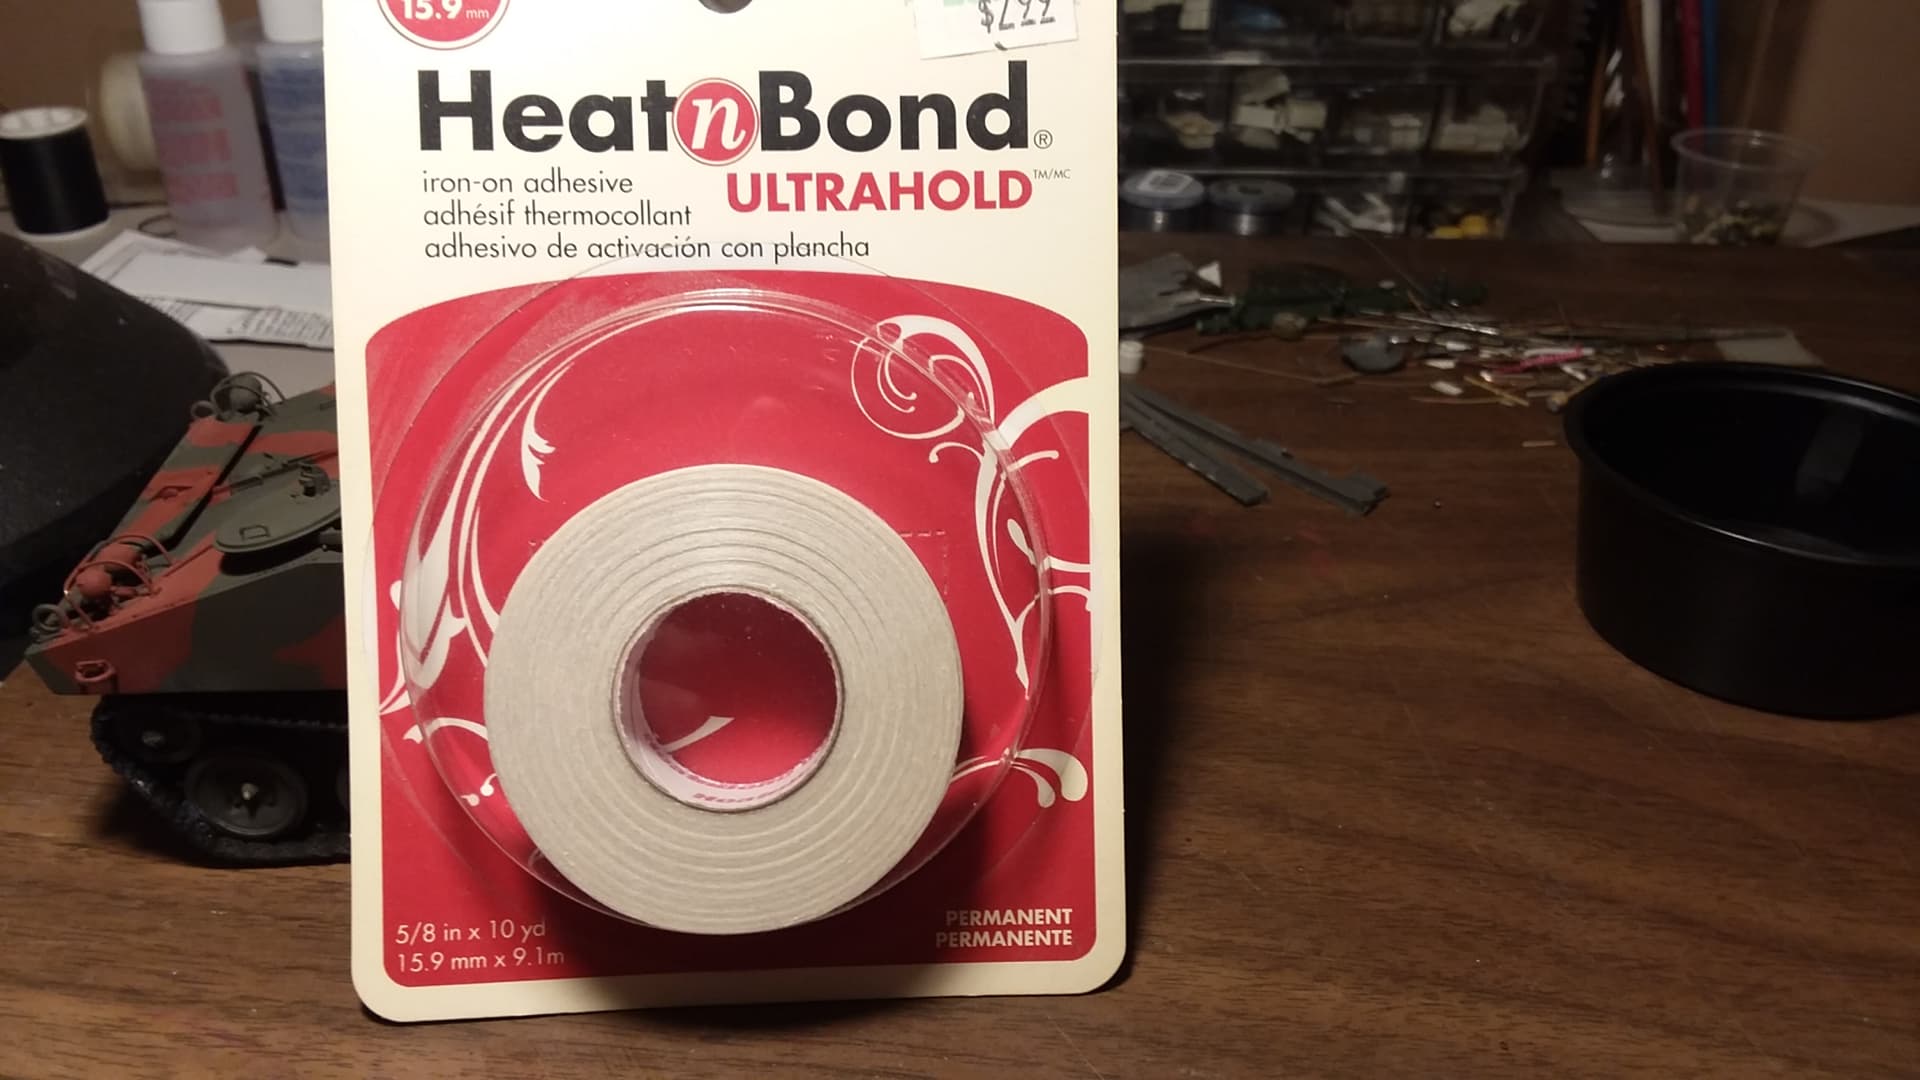
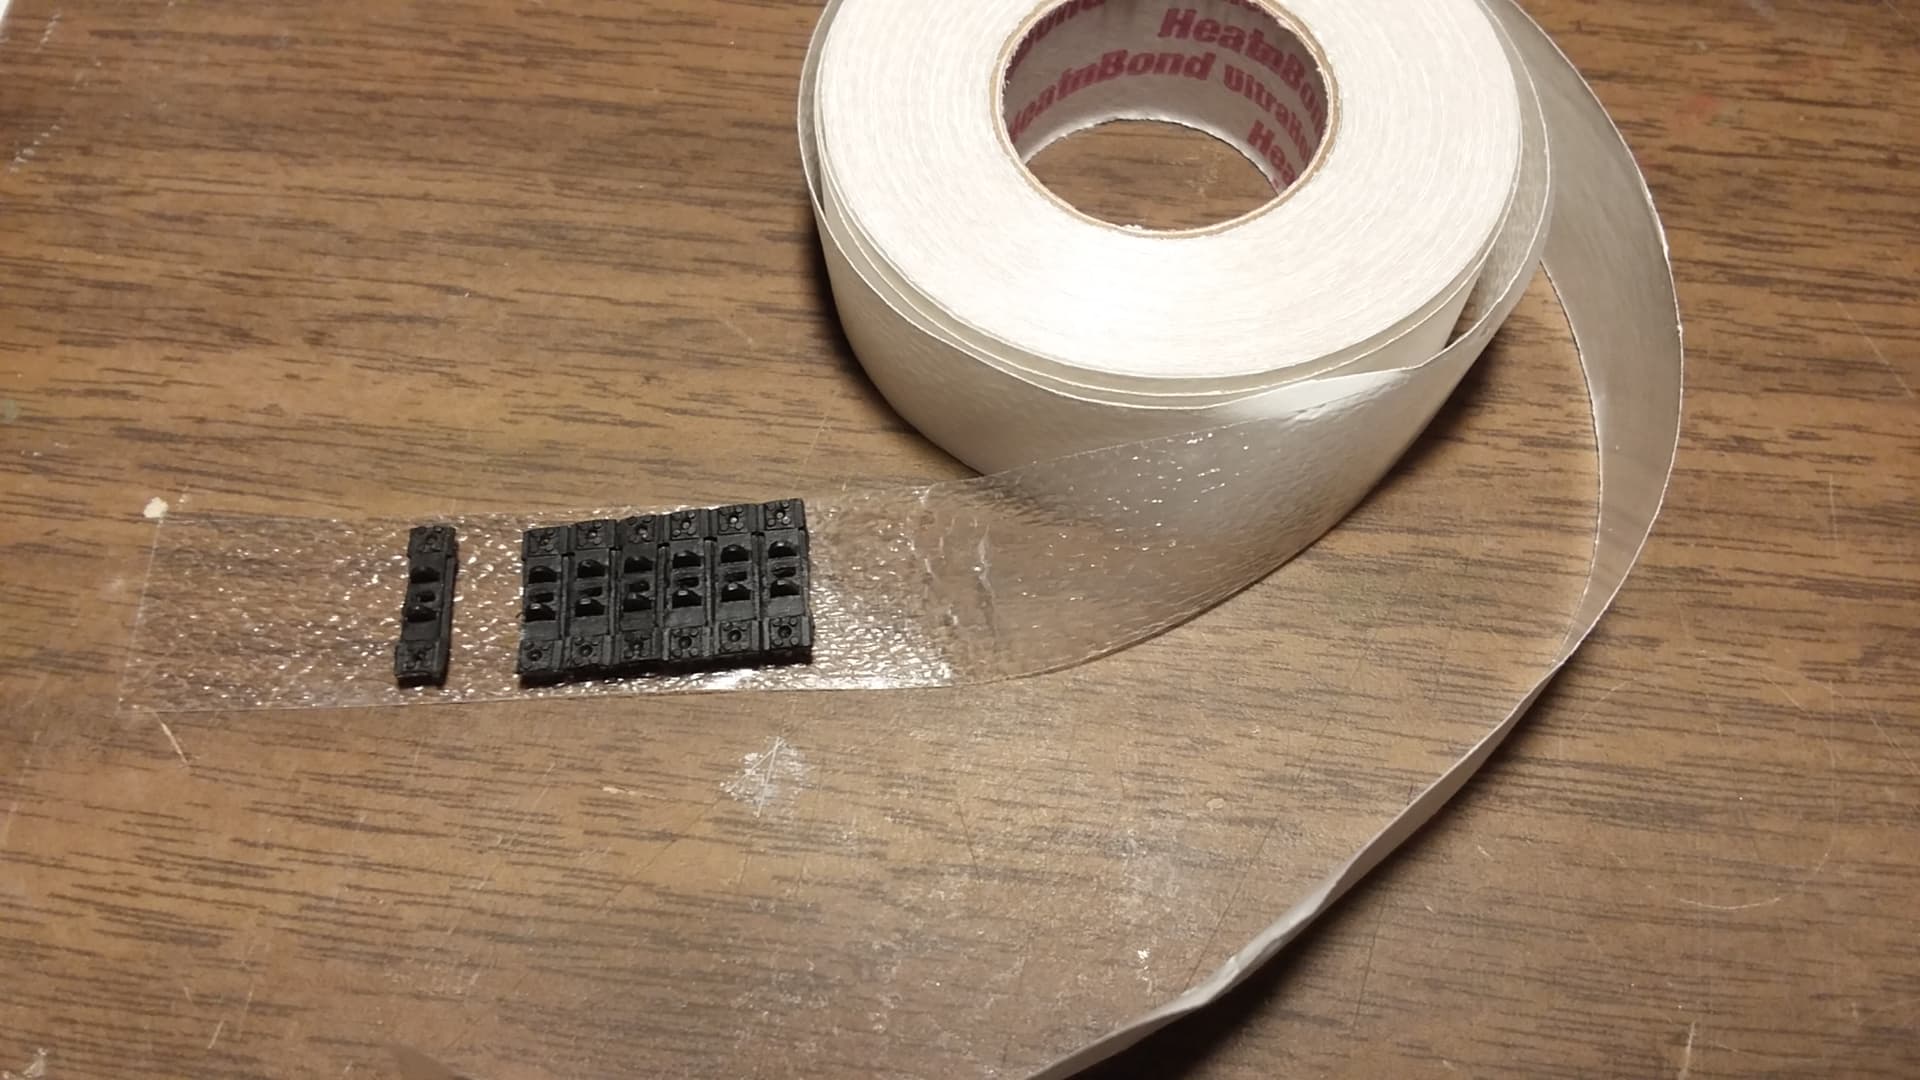
I was considering breaking each link and using something like this to bind them . .
. . . they’ll wind up looking like a picket fence in a hurricane though. This is gonna push this build to the back burner. I may have to reconsider this whole situation. This little fella may wind up being buried in a bog or suspended from an M88 sans tracks . . . hmmm, what to do? Time to see how creative my supposed talents really are.
I was just going by what I was told, and i think it only applies to the older AA resin tracks. I was thinking along the lines of a heavy mud finish on the running gear, although I do like the sunk in a bog idea…It is going to be a tricky one. did you say there are no other tracks similar ?
I haven’t seen any AM tracks, this is probably a low sales volume kit with a limited or nominal intrest value. The gears are grinding in the ole thought mill though . . . I’m thinking now of fab’ing a jig to spread RTV sealant into and attempting to mold a long length of track by melting lead solder onto/into the recesses, it would have to be a two part top/bottom arrangement though which would inherently create buckleing between the layers unless I can find a flexible adhesive to laminate the two halves but allow for forming a band around the running gear . . still thinking.
Got no choice brother, something will happen that’s for sure. Ironicly I’m more concerned about getting the wheels for the LARC V. “WE walk by faith, not by what we see, leaning not on our own understanding but on Him who knows all things”.
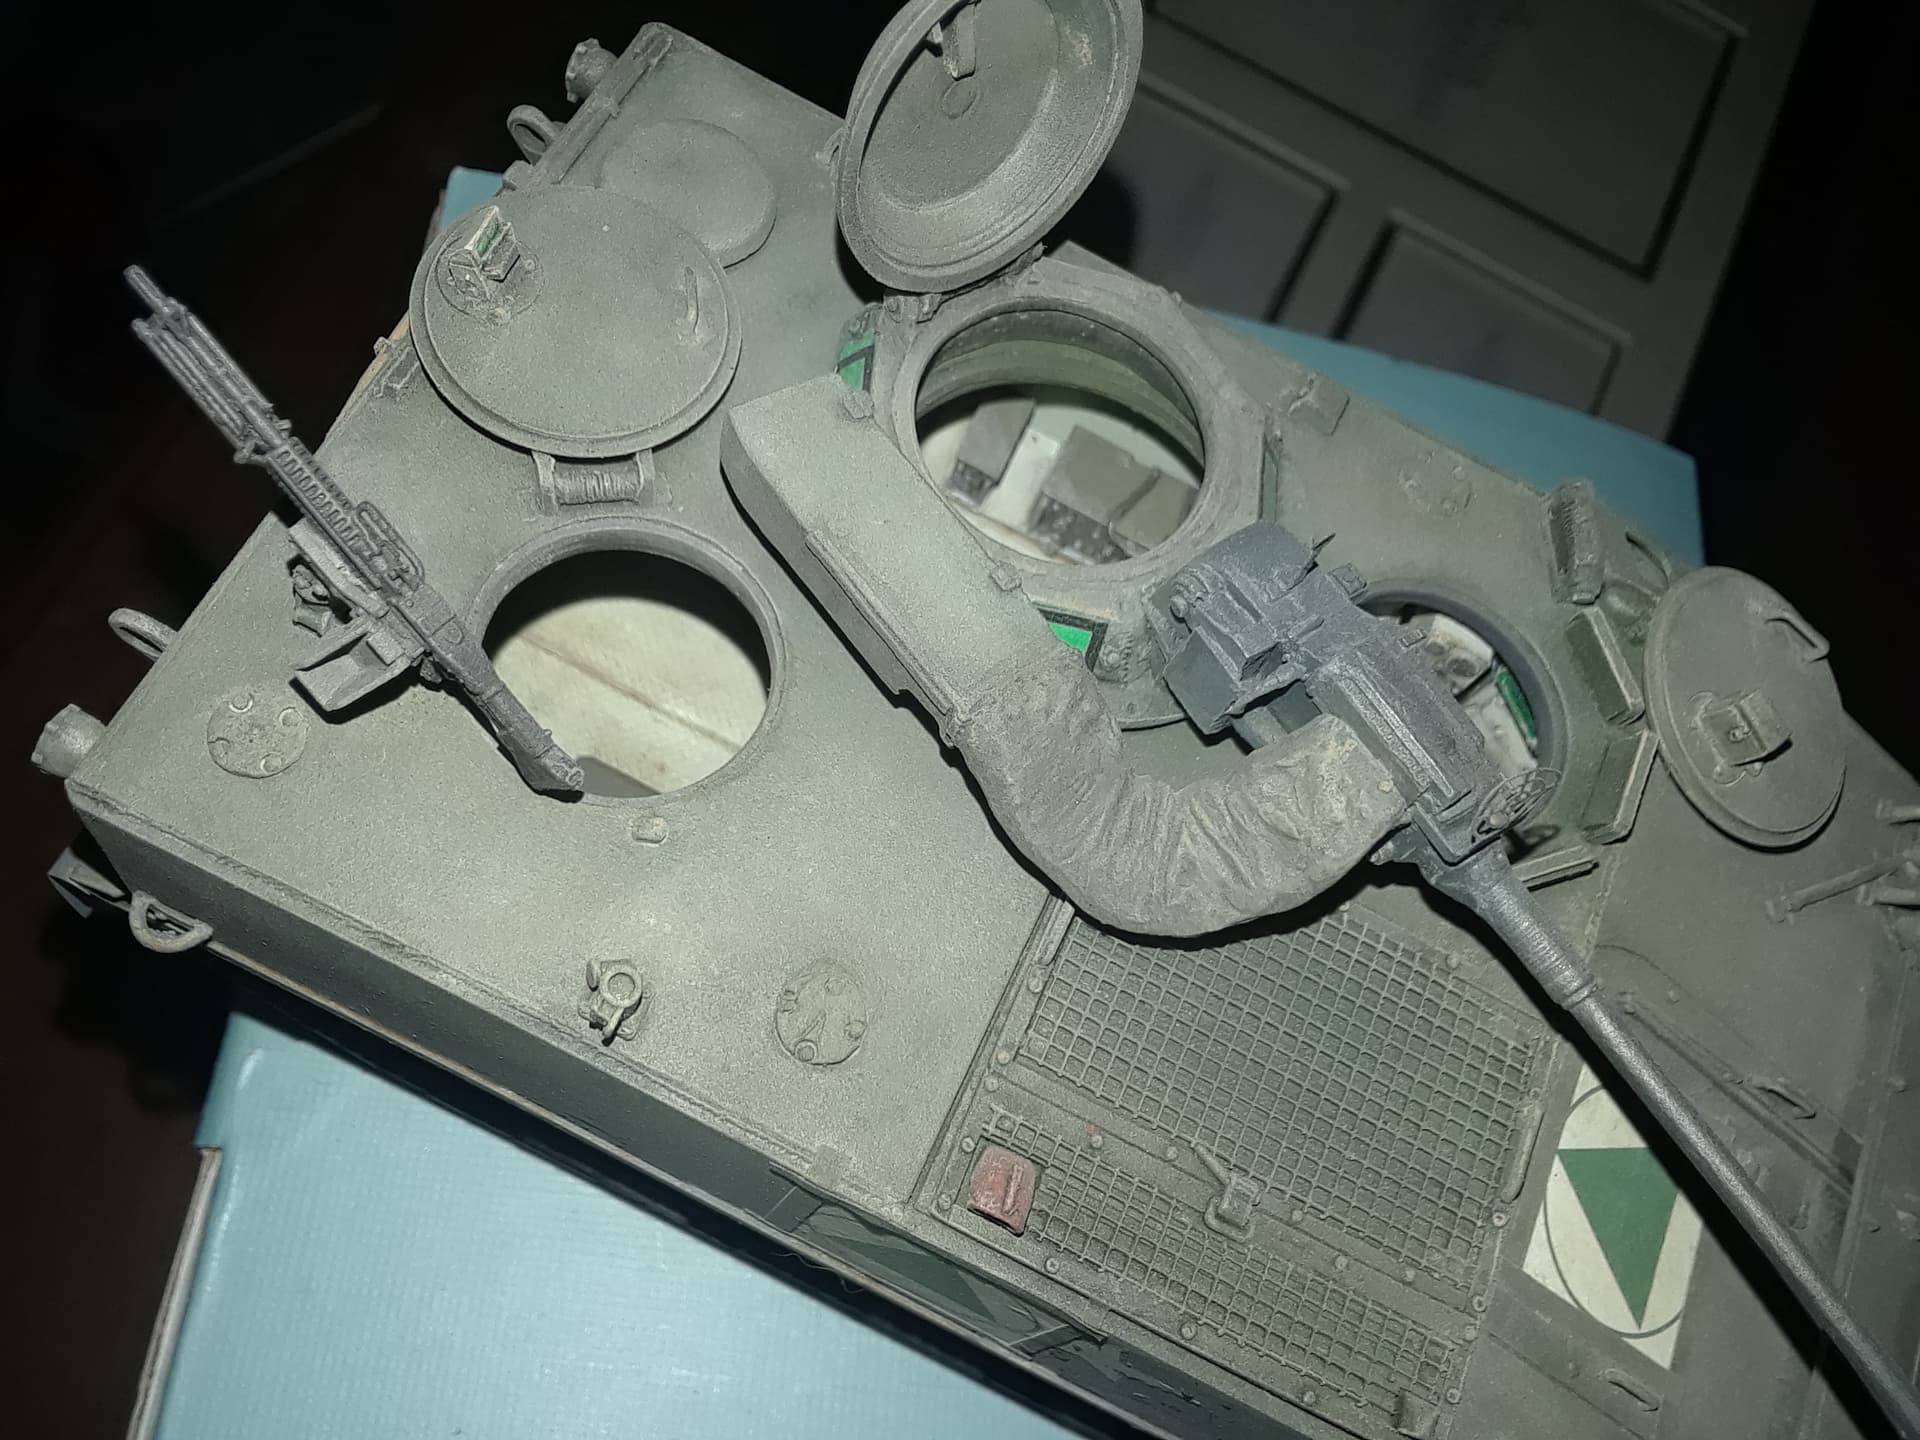
The AA M114 was my first resin complete kit. Such a small box! When I opened it up, I was very surprised to see the amount of detail for the interior, including intercom boxes and cabling that was cast into the interior of the hull shell. Even plastic kits won’t go that deep. VRC 64, ammo boxes, M72 LAWS in clips on the rear door… Metal barrel for the 20 mm (I bought the M114A1E1 version).
I was disappointed to see that the TC cupola was cast in solid color, as this included all of the vision blocks that are a prominent feature of this vehicle. I emailed AA, asking if they might consider casting that single piece in a clear resin, but the response was “no”. Oh well.
The placing of the suspension was going to pose a challenge, as the recommendation was to attach 10mm blocks to the hull and allow the swing arms to be placed using the 10mm as a guide. Well, you’re using CA for glue, which doesn’t permit much adjustment. I managed to do it though.
Then, the tracks… The 1:1 scale tracks are actually the original “link and length”, as the track comes in sections that are bolted together. Since the kit tracks were in long lengths and pretty straight and solid, figuring out how to bend the tracks to match the suspension/roadwheels was interesting. I managed a little heat, hot water, and gentle force to get them to where they ended up. It made me appreciate regular kit tracks, be they vinyl or plastic L&L.
And now, here comes Takom with the M114A1 and (wow!) the A1E1 with 20mm turret. The cover images don’t state if there’s an interior, just hatches that can be open or closed.