ACE Model - 1/35 MUNGA

Technically not armour, but a soft-skin; so I hope I haven’t transgressed too much by listing this where it is.

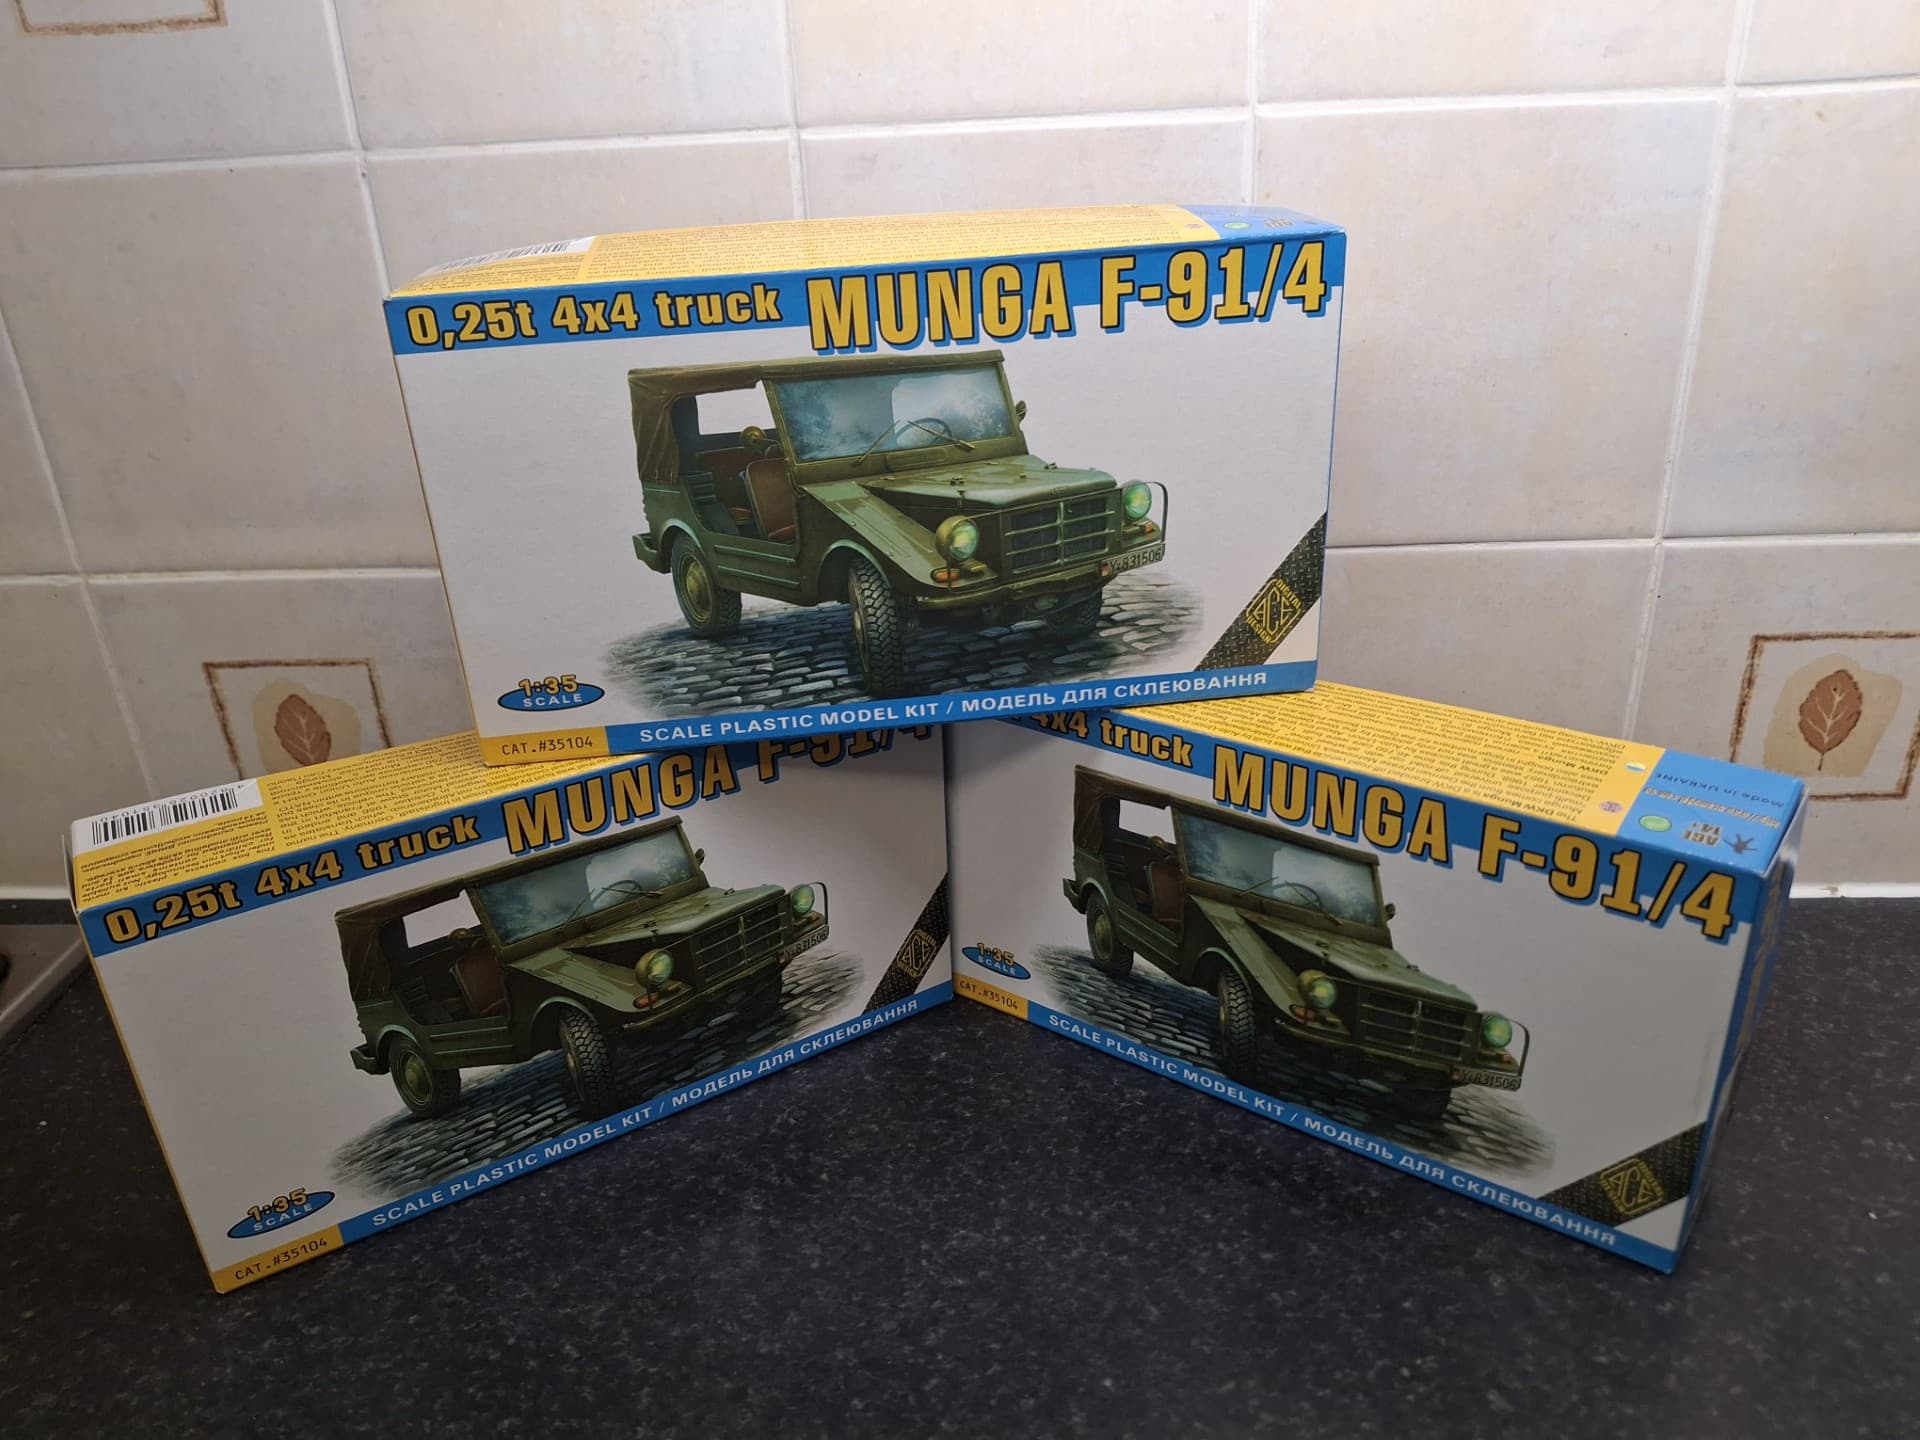
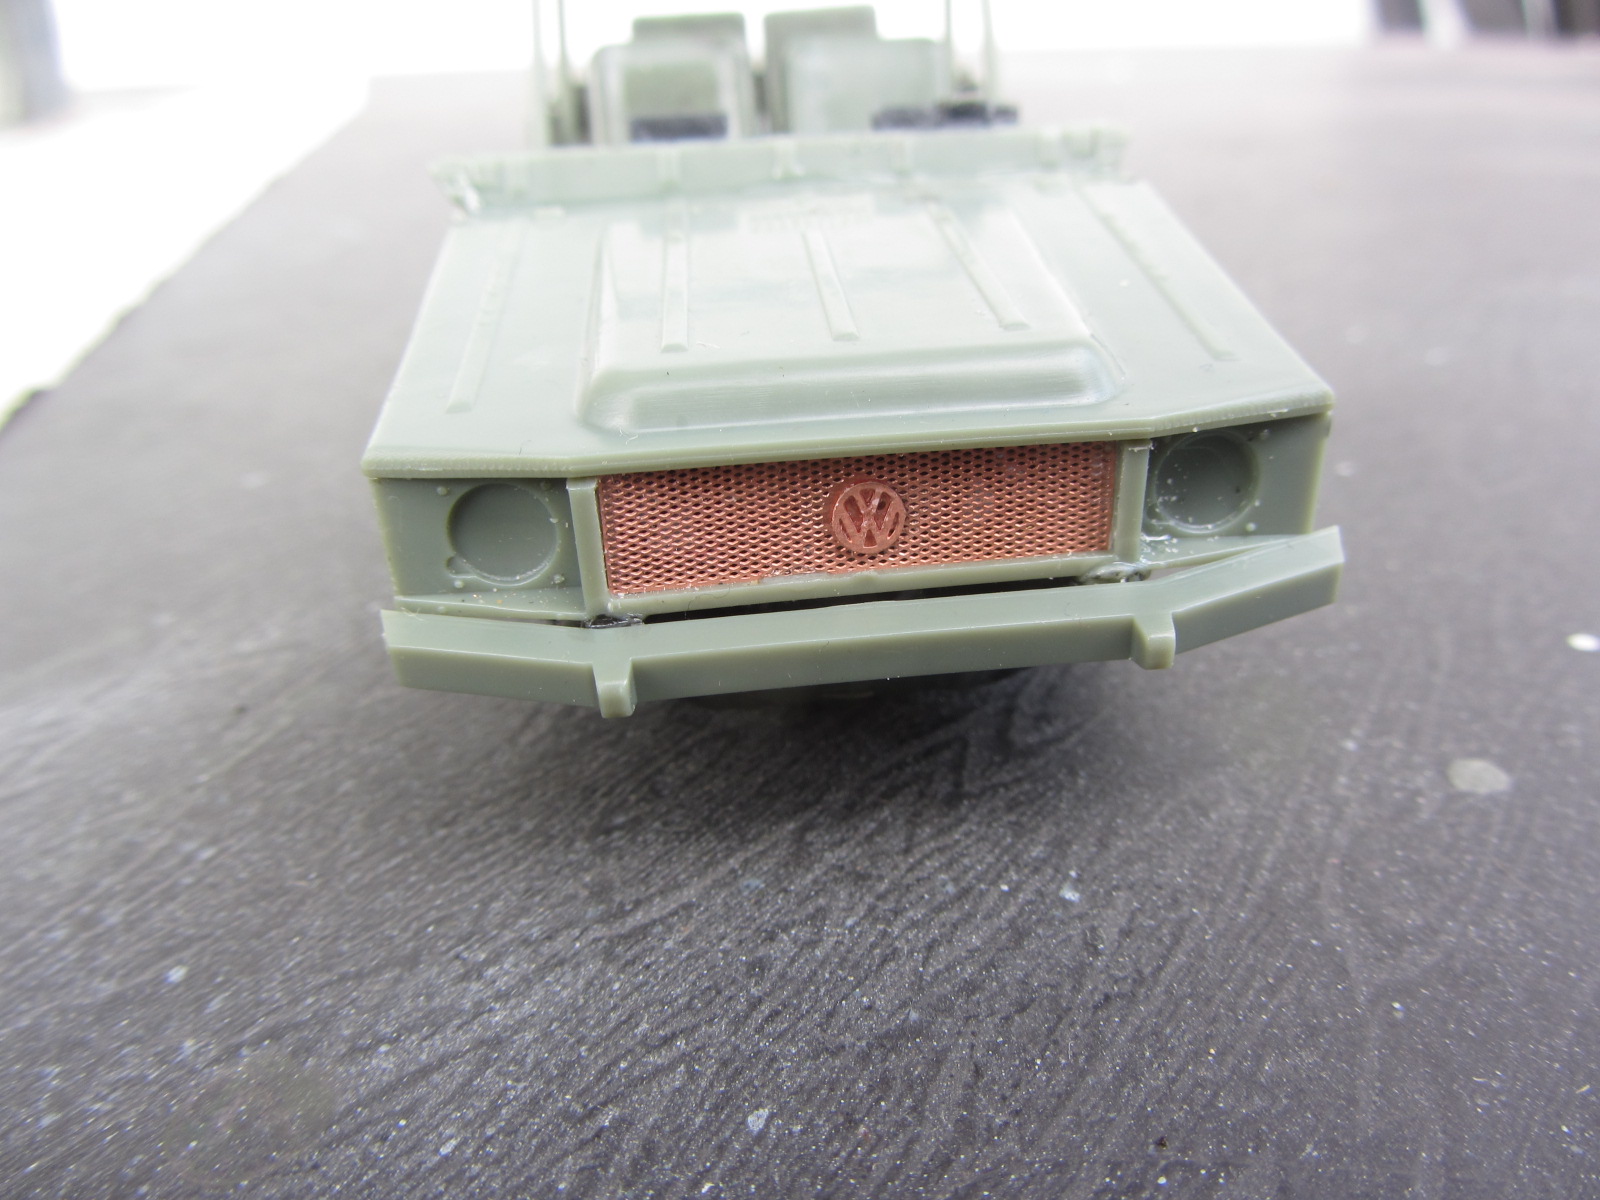
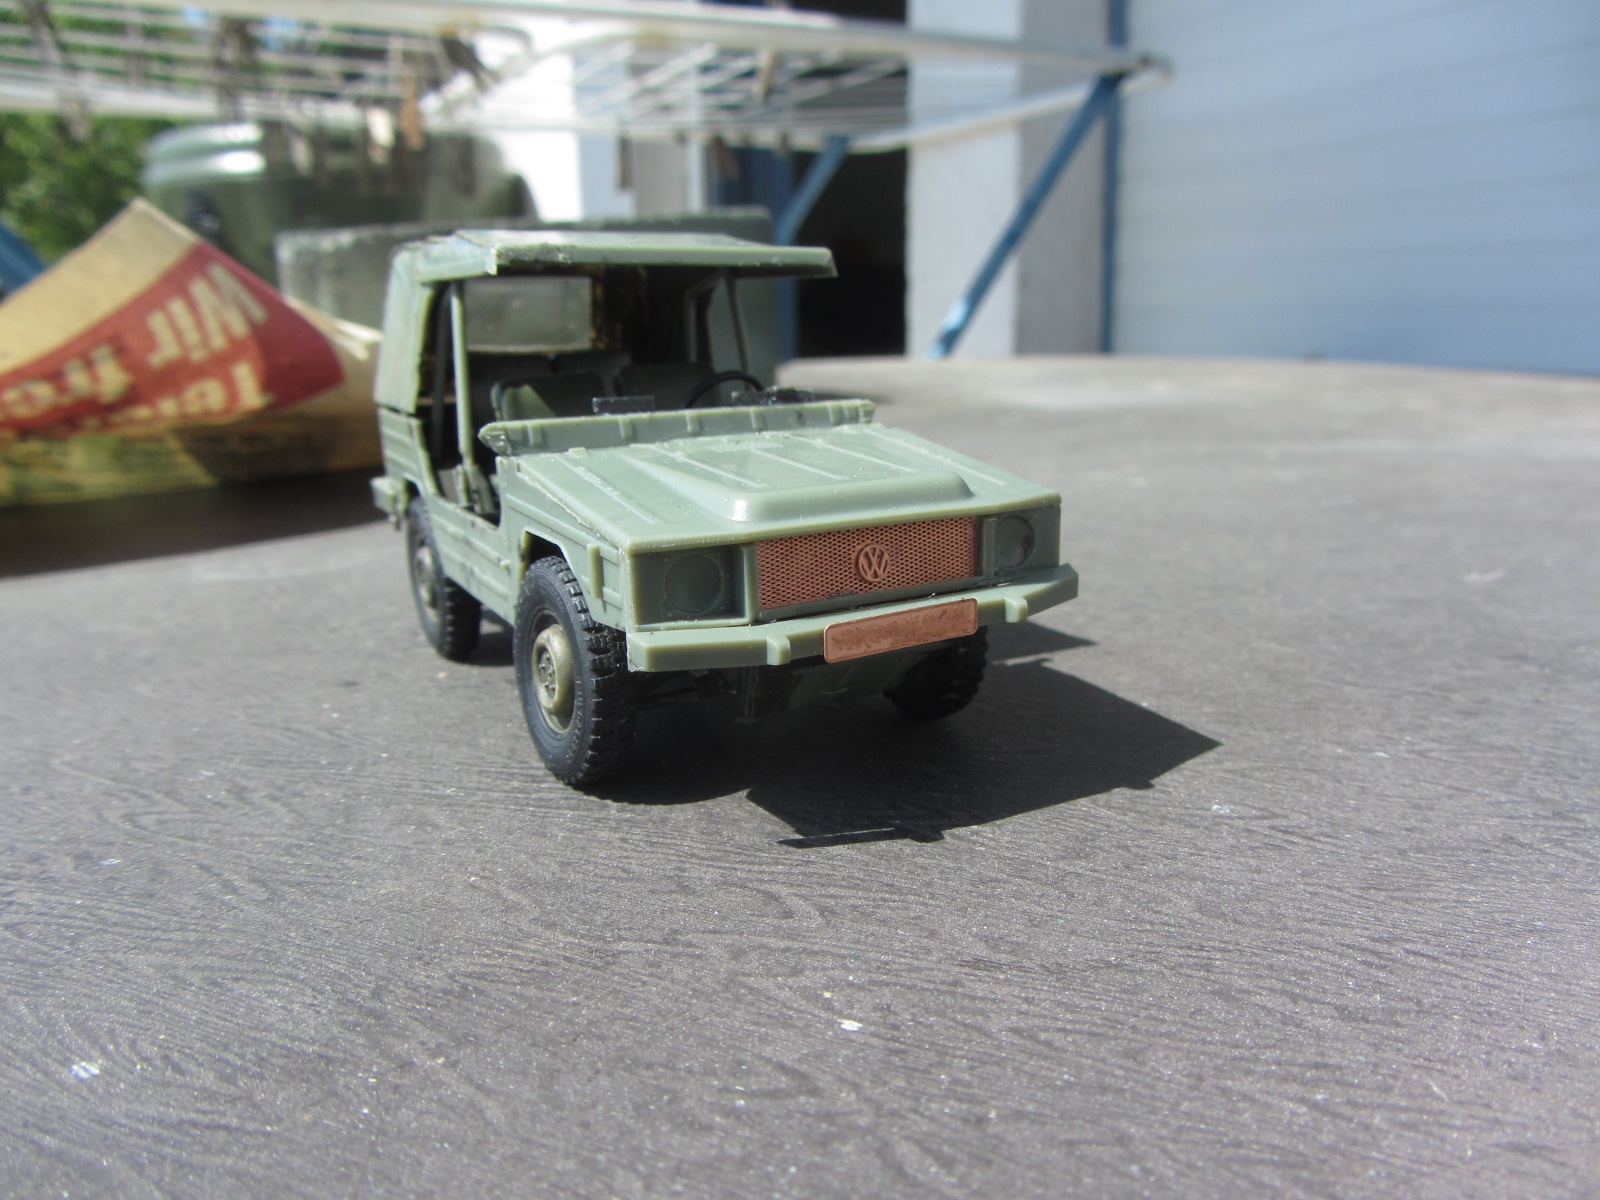
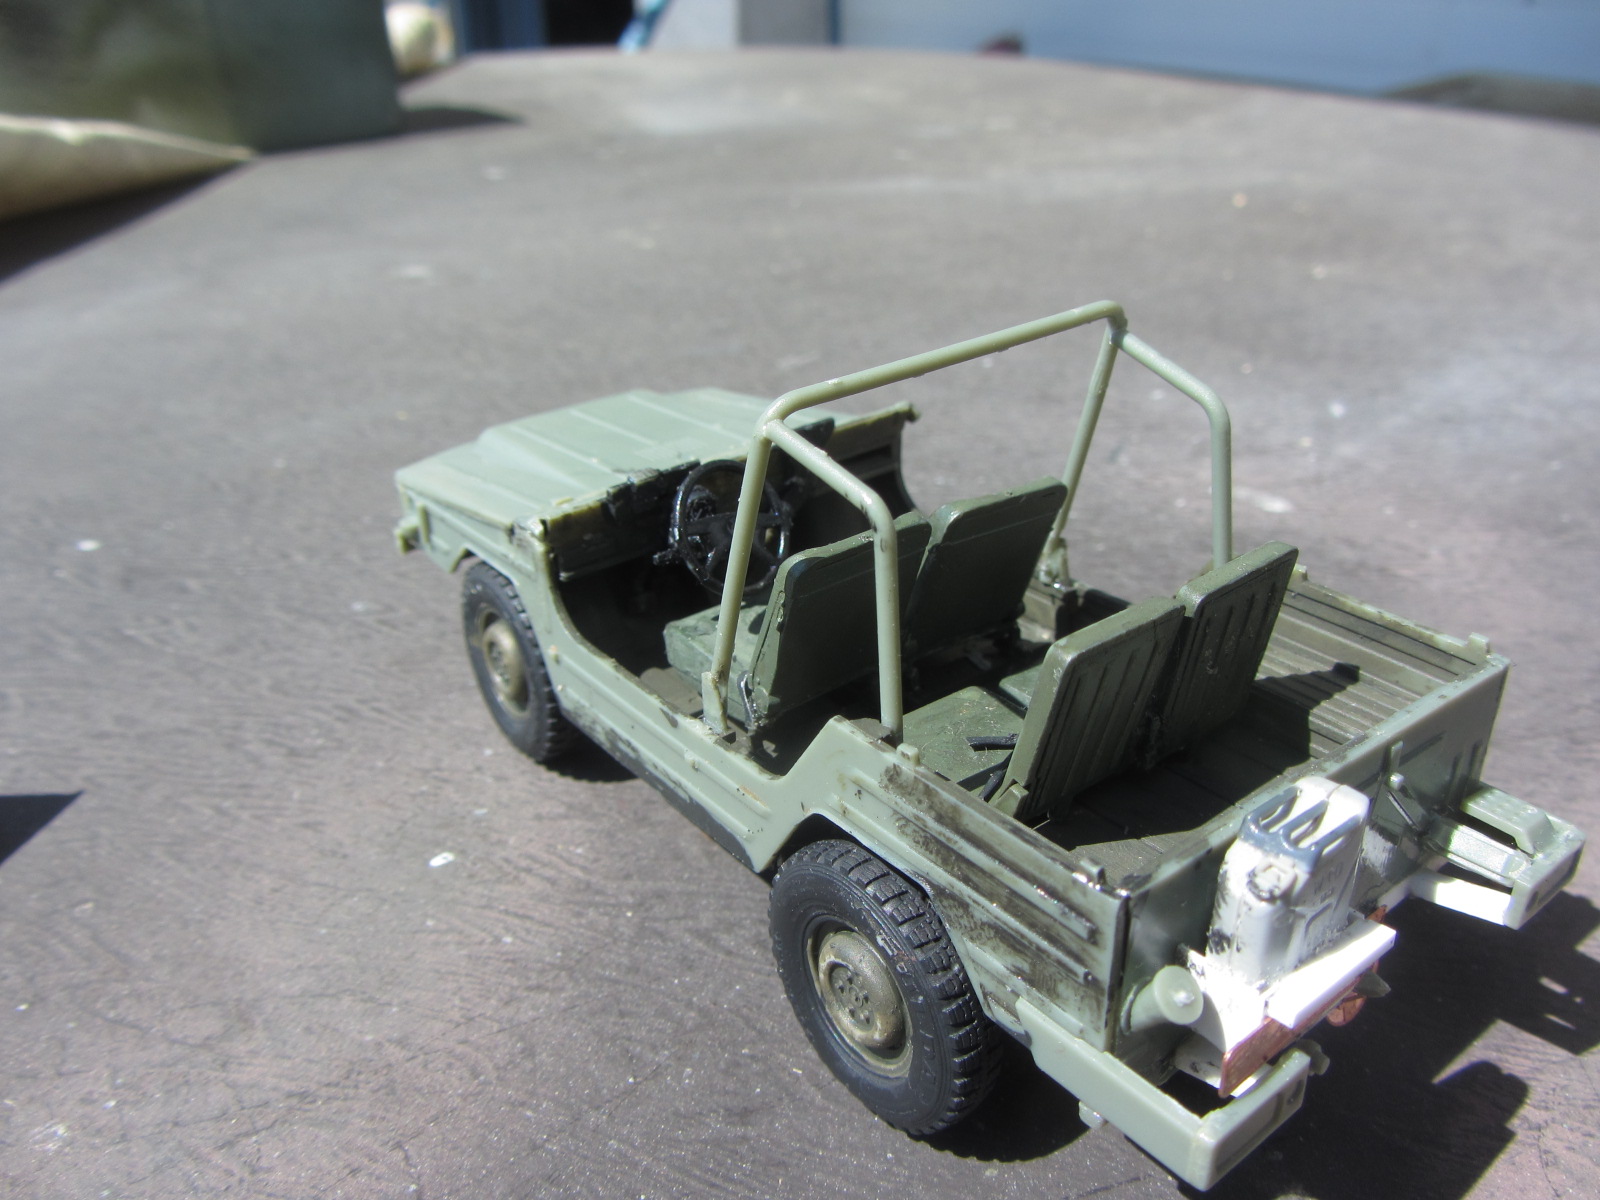
I wasn’t really planning on undertaking a build log until I had all the component models available for one of my Bundeswehr projects, but couldn’t resist tinkering with the ACE Models MUNGA, recently acquired – in fact I have 3, which hurt the wallet somewhat retailing at 30 quid, which seems to be quite hefty for such a small vehicle.

The box is rammed full of parts with tiny identifying numbers on the sprues, so first off, I labelled the actual sprues – A through to F using tabs of masking tape and a marker pen; this looked like a very busy model indeed, but surely, must be an improvement on the resin hell that I recently tackled combining Elite Modellbau and CMK kits.

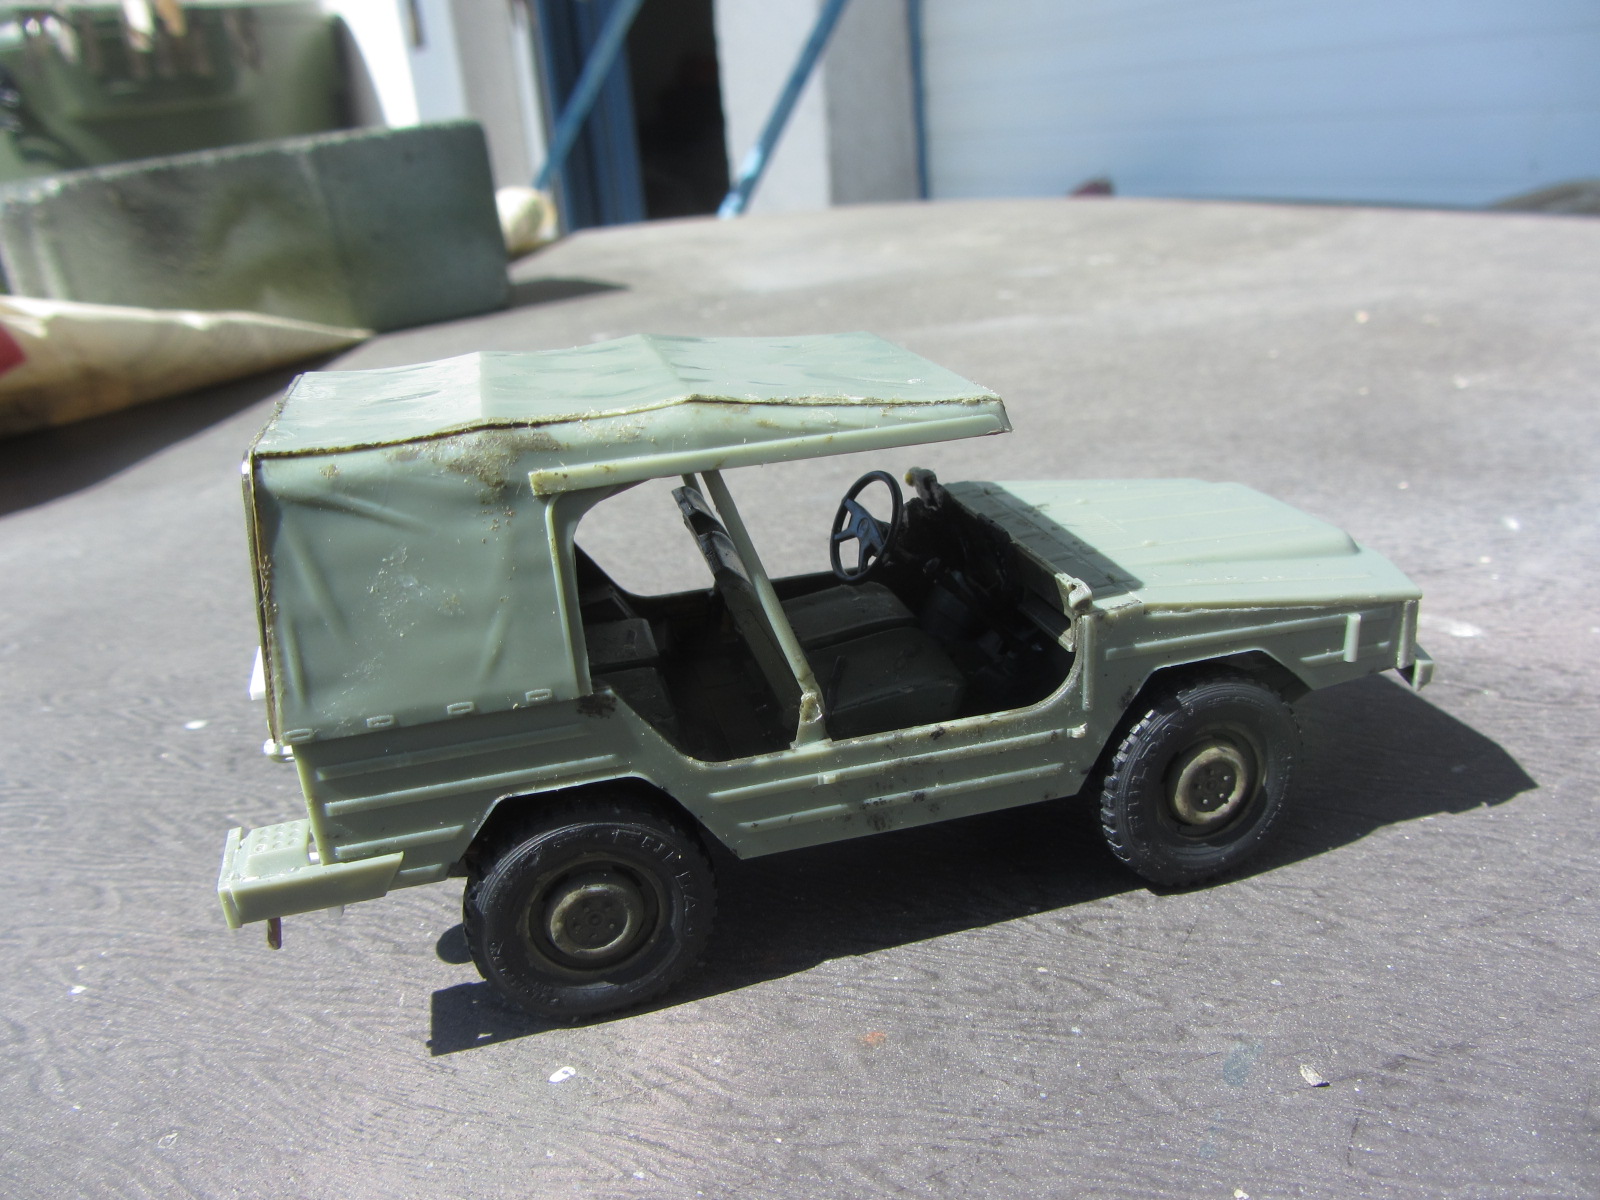
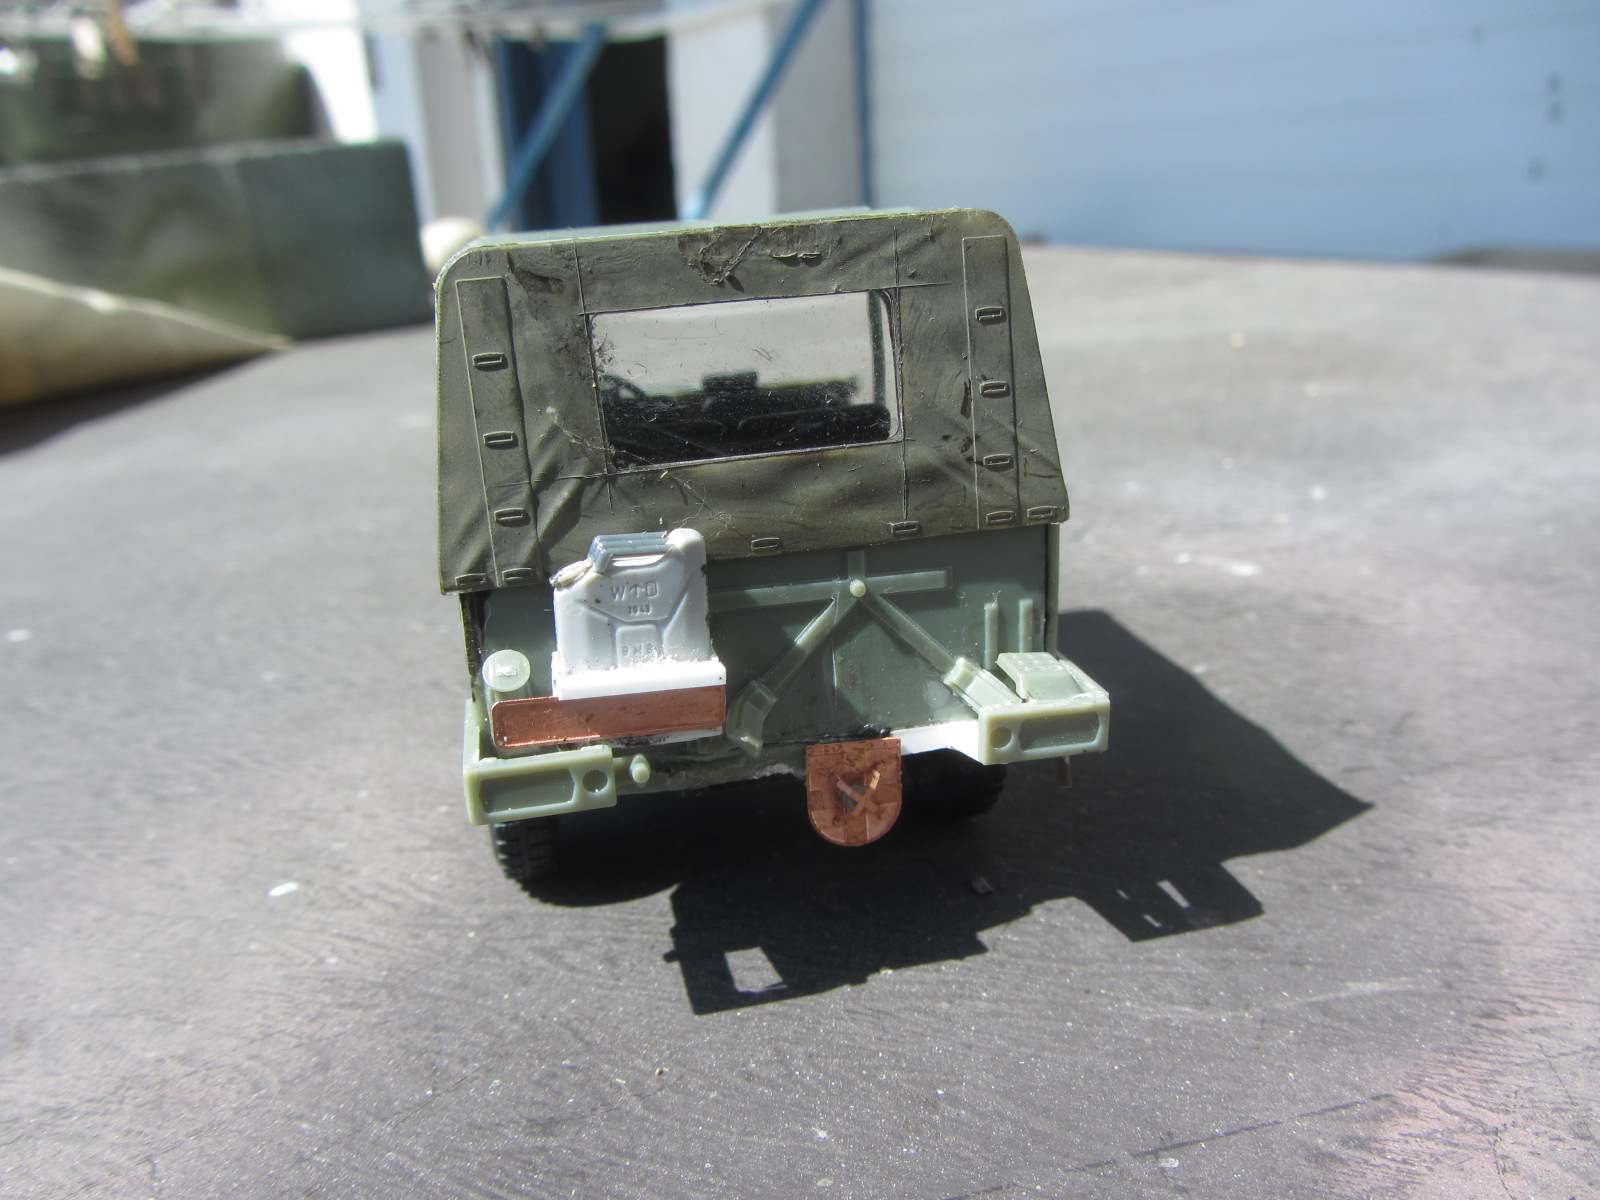
Despite the inevitable distraction this would provide, when I’ve several other projects to complete, I just couldn’t resist messing around with the contents, already envisaging a neat, completed little model in primer. I thought I’d start the build and get the most onerous phase out of the way, which for me is always the chassis.

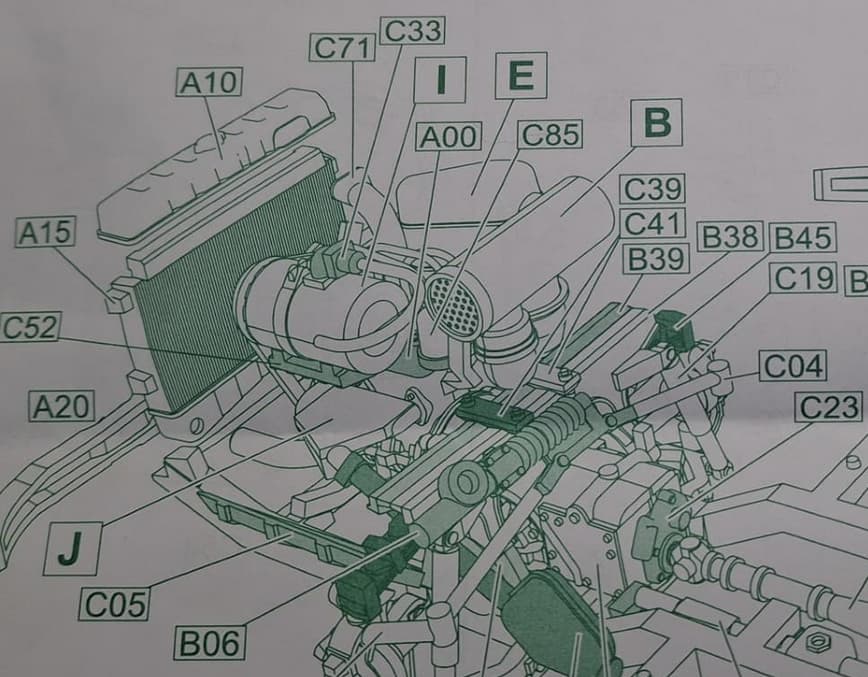
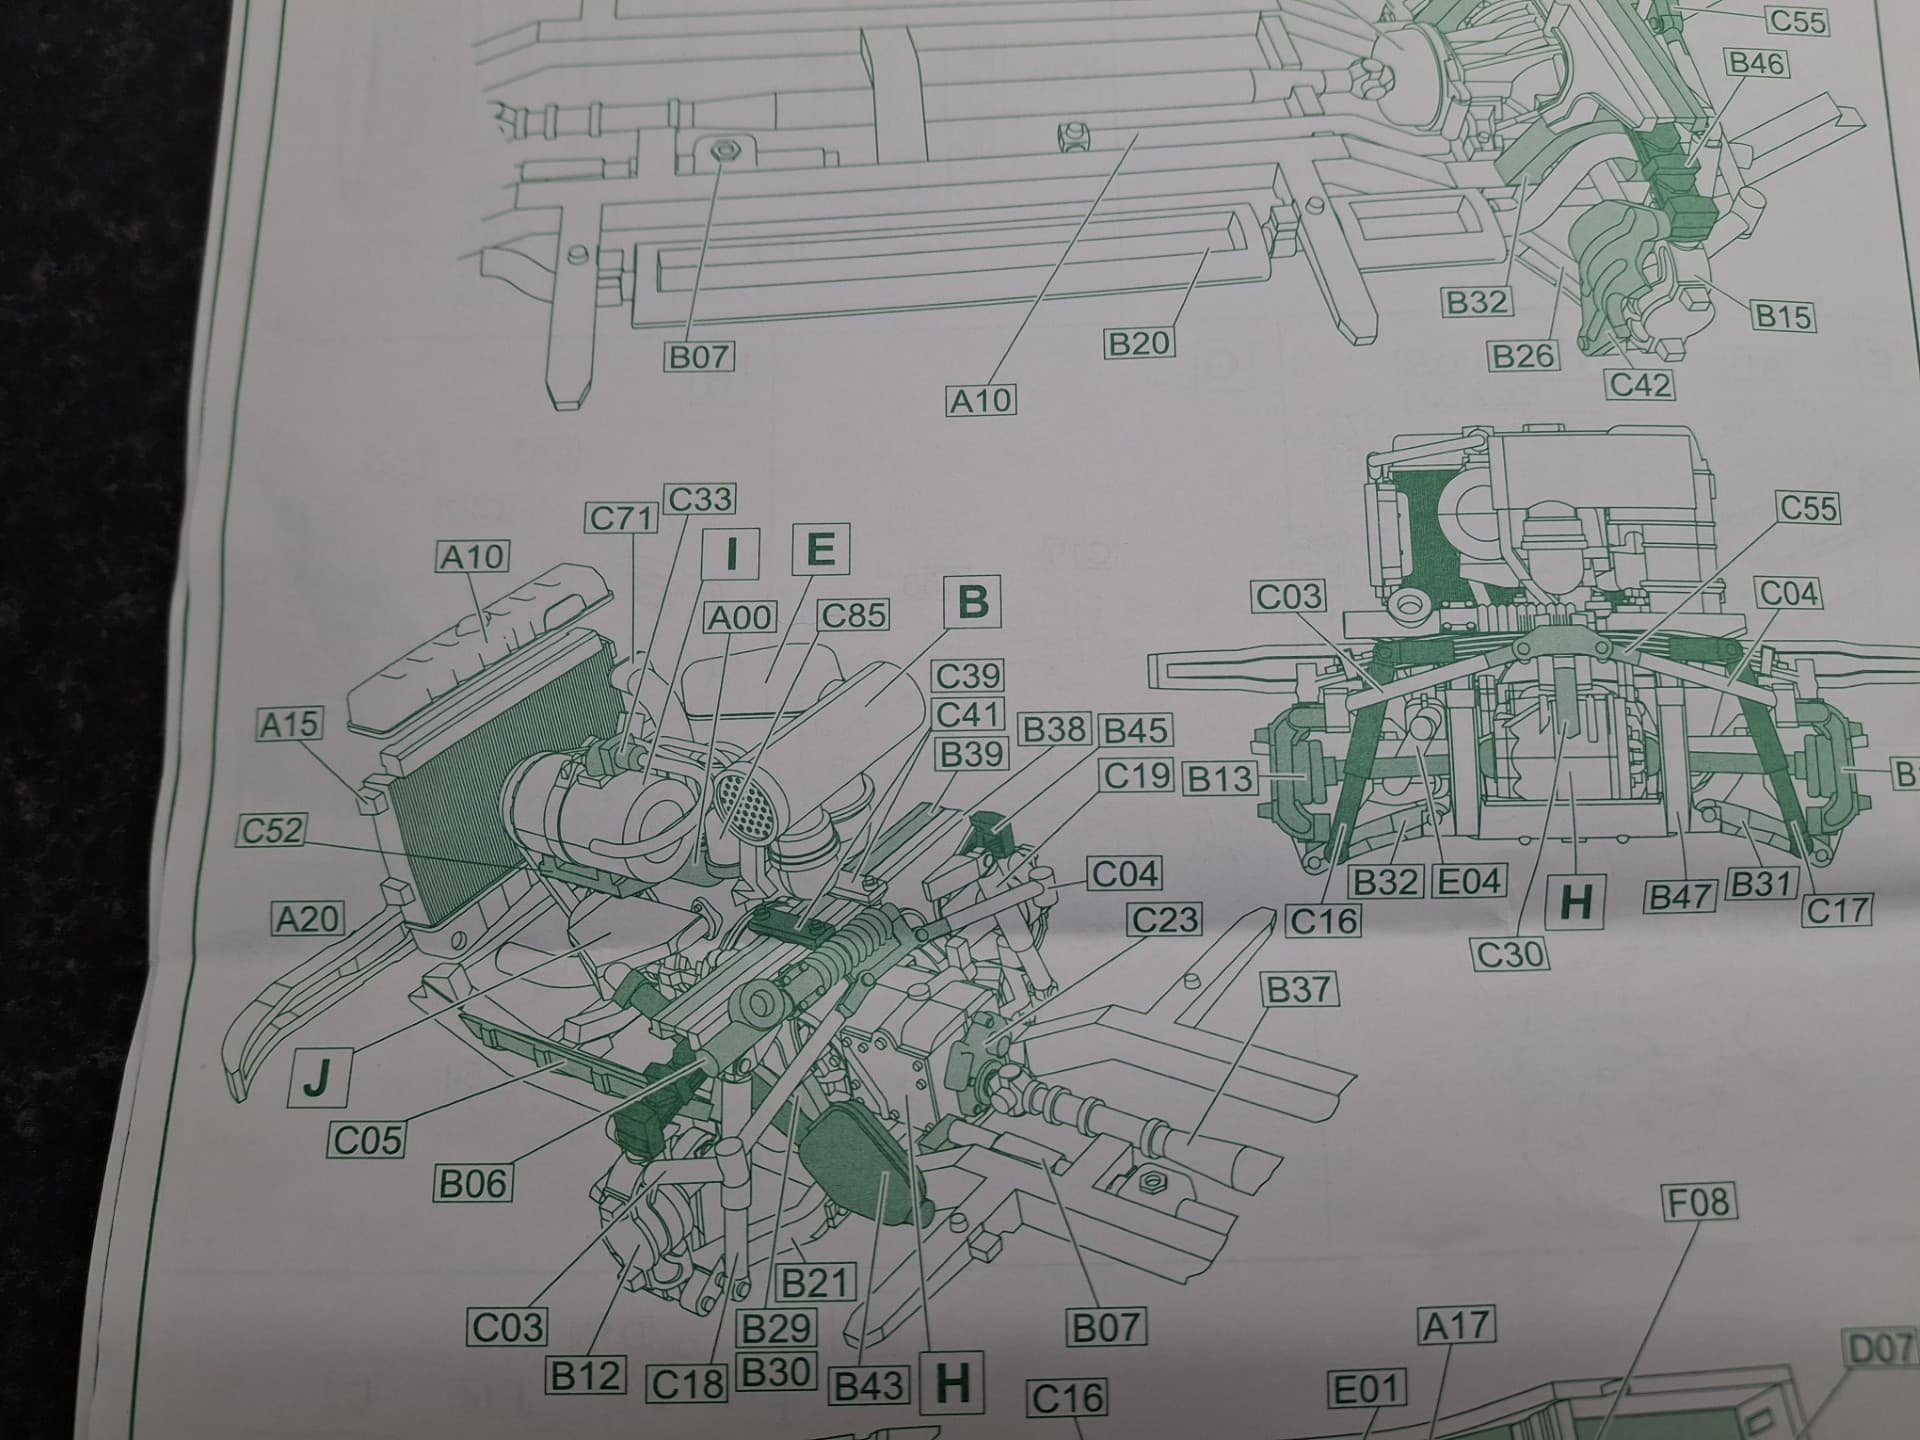
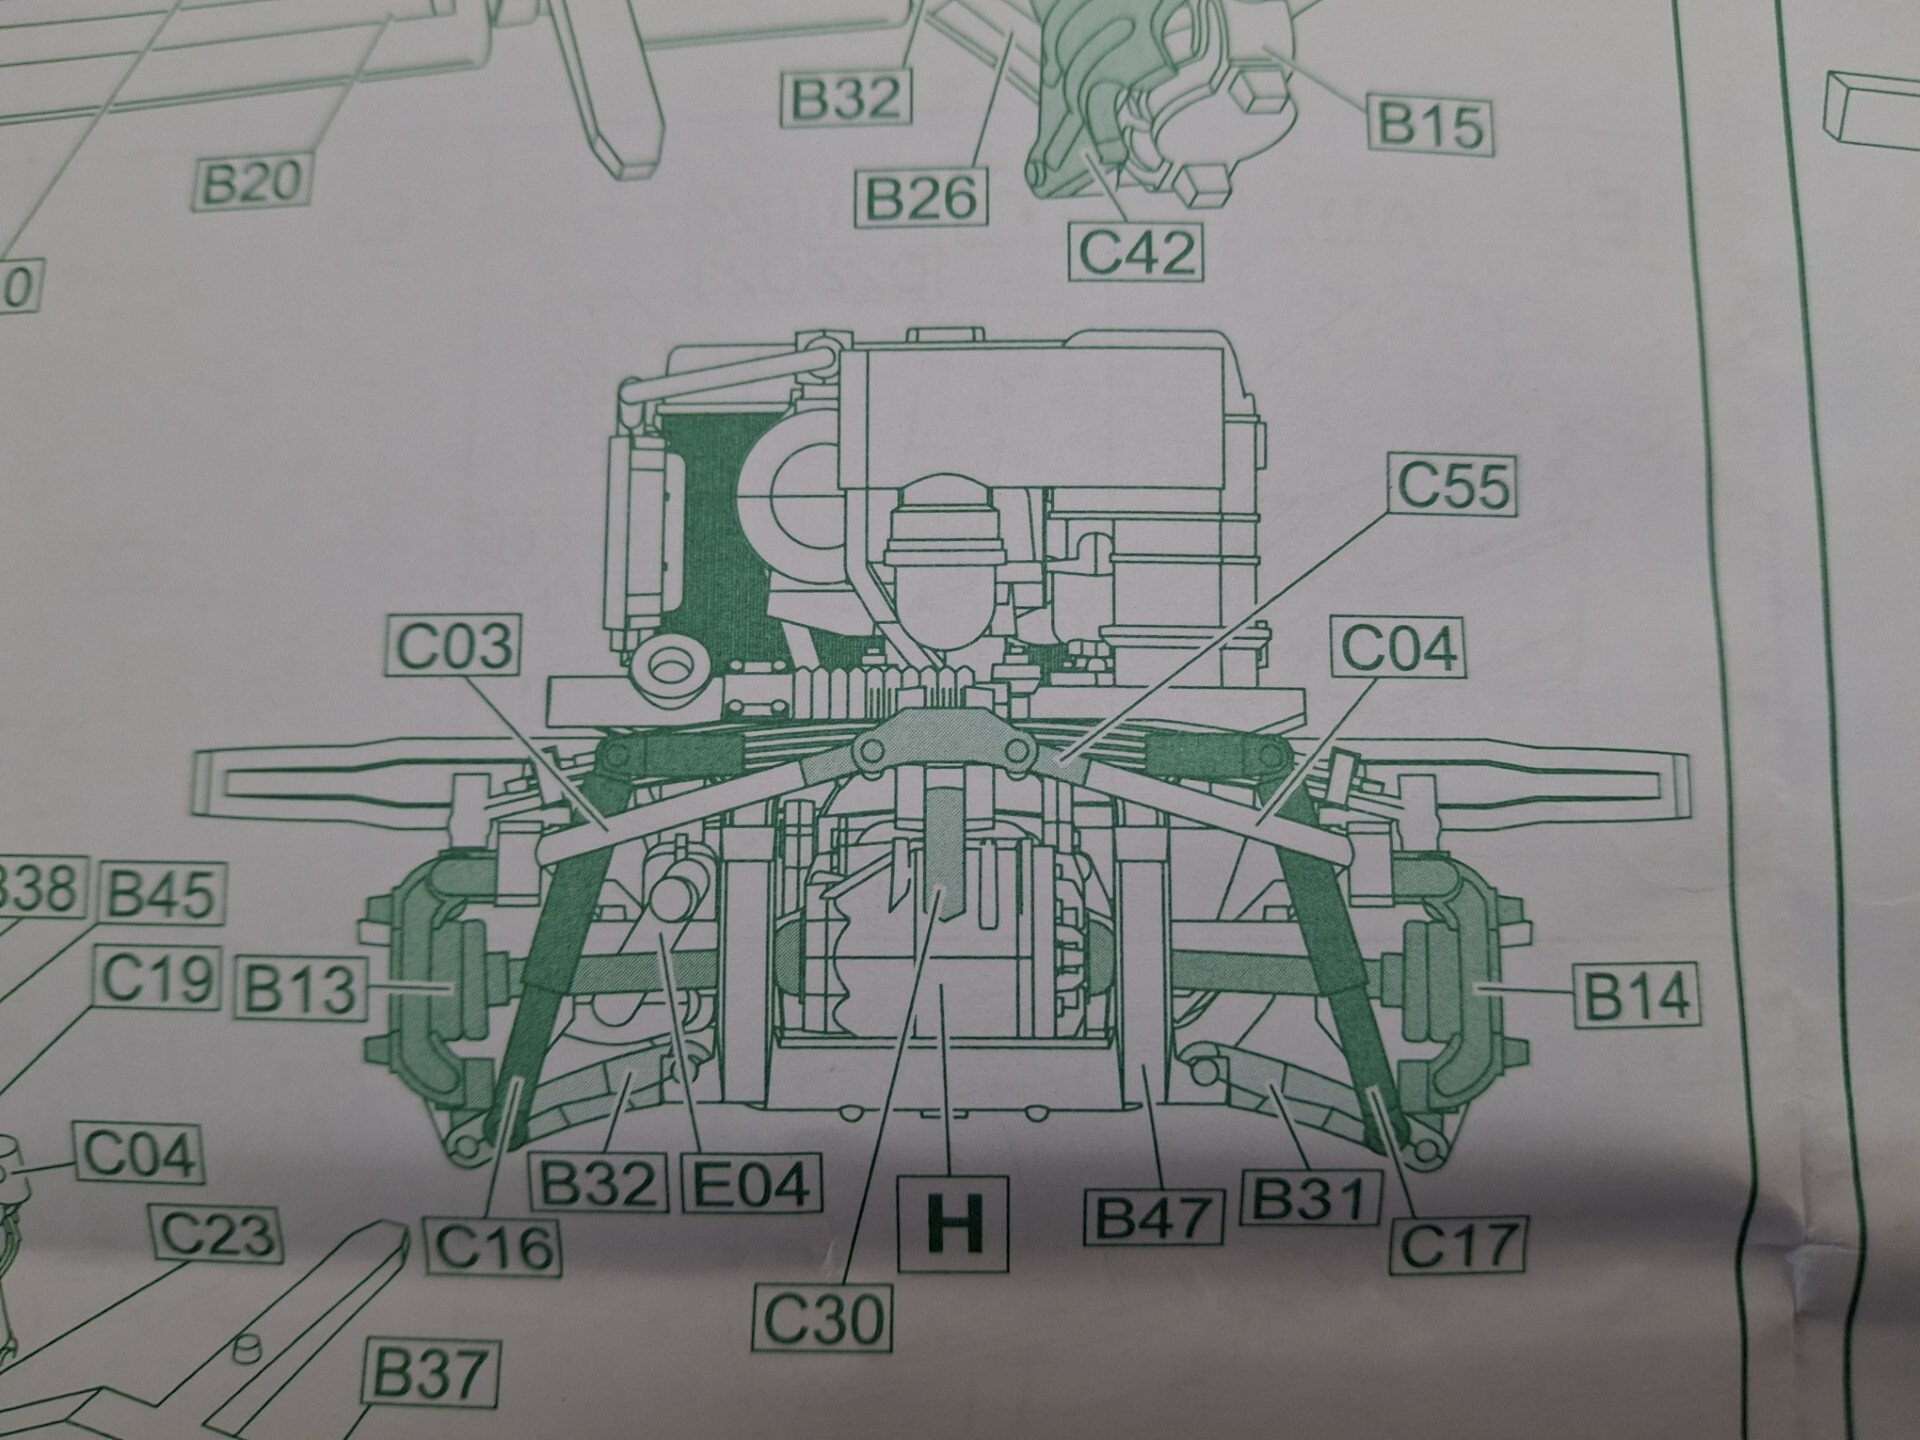
So, I studied the instructions, then looked harder; then looked again. And then undertook a further study. It then dawned on me, with mounting horror, that these instructions were absolutely incomprehensible – effectively useless. Now, I fully admit to not being mechanically minded - I don’t really know much about vehicle construction - but I can follow instructions; I can even for instance, follow a recipe, (with normally fairly decent results) but as General Patton was recorded as saying once, “I may be old, I may be stupid, but it don’t mean a thing to me”.

And that folks, is where I’m at. Stalled while I consider the best way forward; as this is something I’m only tackling in sort of downtime moments, don’t expect any rapid updates.

To anyone thinking of getting this kit, you might want to rethink somewhat!

This is what I’m talking about - some of the so-called instructions – no guide to actual assembly whatsoever. I don’t mind too much being subjected to a requirement for a bit of lateral thinking but this is taking the p**s:

I’ll keep you posted.

11 Likes

Hi Brian, I had the same problems with my Iltis kit, I can feel your pain. Good to know that ACE didn´t changed their habit. :rofl: :laughing:
I think the owner of ACE is present here? Maybe we should tell him that he makes the instructions for modellers, NOT for someone with a mechanical engineer degree. :frowning:

7 Likes

Jeez Hermann, I thought it might just be me!

I’ll find a way around it all I’m sure, just not sure when.

2 Likes

Here some images of my “almost” finished Iltis model. ( YES, it can be build!)


11 Likes

I guess after you finished the third kit, you know how it works. Do you plan on any variant of the MUNGA?

3 Likes

Maybe one can be with just very basic engine parts with the bonnet closed. That should eliminate some confusion.

1 Like

Well, the plans are/were(!):

One with the canopy down with 2 x Spz Marders in the background/alongside as Quick Battle Orders are issued; a bit figure intensive ie a lot of work let alone the models to be constructed. Now, I don’t quite know if the Bundeswehr even have a system of QBOs but I’m sort of assuming they do, so effectively, a couple of officers around a map spread on the Munga bonnet, with Panzergrenadiers evident in the Spzs. A radio will be fitted - SEM 25 I believe.

Second idea is to more or less, replicate the Dragon box-art on the Kpz 70, but depict re-ammunitioning while a Munga rocks up with say, the Company Commander to see how it’s all going. Again, a lot of work.

Finally, another Munga shown alongside a top secret Leopard variant, prior to it rolling down a range. Again, the Munga will really be just the mount of say, a Platoon or Company Commander.

So no real variants - the latter 2 ideas will be with the canopy up.

The ideas are no problem - the building of everything is!

5 Likes

Well, I was always hoping to minimise the engine part of the build in any case; the trouble is I can’t discern what is really what from such poor instructions. It looks as though even making the body is going to be fraught.

3 Likes

Further to my earlier reply, the idea for the 2 x Spz came from a Tankograd book:

I know this shows a Munga transiting past, but it gave the idea of an Orders Group. The Tankograd booklet was this one:

They really are excellent for both details and inspiration I find.

6 Likes

The idea of having the Munga as an umpire’s vehicle on an exercise sounds cool. You could have the umpire putting the Marder commander “on the carpet” for some transgression…

4 Likes

Well, actually I envisage the Munga being the mount of say, the battalion commander (as opposed to an umpire) come to make sure that as a tactical opportunity on the exercise presents itself, he can capitalise - hence quick battle orders. So, the Munga will require a radio set and I can portray it with the top down. Figure intensive for sure but should be effective. It also means I can stick one of those metal pennants on the Munga, which I think for a Pz Gren Comd would be green with a horizontal black bar.

I might invest (and convert) a couple of the figures that come in this set:

All I have to do is manage to build the bloody Munga!

5 Likes

I don’t think I’ve ever seen a plastic kit instructions quite like that! Still- it’s an interesting little vehicle and I like the ideas you have for them.

6 Likes

That’s what these guys are saying. :open_book: LOL!

—mike :hammer_and_wrench:

8 Likes

So, this is where I’m at; in addition to the complete and utter absence of any instructions worthy of the name, no locating pins or tabs anywhere.

This is what I have so far:

5 Likes

When I build the Iltis, I learned that the tyres are FAR too small. So replaced them with ones from DEF Model.

3 Likes

Thanks Hermann, but I think that’s the least of my worries at the moment!

The tyre/wheel seems to match those of my Elite Modellbau/CMK hybrid in my Berlin Wall dio:

5 Likes

Have you ever done jig-saw puzzles?
This looks like one except you got little labels telling you which part fits where
instead of painstakingly testing all the blue pieces in all possible locations until
the sky part of the puzzle has been completed.

1 Like

Well, that’s the trouble Robin, I haven’t got any labels telling me anything at all!

1 Like

Example:
I, E, B and J in squares are subassemblies from somewhere else on the instruction sheet.
A10 + A15 make the radiator which then gets mounted to the front bumper (A20?)


B45 seems to be a transverse leaf spring fitting up under the channel created by B39 + B38. C41 (two of ) sits on top of the channel.
B06 is the steering gear, I presume the steering column will go into the round socket on the left (driver on the left hand side).
The engine looks as if it gets mounted in a previous step (step H?)

4 Likes

Shades of this I fear:

9 Likes