I needed a break from my usual forays into 1/35 Cold War Armour, and decided that I would tackle some of those aircraft kits from my childhood, but bring them up to spec; that is, really regarding finish. The oversized rivets, poor seams, poor fit even, could all stay, yet I would complete them as I’d wished I’d been able so to do when I was a kid. So, not much airbrushing, and I’ve taken the kits at face value, so markings, colour schemes etc will all reflect the period they hail from.
So, a palate-cleanser if you like, but it was actually great fun, and even relaxing, for example, making a kit which say, only had around 20 parts. Anyway, first off, the Airifx Me 109G:
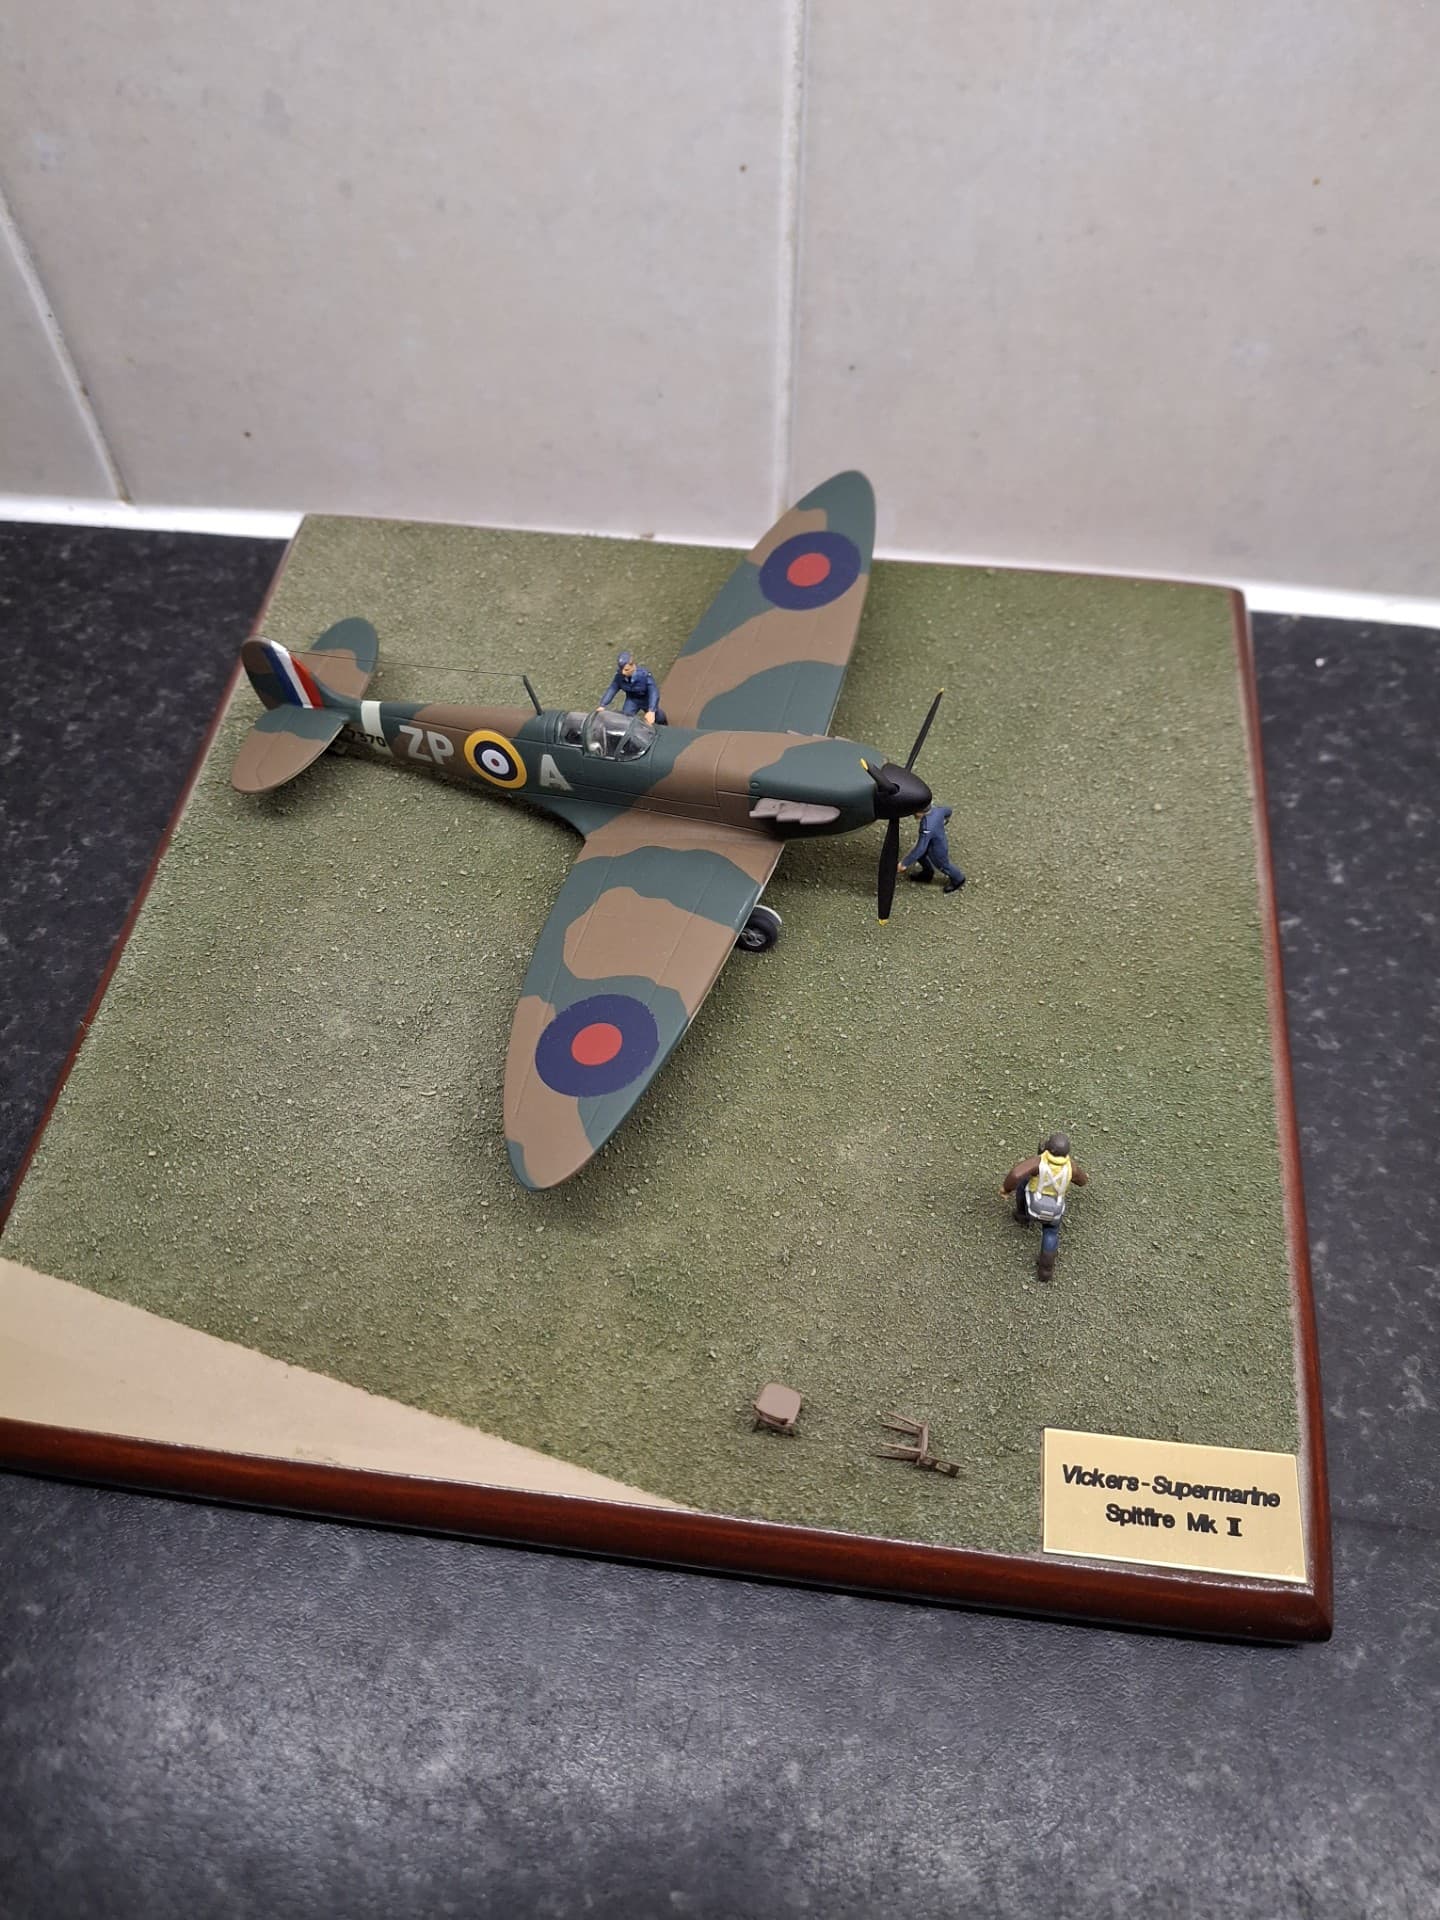
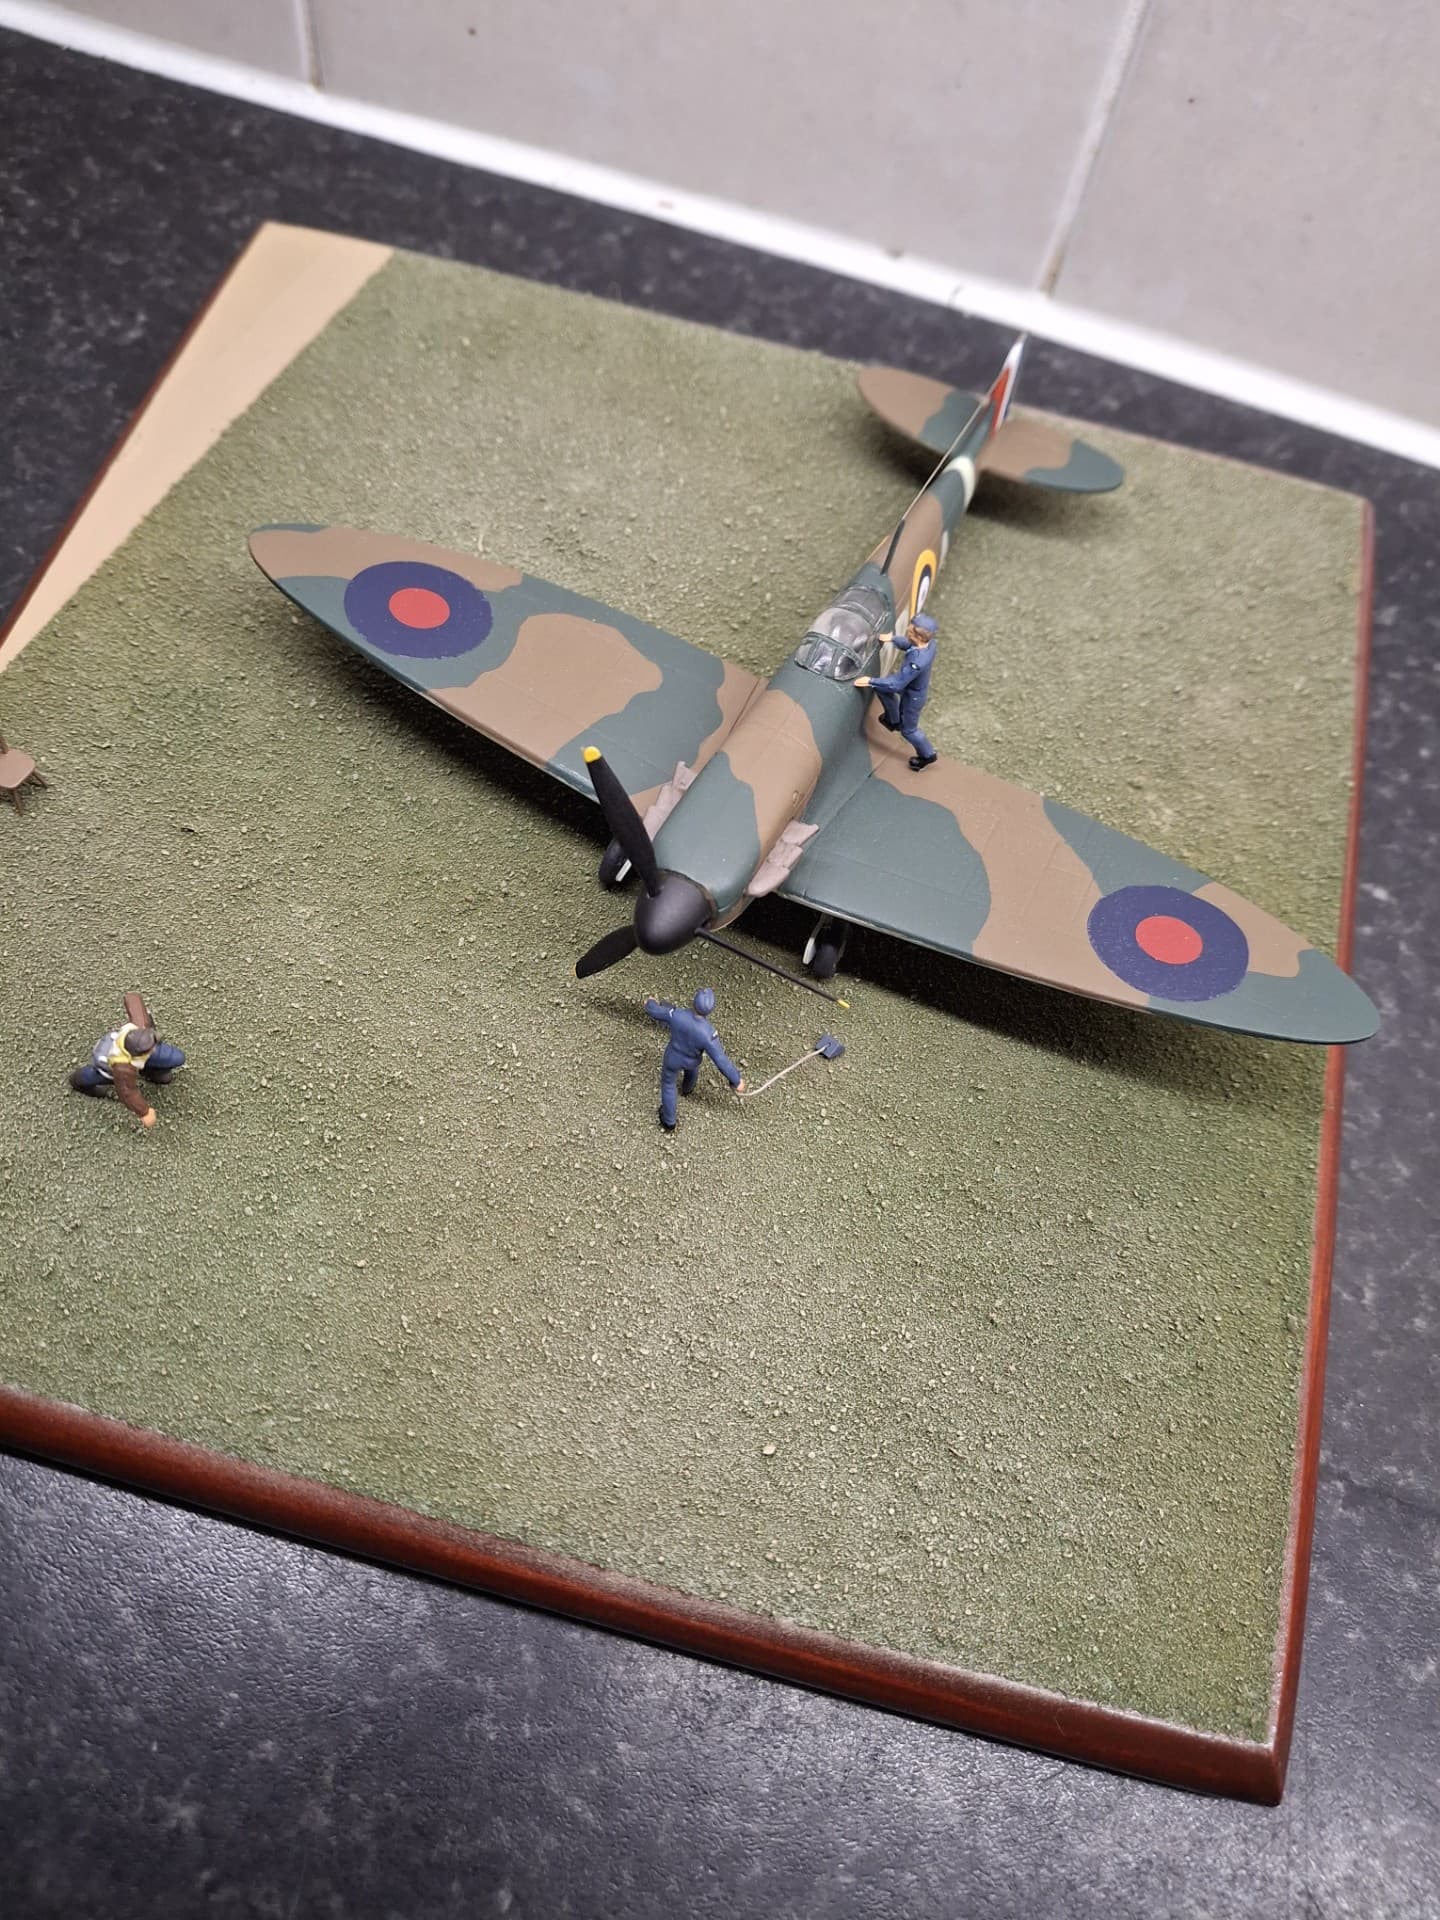
and the Frog Spitfire (which was going to be my entry for a campaign, but as ever, sort of withered on the vine) however, here it is now, just about complete though I wanted to add at least one more figure. We’ll see:
Well said … the models I built as a kid would be Frankensteins now lol … I enjoyed my 1/48 Spit that I did for that Spitfire campaign was a nice reminder of the old kits I built …You may have pushed me into looking for a 109 now …
I’m aware that the tail marking is spurious but can anyone point the way to a more accurate rendition of the painted camouflage. I recall that when I first tackled the kit (c.1964) the instructions would have you just paint light blue lines over the base plastic colour, which back then was a sort of khaki drab. Is there anything similar, and authentic, which I could apply to this model? I’m sort of keen to get the best from it, though purely in a nostalgic way, so rivets will remain, poor fit will stay, but I’d like the colour scheme to at least reflect what is on the box up to a point. I believe the wing and tailplane schemes would probably have consisted of a splinter pattern.
Over to any Luftwaffe experts who may have some ideas.
Modelling how it used to be – and I’m having a blast!
I build far more carefully than I did some 60-odd years ago, though there is only so much one can do with such basic kits; I’ve added some details and intend to have the wing-root MGs protruding.
I’ll sand some thicknesses down where I can, but the aim is to enjoy. One annoying thing is that Lindberg moulded the rear part of the canopy into the fuselage as solid, however I haven’t the skill to amend this. Interestingly, the clear component of the canopy is around 2mm thick!
Progress on the venerable Lingberg He 100; propellor only lodged in position, paint scheme fictitious, but I’ve got to repaint the wings due to a coverage malfunction; anyway, progress:
Just to recap – the venerable Lindberg kit as part of my pursuit of the aircraft I made, or wanted even, as a kid. Overscale rivets, poor seams all abound and I don’t plan to address those. This He 100 is also in a totally fictitious scheme as though, perhaps, it took part in the Battle of Britain. That said, I still ran with the kit emblem of a dagger and a hat.
All matted down using a rattle can Humbrol product, which maddeningly, sort of frosted over on one of the wings. I have no idea why that is; I thought a rattle can would be ideal for this scale, and have used them before.
So apart from the canopy, and the whole new world of pain that is 1/72 cockpit masking, we’re nearly done I think. That said, I still have to sort out a base. The only missing decal would be some kill markings on the rudder but I’m currently at a loss as to how to either make some, or identify some – though I haven’t really started on that just yet; I thought it necessary as given the seniority of the pilot, ie from his fuselage markings, I thought it highly likely that he’d have a few scalps on his belt.
Right - the Heinkel He 100 build complete; a kit I’d wanted to build as a kid but never did. Lindberg models, even though they featured in my local village shop, were beyond my somewhat meagre pocket money.
Don’t look too close as it won’t withstand scrutiny, but I wanted to finish it as I would have liked to have been able to do so all those years ago; I have not tackled oversize rivets, fit issues or anything else - that was, in a way, part of the charm
One of the annoying things about the kit was the part of the cockpit transparency moulded in ie solid. I didn’t think I was capable of doing anything much about it (buy a better kit springs to mind) so just painted the solid panels gloss black:
Quite an attractive aircraft I think, a touch smaller than the Me 109; I finished it in a scheme I thought appropriate for the Battle of Britain so certainly a What-If.
So, in 1940, somewhere near The Channel, early morning, a couple of mechanics are doing what they do, whilst a Gefreiter cycles past with the daily parade state on his way to Staffel HQ.
I need to add a smidge of matt varnish to the glue beneath the bicycle once it fully cures, but that should be it.
In the meantime (and I still don’t quite know why) I’ve amassed the Frog Me 262, the Frog He 162, the ancient Revell Fw 190, Revell Me 109E, and last but not least, an Airfix F-105 for a mad What-If project.
A very old effort by Revell, made in a somewhat brittle olive drab plastic; not up to scratch by any standard but it is from its time, and I loved it as a kid, though I made a hash of it (I was only around 8 when it hit the local modeling shop) and I never quite understood why they put crosses on the tail, but then, I was dimly aware that swastikas were considered unseemly - though I duly noted that didn’t deter Frog a few years later on.
Anyway, poor fit, some details lacking, but I soldiered on with what I could, and did not address many of these issues, after all, this was a re-visit to my childhood, but I hoped to finish it to a better standard - or rather - up to a point(!)
I didn’t get the toe-in of the undercarriage right but the fit was a real struggle and in the end I used superglue, which of course, was it’s usual unforgiving self. Anyway, some details still to be added including a pilot’s seat, and antennae. Next up, primer.