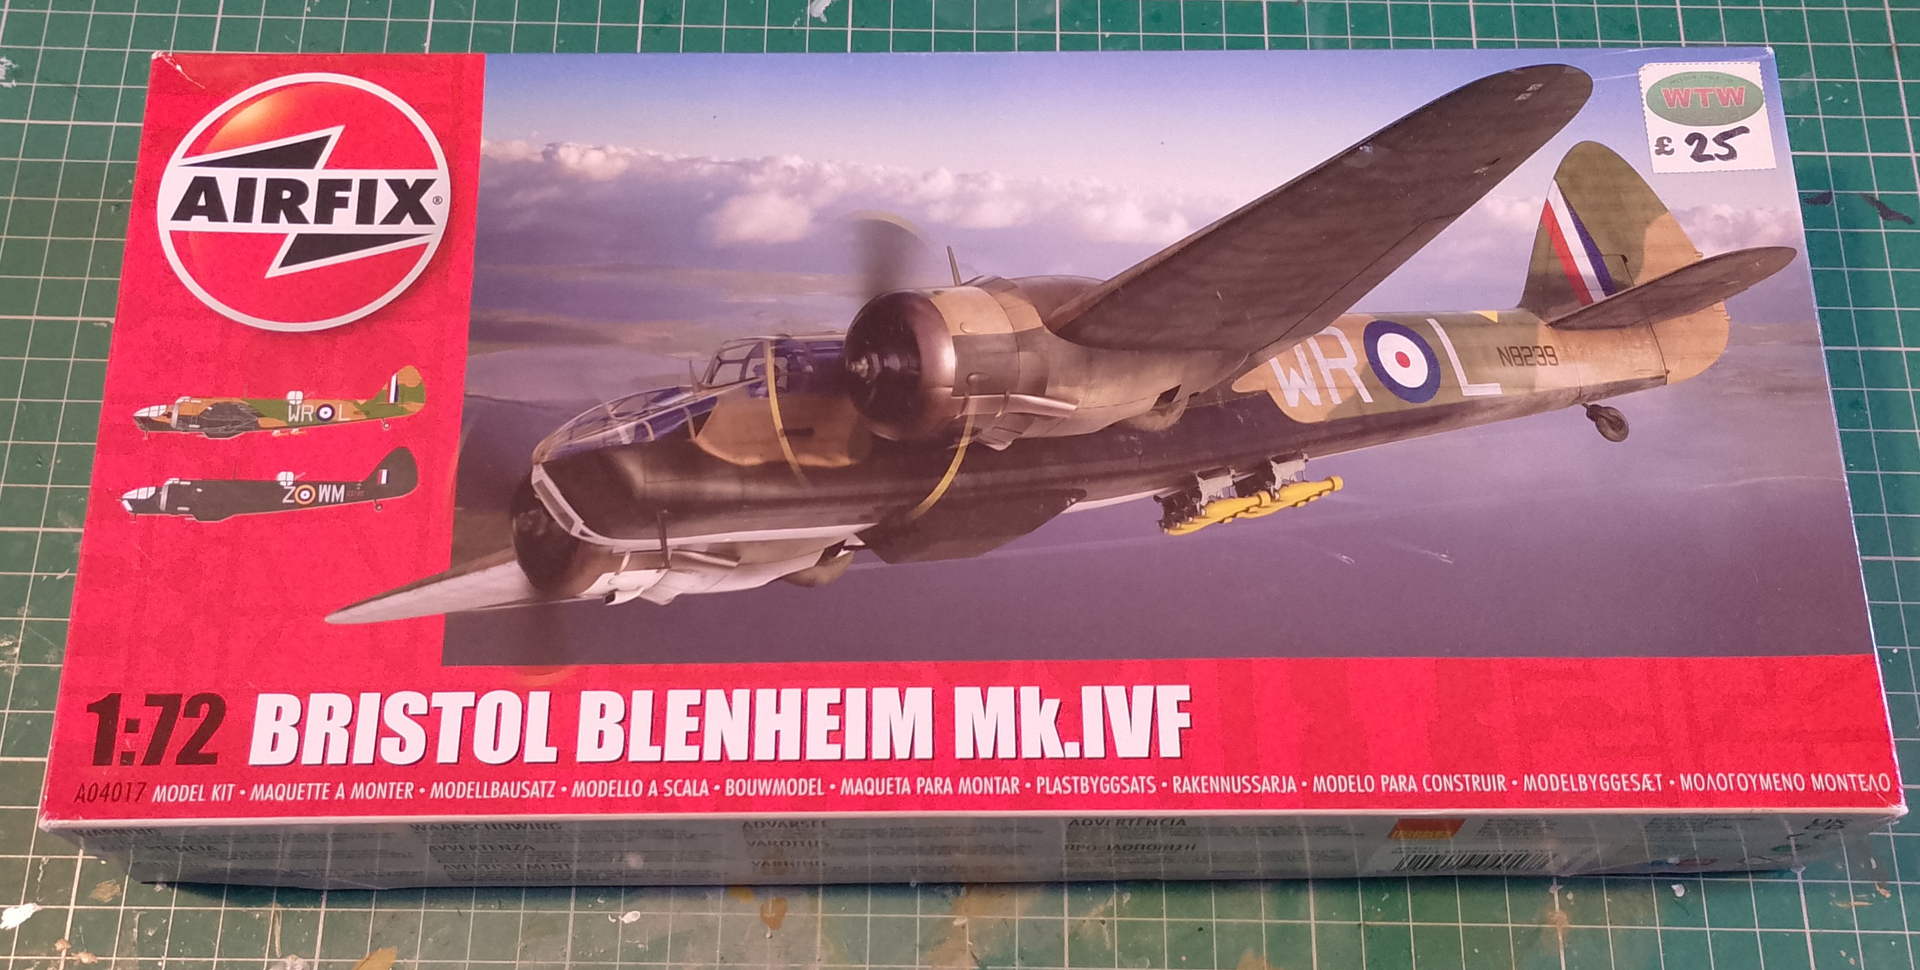
For my next build, I’m going to be building the Airfix Bristol Blenheim Mk.IVF I 1/72 scale. Got this for Christmas from my parents so I want to get cracking with it.
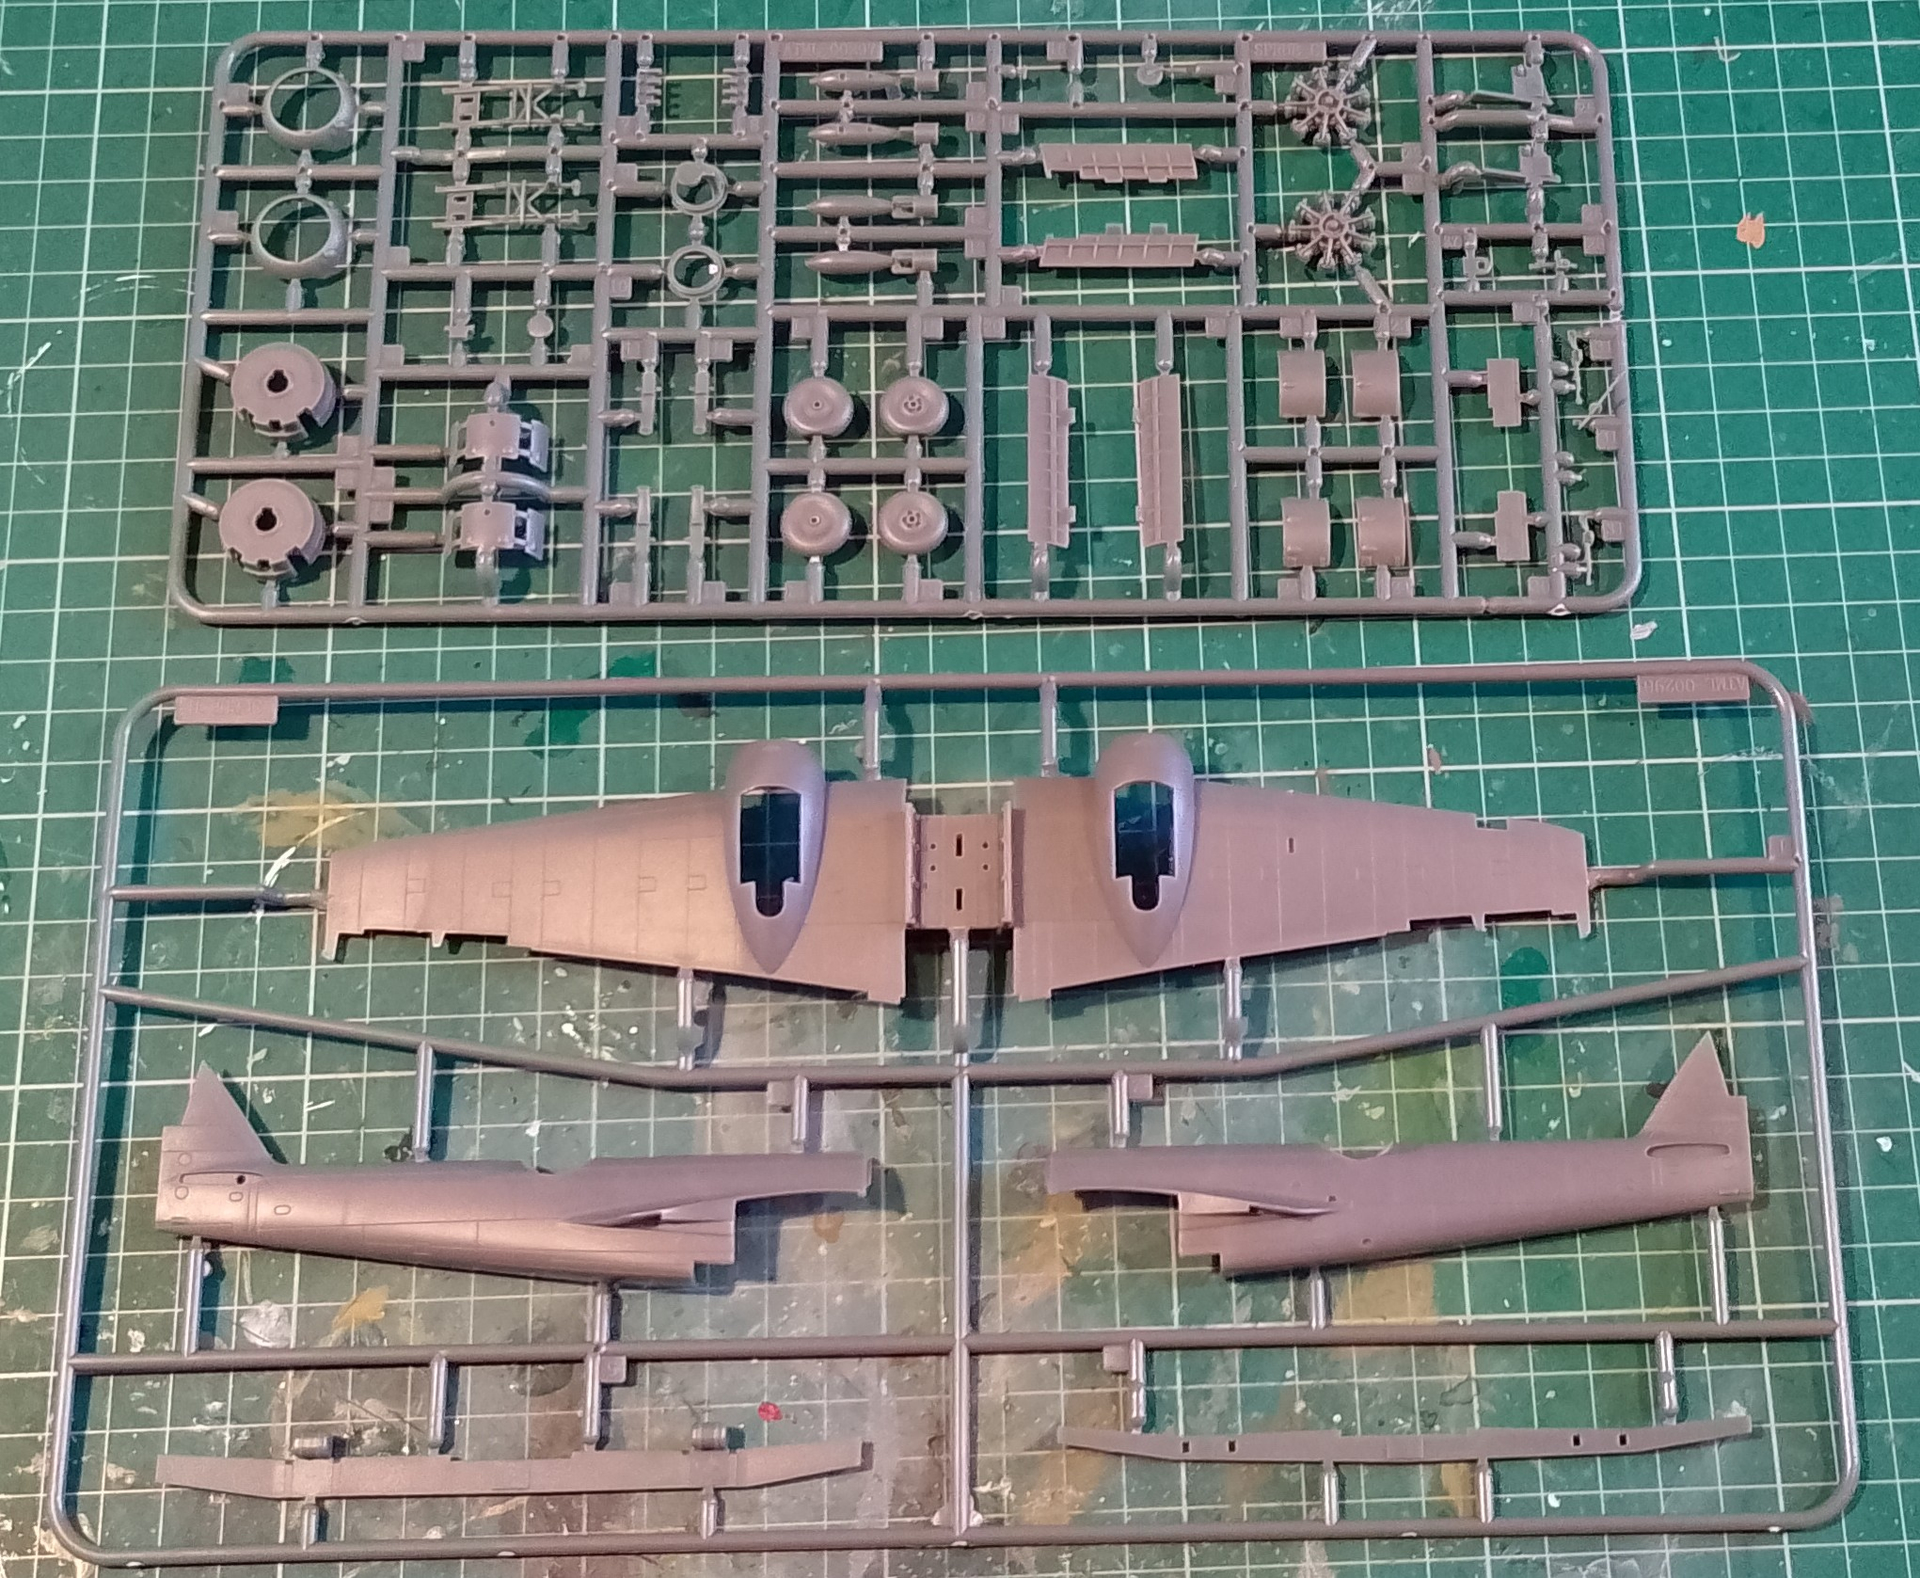
Comes on several sprues. All parts look nice and sharp with good detailing for the scale. It’s certainly better than the old one I built in the late 90’s. Not a rivet in site! You do get some optional parts, such as open bomb bay with a pair of 500 pounders and both single and twin chin gun turrets. I did find a couple of party broken, something which seems to common to nearly every Airfix kit. A seat from one of gun turrets (easy to fix) and one of the three supplied Vickers K’s. I won’t be using those anyway as I’ll be swapping for a pair of Brownings. Nearly every IV I’ve seen had Browning guns.
I’ve got a couple of these and some Mk.1’s, so this will be will be a practice build for those. I hear that the kit does have a few tricky assembly steps, the undercarriage legs and fit of the nose which can be gappy if you’re not careful.
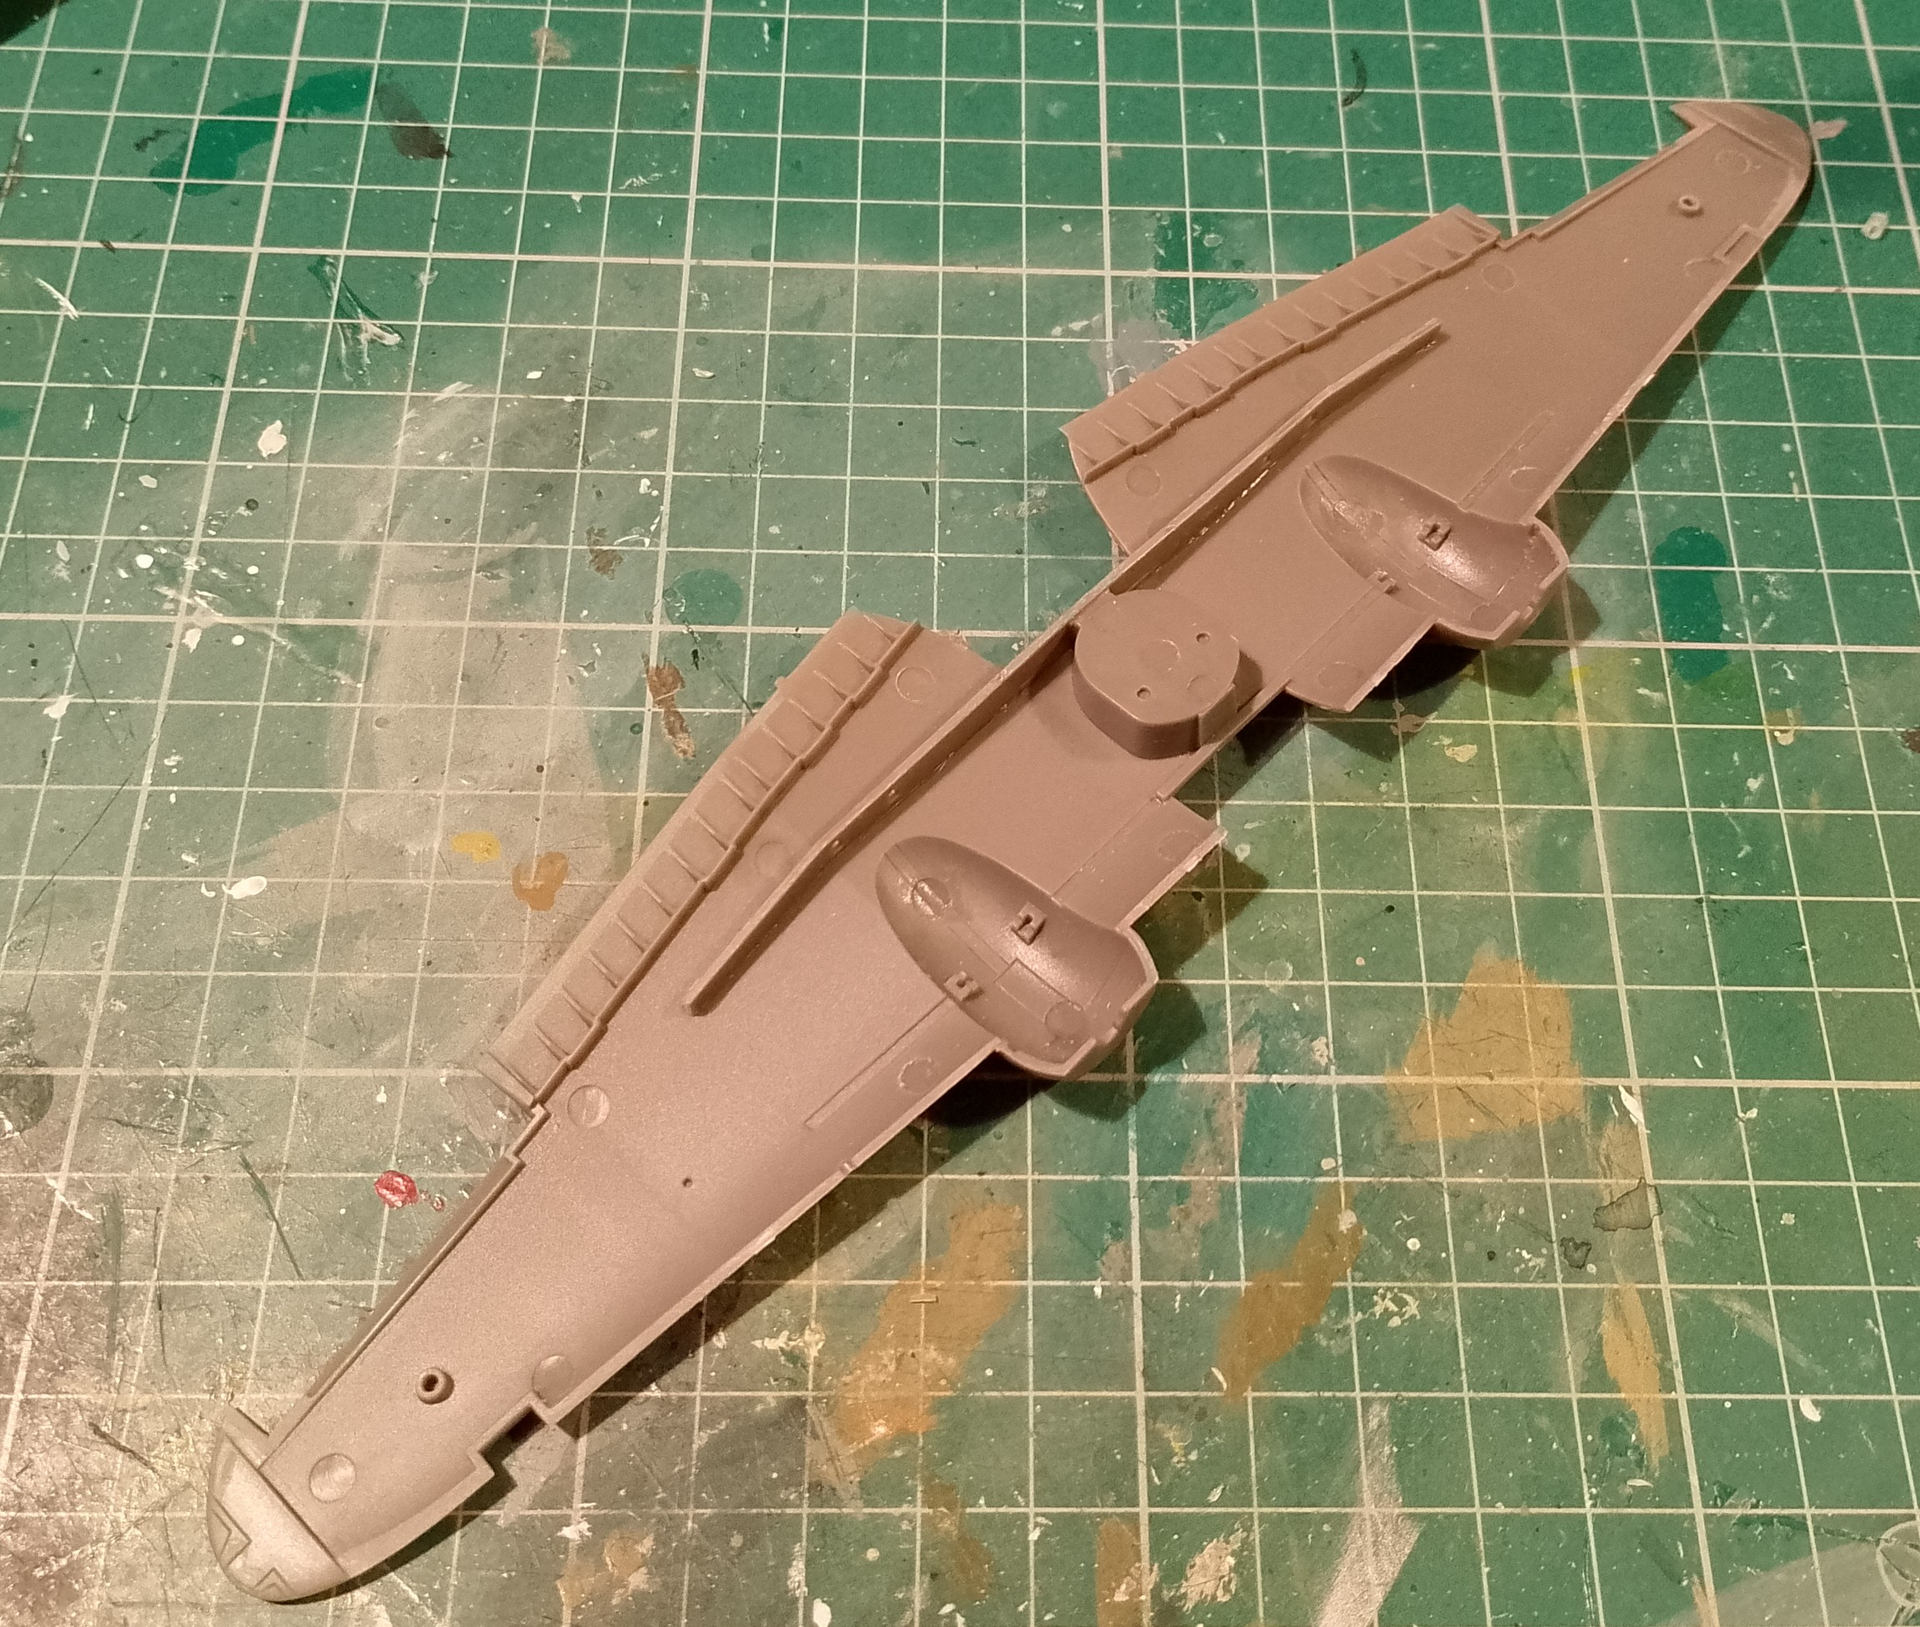
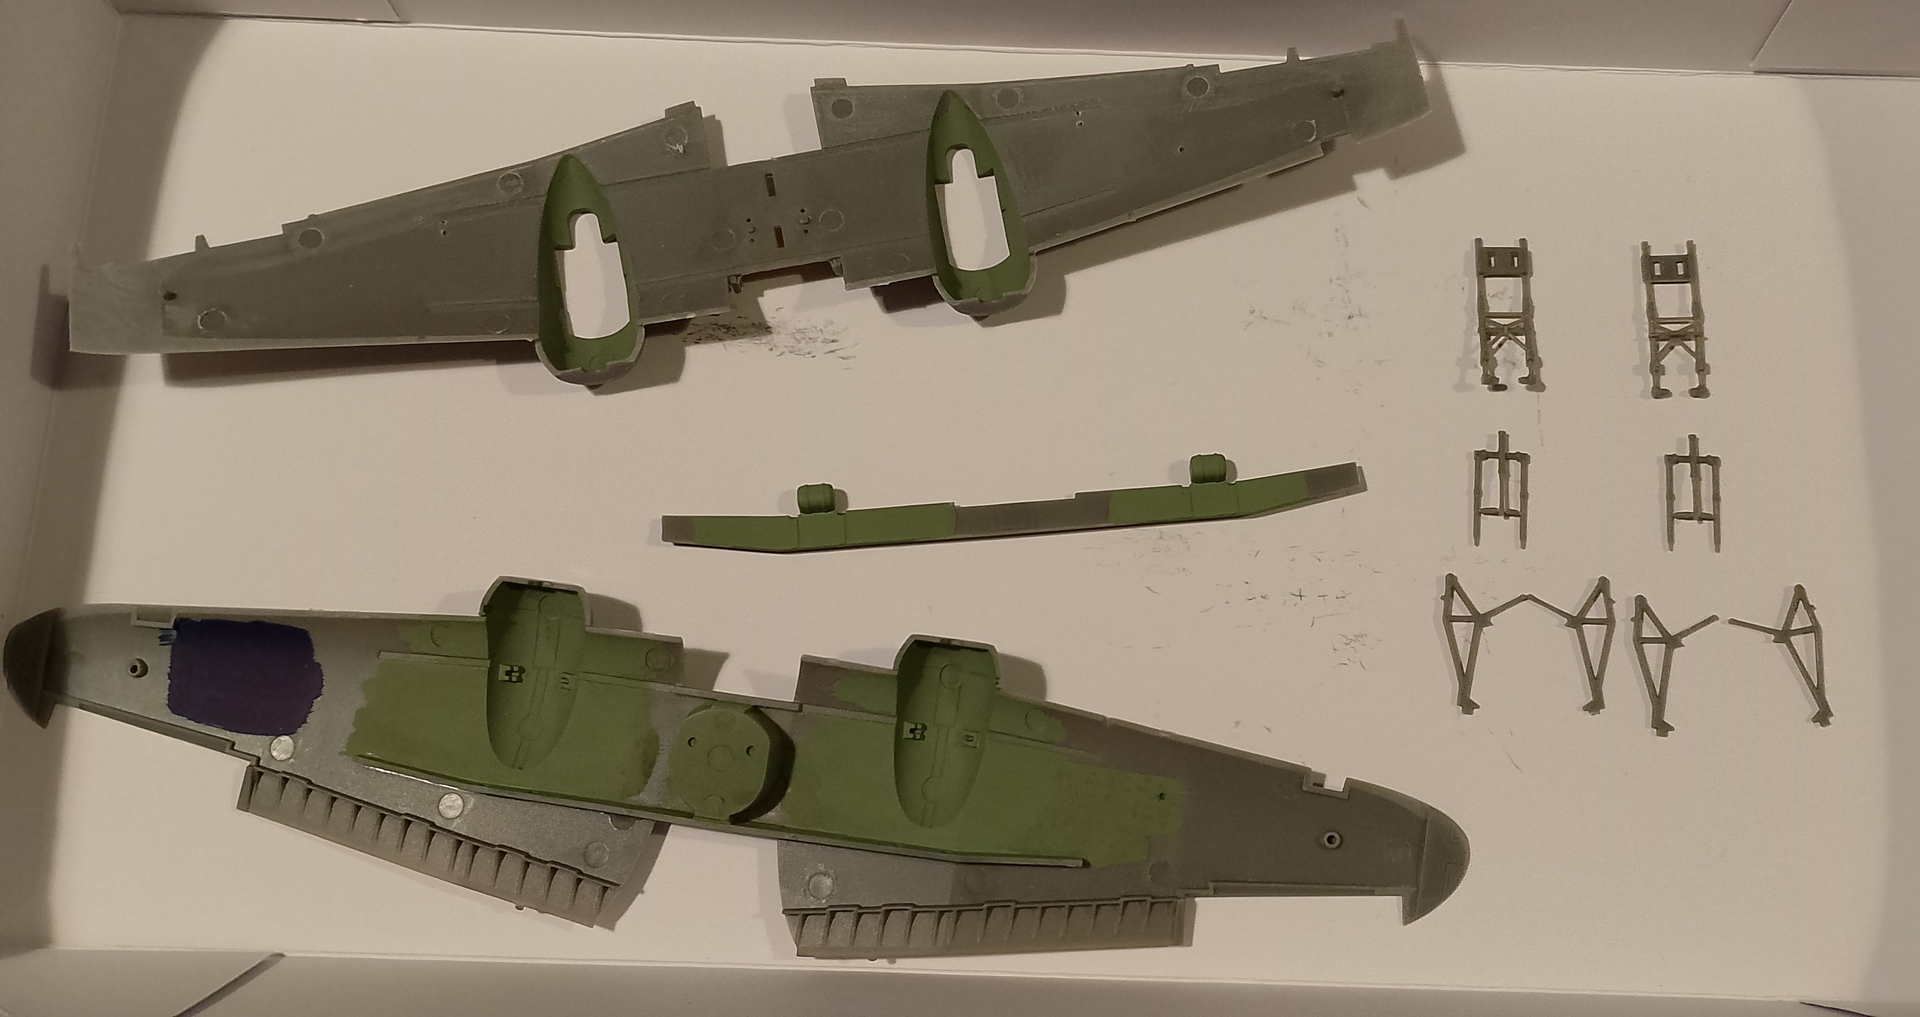
Everything starts with the wings, fitting the spars and mounts for the legs.
And at this point I lost daylight so had to call it a day. Snowed in for three days and barely got more than a couple of minutes at the bench. Luckily it’s all gone now.
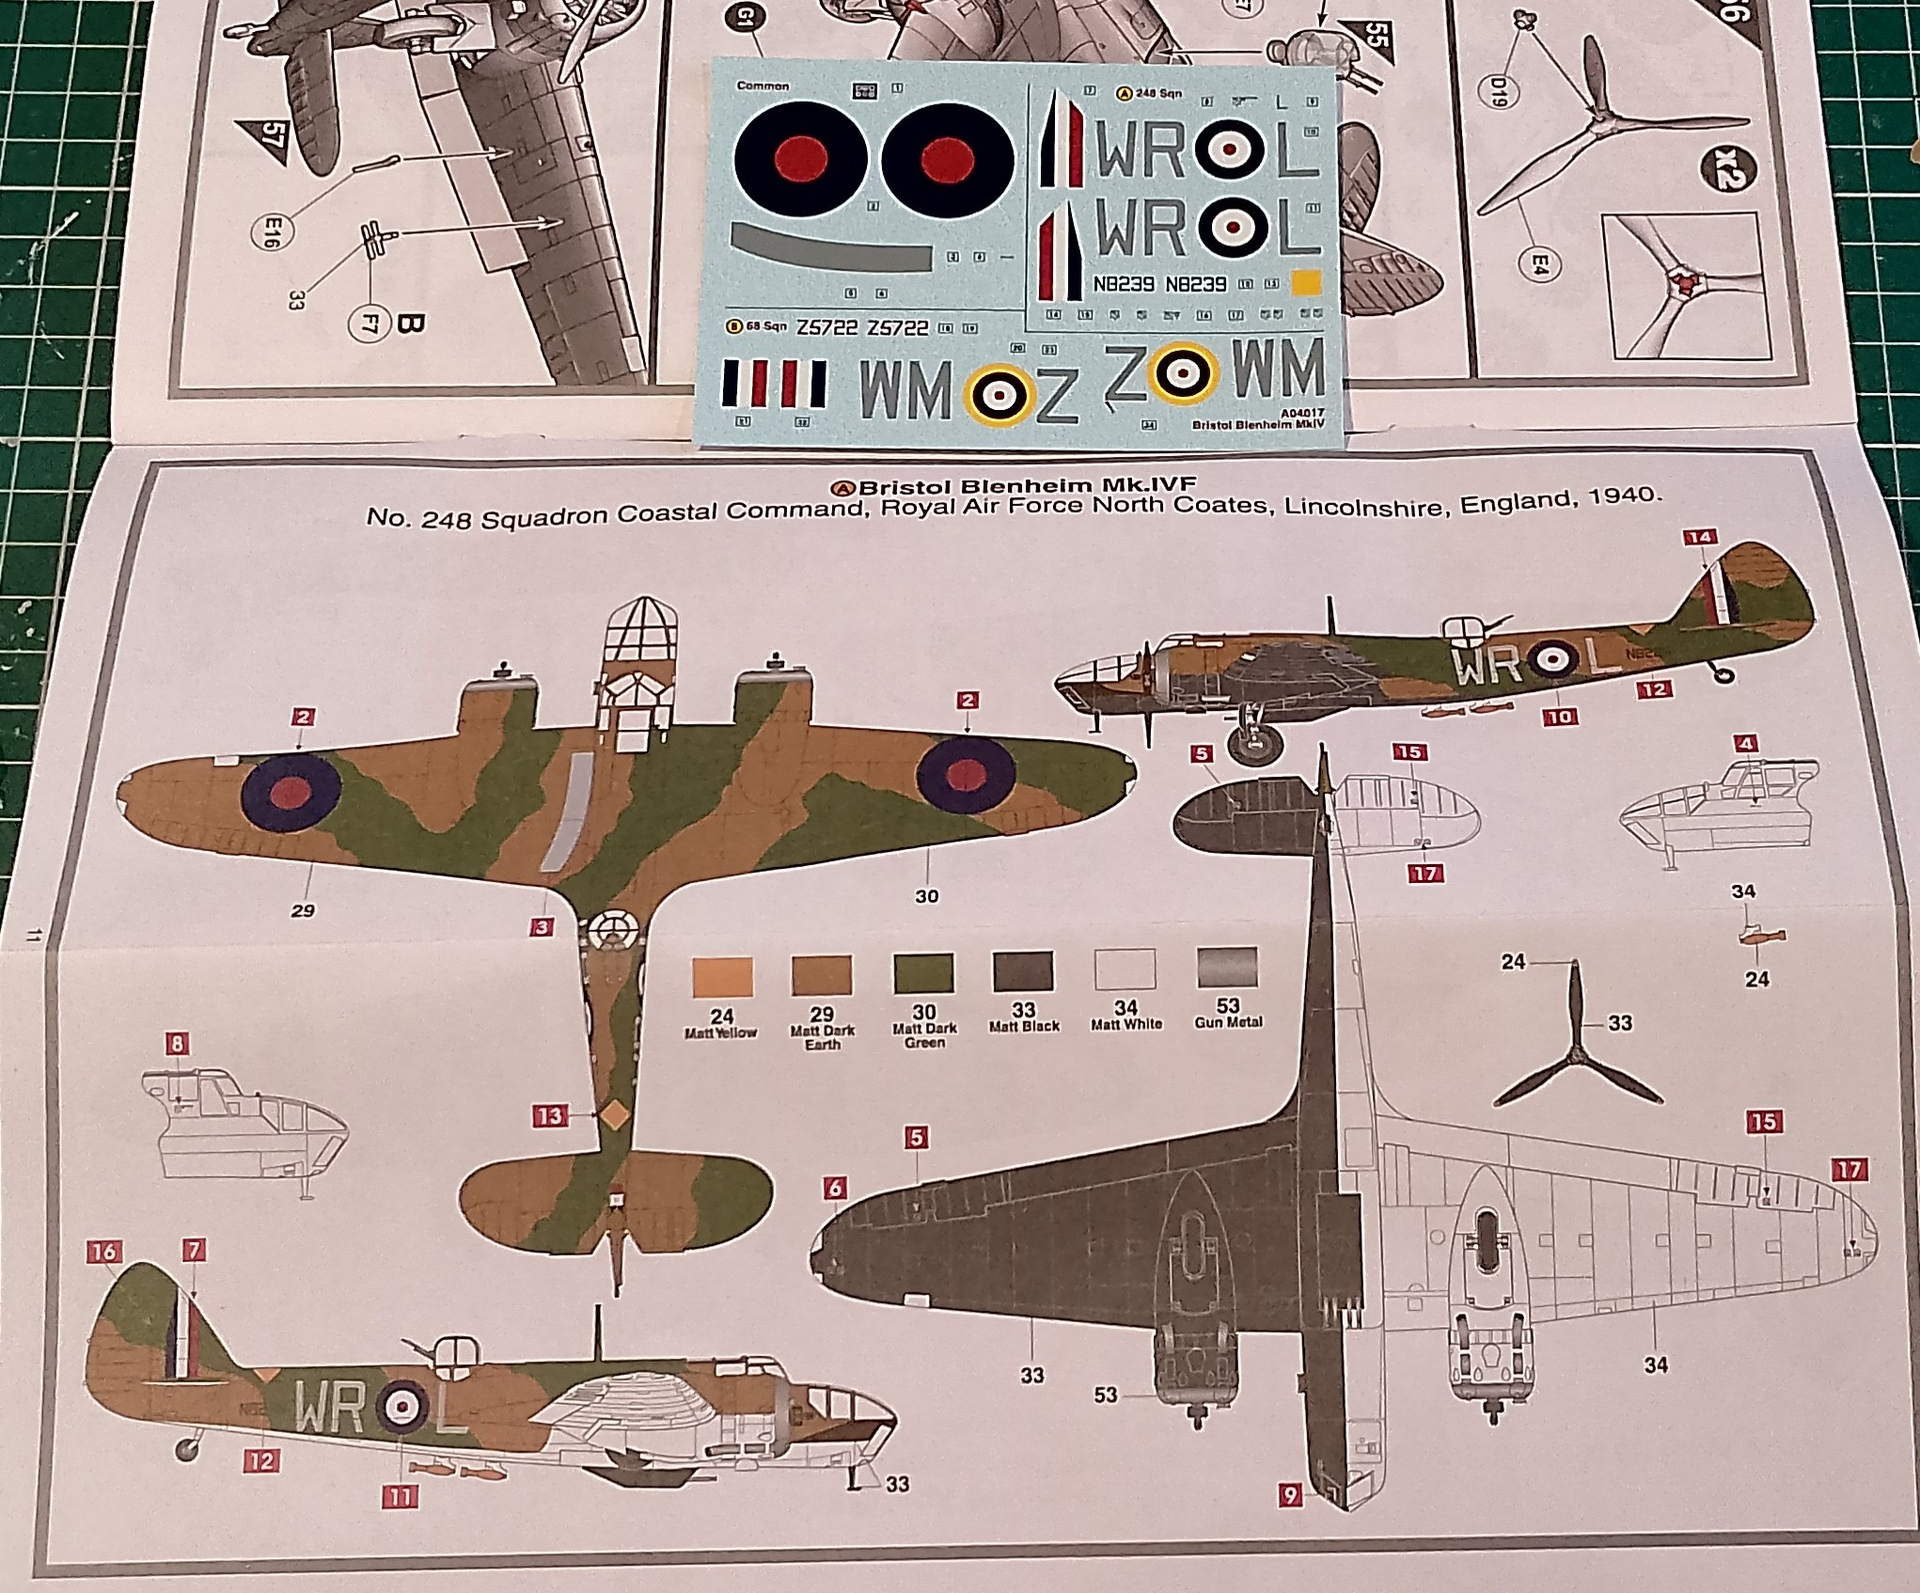
The I’s nice. It’s often overlooked the role they played during BoB.
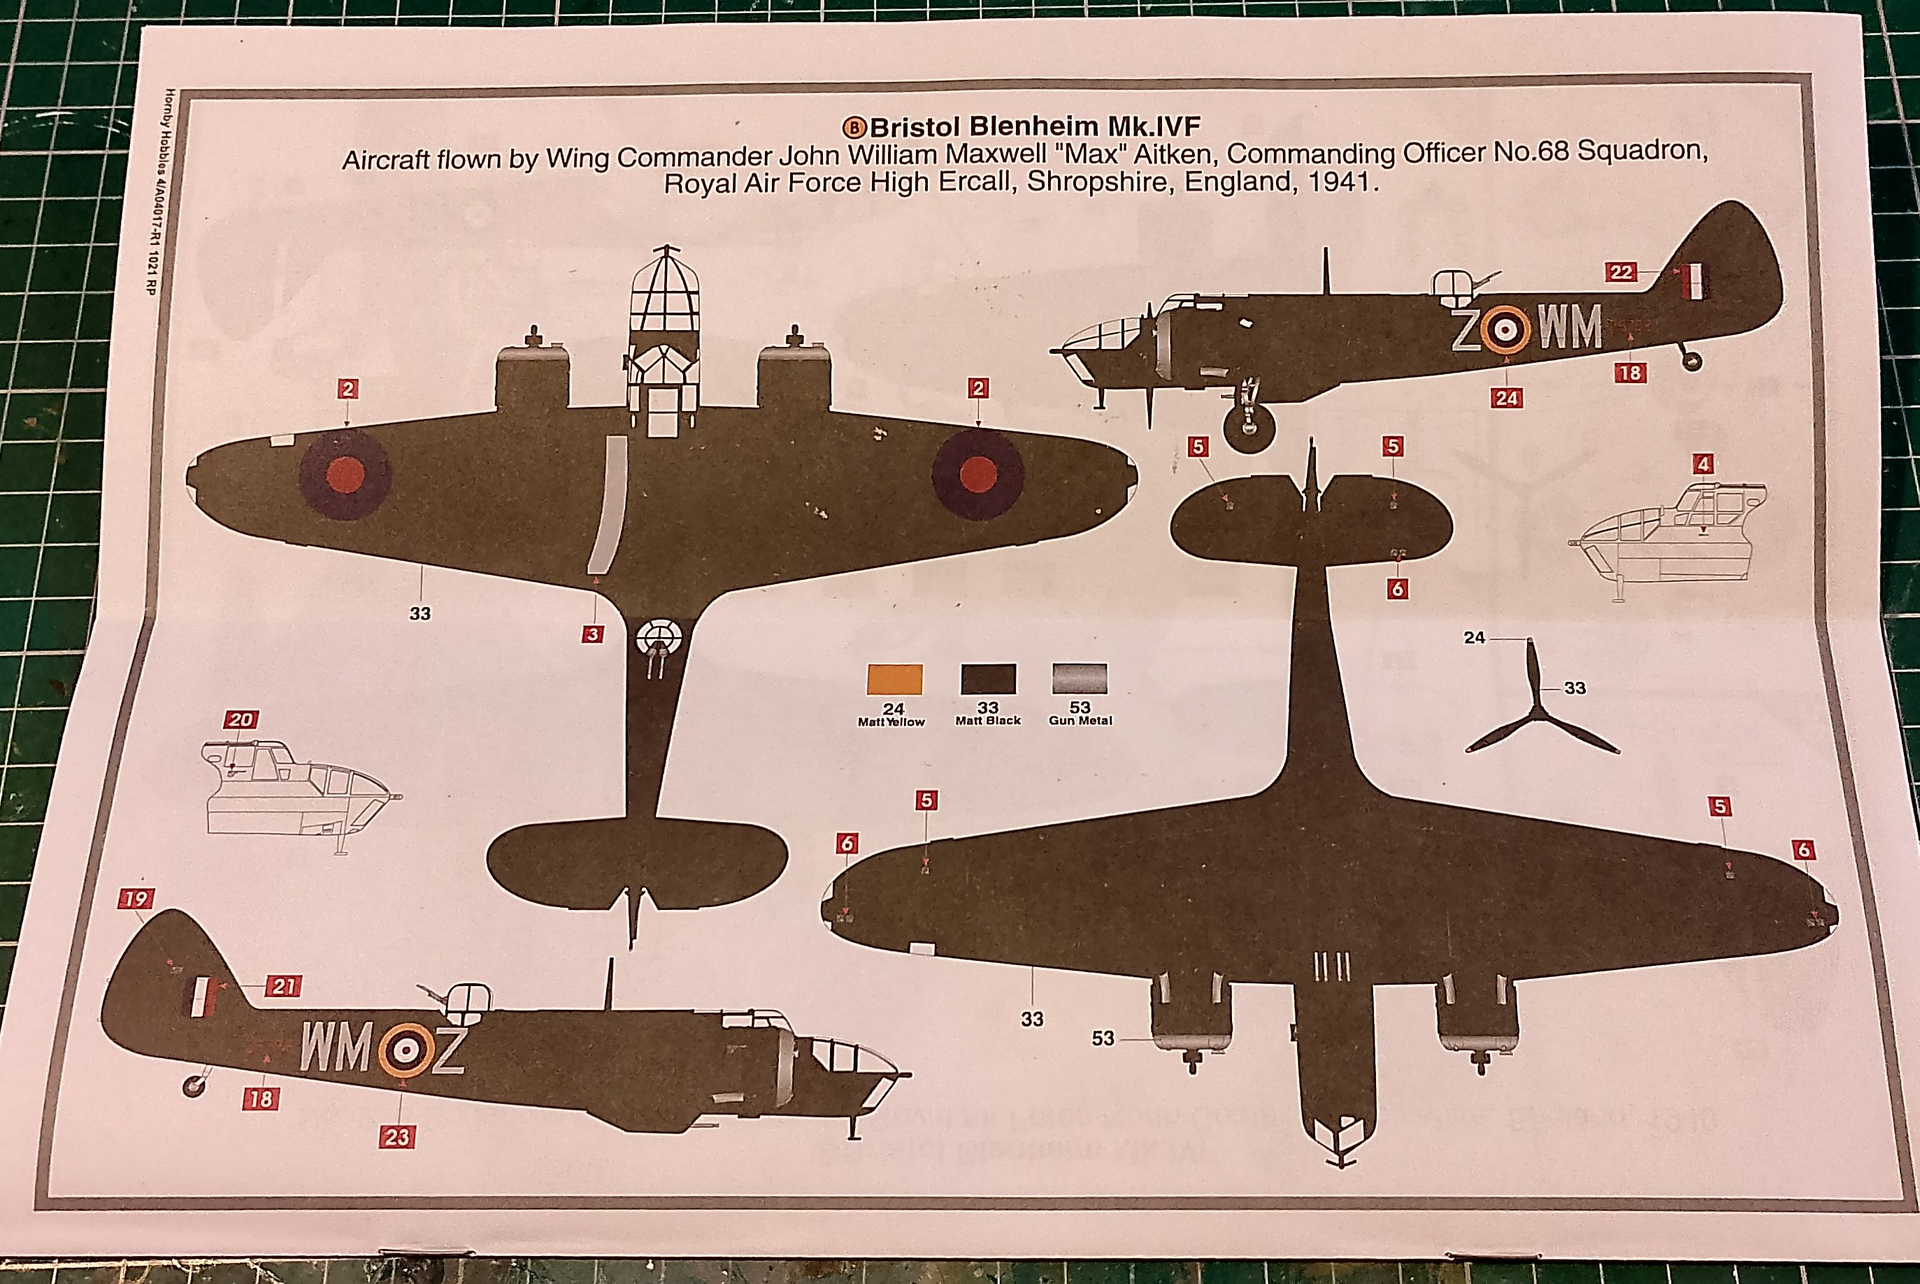
I’ve got decals for one that flew during the Greek campaign which will look good. Again, a part of the War you don’t see built very often.
The Blenheim’s were real workhorse’s those first couple of years. Obsolete and at great risk, but doing the jobs that the Beaufighter and Mossie would later take on.
Was hoping to do a little more this week, but had a lot on. An unexpected extra hour or so at work earlier in the week for training. We had a new cat before Christmas and she has had to go to the vets for chipping and neutering, so had to go and collect her the next evening. The other cat has holding her food down so that was another visit. Vet suspects hair as she does seem to be grooming a lot. Anyway, a shot of something, worming pill and anti-hair ball food supplement seems to have done the trick. Both are happy and healthy. Around £200 for both.
So, I’m hoping for a quiet weekend to get some more done. I’ve also picked up the dvd boxset of Buck Rogers so I have something to watch while I do. I just hope it’s as good as I remember and not too goofy.
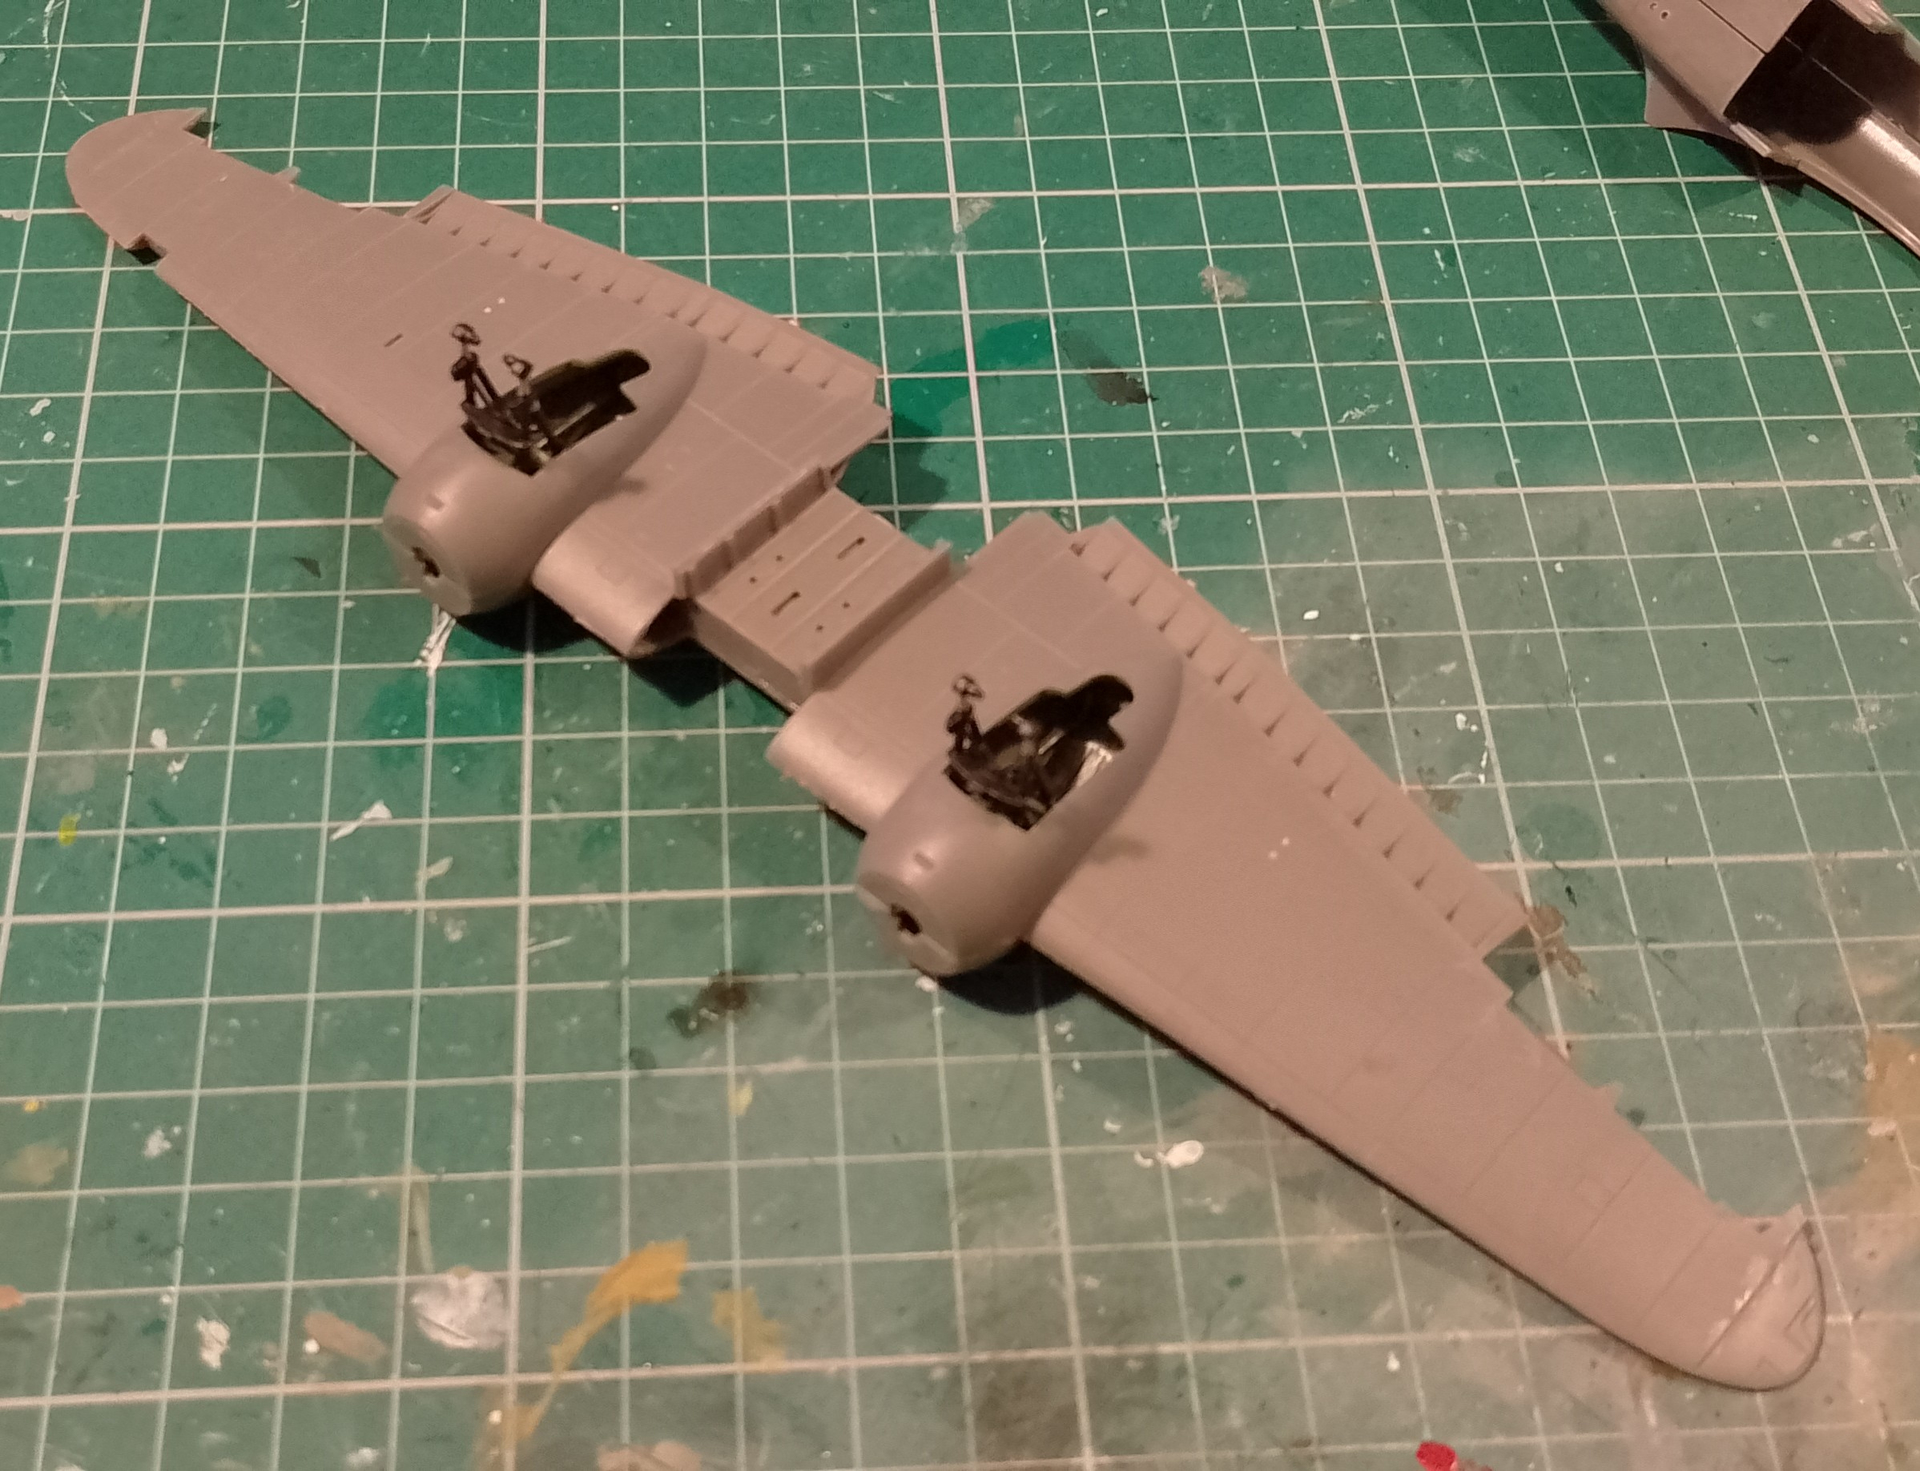
Got the undercarriage parts cleaned up and painted the wheel wells. Used Tamiya Japanese interior green which is a very good match for RAF. Tamiya isn’t my usual poison, but when thinned it does go down thinner than Humbrol. Just have to minimise the brush strokes to keep it smooth. Some of the fit problems with this kit might stem from the tight fit of interiors on some of the new Airfix, so I want to minimise those problems where possible. I tried thinning some Humbrol interior green (a brand new gen3 bottle) with Vallejo thinner, but found it pooled into little puddles and didn’t adhere well. Will have to experiment to find what works best.
Have had a play around with assembly and I think the best option is assemble the legs in the upper wing, then close up. Trying to fit it after is awkward. It will need careful masking and reinforcing with card to prevent breaking during the rest of the build. I have had success doing this in the past and with care, it can work.
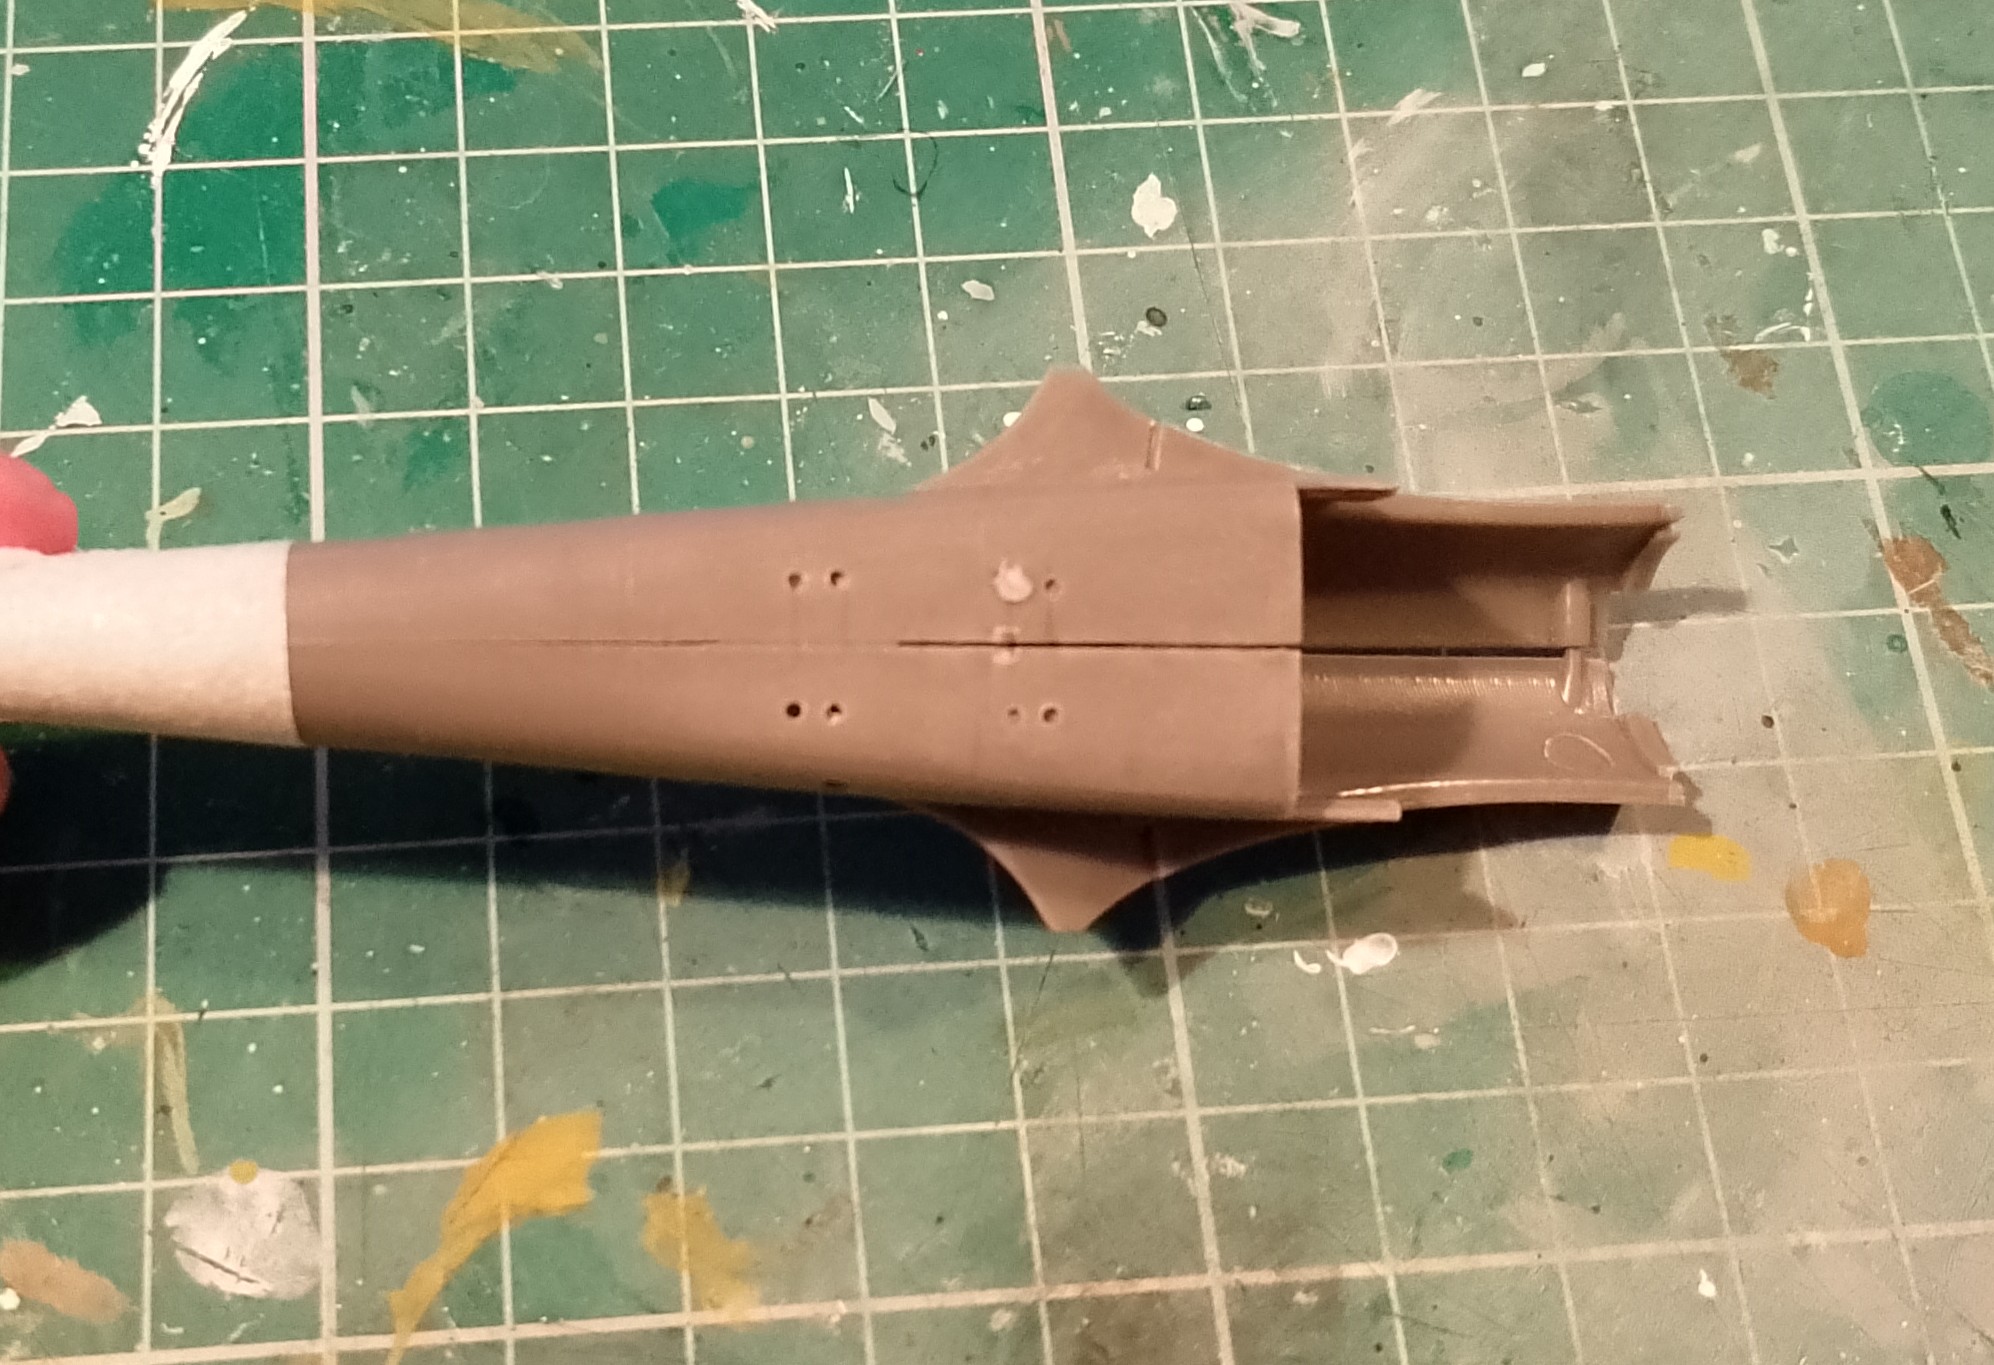
Have made one cock up already, although I don’t think I’m entirely to blame. Before closing up the rear fuselage, you need to drill the holes for the external bomb racks (anti-submarine bombs I think?). Airfix have marked out the location for these with some slots on the inside, but drilling through straight is next to impossible.
The result being that holes are off and the racks wouldn’t fit. I should have seen this coming and measured and drilled from the bottom. It would’ve been a lot easier if Airfix had marked the location with dimples on the bottom. Also think I used too large a drill. So, will have to fill those with sprue goo and redrill. Or just pinch the fuselage parts from one of the other Blenheim’s. None of those will need those racks fitted.
Second attempt at drilling the holes for the bomb racks went a little better. One didn’t quite line up, so I’ve filled in with some sprue goo and will try again. Luckily I noticed after making the .5mm pilot hole before I opened u the others, so it should be easy to rectify.
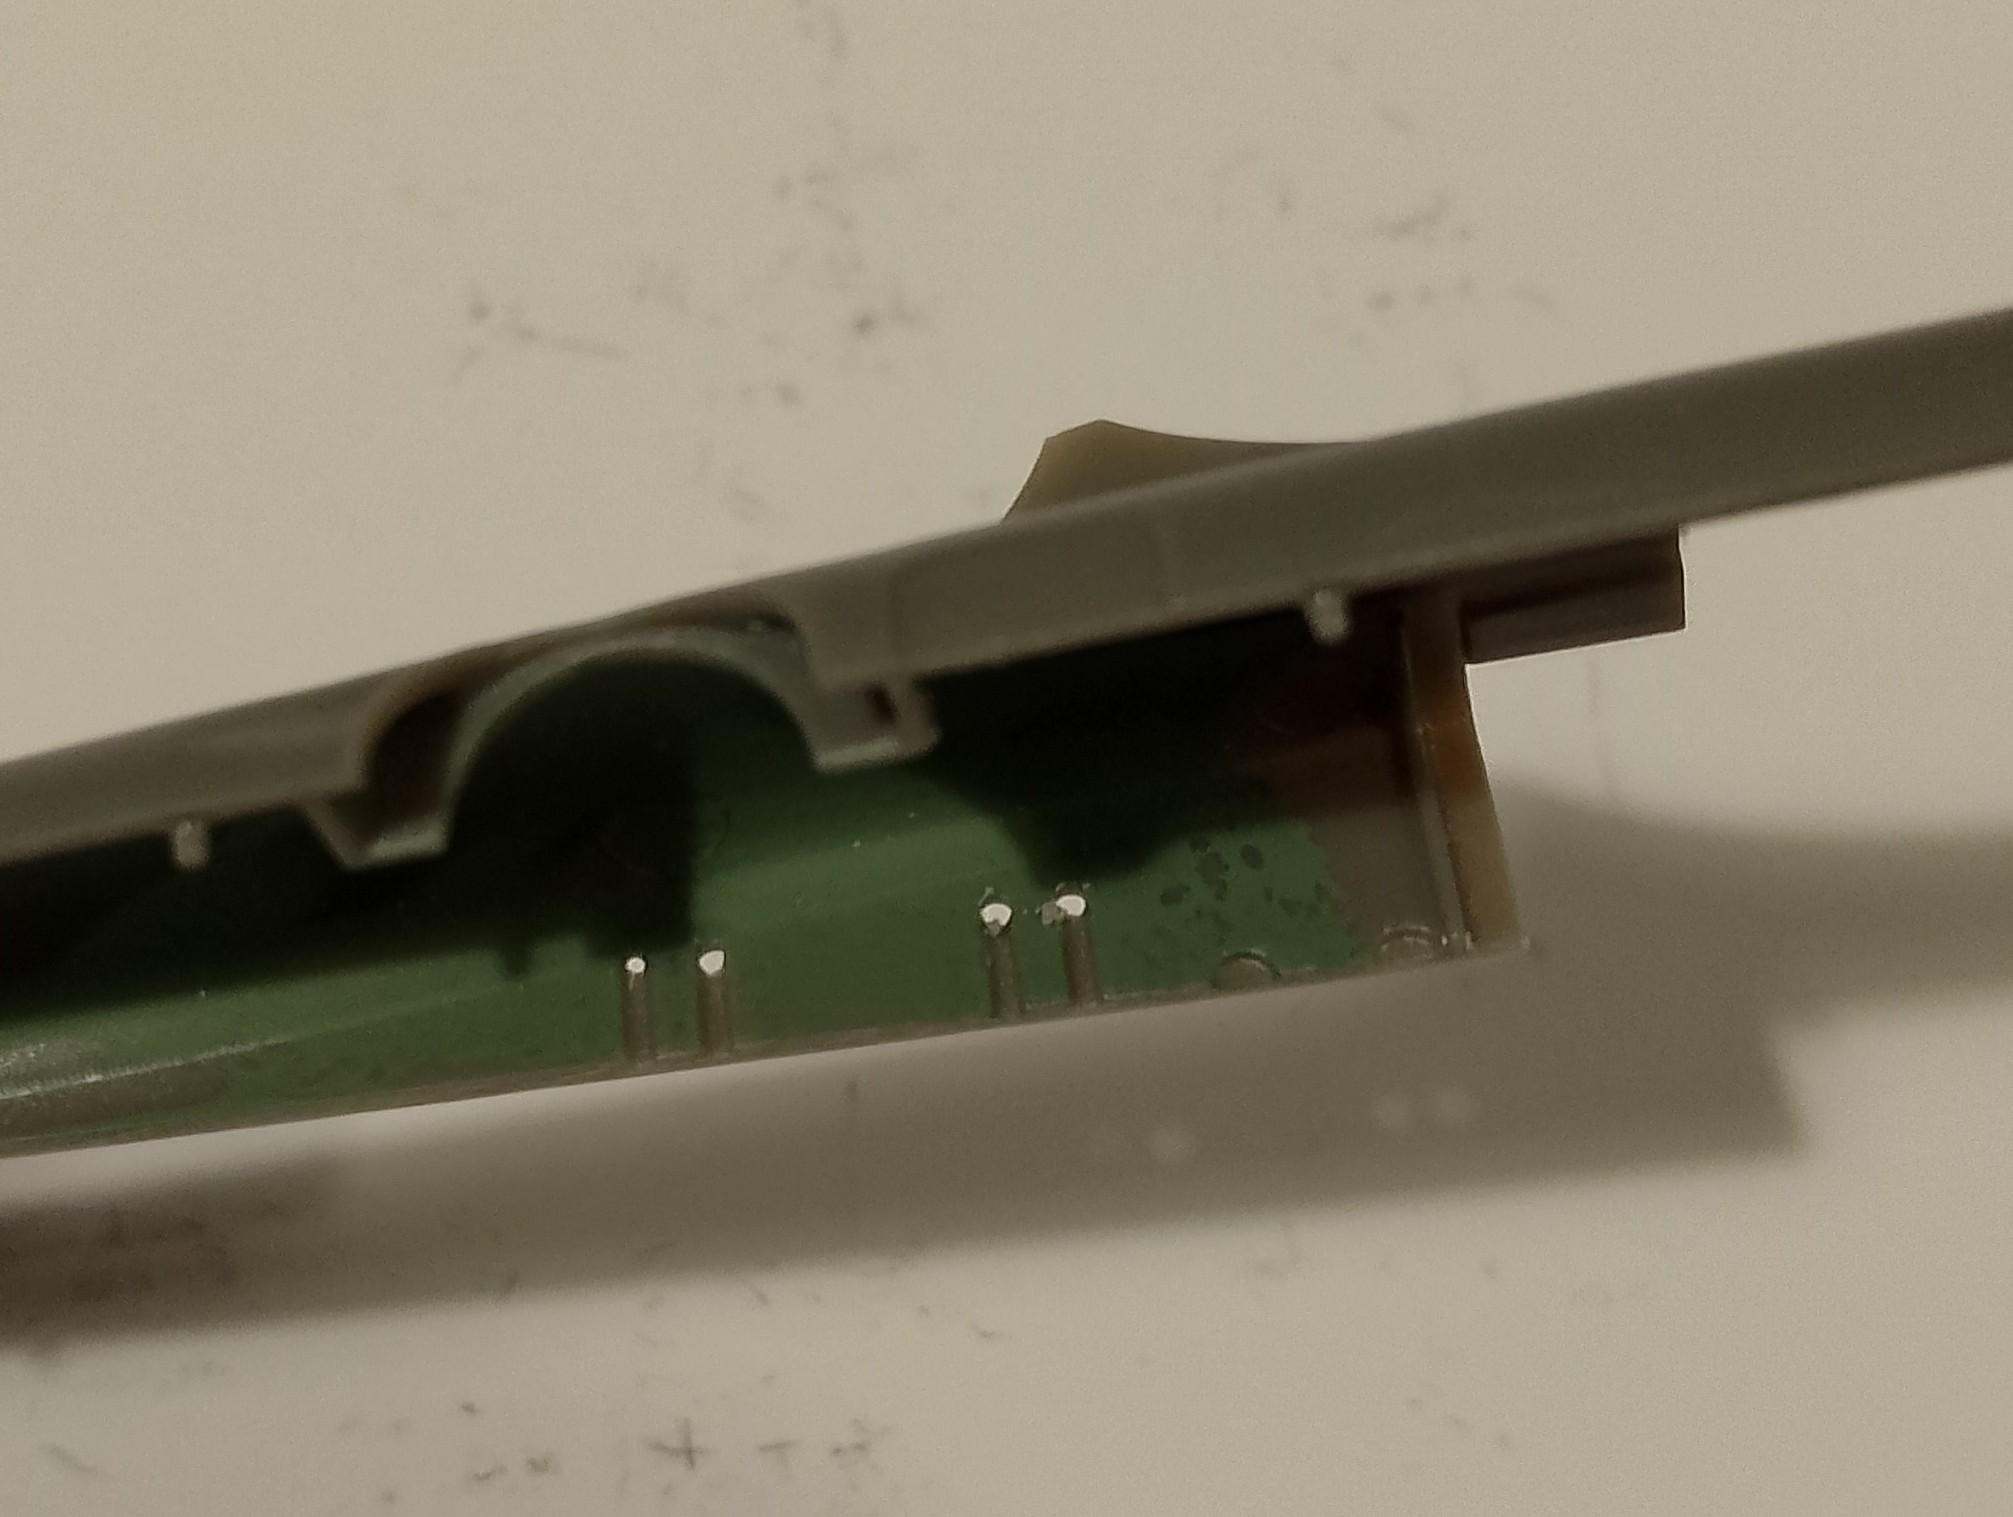
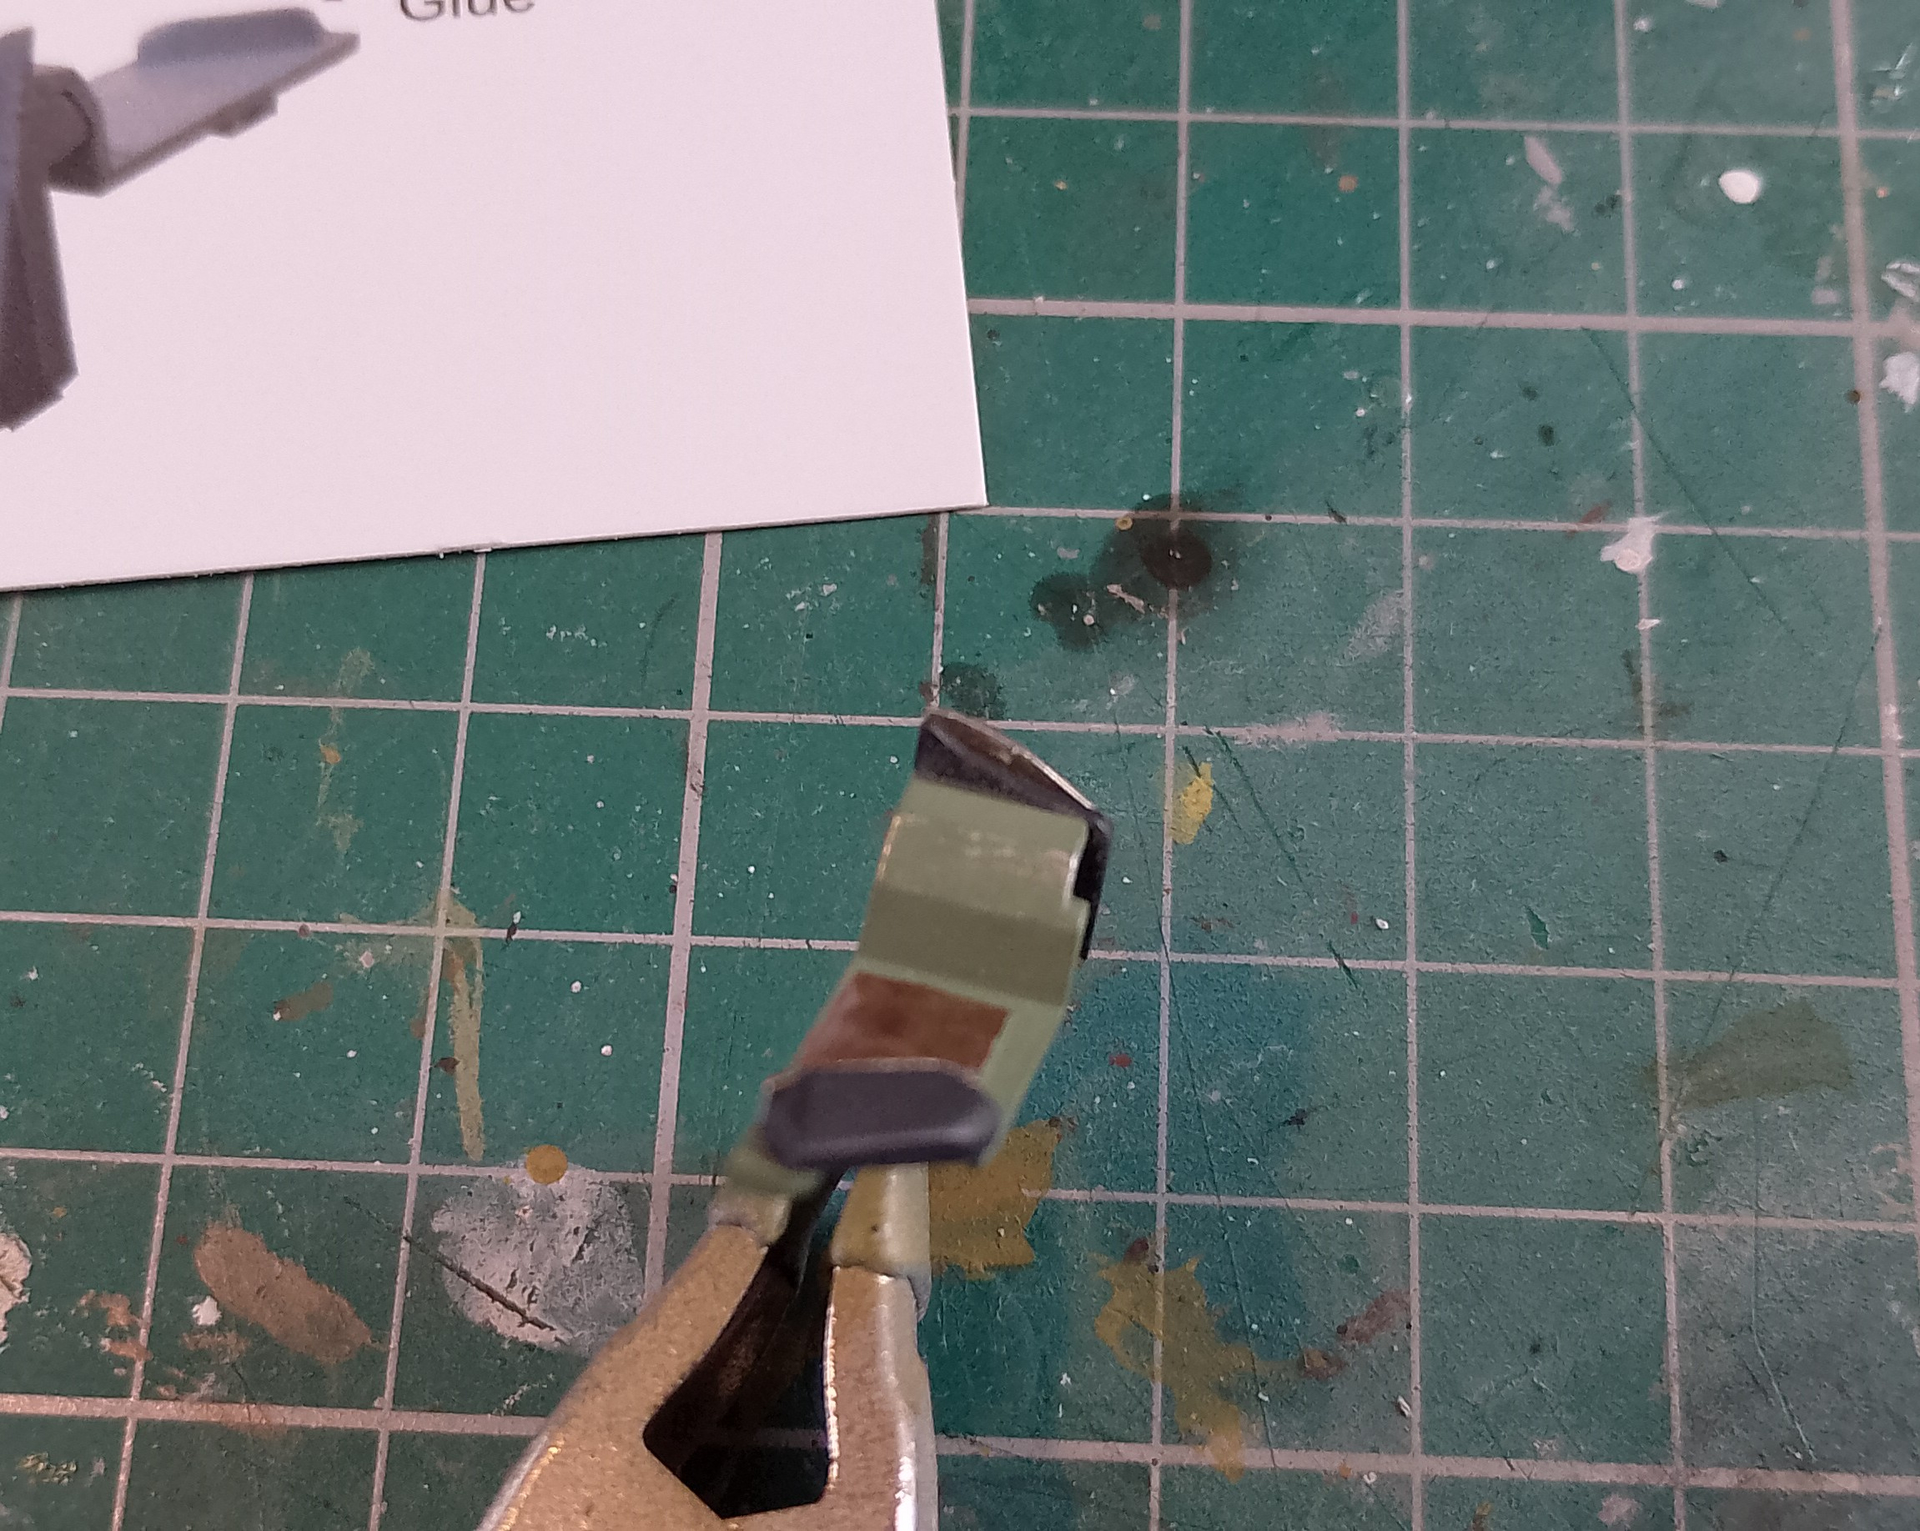
So that really nice Yahu instrument panel is proving to be a little troublesome. Hasn’t realised it until I glued it on, but it’s a different shape to the kit part it’s supposed to attach to.
The kit pane has a curve along the top that fits neatly under the canopy. The Yahu panel doesn’t have this, is taller and interferes with the fit of the canopy. Luckily, I attached it with PVA, so it came off easily.
I think I might have to do some trimming if I want to use it. I do wonder if Yahu actually bothered to do a test fit before putting this into production.
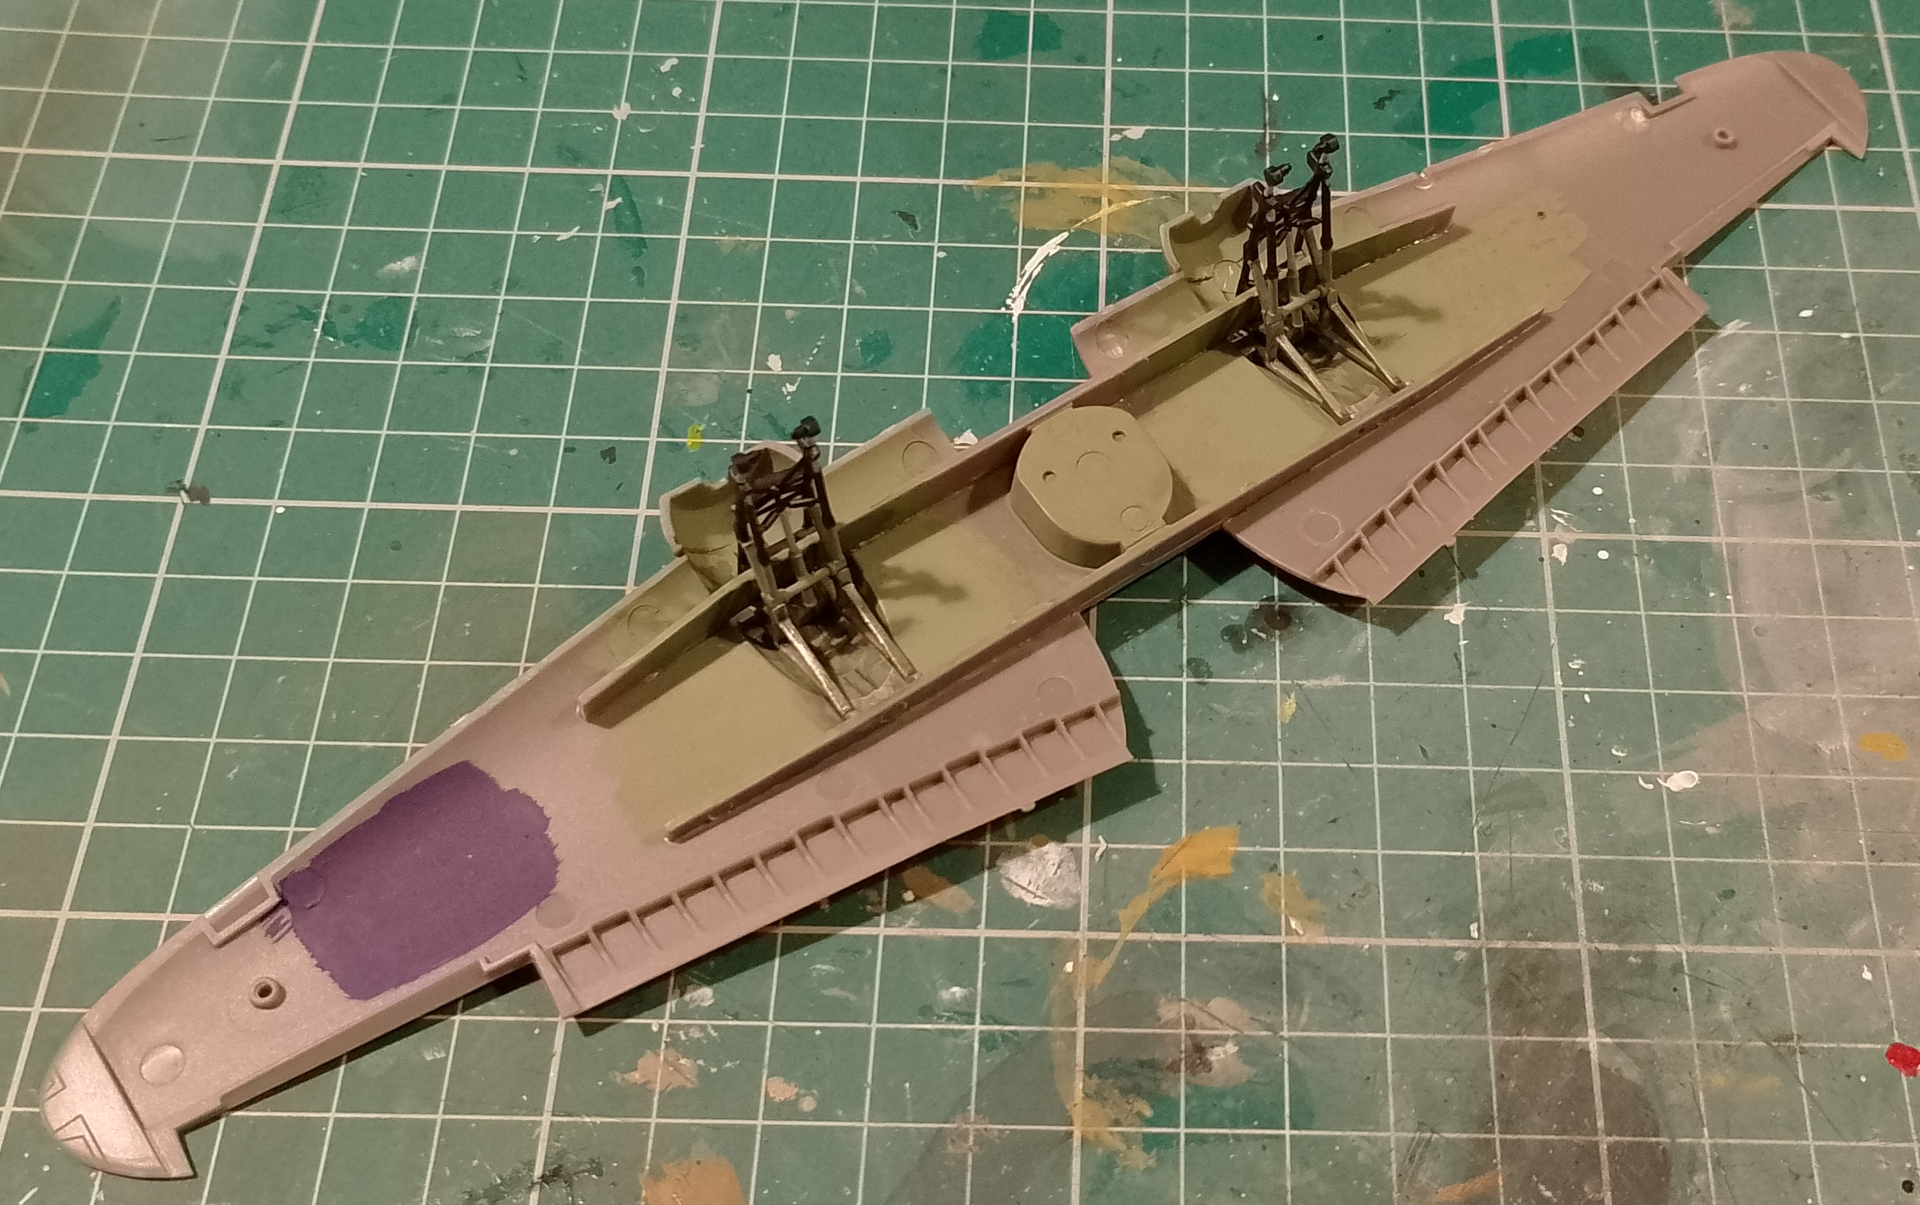
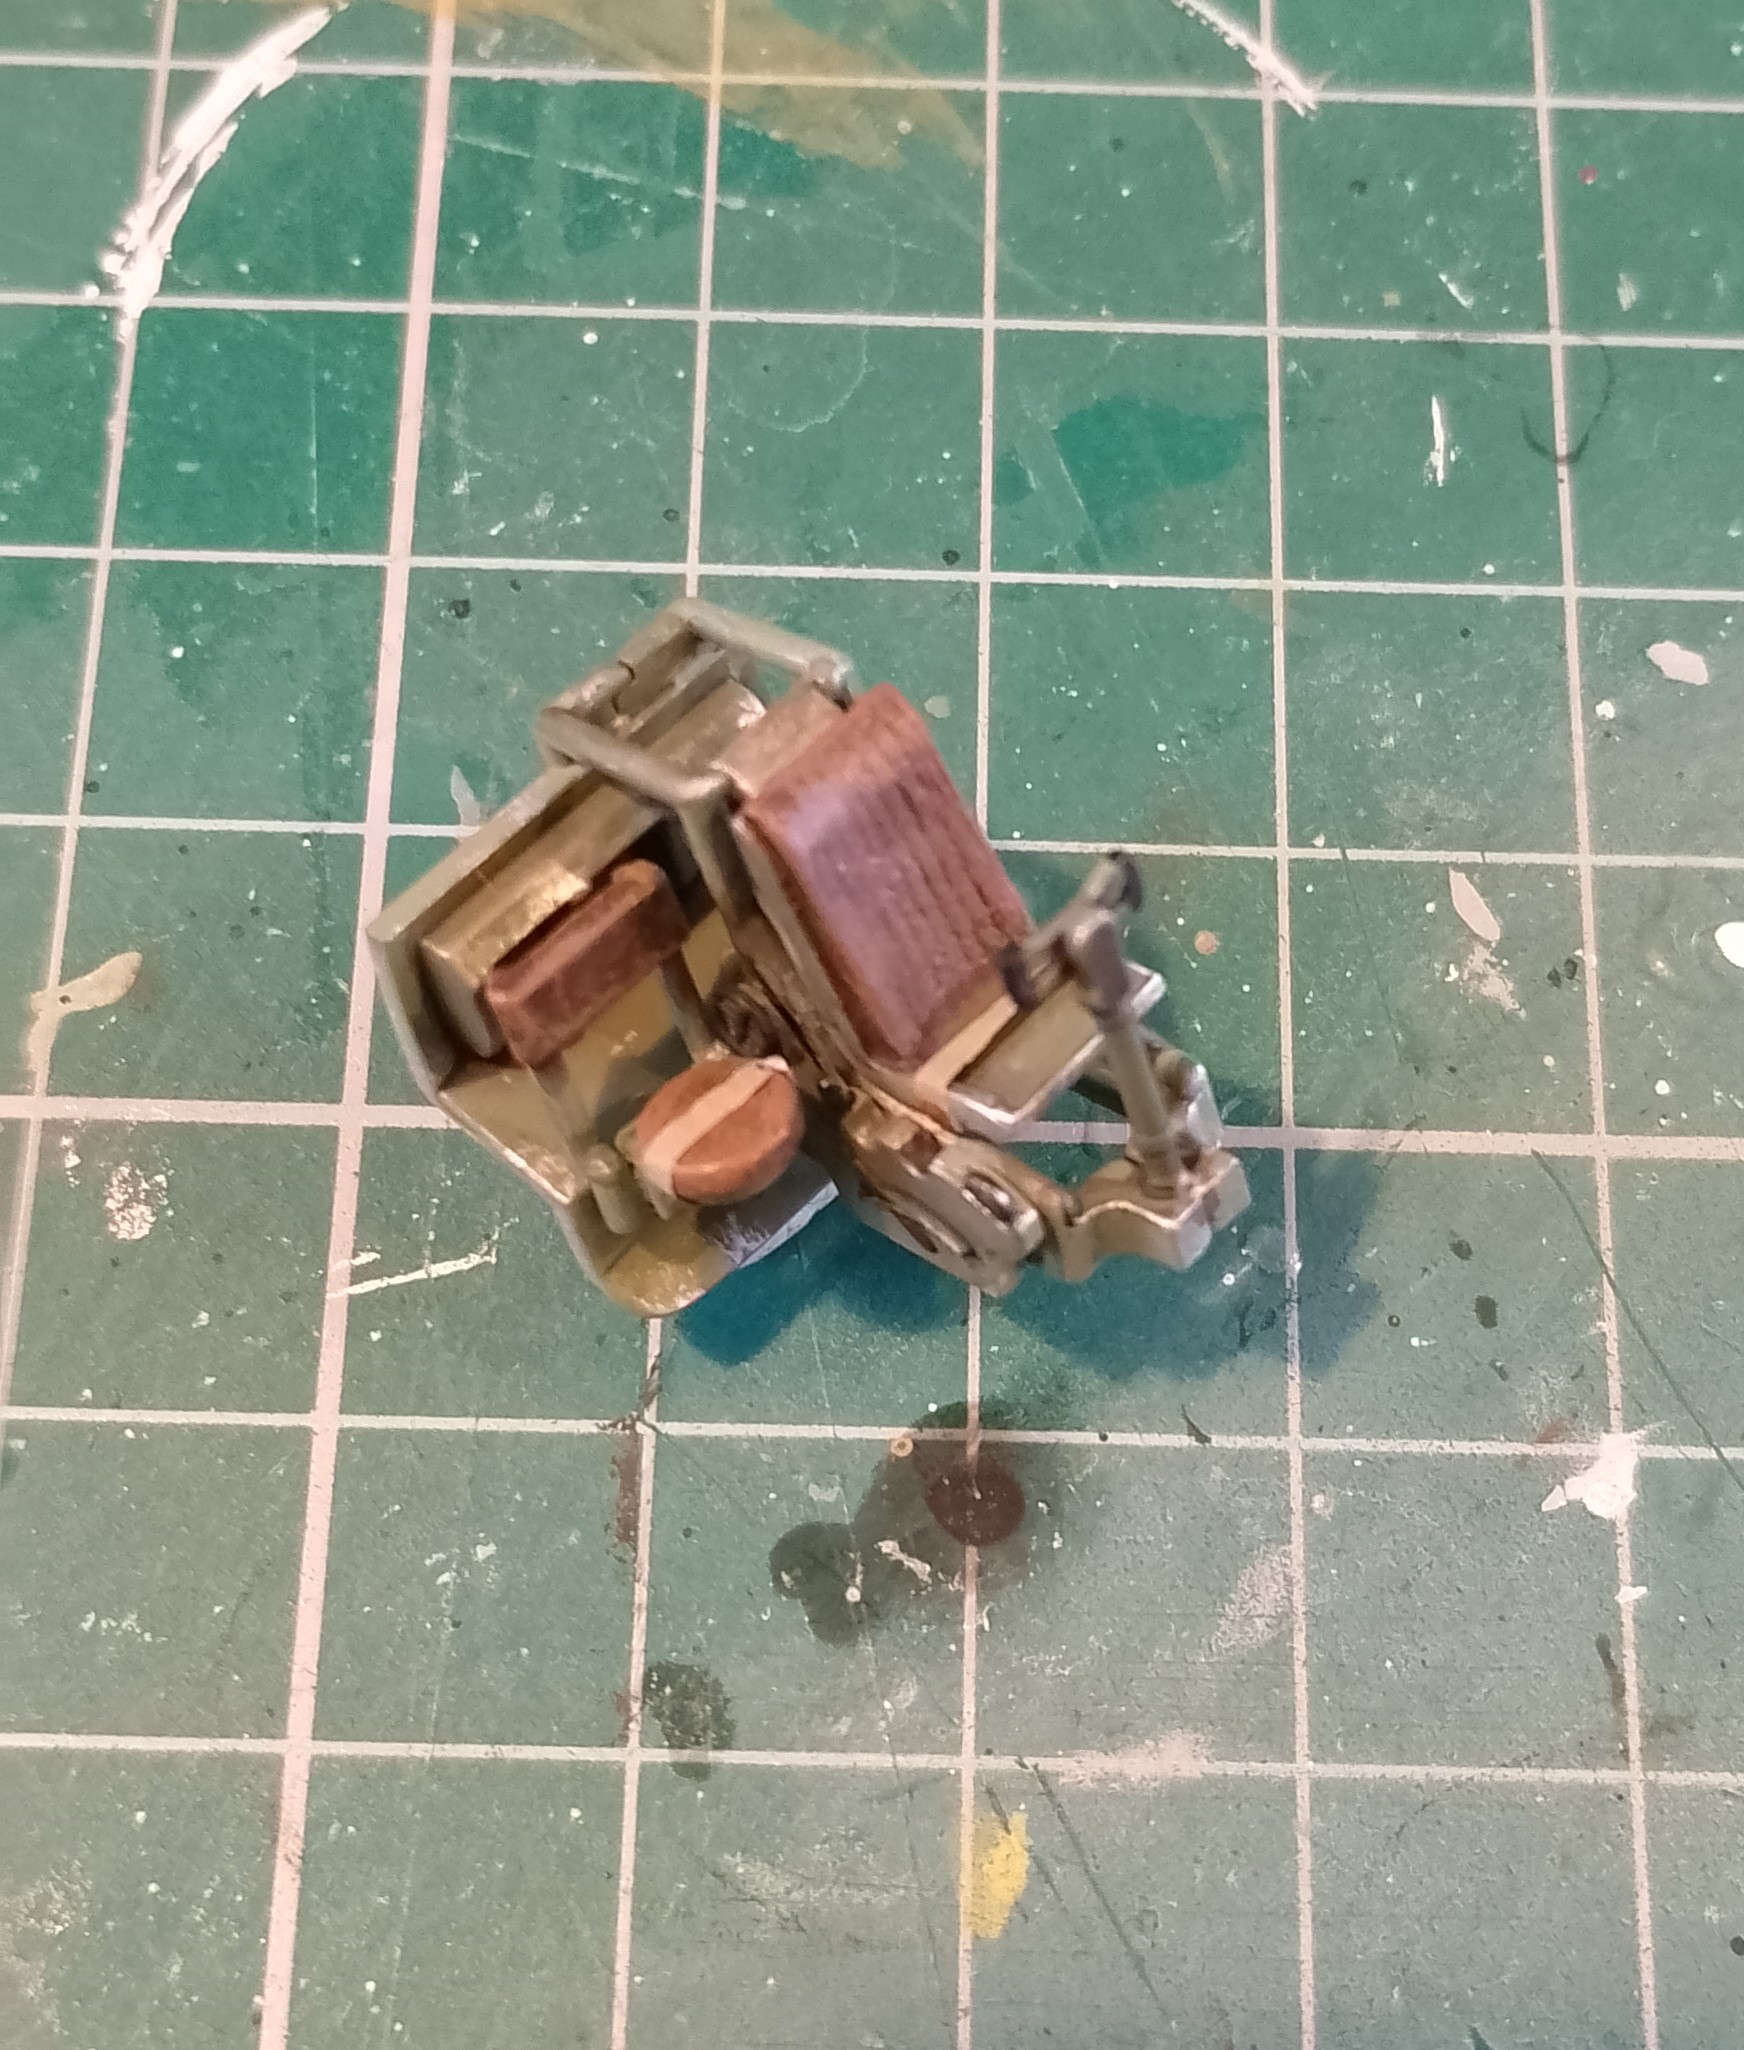
Luckily, the rest of the cockpit went together well. I used the instructions for Eduard’s etch set for reference for the seatbelts. Their set has lap belts for both crewmen. I’m surprised that the pilot didn’t get a multi-point harness to stop him smacking his head on the panel in a crash. Spare a thought though for the navigator, who just got a stool with a backrest.
Ooo, that’s my major irritation with PE: when the parts don’t fit… like you mentioned: it’s not that hard to do a test fit before entering production…
Otherwise coming along nicely
The poor navigator… talk about being in third class
I did have the opportunity to clamber aboard the Beaufighter at our local museum: that was no mean feat! Given the lineage can be traced back to the Blenheim I reckon the navigator was lucky to get a cushion
Wow! Luckily. I haven’t managed to get in much myself to have a proper look. The IWM Museum used to have a Halifax nose you could get in, when in that a few times on school trips when I was younger. I think it’s now in storage at another site. And there was an amusement park in Cornwall that had a Shackleton nose section you go inside. Not sure what ever happened to that as it closed a few years ago.
A lot of the old bombers were death traps for the crew, especially additional crew like navigators and gunners. More expendable than pilots I suppose. It wasn’t until I built the interior of the Hasegawa B-25 that I worked out how the crew could move around in it. A narrow tunnel from the nose under the cockpit and crawl over the bomb bay. Bet that was fun.
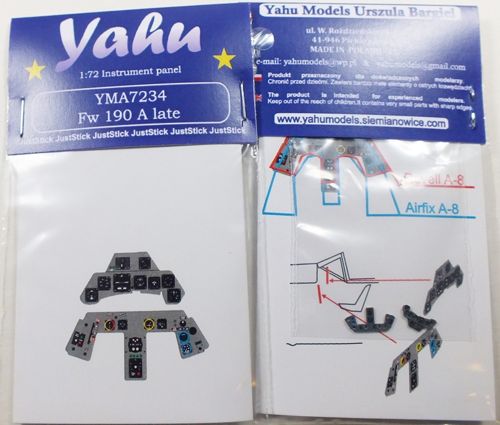
Stephen, remember the Yahu parts are also designed to fit the old MPM kit, a lot of their products show a picture on the back of the packaging showing the difference between their part and the different kit manufacturers parts it will “fit”.
You get the idea with this photo (not a Blenheim) where it shows the difference between the kit parts from Airfix and Zvezda and the Yahu panel.
Fore warned is fore armed, check places like Scalemates NOT Hannants. Case in point, Hannants have a kit listed as future release and it’s been listed like that for years yet I’ve built it, displayed it at shows for at least a year and several years ago (before Covid) retired it to the display shelf. Also spotted several times listings stating kit x is 1/72 or whatever scale but you can tell by the manufacturer code that it’s not, I’ve emailed them in the past to let them know but they’ve never responded or changed it.
Yes Hannants are useful but don’t go by their descriptions.
The panel thing also highlights another thing how can two kits have different shaped IP for the same aircraft?
To be honest, I bought it on a total whim when picking up a few other things. It was just a couple of quid. It’s just annoying
Scalemates is my first port of call before a kit purchase, the reviews and instructions are very useful. But it’s not often I have the same luck on there with aftermarket stuff. Sometimes just a page with the bare minimum of information. It’s a good thing I don’t often buy etch. It’s the work of the devil!