After several planes I felt like doing a ship again.
The Admiralty type leaders were designed at the end of WW I and are a slightly bigger version of the V&W destroyers which were the prototypes of most of the british destroyers up o the Tribal class. The leaders should lead a flotilla of destroyers into battle and had more space for the staff of Captain (D) and better communication facilities. Many had one more gun, too.
HMS Stuart was transferred to the Australia in the 1930s and fought in WW II in the Mediterranean in the famous ‘Scrap Iron Flotilla’ together witn HMAS Vendetta and the other Australian V&W’s. Later she was converted to a fast transport and survived the war.
I got the resin kit for a good price from ebay and thought it would be a good companion for my HMS Cossack.
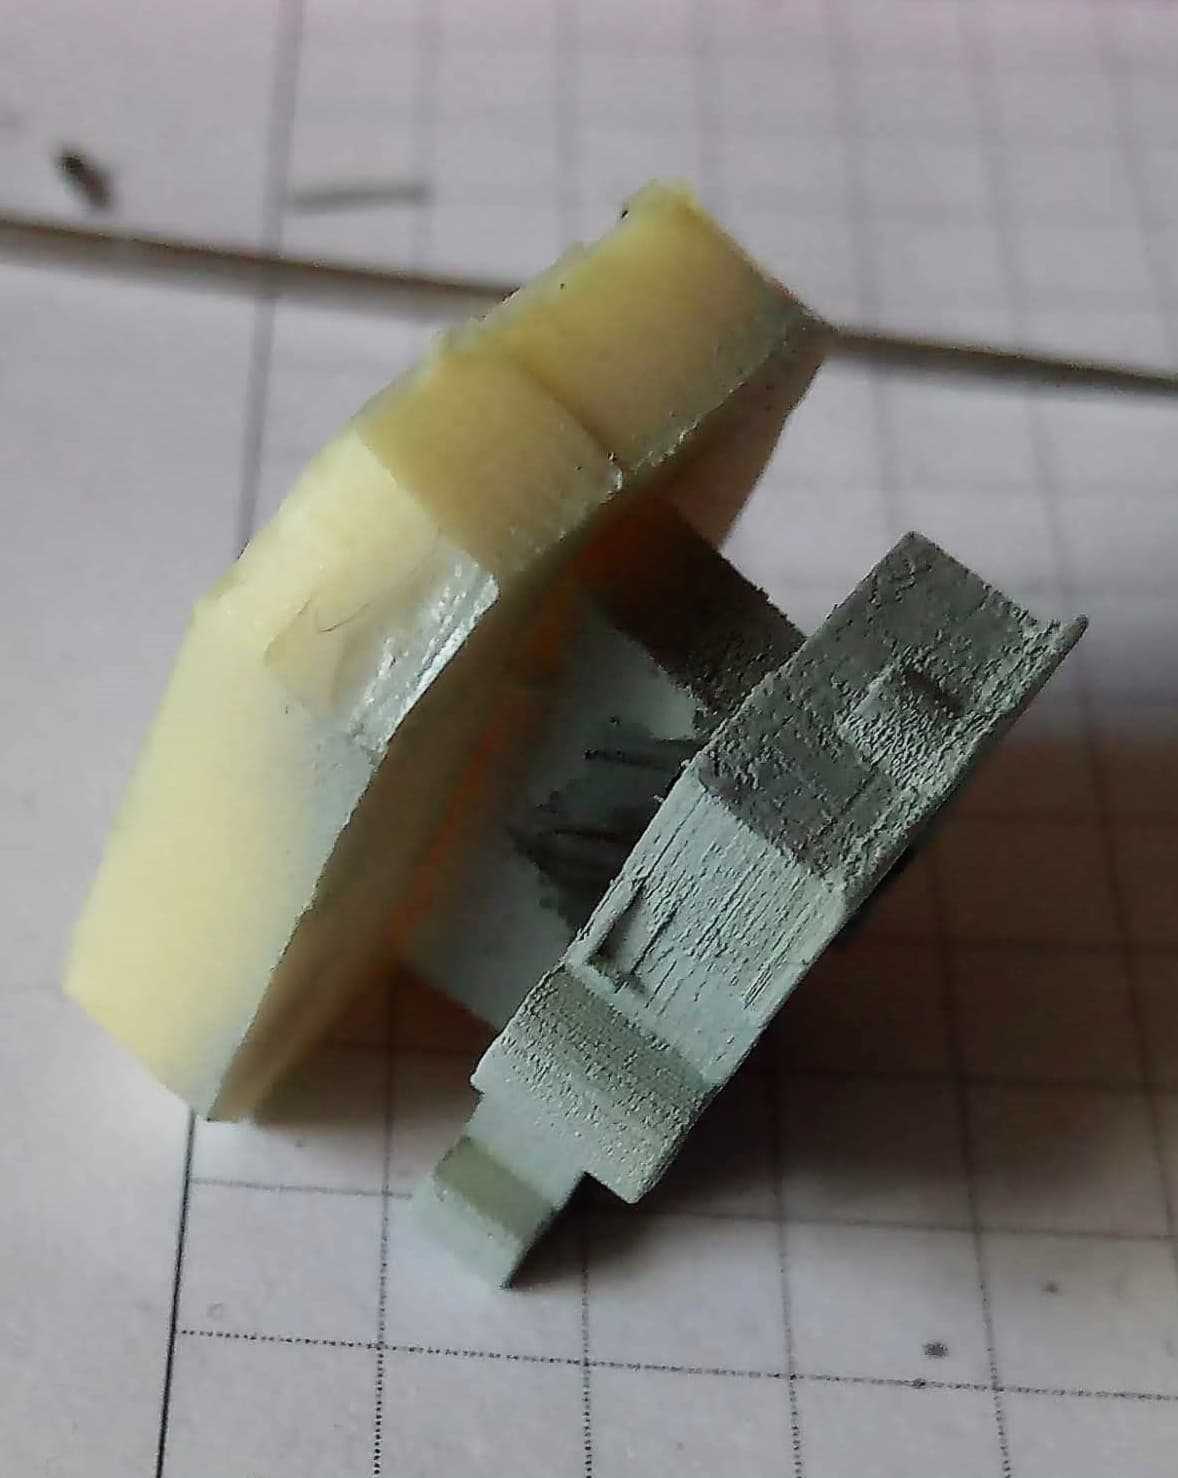
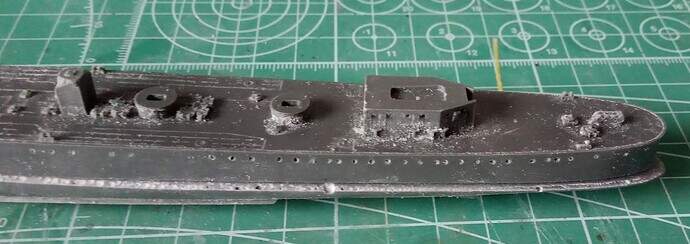
The hull is split in 2 parts horizontally with large casting stubs. The underwater part is longer and a bit wider than the upper part and has some faults
After sanding of 5 mm of casting stub (real fun  ) and trying to de-warp the upper hull there was still a big gap at the bow.
.
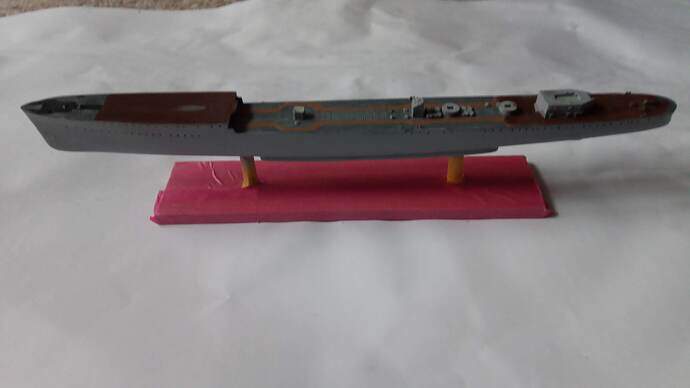
I glued the hull parts with 2-component glue and fixed it additionally with wood screws.
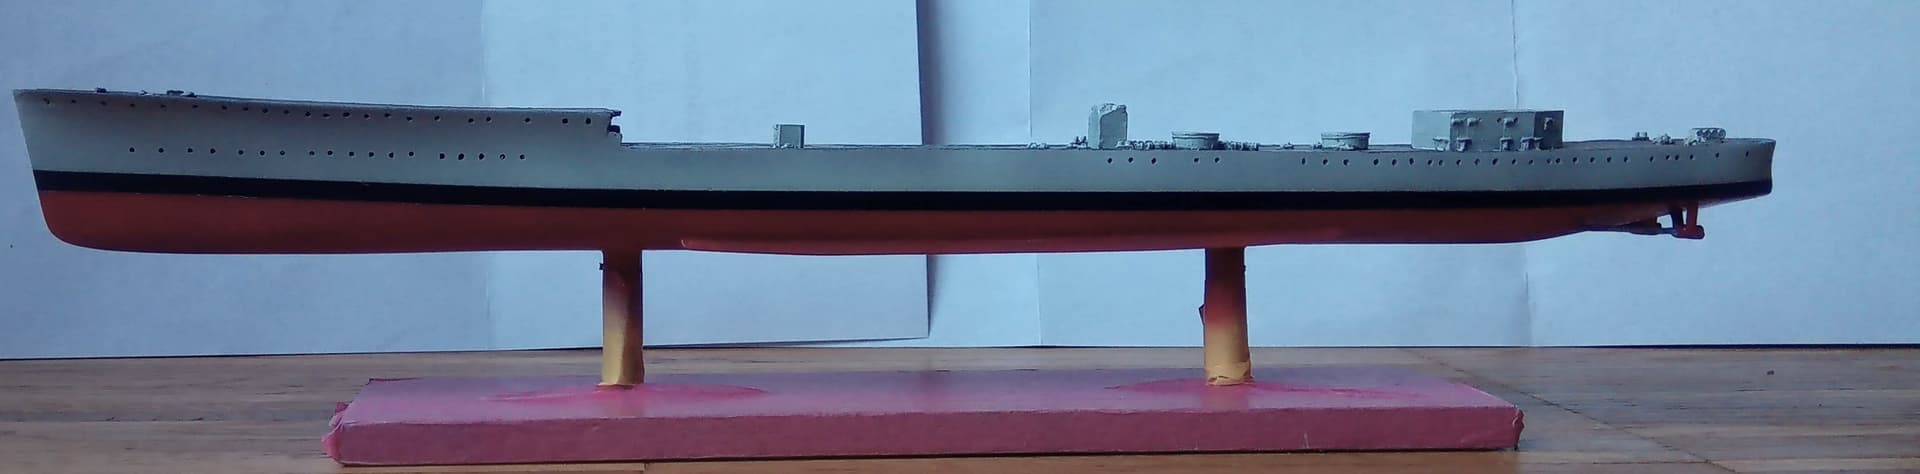
After endless further sanding and puttying and mounting on a pedestal it finally looks like a destroyer hull.
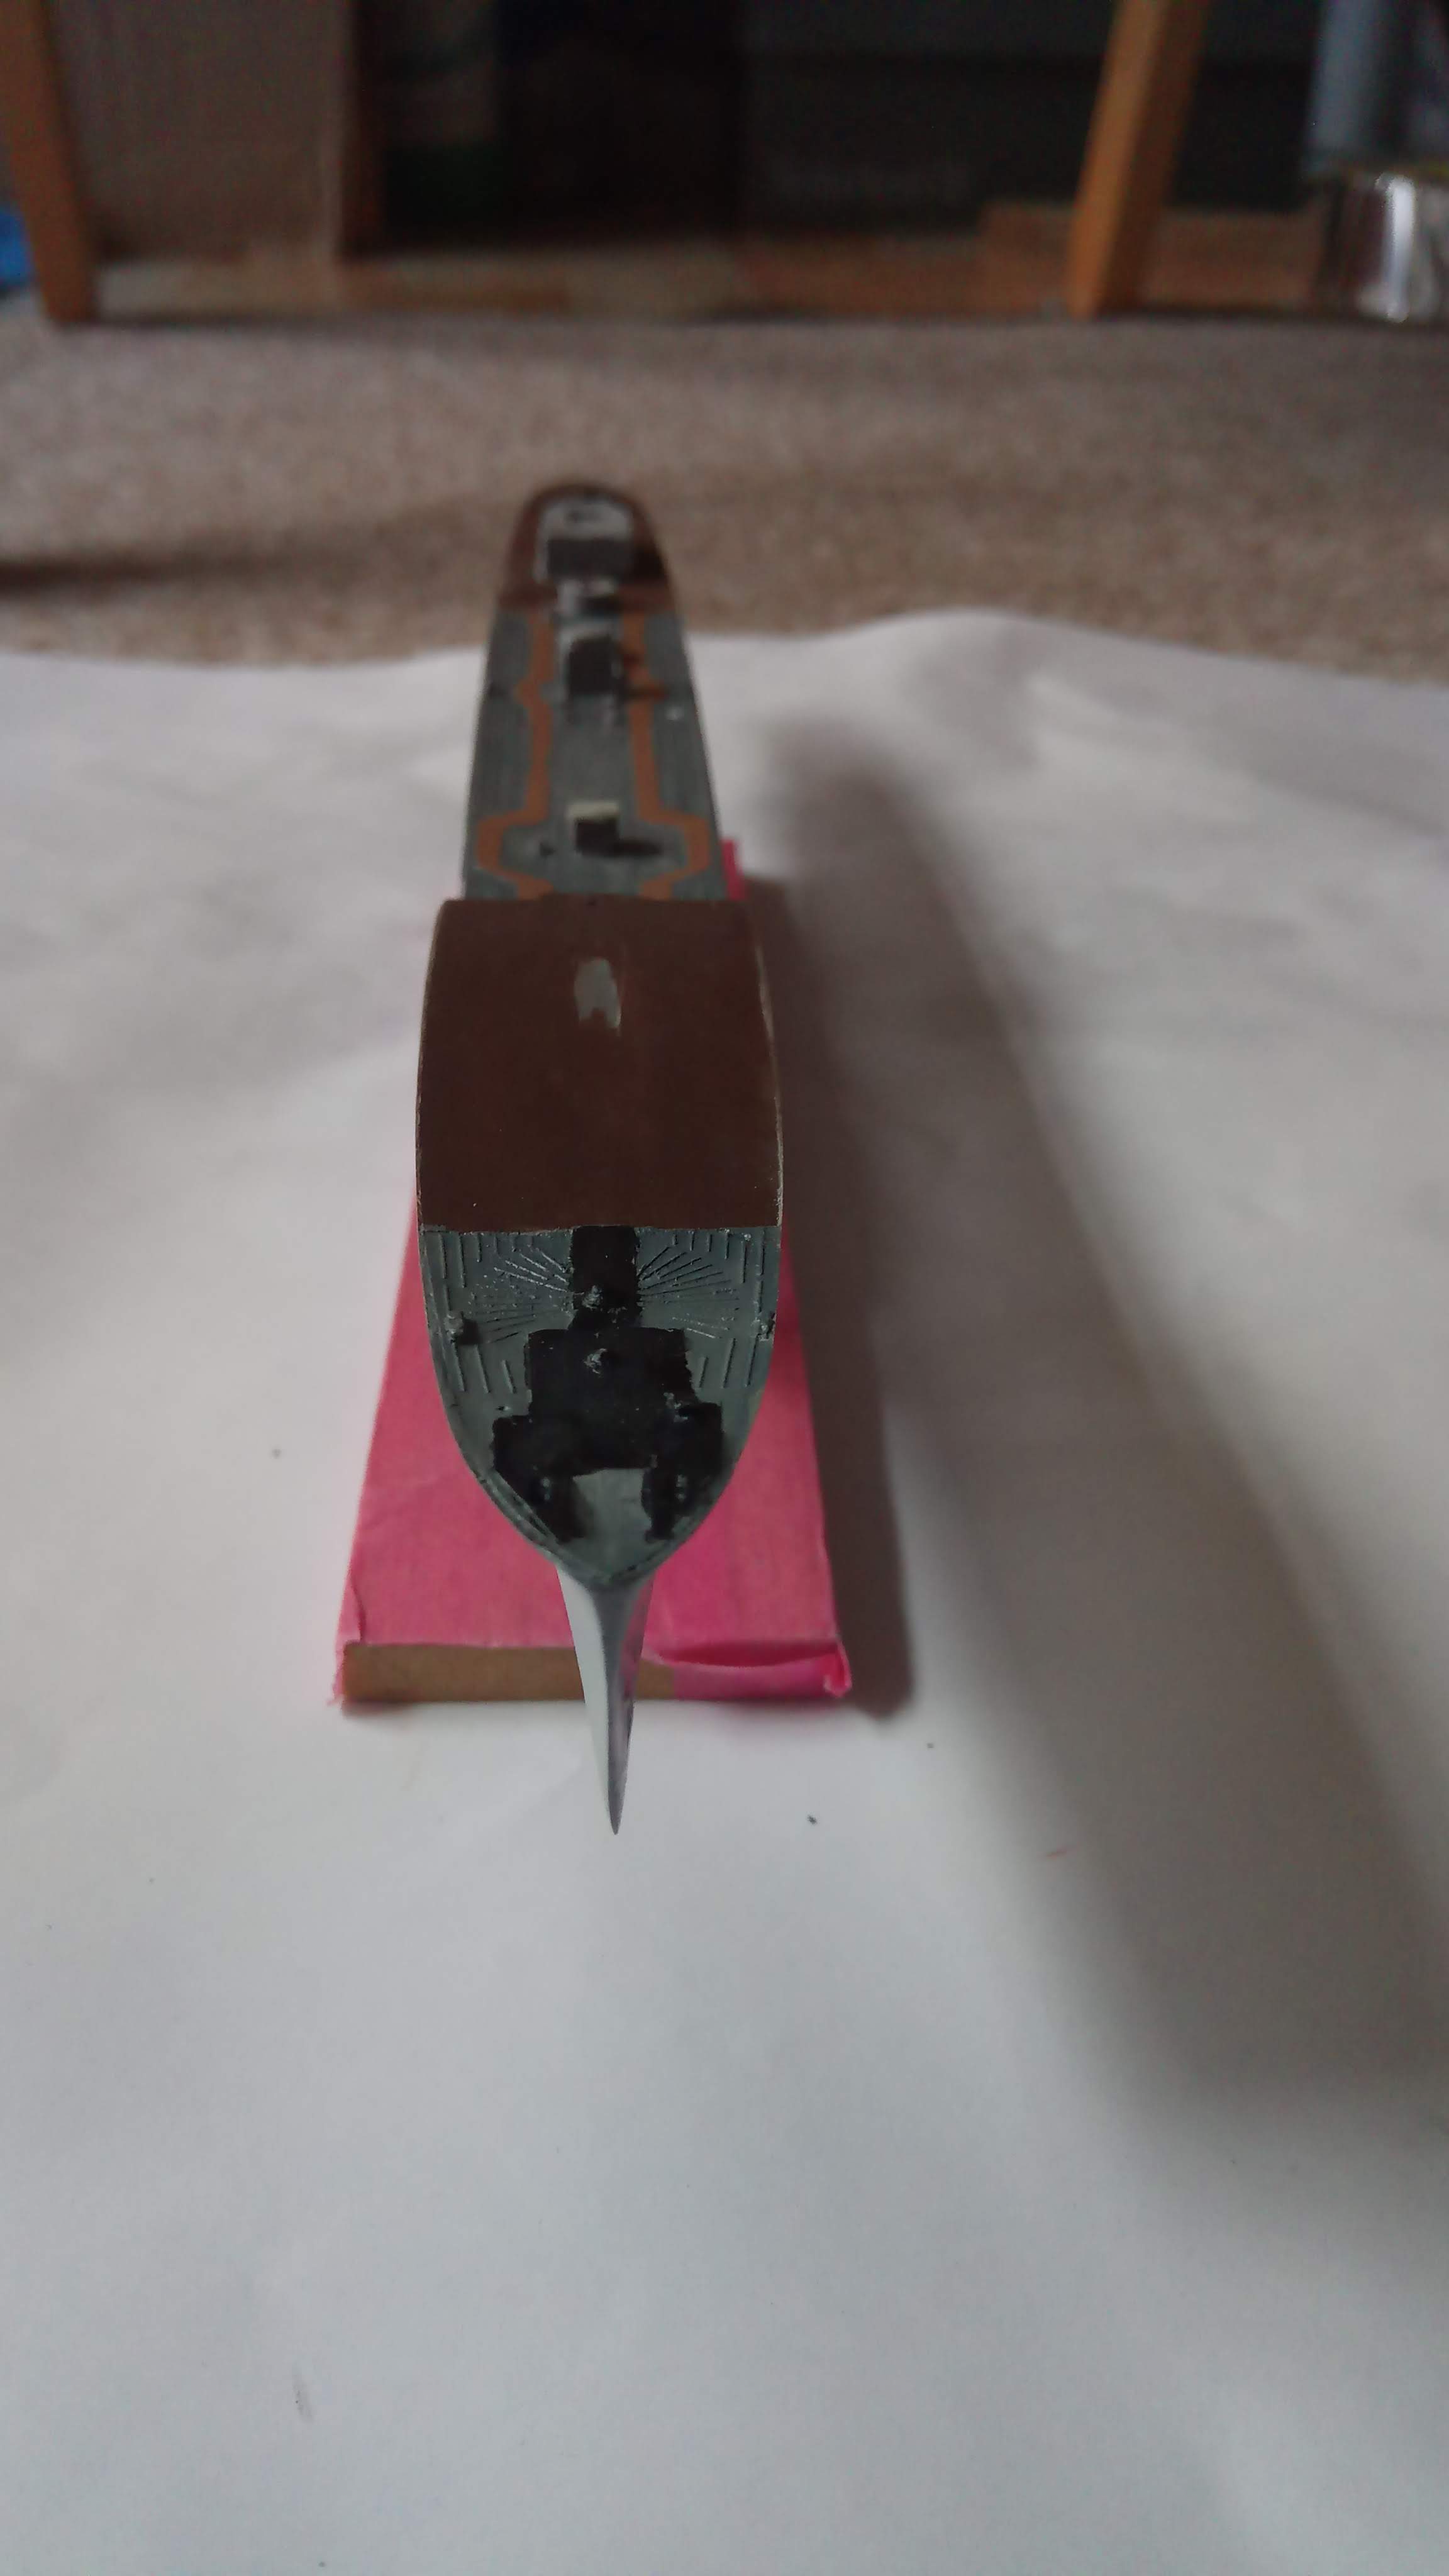
I really like the sharp bow of a real destroyer.
More to come soon
Cheers
Tom
6 Likes
Your off to a great start…will follow with interest.
By the way what are you using to hold the ship up.
Cheers,
@Joe, Thank you.
My pedestals for the resin kits are actually strips of oak from furniture packing. I am happy that they not used cardboard.  The stanchions are small metal pins holding the shelves of an Ikea’s Ivar. Just drilling 4 holes, glue and finish (its sometimes a bit difficult to get the pins straight). If the model is bigger use a bigger baseplate. For a styrene model I would probably use something with a screw.
Cheers
Tom
Wow, that was quite some work necessary on the hull… Great start, last two pictures look fantastic after that mess with the gap and sanding effort!
I’m in and following with interest, very nice model and topic!
Cheers
Jan
@ Jan: she is still not perfect, finding more blemishes and pinholes, but nothing which cannot be fixed with some sandpaper and more time. What I not so much like is the casting of the deck. It cannot be sanded without removing all the fine details. I hope, the unevenness disappears under the paint and all the small details
Cheers
Tom
Small update:
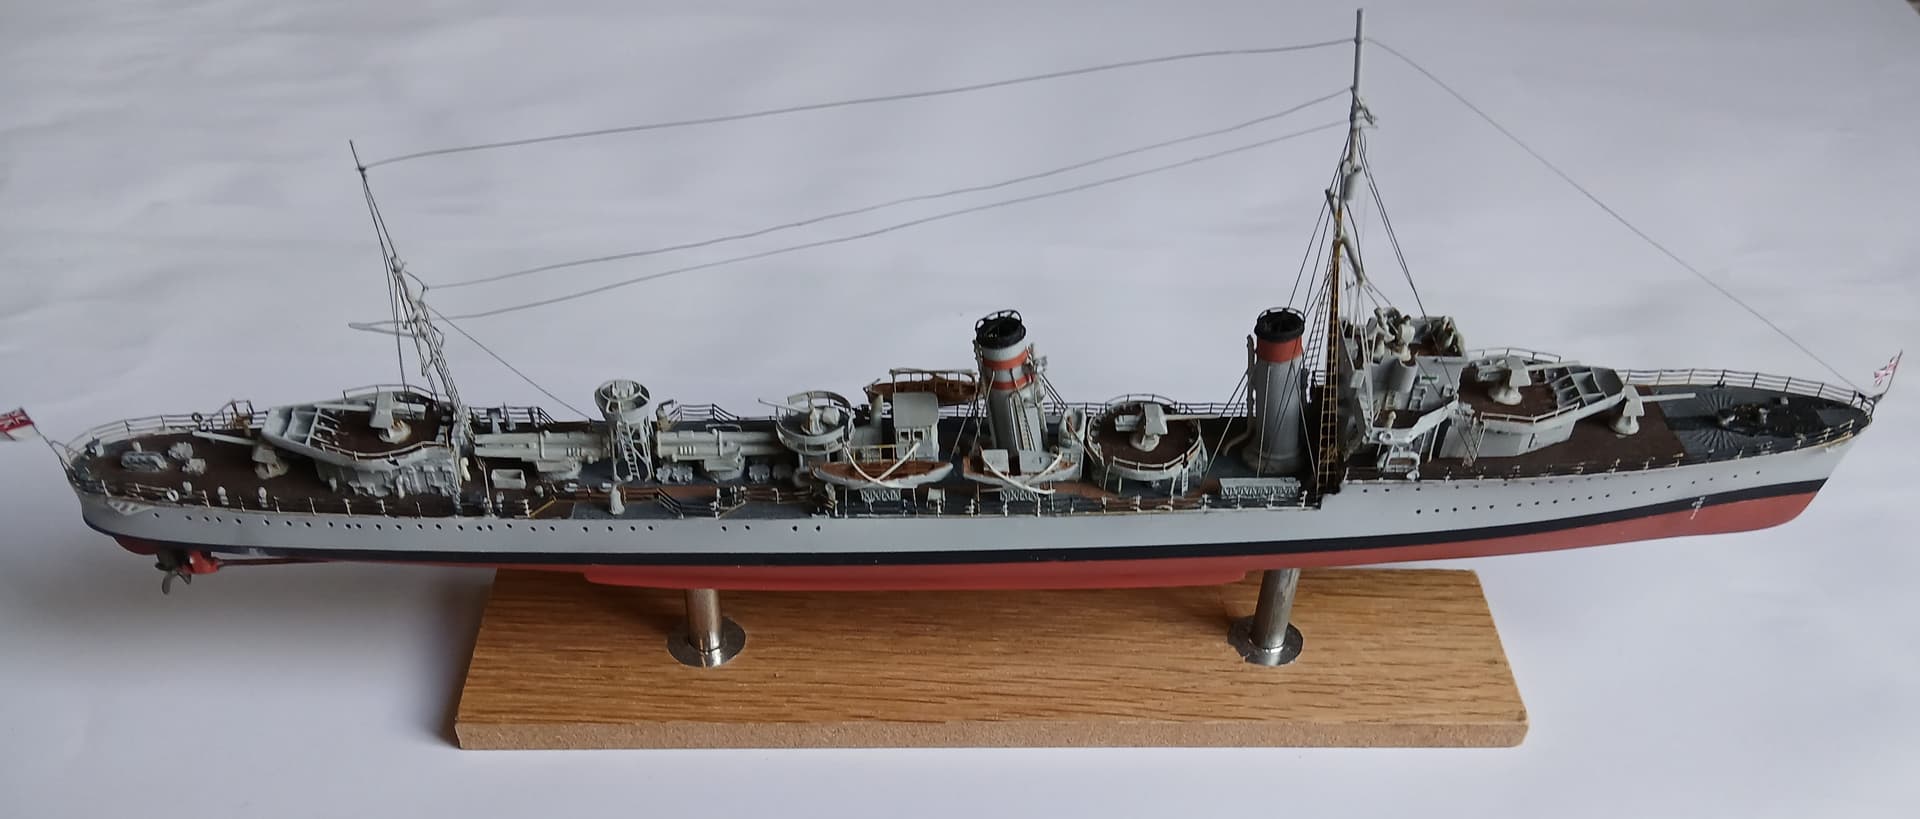
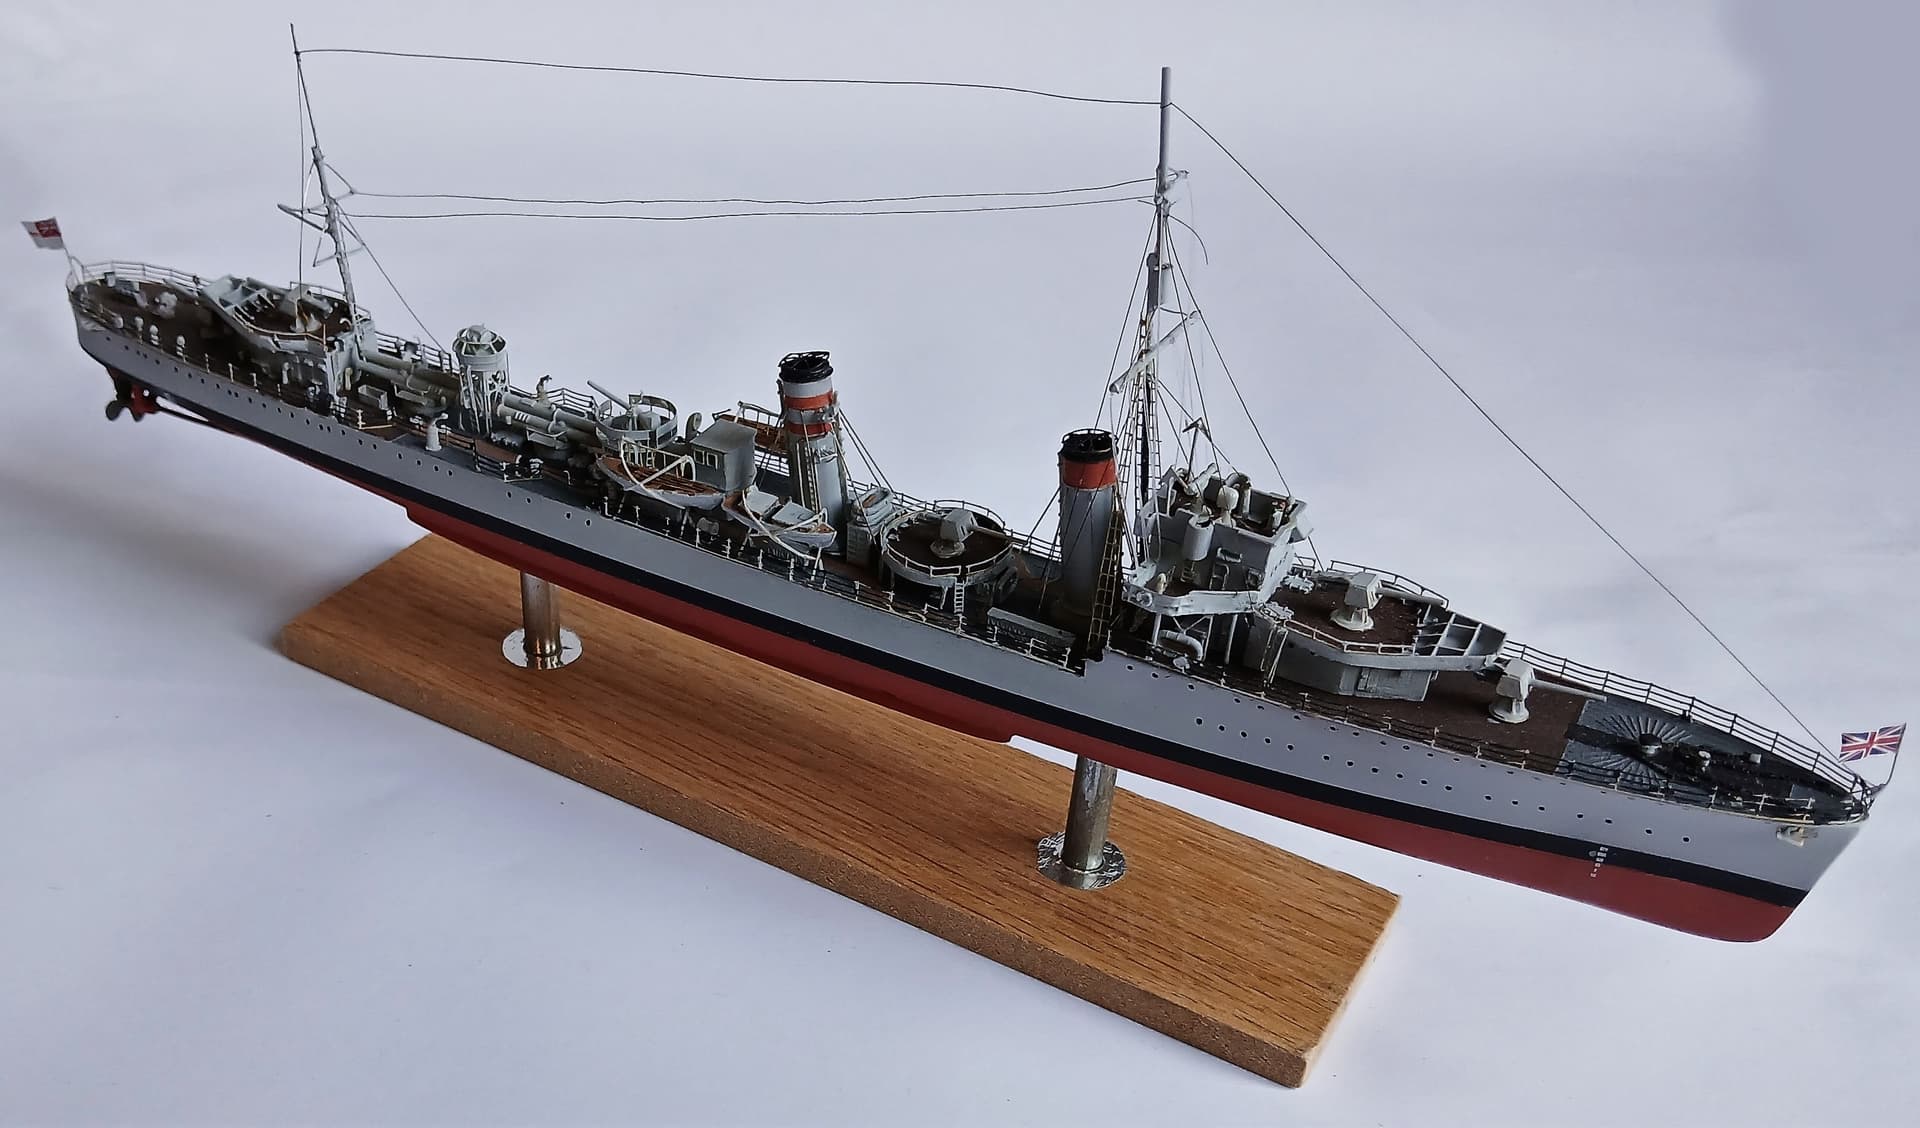
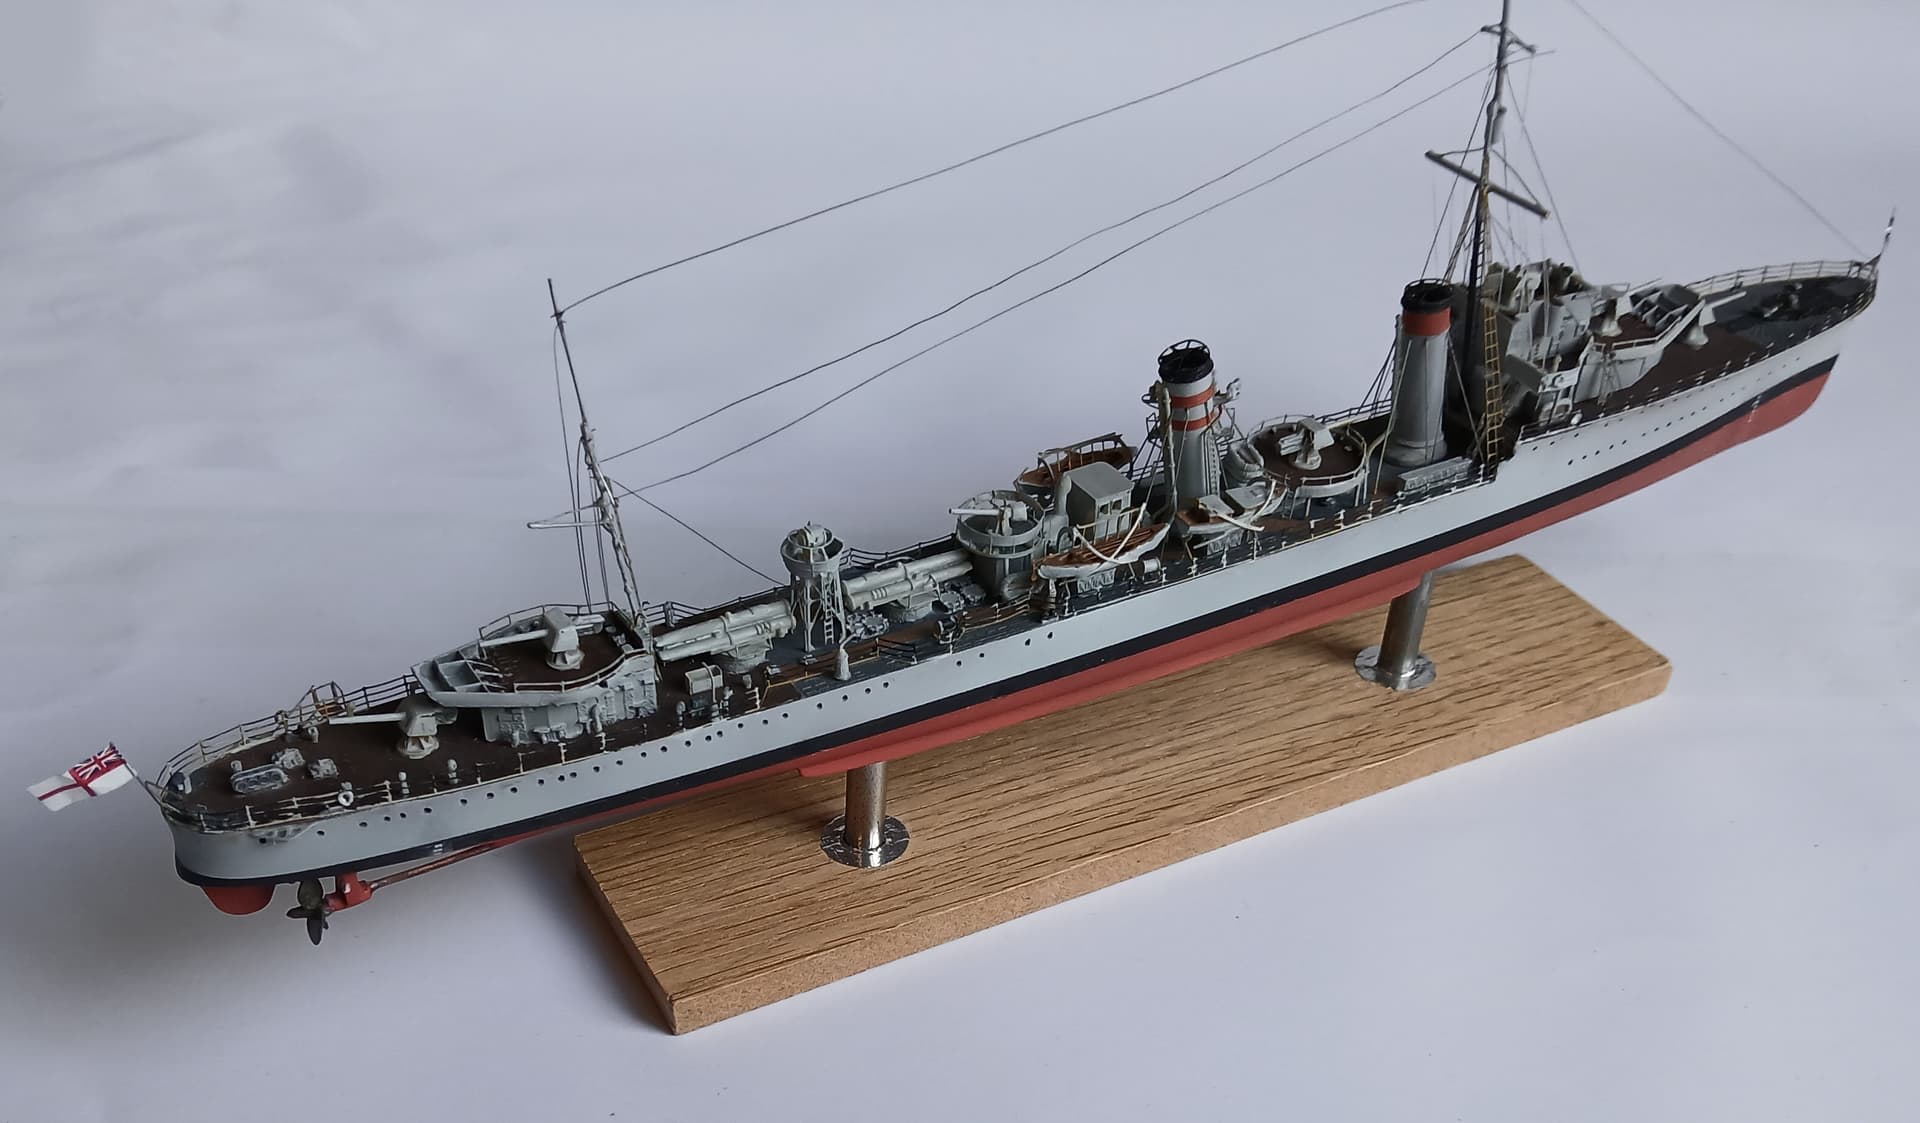
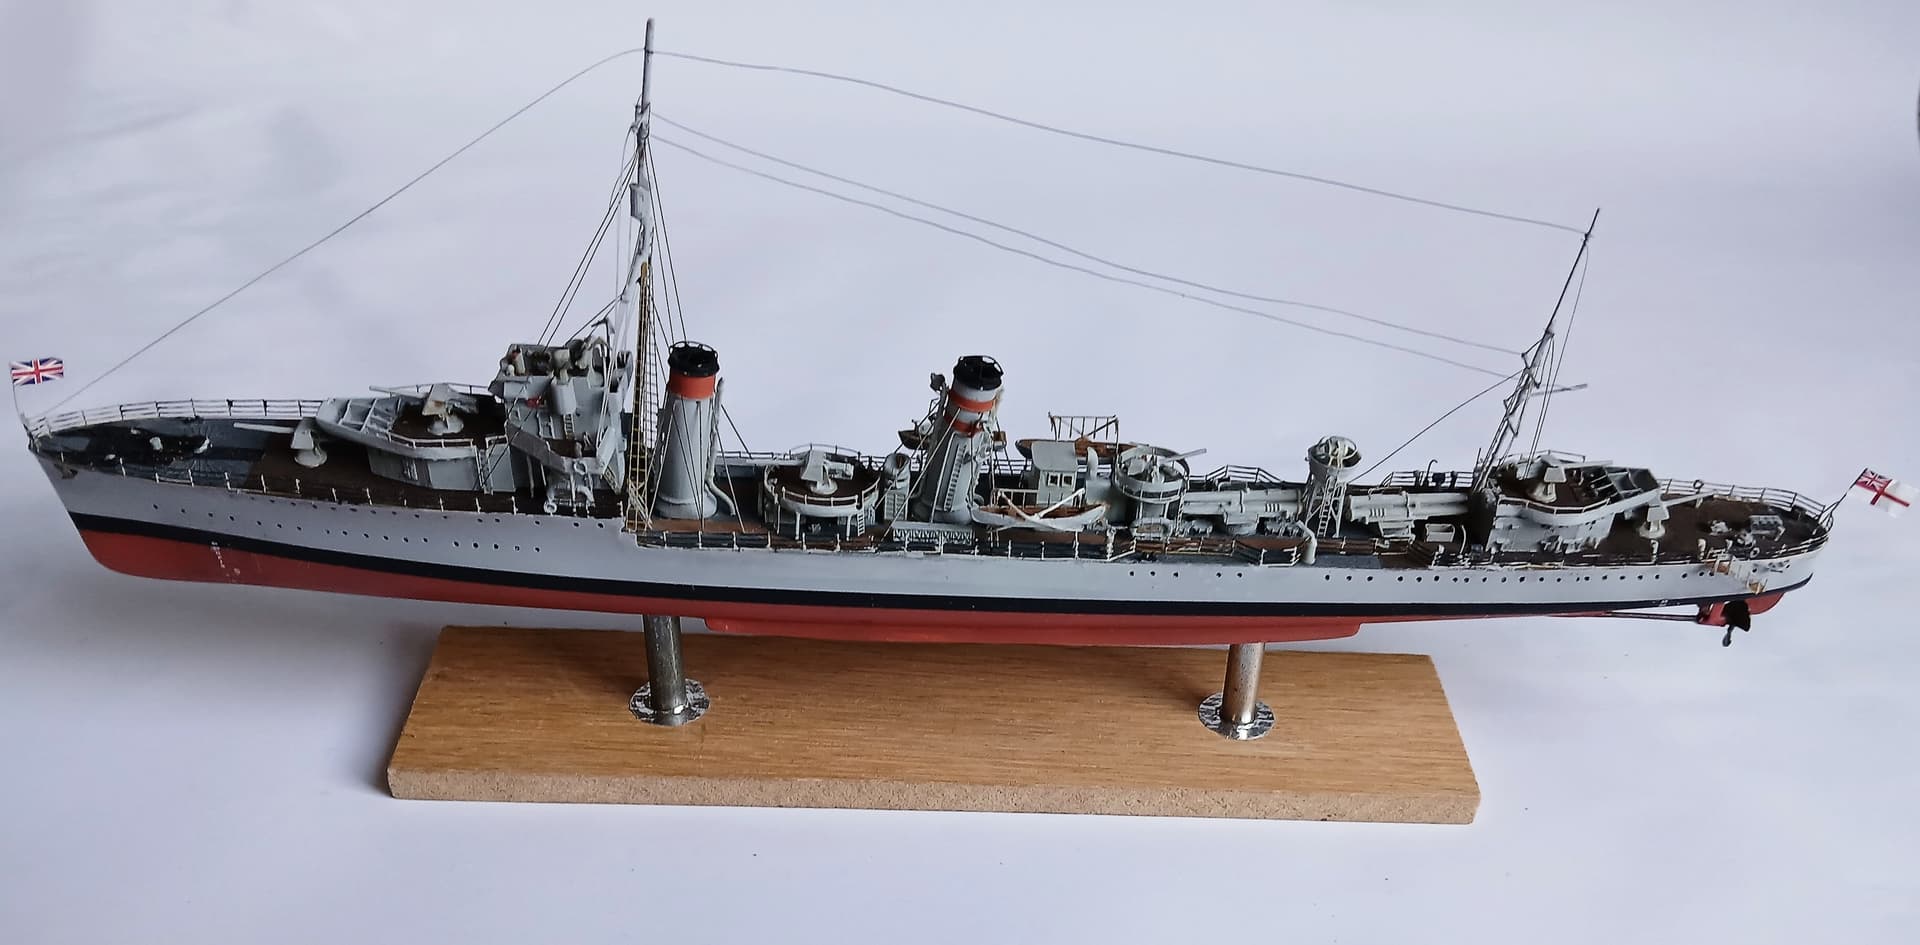
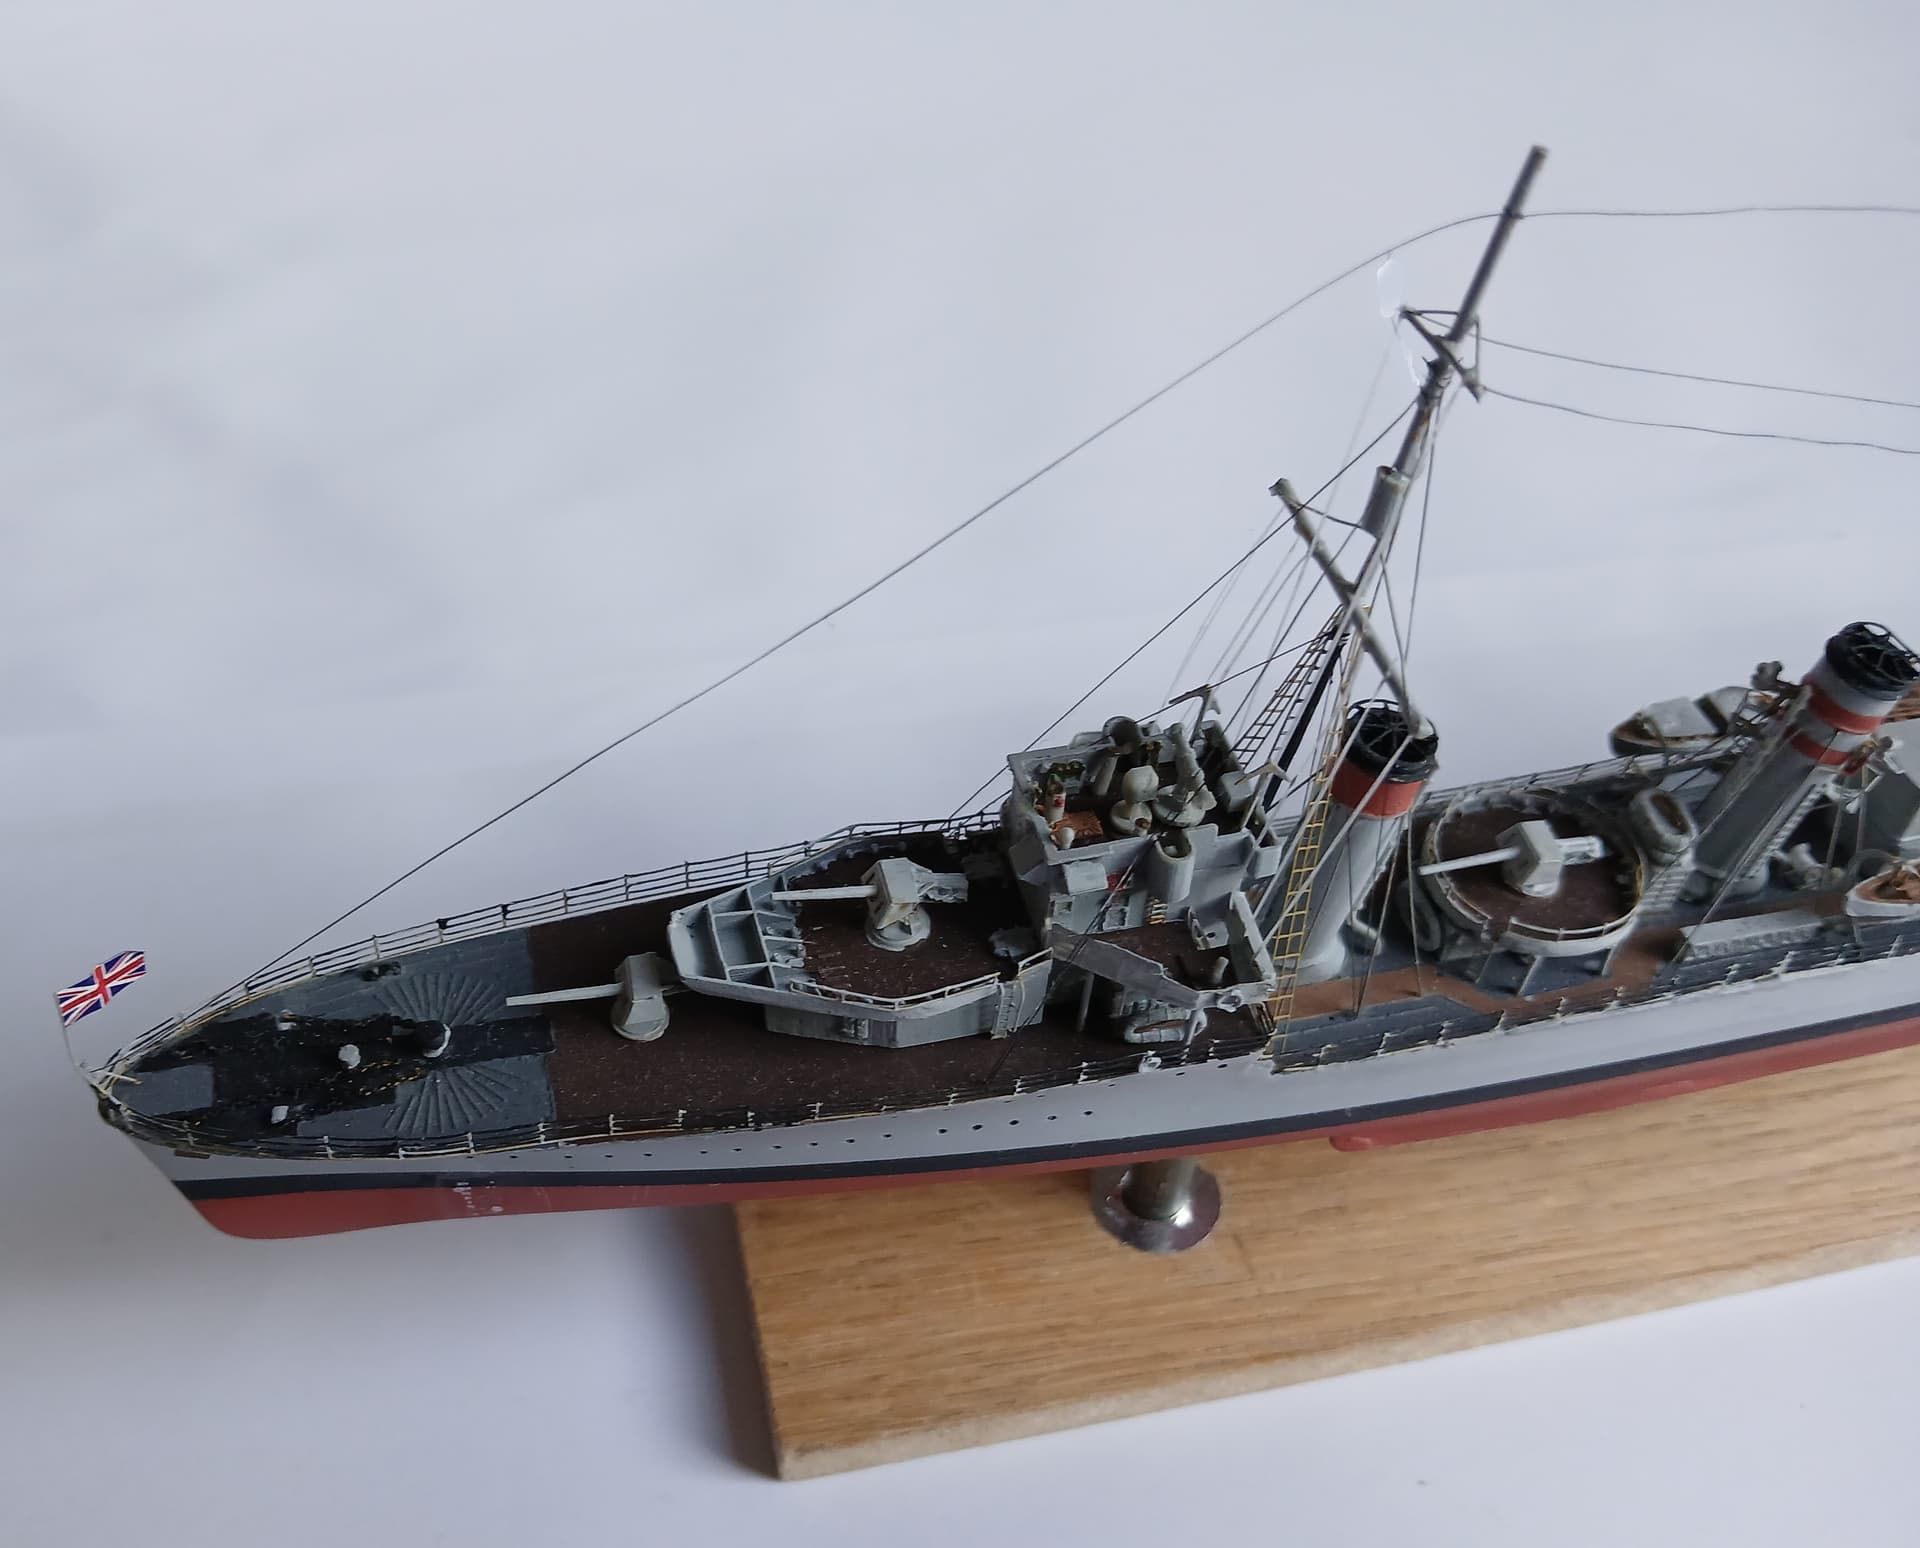
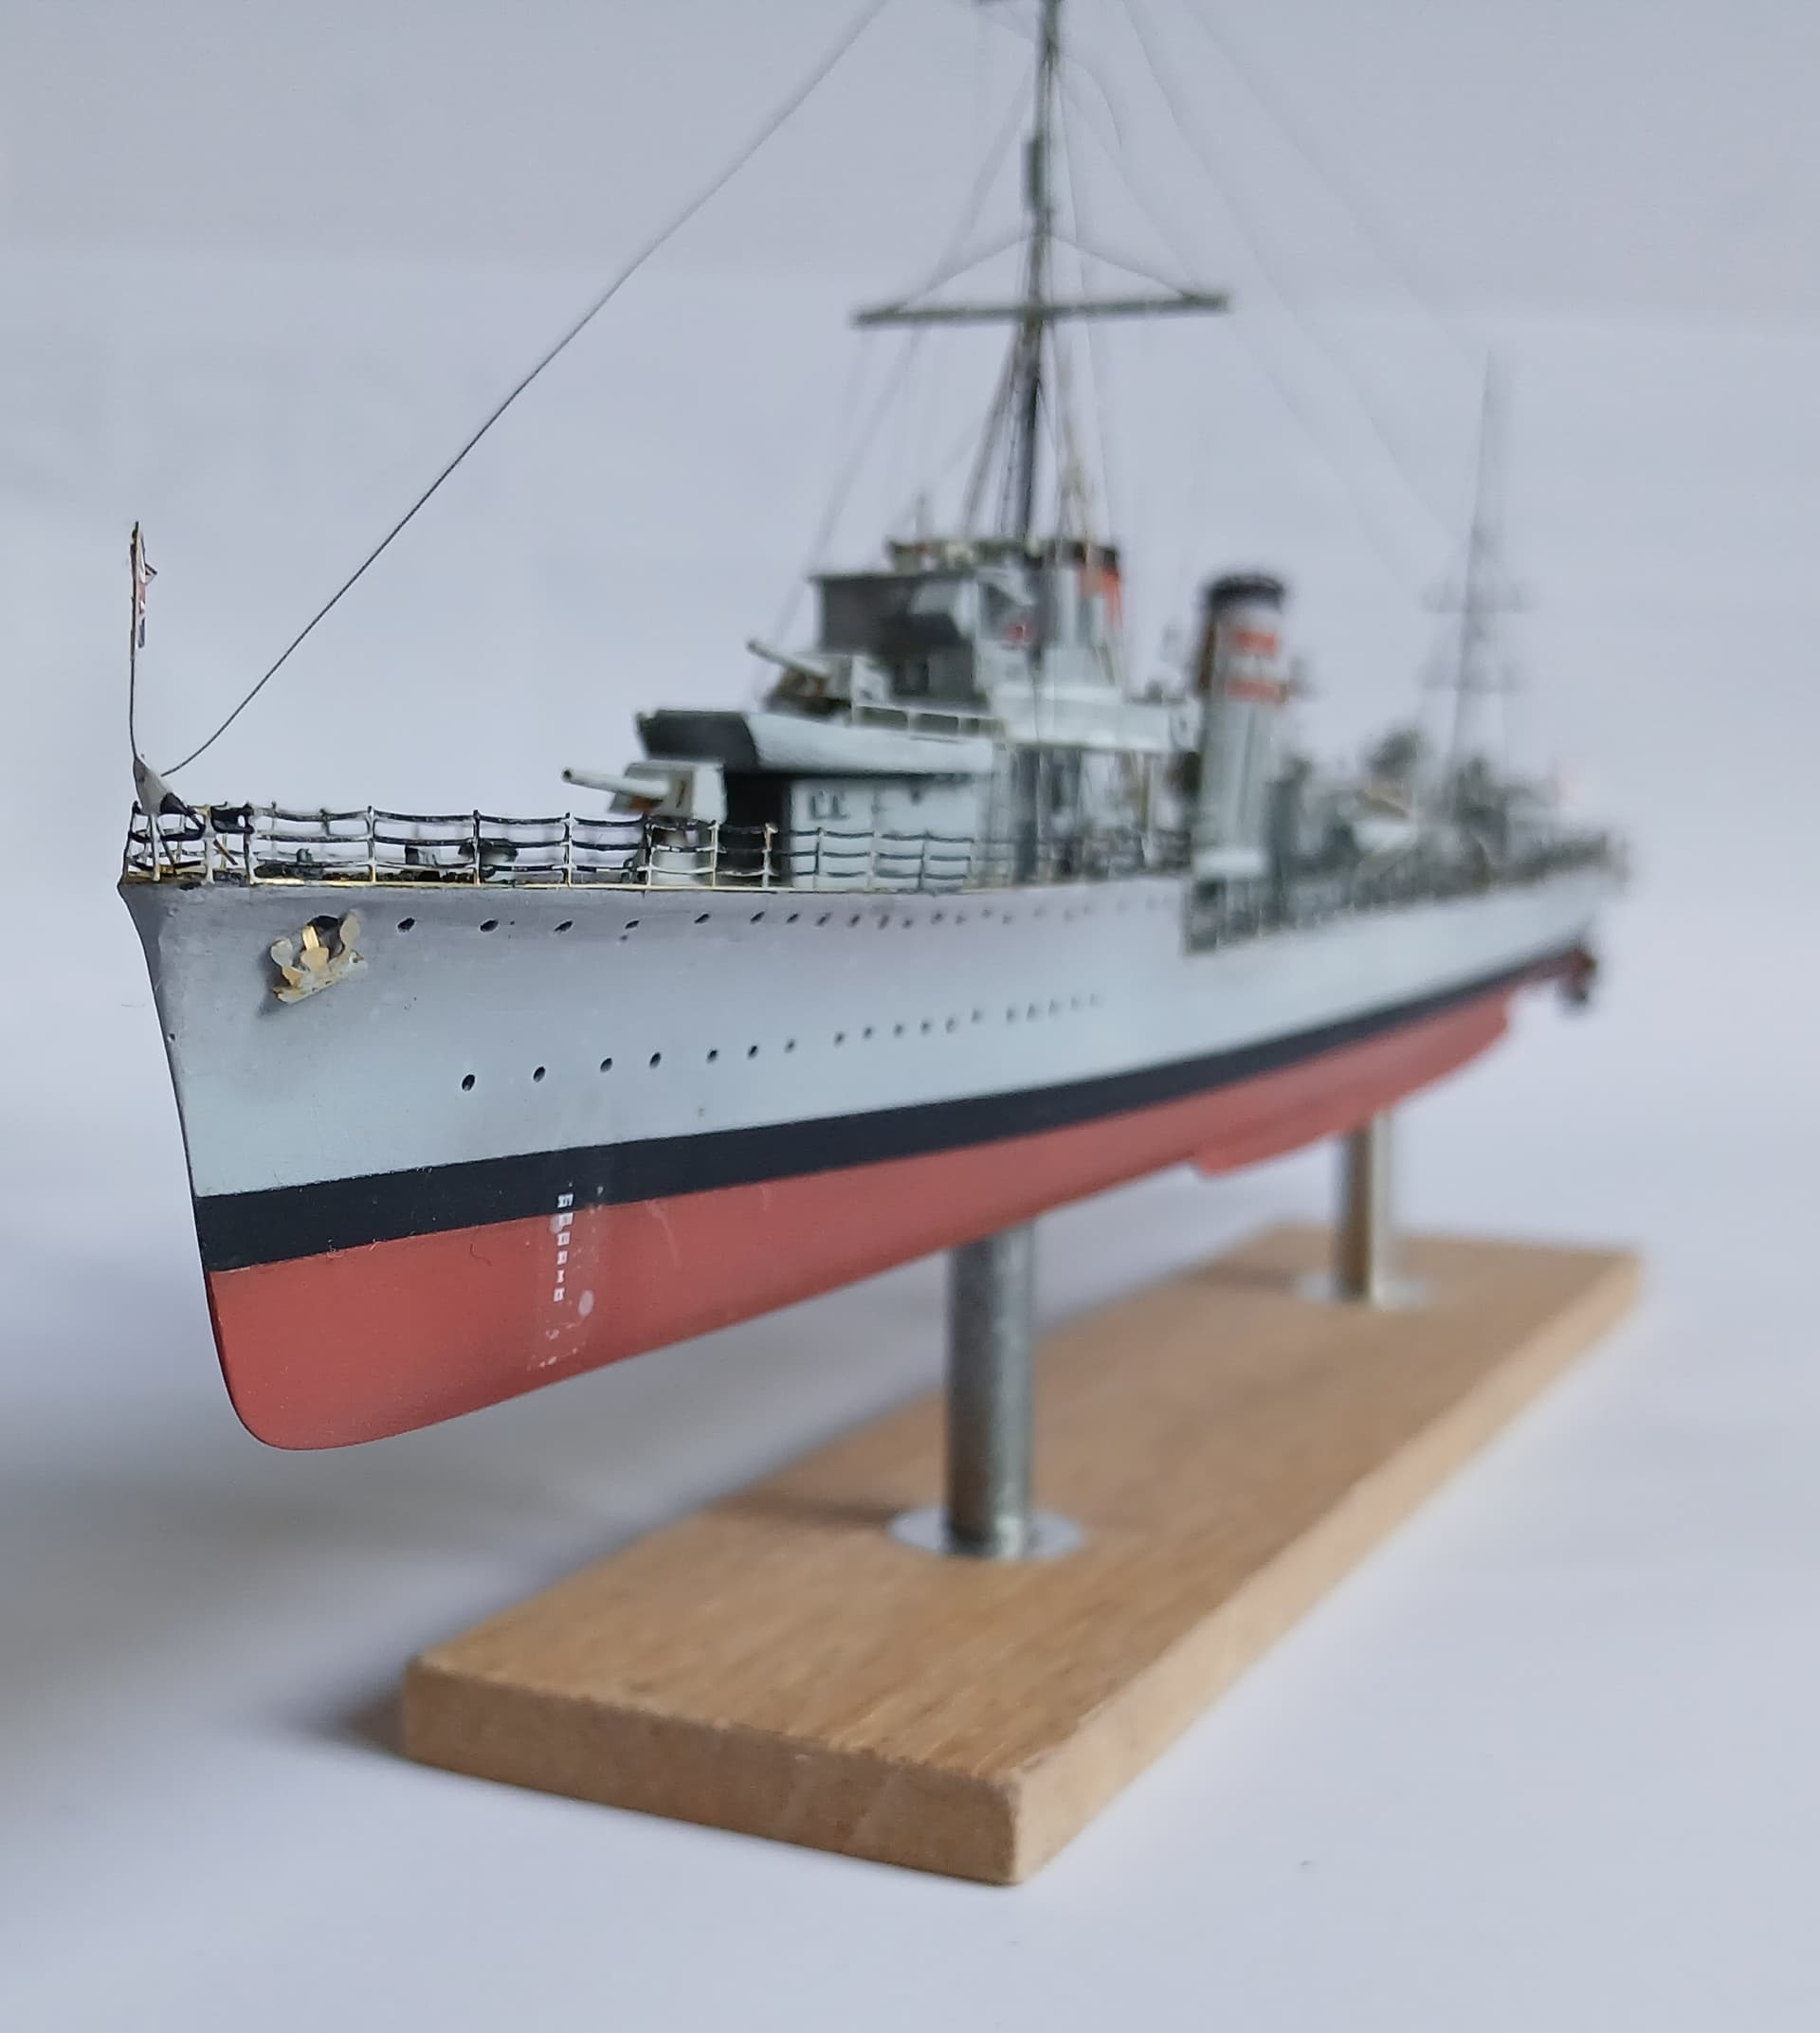
Hull painted in 507c. HMS Stuart was in her early life most of the time in the mediterranean. This is how I want to show her.
The color ist the WW 1 type 507c, without any blue in it. I experimented with lightening of neutral grey to find a suitable shade. As usual it looks totally different dependig on the light.
Next update will take a while. I just discovered that the surface of some of the superstructure parts shows some kind of machining marks in addition the unevenness like in my 2nd picture. Need to figure out how to fix this.
Cheers
Tom
7 Likes
Looks really good…keep it up!..too bad about
the machining marks but I am sure you will find
a solution.
Cheers,
Hi Tom,
Slightly late to the party on this one, but excellent progress on a tricky kit, I built their HMS Malcom a few years back, it did test my knowledge of  but it did come out well in the end.
Cheers, Si
Hi Si,
I am most worried about all the tiny parts jumping away. Need to build this in a Clean Room like micro chips .
Cheers
Tom
Hi Tom,
Nice save on that awful resin casting:
I don’t think I would have taken it on, but your results speak for themselves. Good save on one that at my house could well have ended up in the bin! 
Hi Tim,
To expensive to just throw away  .
.
I do not know what is wrong wiht the casting. Some parts are really good, but some had the white residues or “dirty” surfaces and some parts have a kind of machining marks (like the first generation 3-D printed parts).
I will paint everything in 507c and then carefully sand, maybe with glassfibre pen. See what happens.
Just hate to sand away nice details.
Cheers
Tom
I know what you mean, AJM do like microscopic I will admit several disappeared into the void, but fortunately nothing either essential ot I couldn’t replace from spare etched frets.
Good luck, it will be worth it.
Cheers, Si
Happy Eastern Everybody!
Finally finished my short “in-between” project and am able to continue with HMS Stuart.
I wanted to start with the forward superstructure and the funnels as the biggest parts.
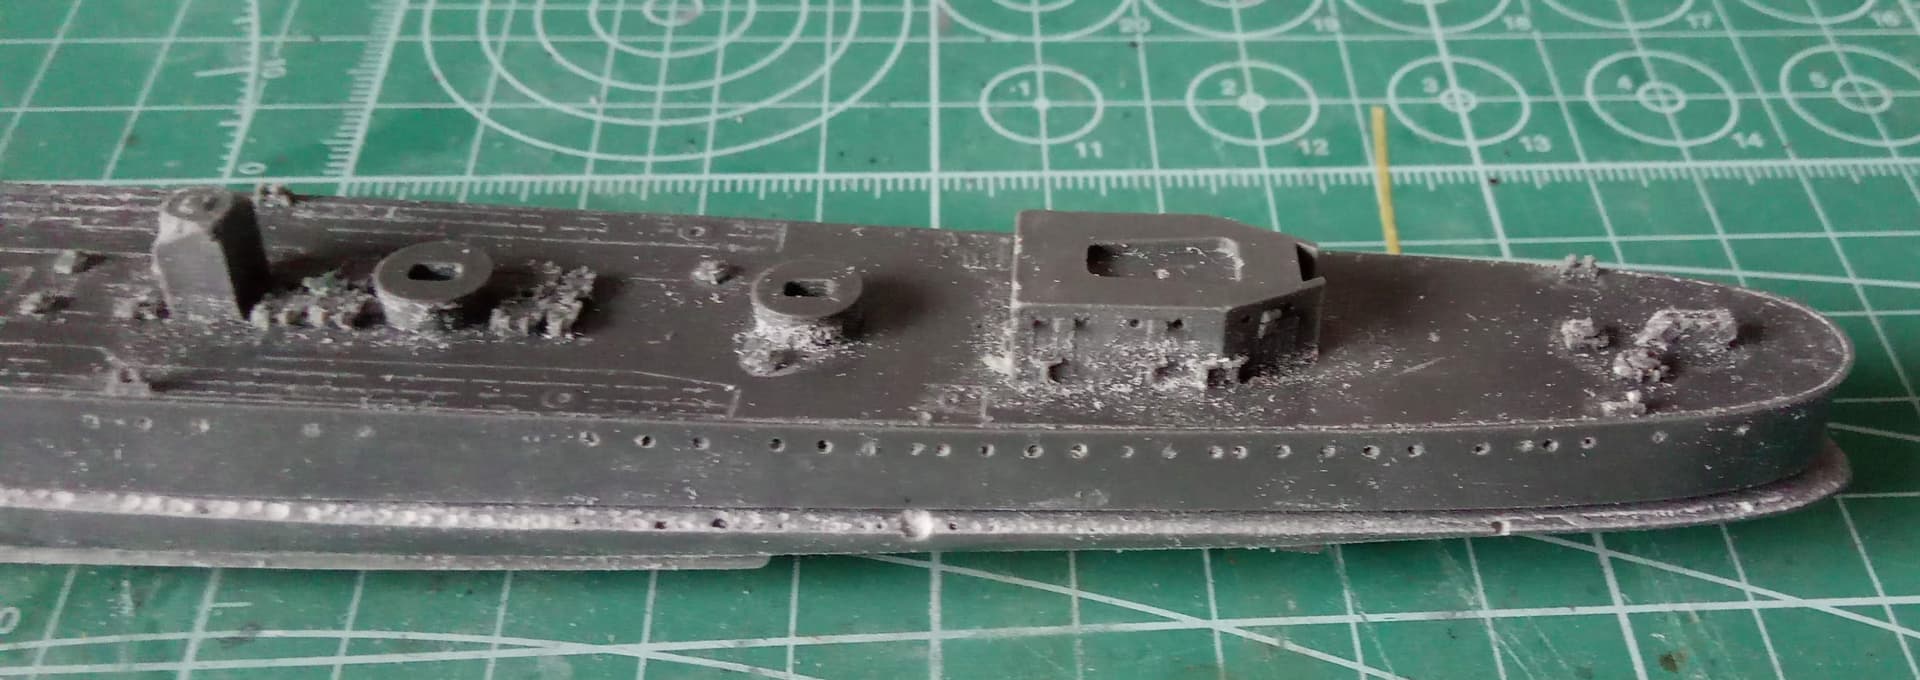
I made some pictures to show my problem with the surfaces.
This is already after treatment with steel wool. Looks like the master was made of wood.
This looks more like a 3-d printed master with a low resolution. I would normally not get too excited about macro fotos, but the rough surface can actually be seen with the naked eye.
Steel wool was not enough. Next I tried Mr Surfacer 1000. Not enough either. Finally used my special curved files and tried to clean the bigger surfaces as good as possible.
Not perfect but better after the 2nd application of Mr Surfacer. More filing and then a final coat… I probably have to work on every surface.
I just found out that there is something wrong with my instructions. Some steps are missing ,some parts are wrong numbered and look different on the instructions than in reality (lower bridge deck). I found a kit review on another website with full instructions. Believe it or not, they are different in arrangement and sequence and numbering.
After the sanding festival of the hull I thought it will become easier, but this project really looks like an uphill battle.
More soon.
Cheers
Tom
4 Likes
Oh wow, that really looks ‘challenging’… Great effort, and she heartily starts to look like a destroyer, but I am afraid ‘uphill battle’ could be a correct assumption, looking at the surface textures…
Keep your spirits high! Really nice work so far!
Cheers
Jan
@JJ1973: With the best kit I will not be able to work as clean as you with the Gneisenau!
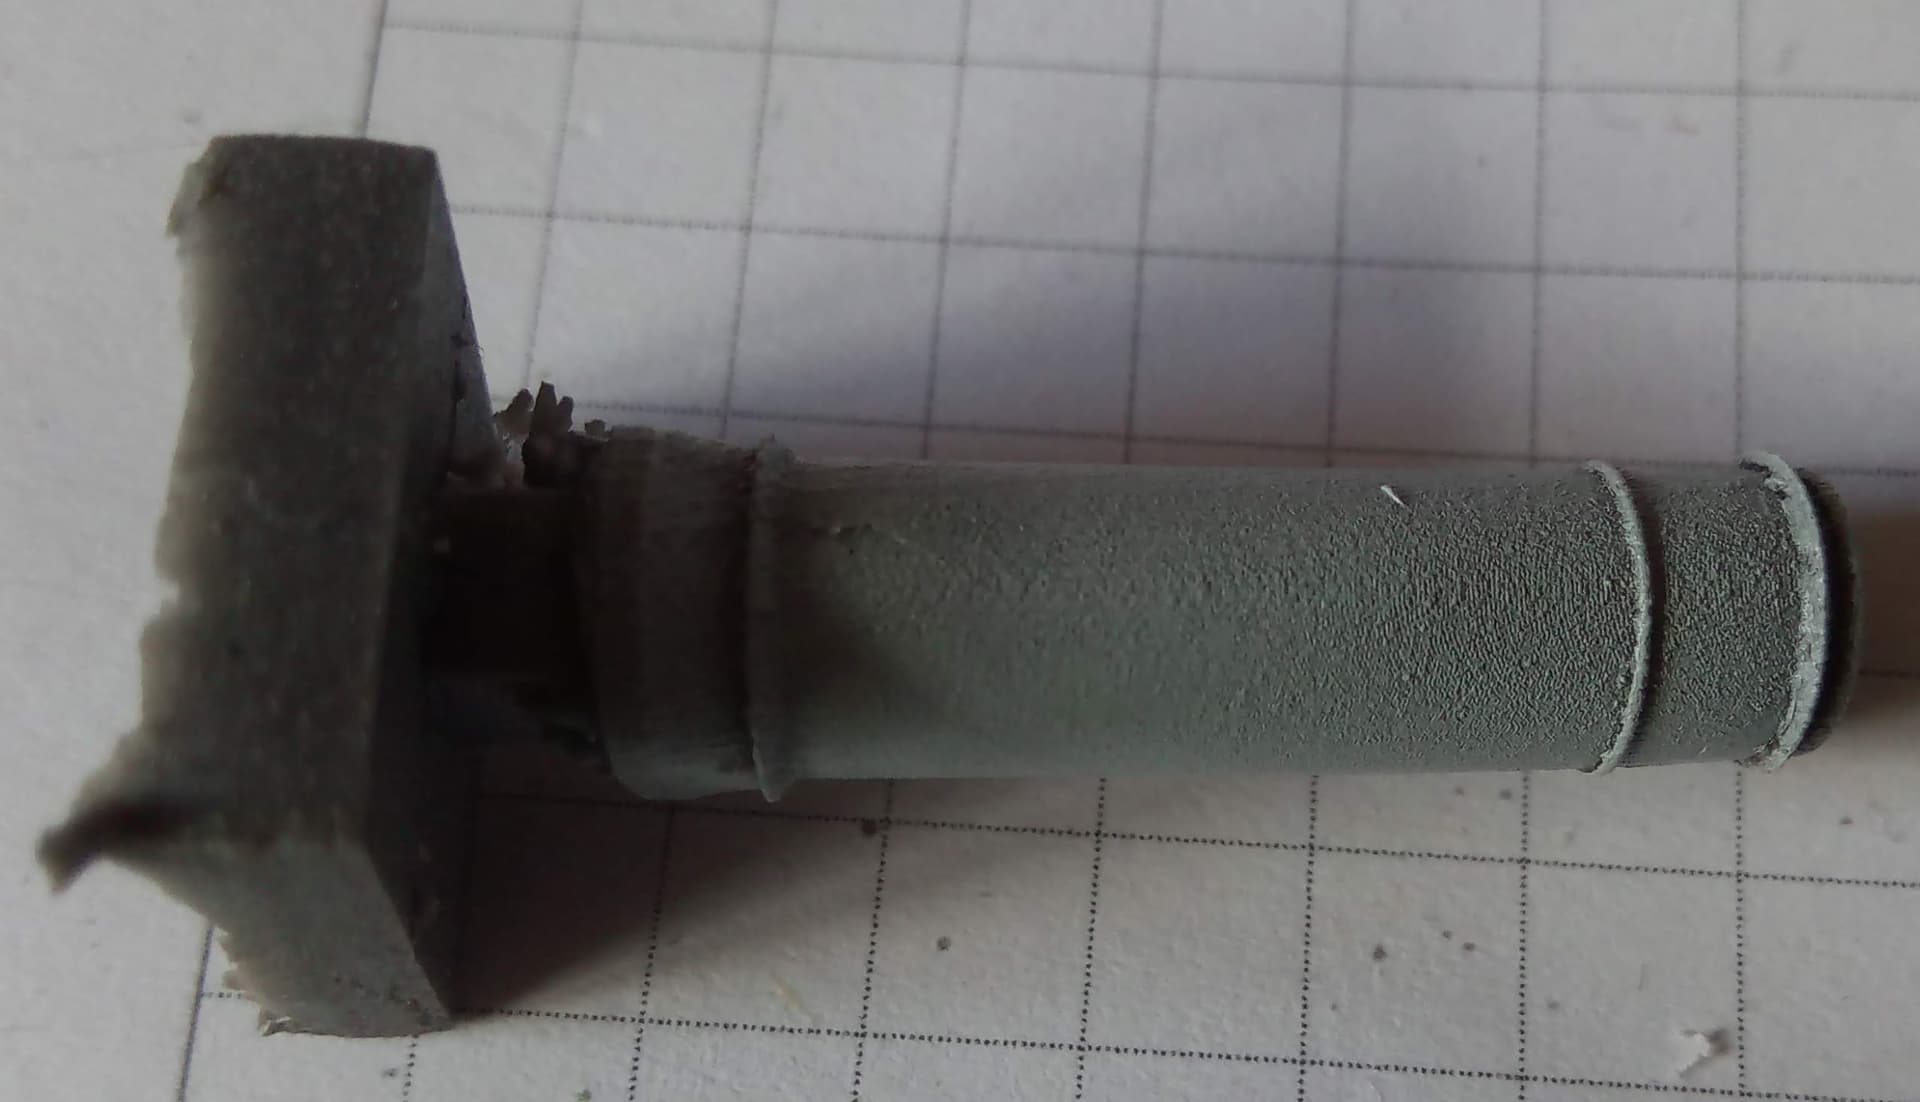
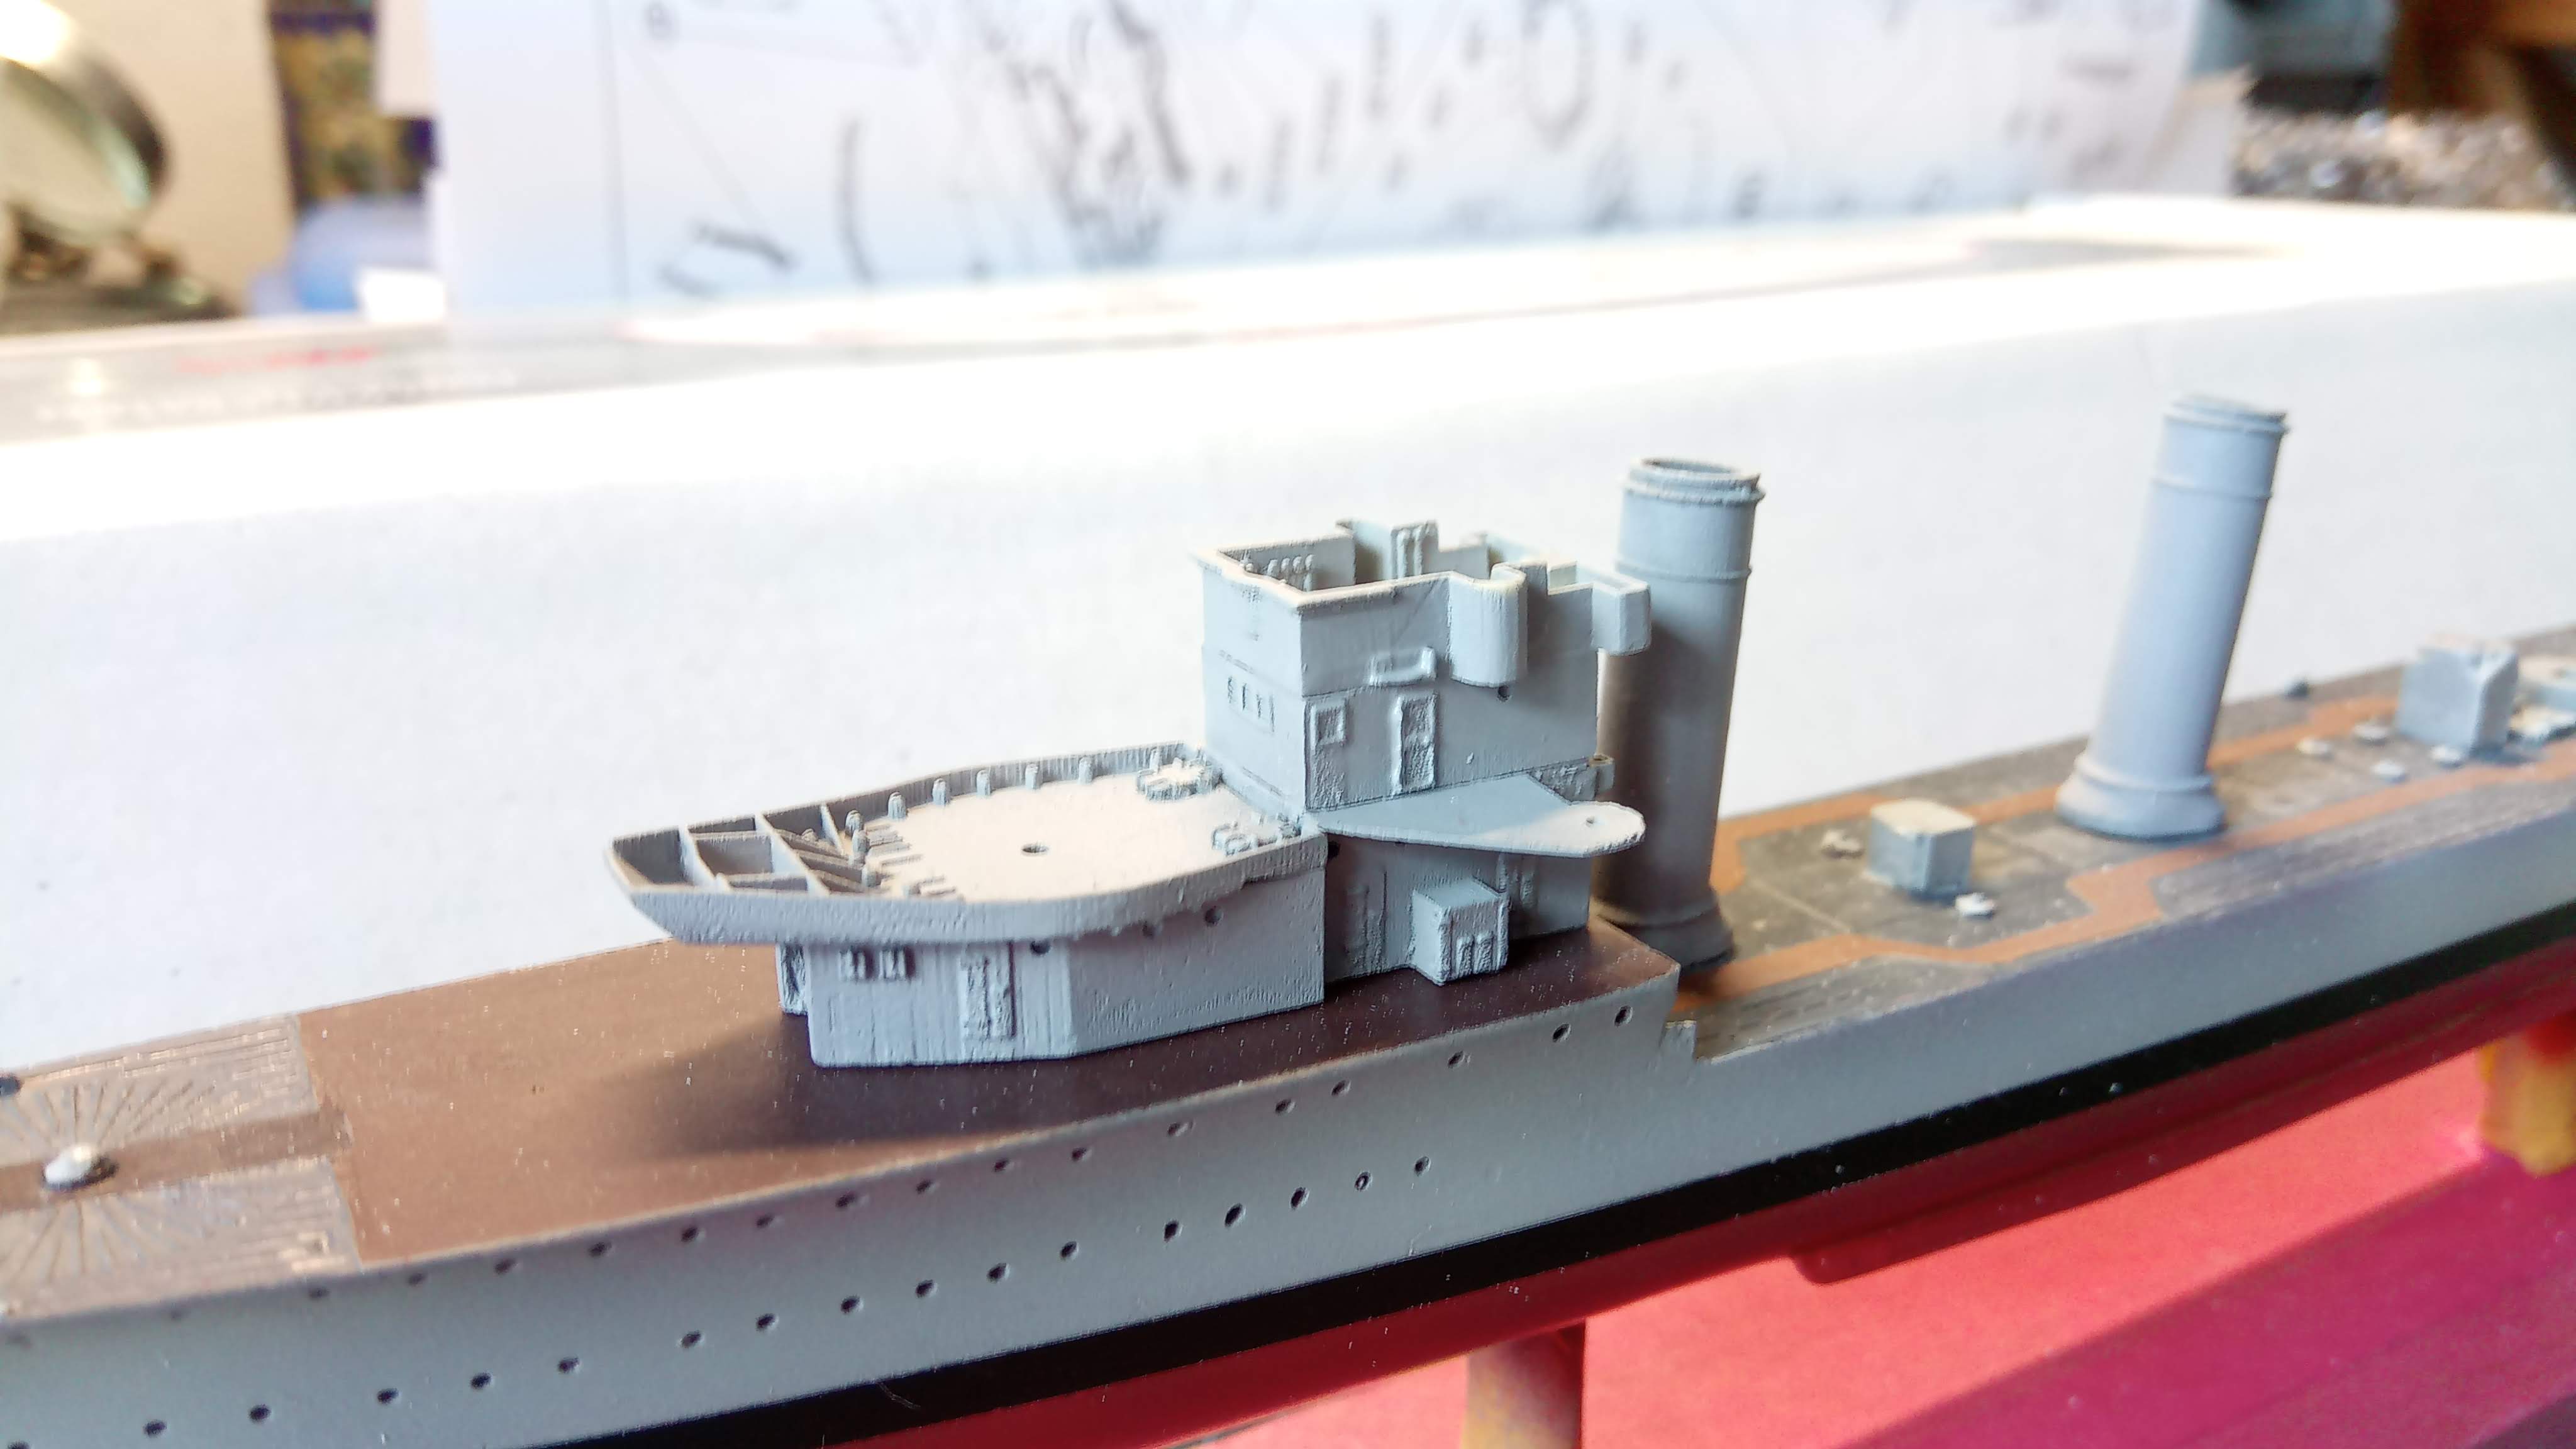
There is some progress on HMS Stuart. I managed to install the funnels. The aft one has abt 12 parts, steam pipes, ladders, platforms typhons etc. More work than it looks at the beginning.
So, which steampipe goes where?
I painted the funnels with the rings of a leader which she wore on several pictures from the mid 1920’s on when she was leader of the 2nd Flotilla in the Mediterranean.
The deckhouse under the AA gun is not fully molded so I have to repair the corners with putty and quickglue. So time consuming!
One questions for the experts: how you best install railings without lower bar or miniature footplates?
Any help would be welcome.
More soon
Cheers
Tom
2 Likes
Hi Tom,
thank you very much for your kind words, but quite some inaccuracies are not visible on the pictures…
Your work and progress on the Stuart is excellent! Overcoming quite some problems with the kit!
Regarding your question - sorry…I’ve not come across that (yet), the railings I had to deal with so far always had a lower bar…that really sounds tricky…
Cheers
Jan
For what they are charging for the kit, this is unacceptable. I know who I WONT be buying from in the future.
That being said, you have made her look fantastic so far. Your effort is clearly visible!!
@ McRunty
Their service is good however. There were some small parts missing as well as a metal gunbarrel. I contacted them and got immediately replacement .
Short update:
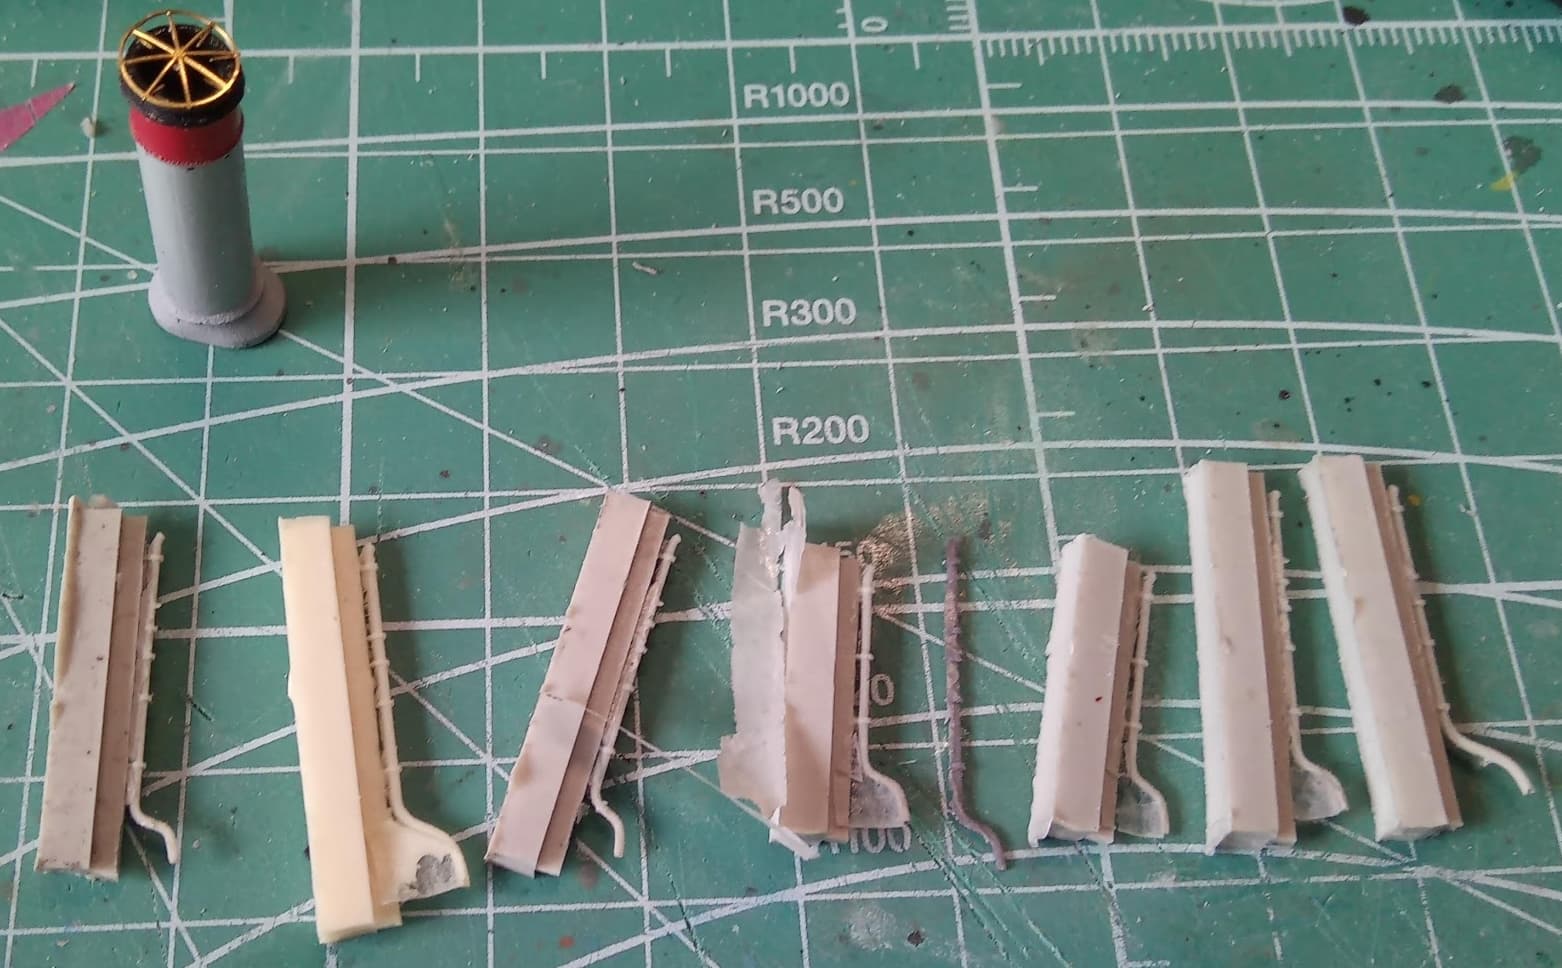
Installed more superstructure parts and soldered the masts and yards together. I prefer an unusual building sequence: First finish the masts and rigging then install railings and small parts. Reason is that I drill some holes for the stays and do not want to damage small parts. I use wire, nylon and black hair ( ) and try to make the everything as strong as possible.
More from the rigging soon, when the masts are placed correctly.
Cheers
Tom
3 Likes
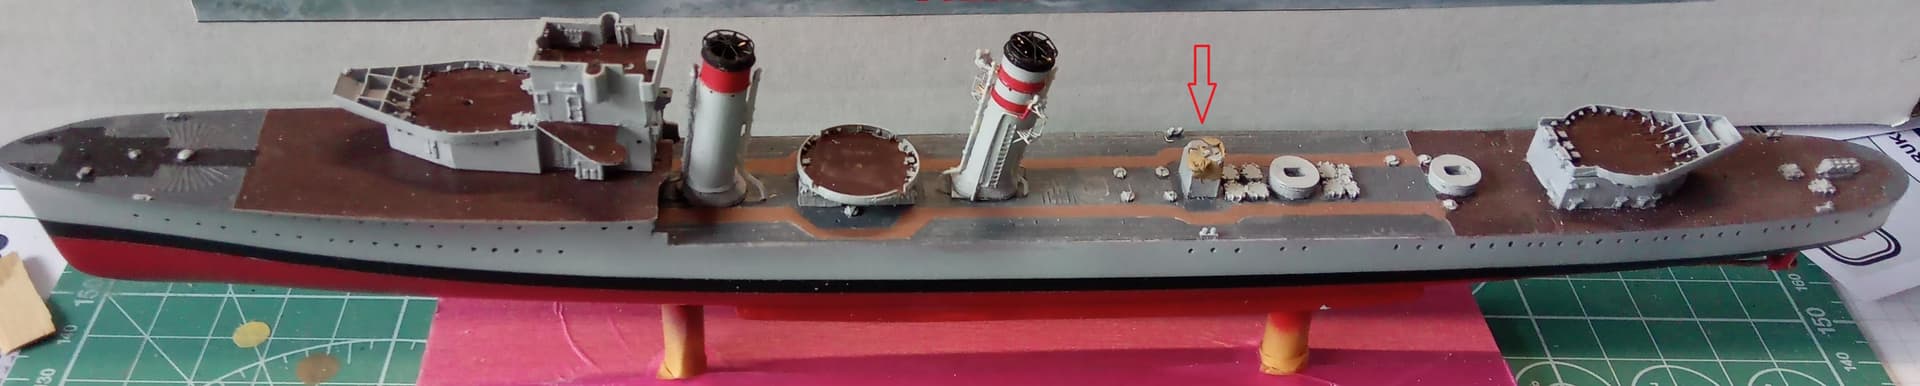
I want finally to finish this build blog. I lost my drive completely and it took me a year to restart it. The kit was fighting me all the time but the end result is not as bad as I feared. I hope you like it.
The rigging is normally tight, but we had very wet weather here and its natural material
I hope you like it.
Cheers
Tom
10 Likes