I have been gathering the Amusing Hobby Conqueror kits since the MkI was released and recently I begun assembling them.
In general the kits are pretty nice and the assembly pretty straight forward and with some dry fitting and minor sanding after gluing the parts together putty use can be avoided or kept at a bare minimum.
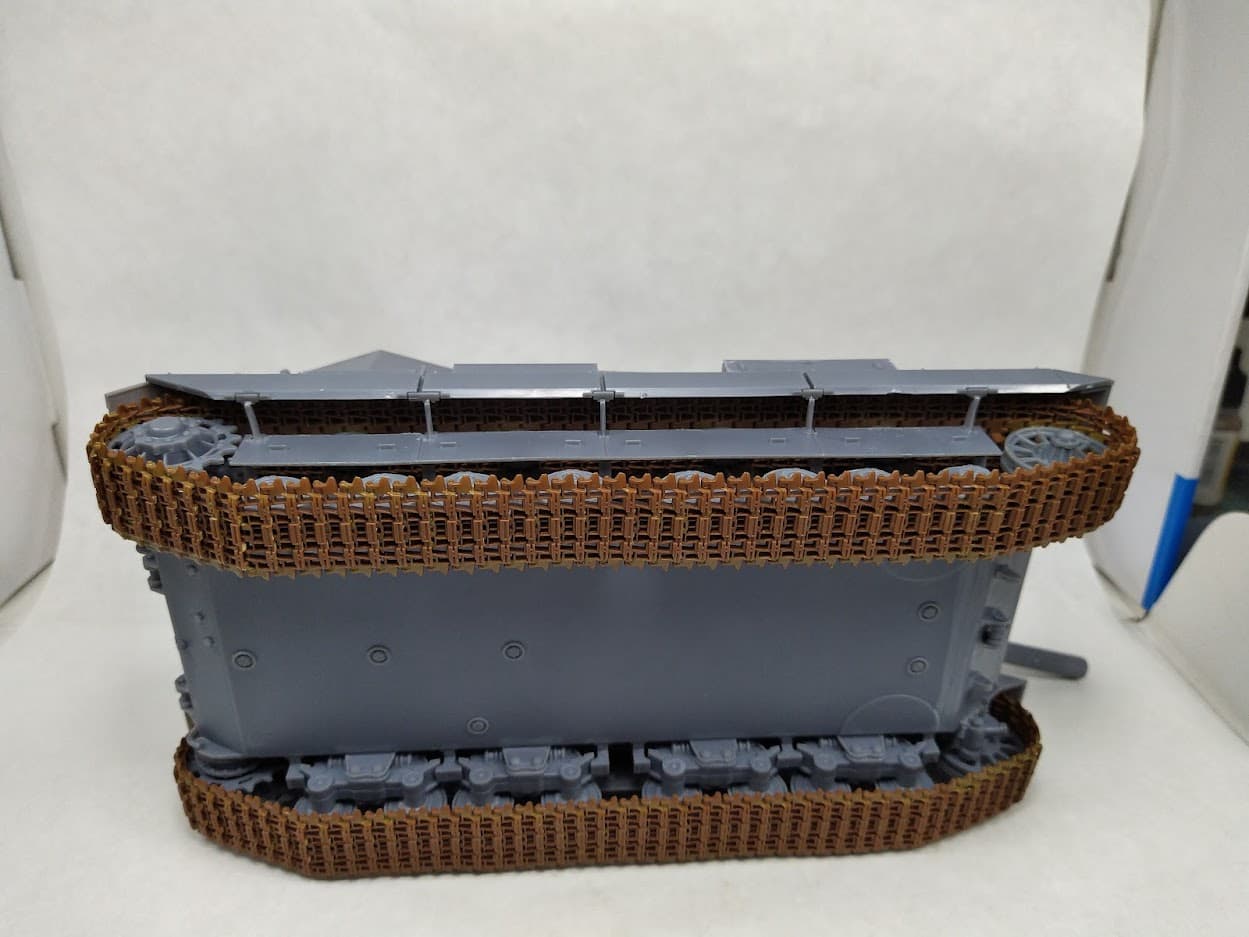
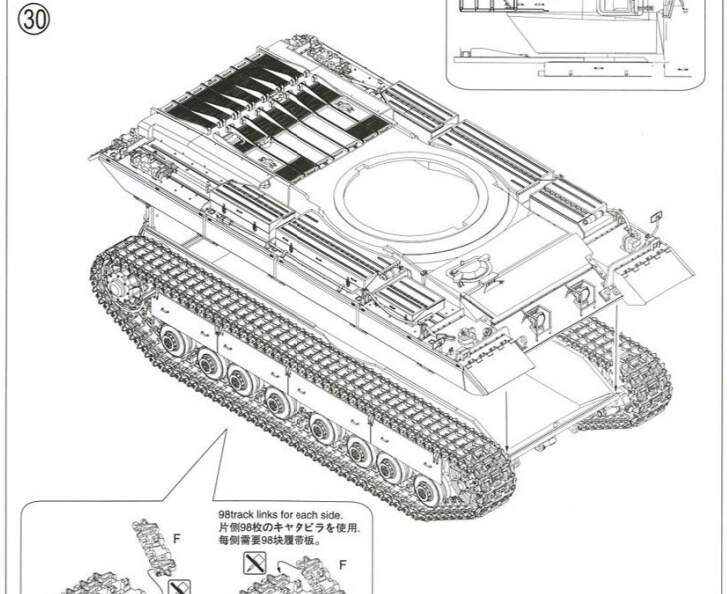
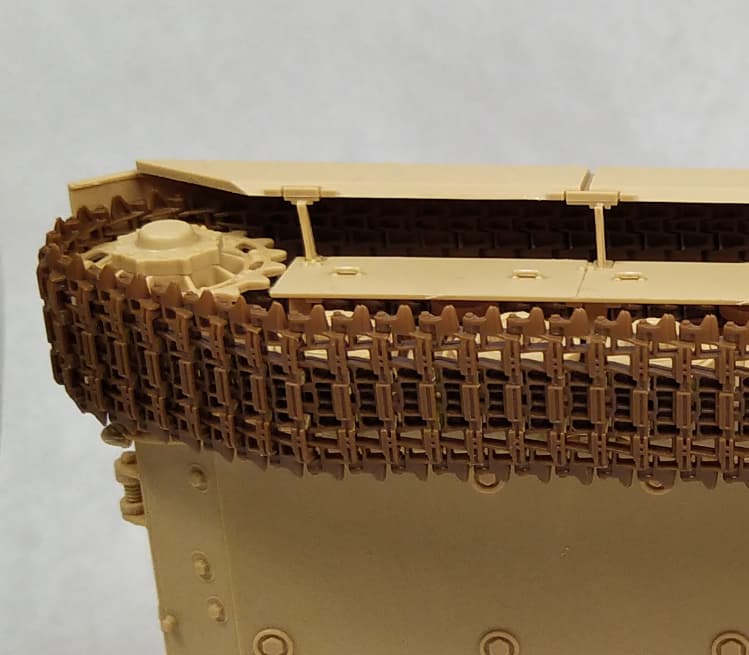
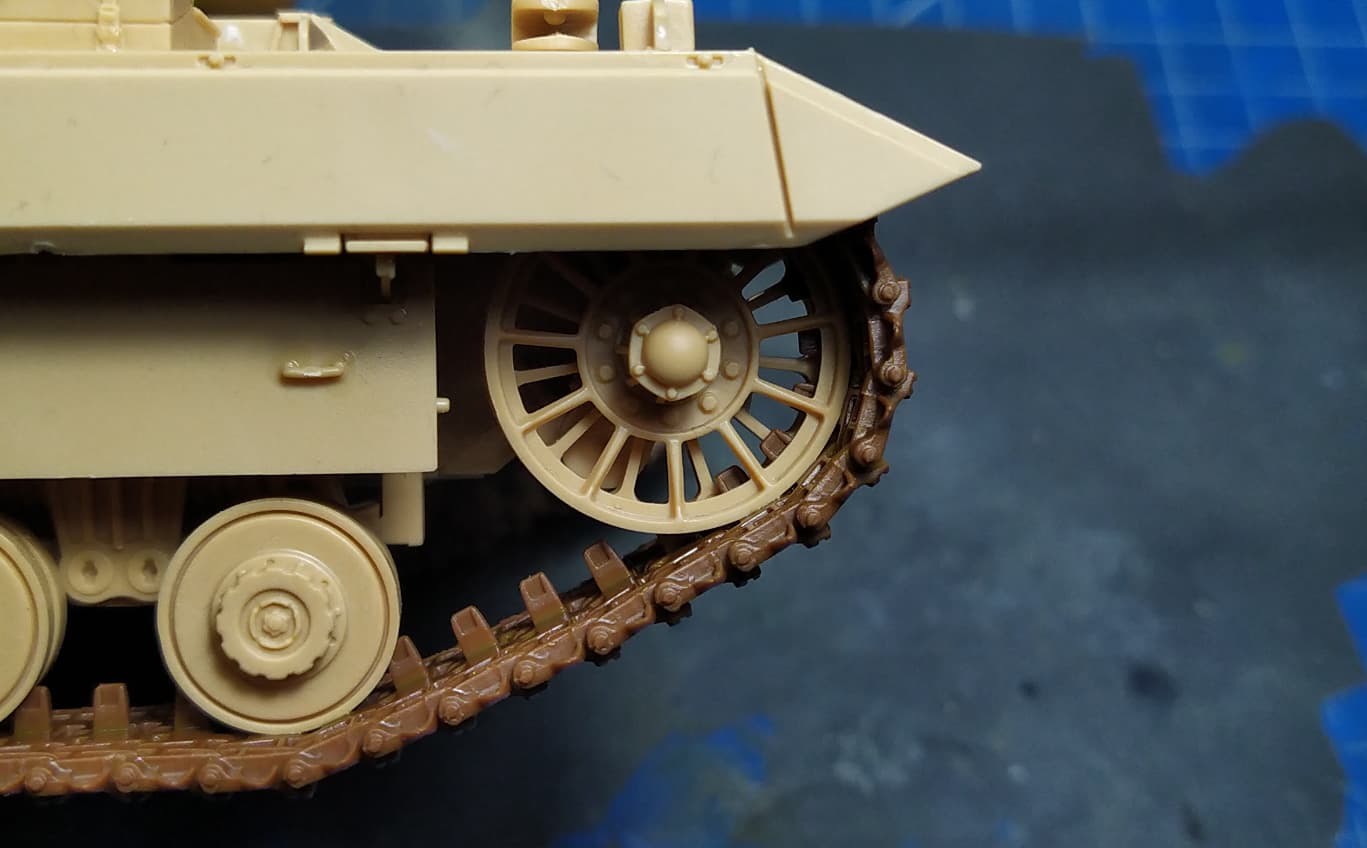
The strongest part of the kits are the track, which IMHO are the best tracks I have worked with. They are provided in pairs and you have to cut four attachment points (two on each link) to free them from the small sprue tree. With a decent pair of cutters you can avoid any extra cleanup. The links click together and the track remains workable. I ended up using 96 links per side (contrary to the 98 links suggested in the instructions). 97 links per side would also look nice since with 96 links the fit is a bit on the tight side of things (take also into account that the front tensioner wheel is somewhat adjustable, more on that later…) The first two kits of the line, the Mk I and the FV215B included a different style of track, so if you got your kit very early you might need to check what track in included in your kit, since the original ones are a PITA to assemble, still pretty decent and workable though.
The first kit that I assembled was the FV215B kit but I stopped because I did not like some of the features of the kit such as the commander’s cupola, which was horrible and devoid of any decent detail. I replaced that with a M1A1 commader’s cupola, that fits nicely. I was considering using a spare cupola from the ones included in the other kits but I was not in the mood for major turret reshaping, as required because of the size of the cupola.
Assembly and detailing is not finished on this kit since I want to work more on the details. OBB the end result is a bit on the crude side and poor detailwise, especially if one wants to build an operational what-if vehicle. There is also a huge deference in the molding of the MkI and FV215B kits when compared to the next releases of the series. The molding detail is sallow and less pronounced/defined compared to the MkII or the Badger kits. Also the plastic surface is very smooth and someone might want to work on adding casting effects on those two vehicles, whilst the later releases have some casting texture molded on.
I should also add that when I got the kit the upper hull was missing about 20% of the front, due to bad molding and it was replaced ASAP from the supplier, which is also the importer of Amusing Hobby kits in Germany, and that is how I got the new style of tracks for my kits.
The kit which I have finished assembly, at least according to the instructions is the Badger kit.


I need to add some details that are not included in the instructions but are supplied with the kit and add a couple of parts from other kits.
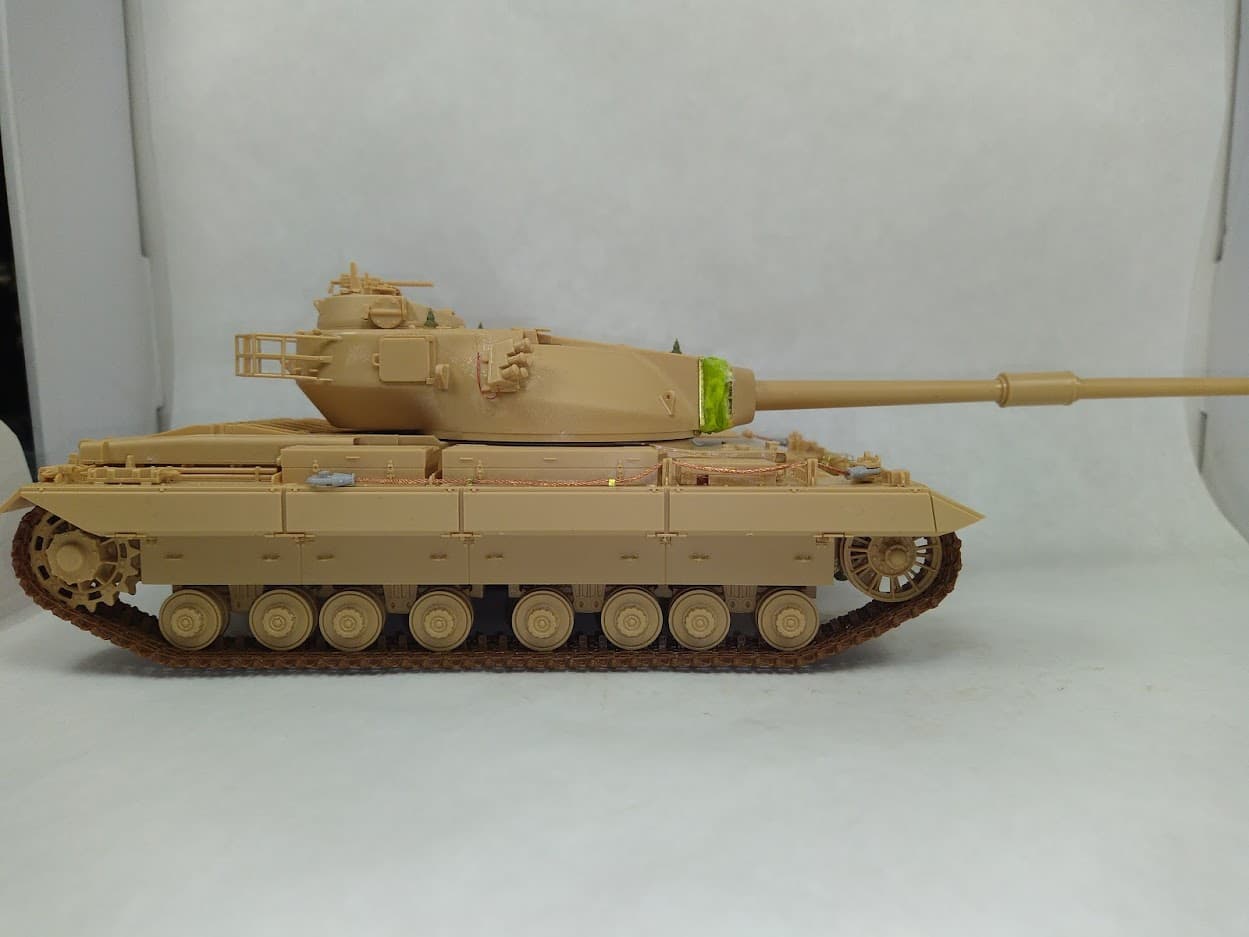
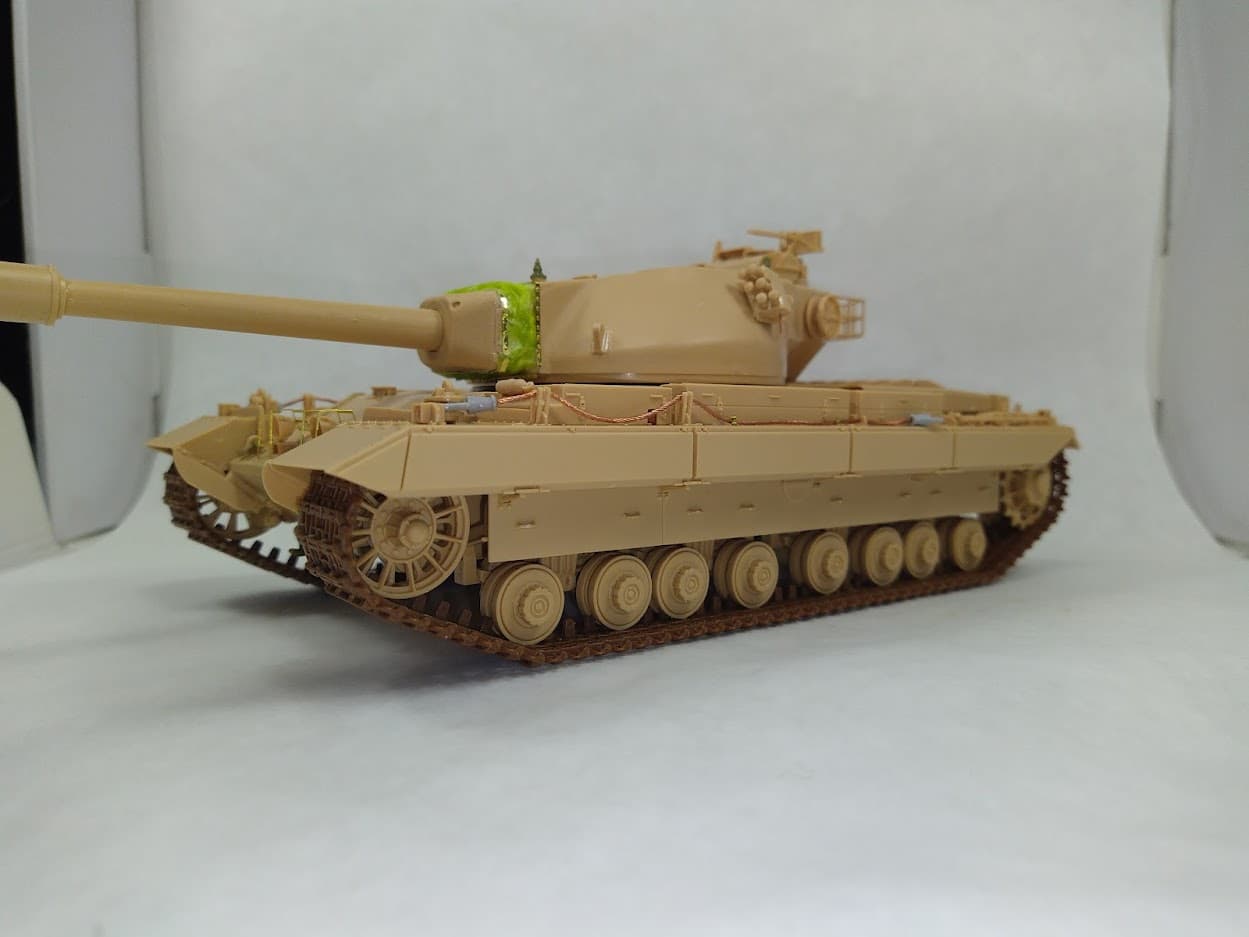
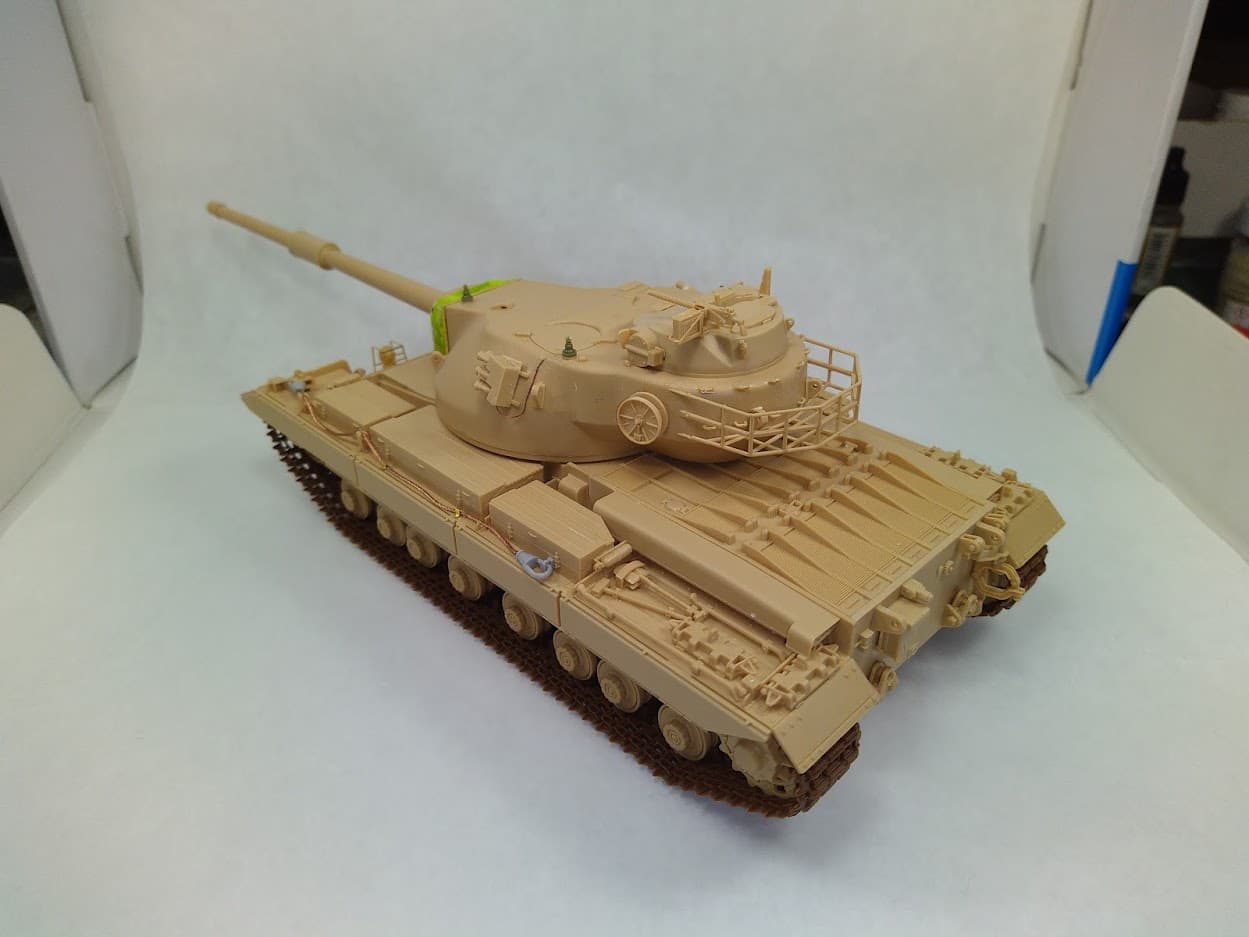
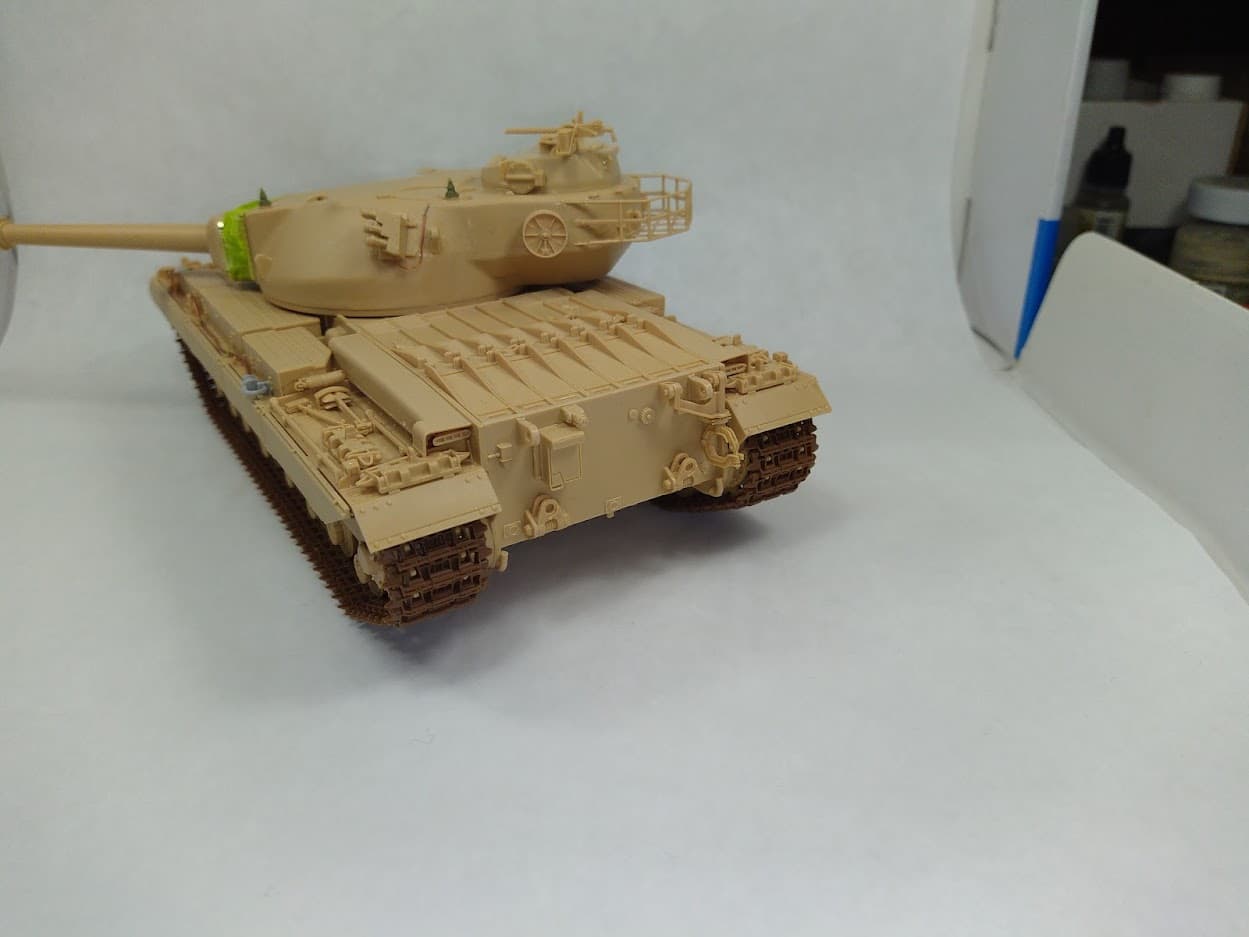
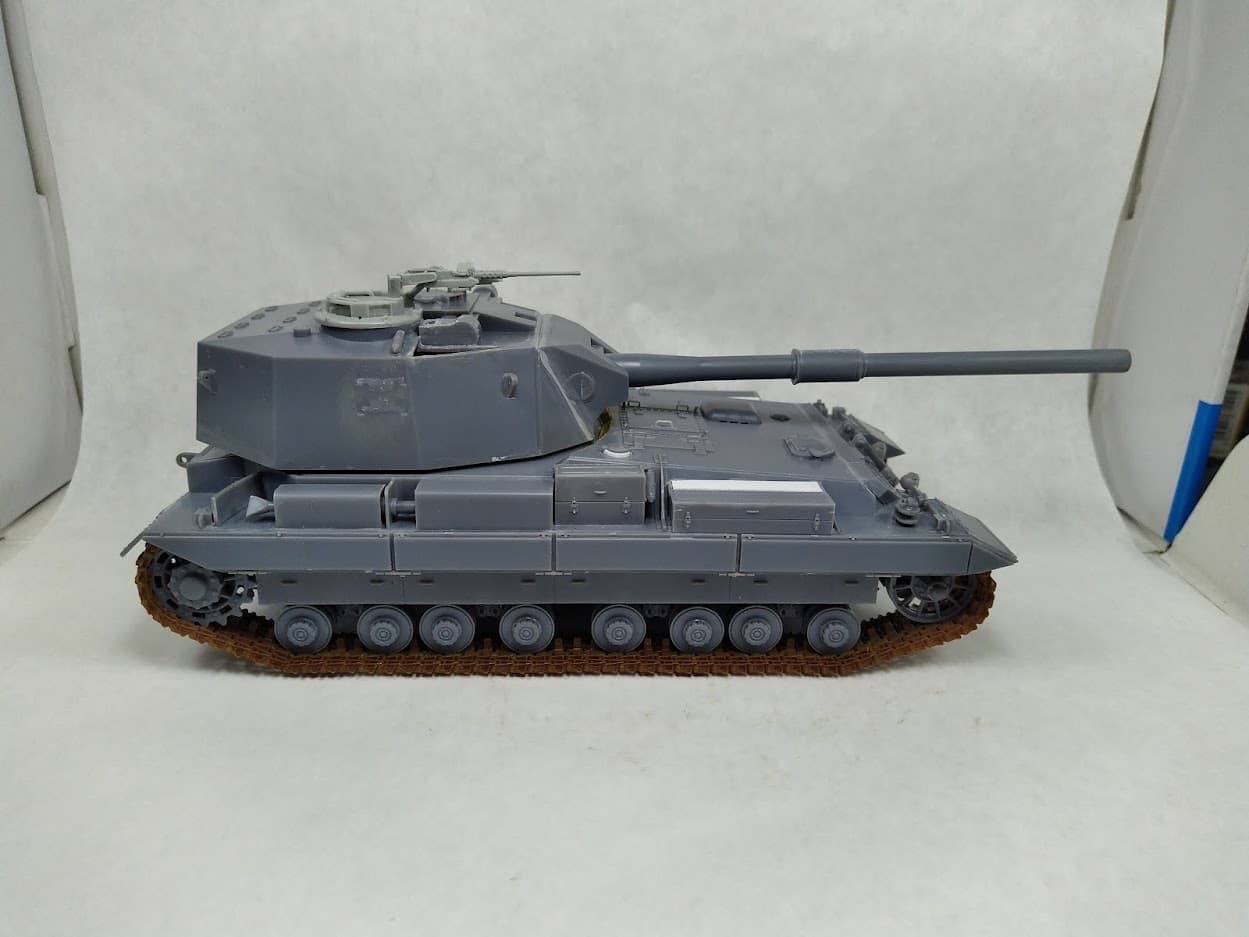
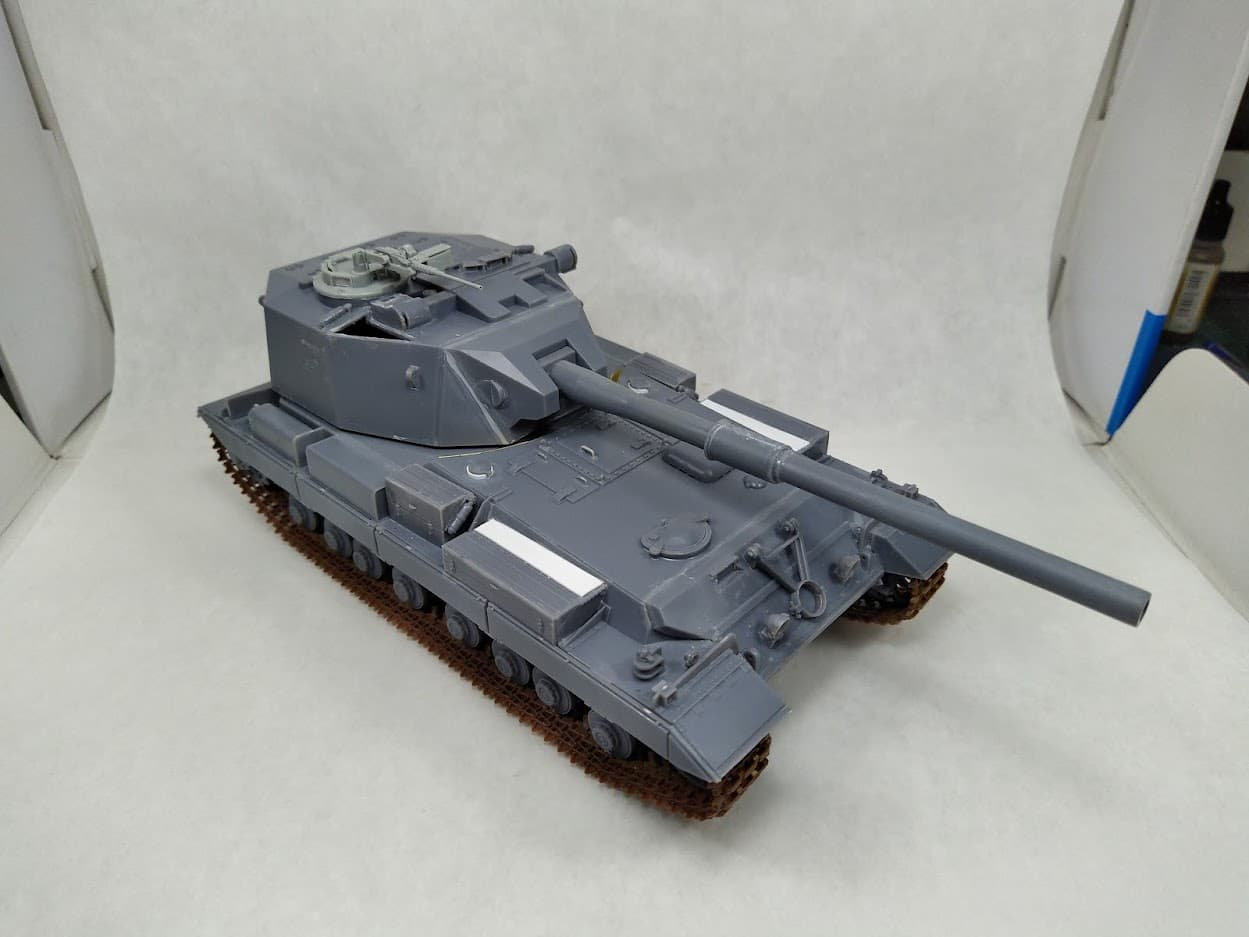
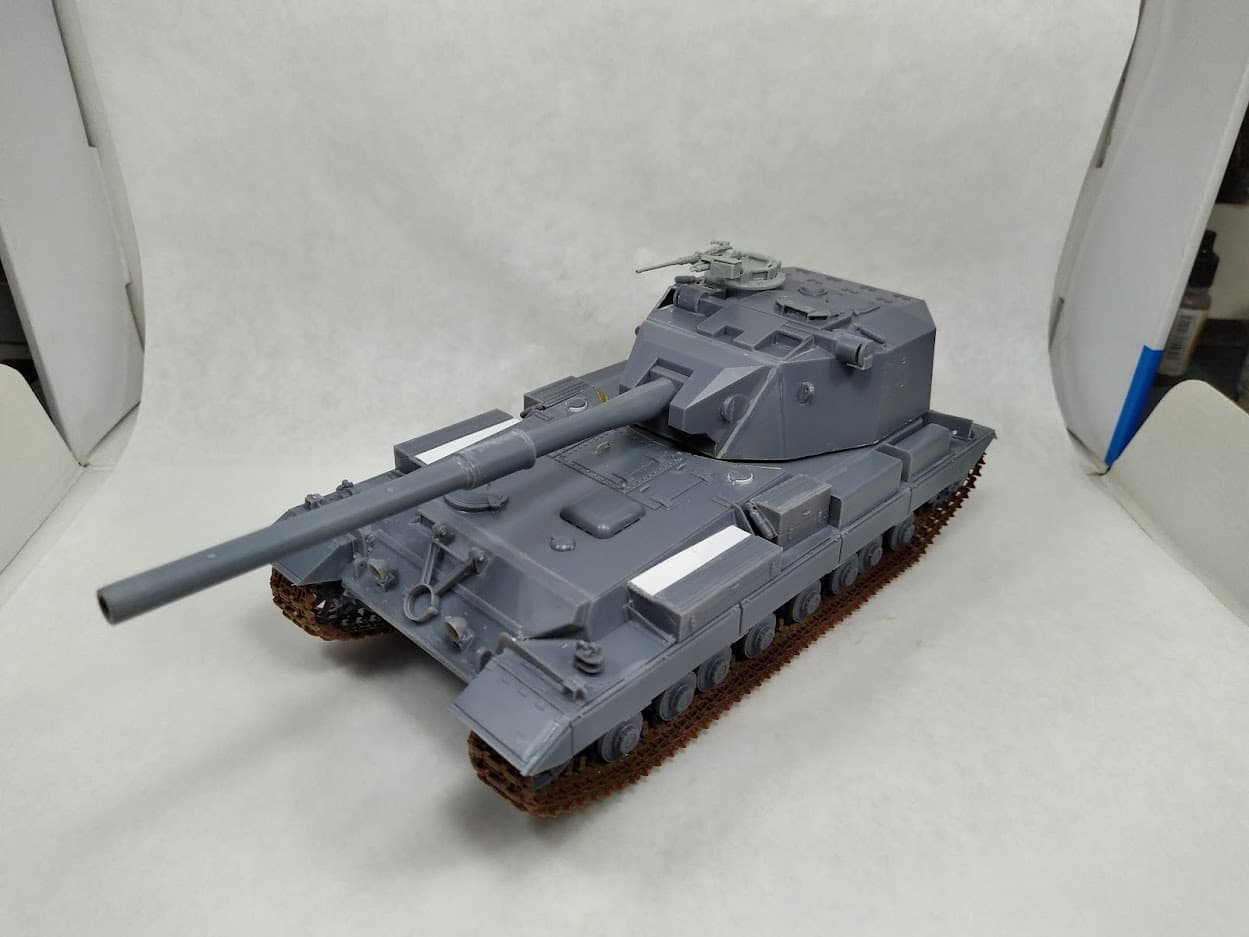
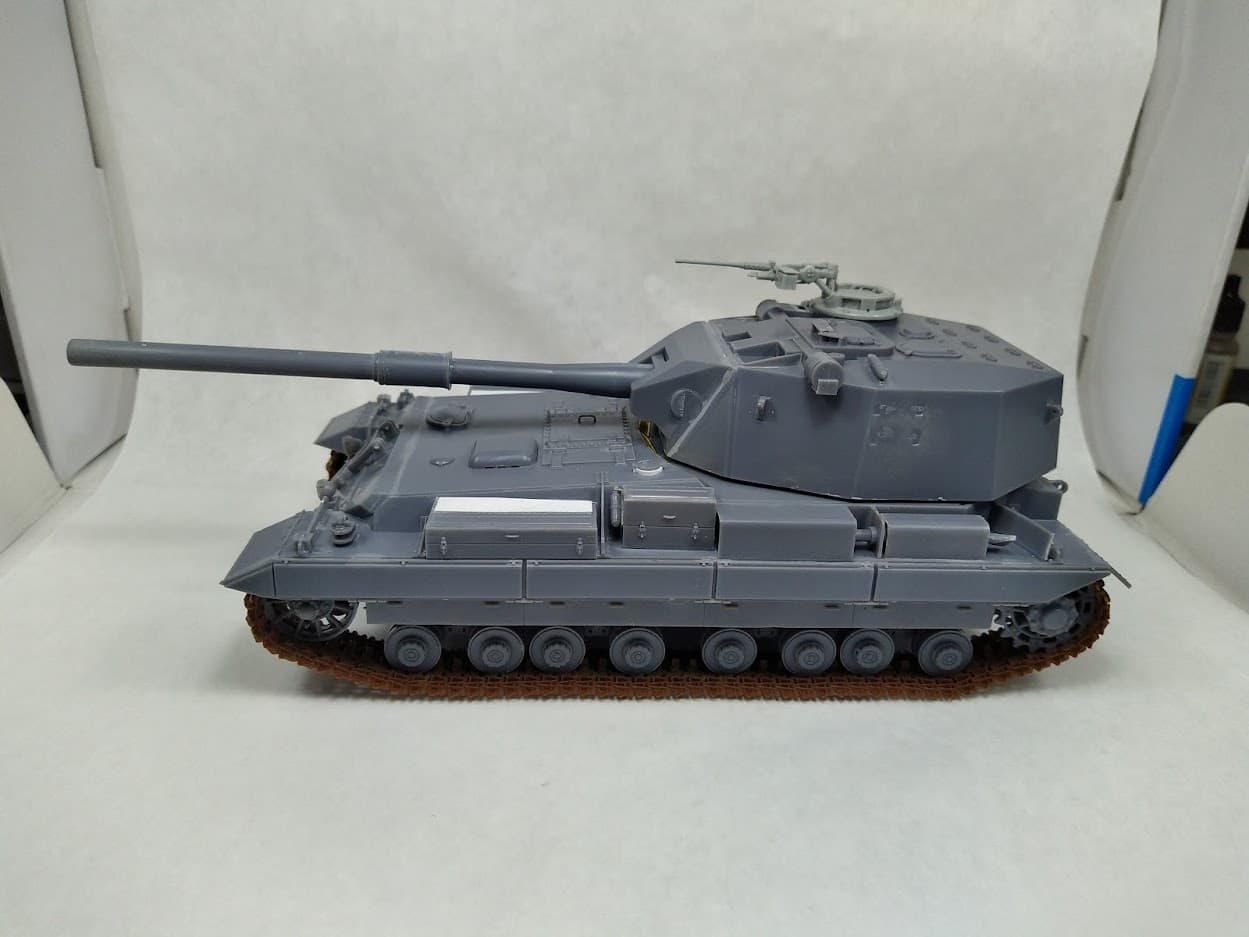
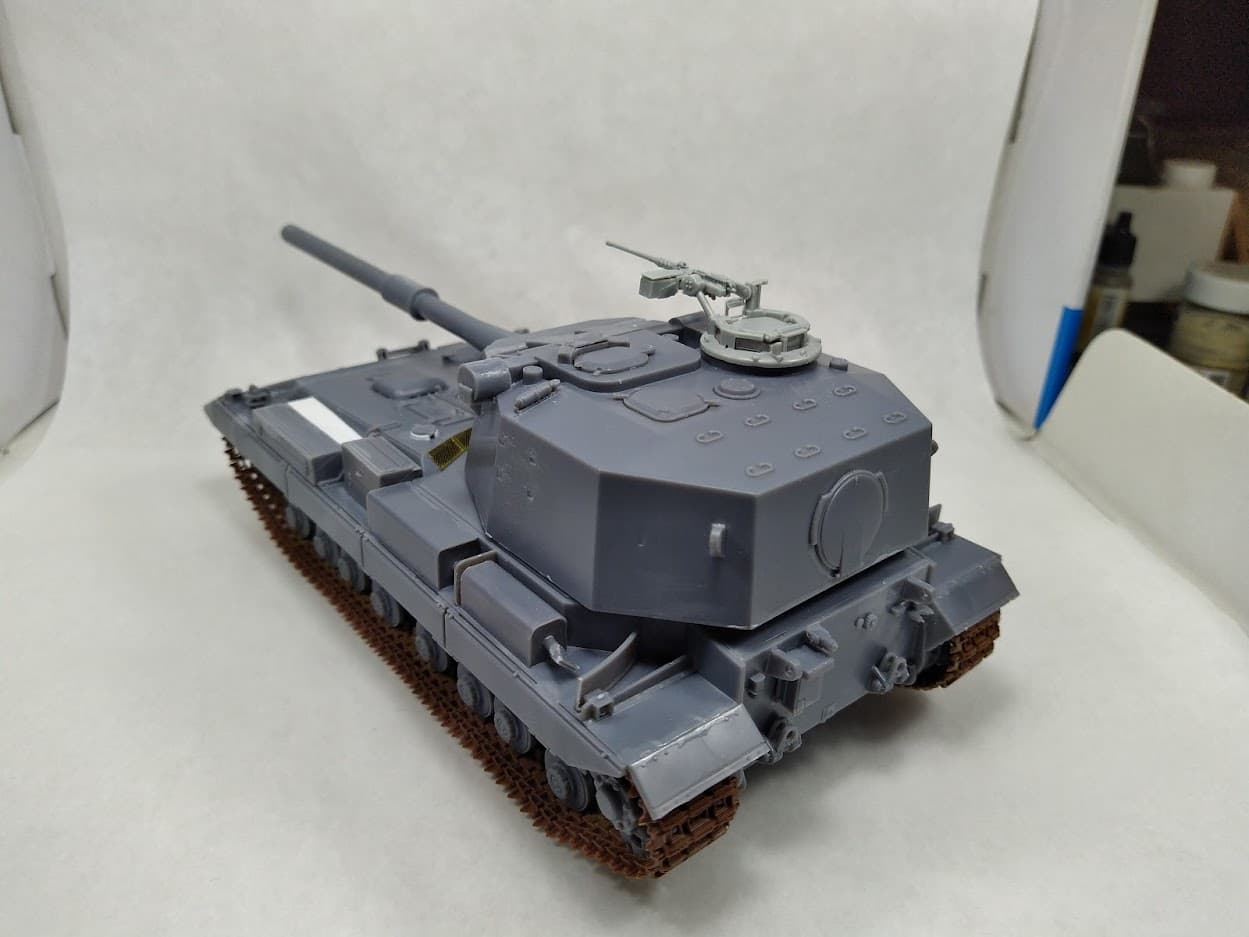
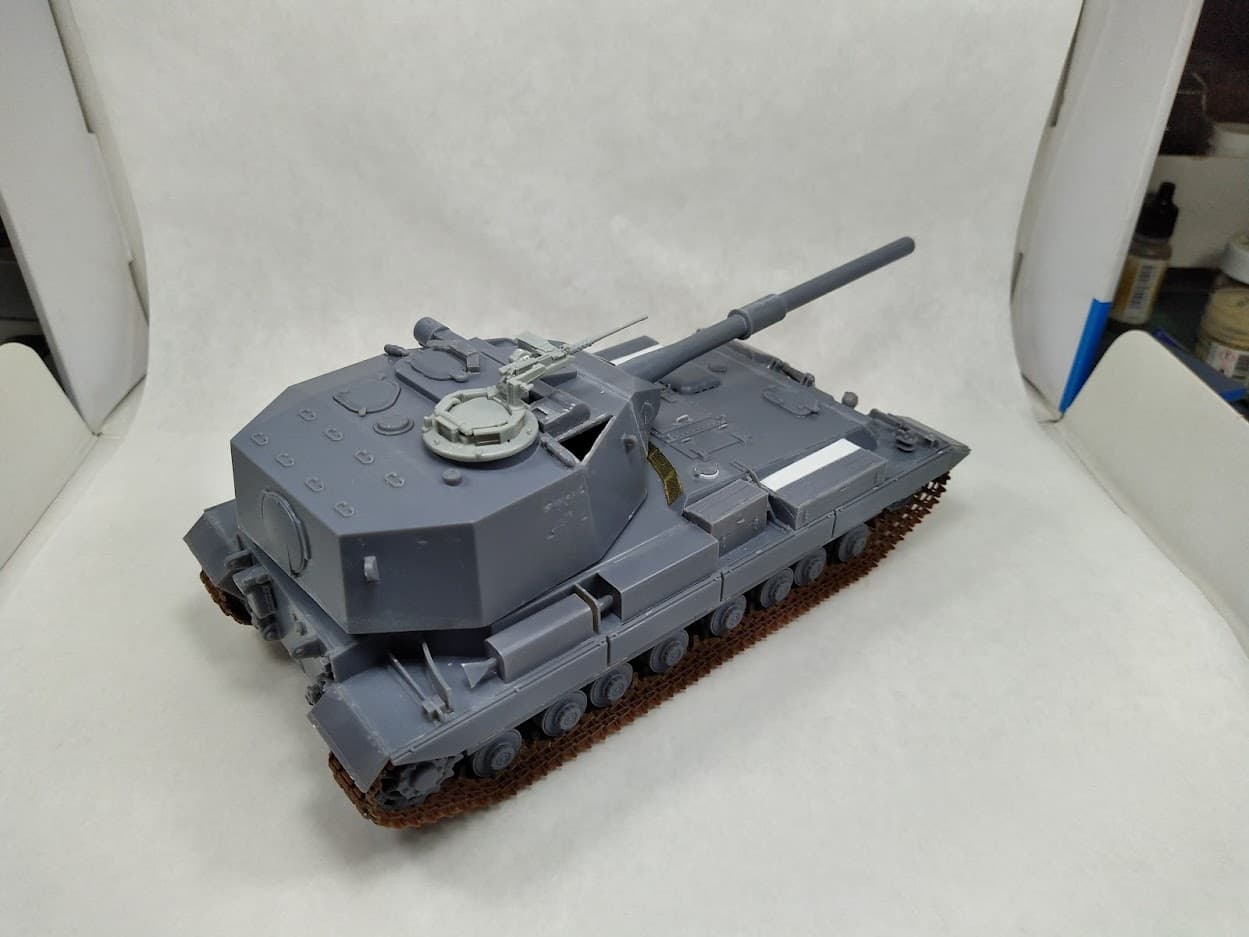
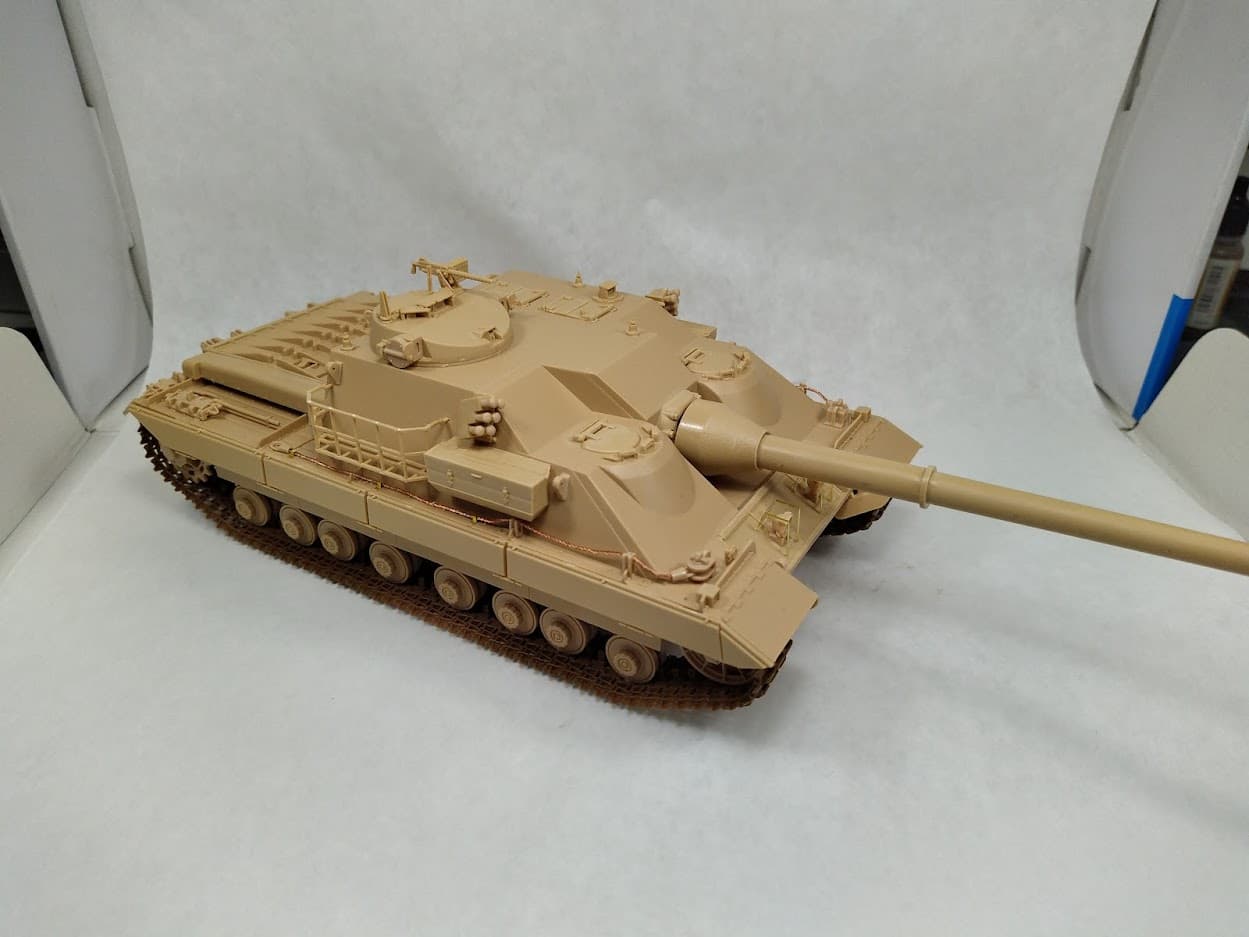
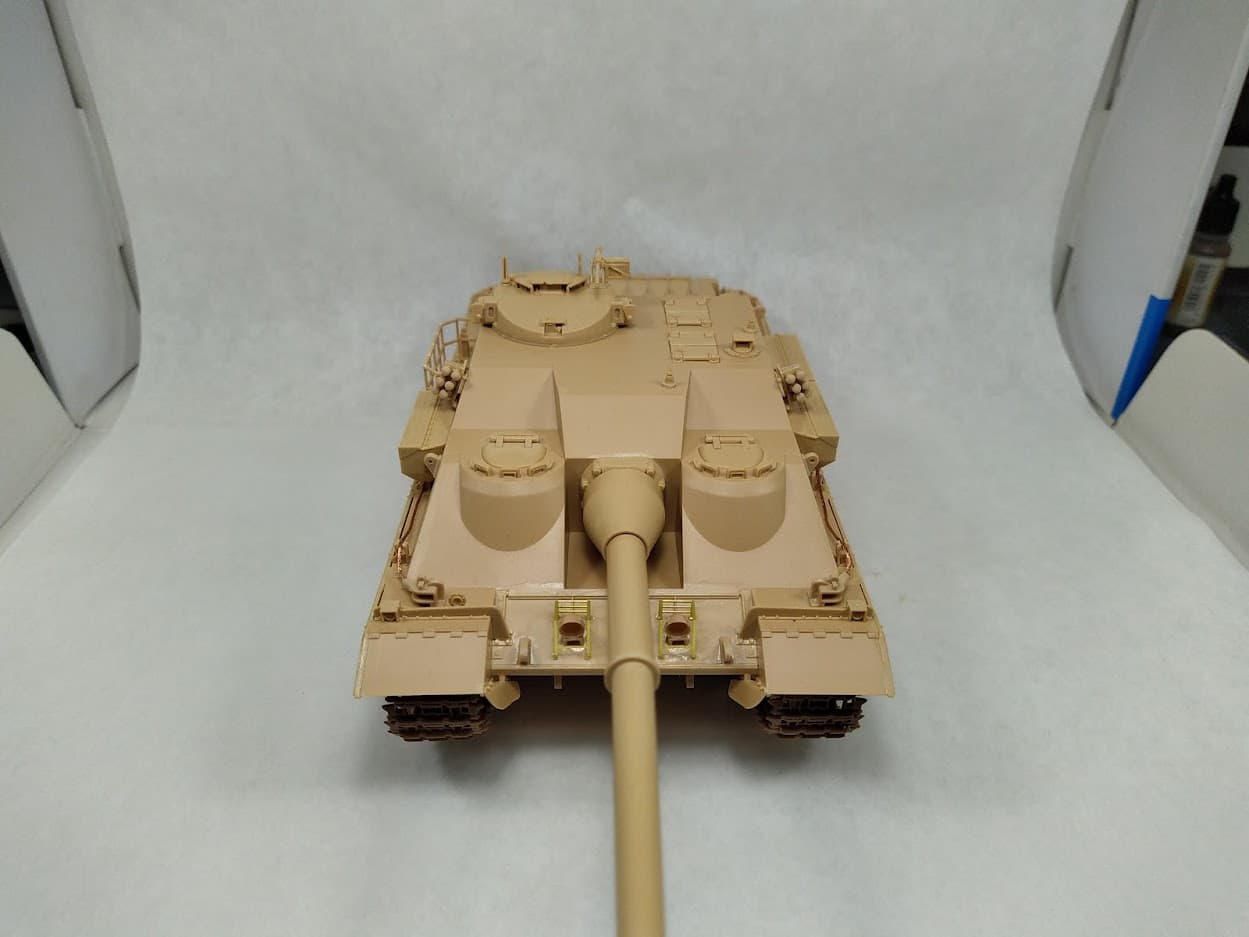
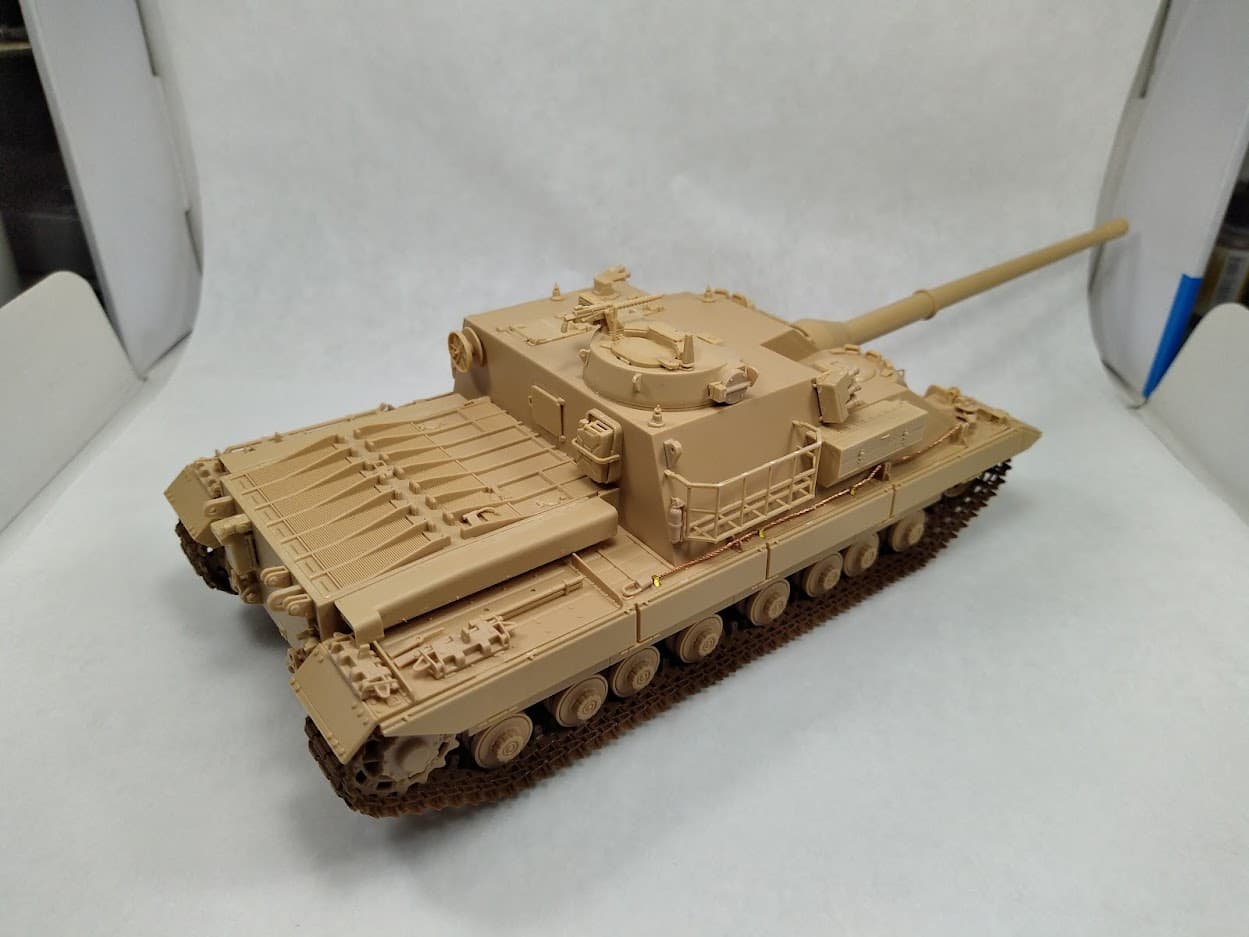
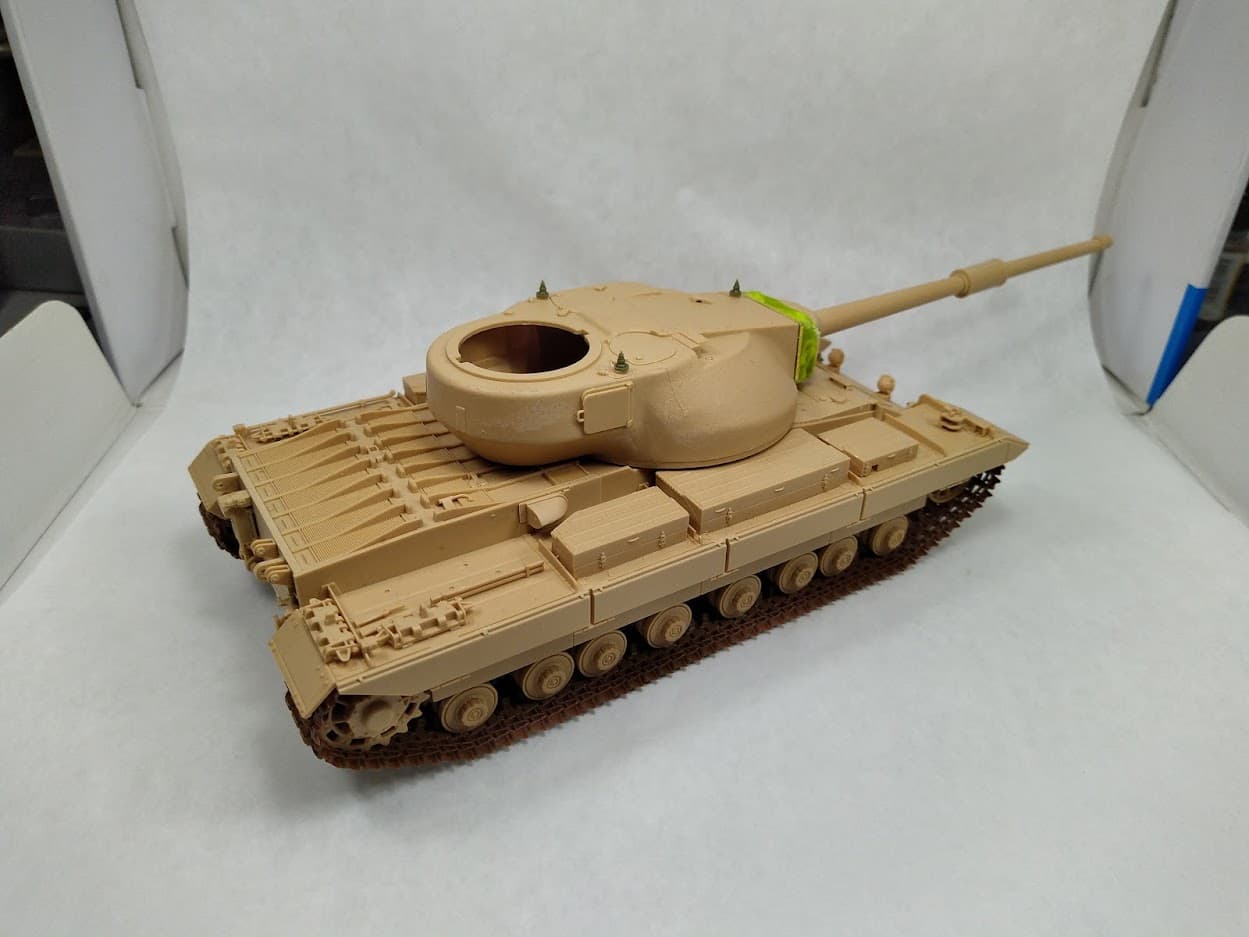
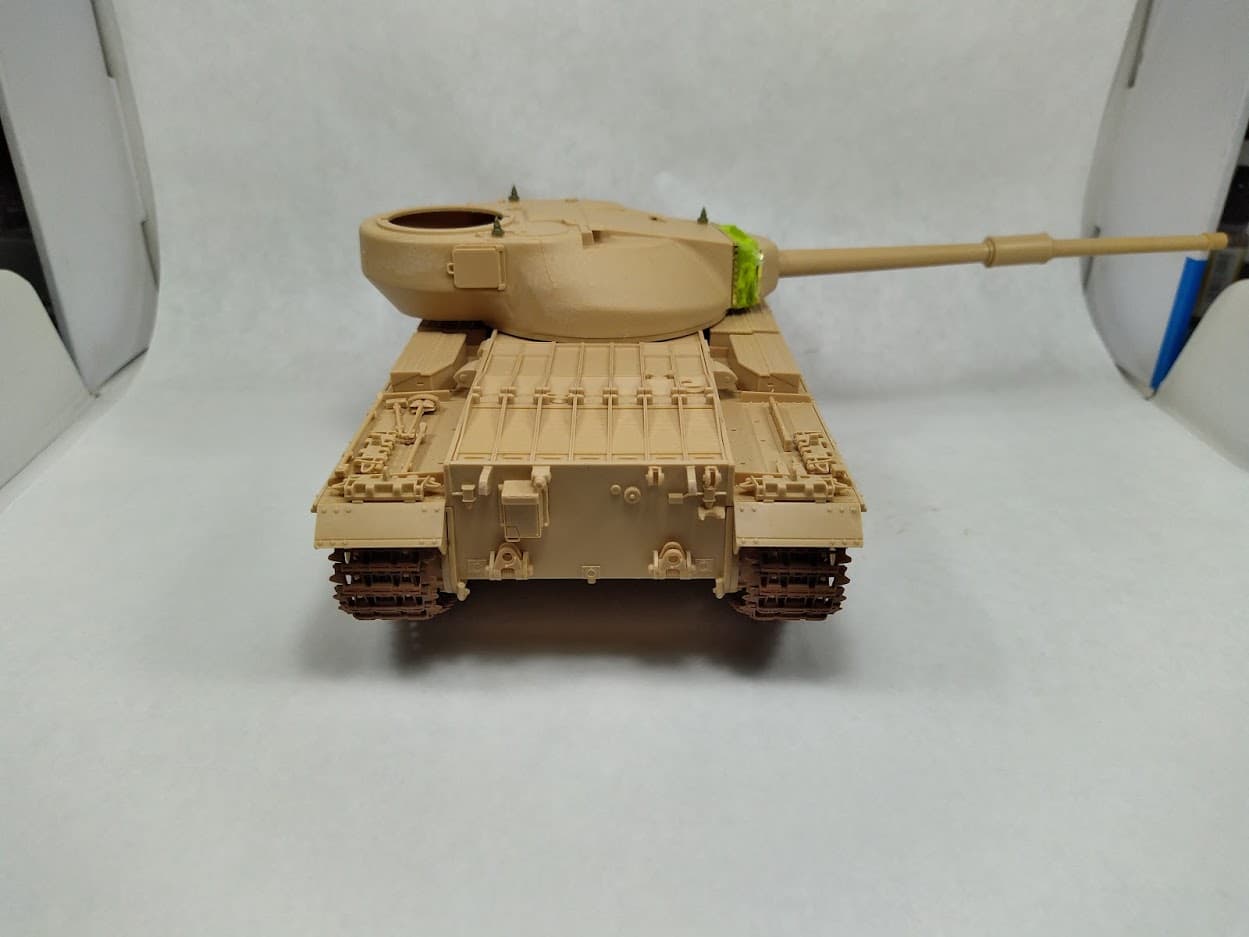
The next kit on the assembly line is the MkII kit. It stands as shown in the following photos:

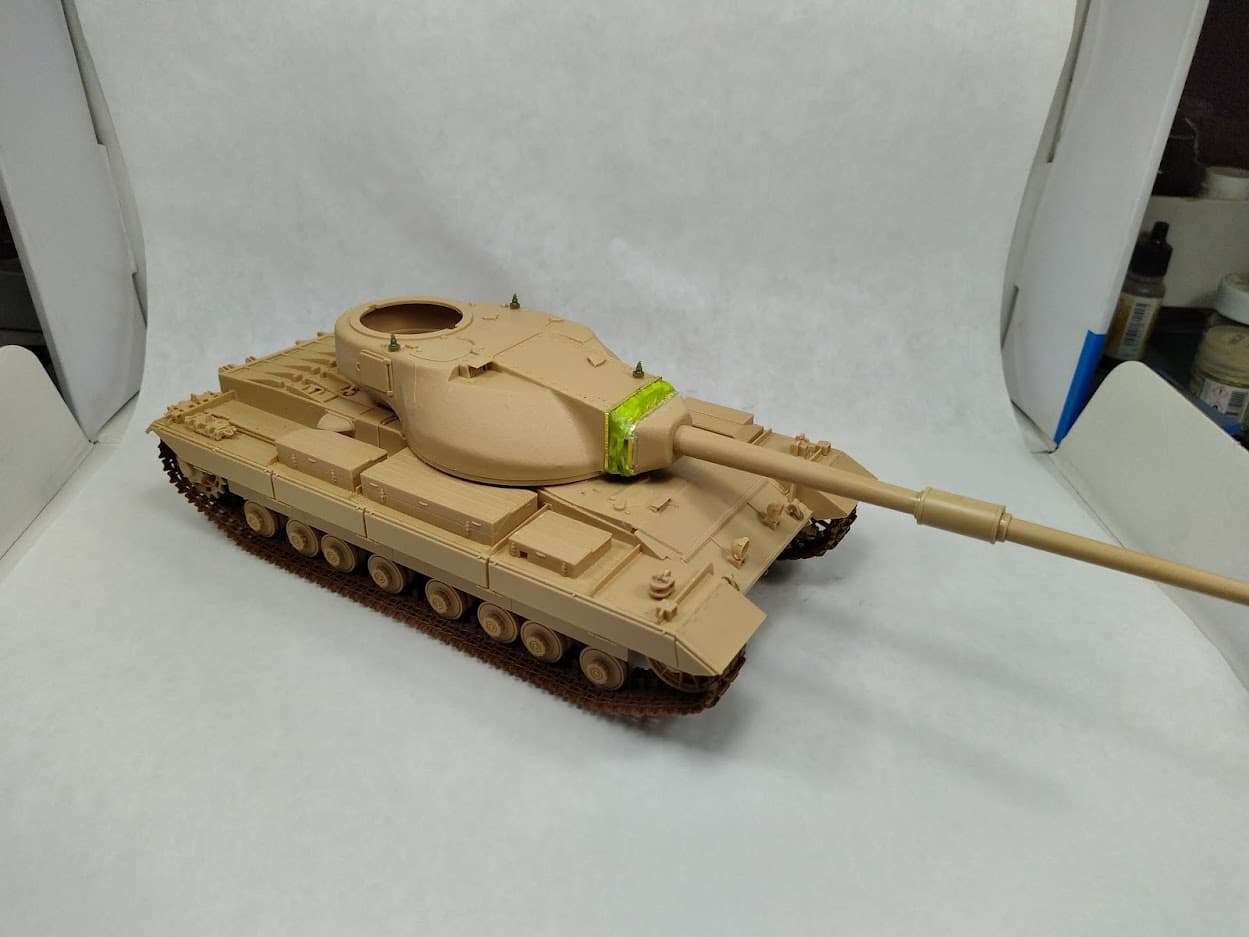

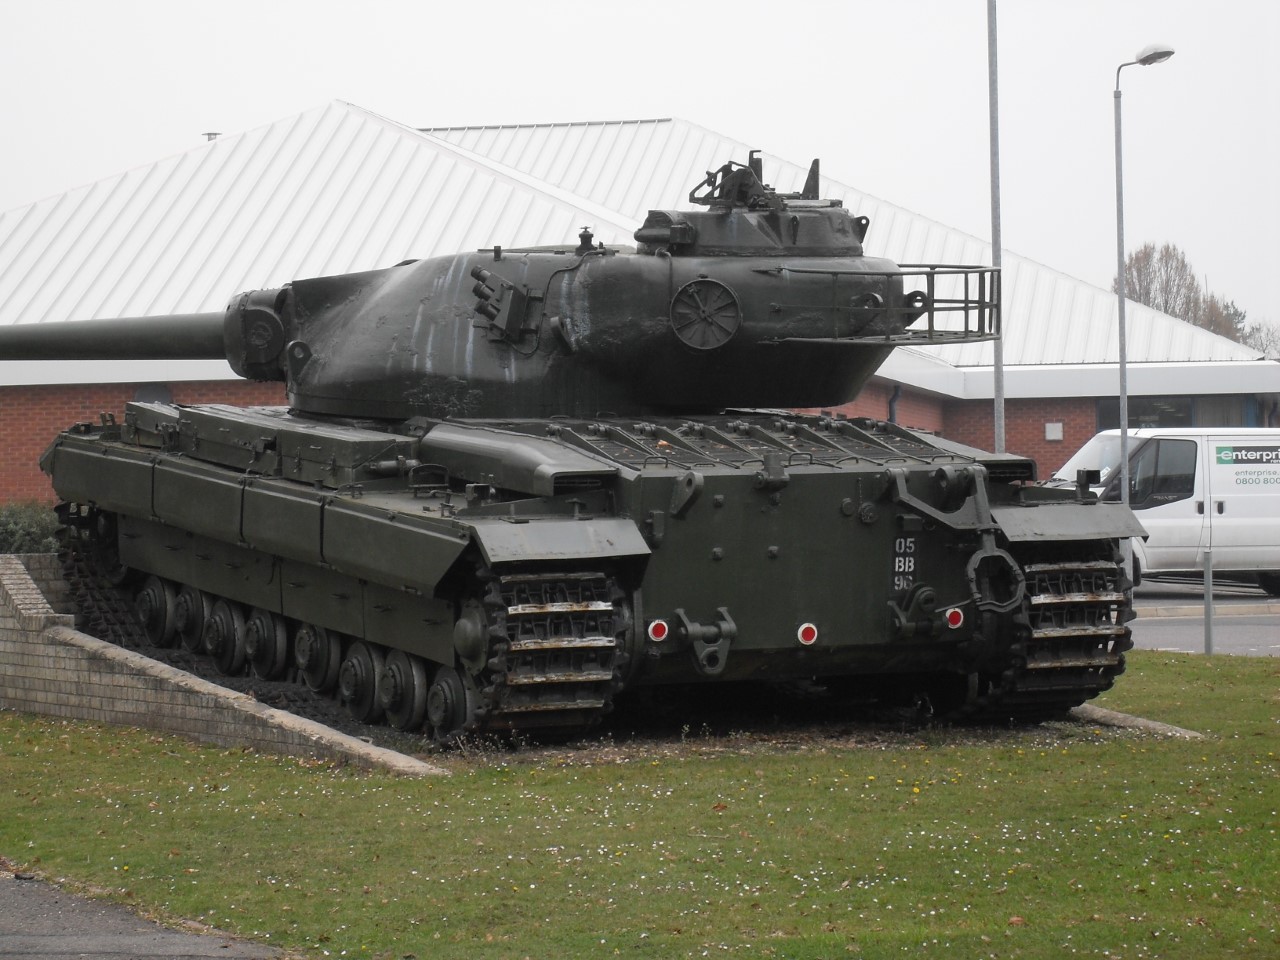
I cannot comment on the accuracy of the kit regarding shape and dimensions, but it surely looks like a Conqueror. Detailwise the kit is decent at least, but if one goes in full rivet-counting mode some attention is required since some details are missing, or need reshaping or texturing.
I will use the instructions of the MkII to illustrate some issues I found.
First, ignore the assembly sequence of the instructions and make sure you fit the upper and lower hull parts correctly. Use the rear end part of the hull as a point of reference and alignment.
If you try to follow the instructions and try to assemble the lower and upper hull after you have added the details you will probably end up with a misalignment and broken off details.
I also had an issue with the alignment of the sideskirts and the corresponding supports.
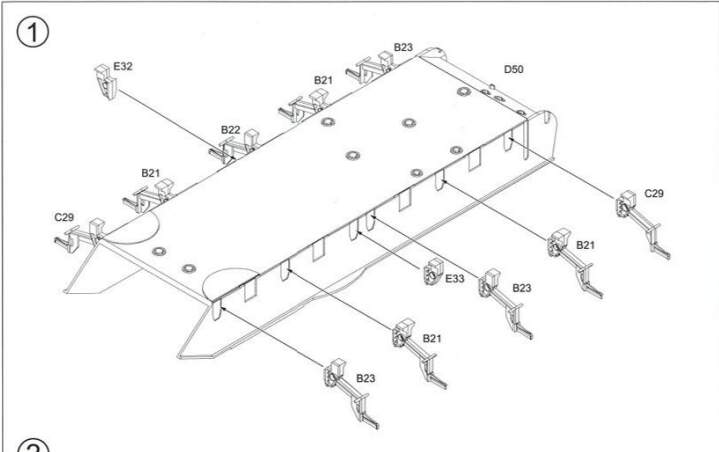
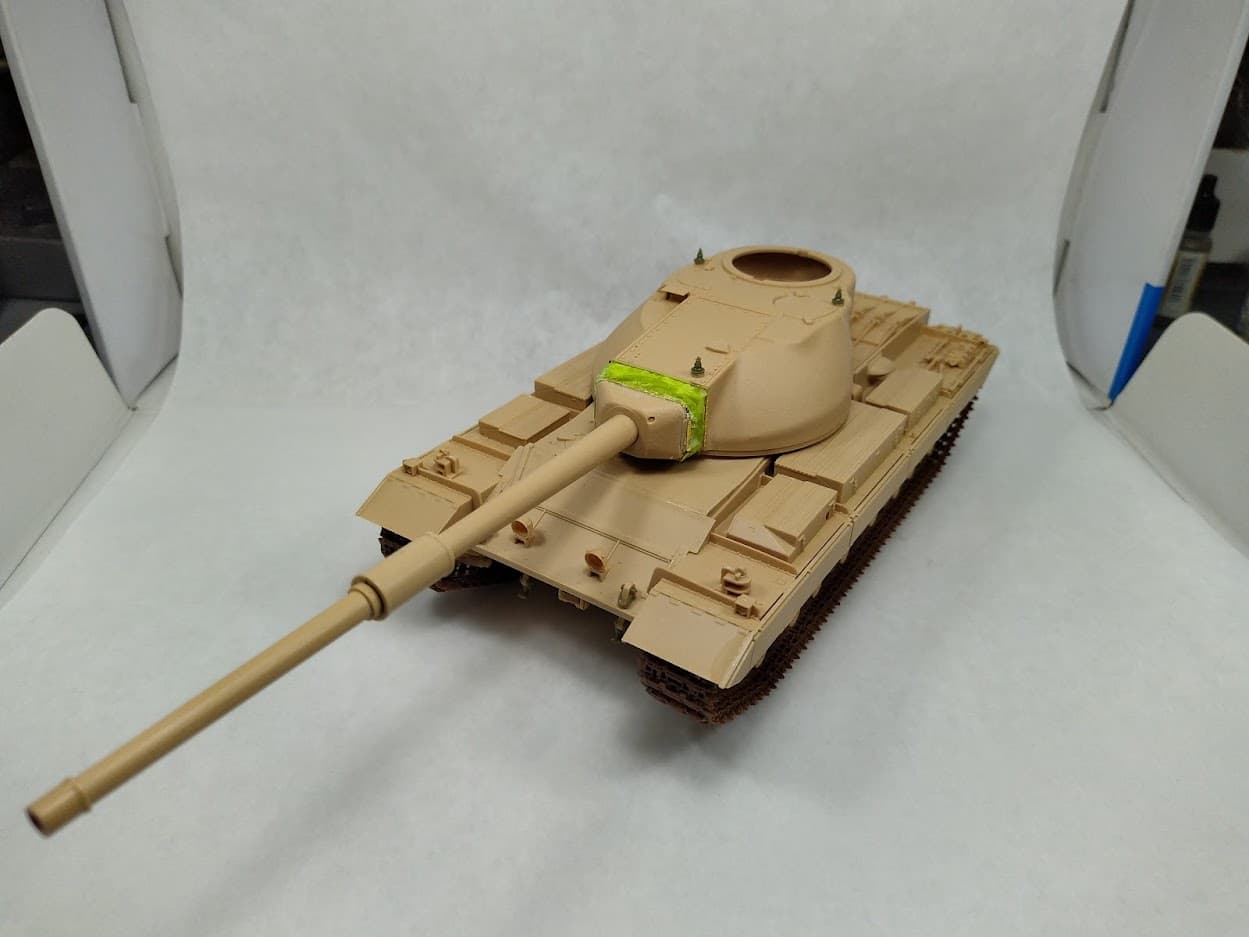
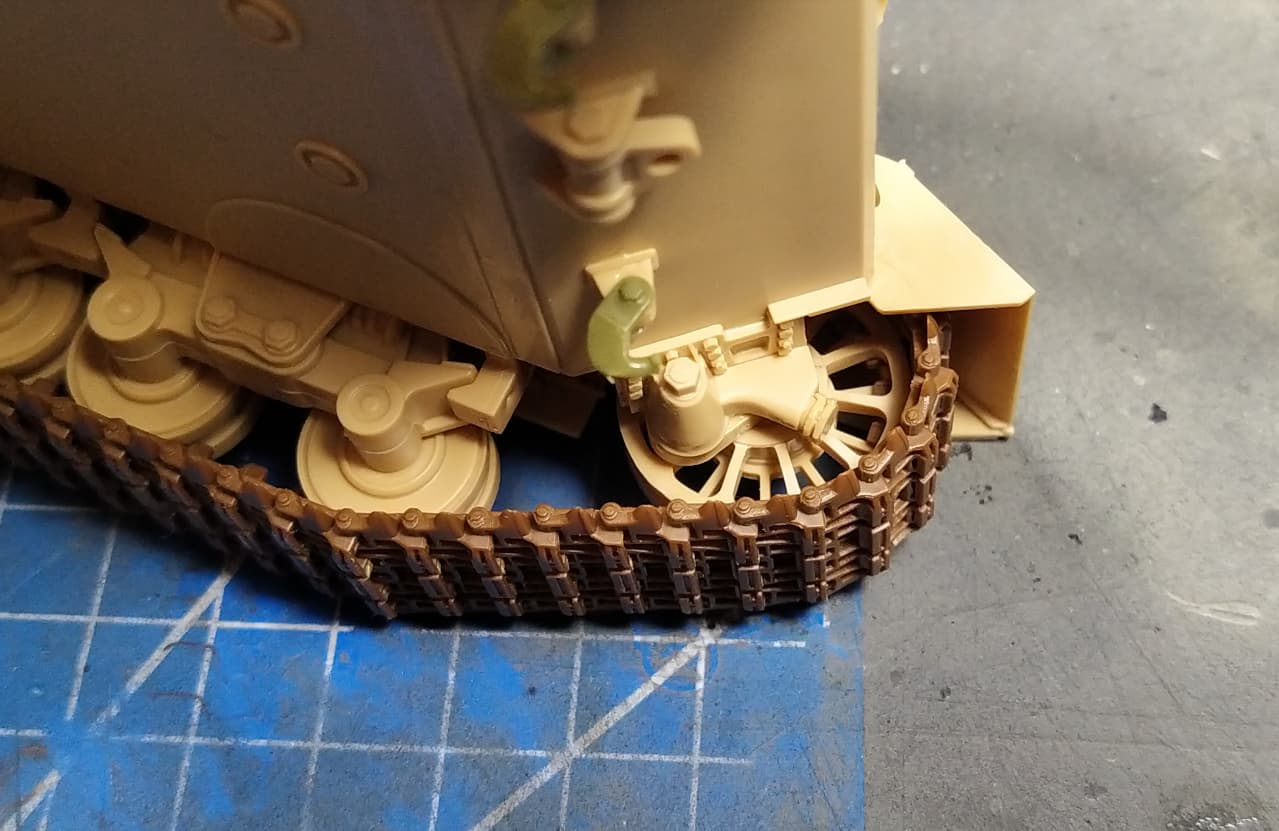
If you look at the photos of the bottom of the models I posted above you will notice that parts B23 and C29 at the hull ends are bent, since the sideskirts (parts E10 and E11) do not align correctly and are about 1mm longer at the ends. In the MkII build I managed to somewhat make them look a little better by cutting of the part after gluing the sideskirt, thus leaving it to settle in a more aligned place and then glued it to its final position. Compare the MkII (yellow) with the FV215B alignment in the photos.

Part E29 (the spent casing port at the sides of the hull) is a bit underscale and should be a tad bigger.
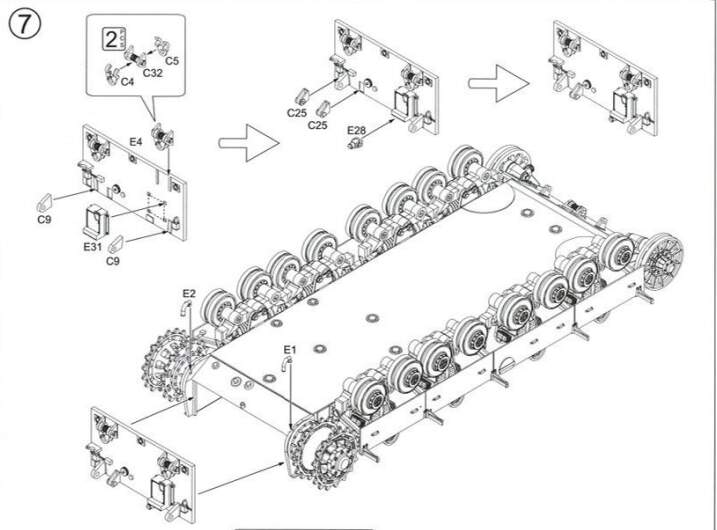
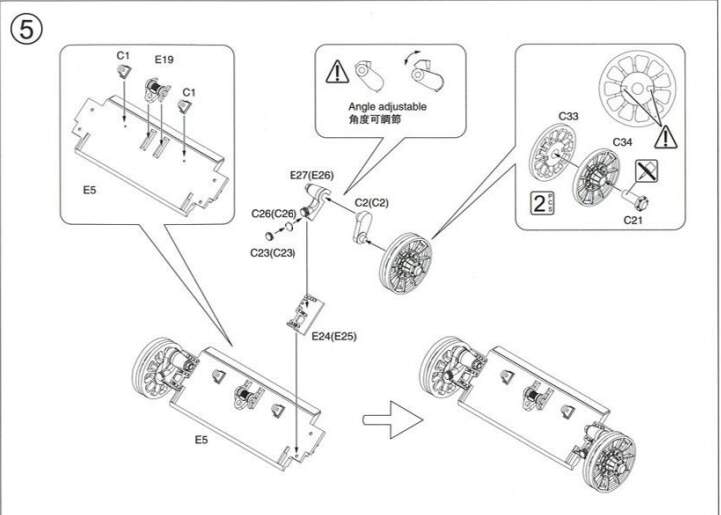
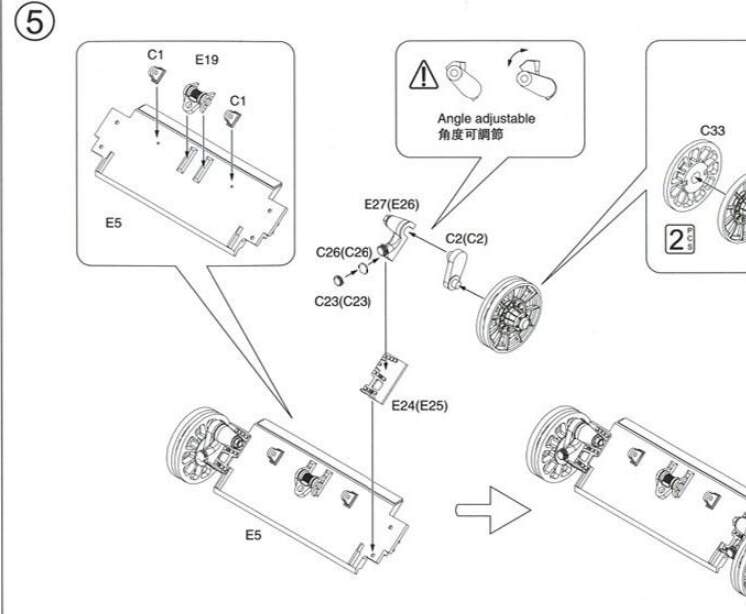
Another issue I faced was the front idler assemblie, which is very crude, without and alignment/adjustment points. The solution I figured out is to glue the part in place at a specific position well before trying to mount the tracks. The position shown in the photos is the one I chose, allowing me to use 96 links per side of track (not that you need to save on links, there are plenty included in the kit).
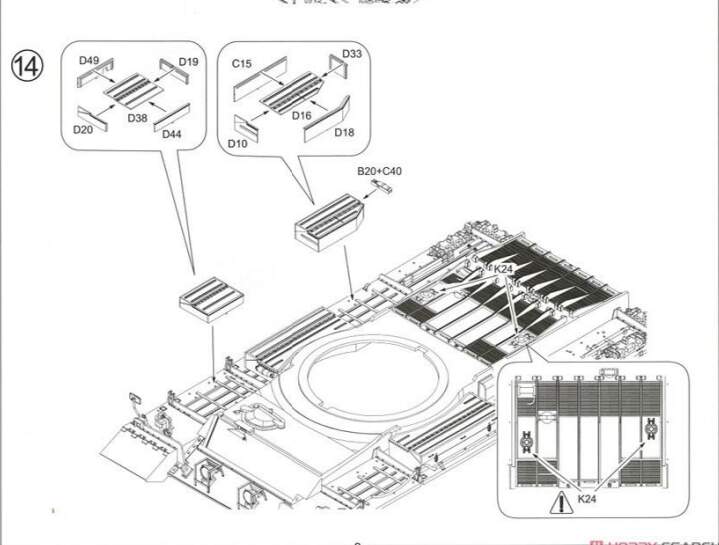
The stowage boxes on the fenders are easy to assemble but require some attention when positioning on the fender and setting them in place. You might need to clean a couple of molded on details so you can achieve a better fit.
Also the position of the fire extinguisher on the front of the right fender is wrong, it should be mounted on the front stowage box and not on the middle one.
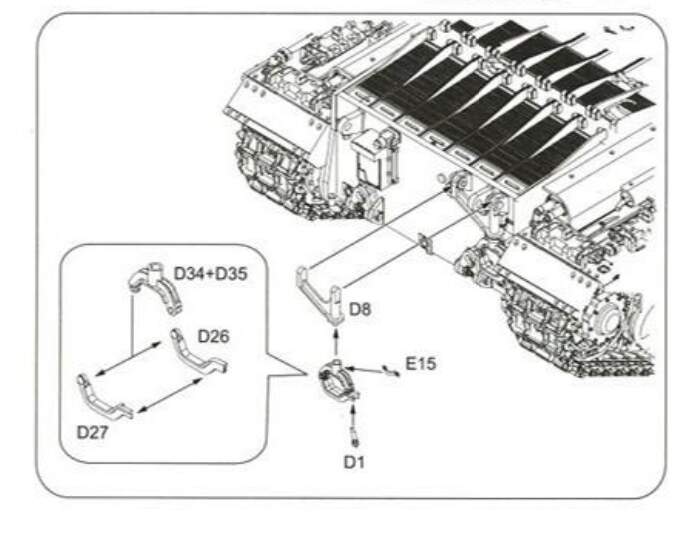
Next issue is the positioning of the exhaust parts, since there are no locating points for the exhaust supports, parts K3 and K2

I created the mantlet cover using tissue paper and PVA glue. I am comfortable using this material and there is always enough time to make corrections and adjustments.
Comparing the kit of the MkII to the real thing I have found a couple of details missing (green plastic parts, kindly provided by AFV Club centurion kits leftovers) like the tow hooks. The antenna mounts on the turrets are molded as small cones by Amusing Hobby, so AFV Club to the rescue. I also think that the tow-cable ends are underscale and I might replace them with some larger ones.
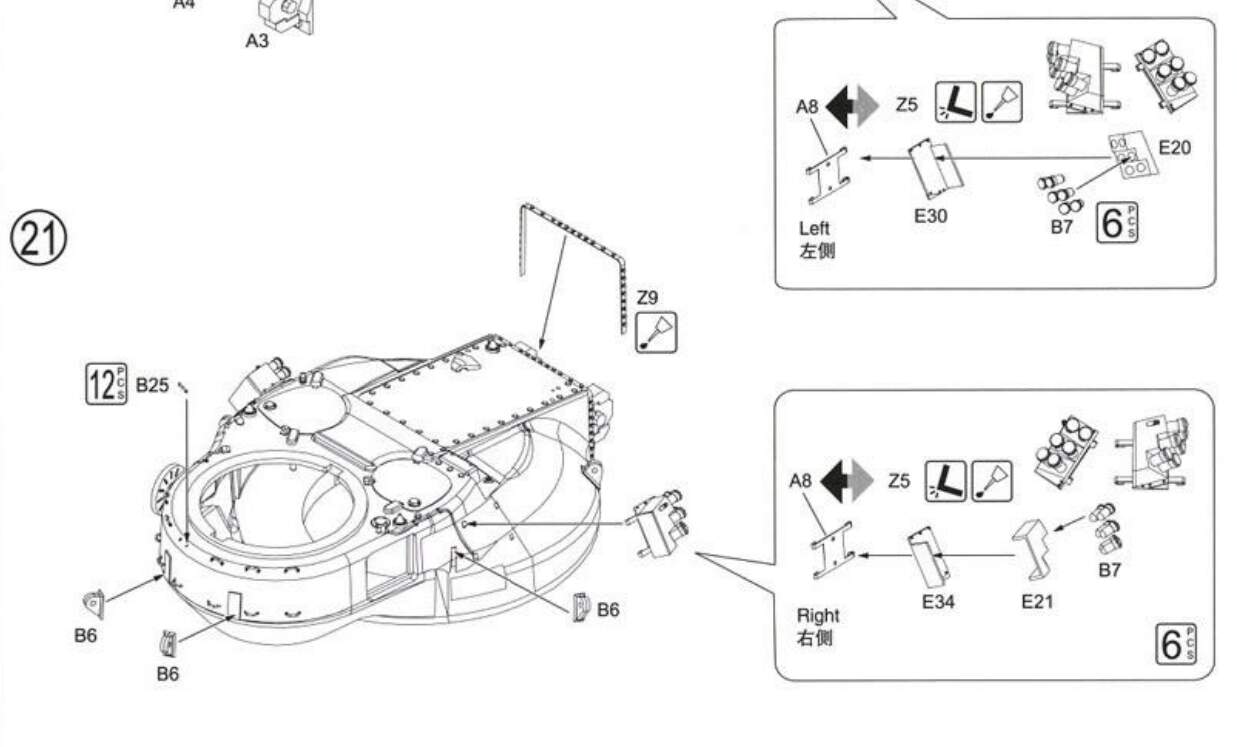
Another detail testing my OCD is this minor issue: According to the instructions, one should use part B6 for the front upper glacis and parts C1 for the lower glacis.
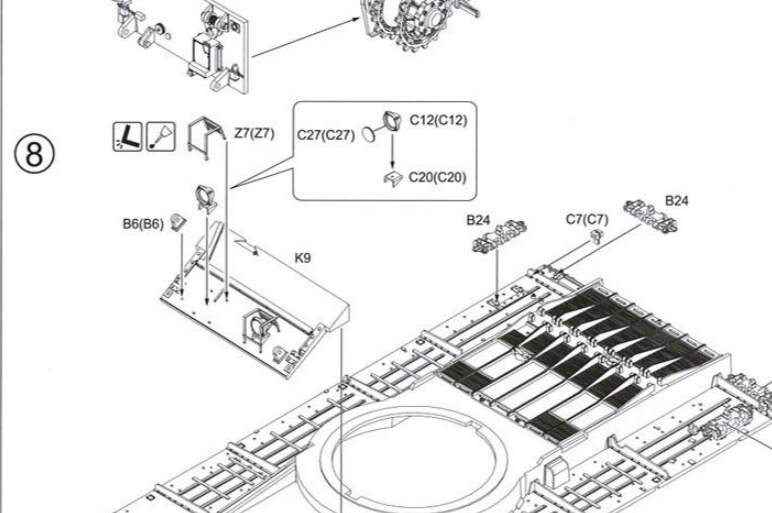
Unfortunately part B6 is not the correct shape as in the real vehicle and part C1 should be also used here, but there are only 2 C1 included in the kit.
That is all for now…