Hello there,
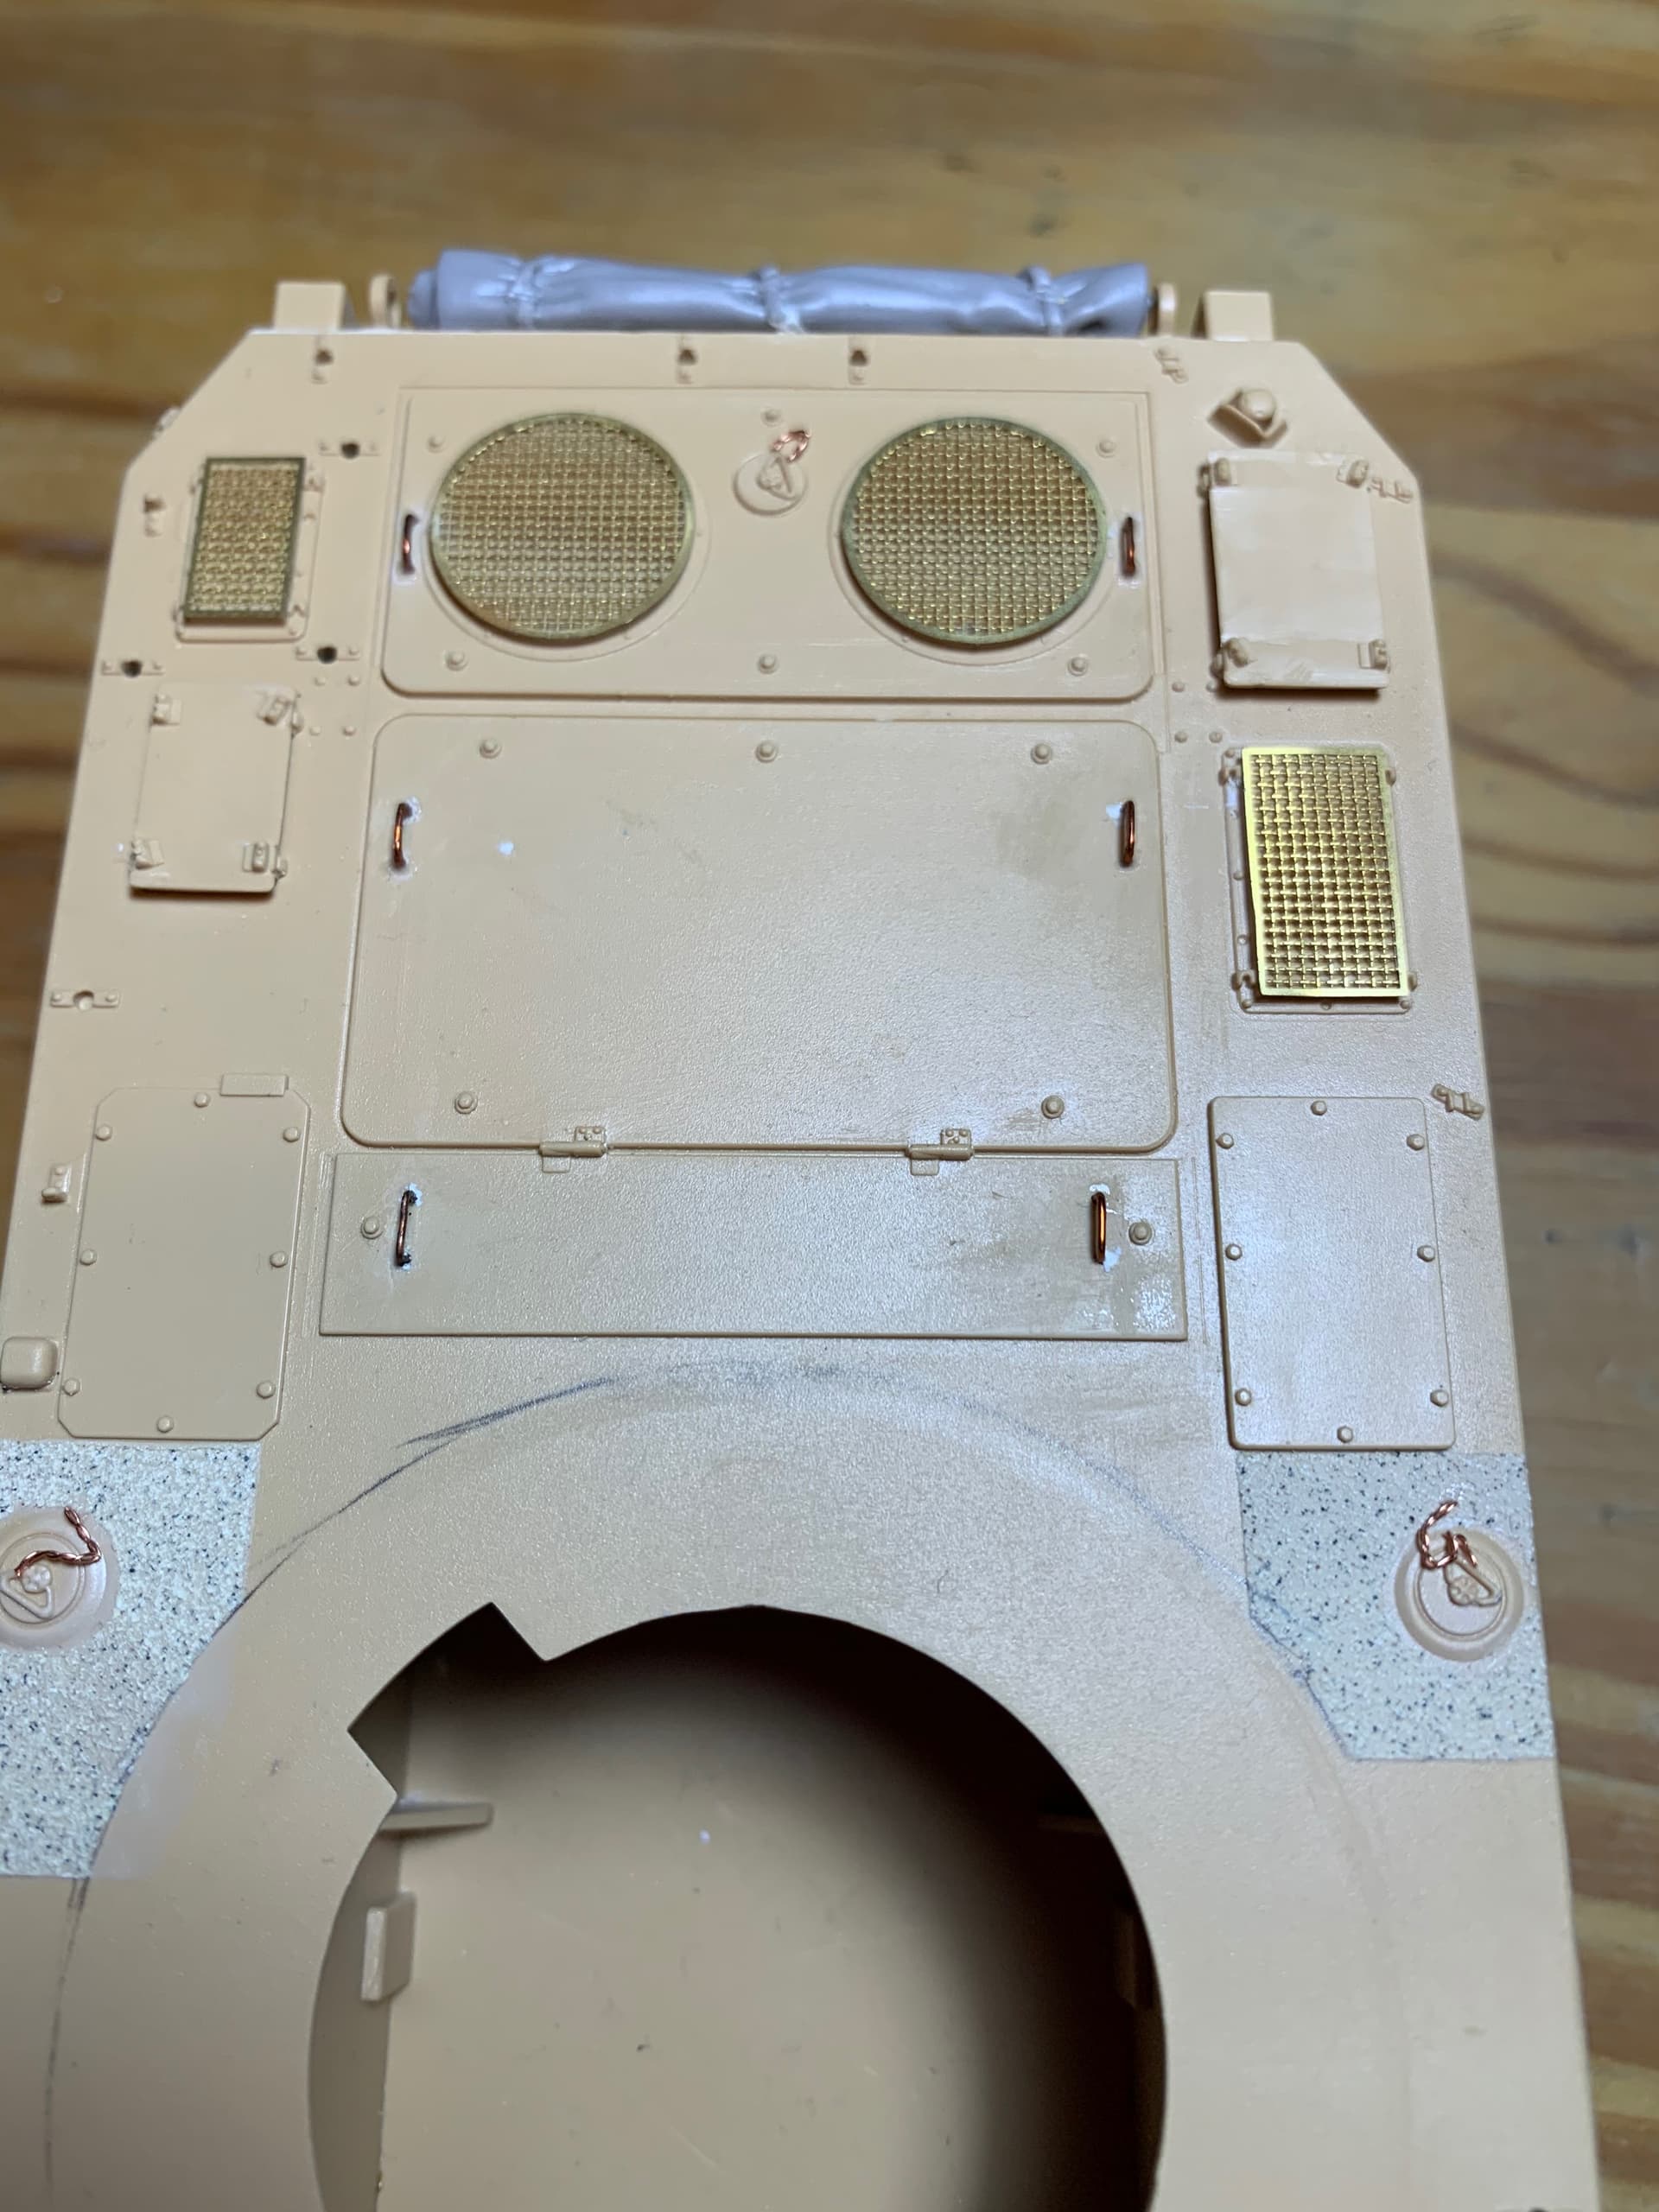
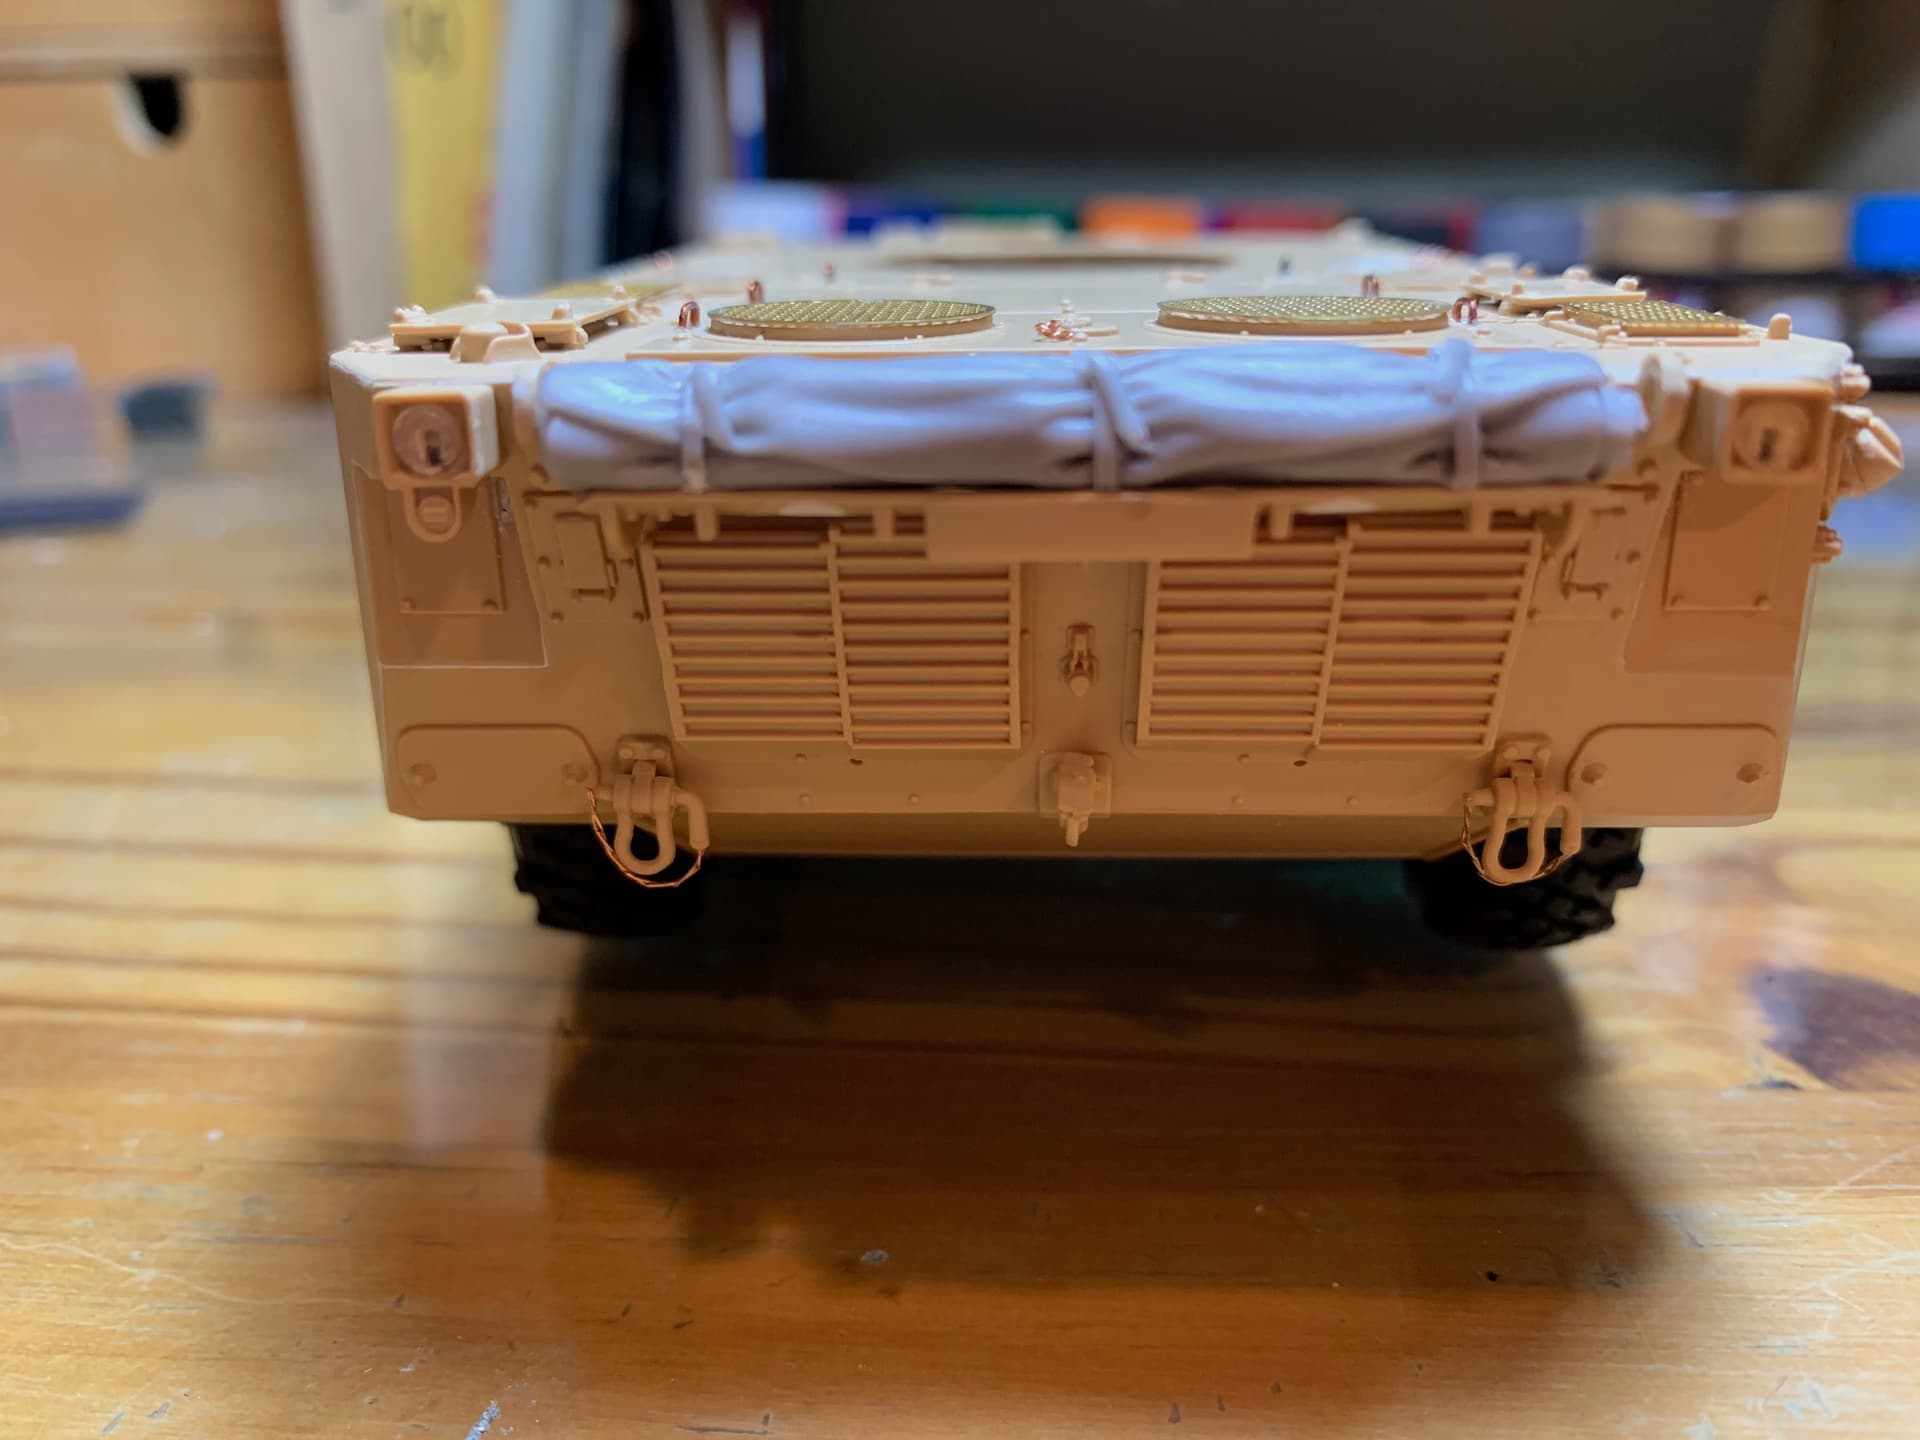
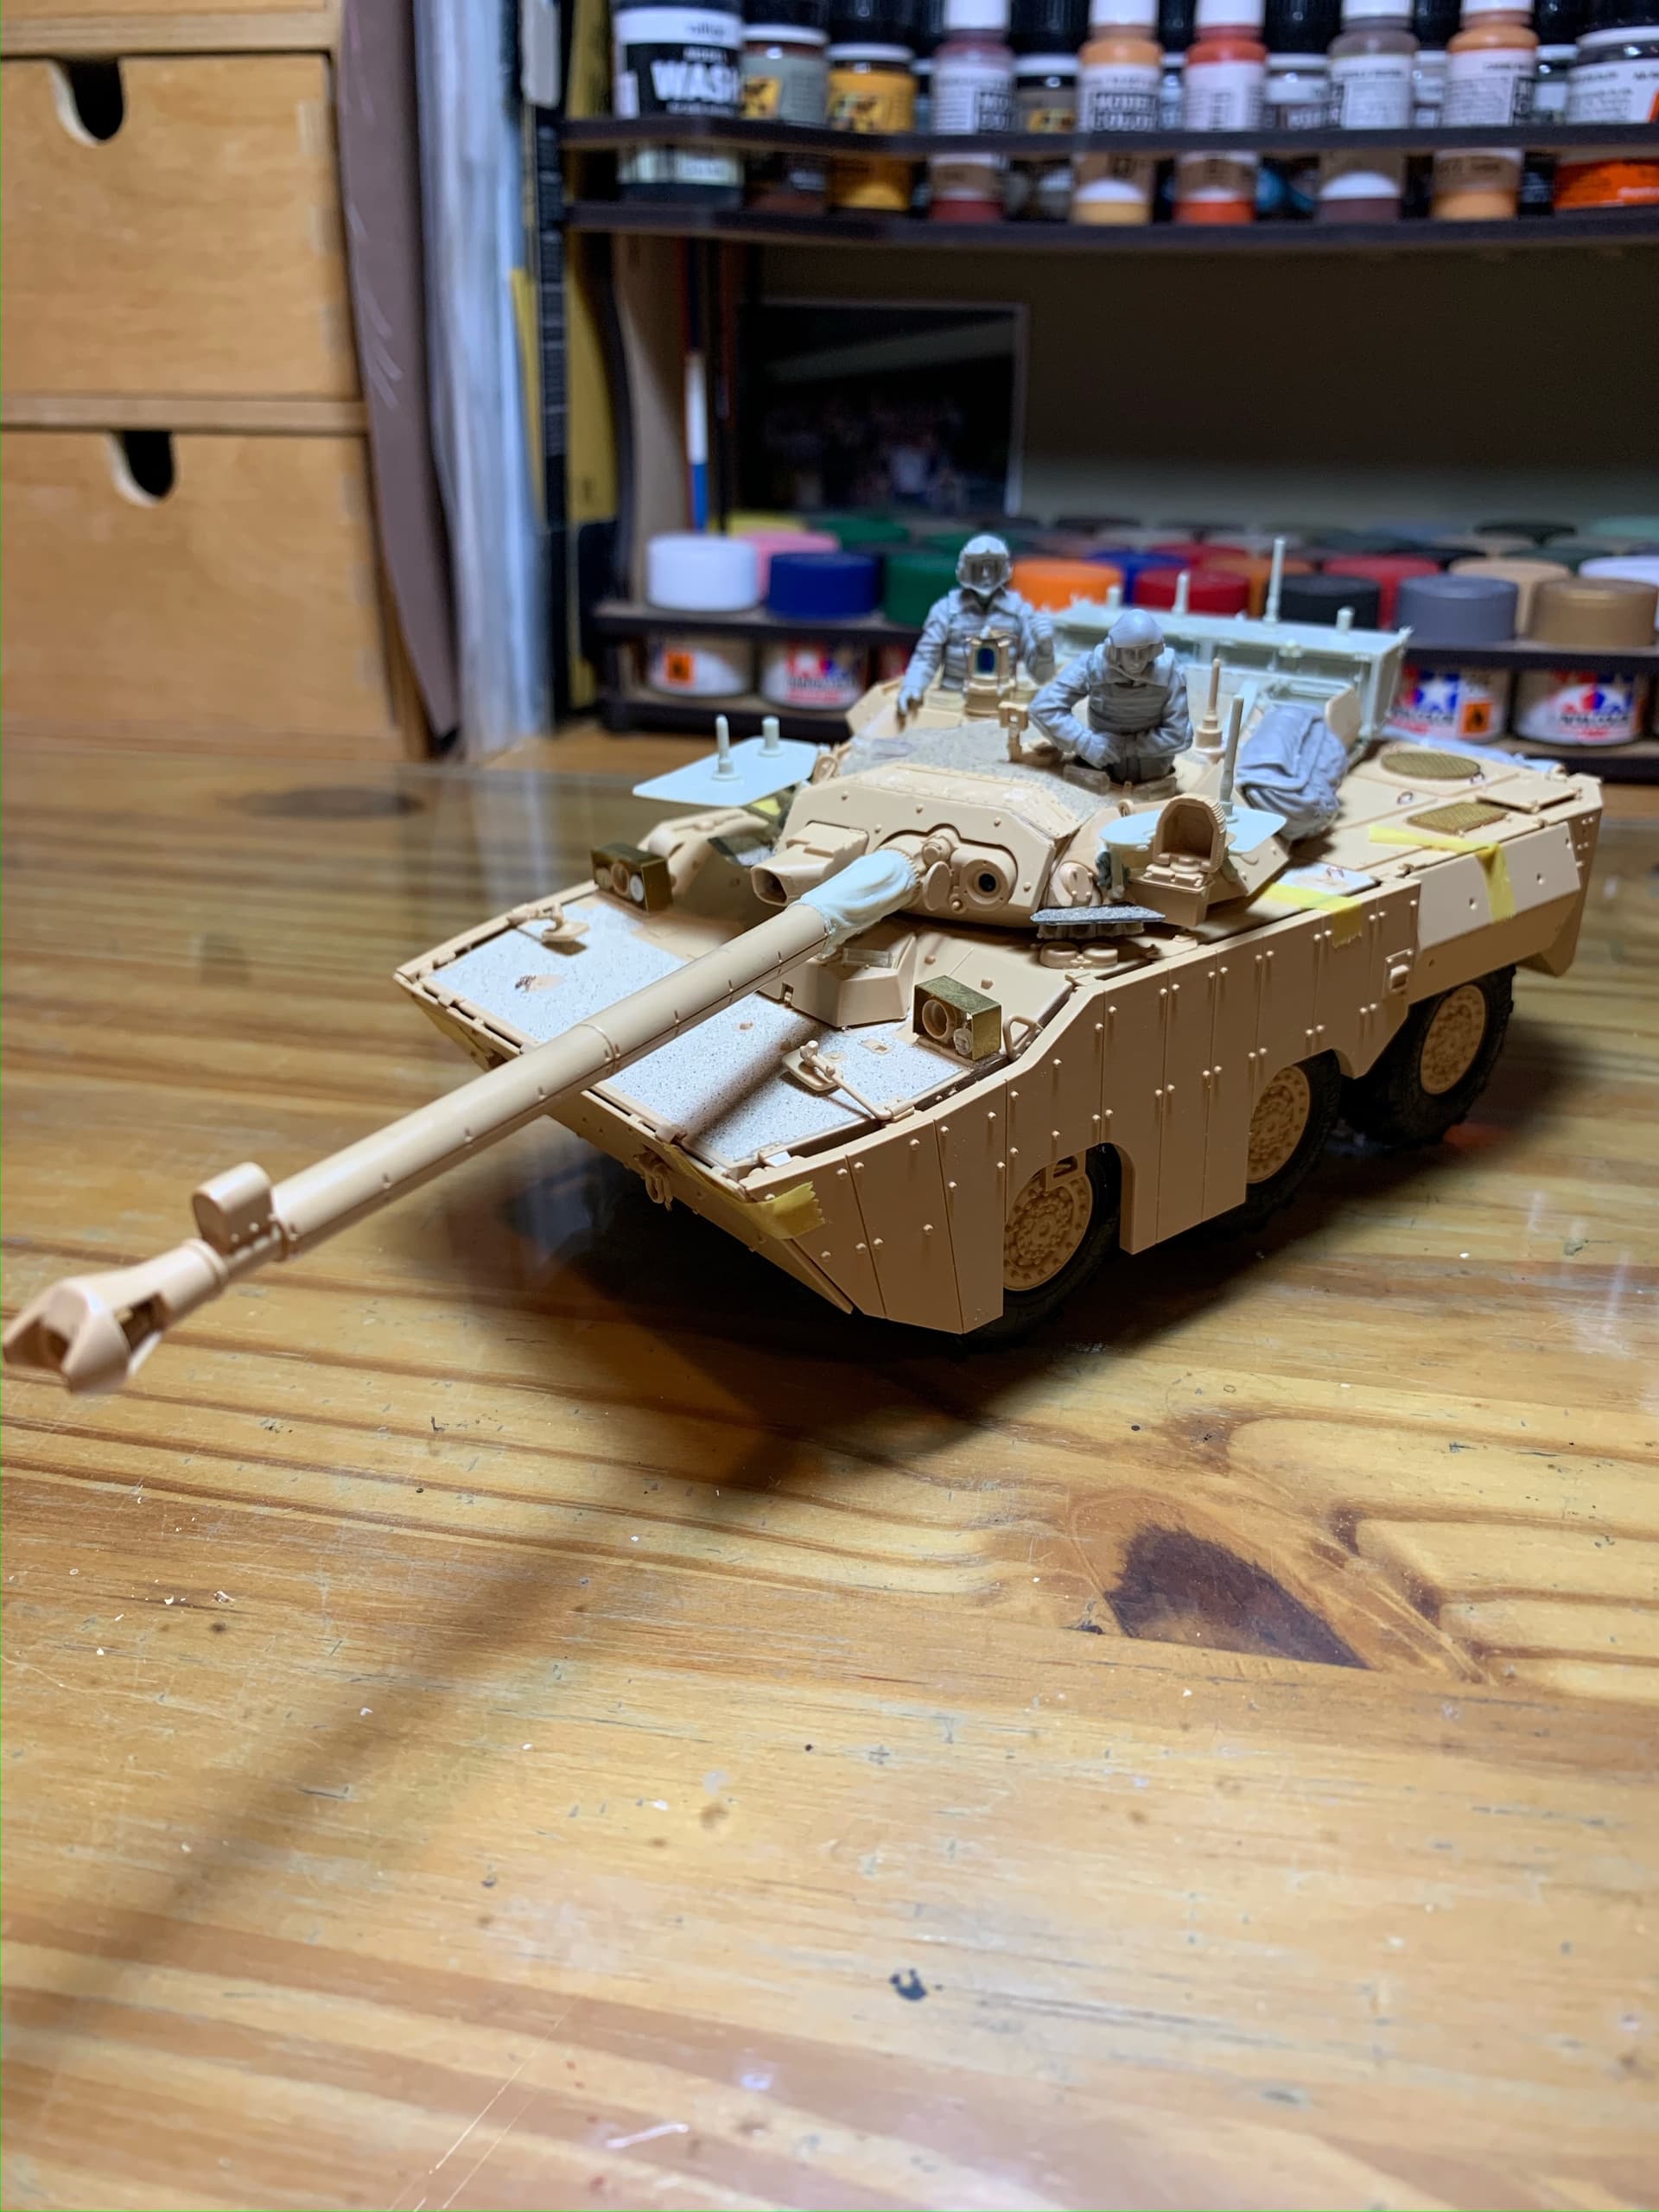
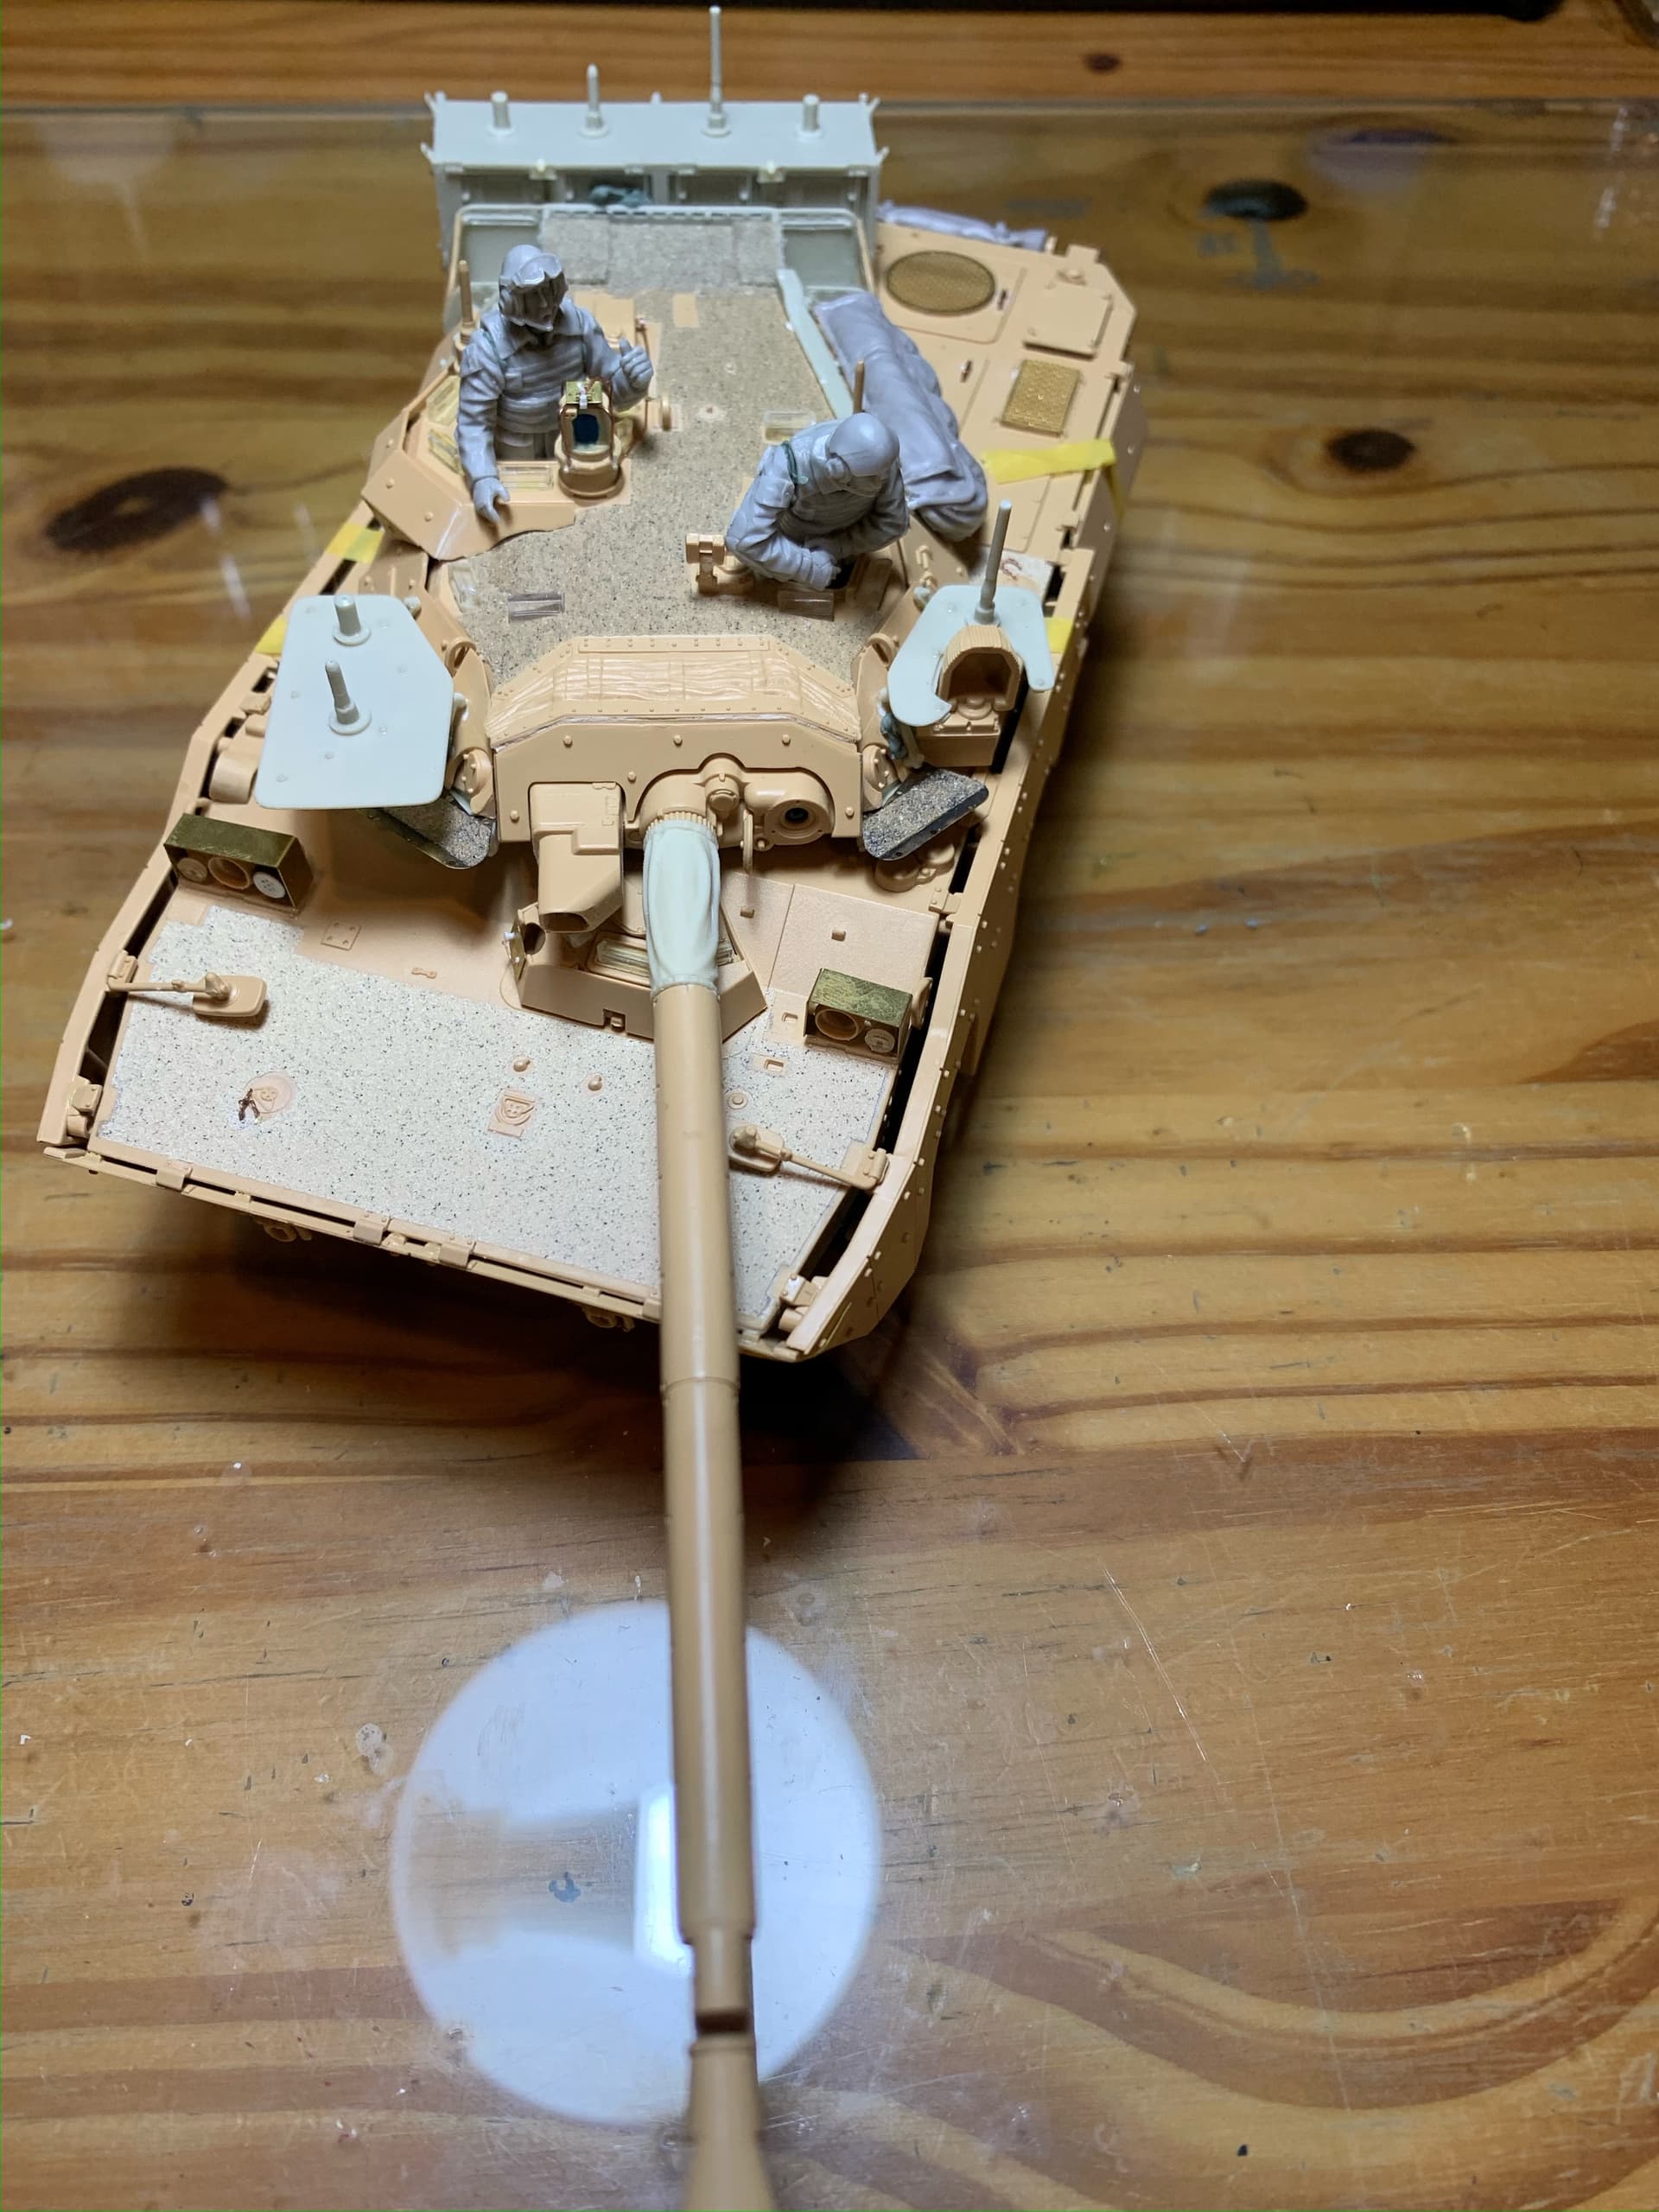
Here is my current project, by tiger models. The kit was supplemented with aftermarket bits such as a jammer set by kmt (much better detailed than the kit’s original parts) and blast models basic upgrade set. I will also use a stowage set by black dog and some figures by djiti’s models. The last pictures shows the upgraded headlights shields that were designed and 3d printed by me. In this current configuration the vehicle can be set in an afghan setting, as these vehicles received other upgrades when deployed in Mali. Pictures are showing the model in different states, as the jammers set was added prior to the final assembly and the hull had to be redone entirely due to an accident.
10 Likes
Great job!
Question:antislip is mandatory or was it not on early vehicles? What kind of painting do you envision?
Hello ! Thanks for the kind comment. In it’s basic “RC” configuration, the antislip wasn’t applied on the vehicle, based on photos I’ve seen. So for a Daguet era AMX 10, you’d be good without it. For RCR’s, the antislip is there. It’s going to be painted standard french 3 tone camo and weathered with heavy dust and scratches.
1 Like
Fantastic project you’ve got going there. It’s nice to see all the added details- particularly your own printed parts. The resin upgrades certainly make a marked change in the shape of the turret. The anti-slip is great too- what did you use for it?
1 Like
It is ! I’ll try the mig paste for the headlights shields and see which I like more.
1 Like
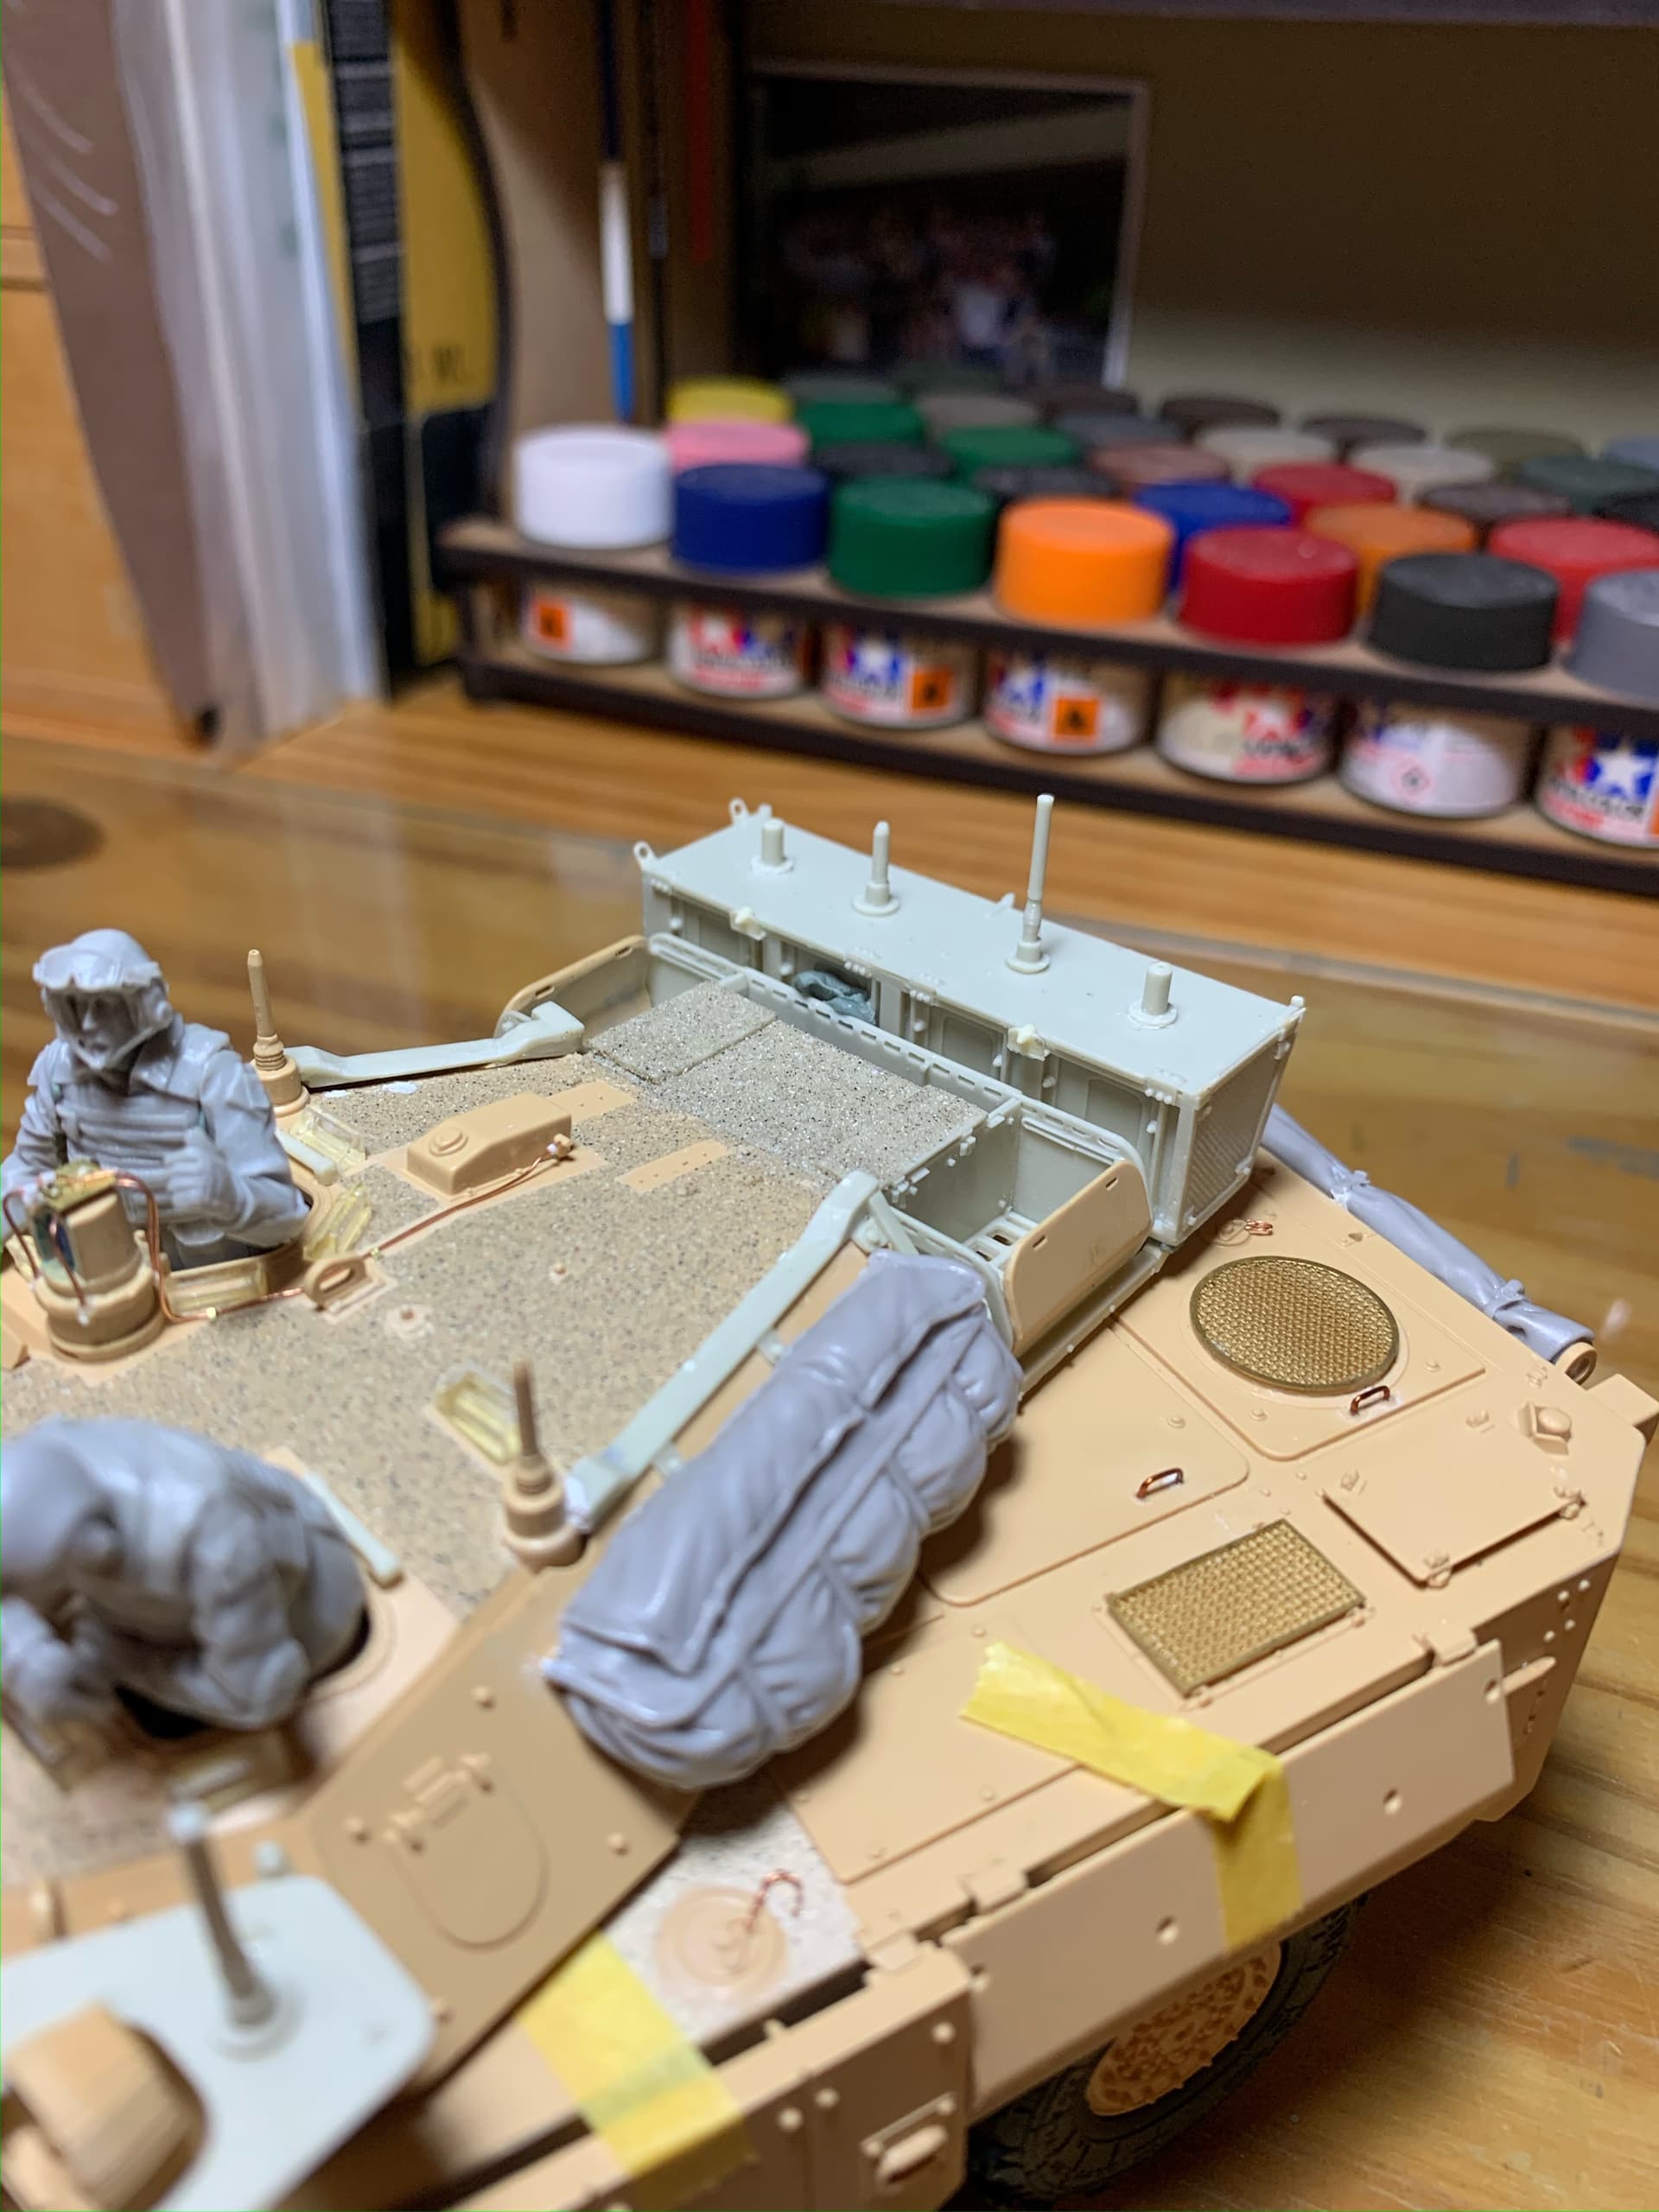
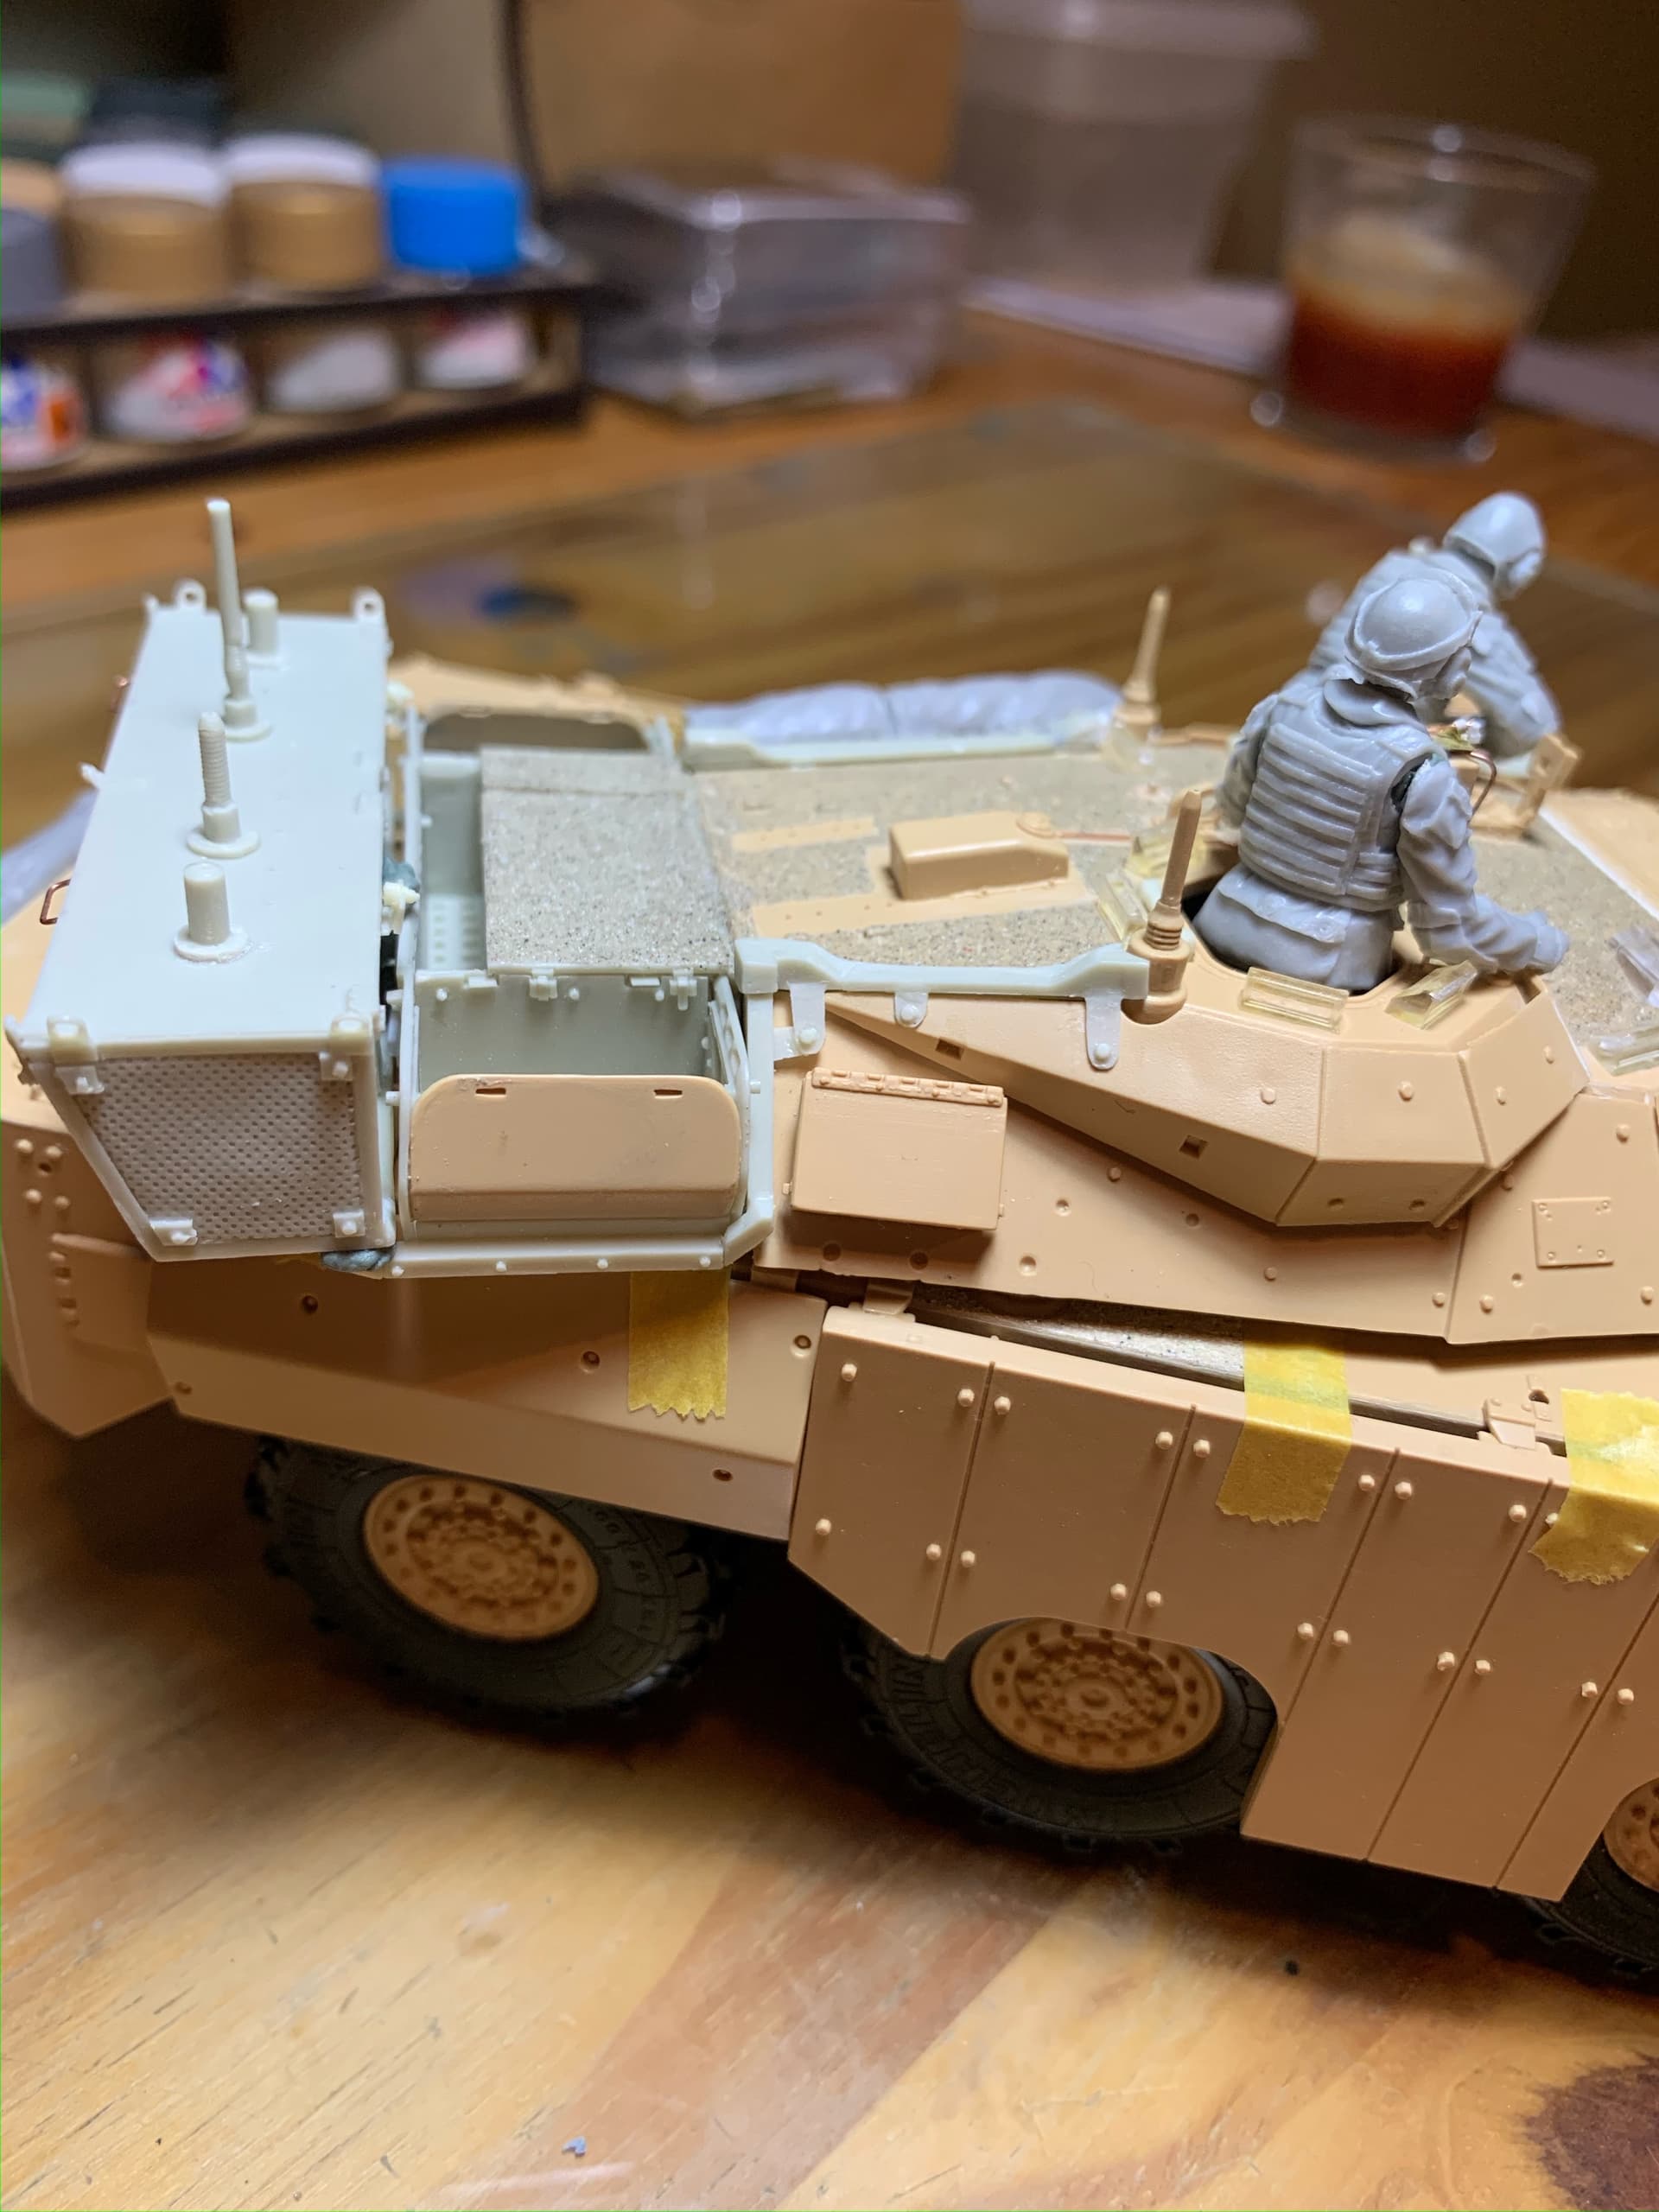
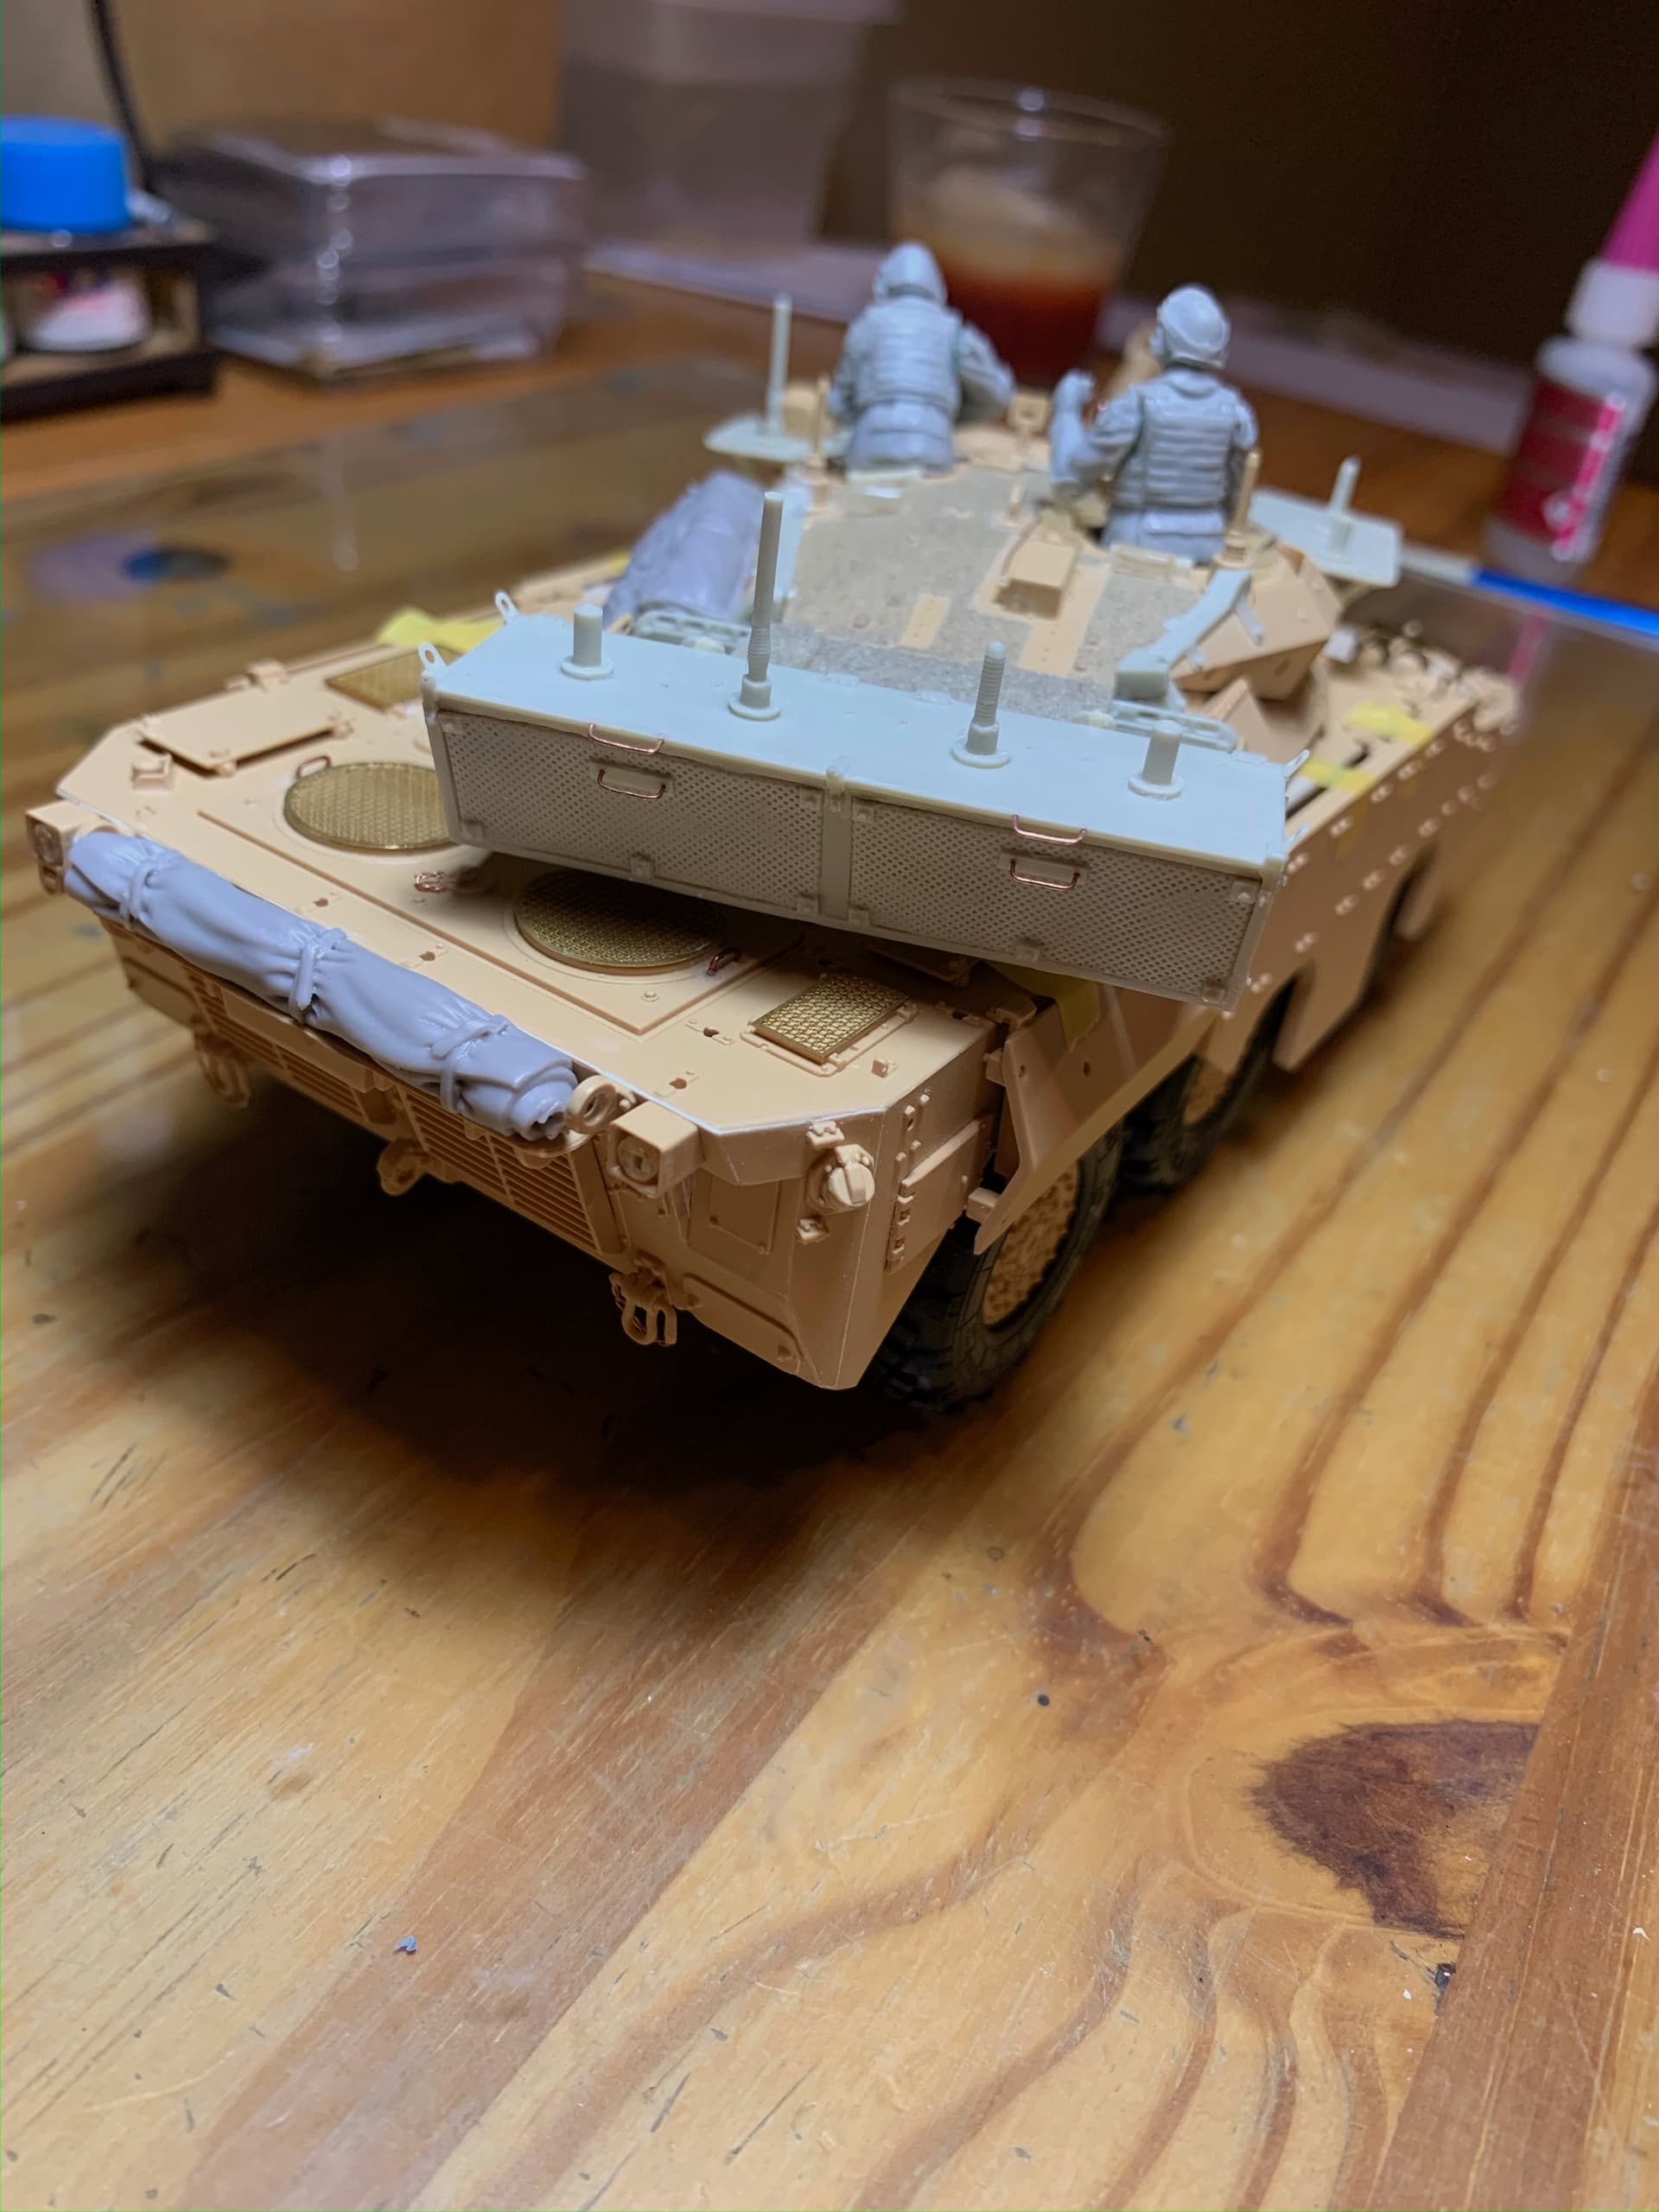
Looks excellent; lots of small details. What is the large box on the turret rear? Storage? And the flat plate objects on either side of the turret from? Very interesting vehicle there and great to see some modern French armor here.
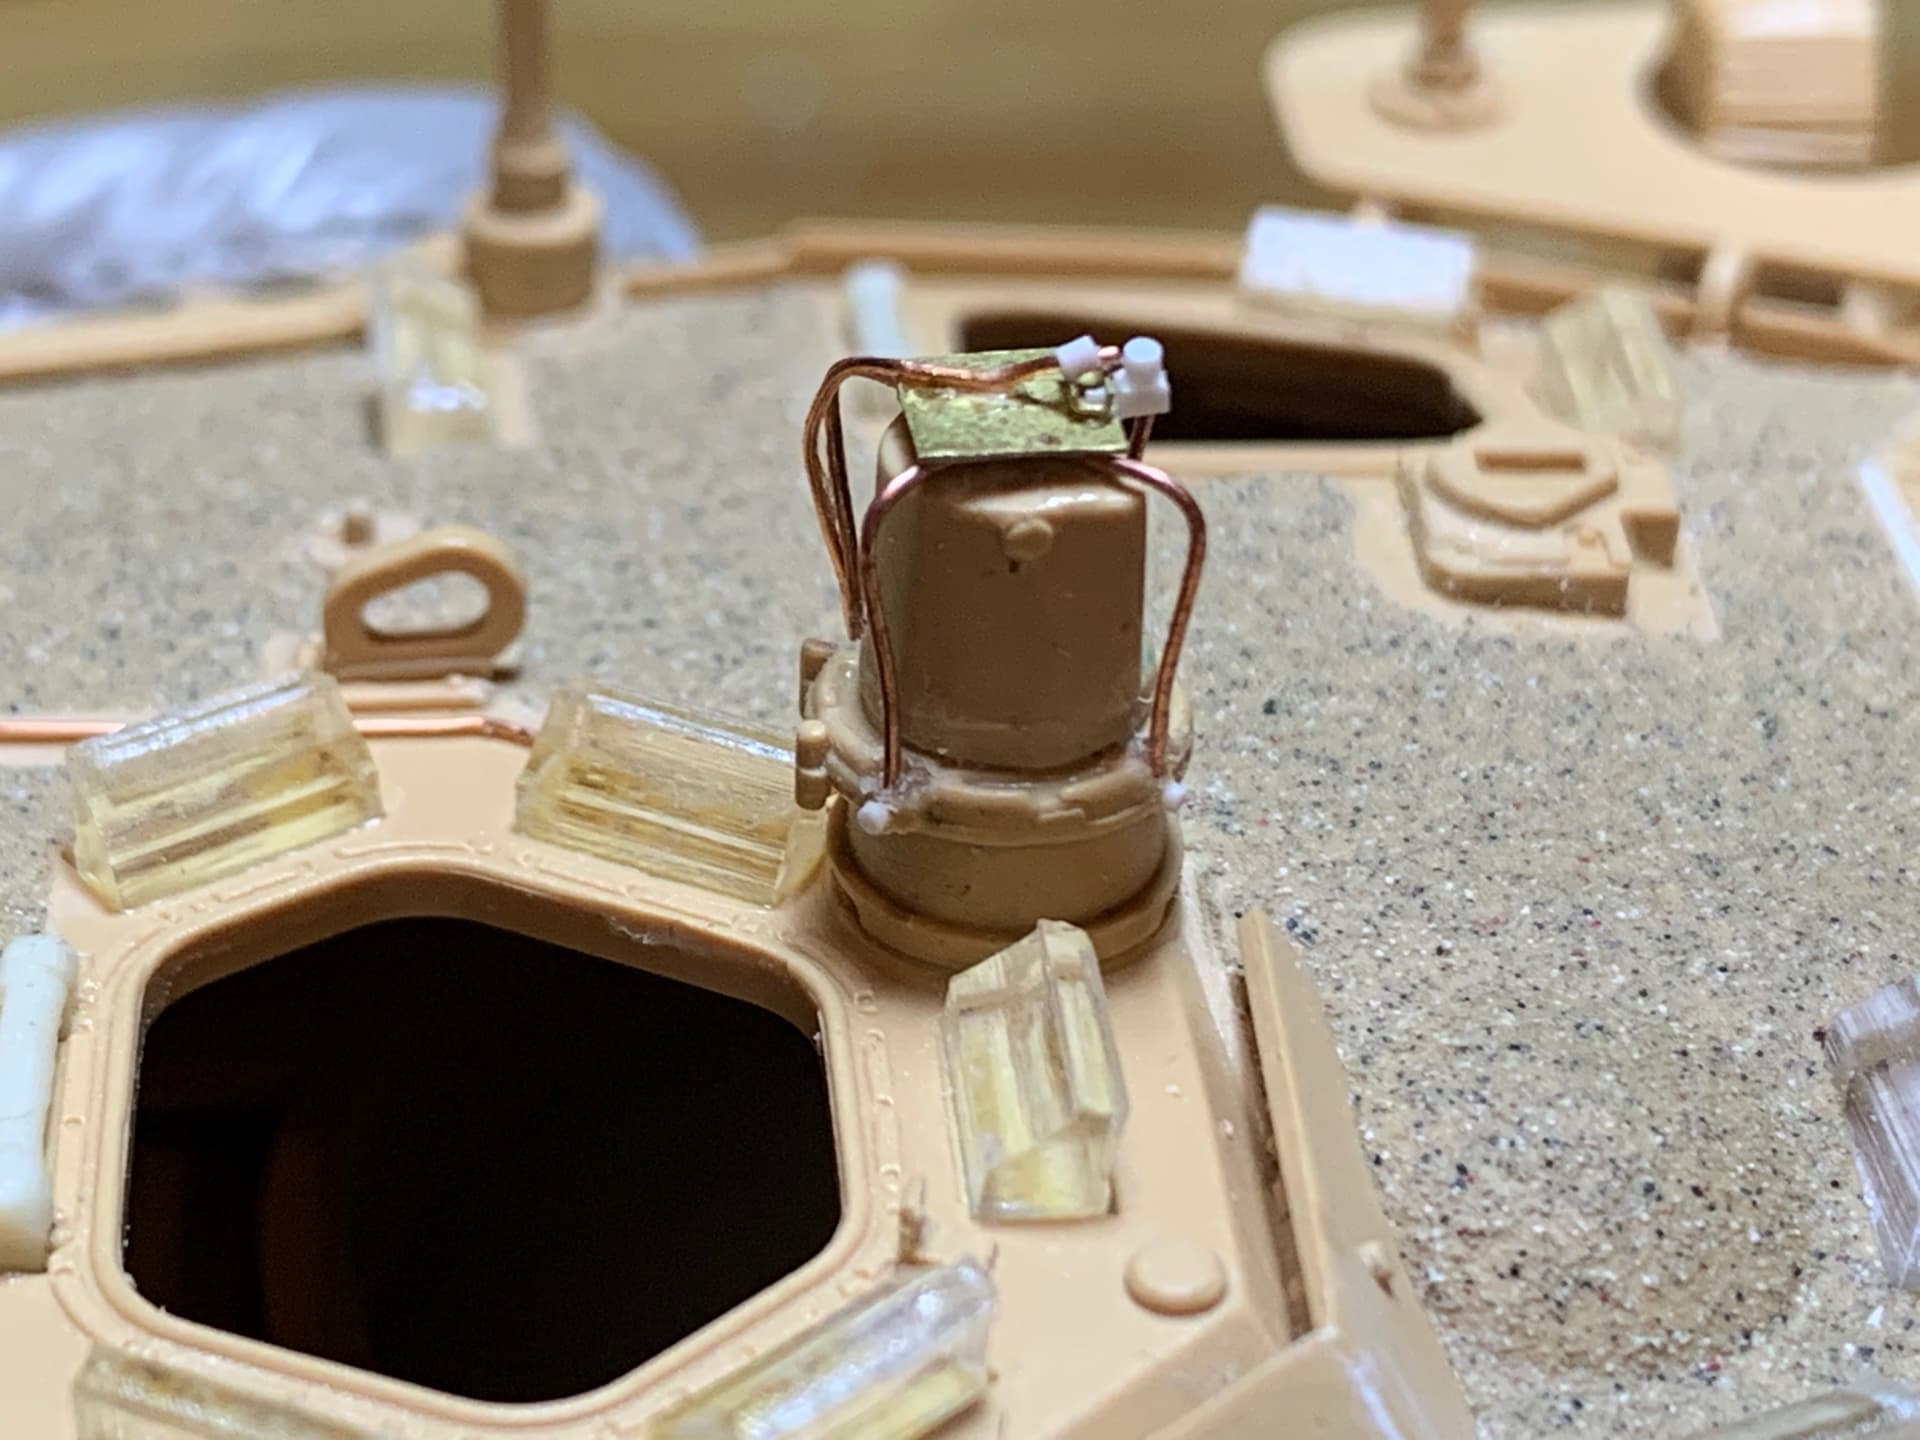
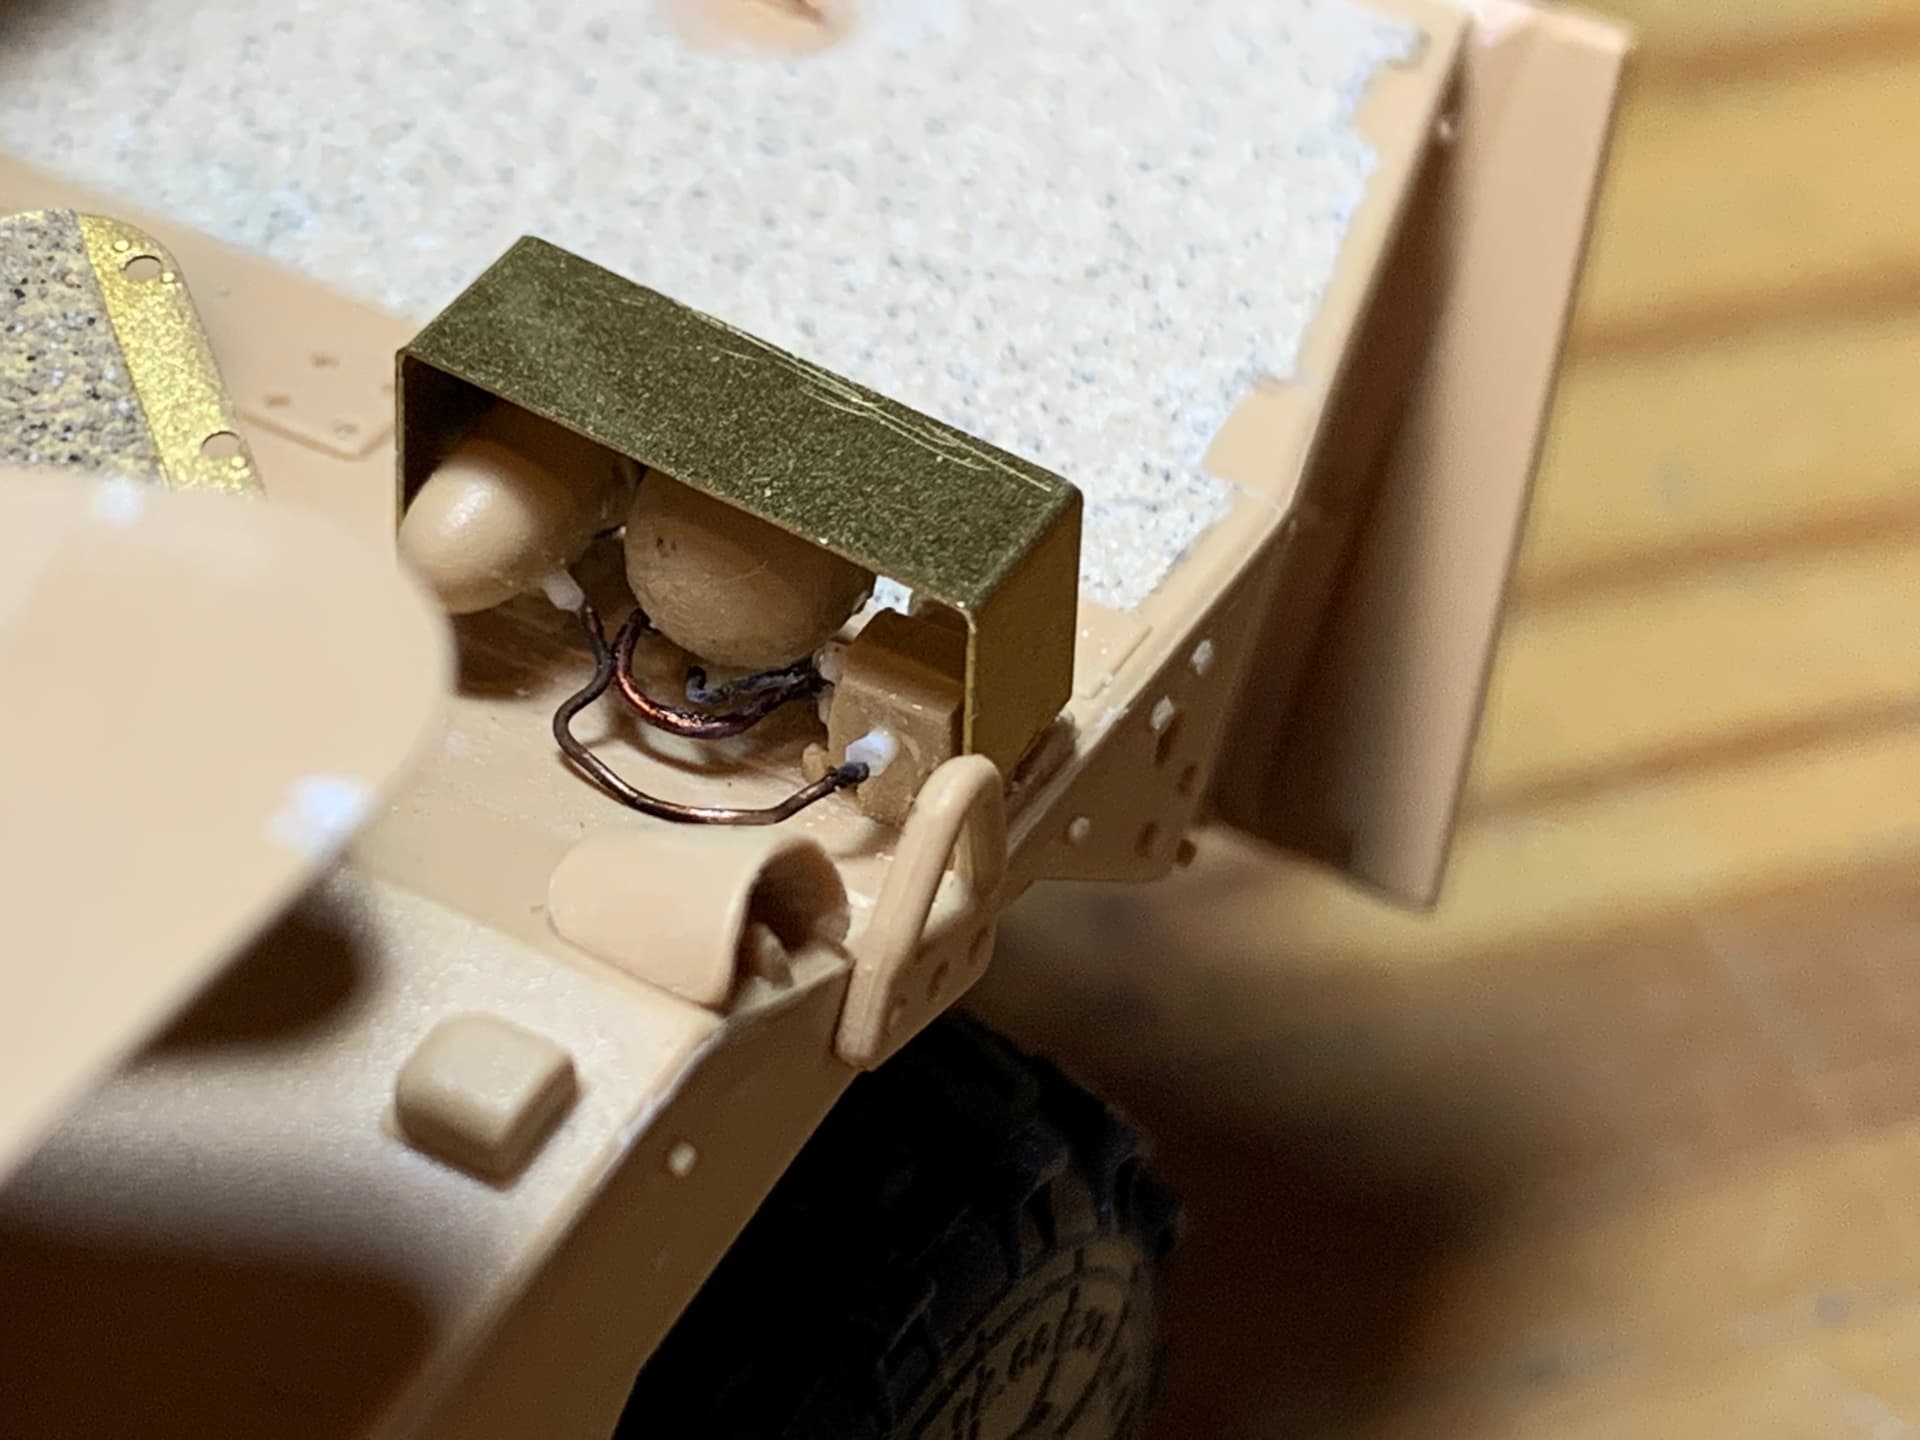
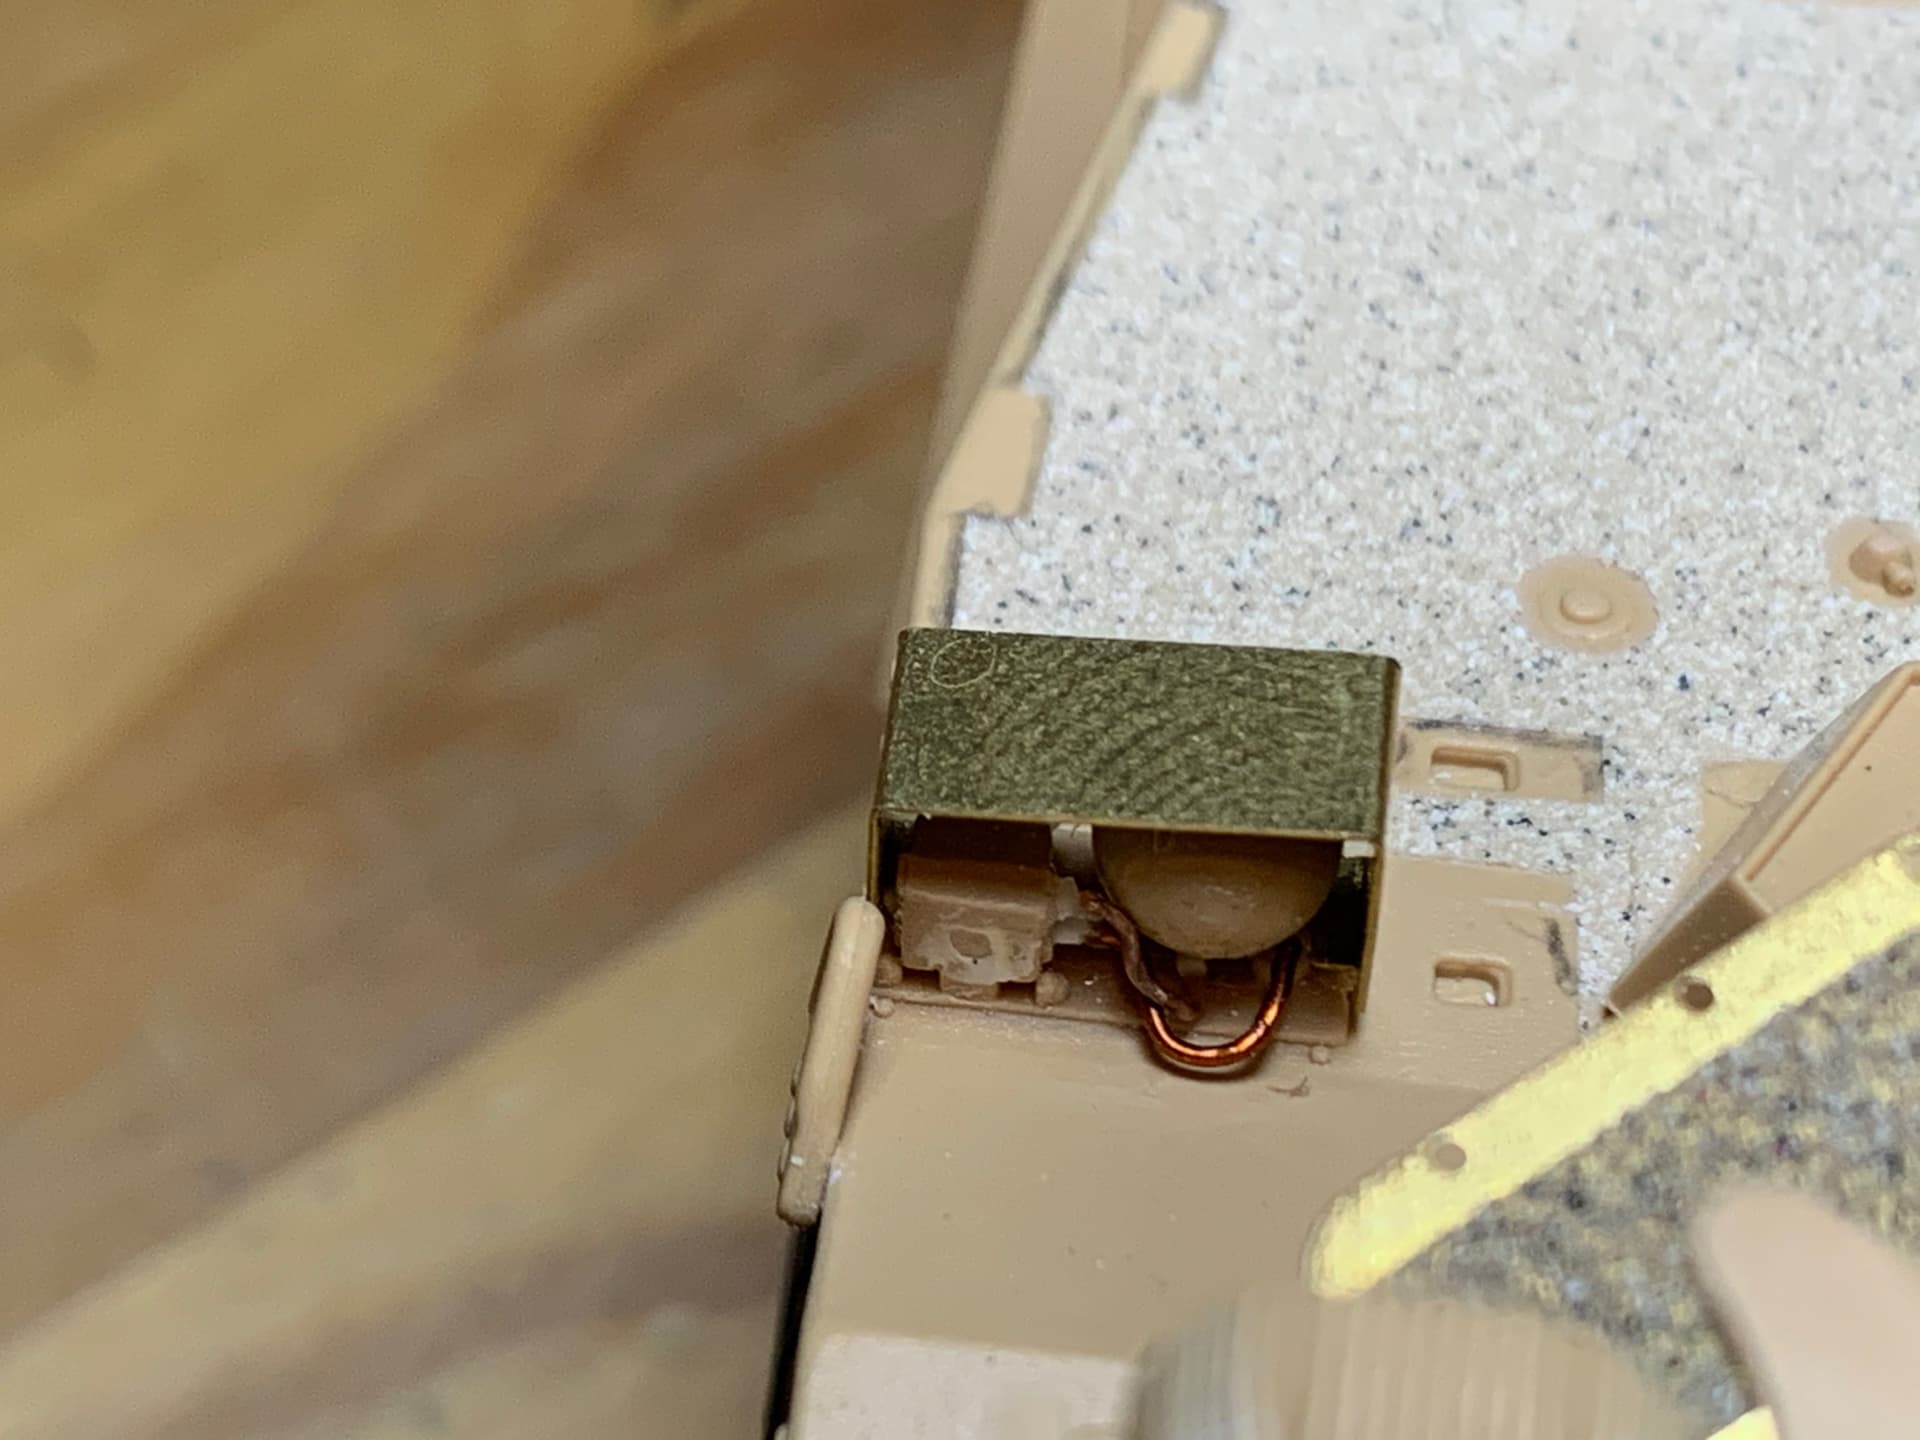
Hello ! Thank you. They are anti-ied jammers. I don’t think the bustle box has room for stowage, it probably has to do with wiring and maybe batteries to power the rig. That’s my guess.
How did you separate the paste from the vehicle components?
Those are beer cans holders so the crew can have a cool beverage at hand at each stop 
Unfortunately they are just plates for IED jammer aerials used in addition to the ones on top of the large box at the rear.
Olivier
3 Likes
Oh ok great idea!
Lol………then reality sets in……
Always like the look of this vehicle, but did wonder how the tyres dealt with the steering system? Do they wear quicker than normal systems. Good job on the non slip thouigh.
Is the second axle not steering? 
As far as I’m aware it uses skid steering. With the add on side armour the wheels wouldn’t be able to turn.
1 Like
Yes, it’s totally skid-steered. makes me wonder about tire wear too. I just finished the RCR myself, thought the kit was pretty good except for a couple of minor fit issues and the color of the plastic made it extremely hard to find the minor but common flash throughout.
Mine’s totally OOB, not even any anti-slip.
 IMG_3490 by Russel Baer, on Flickr
Not a hi-jack, more to illustrate that steerable axles are out of the question.
2 Likes
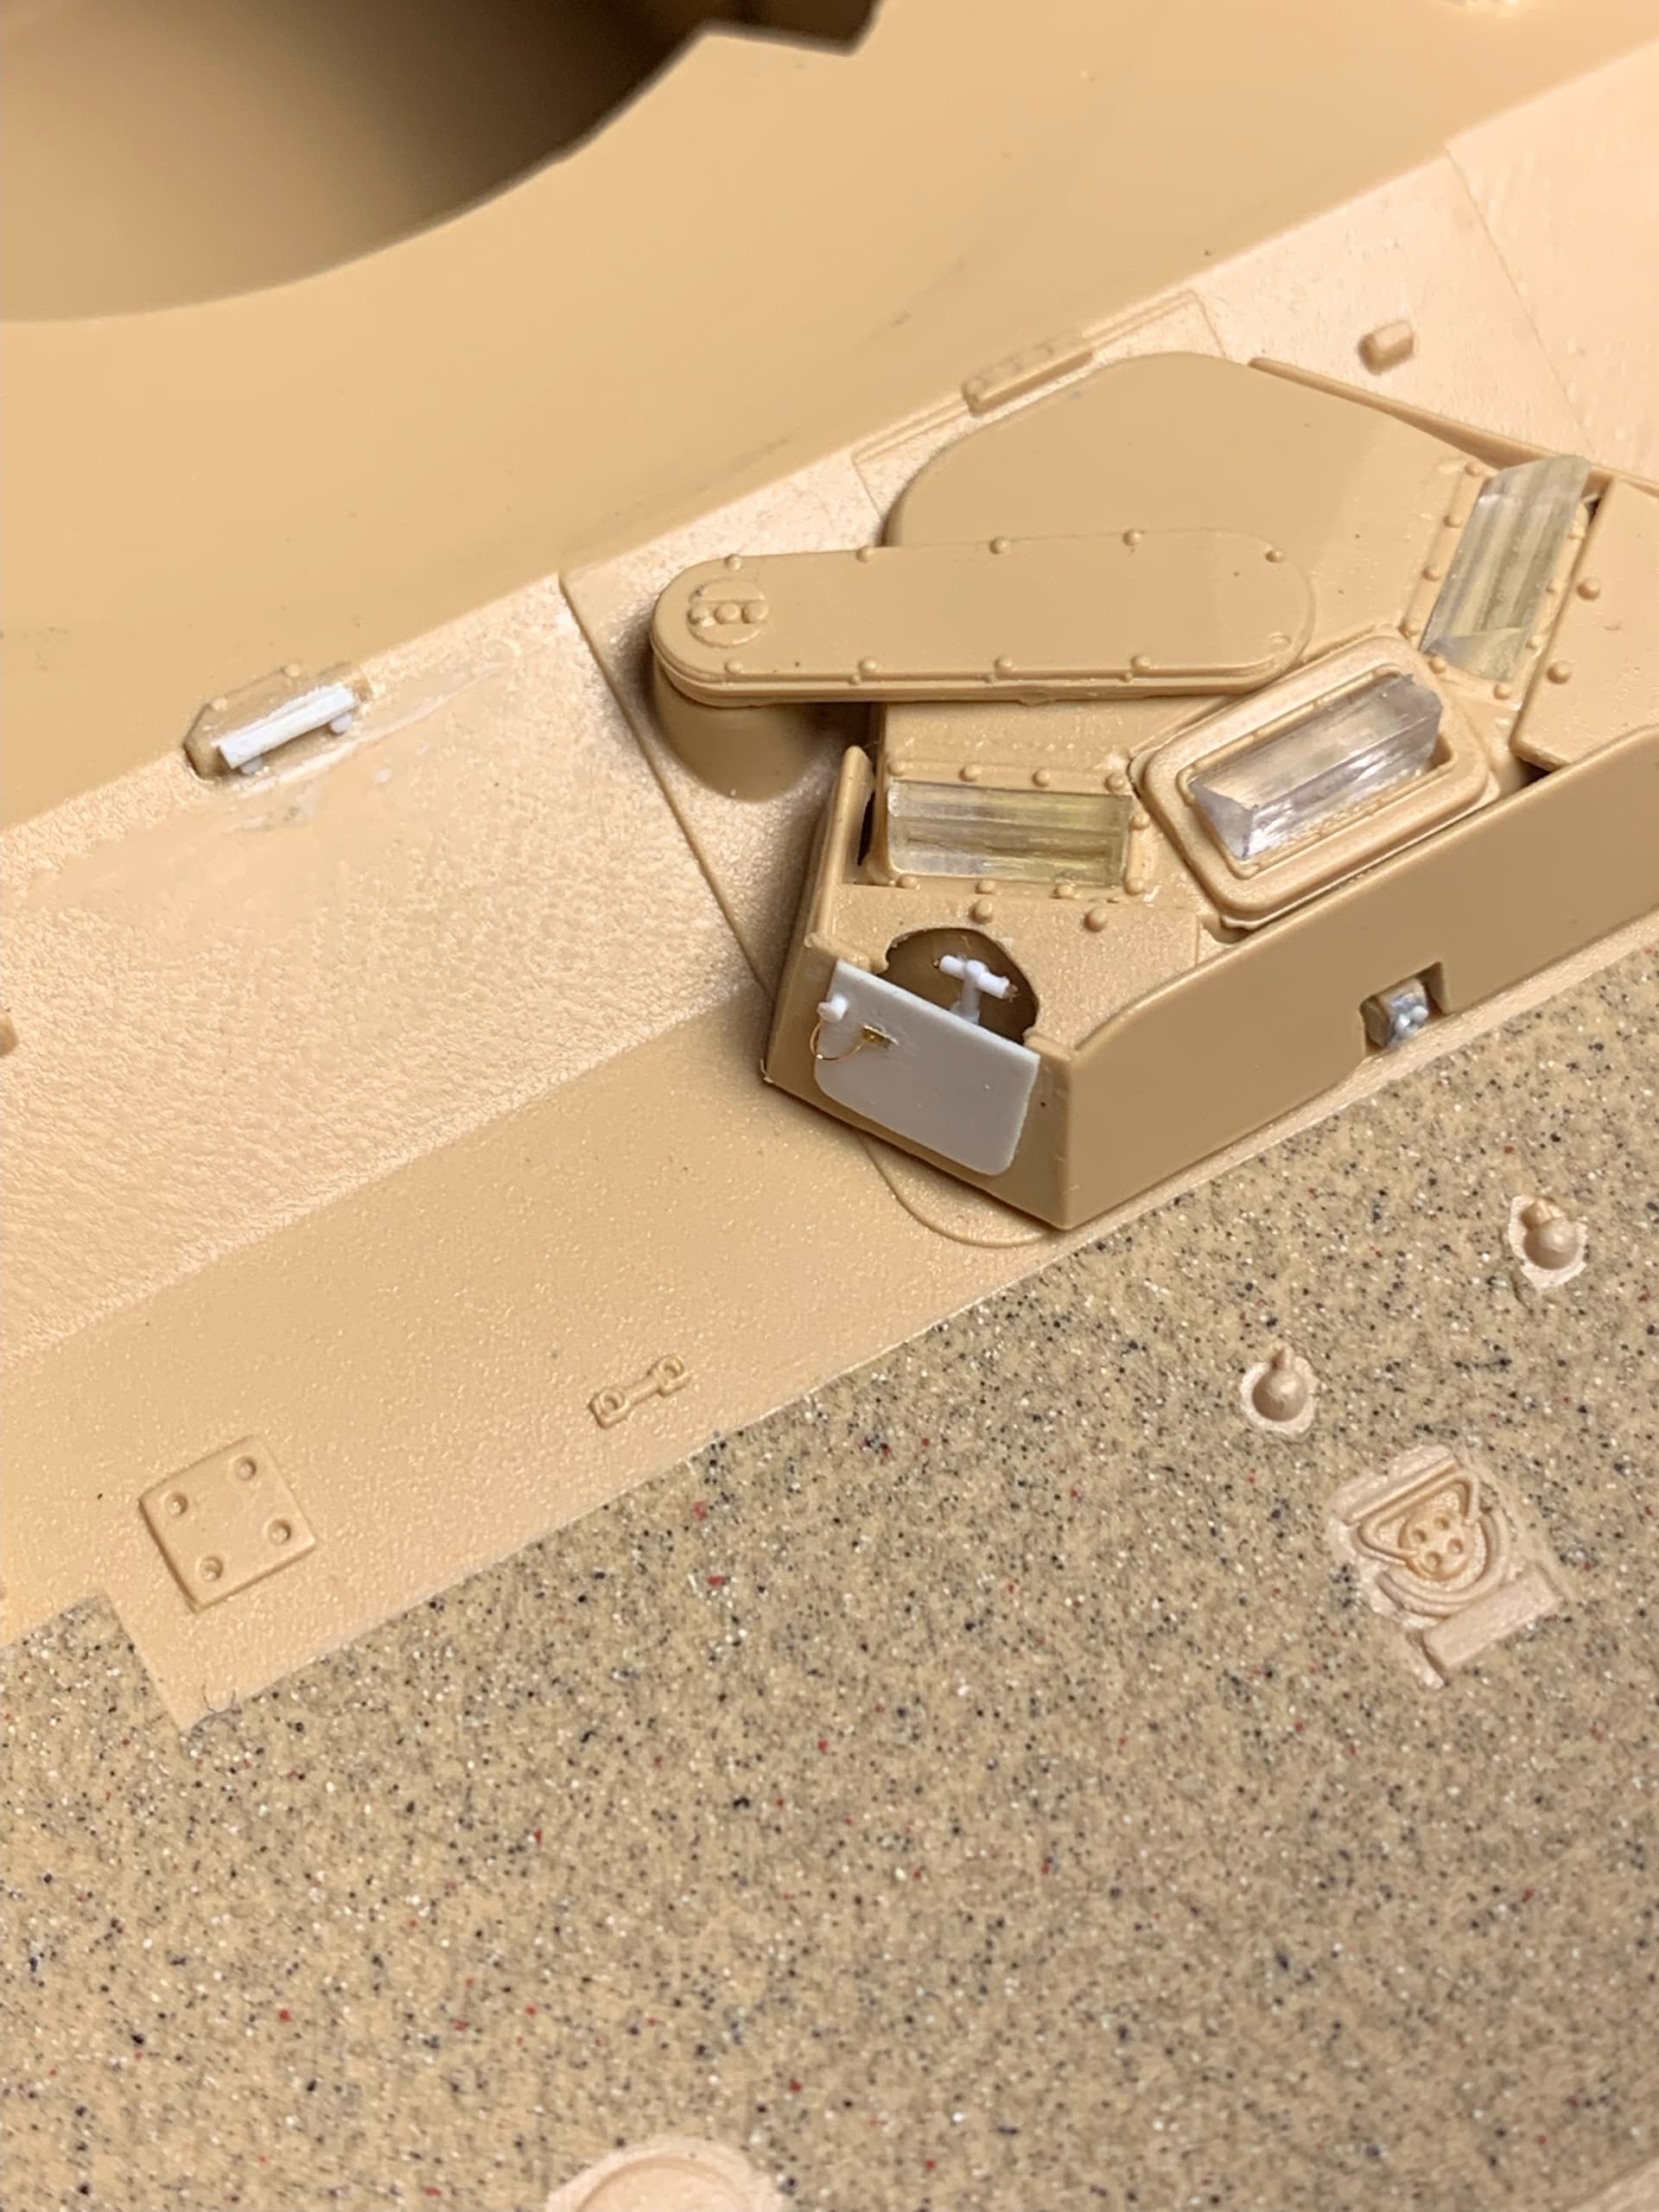
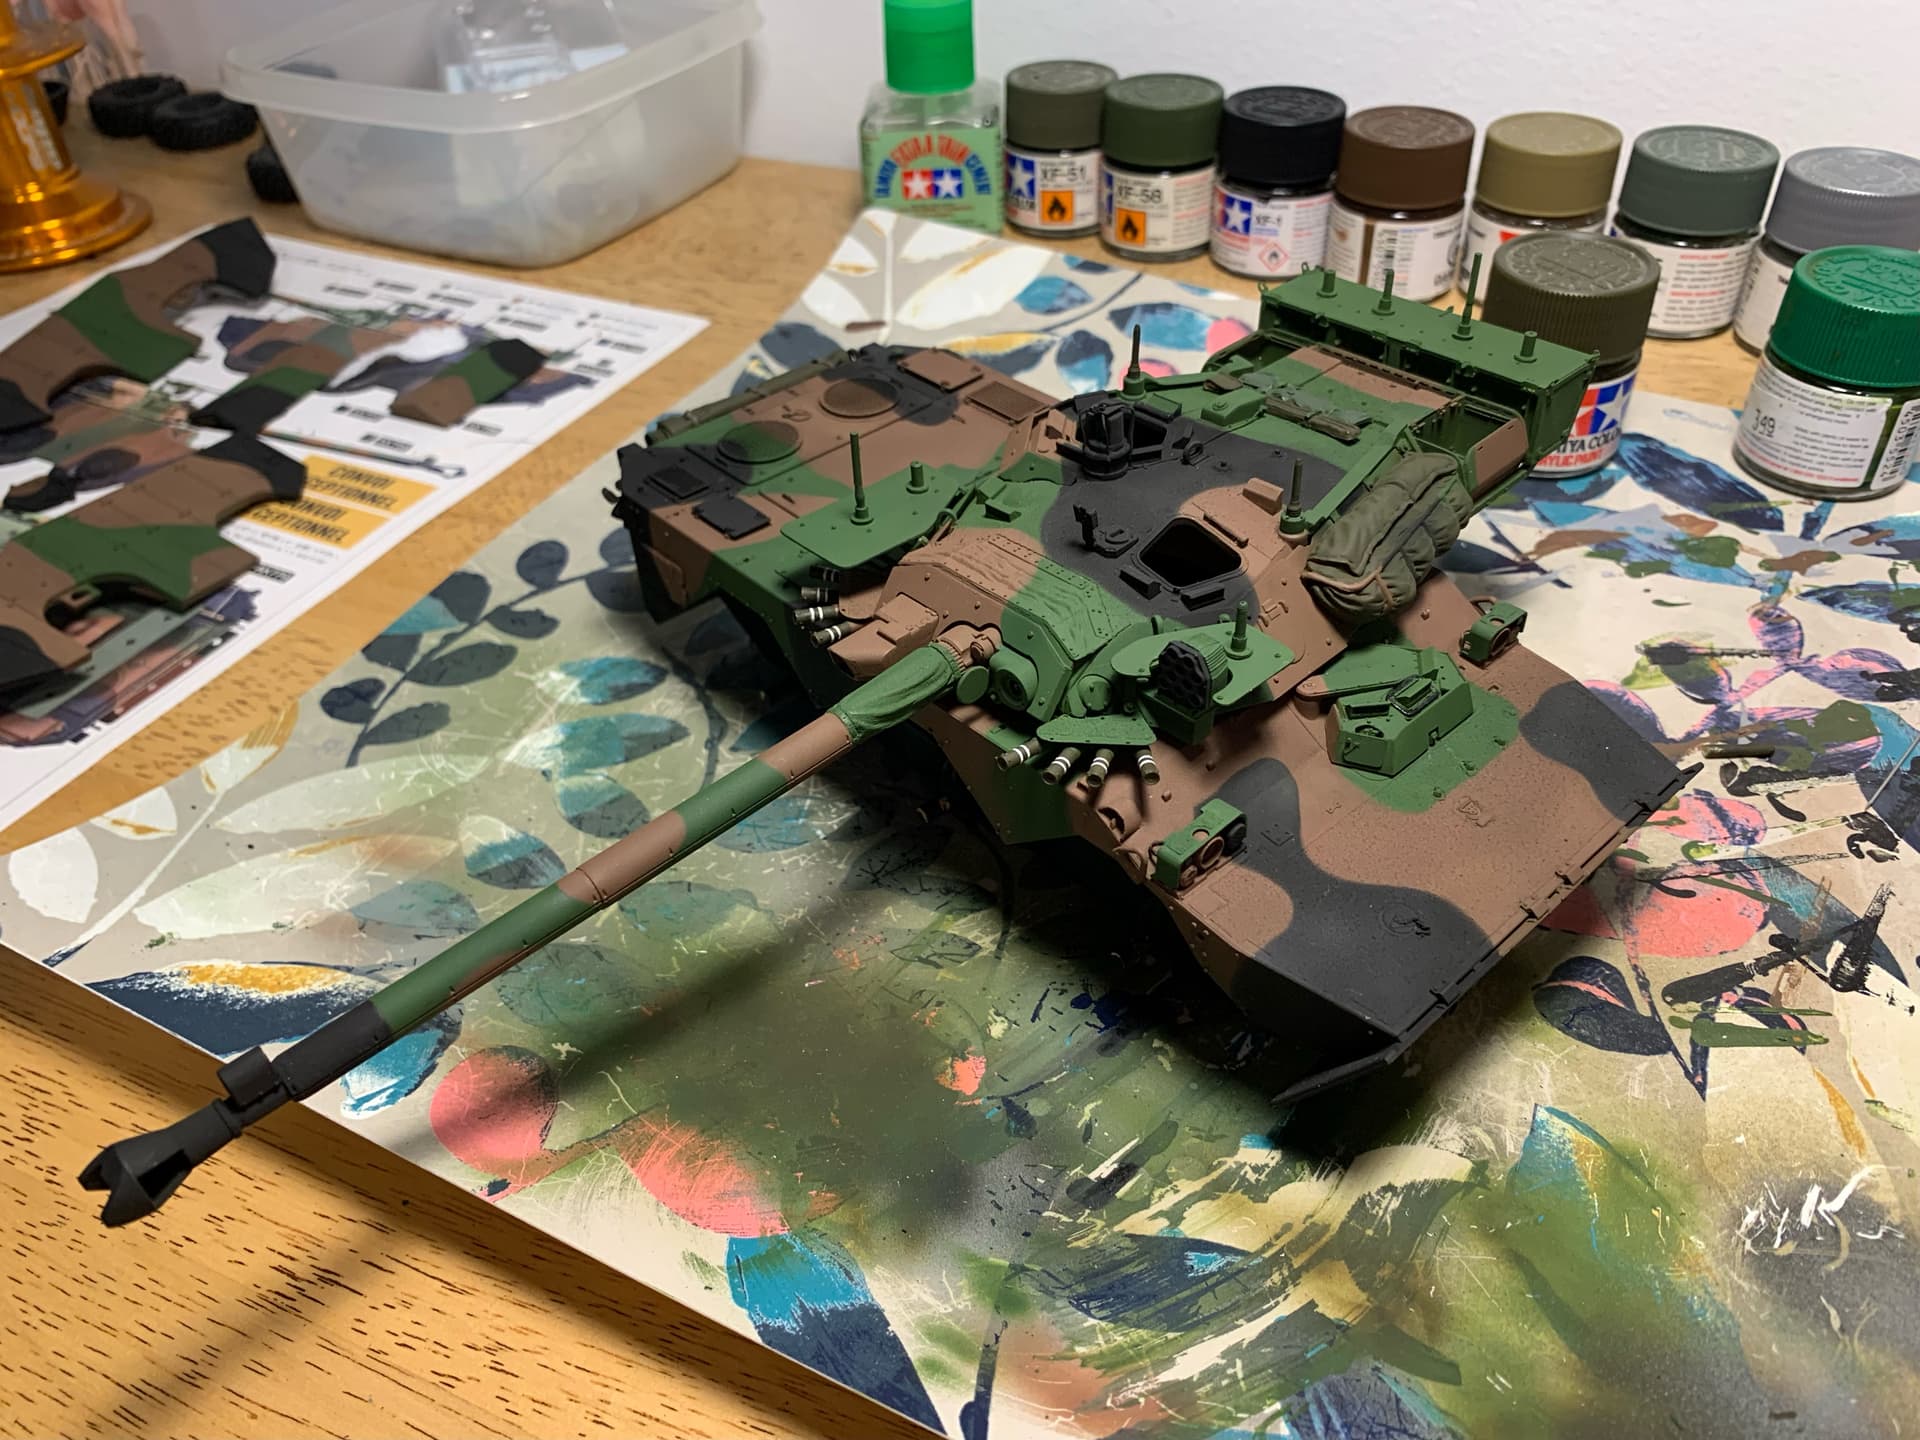
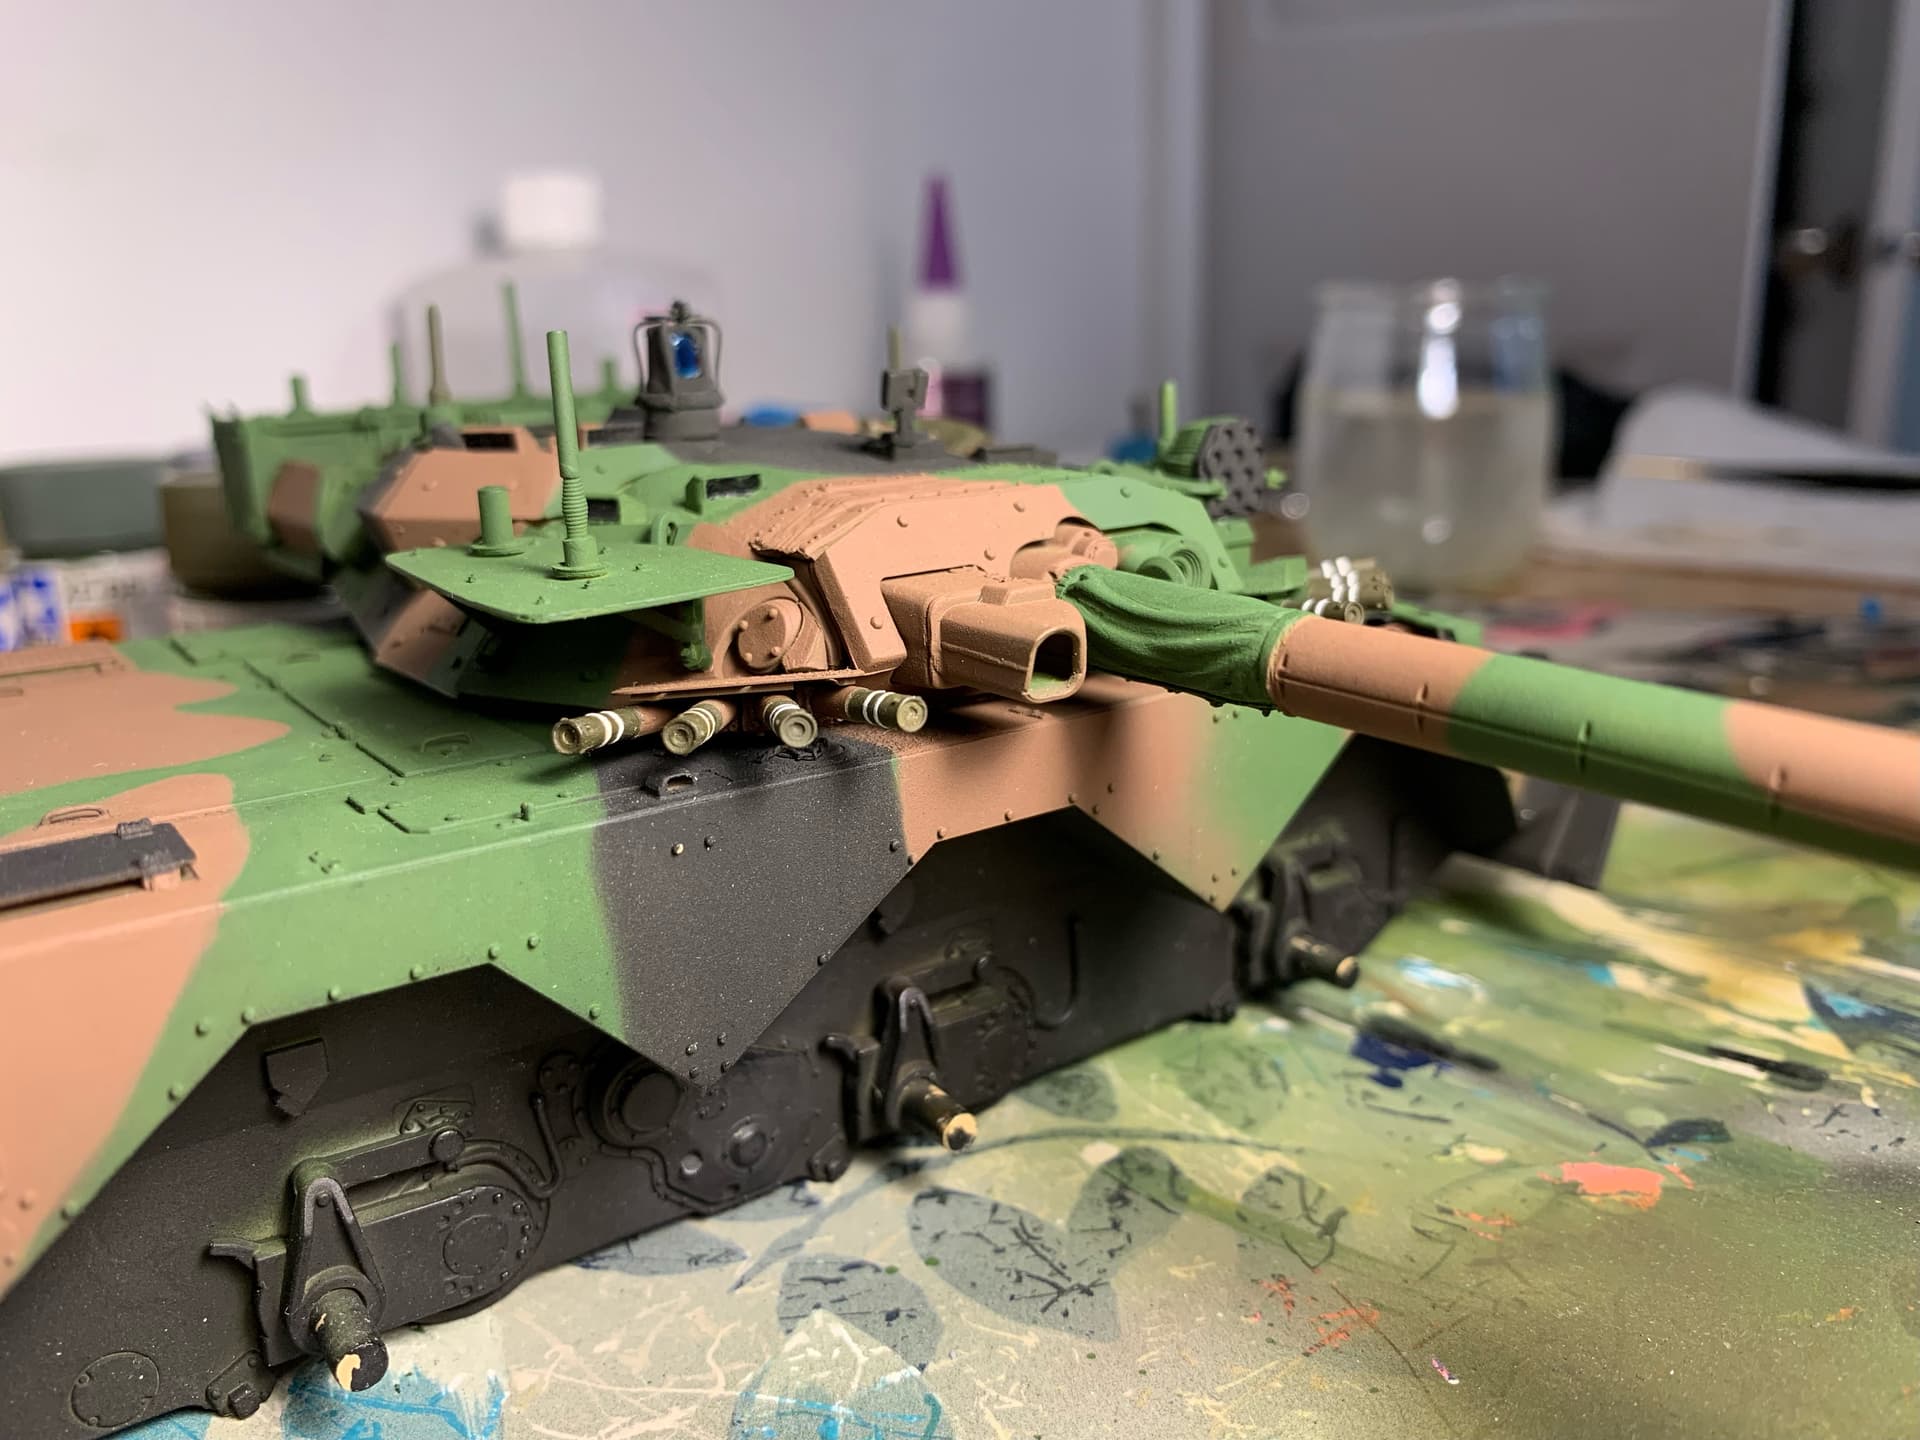
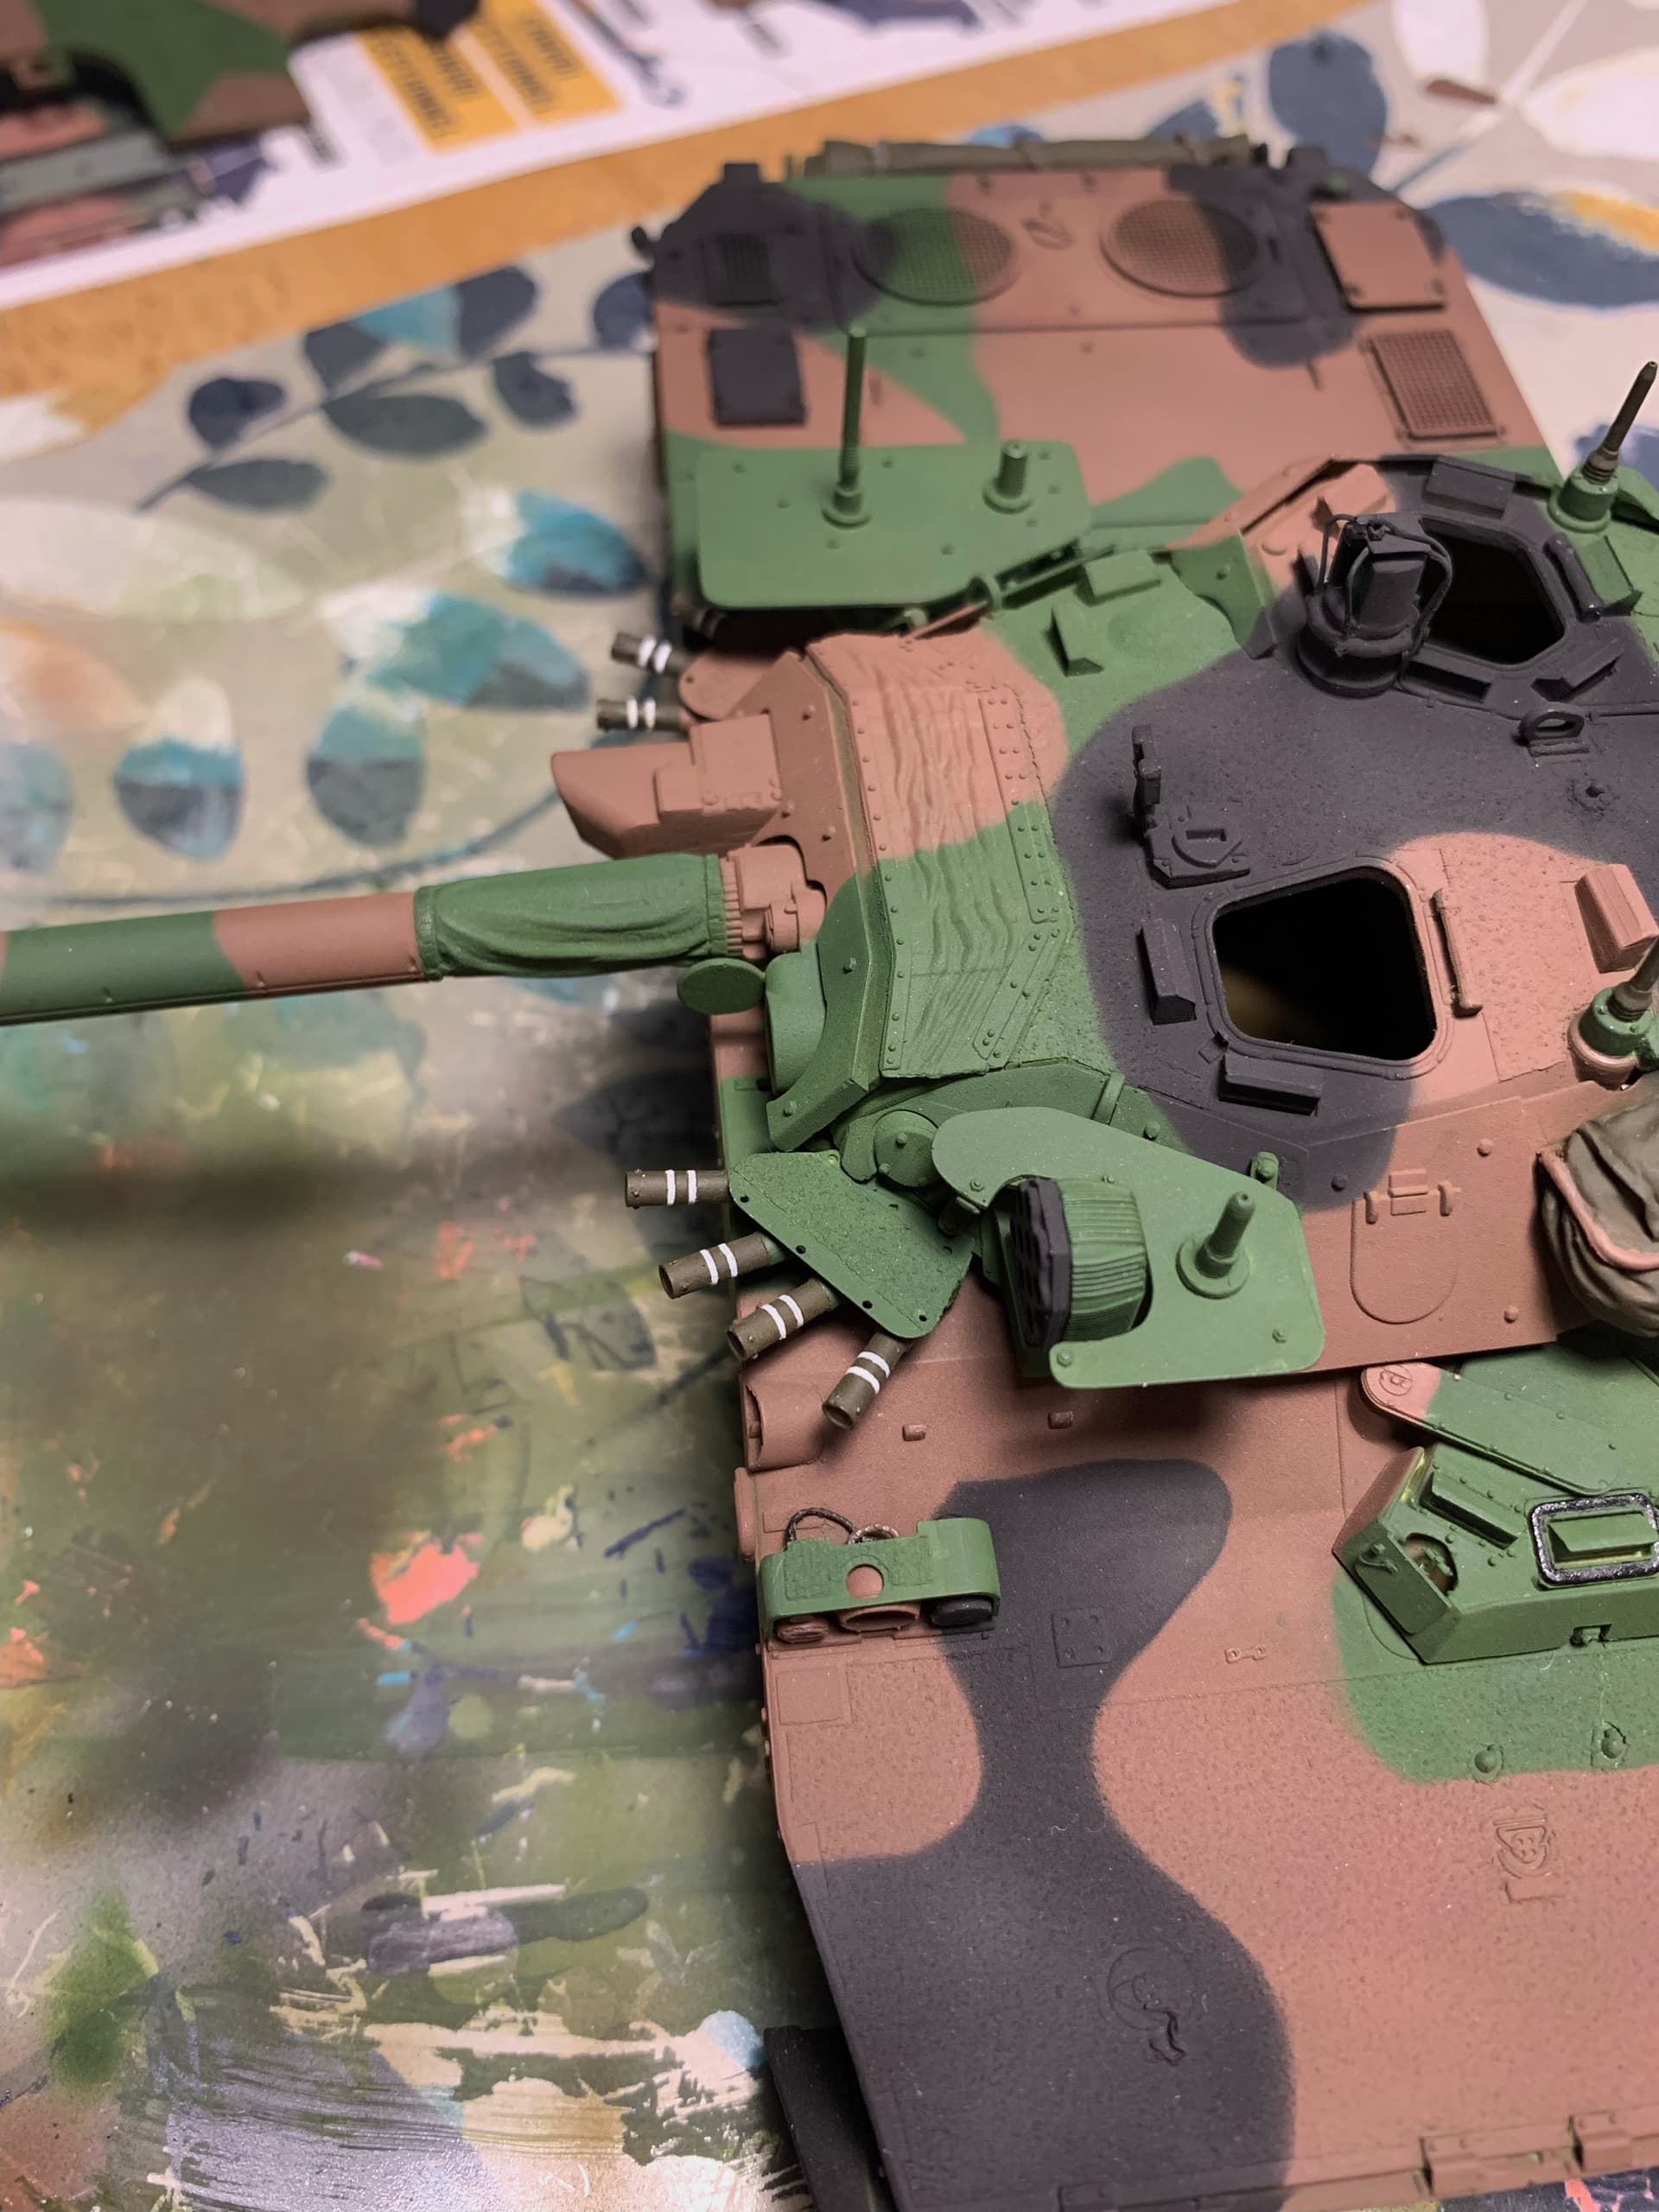
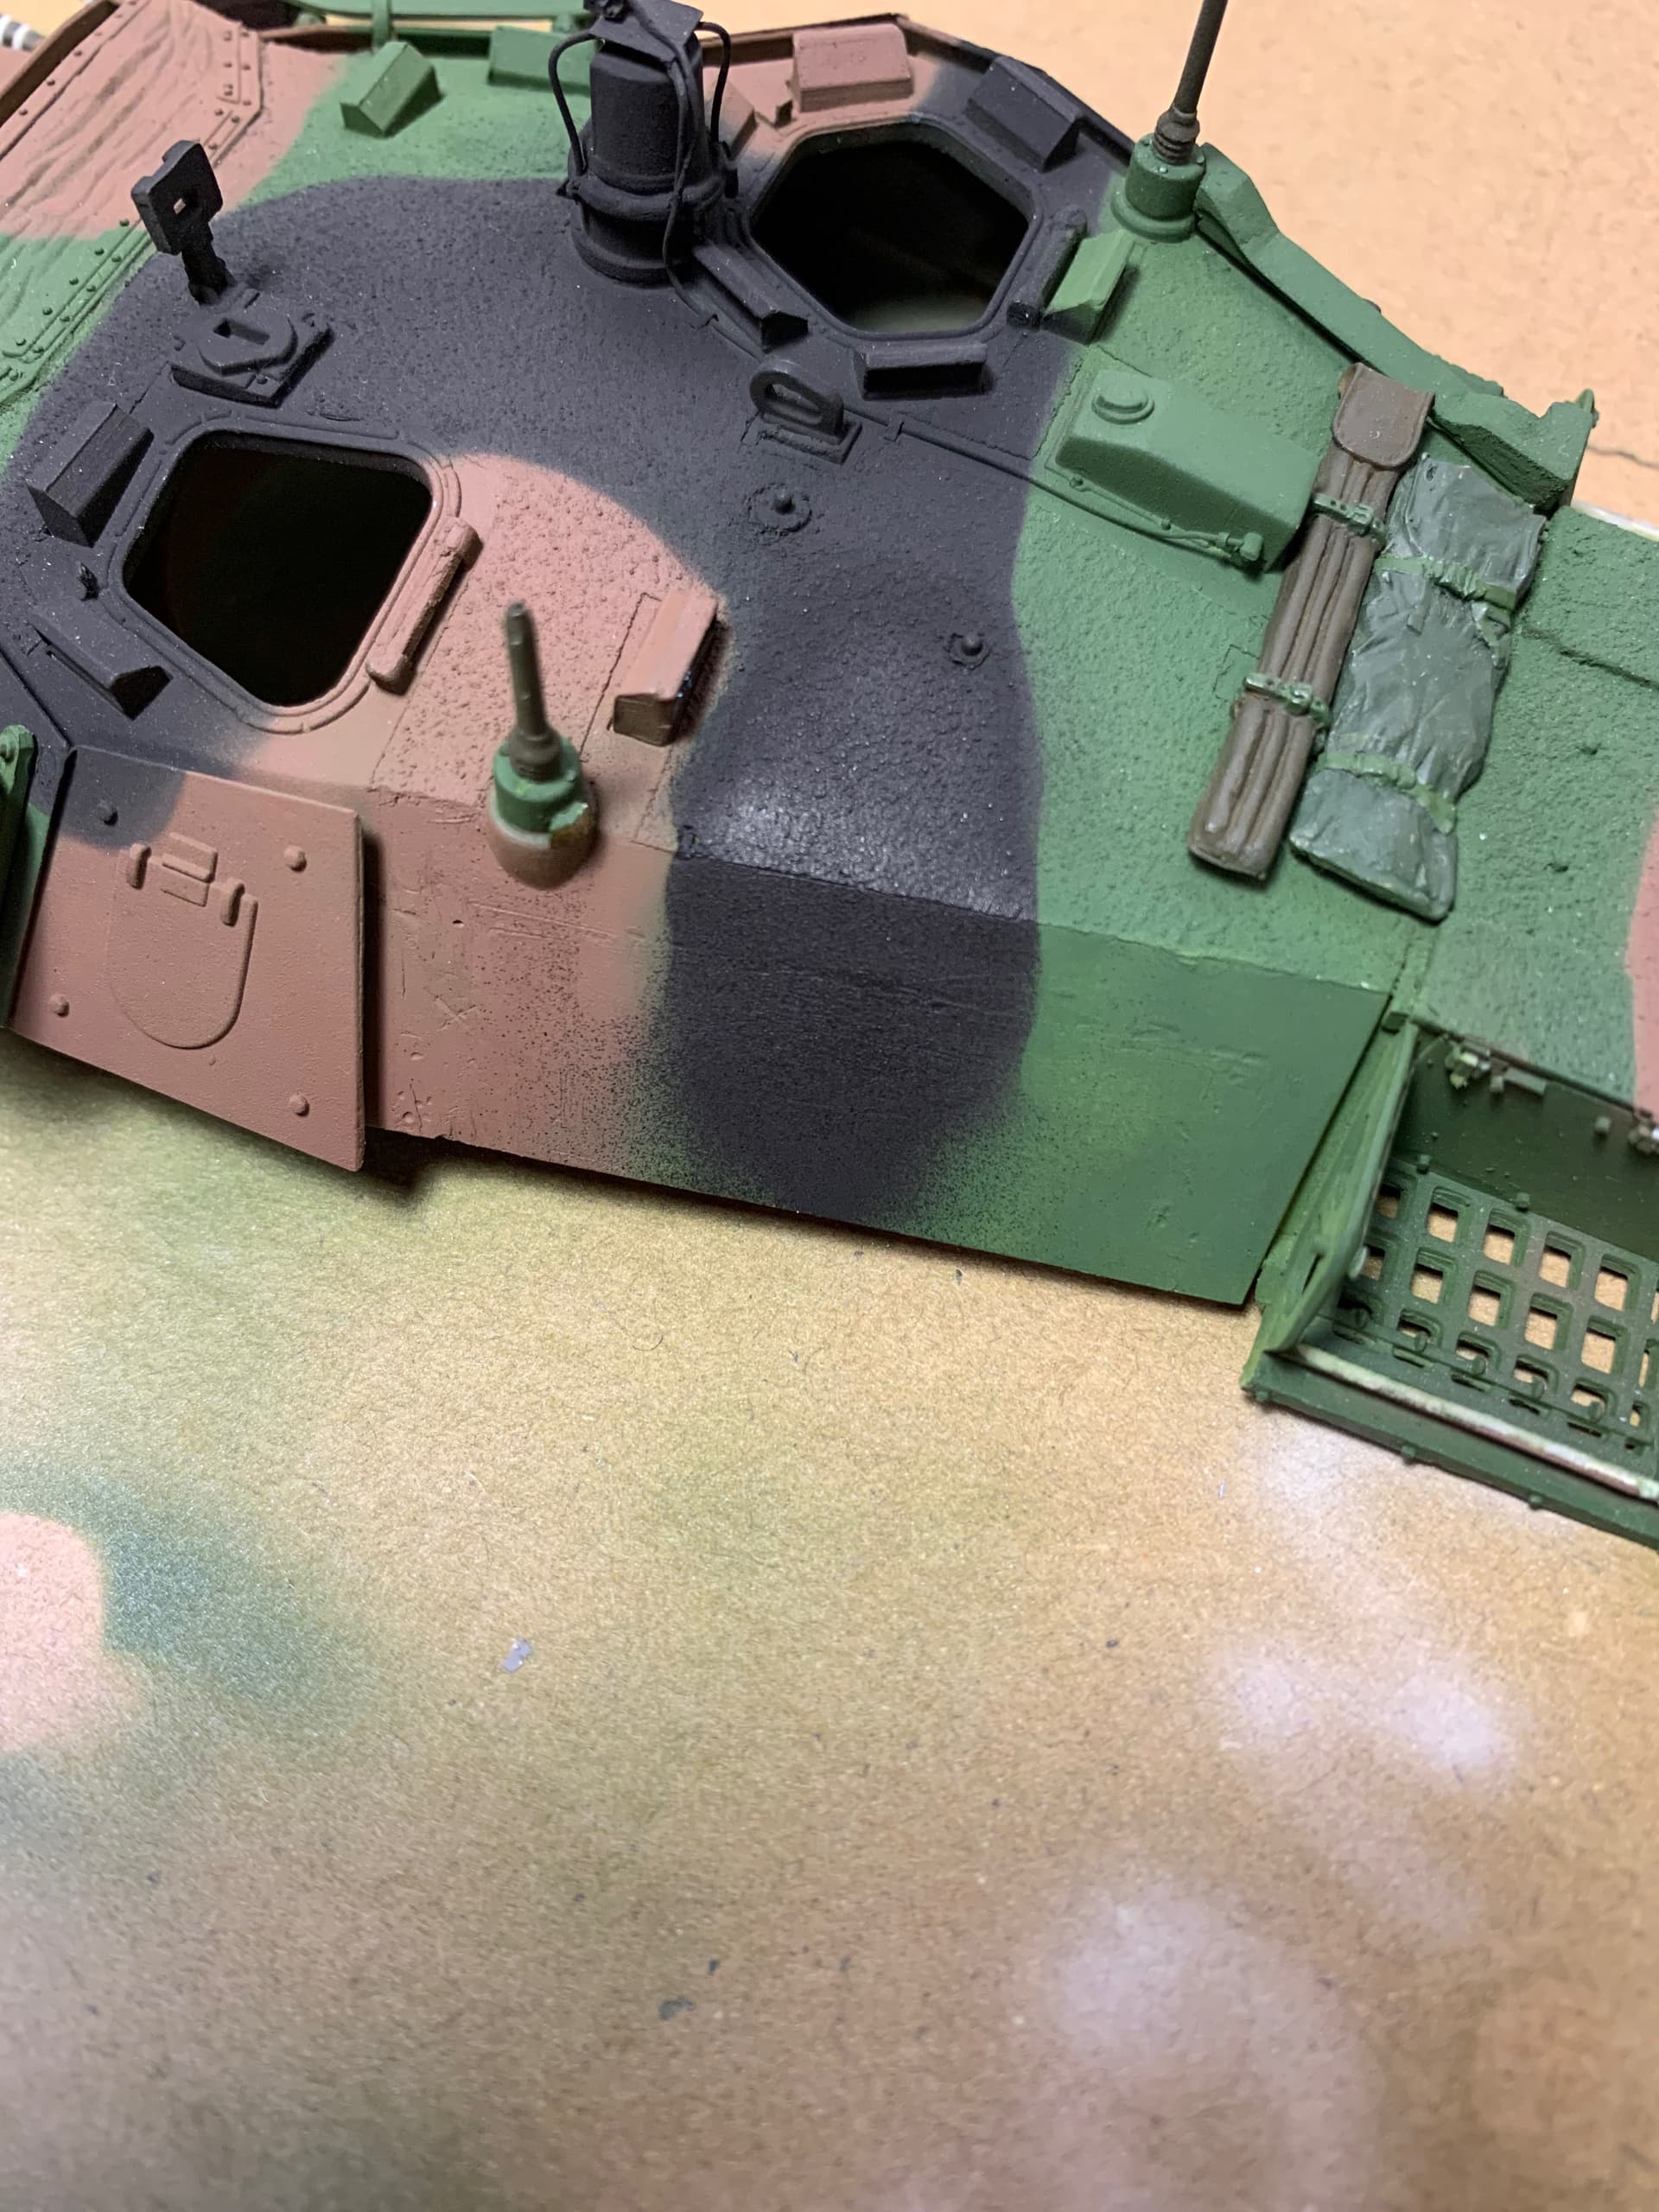
Hello ! Here are some small advances; Camo is pretty done, minor some touch ups here and there that will be added soon. I applied anti-slip on my 3d printed parts using mig paste for the first time. Worked like a charm, I highly recommend it. I’m in the middle of painting the tools and adding the last bits to the model. Detailing efforts have been put into the plate protecting the galix smoke grenades. It needs to receive a transversal bar that acts as a spacer between the tubes and the plate. Because of this bar, the plate needs to be angled, and one hole has to be drilled. Hope you like it, comments are welcome !
9 Likes
Hello,
Yearly update on my project 
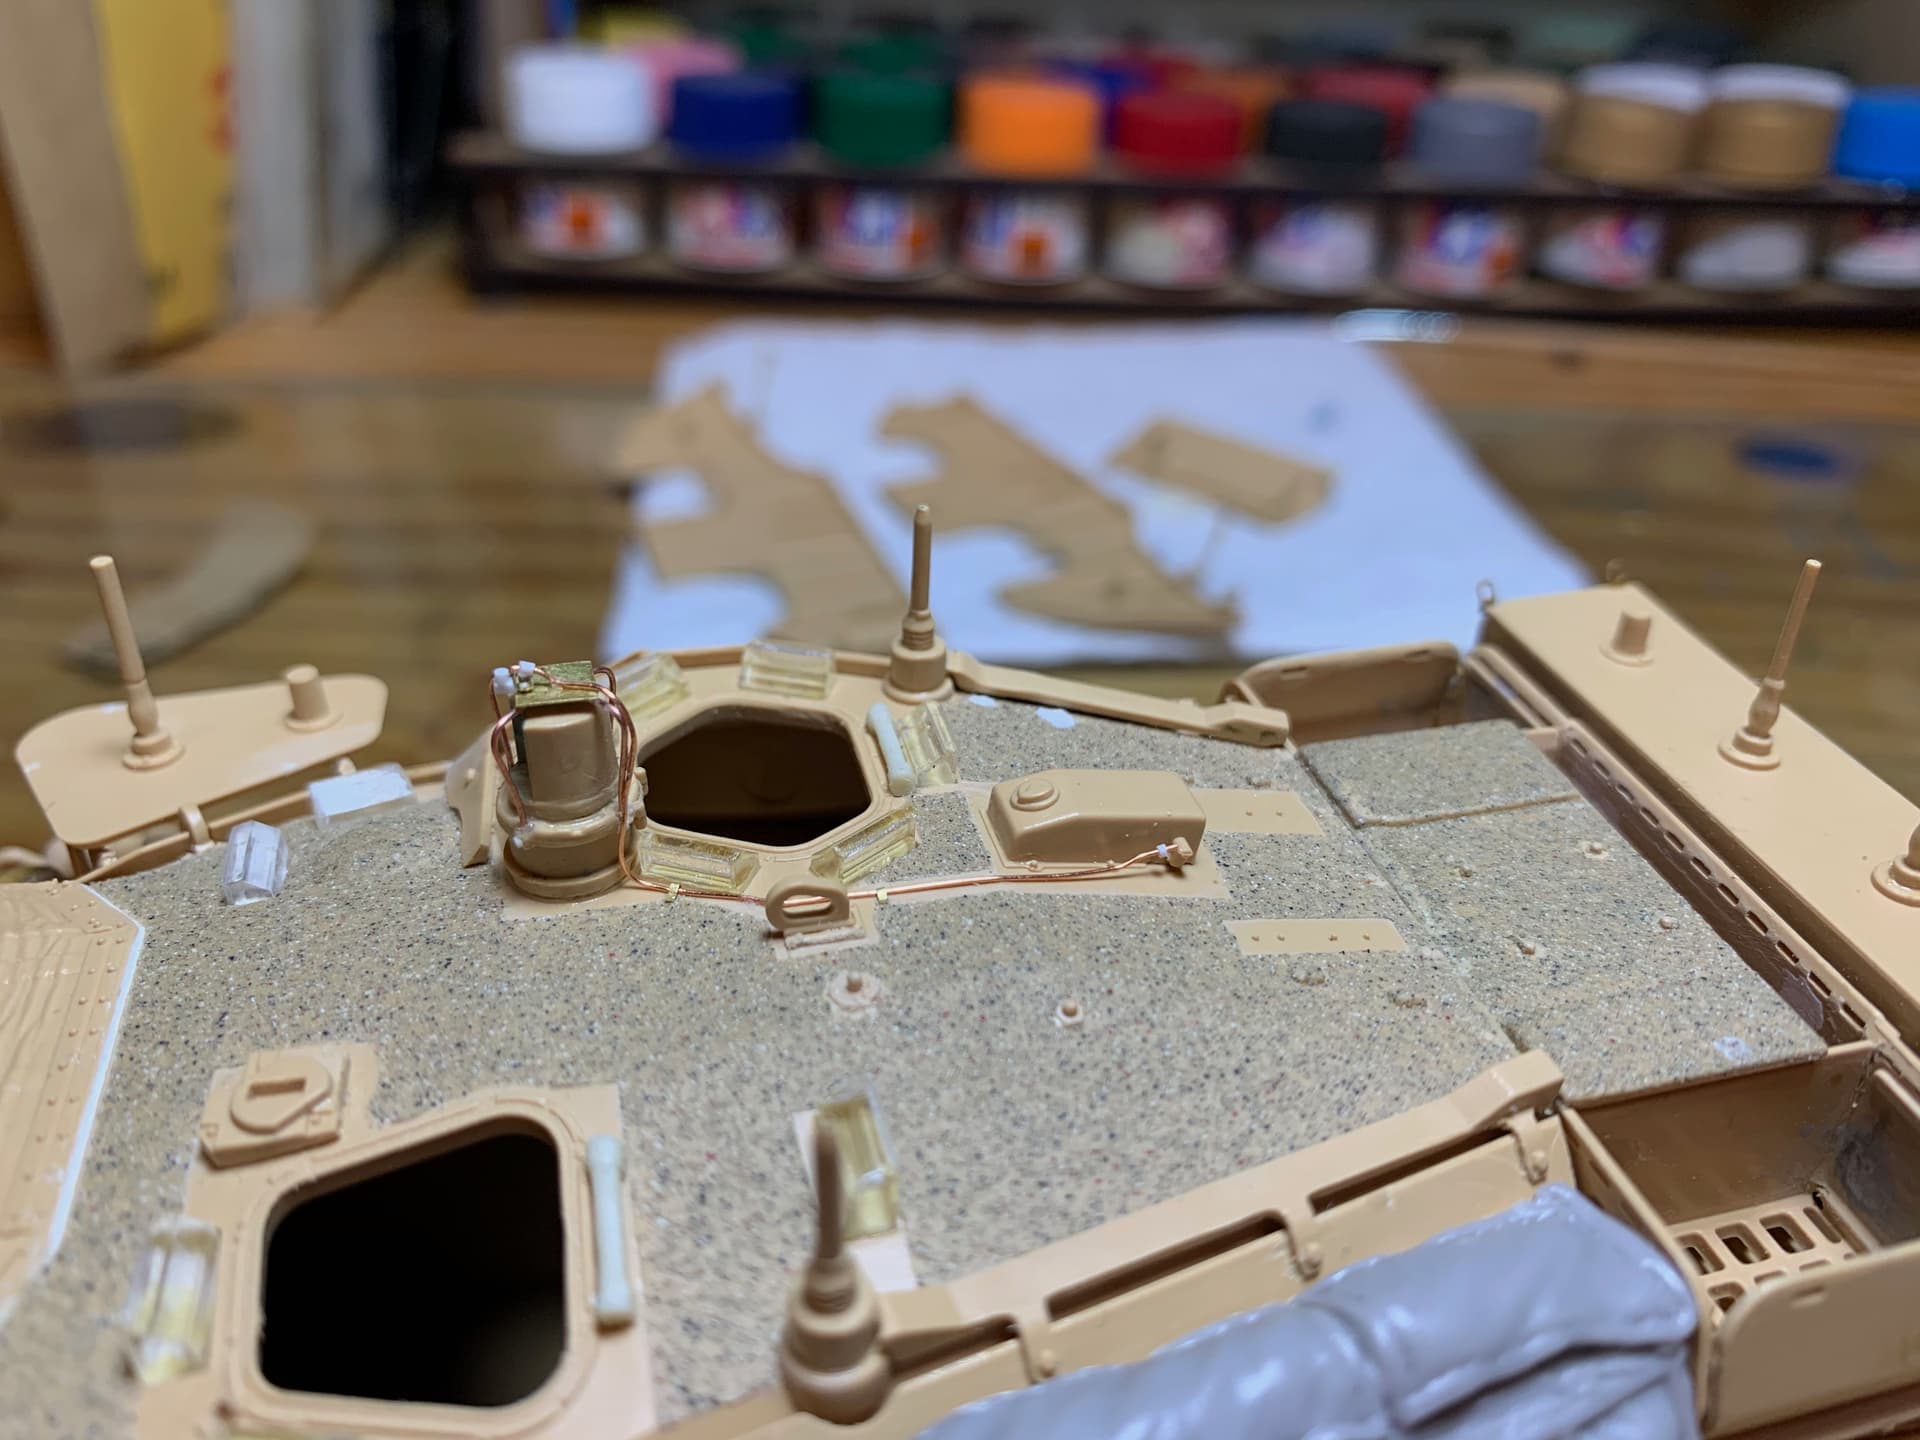
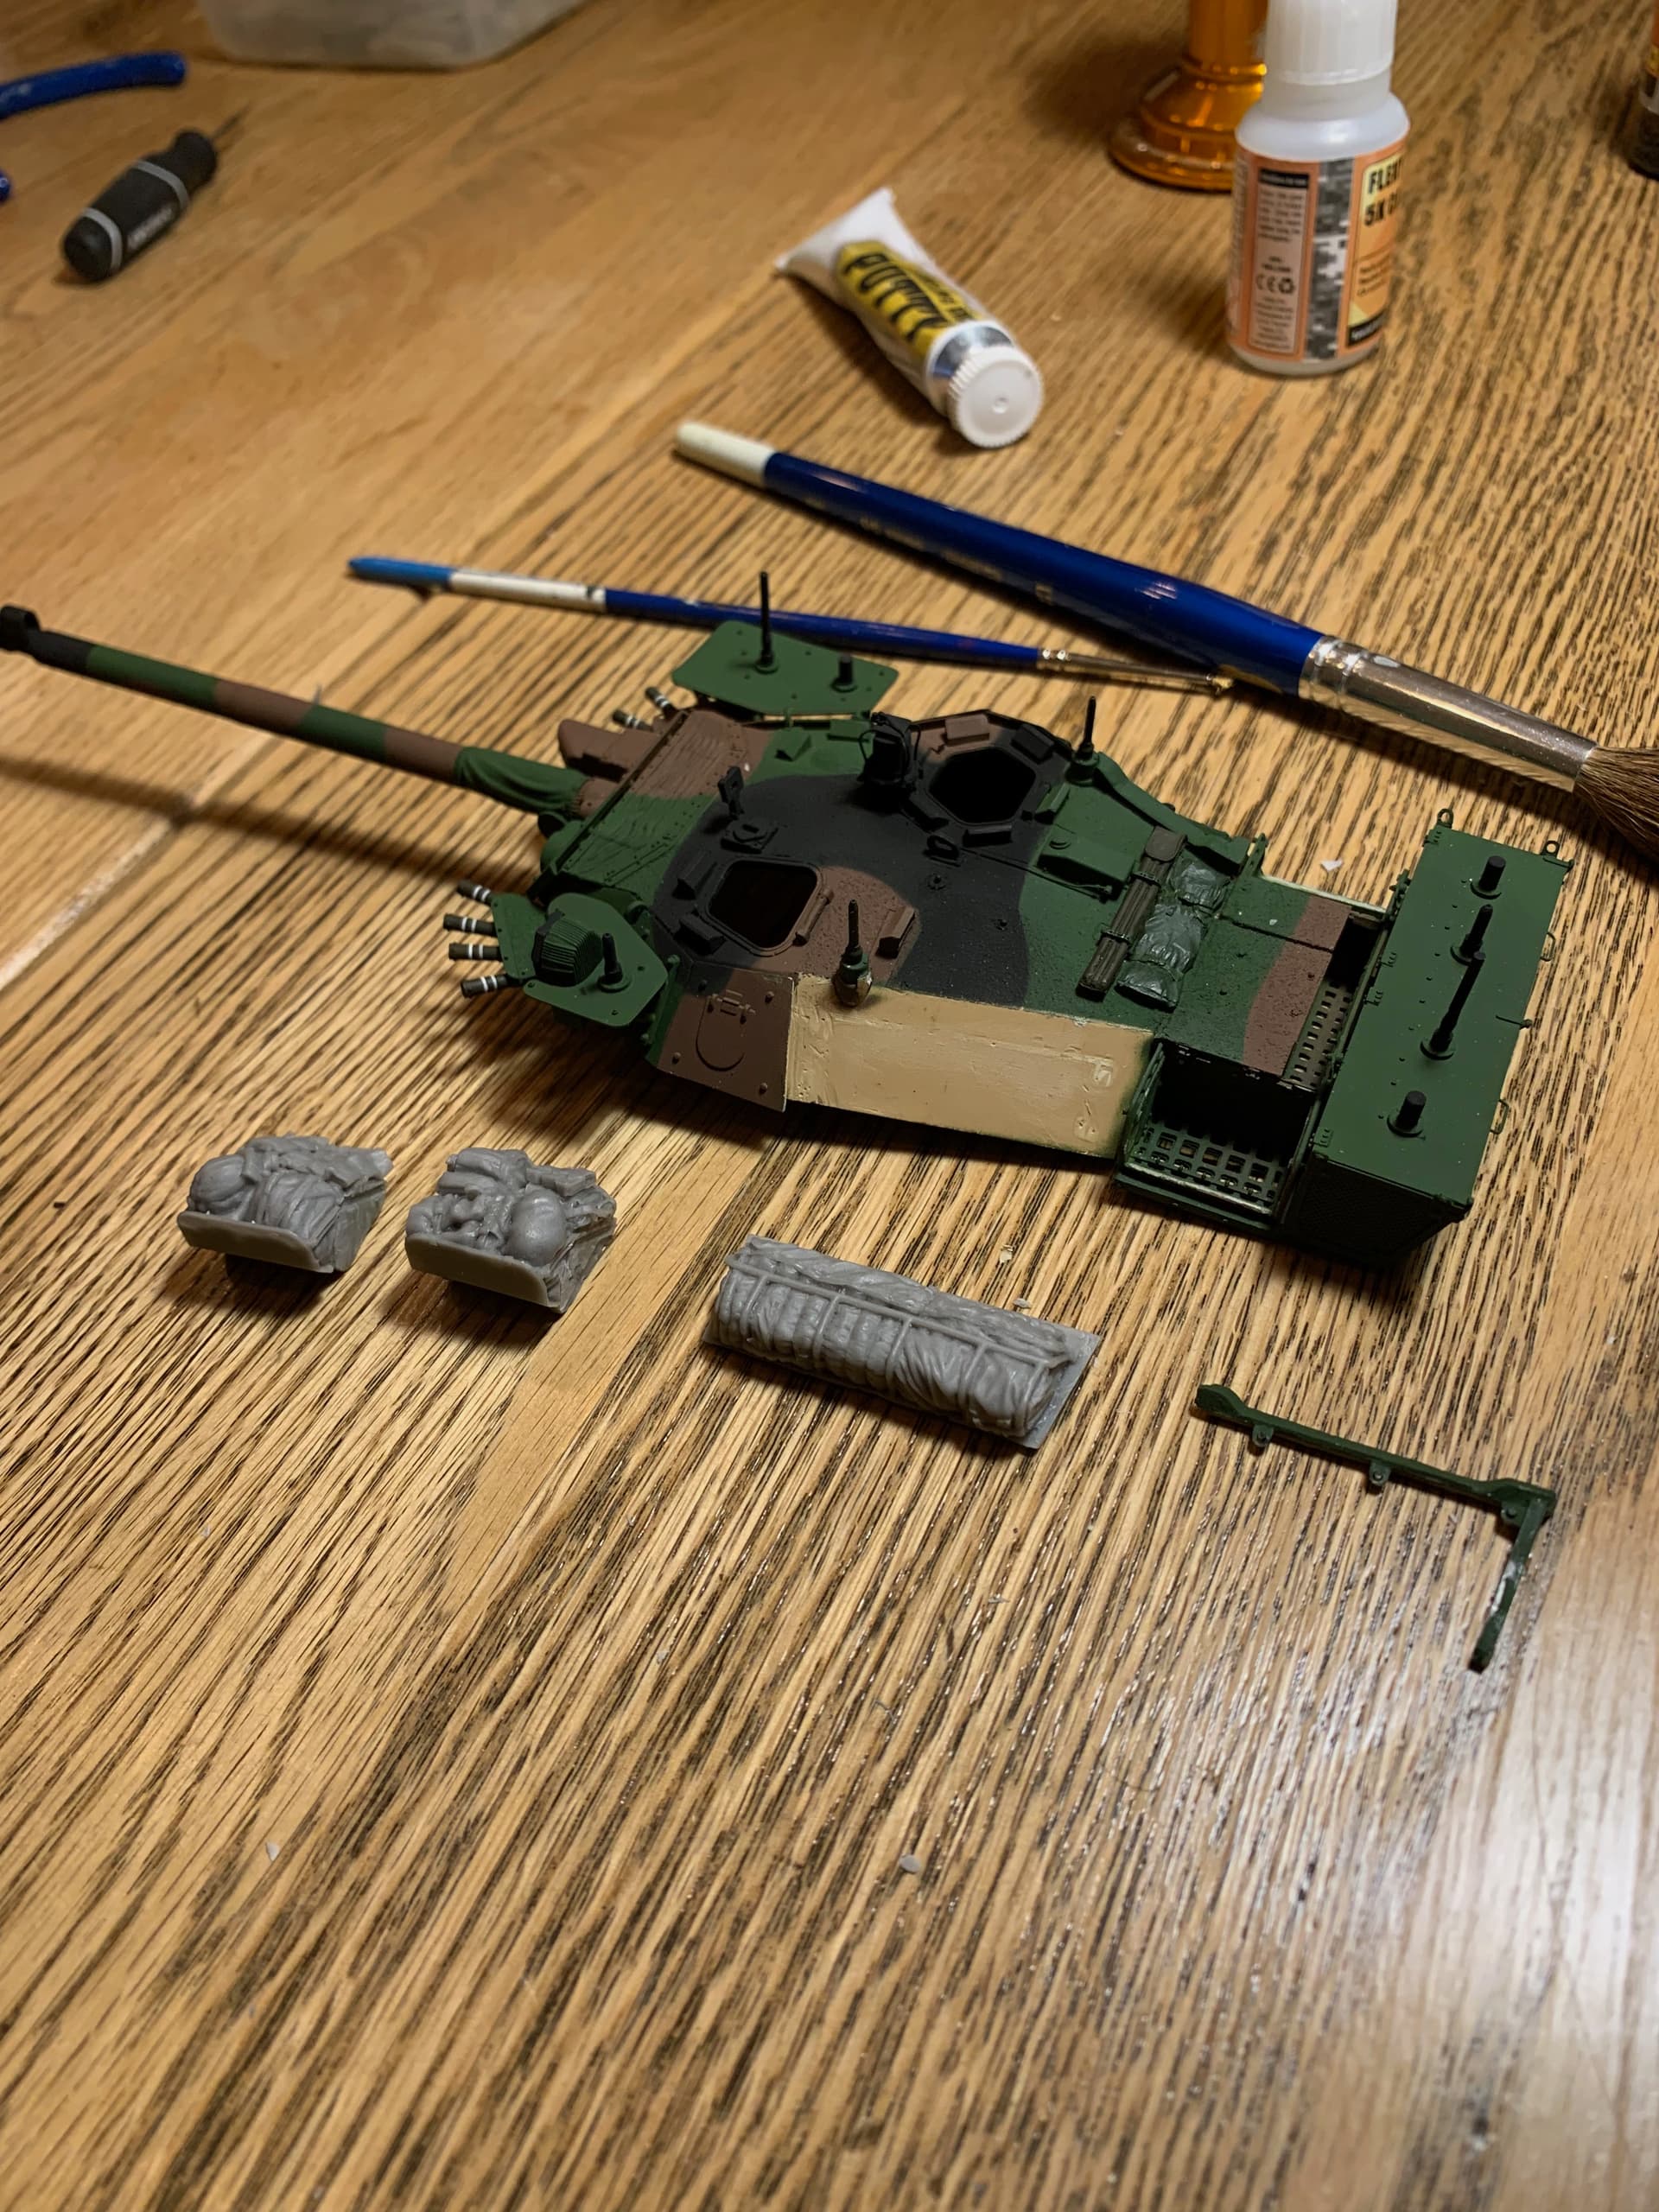
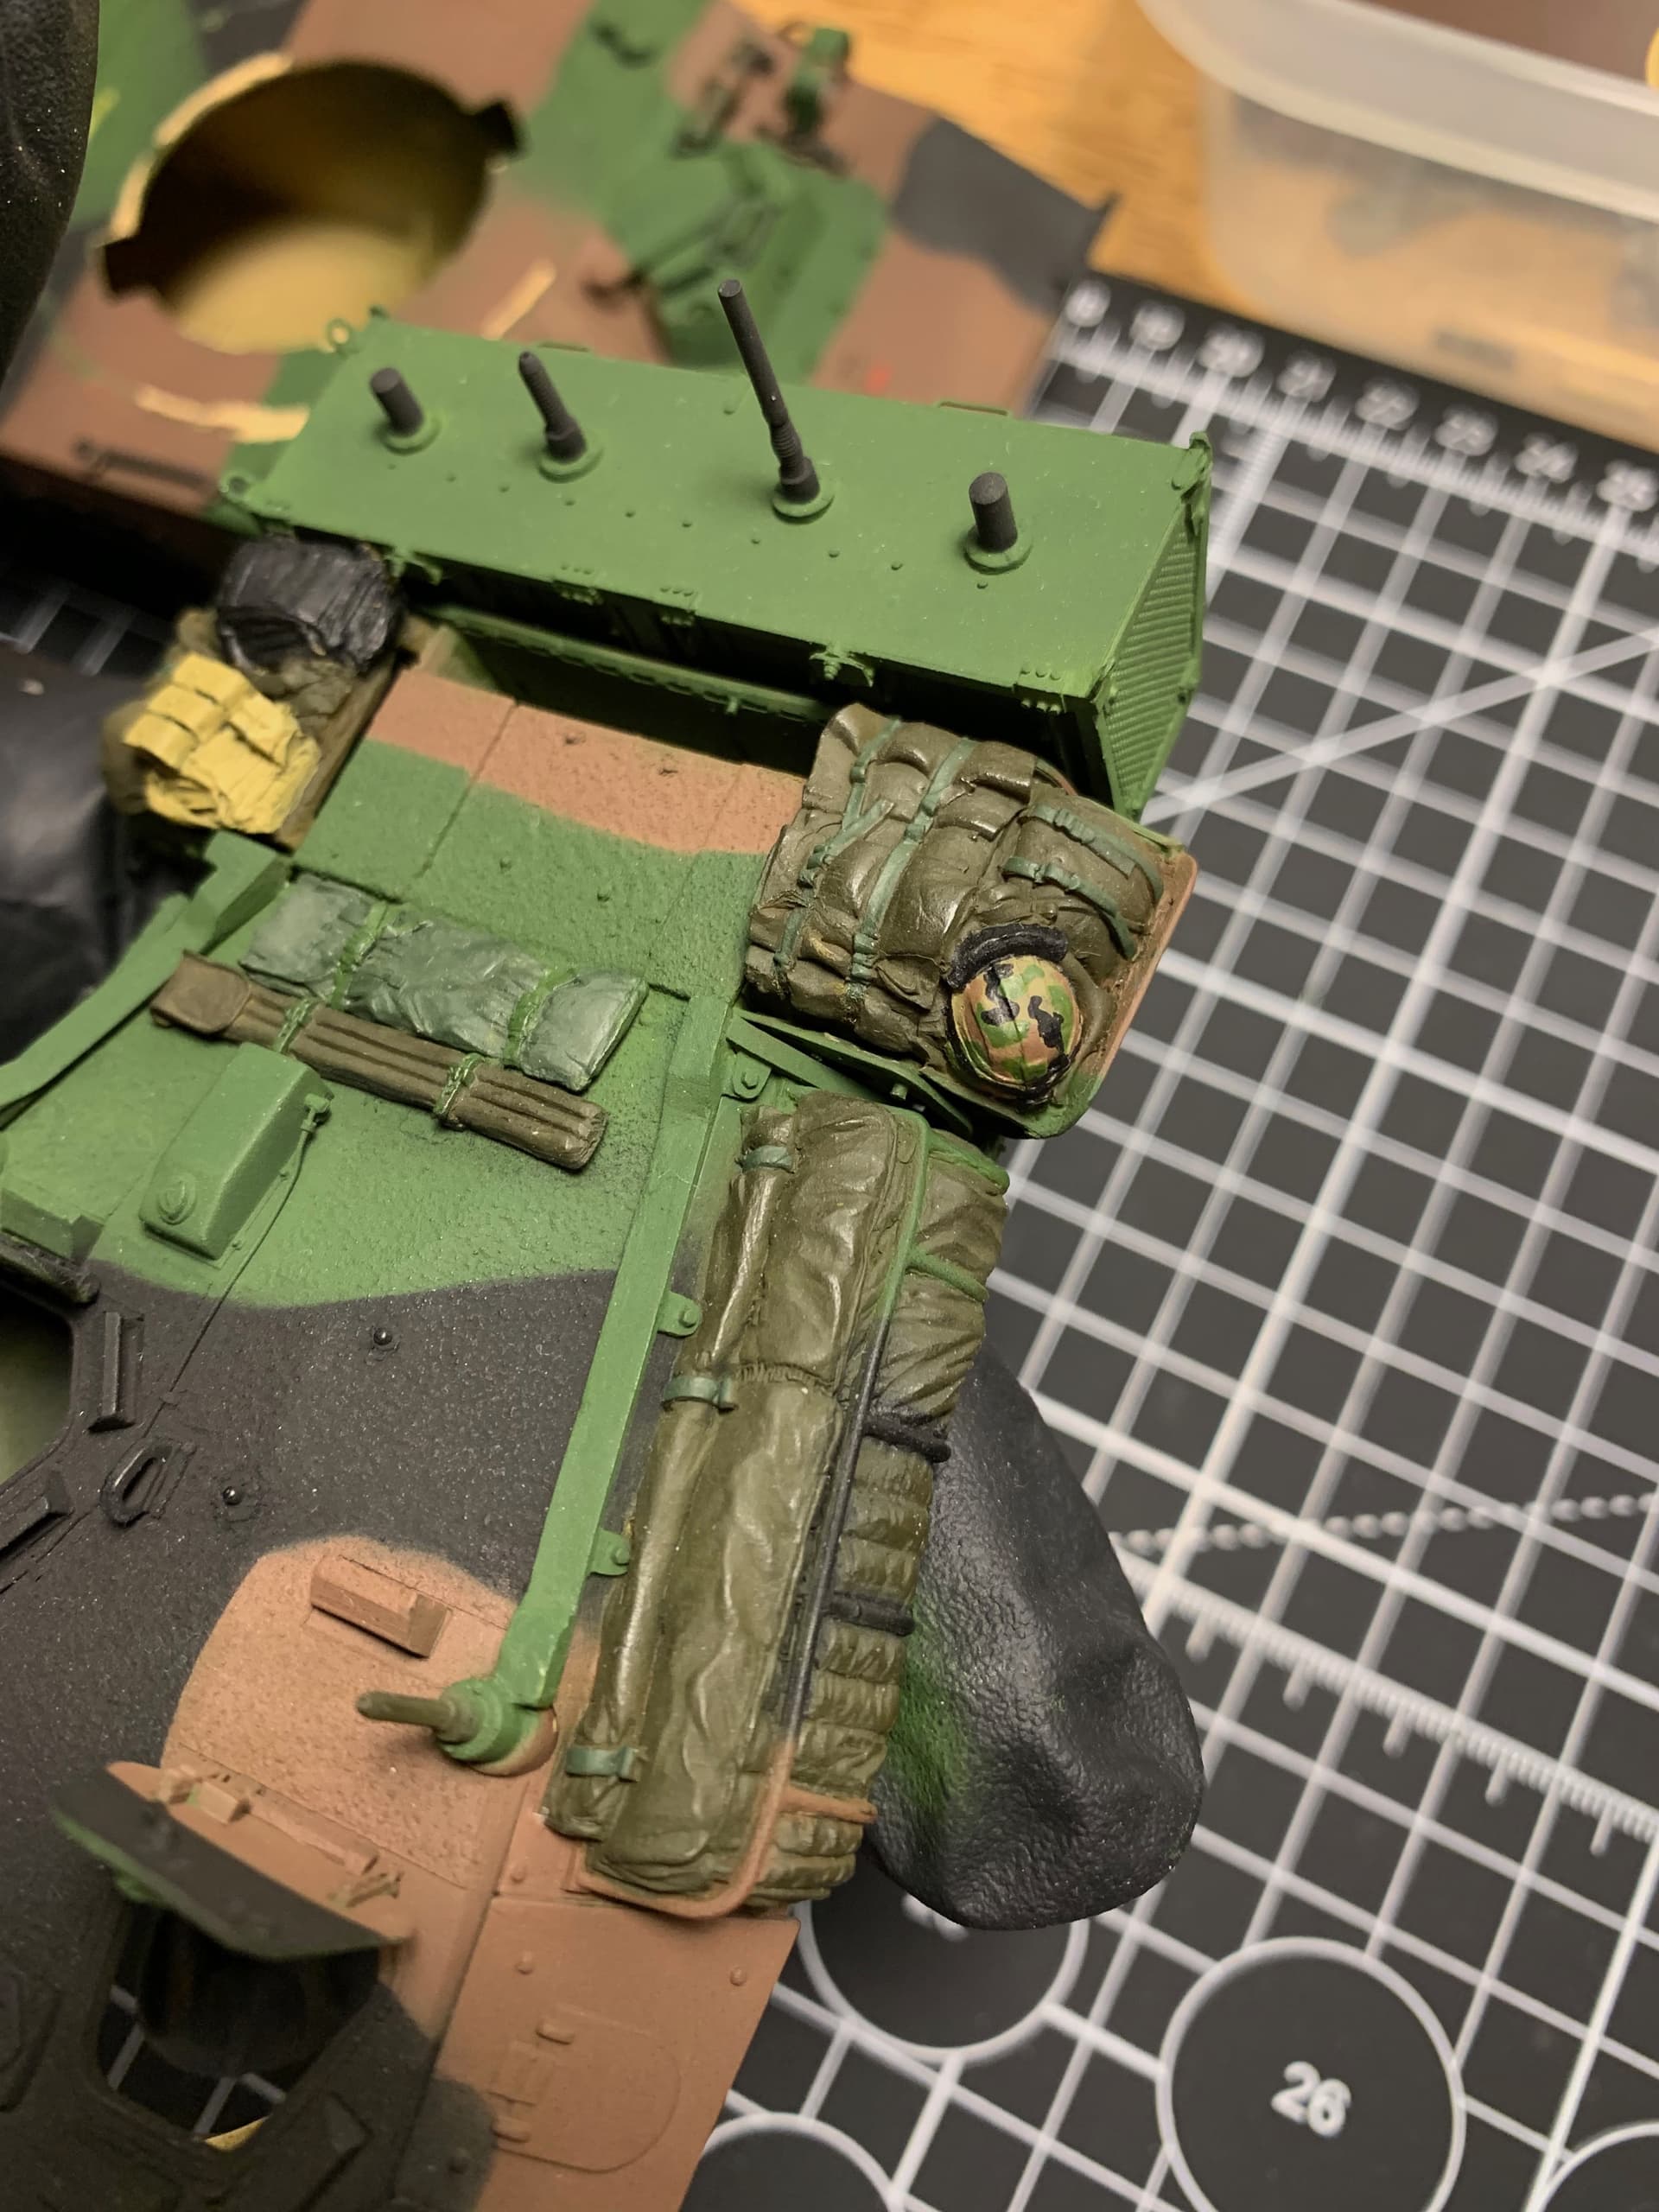
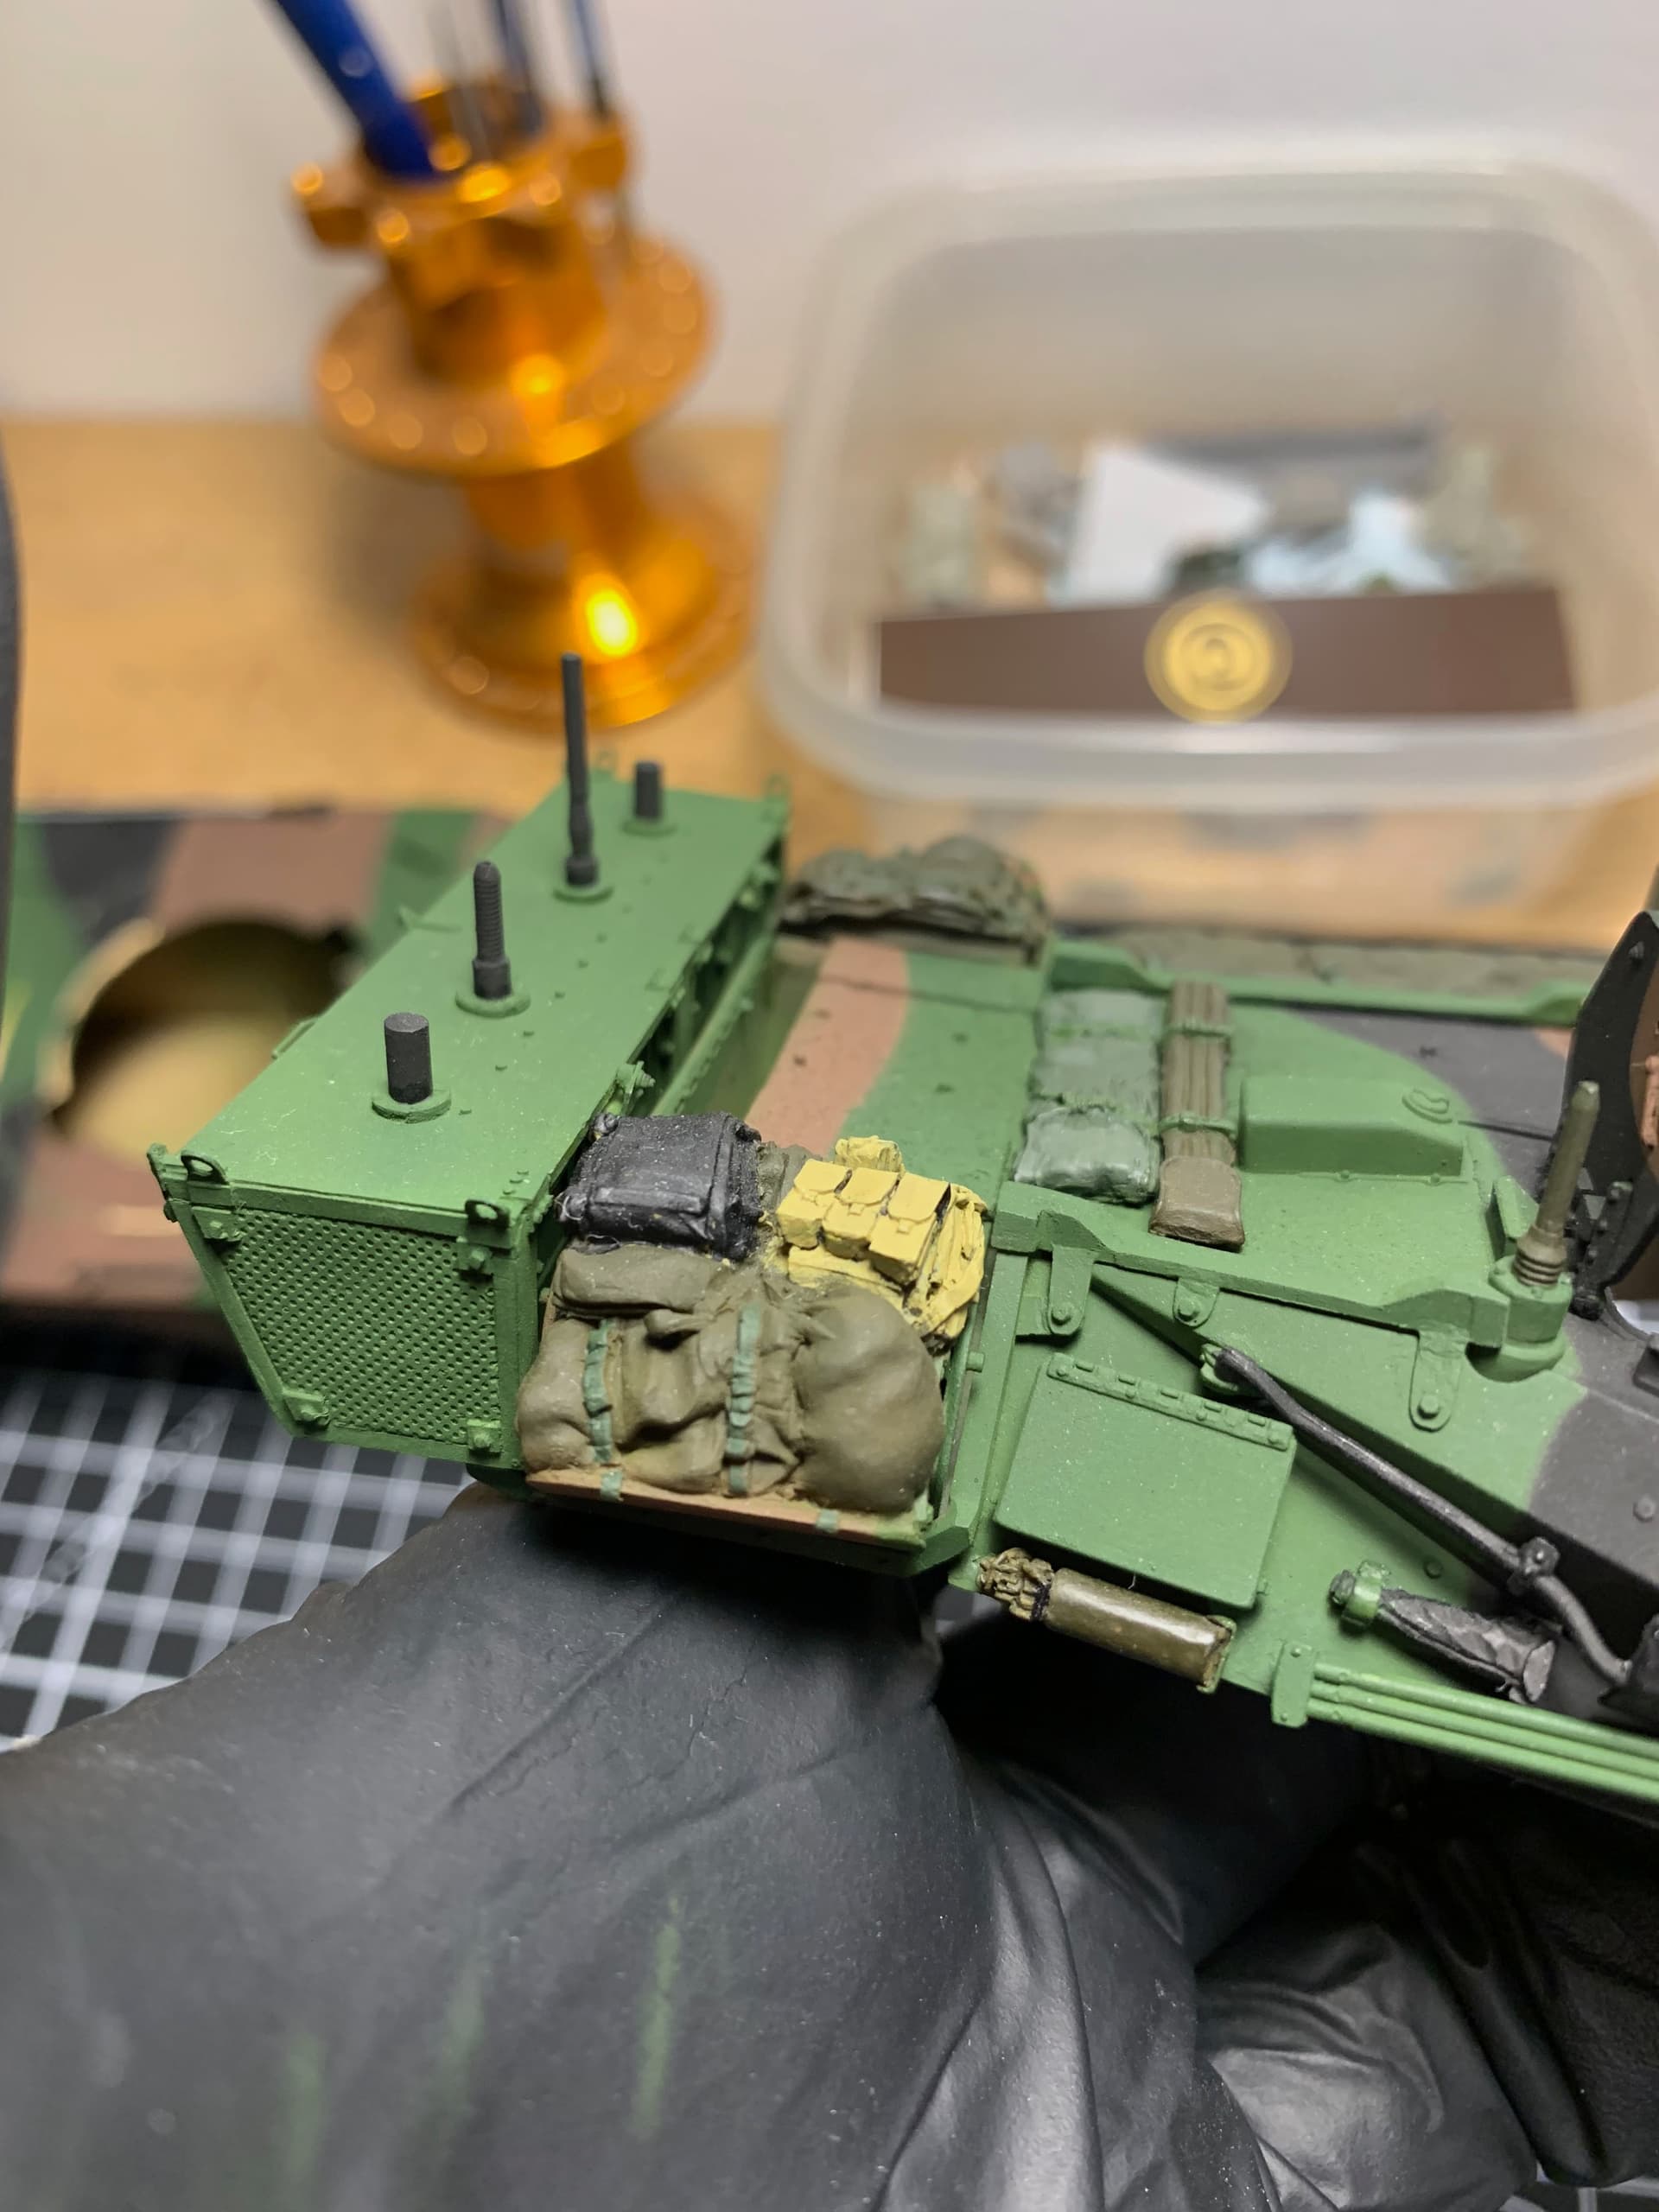
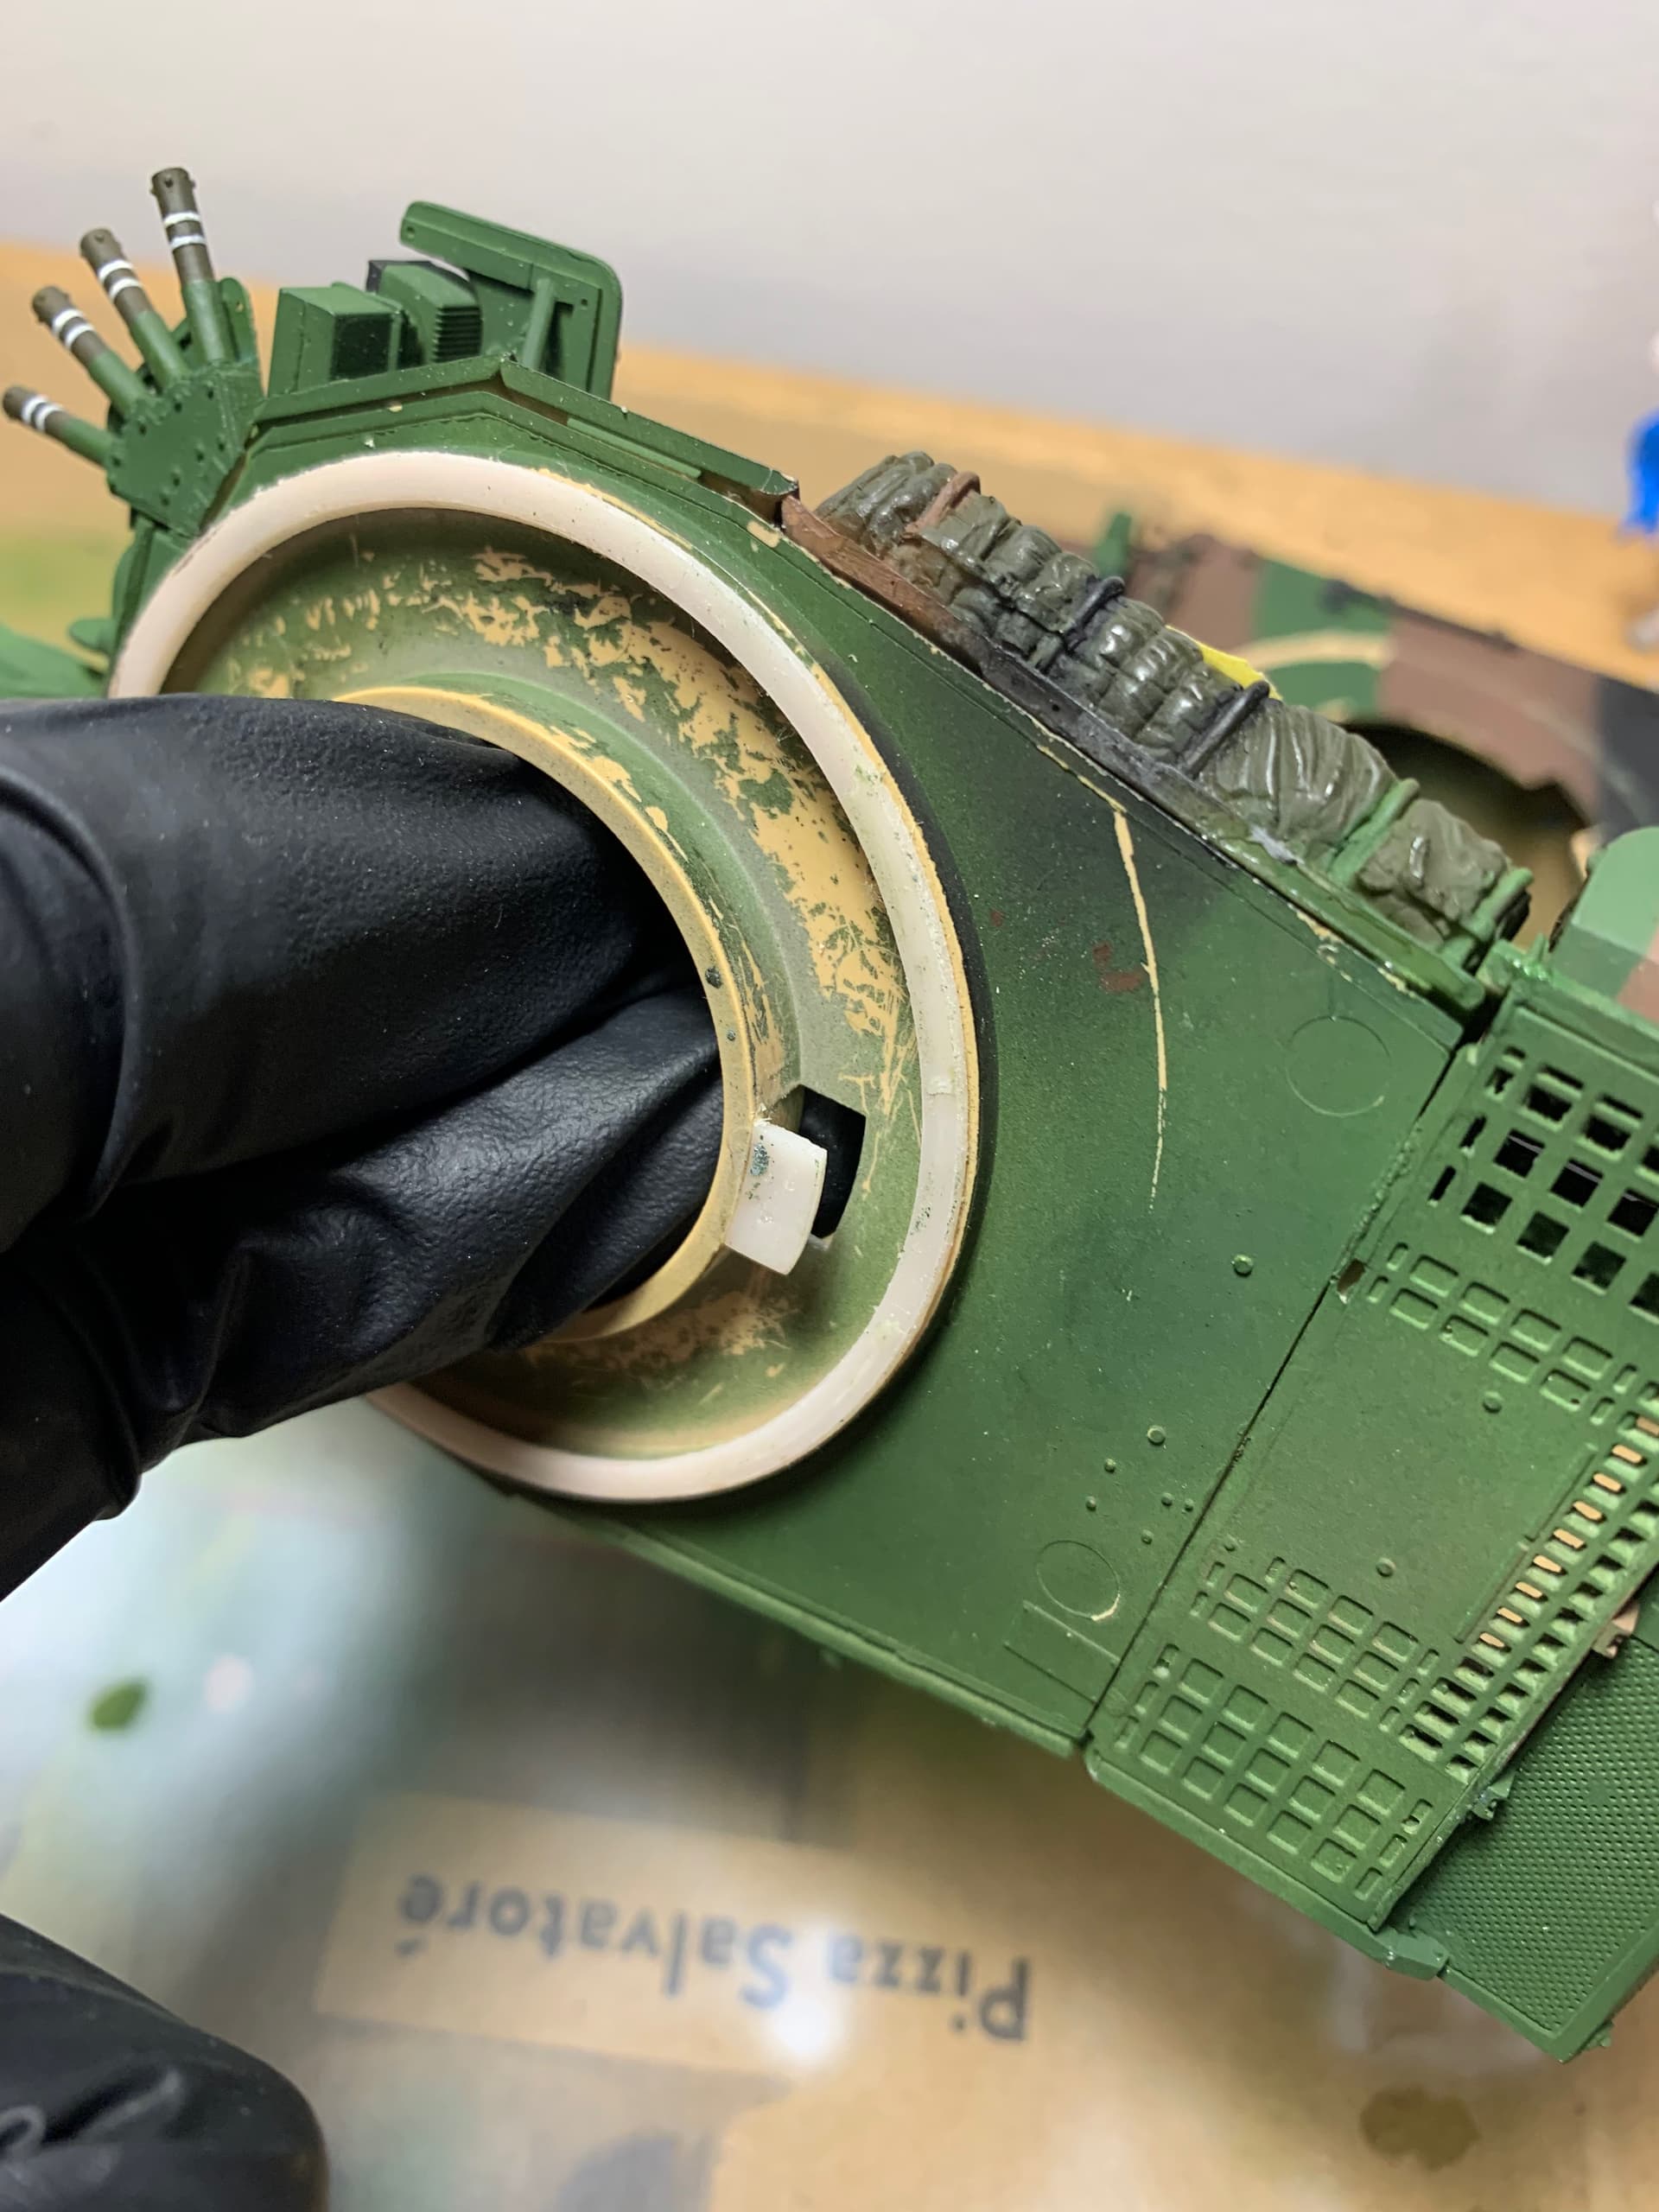
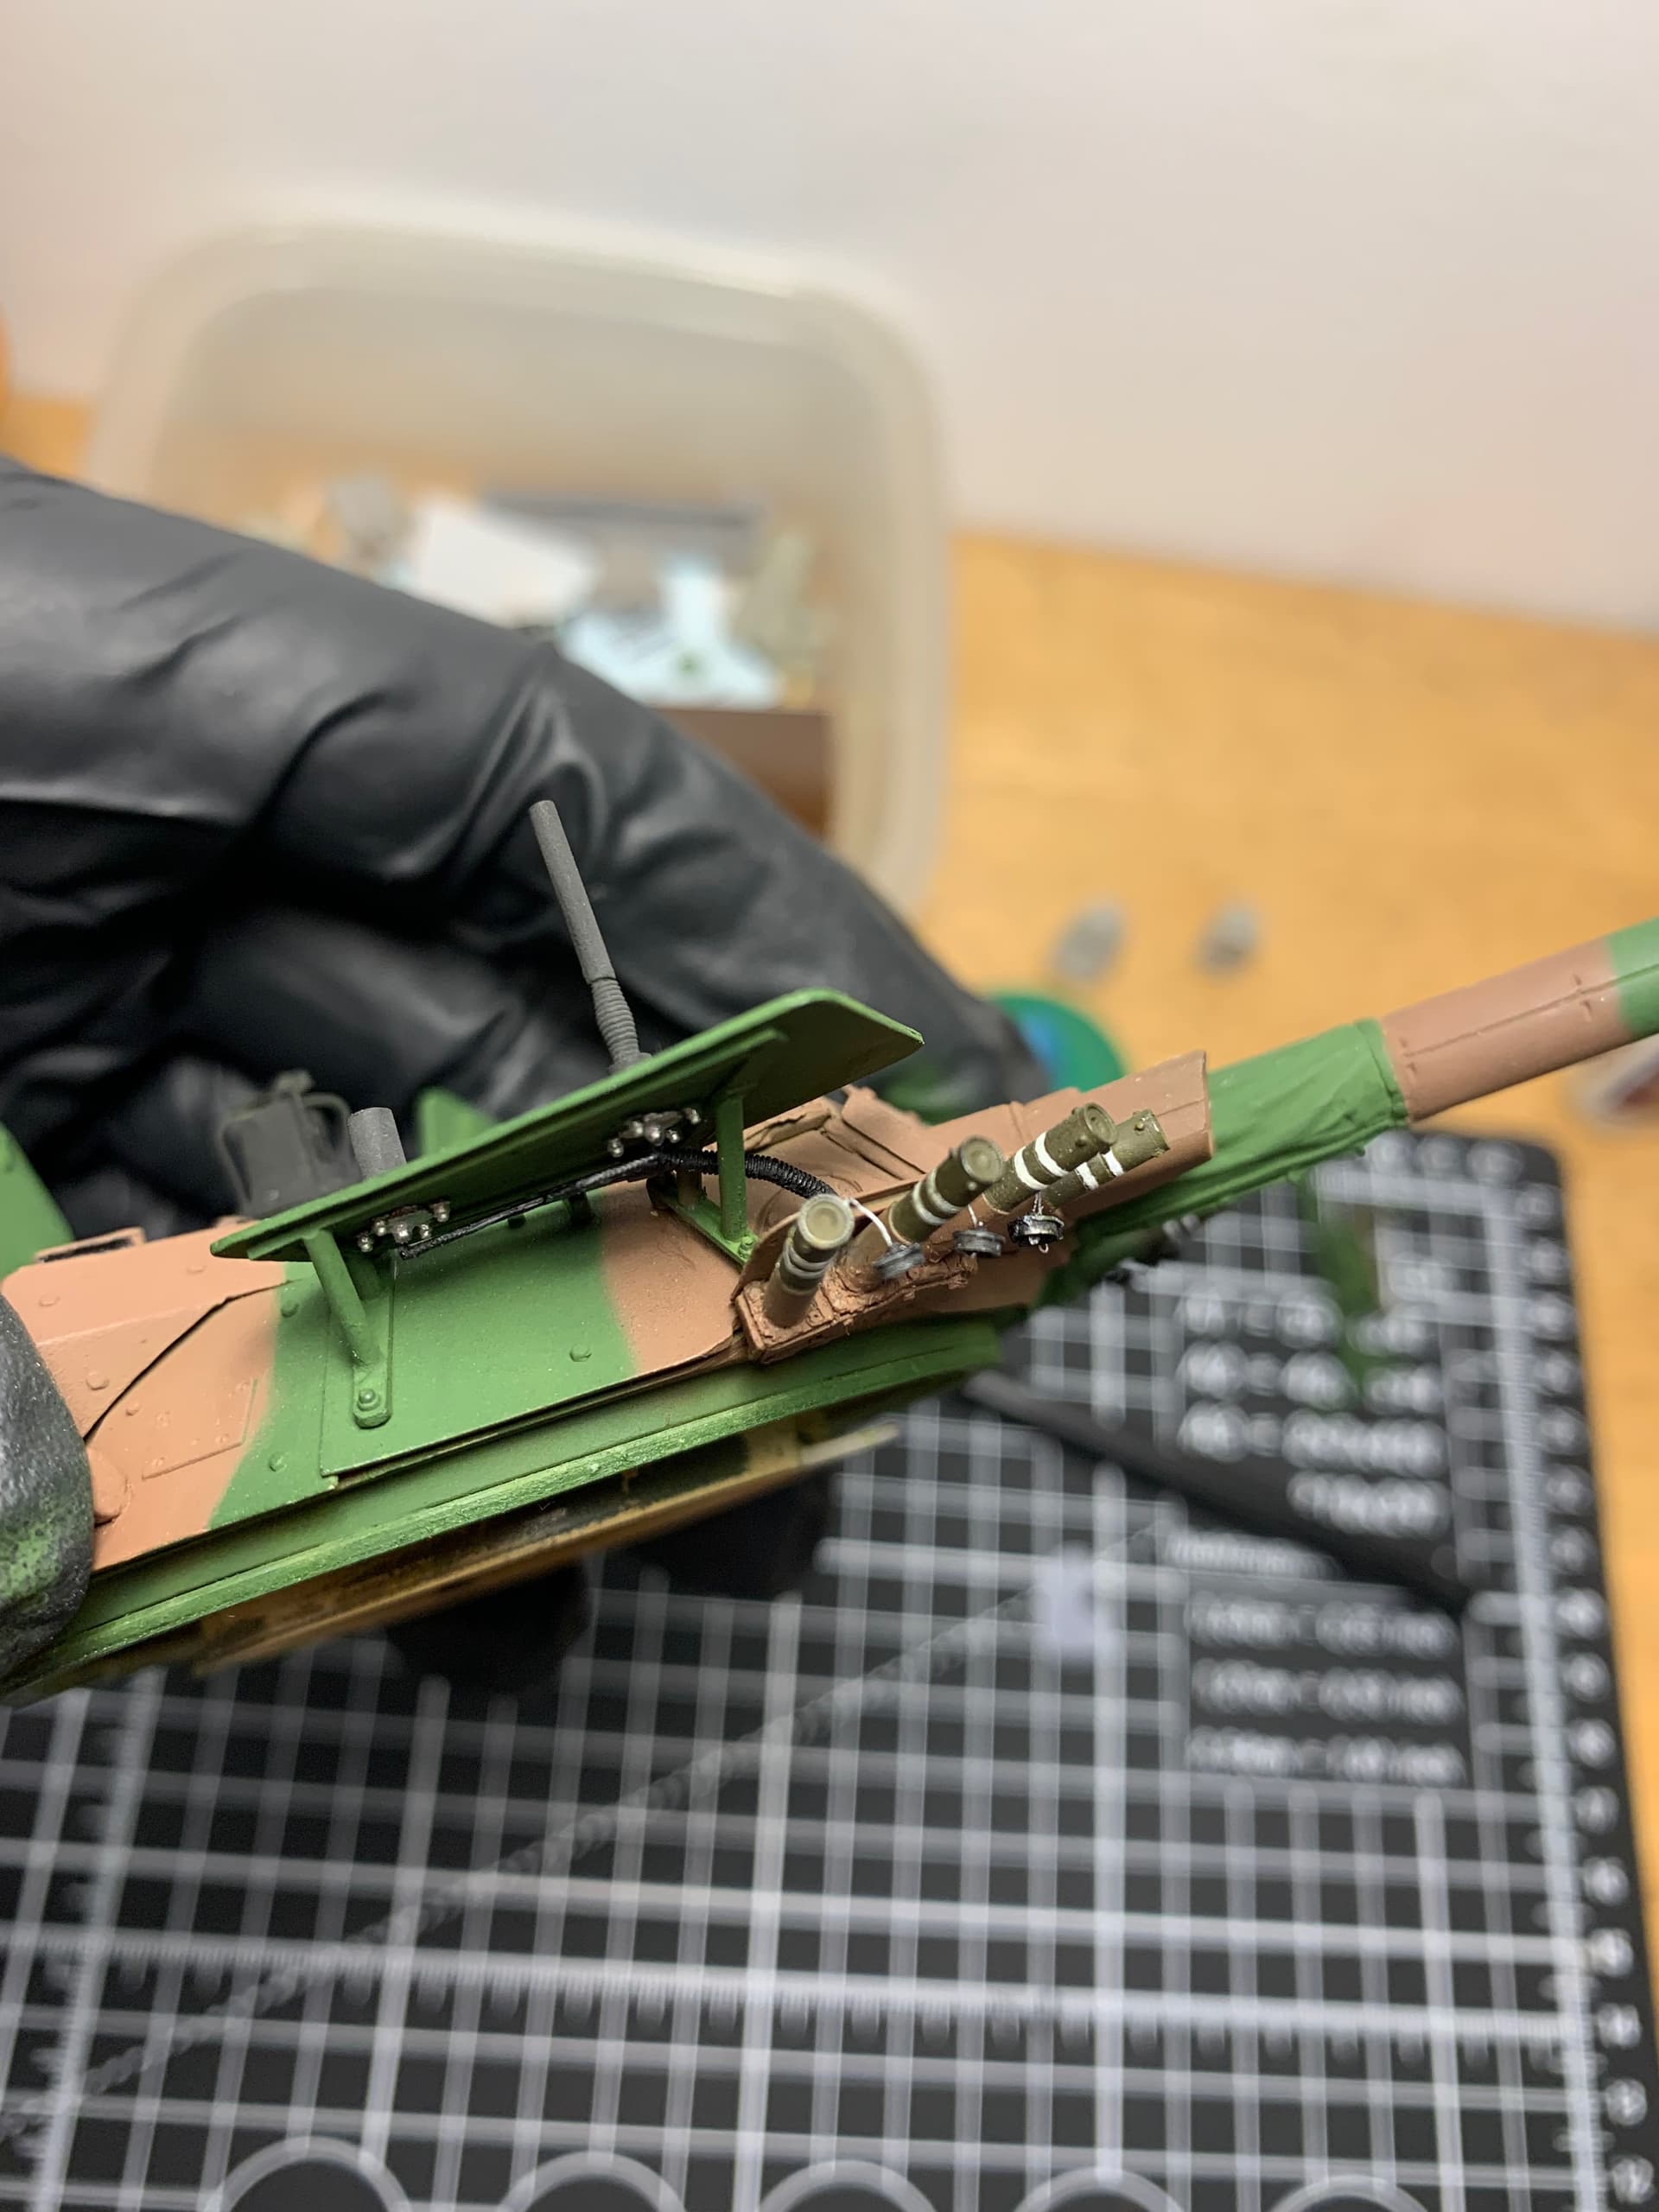
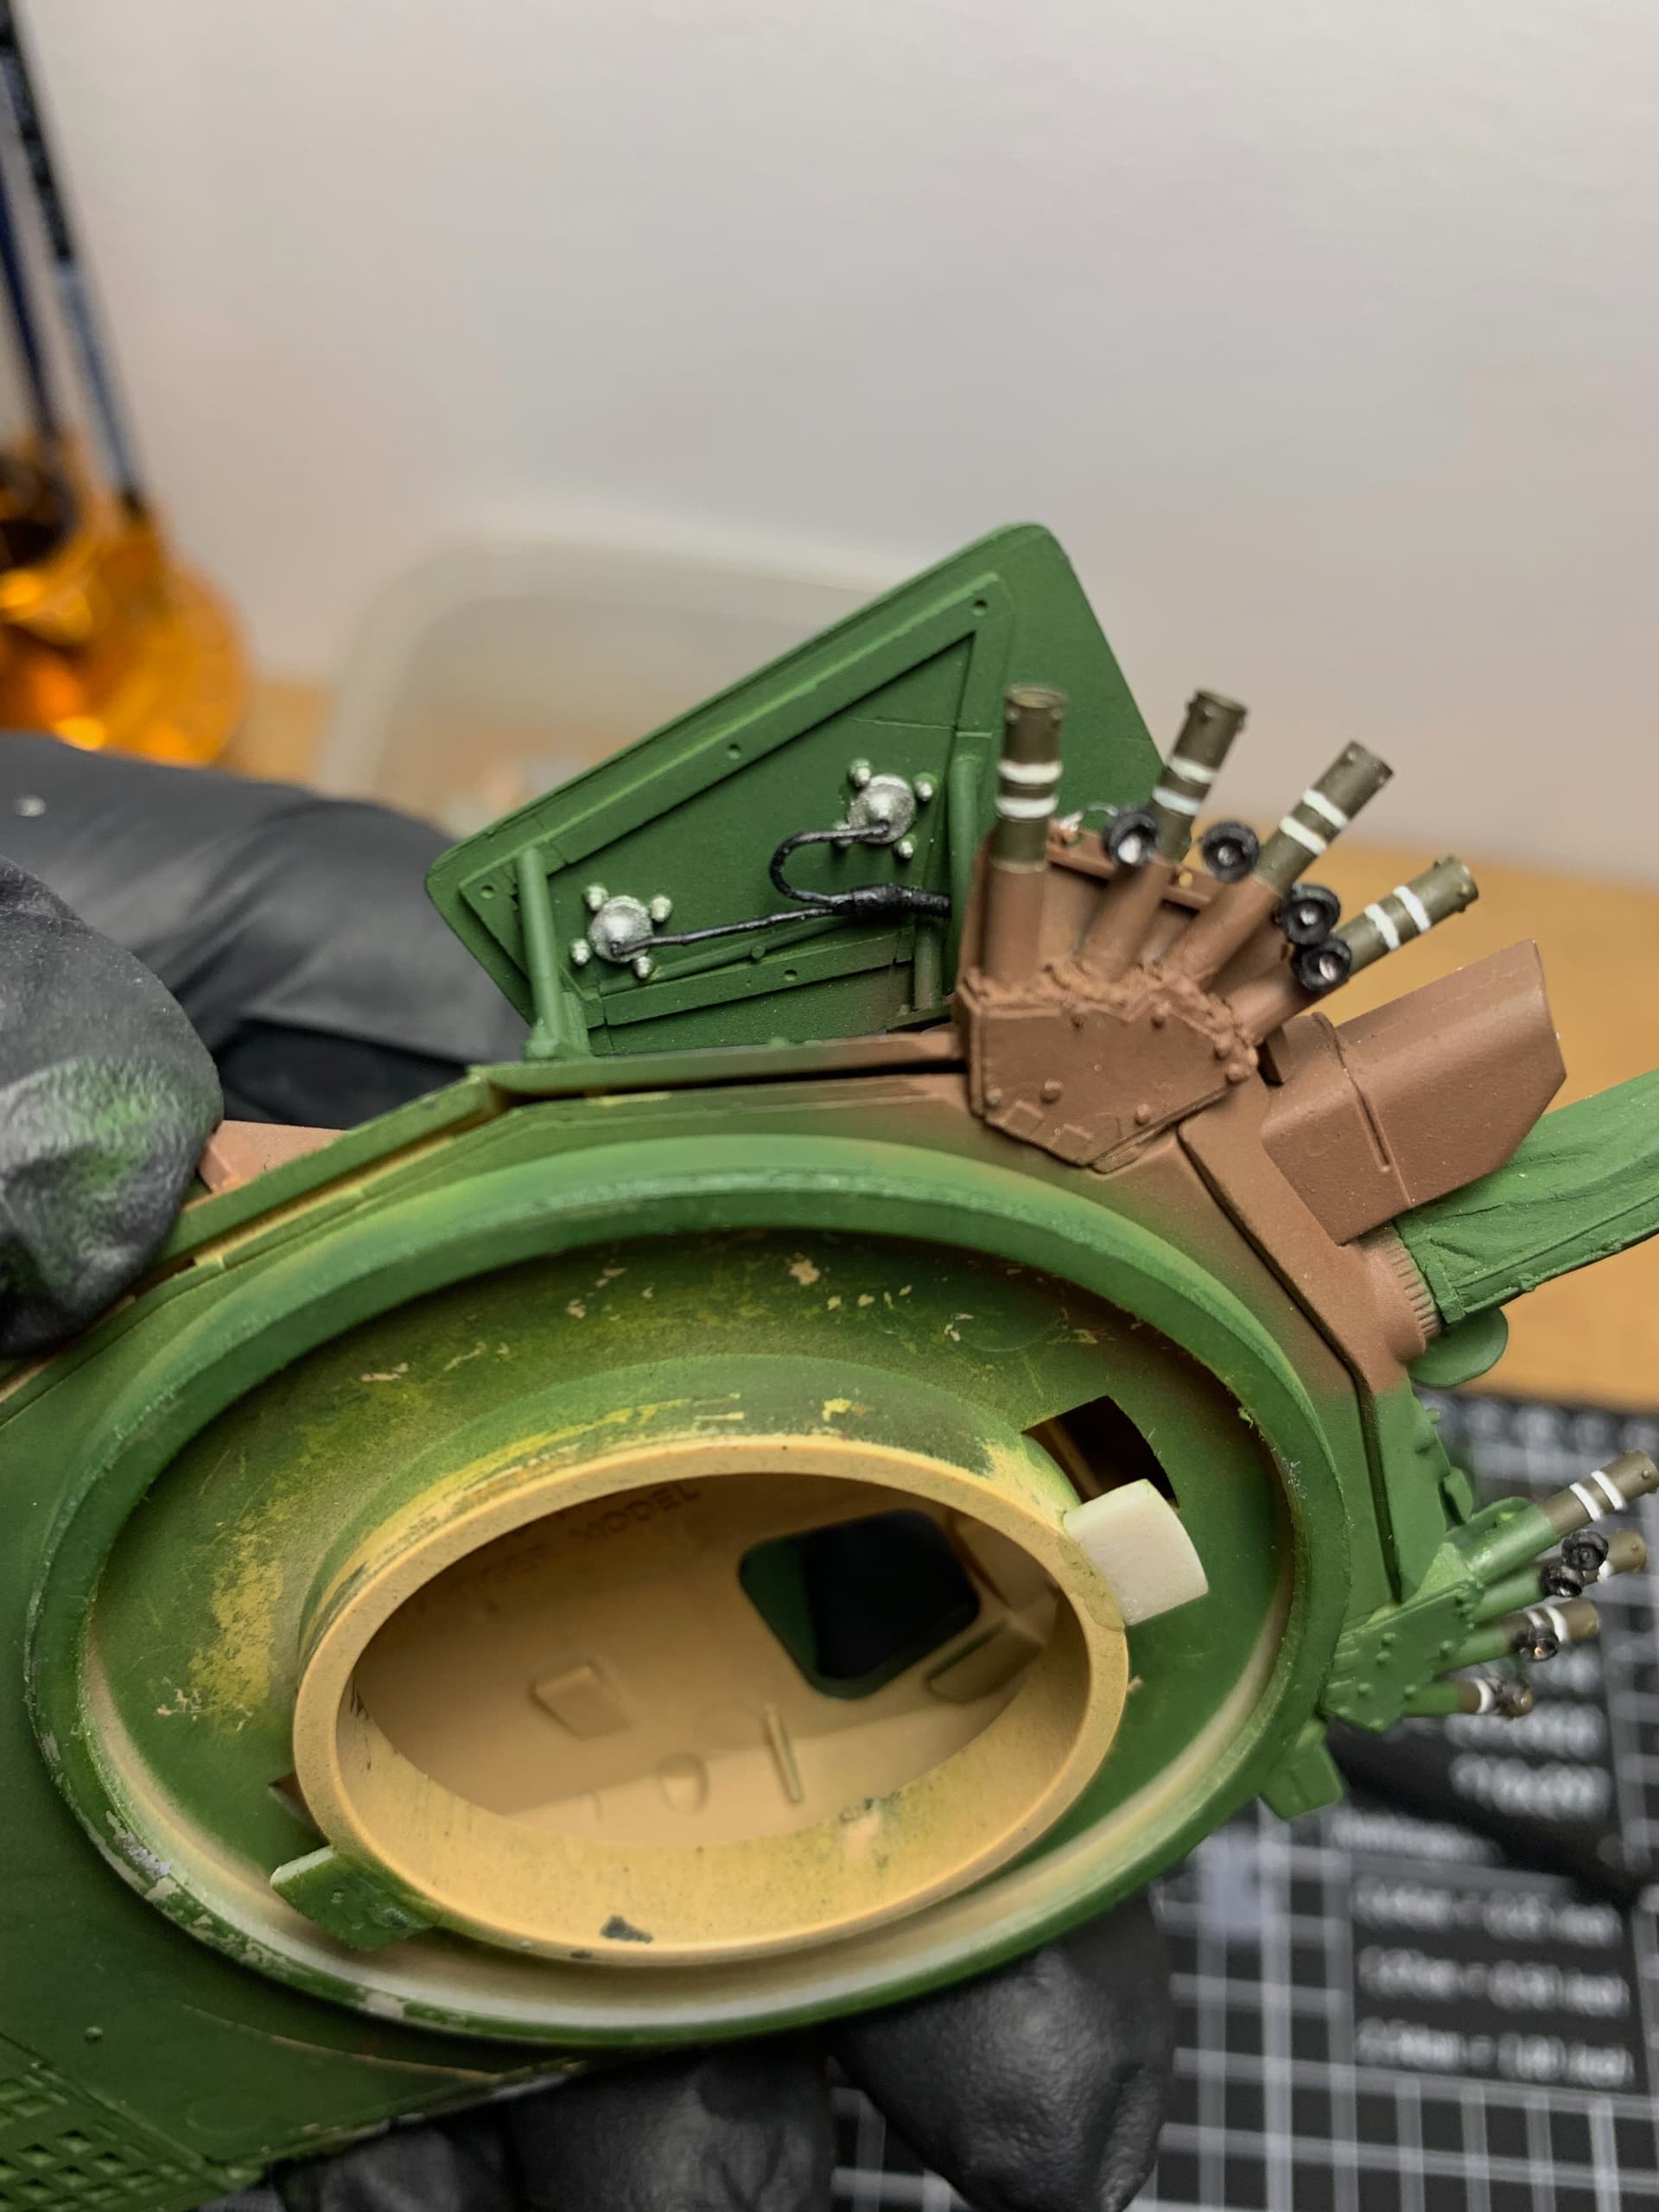
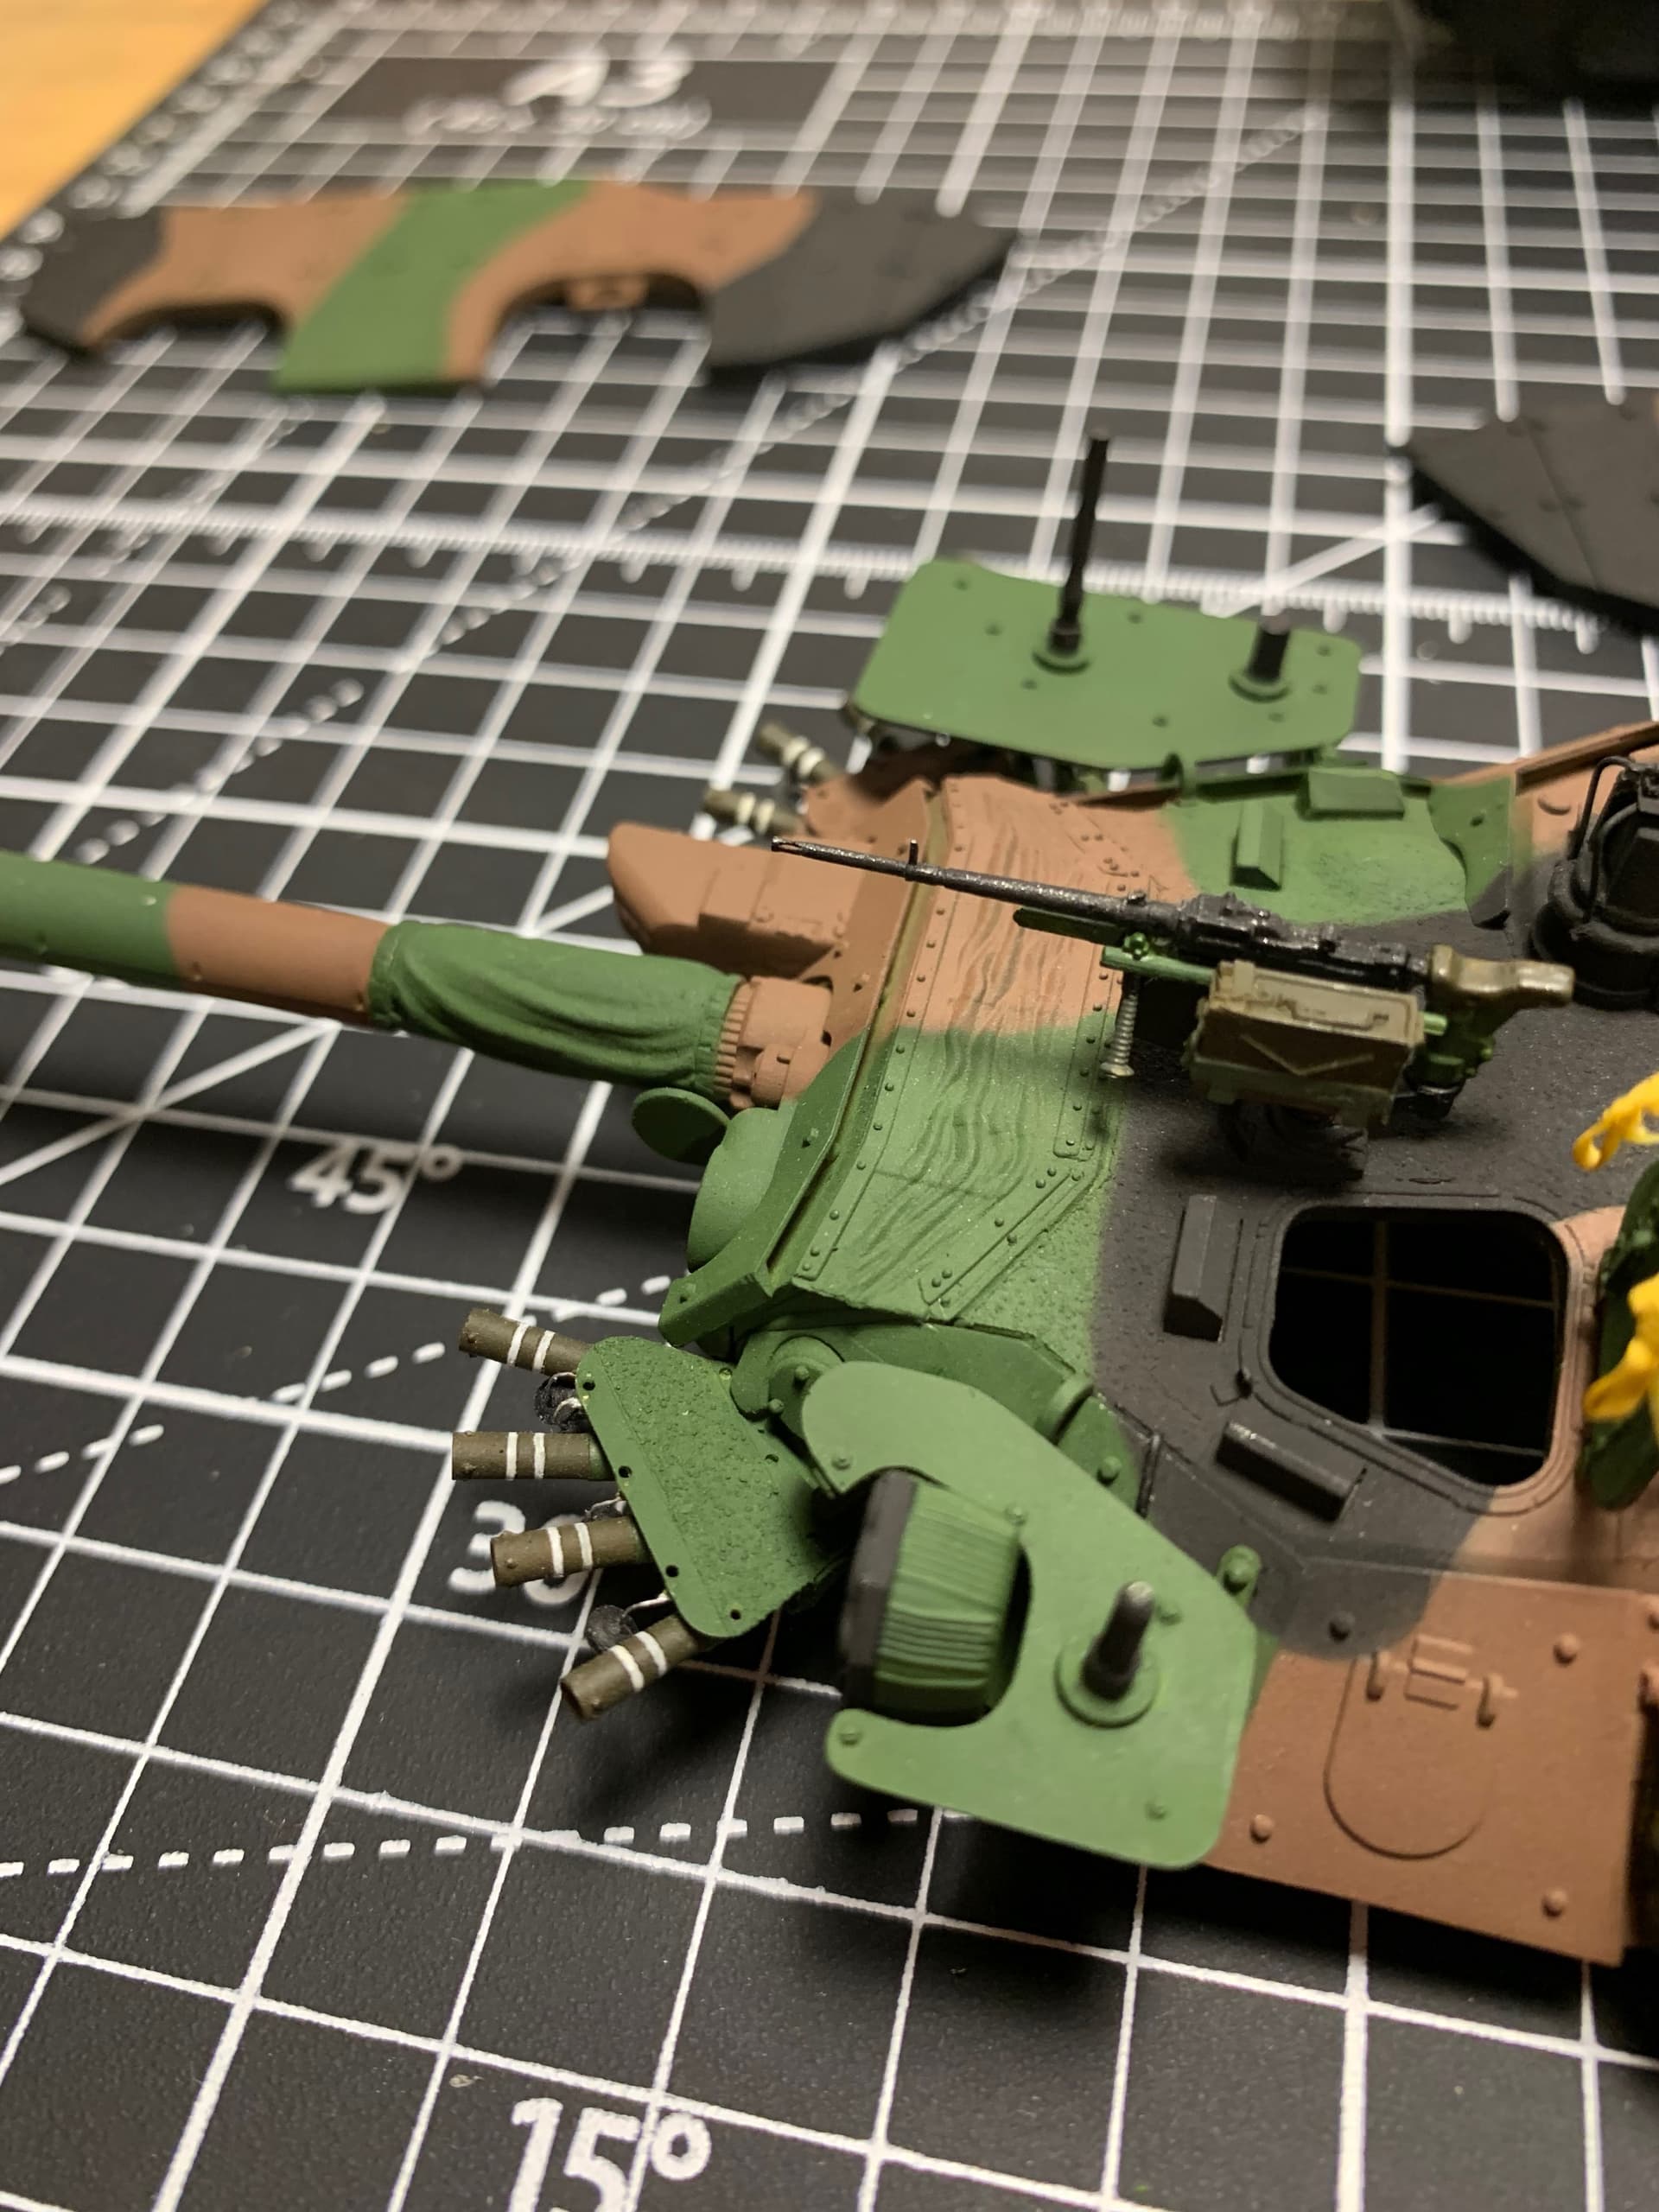
Work was done mainly on the turret. I decided to remove black dog’s turret stowage with the one from blast models. Given the state of the project it was a delicate attempt to retrofit the parts and mate them with kmt’s bustle rack. There was a lot of tools and what not to glue in place after painting and it was a chore. Some touch ups were needed frequently. I made the mistake to paint the turret well; when it was installed on the hull, the rotation of the turret lifted paint beyond what is hidden by the turret ring. I had to sand and repaint, doing my best to leave no scars visible. Galix smoke grenades made by blast models had a poor fitment with the launchers, leaving visible gaps. I had to apply a generous amount of CA glue to make the parts hold in place properly. Not pretty, but it won’t be visible.
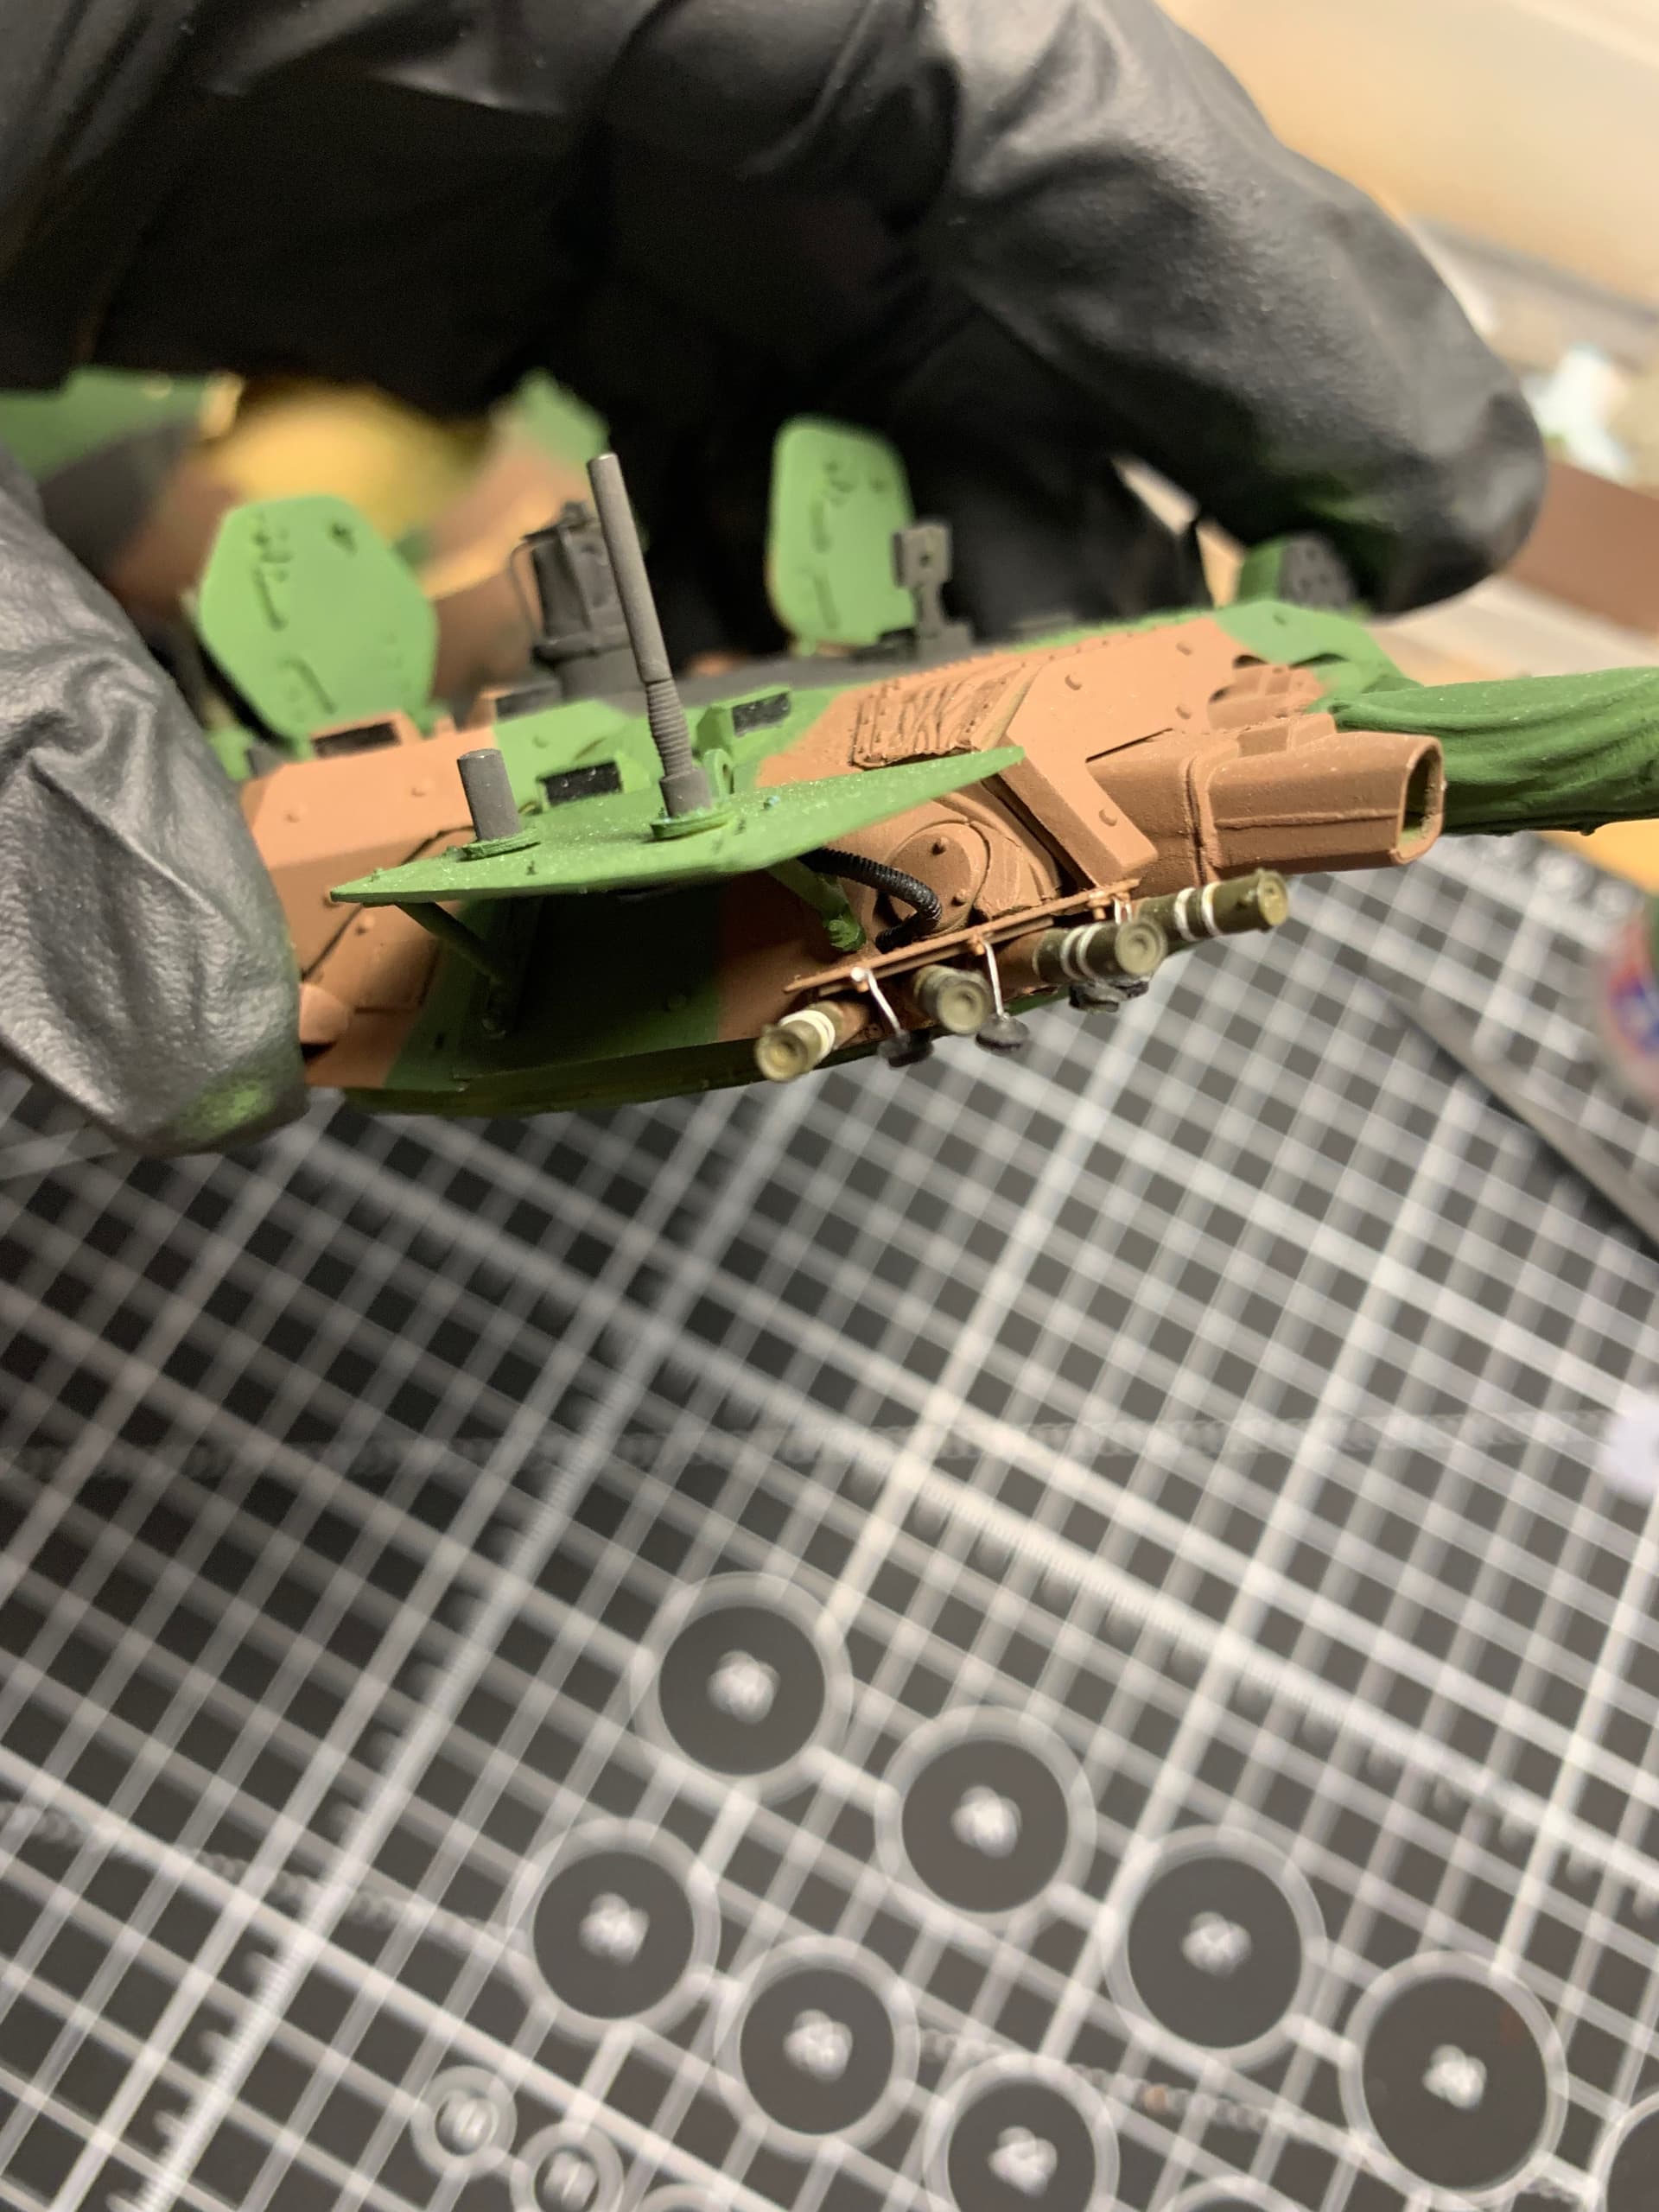
I added a 3d printed turret ring extension to raise it, as it was rubbing in certain areas of the hull
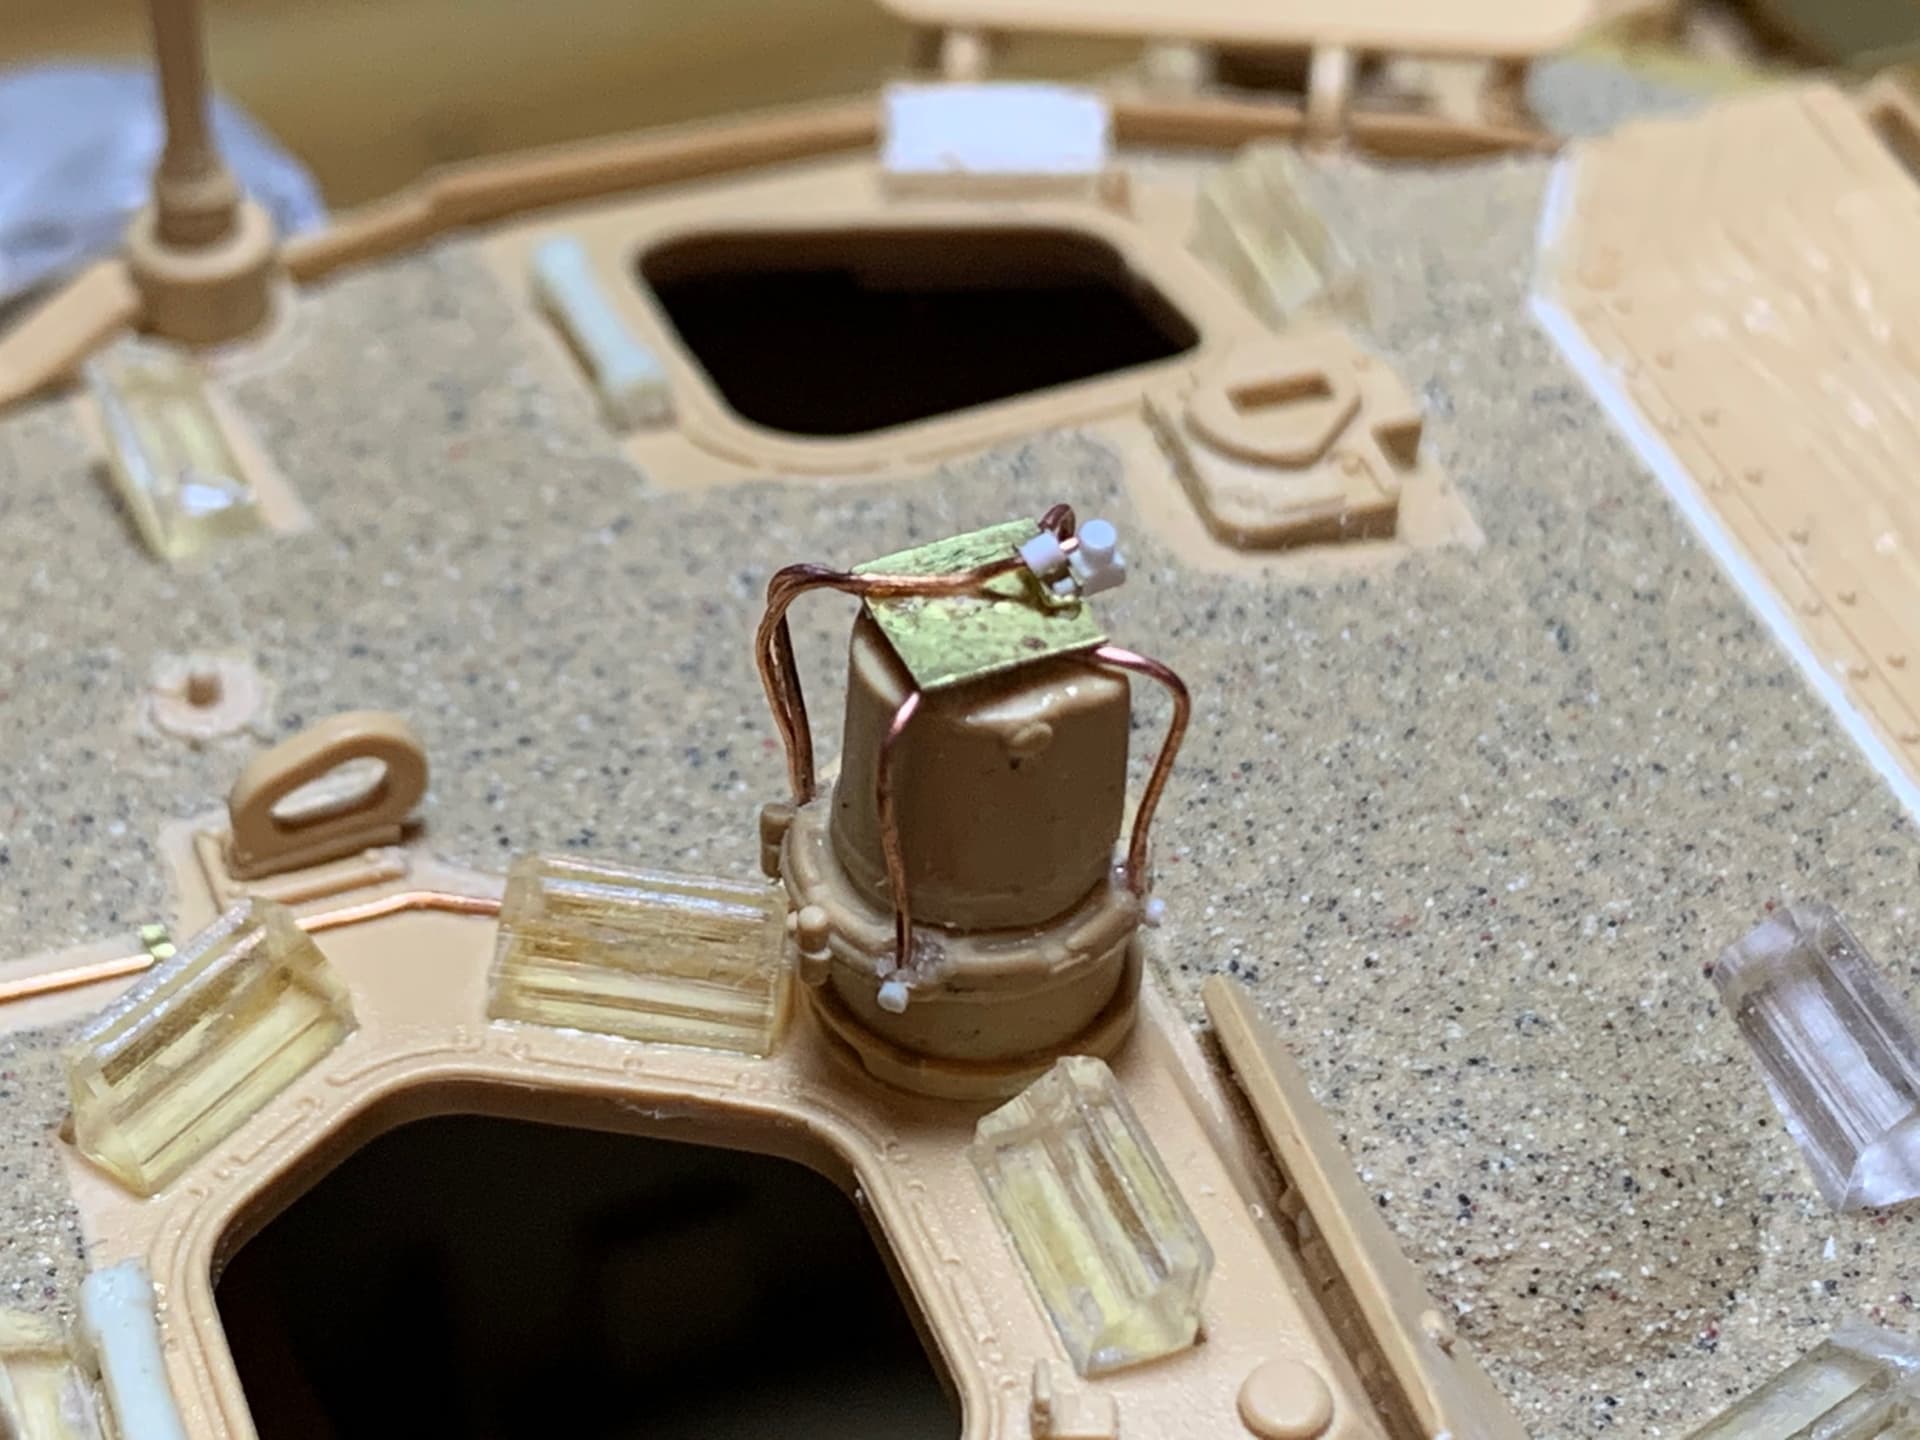
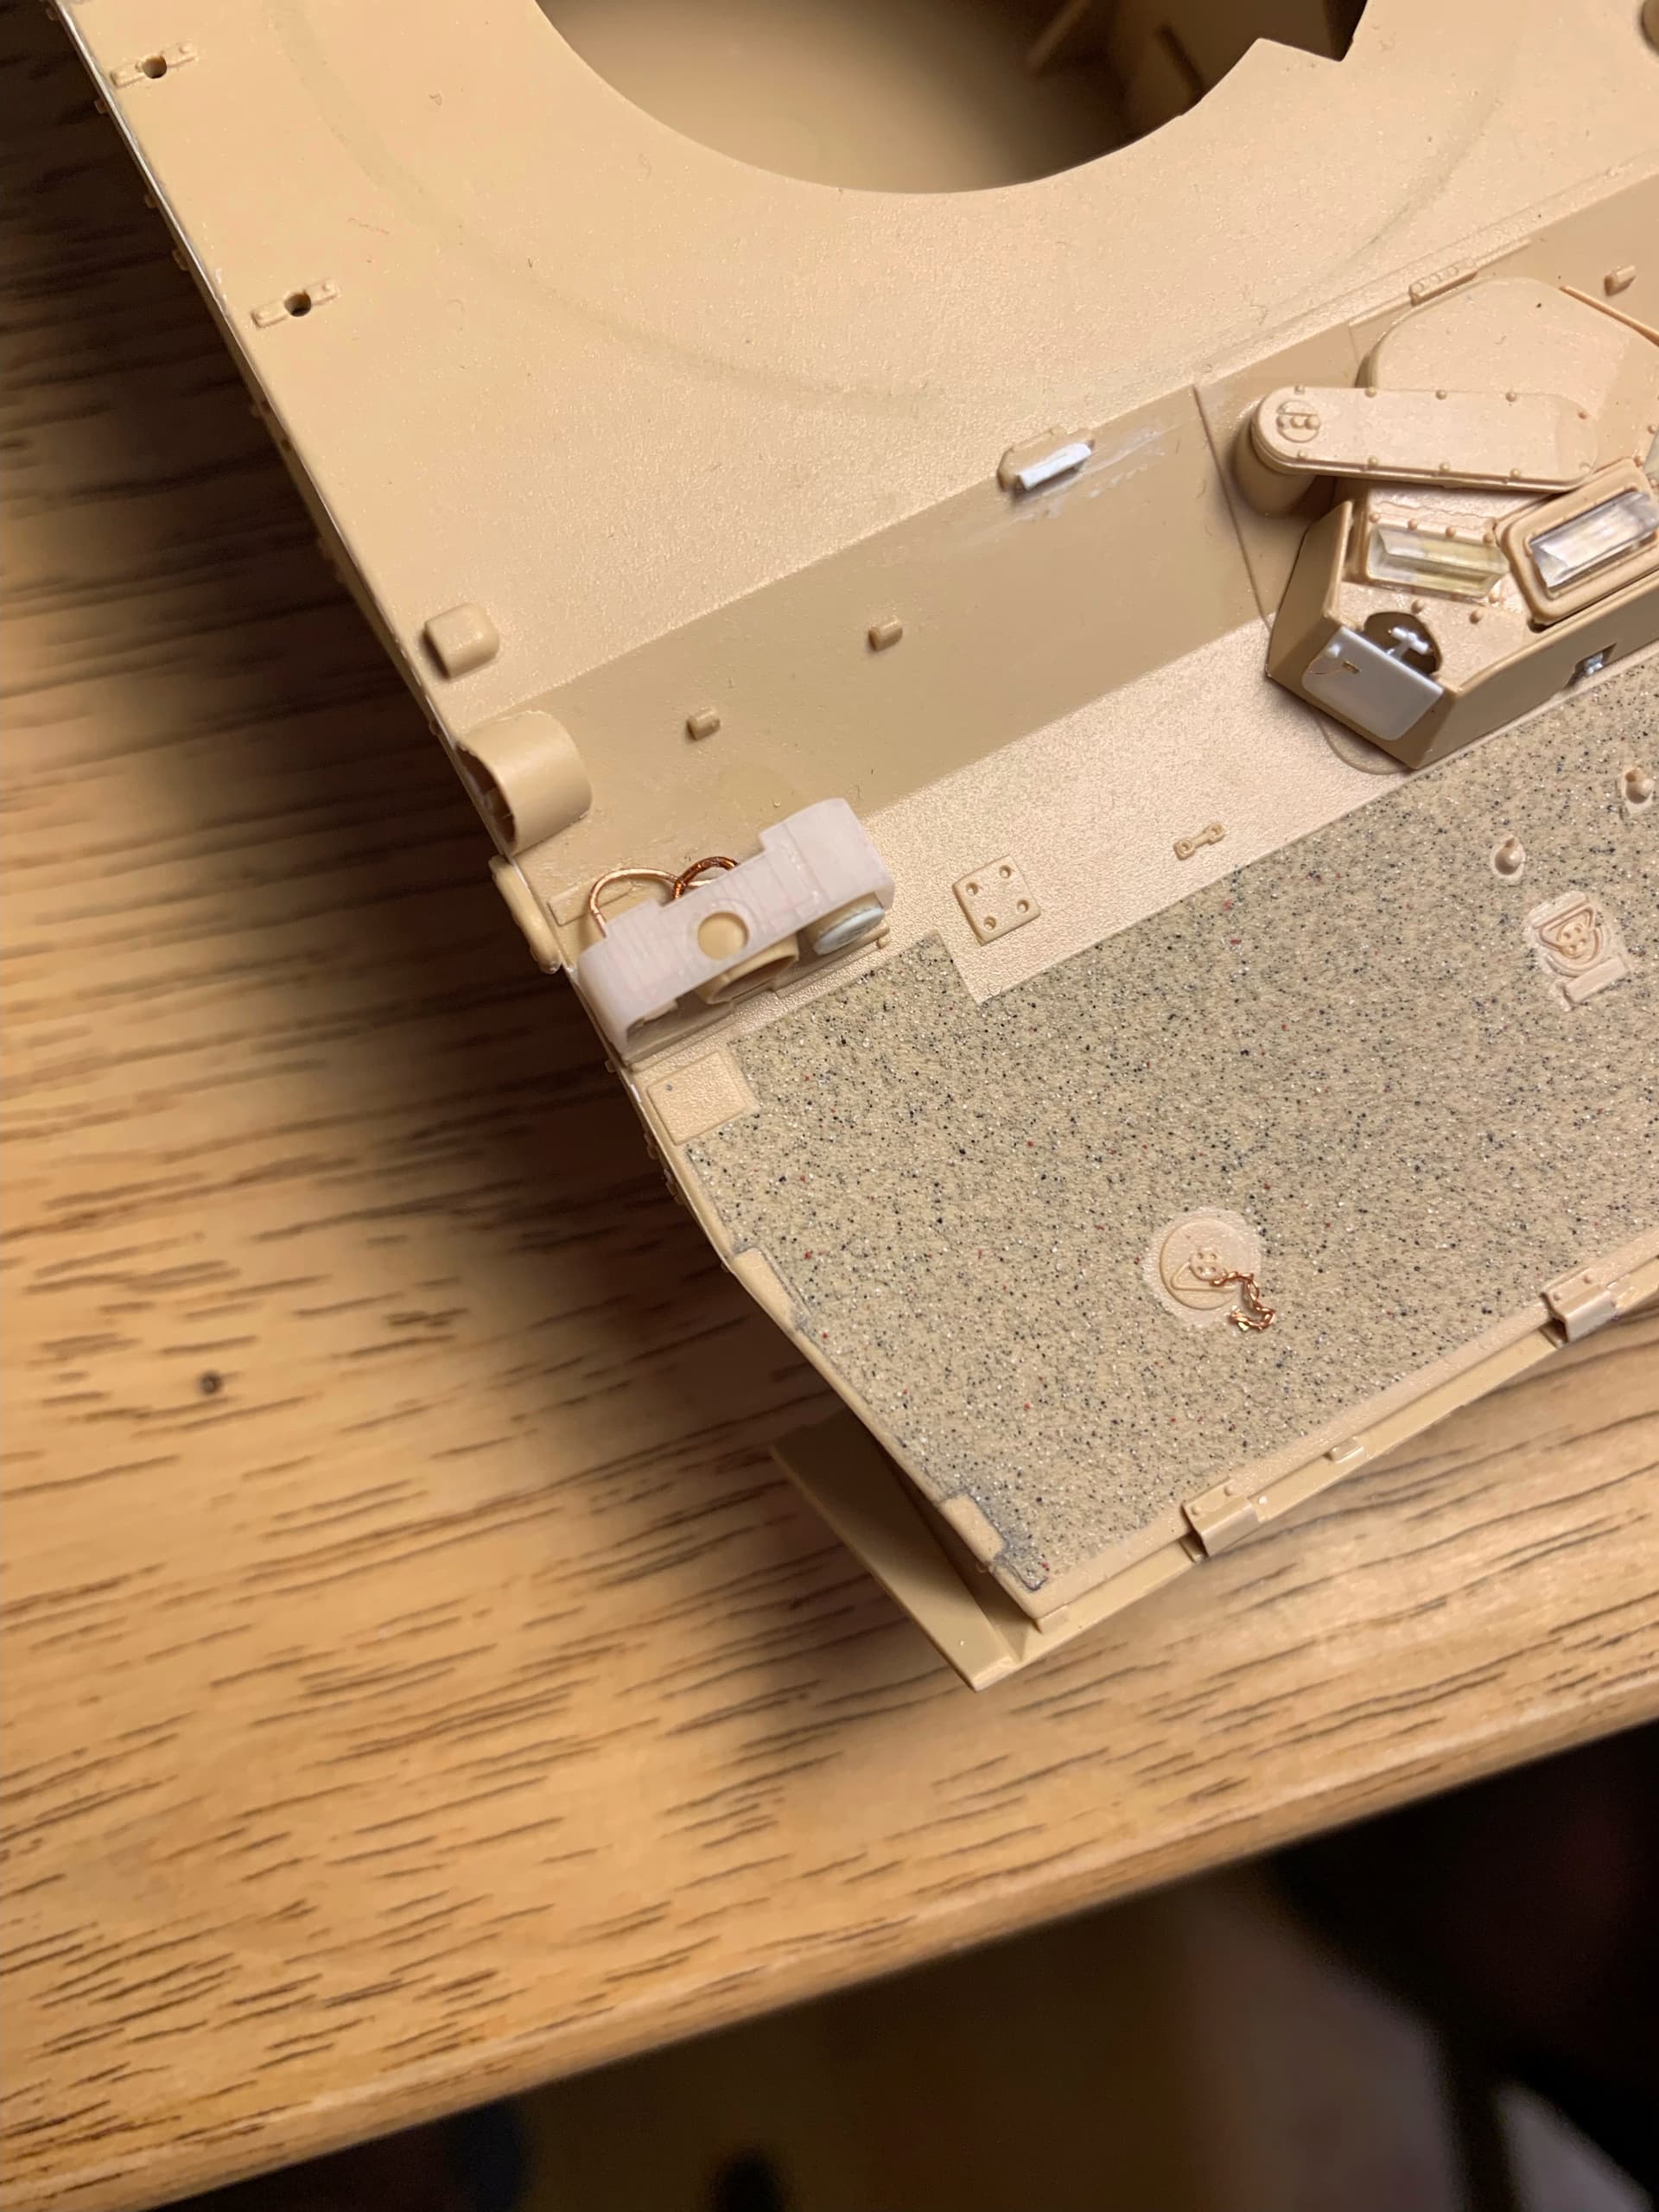
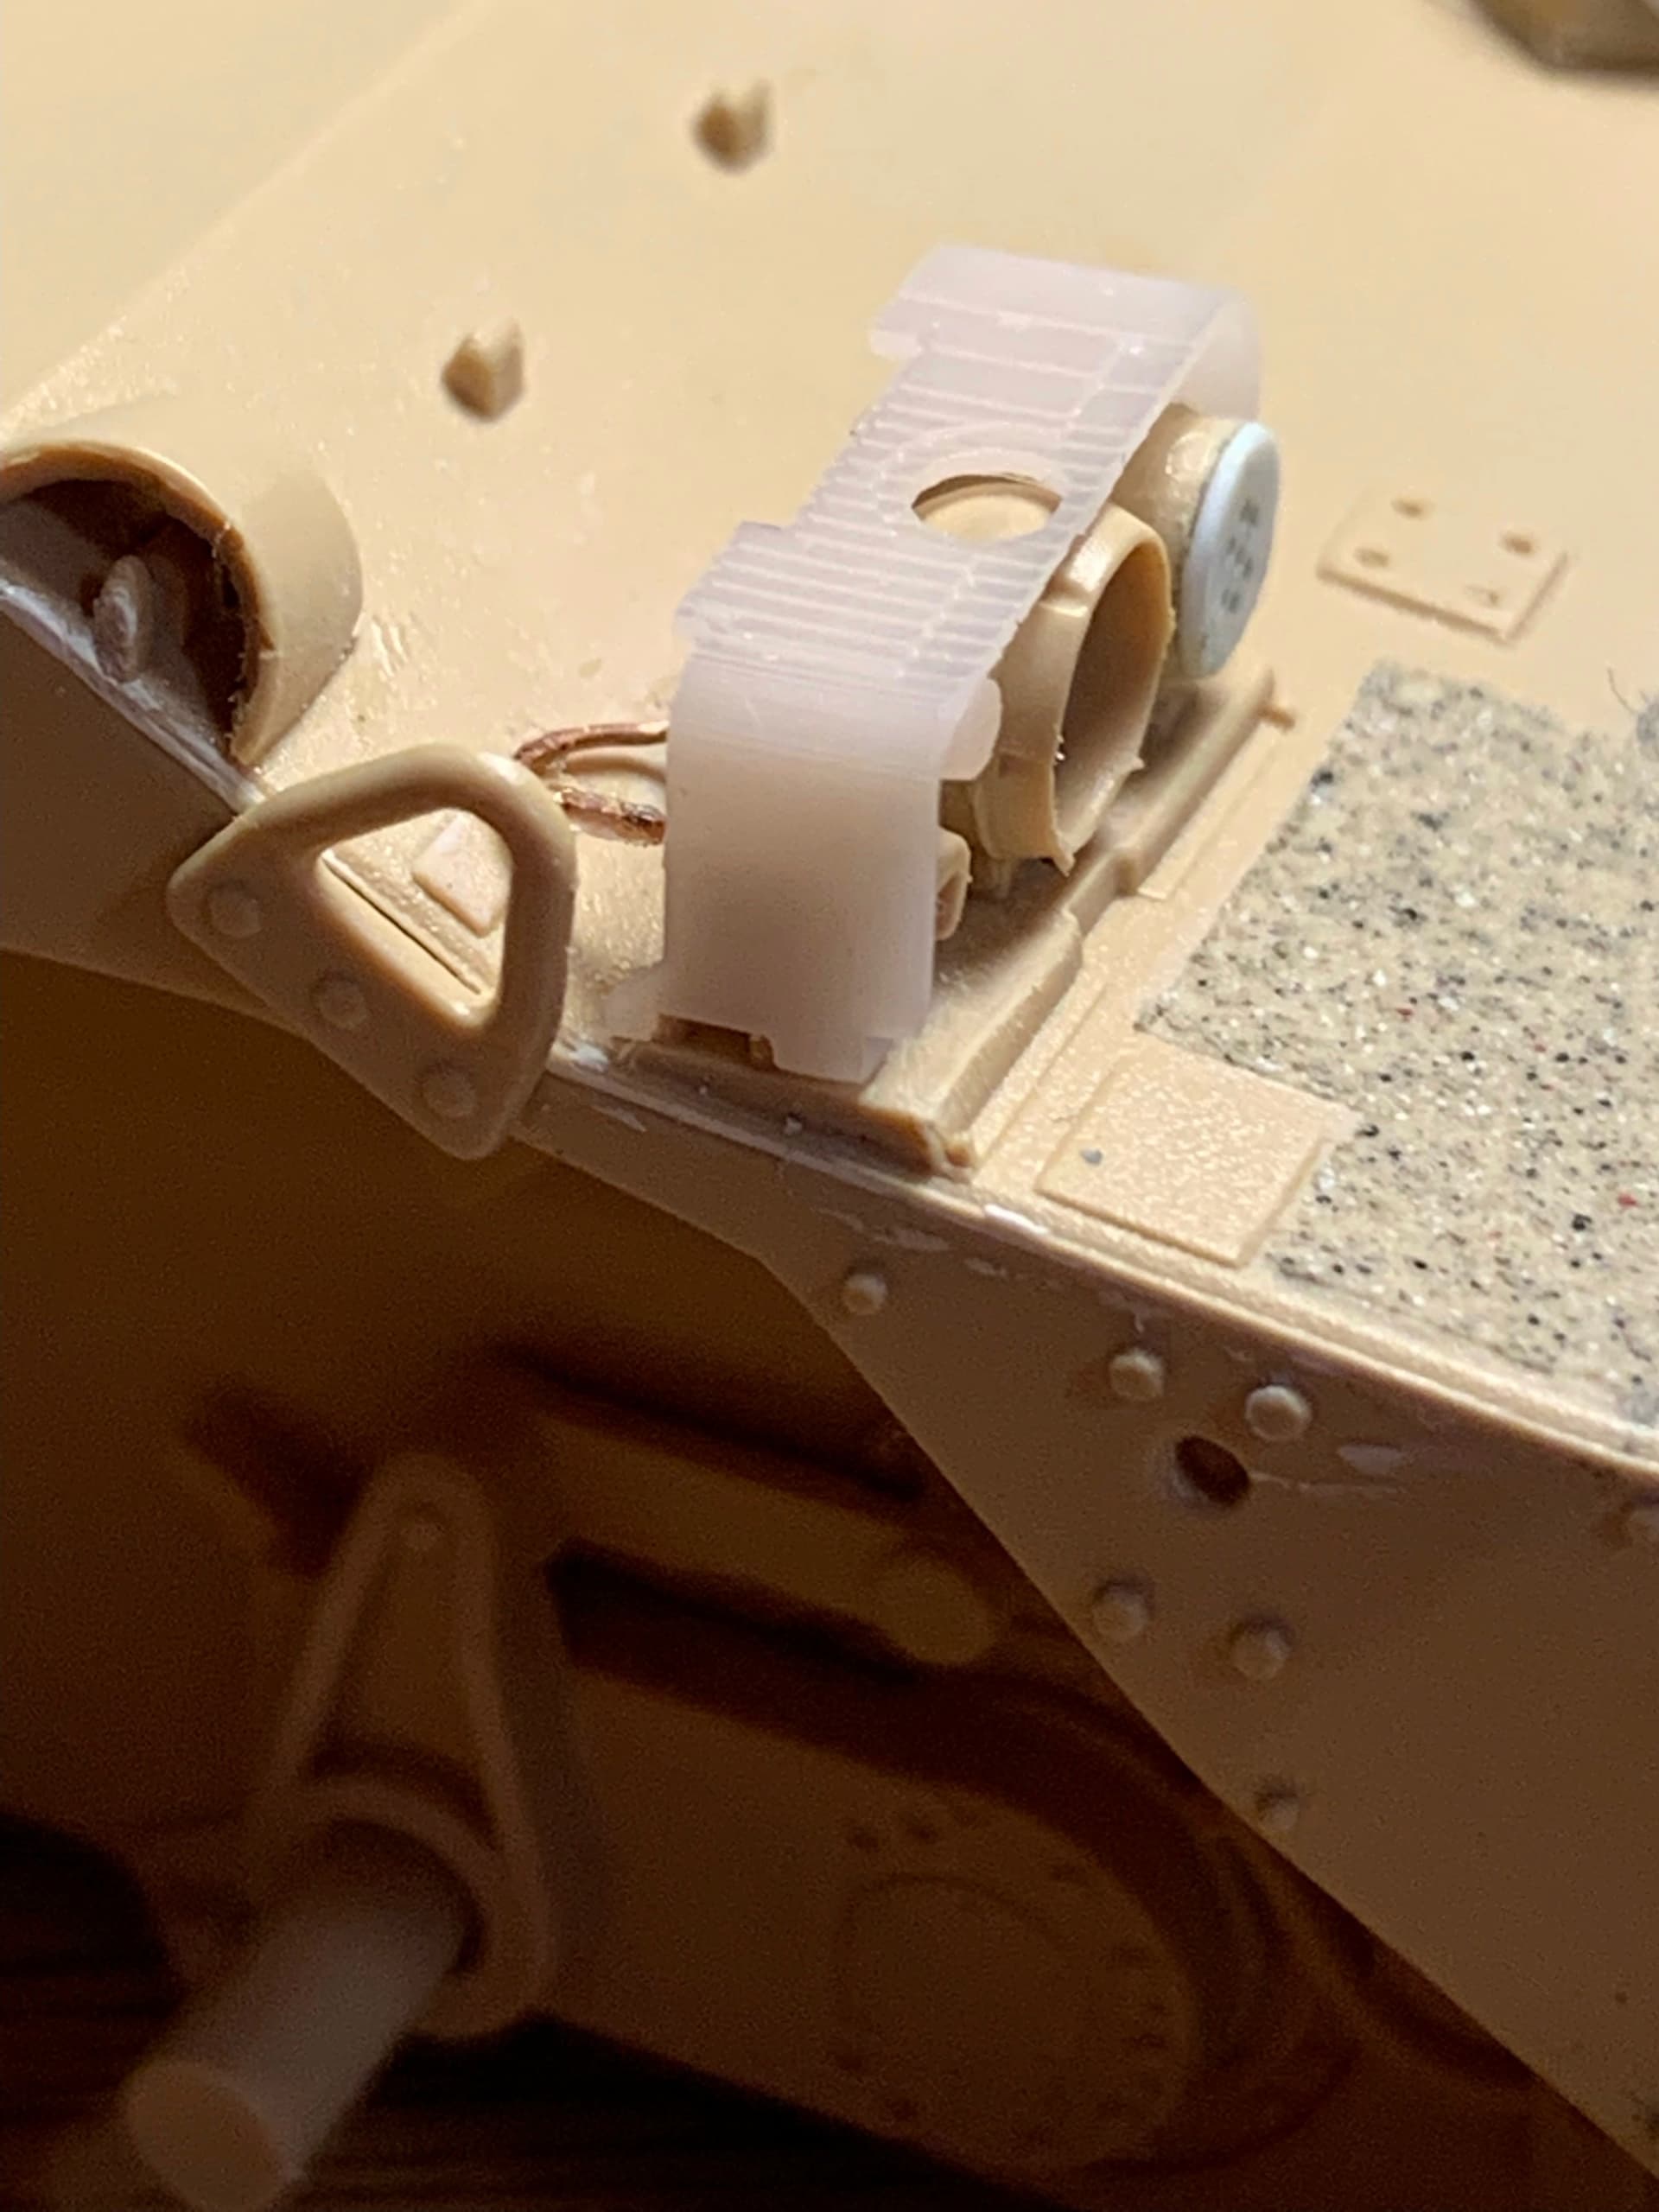
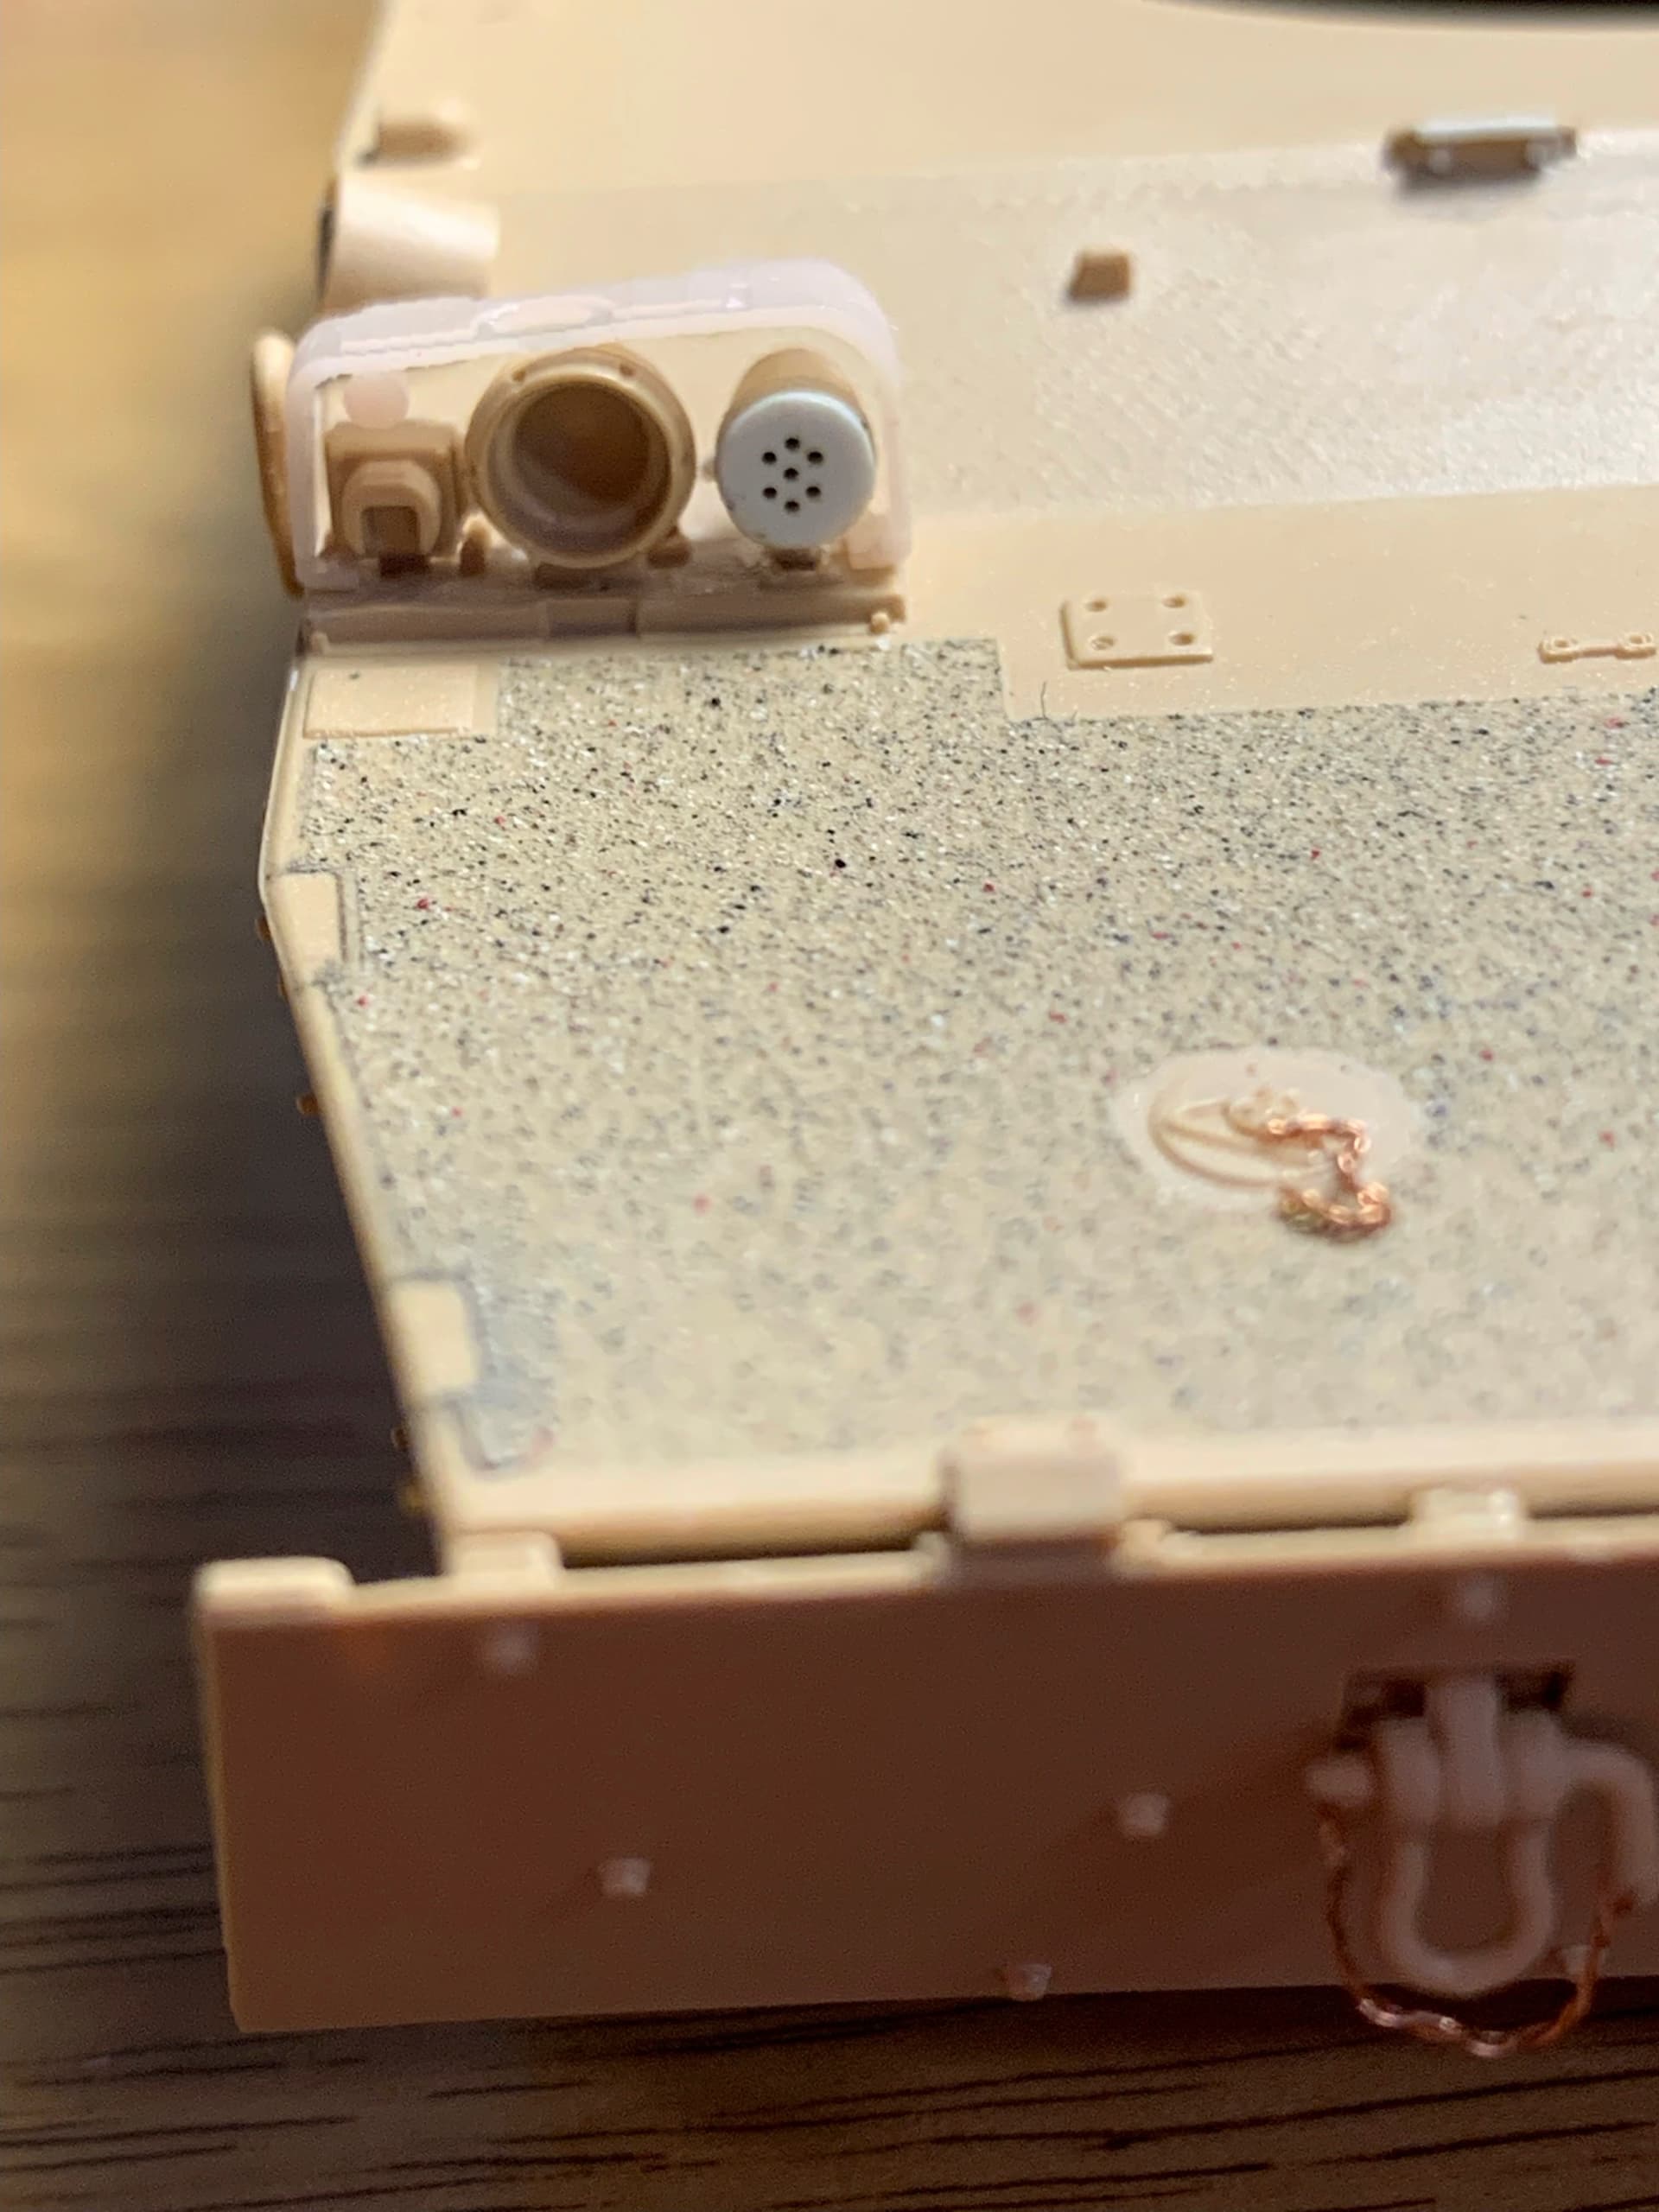
Wiring for the galix has been added…
As well as the wiring for the ied jammers, 3d printed
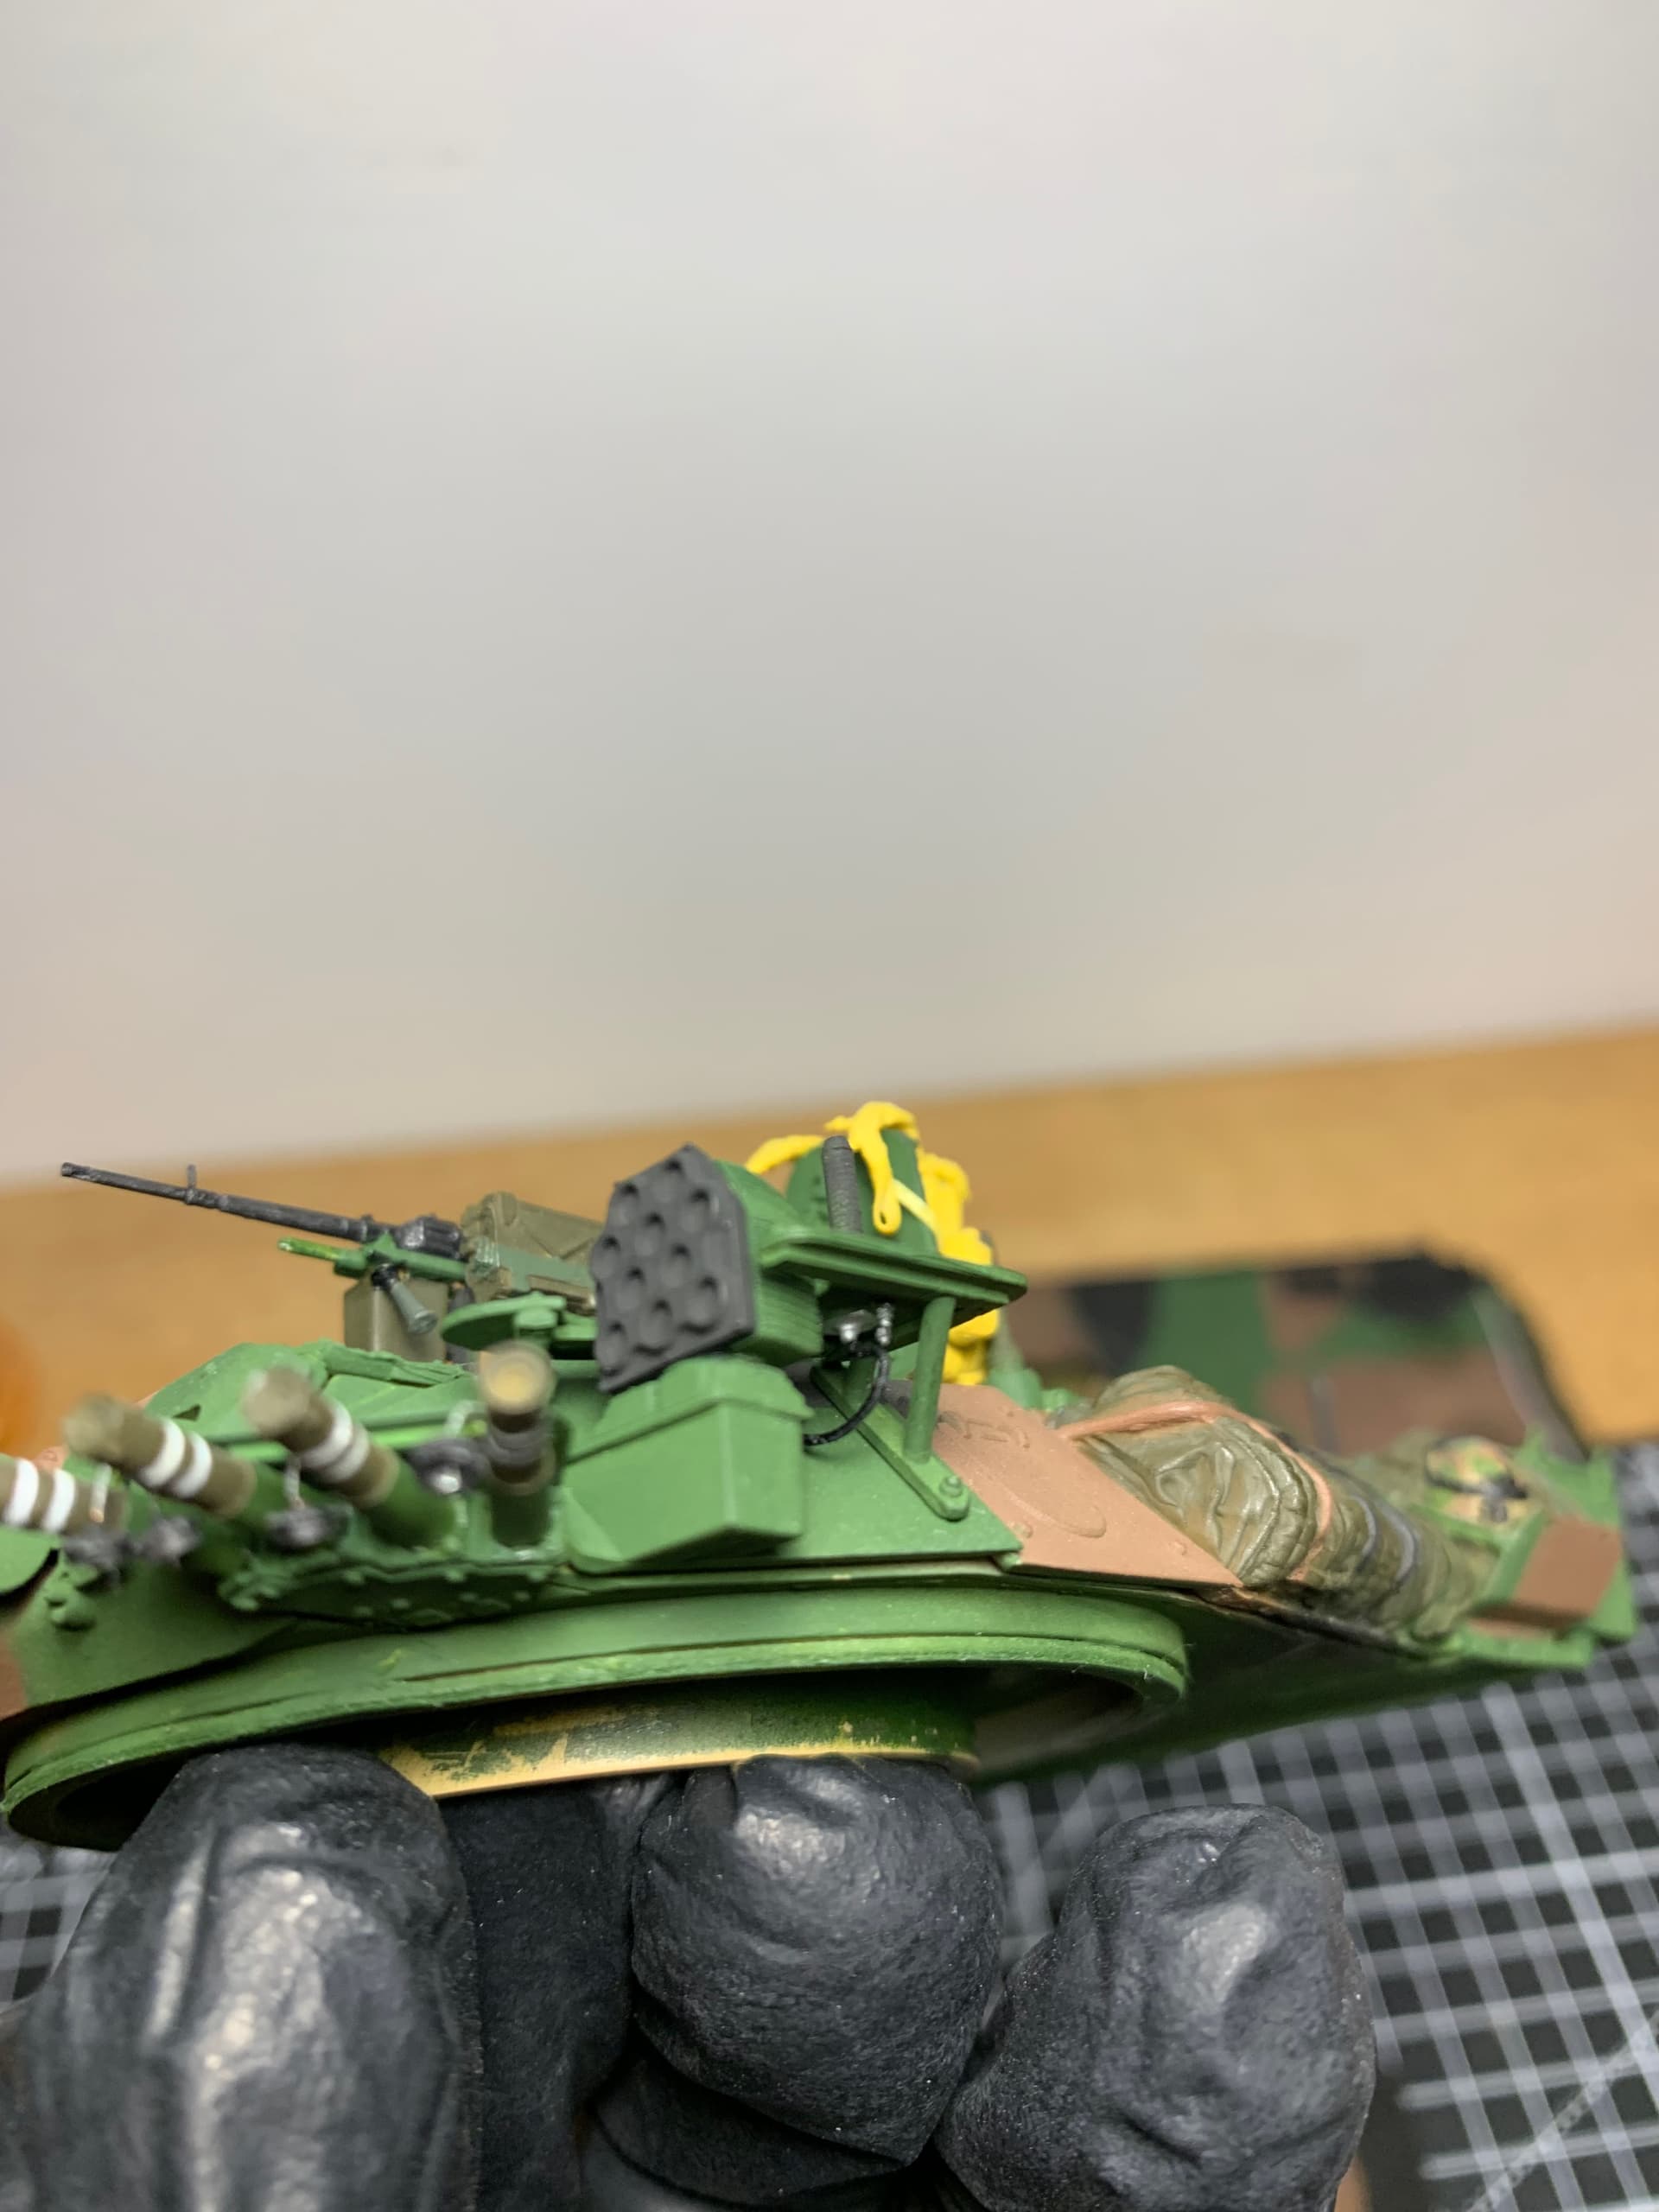
I bought these backpacks 3d models that were initially made for 3d animation. I had to tweak them for 3d printing. I cut the adjusting straps and remade them using masking tape to place them properly on the hatches
The anf1 mg is a 3d print acquired from somebody on another forum. The print quality is impressive
Minor additions need to be installed before varnishing. I made so much touch up on the camo, either because on some areas the paint coming out of the airbrush was drying before hitting the model or because of colors overlapping, that I fear that it will stand out during varnishing and weathering. Hopefully not… We’ll see !
7 Likes
Looks very good. Nice touch with the Bergen’s on the hatches, I use to do that with my webbing for when I had to dismount…
3 Likes