This is t last project I completed (lost my mojo a little bit after this one but gradually getting back into the groove).
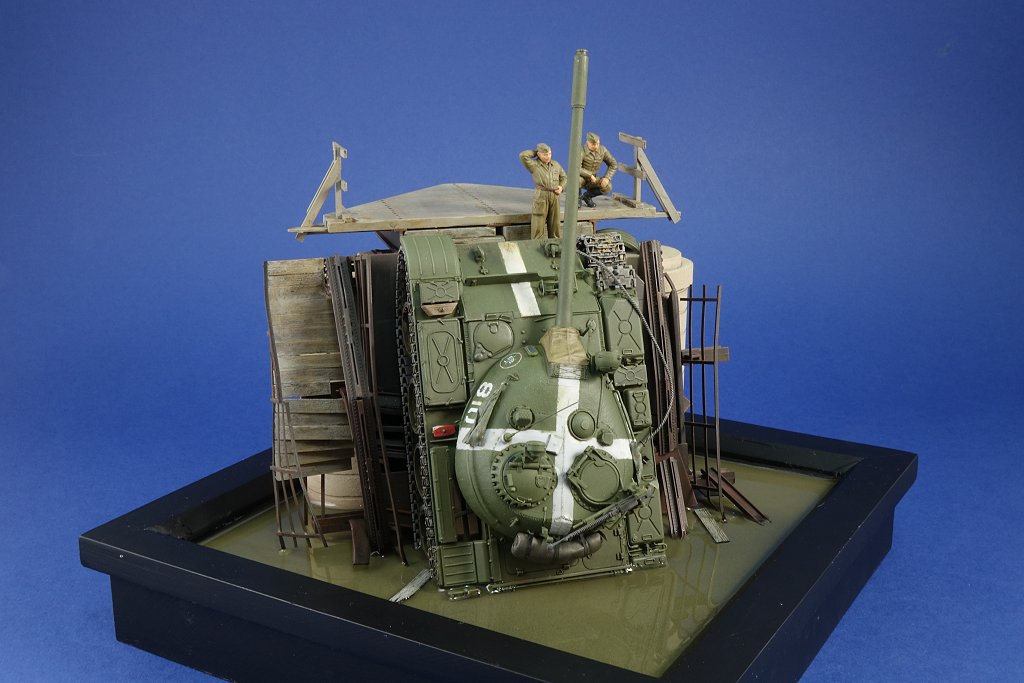
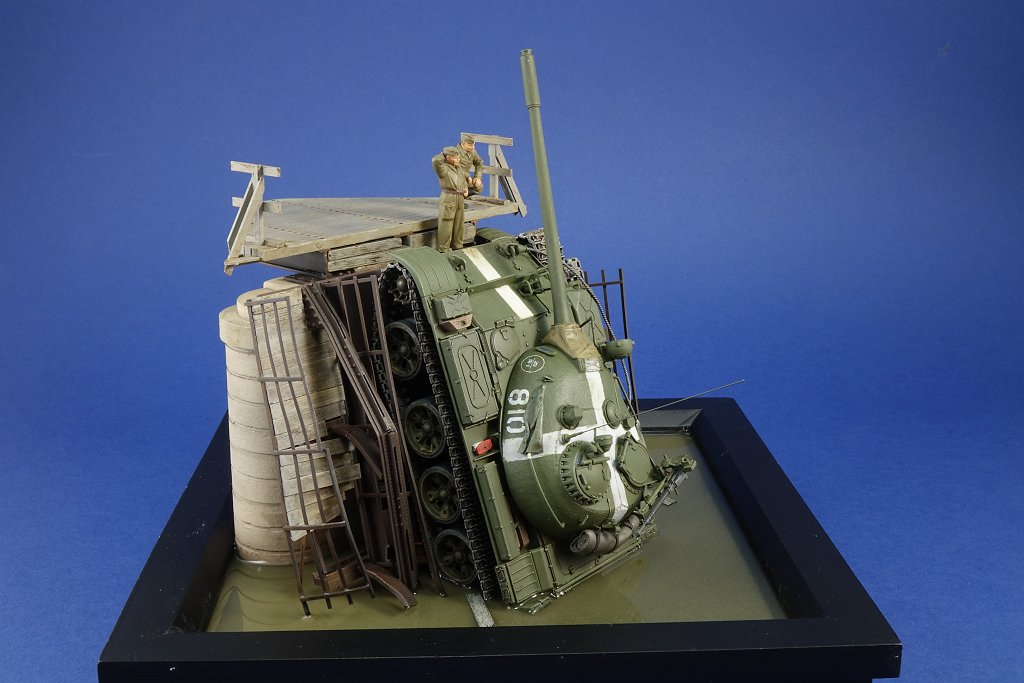
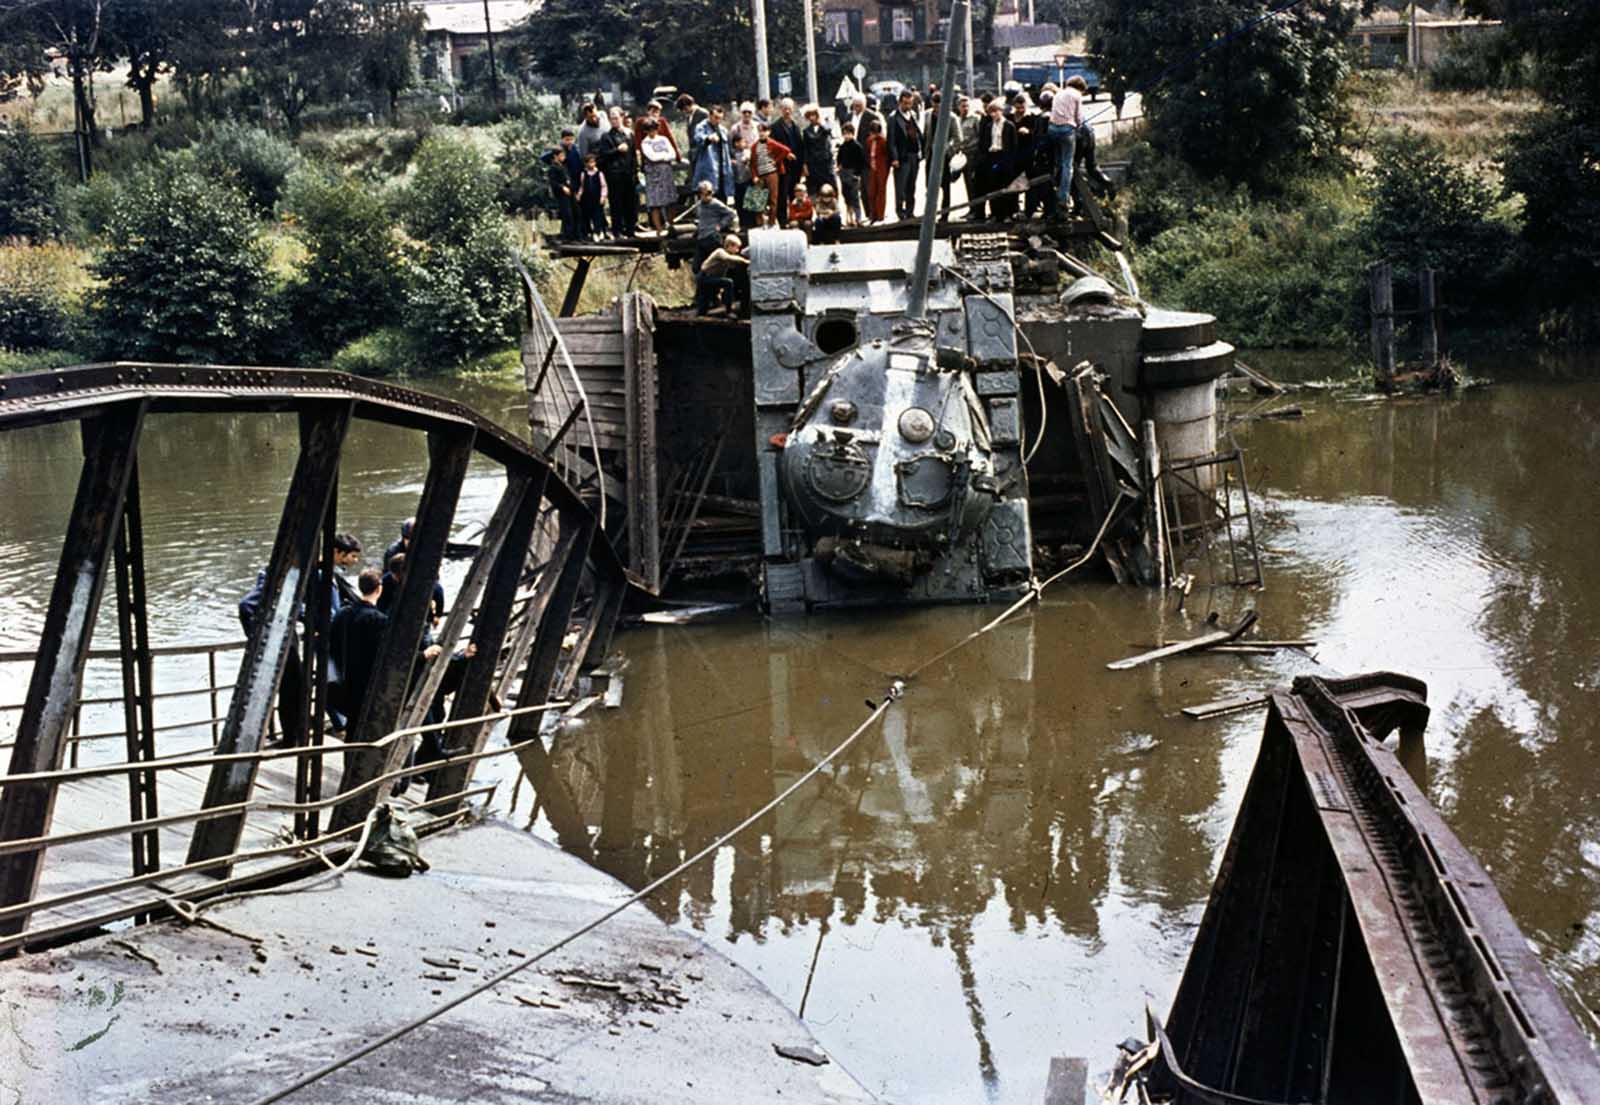
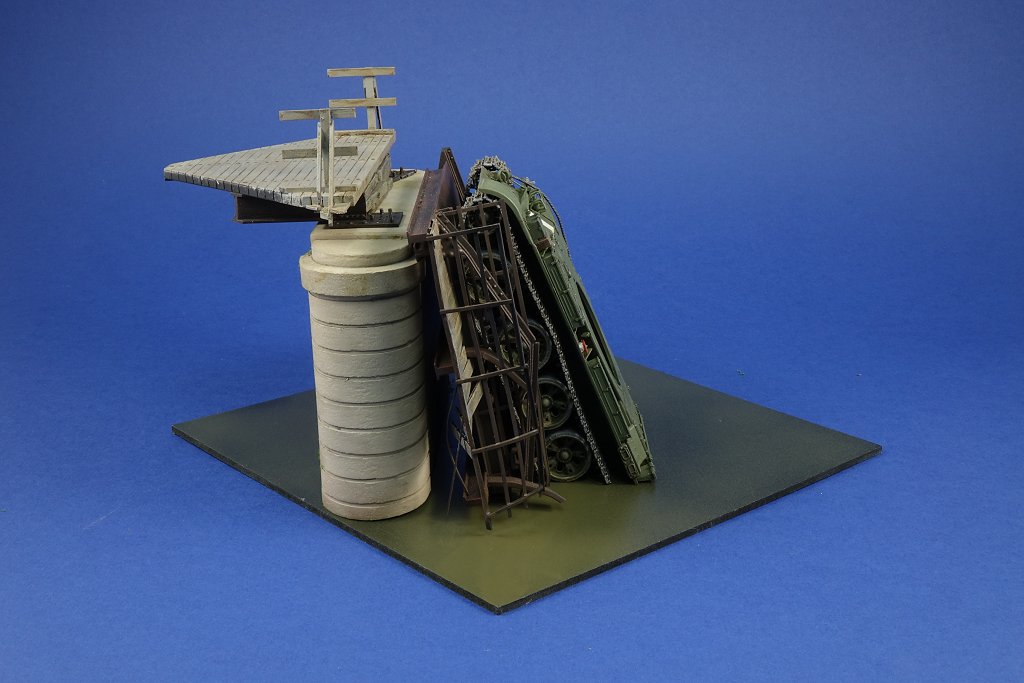
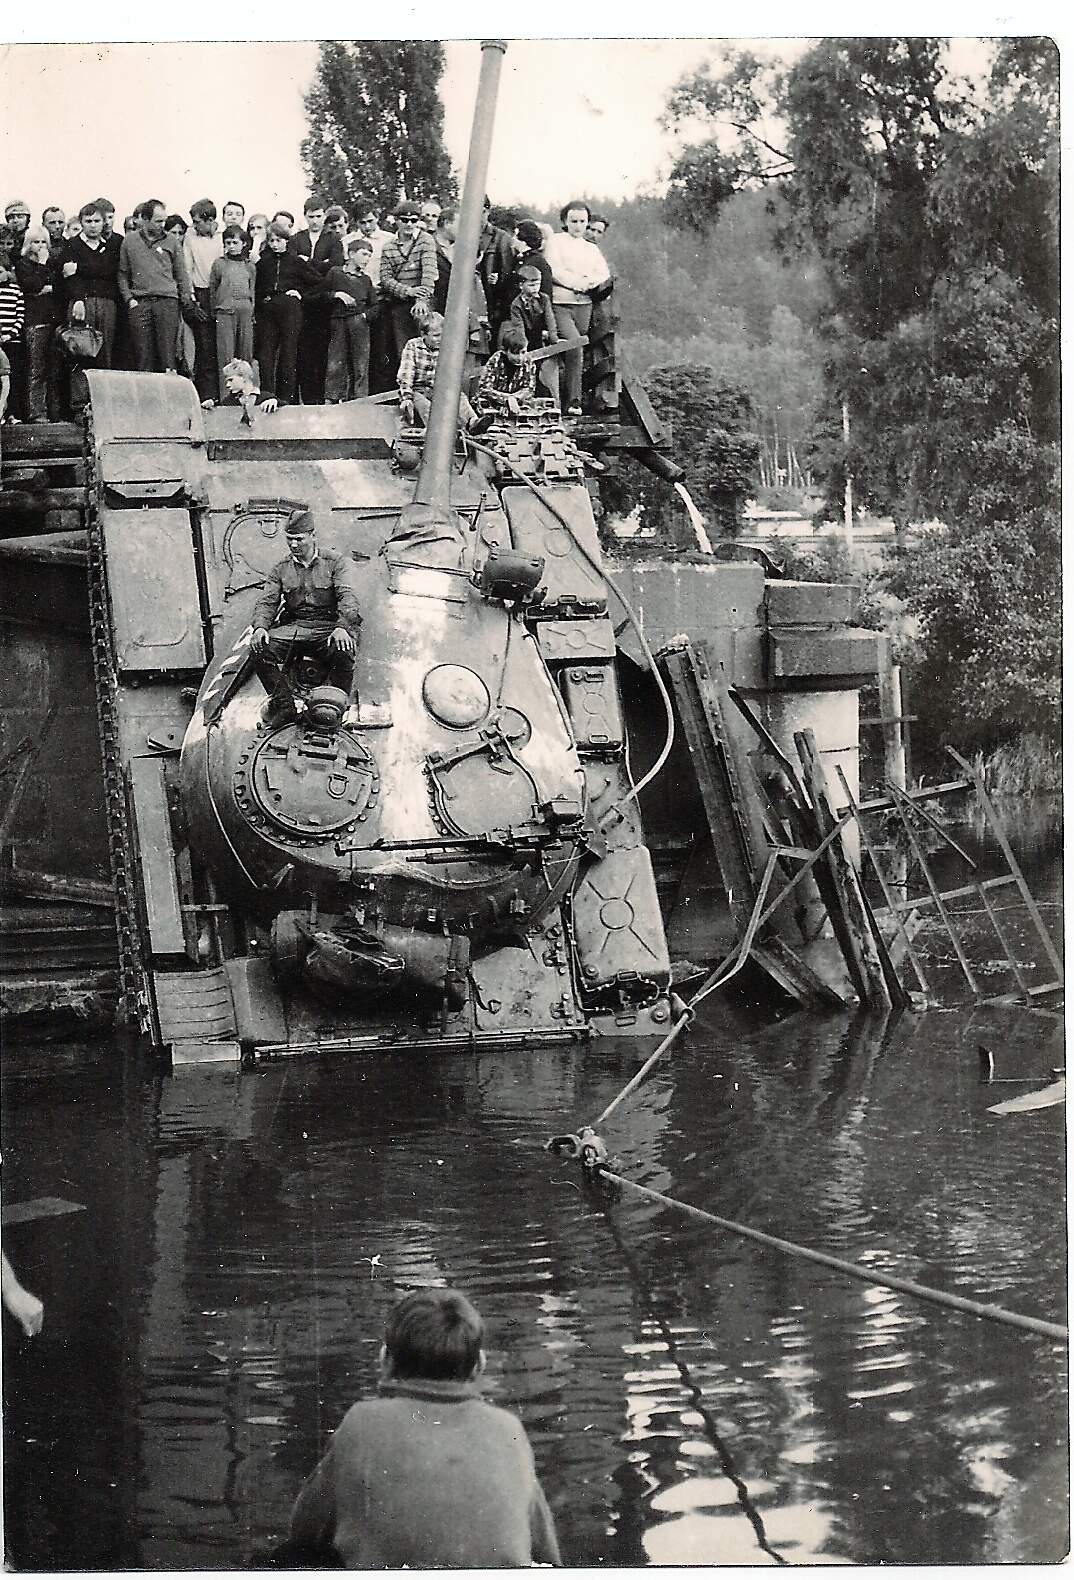
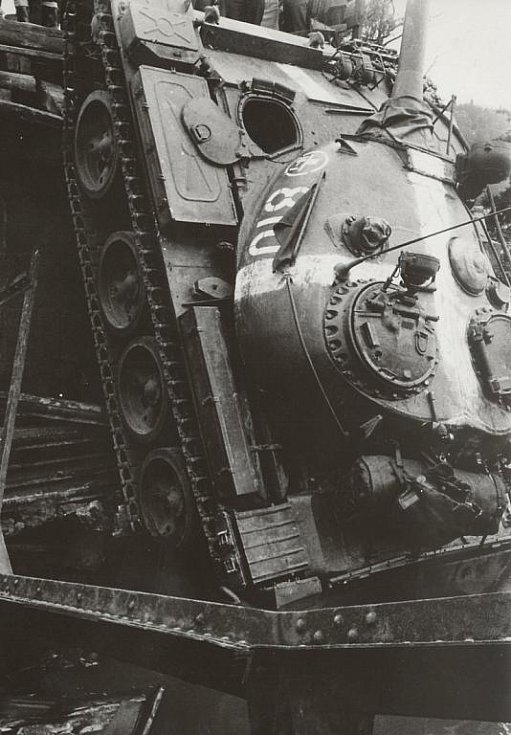
I used Tamiya’s new 1/48 scale T-55 but backdated it to a T-54B. The bridge is entirely scratchbuilt and the scene is based on a series of photos taken close to Karlovy Vary. The tank tried to cross the bridge but it collapsed. Some sources claim the bridge was sabotaged by local people but other sources claim that the bridge had a 5 ton weight limit and the crew were foolish to try and cross it.
Great to see you posting your 1/48 scale masterpieces in the “new” forum, John. Welcome!
An interesting scene and superb execution. The collapsed bridge is a work of art.
I can relate to losing the mojo after completing complex projects, but I’m sure you will get back to the modeling bench soon. Any ideas on your next project?
I know that tanks are occasionally backed into pits to increase the elevation of their guns for use as indirect fire artillery but THIS is a bit over the edge
Thank you - I used a product called Aqua Magic from Deluxe Materials. It’s the first time I’ve tried to receate water effects - in fact this is the most complex scenic base I’ve ever attempted. Normally my bases are just scenic enough to ‘present’ the finished model in an appropriate setting.
There are a variety of scenic water effect products on the market but I chose the Aqua Magic for two reasons. It’s a one-part product (so no mixing) and since this would the first time I tried some water effects,I could buy it in a small quantity. It comes as a thick gel-like substance. It’s a clear product but it can be tinted with small quantities of acrylic paint (I used a few drops of Tamiya Khaki).
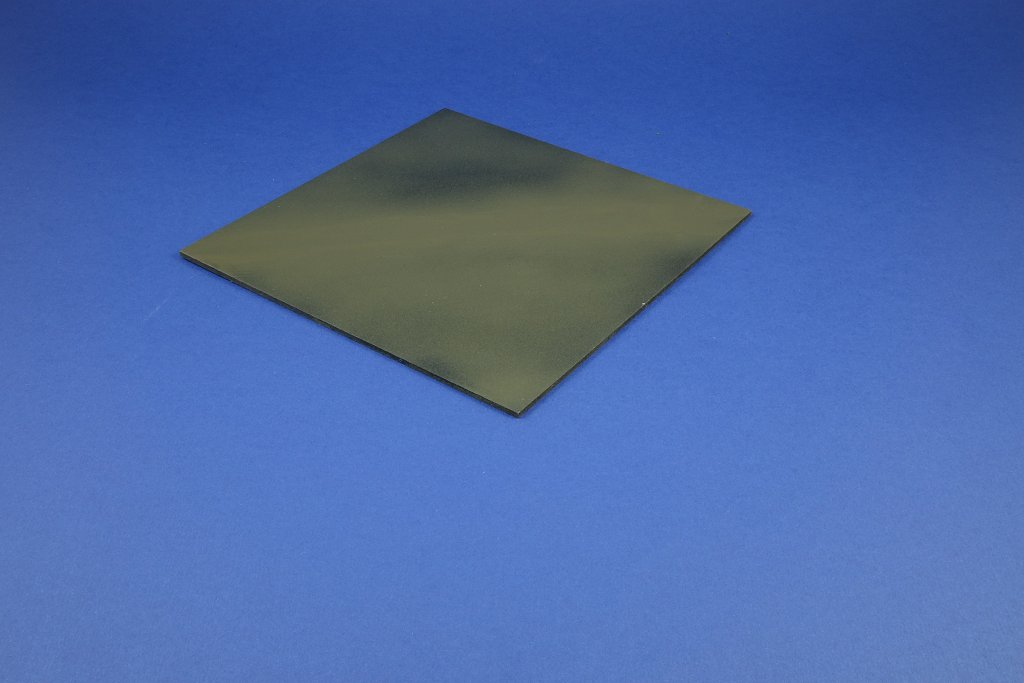
I started by spraying the baseboard Flat Black. Then I misted on some swirly uneven patterns of Khaki (didn’t bother too much with the part of the base that would be under the back of the bridge) - first photo.
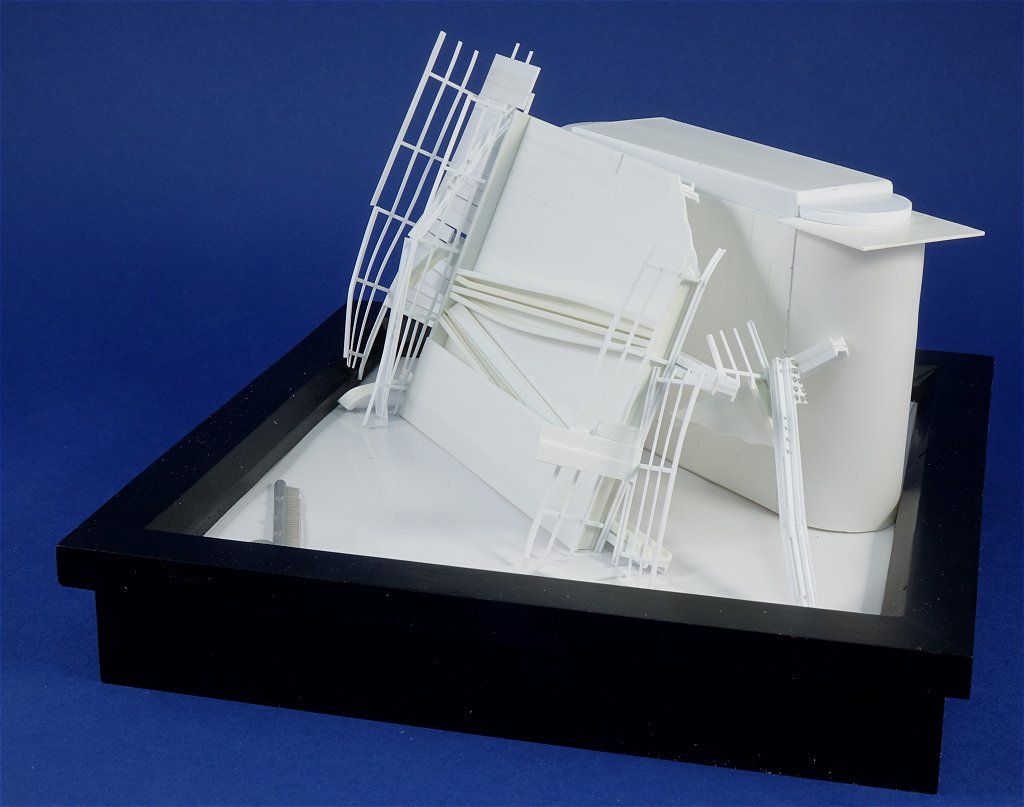
Once that was dry I added several layers of gloss varnish (Klear floor polish in this case). That gave me a well-sealed base. The second photo shows this gloss finish with the main components set in place.
Next I fixed the baseboard into the black frame, making sure that I’d properly sealed the inner edges to prevent any leakage of the water product. and glued the bridge and the tank in place on the board.
Now the fun started - the Aqua Magic comes in a screwtop bottle so I added the few drops of paint to the bottle, mixed it thoroughly but carefully into the resin and left it to stand (with the lid back on) to get rid of as many of the air bubbles caused by the mixing as I could. This gave me a muddy, slighlty green translucent ‘water’. The bottle has a funnel in the lid so I started squeezing the liquid onto the base, working slowly and trying to avoid any bubbles. I worked the resin into all the nooks and crannies with a toothpick and ‘popped’ any errant bubles i could find. The process takes time and the resin remains workable for a couple of hours at least. Lastly I left the base on a flat surface, covered with an upturned box to ensure no dust settled ont he surface. The ‘water’ layer is only 2-3mm deep, but on top of the patterned base it achives the desired result.
Considering it was a first attempt I am really pleased with the results.
There is an Australian railway modeller called Luke Towan who has his own Youtube channel. He has done several videos on creating water effects and they were my inspiration (different water products but the principle is the same).
Thanks John, that was a great help with some really helpful tips… And for the first attempt, you nailed it !!
I shall be adding that stuff to my ever expanding shopping list