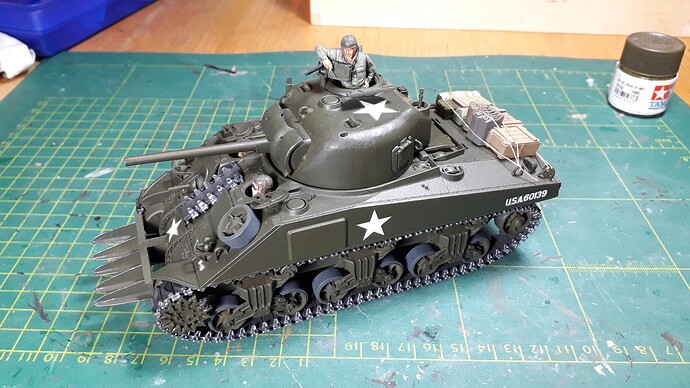
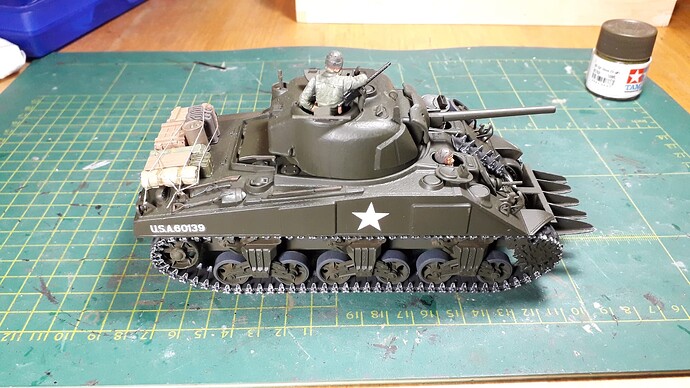
To be fair to Tamiya, they tooled this kit long before the modern “Sherman research” revolution of the past two decades, so they can be forgiven for thinking all Shermans were alike and the details were unimportant. Of course now we know better, but them’s the breaks…
Indeed.Still a great model and the extra work is elevating it nicely.
Good work fella.
Richard
Makes me want to build an Italeri Sherman this weekend.
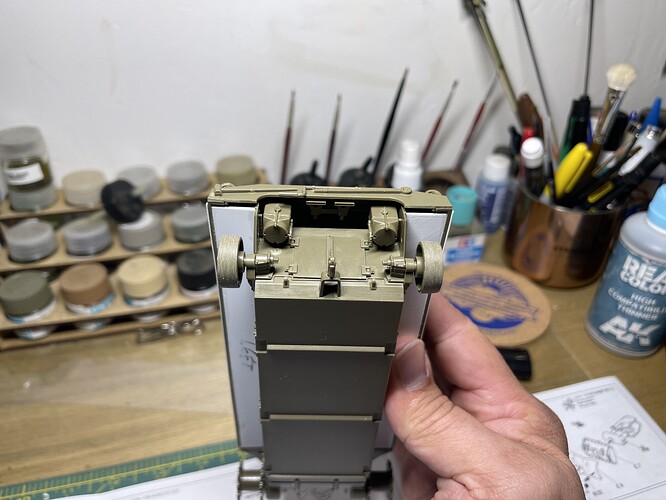
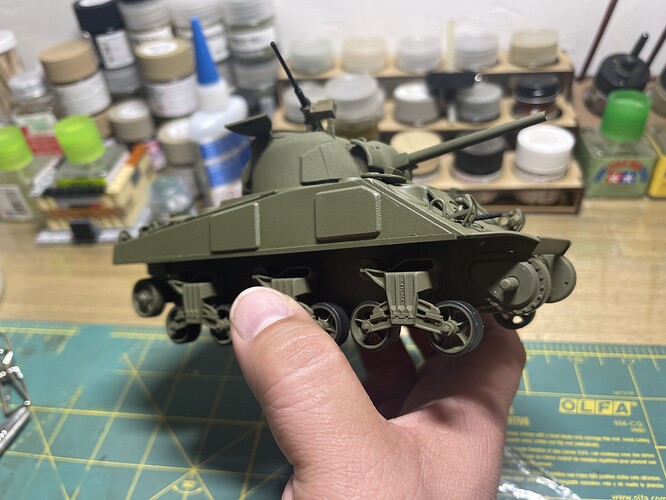
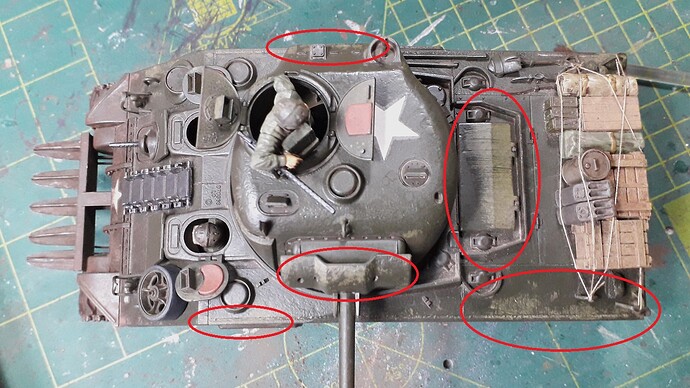
I believe that gap is supposed to be there, as that is where the engine exhaust and cooling air exit the engine compartment. The upper rear plate covers this gap.
Ken
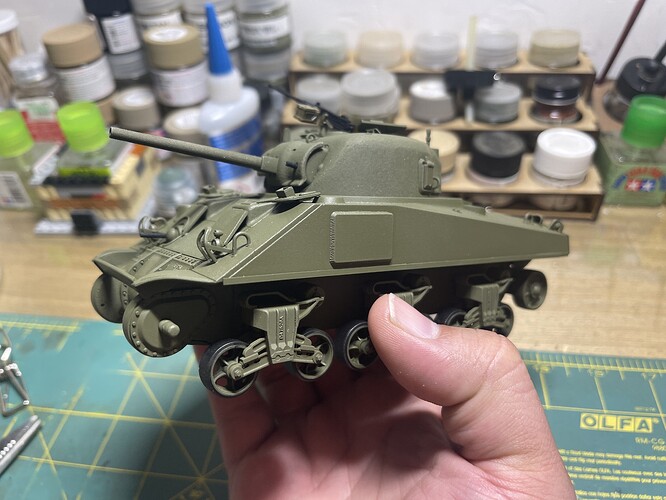
M4 medium tank differential covers were interchangeable, as were many other assemblies including idlers, sprockets, tracks, and even entire bogies. All sorts of crazy things happened at repair depots.
A quick search found lots of direct vision M4s and M4A1s with the three piece nose. I have not yet found a period photo of a small hatch M4 with the three piece differential cover but it very probably happened, somewhere. (One of my favorite period M4 photos includes a bogie truck with the swept back return roller assembly mounted backwards.)
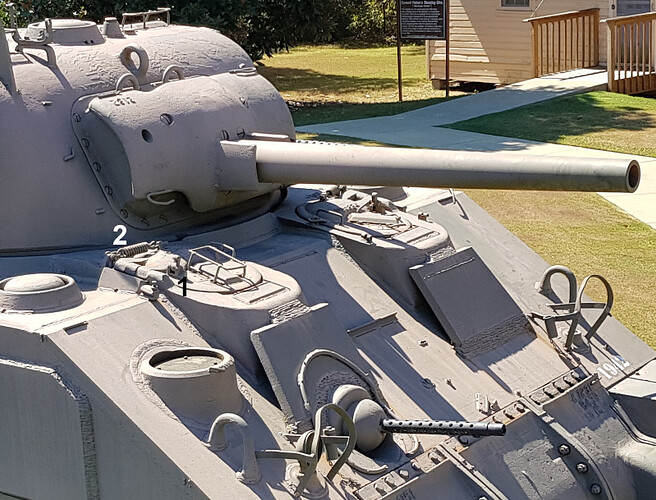
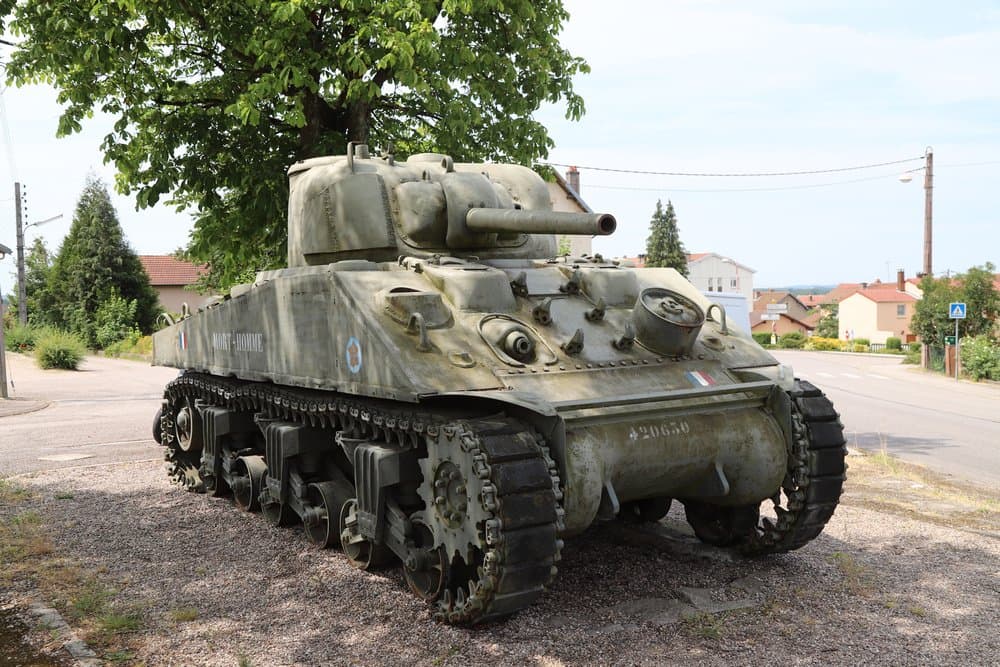
The Sherman Minutia website has a picture of a gate guard, small hatch M4 with a three piece differential cover and added welded armor plates.
This vehicle looks a lot like your model.
facepalm
Dang it! Just when i though i did a good mod. ![]()
Thanks for the link to the Sherman Munitia, @Damraska; that cleared a lot of confusion on this kit. It is helpful.
Well? I will have to get home tonight from work and knock that plate of and somehow, tidy the rear end, because now it’ll bother me enough that i will HAVE to undo that mod. Sadly, I glued eveything together, so it may be a little hard… Or, I could just leave it as-is nd not worry about it… But I know it will bother me enough.

I was able to pull the styrene I used to cover the back of the engine deck, without damaging anything.
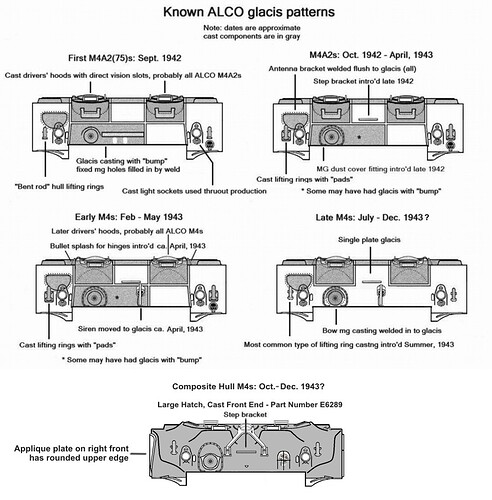
So we’re good to go. After going through the Sherman Minutia website, I’m trying to choose which front glacis option I want to go with and if I want to add the siren to the left fender skirt ir in thf middle of the front glacis and add a step to it.
Any advice will he greatly appreciated.
You have the Serman’s minutia page, but how about this one?
The Sherman Tank
And that glacis image is helpful too!
Just build what’s in the instructions and have fun. I say that because once you start to peel that onion on the Sherman it starts you on a path that should have been charted before starting given all the little differences in details from each manufacturer of the 1:1 over the years. In my opinion, it’s one of subjects that the end chooses the beginning. Detailed kit or OOB. If detailed, which tank do you want to build sets you down a path of doing X.
HTH
Options 1 and 2 have direct vision hoods and are thus disqualified.
Option 5 is for a large hatch vehicle and also disqualified.
That leaves Options 3 and 4. Option 3 requires more weld bead work. Option 4 requires moving the siren to the glacis plate. The tank in the picture I linked appears to be Option 4 with the siren missing.
Edit:
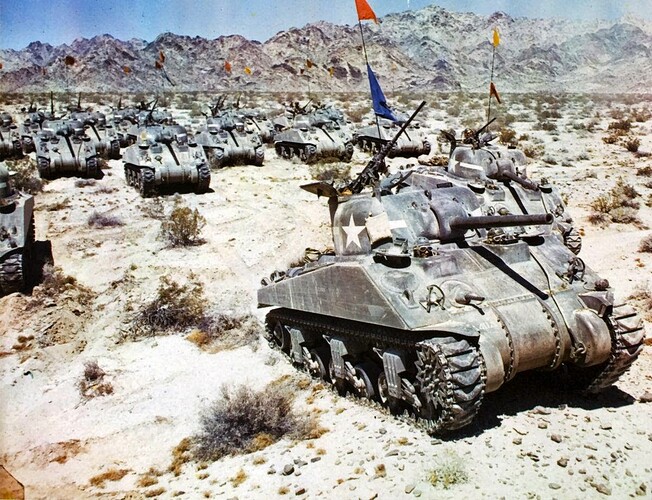
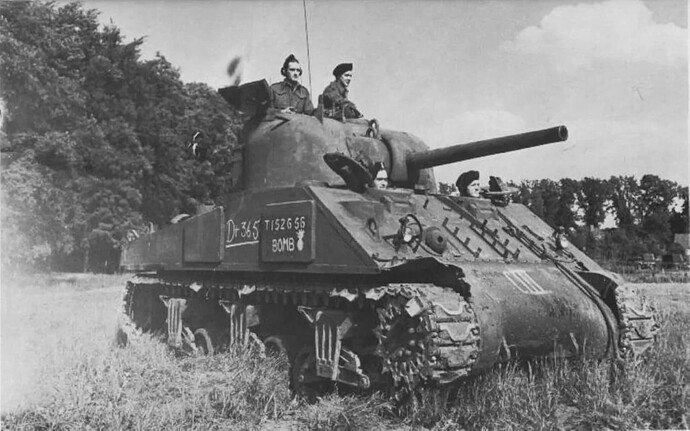
The following picture from the World War II in Color website shows a period M4 with the three piece differential cover.
This picture could also serve as an excellent painting reference if you like weathering. While not an exact match for the Tamiya model it is fairly close. It is the Option 3 configuration.
I’ve decided NOT to add the siren bill settle for building this and be done.
If I want an accurate Sherman model, I’ll go with a newer kit and not with Tamiya.
That is correct for the earlier kits, don’t want to throw the baby out with the bath water. The Firefly and “Easy Eight” with figures are Asuka/Tasca molds.
The newer “Easy Eights” with WW2 or Korea are new Tamiya kits and not sure about accuracy of those but seem better then the older Tamiya kits.
Excellent build and paint Ron. Nice stowage. Now just throw some dirt at it.
I did… and it went wrong. Very wrong indeed…
Nice job. I painted mine yesterday. I’ll be starting detail painting over the weekend, including the tracks.
Smooth, Reynier. Nice build.
Here’s what went wrong: I did the usual with washes and pastel powders. First dark en brown washes around the lower half, followed by darker and brown pastels. Then a light dusting with pastels on the upper half.
Problem is that these powders are not really fixated in place, so when handling they tend to come off or show fingerprints. So I thought to seal them in place with hairspray. Did so before…
But this time the haispray screwed things up. Not only did the powders all but disappear, the hairspray reacted with the paint in a number of areas, turning it bright green!!
One thing I’ll be adding is the persicopes to all the hatches. i have some spare ones from my Meng BUSK Bradley build, since they came in both clear and clear "Coke Bottle’ green. i did the same on my M51 Sherman build.
