Thanks guys. Brains willing but the body has gone on strike.
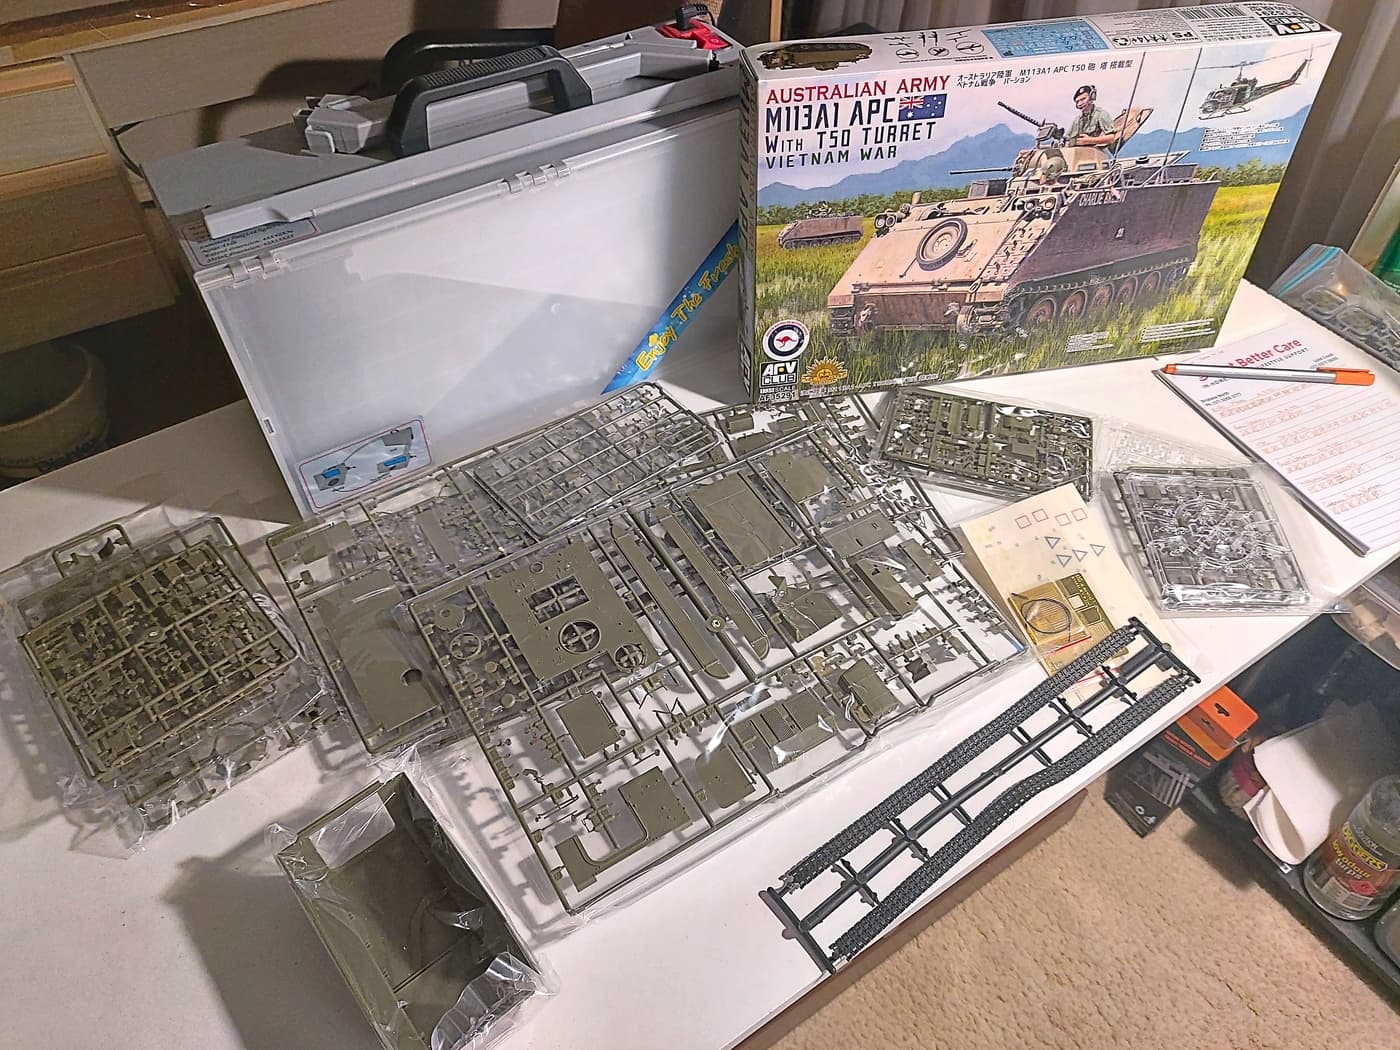
Hey I’ve made a start!! Well I took all the sprues out of the box. Doesn’t that mean I’ve started?
I didn’t realise it had rubber tracks. So paint or replace?
2 Likes
track, replace.
Paint 'em. Use the rubber track. Since there’s no track sag to replicate just glue the top track run to the top of the wheels and save yourself $40.
1 Like
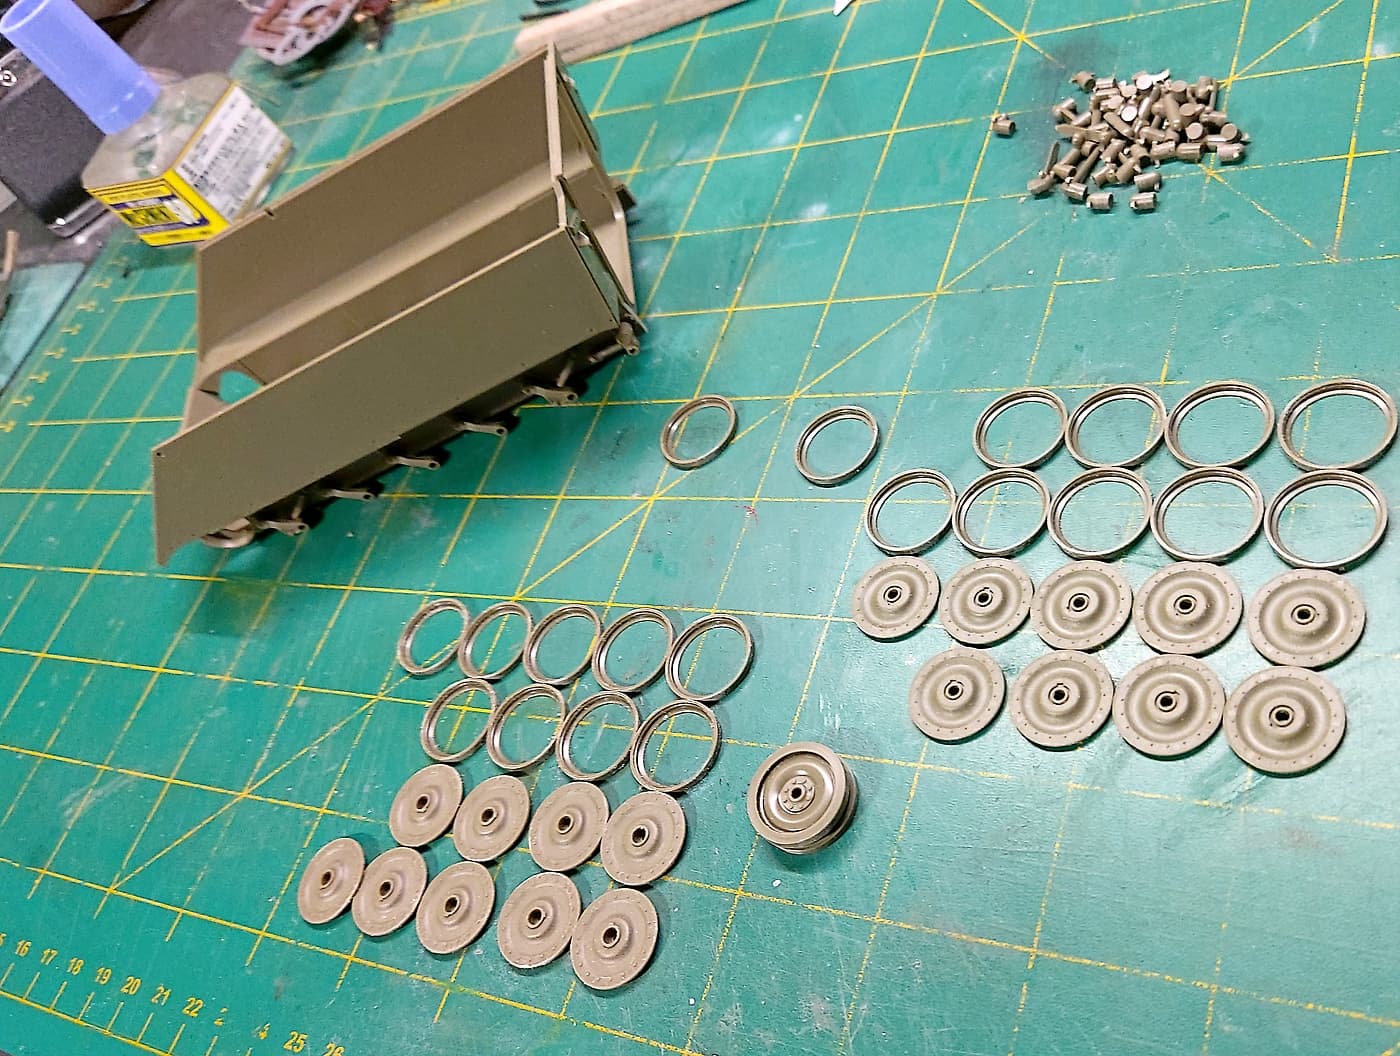
Wheels. Darn wheels. Who invented all these wheels?
I’m guessing this is an old kit. Lots of push pin marks.
2 Likes
Just a follow up to my previous post.
A very disappointing kit. I’ve spent most of my time cleaning up push pin marks and the remains of push pins. I’m about at the stage now that it may well be my first shelf queen.
May be my last AFV kit!!
1 Like
Oh, that’s too bad. Don’t be so hard on yourself, though. You can avoid creating a shelf queen. Just put everything back in the box and return it to the stash. That way you have a “started model” and not a “shelf queen”. Huge difference!
2 Likes
Matt, you are killing me! ![]()
![]()
![]()
Keep at it Bruce. For me, doing the AFV Club kits are no different to an Italeri one with their knock out marks, sink marks, and warped parts. They are a lot better than the Horror Boss kits I have done, which required extensive scratch building to make parts that were missing!
2 Likes
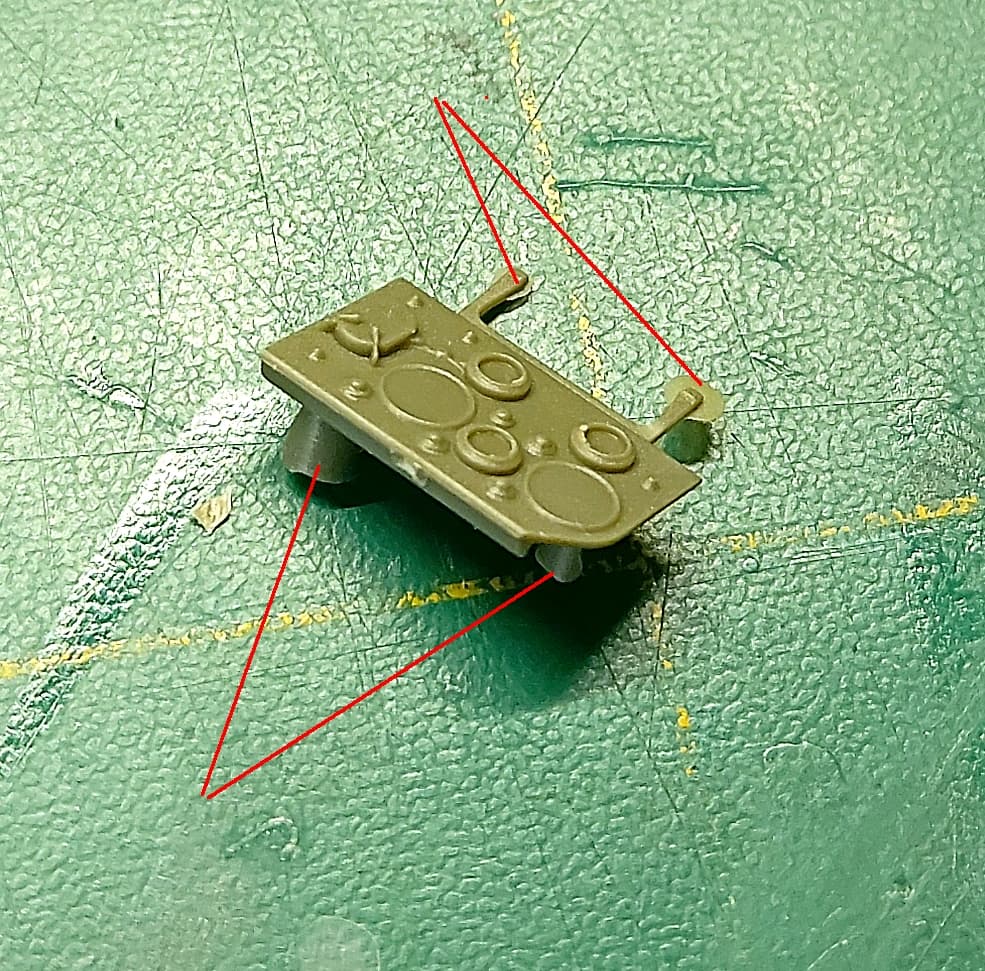
OK. Evidence!!
Here is a very bad image but it still shows the problem. It’s the inside ceiling. Keep in mind it’s an interior kit.
Every red line is either a recessed pin mark or a pin I have clipped off. The 2 red/green lines are inside the hatch. Almost impossible to sand out.
You can see I have sanded out most of the marks but with more work yet to be done. This is just one part. I could show many more.
This will be my last AFV kit!!
![]()

1 Like
Actually the track should touch the top of the three rear road wheels when tensioned properly. The track should be approx 2” off the front road wheel, and just off of the second road wheel.
2 Likes
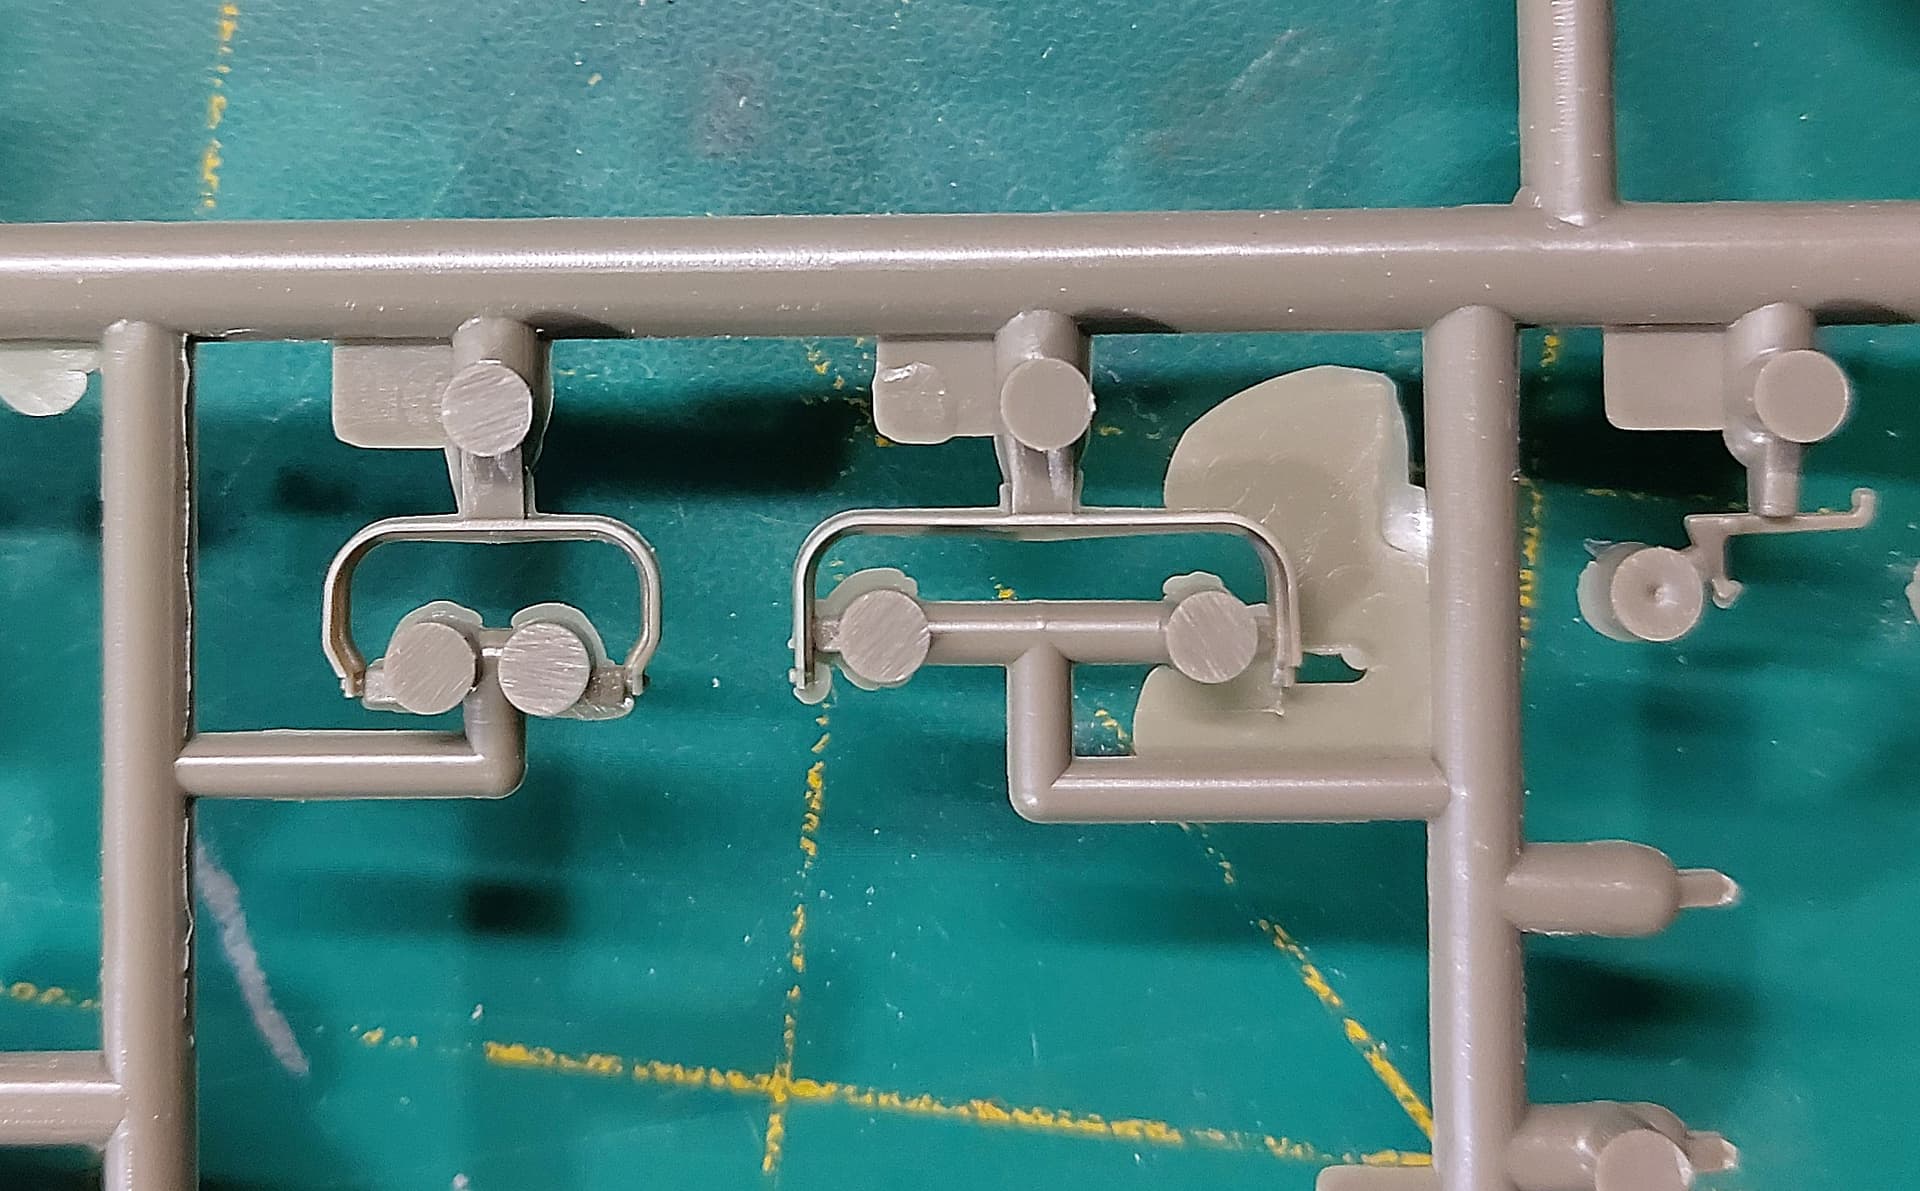
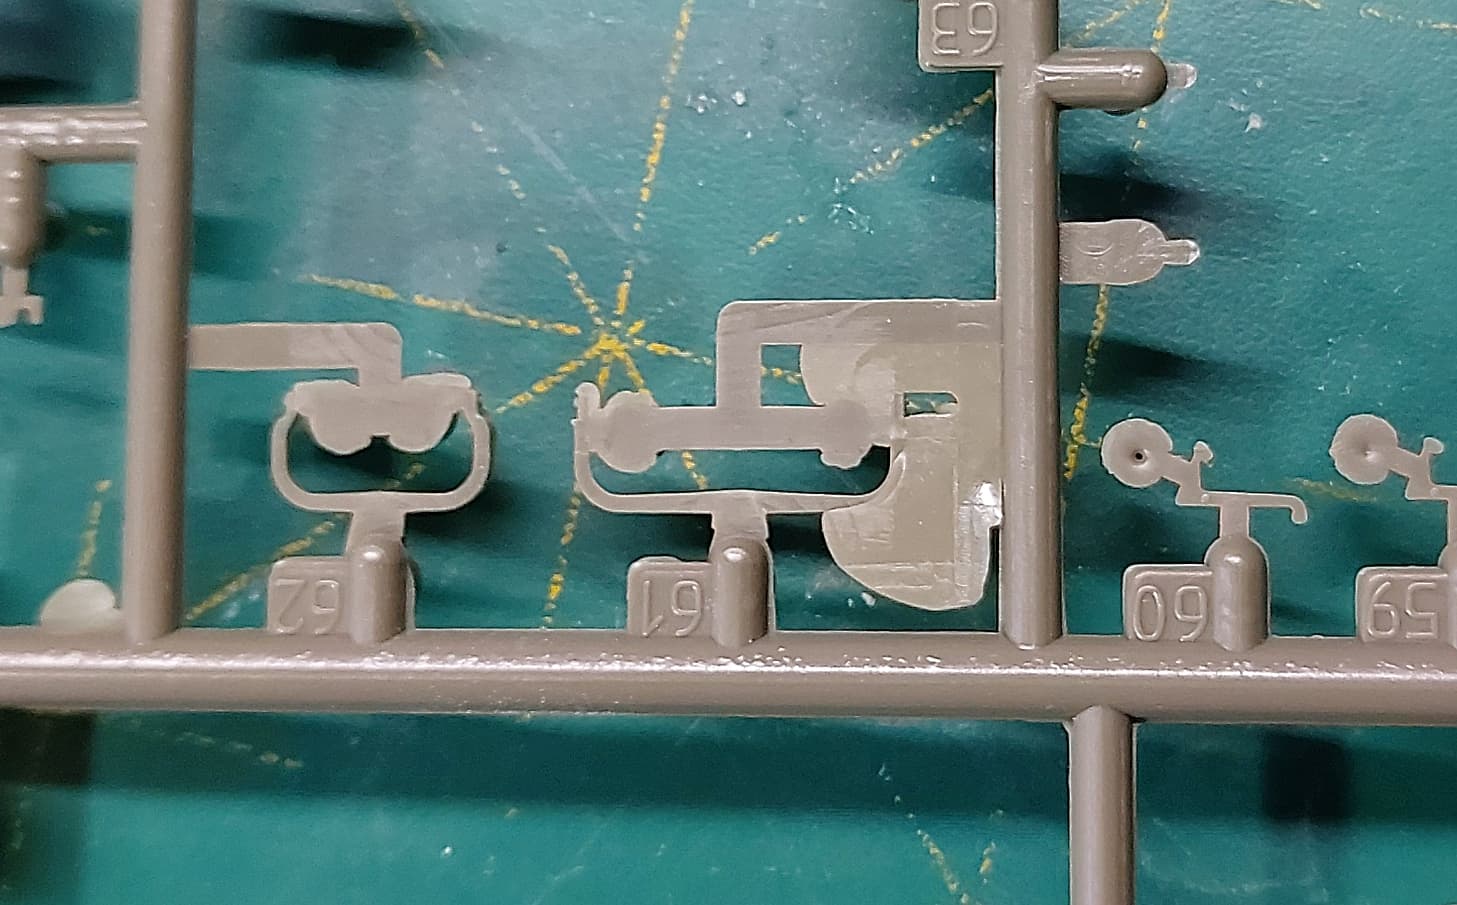
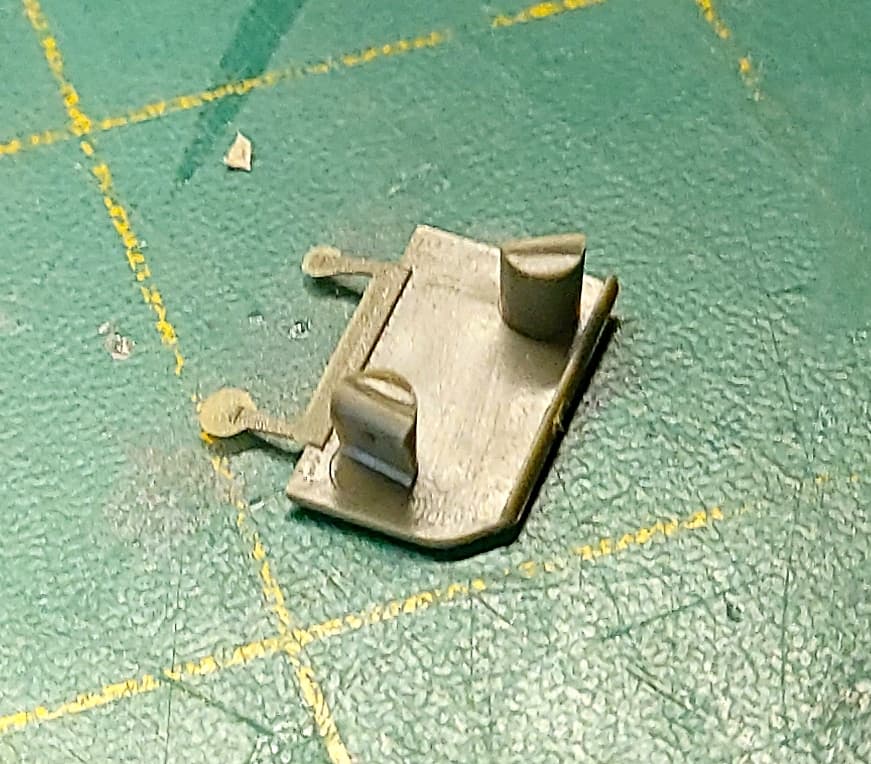
While I’m complaining!
This is ‘typical’ of how many parts appear.
LOTS of clean up.
Not a happy modeler. ![]()
3 Likes
My AMT truck kit looks slightly better, ouch!
1 Like
Wow! I don’t feel so bad about my Eastern Express B-4 Howitzer now…
1 Like
@BGT This is the AFV Club kit? That’s really bad quality wise.
Ken
1 Like
I have two of these kits and mine are both perfect. No flash like this anywhere. It seems you got a dud kit Bruce. Quality control really slipped on on yours I am sorry to say.
2 Likes
My kit was also nothing like that, it was a breeze to build.
2 Likes
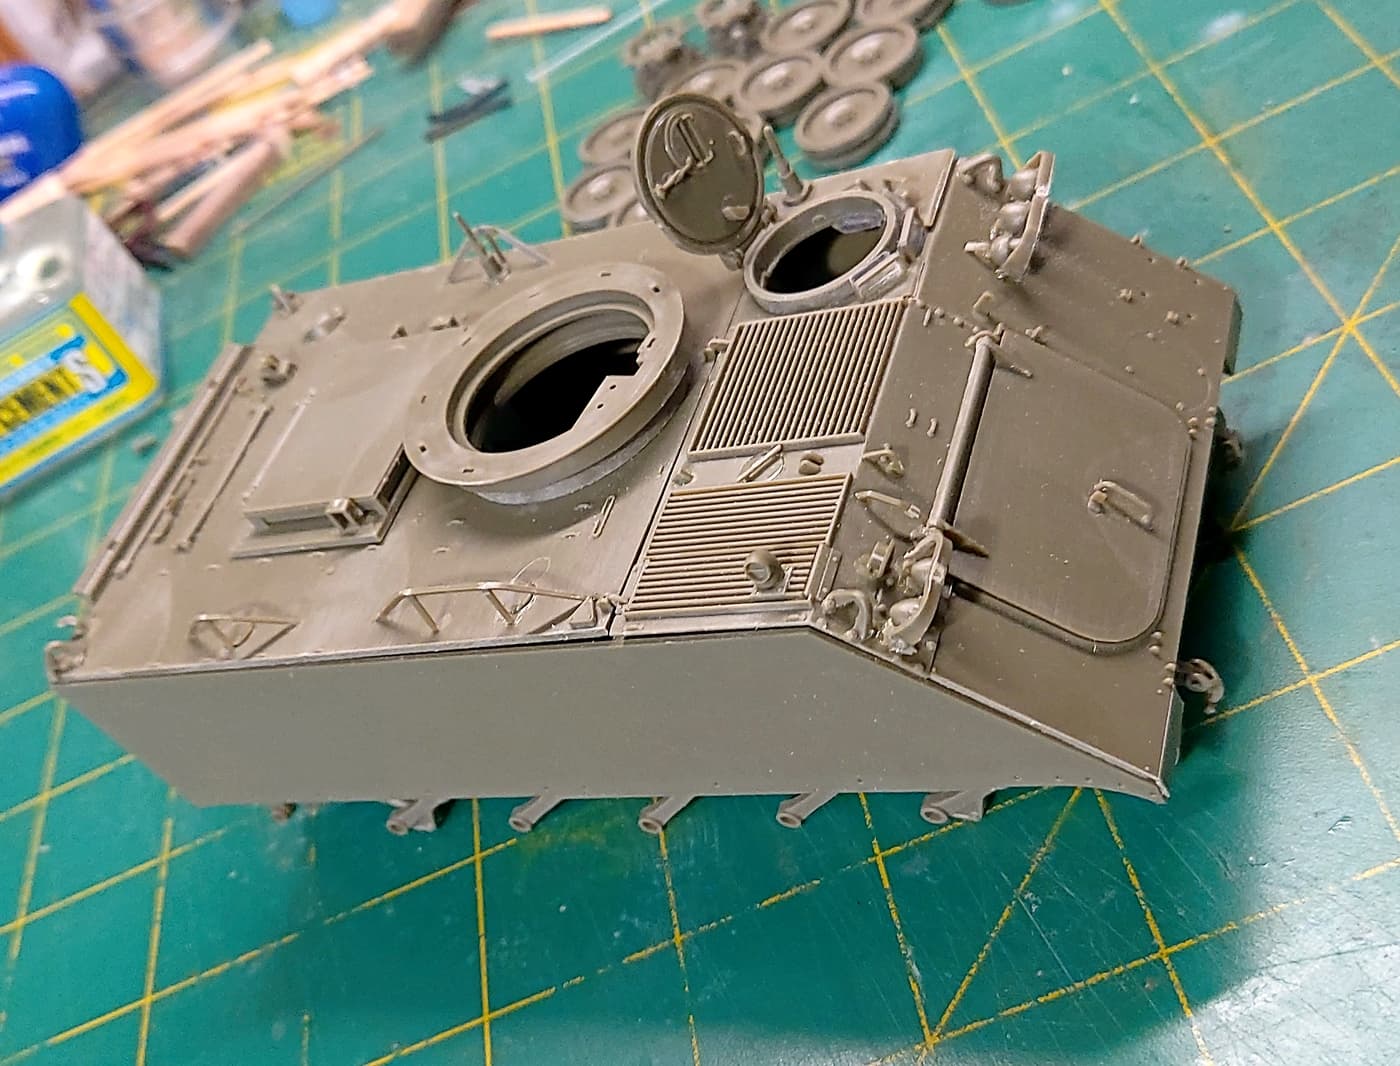
A bit of progress.
I decided to build a generic M113. No Long Tan version.
The kit has frustrated me so much that I’m now just plowing ahead to get it finished.
Look at the headlight guards. The white in the centre is where I struggled to cut them off the sprue. I’ll sand and fill them before paint. This is a result of poor design or old tooling.
Dry fitted. Next step is primer.
All the hatches work but not without some cursing. OK lots of cursing.

3 Likes
Roger that.
1 Like