Thanks. Easy fix. But out of the box, following instructions, thats how they fit.
I should have looked harder at my reference images.
1 Like
The instructions have them fitted vertical Bruce:

I also think the access port cap should have the handles North -South:
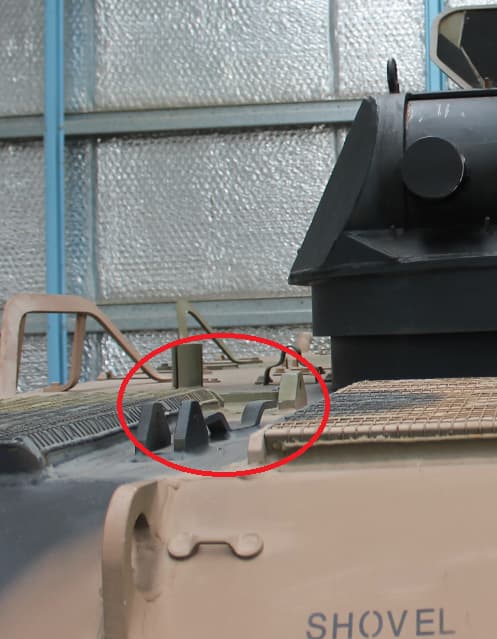

…and the exhaust pipe should be angled backward, not straight over the side.
I presume you are removing the ejection pin under the driver’s hatch?
1 Like
Thanks for the tips. I tried various ways to get them vertical. Nothing seemed logical. Mind you I hadn’t looked hard enough at images to realise “how vertical”. Ive sort of fixed them now.
My handles arent north - south because the crew are a bit slack.
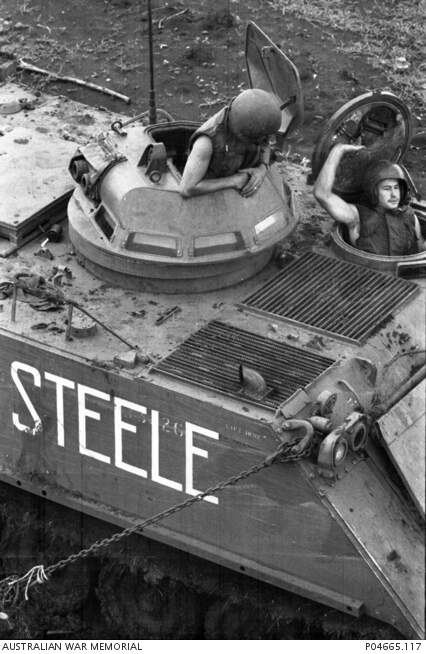
If you look at step 14 part b36 it sort of angles at 45degrees. Then in step 15 it looks like its at 45degrees. So I did 90degrees. Logic? Besides your image of STEEL looks like the exhaust is angled somewhat as well.
Injection pin? ![]() er, ah, er, bugger. I hadnt noticed it.
er, ah, er, bugger. I hadnt noticed it.
Please be gentle with me. This kit has been a PITA. Im rushing it to get it out of the way. Off the work bench. Gone. I dont think Ive ever had a kit that has browned me off so much.
I dare not bin it. Im angling the wife for a new, expensive, camera and if she thinks Im wasting money binning kits then I may be talking with a high pitch for sometime. And no new camera.
EDIT - injection pin gone. 
Exhaust now facingbackwards. But should it be? See below.
Handle on the access port is staying. Handle is too fragile to jackhammer off. There again I could eliminate it and drop in a wire one. Hmmm.
4 Likes
Not much happening. Tooo many sick days!
For all its faults this kit has some fine opportunities to make a nice build. Pity I’m not in the mood!!
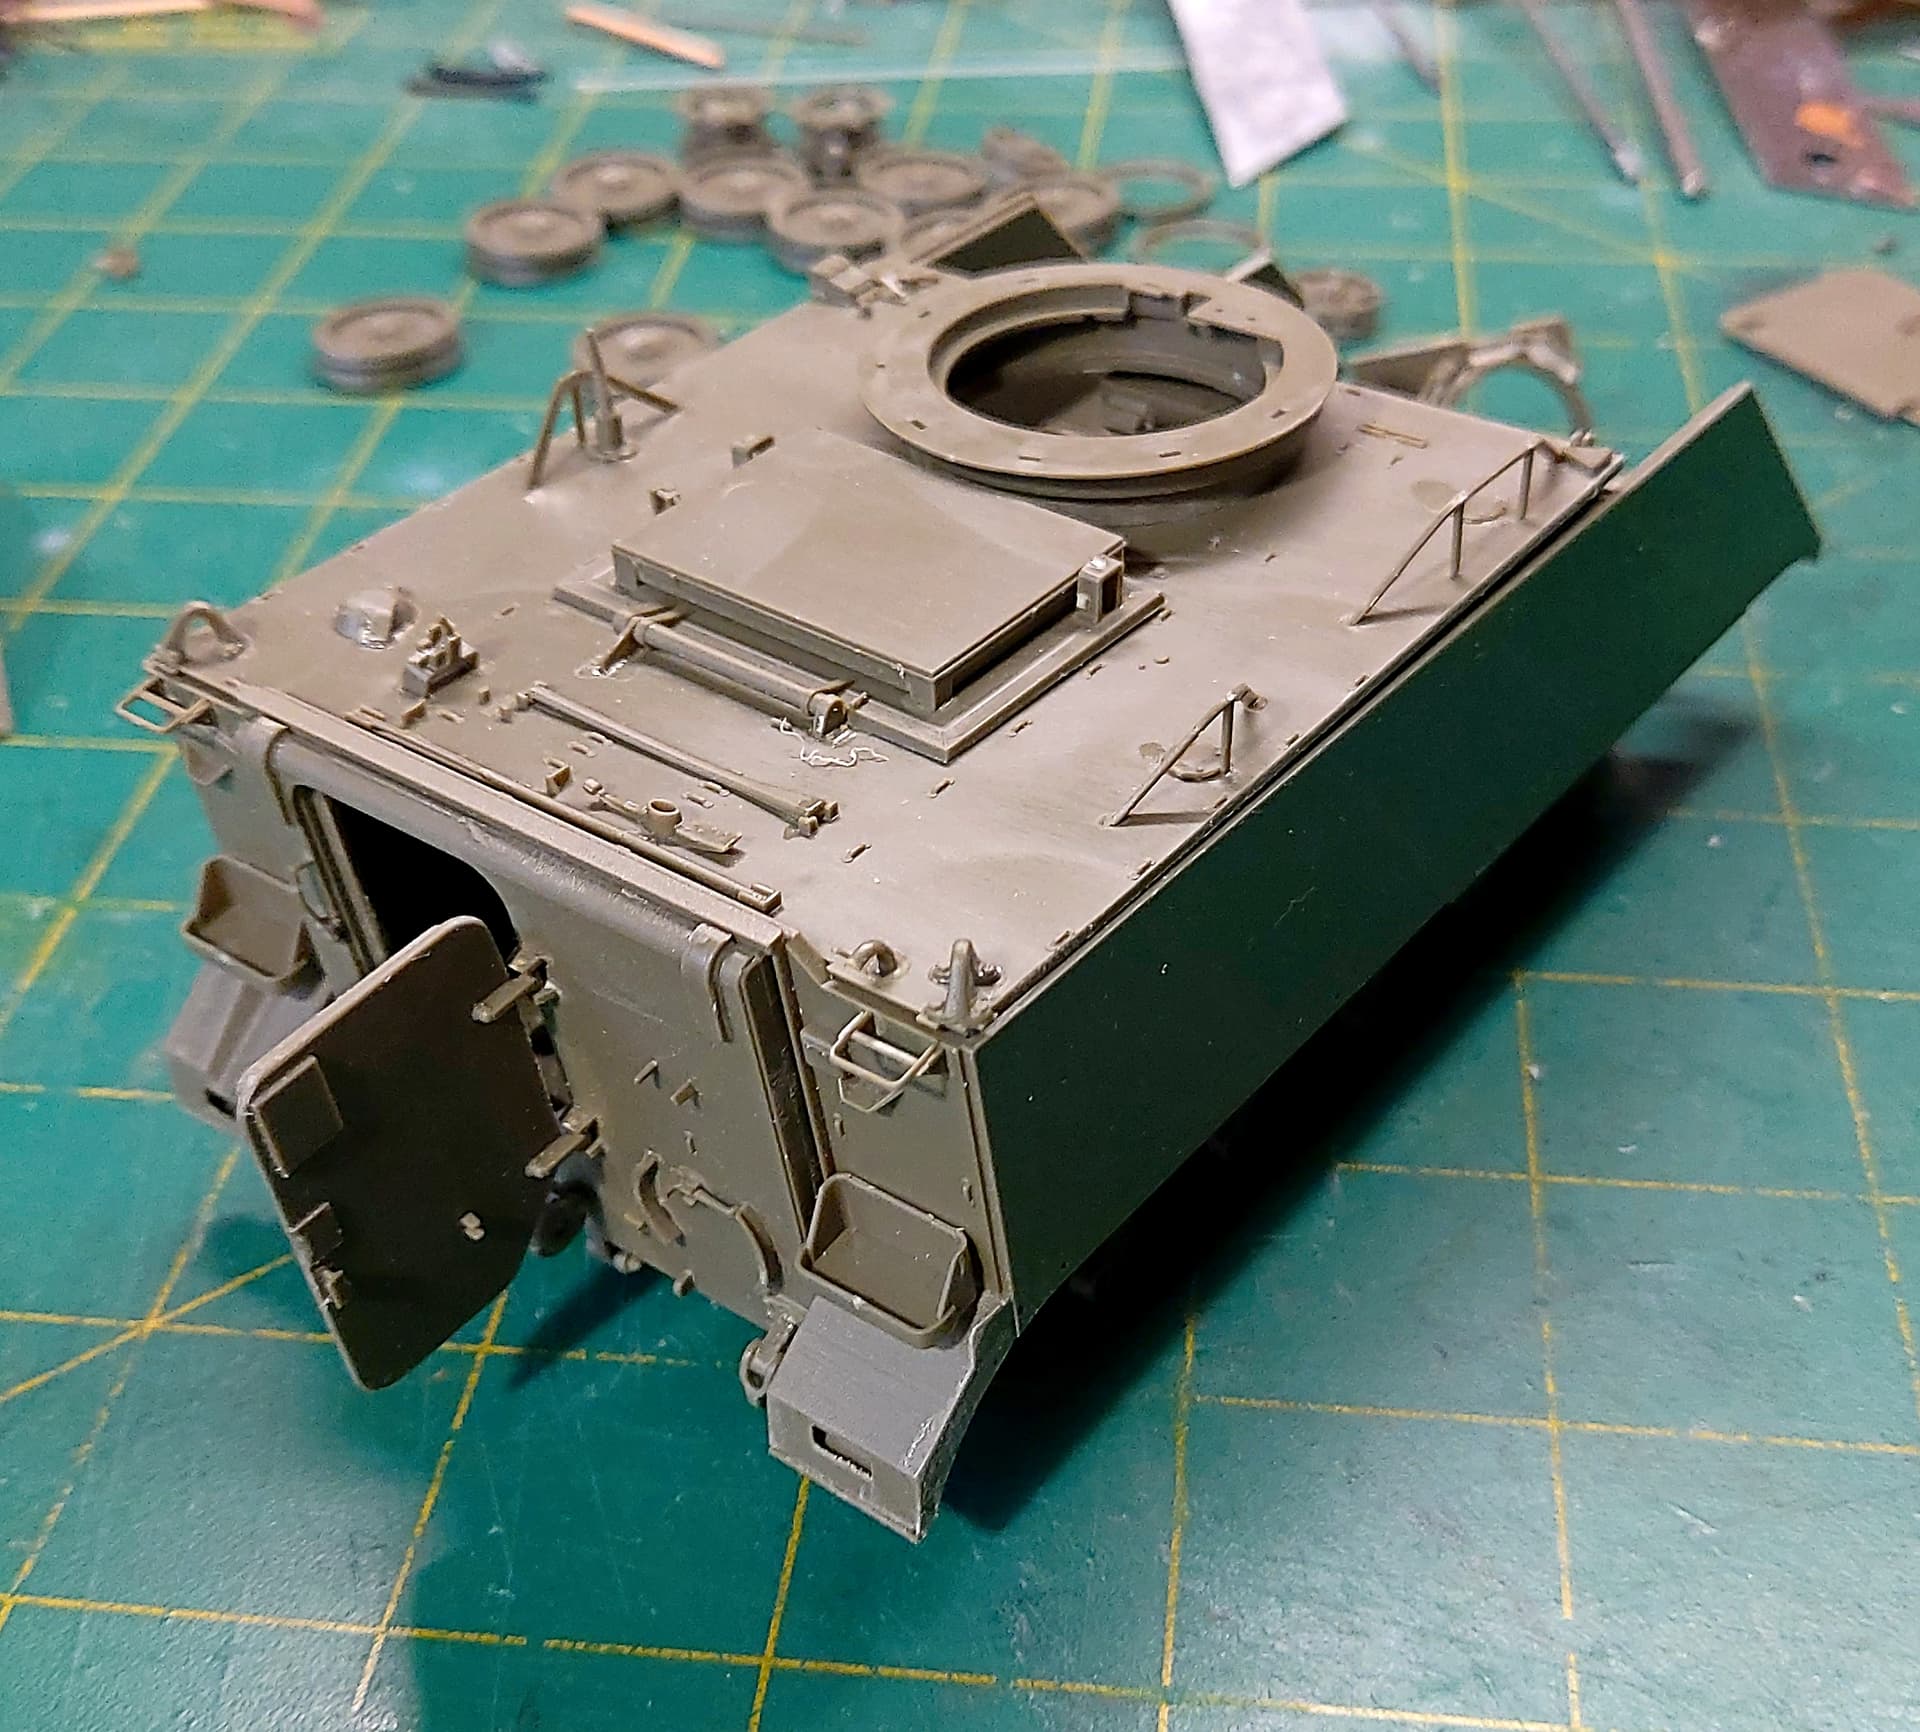
I managed to get all the hatches operable.
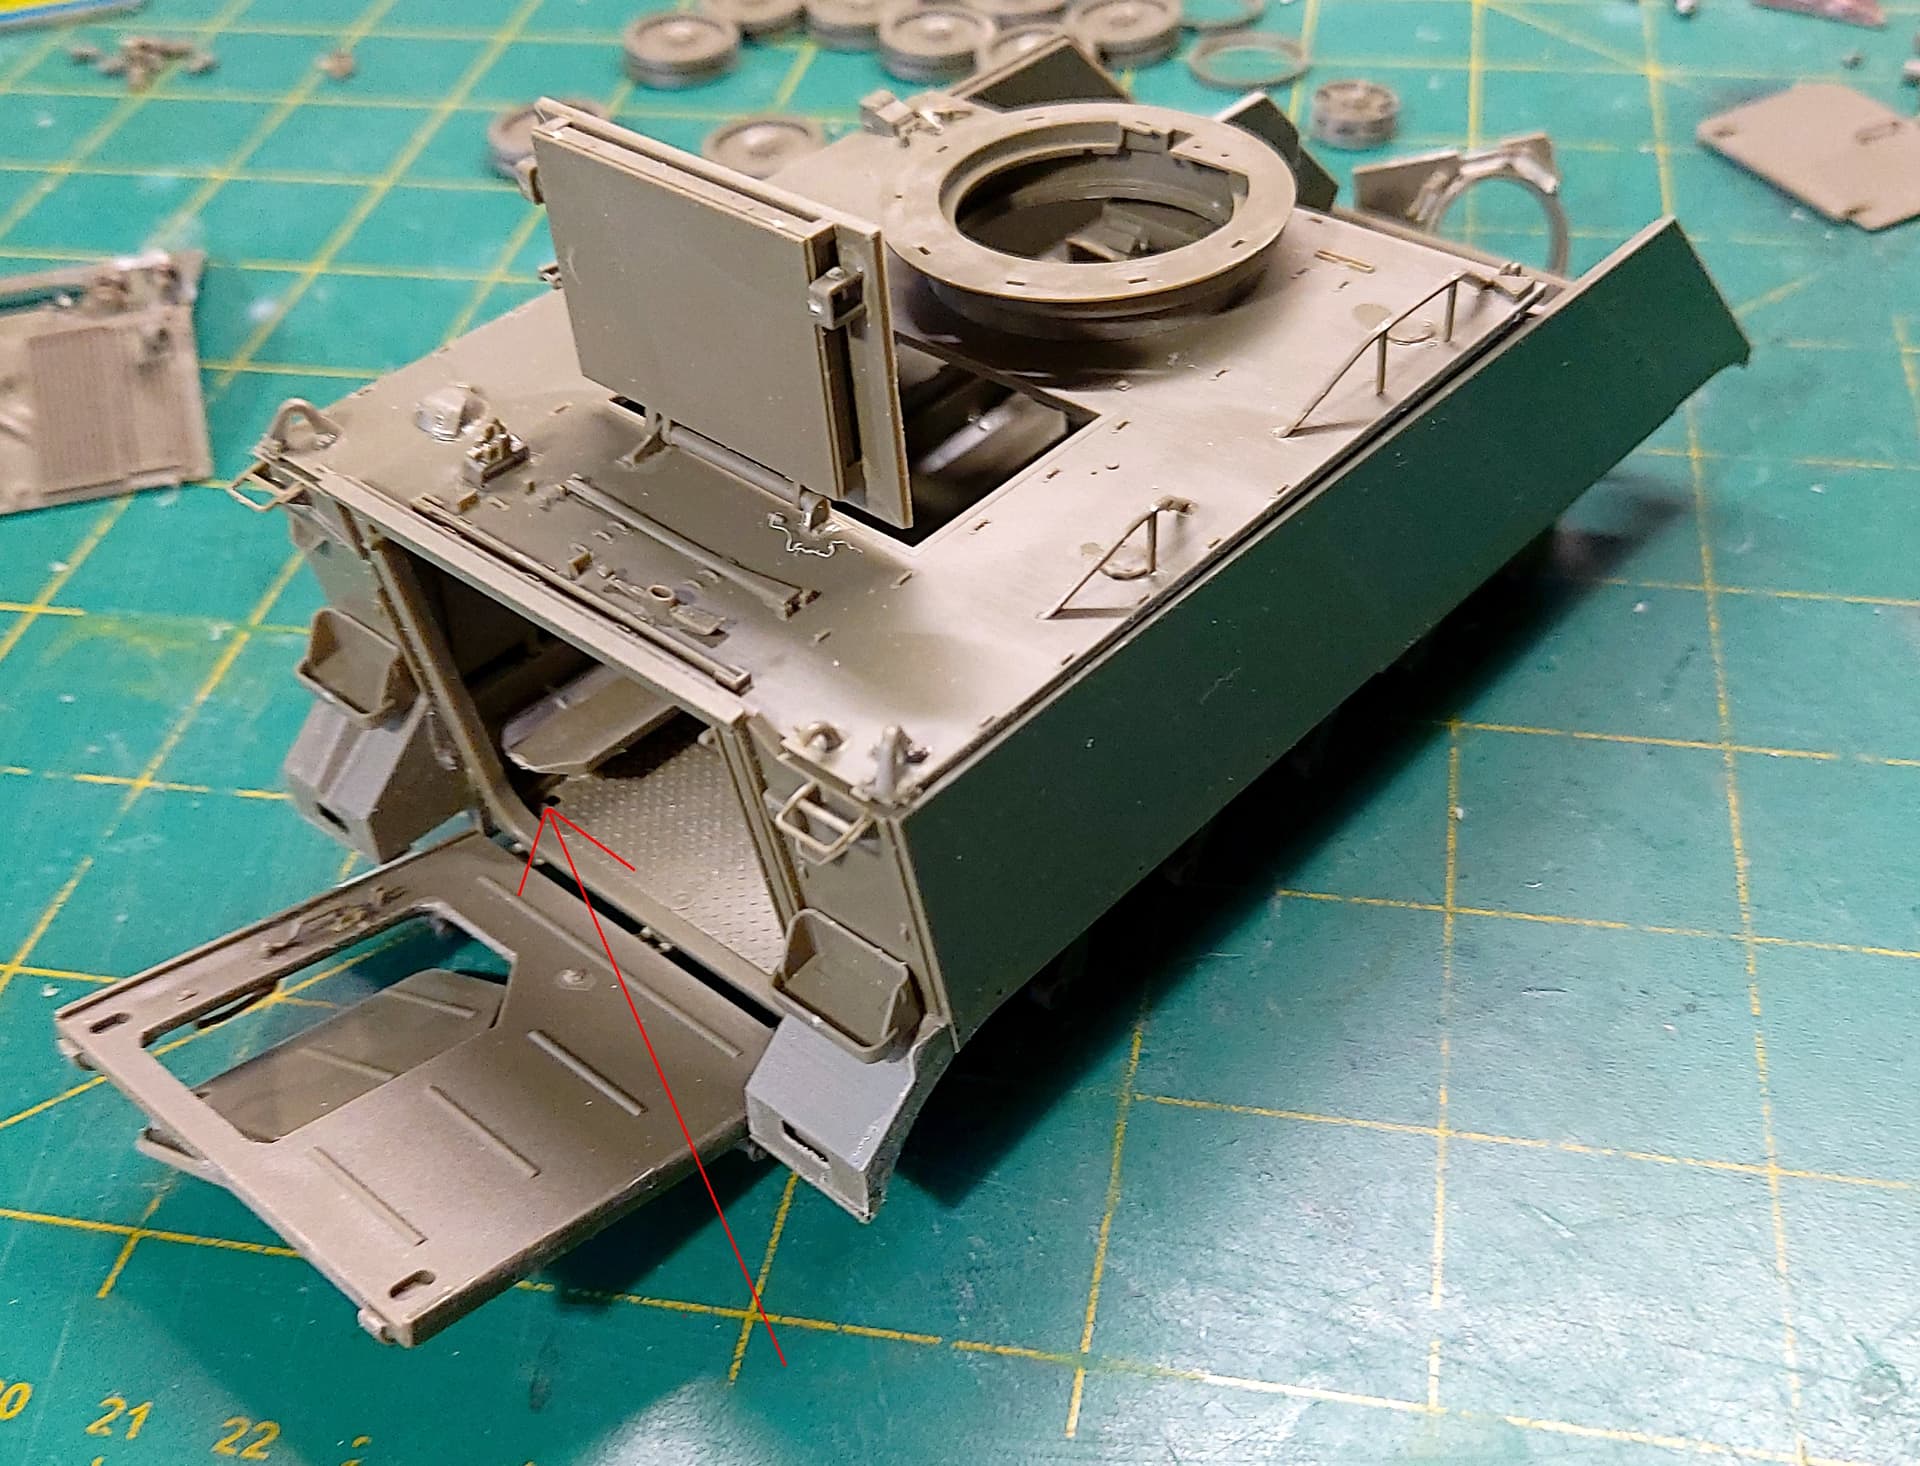
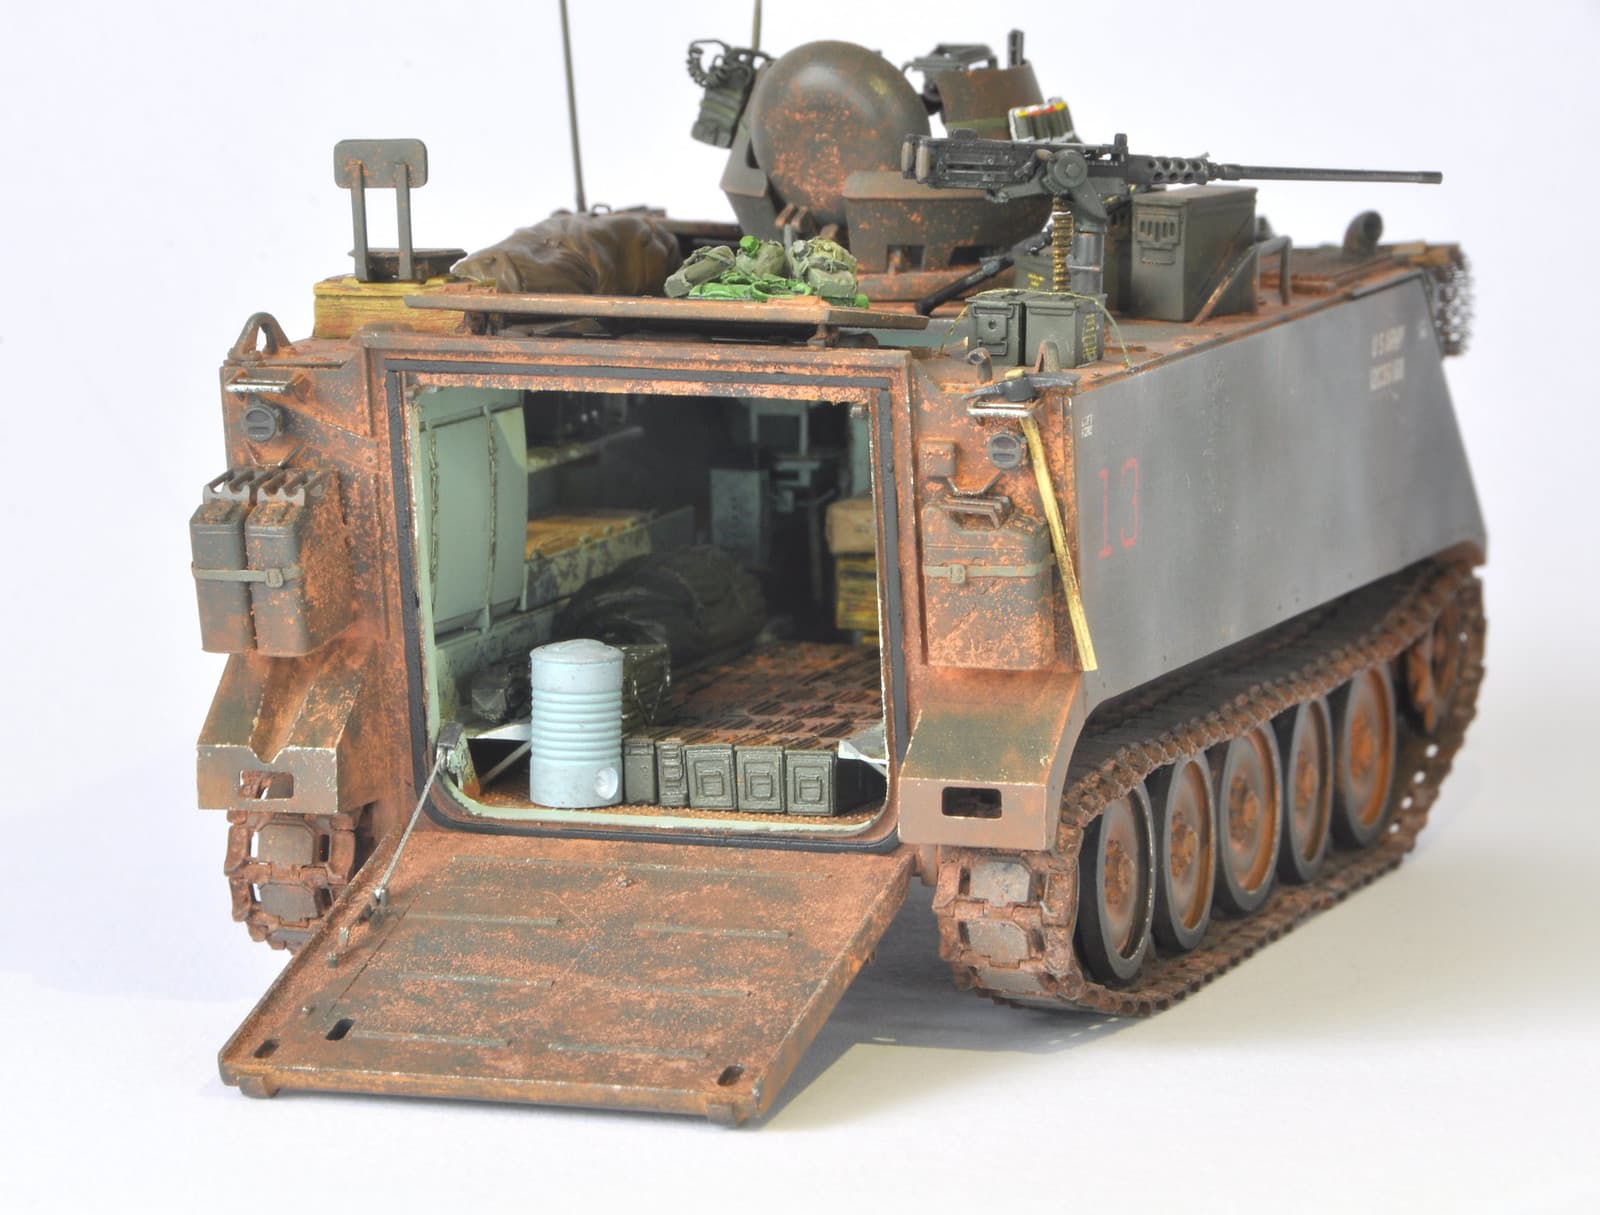
BUT. Step 18 gives you the option of an open or closed rear door. That has 2 issues. First in step 6 you have to install the rear seats. Their placement is a bit vague so beware! In step 18 you have to install part C8. (see red arrow). Good luck on that if you haven’t got your rear seats high enough in step 6. Then in step 18 there is the option of rear door open or closed. I’m building mine closed because of the diorama I have in mind. I could just glue the doors closed. But! But having built them so they open I want the option of peekabooing inside. Now can someone with a higher IQ than me tell me how I install part C8 and C2 if the deck is glued on and the rear door is to be closed?
Note - the commanders hatch/openning is just sitting there. I haven’t yet looked at the options.
1 Like
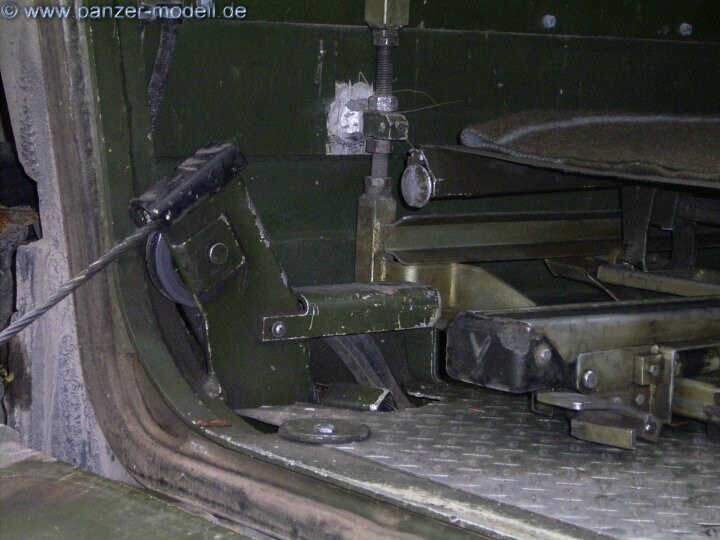
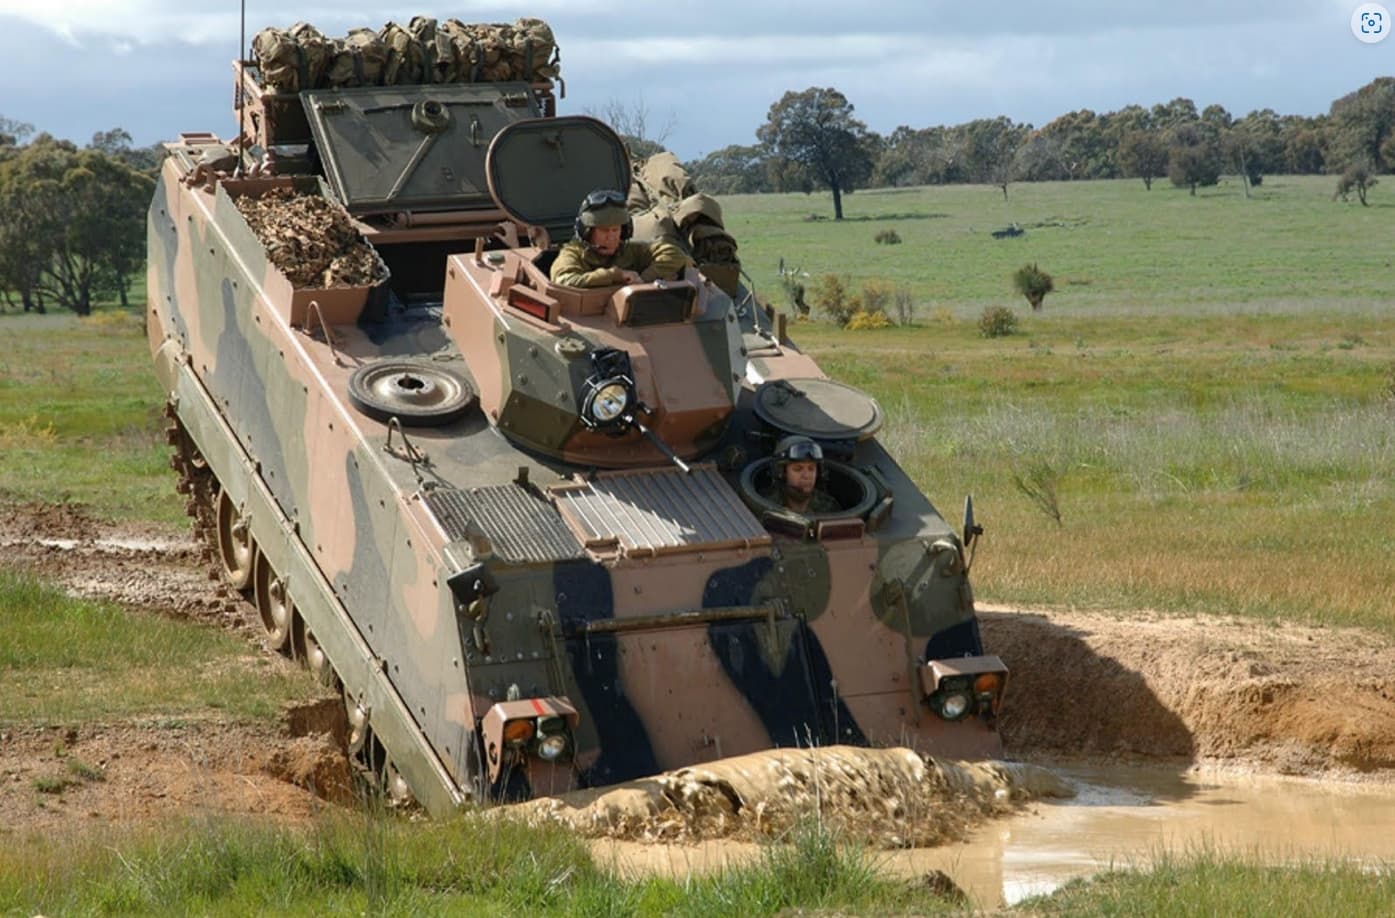
The arrow points out to where the ramp pulley cable goes (on an M113 Ambulance)
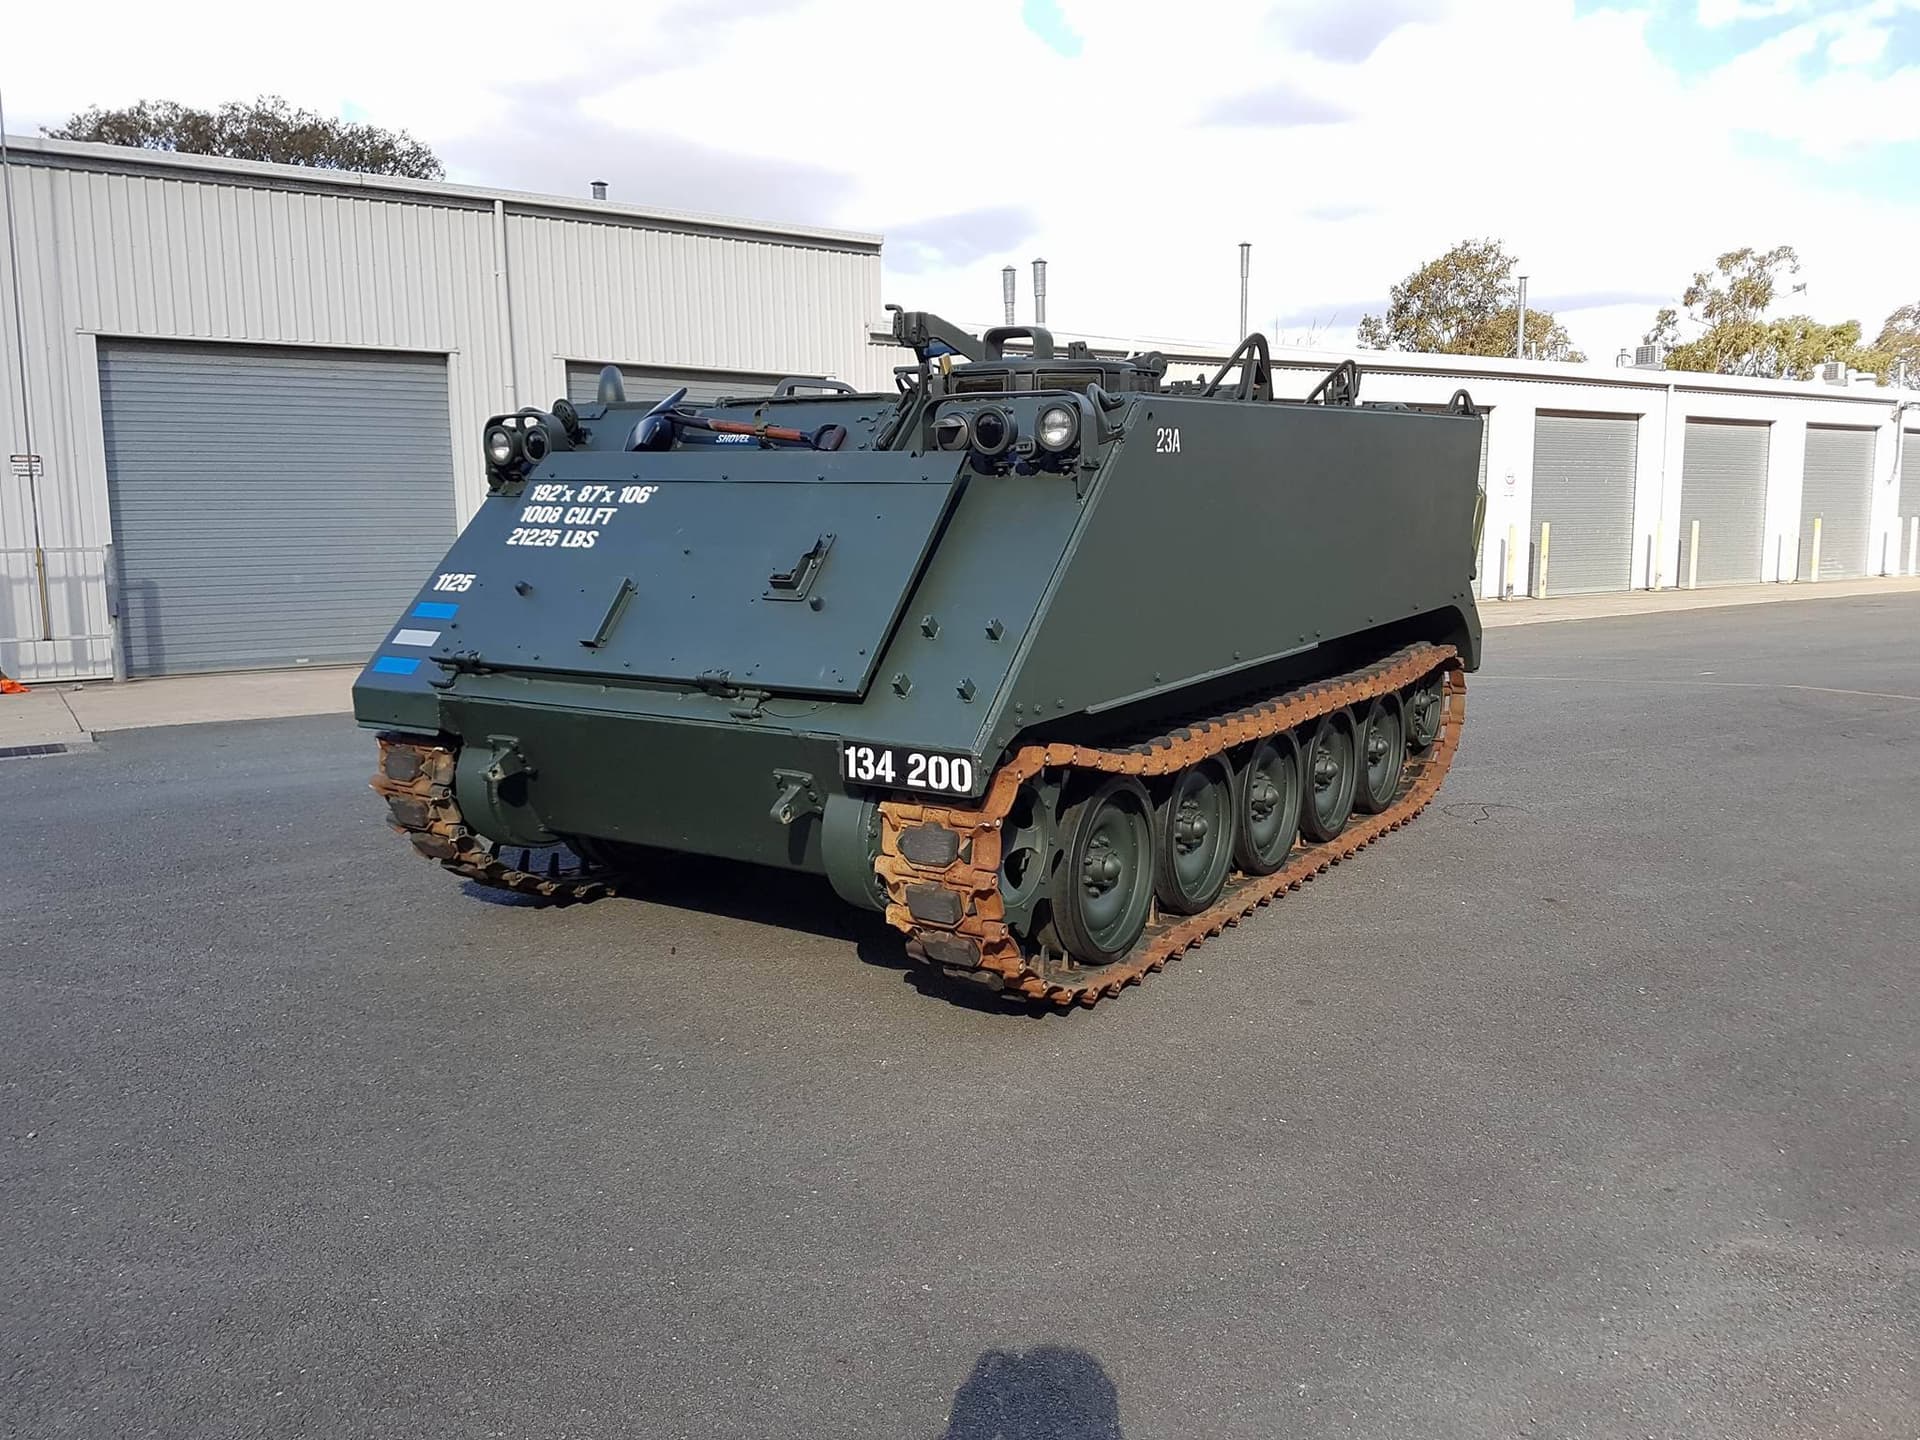
As n an M113AS4.
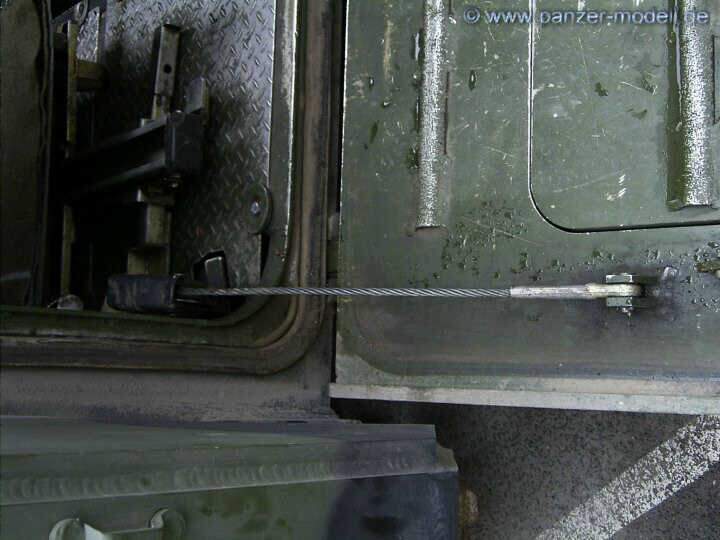
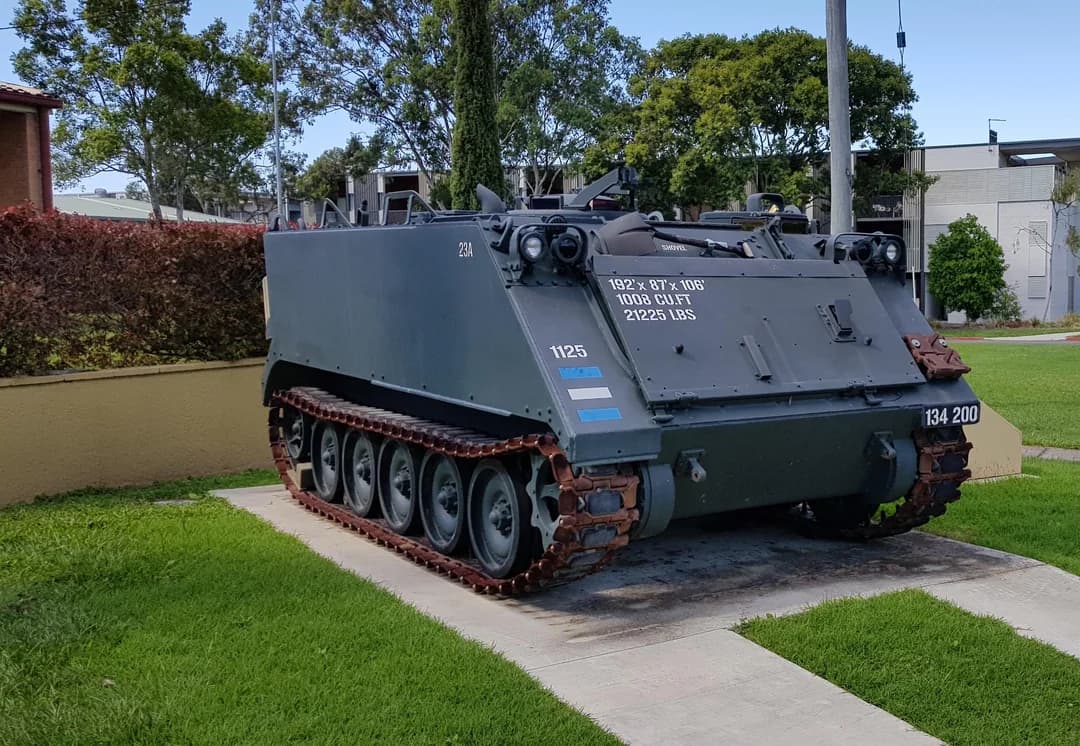
On the AFV Club M113A1.
3 Likes
Thanks. I know where it goes. The location of the seats is vague. Mine are about .5mm too low. Brute force will work. But how do you assemble the pulley if the door is closed?
The joys of modelling!
1 Like
I would just install the pulley system without the cable, since the ramp is closed, but the troop hatch will be open, you won’t see it at all.
2 Likes
I need some help! Well wife says that all the time! ![]()
The AFV kit is an Australian version. However all the options are for a ‘turret’ version. So can someone please point me to some images of the top commander hatch as would have been on the units at Long Tan.
Thanks
1 Like
@petbat can point you in the right direction. I think that the M113s present did not have turrets, but I’m most likely wrong.
There are pics posted here that show the vehicles present during the Battle.
1 Like
Bruce, thy had the standard original cupola at Long Tan. See the pics I posted back on 25 March
They used one original configuartion vehicle in the movie Danger close, which is actually the vehicle Clements was wounded in. ![]()
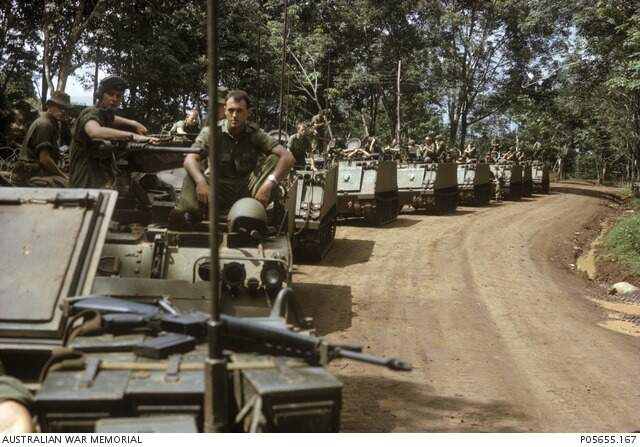
Similar vehicles to those used at Long Tan
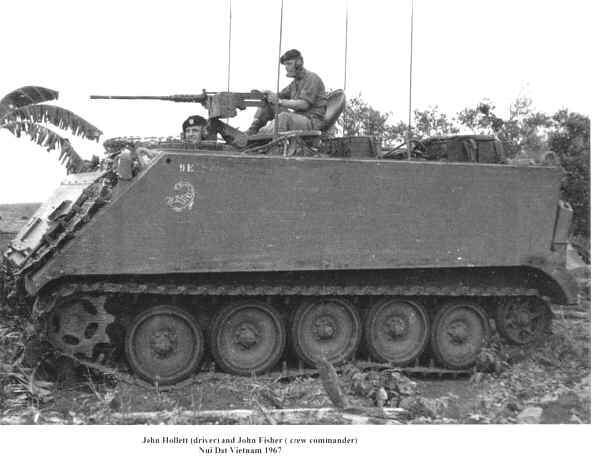
They had standard cupolas without the gun shield; the shielded cupolas were not adopted until AFTER Long Tan.
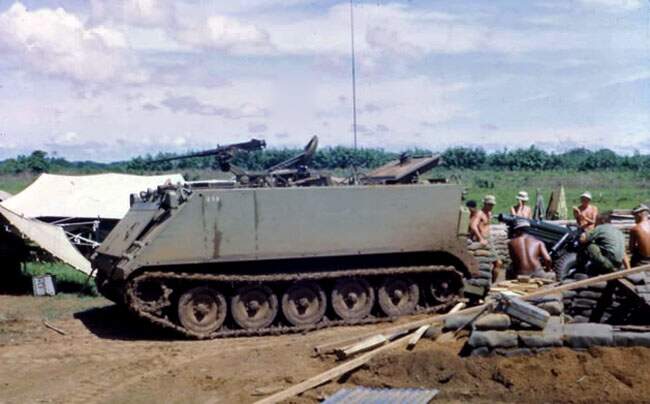
Aussie M113 with gun shields, post-Long Tan.
1 Like
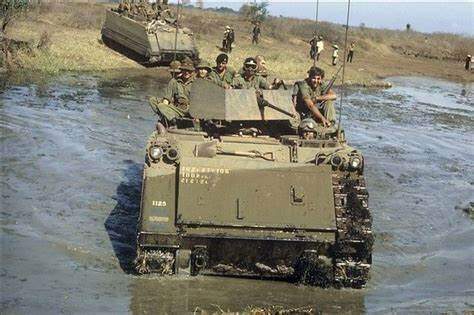
I think this is the vehicle still in Vietnam, after the battle - same markings and everything.
Thanks guys. I have most of those images and more. But the kit doesn’t have the ‘standard’ setup. I want to build a ‘standard’ setup. So I want a clear image looking down on APC. Inc gun mount etc.
I do not know how different the top roof on the kit you have is to the M113A1 ACAV model, but you might need to replace the top with the B Sprue from AFV CLub’s M113A1 ACAV kit.
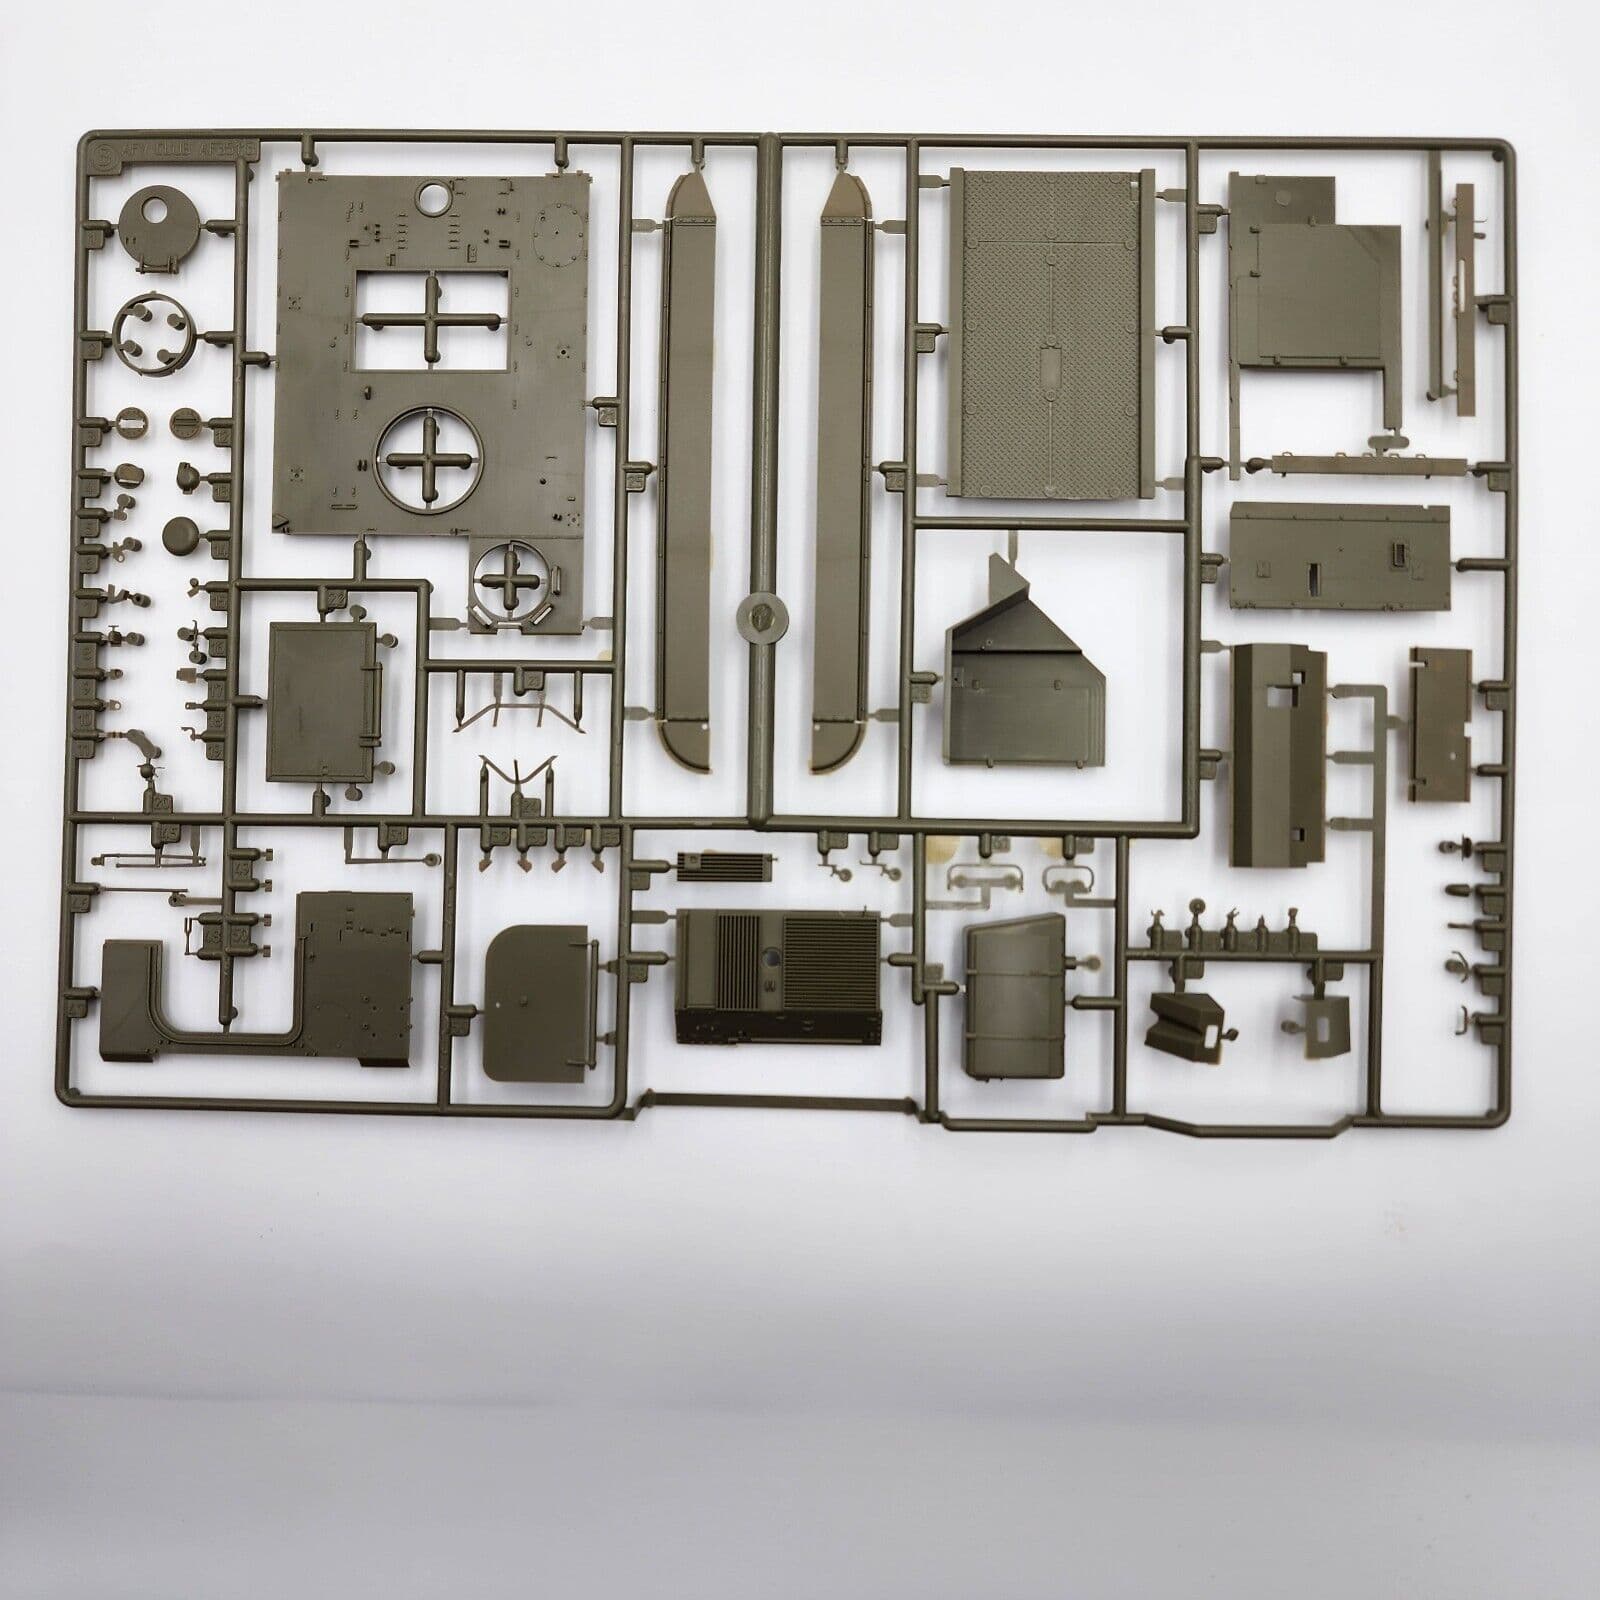
AFV Club 1/35 M113A1 ACAV AF35113 Parts Kit Bash B Sprue Tree | eBay
But then you’d need the standard commander’s cupola with the .50 caliber MG, which is Sprue C.
The Australian M113A1 kit comes with every sprue that is in the ACAV kit, including sprue E with extra bits added. In fact, all they needed to do was add the ACAV decal sheet and the differing parts of the instructions into the Australian kit and make a ‘2 version’ kit.
The ACAV kit
The Aussie kit
1 Like
Now this is where a nob like me comes unstuck.
I follow the instructions. What else do you do? ![]()
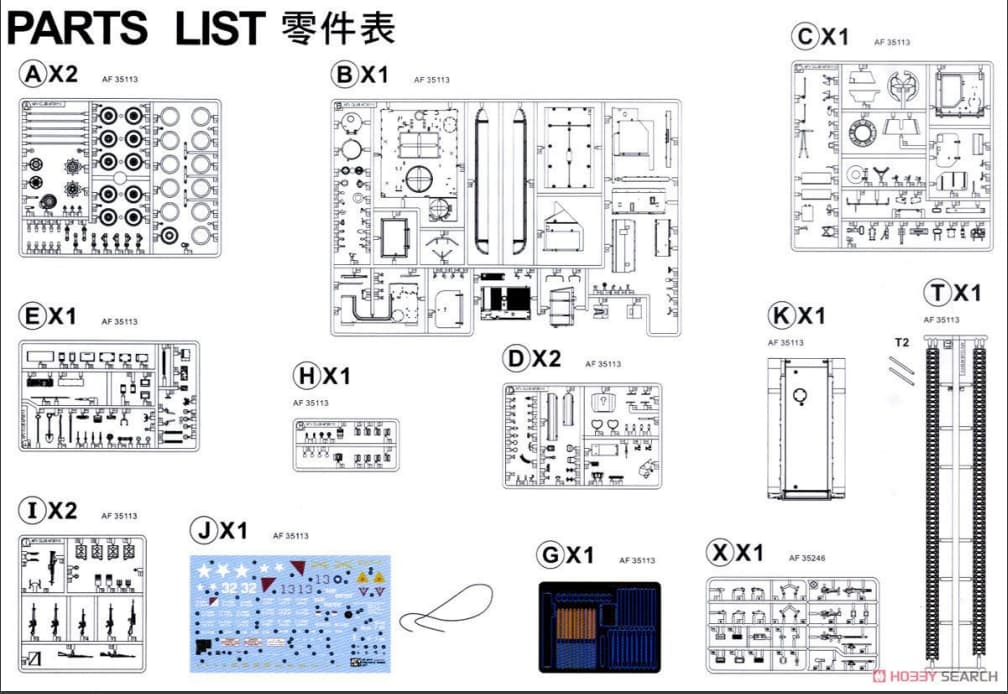
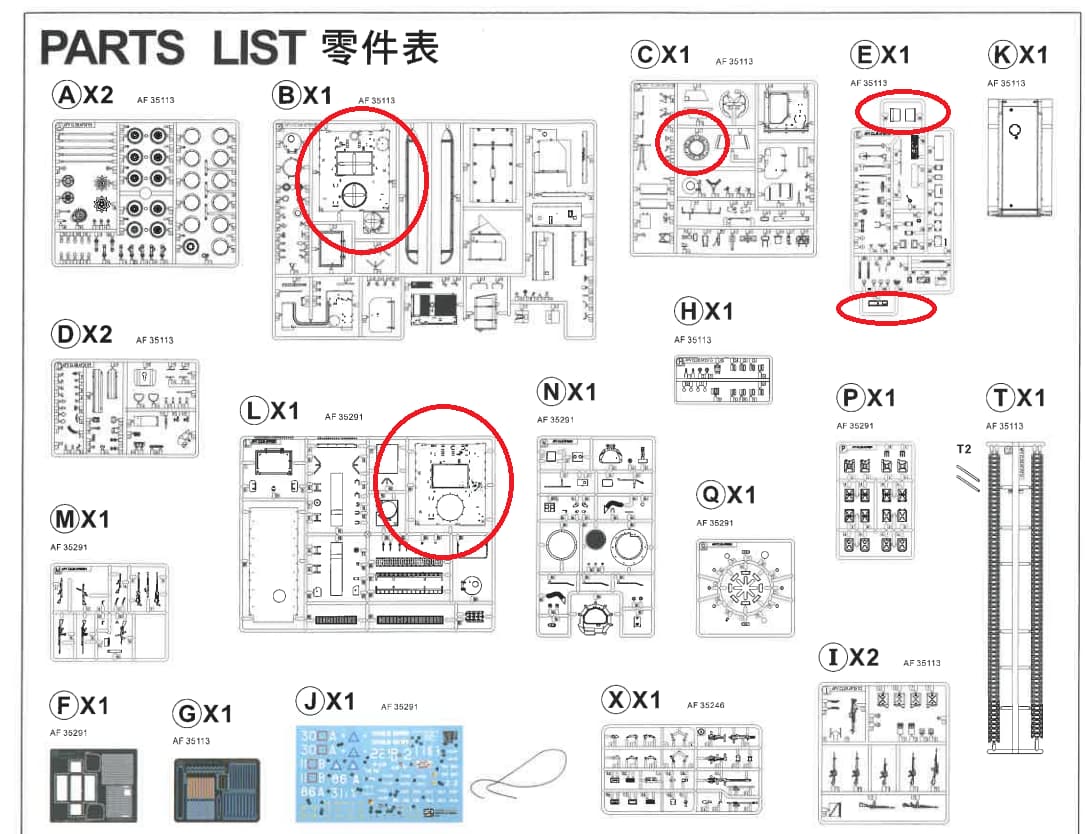
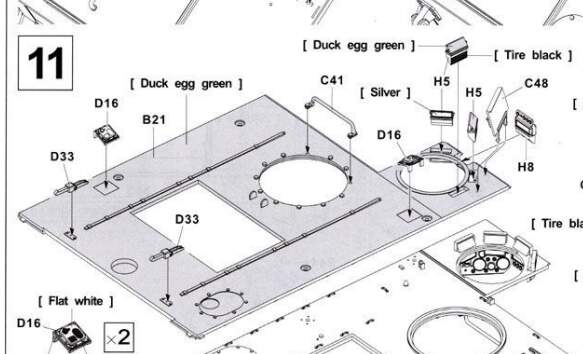
Step 11. note the green ‘circles’. Part B21 AND part L14. Which do you use? Now look over to the right and the red ‘circle’. So logic tells me that to use part L15 I need to use L14. I’m now assuming I should have used part B21? Or maybe not!
I guess I should have started with another kit. A kit of an original M113.
So out of the bits I have I need to cobble together something. I need a top down image to do that. Plenty of side on images.
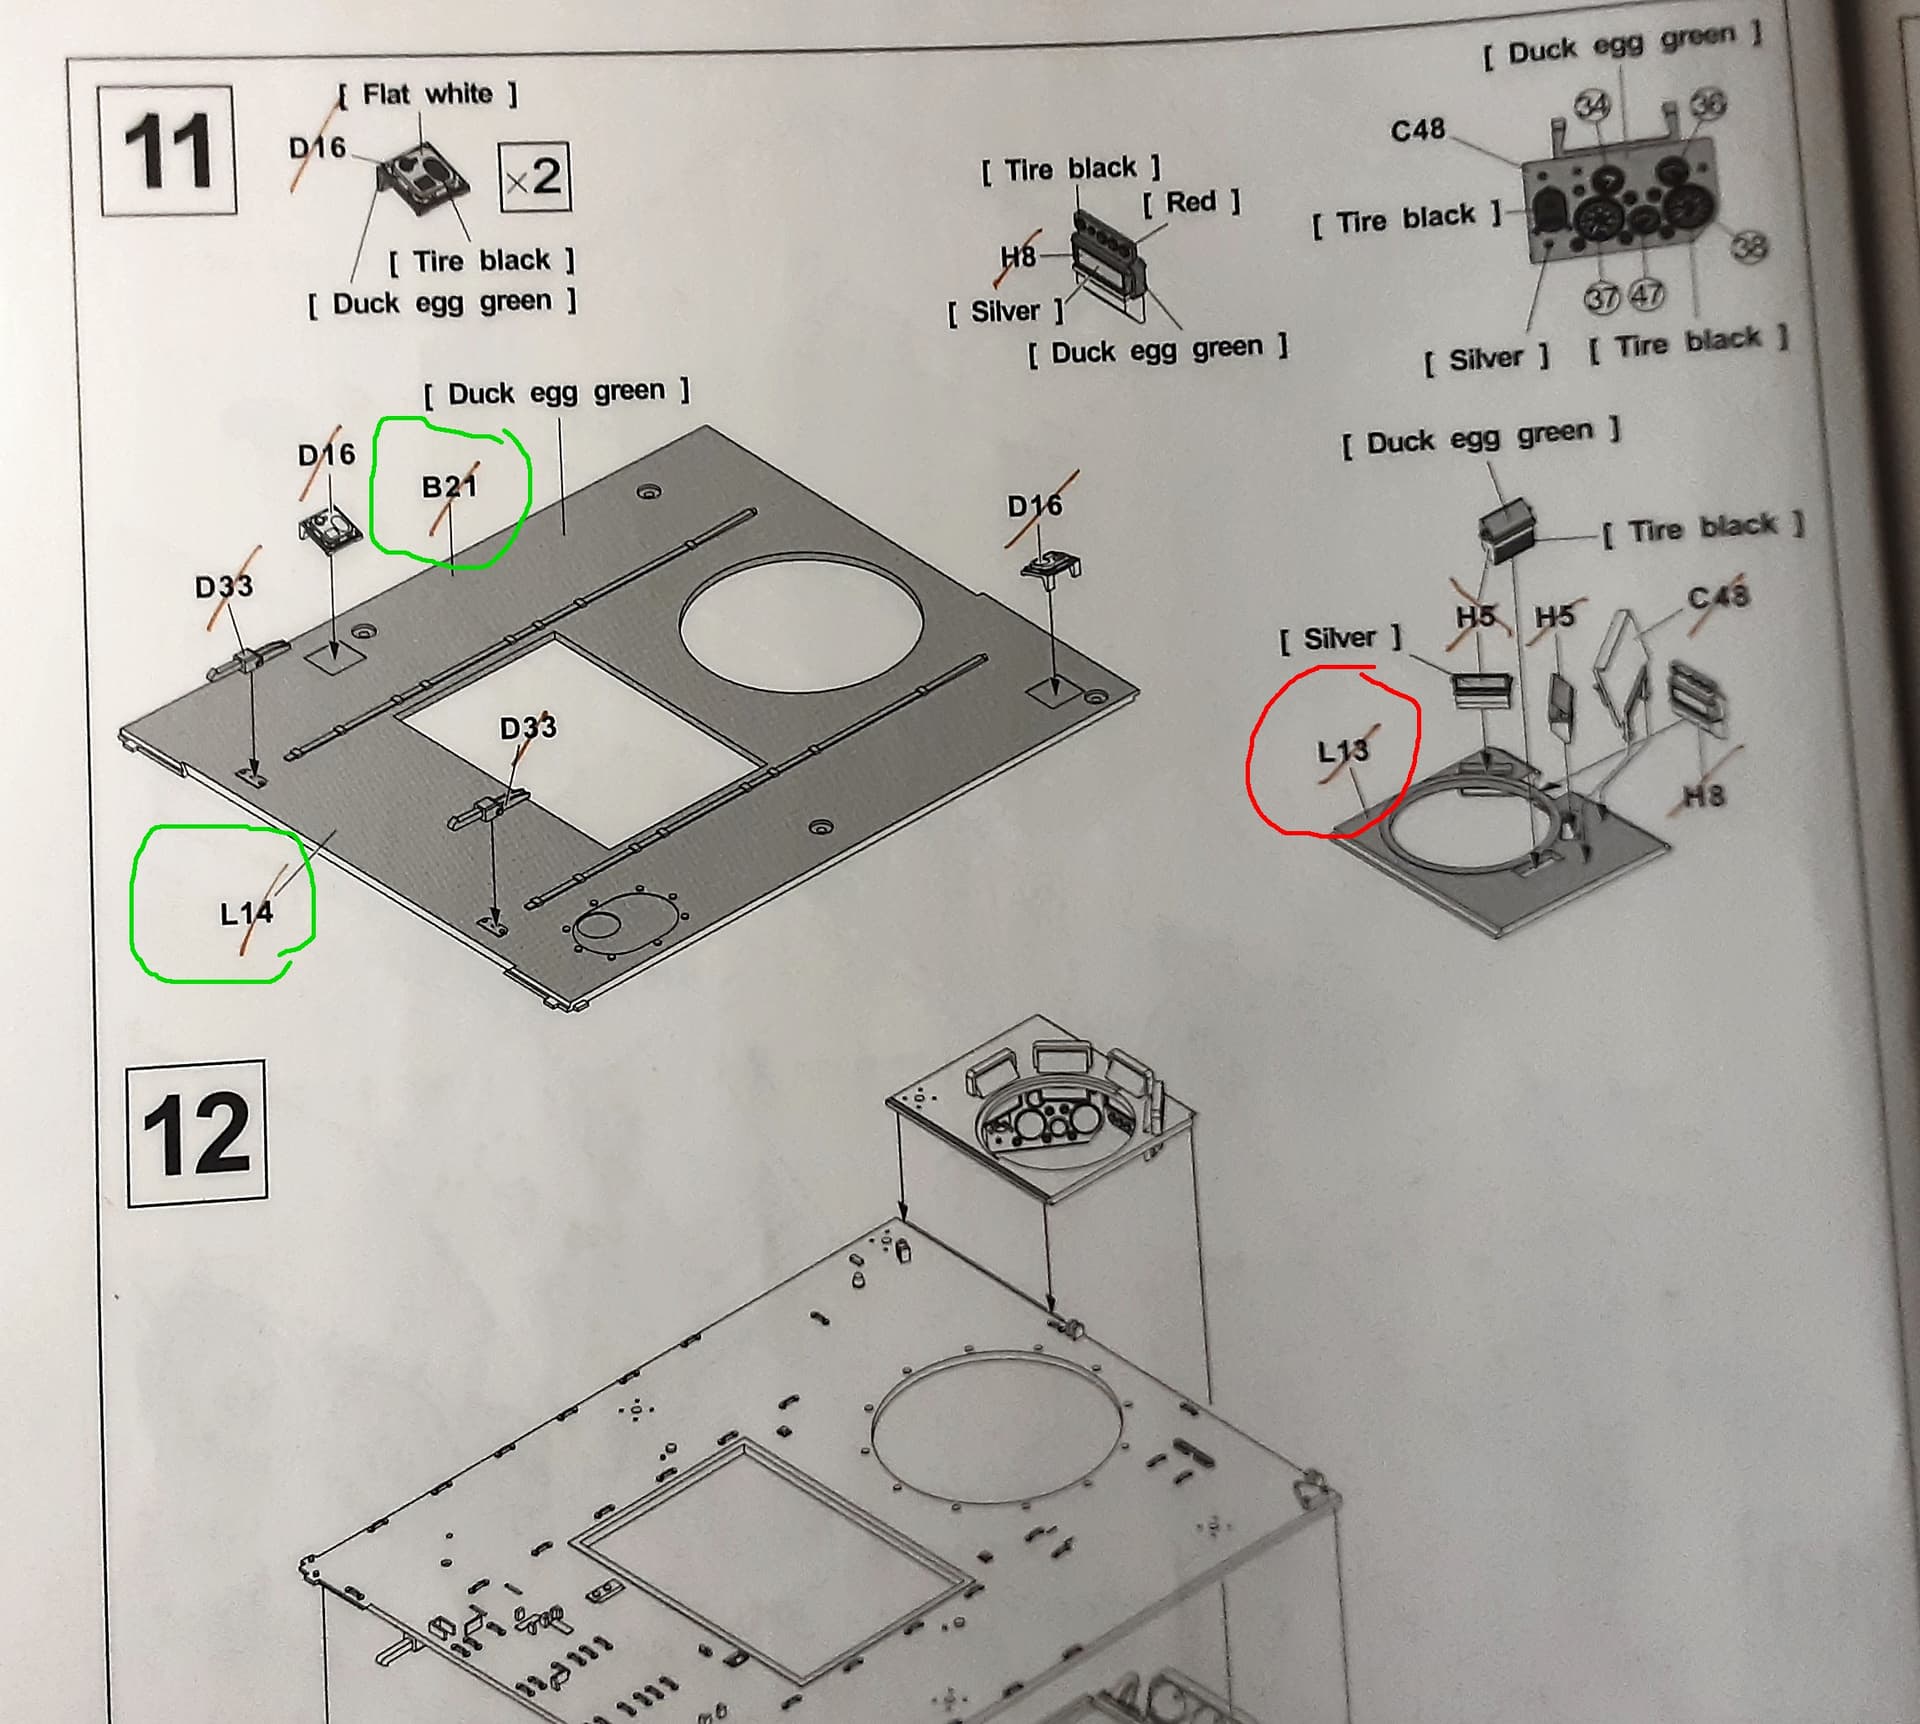
Aaaah Bruce I was with you mate, right with you until you said part “L 15” & then my brain hit a speeding lamp-post – I really hope you meant part L 13 or my insurers won’t pay up. I truly have no idea but the instructions seem to imply you can use L13 with either B21 or L14, so I’m bound to be dead wrong ![]()
L13.
L13.
L13.
Oh god now I will have to write it out so many times. L13. L13.
Sorry. It’s not my eyes. Nor my brain. But it’s my figures on the keyboard.
Honest.
Note - I used Google to find a PDF of AFV Clubs earlier kit. That has information on the original hatch.
1 Like
B21/L14. The same guy that designed Dragon kit instructions must have been employed to do these too. Simply using the same upper hull diagram from the ACAV kit and then adjusting it slightly:
Bruce, which config are you doing? Long Tan or the later one with the T50 turret? You can’t follow the T50 version instructions and get a Long Tan version. For Long Tan, download the ACAV kit instructions from Scalemates.
Even then, the parts for a ACAV are not all the same as those used on the Aussie Long Tan version.
Like any build where you are not doing exactly what is in the box, you have to do your research first and compare the kit parts to what you need. Measure twice, cut once…
Here is the Mouse House conversion for Tamiya based Long Tan vehicle. It shows the upper ull clearly:
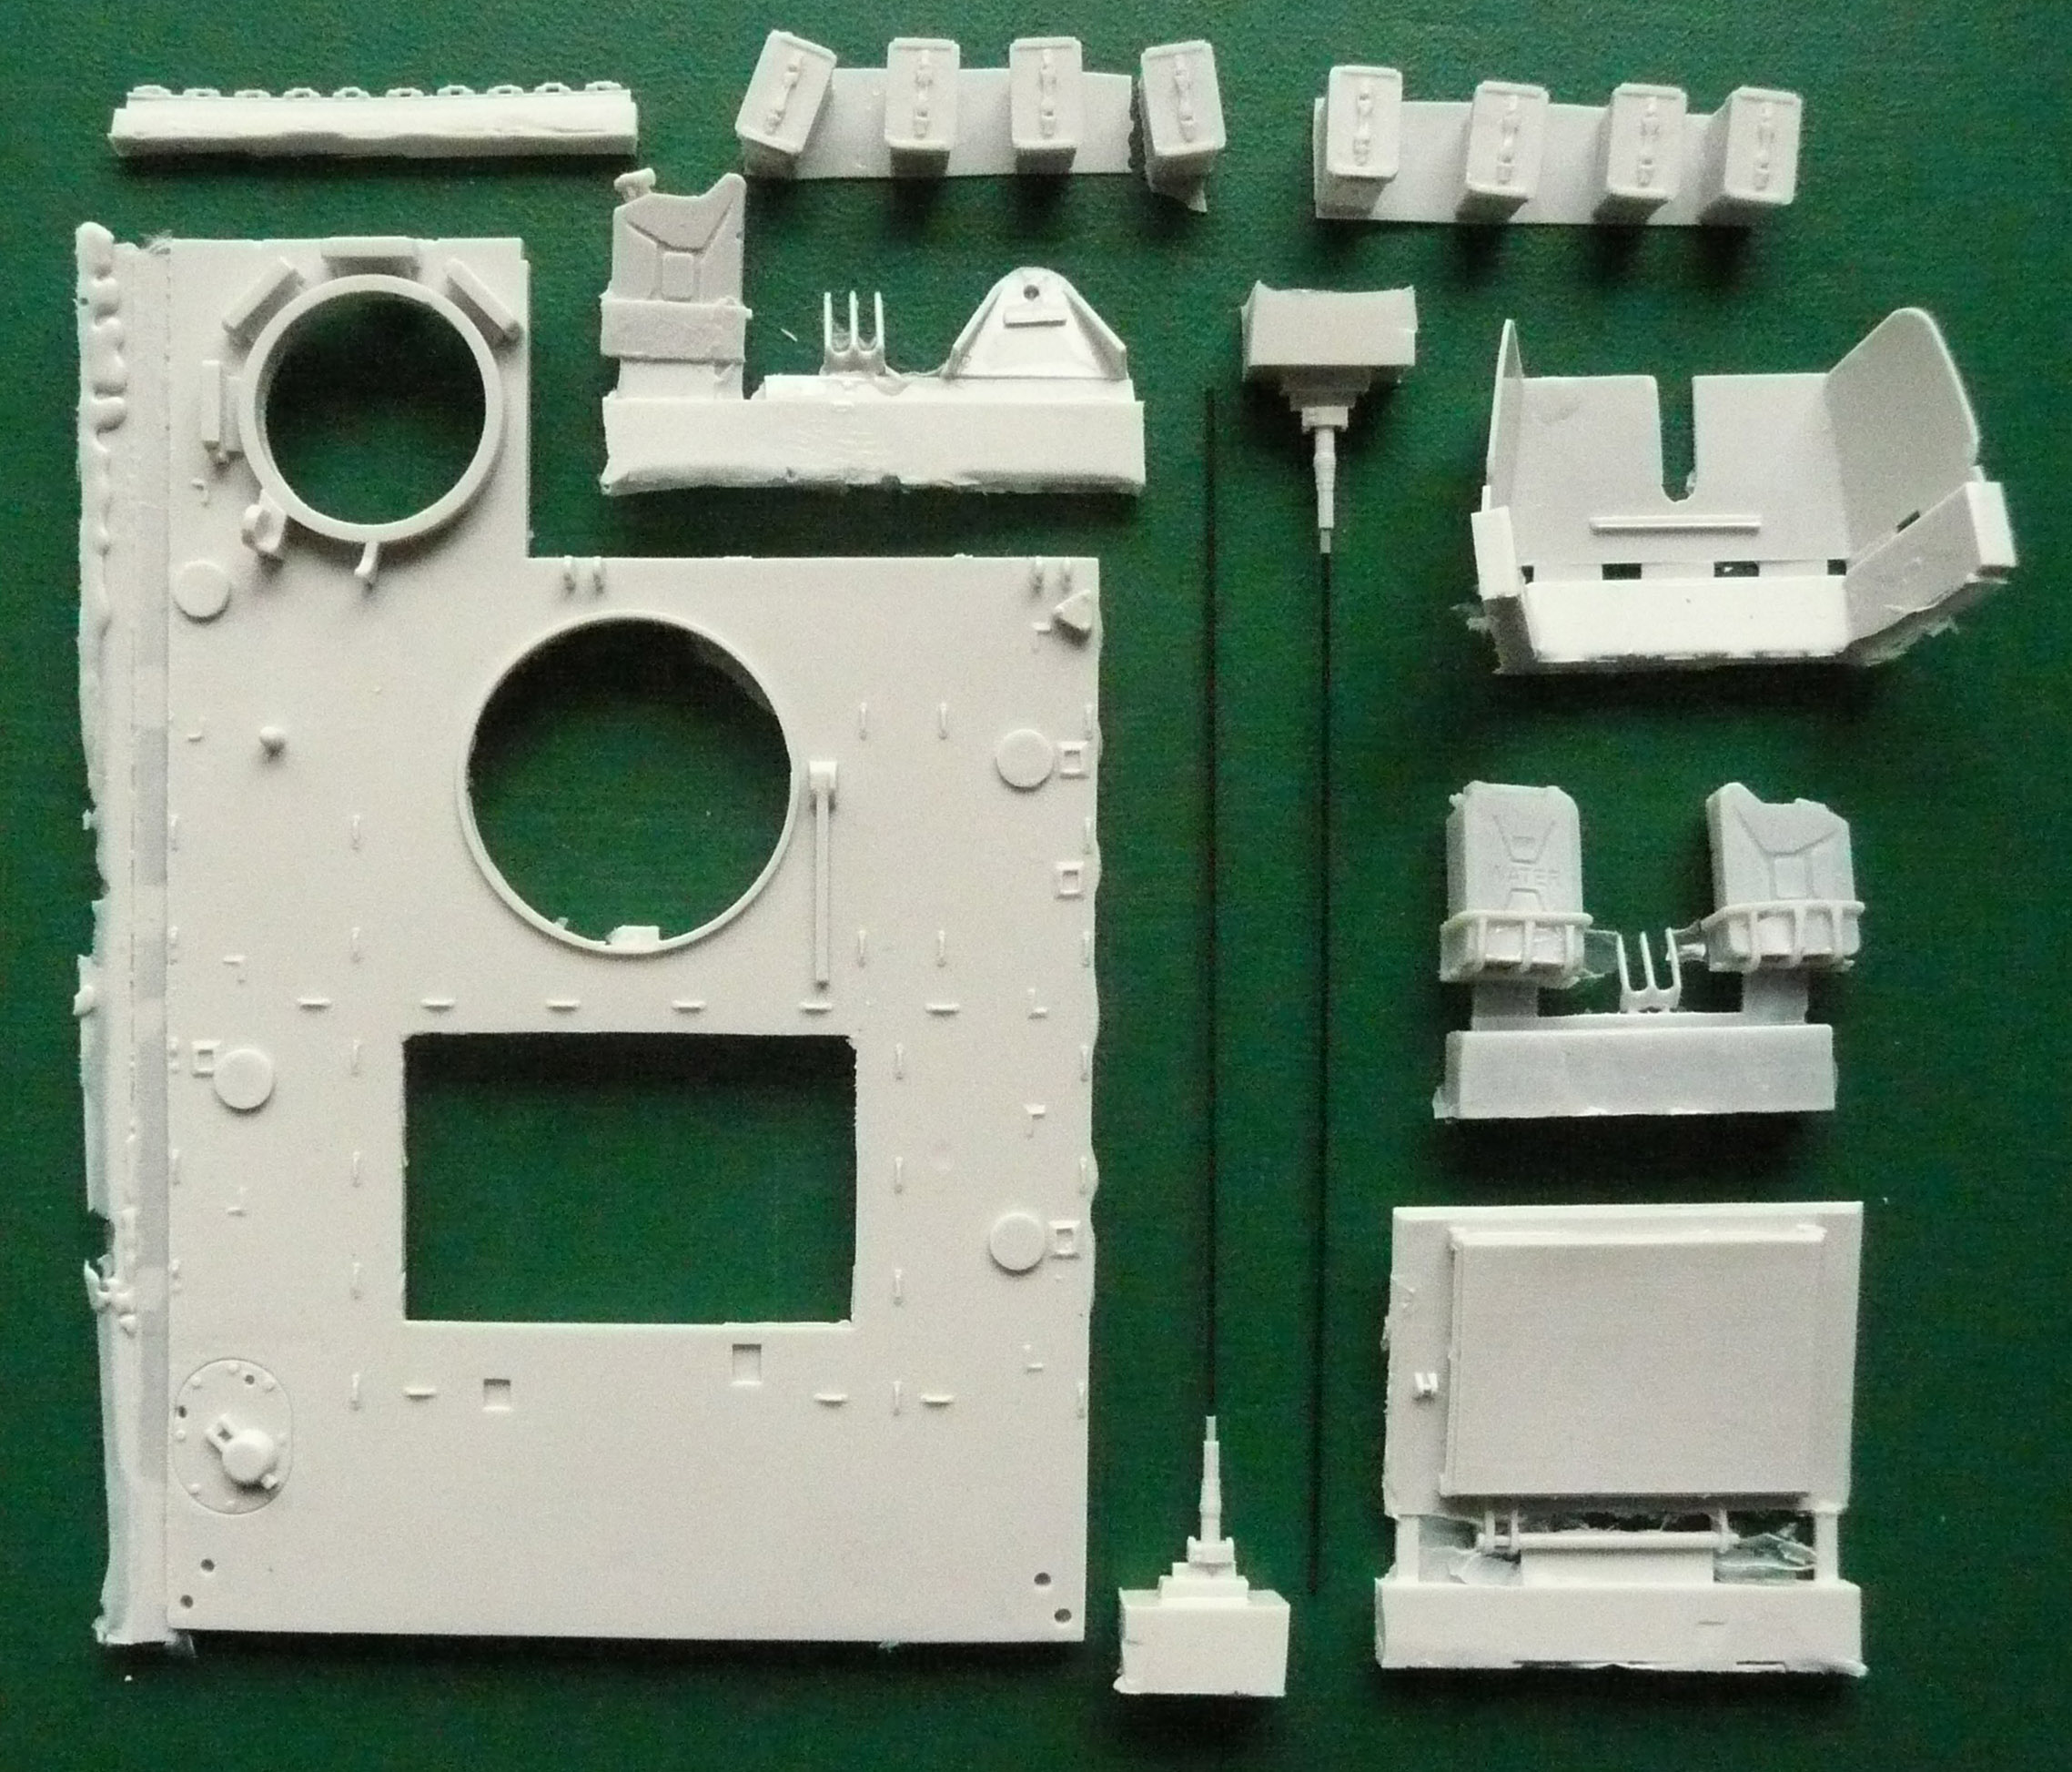
Here is the Callsign conversion for the Academy?Tamiya kits, which shows the config:
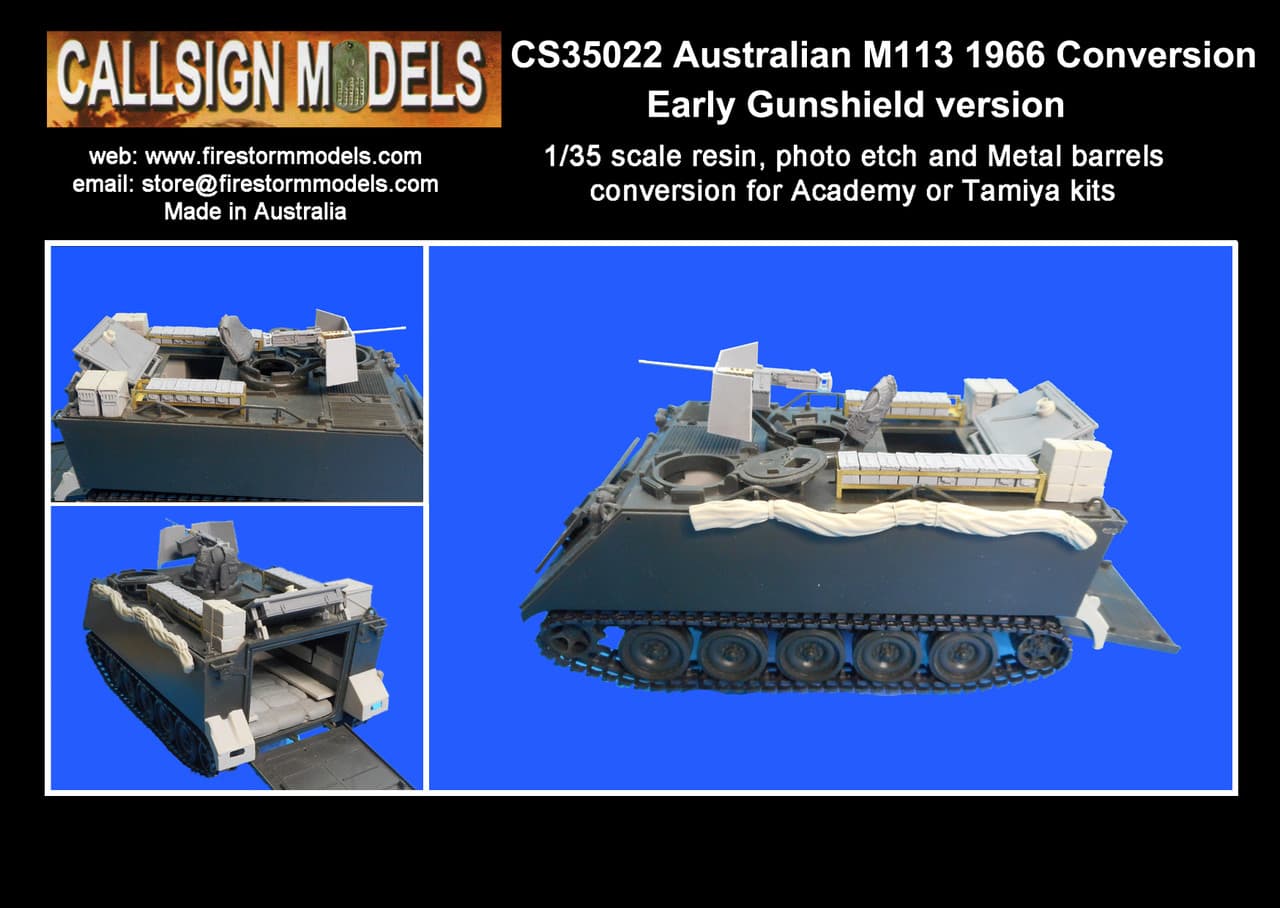
Thanks. I want a good representation of the M113s that fought at Long Tan. Im not a rivet counter so near enough will be ok. I dont want the turret.
I made the mistake of buying the kit without researching the Long Tan facts. Next time?
Kit or scratch building is ok by me.
Because the kit is a bit of a lemon, see above post, i have gone off doing a “real Long Tan” version.