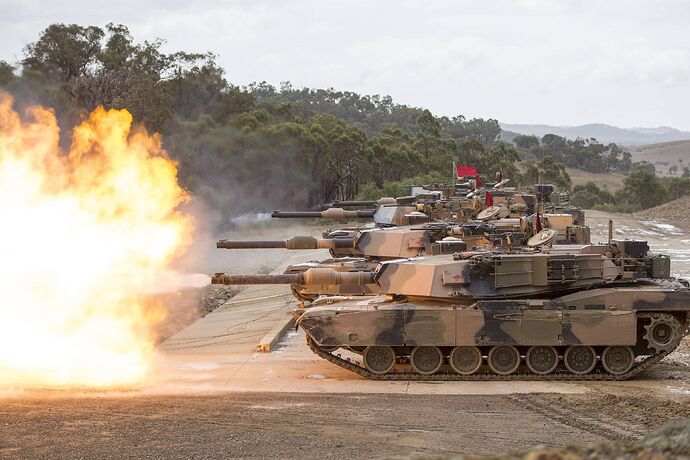
Here is an article I did a while ago, when Dragon’s M1A1 AIM kit first came out. It describes how to build an Aussie M1A1 SA from it.
For those wanting to build an Australian M1A1 AIM tank from Dragon’s new M1A1 AIM kit, here are the specific parts required for hull number 6 (ARN unknown), the most photographed Aussie M1A1 AIM to date.
Turret:
· N13 - loader’s hatch with rim
· R1 - MCD adaptor
· R2-4 - BFT/FBC2B2 box and associated bracket for GPS doghouse
· Either wind sensor, both have been spotted
· Q11 - armored conduit cover
· Q2 - EAPU conduit
· Q3 - loader’s hatch latch
· Q12 & 13 – “smooth” blow off panel covers
· N37/38 - EPLRS antennae
· N1, N43, N44, 53, N54, N55, MA8, MA9 - EAPU
Hull:
· U32 - driver’s hatch with rim
· T5 + MA10 + MA11 - engine intake (?)
· U37 (USMC wading trunk adaptor)
· f1 (x2), f2 (x2). f3 (x2) – Engine exhaust deflector
· U36 – heater plug
· V19 – “fancy” sprocket ring
You will have to add:
· USMC-style bustle rack extension (BRE: Eduard ED35598 or “borrowed” from the Academy “Iraq 2003” boxing of their M1A1 kit #13202, or the Dragon M1A2 SEP kit.)
· Refrigerator and bracket to turret bustle (to the right of the EAPU)
· Refrigerator power connection – replaces kit part O5 on rear of upper turret (#M1)
· Turret umbrella mount – a pipe mounted vertically on the turret roof adjacent to rear of the commander’s cupola (when looking from the top, the mount is in front of the right “blow off” compartment, near the centerline of the turret. It is slightly shorter than the loader’s hatch catch [Q3] on the left panel)
· External slave receptacle; located on the right, rear hull plate, next to the rear taillight. (In DML M1A2 SEP kit.)
· Tank/infantry telephone; it is located below the external slave receptacle. (Also present in the Academy kit and DML’s M1A2 SEP kit)
· Red Kangaroo, Hawkeye Models is coming out with a decal sheet
The only outstanding build information now is whether our 50 cal MG will be QCB - pretty sure yes, but not definite, and if the MAG-58 (M-240 in US service) will be fitted with its stock. The timeline for barracuda MCS is also yet to be confirmed. Finally, the M250 US Army style smoke dischargers (MBSGD) will be fitted.
They use the T158LL (hollow guide horns), same as what’s in the Dragon M1A2 SEP kit.
-
The Fridge (dimensions below)
-
Fridge power adaptor box (in lieu of the PLGR antennae). The fridge adaptor is how they get power out of the tank and into the fridge. It is a small box mounted centrally to the rear of the “blow off” panels and replaces part “O5” in the kit.
-
Wind sensor retainer bracket (re-located because of the fridge). The wind sensor folds laterally to the right side of the tank when looking toward the front of the vehicle. Part “O12” in the kit is the bracket that holds the wind sensor when folded, but is not used when fridge is installed (it is actually removed on Australian tanks). A new bracket, mounted centrally, immediately forward of the fridge on the turret roof, replaces this part, dimensions below.
-
Umbrella mount (aft of the Crew Cmd’s cupola). The umbrella mount comprises a mount that is attached using holes/bolts that are already present on the turret roof and a vertical tube. It is used for range flags (red/green/blue etc) and for the umbrella, similar to that used on the Leopard AS1 when it was in service. Dimensions are below.
Fridge dimensions (overall):
Fridge Power Adaptor/Connector box (replaces kit part O5)
- 175mm long, 105mm wide (widest points on top), 85mm wide (narrowest points on top), 90mm high
Flag/umbrella holder: 45mm dia 160mm high
Markings: ARNs (Army Registered Numbers, lower glacis plate, front right side, rear left on the upper engine grill), TAC symbols (<, >, etc, on the ballistic skirts) and names are applied to 1st Armoured Regiment’s tanks. Names are painted in black on the flanks of the vehicles, above the skirts to the rear of the hull. Callsigns are painted on boards places on the turret sides and the bustle rack extension.
Since I originally wrote this, the Mouse Armour/Mouse House Aussie M1A1 SA Conversion kit came out. I believe it is out of production though now. If you can get one, it has all you need.
https://armorama.kitmaker.net/review/3344
