Avro Lancastrian build

And now for something somewhat different, I give you the Avro Lancastrian…

For much of WW2, Britain basically stopped producing civilian and transport aircraft. There were a few exceptions, but mostly the RAF adopted the Dakota and a few other types while planes in airline service were often drafted into military service. Always makes me think of the majestic HP 42s ending their days in camouflage rather than the glorious Imperial Airlines markings on bare metal. That of course makes me wonder why no one has made a 1/72 HP 42 injection moulded kit, and I then grind my teeth thinking that there still isn’t an Avro Lincoln kit, and that’s an afternoon gone :slight_smile:

Anyway, the point is that the UK had a lack of home grown civilian types when WW2 was ending. It did however have an awful lot of large four engine bombers that soon were going to be out of a job. So limited conversions were made of the HP Halifax but more often the Avro Lancaster, which became the Avro Lancastrian. Naturally a lot of work went on inside the aircraft allowing the plane to serve as pure transport or airline duties. By all accounts it wasn’t the quietest journey with four RR Merlin engines just outside the windows, but since people had suffered all manner of privations during WW2 few people complained. A wee bit different from now…

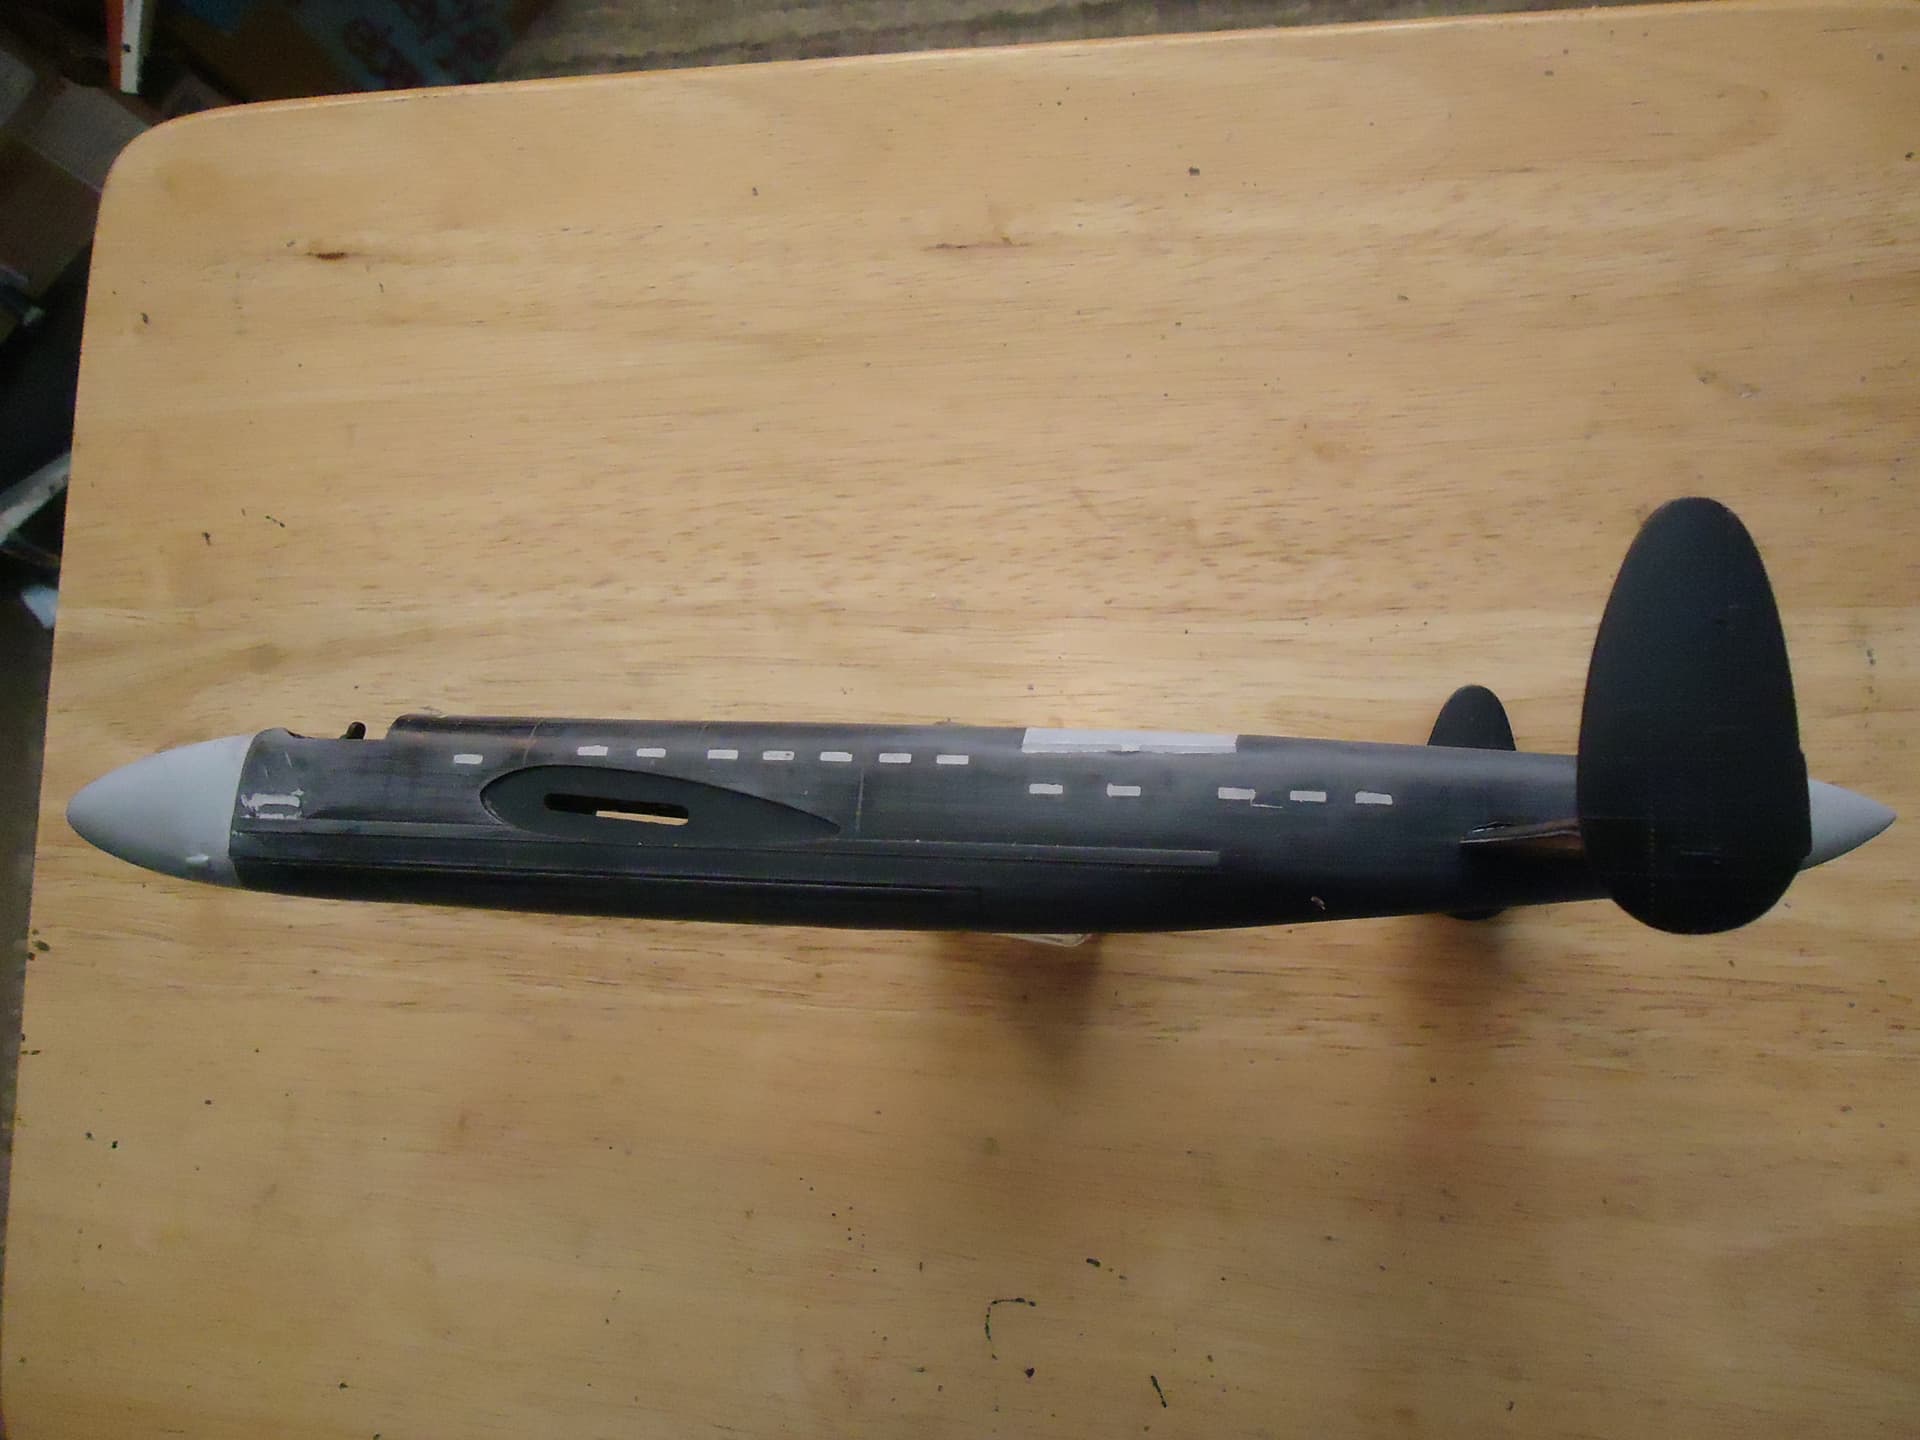
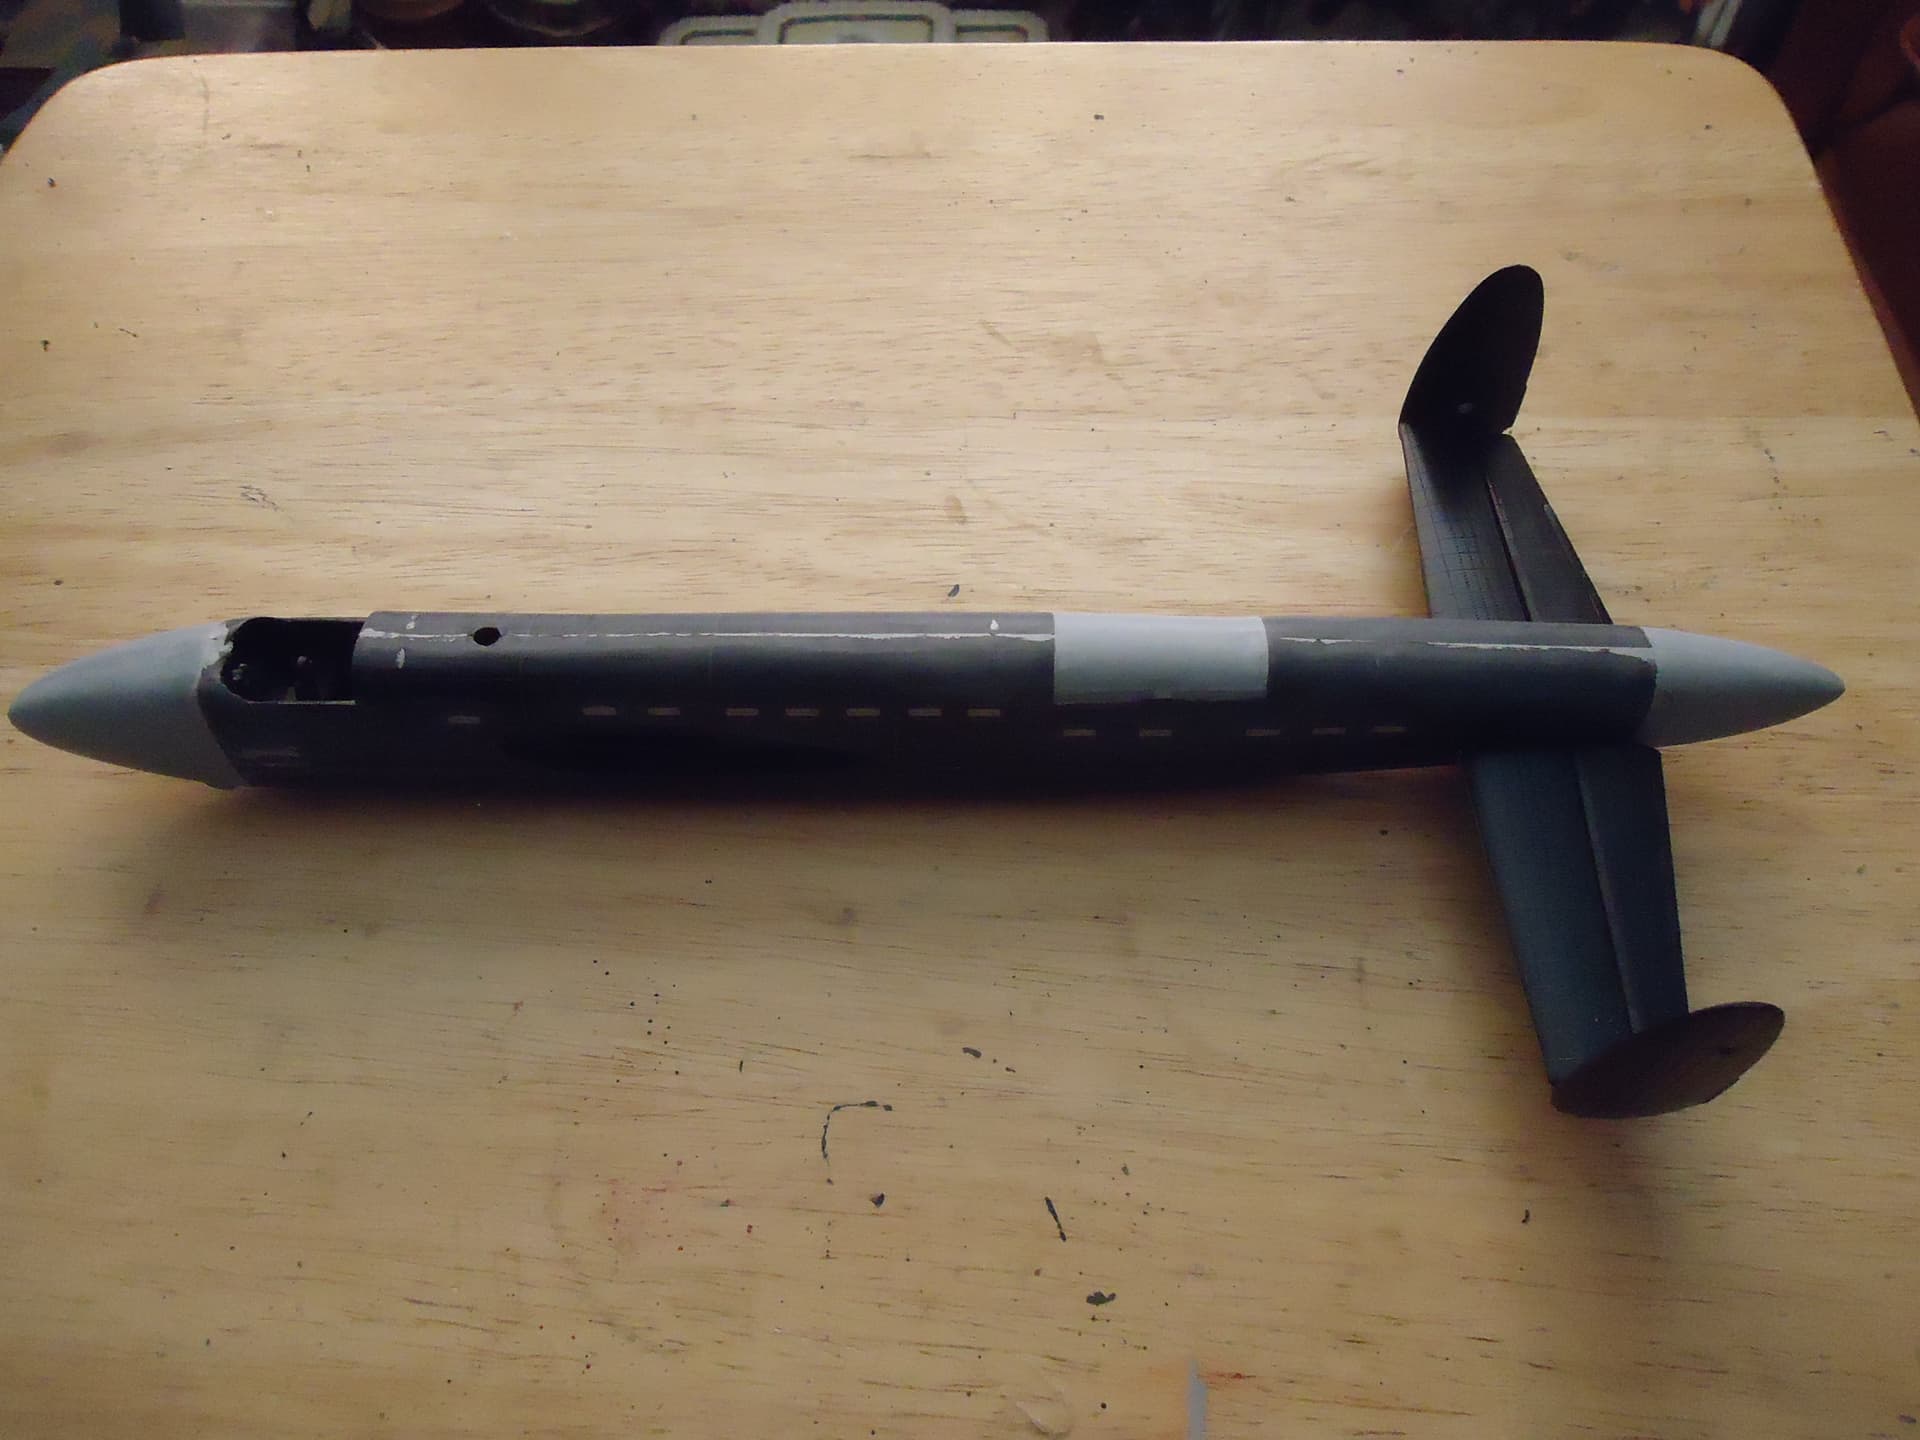
Exterior changes were quite significant. the forward and aft turrets were taken off, the aircraft cut away to allow large nose and tail fairings to be attached. The top turret was also removed and it’s position cut away with fairings covering that area, in much the same way the Lancaster had when in Dambuster or Grand Slam dropping configuratios.

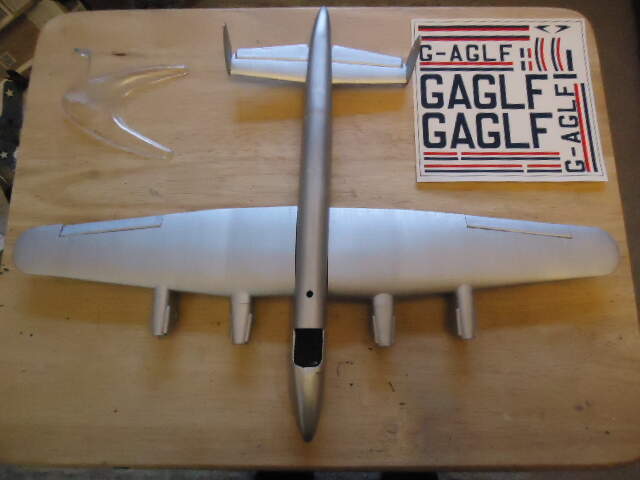
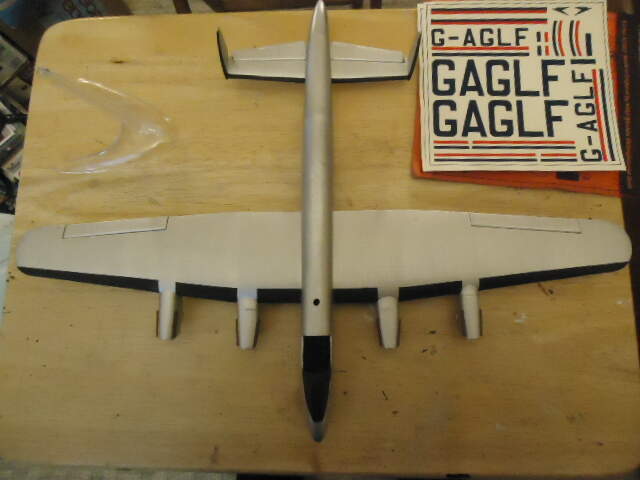
That brings me to where I am so far. Having found an unopened M&E conversion pack when sorting through some boxes, I decided to take a break from the 1/35 tanks and start on converting the original Airfix Lancaster I had in a ratty box, (from 1973, so no great loss since the turrets etc. aren’t great). I cut away the fore and aft sections in line with the handy 1/72 scale diagram of the Lancastrian printed on the inside of the packing. I also carved away the mid section turret position. The faings for the front and back both come in two parts, the mid section just one piece, so they were glued together, allowed to set, had filler added and basically made ready.

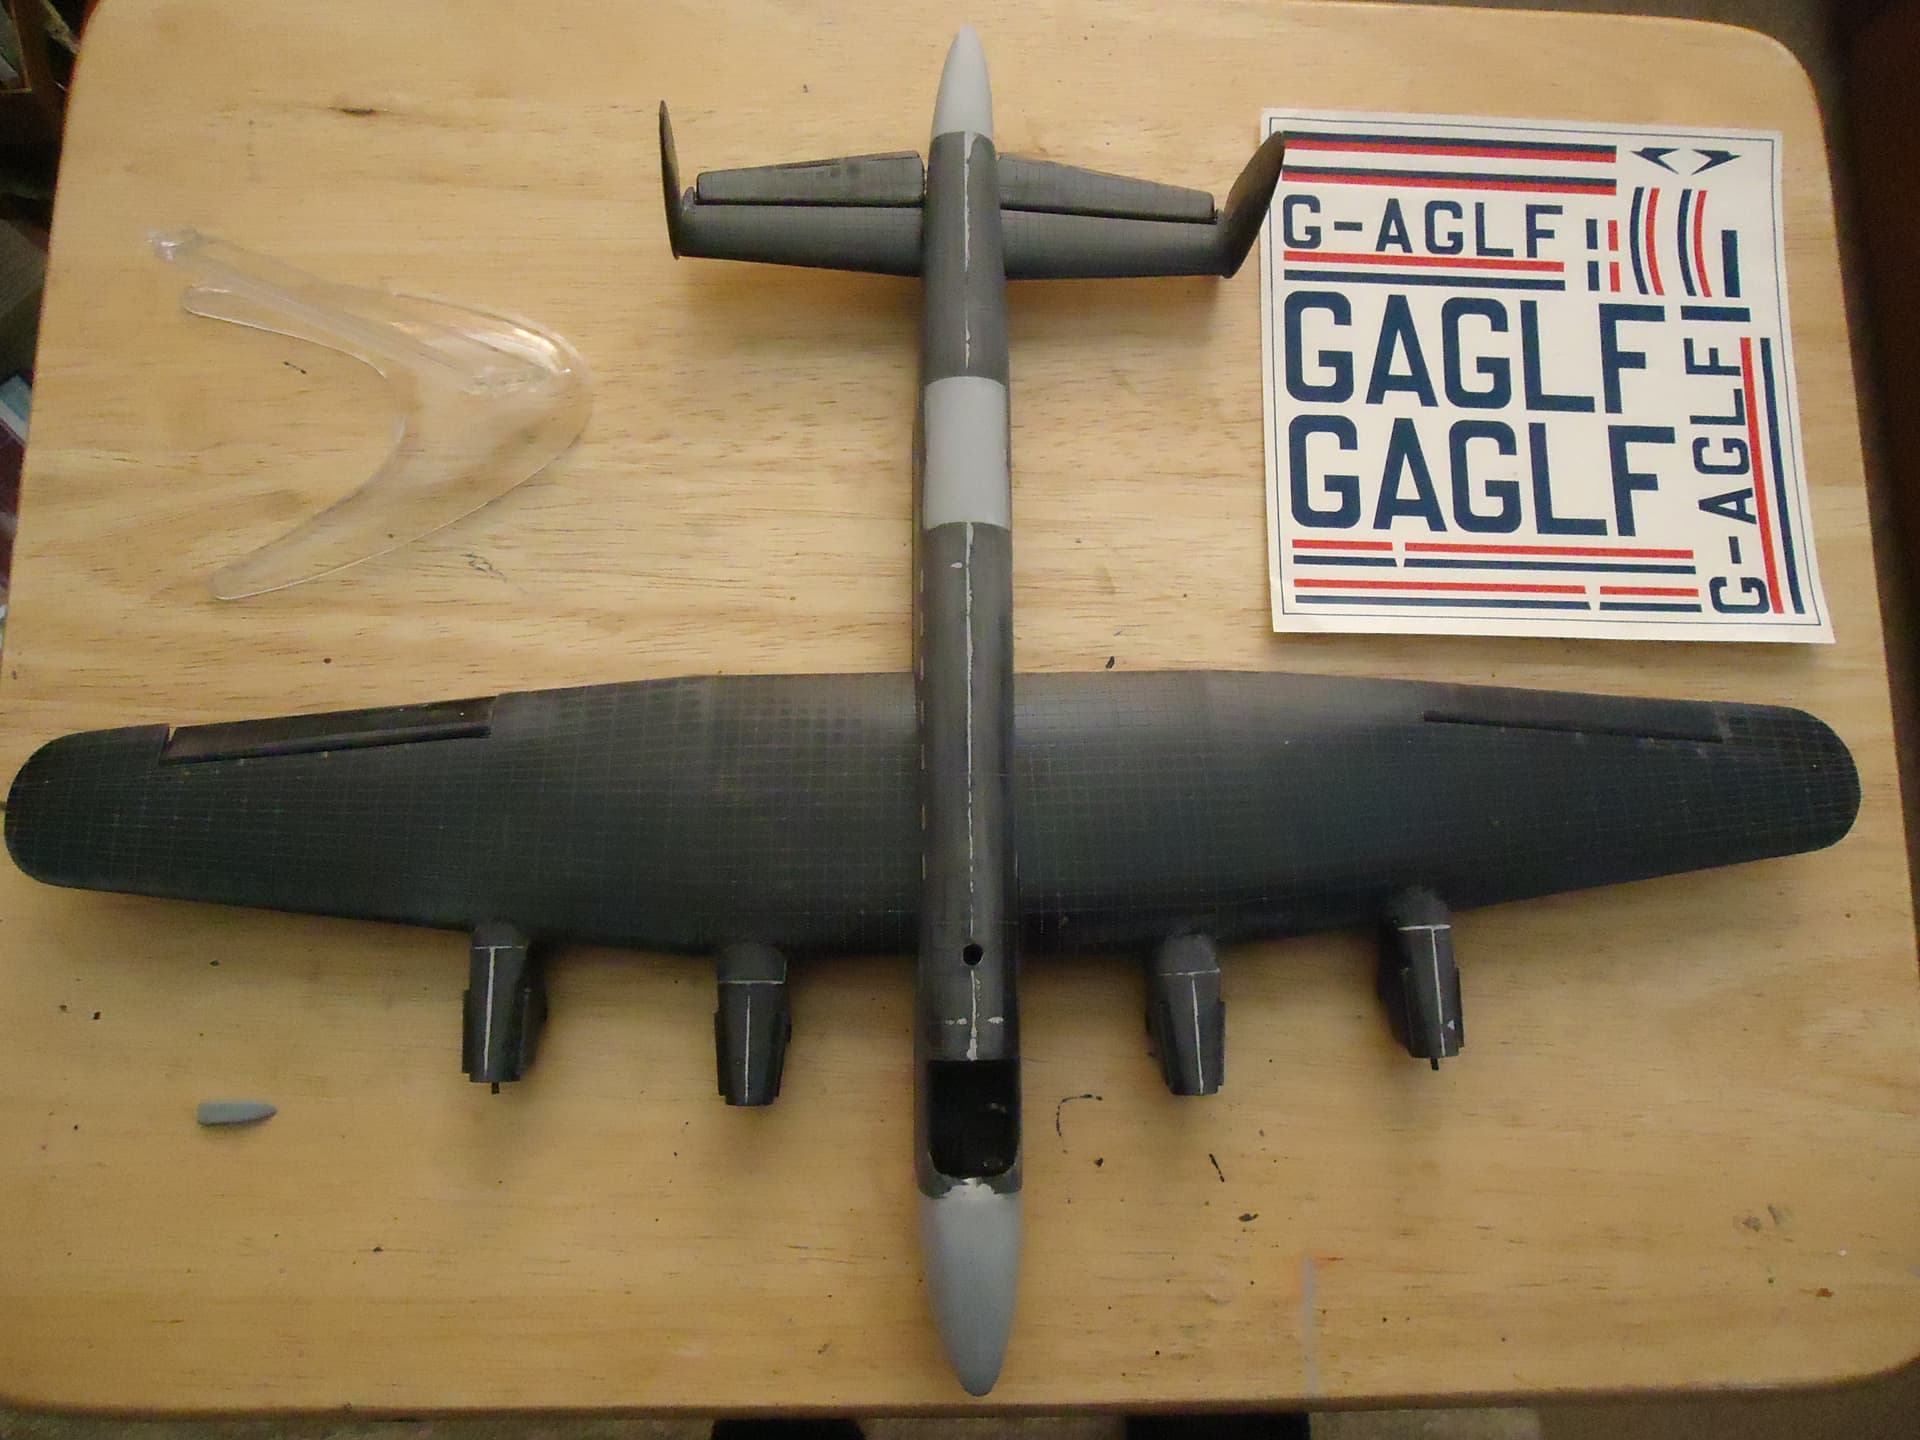
Meanwhile, the windows of the Lancaster were all backed by pieces of styrene and then filled in. The usual pilot seating added, the halves joined together and then simply glue the conversion parts in place. Only when you do that do you see exactly how much filler is required, (quite a bit) and how much the old kit needed filler in the first place, (a lot) Fast forward the filling, flattening and sanding and you reach the stage I’m at now… (see photos). I added the tail sections too, basically to have the fuselage sit upright. The wings are a straightforward build with no variation from the Lancaster… Again, quite a bit of filler required. To be continued.


10 Likes

Looking interesting. Like the Lancastrian a lot. If l won the lottery l would build one in 1/32.

1 Like

Thanks, I have two sets of the conversion kit so this might either be a practice run or the first of two, depending how it goes. It would certainly be easier using the more modern 80s version of the Lancaster by Airfix, but I’m glad I used the earlier version first. After all, with the weakness in detail and parts, I’d never have built it as a traditional Lanc. I built a couple of 1/48 La
ncasters, with a third waiting to be built, but the 1/32 is a bit beyond me. Weirdly, I have two 1/32 B-24s, but the Lancaster is about double the cost, or three times if you consider what I paid for the kits.

1 Like

The 1/32 is a dream really, it would cost crazy money whichis why it was a lottery win thing. I also have a 1/32 lIberator. This is much more realistic and manageable

Any idea on markings/ location? They were used for delivering fuel during the Berlin Airlift but l guess you know that already.

2 Likes

Yes, it is odd how much less the Liberator is compared to the Lanc. I’m sure someone has the answer, but I managed to buy two versions of the B-24 for less than £100, (one was actually £68) and yet have never seen a Lancaster at less than £250, most near £300+.

As for markings, the ones issued with the conversion parts, (very large and colourful) are similar to the Airfix Armstrong Whitley V when that aircraft was demilitarised, turrets removed and in service with BOAC. That aircraft was still camouflaged, (in spite of the very large lettering and huge red and blue stripes adorning it) but I suppose you could say that refit was a forerunner to the Lancastrian. Anyway, looking at the diagram with the conversion, the aircraft was an all over aluminium finish, aside from black non-reflective patch placed before cockpit and black props, but it doesn’t give any other information, but as I said, having seen the Whitley and other aircraft in BOAC service at the time, it is safe to say that’s where it served immediately post war. I have heard others say their decals disintegrated, so I’ll have to see how that goes.

1 Like

And on we go. As mentioned before, the wings, engines, etc are pretty much standard. Some aircraft had the covers removed from the engine exhausts, (I’m sure there’s a correct term but it escapes me right now) but the diagram I have of this aircraft has them with them on, so one less thing to so. Quite a bit of filling, obvious from the dark grey on black plastic, but when sanded down, as well as sanding the very pronounced rivets on both wings and fuselage slightly, the main aircraft proper is near ready for painting. One call out though. A single part was included in the conversion kit and the instructions don’t mention it or where it should go and seek as I may, I’ve yet to find any photos of the Lancastrian with it present. It is curved underneath, 9see second photo) and seems fitting to go on either the new fairings at the front or back somewhere but where exactly is a mystery. If anyone has an answer I’d appreciate it. Anyway, photos of the model as it is now, with decals and fifty year old stand included with the kit, and second photo is the mystery


part. Yes, it is a BOAC plane, after looking I noticed what I call the BOAC speedbird, so that’s all right then.

5 Likes

I look forward to your build. Speaking of that 1/32 Liberator (which I’ve seen at the hobby shop and was sorely tempted to buy) I’m doing a C-87 in 1/48. I’ve had some starts and stops, but I wanted it compatible with some of my converted 1/48 Tamiya trucks.
It made for an awful cargo plane as the whole center of gravity was shifted, but it’s cool and I already have the dio in my mind.

Holy Cow! I just realized that this June starts the 75th anniversary of the start of the Berlin Airlift. I am not a campaign guy, but I might have to make an exception if anyone wants to get the ball rolling…

1 Like

That sounds great, not an aircraft I have much experience of but I’ll be fascinated to see how it turns out. Most of the conversions were a flop, the Lancastrian and converted Halifax bombers, (the latter was basically the transport version of the Halifax sold for freighter use) didn’t have the issues you mentioned about the B-24 converts to C-87 given that they were tail-sitters, but they were very thirsty aircraft compared to say a C-47, so any airline wasn’t going to use them for any longer than needed. Yes, it is nearly three quarters of a century since the Berlin Airlift. I’d like to style it out that this build was inspired by that but it was genuinely just chance. Still, will certainly try and have this built, and maybe a second in the guise of an aircraft that actually took part in the airlift by then. Oh, as for the 1/32 scale B-24, I recommend it totally, it is just incredible.

1 Like

Sometimes I have other things to do. For example, over recent weeks I’ve had to delay any new kit building in order to repair a large number of models damaged when water pipe burst at the end of last year. It sticks in m craw when I find I can’t repair them because they are too badly damaged or I don’t have all the parts because in the mass clean up they were binned. However, having done as many of those I could I’ve managed to push on with the Lancastrian to the point which the basic aluminium coat is done. Yes, it needs a bit more work, especially more polishing in places, but since these aircraft were conversions, and built at a time when aircraft production is often described as metal bashing I don’t intend to so what others have and make the plane look flawless. So compare and contrast with yesterday’s photo.
DSC03479
and then with the flash;
DSC03480

4 Likes

Having masked and painted in the new windows, (very little point spending an age carving into the sides to make new windows, then back with clear styrene when they simply look into an empty shell) painted the rust coloured exhaust baffles and so on, it was now time to decide whether to follow one lot of photos or another. Some photos of BOAC Lancastrians show them with simply a bare skin, aside from the anti-glare patch in front of the cockpit, (either matt black or matt green) or with broad black edges to the wings and tail. Seeing as it makes the plane look more interesting, black edges it was. Plus, I have a BOAC 1/144 Corgi diecast Lancastrian that has the edges, so that nailed it. On went the masking tape and after a couple of coats of matt black, here we are;

DSC03517

Next up are the undercarriage and well doors, then decals and finally fasten the wings to the fuselage.

2 Likes

And that is where we leave this build for now. The decals, lovely and crisp as they were, did not stand up to the test of time. I used the first line of large registry letters, fine. One cracked when it was being maneuvered on the wing but nothing that couldn’t be eased into place. Then came the second set and for whatever reason these just decided to disintegrate. So one wing has GA and GLG on the top and bottom respectively, the other only an F on the top, (the only letter not to be a total loss). The registry letters for the fuselage sides went the way of their compatriots and that’s where I left it until I coat the remaining decals with clear. The decals were very nice but awfully thin and that would be my bet as to why some of mine failed. Having snooped around the net I’ve found others had the same issue. So until I managed to find another set of these decals, the Lancastrian will be mothballed. Never mind, I think we’ve all had this issue at least once. Usually though alternative decals are available, but so far I’m coming up with nothing that would be adequate in replacing the ones I lost.

You can photocopy the decals and then cut out the large registry letters from that copy, slightly wider than the edge of the letters. Spray the back side with spray mount and rub it onto black decal film. Then using a straight edge and a brand new #11 blade, Cut all the way through the copy and the black decal paper. Peel the photo copy off of the decal. You’ll end up the black letter that will have no clear film around them when you apply them so they’ll look great. I’ve done this with very large white marking on IDF vehicles, and also large black markings on a Bradley build several years ago. I’d actually been planning on doing a “how to” article on it. I posted photos of the technique on the archived Armorama but I can’t seem to find it. However, then I stumble across the remnants of the black and white sheets that still have the markings on them, I’ll post photos. It will become clearer then.

Thanks, but copying the decals would only work before the decals disintegrated, and I do mean into little pieces. What I’ll do is eventually get another set and klearcote the front of the sheet a few times so it seals the decals together and becomes the carrier film. I appreciate the input though, that’s good advice for other decals. What really annoyed me about the set in question is that they’d been protected since I bought them and showed no signs of damage until they got wet. I suppose sometimes you just can’t tell.

Could you source a Cricut or some other cutter and make masks?

Ah, there you’ve exceeded my modelling knowledge :slight_smile:

Another legit solution, although you don’t even need the Cricut. Again, borrowing from the technique above cutting out decals from black film, you can even simplify my suggestion:
Photo copy the decals, and just carefully cut the letters out of the photo copy. Obviously the more careful you are the better the stencils will look. After cutting out the stencils just flip over, spray a light coat of 3M Spray Mount, w aait minute or so, and you have instant stencils ready to be sprayed through. I’ve done this a couple of time, but whatever you’re doing need to be fairly large and able to applied to a relatively flat surface.

1 Like

I gotta think there’s a solution here. Those reg numbers are not complex shapes. They’d be a pain to mask but totally worth it IMO.

I have thought about masking and painting them, the main issues would be masking onto the wings covered with rivets, (bleed through) and getting the colour right. They are a very dark blue, not black, and while the L ans F would be easy enough, the G would be the real pain. But most of all, its the smaller letters for the fuselage that would be the biggest challenge. While the sets don’t come p every day on ebay, they are for sale maybe a few times a month so it will be worth waiting. Plus, I have plenty more models to build so I shan’t be stuck for bobbins :slight_smile:

1 Like