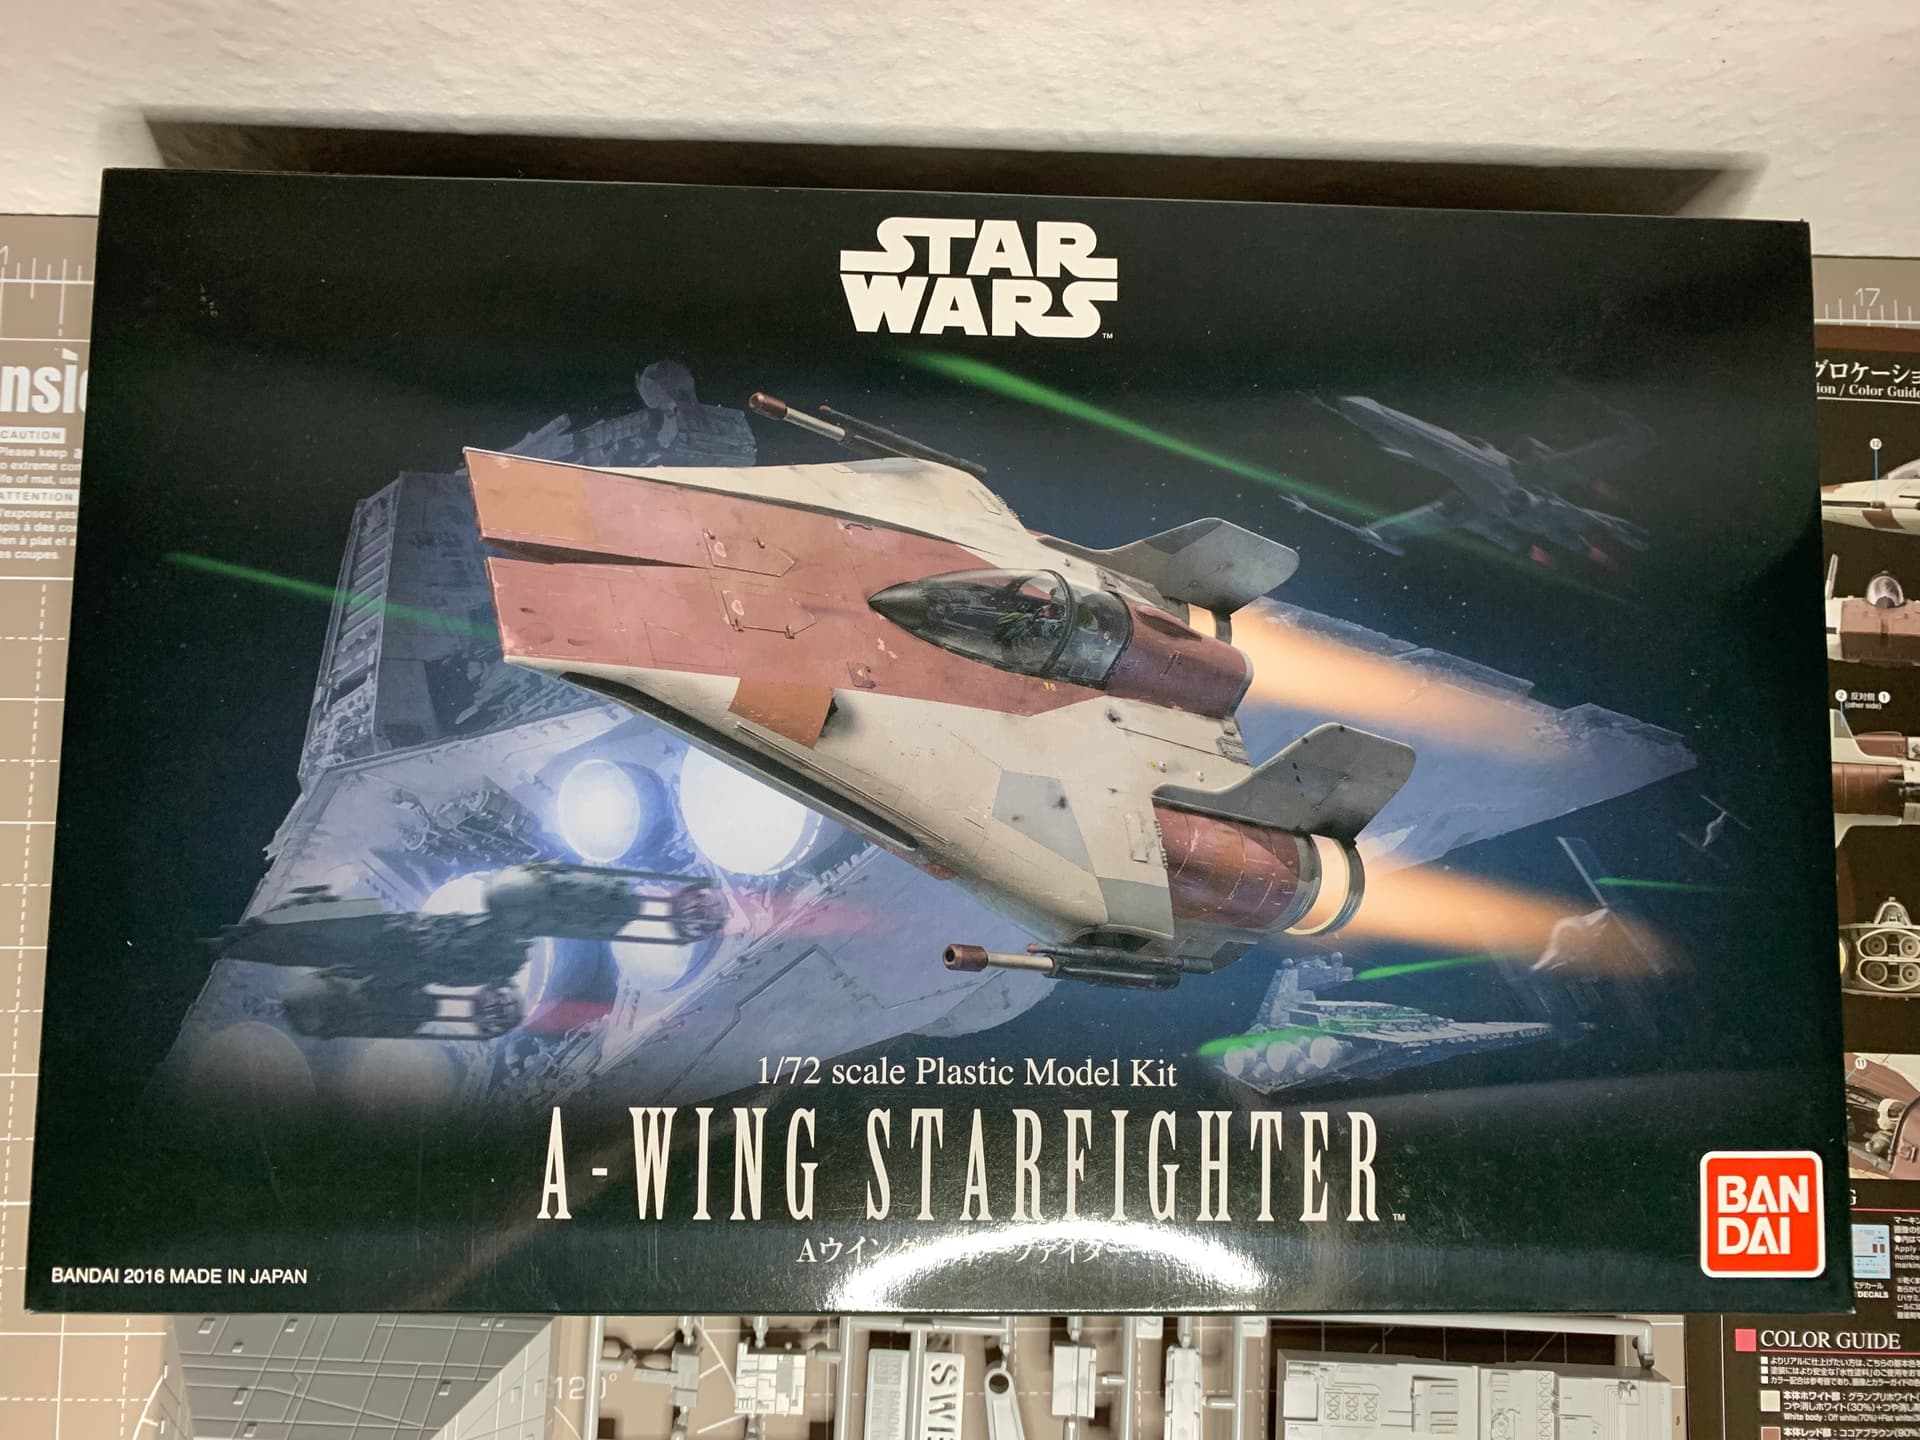
Hi all,
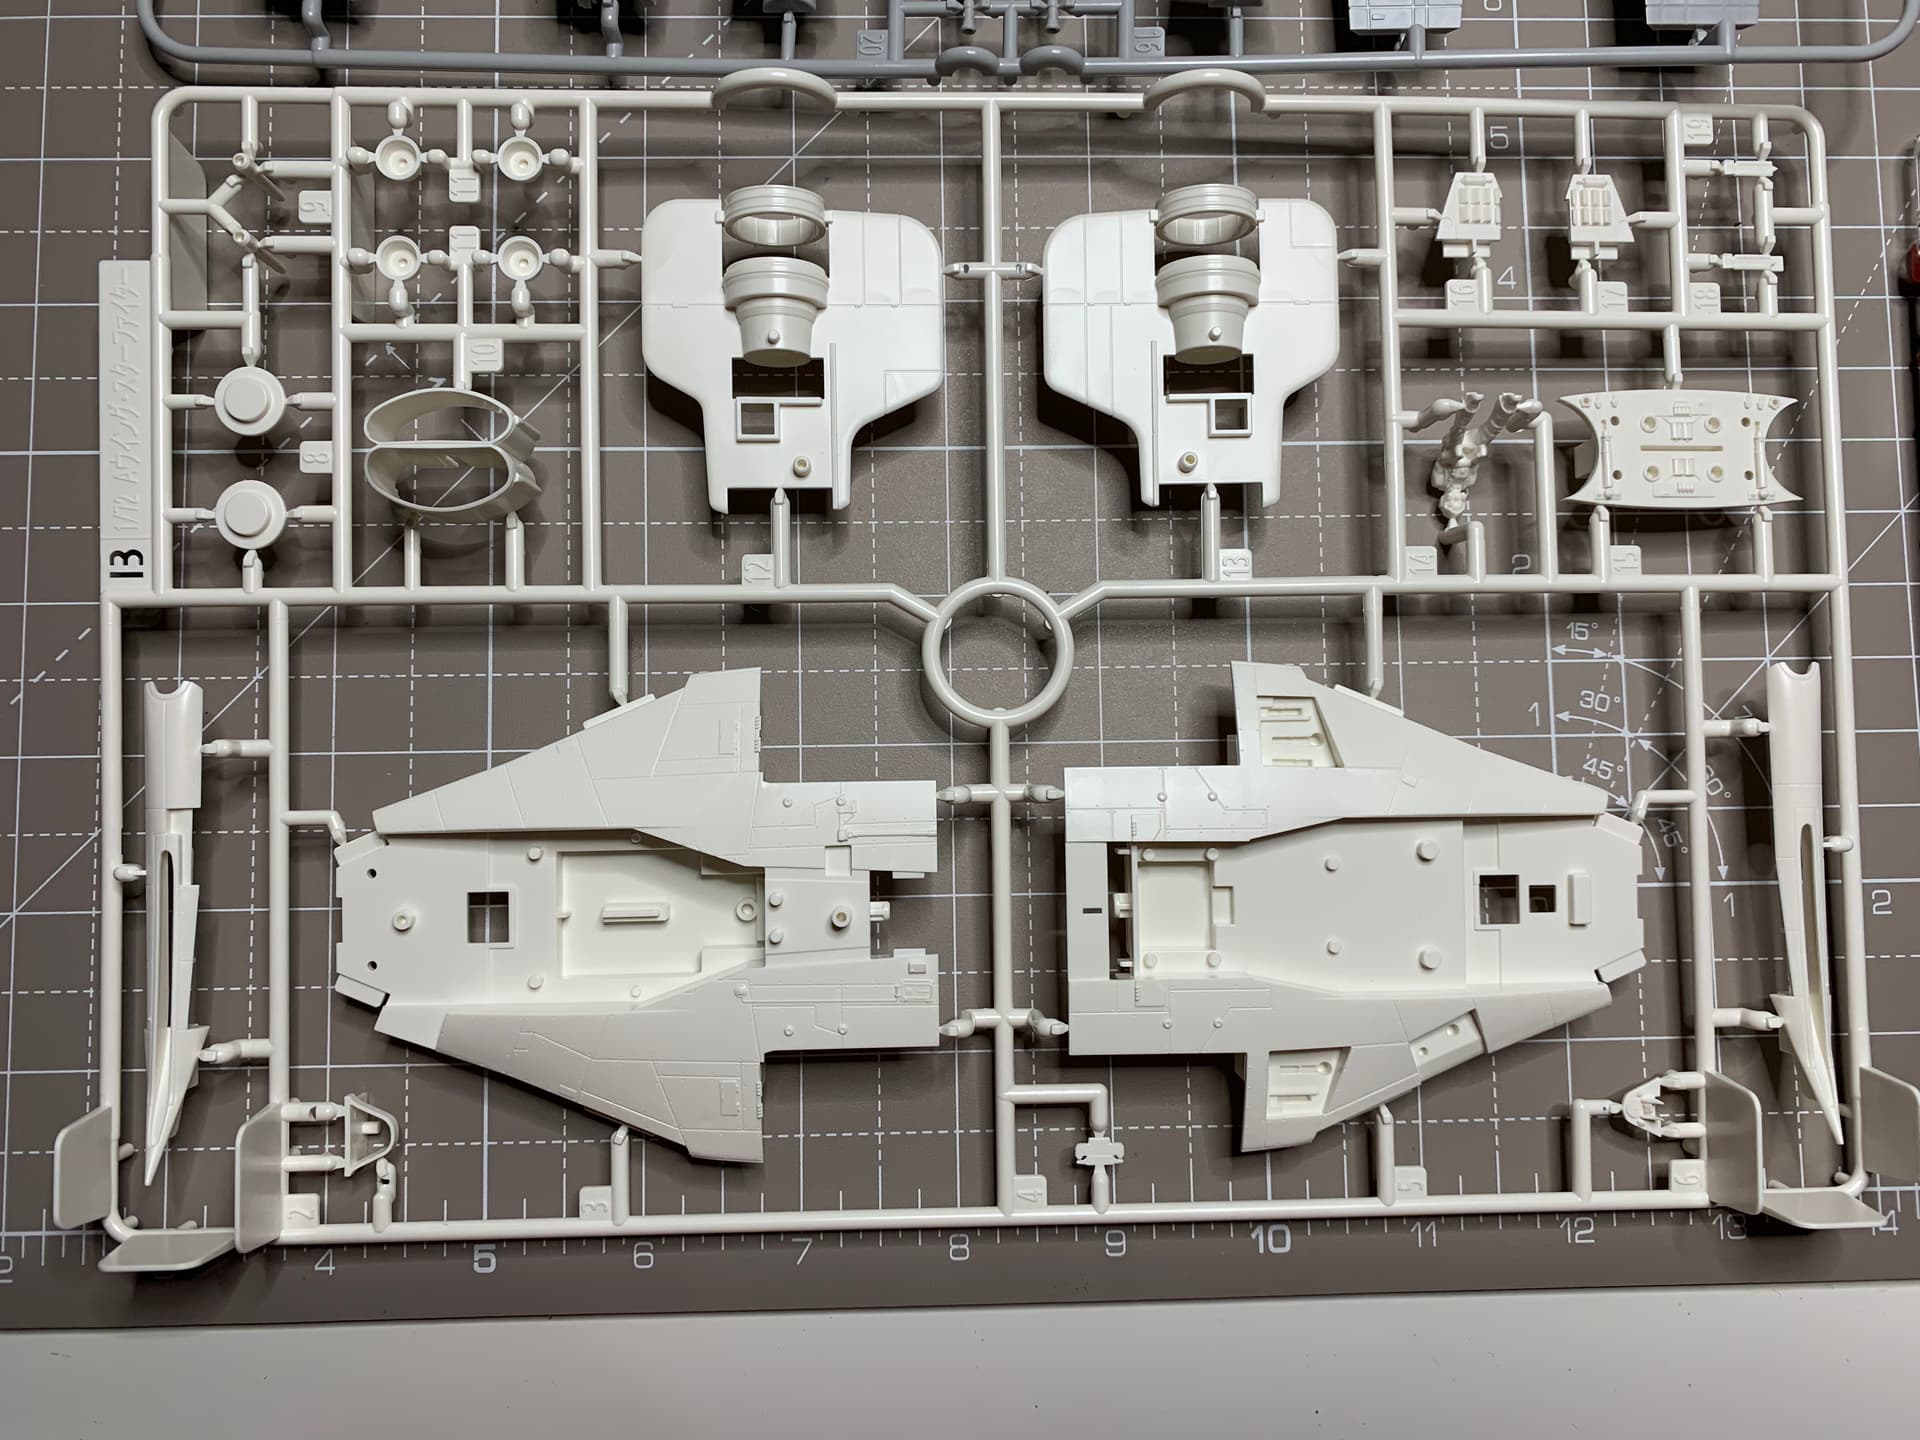
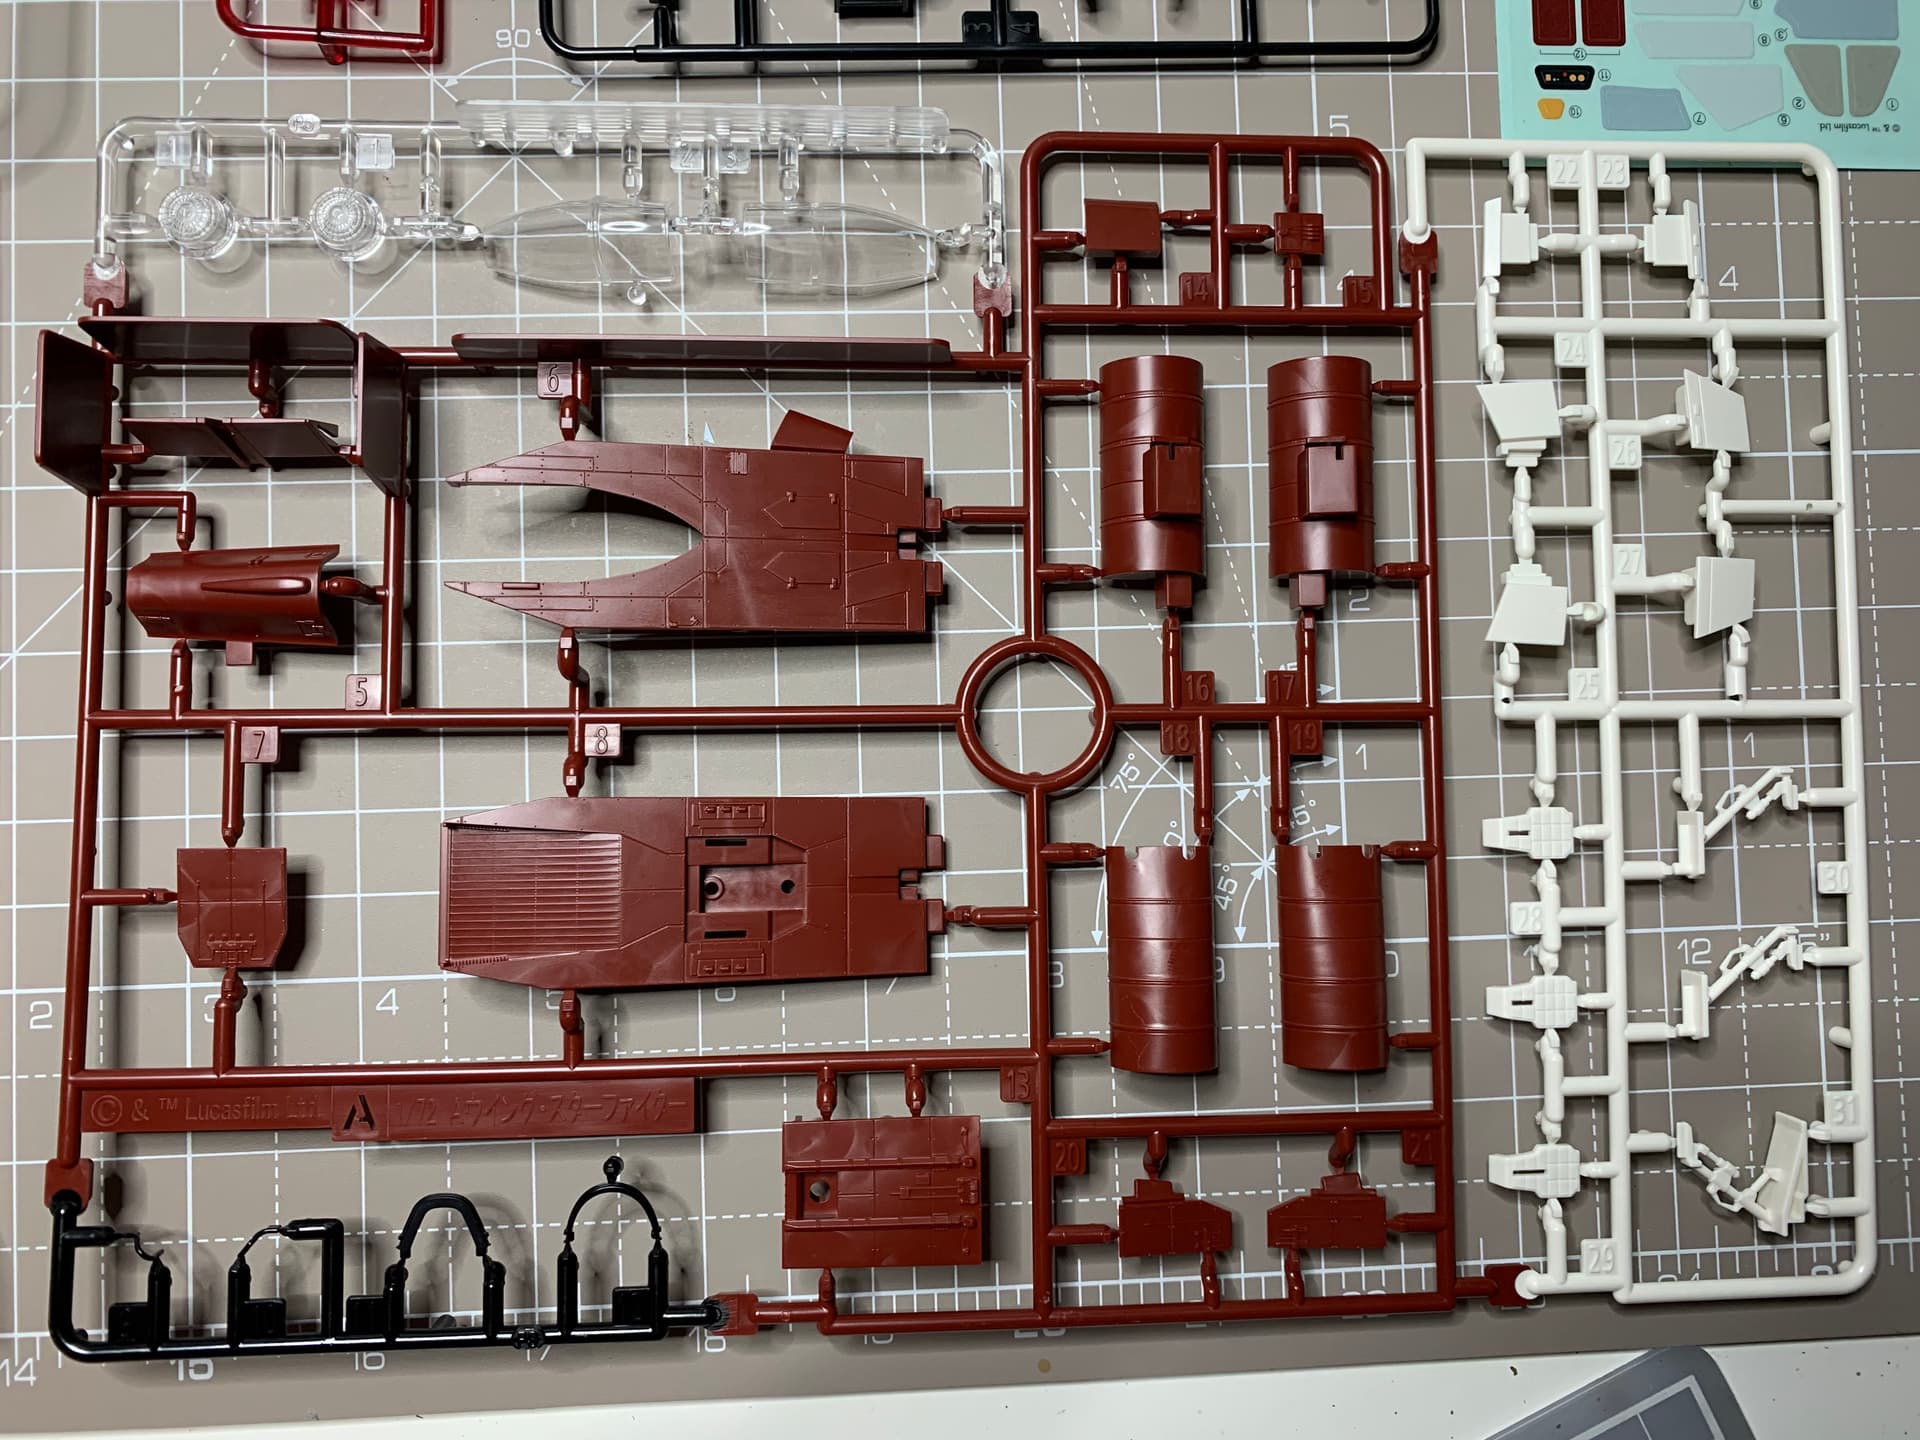
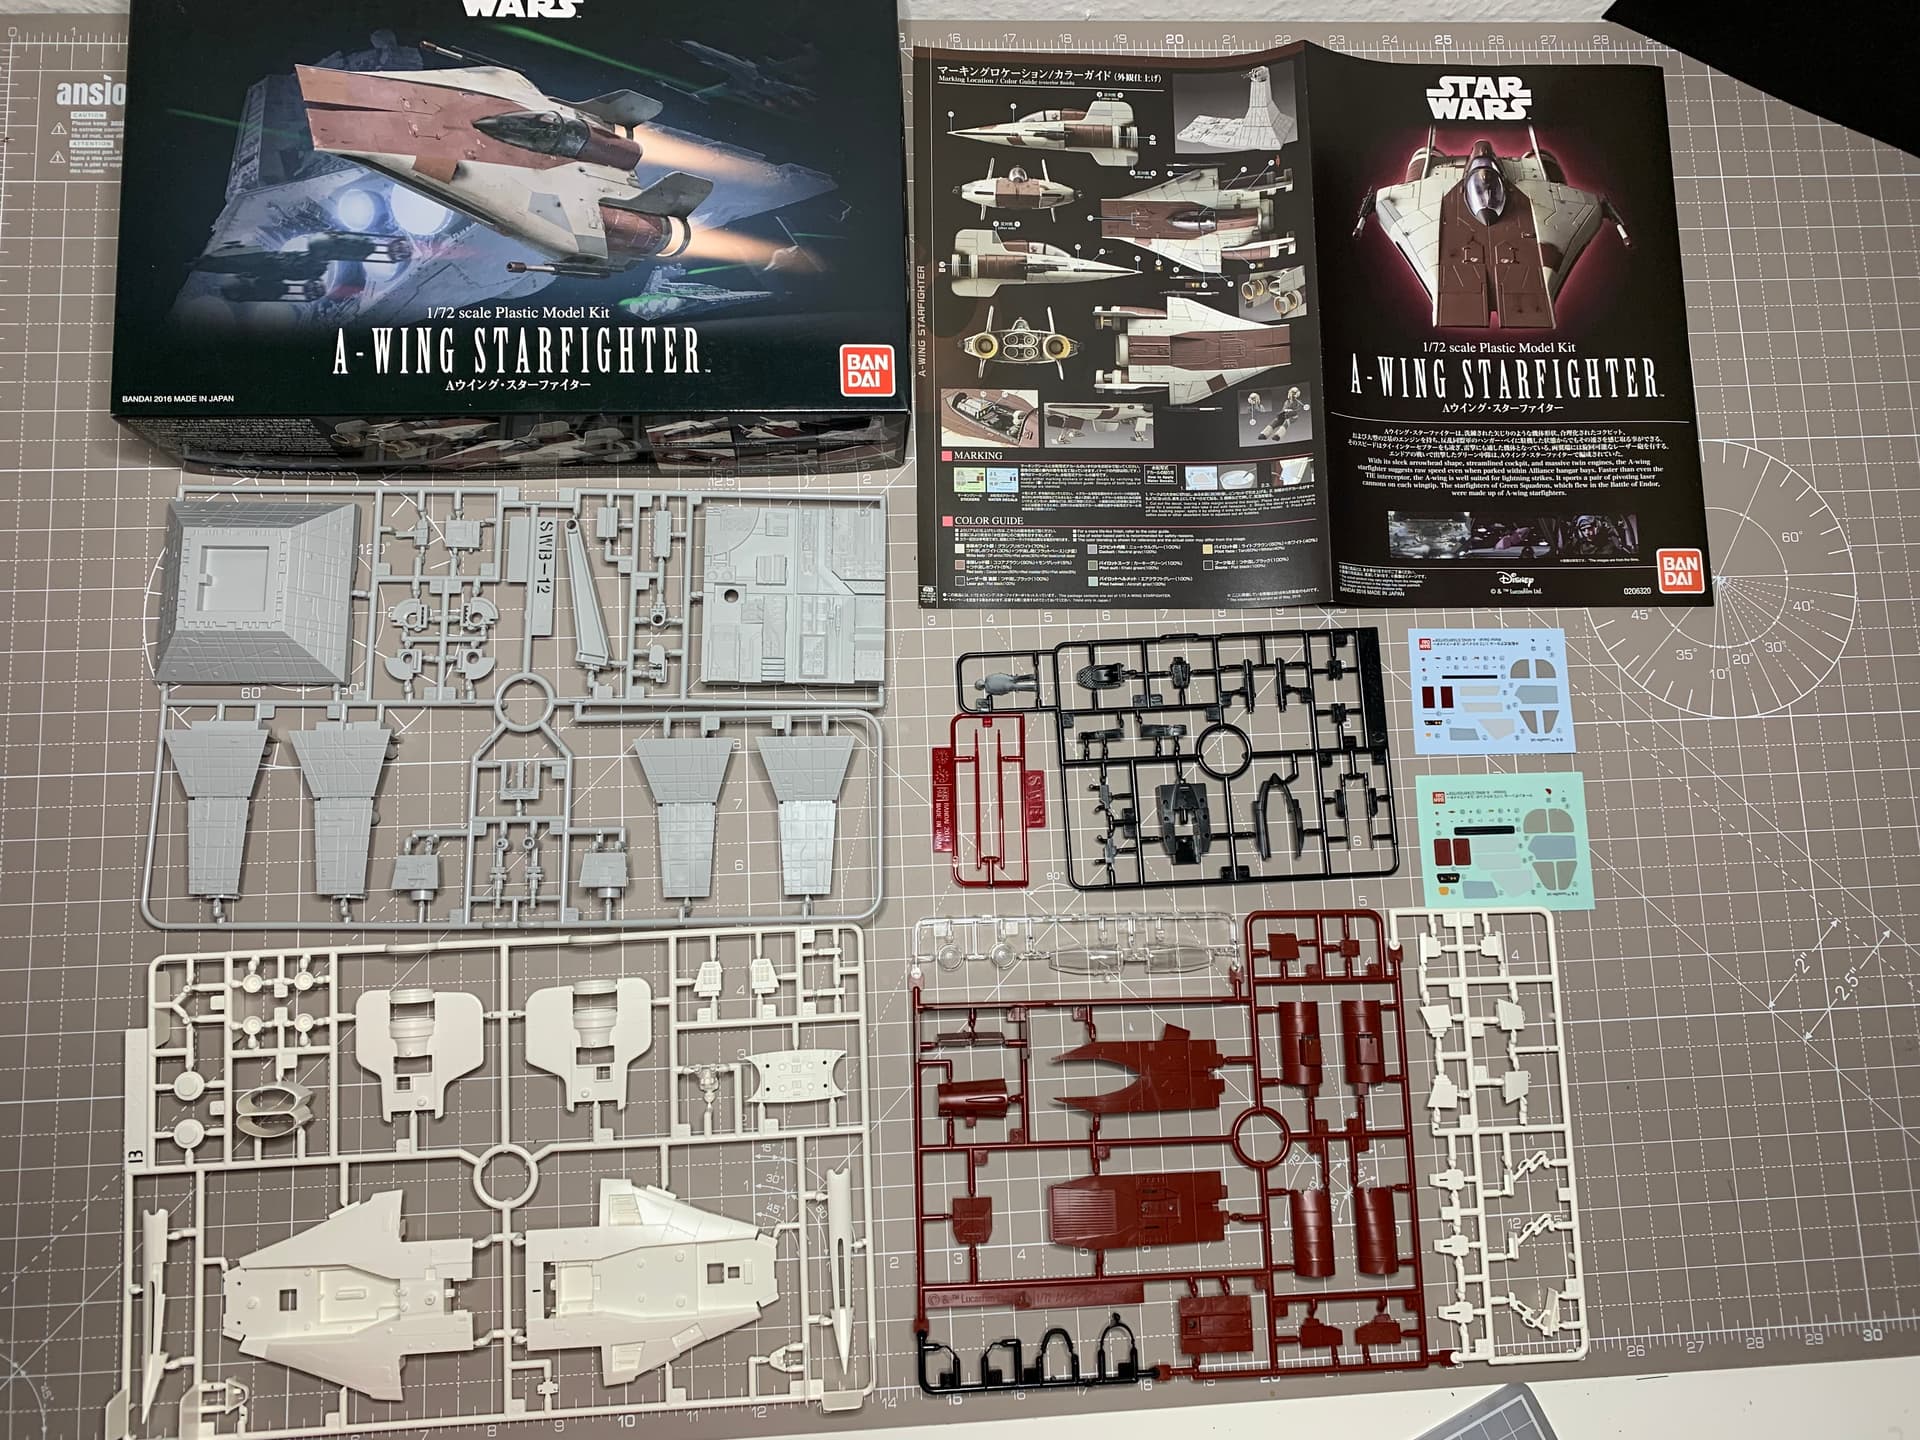
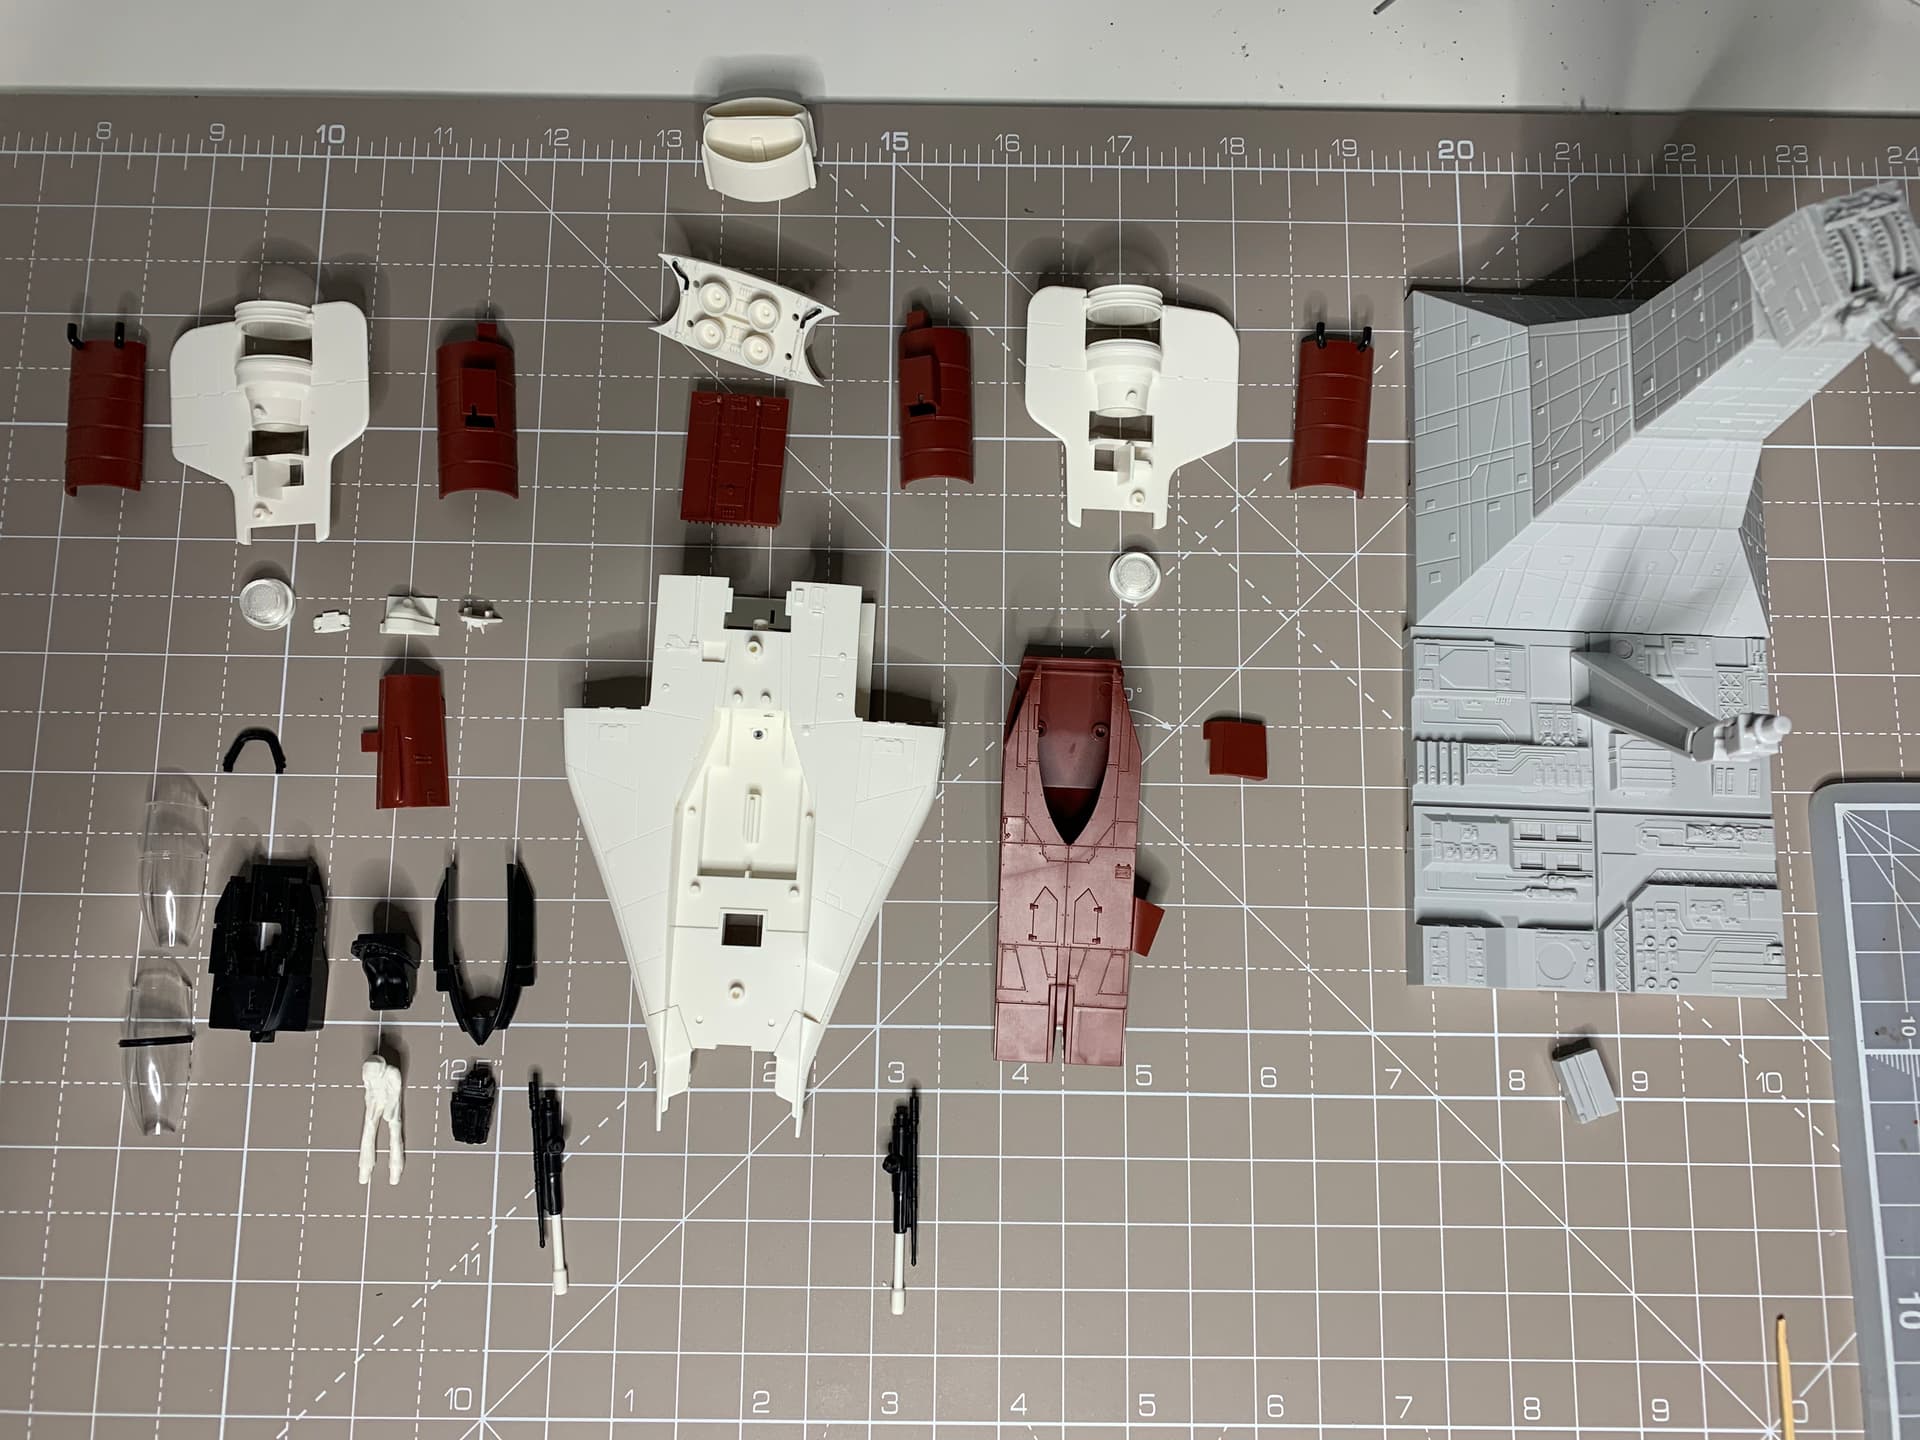
I have decided the B-wing really needs an A-wing for company. It’s a lovely wee kit that goes together very easily. I’ve decided to paint it in substructures as the engineering of the kit makes this the obvious option. I will be careful not to coat the mating surfaces in paint as much as possible.
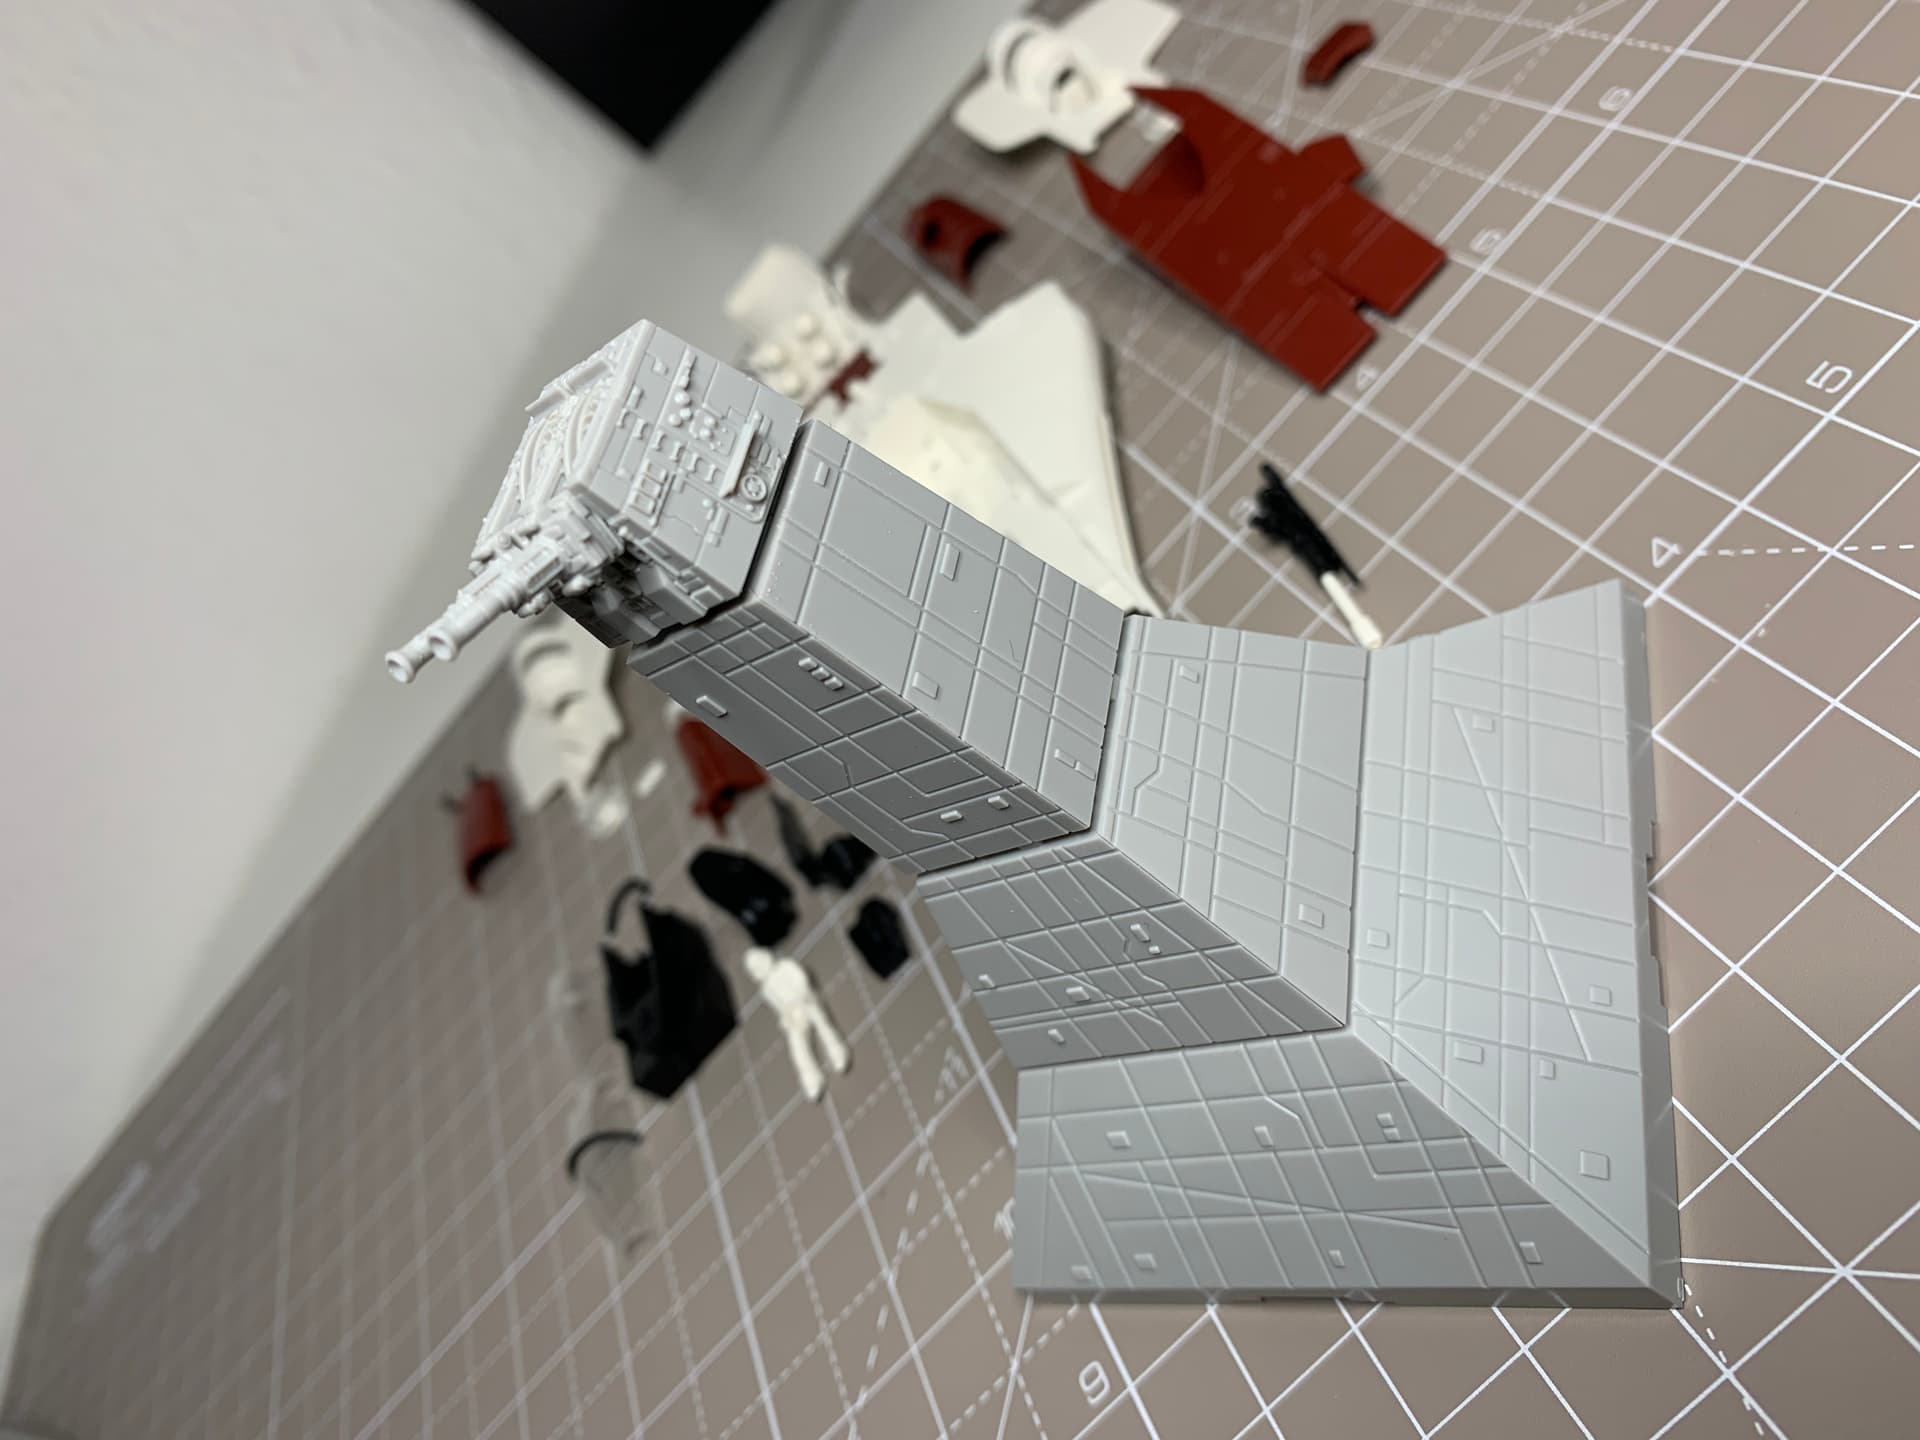
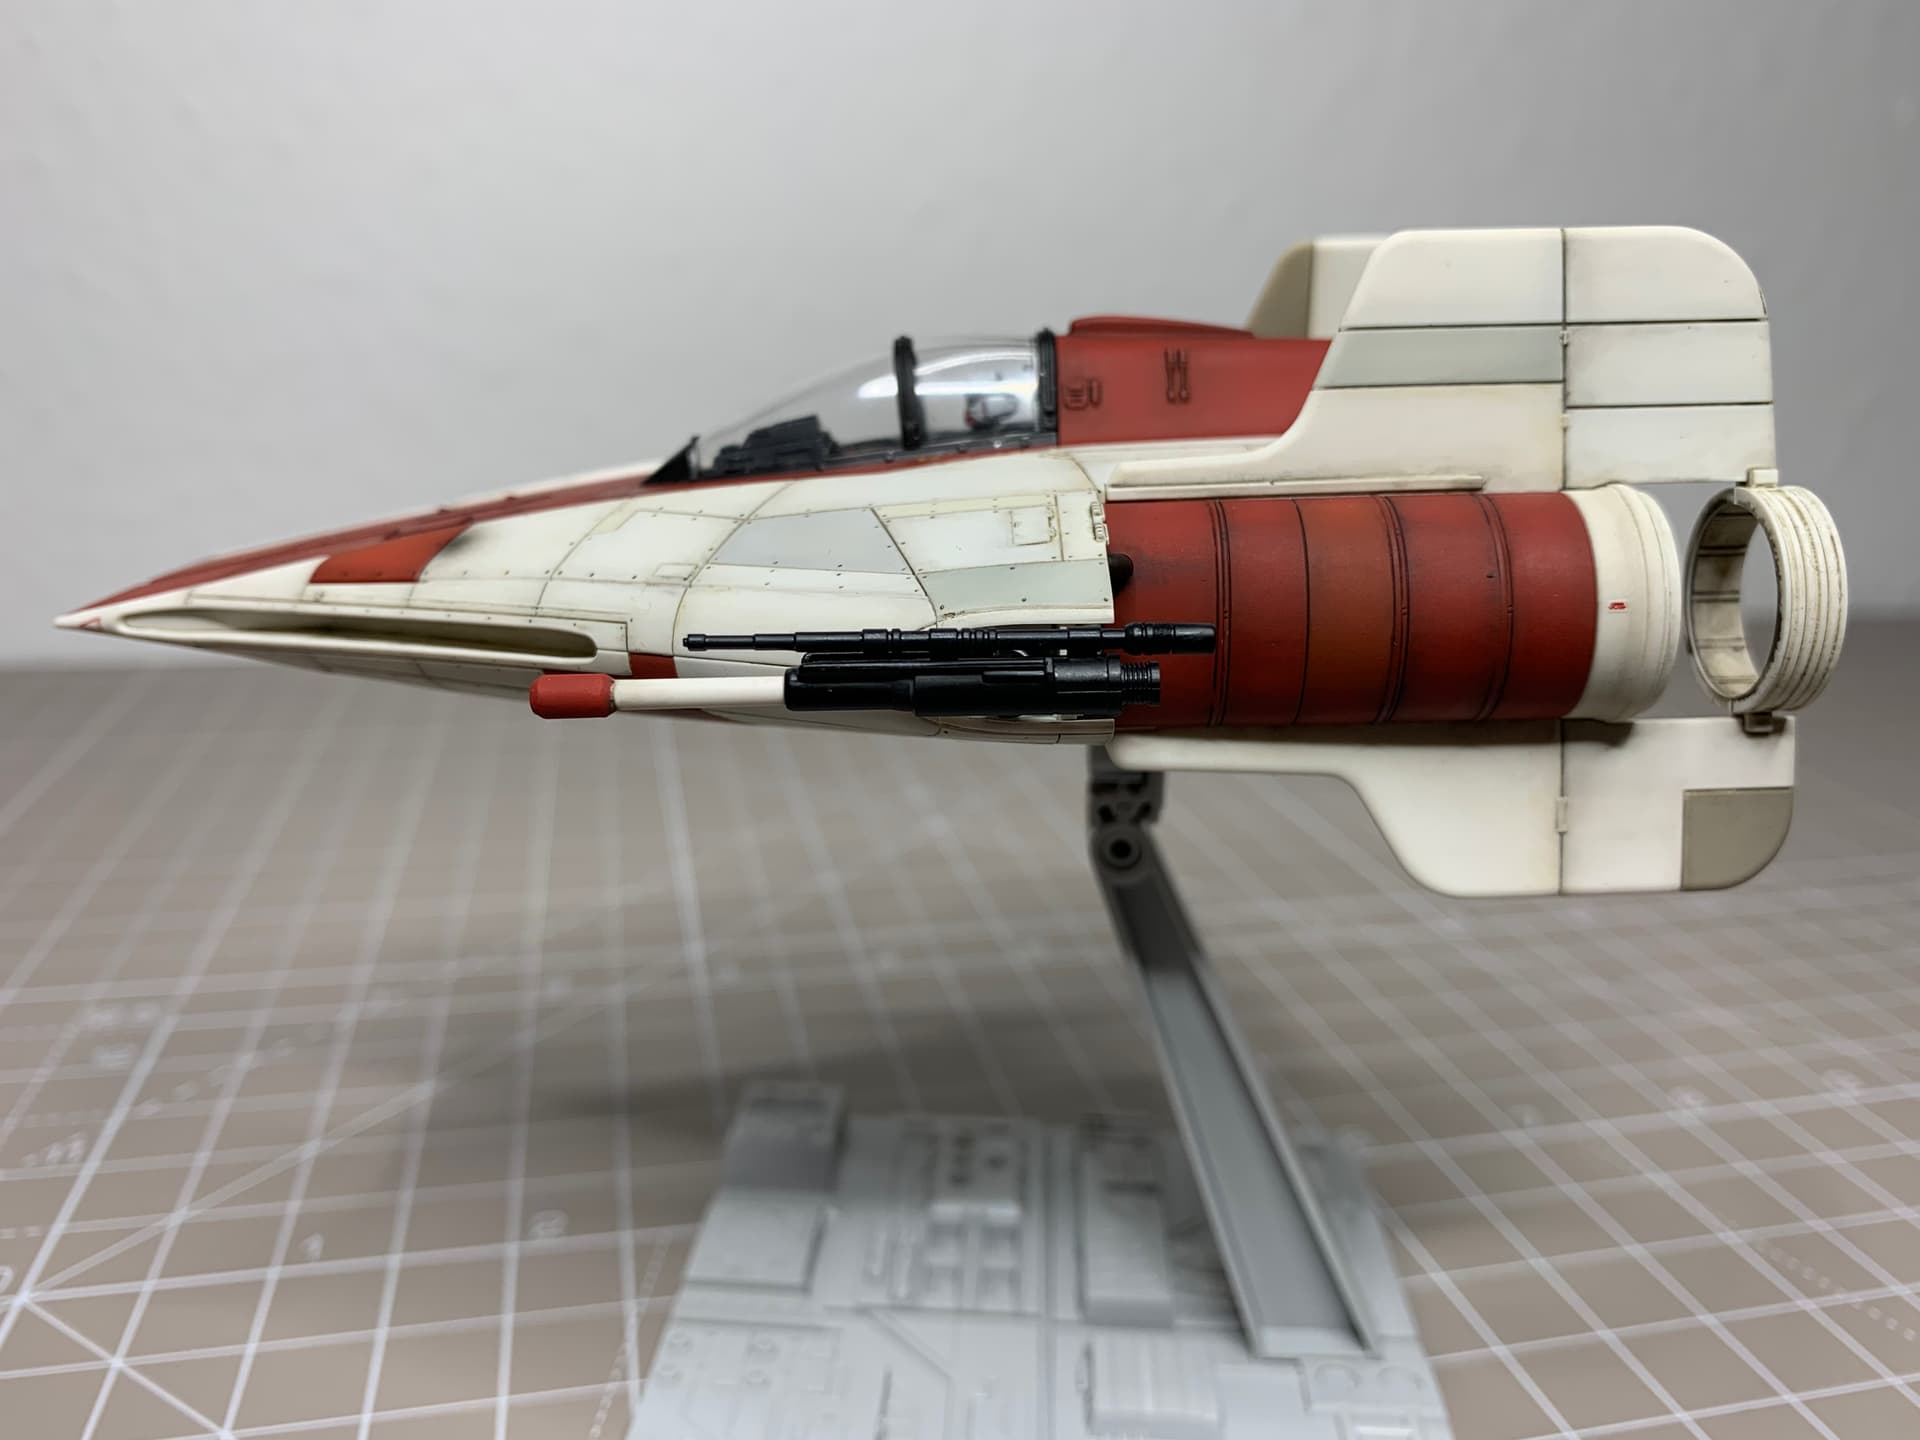
The additional turbo laser turret took about 15 minutes to put together and is a nice piece.
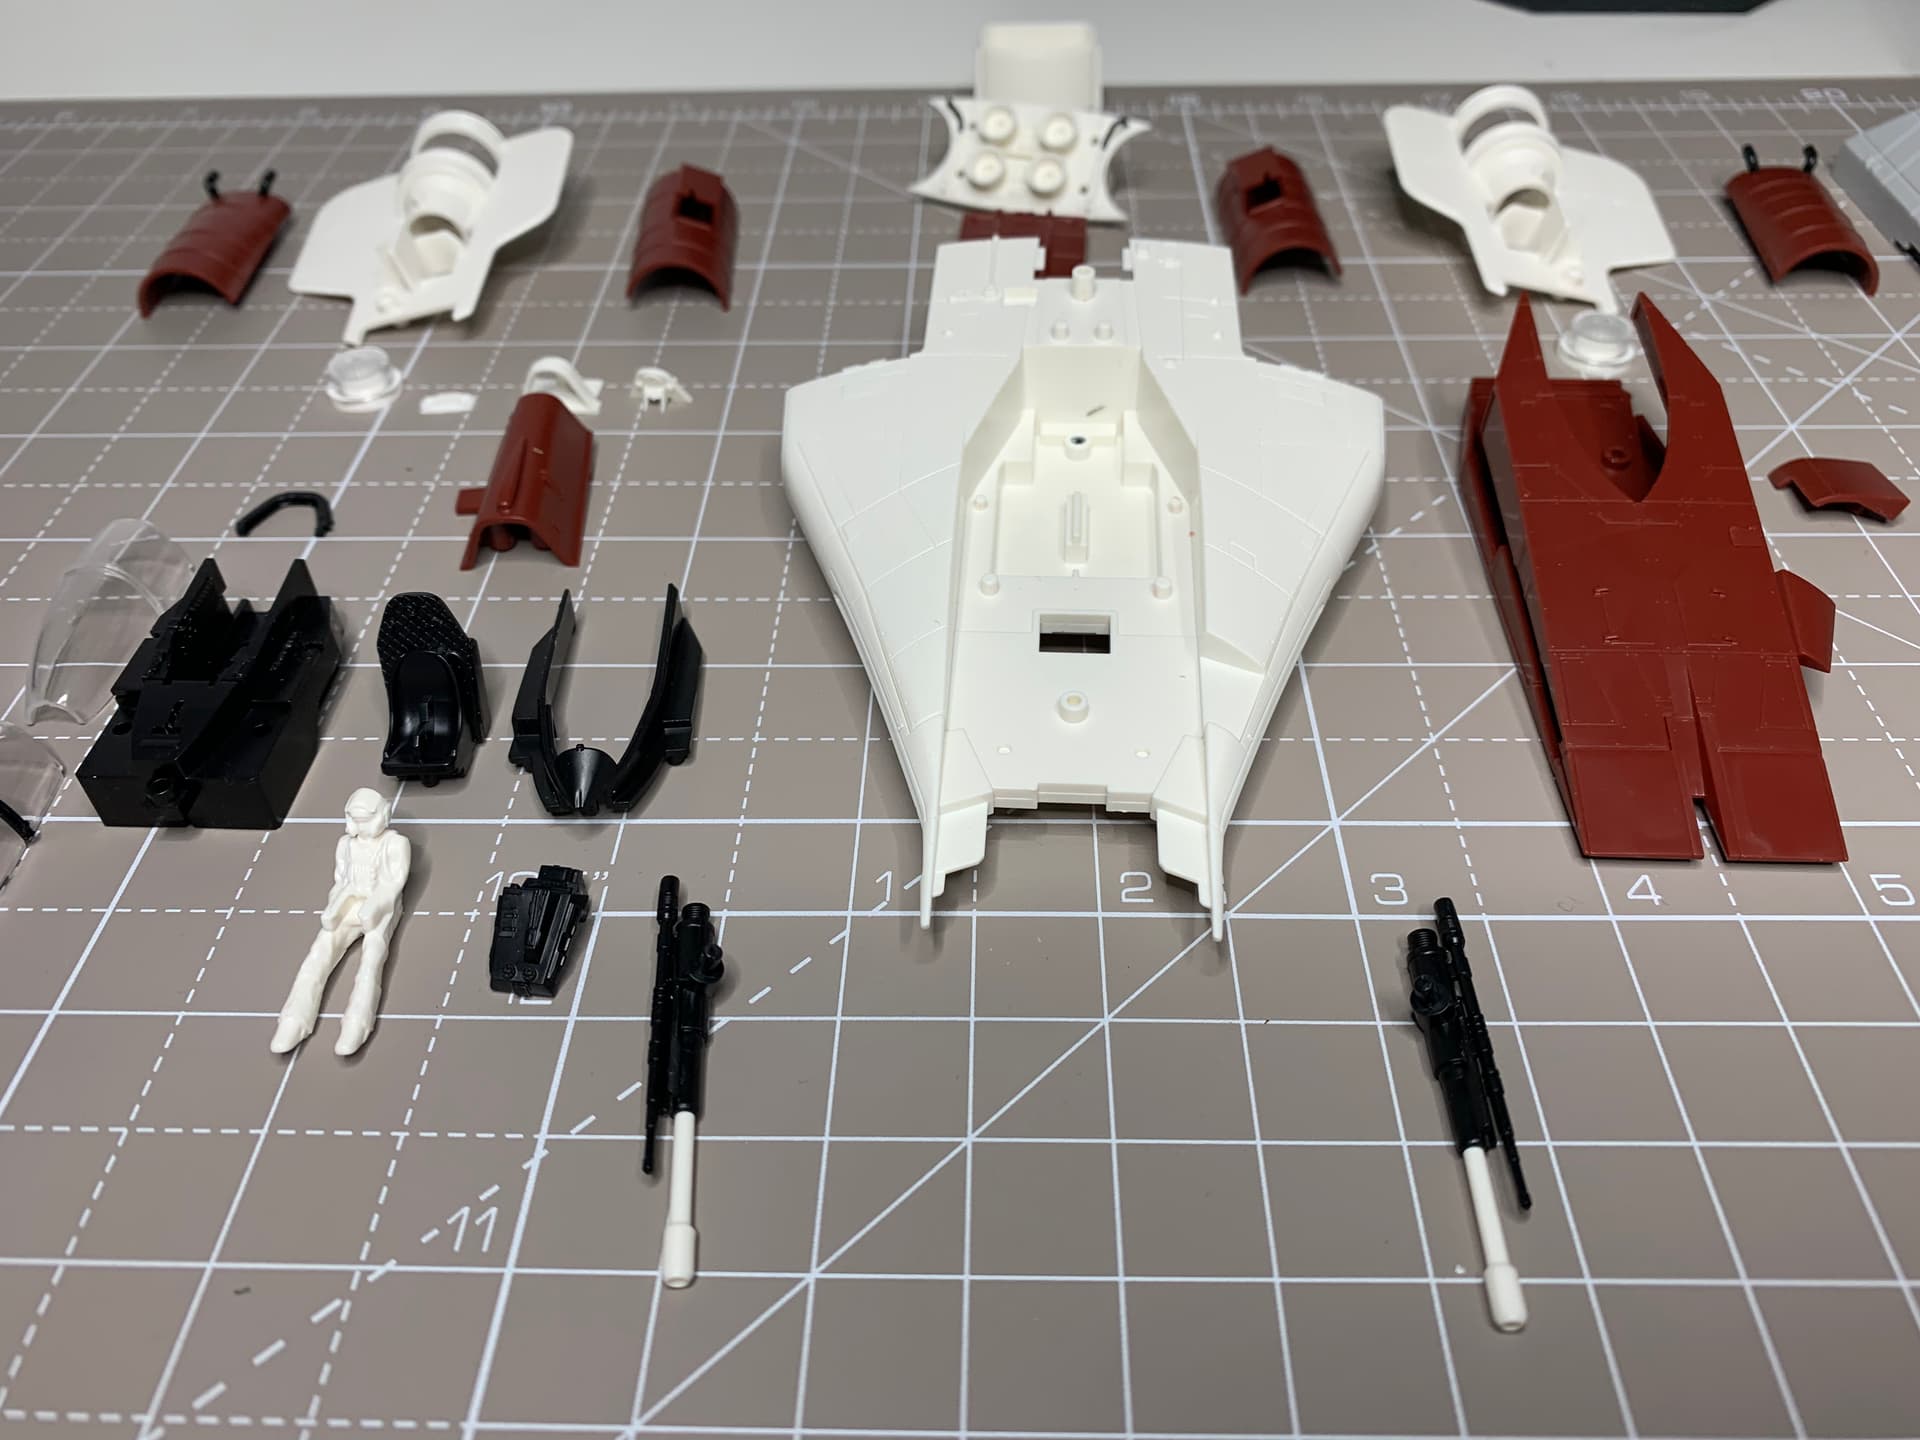
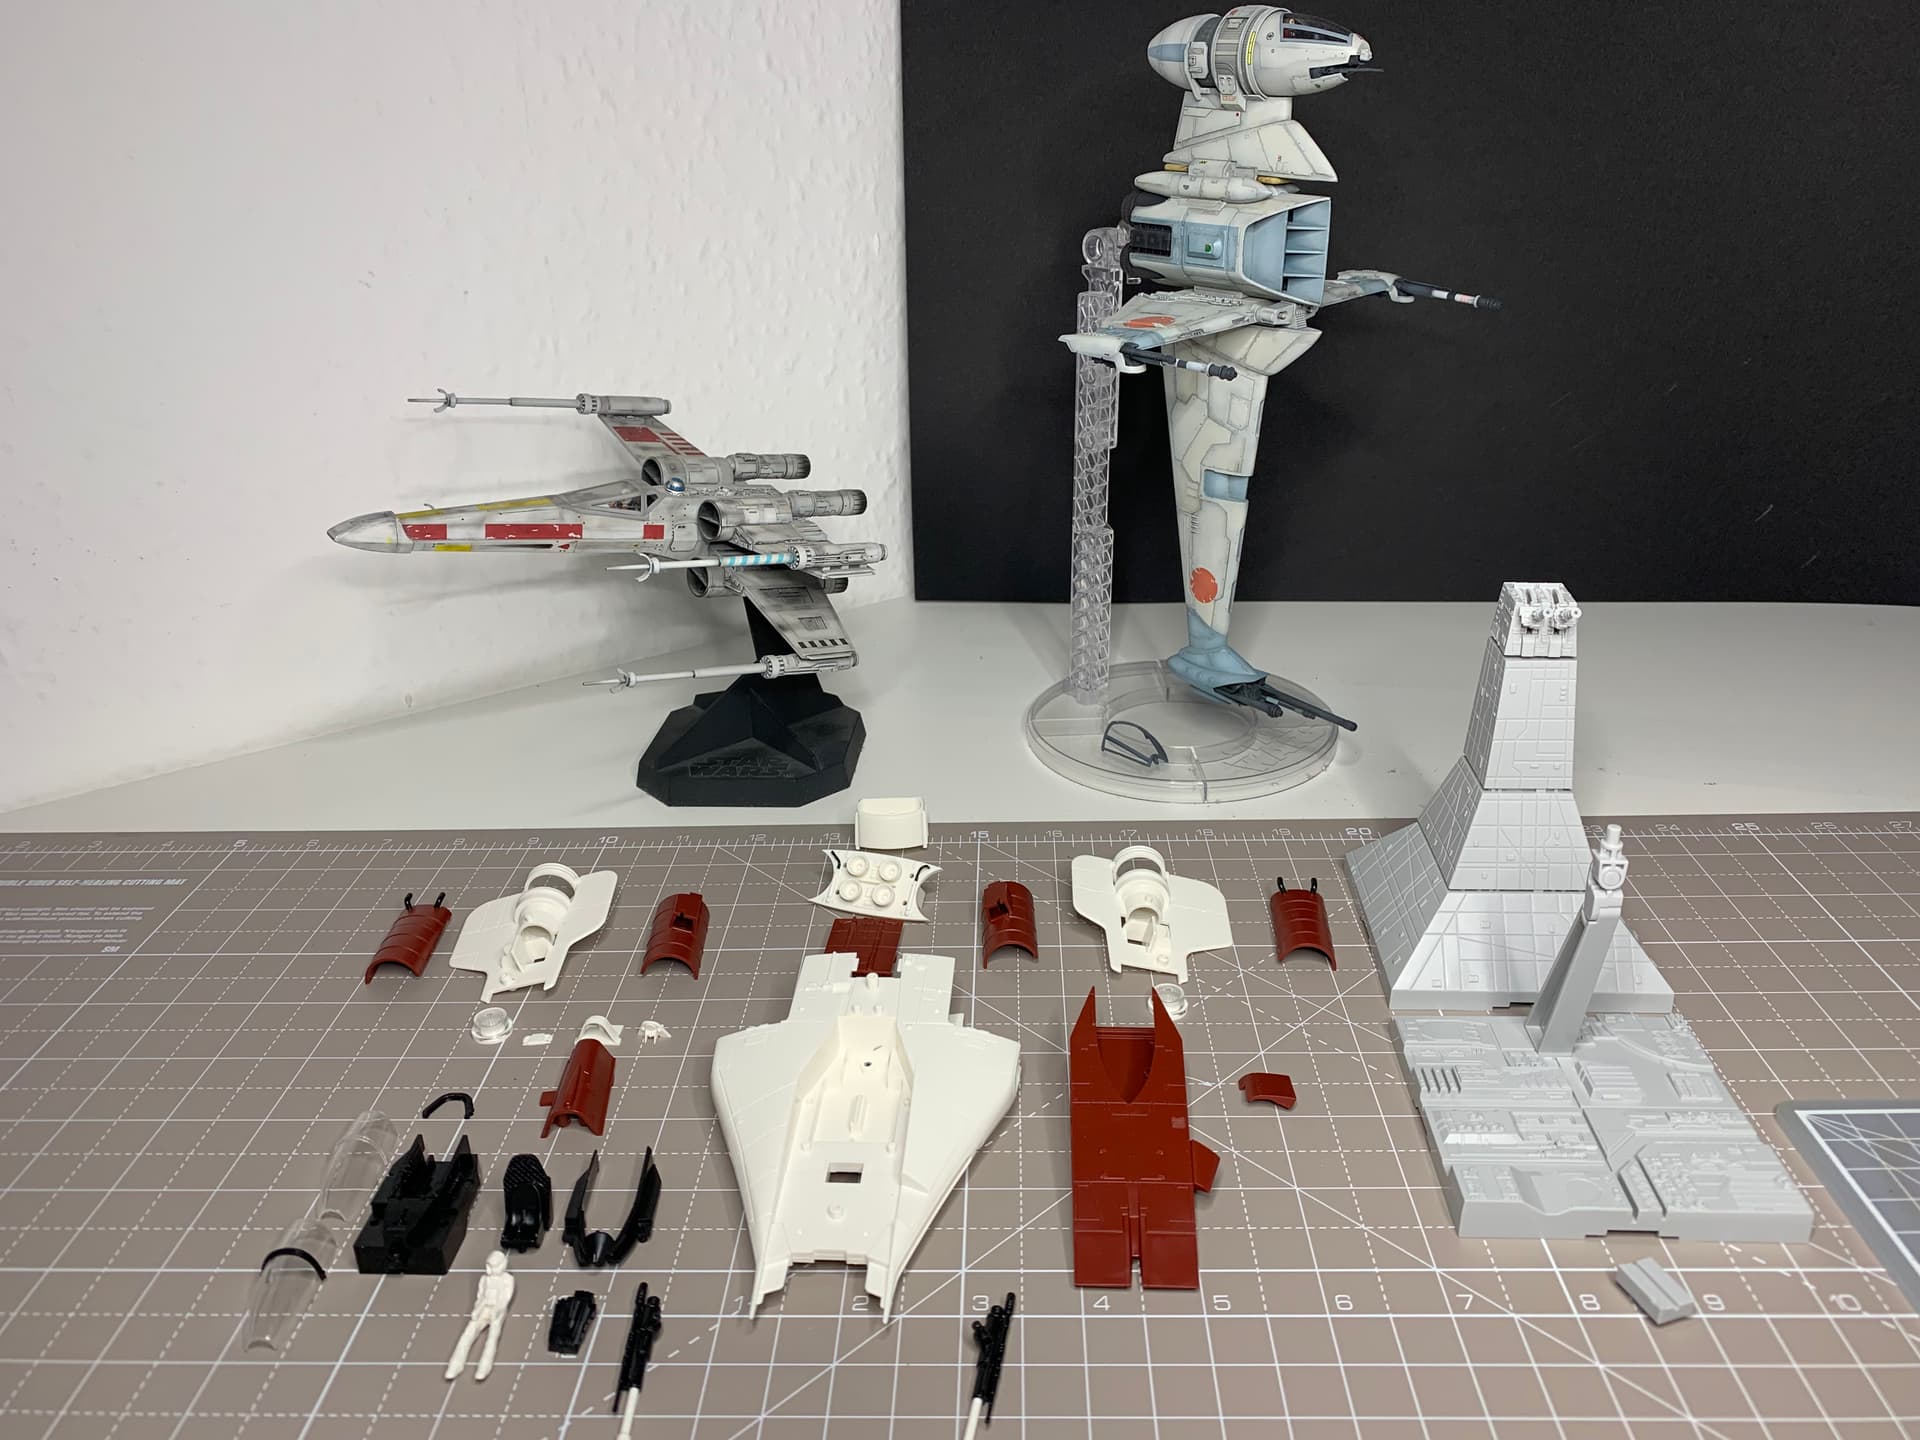
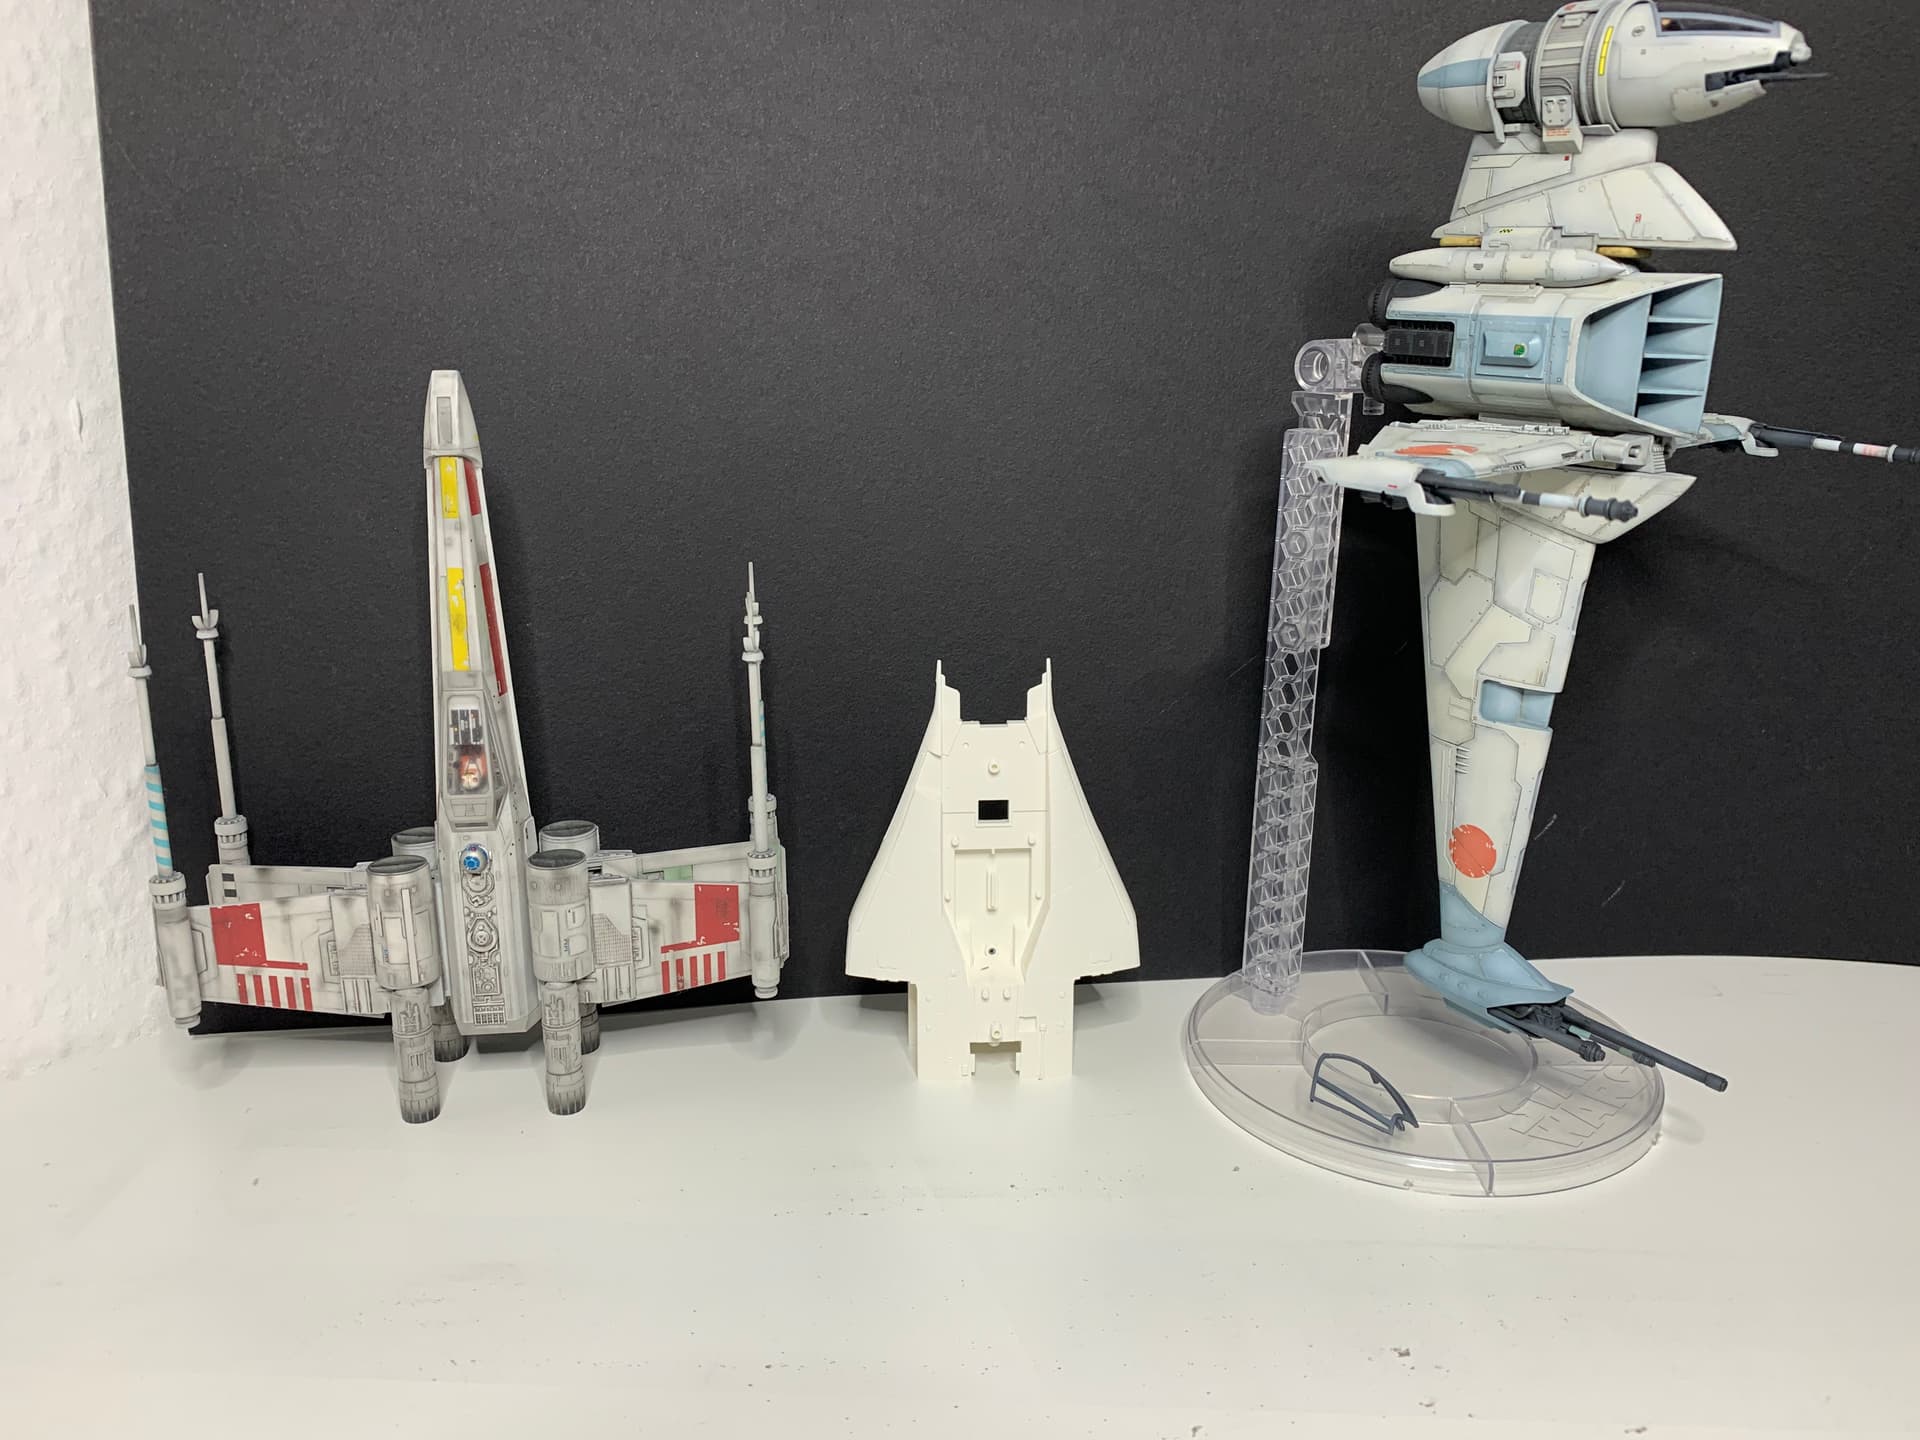
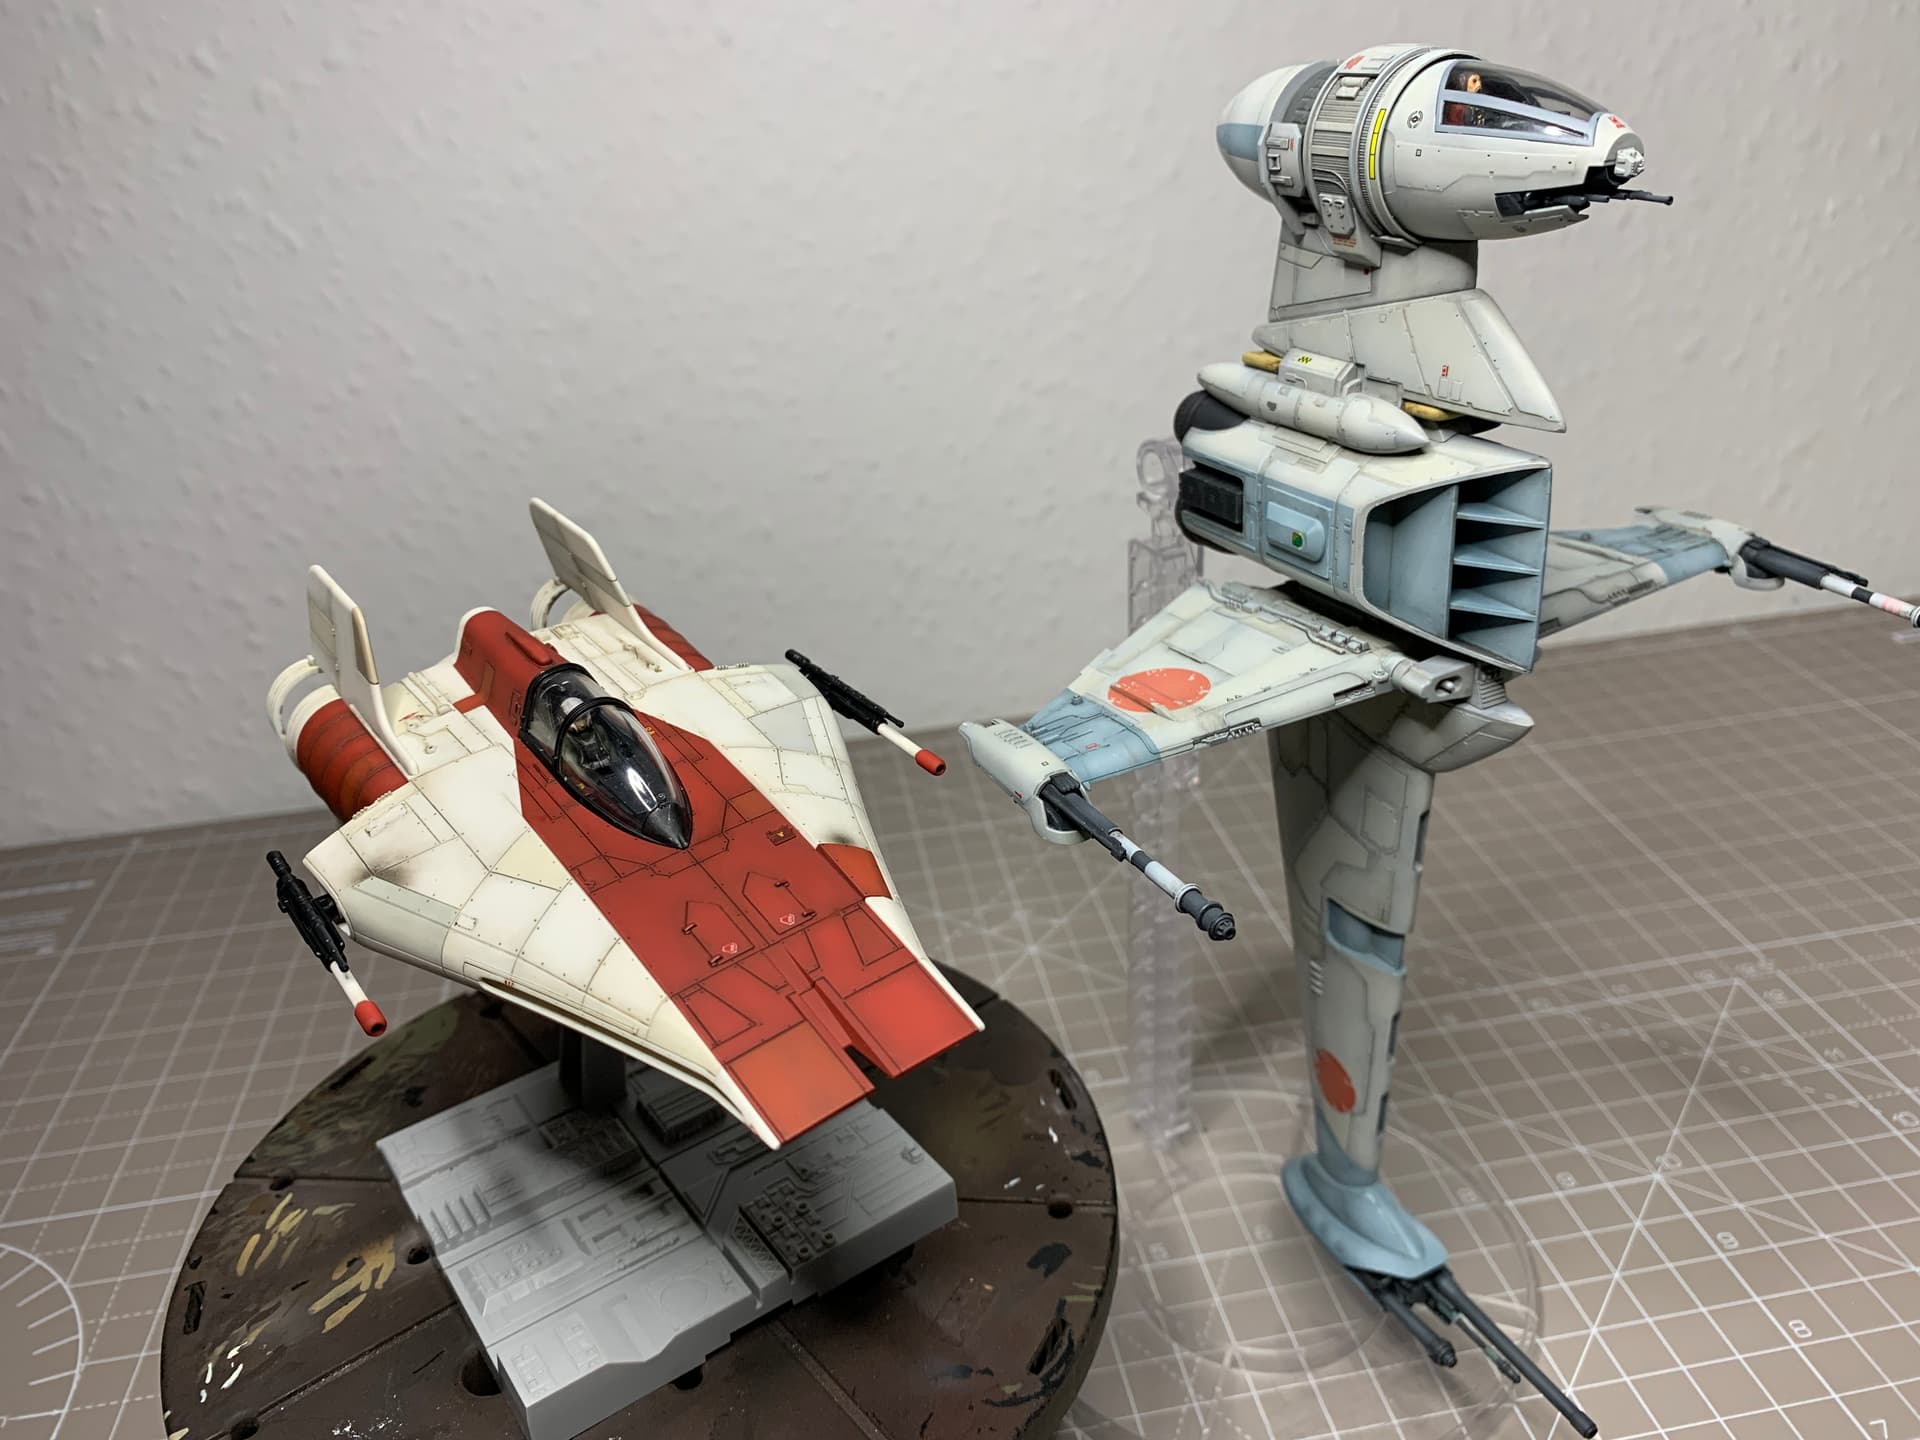
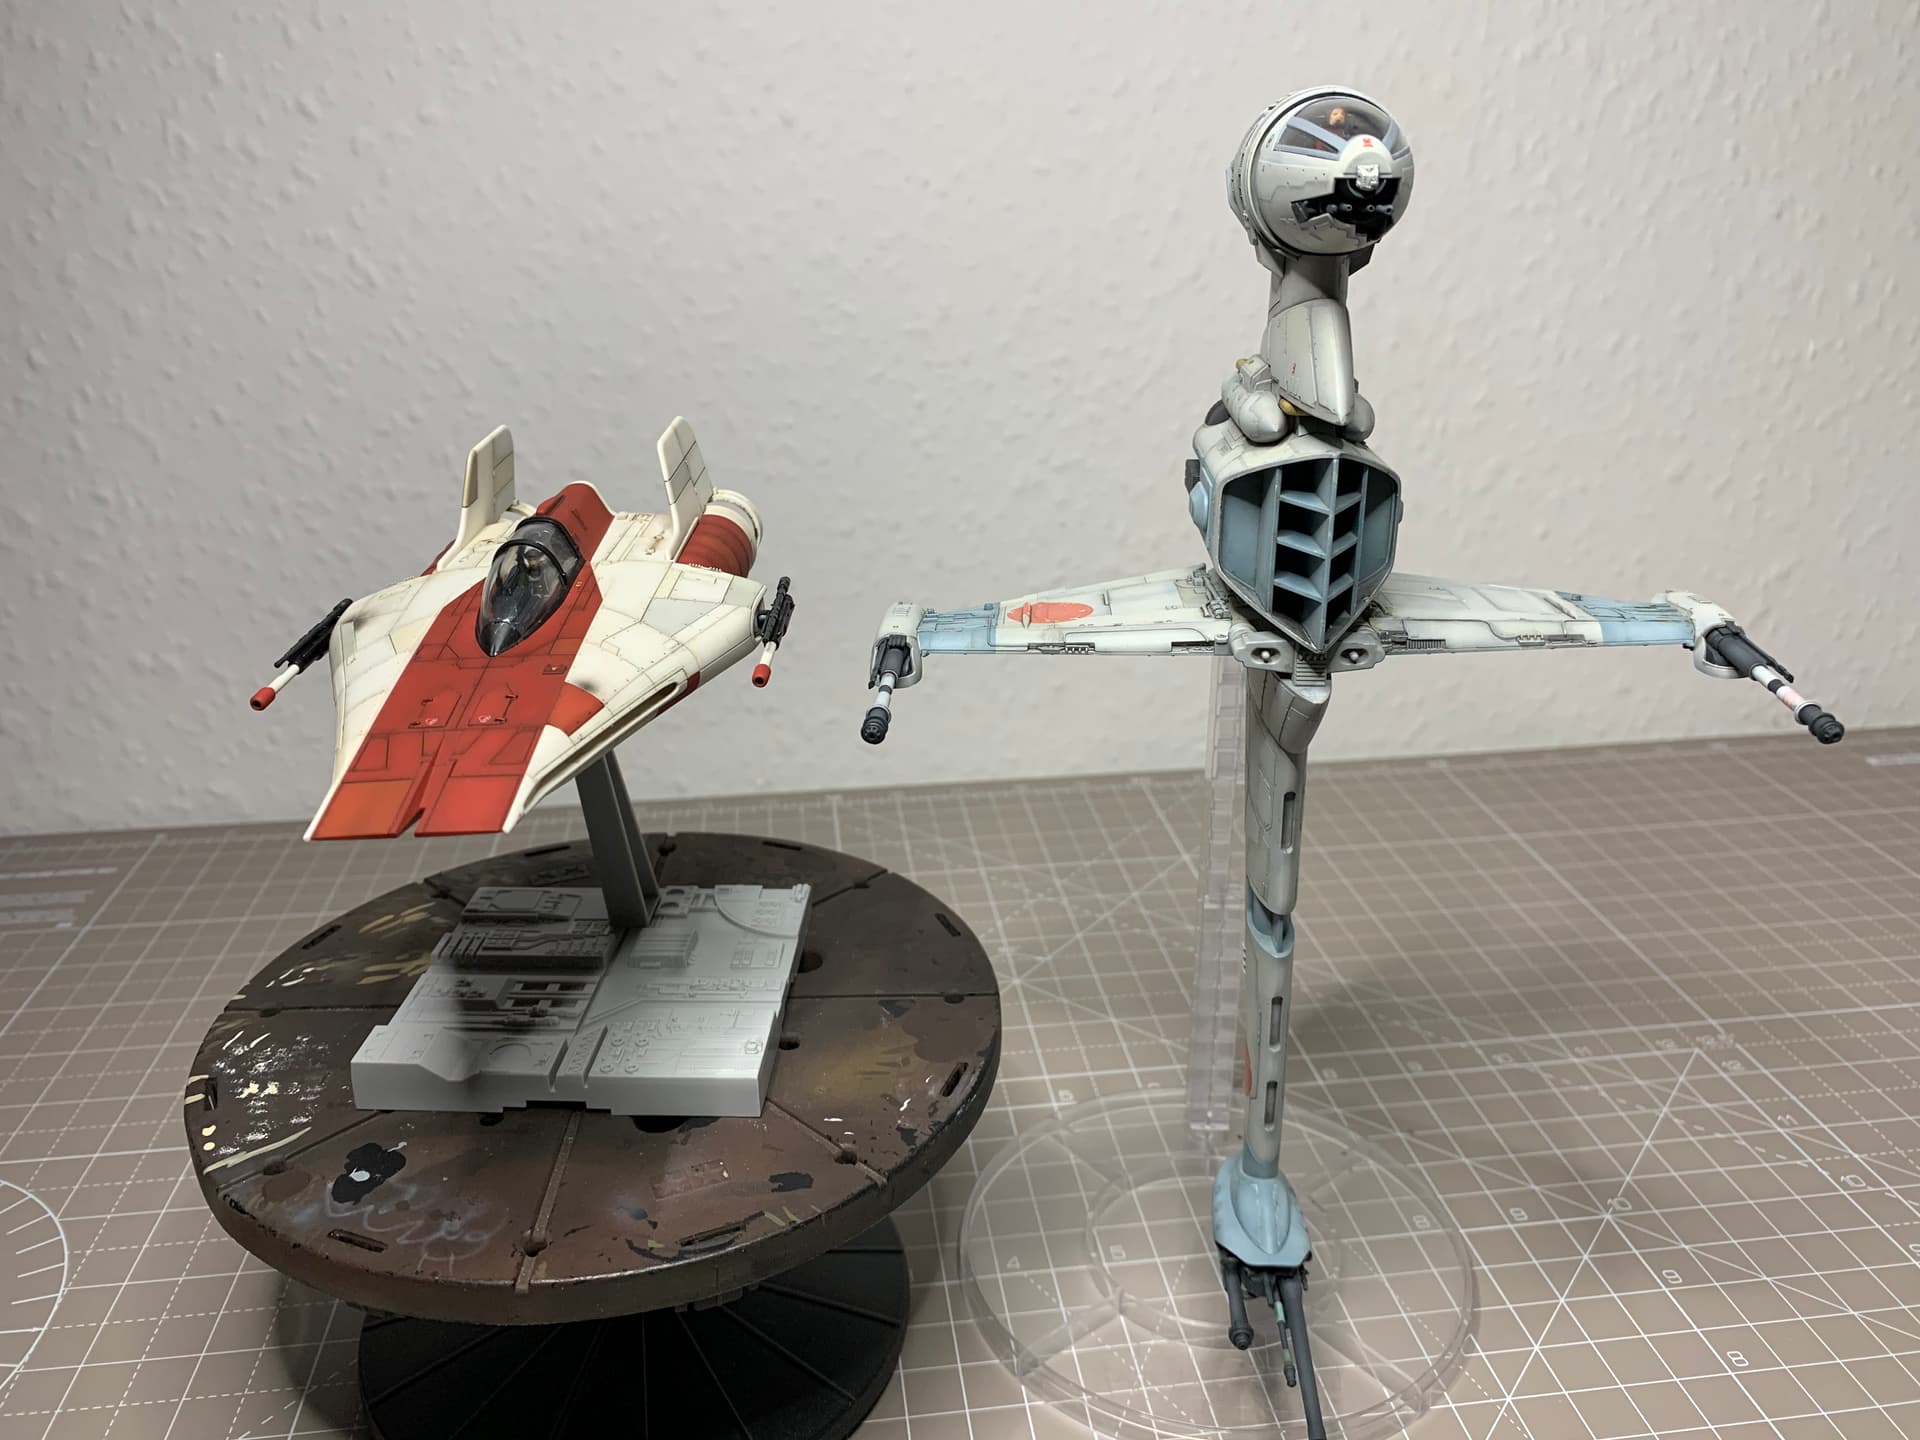
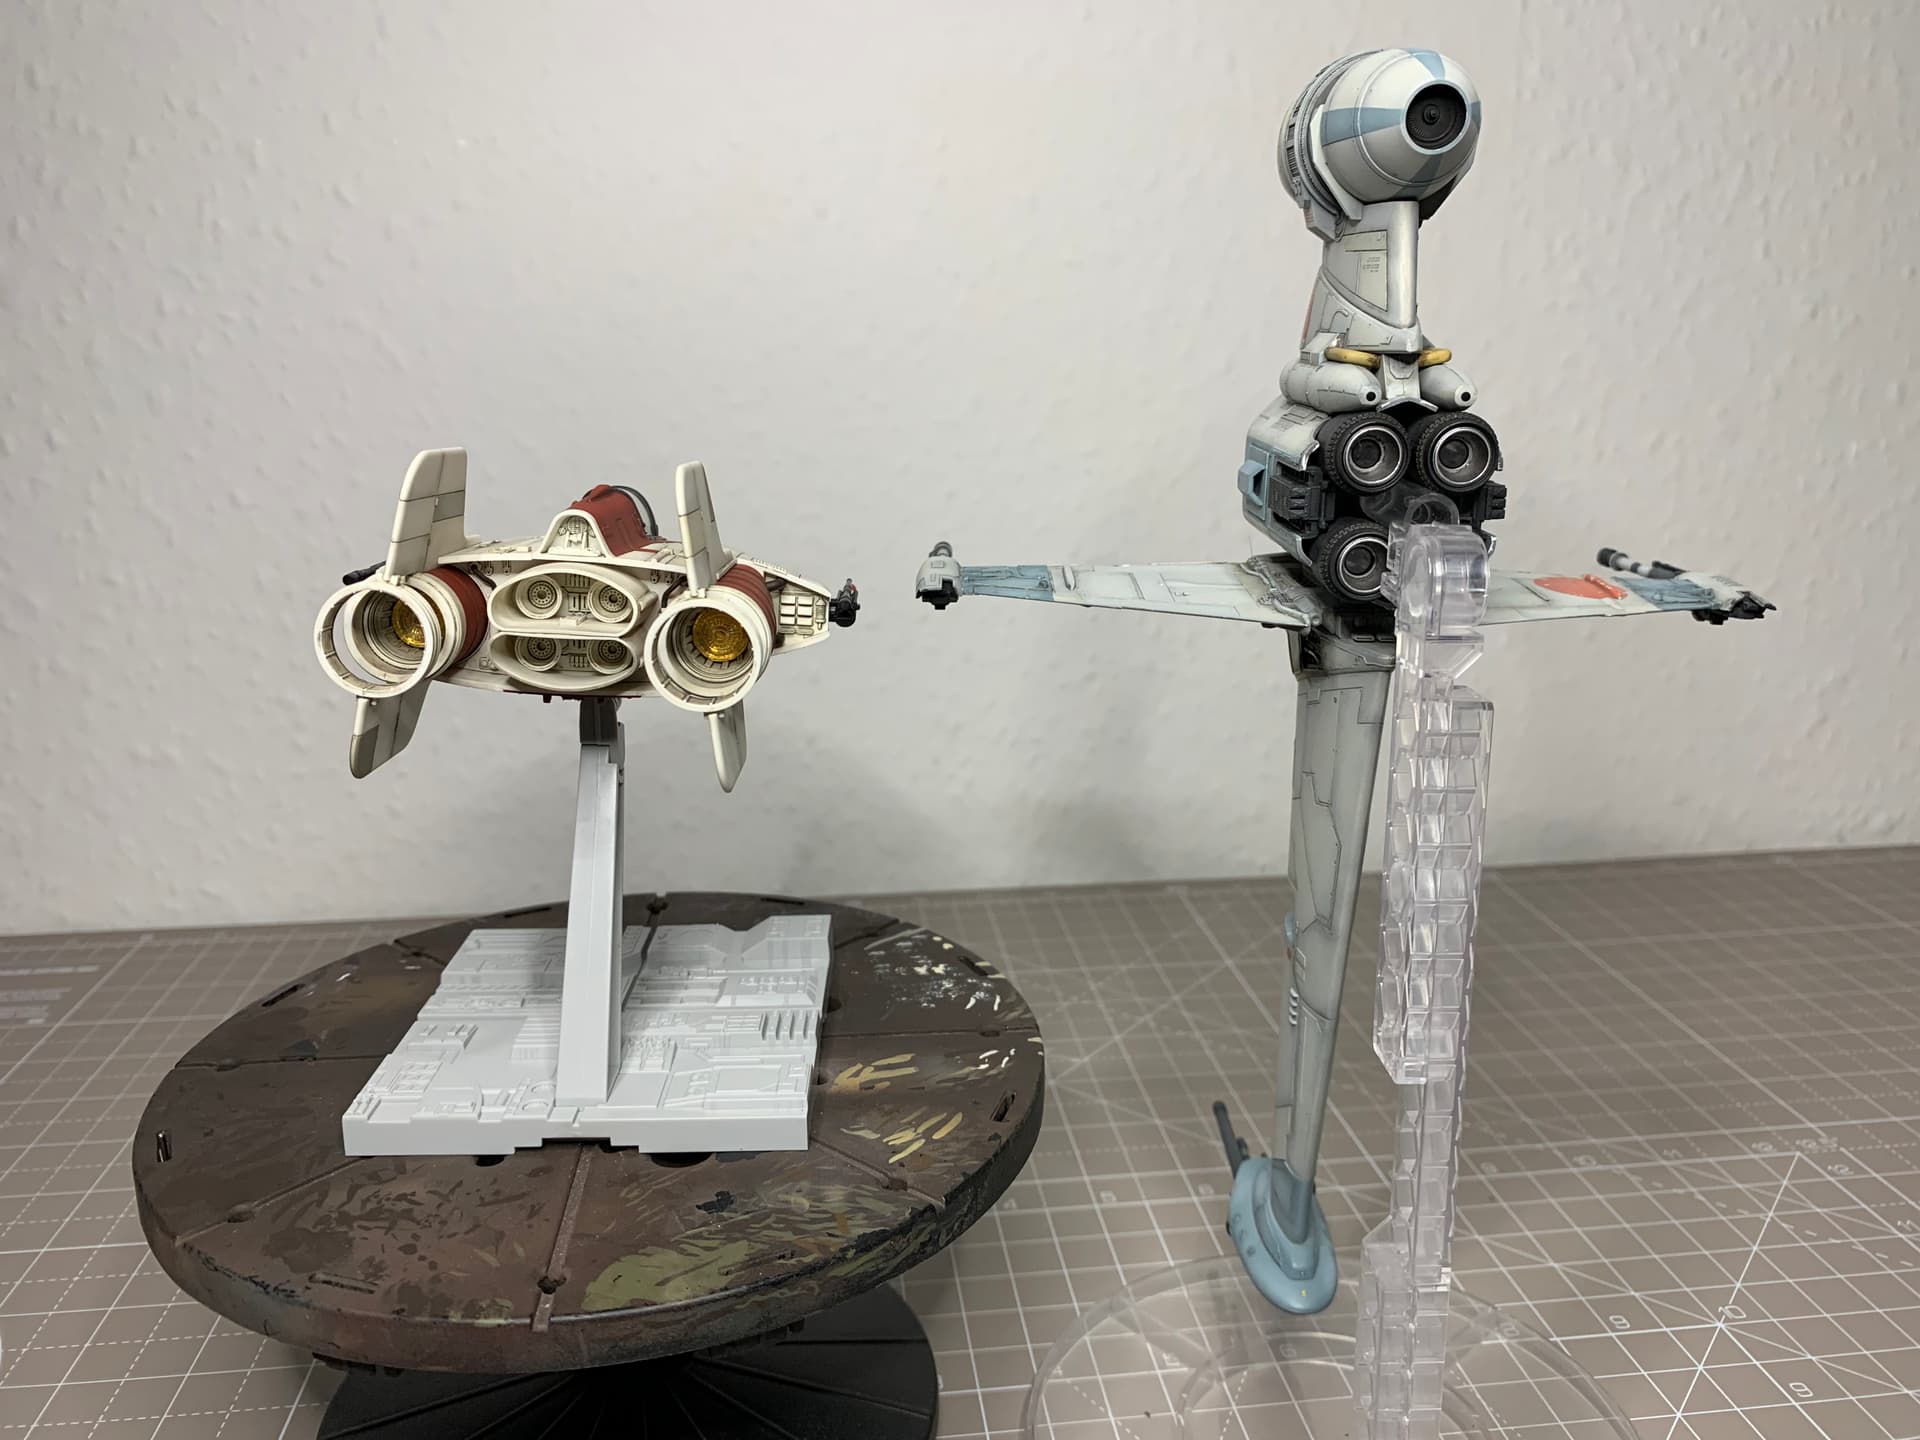
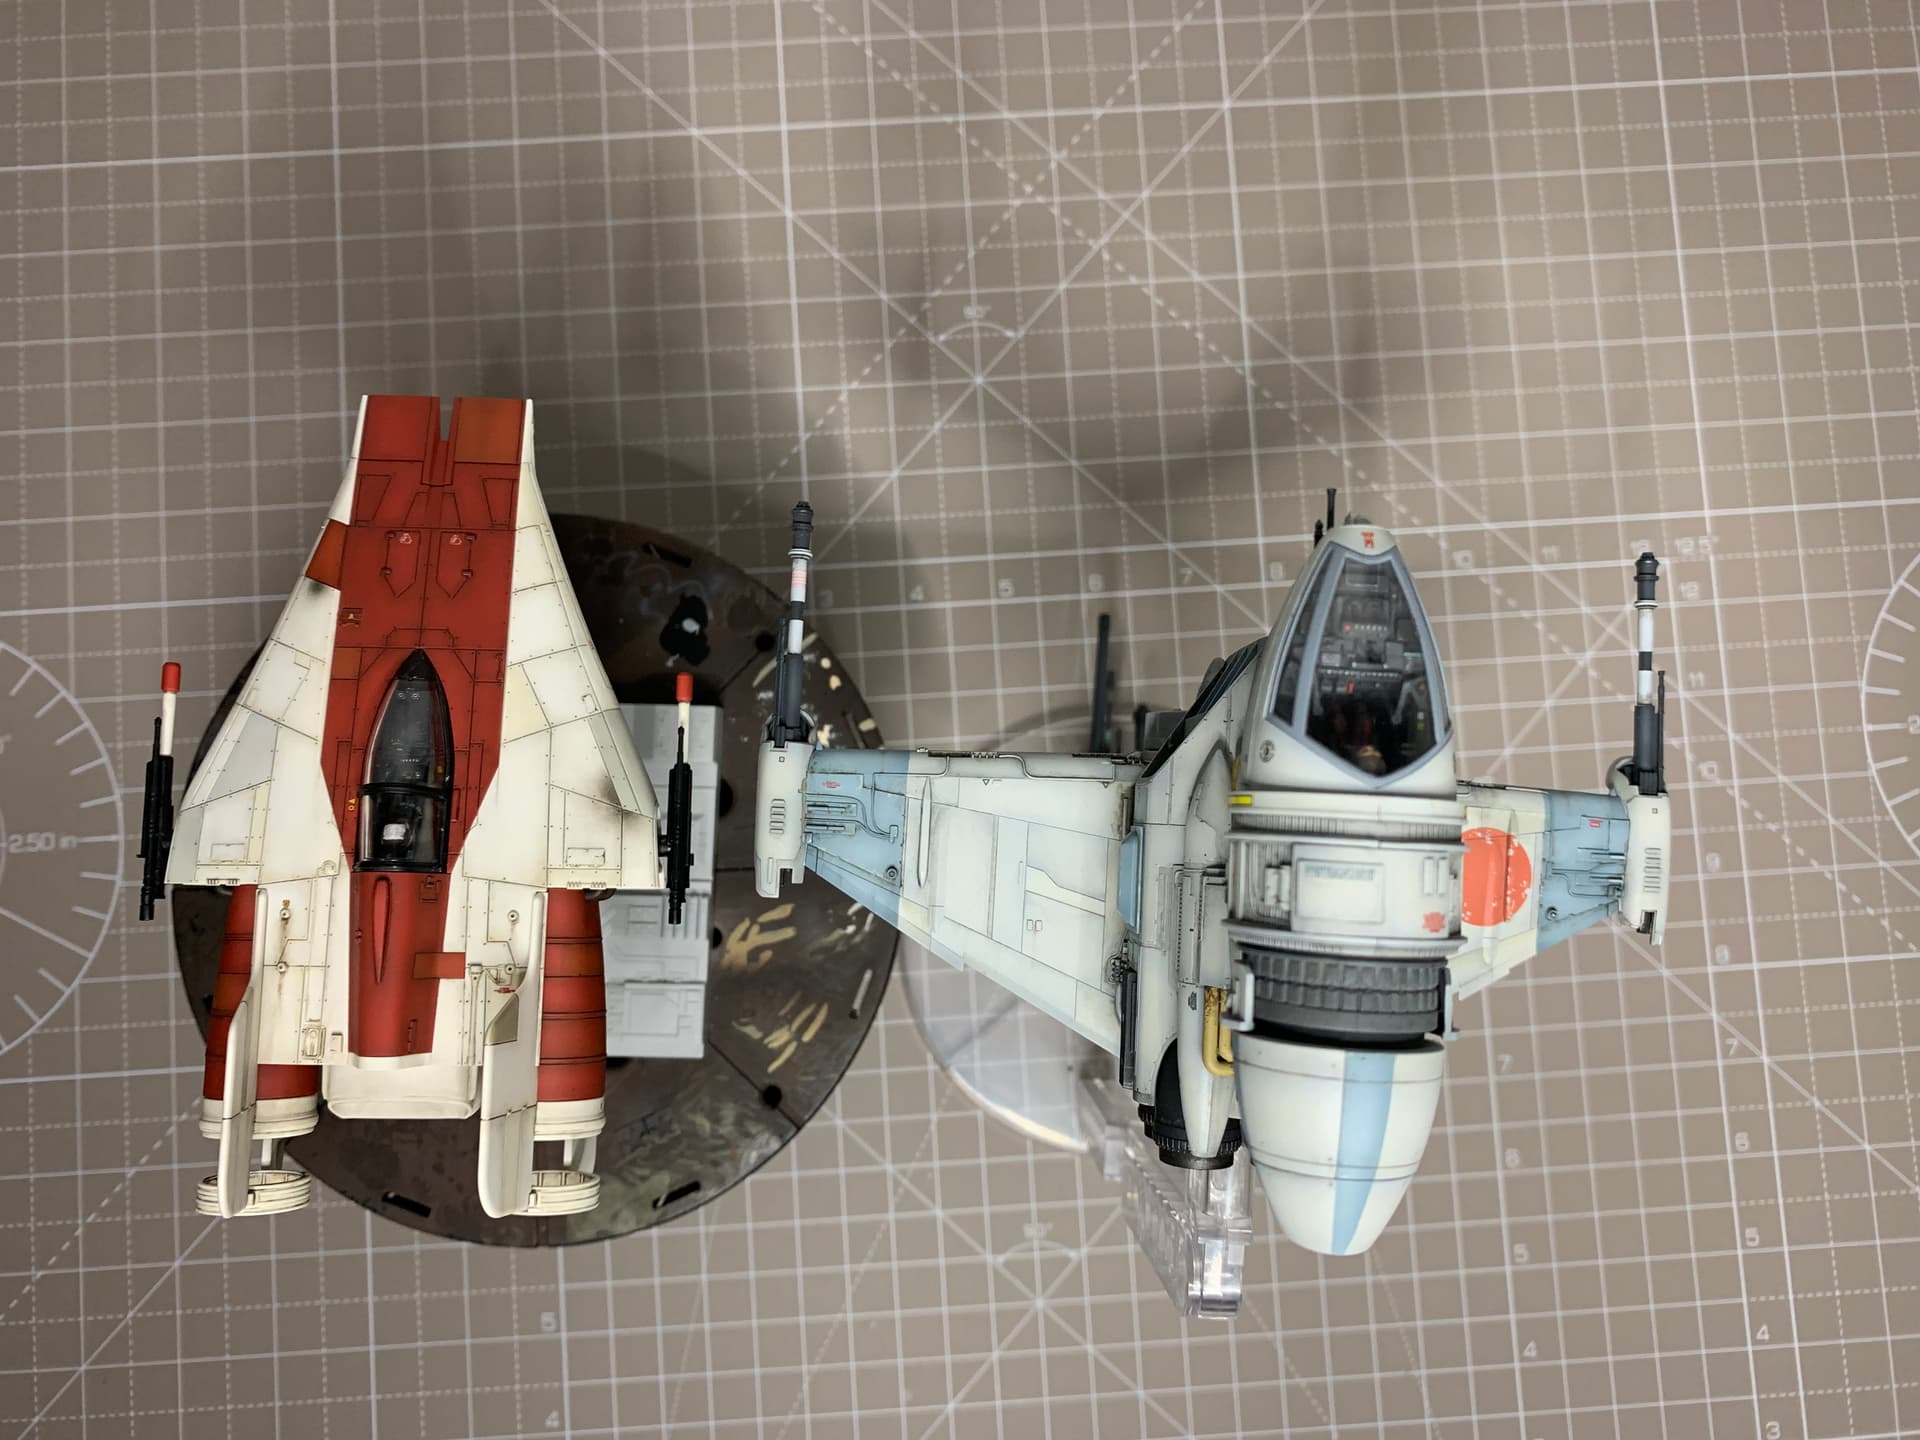
The last pics show the Bandai B-wing and finemolds X-wing both in the same scale, for initial scale comparison, sorry no pic with the A-wing fully mocked up but don’t want to risk building and taking it apart too often.
Now for the usual wash up then start to figure out which colours I’m going to use…???
Here we go again.
6 Likes
Oooh, me likey! 
Actually, I must say those kits look pretty good, especially the B-Wing!!
That base for the A-Wing looks pretty impressive as well.
Thanks for sharing. 
1 Like
Again, looking forward to this one Jim… And that base is definitely worth getting the kit for. It’s pretty neat 
1 Like
Hey Gavin and John @The_Snowman and @Johnnych01, it’s great to have you on board!
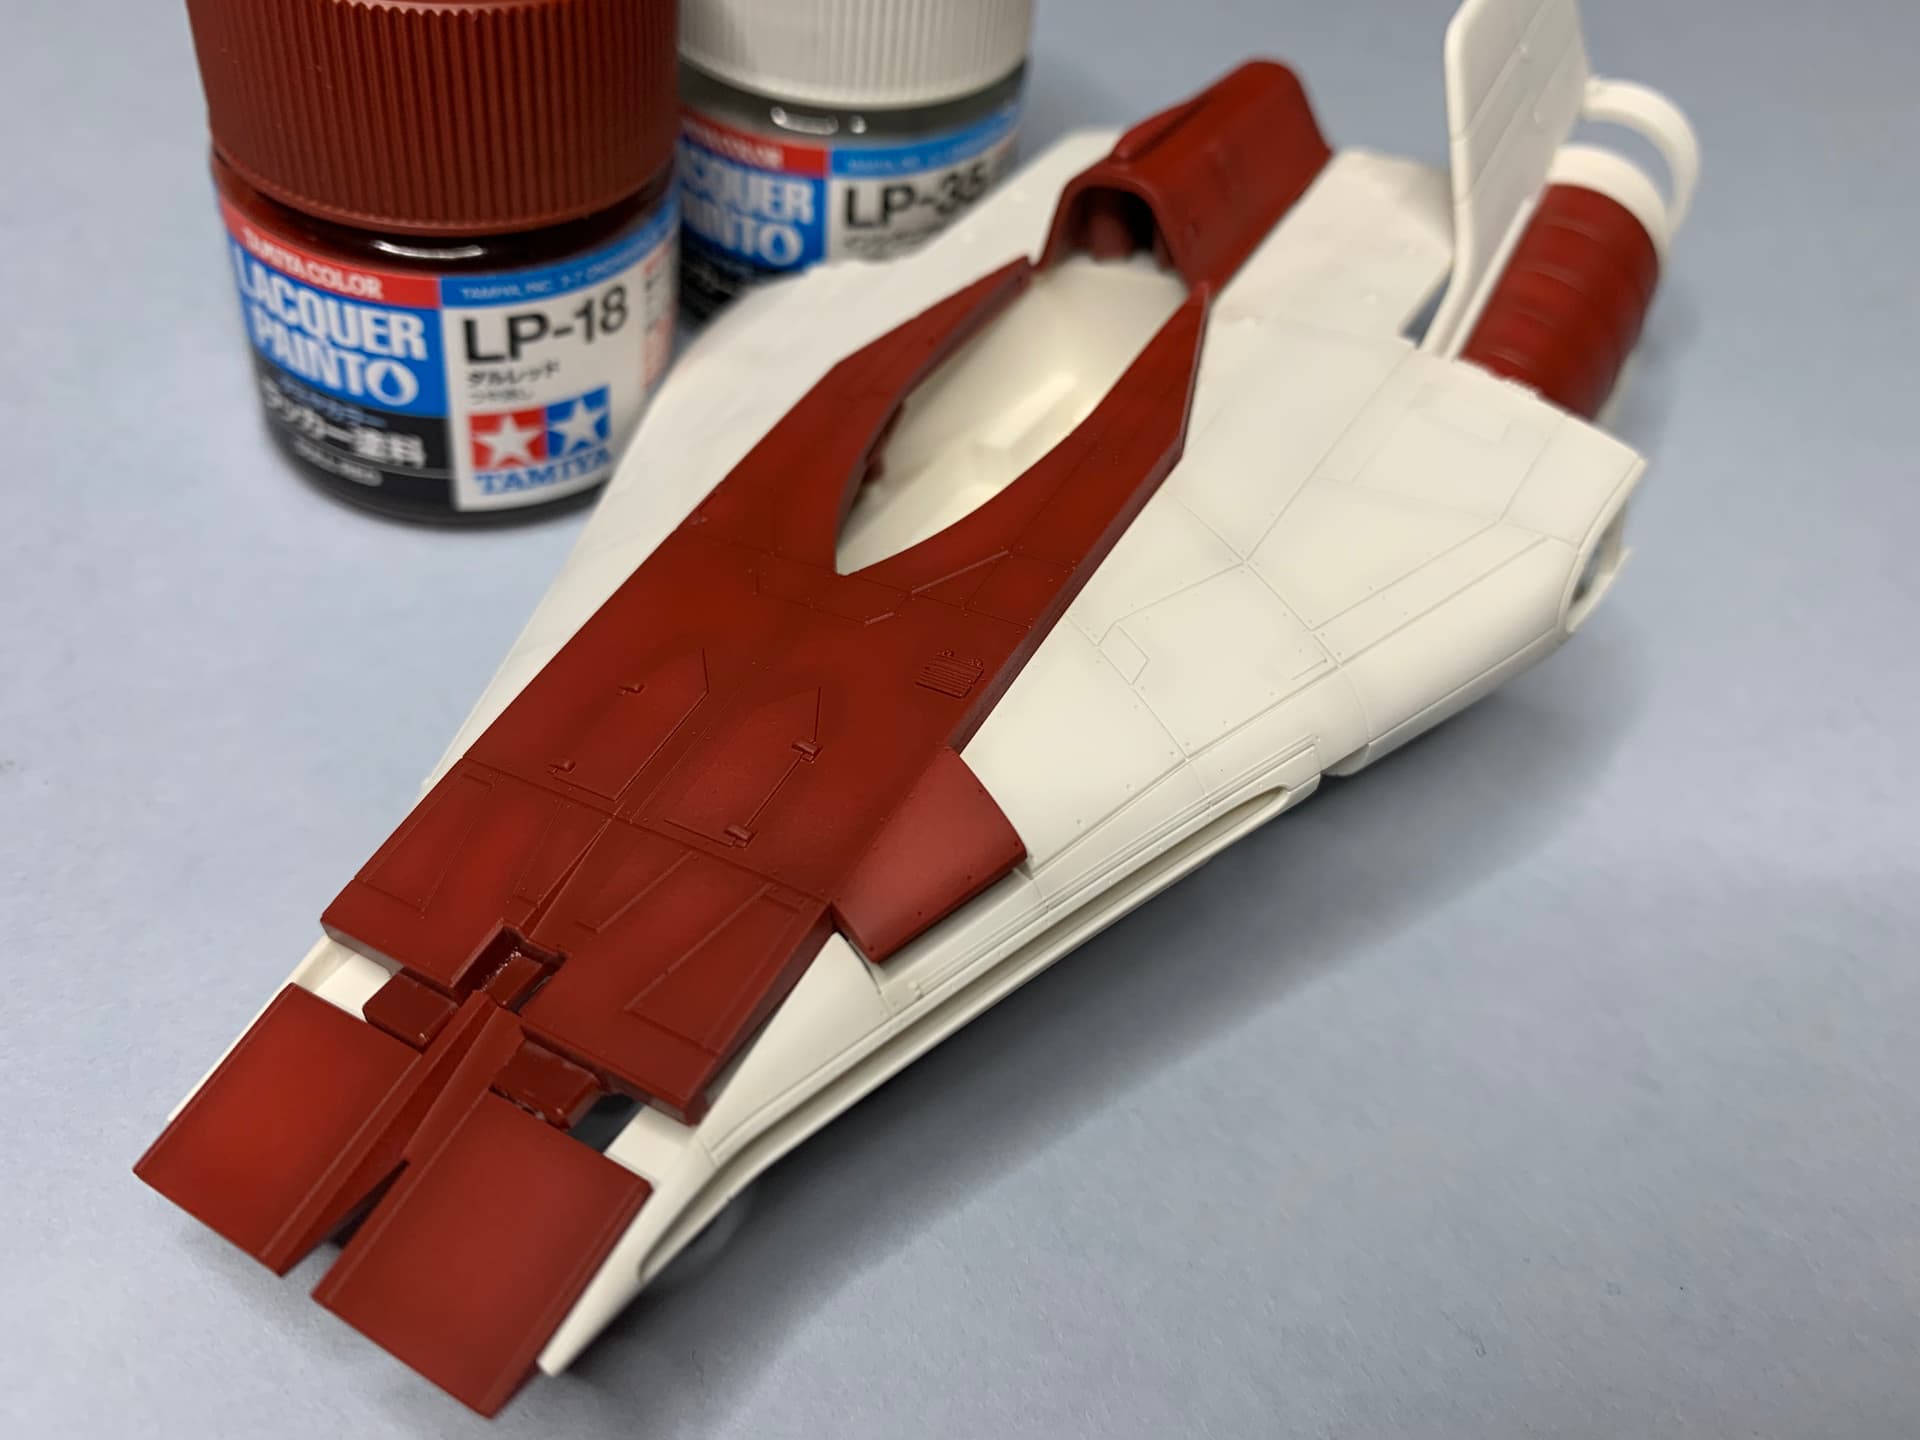
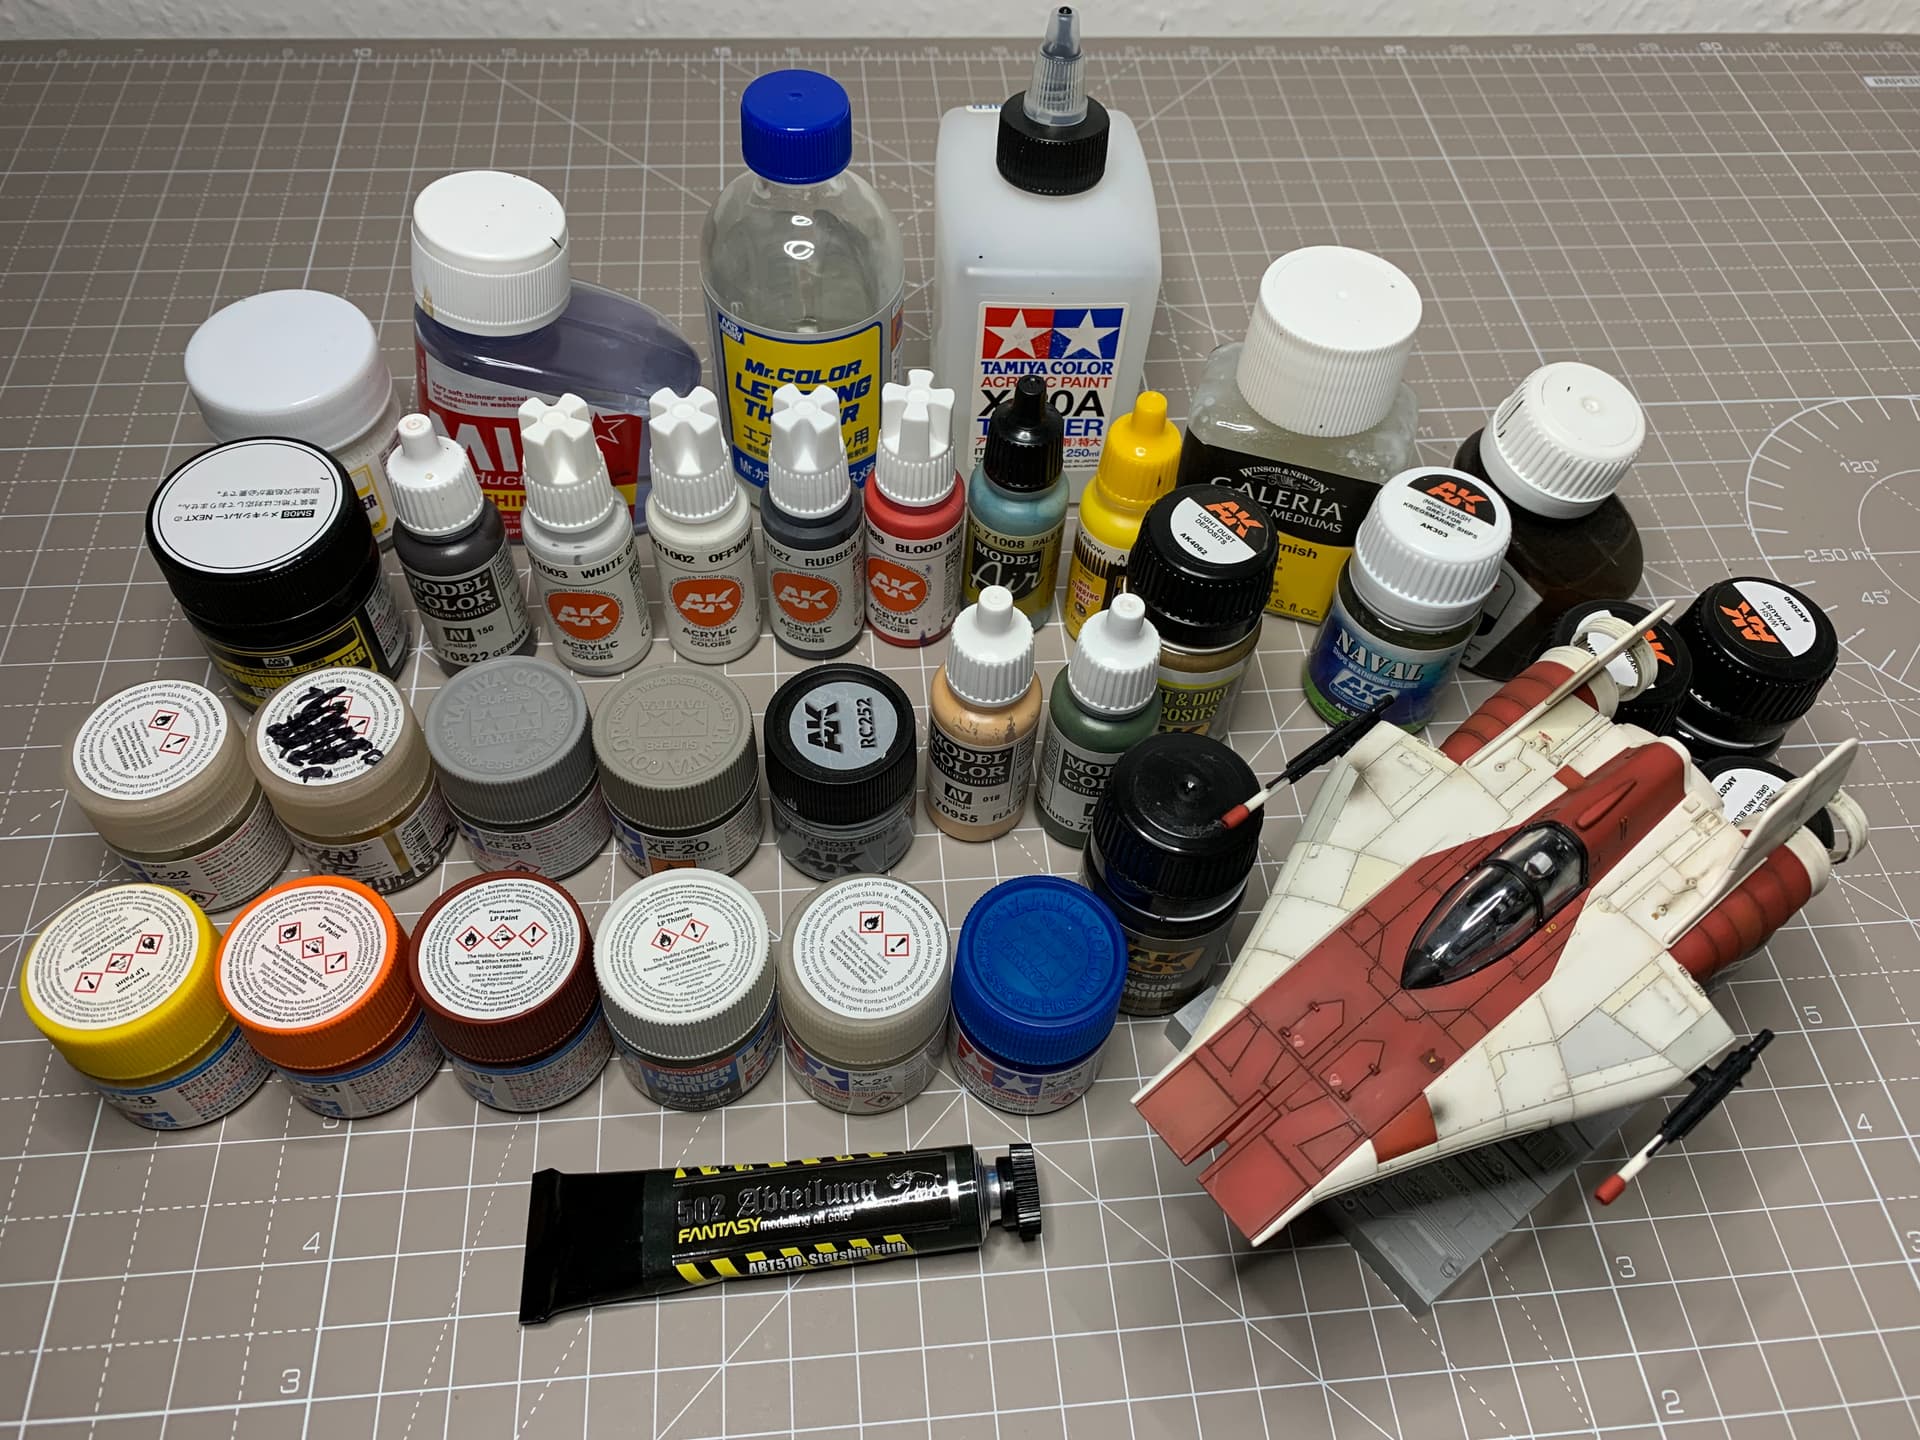
I have the base coats on now. I used the Tamiya LP lacquer paints and they are very nice to use. I thinned them 50/50 with Mr Color Levelling thinner and built up the coats gradually. My process so far;
Light coat of white primer, mr finishing surfacer 1500, all over white parts and concentrated on centre of panels on “red” parts.
Pre shade of white parts with Tamiya medium grey, normal xf20.
Then Tamiya LP35 insignia white, I really like this colour!
Then Tamiya LP18 dull red for the “burgundy”. I sort of preshaded with this colour then put a lighter coat overall, once again I really like the paint, spotted it when searching for mixes for this but I thought it might work straight and I think it could be the one.
Now for the different coloured panels…
Thanks for looking in, J.
5 Likes
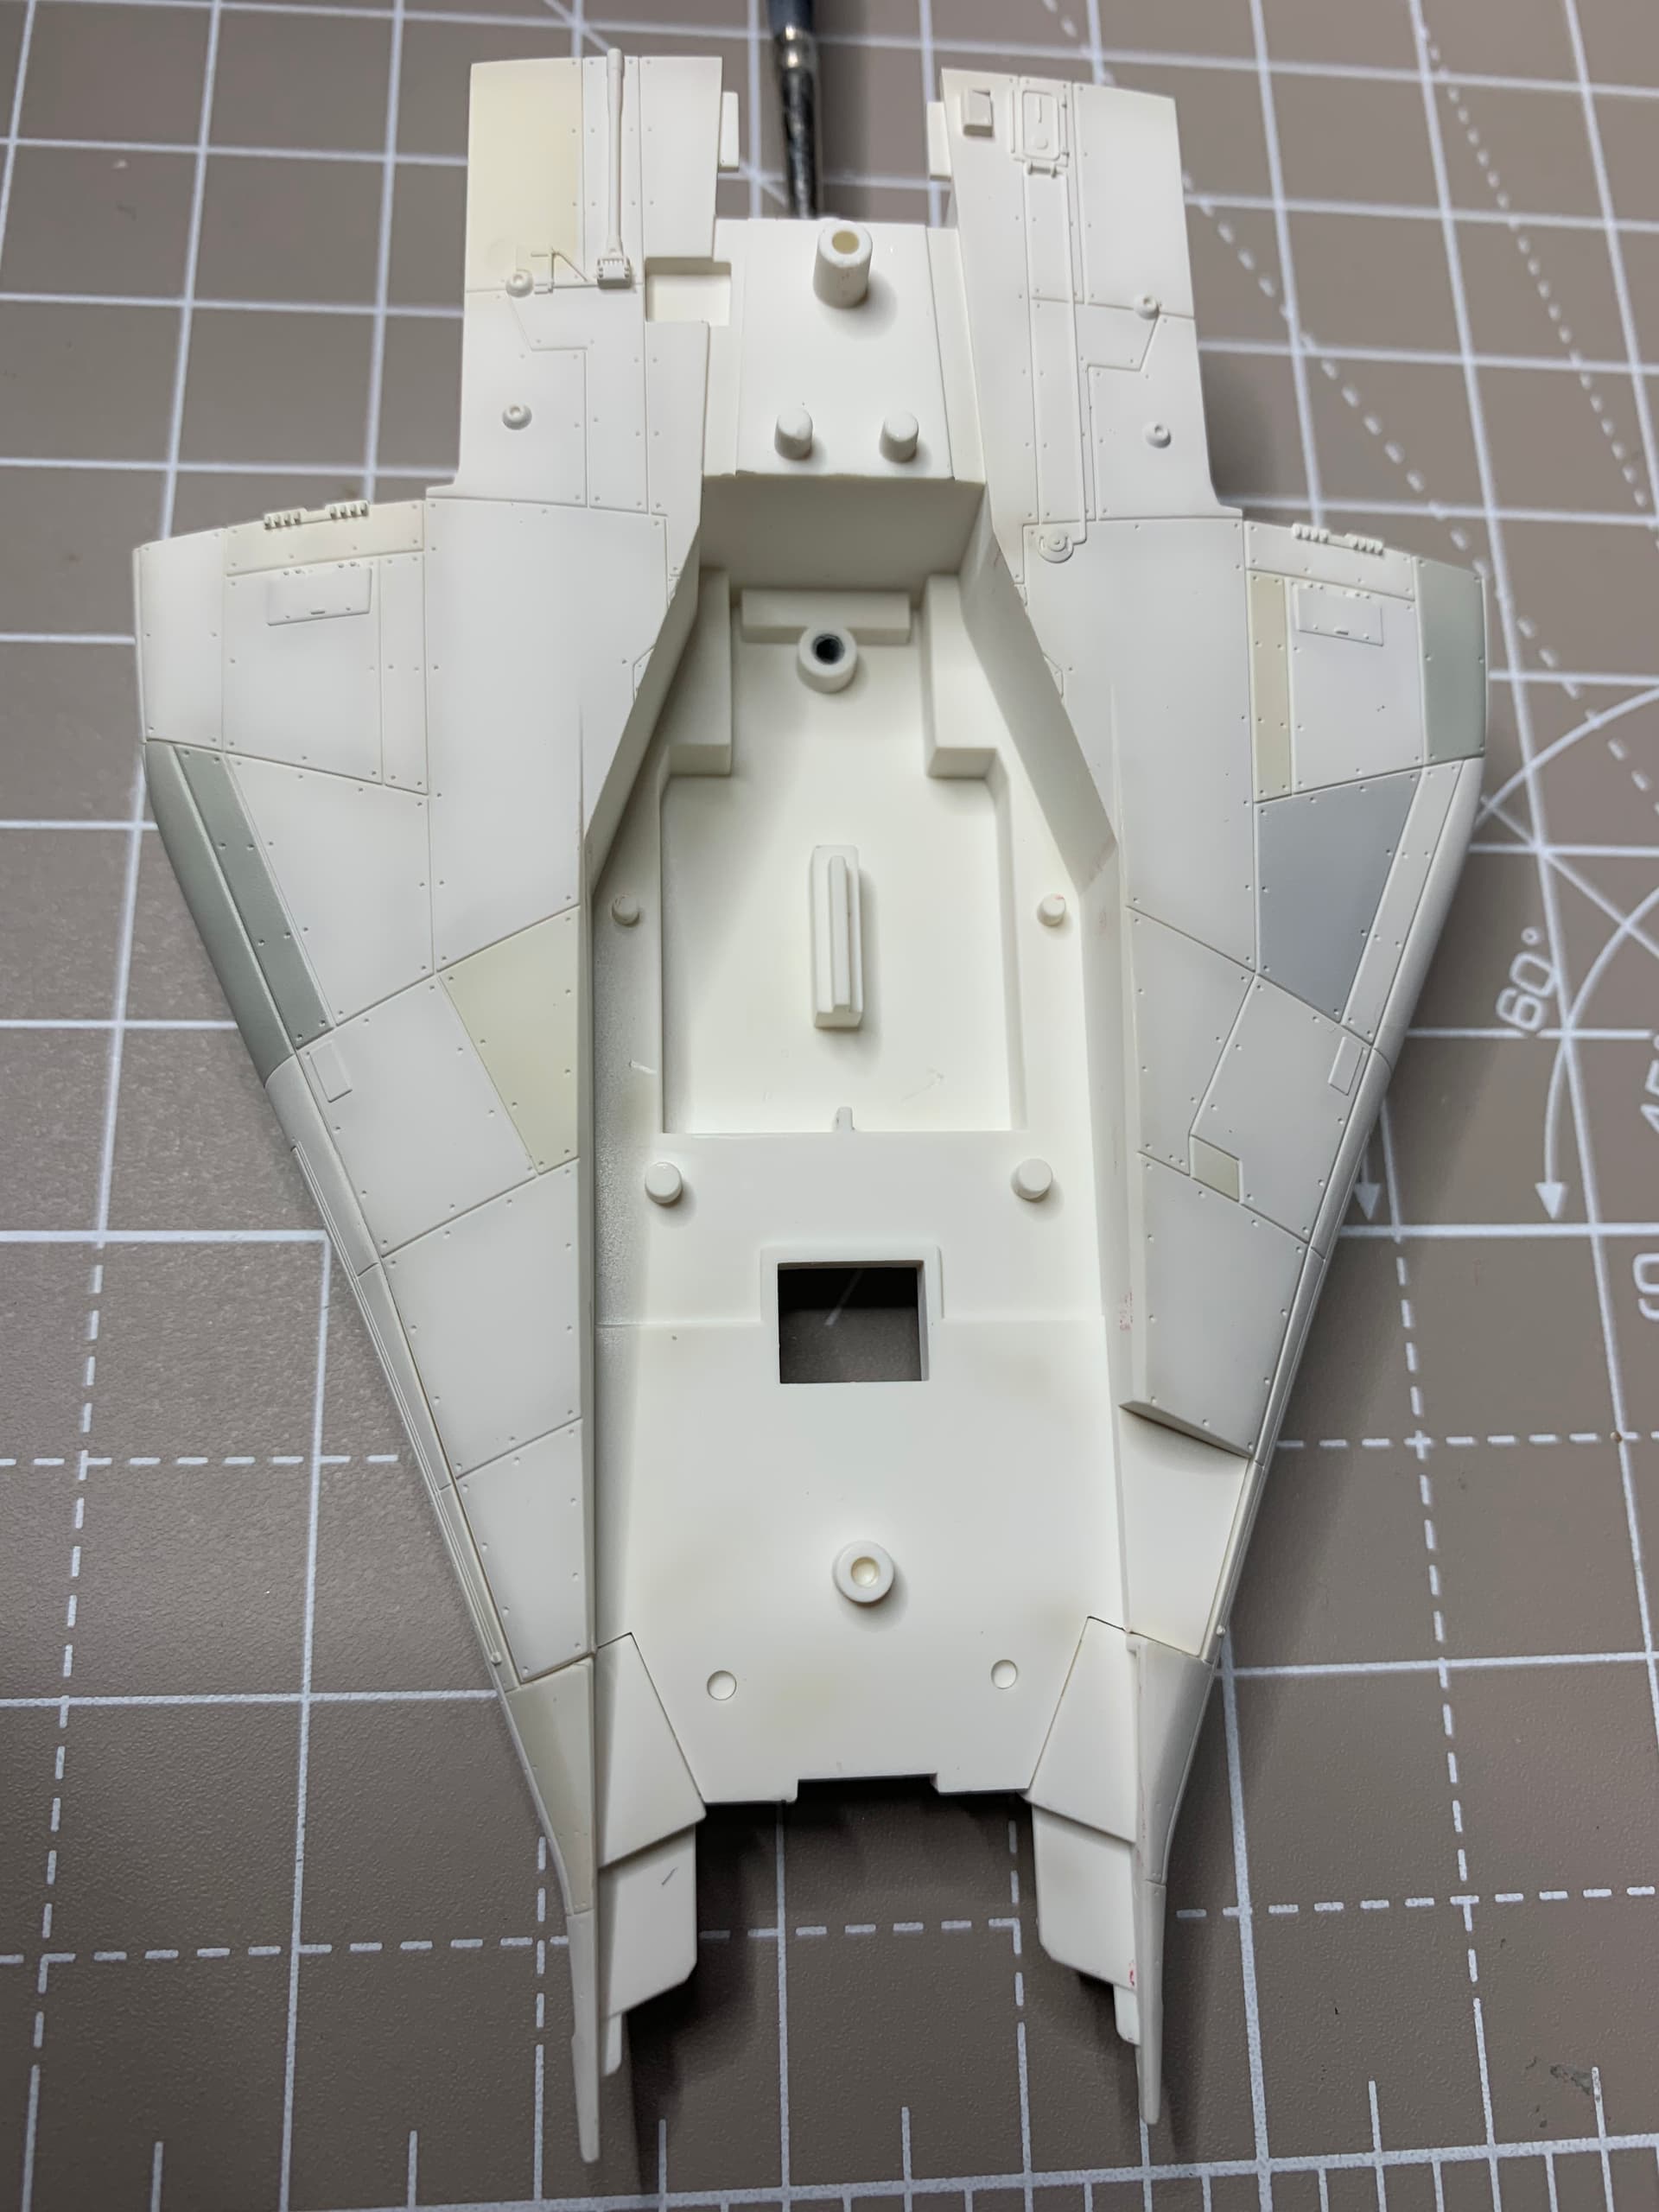
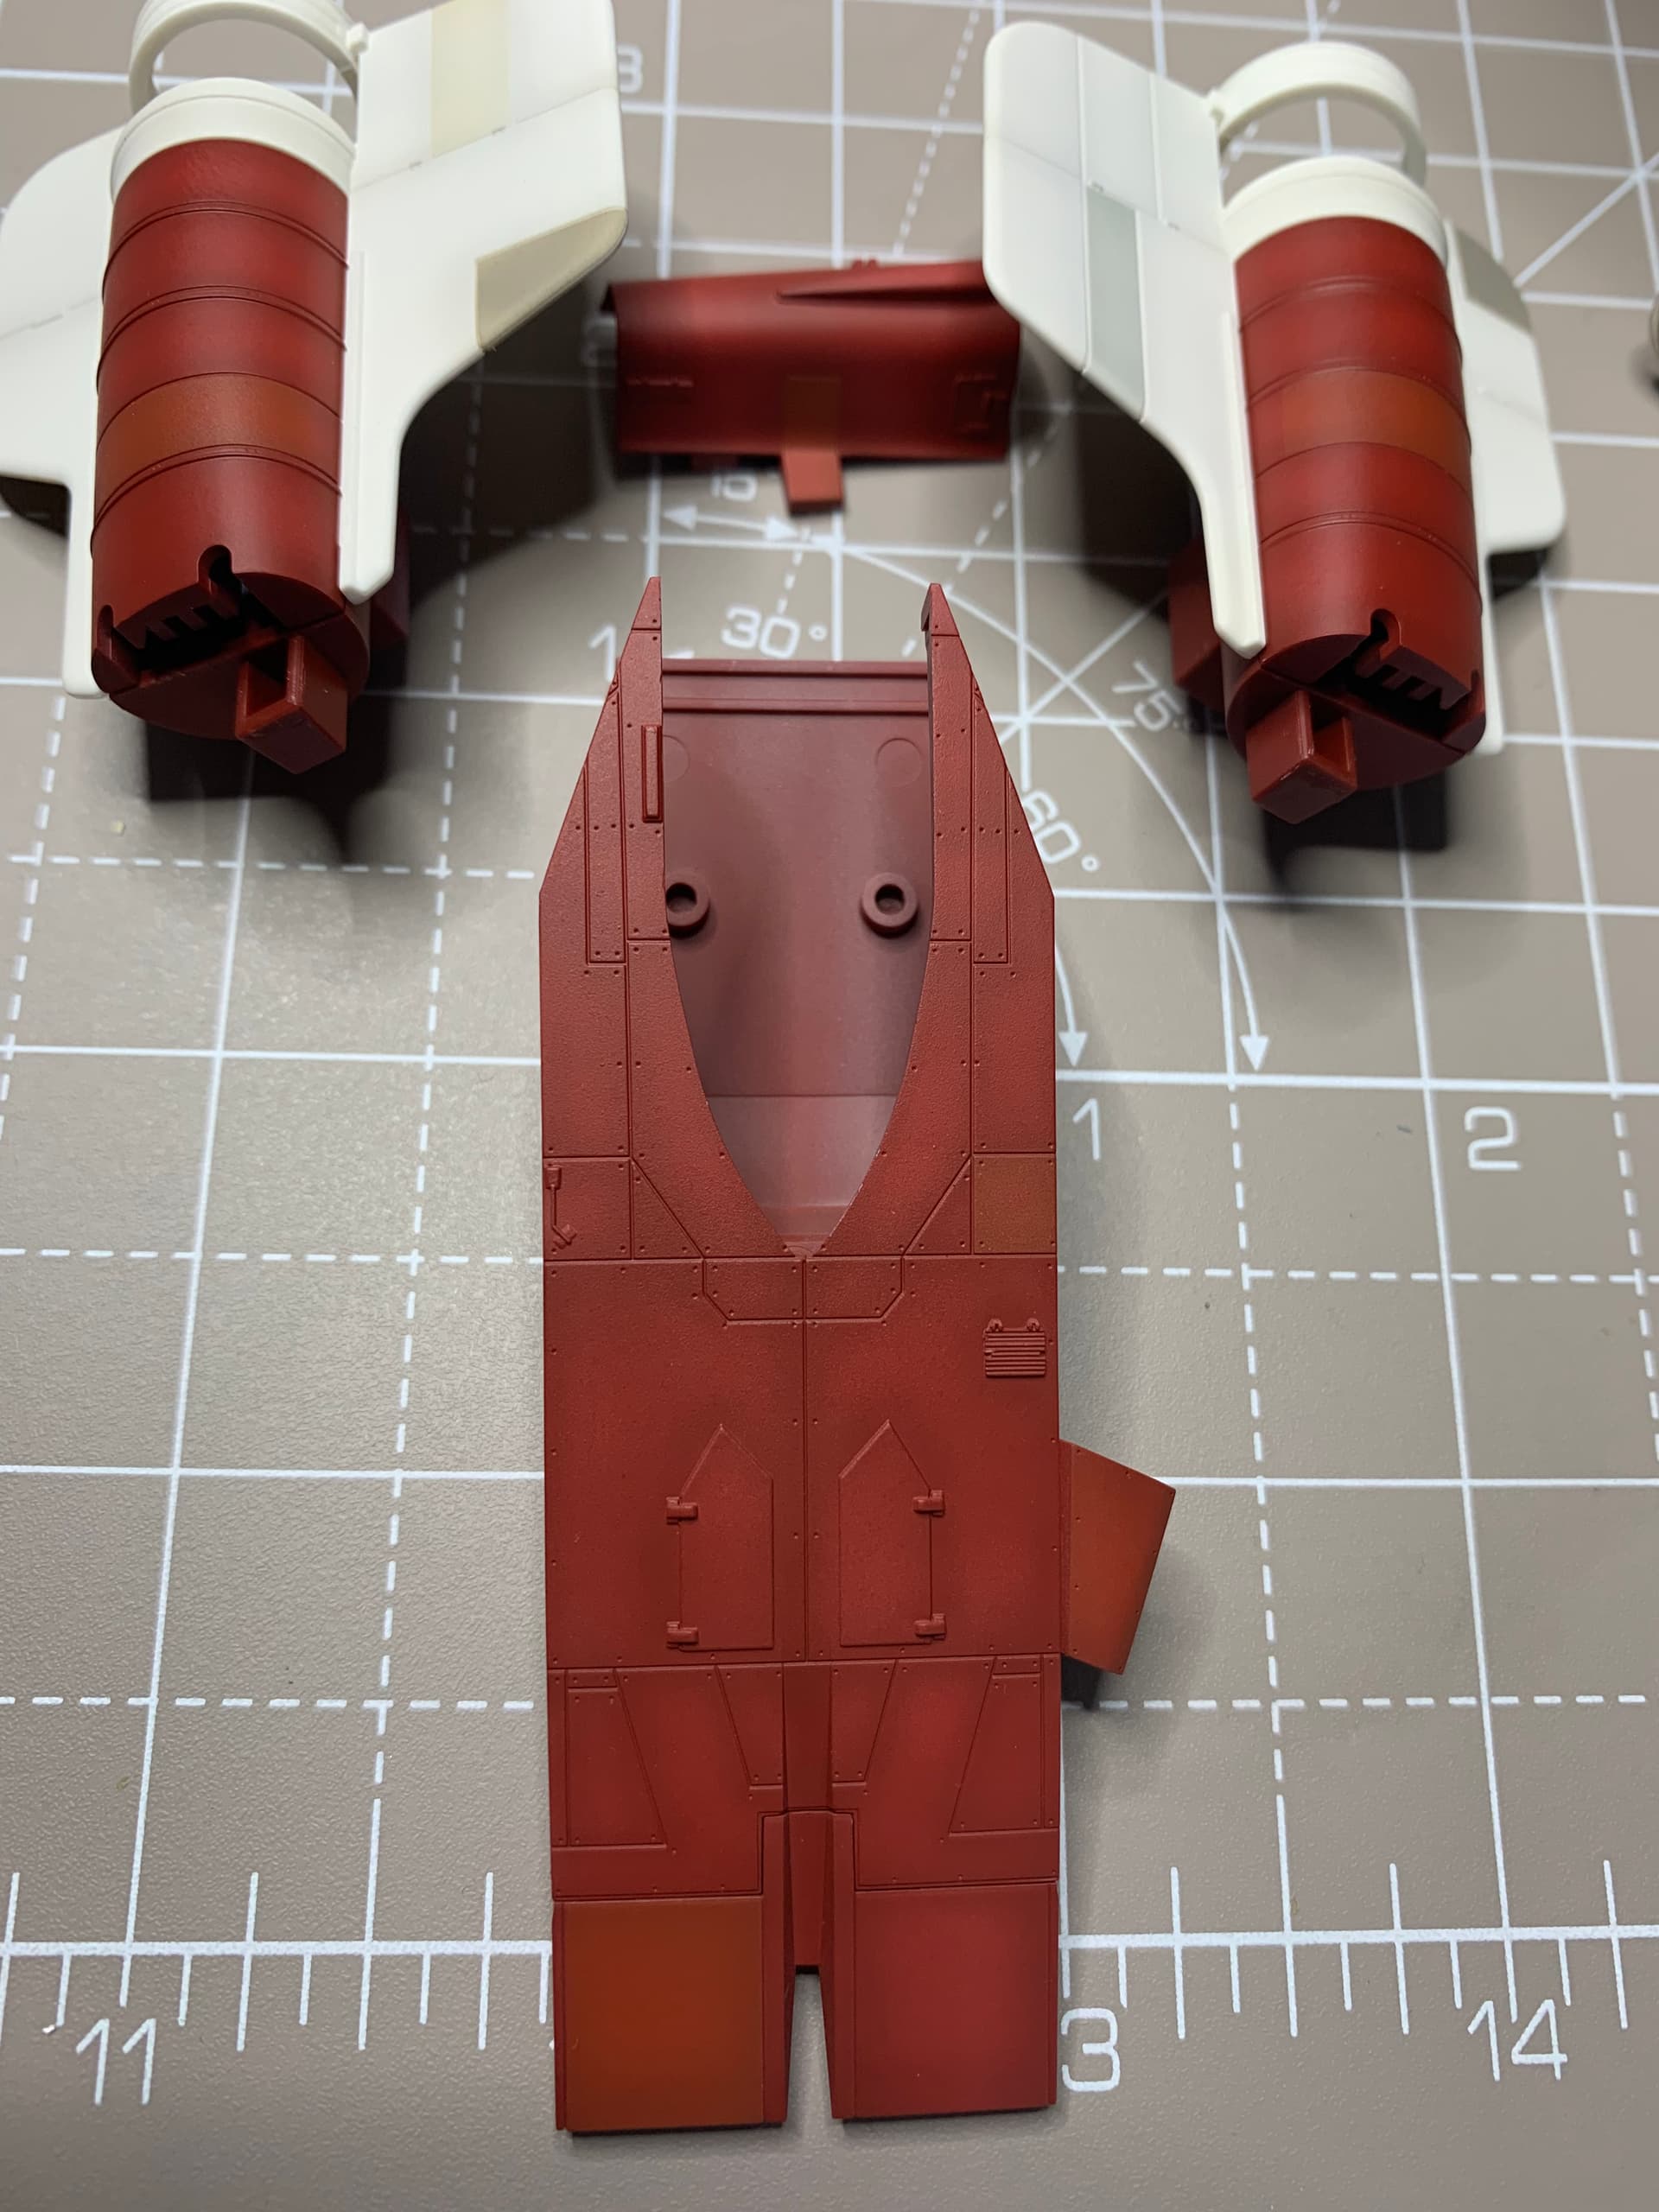
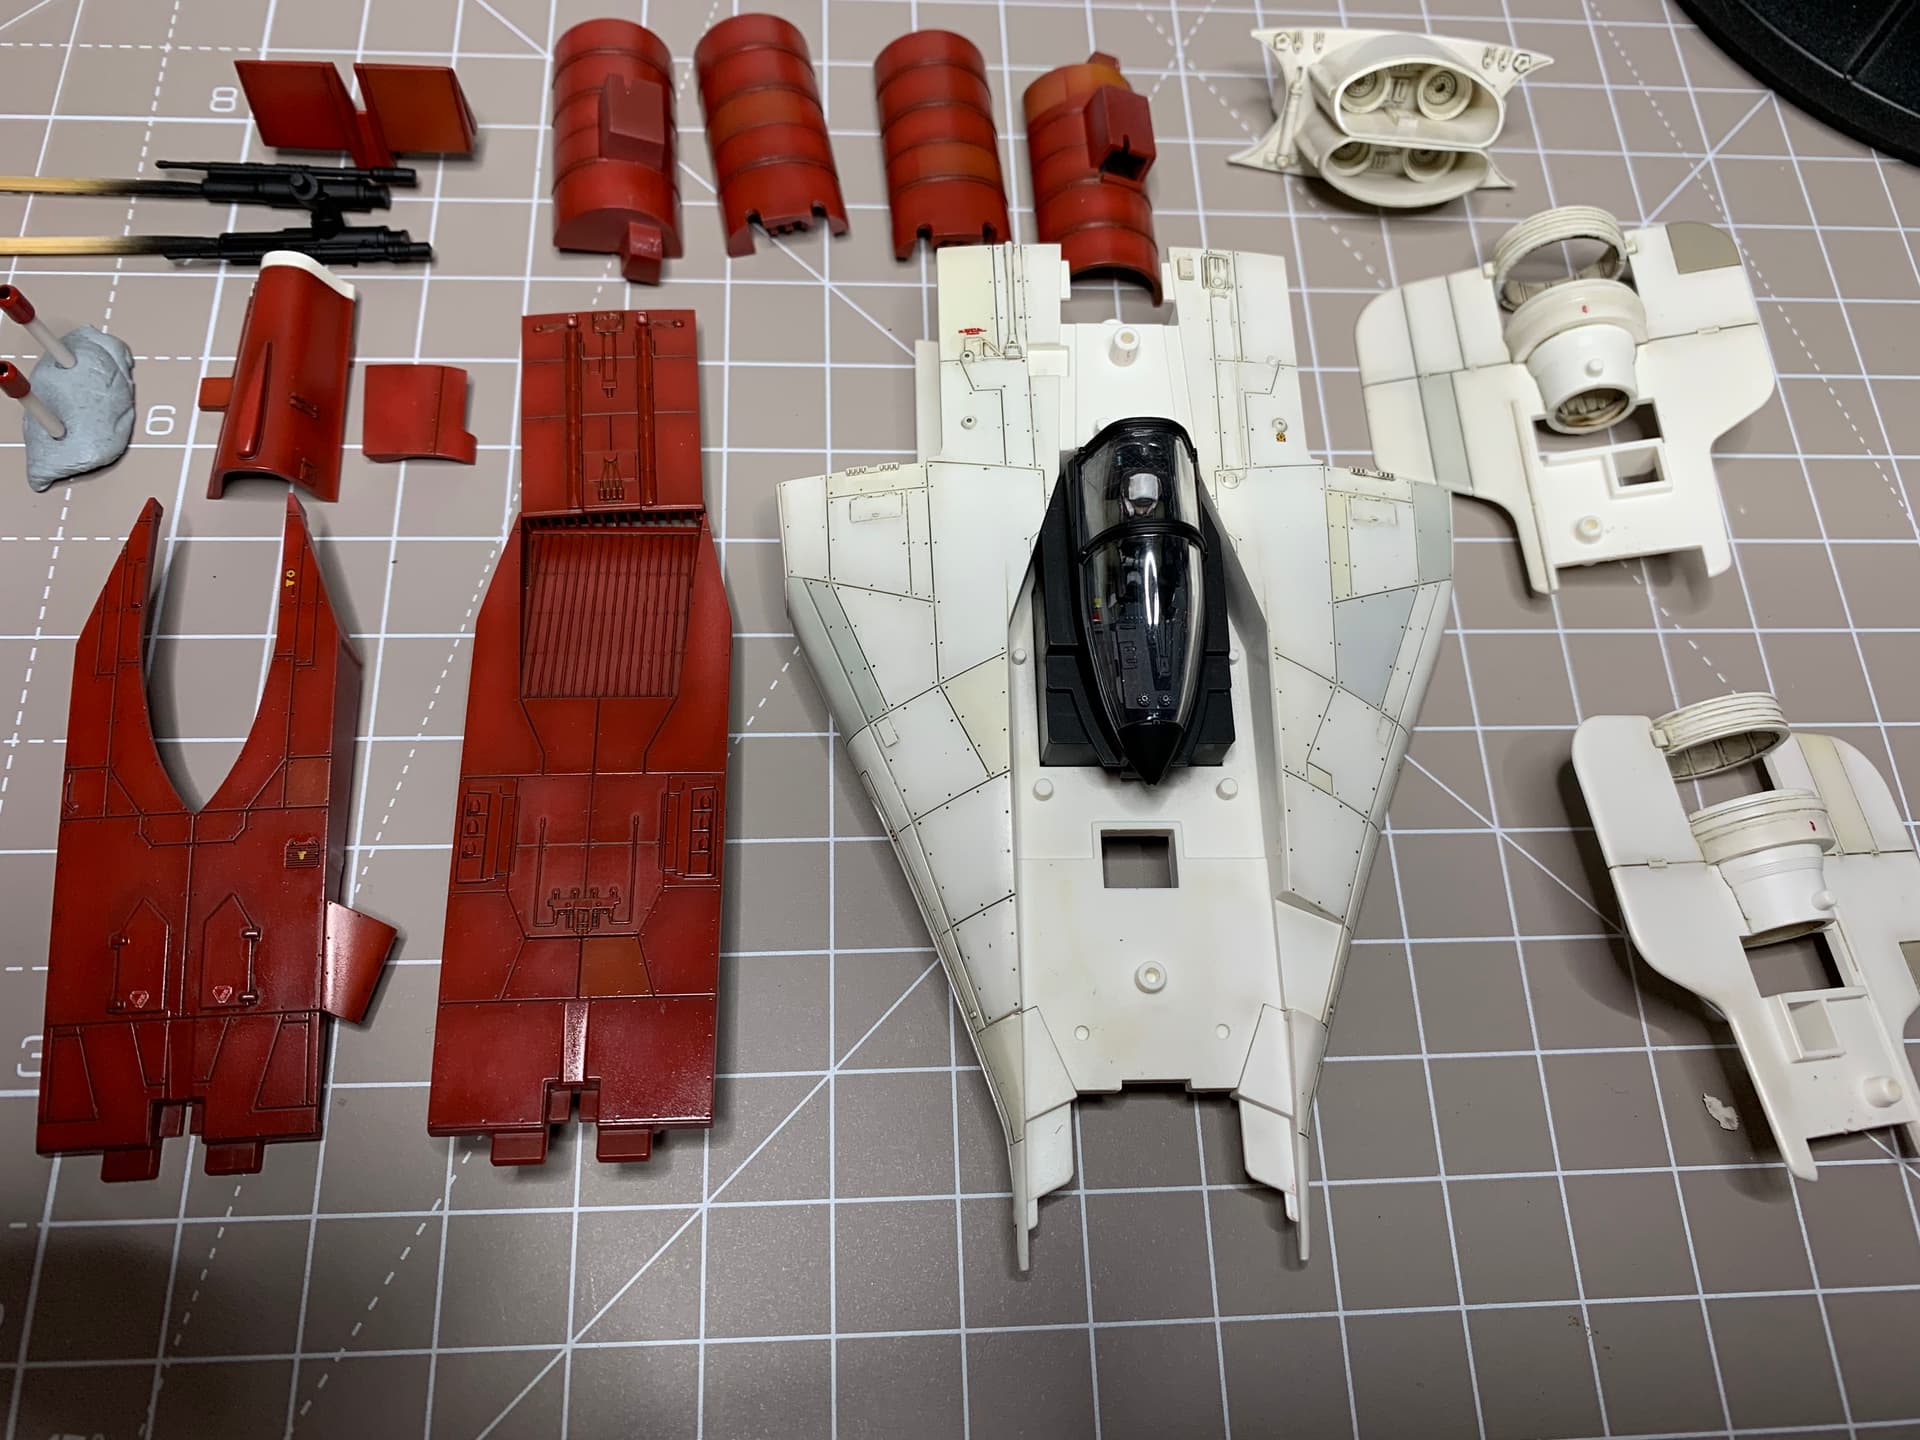
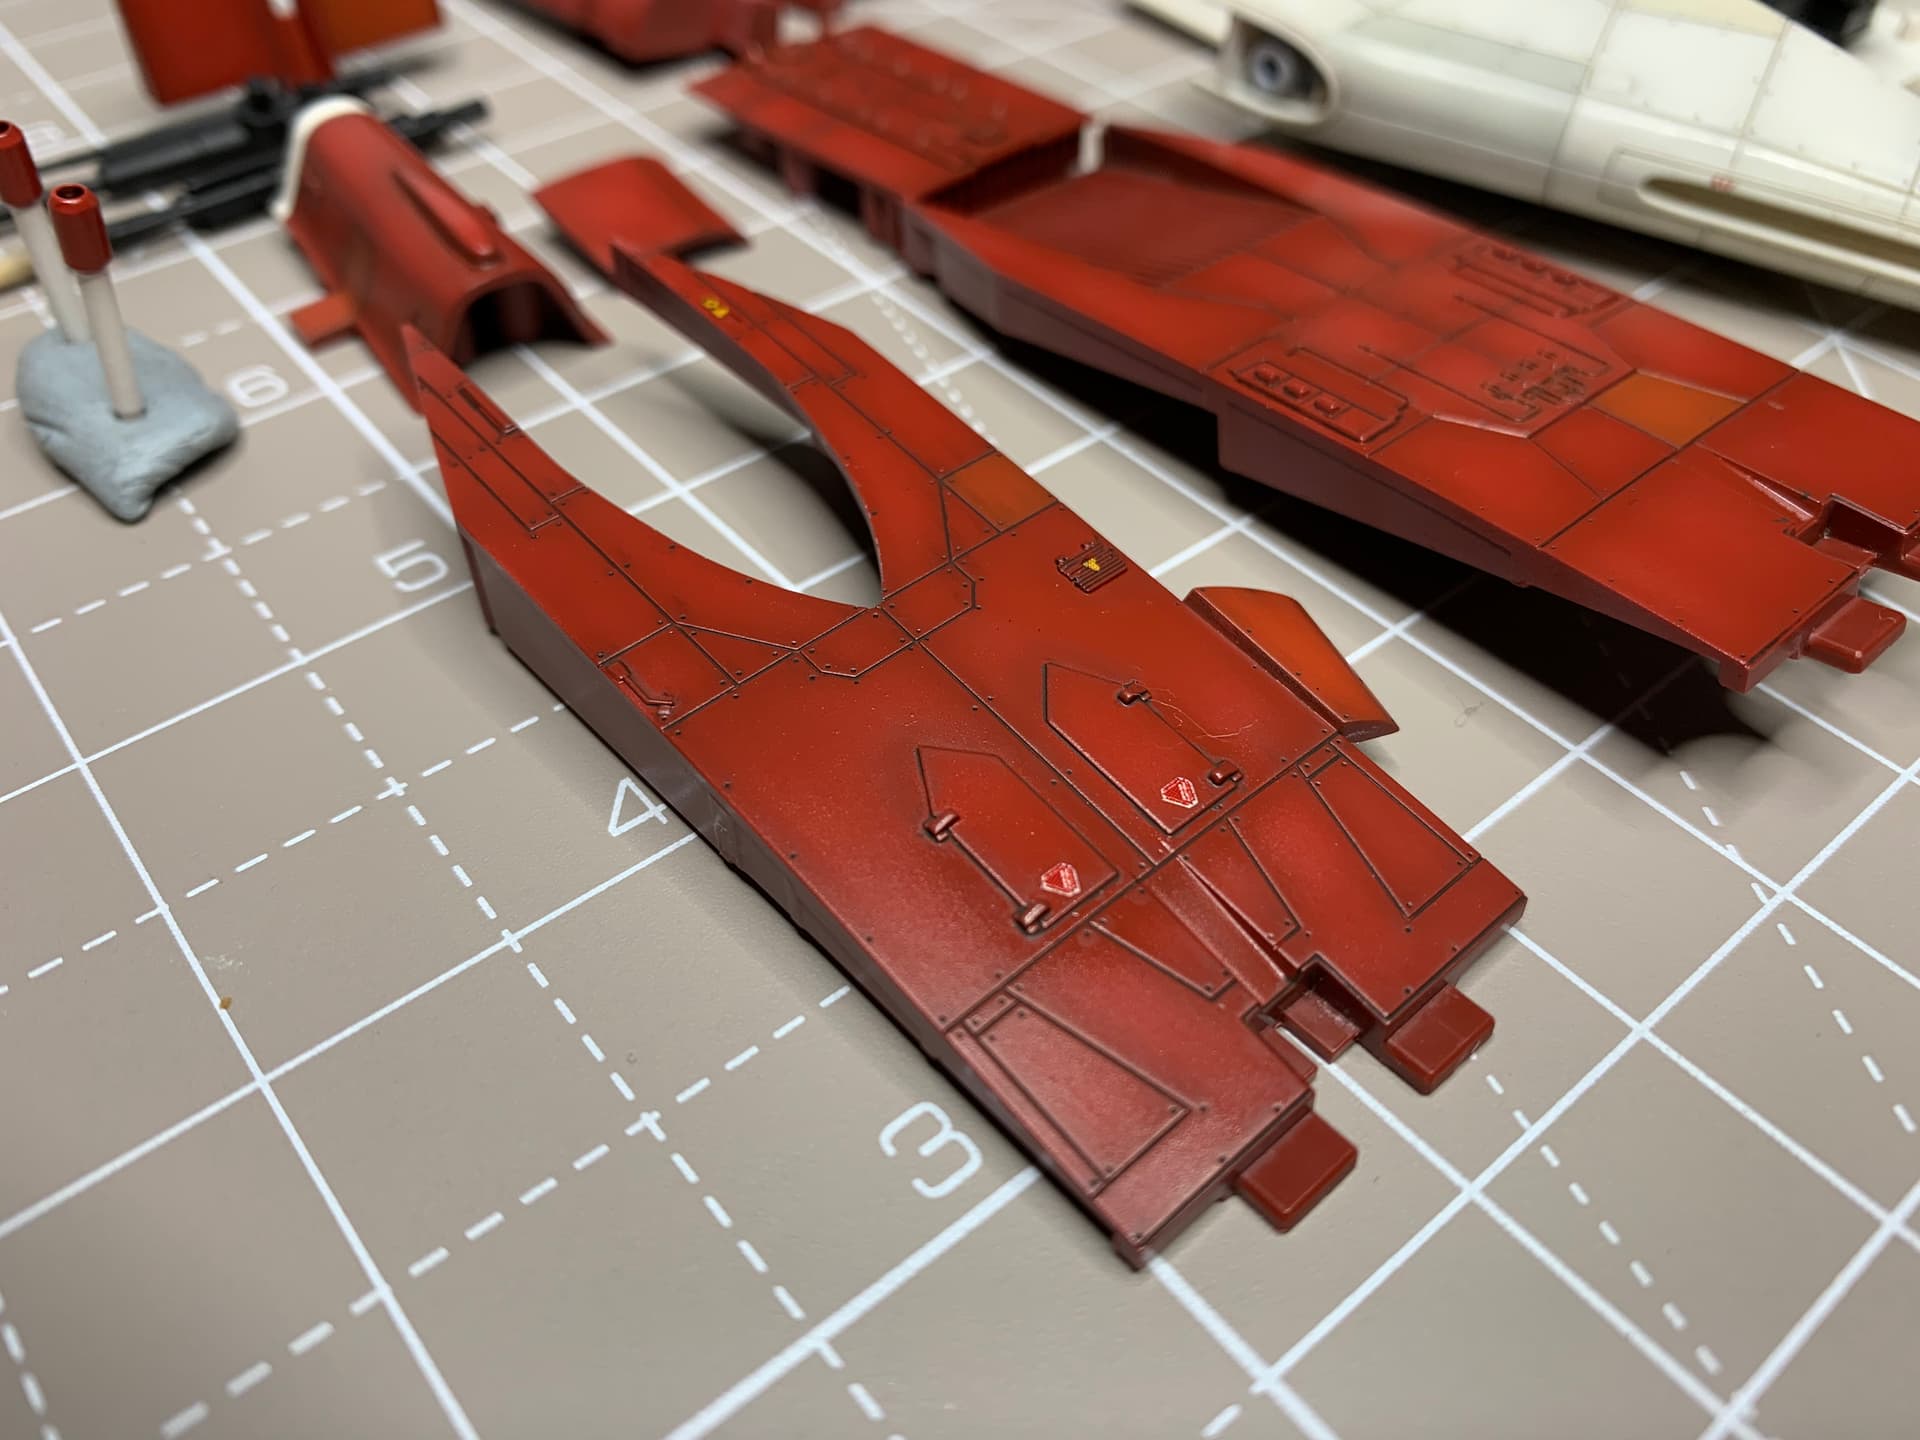
And we have some of the panels done. The two greys are called out for in the instructions, although I choose my own colours, and the tan panels I randomly picked out, one of which may be getting tweaked.
Darker grey is Tamiya xf83 medium sea grey 2, lighter grey is AK RC light ghost grey, and tan is 50:50 Tamiya deck tan and white.
7 Likes
Looks great Jim. I really like that dull red. Looks nice and deep.
1 Like
Very nicely done! I like the way you have achieved the uneven modulation of the colours, superb!
1 Like
Thanks fellas, @The_Snowman @Johnnych01
I’ve now added the dark grey to the tail fins, Tamiya xf20 medium grey.
Also added the rusty colour to panels similar to one of the studio models and added a couple of random ones of my own. This was made up from Tamiya LP paints, two drops 18 dull red, two drops 8 pure yellow and two drops 51 pure orange, very thin and built up in about five or six coats.
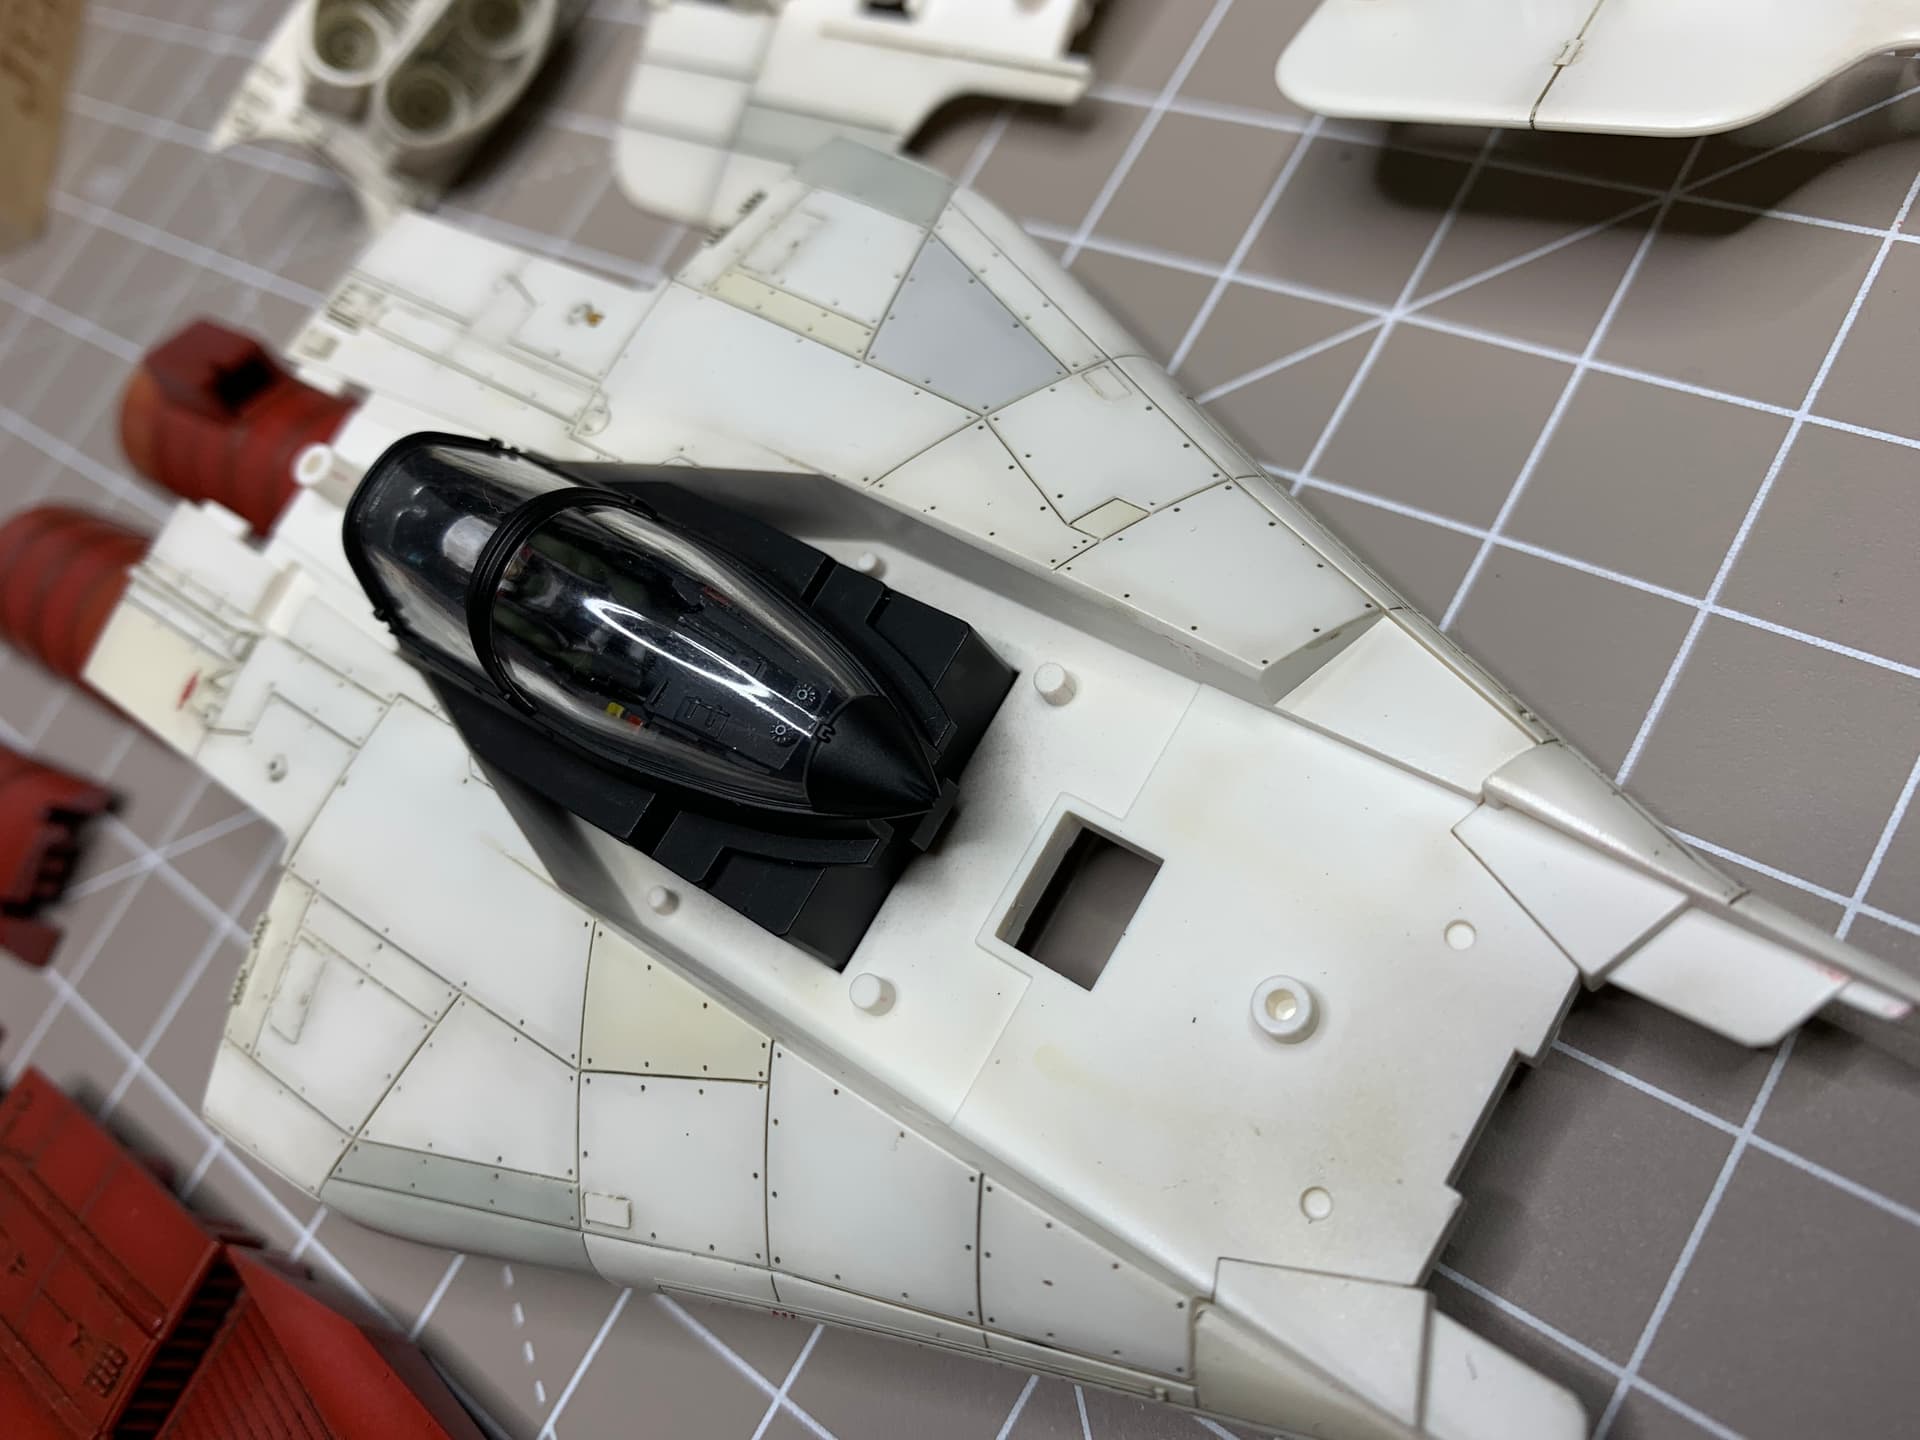
Gloss coat ready for decals and weathering next, however I may make a start on the cockpit and pilot now…
Thanks again, J.
3 Likes
I don’t even like the look of the A wing for some reason but you know how to dress a girl up.
3 Likes
you’ve done a fantastic job on that so far and tamiya deck tan mixed with white is a standard mix for me.
1 Like
Thanks Ryan @Tank_1812 , it’s not my favourite either but I really want to display one with the b-wing, and the kit is just a little gem.
Thanks David @Klaus-Adler , yeah the deck tan white mix is left over from the b-wing build. I’ve used sky grey and white mix before too, but I can see the insignia white being used again in the future.
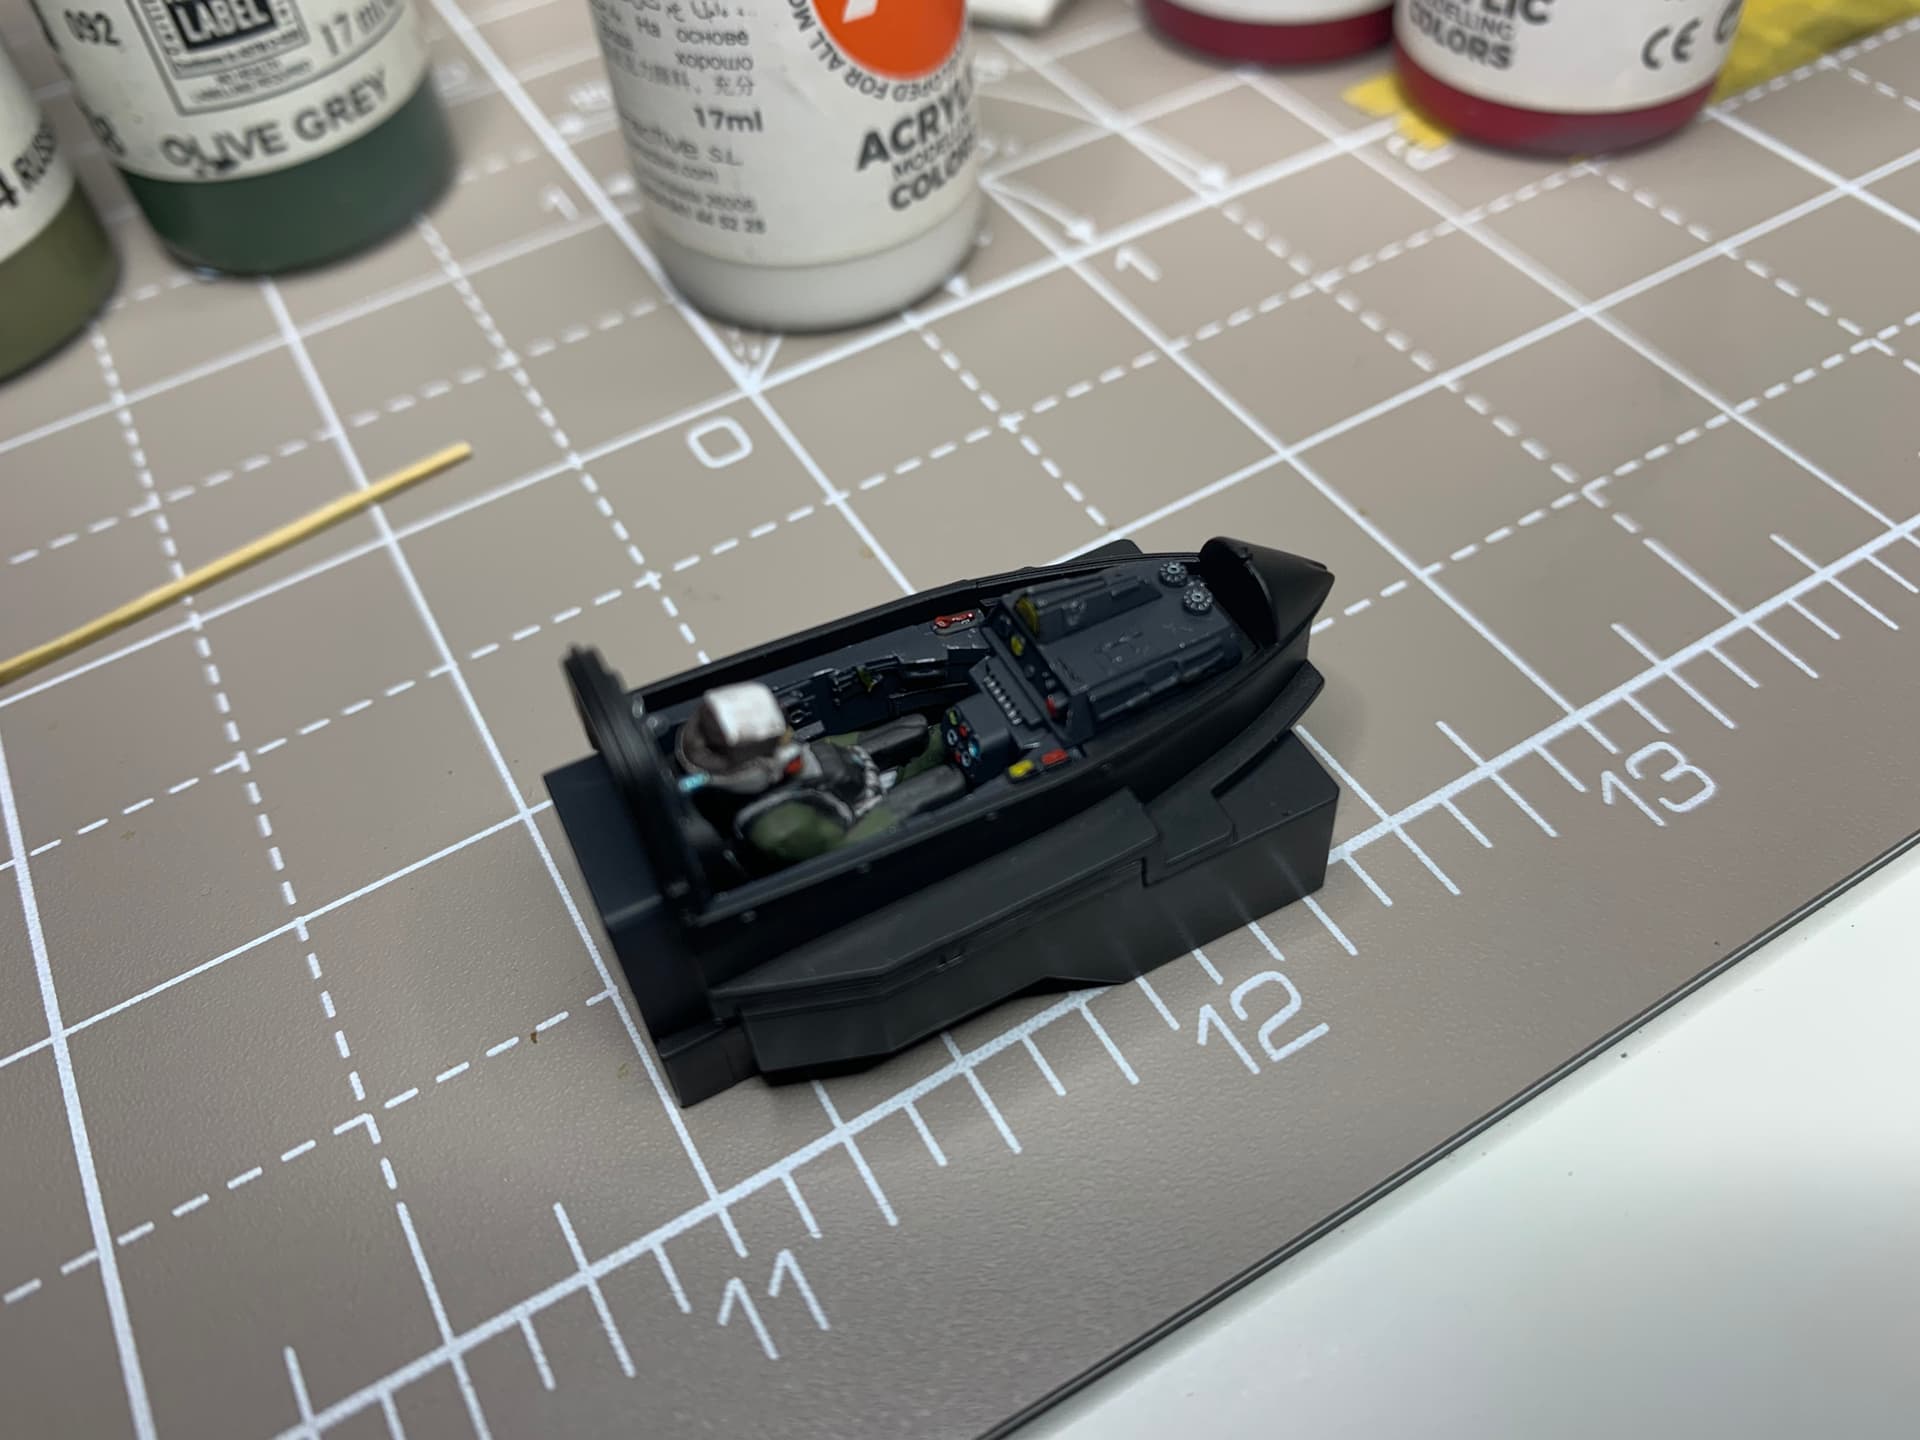
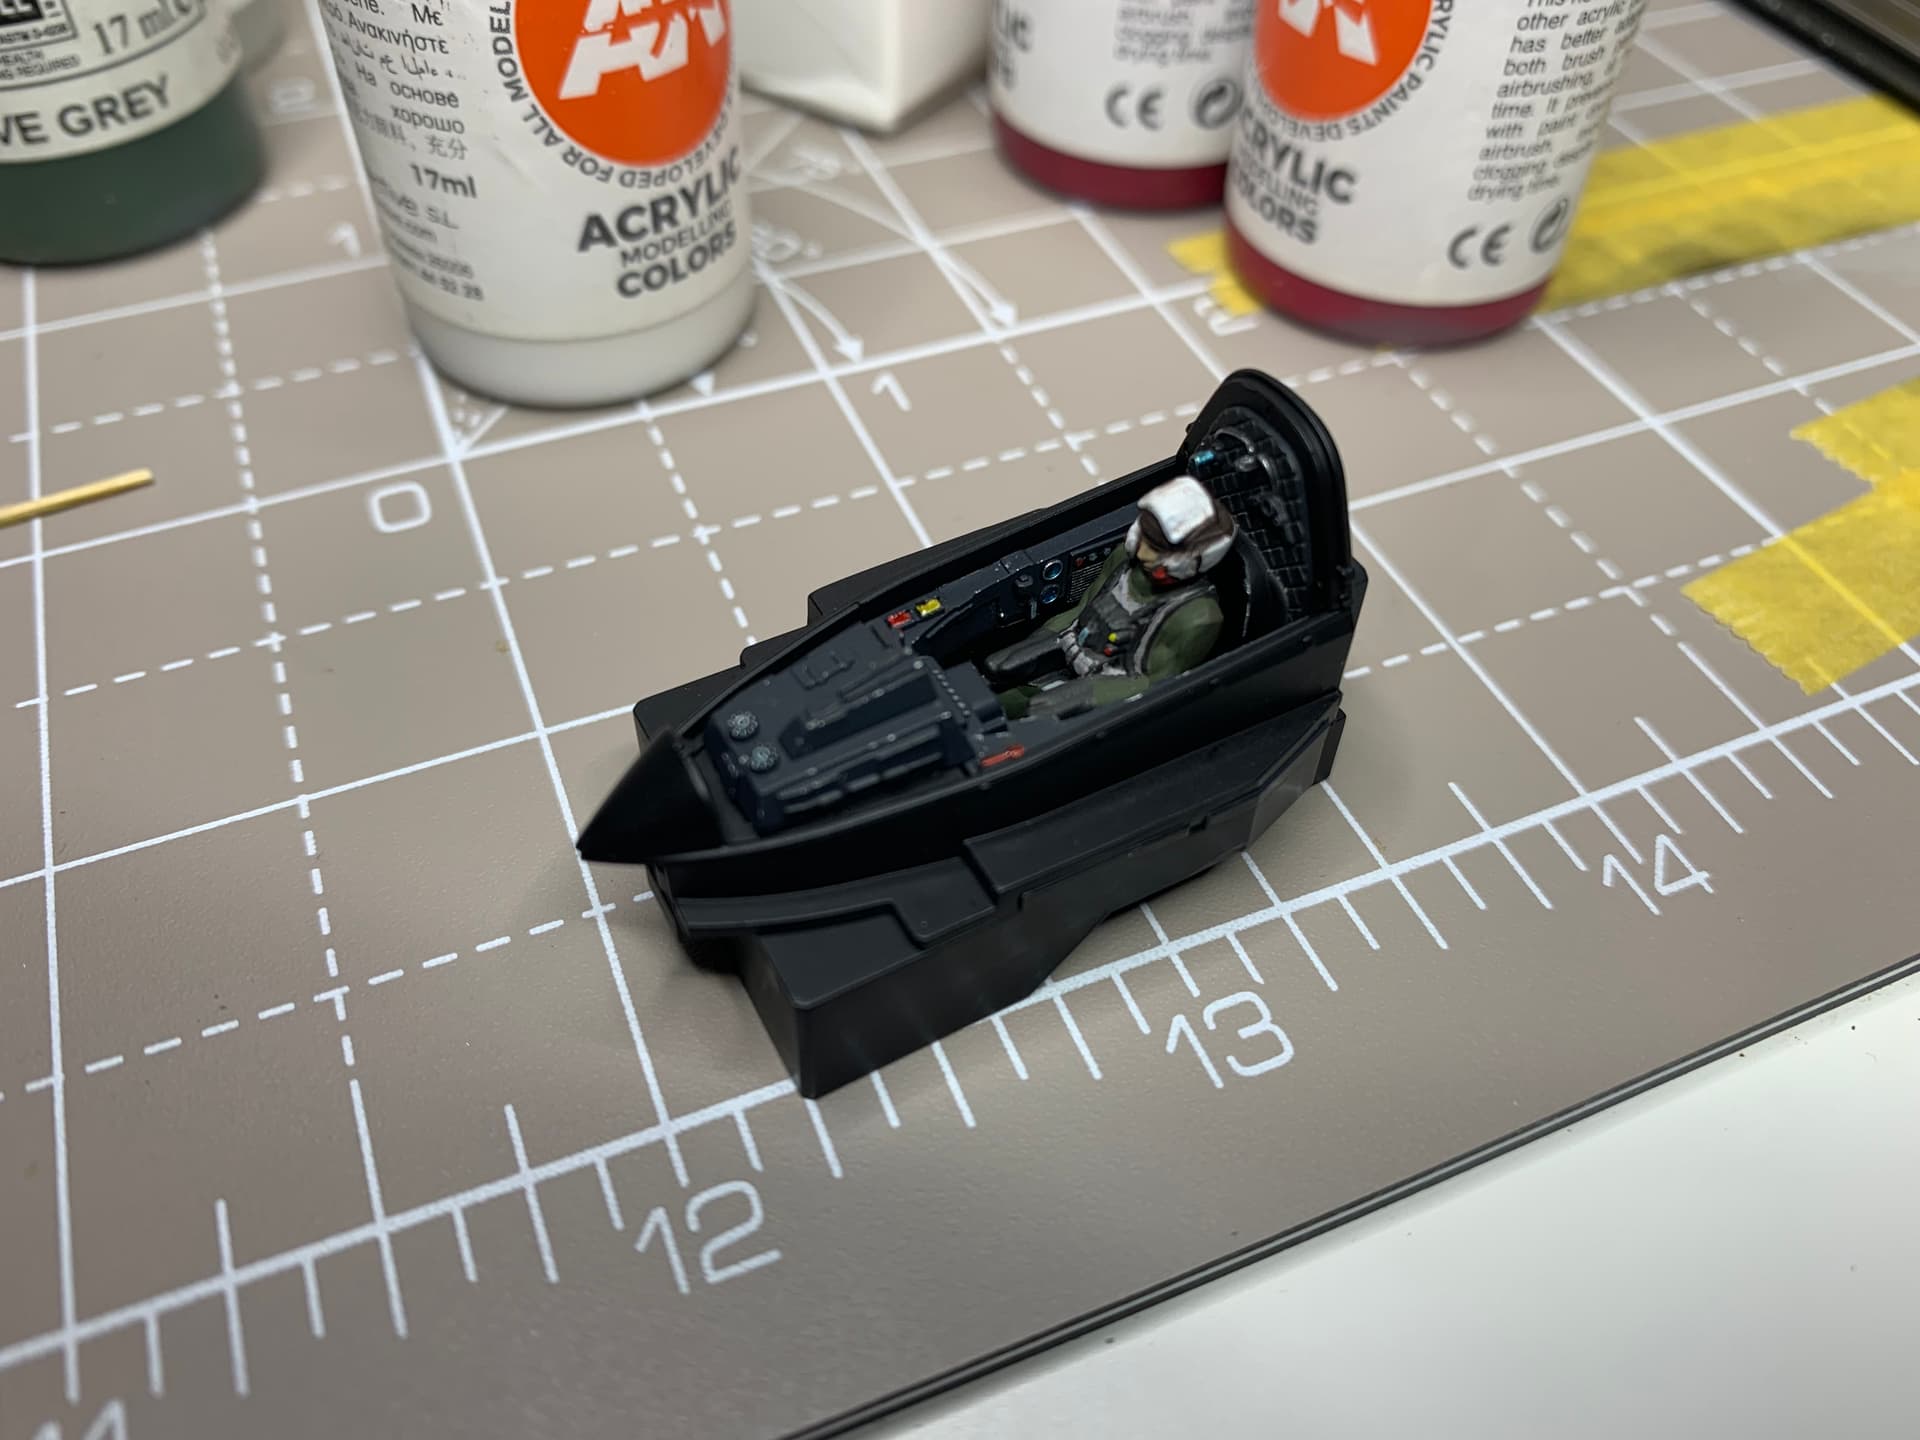
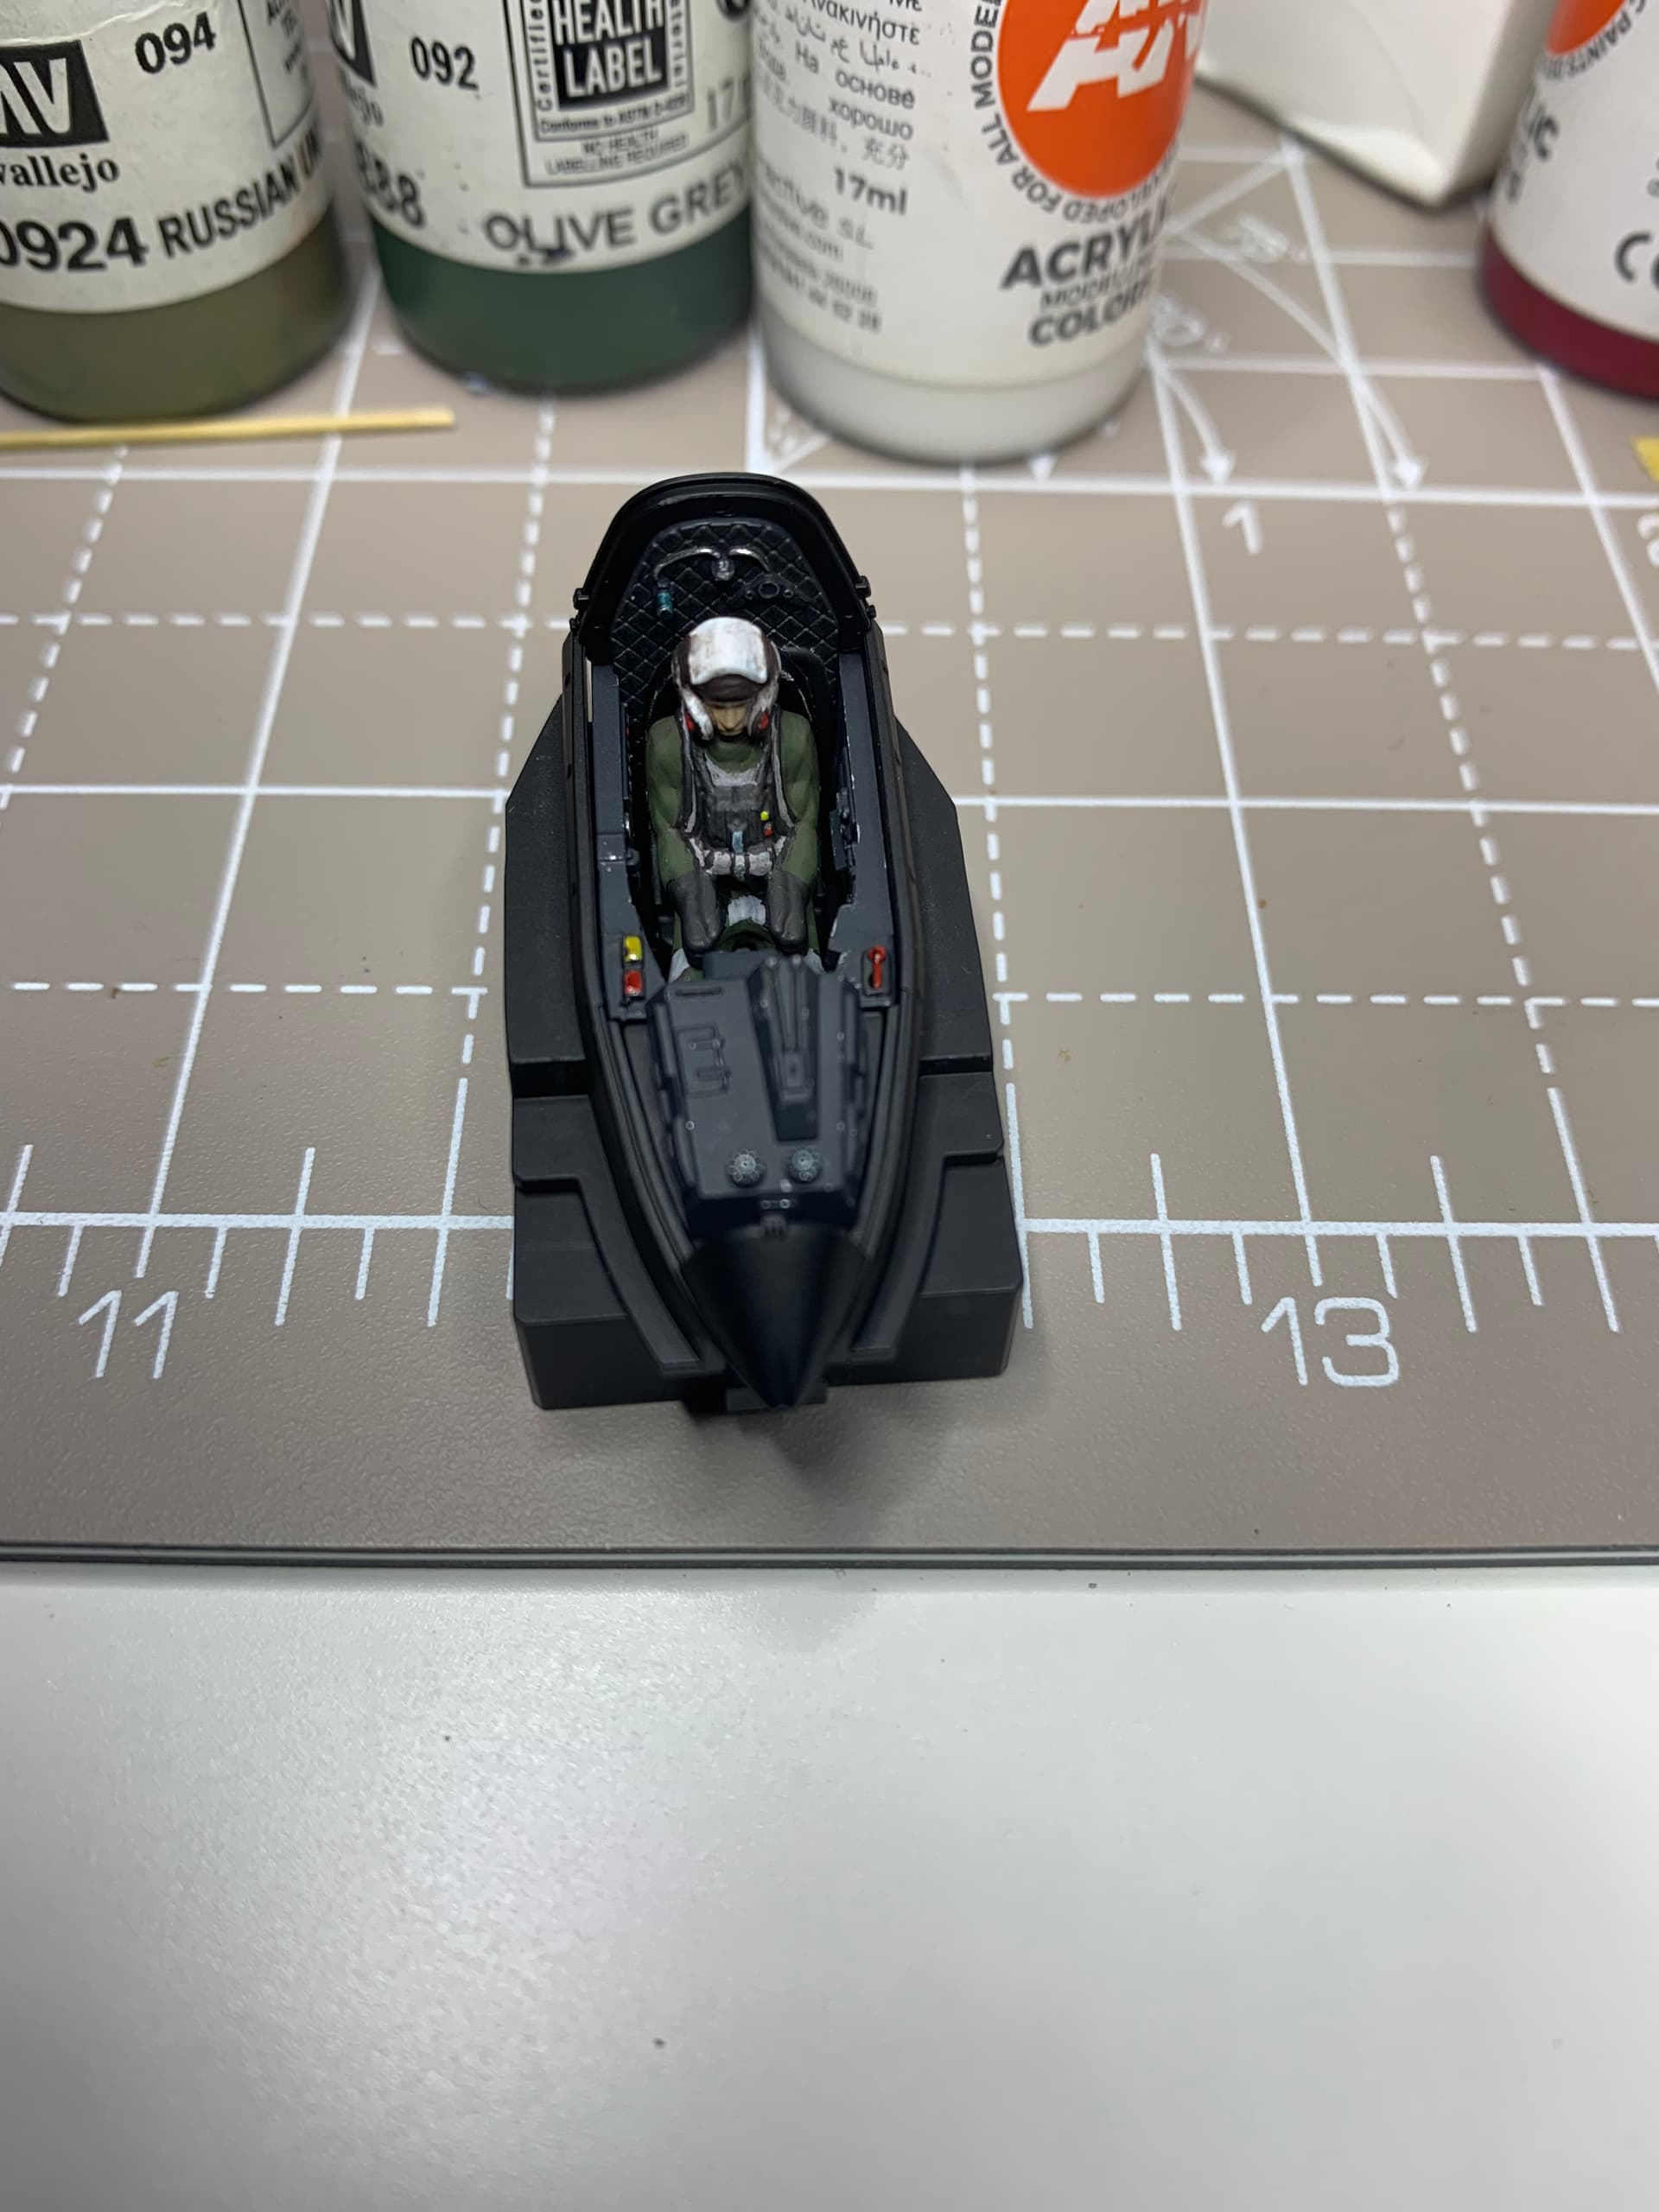
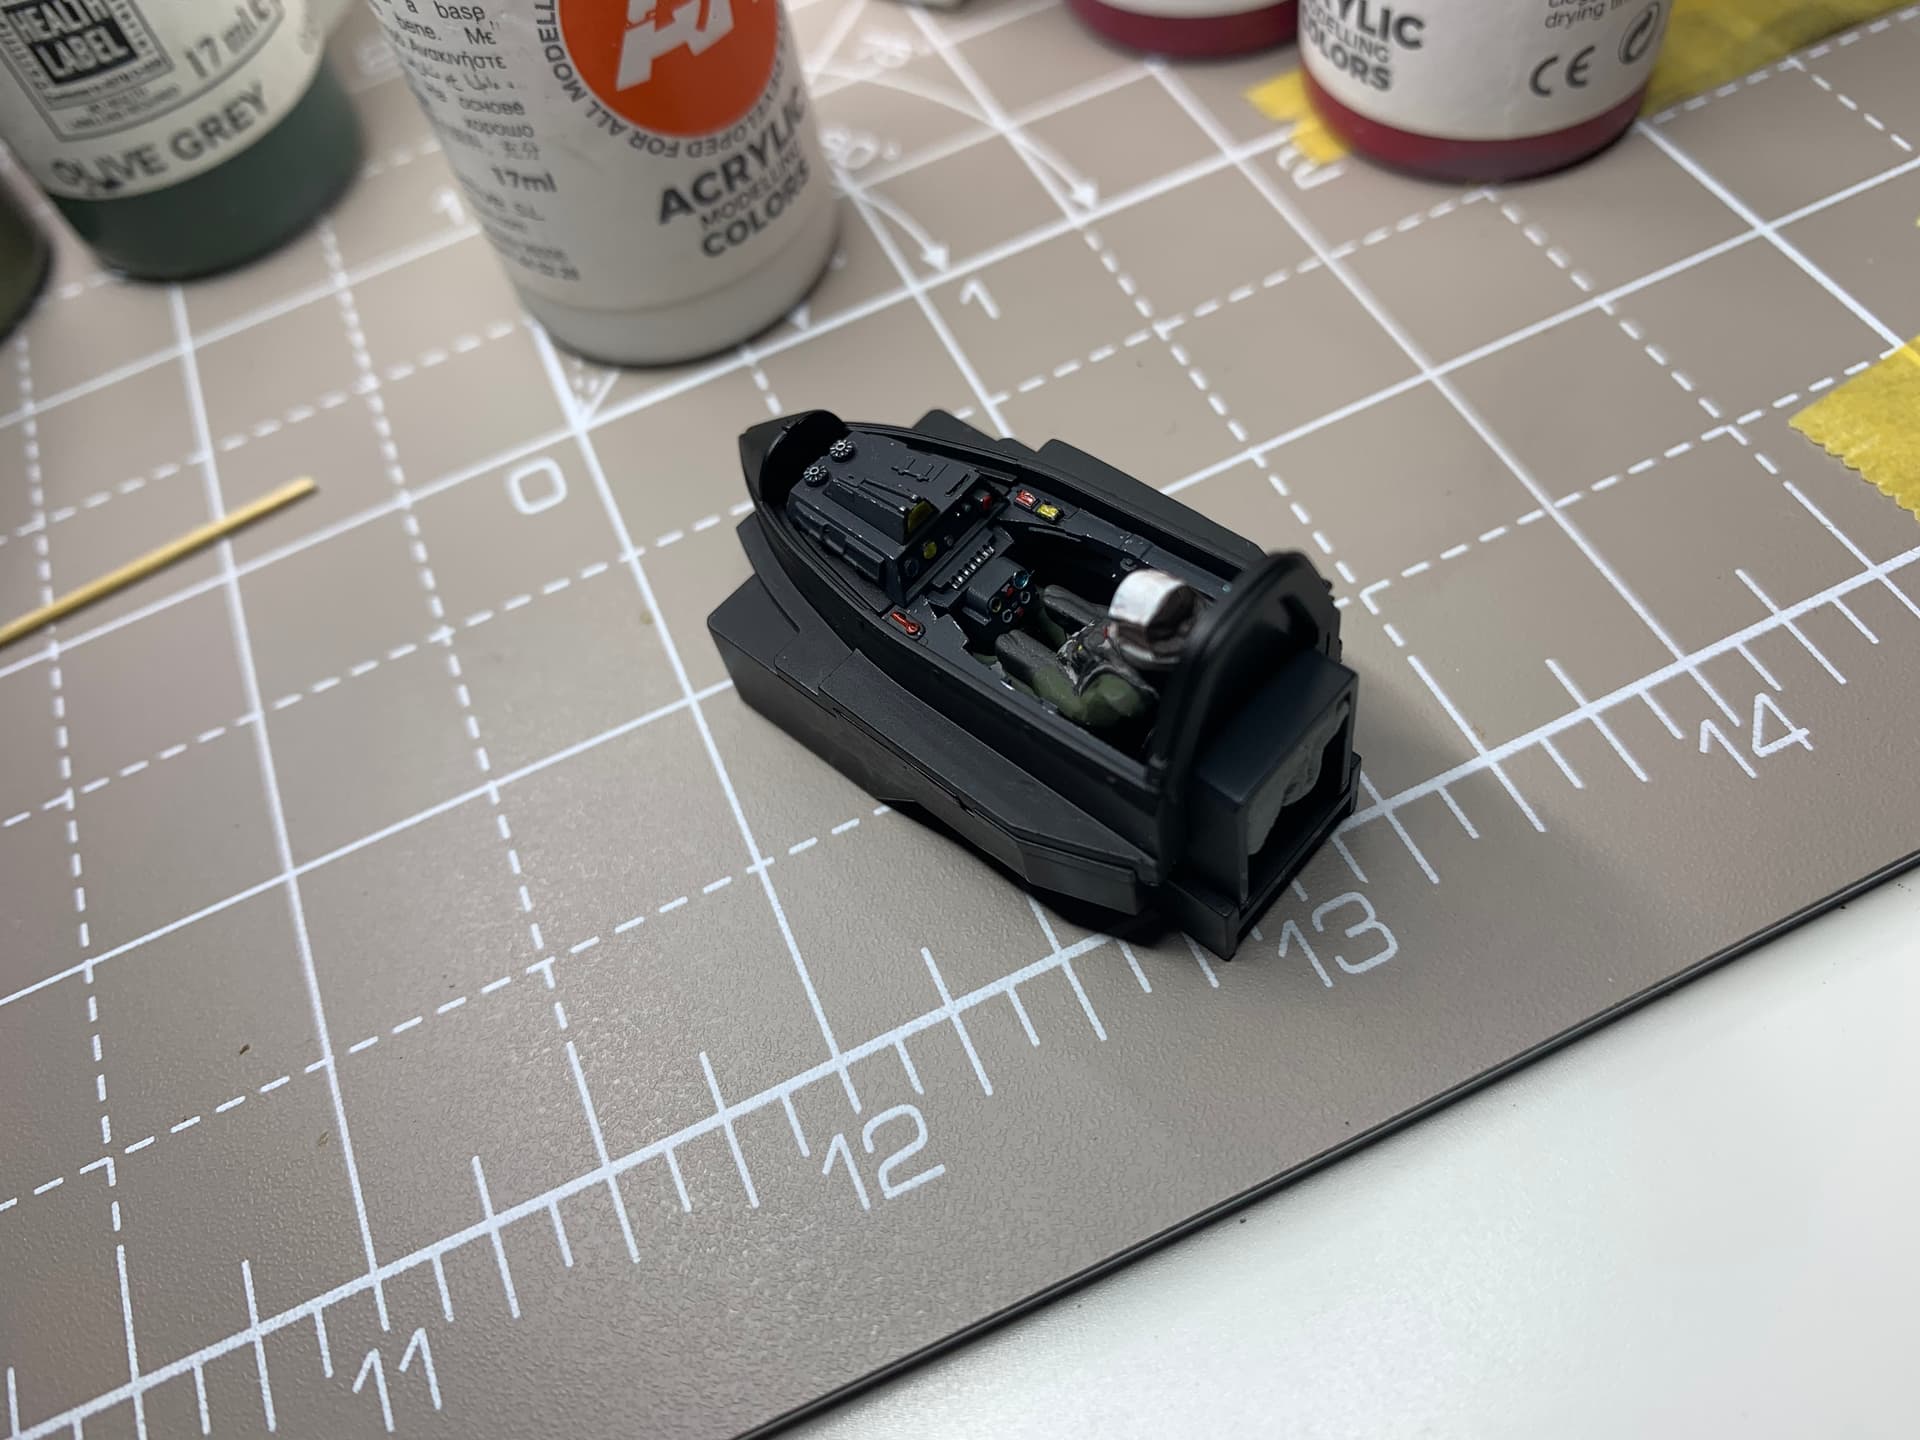
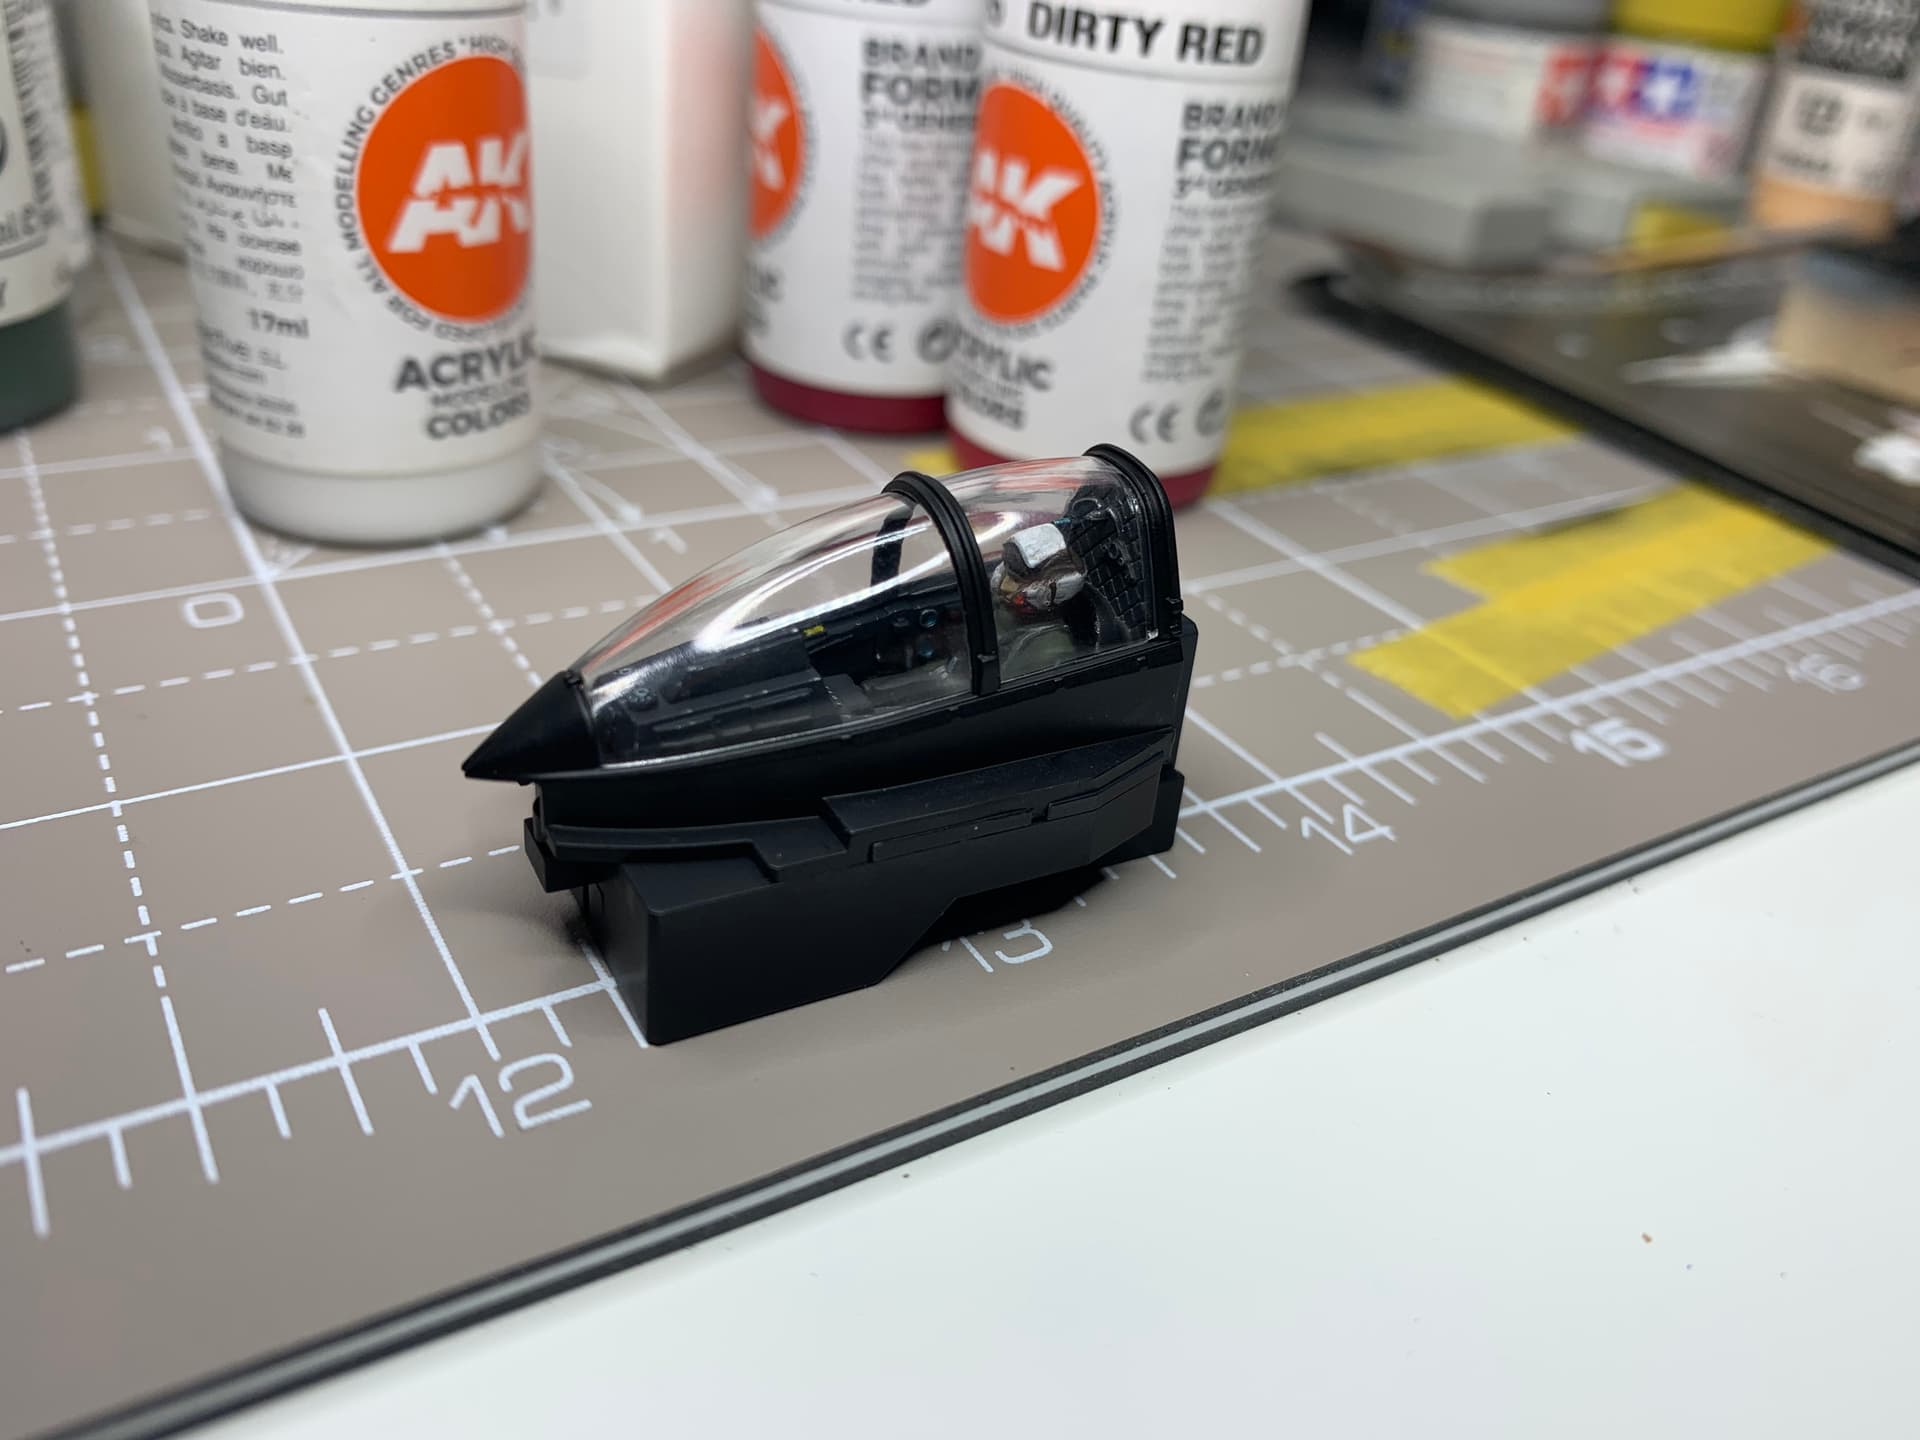
Got the pilot and cockpit just about sown up today. Primed everything with Mr Color 1500 black, which the canopy surround is staying, just need to add some silver chipping to that. The interior got a coat of AKRC NATO Black and details picked out with various colours and lightly chipped with some silver. The pilot is Vallejo Russian green, it was a quick job but not the worse I’ve done.
5 Likes
And on we go with the little star fighter.
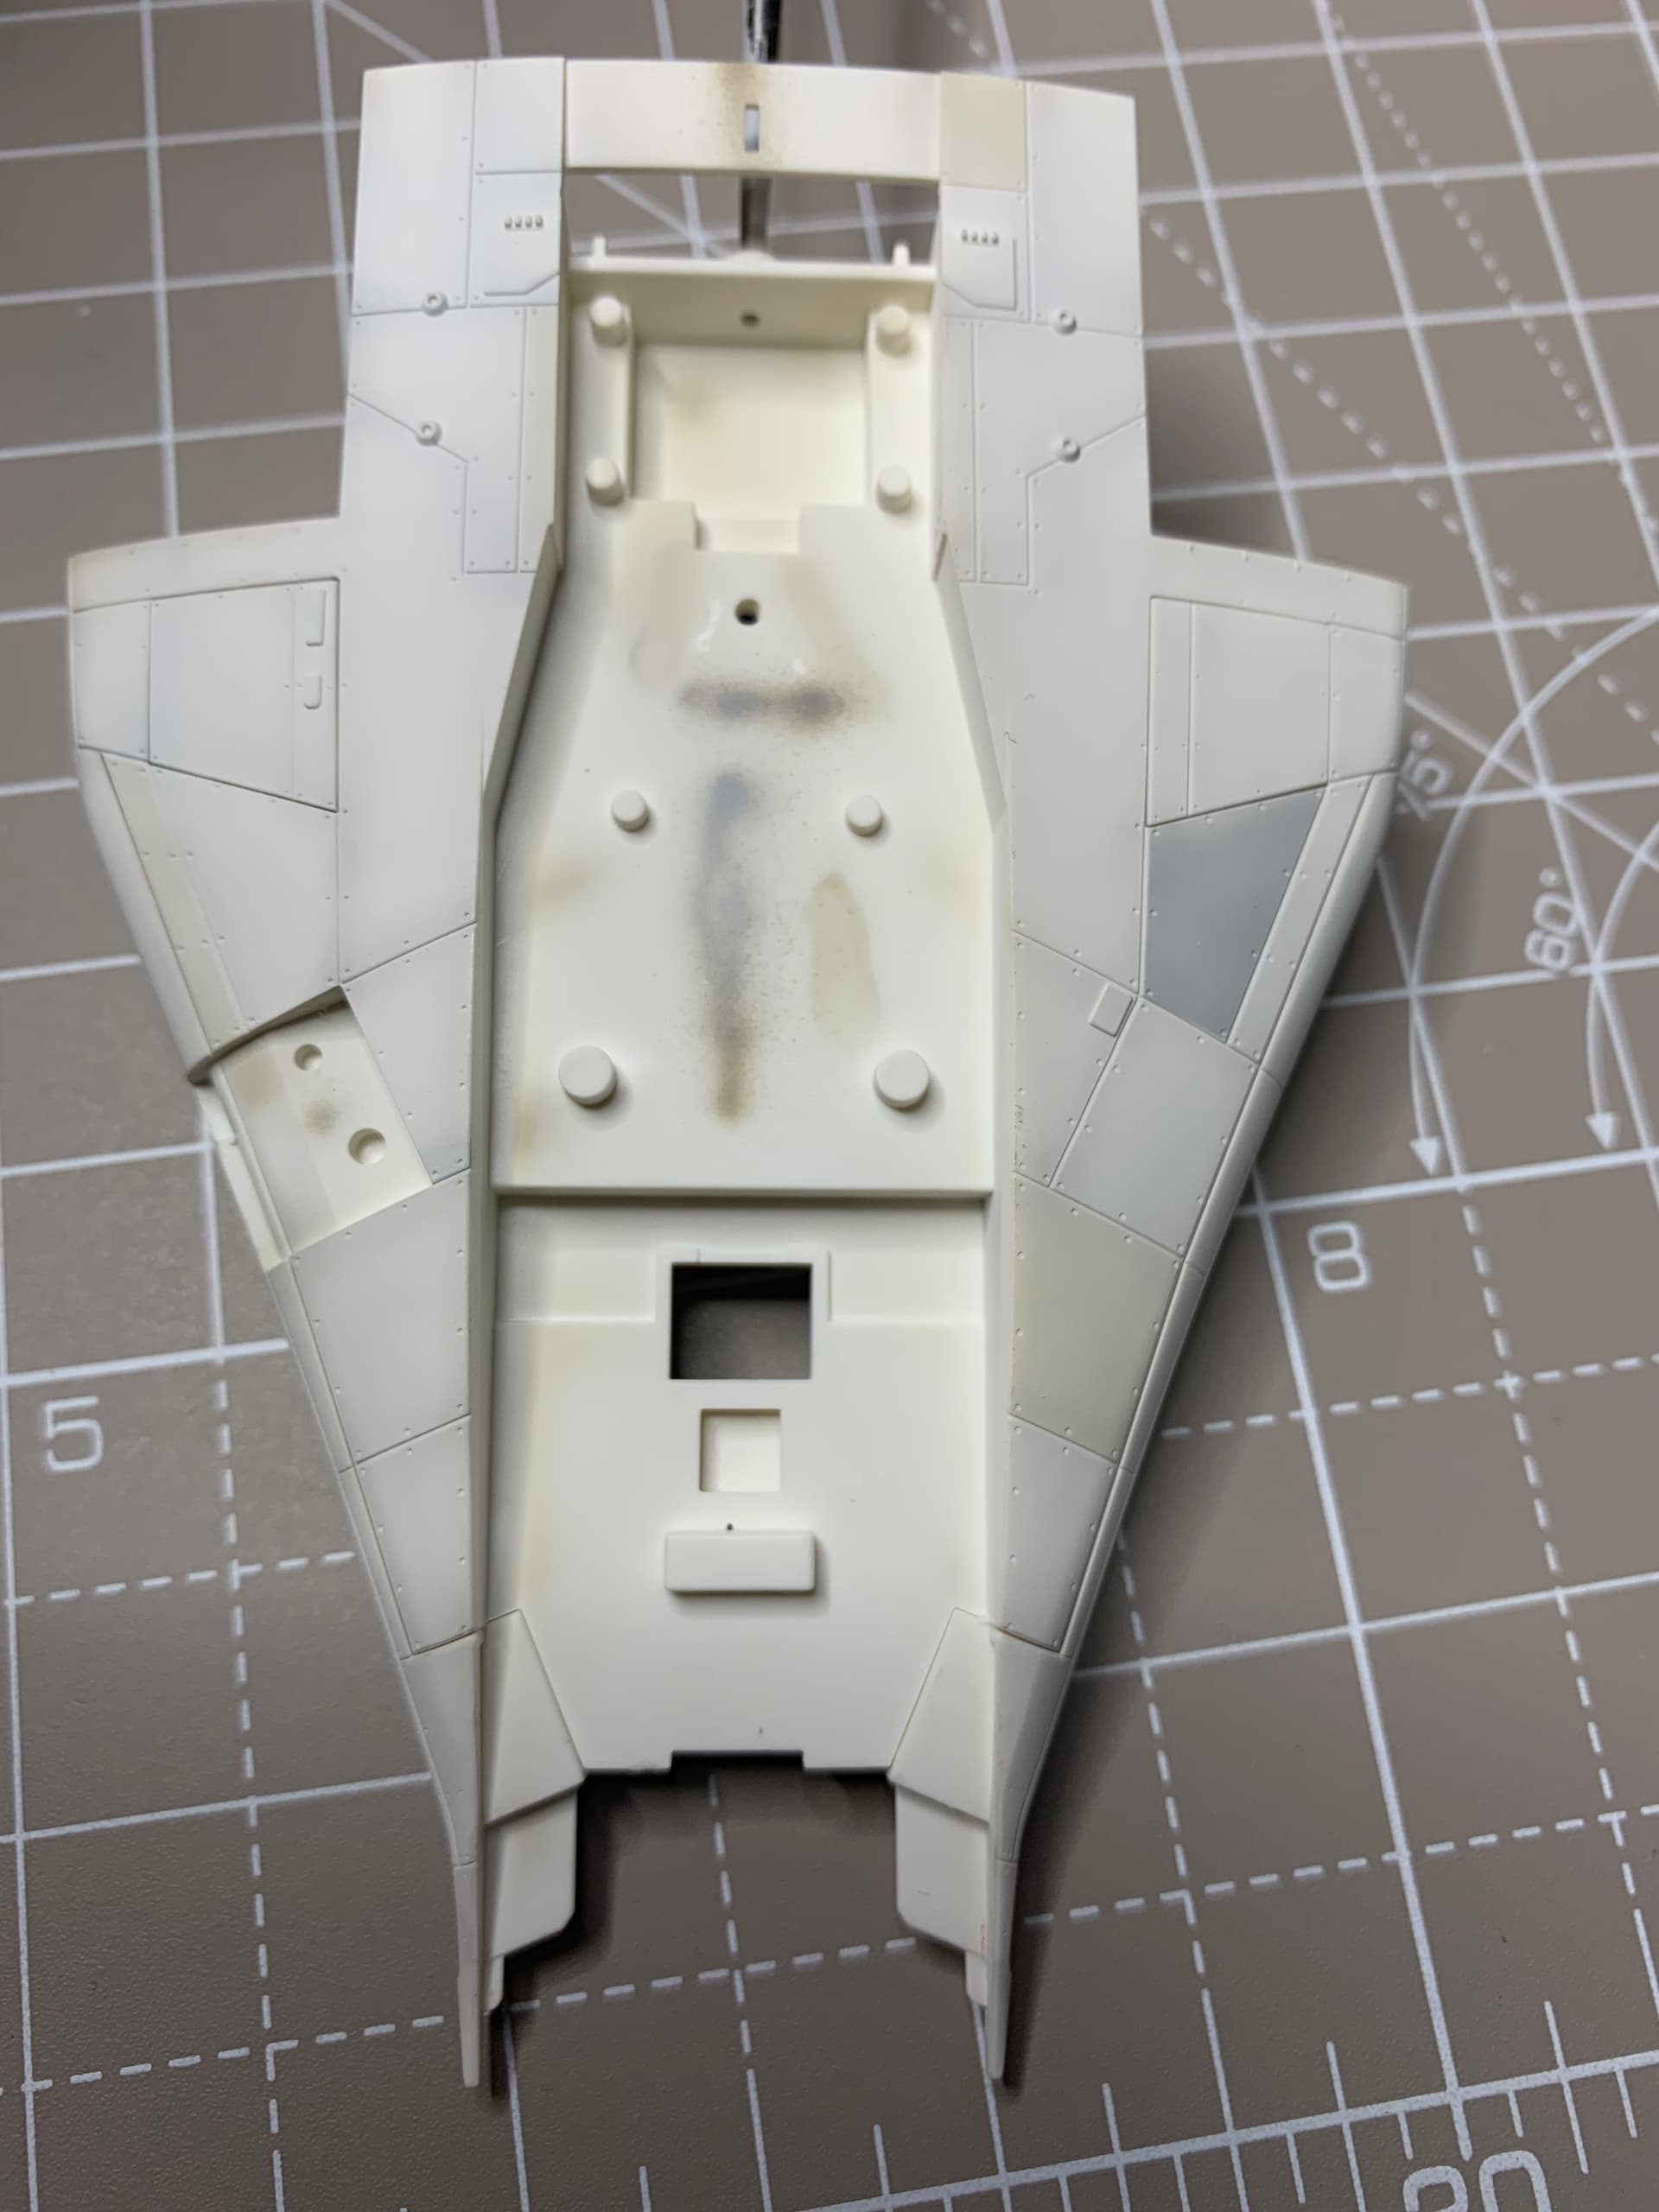
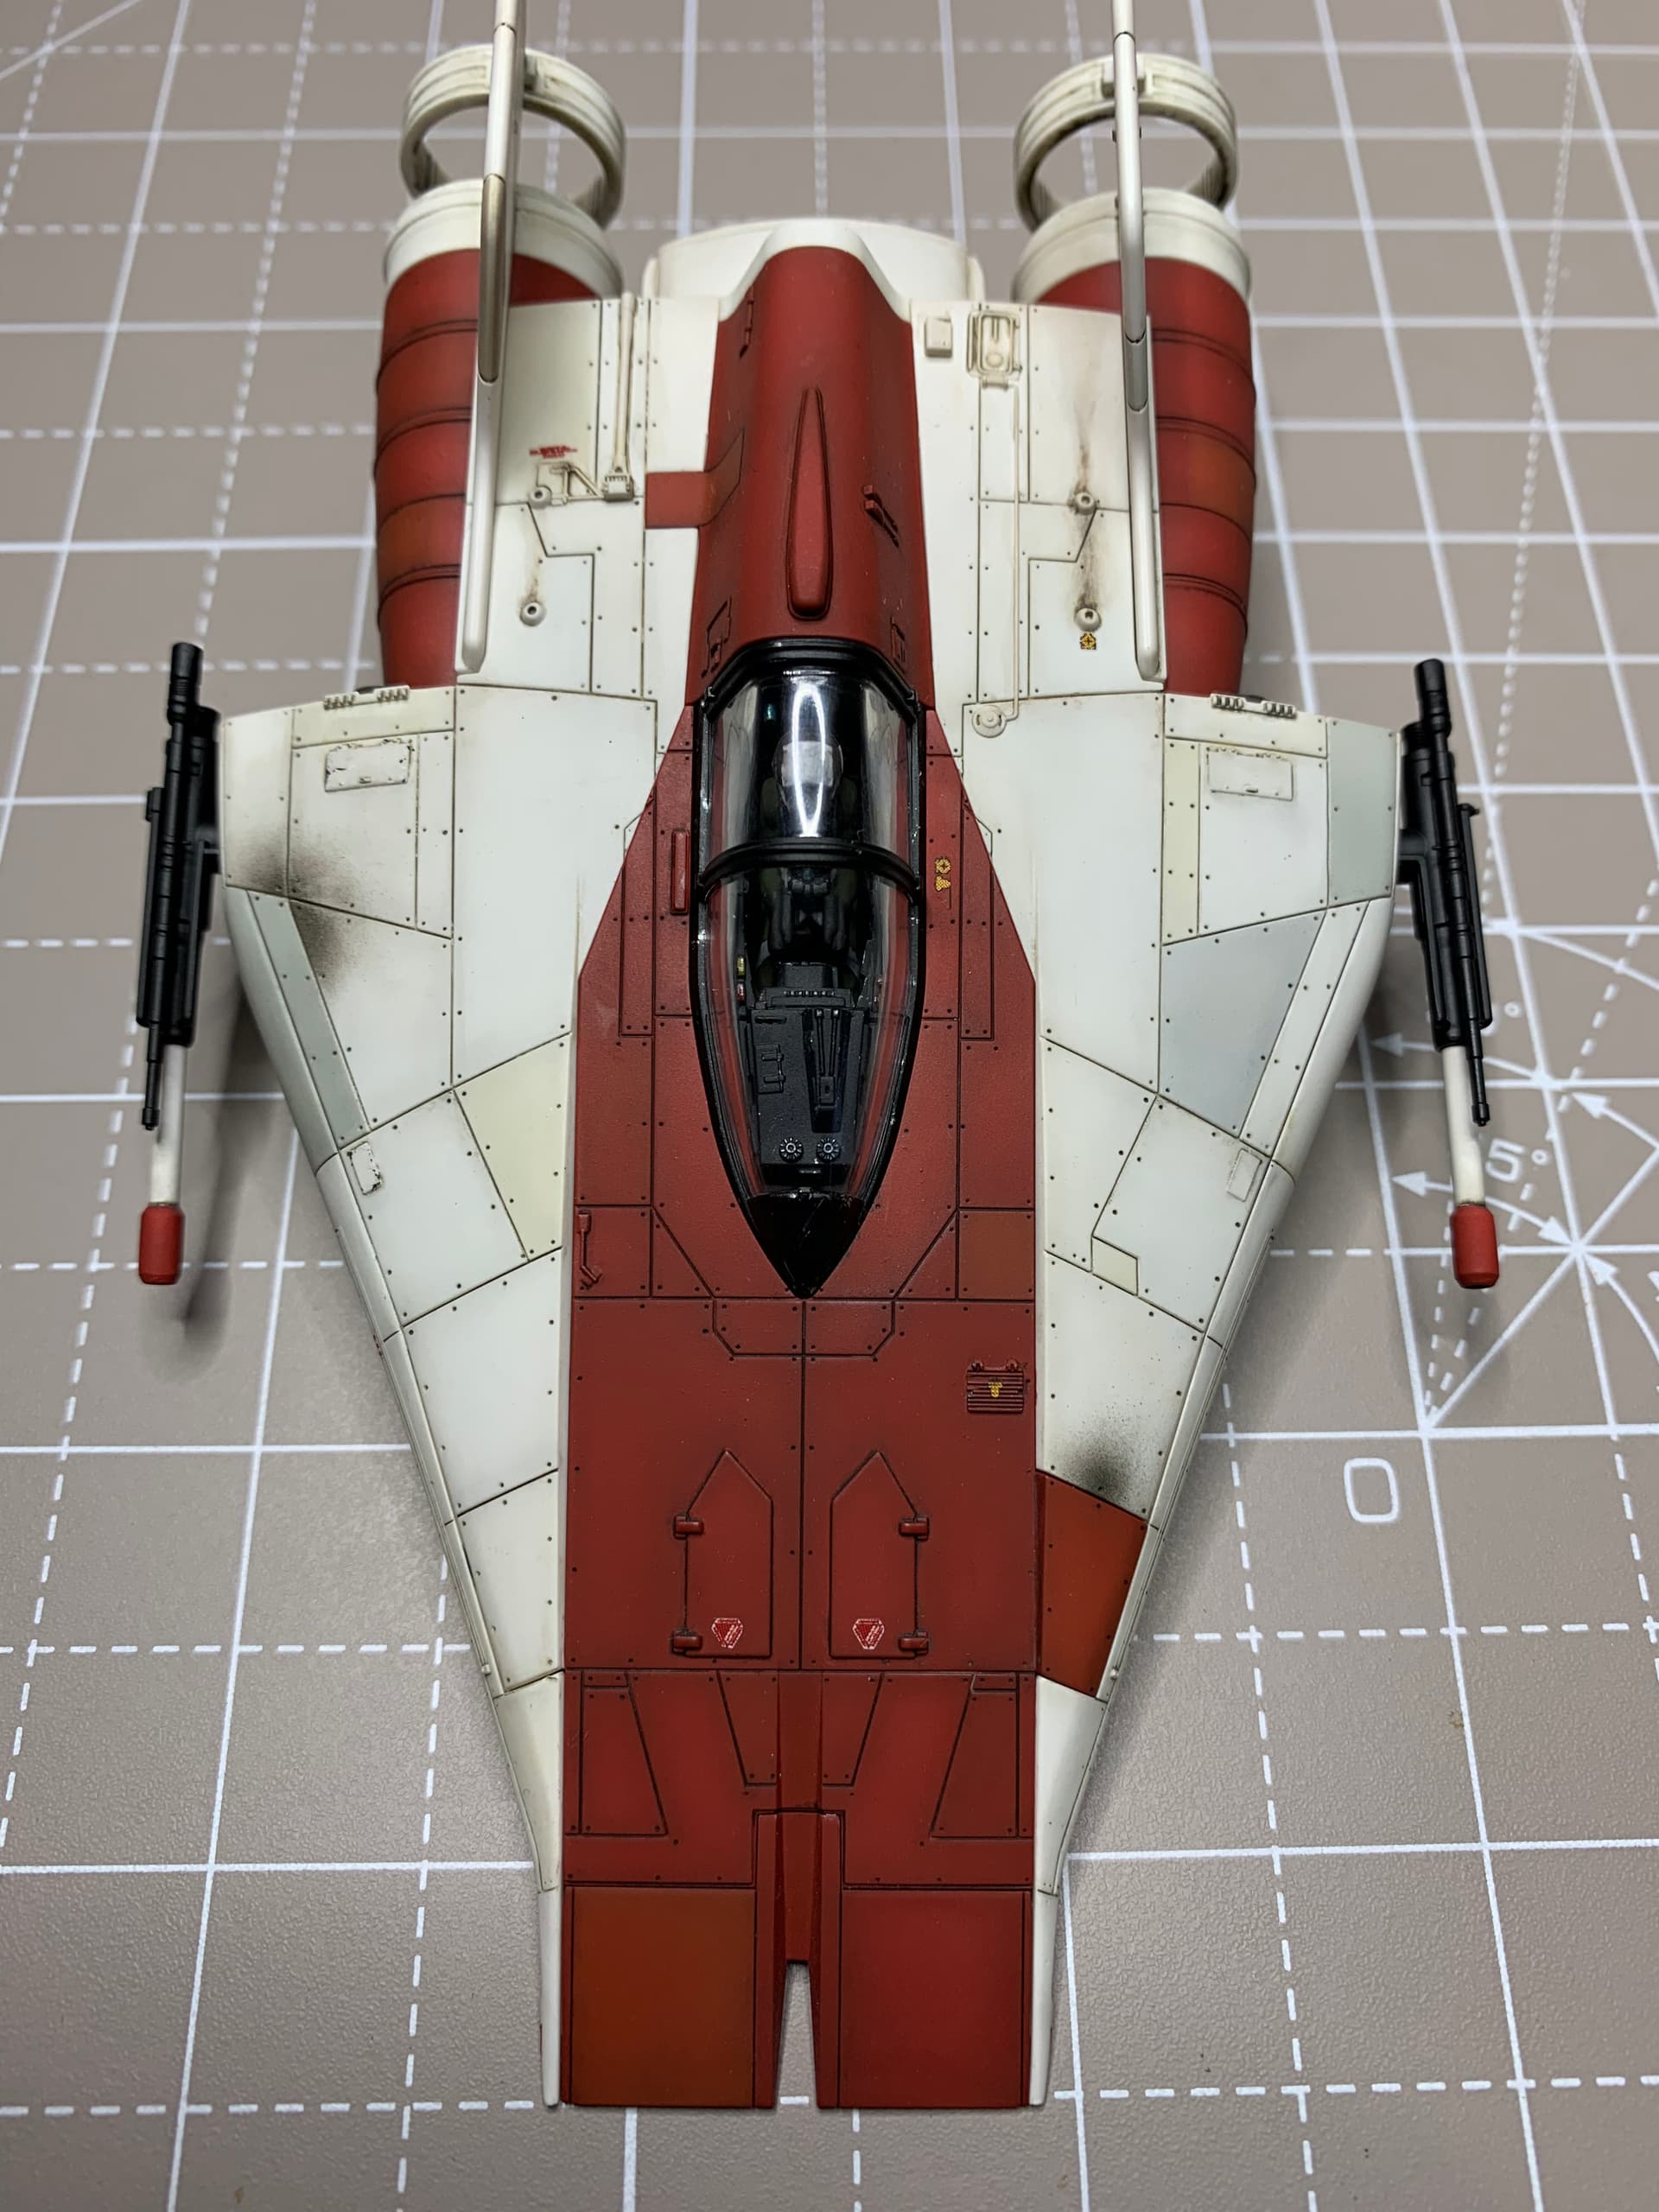
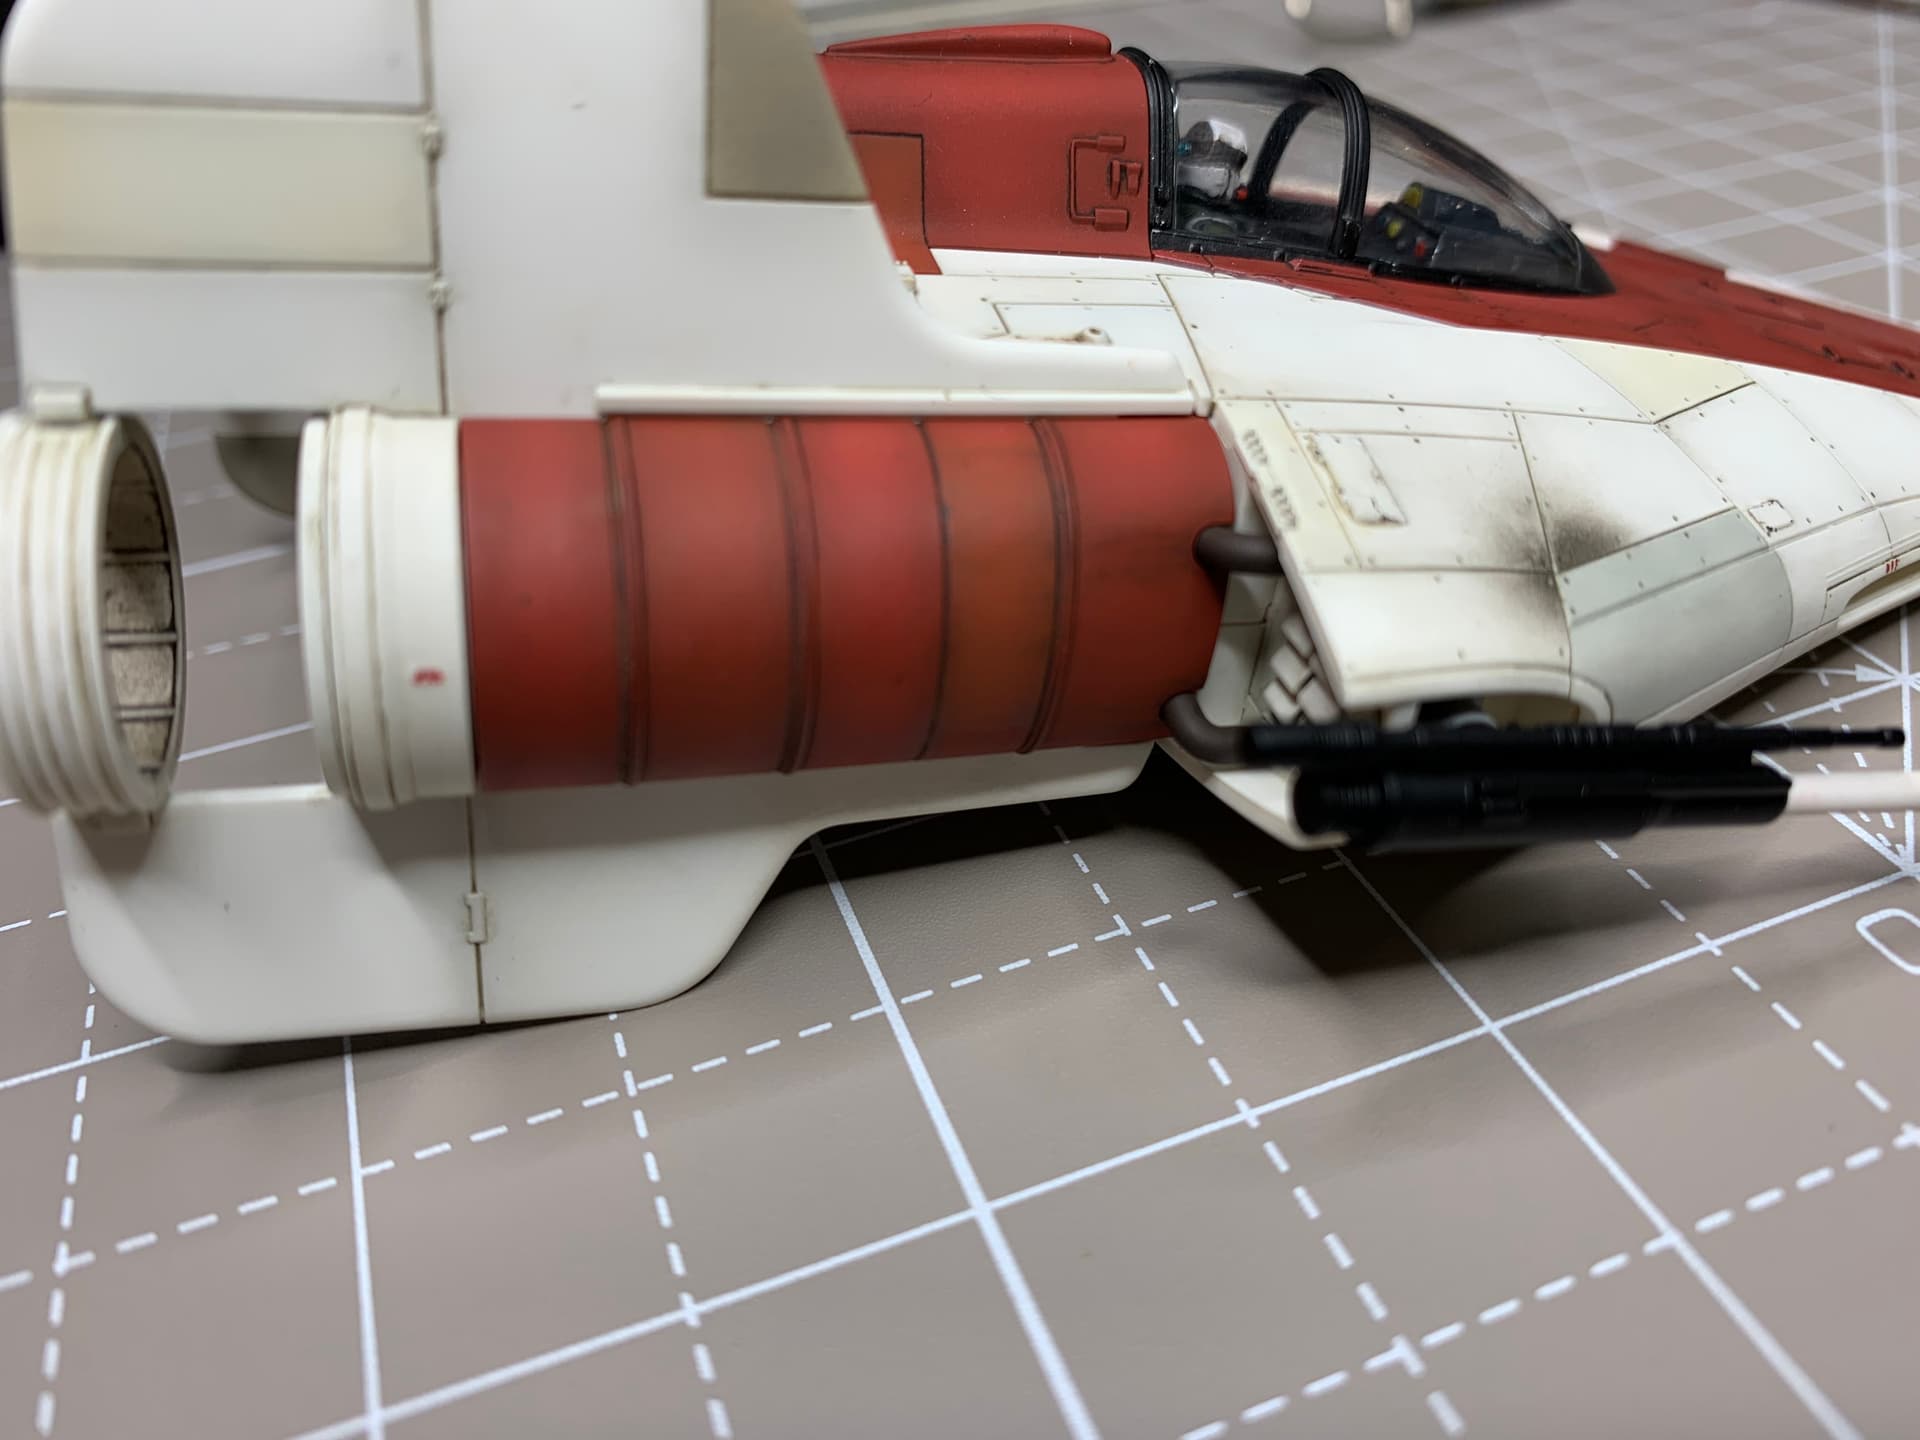
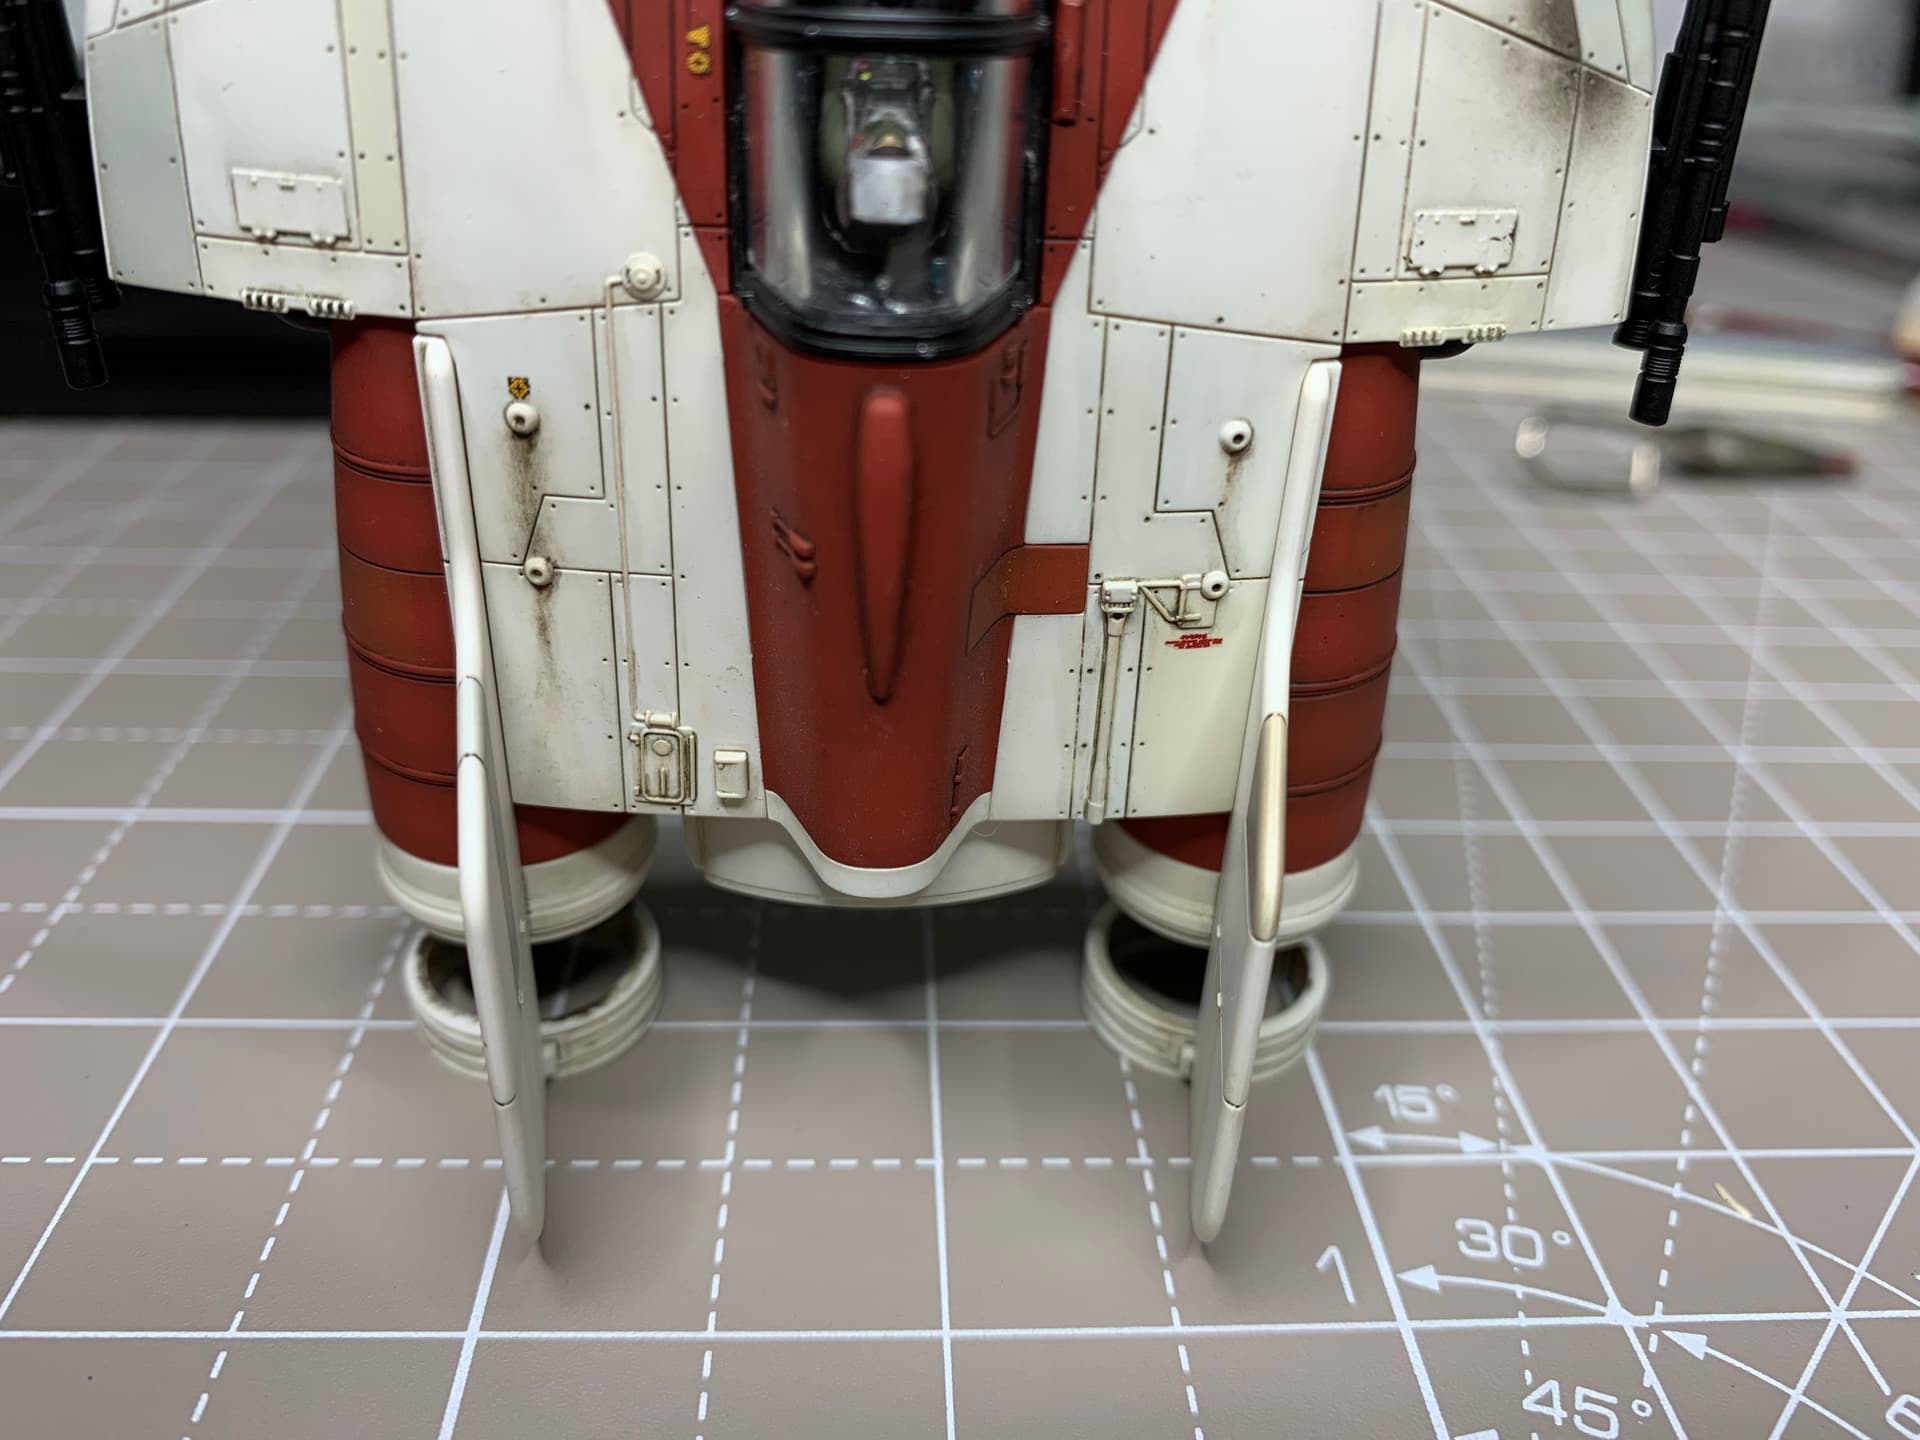
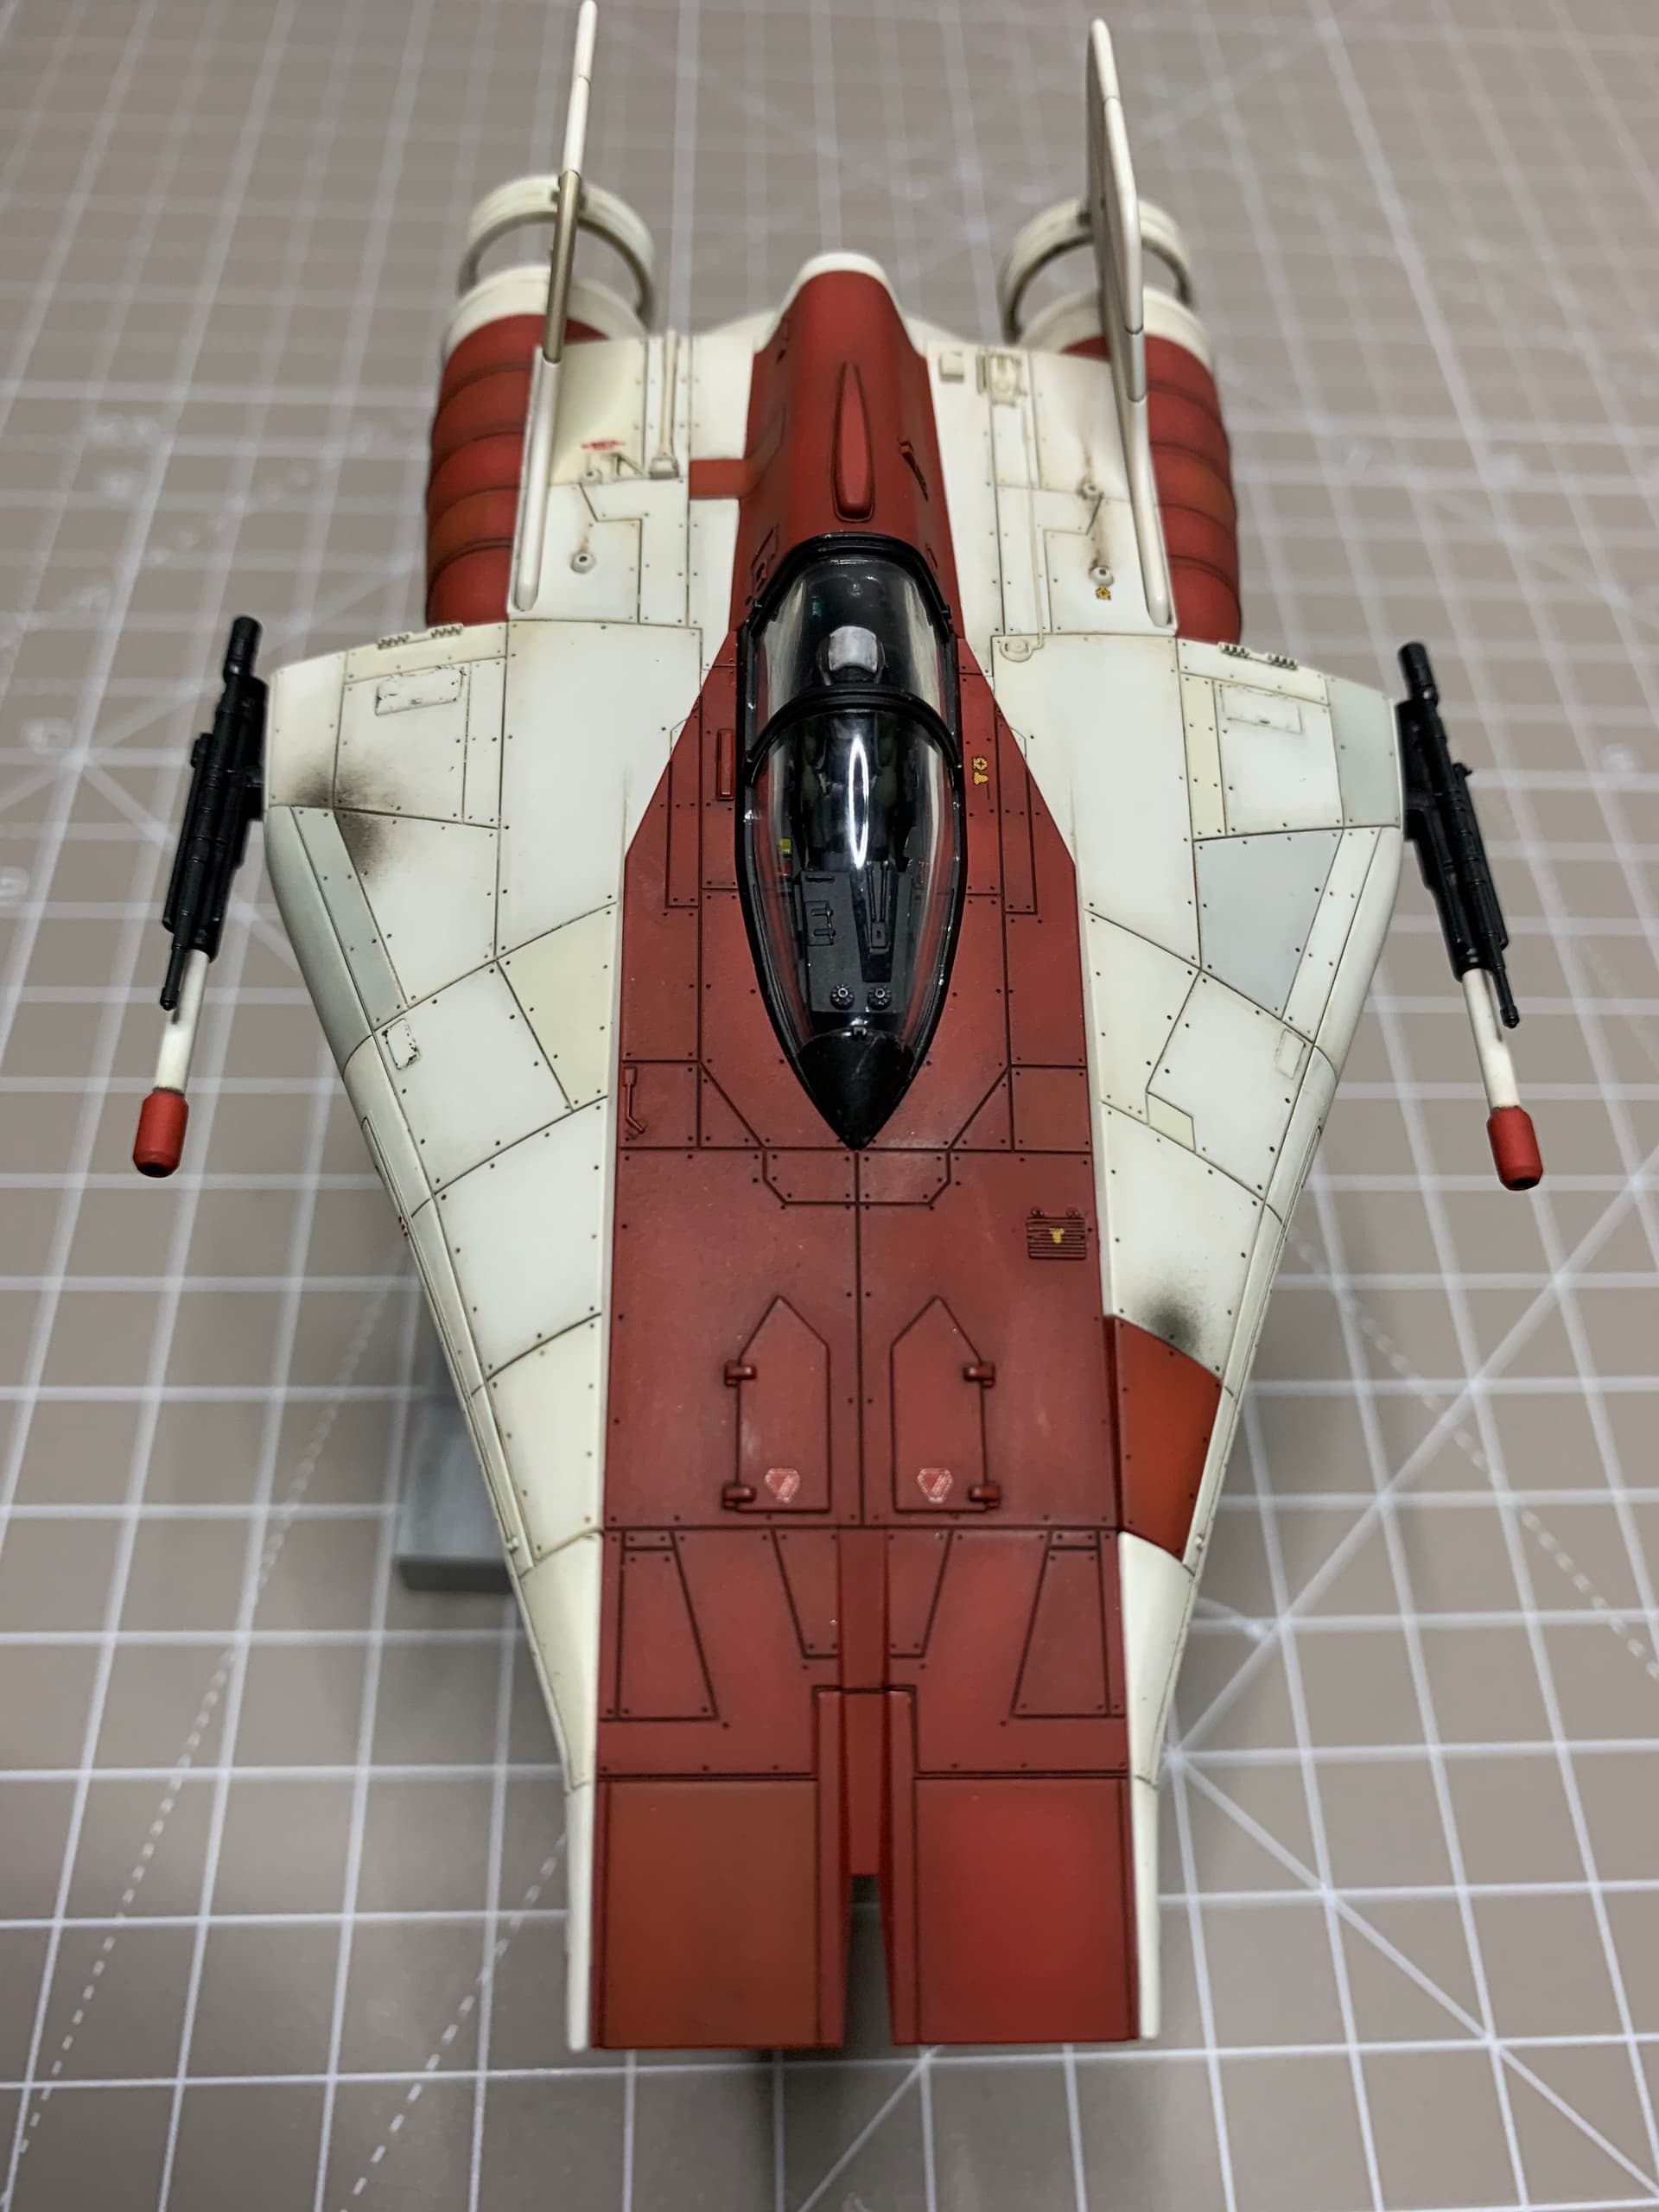
The decals, pin washes and some discolouration of the panels is done. I used AK303 grey wash for the white parts, and Mig dark wash for the red parts.
I think I may avoid chipping on this, just a few blast marks and some more discolouration when the matt varnish is on, maybe…
Thanks for looking in, J.
6 Likes
Excellent job on the panel lines Jim. They really give it great look.
1 Like
Nice work on the A-Wing Jim and thanks for the run down of paints/washes your using.
Personally the A-wing is my second favourite after the Y-wing.
2 Likes
Thanks very much @Johnnych01 @Littorio @The_Snowman , it’s an interesting little subject.
Have been working on the weathering, pics not showing the staining very well, probably something to do with contrast etc.
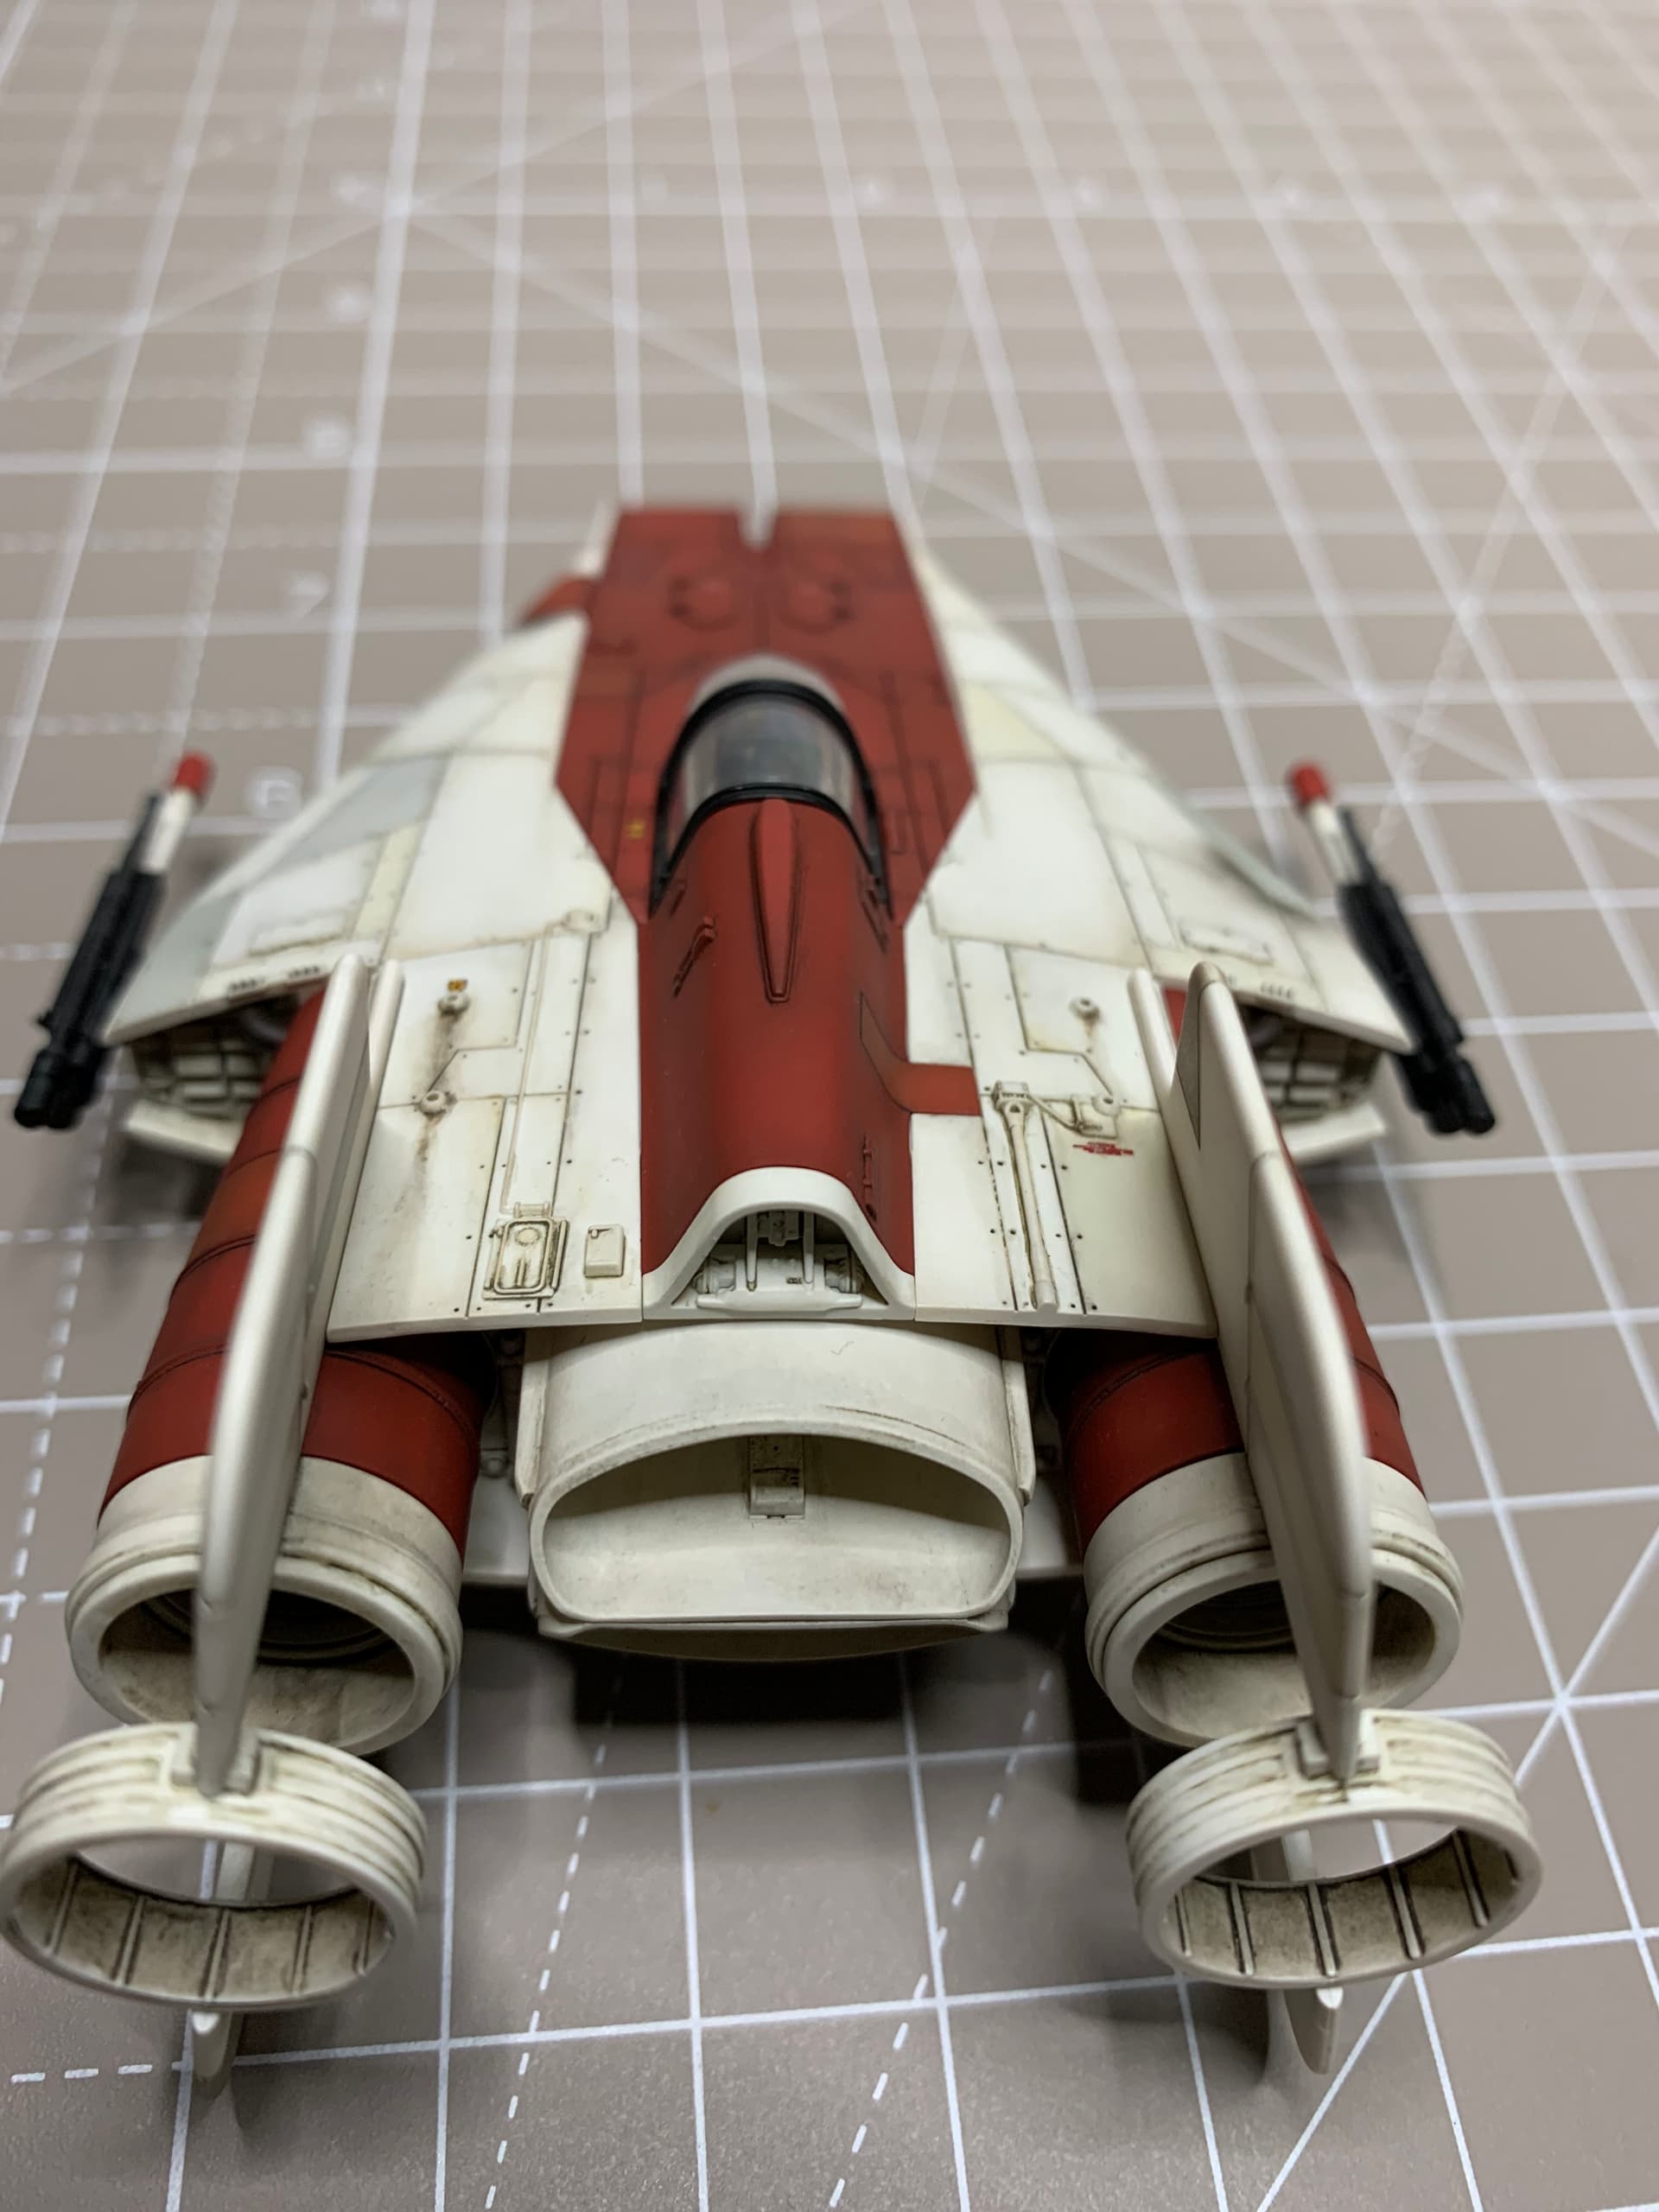
Various enamel washes from my collection used to stain various panels and create some streaks and other effects, still working on it, the tail fins haven’t been started for example. Broke out the airbrush for the blast marks around the replaced panels.
Will keep tinkering for a while more but nearly there.
Thanks again, J.
5 Likes
Its going to be a nice addition to your rebel fleet Jim. and nice idea to use the airbrush for the blast marks
1 Like
Cheers John @Johnnych01!
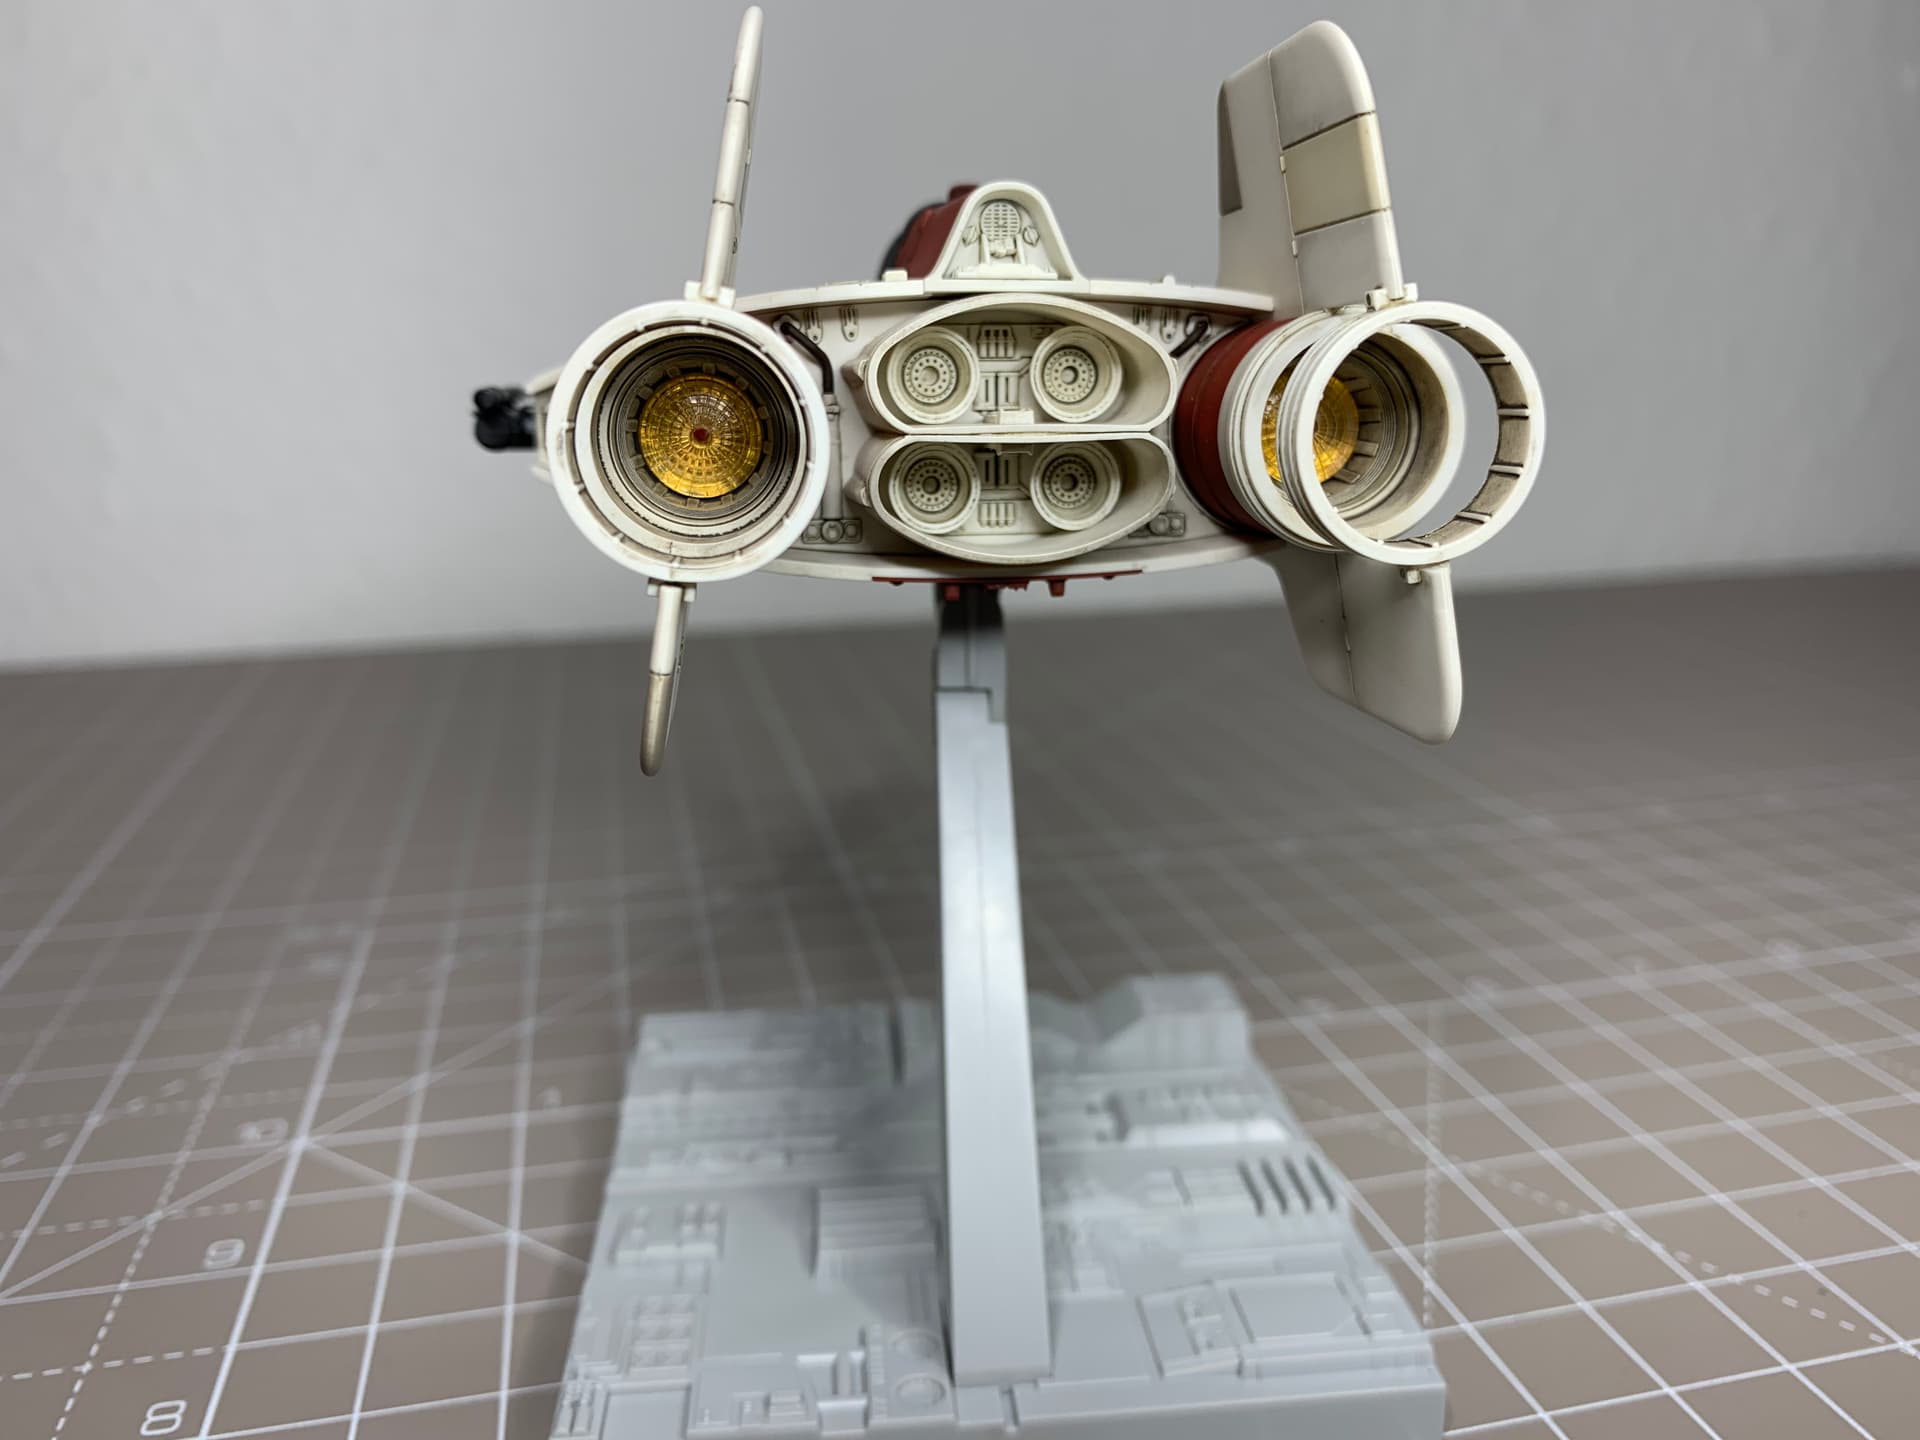
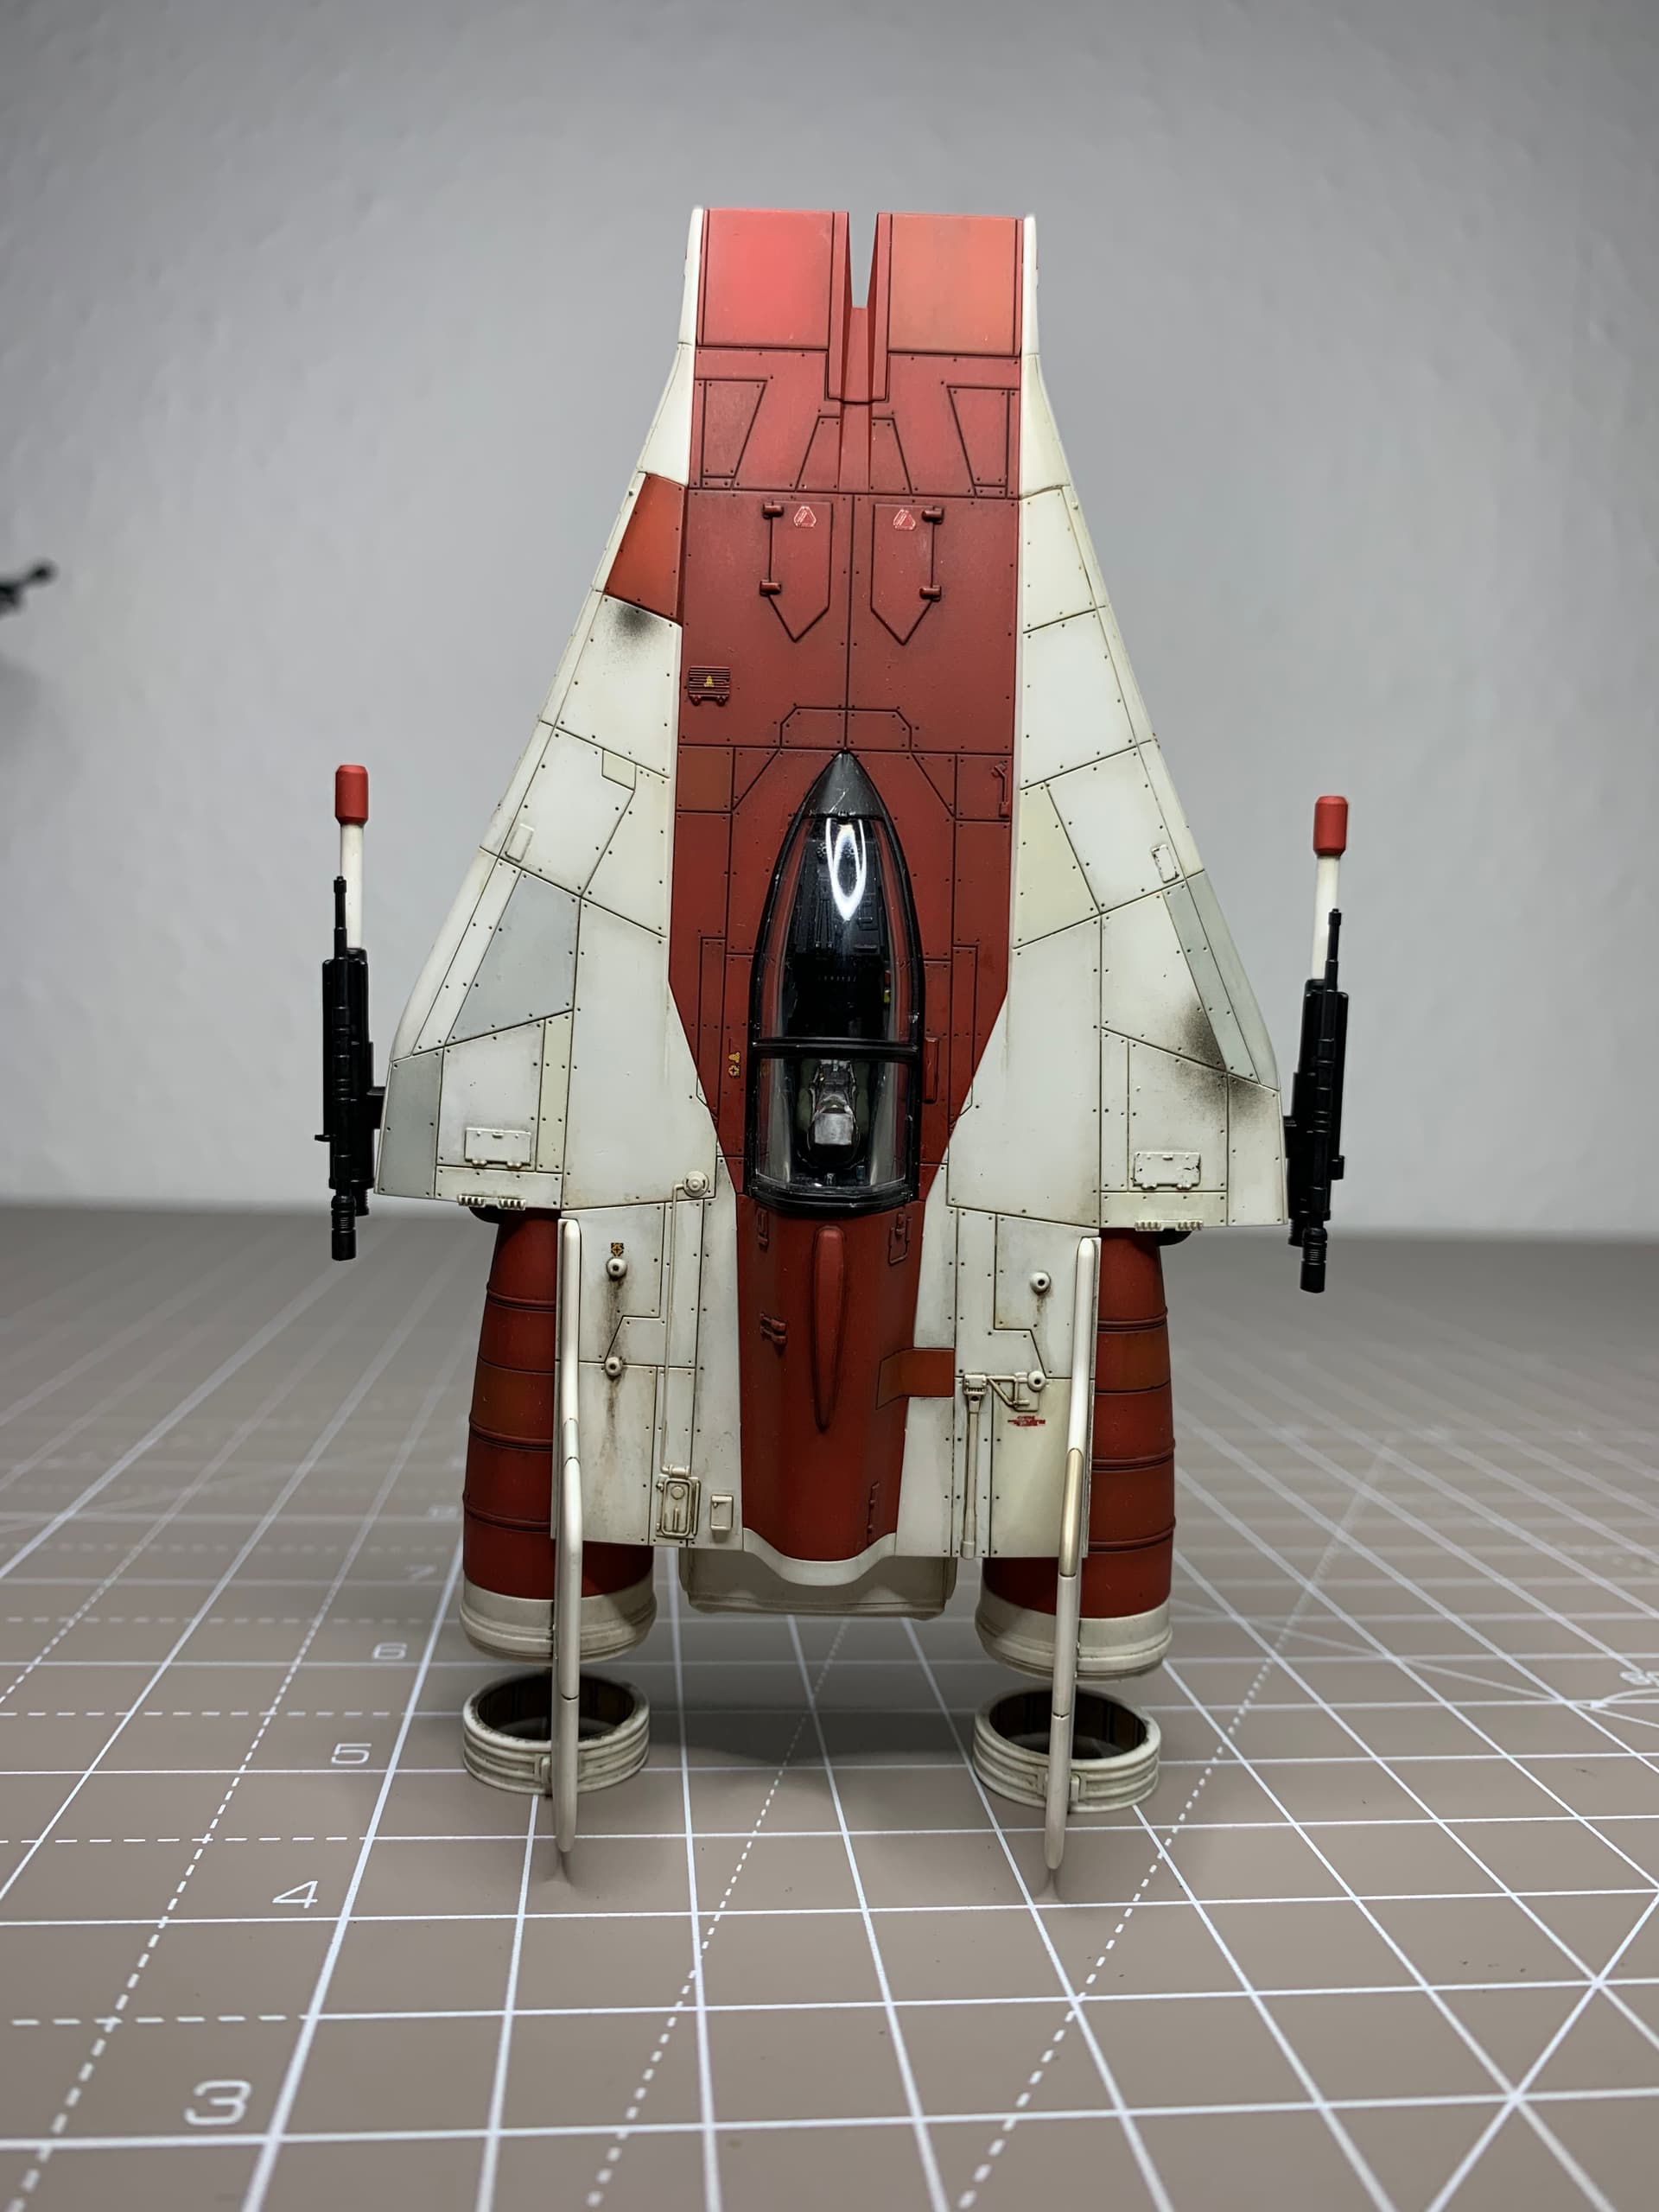
I am calling the A-wing finished for now. The pics just won’t show the true extent of the grubbiness of the finish, but I’m not going any further. As you can see in the pic I used lots of different washes etc to alter the finish. I added gold confetti behind the clear of the engine as the screen engines were yellow, and added a tiny dot of red in the middle just for the hell of it!
I hope y’all like the least favoured of the rebel fighters, a camp that I was in, however I changed my mind while doing this build…
8 Likes
I think I am still in the camp but you have made her shine. 
1 Like
Brilliant … Simple as that
1 Like