For dio bases, if you have any DIY stores nearby, buy a plank of pine (real cheap), the thickness and width is up to your requirements. They usually come in 6, 8, and 10 ’ lengths, just check the plank for straightness. Cut off sections according to your requirements. For a nice finish, just roughly sand off any splintering on the cut end, and apply heat-adhesive veneer strip (apply with an iron on “cotton” setting). Some light sanding with fine sandpaper, and finish with gloss spray for a pro-look!
Example of veneer strip over plain wood. BTW the “water” is an experiment using the foam core board discussed above. I peeled off the facing and textured the surface into a wave pattern, painted, and brushed with clear acrylic:

2 Likes
It’s always best to seal any wood. Spray varnish works great.
Ken
2 Likes
@brekinapez Balsa wood is an interesting idea. I had not thought of using it for buildings and fences and such.
@Biggles50 A lot of gamers use foam core for buildings. Gamers with more money cut insulation foam into sheets using a Proxxon Hot Wire Cutter. The really advanced gamers use playwood in a laser cutter. It was my impression that model builders prefer wood. Do you think foam core is better than wood?
Pine planks for bases is a very interesting option. I like the idea of using real, quality wood instead of plywood. The Home Depot website has 1" by 10" by 10 foot boards. I wonder if someone could cut them for me. My brother has a miter saw(?). Maybe that would work?
Your carved foam sea base looks quite lovely! Maybe I should use that technique for a Panzer of the Lake.
@tankerken Got it! Thank you! I would have probably left it raw and got myself into trouble.
1 Like
You can rough-cut some Pine boards to 8x10, then have the edges carved out with a router to make it all nice. Then stain the boards with your choice of finish or just paint them in satin black.
1 Like
Does he have a router? He could put some nice edges on those bases.
1 Like
Any saw would work, but a miter saw would be rather awkward to use in this case. Look for a real cheap cross-cut saw at a “Dollar” type store. You don’t need an expensive one such as from DIY stores. BTW; have you ever done any wood-working before, or even sawn a piece of wood? I’m not trying to make fun of you; I just want to know your skill level before giving you advise.
Foam core can be cheaper than wood, especially when bought in notice-board size sheets. It is also much easier to cut. Thin strip wood can be glued to the surface of foam core for a better appearance, as well as brick, or stone pattern embossed plastic sheet. Foam core with the facing stripped off can also be carved or embossed in brick or stone pattern surface. I also like to use real wood at times, but I have a variety of tools for sawing and cutting.
![]()
![]()
1 Like
If he doesn’t have a router, but does have a miter saw, and miter box, there is a variety of 1/4 round wood moldings that can be cut to length (and mitered with 45 degree angles) and framed around the pine board. Does take some precision to get the lengths and angles right for a perfect fit!
![]()
![]()
1 Like
I don’t know if my bases are technically dioramas or not, but I do like to set the model in context; now, that might be as simple as a grassy meadow, a forest track or a German street but here’s how I go about it. I also prefer a consistency in the style of bases so they always conform to a certain pattern and bear a nameplate in the bottom LH corner. I tend to major in AFVs etc of the Cold War.
I’m lucky in a way I suppose as I utilise 12mm MDF and can afford to have them made for me. The edges are slightly contoured but this disappears once I’ve sanded them down. I use the following sizes, which correspond to European paper sizes, not least as I then use the boxes for storage and transportation to shows:
A3 - normally for a major vehicle and a smaller supporting one
A4 - usually for just a single model
8” squares - obviously not a paper-size but will fit in the same A4 box – for say, APCs
7” squares - smaller vehicles, mainly softskins
5” squares – motorcycles or groups of figures
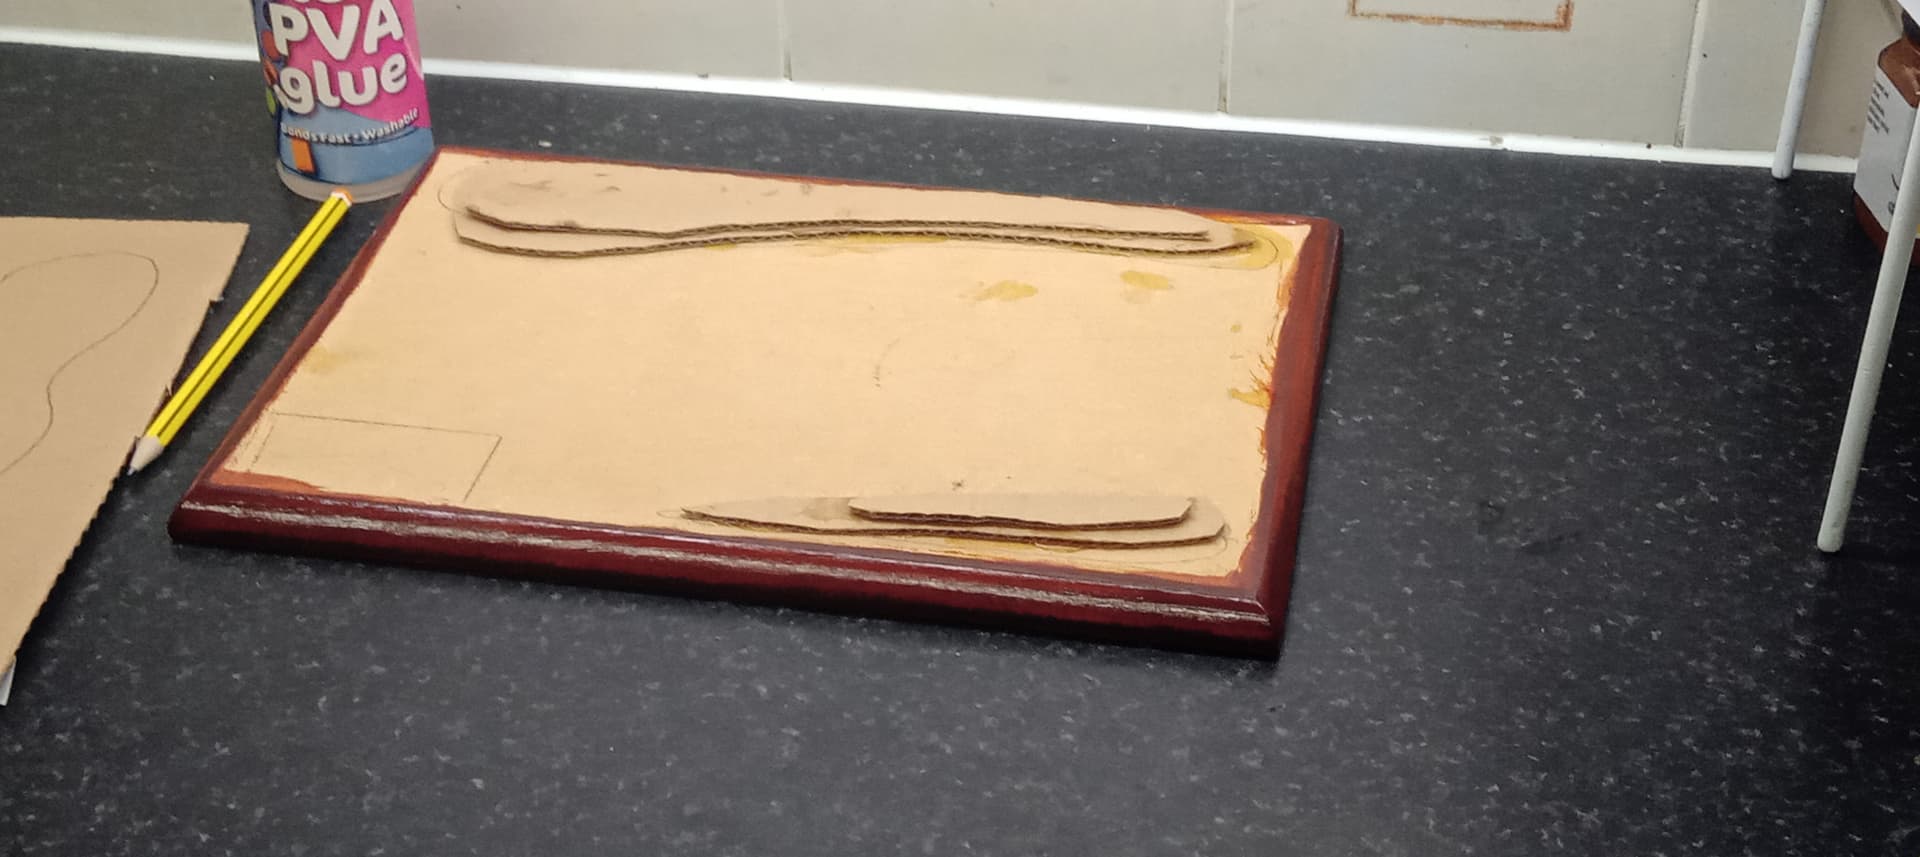
I always sand, stain and varnish the base before adding any groundwork. Depending on the depth of terrain I want to represent, I may make cardboard formers before applying tiling grout; once the grout is applied I then add texture normally using flock and the like from the model railway fraternity. I should mention that I mask the edges of the base before this stage, and also mask off a space for a nameplate. The grout is, obviously, an adhesive as well as providing some texture; if a tracked vehicle (or even sometimes wheeled) I cover the base with clingfilm before it dries out and then press the model into it to obtain track impressions, remembering to also press down to show where the vehicle has been. This normally works OK, the trick being not to let the grout dry too much yet not pressing into it when it’s too wet.
I add trees, bushes as required and any other diorama accessory as I require eg German road markers.
Here’s a base undergoing preparation:
And some examples of the sizes and overall effects I obtain. First off, an A3 one:

A4:

8" square:
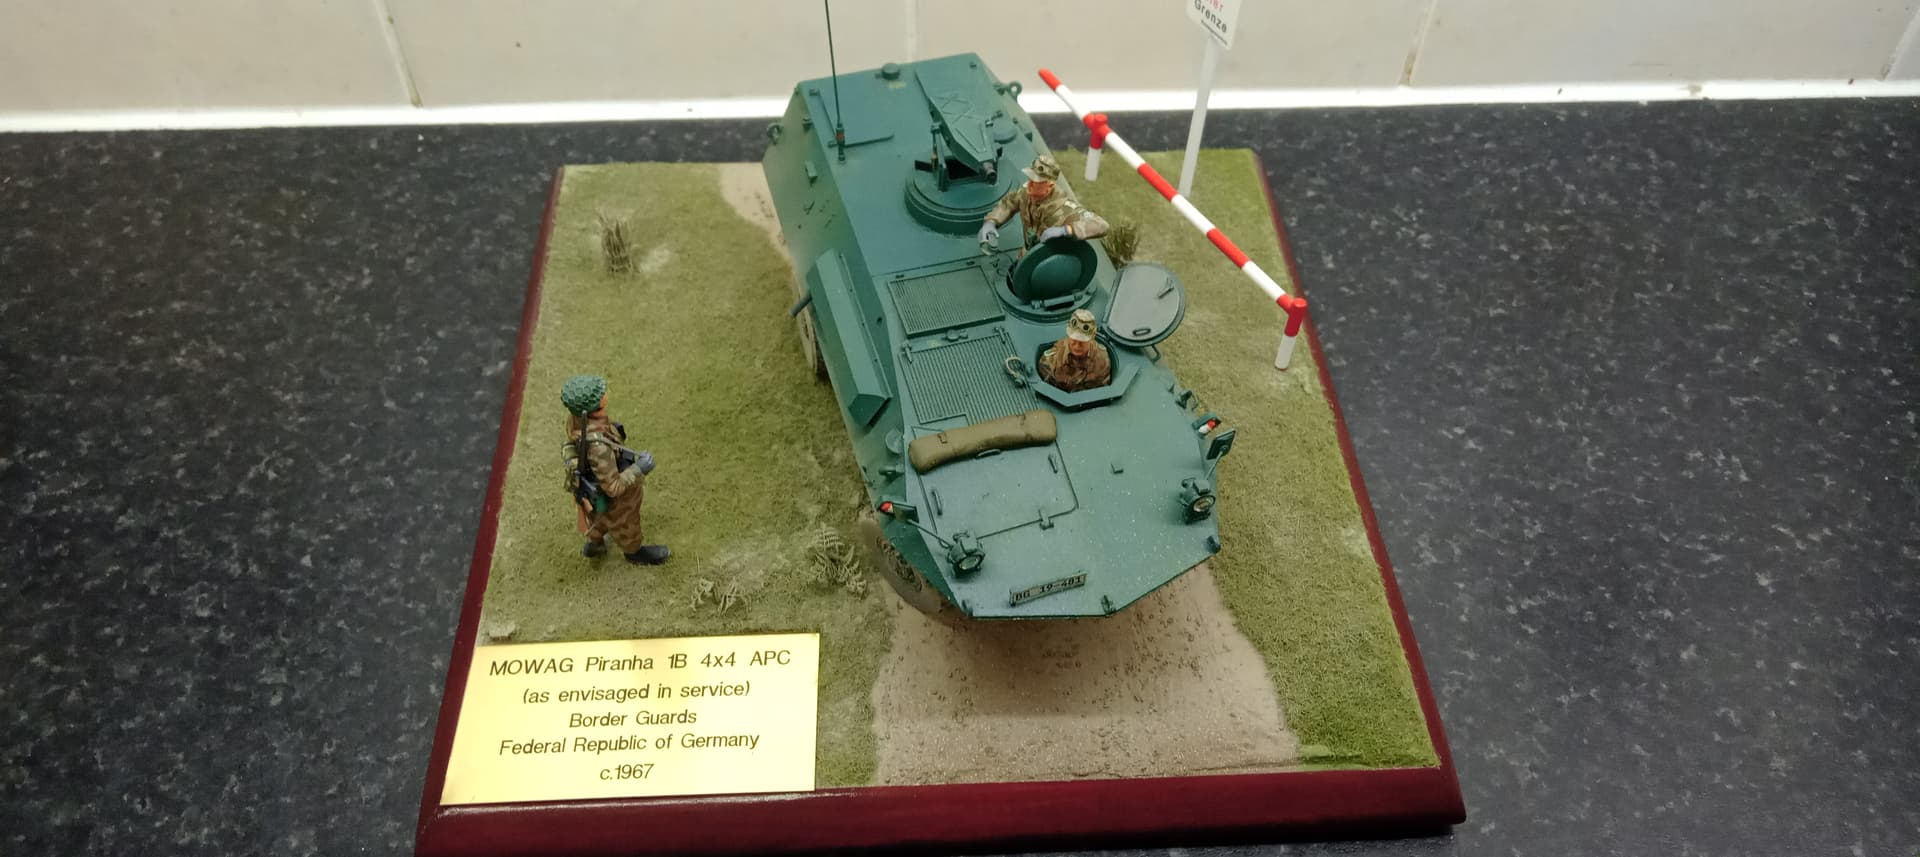
7" square:

In some cases the scenic effects are fairly extensive, others not so much (sometimes less is more). Hopefully this will help generate your own ideas.
4 Likes
@SableLiger The bases need to be 10" by 10" so that two fit inside a 10.25" by 21.5" display case. (Please see picture below.) There is some wiggle room.
@brekinapez I do not have ready access to a router, nor a table to mount one, nor a wood shop space for the table. ![]()
@Biggles50 I do have some saws but making straight, 90 degree cuts is beyond my skill. (Cuts always come out a bit wonky.) Amazon has foam core boards for cheap so they are really easy to acquire. ![]()
Going with a smaller base board and framing around it is possible. The miter saw available to me can easily cut pieces for picture frames.
@BootsDMS Those are very nice dioramas and exactly the sort of thing I wish to start with. In time, I hope to work up to projects like the water mill diorama under construction in these forums.
…
Someone asked about my woodworking skills. I had one semester of high school wood shop in a century past. ![]() We made picture frames. One of the great regrets of my life is never assembling a wood shop and pursuing woodworking as a hobby. Now it is too late.
We made picture frames. One of the great regrets of my life is never assembling a wood shop and pursuing woodworking as a hobby. Now it is too late.
Amazon sells 10" by 10" by 1/4" plywood boards for about $1.50 US each. No cutting is necessary. Both Home Depot and Lowes will cut wood boards for a small fee, so the suggestion by Biggles50–cutting up a pine board–is also possible.
How do you all feel about bases without routed edges? Are they too ugly? The advantage is that such boards can butt together to form a larger scene.

This is one of my aquarium style display cases. They are made out of 1/8" acrylic sheet and somewhat flimsy. Two 10" by 10" tiles will fit inside. The current base is a piece of ugly black felt.
Problem one is choosing a base material.
- Plywood: Cheap. Comes in exact size needed. May have ratty edges. Water will destroy. Flammable.
- Acrylic Sheet: Much more expensive. Comes in exact size needed. May be too flimsy. Alcohol will destroy. Flammable.
- Styrene Sheet: More expensive. Hard to get in exact size needed. Easy to cut. May be too flimsy. Flammable.
- Aluminum Sheet: Expensive to get in exact size needed. Must have professional cut. High end. Super durable. Baking sheets might serve? Easily survives water. Inflammable.
- Two part epoxy: Expensive. Must individually sculpt each tile. Strong if reinforced with wire. High end. Immune to water and most solvents. Nearly indestructible. Not flammable.
Problem two is fitting exactly two tiles in each case.
Problem three is figuring out how to get tiles in and out of cases without Godzilla smashing stuff.
- Build a solid wall carry cube around each sheet. Almost impossible to do with precision.
- Build a wire carry cube around each sheet. Piano wire is cheap. Bending tool is cheap. No way to weld the wires.
- Add wire lifting handles to the side of each tile. Carry handles look ugly.
- Add a building facade or tree to the back of each tile. Pick up the tile by the building or tree.
Two part epoxy is the dark horse in this race. The 2" by 2" tiles I manufactured are surprisingly good. Making 10" by 10" tiles is a ton of work. No one does this.
1 Like
Old awards. We don’t seriously hang them on the wall, do we?
If all you want to do is hide the crappy plywood edges of your bases, I suggest the two ways I already mentioned:
- using veneer strip is the easiest, uses the least amount of tools, and can look pretty nice. All you need is veneer strip (cheap, from DIY stores), an iron (doesn’t have to be a steam iron), and a sharp craft/modeling knife.
- using quarter-round wood molding strip (available from DIY stores), a miter saw (which you already have access to), as well as the accompanying miter box (important for 45 degree cuts). Could be fiddly making precise cuts to meet at the corners. Adding wood molding also adds to the overall dimensions of your plywood bases.


Yeah…I’ve got a box full in the bottom of my closet. I’ve considered using them as bases, but vanity said, “No way!”. ![]()
![]()
![]()
I actually got a supply of old award plaques that belonged to an employee who left them behind when she retired.
1 Like