BATUS Chieftain Mk10 Stillbrew & CVRT Spartan Range Safety

I have decided to put the Panther G to one side for a few days to start this…

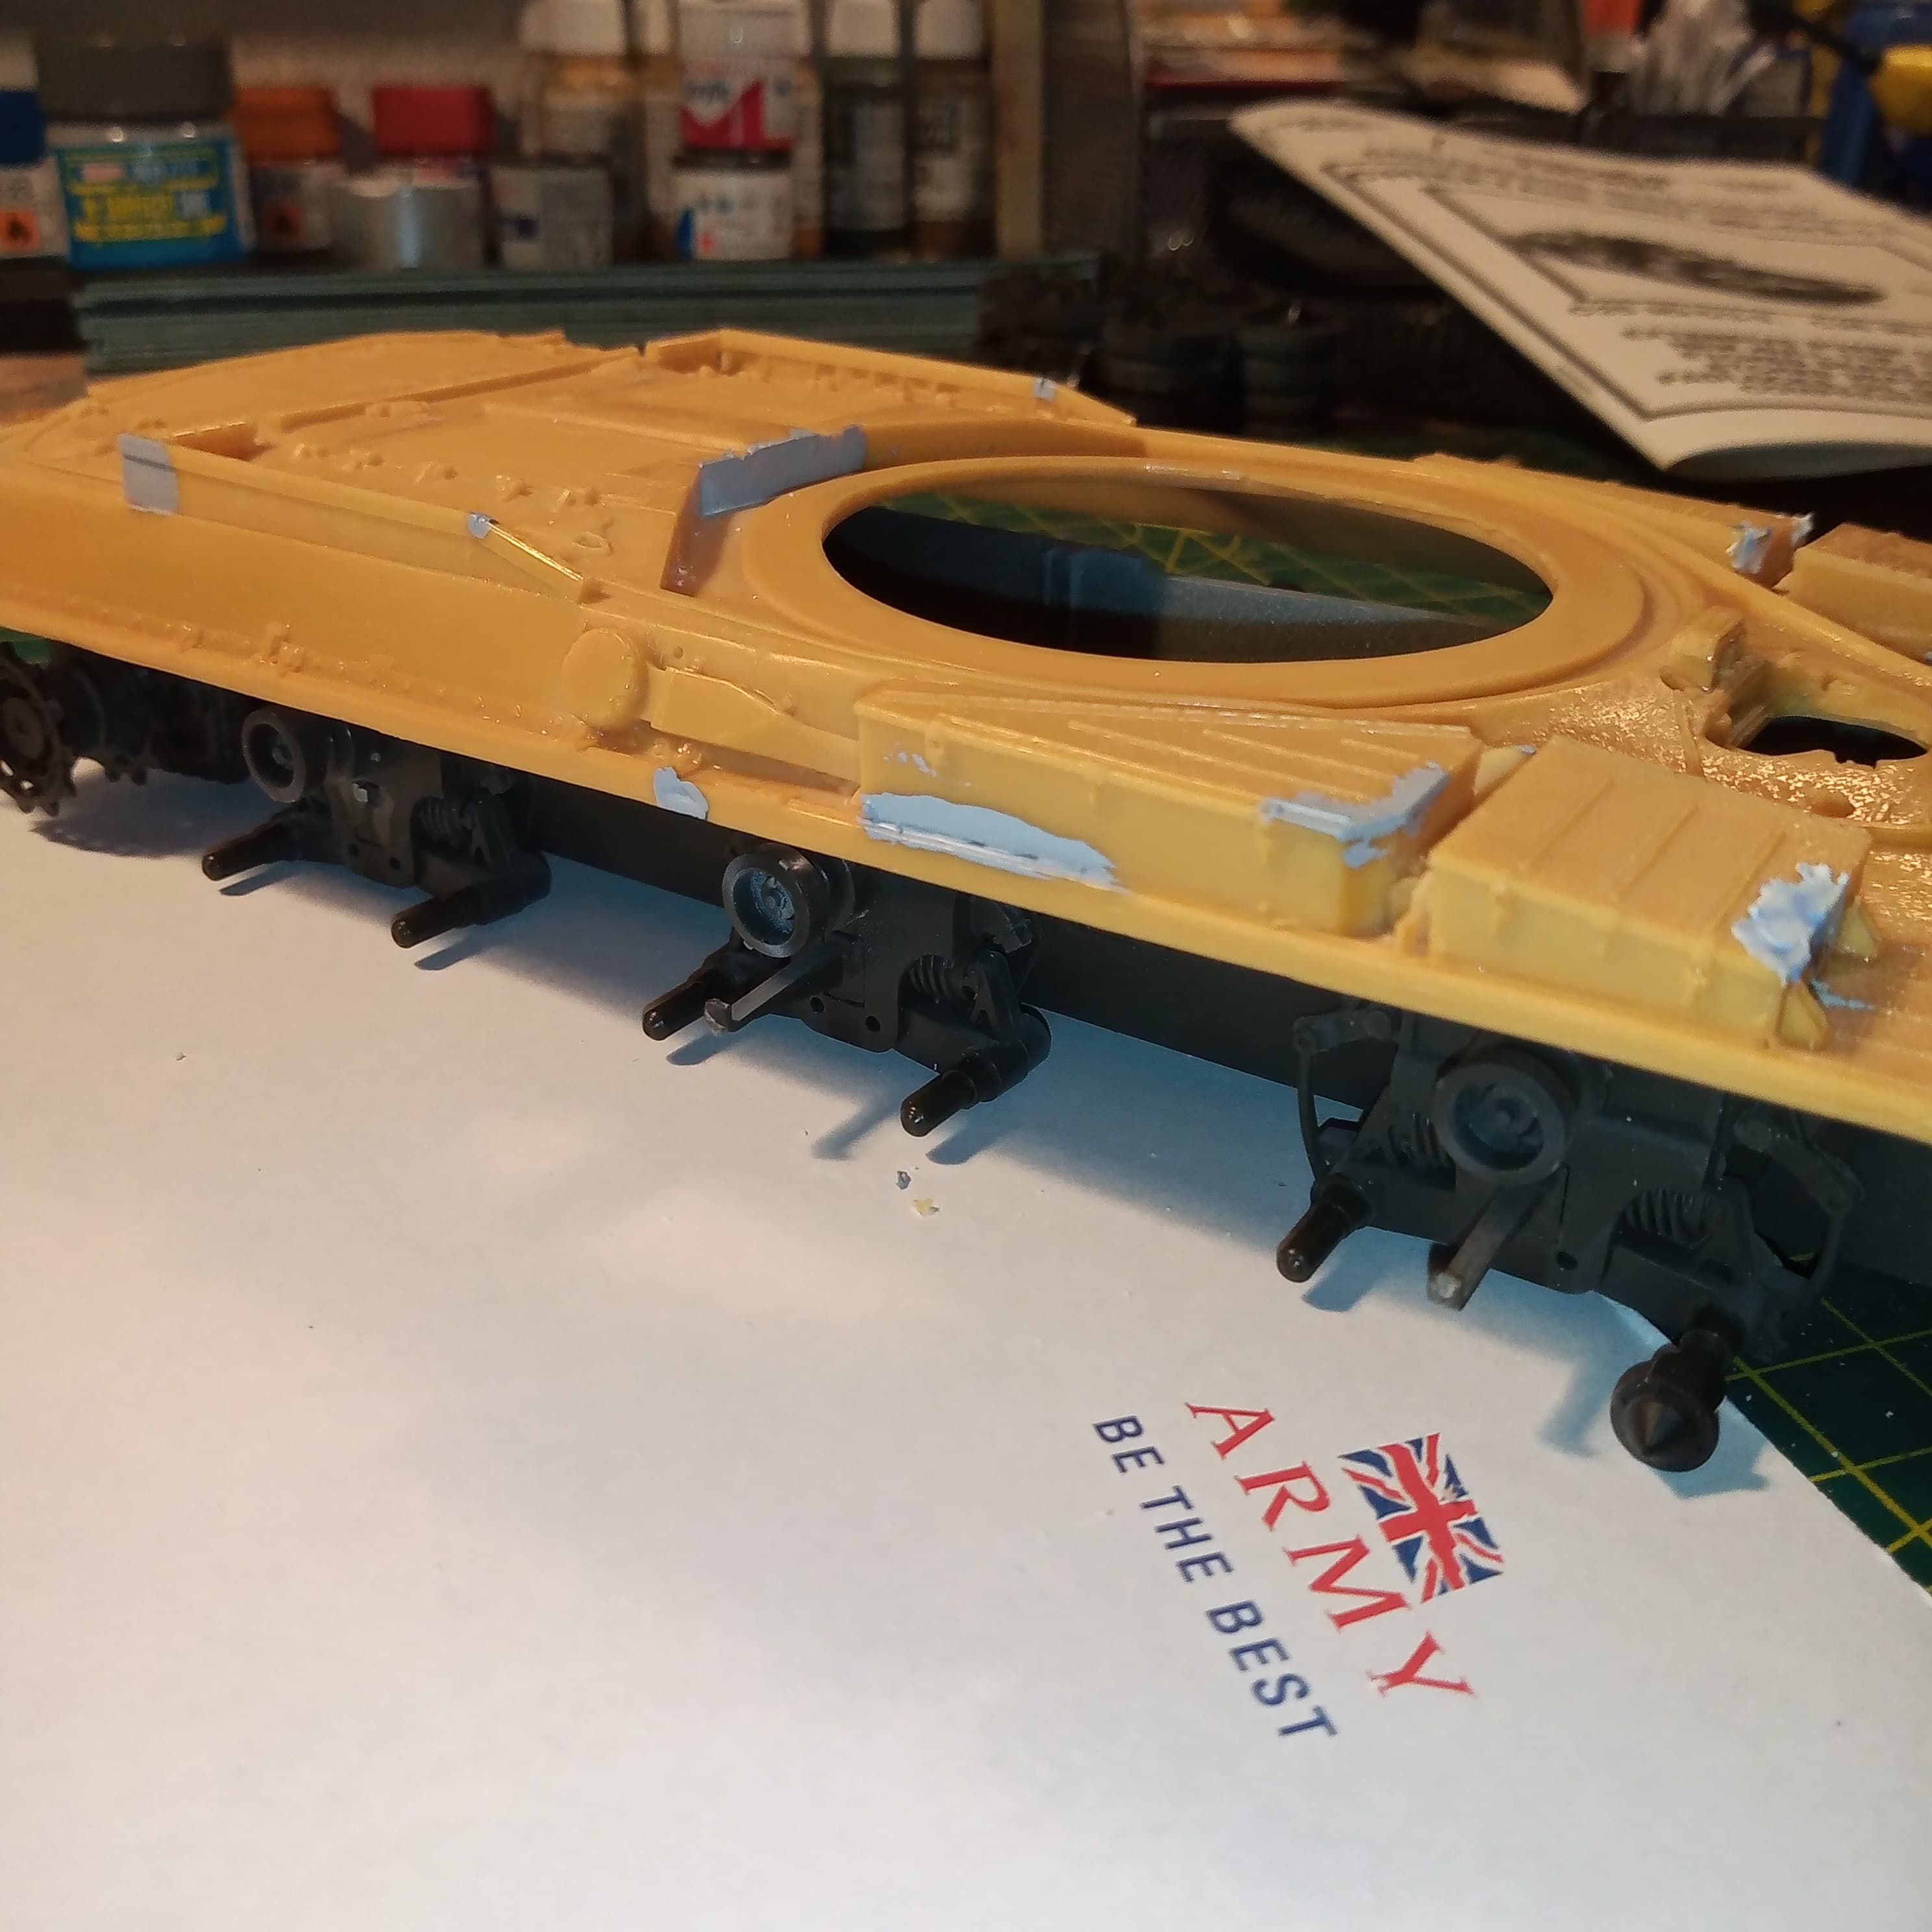
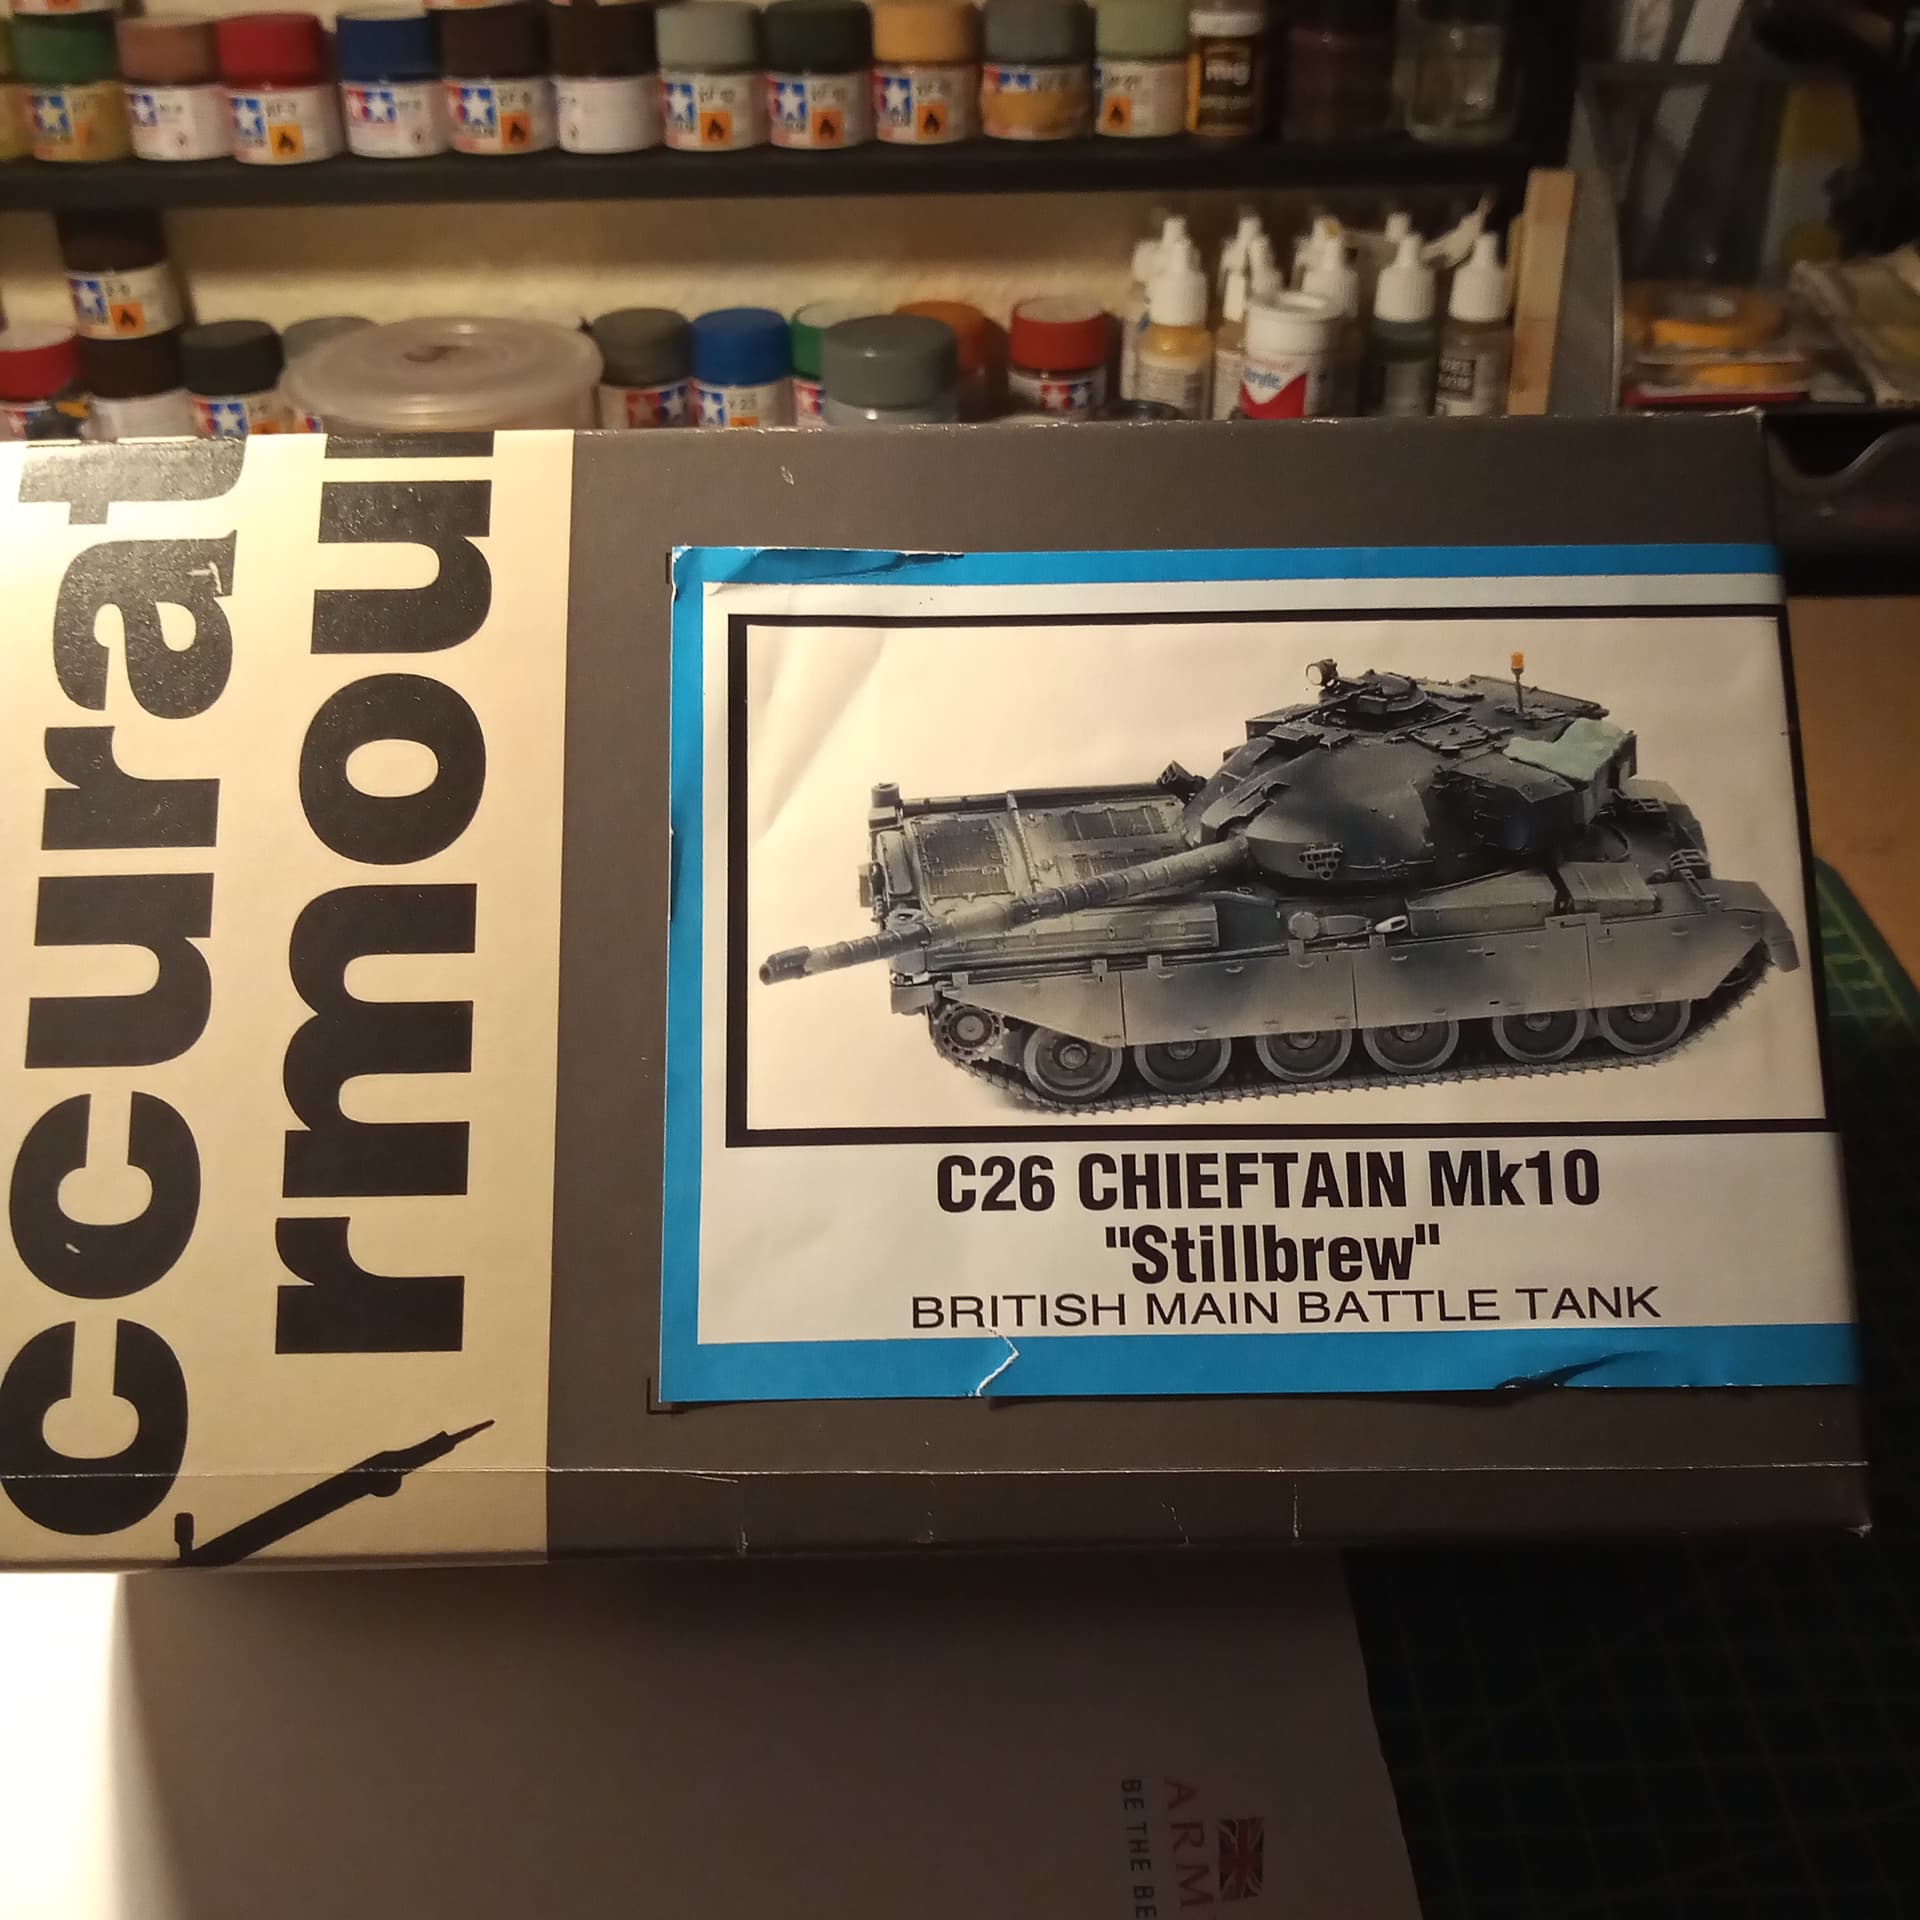
The Accurate Armour Chieftain Mk10 Stillbrew, combined with the Tamiya hull and running gear.

This will be another of my rides from as was BAOR in West Germany at the time, while I was based in Detmold. The call sign will either be B Sqn 22 or 31. Not totally sure on the finish, may possibly do it as a BATUS wagon…

I sourced this as a partially started build with the Tamiya hull already joined to the AA upper, and the majority of the running gear positioned.

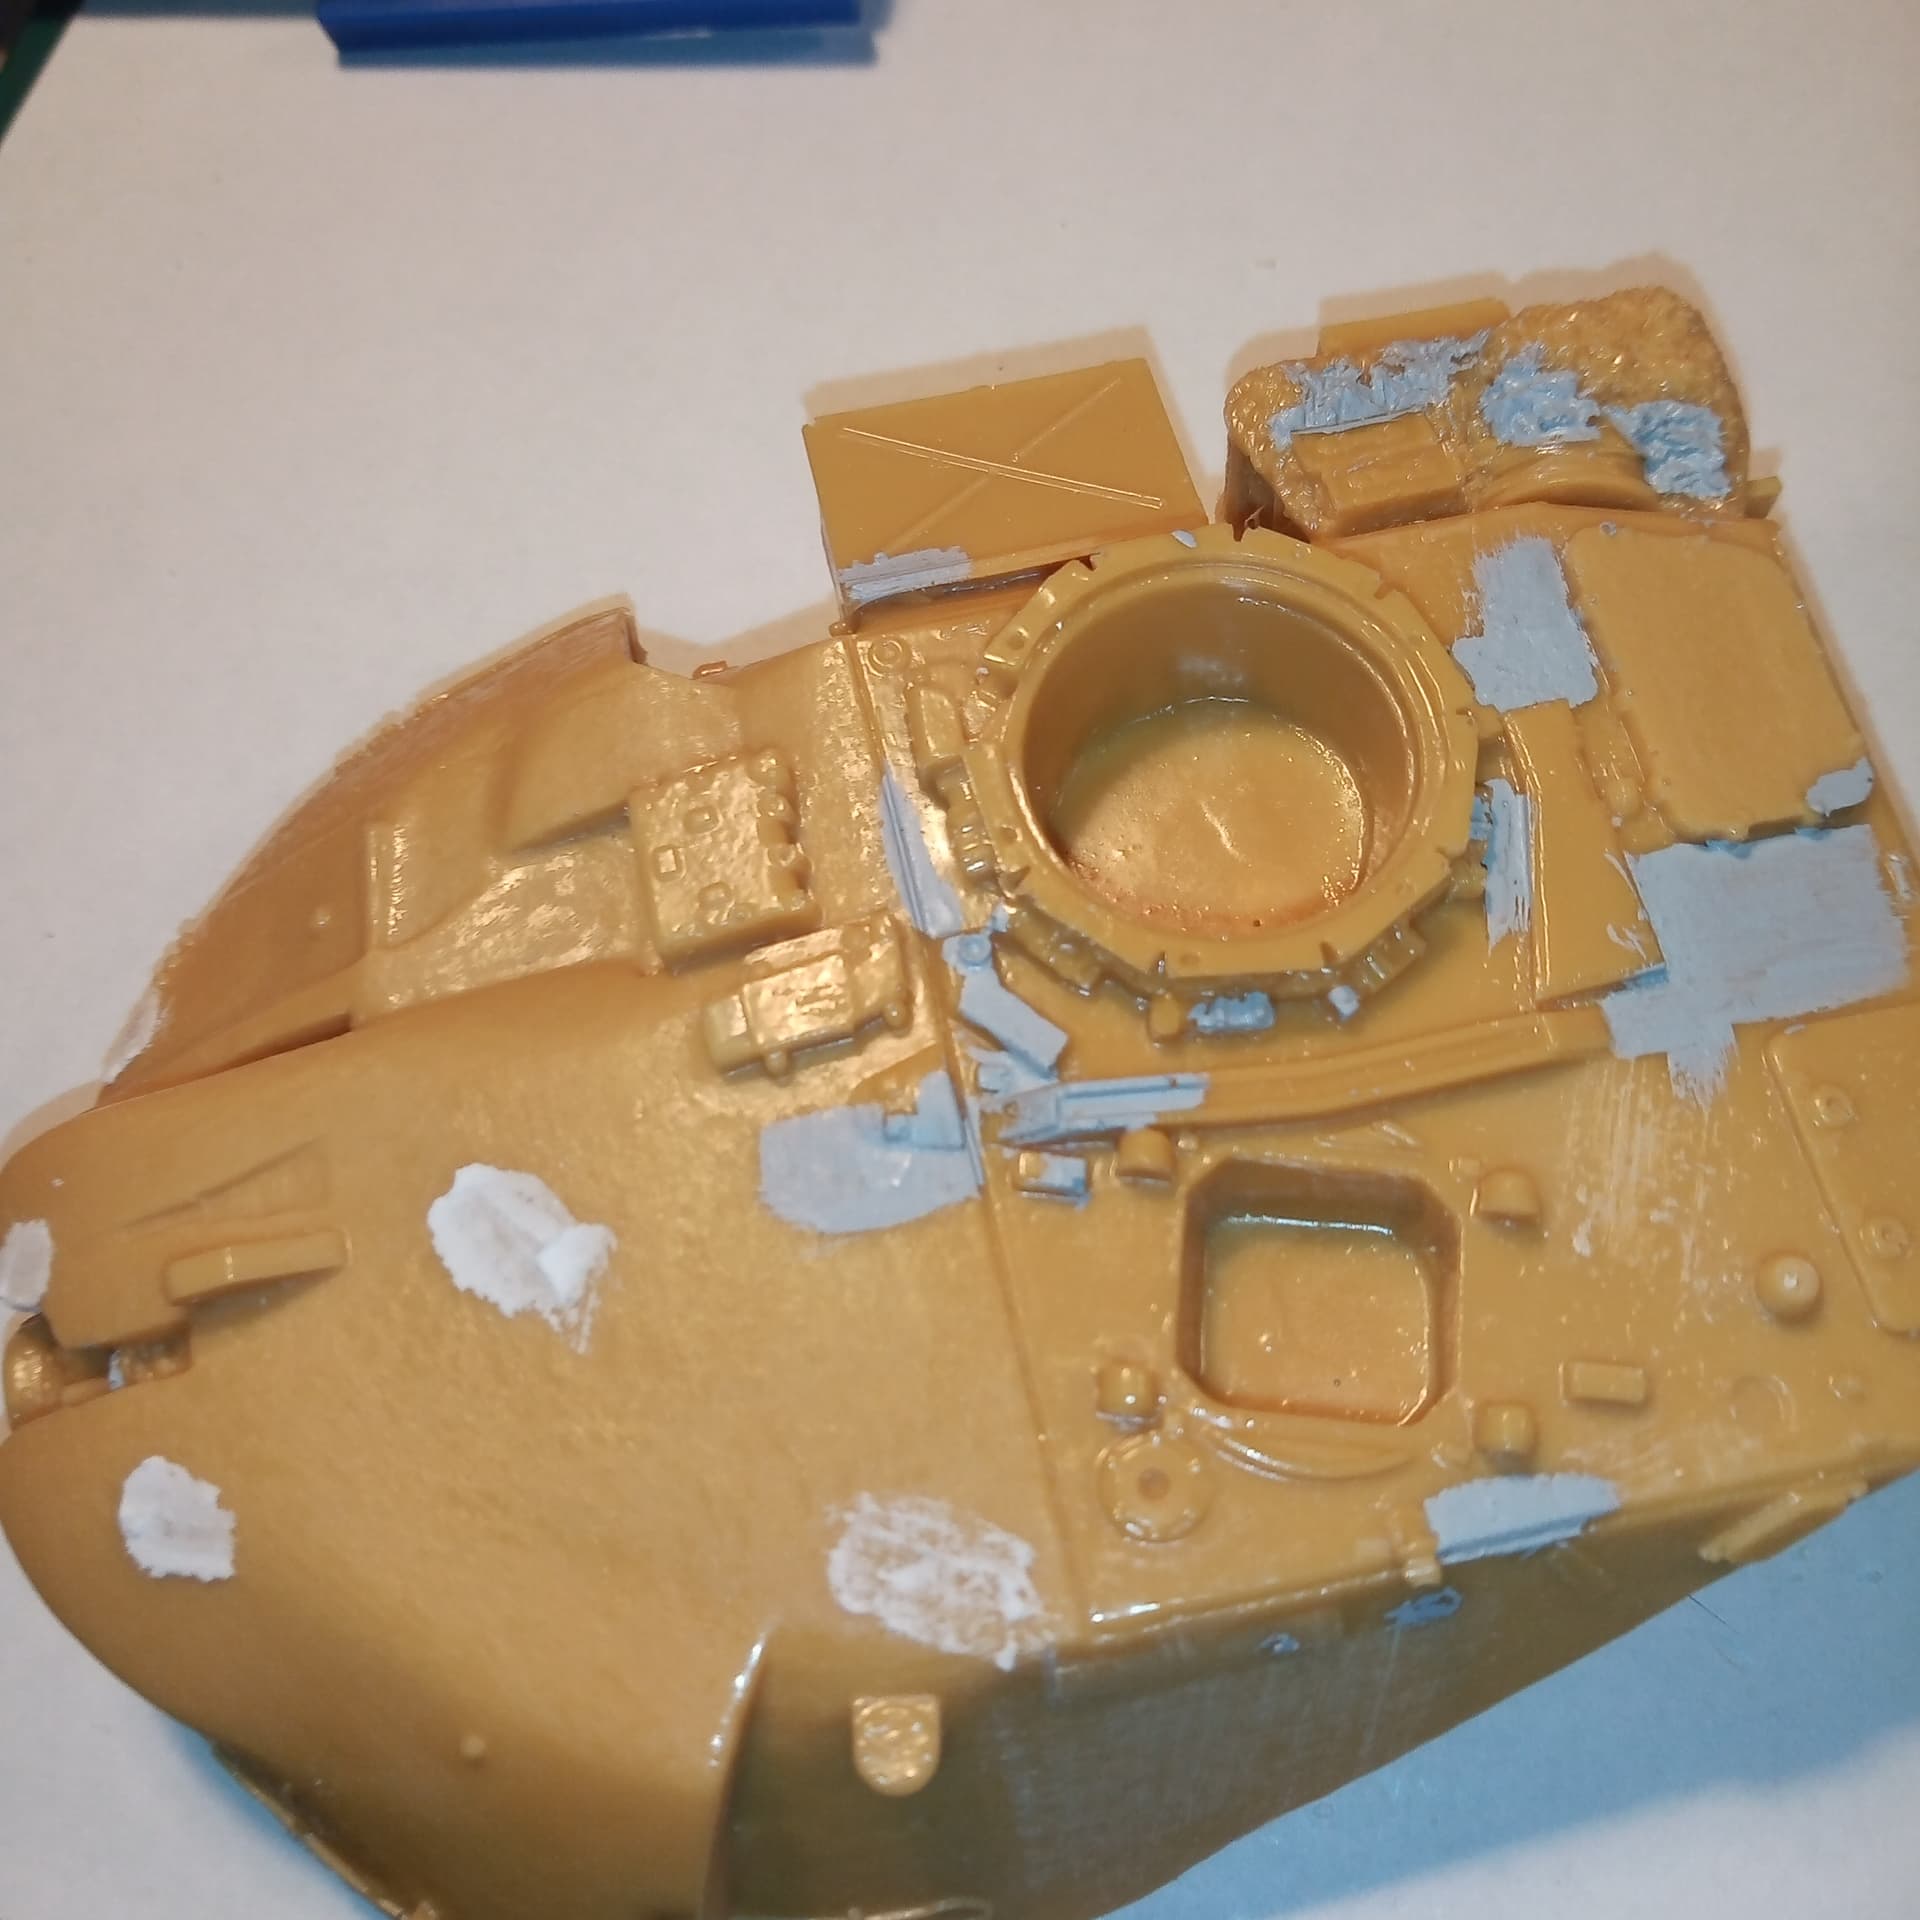
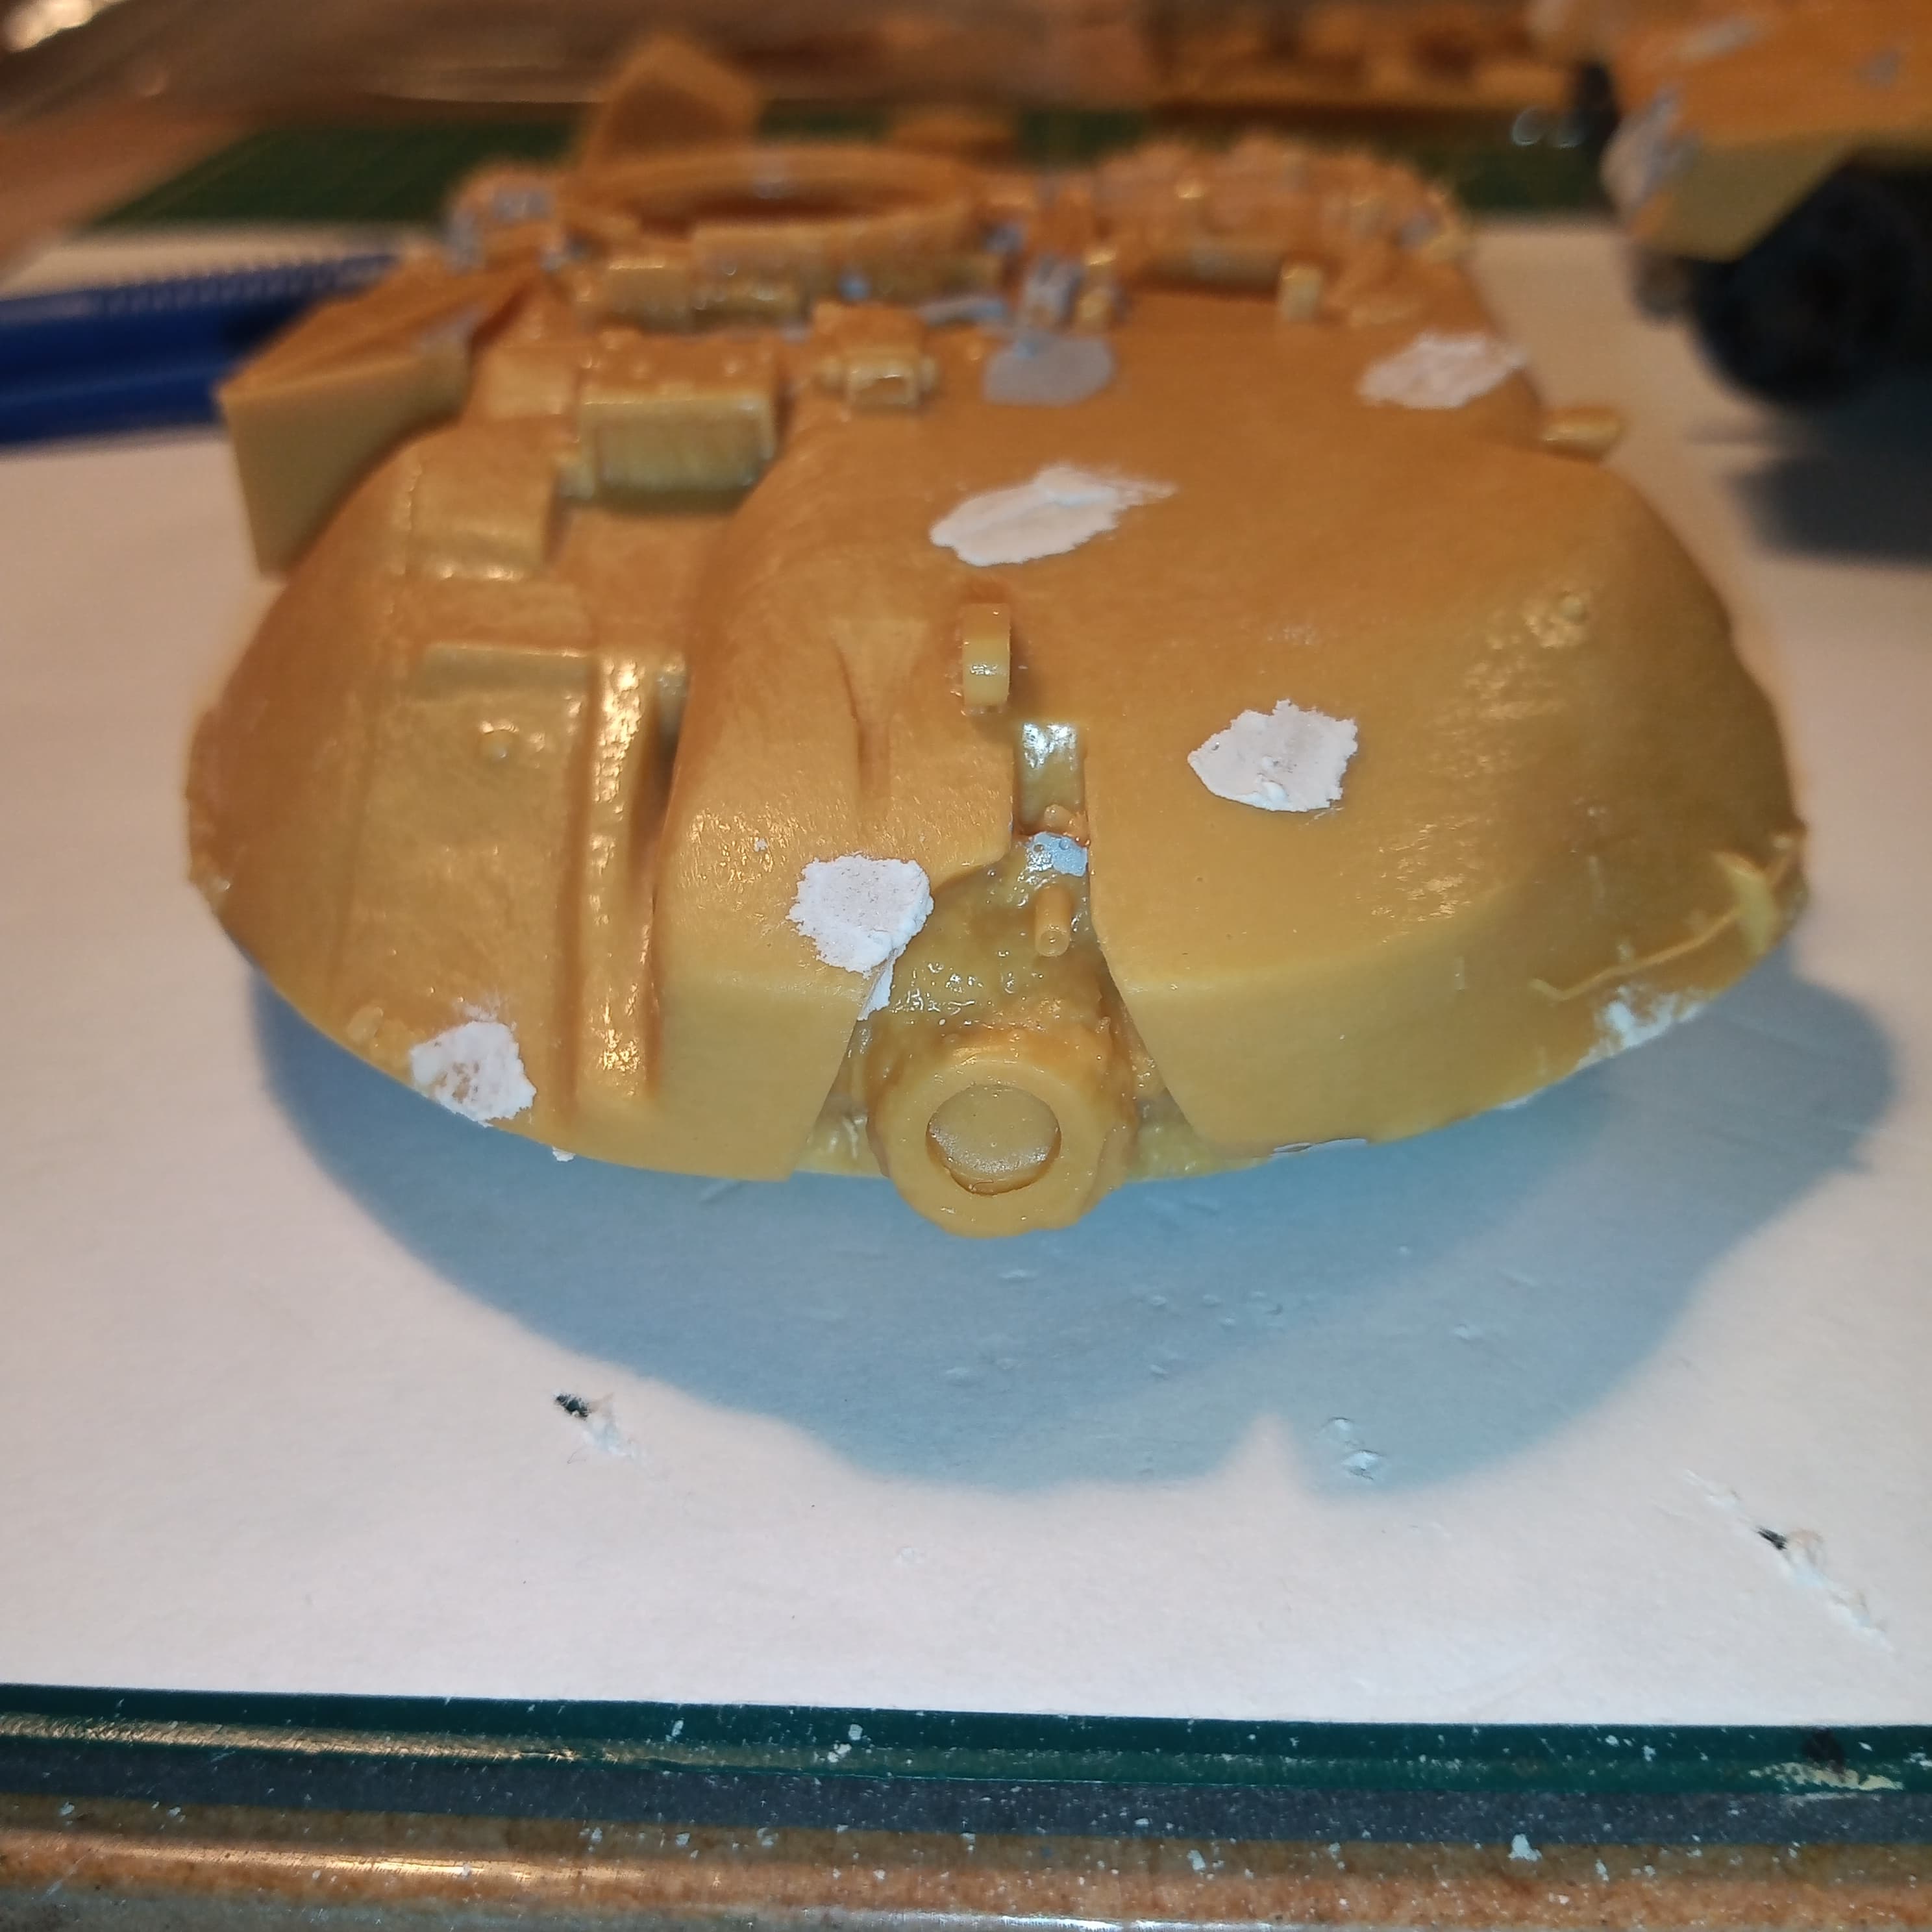
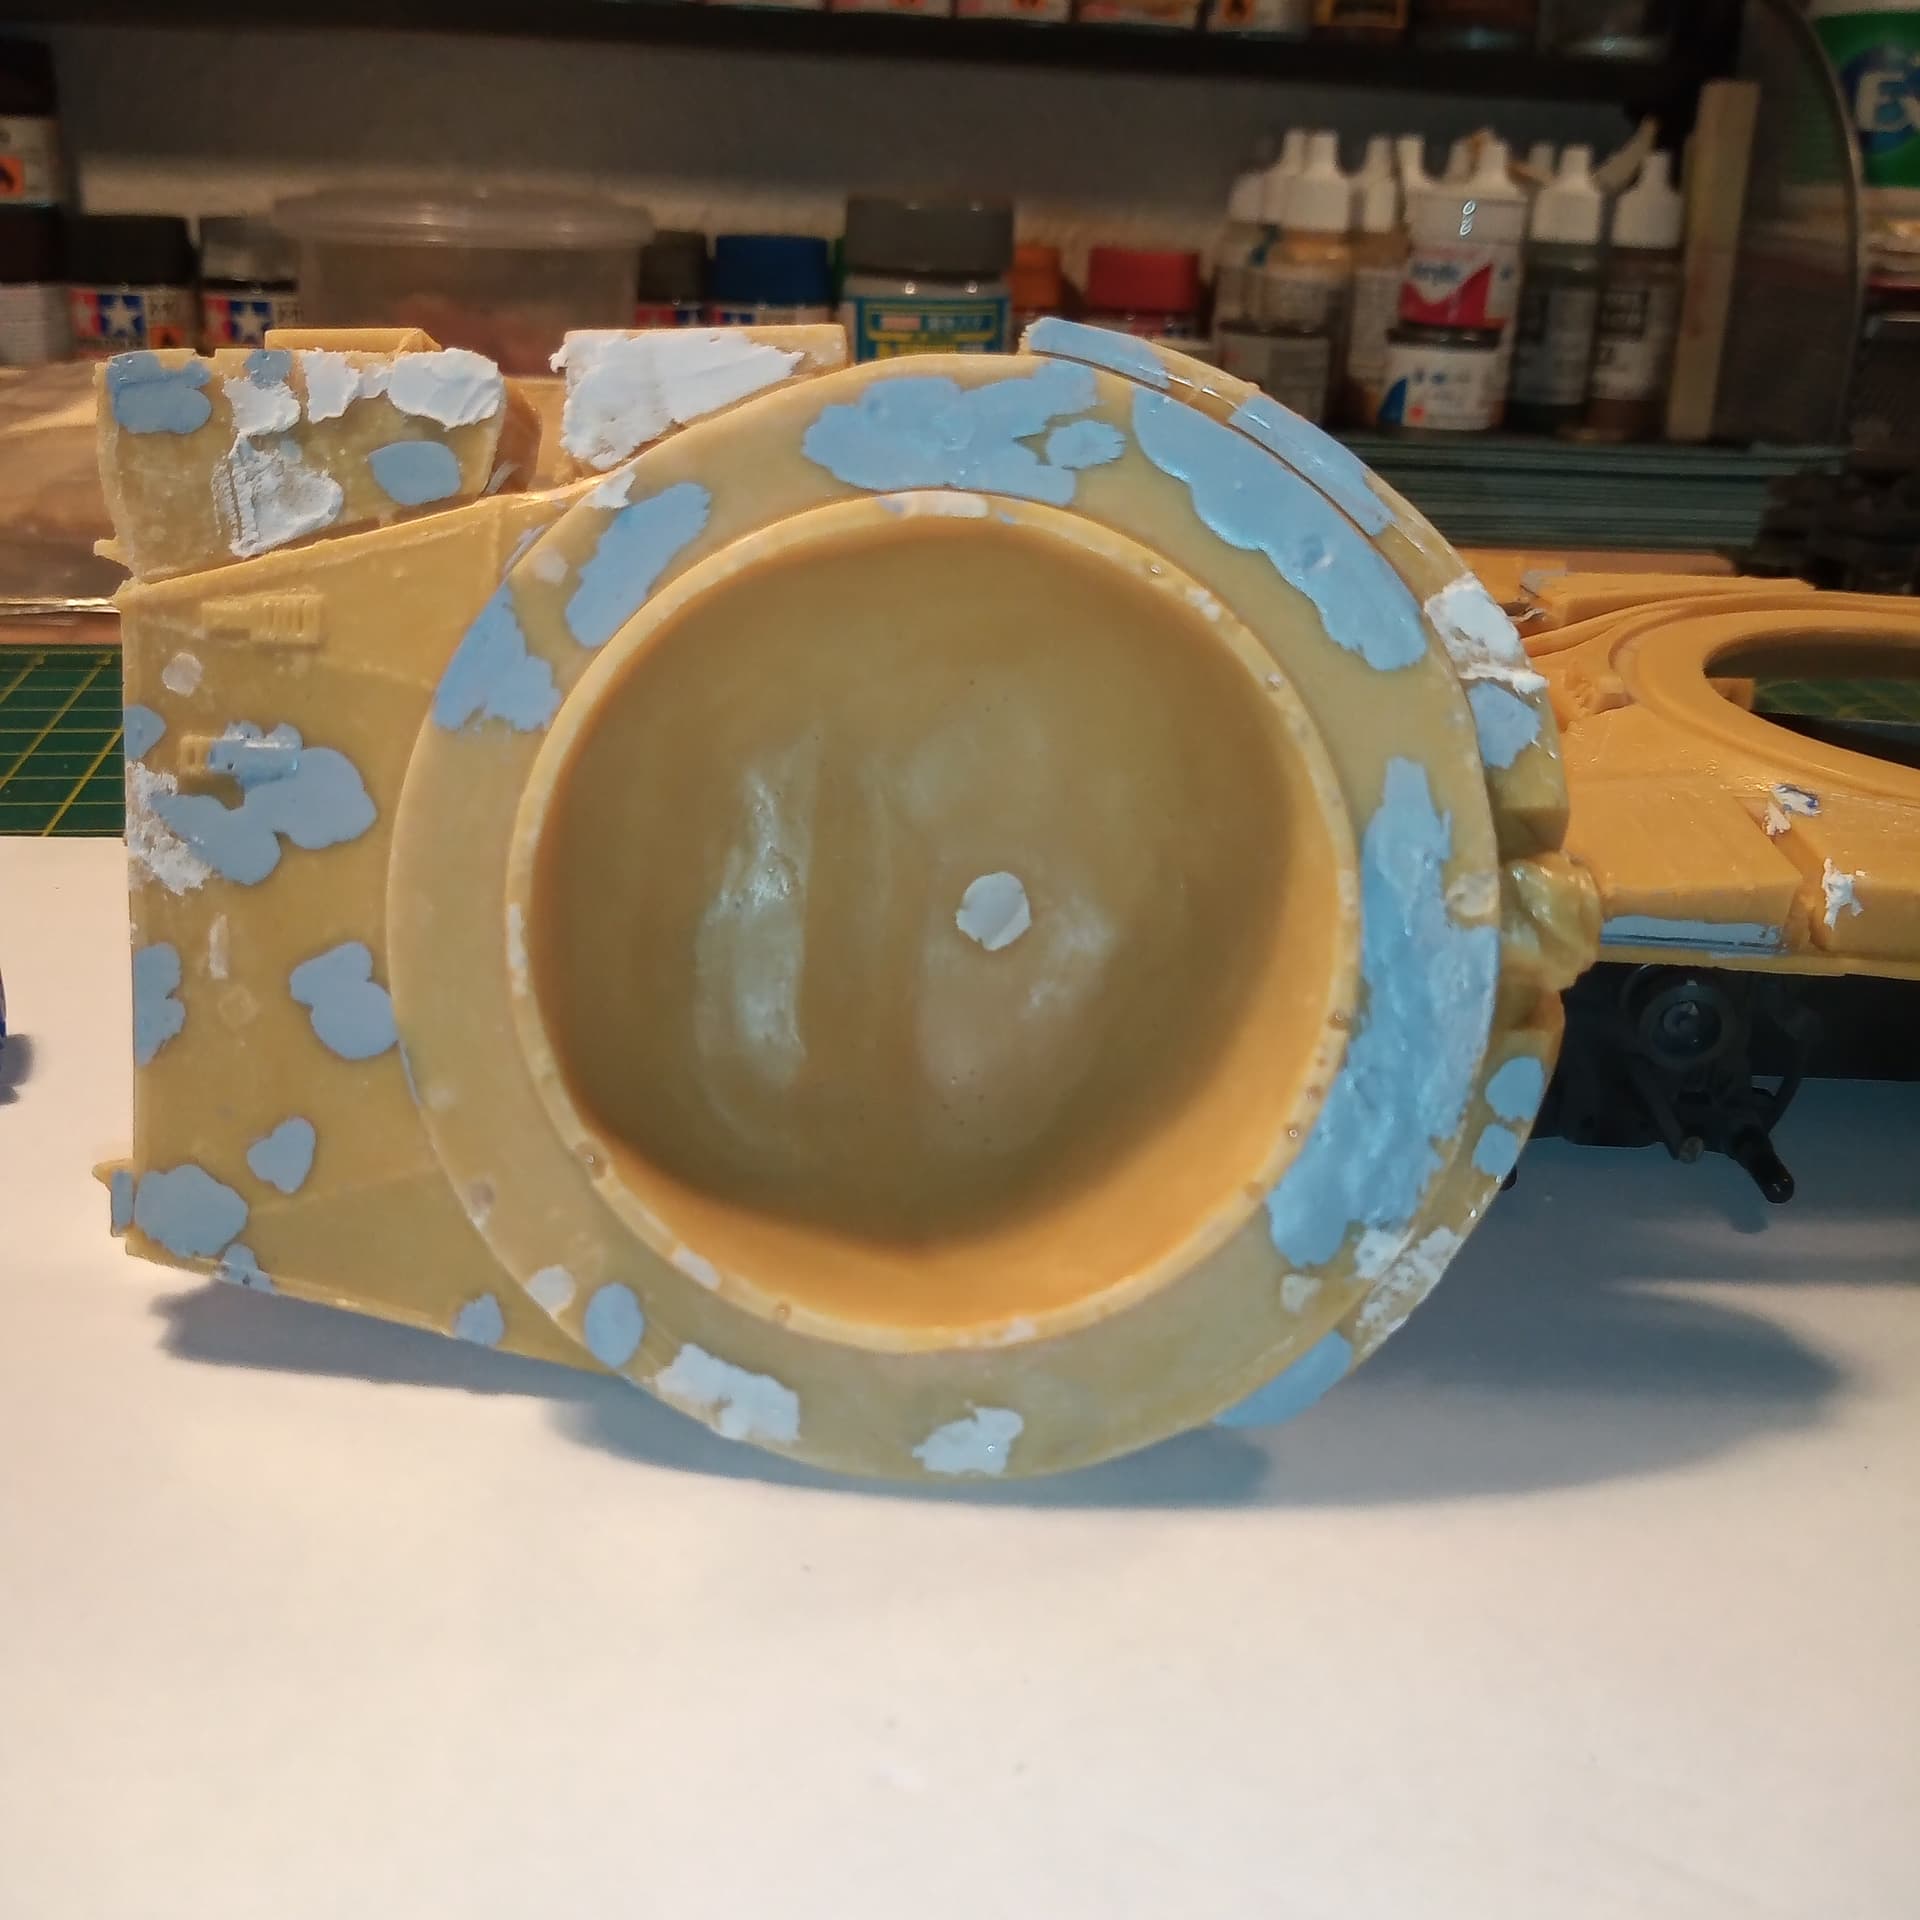
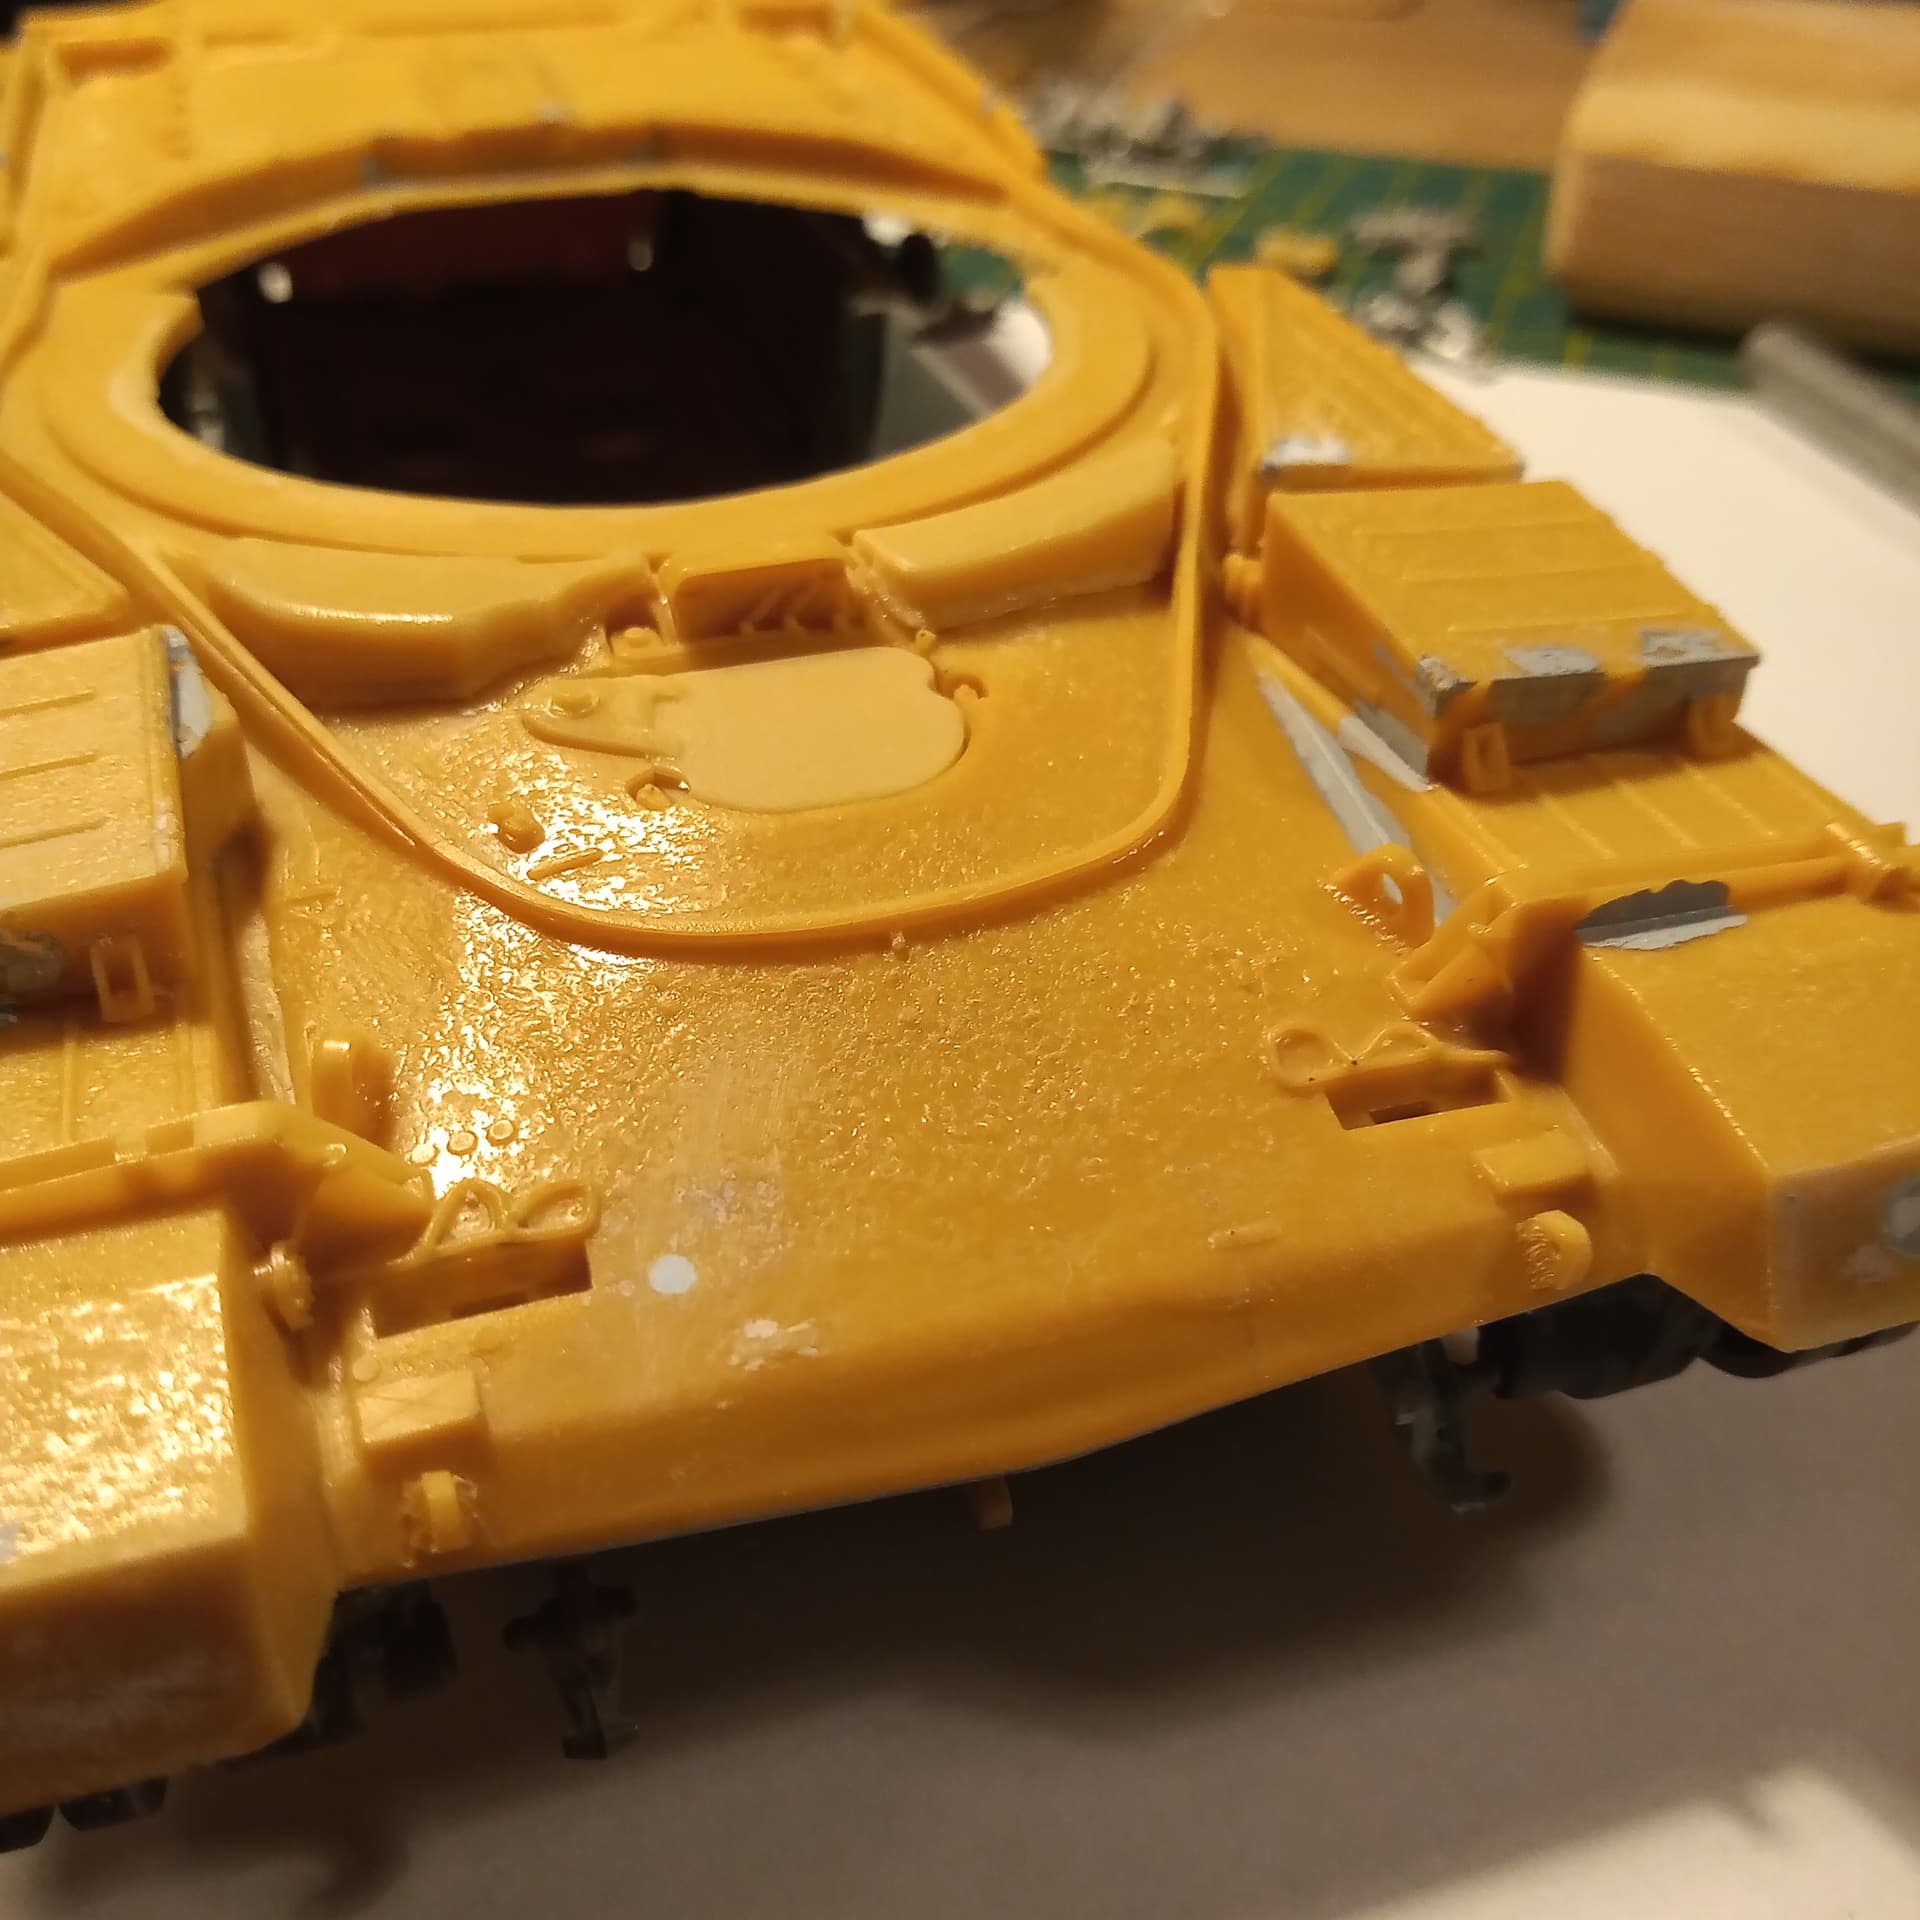
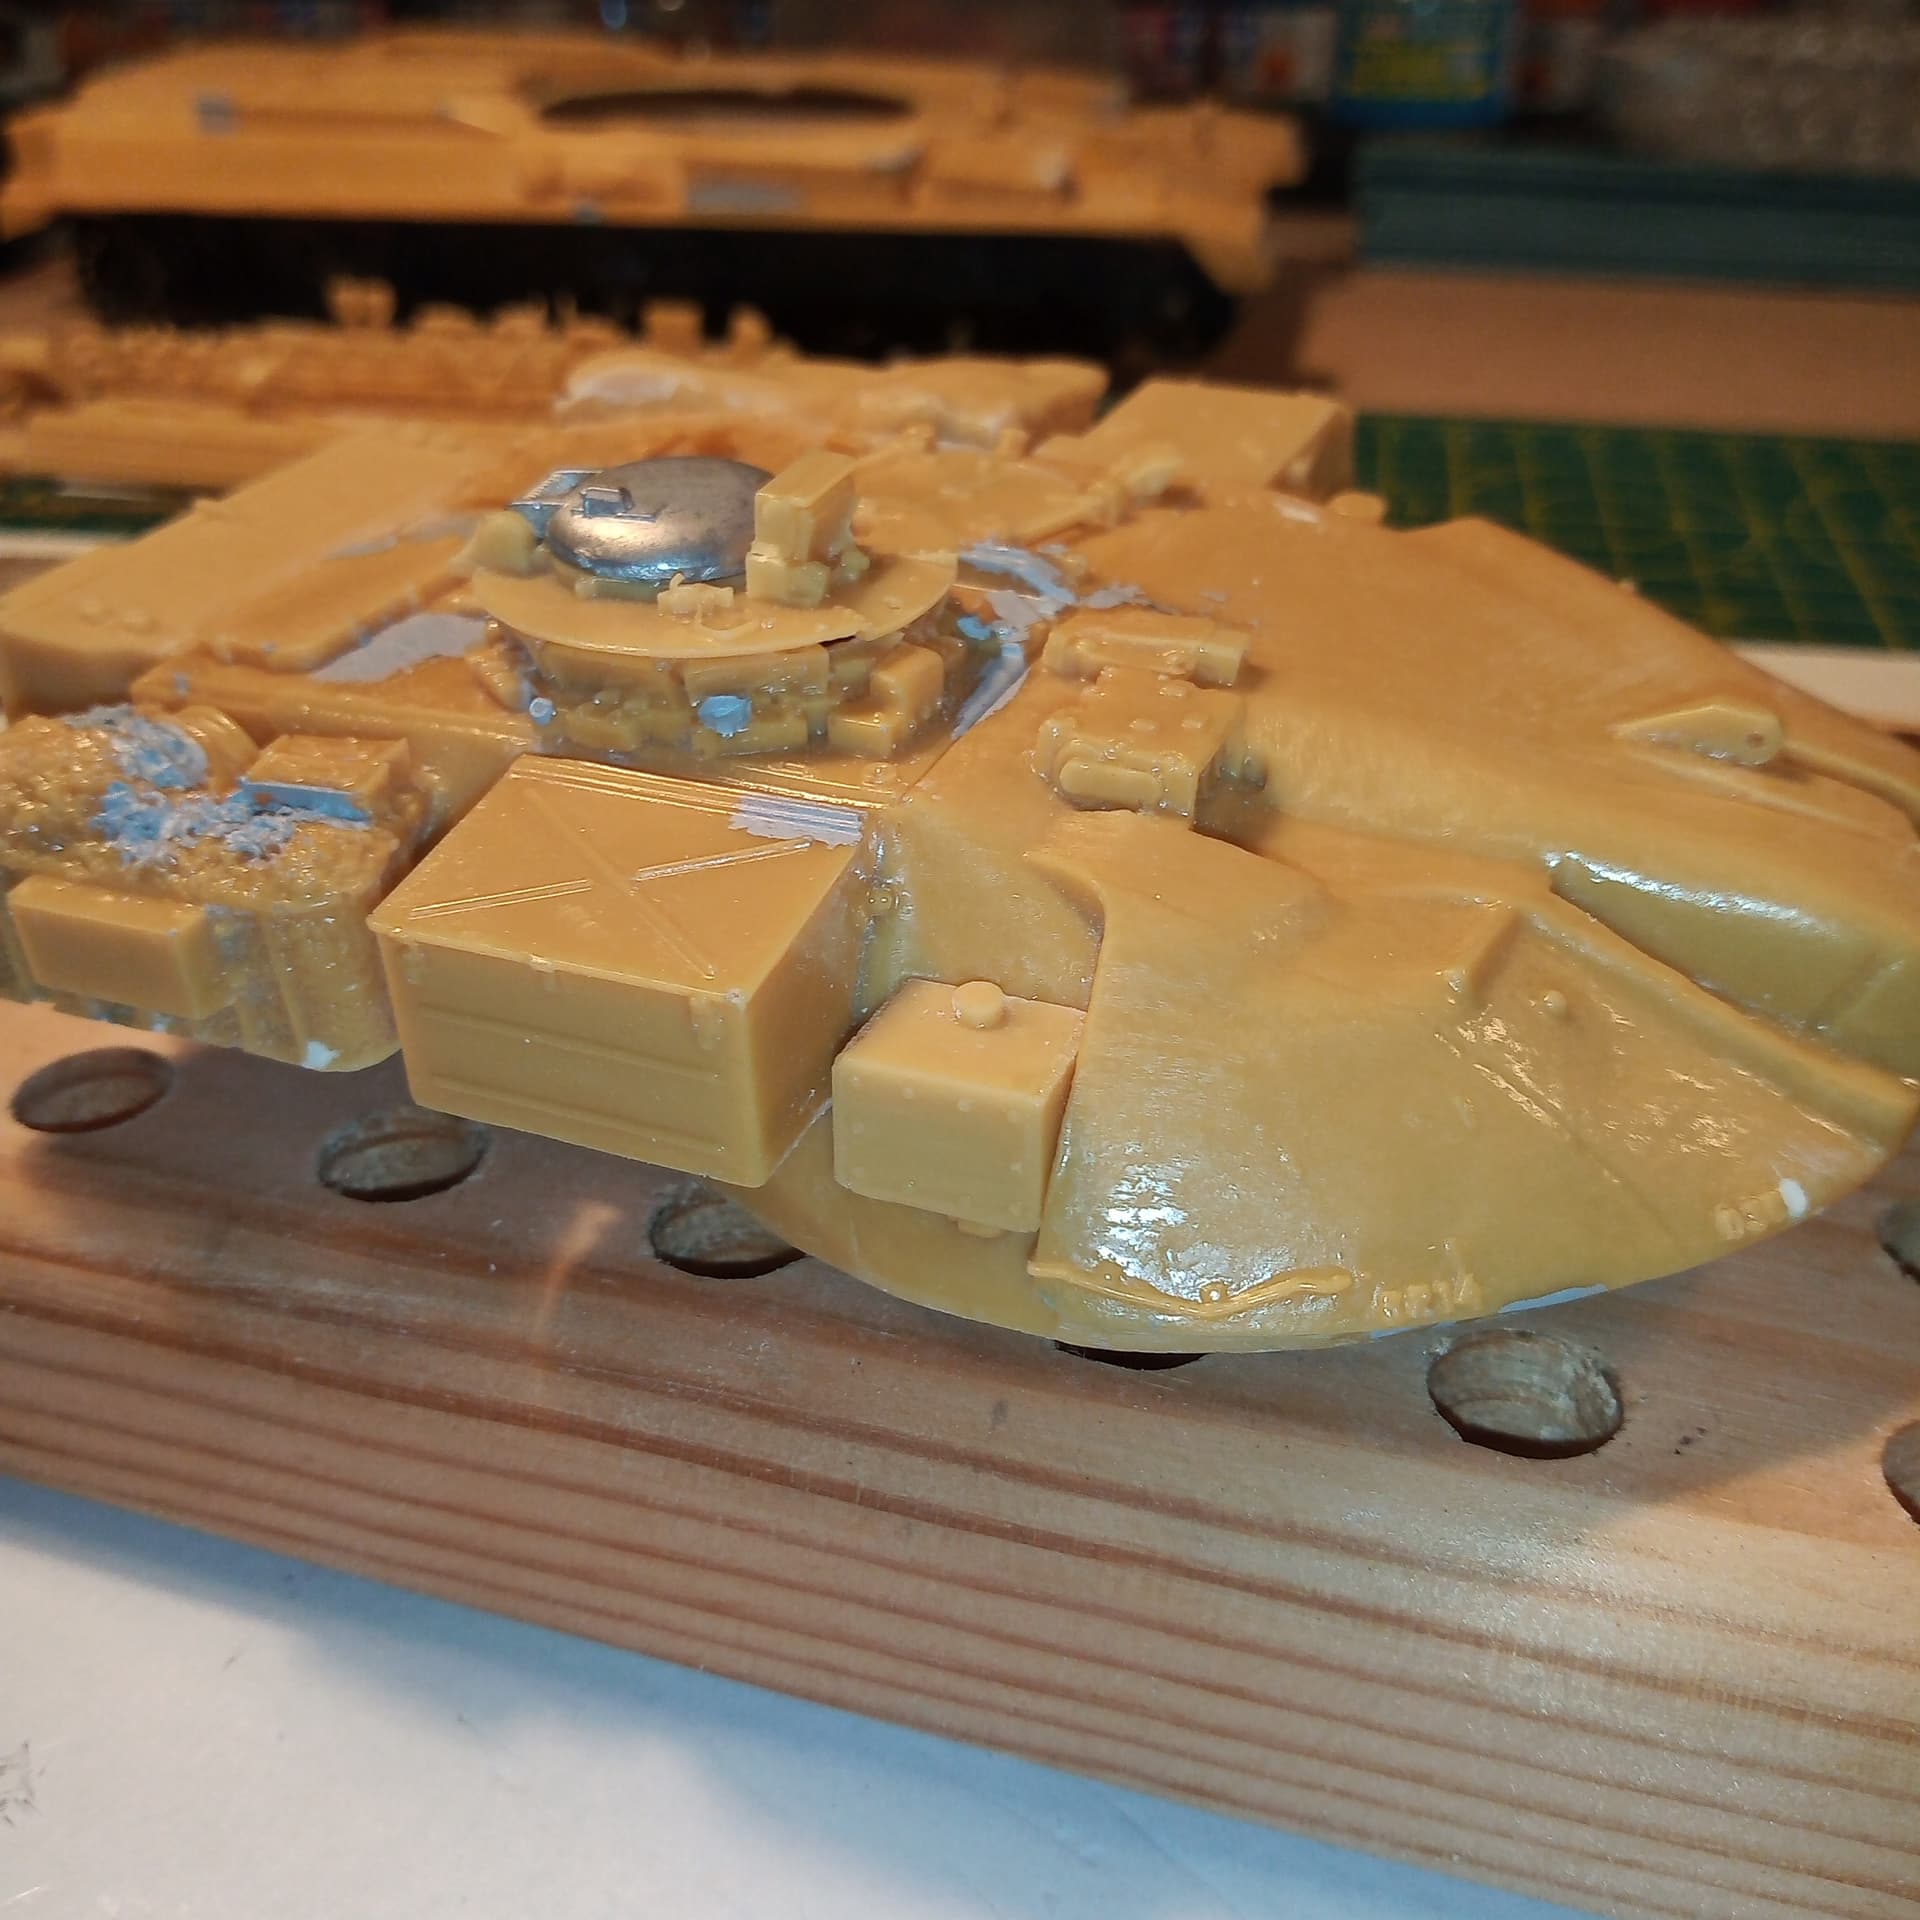
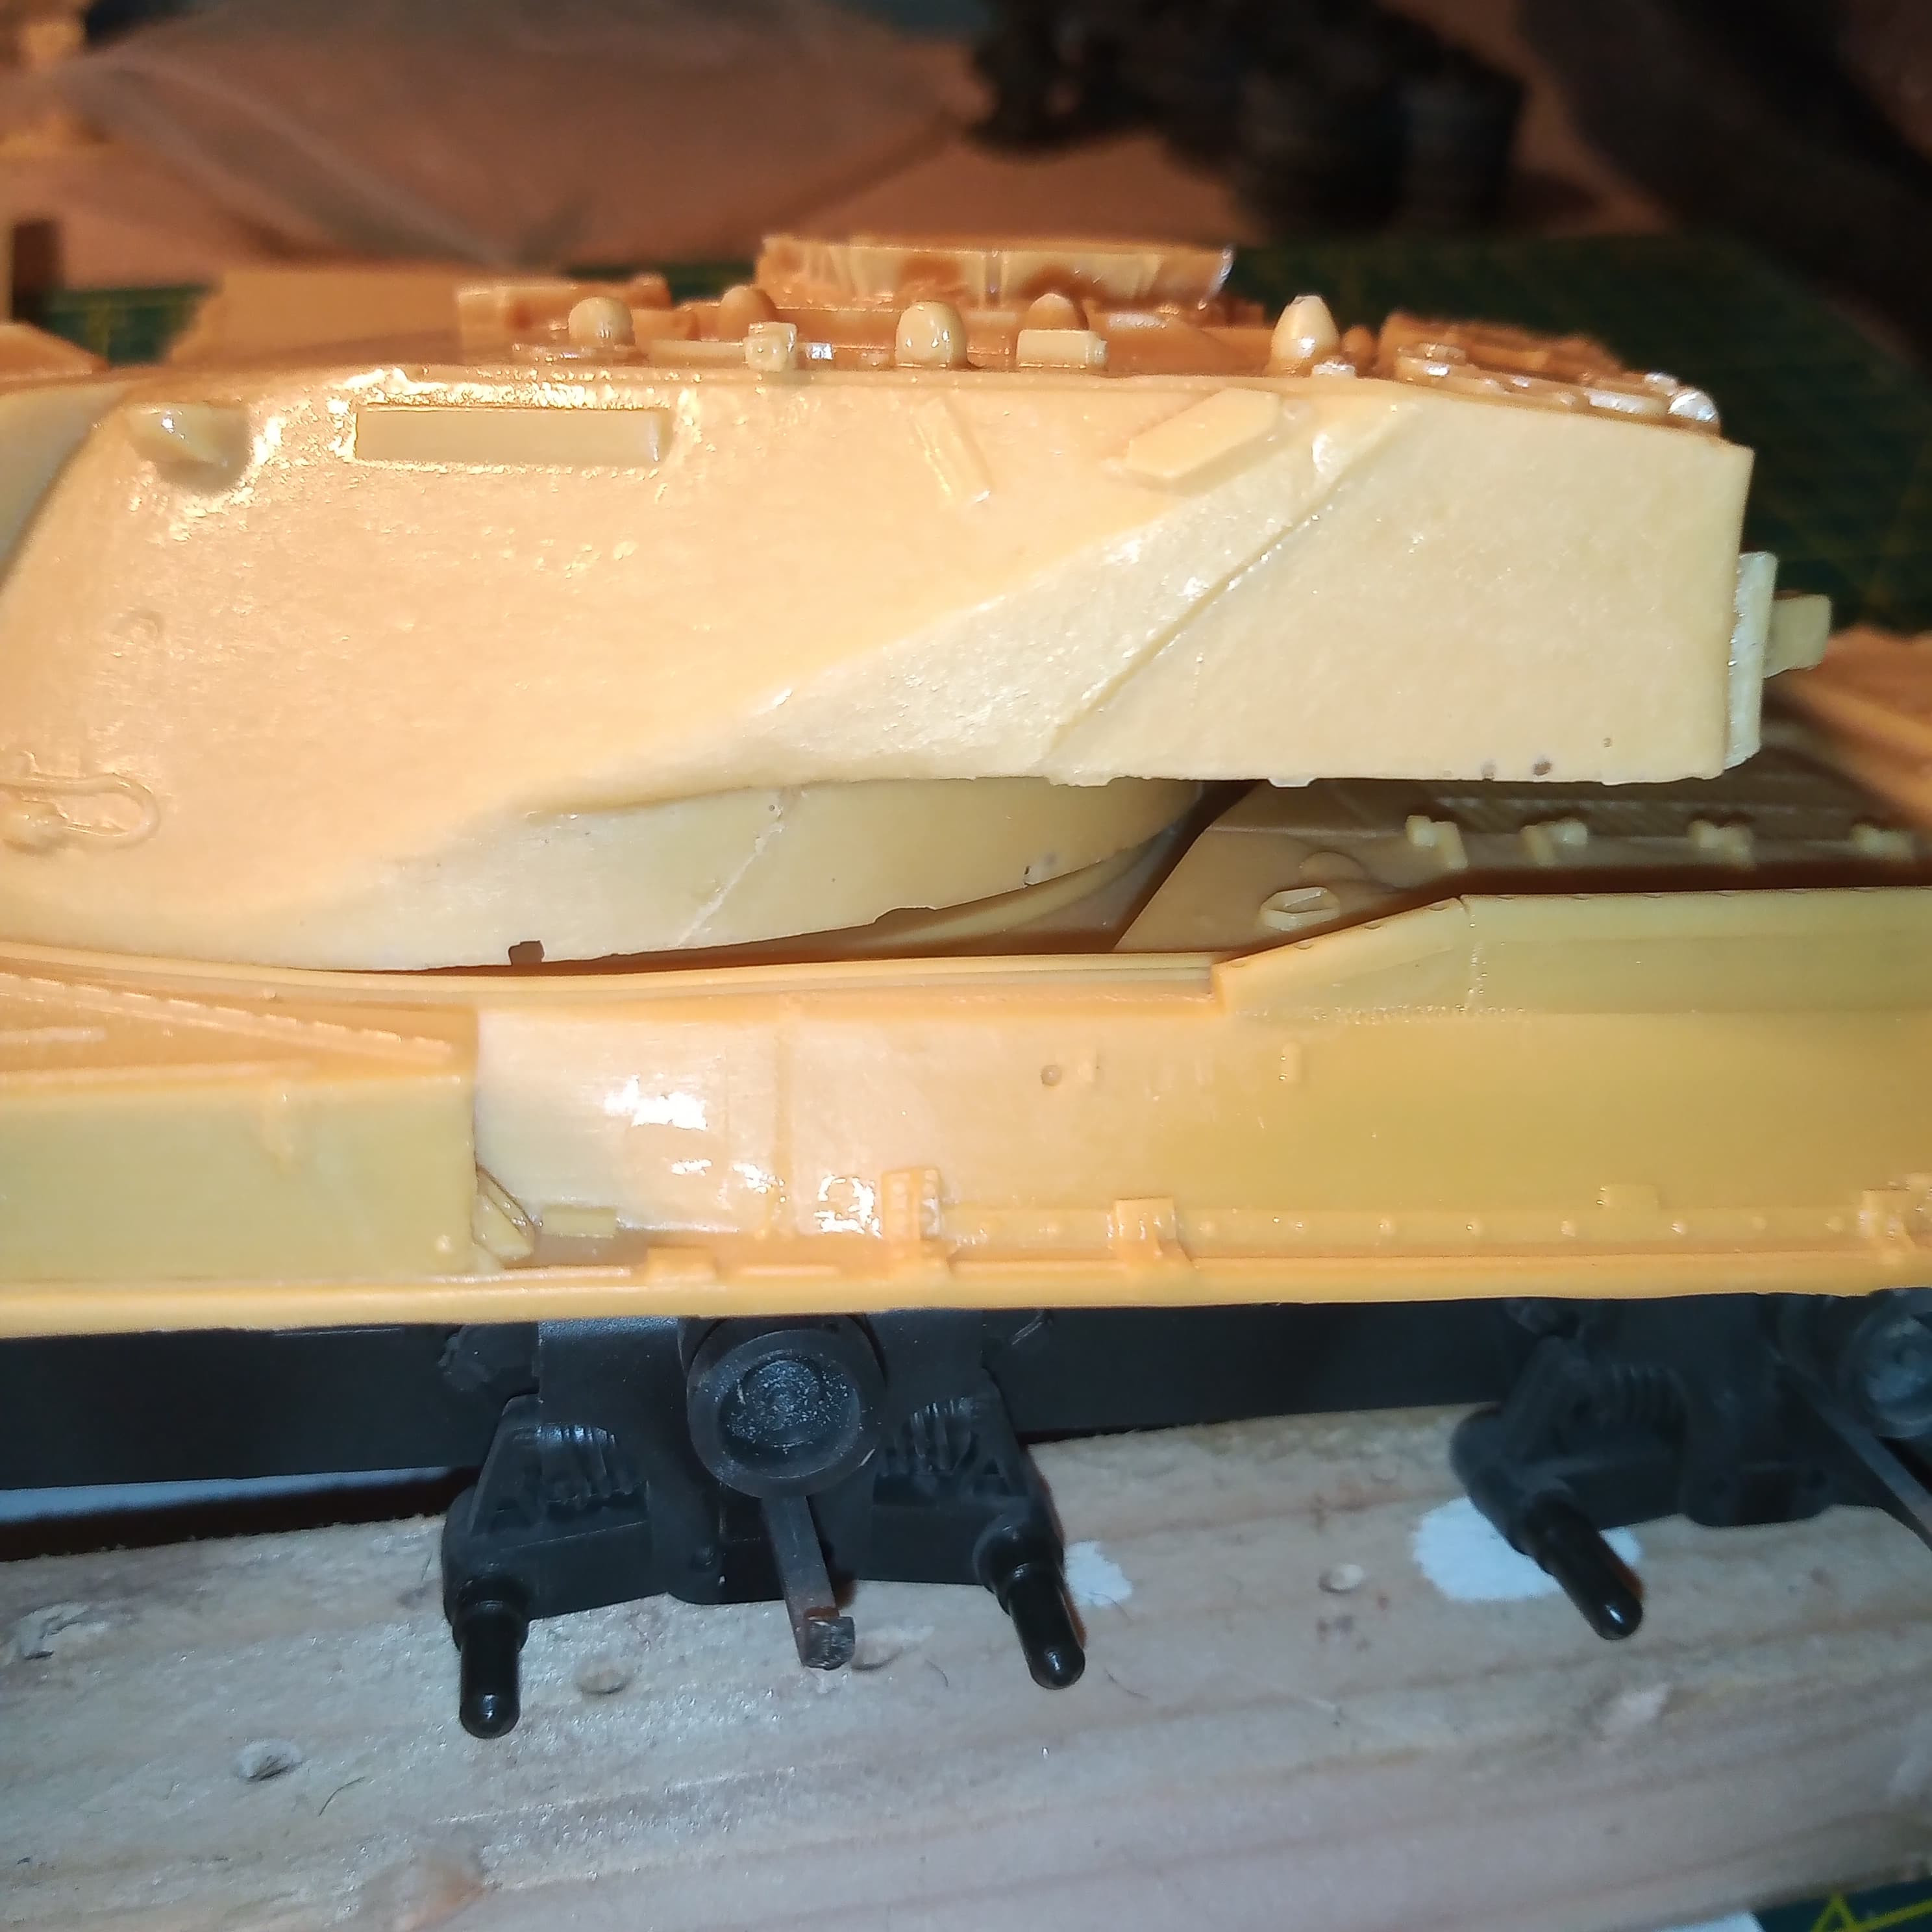
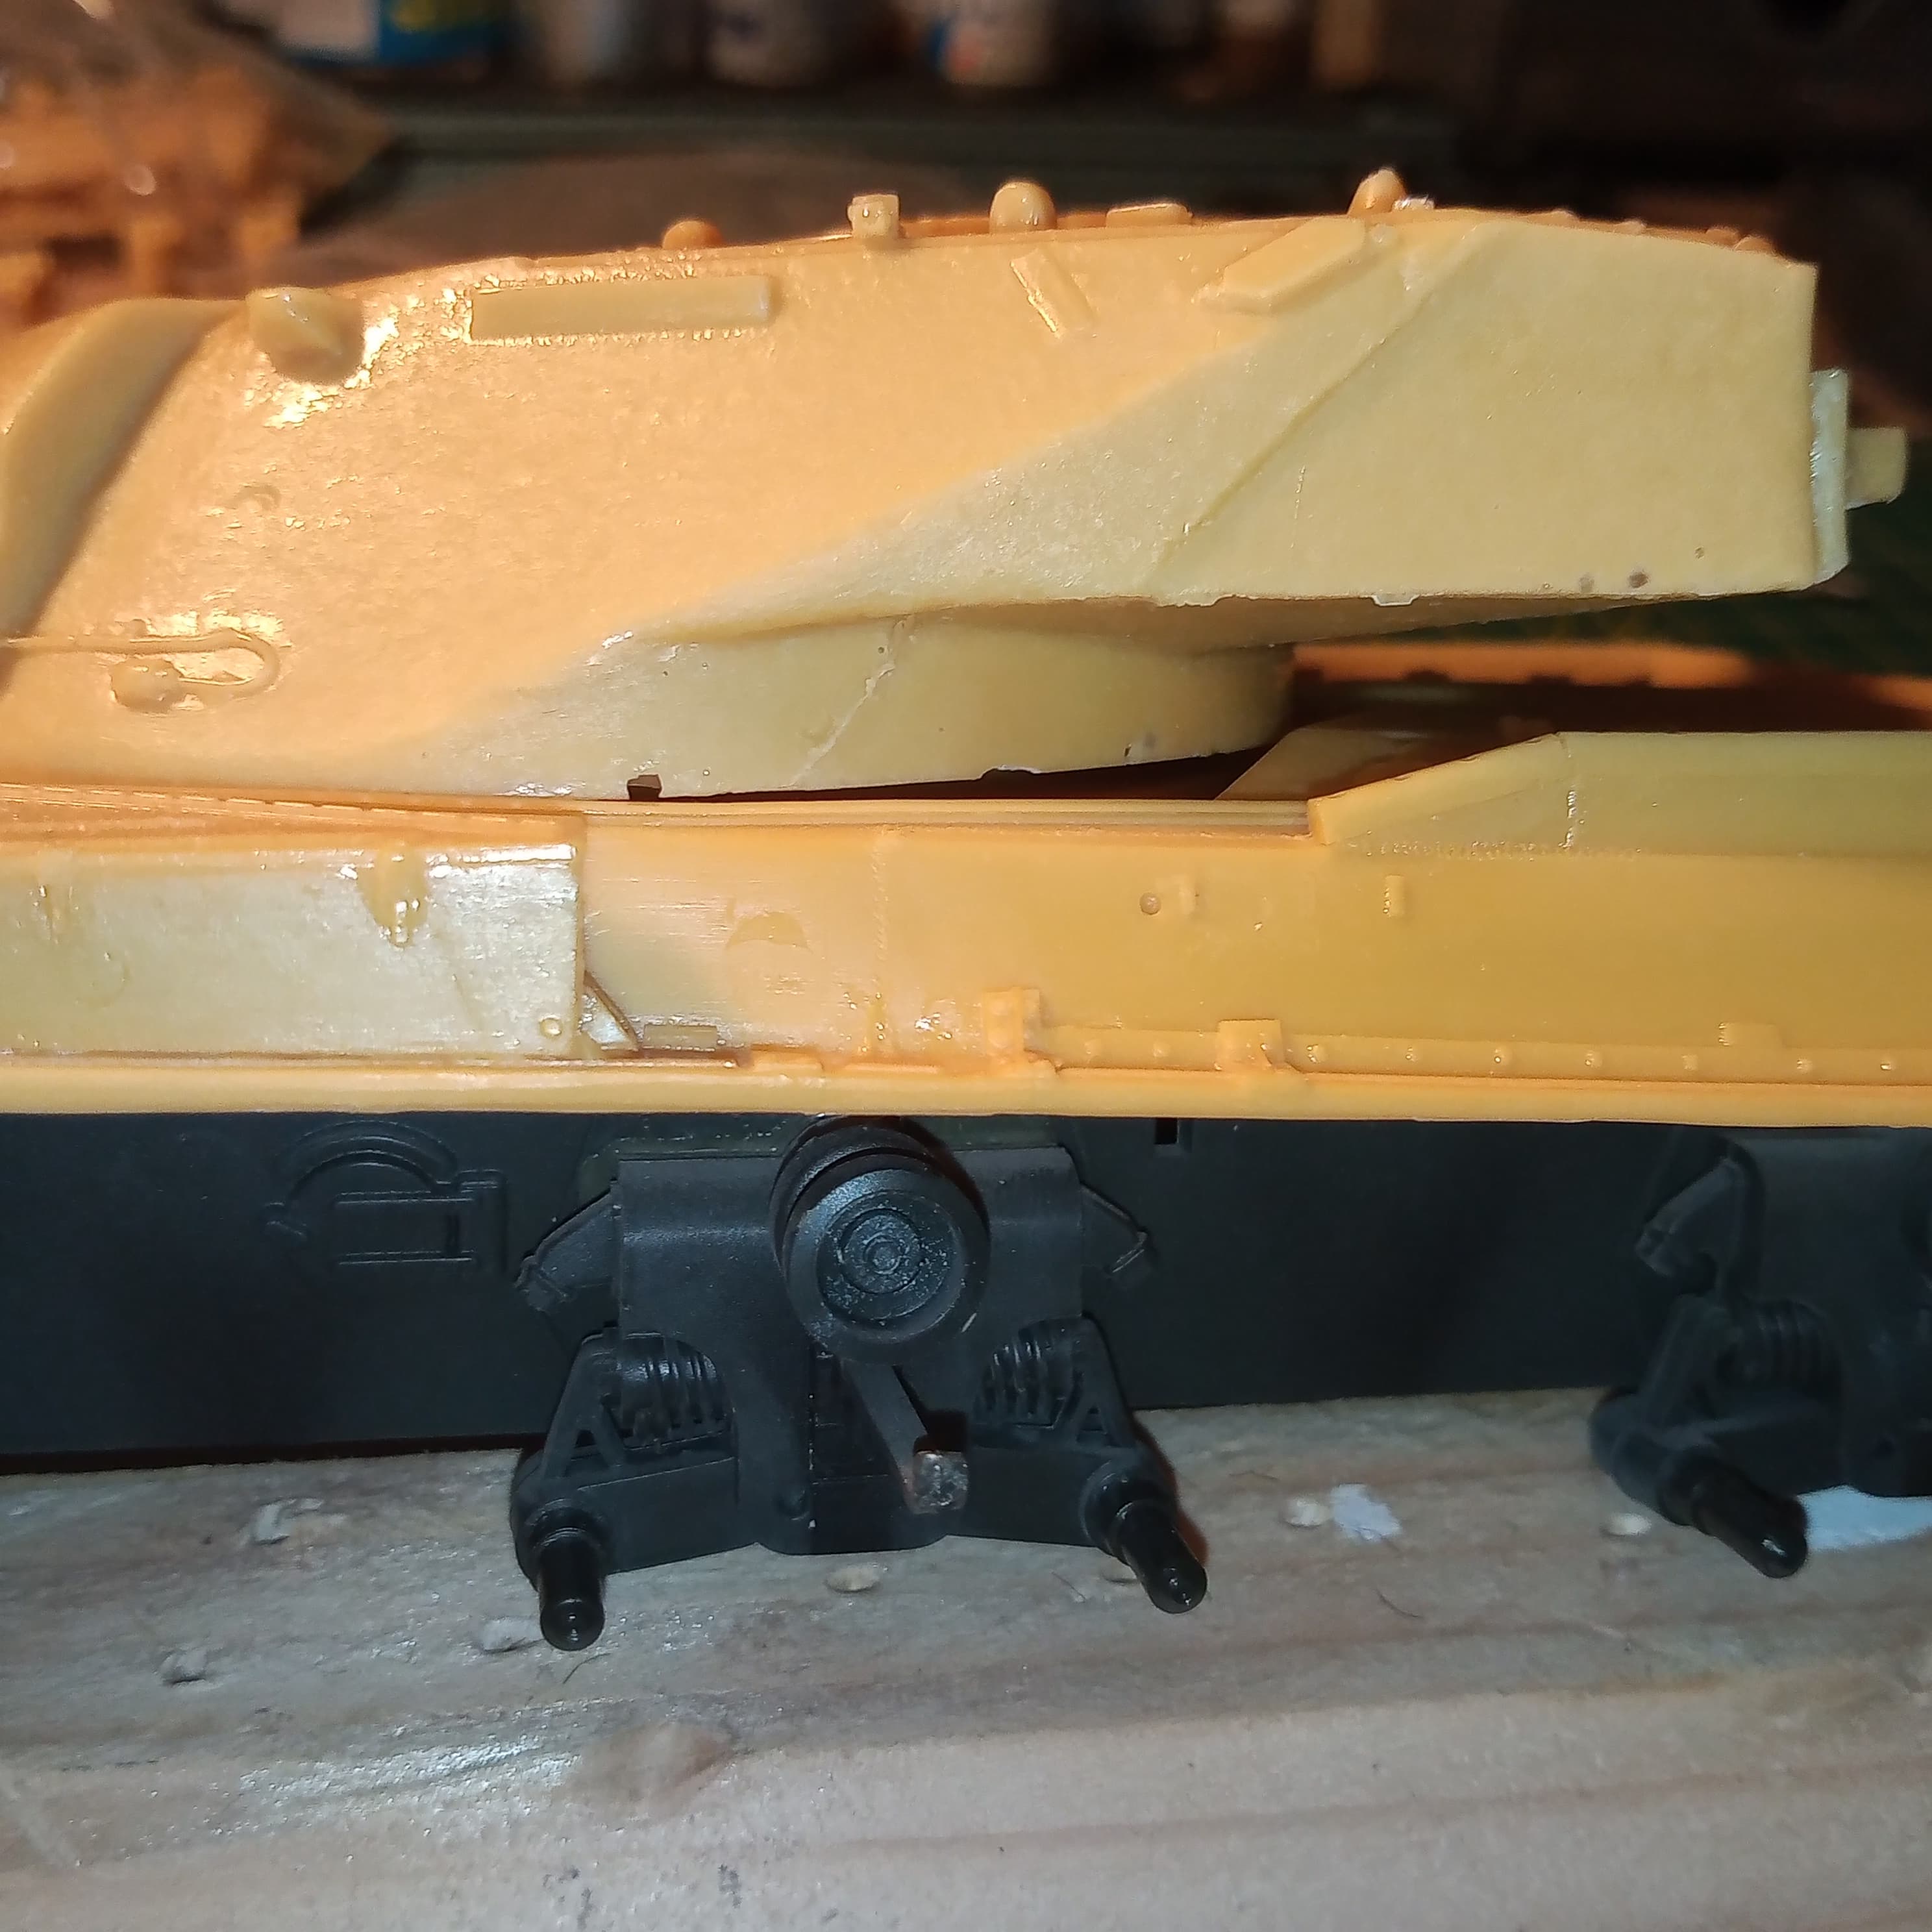
This is one of the original castings and compared to how they produce the pieces now in grey resin, this does show its age. The detailing looks nice and well defined but there are an abundance of small holes and air pockets all over the main upper hull and turret and indeed a lot of the other additional parts are likewise suffering in the same way.
However, they are nothing that isn’t fixable with some time and care.

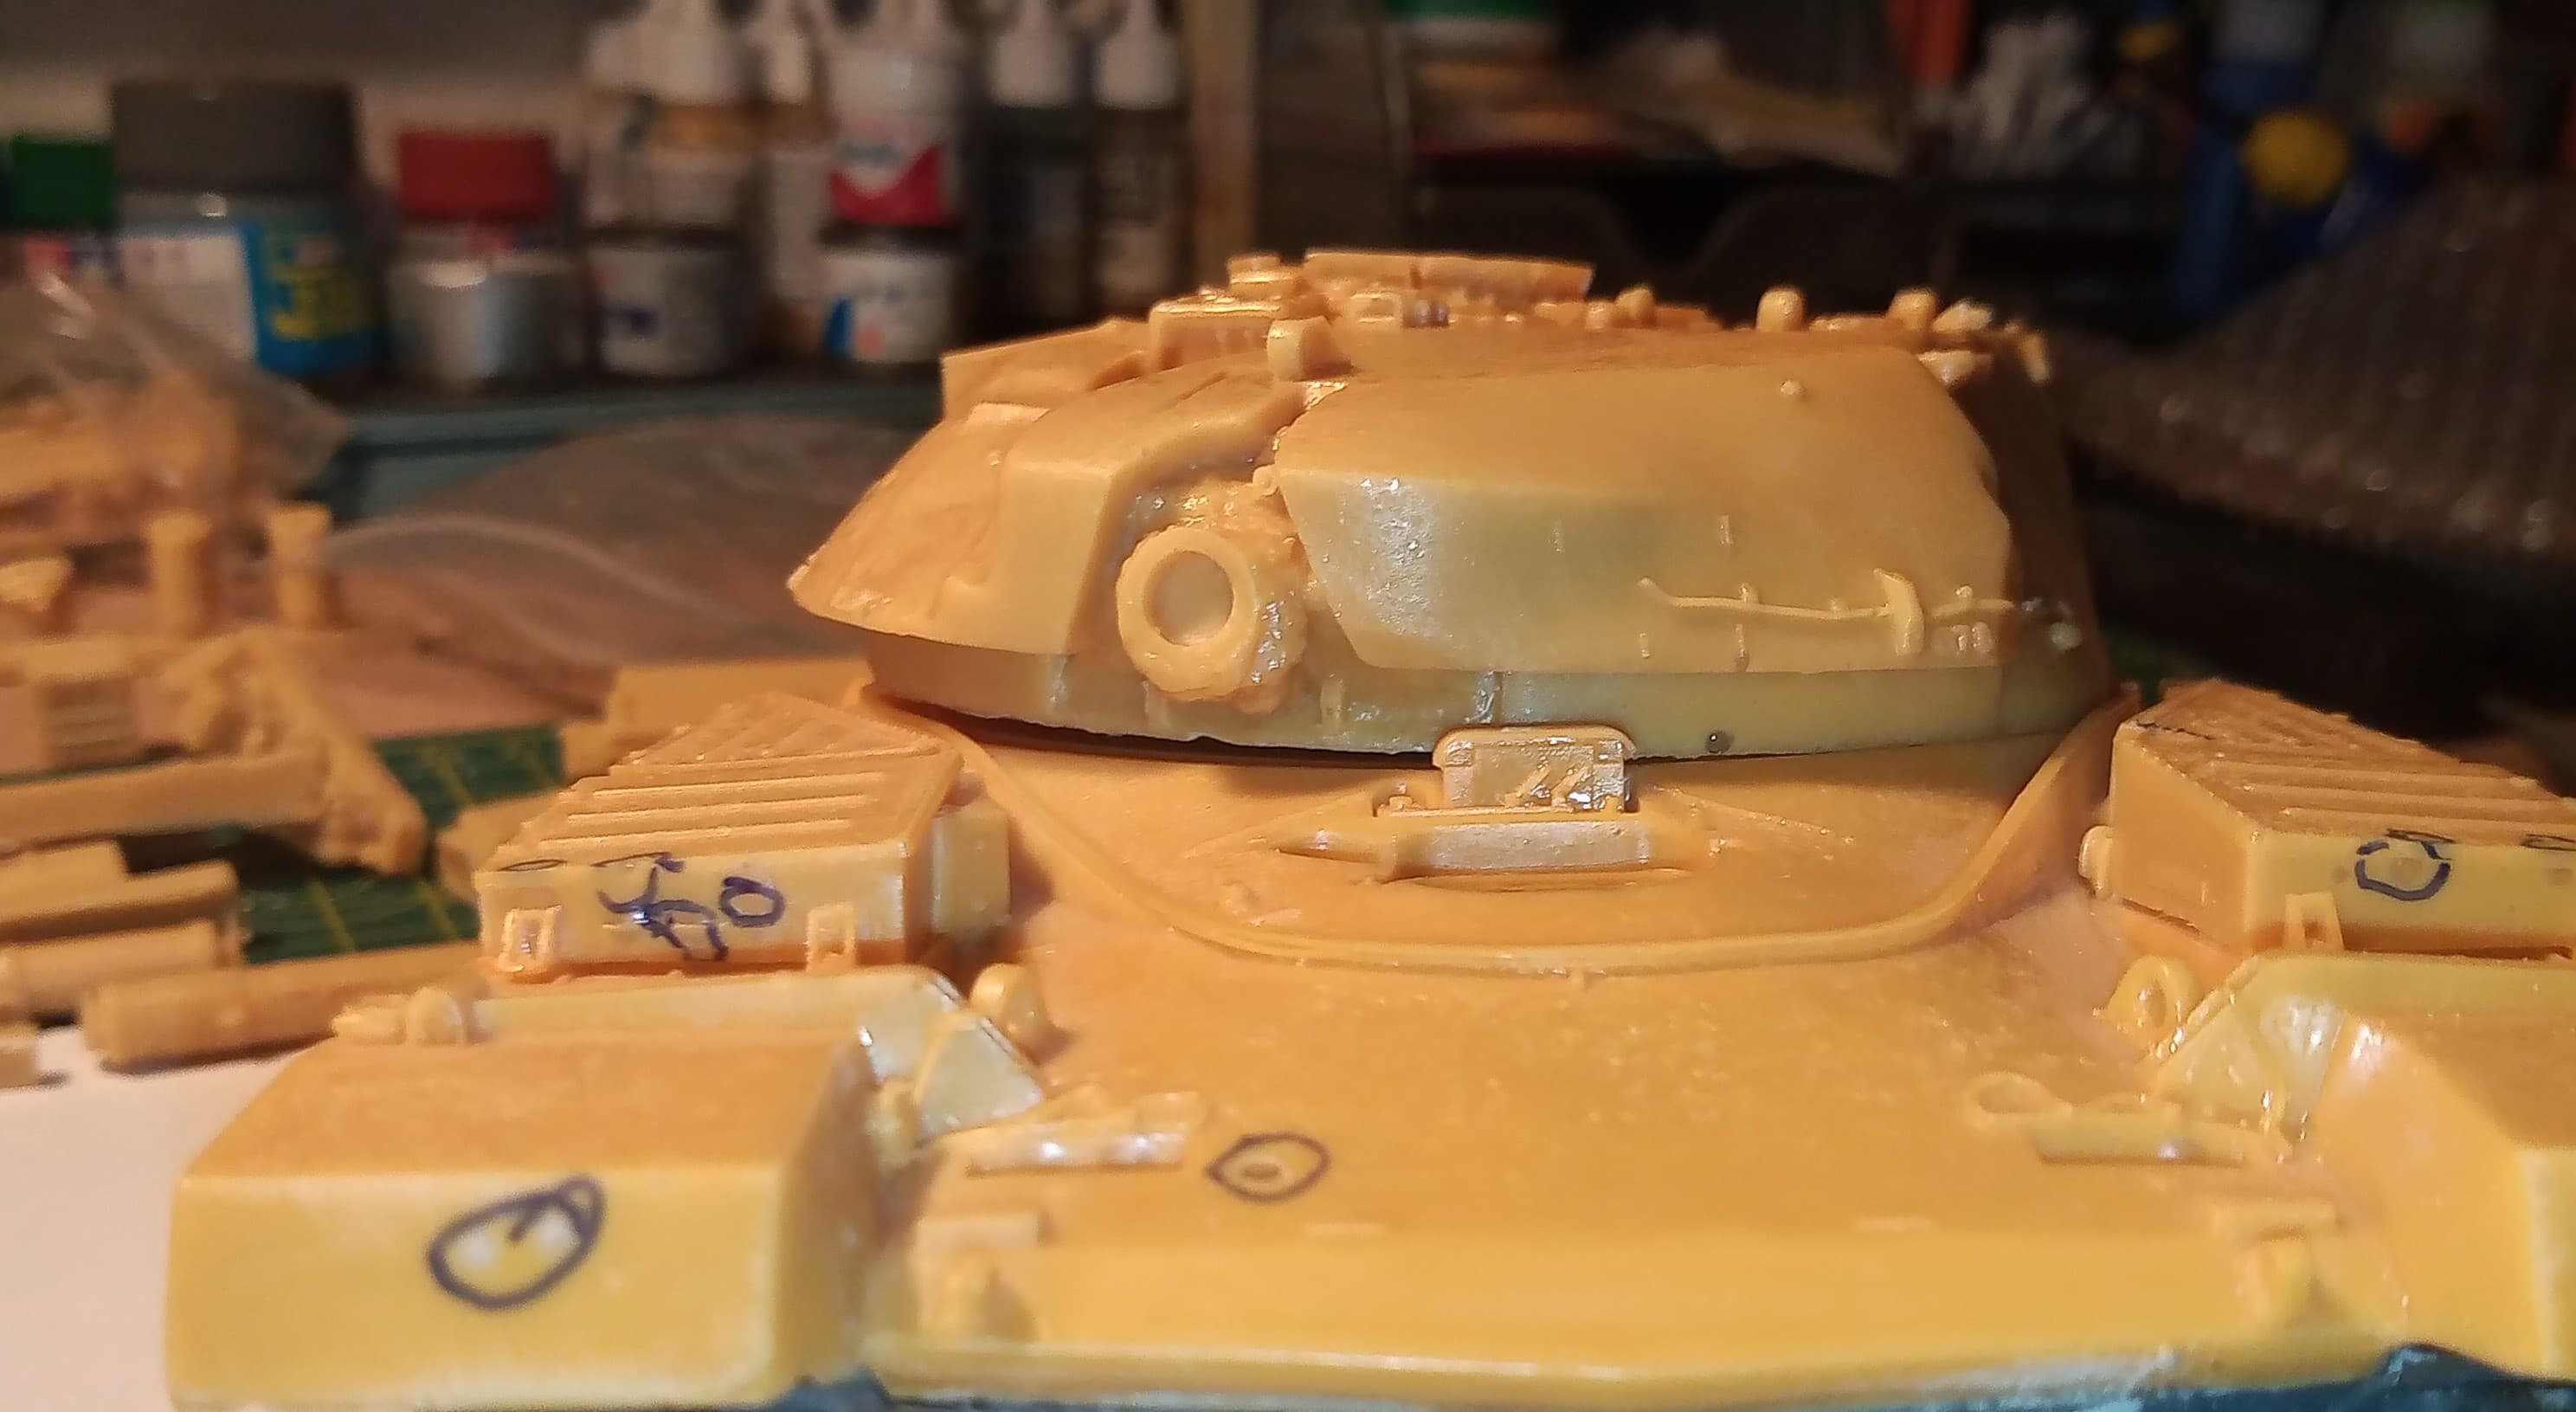
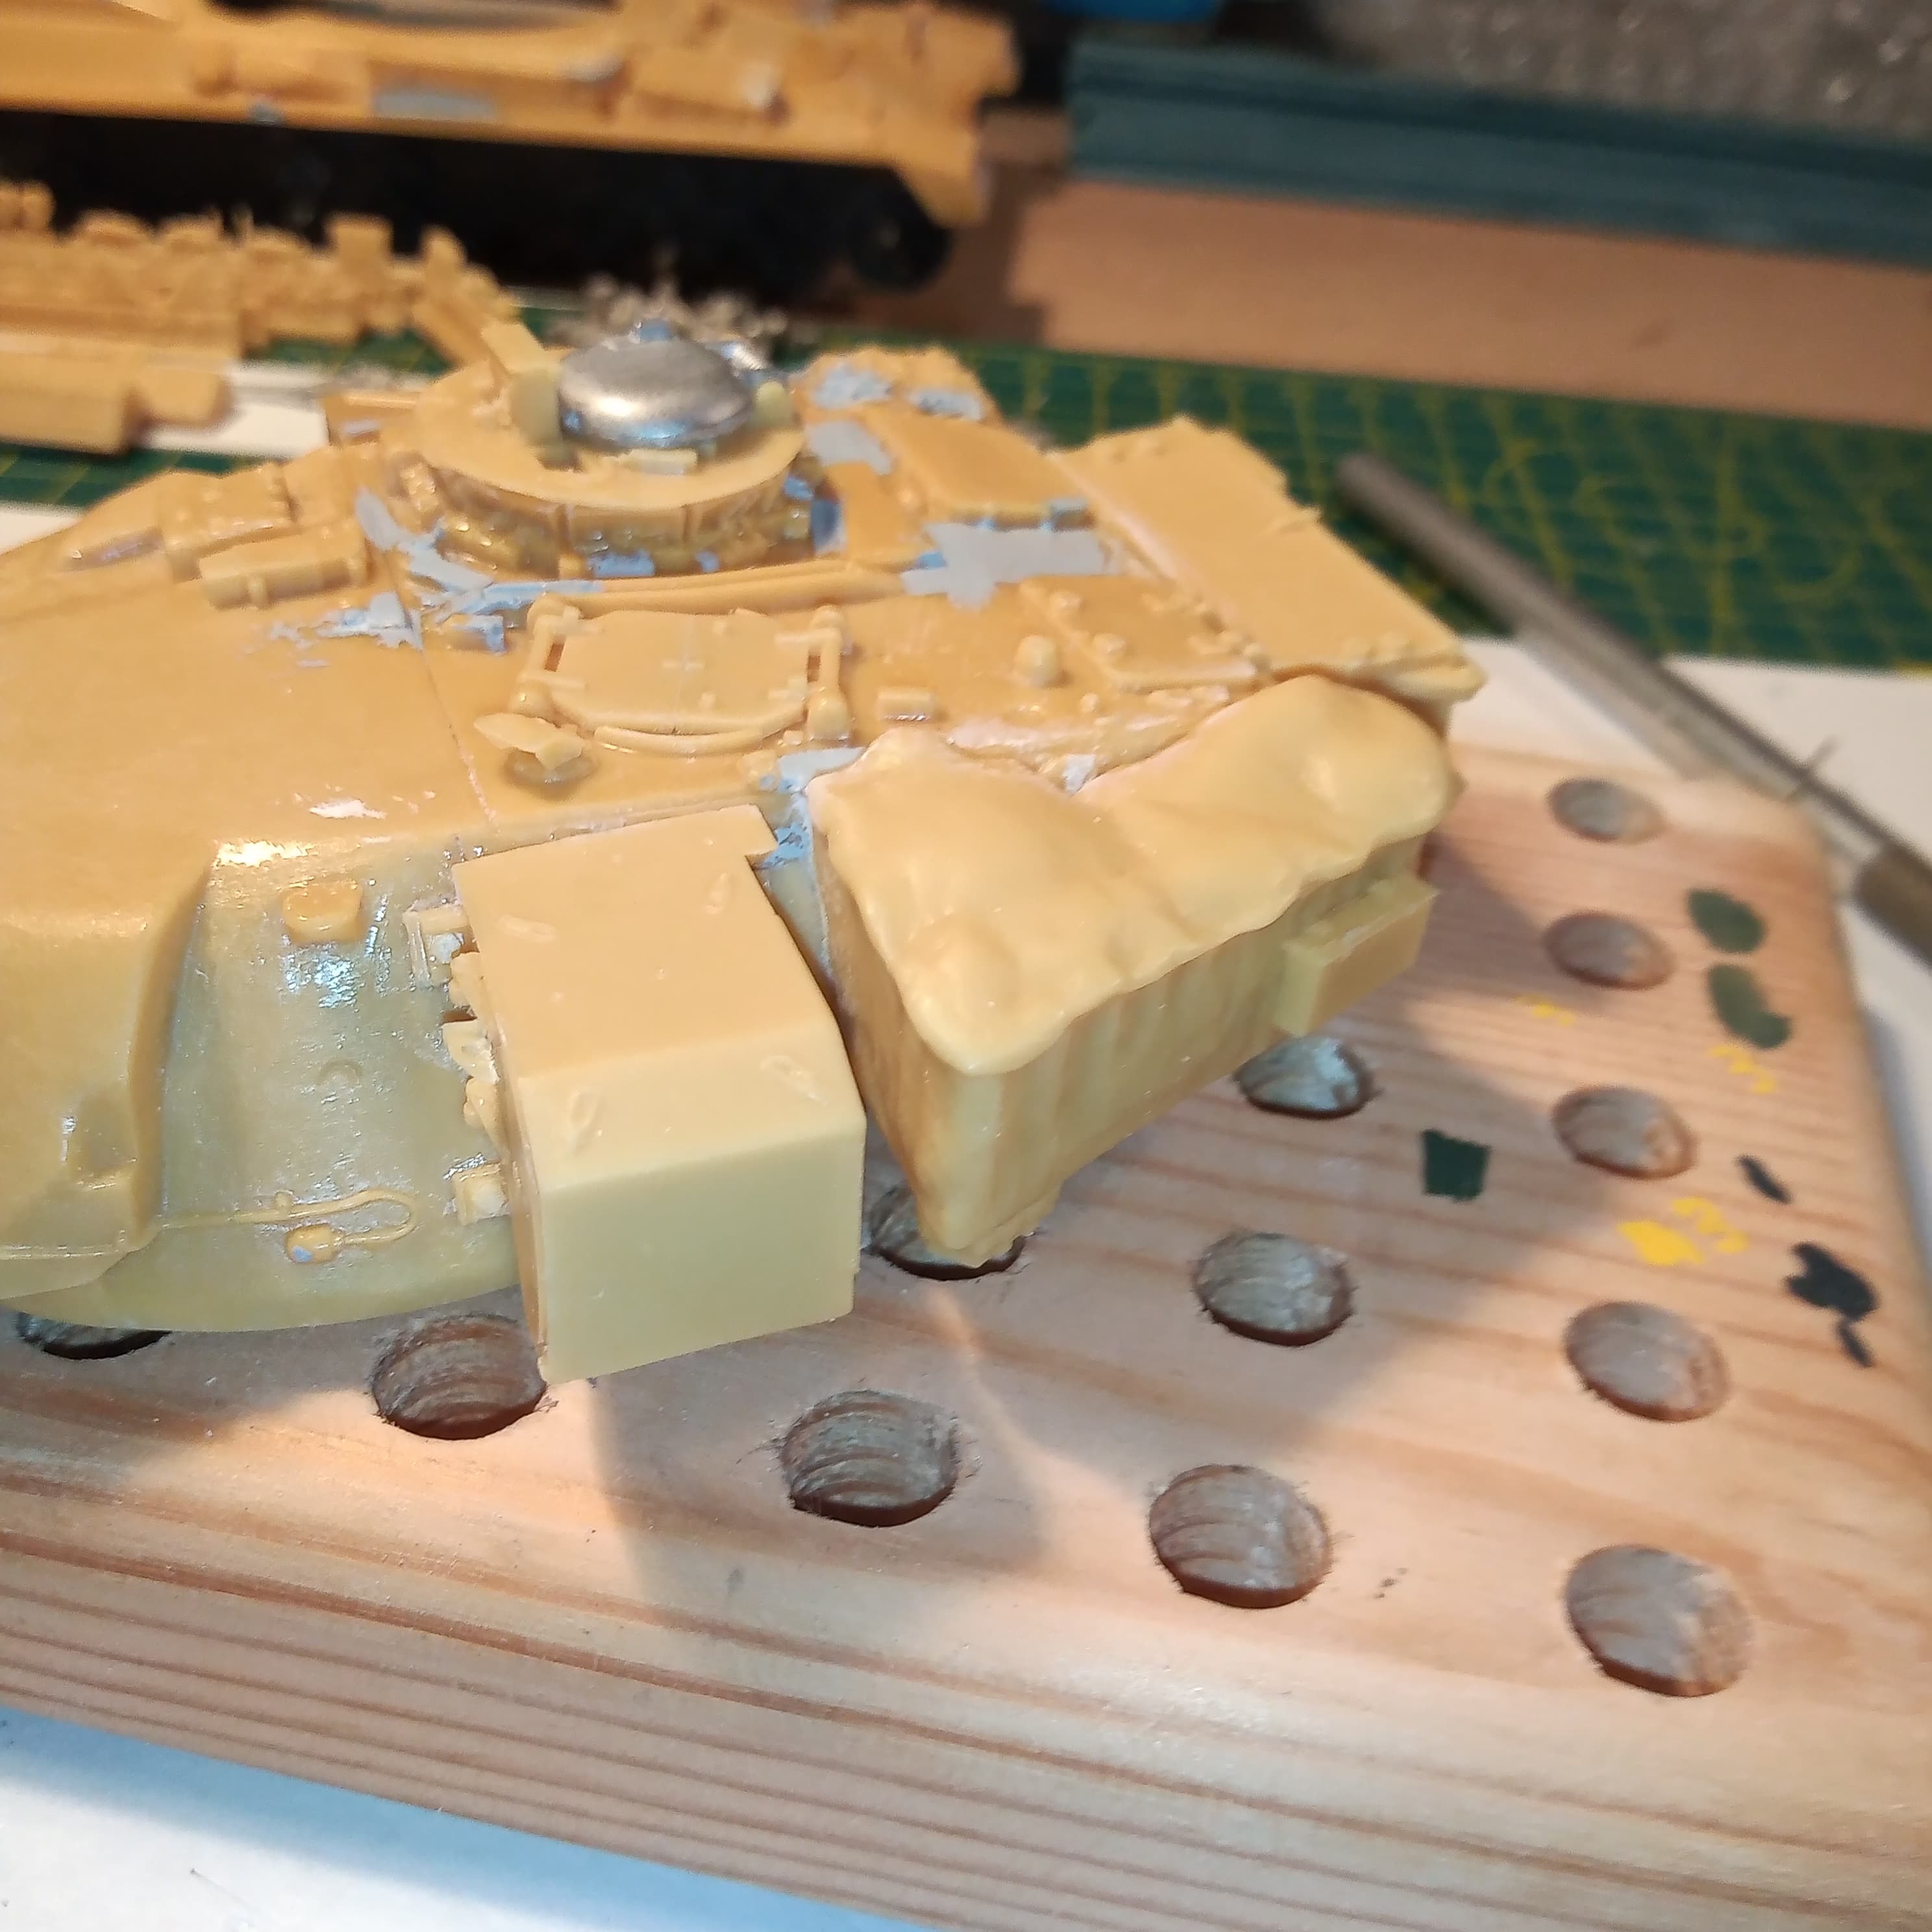
One major issue is the turret to hull fix…
It ain’t good … Lol

Hopefully you can see how the rear is raised…there is a massive bow on the rear of the turret ring which lifts the turret up at the rear area.

Not sure if will be an easy fix, or I may have to resort to cutting out the bowed section and securing the turret at a fixed position…

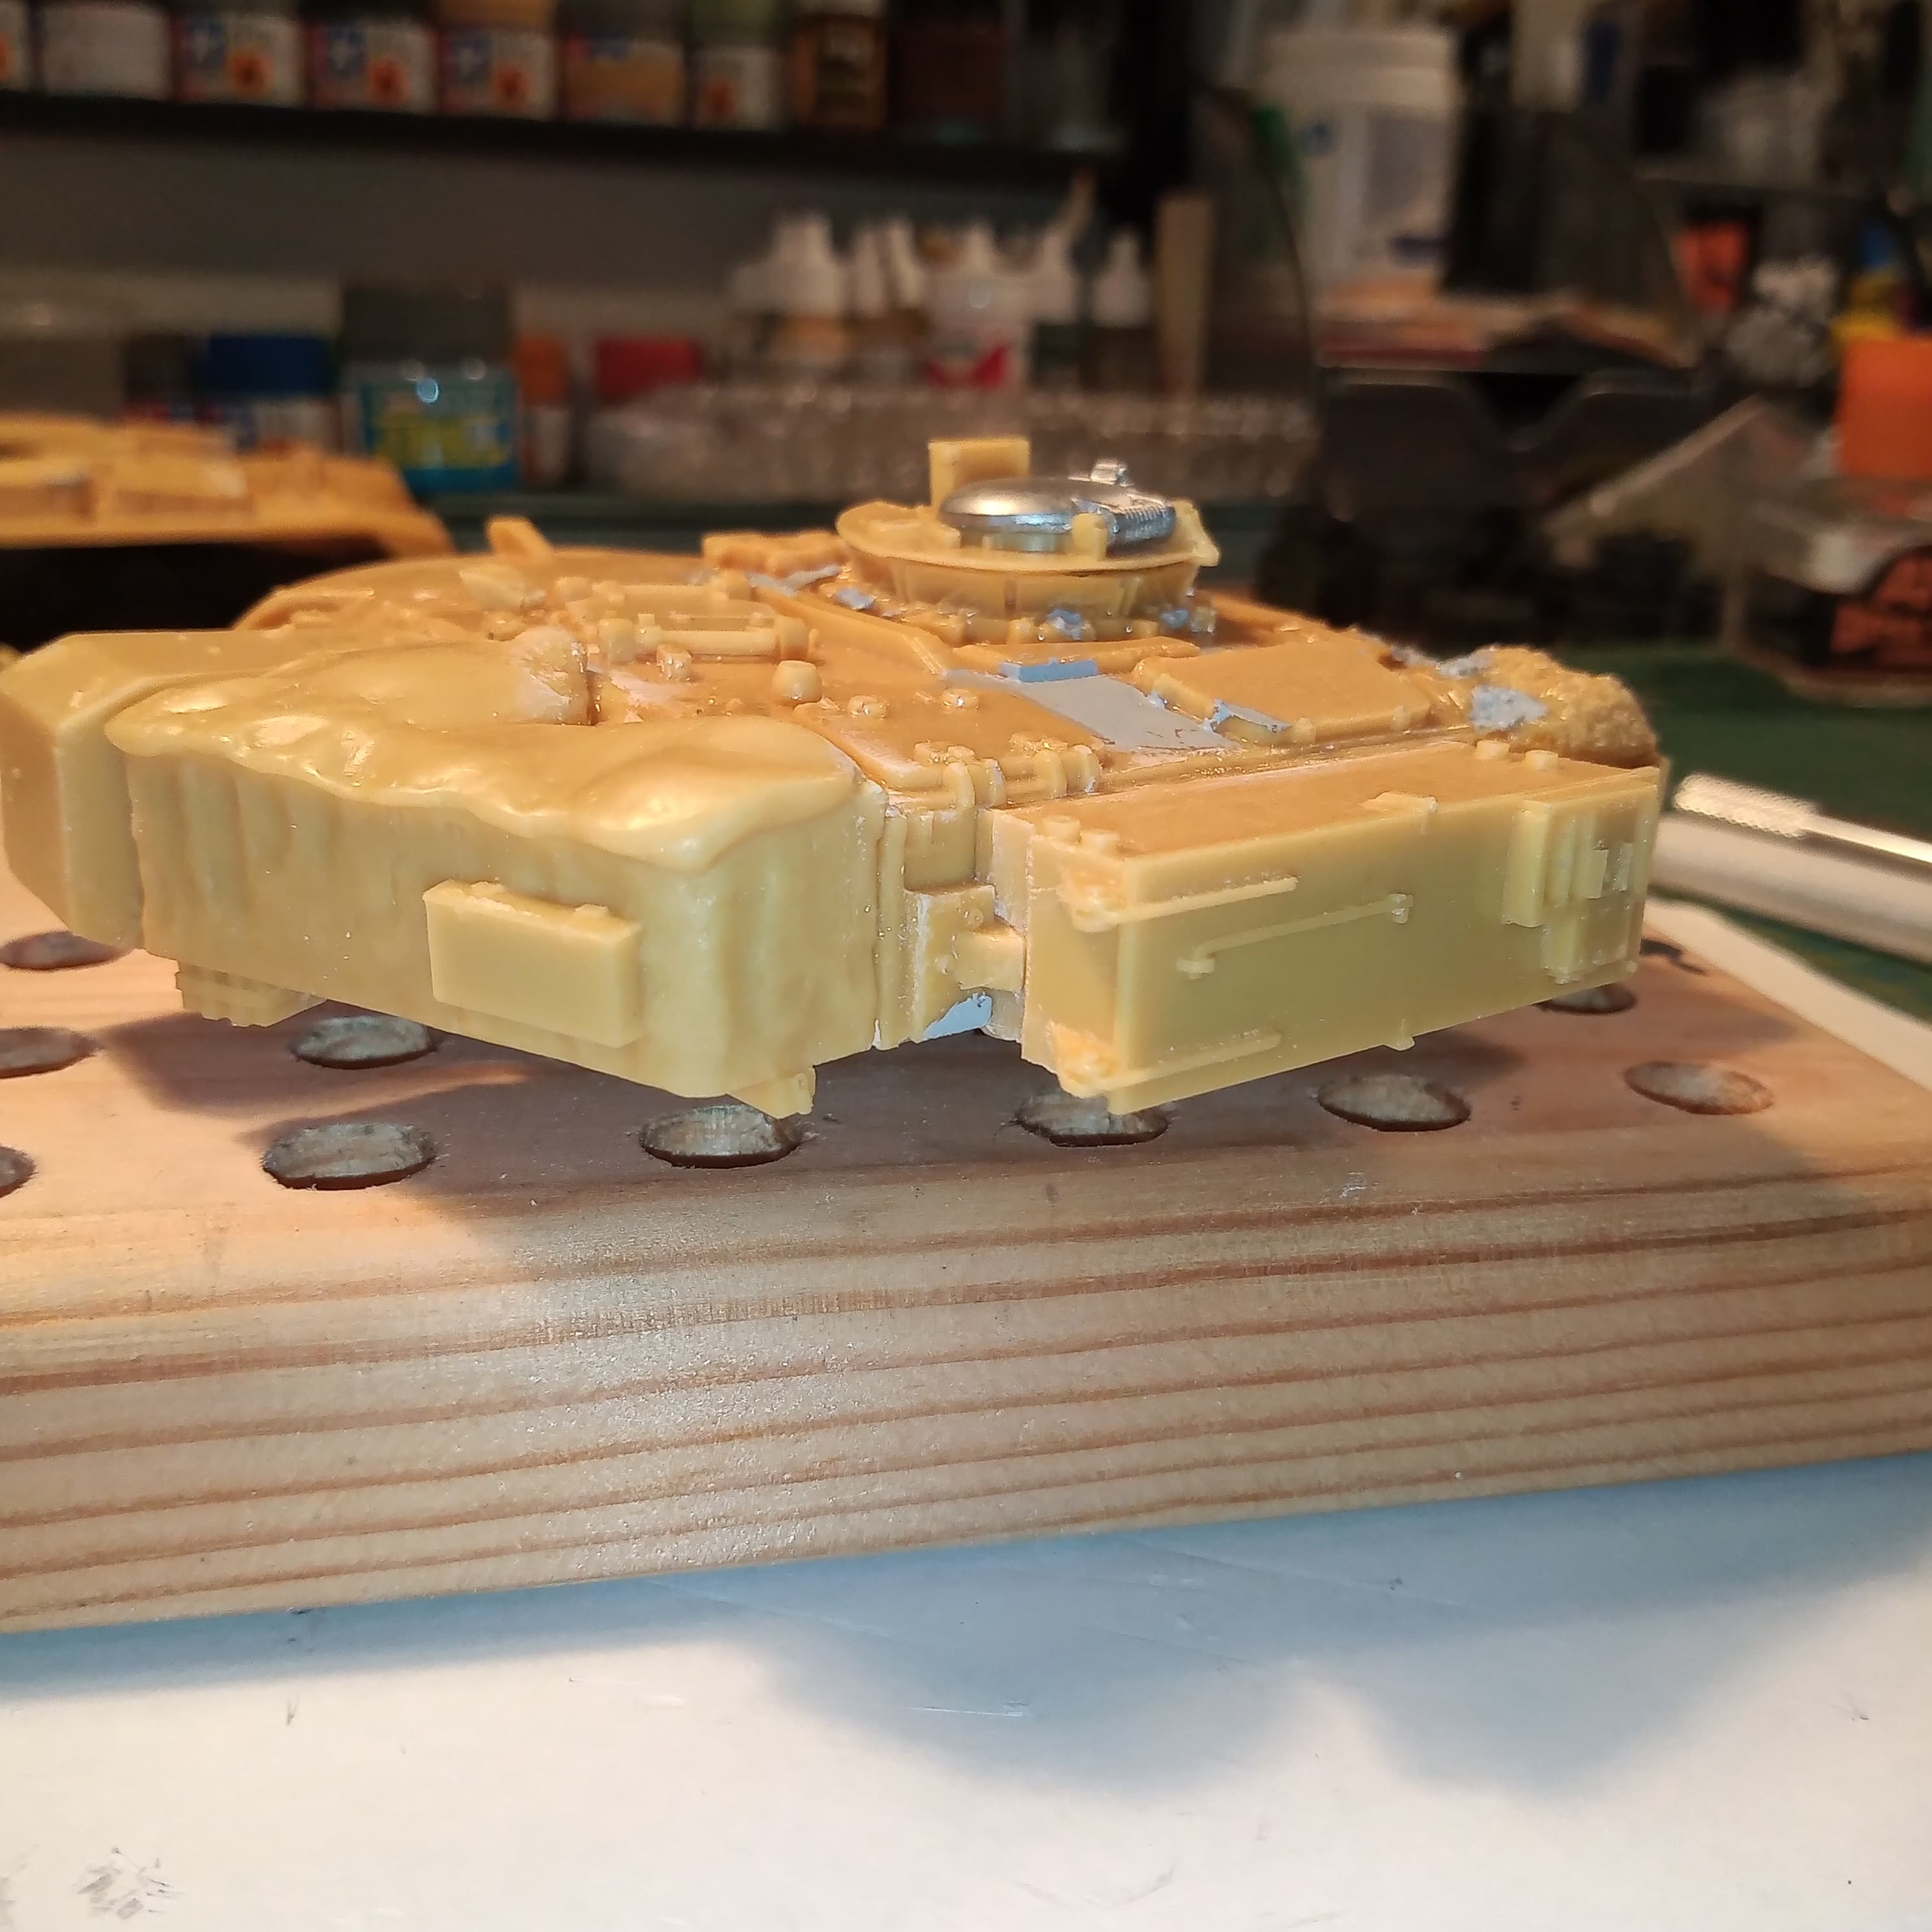
Another problem is the barrel… It’s in 3 resin parts and the section out from the mantlet has a bend on it… Quite noticeable… Not sure if you can get metal barrels for Chieftain…

Last small issue is theres a hub cap missing, and I don’t think I have a way or means to scratch one of those…so will have to have a think about that one…

The next few days will be taken up with Mr Surfacer 500, putty and sanding …and probably repeating that process again…

Will endeavour to do lots of WIP pics all the way through the build blog.

Stay safe…

11 Likes

Hi Johnny
Looking forward to this. I have a metal Chieftain barrel - but 2 problems - it’s an L11A3 & it’s 1/16th. Had similar problem with my Centurion turret - warped resin - clamped it up hard & immersed it in boiling water, which fixed the problem.
Don’t know if that would work here?

Mal

1 Like

I fully support this line of thinking.

1 Like

Good Luck John. You saw my ARRV and it is a pour from the same era…

1 Like

I feel you pain. I had the AA Centurion AVRE from the GW1 period and got rid of it because of the same kind of issues.

Enjoy your build anyway :wink:
Olivier

1 Like

I built a chieftain from AA and had no major problems, it went together fine. Just a handful of air holes to fill. I also have the Centurion AVRE from GW 1 in my stash. Looking forward to this John!

Hi John really looking forward to your new “ride” build. I’m sure it will be as great as the last one. It looks like you have taken on a heap of someone else’s problems, though. That kit has some serious engineering issues! Or, more correctly, casting issues. Those look like some huge gaps in some very hard to reach places.
I know you love to tackle a challenge, but since this is a special build, a ride build, why not save yourself the nightmare and wait a couple of weeks for the brand new Meng Mk.10 Stillbrew? That would prevent oh so much fresh hell from entering your world…

1 Like

I know what you mean Matt… This is going to take an above average amount of work… But it would be a crime to sideline it… I would of gone for the Takom Mk10 if it had been a tad cheaper… Will keep an eye on those and this new Meng one when it’s out… I will probably end up doing another one any way…

Still scouring the web looking for after market barrels… I may end up trying to get a cheap donor chieftain or Chally 1 from evil bay for the barrel if all else fails…

1 Like

Don’t bother with a Tamiya Chieftain barrel for that project as it’s an L11. You need an L11A3, which is what Cr 1 carried. You might like to modify the muzzle of the Tamiya L11A3 too, as the MRS mirror and shroud are not depicted correctly.

An alternative would be one from the later variants in the Takom kits - you need one with the MRS mirror on the muzzle as it was standard by the time Stillbrew was fitted (exceptions being a few ancient Mk 1 which still had the L11 and other original features but didn’t receive Stillbrew).

Yeah Robert, thanks, I was aware about the Tamiya barrel, but I can use the AA barrel end if I need to as that has the MRS complete on it :+1:
Did you mean L11a5 for C1 as thats what we had ?
I thought the A3s were Chieftain Mk5s or before. After the upgrade packages Mk5s were known as Mk6 with the various upgraded systems and the L11A5 main gun.

1 Like

Started the onerous task of filler and Mr S 500.

It’s not pretty but it has to be done.


Although most of the holes will not been seen under the turret rim, a few bleed through the side so I did as much as was needed.

I wasn’t going to go crazy with this but I may look at a PE set for a MK10 and I’m sure I’ve seen some 3D exhaust elbows and complete headlights within the guards, so may look into those as well.

6 Likes

Looking forward to seeing how this goes together. I’ve got the Castoff Mk11 which looks easier in some aspects but I’ve got to do the rear intake grill changes.

1 Like

That’s a lot of work… it’s almost a camo pattern :grinning:

1 Like

Thanks Paul. I think the easiest options for these are the Takom kits, it’s all there in the box ready to go, but these resin kits in their day were what was available. I will look at getting the Takom Mk 11 as I was on a TOGs one as well, which was a real game changer for us when we had those delivered.

1 Like

Haha… You are right Bert, if I’d used a few different coloured fillers it would be a nice abstract cam scheme :grin:

1 Like

Have at it John, you’ll straighten out this kit in good order! :beer:

Just a bit of background prep to report. Cleaned up the resin of all it’s flash etc so it’s ready to go on.

The LH front mudguard needs a top up of filler as the hole was bigger than I thought.
Rest of filler is sanded down ok and there are a couple of places that need a top up of Mr Surfacer 500 to square those away
Test fitted the major turret parts like bins and searchlight.

Have made the bold choice and cut out the bowed section on the turret ring that was unseating the turret and causing it to rise at the rear. All sits fine now so that’s one thing out the way.
Have to get some 2part epoxy glue tomorrow after a joyful trip to the dentist, and will then start the assembly of the hull and turret components…

The 3 part resin barrel… Never going to happen. It has a very bad warp in it which is unfixable, and the general fitting isn’t great …not sure what the new casts are like but this old one is not good on this one. So the hunt for a Chally 1 L11A5 barrel goes on…

Another part I didn’t really pay much attention to initially were the turret baskets. It would of been nice to have at least one empty, instead of both being cast with stowage in, now it’s not a gripe, just an observation. I was thinking of scratch building a basket… But it is to much hard work …

Onwards and upwards :grin:

2 Likes

The exhaust ends:

You may want to consider:

When adding putty to their resin, first add a little cyano. It will seal the resin so the putty and resin do not separate later. I found I needed that on the ARRV, but more so where the resin was not homogenous. For deep holes, use Cyano gel and baby powder. You will find it bites better.

I was just painting the exhaust on mine, and the putty that was filling the hole just fell off with part of the resin attached. :rage: This was not one with cyano in it - I was told the tip afterwards.

Oh, and I am with the guys - Takom MK 11 would have been a better choice :japanese_goblin:

2 Likes

Those were the 2 3D sets I saw. I think I might do the exhaust elbows as I don’t think I can face drilling out the AA resin ones… I can sense that’s a disaster waiting to happen.
And on the Takom kits I do agree, even with the slightly elevated price compared to other kits, they seem to have crisper detail and they are whole kits in one box…but I will build this bad boy and do it justice.

2 Likes

Managed to get a few bits done and forward movement with the build.

Air holes in resin are pretty much done now. Will fix any from now as and when I find them.
Got the additional Stillbrew armour fitted either side of the DVRs sight, which I noticed isn’t really right as the vision block sits under a full cover, on this one the side bits are missing.
Have fitted the driver’s hatch as this one will be fully closed up.

Have done most work on the turret tonight. Turret baskets are on, searchlight done (just need to add the handle) NBC pack mounted and the TUAAM fitted. Comds and loaders hatches are on and closed and loaders vision hood fitted.
I did notice another error on the cast of this one. The LH MBSGD electrical cable entry point is wrong. The actual armoured elbow for the cable should be above the cable, not below it as you can see in the first pic below. I did contemplate changing, but thought better of it. It will stay as is on this one.

Had a bit of a mishap while sawing off the resin block from the additional bins that are sometimes mounted to the rear of the baskets… Let’s just say one ended up 3mm shorter lol…
Luckily I still had 2 spare bins from my AFV club Scimitar so they have come to the rescue.

Will carry on with some more tomorrow after work. If the puppy lets me lol

6 Likes