Nails can be hammered with cobblestone, but a hammer is easier and better.
3 Likes
Without doubt, I would end using a hammer if I ever tried to build that model ![]()
2 Likes
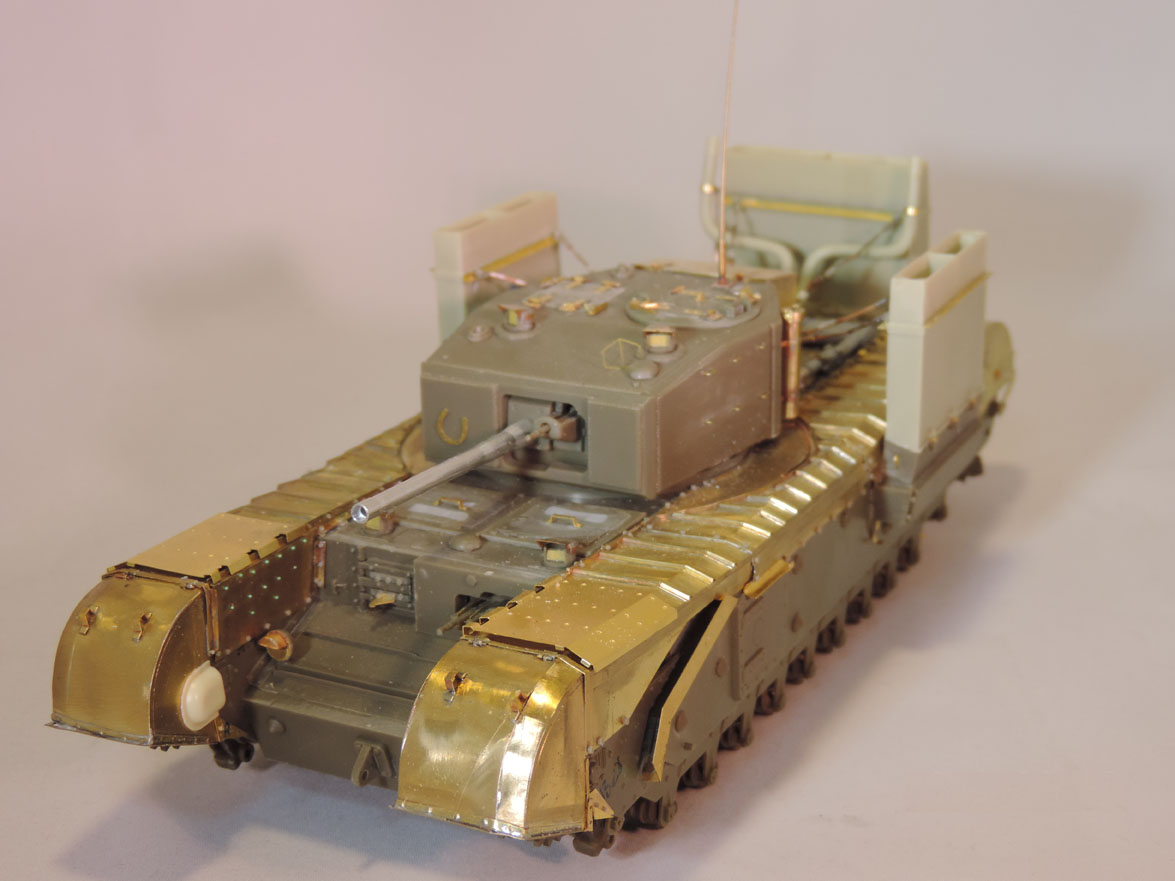
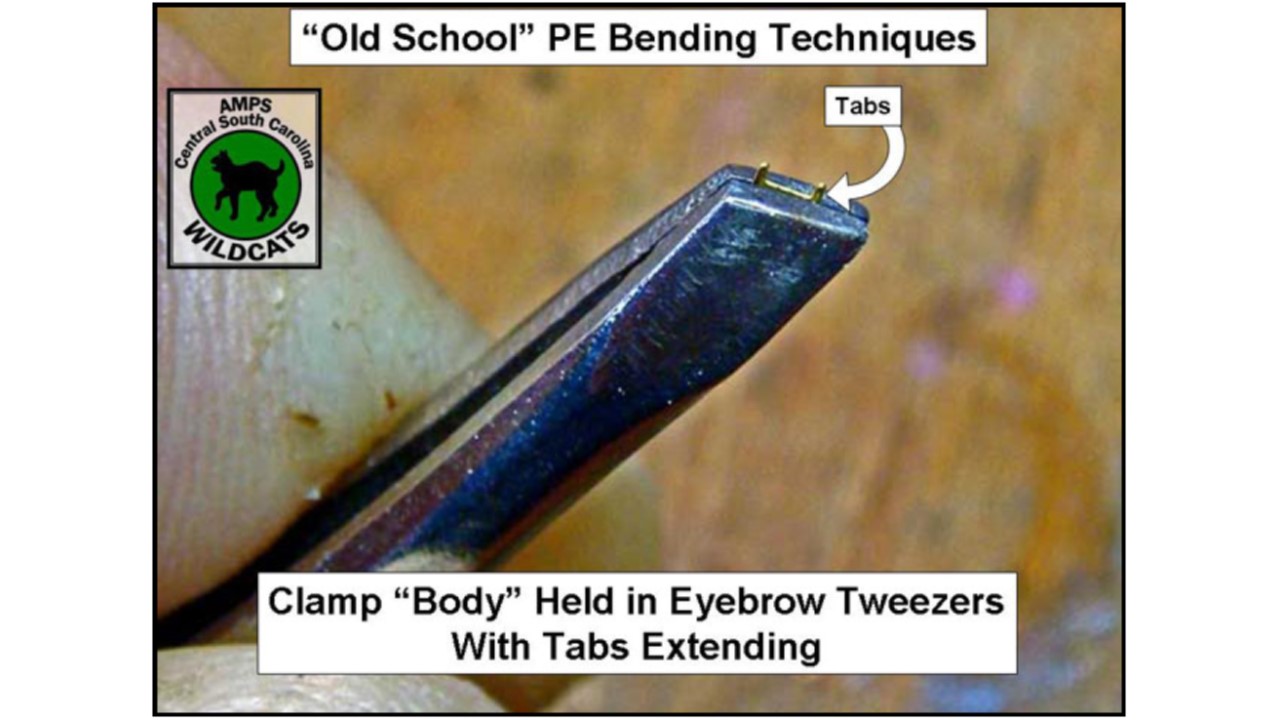
Since the initial question was bending and forming PE without using a design purpose PE bending brake, here’re a few shots of forming the other parts of the workable tool clamps using ordinary or general modeling tools:
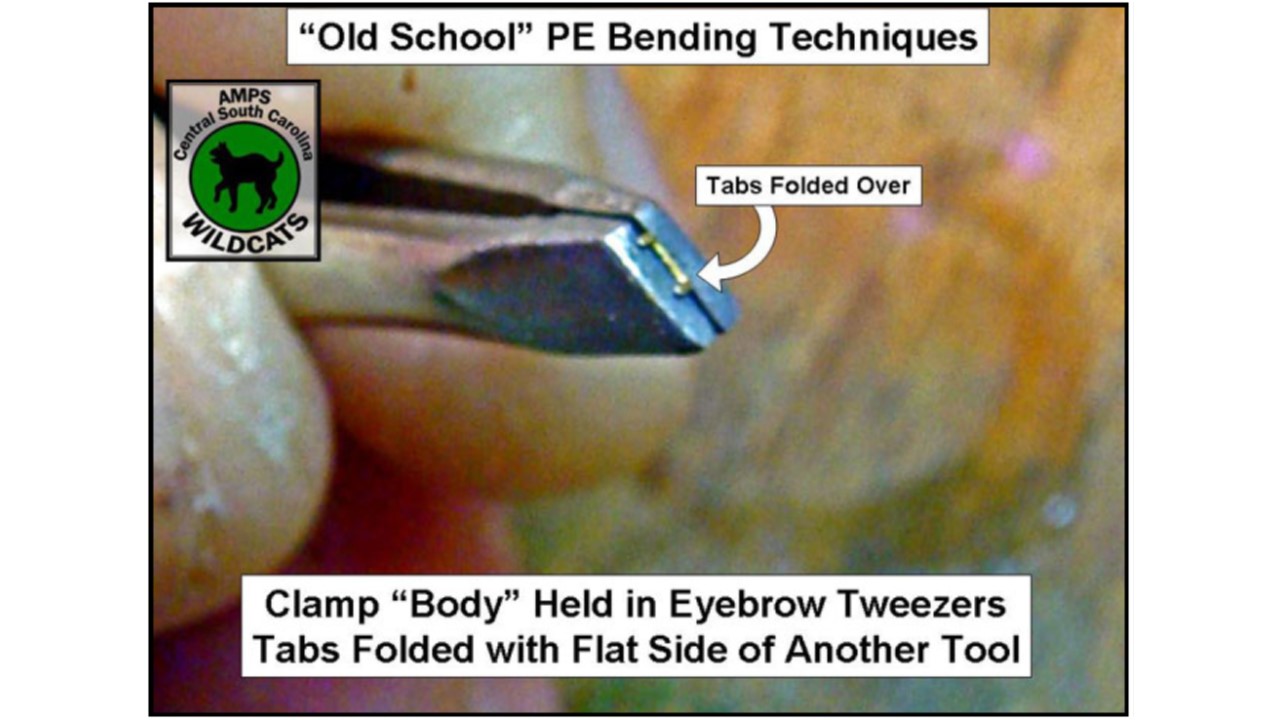

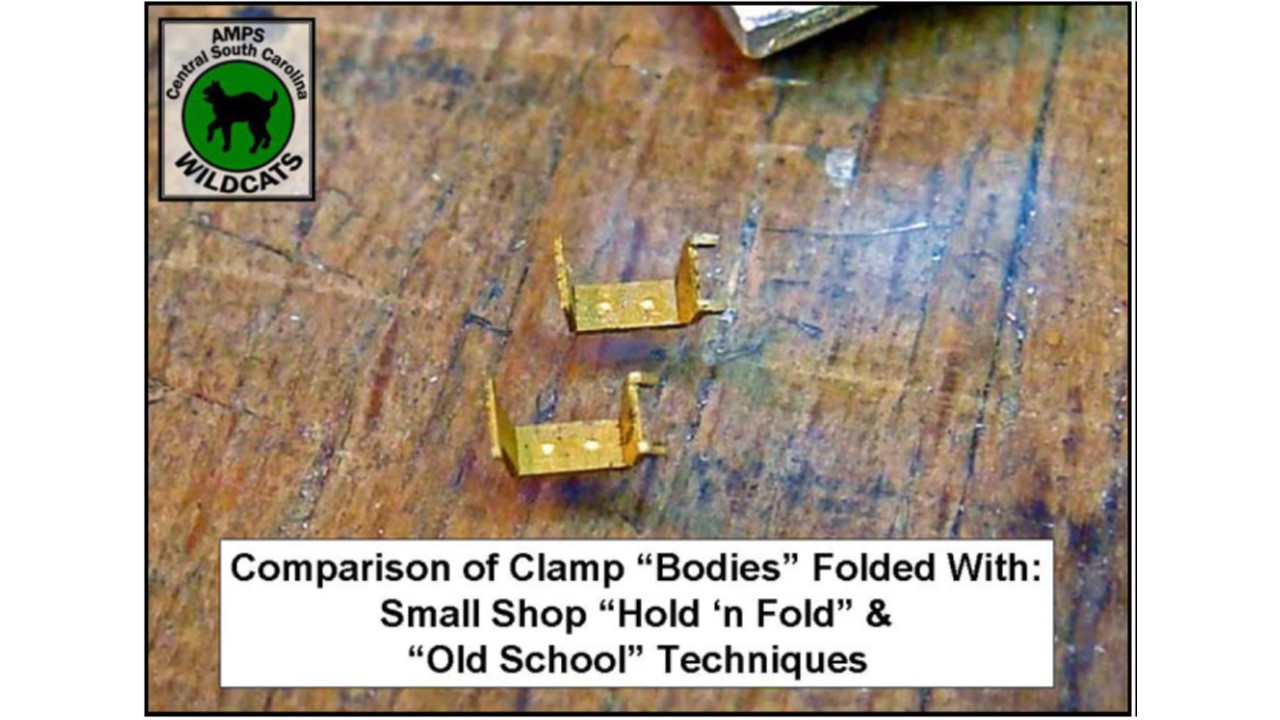
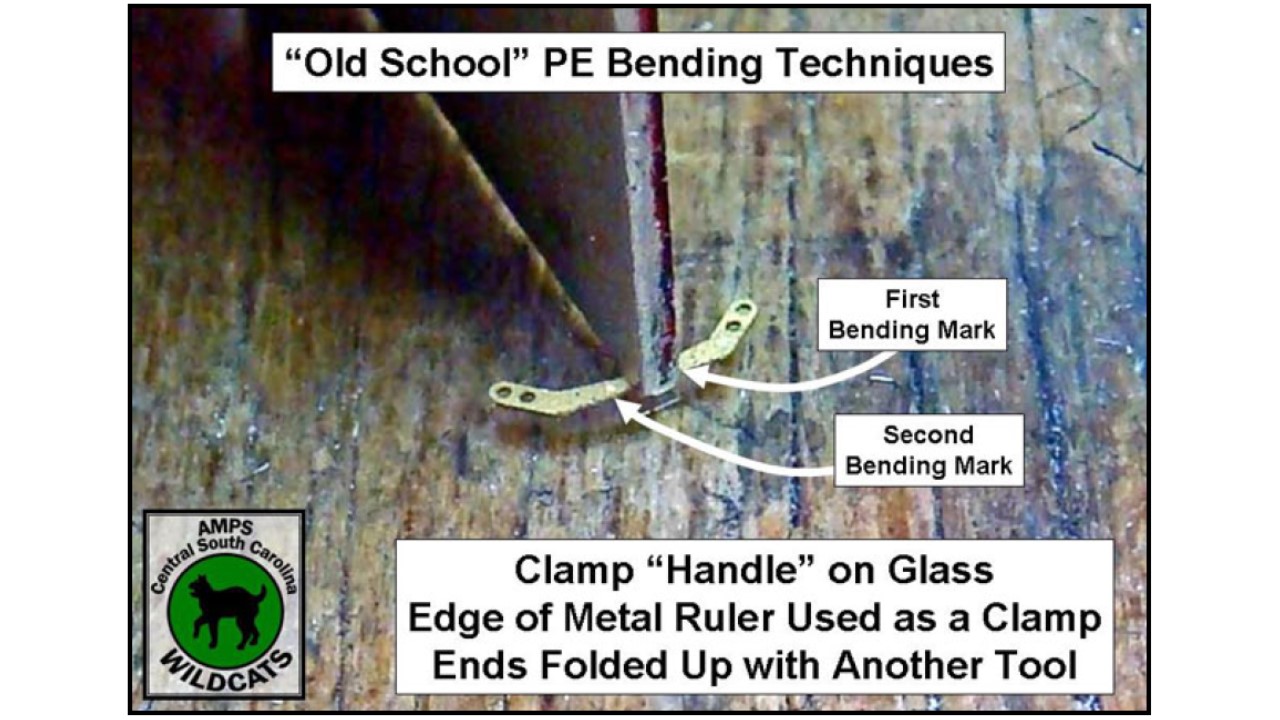

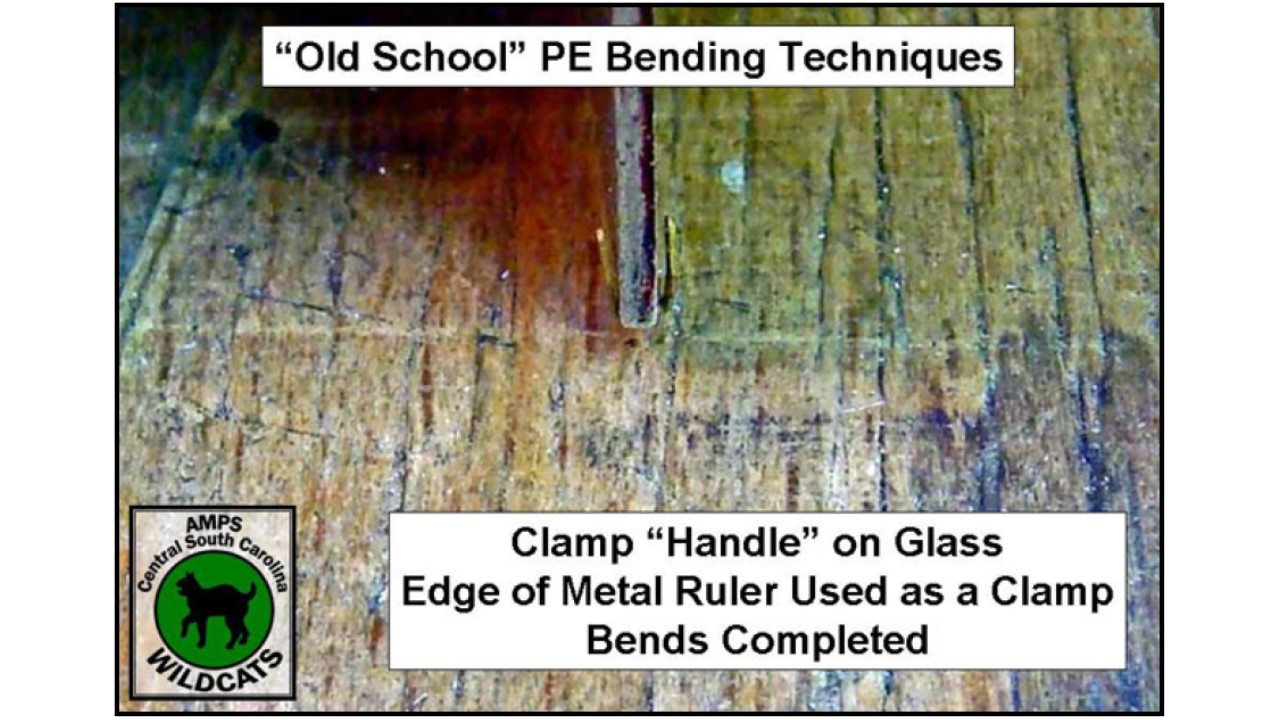
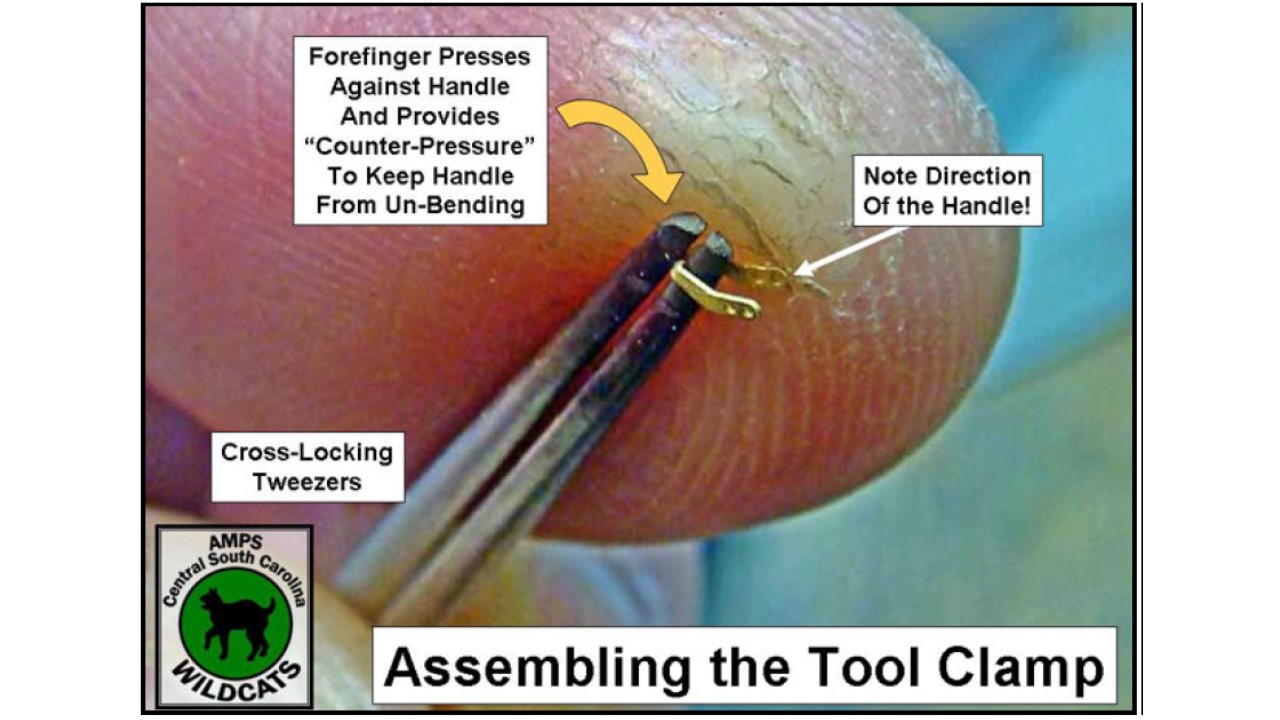
For the actual assembly of the PE parts into the working tool clamps, here’re the illustrations for those steps, again, all done with just general modeling tools:
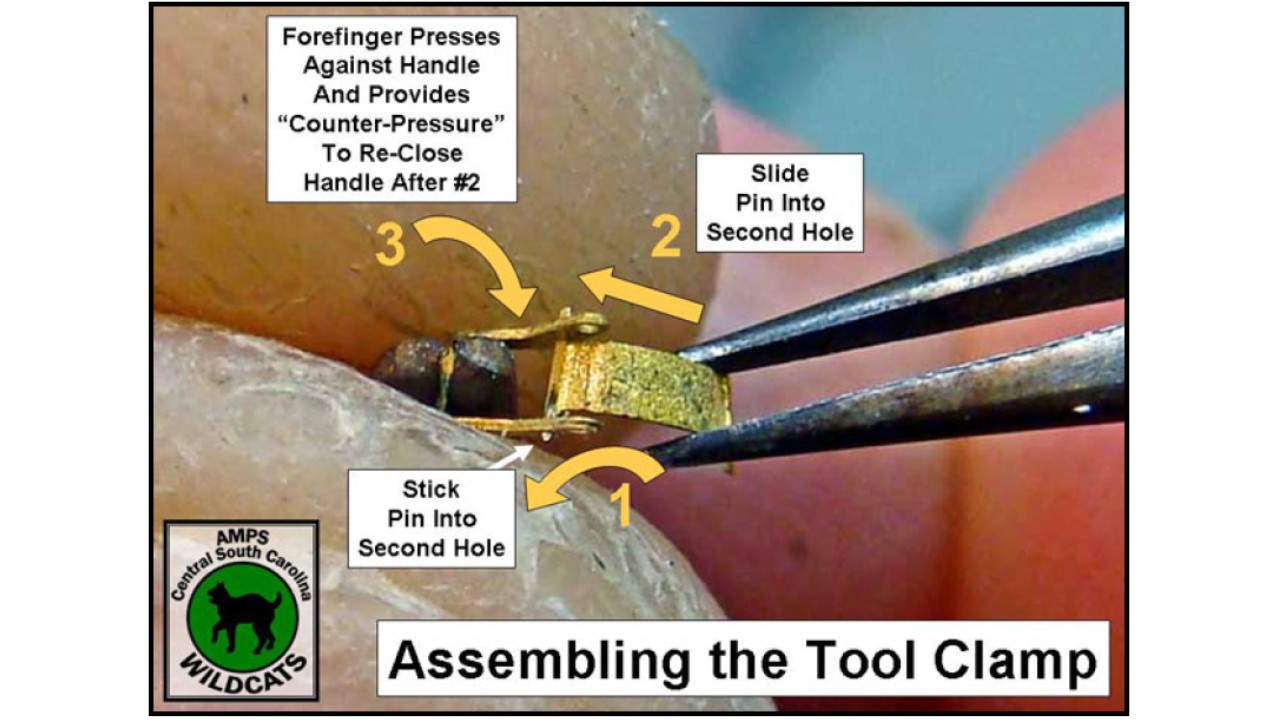
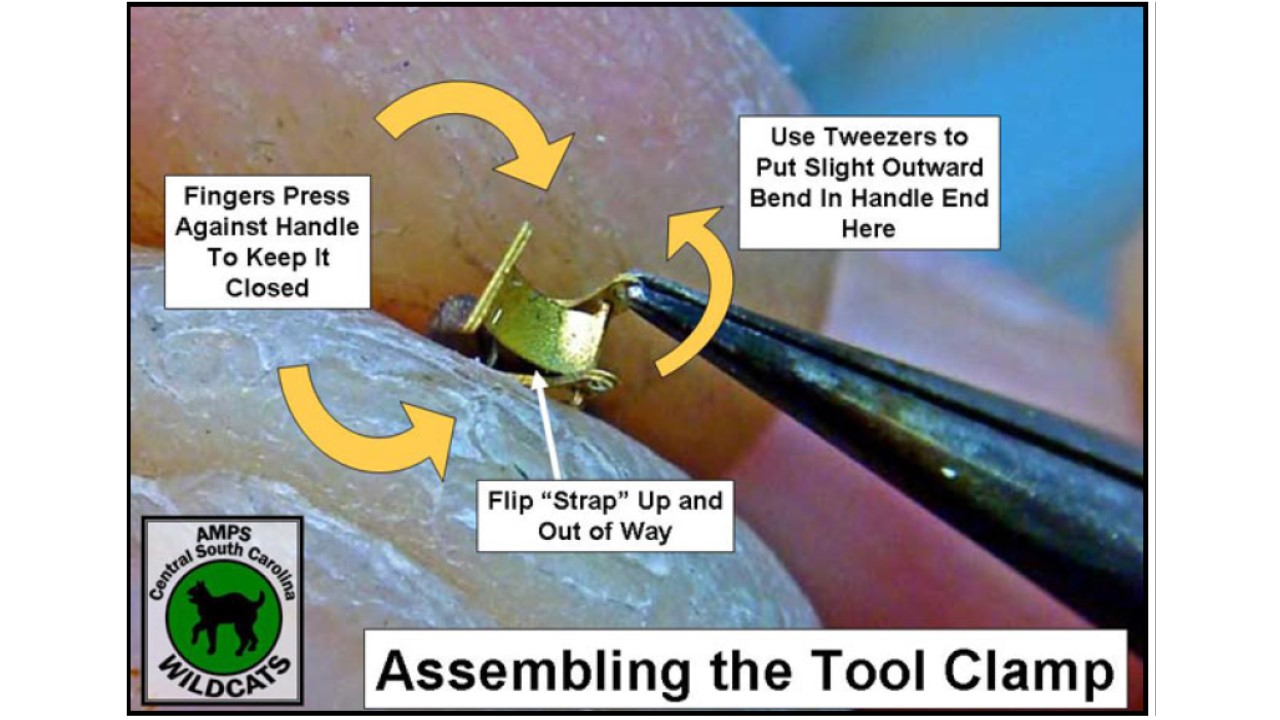

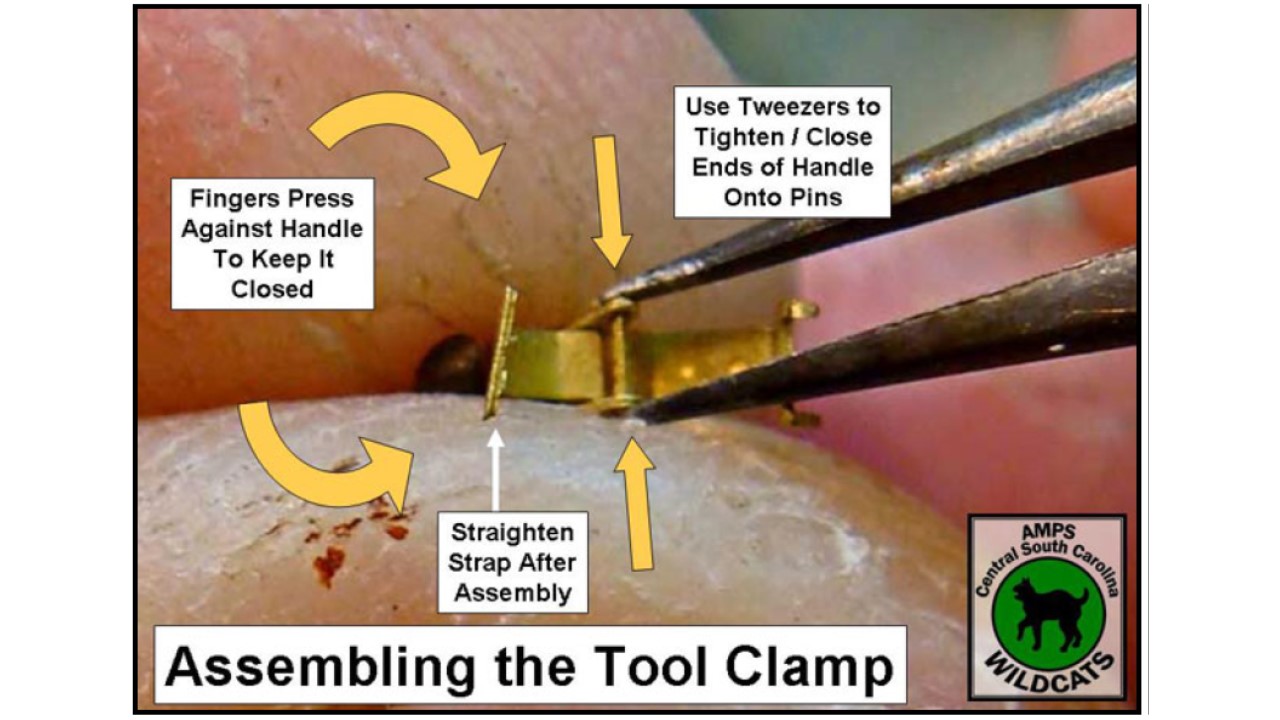

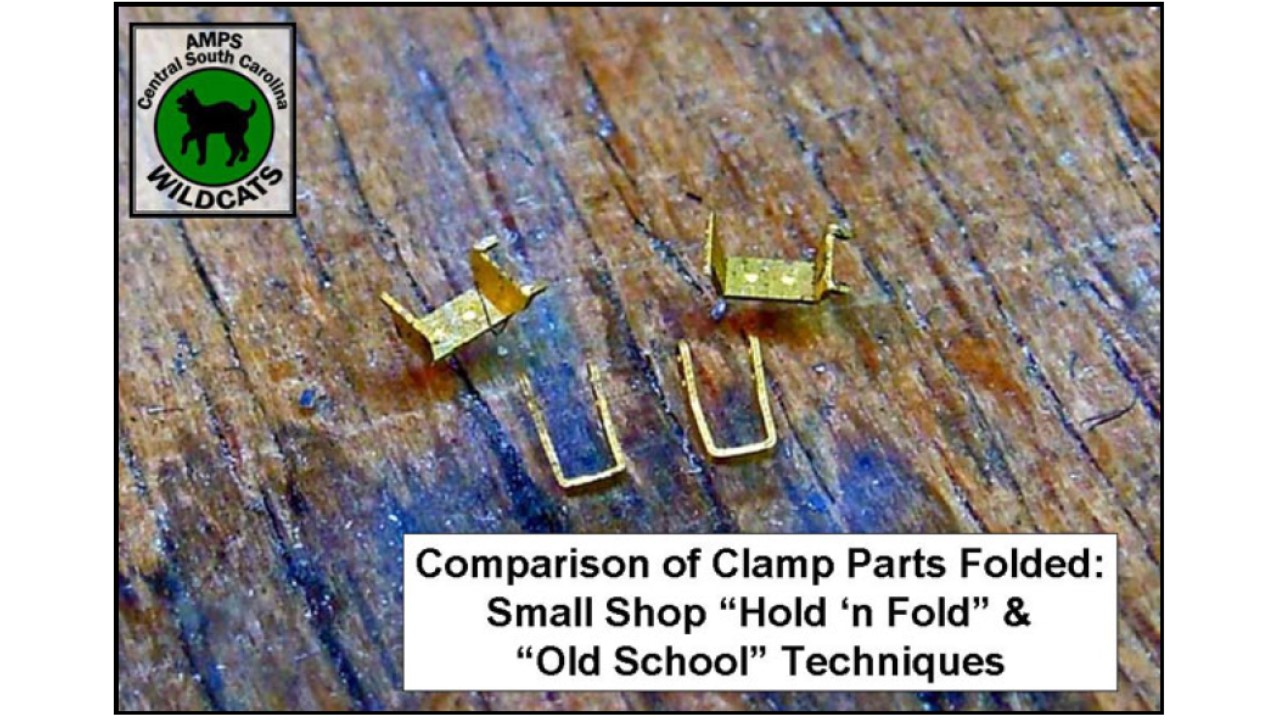
As you can see, it can all be done without a purpose PE bending brake, but it is a bit easier done using one.
PE parts becoming so common now as integral parts of many kits, eventually getting a design purpose bending brake makes sense.
7 Likes
Not sure I’ll go that far on photo etch , I like to use what’s provided in the kit (unless it’s innacurate). I’m not a madman when it come to this kind of stuff. The result look good tho, especially the skit.
I use a flat nose pliers for jewelery and variousTweezers.
1 Like
Fantastic demos Mike. And of course the “HOLD” part of hold and fold means you lose less tiny fiddly bits to the voracious carpet monster
1 Like
That’s a great mini tutorial there Mike. I just got finished making those clamps for the tools on my Dragon Panzer IV E (6264) but they did not come that good. I could have done better but I’d never done those before and hardly ever do extensive PE. Gotta get me one of those Bugs.
1 Like
Thanks! This info was actually published here on Armorama back on the old site - now unfortunately lost. (The ephemeral nature of the inter-web strikes again!)
I actually have the companion graphics for doing these with the mini-bending brake (The Bug), but even with using a dedicated bending tool, a considerable amount of hand-work is still required, especially for the final assembly of the parts. Using the dedicated bending tool does speed up the work and makes the repetitious forming of multiple identical parts. (It’s pretty rare to only need ONE tool clamp! LOL!)
1 Like
Mike,
thanks so much for making your photoetch technique guide freely available to all. Working my way through it now and the idea of dealing with gaps using brass wire is genius !
1 Like
There are many tools on the market for bending, and I own a good number of them. Best and cheapest is a good pair of eyebrow tweezers, I use a pair with rubber grips as they are also heat insulation when soldering. If you have the money I really like my hasegawa tritool photoetch pliers (they look like scissors), and Xuron PE pliers. After that my Hold and Fold five speed takes care of most of my needs and usually gives me the best results (but it is slower). In my experience the one thing to avoid are Tamiya long PE pliers (totally useless) and using sharp tweezers as they tend to damage the part or bend it all wonky.
There’s a learning curve sure, but keep at it and it gets easier.
1 Like
Are the Tamiya long PE pliers the ones with the beveled edges all the way around ?
I’ve had my eye on them as seeming to be very handy, what’s the problem with them ?
Yes those are the ones, just bad workmanship to be honest. Ideally they will connect down the full length of the jaws when closed, but they connect at the tip first and as you press harder the tips open and they connect somewhere halfway down. So you cannot use the full length of the pliers to hold or bend just a small section. Second issue was that the jaws are at a slight angle compared to the handles so the tips tend to move laterally away from each other. The small ones are probably better I believe as most of the issues stem from the length of the jaws and the fact that they are some light alloy not steel. For that price there are much better PE benders.
2 Likes
Wow, surprising. Thank you for the warning.
I thought of taking them for long PE part, thanks for saying this.