Best starter kit & guide for painting 1/35 scale figures? Faces are of course my downfall. My last efforts were like 30 to 35 years ago and quite terrible:)
My goal is to eventually paint an anti-aircraft gun crew. Several members faces are obscured but a couple aren’t.
Open to advice and suggestions. Ive watched a few videos and read several threads but would appreciate input from armor modelers.
Sadly there is no magic formula to painting figures. Now days I suppose there are lots of videos on the internet that will show you how to and demonstrate different techniques. Modelling over 50 years and still struggle with figures. Passable but will never win any awards so I’m not one to give advice. I’m sure others will offer their opinions. Good luck.
The FIRST thing you have to decide is what medium you’re going to use. There are three basic choices: hobby enamels, water-based acrylics, and artist oils.
Each of these mediums requires different painting methods and techniques (and clearly different materials), and many of those cannot be used across more than one of the mediums. There are some commonalities, of course. Color theory, brush control, placement of shadows and highlights, lighting direction, volume, etc. are fairly common.
However, the techniques that really matter to success (especially blending colors to achieve smooth gradual transitions between shadows and highlights, mixing and thinning paints, and pallet control) with each of the mediums are pretty much unique to that particular medium. Much confusion can arise from reading about and watching videos of one painting with one medium and then trying to apply those techniques to one of the other mediums.
So, first, get clear in your own mind exactly what kind of paint you intend to use and master. After that, concentrate your study on that particular medium. Once you have achieved a certain level of skill, then you will know enough to draw on ideas, methods and techniques that are used with the other mediums to see how those ideas, methods and techniques might be applied to your medium of choice.
Once you have the medium selected, you can easily find information on how to use it.
My preferred medium is artist oils. My general technique is to apply these over acrylic undercoats. I could give you plenty of advice on how to paint figures using this medium, but if you want to paint using water-based acrylics, like Vallejo Model Colors (for example), very little of that advice would be directly useful to you.
Because my preferred medium is artist oils, my personal recommendation would also be for that medium. Once again, though, if you want to paint using one of the other mediums, then my recommendation would only be confusing and contradictory sounding. I get what I believe are very good results with my preferred medium. However, that does not mean that other painters using different mediums are not as good (or even better!).
The very personal choice of medium and the development of a personal painting style are two things that only you can make.
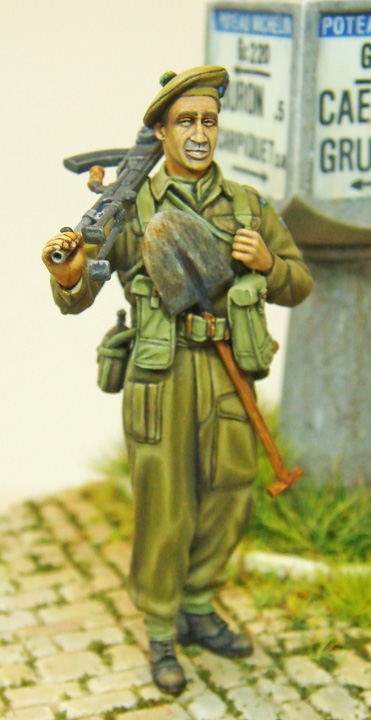
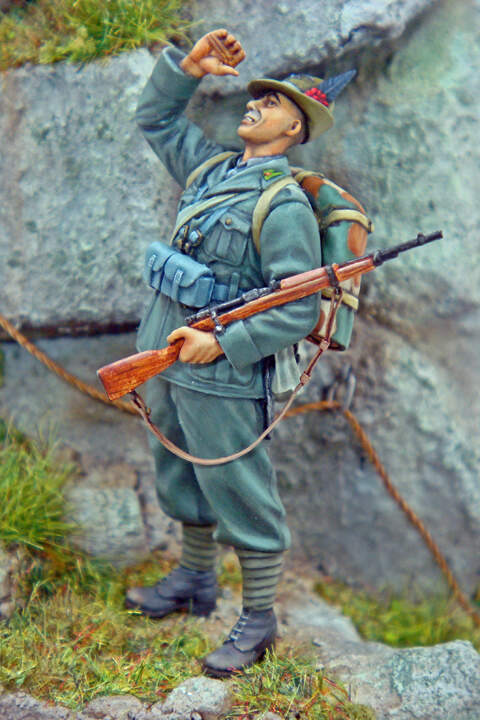
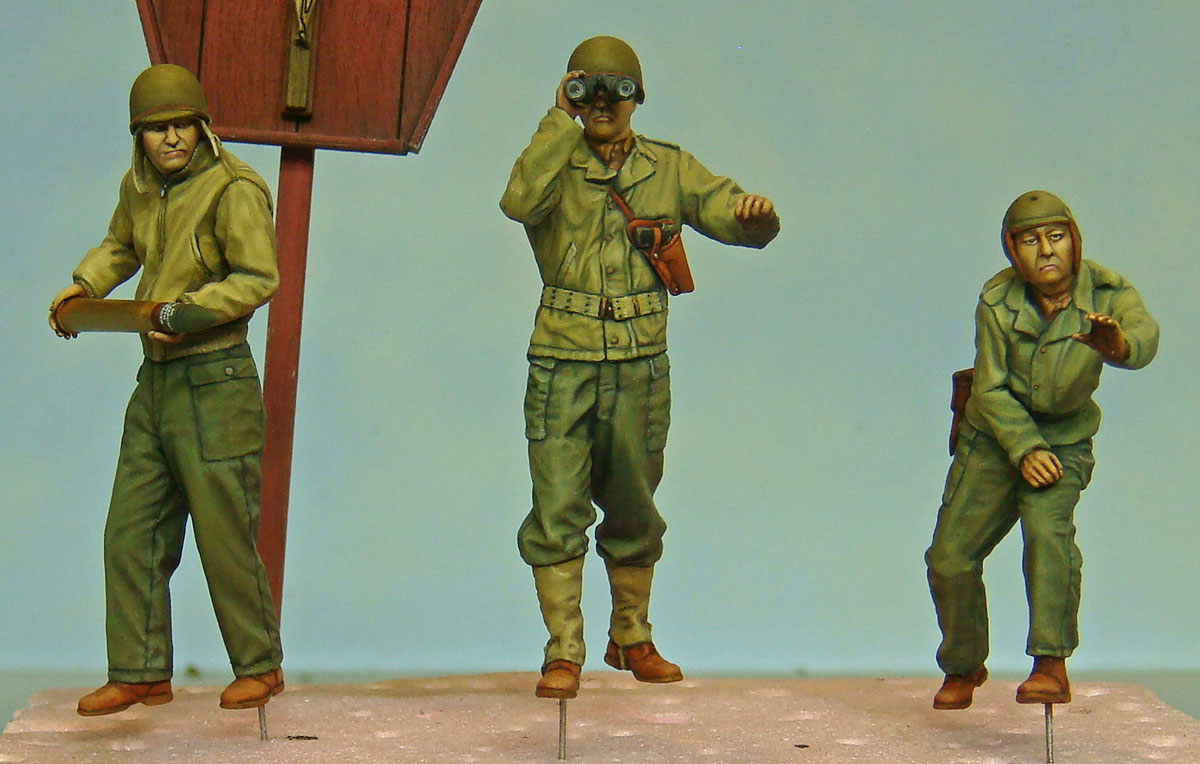
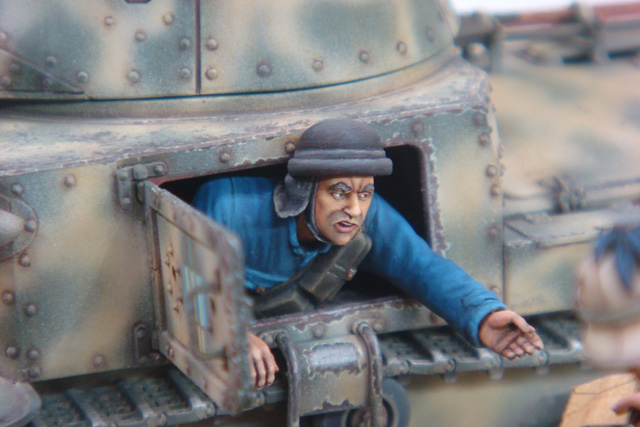
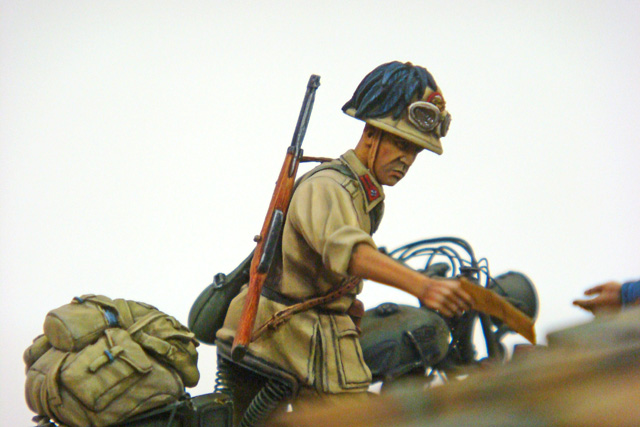
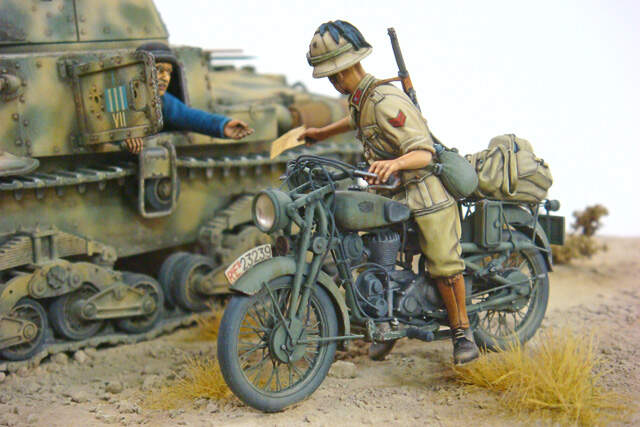
But, just in case you’re looking for a recommendation, my advice is that artist oils, the classic and “traditional” medium for figure painters, can get you there. These are a few quick examples of 1/35 scale figures that are all painted in artist oils over acrylic undercoats. Some are conversions, but many are stock figures, right out of the box…
@SidAufKia, those are outstanding figures and amazing results in my opinion!
I’ve always found artist oils easier to control for pin point application. However, for figure faces I’m starting from zero so any paint can be purchased etc. Really want fast, easy and mediocre results as that’s light year beyond my current ability with figure painting.
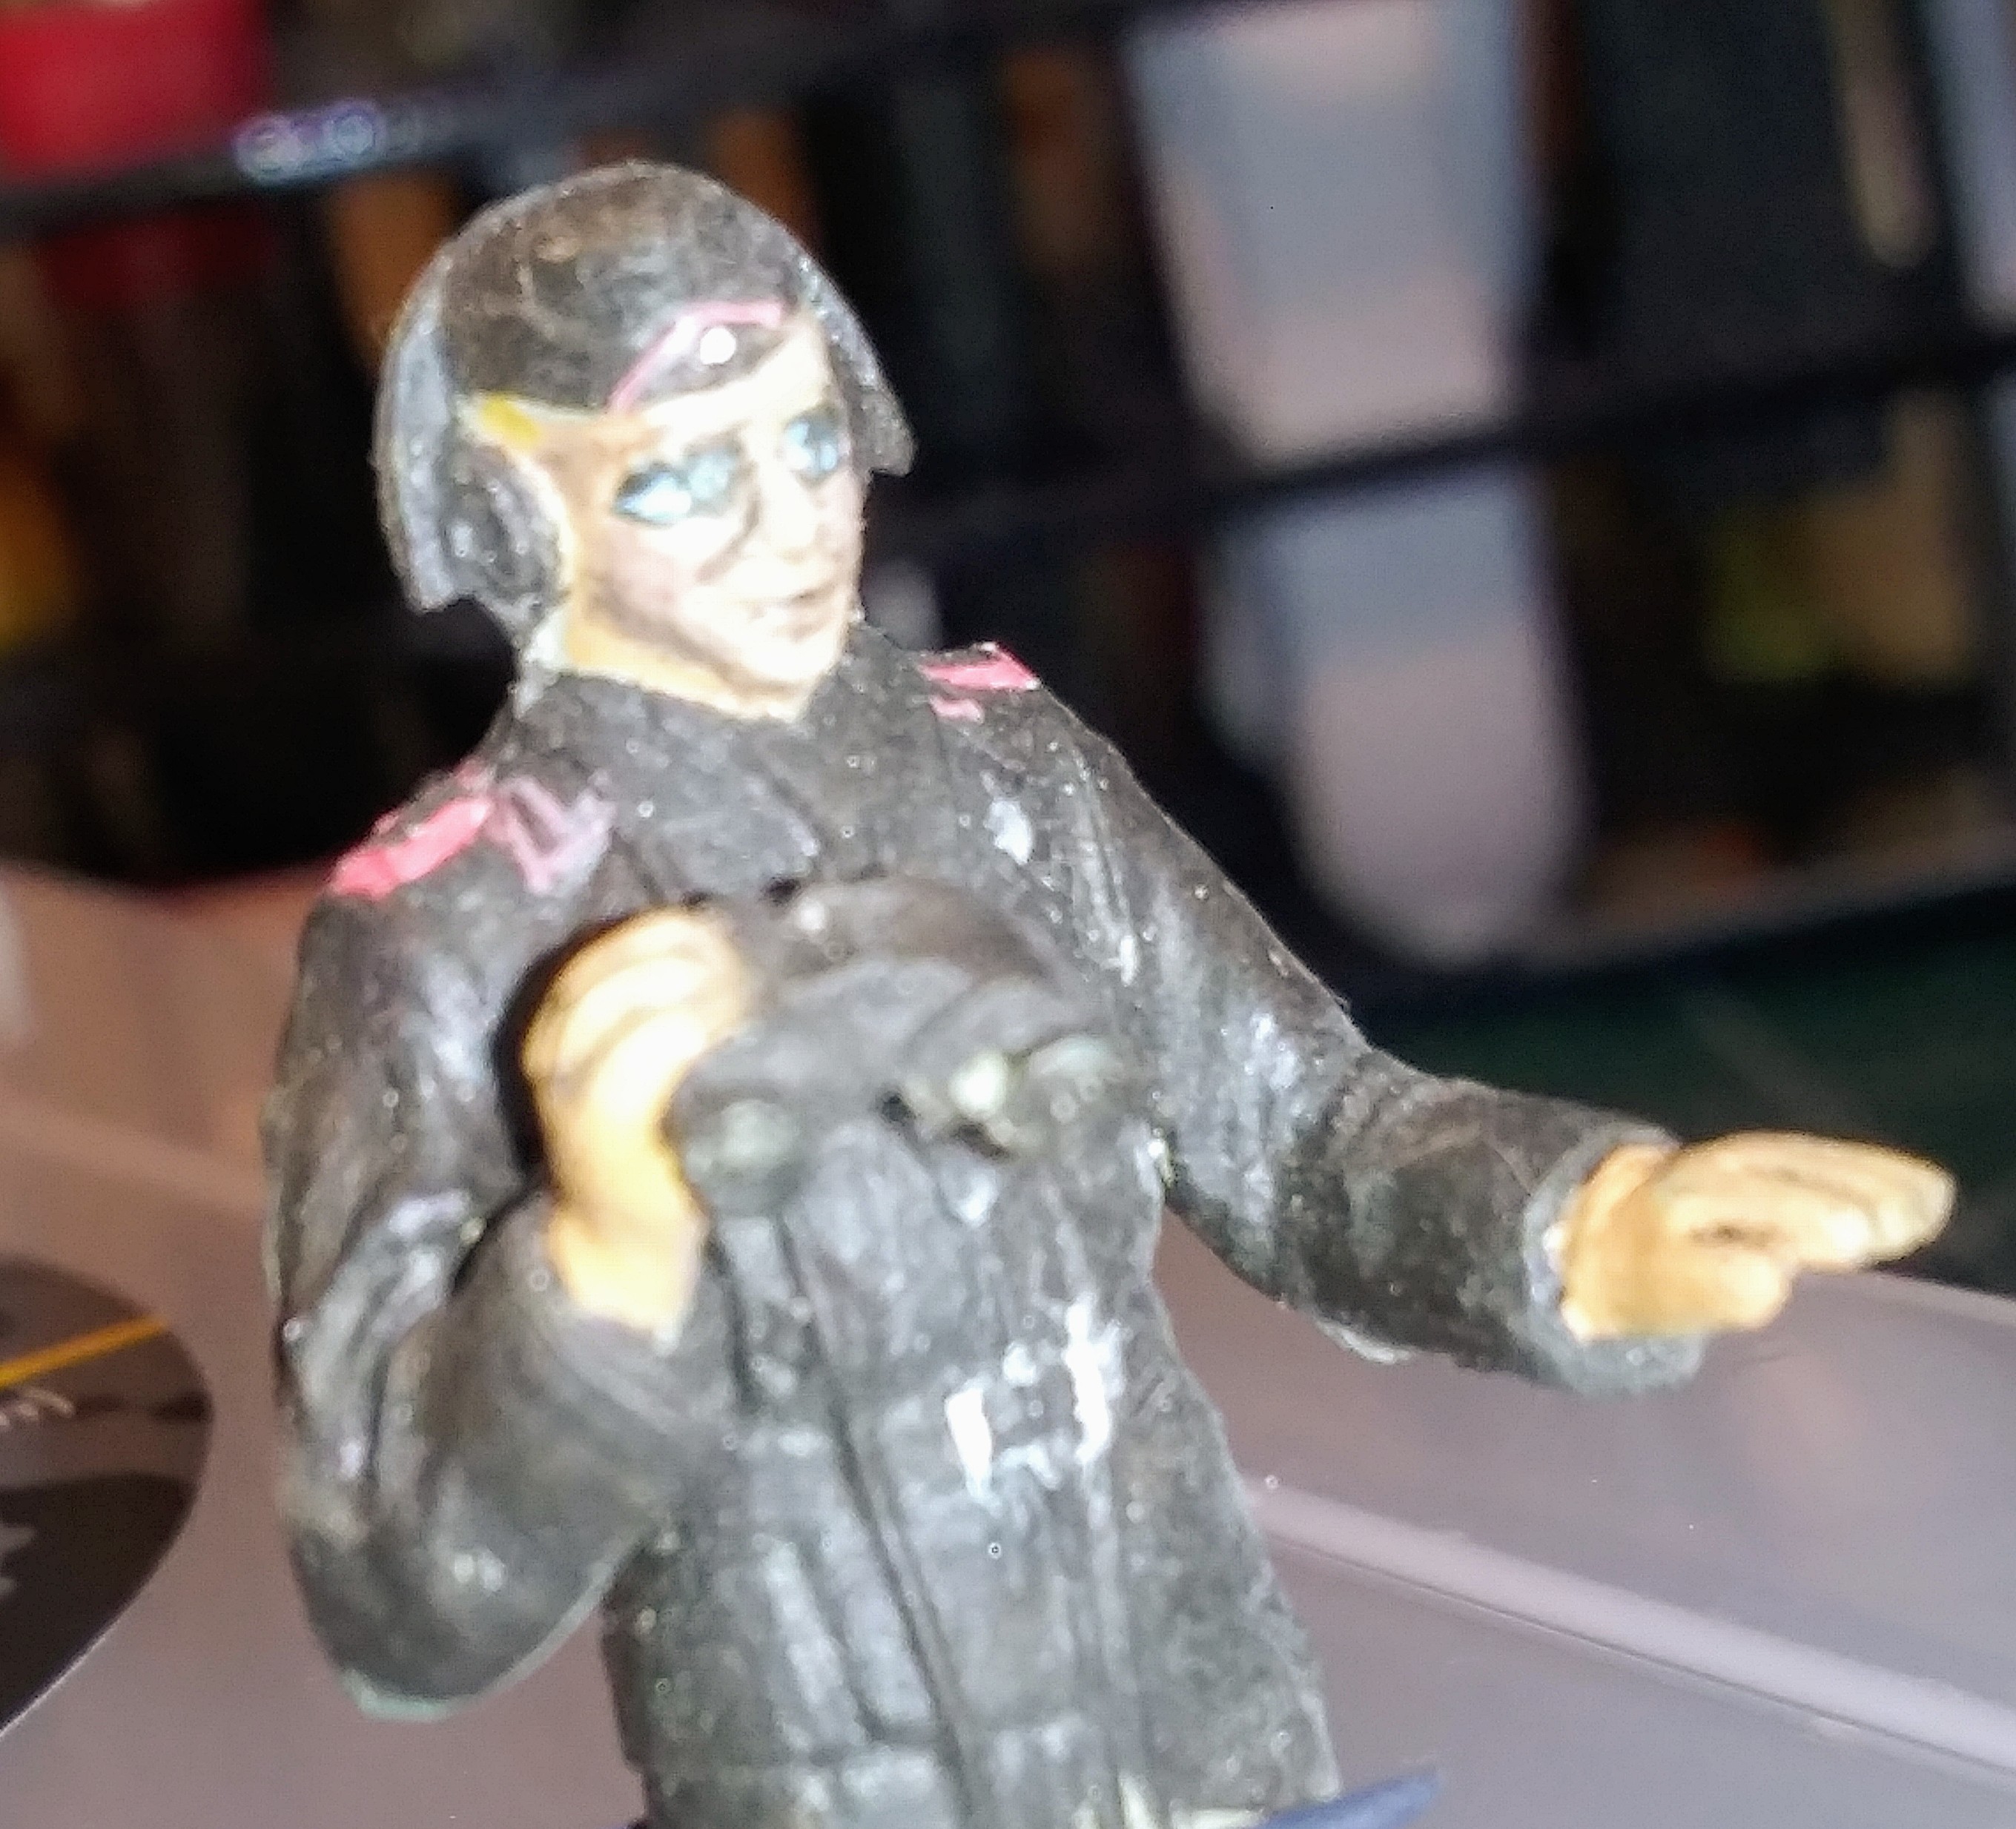
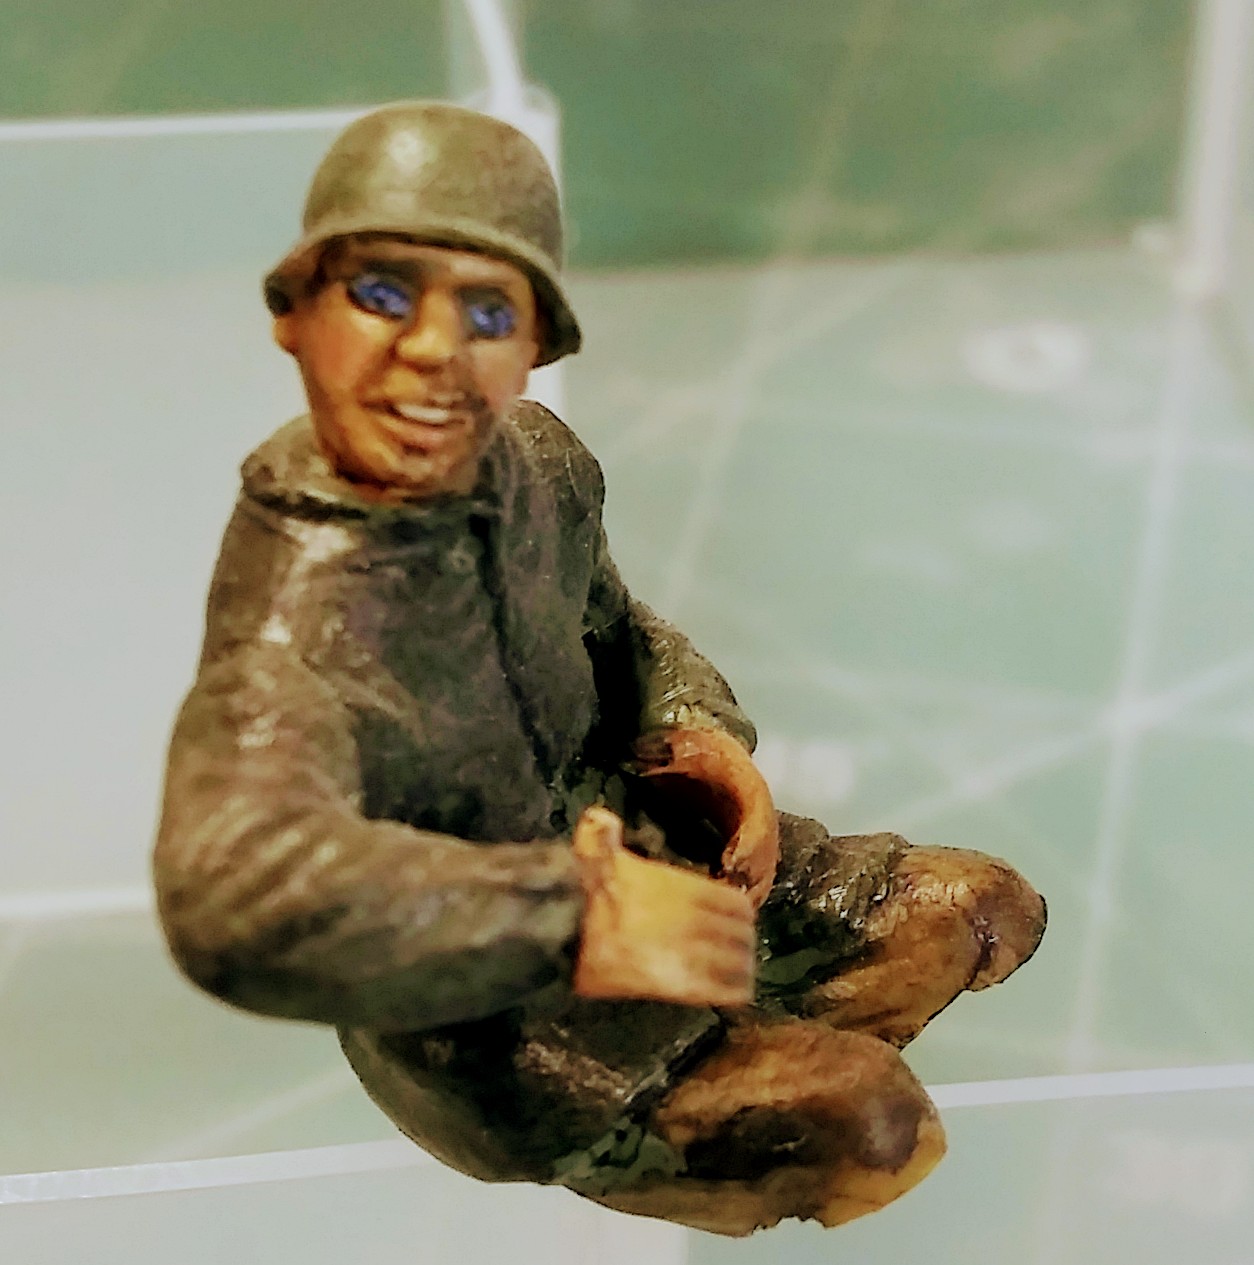
Previously worked with artist oils and have them in hand. Read some of Shepard Paine’s books etc. I have real trouble mixing flesh tones and blending for a natural look. Some of the more candid comments from club members about my sad figures:
“Is he a zombie?”
“Did he get hit in the face by a flamethrower?”
“Is he a zombie who got hit in the face by a flamethrower?”
Another golden one was “Is that Freddy Kruger in uniform?”
Thanks for the kind words about the figgies. I’m not sure that there are any “fast, easy and mediocre” methods that can be built on and improved over time.
The easiest and fastest method to give “arm length” fairly good results is the simple wash and drybrush. However, that method or technique can only be taken so far before its natural limitations are reached. In short, it’s very difficult to get smooth, subtle and gradual transitions from shadows to highlights, especially as the detailed area gets smaller and smaller. It’s second, and more fundamental limitation is that it really doesn’t put the shadows and highlights in the right places. You’ve read the Shep Paine books so you are familiar with his “stop sign” description of how shadows and highlights actually fall on the folds and wrinkles on the figure.
The wash-drybrush technique puts the shadows and highlights (but especially the shadows) in what should be mid-tone areas. Even if the painter really develops his skills to make the dry brushing (especially) smooth and less “grainy” looking, the shadows and highlights will always be in the wrong places - always just kind of close, but never really right.
I can only speak from my personal experience, but I reached a point in my own modeling where I had to make a conscious decision and effort to really improve my figure painting. There were simply no shortcuts to just mastering my medium.
I guess my point would be to don’t spend a lot of time learning some technique that will only ever limit you no matter how well you apply it.
If you really want to go with artist oils (and why wouldn’t you! I really do believe that they are the easiest and most intuitive of the mediums to learn…), I would offer up the following you tube video of a seminar that I pitched some years back a the AMPS International Show:
I continue to work and try to learn new variations on the technique, but by and large, my figure painting methods right now are very close to what’s shown in the video.
I now use a slightly different flesh mix, but the mix demonstrated in the video is, again, a very simple and basic mix that can be built on and learned from. Once you’ve used it for a while, many, many other flesh mixes will just “click” and start to make sense.
I also now use W & N Liquin as a thinning media for actually painting. However, mineral spirits, as shown, is still a viable and sound method. The Liquin is really just a slightly more polished version of it.
I freely acknowledge my debt to Mark Bannerman for the guidance he offers in his Osprey book on painting military figures with oils. His face painting technique illustrated in that book is still one of the absolute best and clearest descriptions that I know of. In small scale figures, 1/32 - 54mm and smaller, his technique is still the one I use. It’s also the technique demonstrated in the AMPS seminar.
If you discount the somewhat separate topic of painting eyes, this technique is almost as fast as a well-polished use of the wash-dry brush technique, but it gives results that are lightyears better. Simply use Shep Paine’s “Clint squint” technique for basic eye painting, and you’re there.
The beauty of this technique is that the more you use it and practice, the better and better your results can become. There’s really no limit to how well you can develop your skill. It even makes for an easy transition to a more deliberate approach if you decide to paint some larger scale figures or busts. You simply learn to paint the shadows in rather than relaying on the initial wash to get them started.
If you decide to the route of artist oils, don’t hesitate to ask any questions here. I’m sure there are a number of us dinosaurs who still paint with oils lurking about! LOL!
Before you beat yourself up over your abilities (or lack thereof) consider the figures themselves. I started painting figures before resin came out. Back then Charles Stadden (54mm scale cast lead) was considered the best. I never cared for the faces since they lacked detail. Historex plastic figures were much better but were mostly Napoleonic. The quality of sculpture on a figure… especially the face, will either make your life easier or have you looking to saw the head off and replace it.
That’s a good advice. Resin figures and resin heads definitely make a difference and are absolutely superior to plastic in terms of details,thus easier to paint.
the one piece of advice I would give is stay away from paints that are called “flesh” as they are usually far to pink in colour and resemble sunburn more than a natural skin tone.
Whoa! That’s positively frightning! But on the other hand, had you been practicing all those years imagine how good you’d be, just look how much better your models look now compared to the earlier ones, but I’m not one should preach, unfortunately I’m no better, I won’t put figures on my kits because a bad figure will diminish a premium build. I wouldn’t recommend enamels though, they don’t blend well at all.
. . as you can see the paint looks like it was applied with a spatula, I’ve since learned that Naptha is the better thinning agent but when it comes to figure painting I’ll maybe experiment with oils. Best of luck to you on your next attempt, don’t let these little guys whip you.
It’s all about technique and practice. There are some phenomenal figure painters who use hobby enamels. For example, one of the best miniature painters in the world, Bill Horan, paints with hobby enamels.
Here’s one of the Planet Figure Bill Horan Q&A where he gives a brief explanation of his blending technique.
Question (Ernest Reyes):
Hello Bill, my question is about your blending for painting the flesh tones, if you paint with enamels humbrol how could you do to blend the lights and shadows with this soft transitions … How could you do that with humbrols??
Answer (Bill Horan):
Ernest, the key is to have a good, opaque undercoat to start with. I start by adding the shadow colors in a small area first (beginning with the lighter shadows, in 4-5 folds). I use a brush with a very slight amount of mineral spirits (cheap hardware store “Paint Thinner” in the USA), and gently blur the edges of the shadow only where a gentle fold is, and leave the line sharp where a sharp transition is. I follow the same practice with darker shadows, and later highlights. The keys are: keep the paint thin, but not watery or transparent, and limit your blending work to the edges only.
A quick Goggle search for “Bill Horan Figures” will turn up hundreds of photos of his his work for anyone who’s never heard of him or who might doubt his skill and talent as a painter.