Biplanes of WWII Campaign

Great progress Michael.

The size of the ICM kit is impressive: I’ve become a bit of fan of the Gladiator thanks to this campaign… Now if Airfix should happen to release one in 1/24… :thinking:

1 Like

A very brief update tonight, because, even though I’ve been quite busy on Airfix’s little Gladiator, there really isn’t much to see…

I’ve applied all the decals which went on nicely and now it’s on with more gloss clear coats to seal them in before pin washes

I really wanted to finish this before the end of the year, but it looks like time will get away from me with real life butting in :christmas_tree:

4 Likes

This will be the last update on the Gladiator before Christmas I’m afraid as family matters are brought to front and centre!

This time the engine assembly. It went together quite nicely but the seems will need a little filling and sanding prior to masking up and painting the dark green

Merry Christmas everyone!
May the man in the red suit bring you gifts of the styrene assembly required kind :innocent:

5 Likes

Looking great, Russell. Very nice metallic effect.

1 Like

Nice, Russell!

Some progress on the ICM 1/32 Glad. Fuselage together:


Fit was very good. Still a bit concerned about the tail wheel strut and lights on the spine, but we’ll see if I can avoid damage. I’m not really thrilled about the seat harness, not really Tamiya’s finest hour, but it’s better than nothing!

Michael

5 Likes

Happy New Year Everyone! :slightly_smiling_face:

Well, it’s been a few weeks since my last update. That’s because progress hasn’t really involved any major stepping stones to show, until now.

Well, now I can show you that pin washes are complete, clear satin coats are on and progress towards completion can take place. This so far has involved fitting the machine guns to the fuselage, the gun sights and now the top wing.


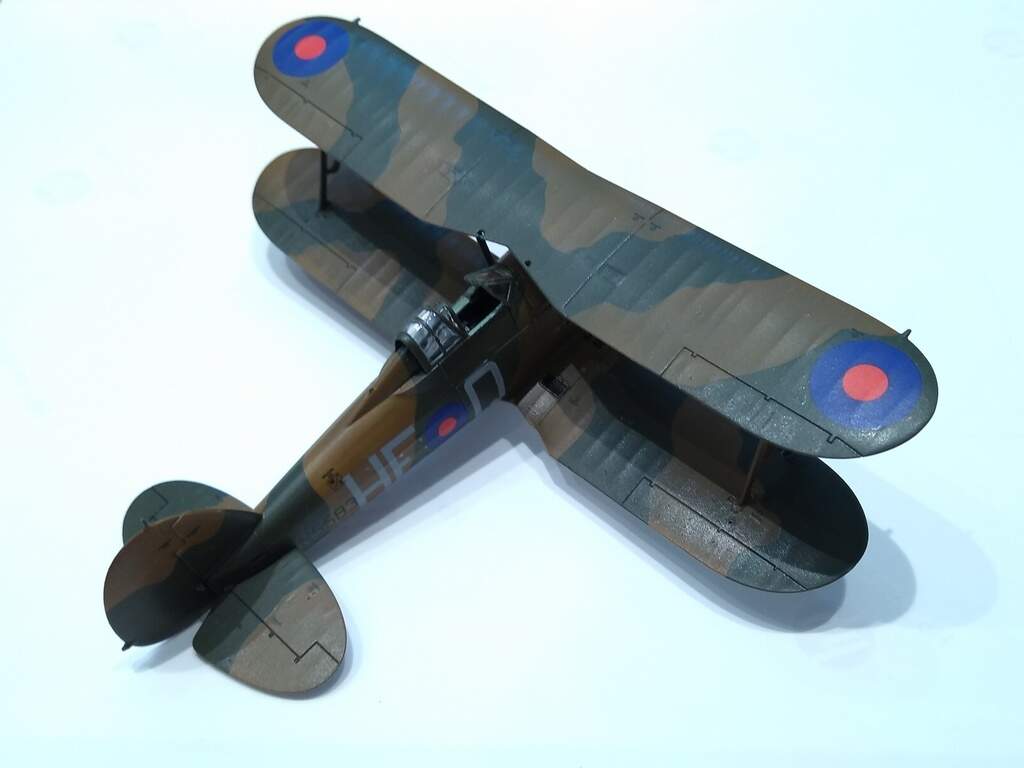
Now, I can safely begin removing the braces that hold the top wing’s struts in position while fitting.
Next is the rigging and then final details! :crazy_face:

4 Likes

Looking good Russ!

1 Like

Looks great Russ!

1 Like

Airfix’s 1/72 Gloster Gladiator is now completed!

A fantastic kit and one of the most enjoyable I’ve built in years…


More pics in the Hangar Collection

Thanks to Michael for running an excellent campaign :blush:

6 Likes

Amazing build Russ!

1 Like

Very nice, Russ!

Michael :stuck_out_tongue:

1 Like

Thanks guys :relaxed:

1 Like

Hi All,

Wow! There is some really great stuff getting done here! Primoz, I really like the way you did the canopy’s, I’m going to be using the same technique on another build soon, thanks. So, I’ve been plodding away on my Pete, and thought I’d posted updates, but can’t seem to find anything. So, here goes to where I’m at thus far.

The cockpit on this kit is quite involved. Surprisingly, most of it can be seen! I did purchase the Hasegawa PE set for this kit, though opted not to use the instrument panel parts as they would not give a 3d look (too flat). I think it turned out ok. Sadly, I can’t seem to find pics of the radio/gunner section.

I’d say the only issue I had was putting the cockpit onto the side of fuselage. I’m guessing I messed up as it was a tad bit to the right. Fortunately, there is a combing that goes around the pilots seating area that hides this goof to the point that you really can’t see it. Whew!

The kit went together per the instructions, and the fit is really nice. I did give the seams a shot of Mr. Surfacer 500, mostly out of habit. It was also nice of Hasegawa to tell you the amount of weight to put into the float to avoid a tail sitting bird on the dolly. Most tell you to add weight, just not how much, a nice touch.

I also used Russelle’s technique of putting liquid mask onto the areas that would be glued later. Great tip Russelle!

Next was off to the paint bench, where I used Mr. Surfacer 1000 Mahogany as the primer. Early Japanese aircraft were primed with a red/brown colored primer, so this is sort of close, and using a variation of the black base method would give me a nice background base.

This was followed up with Tamiya XF-12 JN Gray for the fabric areas, and XF-76 Green/Gray for the metal areas. I then blended it all with a very dilute (1:10ish) of XF-76 and Mr. Leveler Thinner. I was quite pleased with the results.

After giving it a gloss of three coats of my future mix (75% Future, 25%, 70% IPA, and a drop of dish soap), she was ready for the decals. Since I was doing this mainly OOB, I used the kits decals, though for the tail codes I stole some from Tamiya’s Rufe, and cobbled together them to give the tail codes from the Kamikawa Maru, as it would have been near Shortland Island at the beginning of the Guadalcanal campaign. And hopefully look pretty cool next to my Rufe off the same ship!

Next up some minor weathering and adding the top wing, and rigging! Yay me!

Take care, and be safe!

5 Likes

Looking good here!

After a longer than anticipated hiatus, I’m getting some paint on the ICM 1/32 Gladiator II:

God bless the RAF and their bloody shadow schemes, but there it is. Gotta do it right (or as right as I can!)

Michael :stuck_out_tongue:

3 Likes

Well, as the weekend draws to a close, here’s where I am on the Gladiator. Light earth, light green, and dark green applied. Only dark earth left. I might pull this off.

Michael

3 Likes

You can do it Michael! :+1:

Yeah, I dunno Russell. Here’s where I am after the weekend:

Not overly thrilled with it, but I think a gloss coat will help. That said, I don’t see myself finishing by April 1. I don’t really like giving myself an extension, but if others are asking…

Michael :stuck_out_tongue:

2 Likes

I’m not that far along, but another month might help here. :wave:

Atta boy, Mark! Anyone else?

Michael :stuck_out_tongue: