Thanks guys 
1 Like
Hi All,
Wow! There is some really great stuff getting done here! Primoz, I really like the way you did the canopy’s, I’m going to be using the same technique on another build soon, thanks. So, I’ve been plodding away on my Pete, and thought I’d posted updates, but can’t seem to find anything. So, here goes to where I’m at thus far.
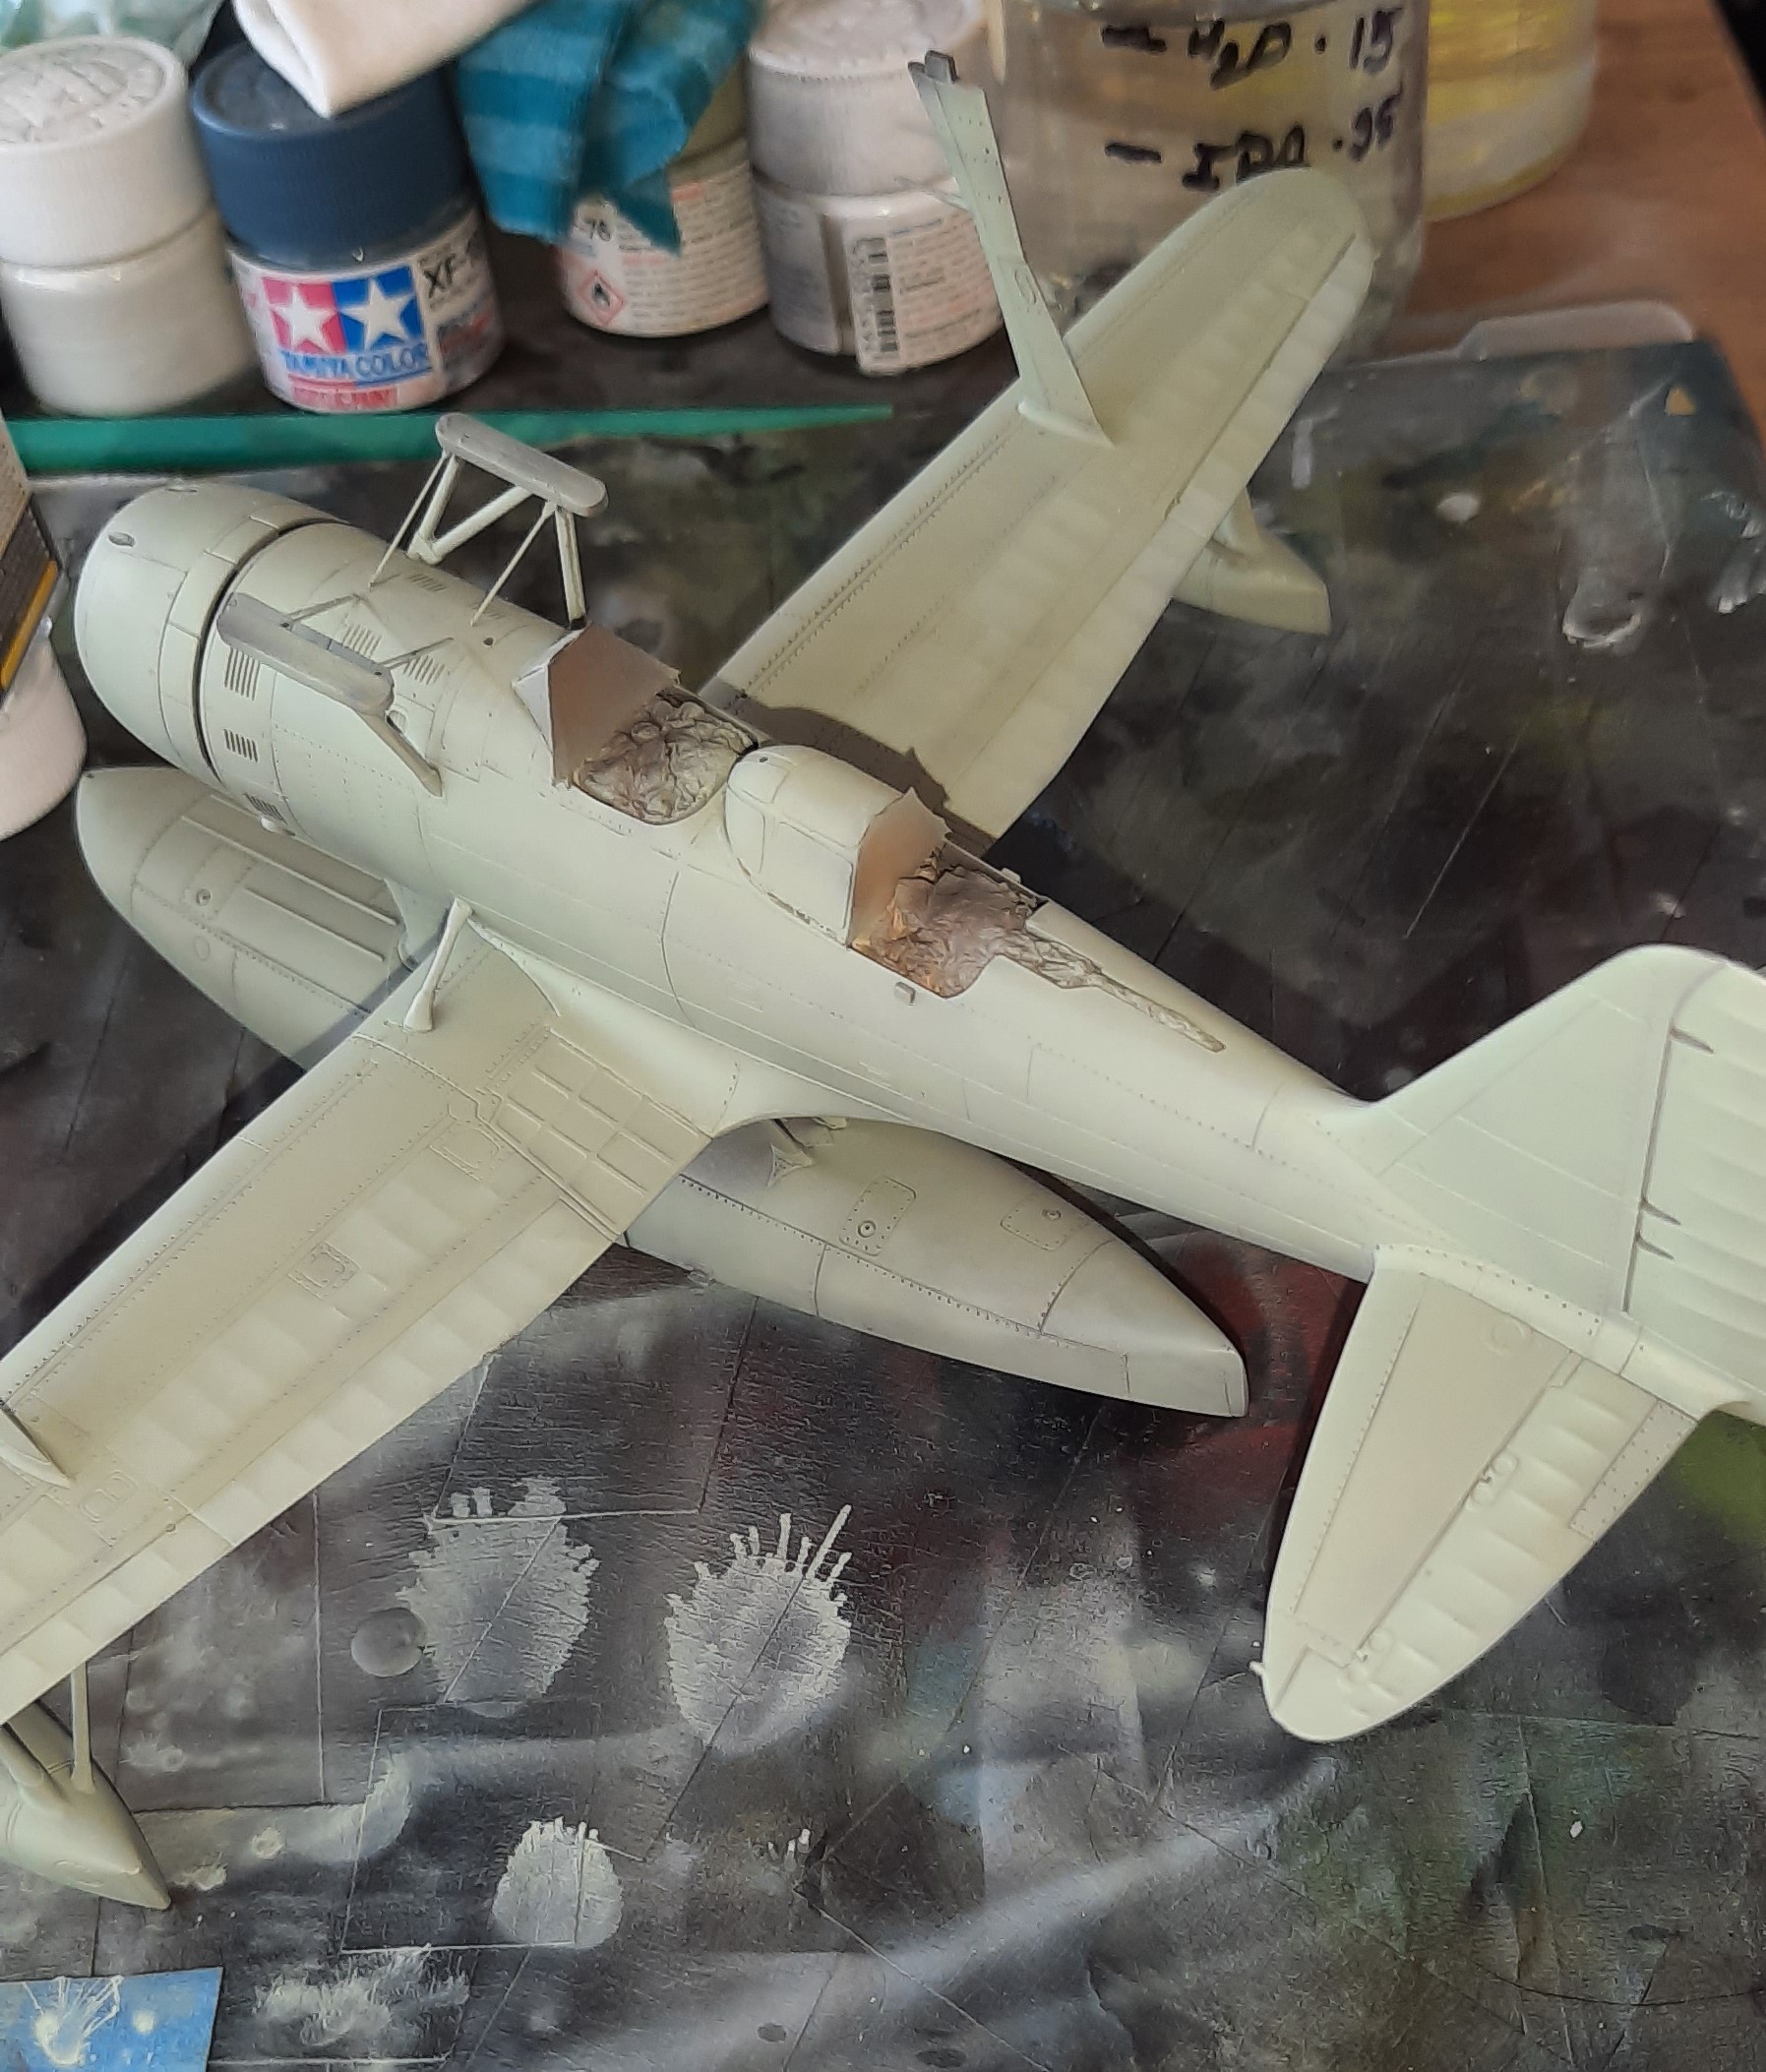
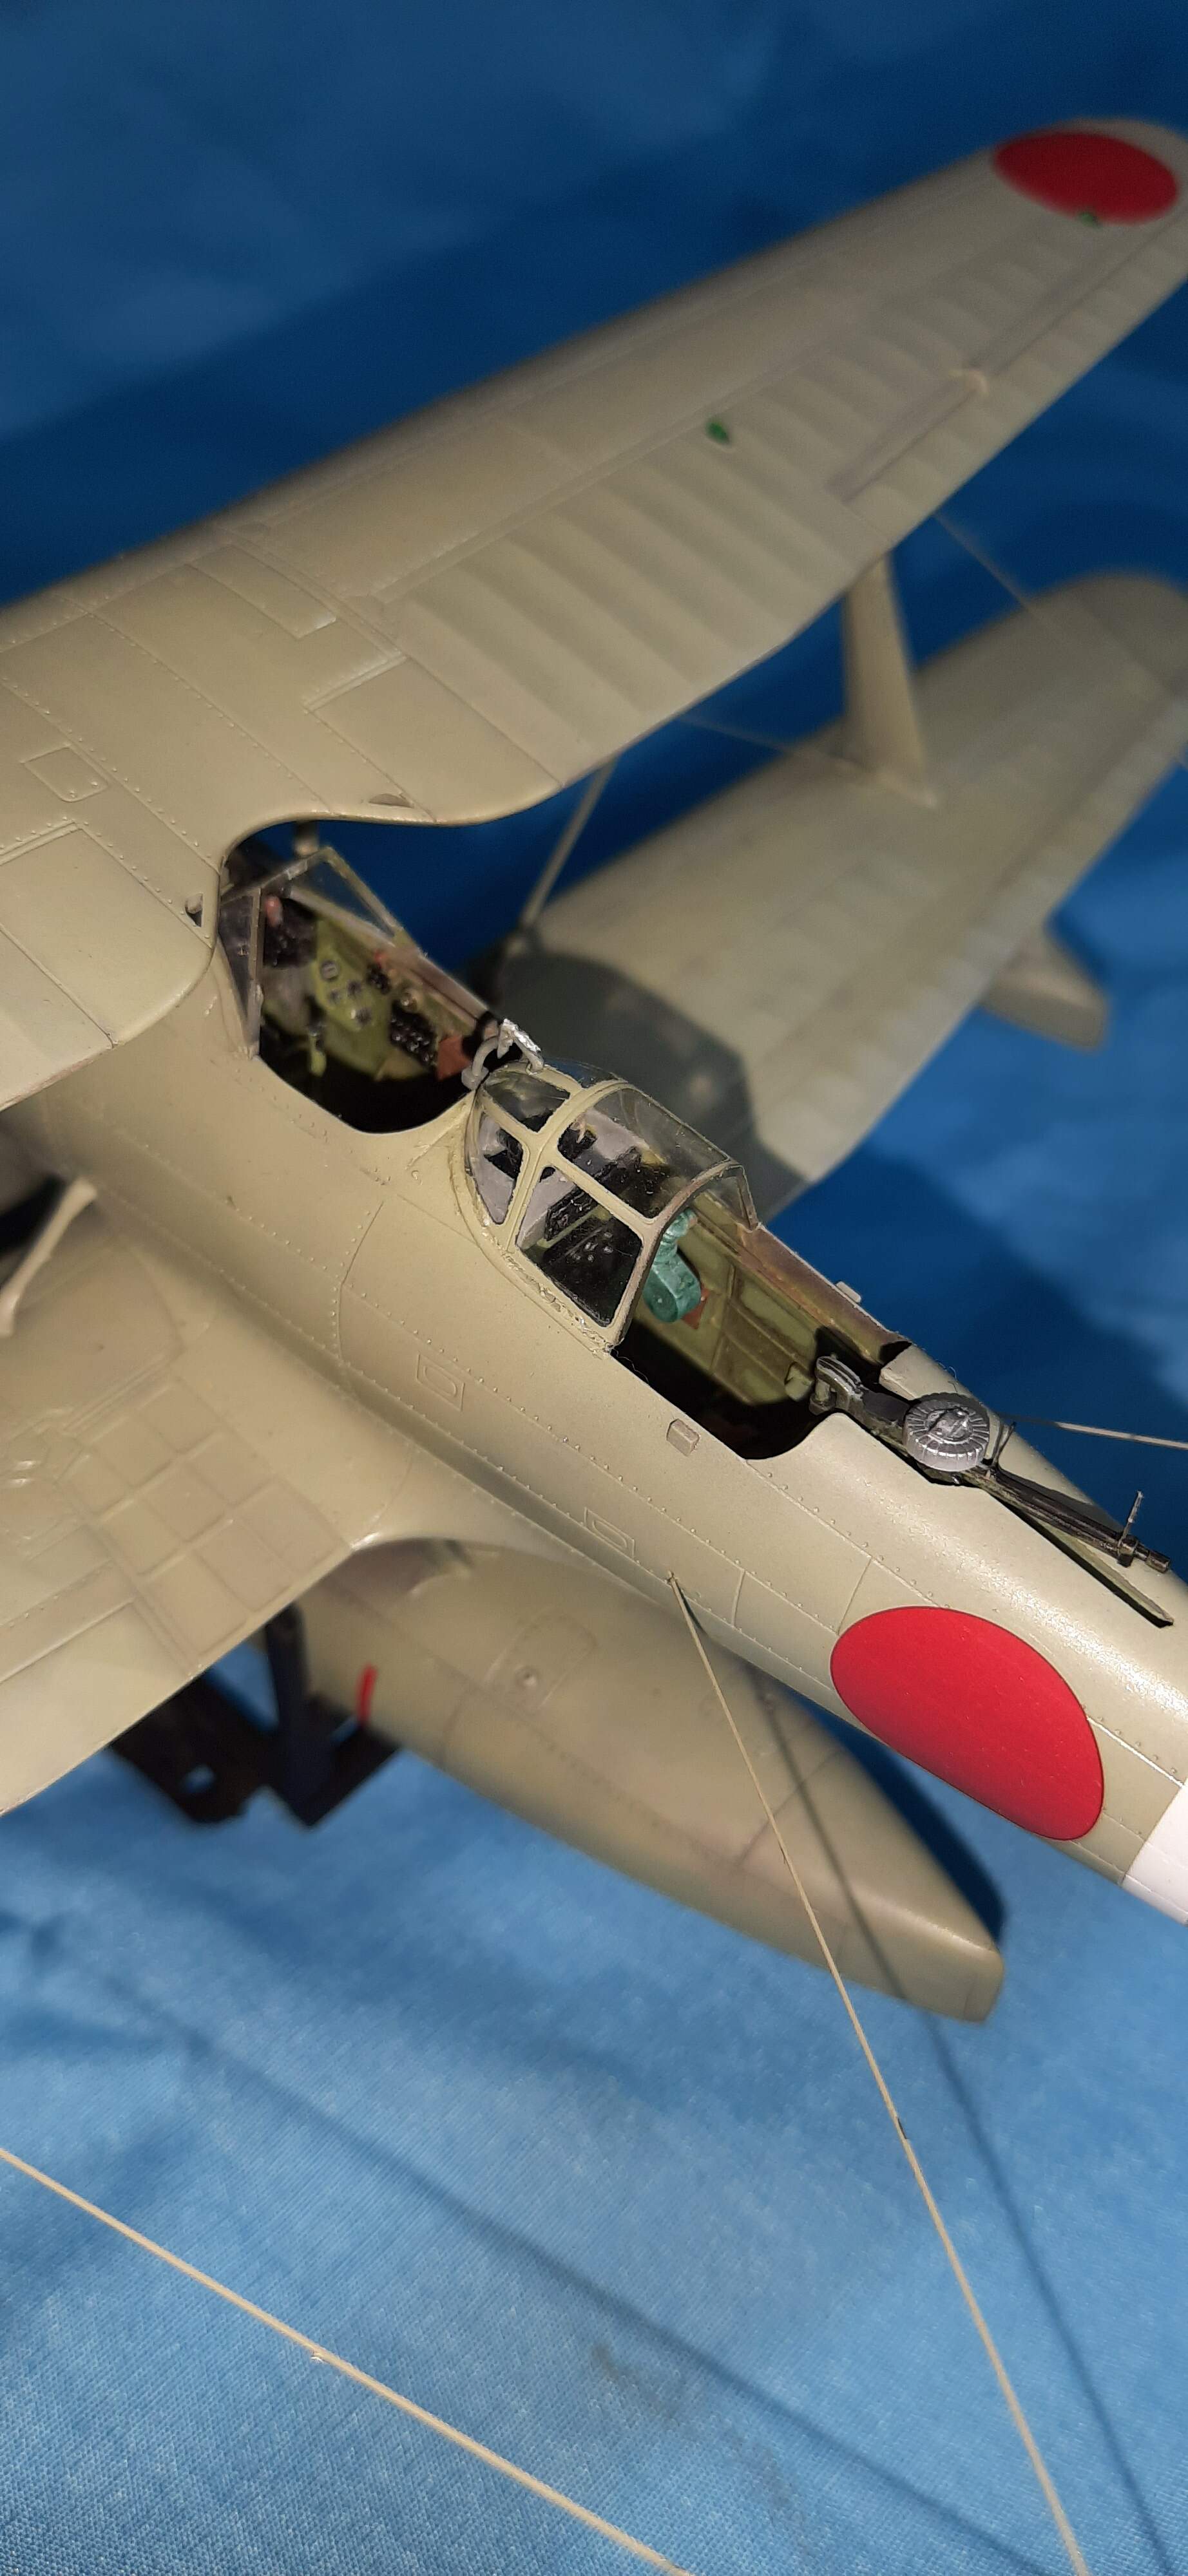
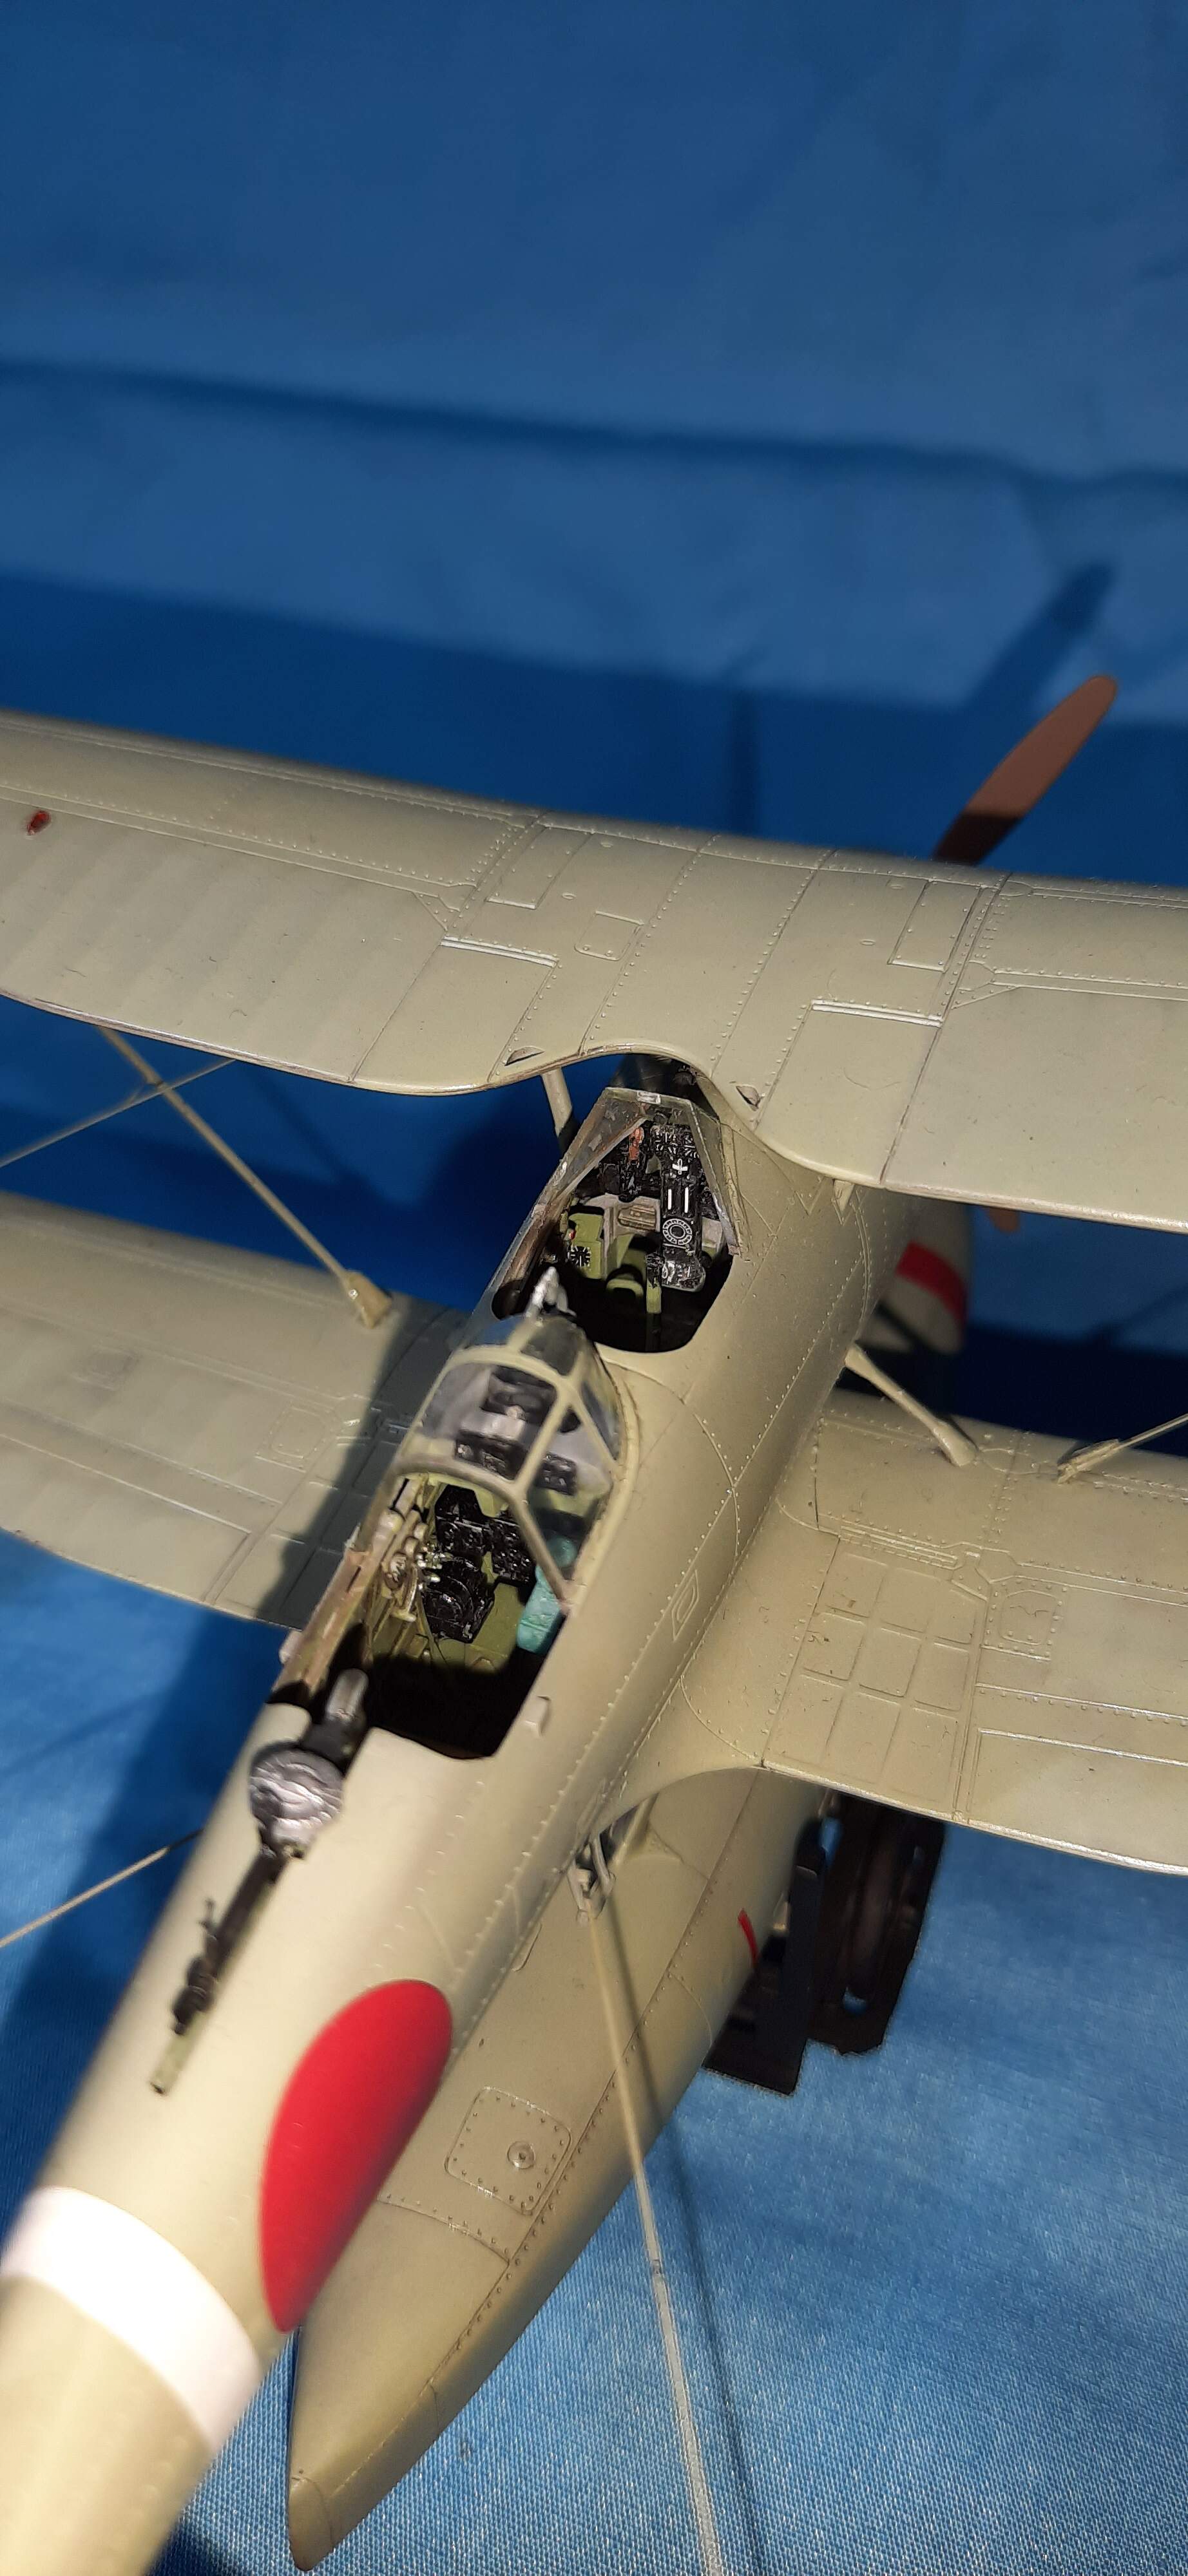
The cockpit on this kit is quite involved. Surprisingly, most of it can be seen! I did purchase the Hasegawa PE set for this kit, though opted not to use the instrument panel parts as they would not give a 3d look (too flat). I think it turned out ok. Sadly, I can’t seem to find pics of the radio/gunner section.
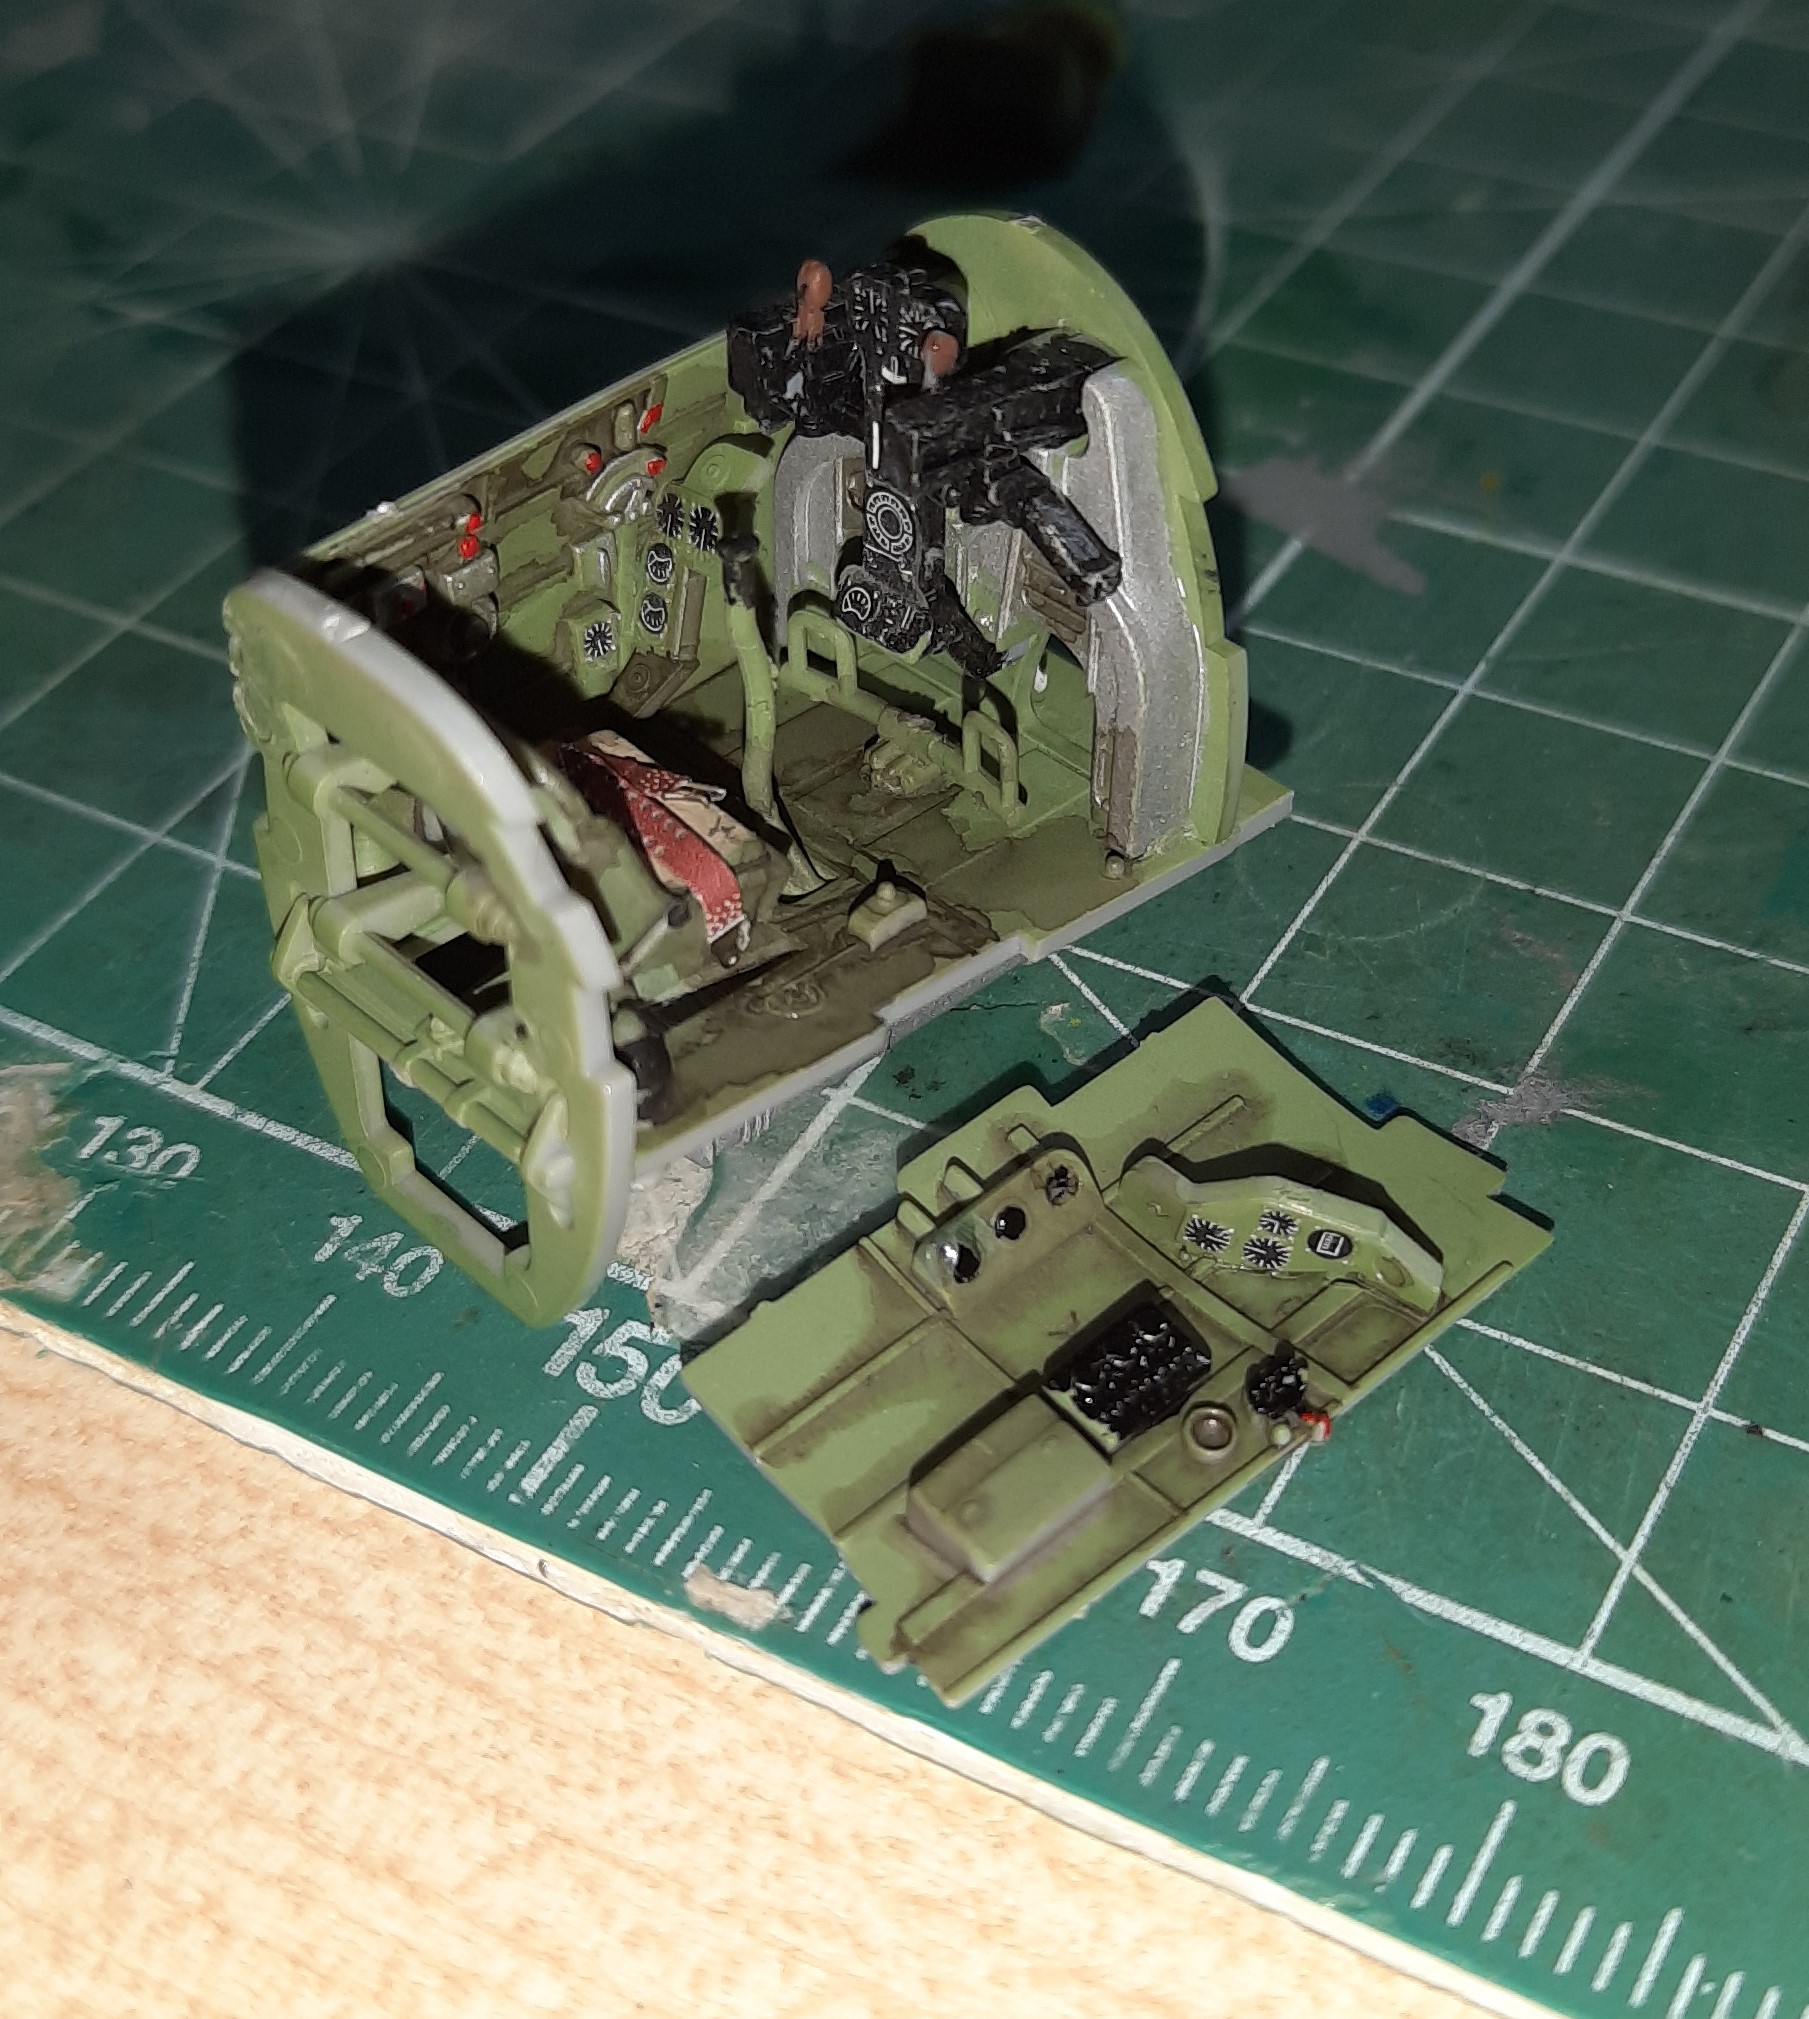
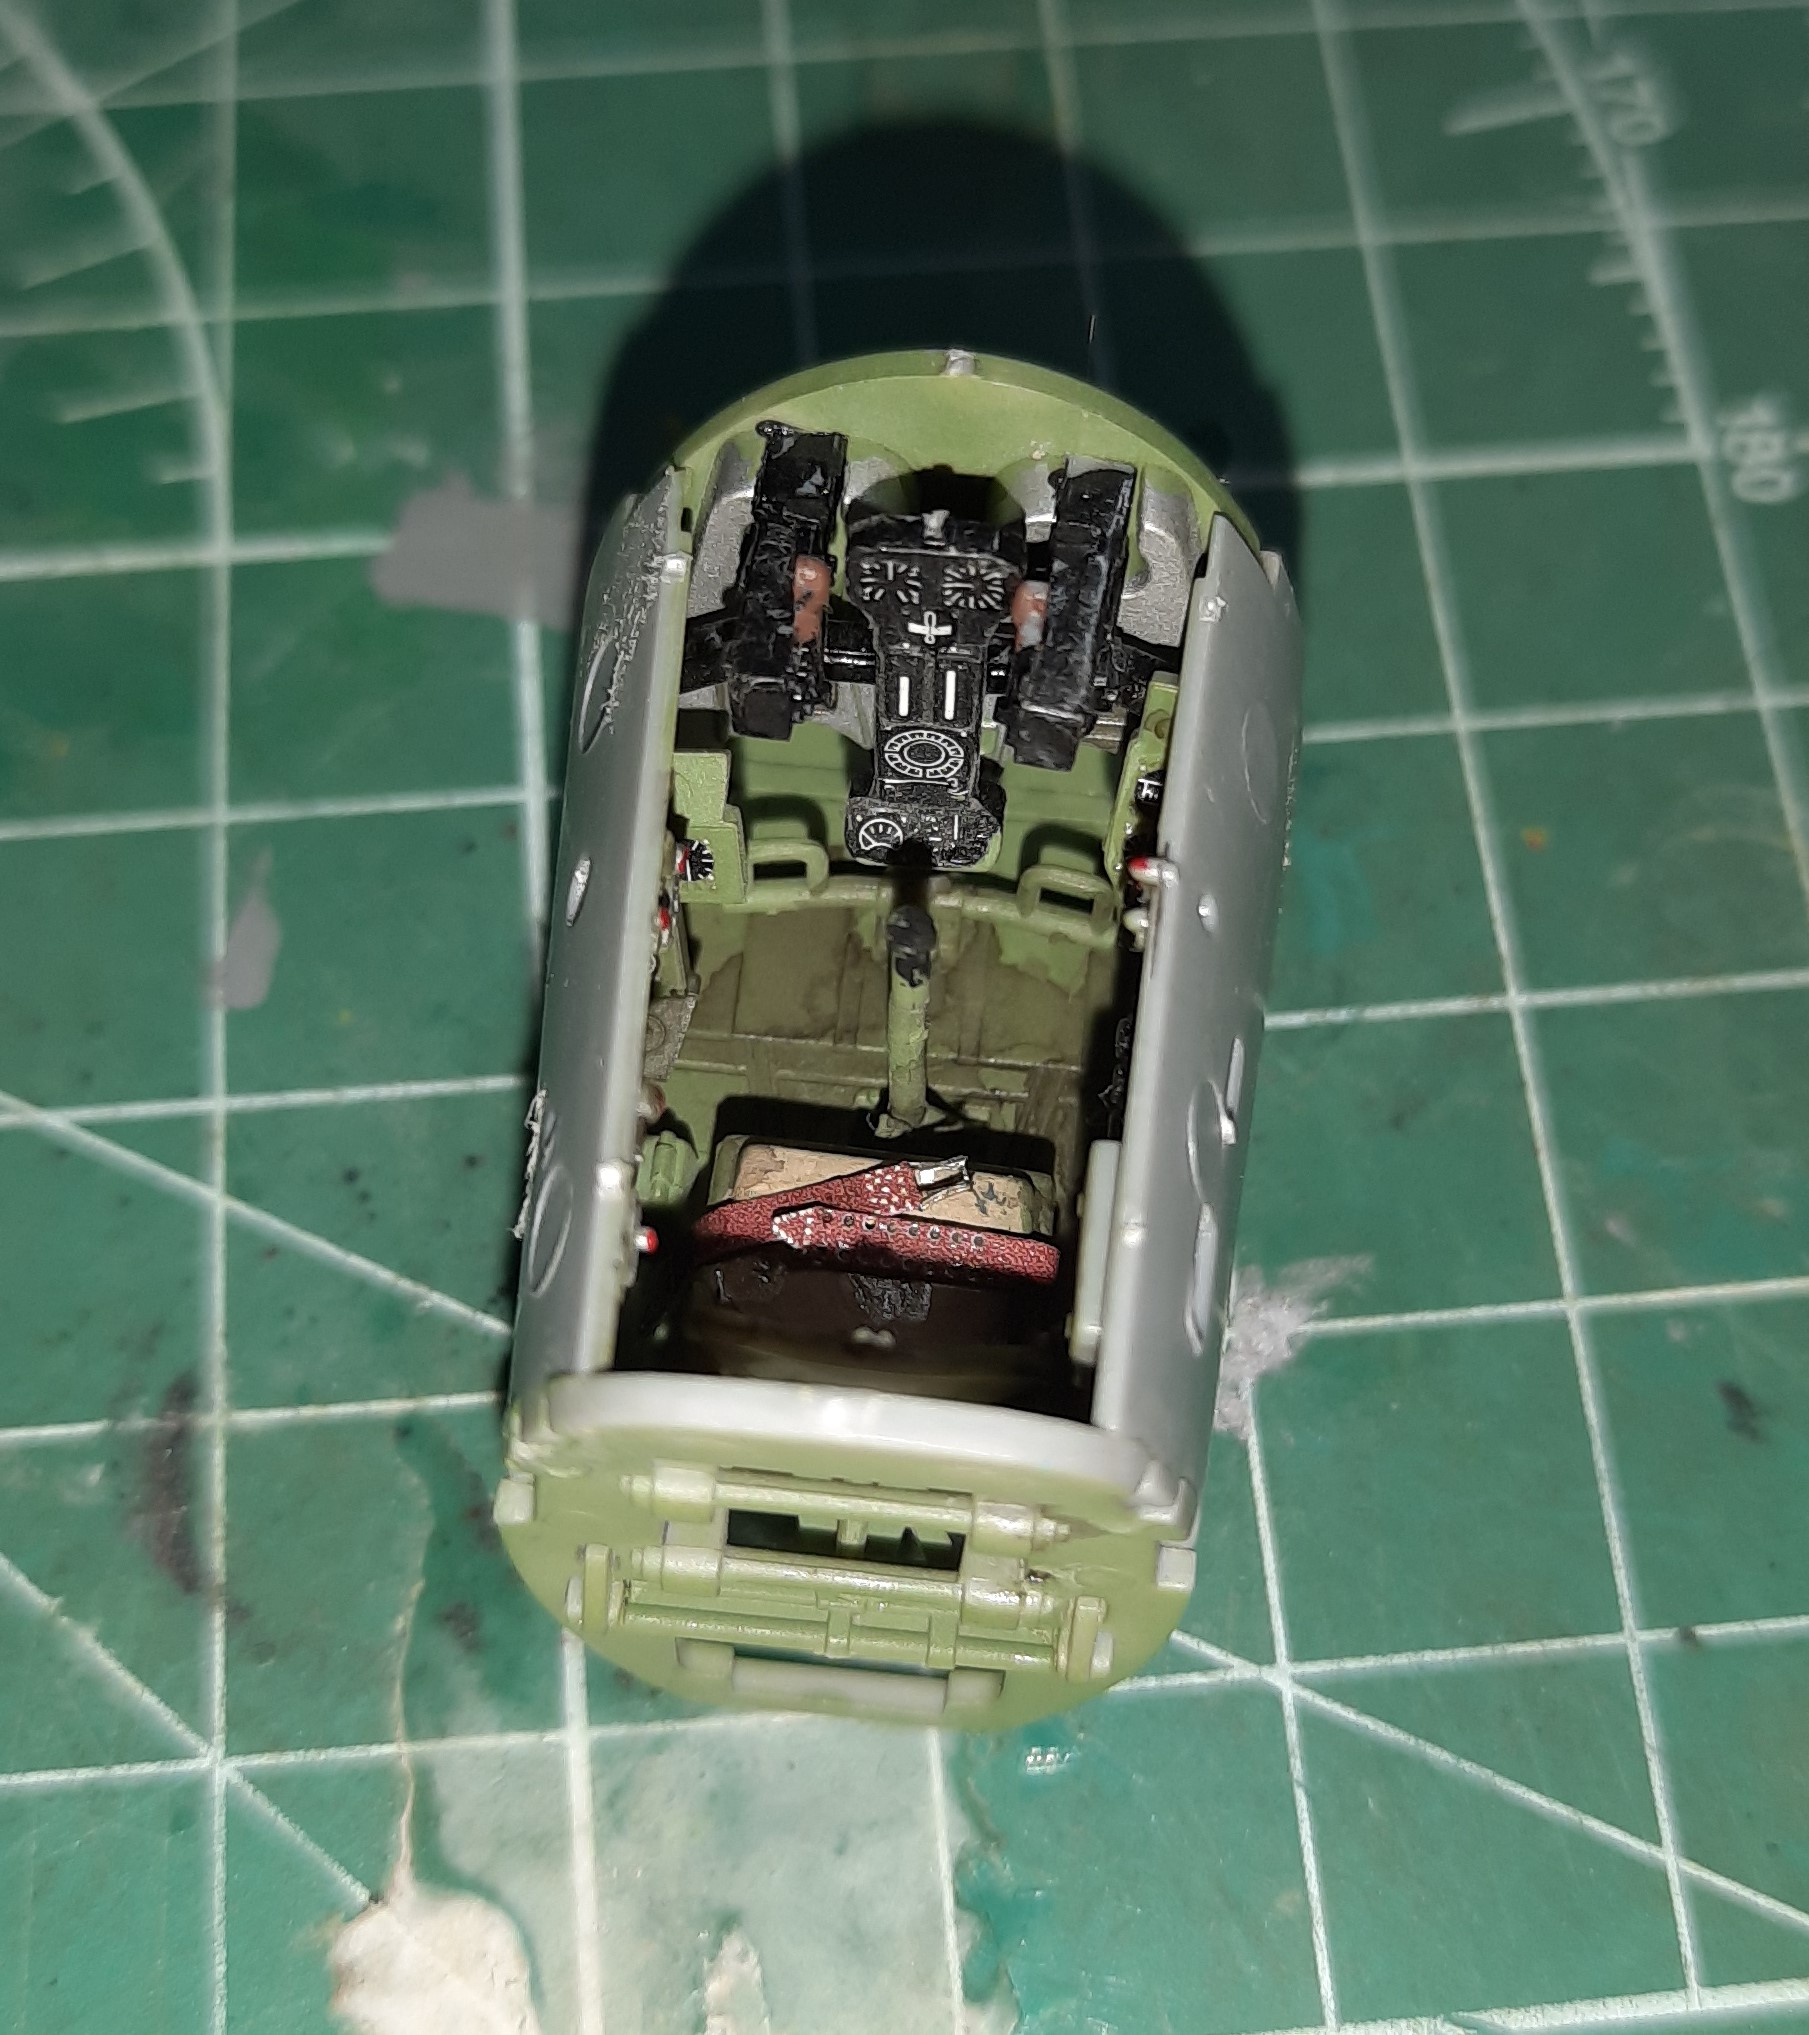
I’d say the only issue I had was putting the cockpit onto the side of fuselage. I’m guessing I messed up as it was a tad bit to the right. Fortunately, there is a combing that goes around the pilots seating area that hides this goof to the point that you really can’t see it. Whew!
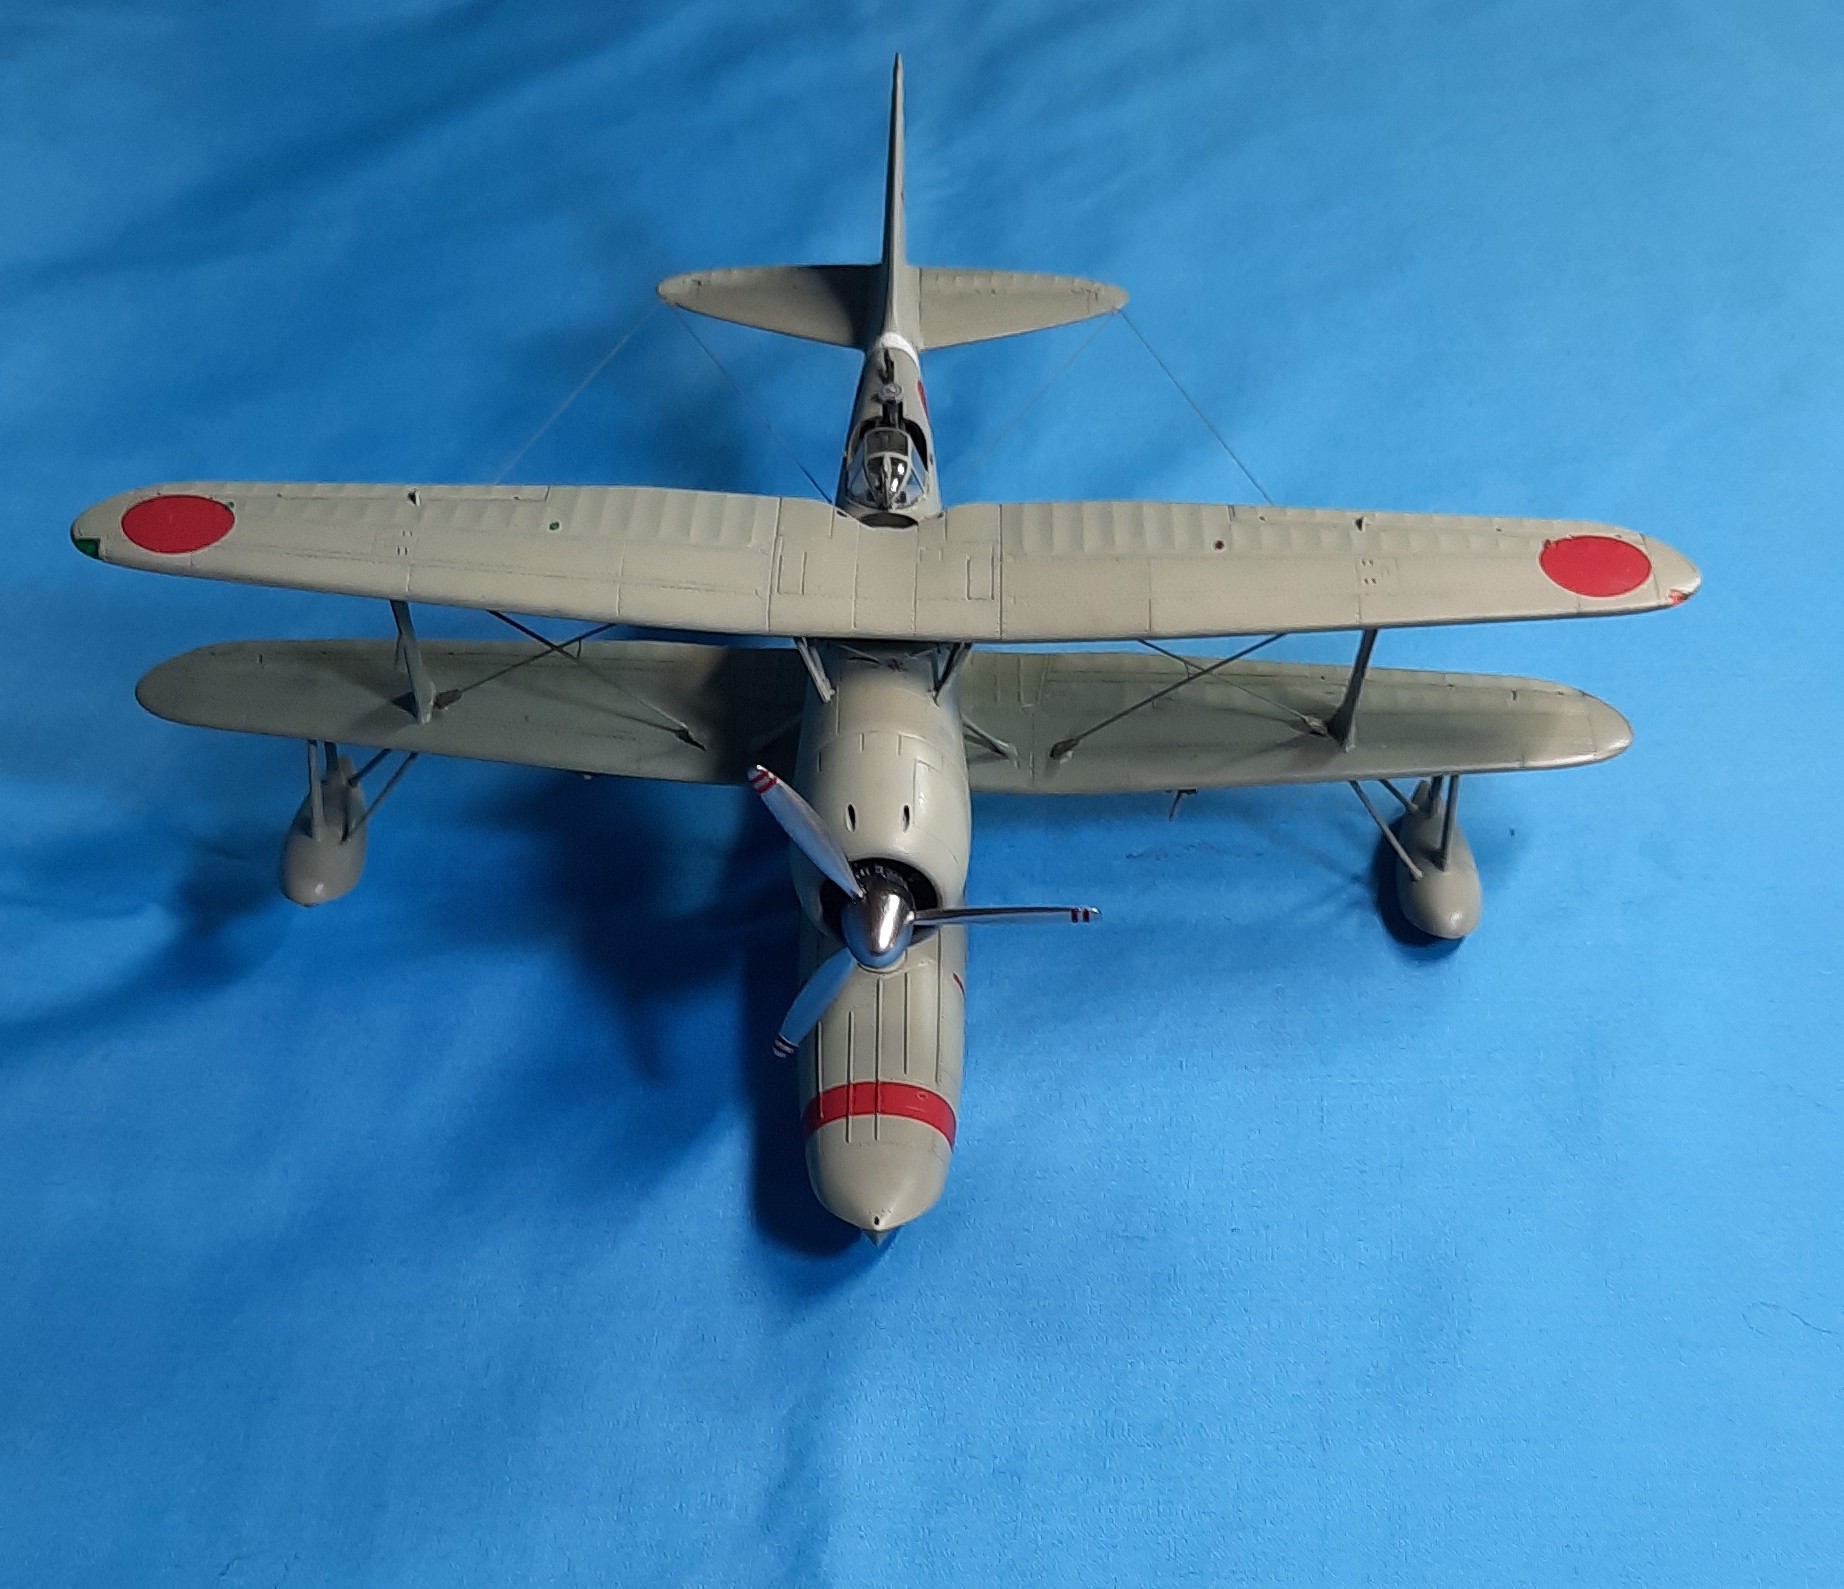
The kit went together per the instructions, and the fit is really nice. I did give the seams a shot of Mr. Surfacer 500, mostly out of habit. It was also nice of Hasegawa to tell you the amount of weight to put into the float to avoid a tail sitting bird on the dolly. Most tell you to add weight, just not how much, a nice touch.
I also used Russelle’s technique of putting liquid mask onto the areas that would be glued later. Great tip Russelle!
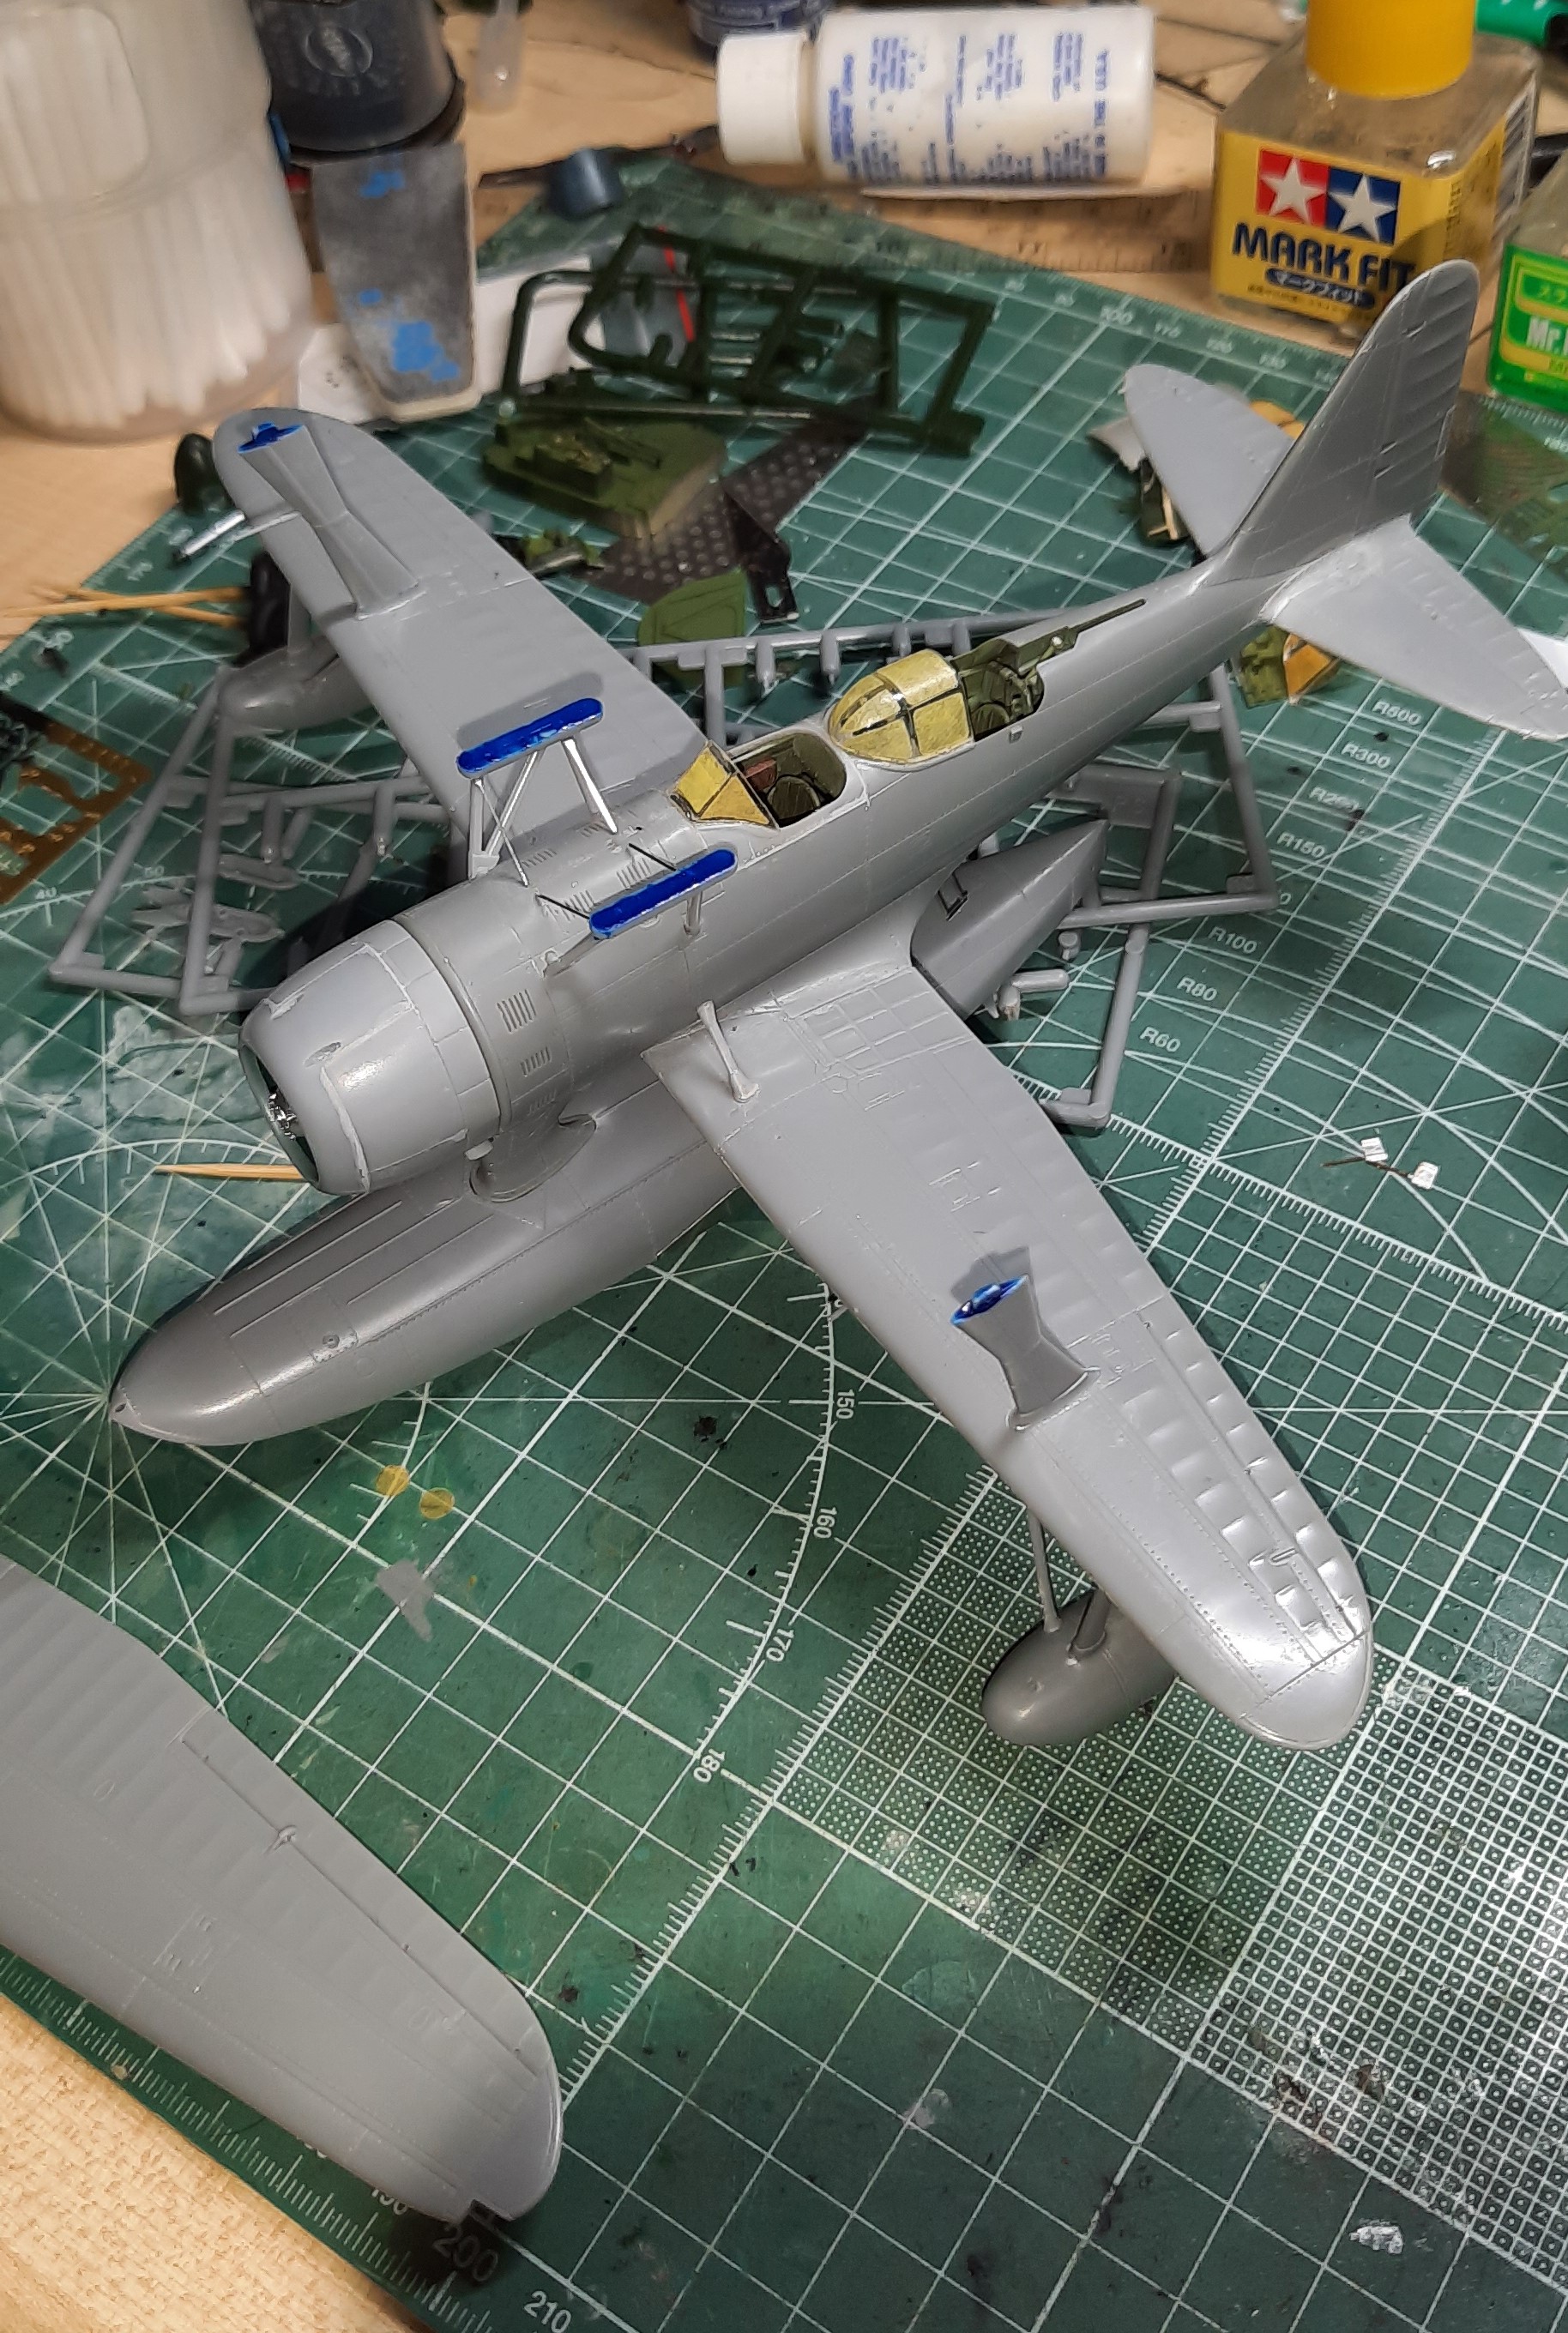
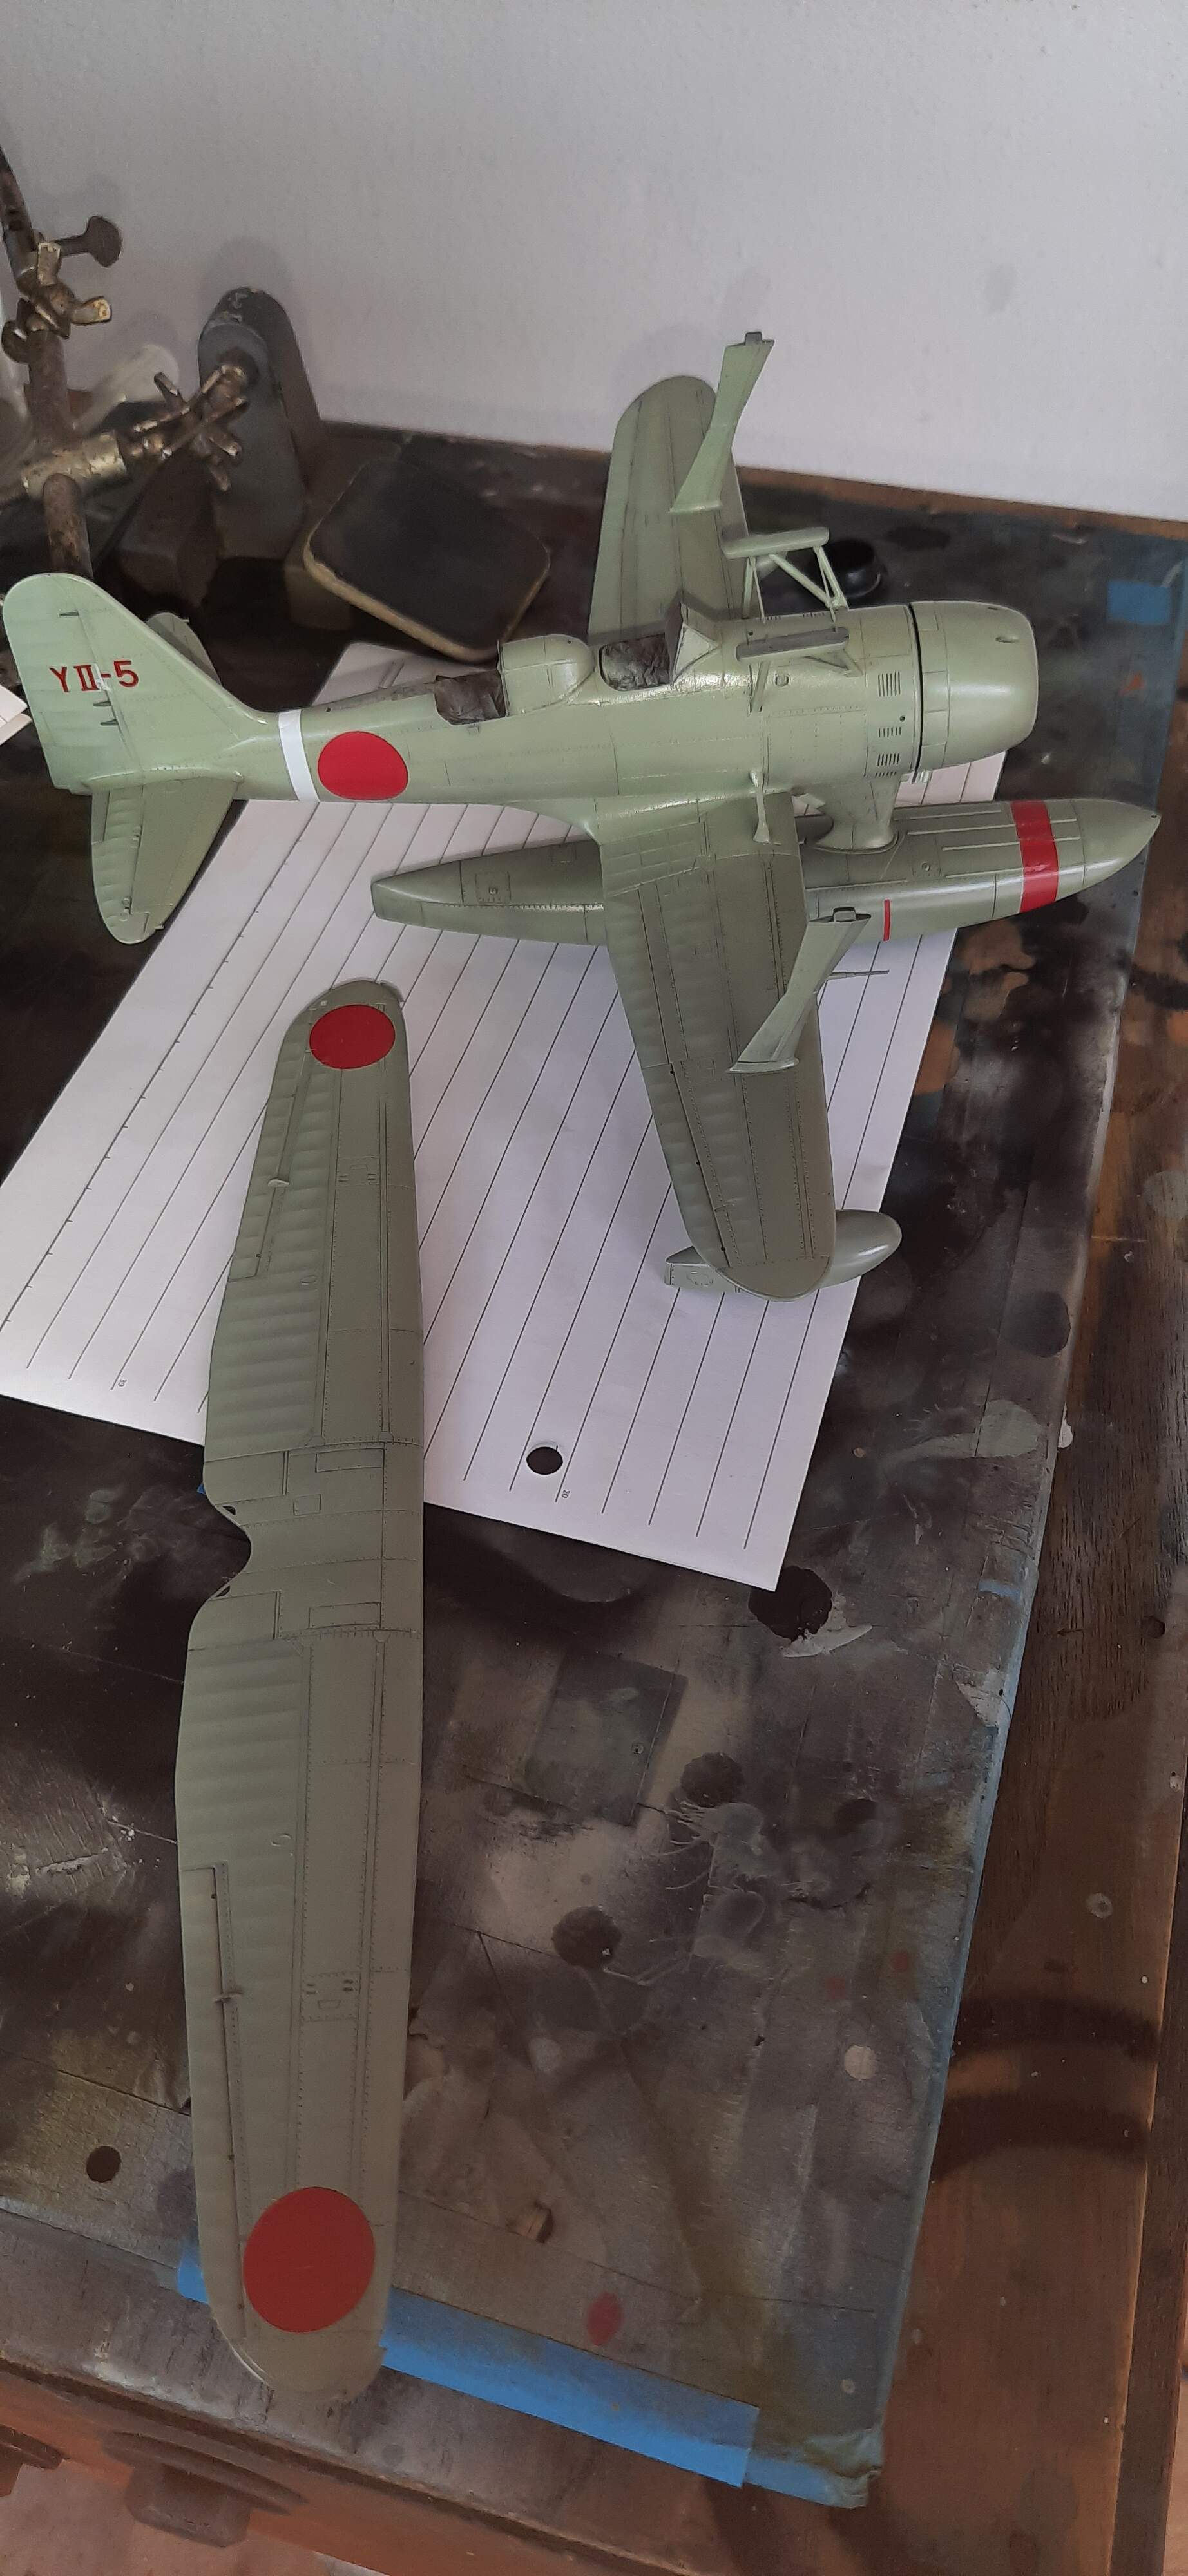
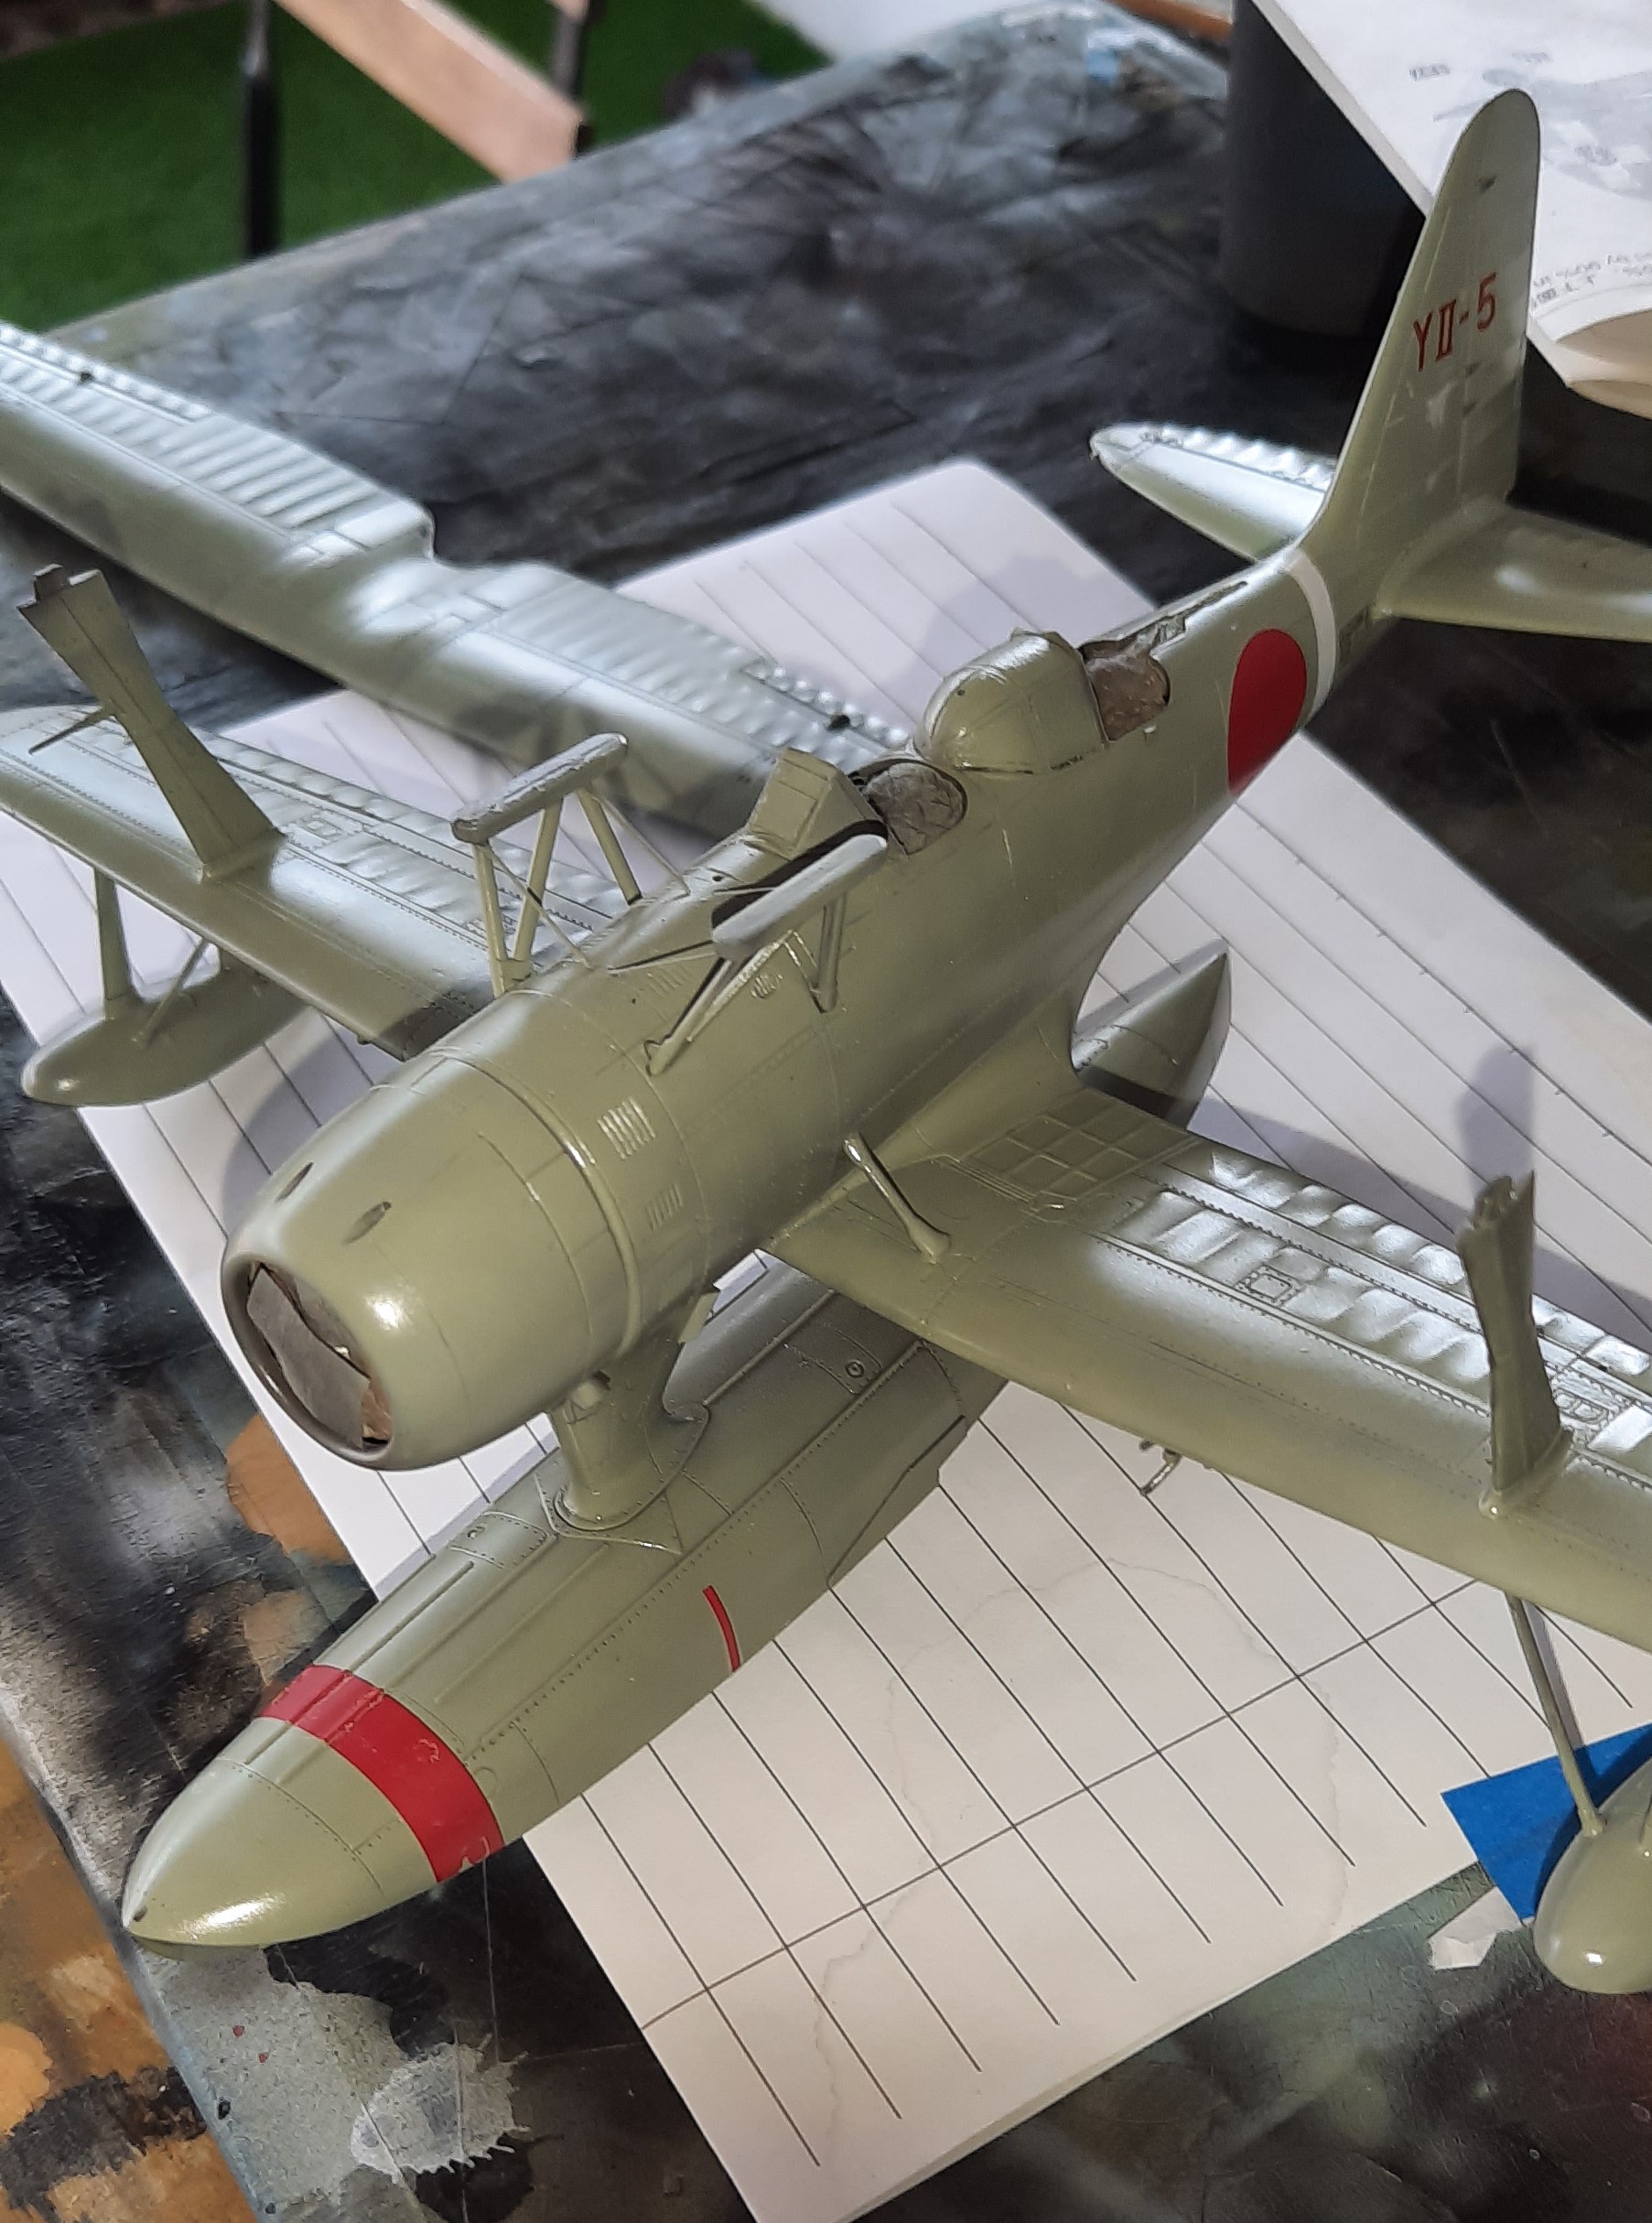
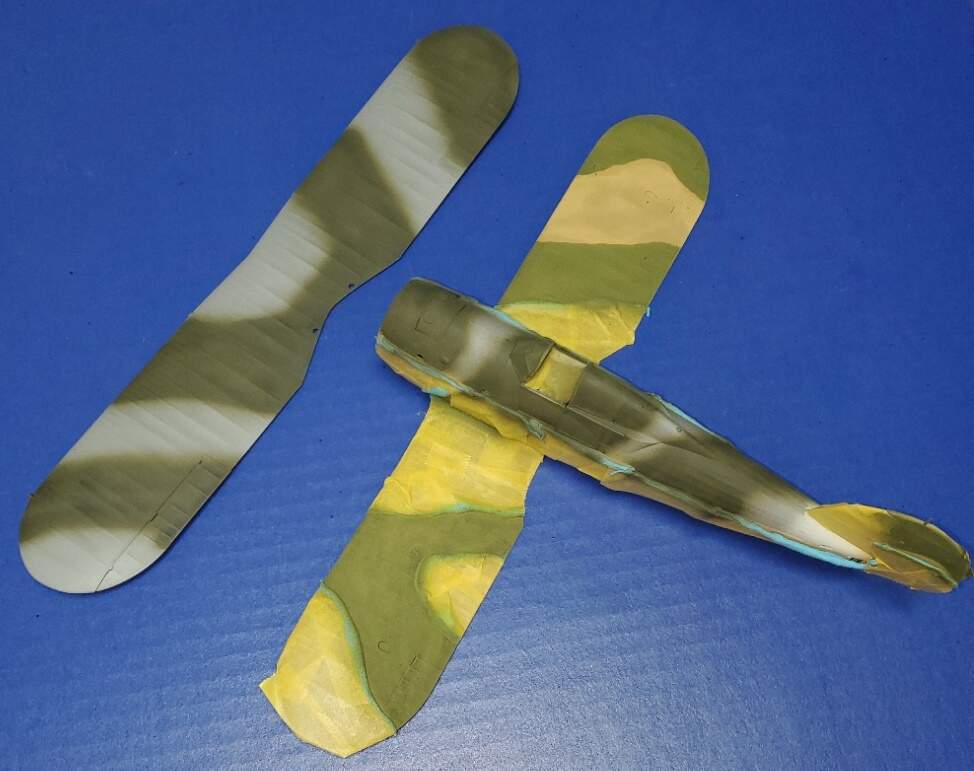
Next was off to the paint bench, where I used Mr. Surfacer 1000 Mahogany as the primer. Early Japanese aircraft were primed with a red/brown colored primer, so this is sort of close, and using a variation of the black base method would give me a nice background base.
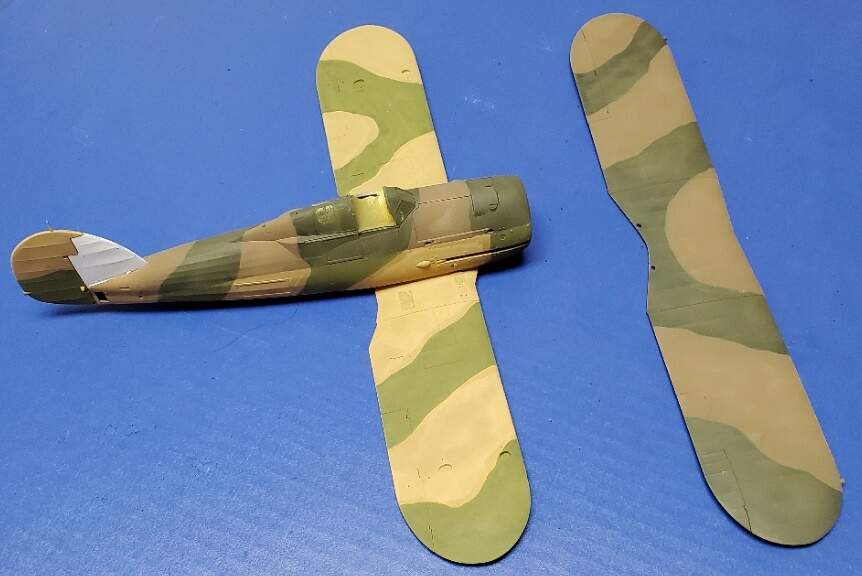
This was followed up with Tamiya XF-12 JN Gray for the fabric areas, and XF-76 Green/Gray for the metal areas. I then blended it all with a very dilute (1:10ish) of XF-76 and Mr. Leveler Thinner. I was quite pleased with the results.
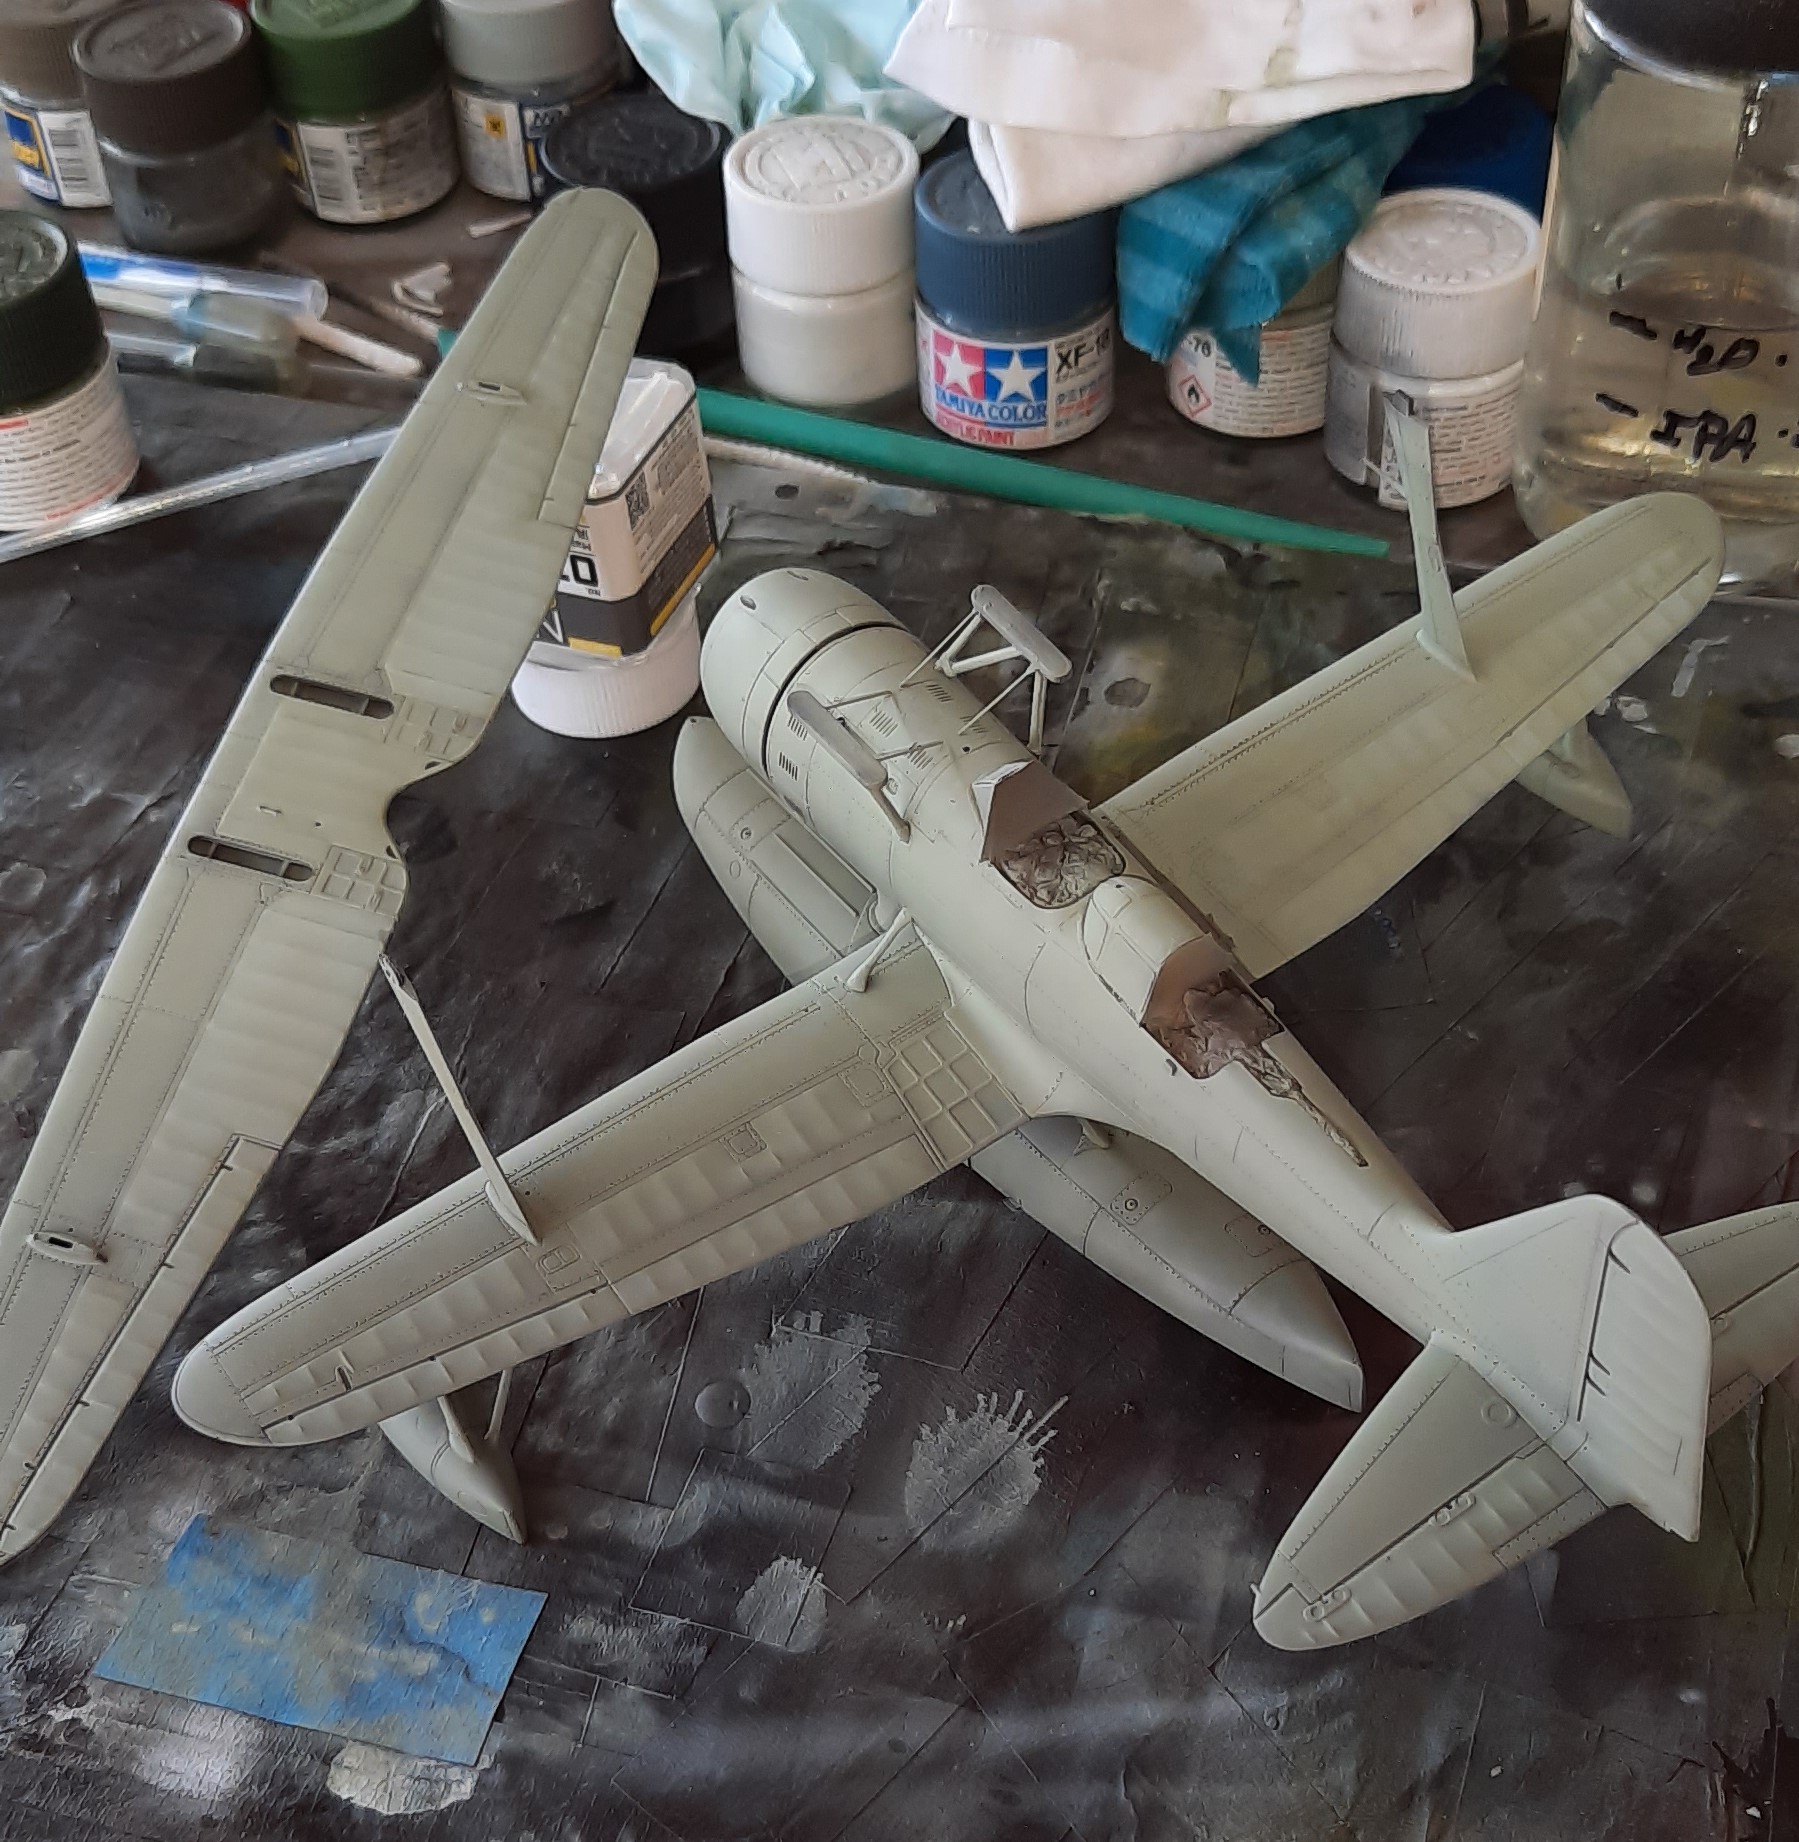
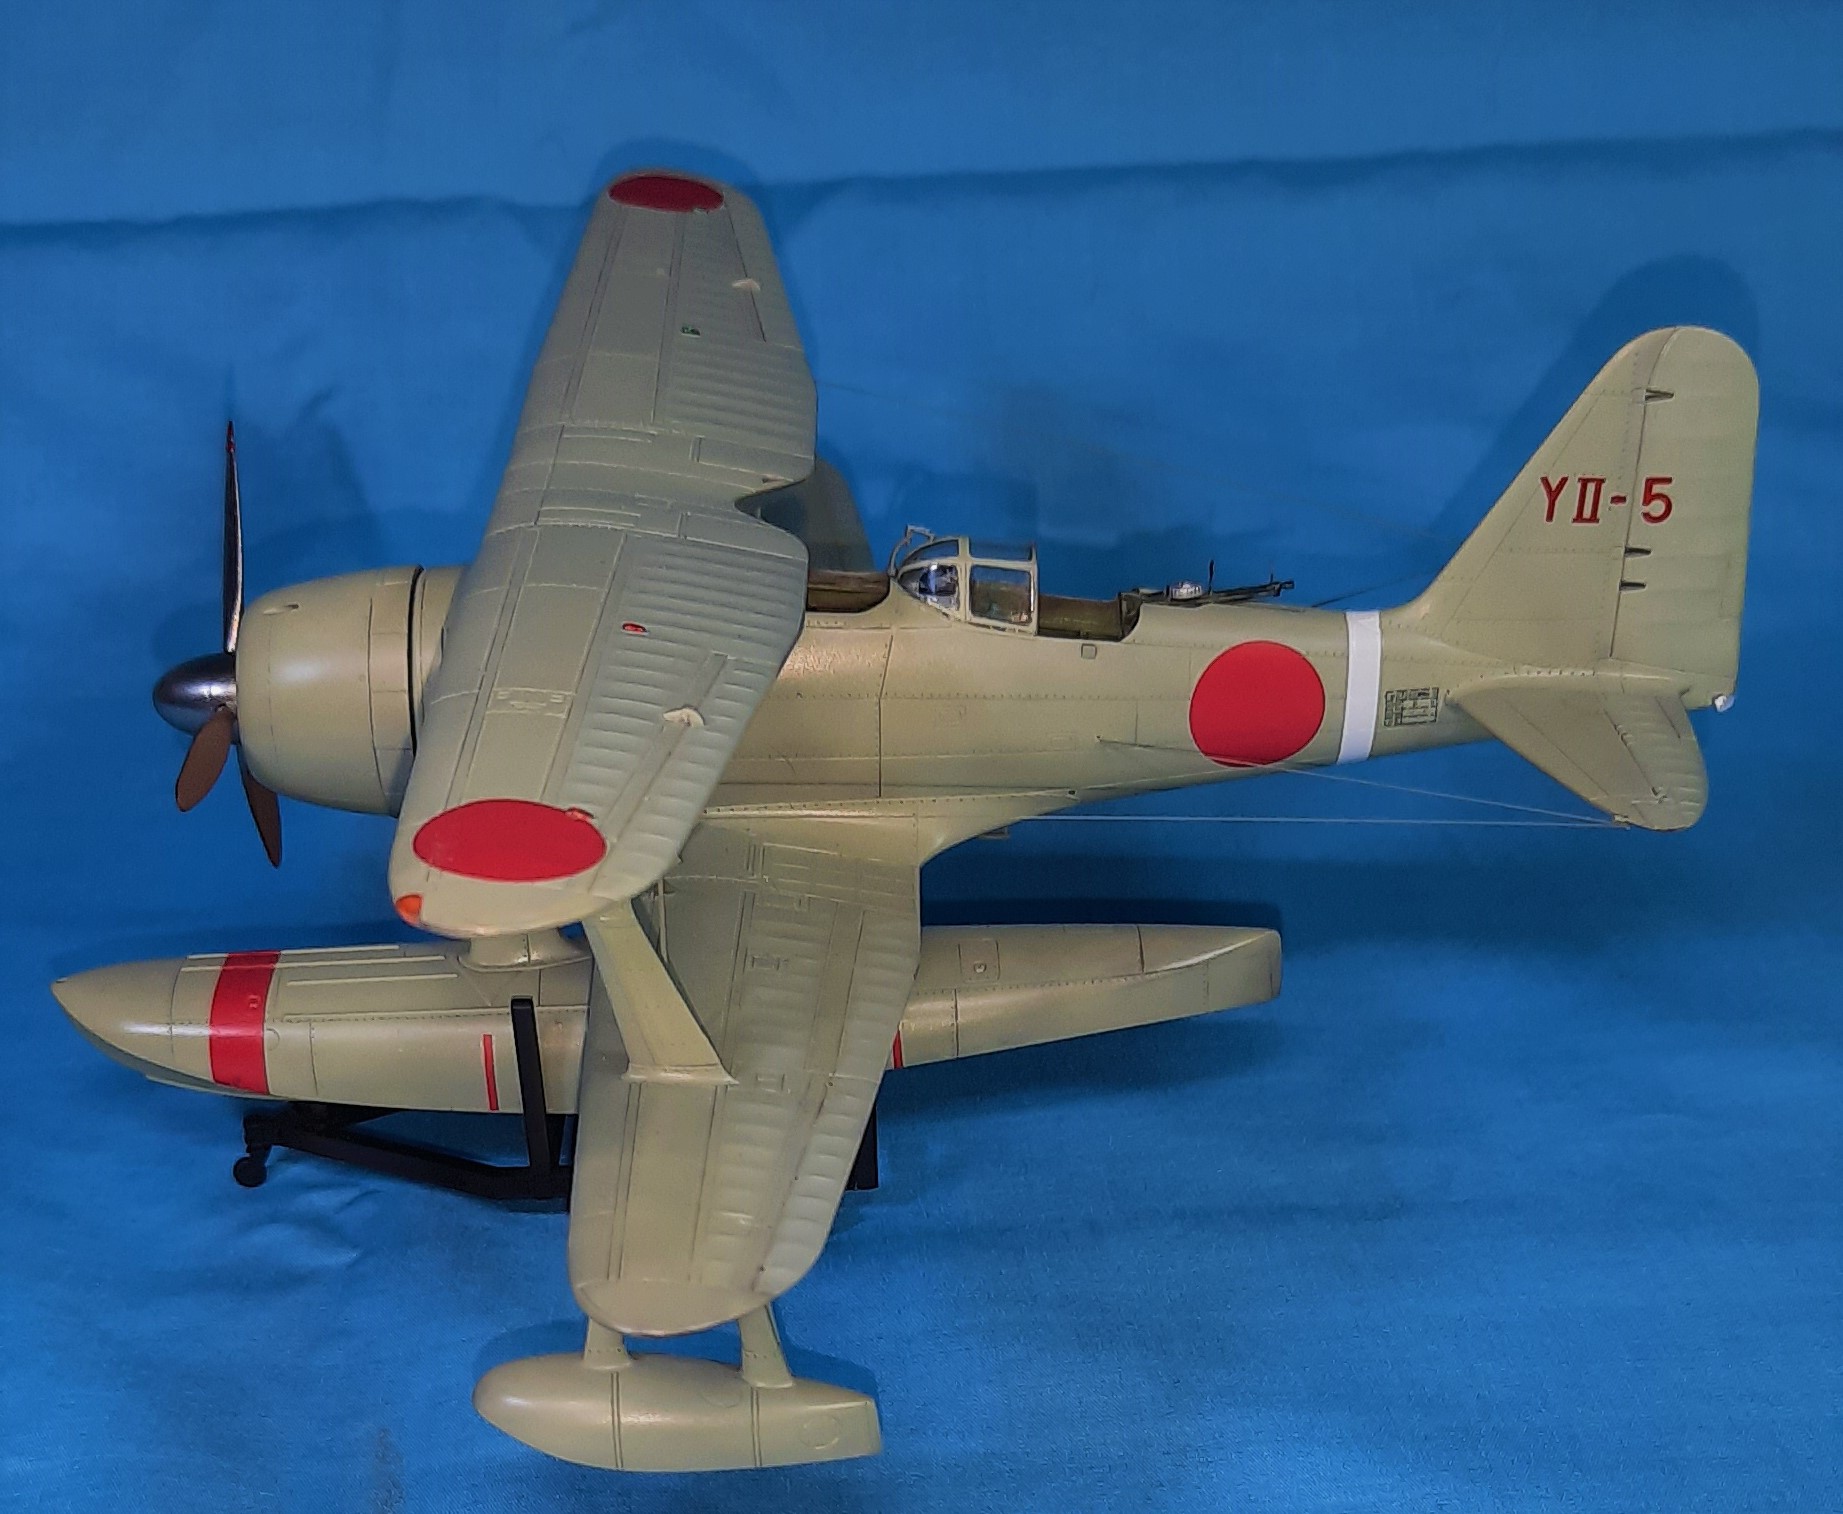
After giving it a gloss of three coats of my future mix (75% Future, 25%, 70% IPA, and a drop of dish soap), she was ready for the decals. Since I was doing this mainly OOB, I used the kits decals, though for the tail codes I stole some from Tamiya’s Rufe, and cobbled together them to give the tail codes from the Kamikawa Maru, as it would have been near Shortland Island at the beginning of the Guadalcanal campaign. And hopefully look pretty cool next to my Rufe off the same ship!
Next up some minor weathering and adding the top wing, and rigging! Yay me!
Take care, and be safe!
5 Likes
Looking good here!
After a longer than anticipated hiatus, I’m getting some paint on the ICM 1/32 Gladiator II:
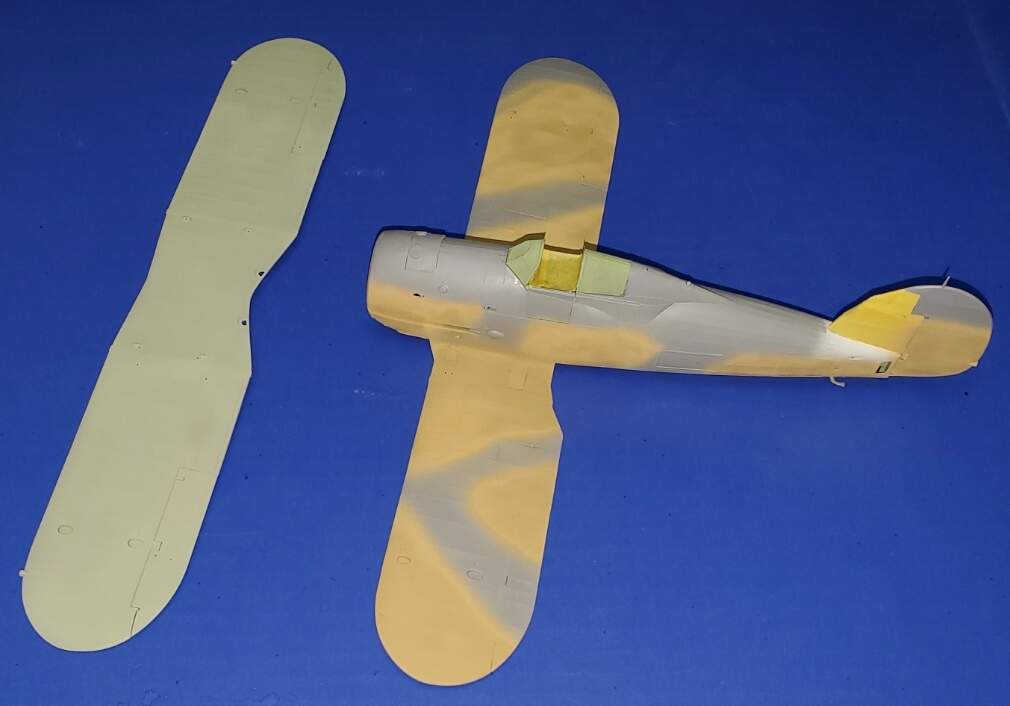
God bless the RAF and their bloody shadow schemes, but there it is. Gotta do it right (or as right as I can!)
Michael 
3 Likes
Well, as the weekend draws to a close, here’s where I am on the Gladiator. Light earth, light green, and dark green applied. Only dark earth left. I might pull this off.
Michael
3 Likes
You can do it Michael! 
Yeah, I dunno Russell. Here’s where I am after the weekend:
Not overly thrilled with it, but I think a gloss coat will help. That said, I don’t see myself finishing by April 1. I don’t really like giving myself an extension, but if others are asking…
Michael
2 Likes
I’m not that far along, but another month might help here. 
Atta boy, Mark! Anyone else?
Michael
Hi ho!
Despite being ready to take photos of mine, you know I’m a big believer in giving those that need a little extra time to cross the finish, to get the time! Like your build so far Michael!
Yes, an extension will be worth it Michael just to see the 1/32 glad cross the finish line
OK, you guys talked me into it. I’m giving this one another month. This campaign will now close on 1 May, 2021. I’ll change the info to reflect that. But now I won’t have any excuse not to finish the Glad.
Michael
2 Likes
Thanks Michael!
I finished this one, and will say it was a fun build. It kindled a spark to do more biplanes. I did purchase Hasegawa’s PE set for this, and aside from the rigging wires it was not worth the cost. Overall, the PE set didn’t make this an easier build. I used the kits instrument panels as they are more realistic than the PE. Anyone with a few kits under their belts can do it.
The rigging part of the PE was helpful. It has the attachments for the wires. I made a copy of the PE, and will use it on the “Dave” kit in the stash. Worth the cost? Not sure, I’m not a biplane guy, and this really helped. Could I have done it without? Yep. This kit really got me over my “fear” of biplanes. The fit of the wings are great, and will get the novice off the biplane “fear”.
The real motivation for me was doing a bird that was a biplane, and one that came off of the Kamikawa Maru. I really like the history of this ship, despite her sad demise and murder of her crew. A thing I love of this hobby is the history behind the build.
The battle of Guadalcanal has a lot of documentation. Almost all of this documentation has been written by the winner. I will be the first to stand up and say Imperial Japan didn’t do a good job promoting themselves, and they had really bad leadership. You get what you deserve.
This isn’t about who’s right or wrong. A warrior only becomes a warrior because somebody says so. These guys wake up and say “Please let me come home”. They are doing a duty for their country.
Joe Foss, a respected US Navy pilot, woke up and got into his F4F-4 to take care of some harassing enemy aircraft. Due to the way the Japanese detailed things, all we can say is two guys, a pilot and radio operator were doing their job, which was lob a few bombs at the enemy and keep them awake at night. These three men were to meet over what became called the “Slot”.
Back in the day of fighter plane duals, the best way to overcome an opponent was to come from behind out of the sun, and nail them before they ever saw you. If you were defending something, it usually meant that you were climbing for altitude, and the whole get the sun behind you went out the window.
If you’re in a biplane that just lobbed little bombs over an island, well, you want to go home. You’re not going to want to dual with an opponent that out guns you, and can fly a little faster.
So, Joe couldn’t get the direction, and the pilot couldn’t outrun, it was a faceoff. Head-on confrontation was actually pretty common in the day. 50 caliber lead coming at you is tough, doesn’t matter what side. The damage is something you all should look at. In this case, everyone was shooting, Joe did his left turn and might of got popped by the back seater.
Bottom line, Joe got shot down. The “Pete” he went up against also went down. Stats show this was a draw. Everyone did their job, and everyone got to go swimming.
If you want a kit in 1/48 of this history get it! If you don’t like rigging, get the PE, otherwise don’t bother. I scalped the tail codes from the Tamiya Rufe kit, and it looks great next it.
Keep up the great work and fun! This was a really great build for me, thanks to all, especially Michael for making it happen!!
6 Likes
This topic was automatically closed after 45 days. New replies are no longer allowed.
Well, time to wrap this one up. Thanks to all who participated and congrats to all who finished (not me  ). Keep on modelling!
Michael
1 Like