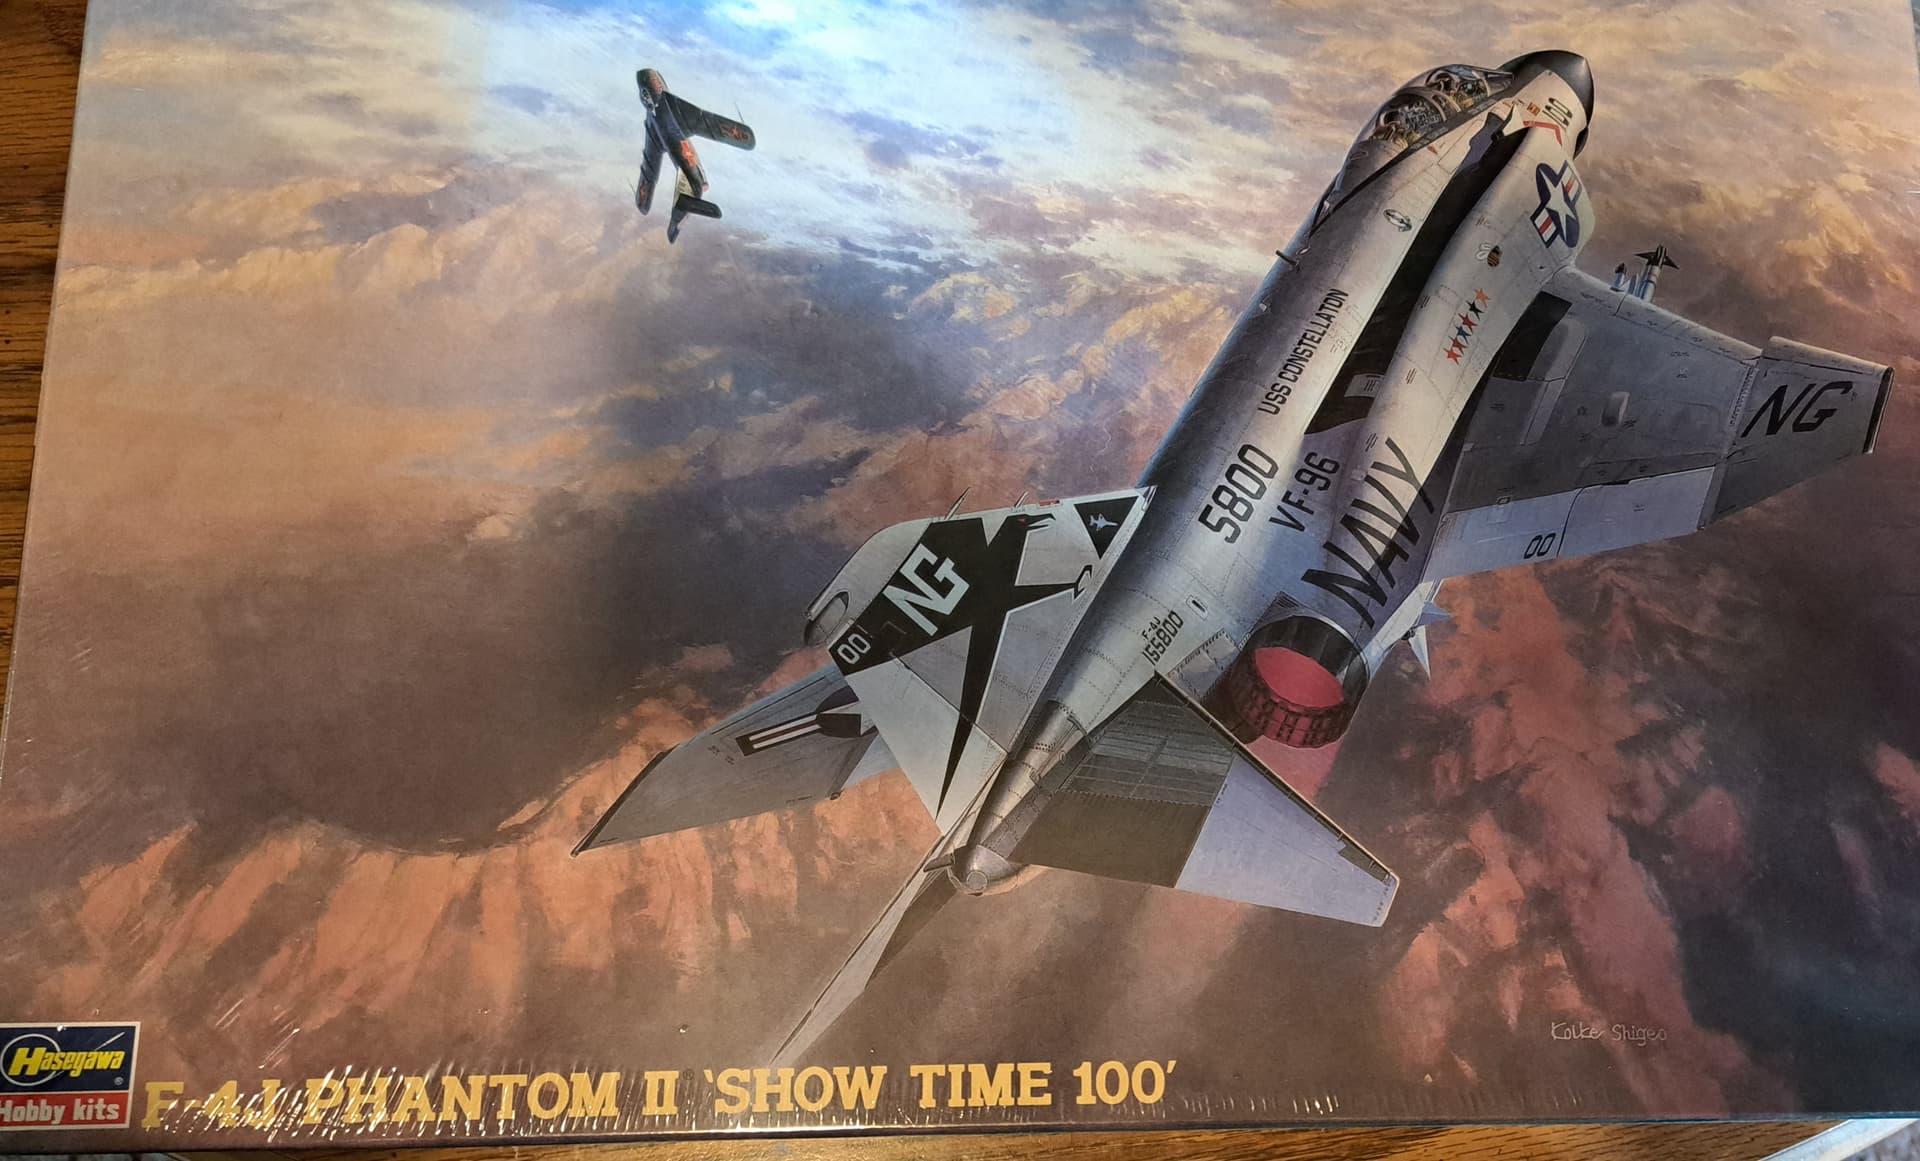
I’ve want to build a 1/48 Hasegawa F-4J Phantom II for a long time. Haven’t built a jet in over 30 years. As an AFV modeler really interested in tips and suggestions to help with this specific project.
Looking to do an Out of the Box or very close to out of the box build. The 1980’s era detail will be good enough etc. Really concerned with assembly and avoiding visible seams.
Thank you
1 Like
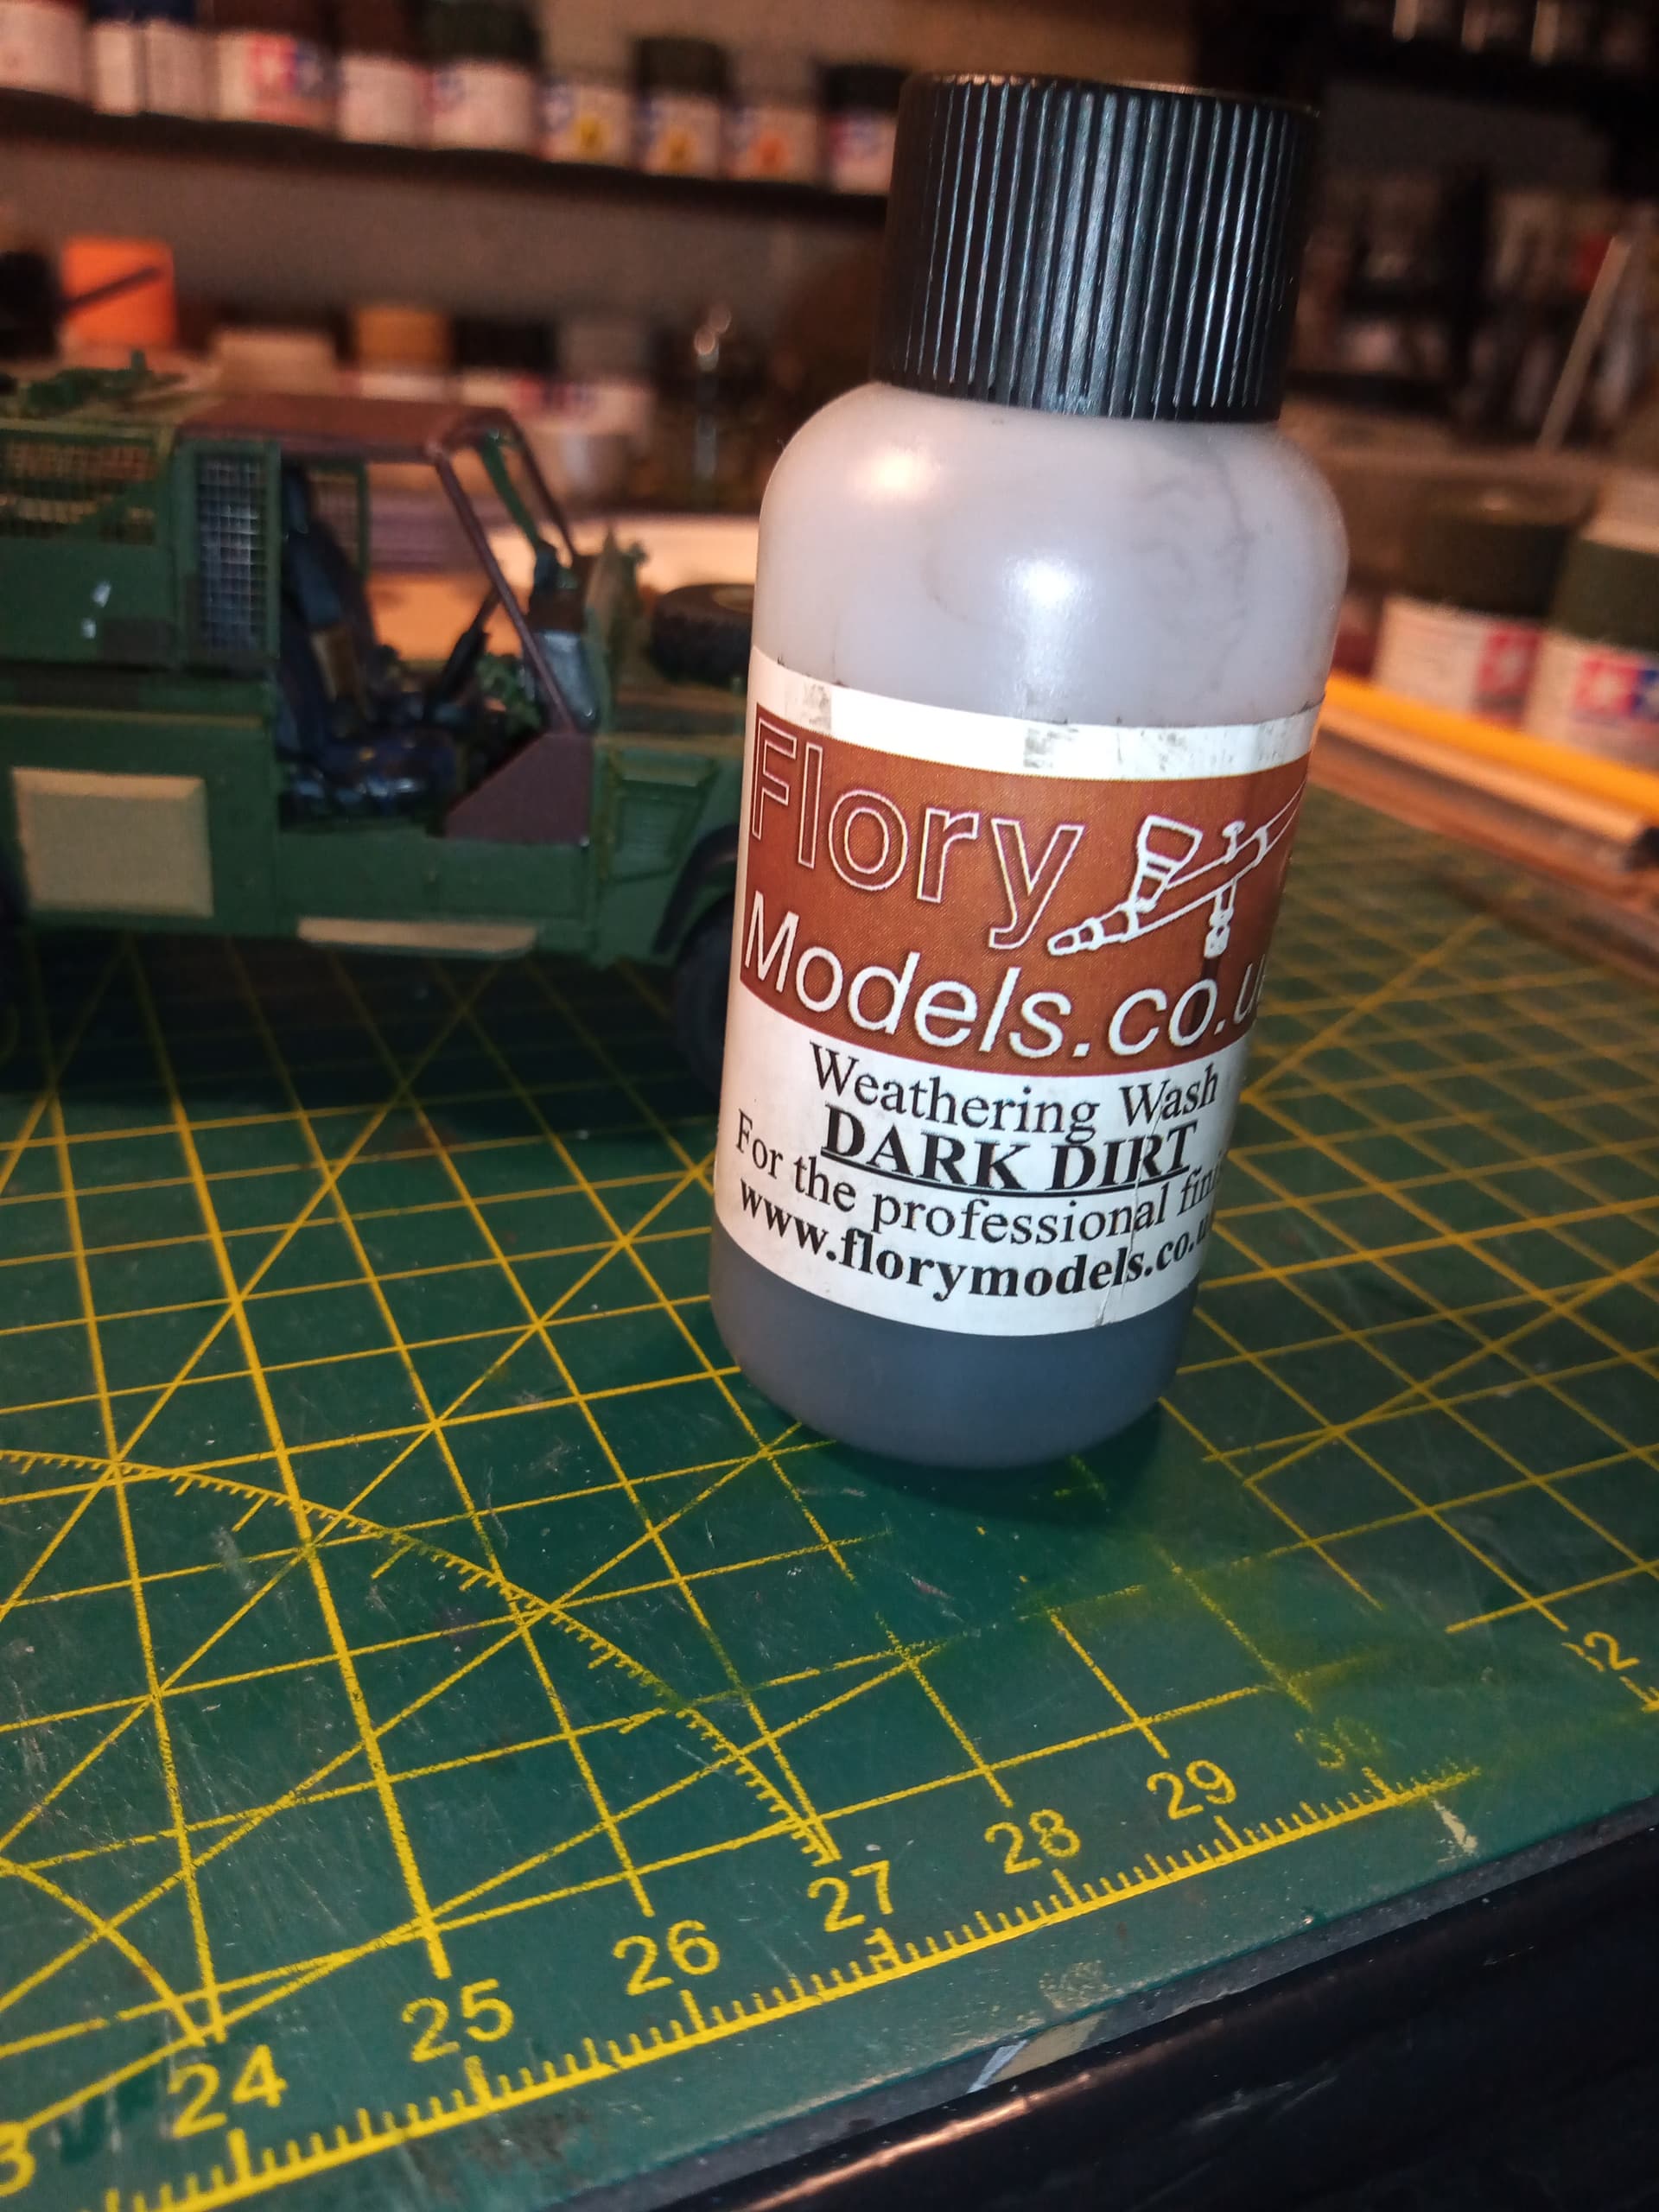
So the intakes can be an issue. Flory talks about the issue with a quick fix and in a few weeks will have build video for you to follow along with.
Depending on canopy being open or closed, I might replace the seats and wheels but that is about it. Weapons depending on load out wanted.
Otherwise it’s a nice kit from what I have heard. I don’t have one but have the Monogram and Tamiya versions.
2 Likes
I was going to get this one, so will be following along on it 
2 Likes
I second Tanks suggestion on Florys vids on this kit. That kit actually started his business and he speaks highly of it. Depending on the age of your kit you may want to swap out the decals even if you plan on build an F4 from the Connie. My recollection is is Hasagawas older decals could be temperamental so a nicer set might lessen your aggregations at the finishing stages.
I just finished my first aircraft too in decades. I need to update my post later but for filler I stuck exclusively to using Sprue goo and the old squeeze tight till you get a bead of plastic w Tamiya extra thin. Shave it carefully and sand gently with fine grades to preserve panel lines. I lost a few on my build along the fuselage but didn’t fret too much. Work in sections, don’t do rubber bands along w capillary action if you can help it, a little bit of uncontrolled flow there will cause a mess where the bands are.
2 Likes
Thank you for the suggestions Chris. It’s a recent purchase hopefully the decals in the box will be good. Biggest airplane I’ve completed was a 1/48 TA-152 so this build a whole new world.
The kit arrived today! I have to finish a few projects before starting this one.
Looking forward to seeing Flory’s build video. I check out his Life Changing kit video and it’s excellent! Great tip on intake assembly. One of the modeler’s at IPMS Roscoe Turner strongly suggested trying the Flory wash as well. His results are very impressive. So I ordered a Flory’s wash.
2 Likes
I think I’m going to spring for Tamiya’s new F4 kit because by all accounts it’s amazing. And maybe a whole slew of aftermarket and just go crazy on a long build. I’m anxious to watch you progress.
If you do the future bit with your canopy let me know your results. It’s a step I’d like to learn and incorporate in future aircraft builds.
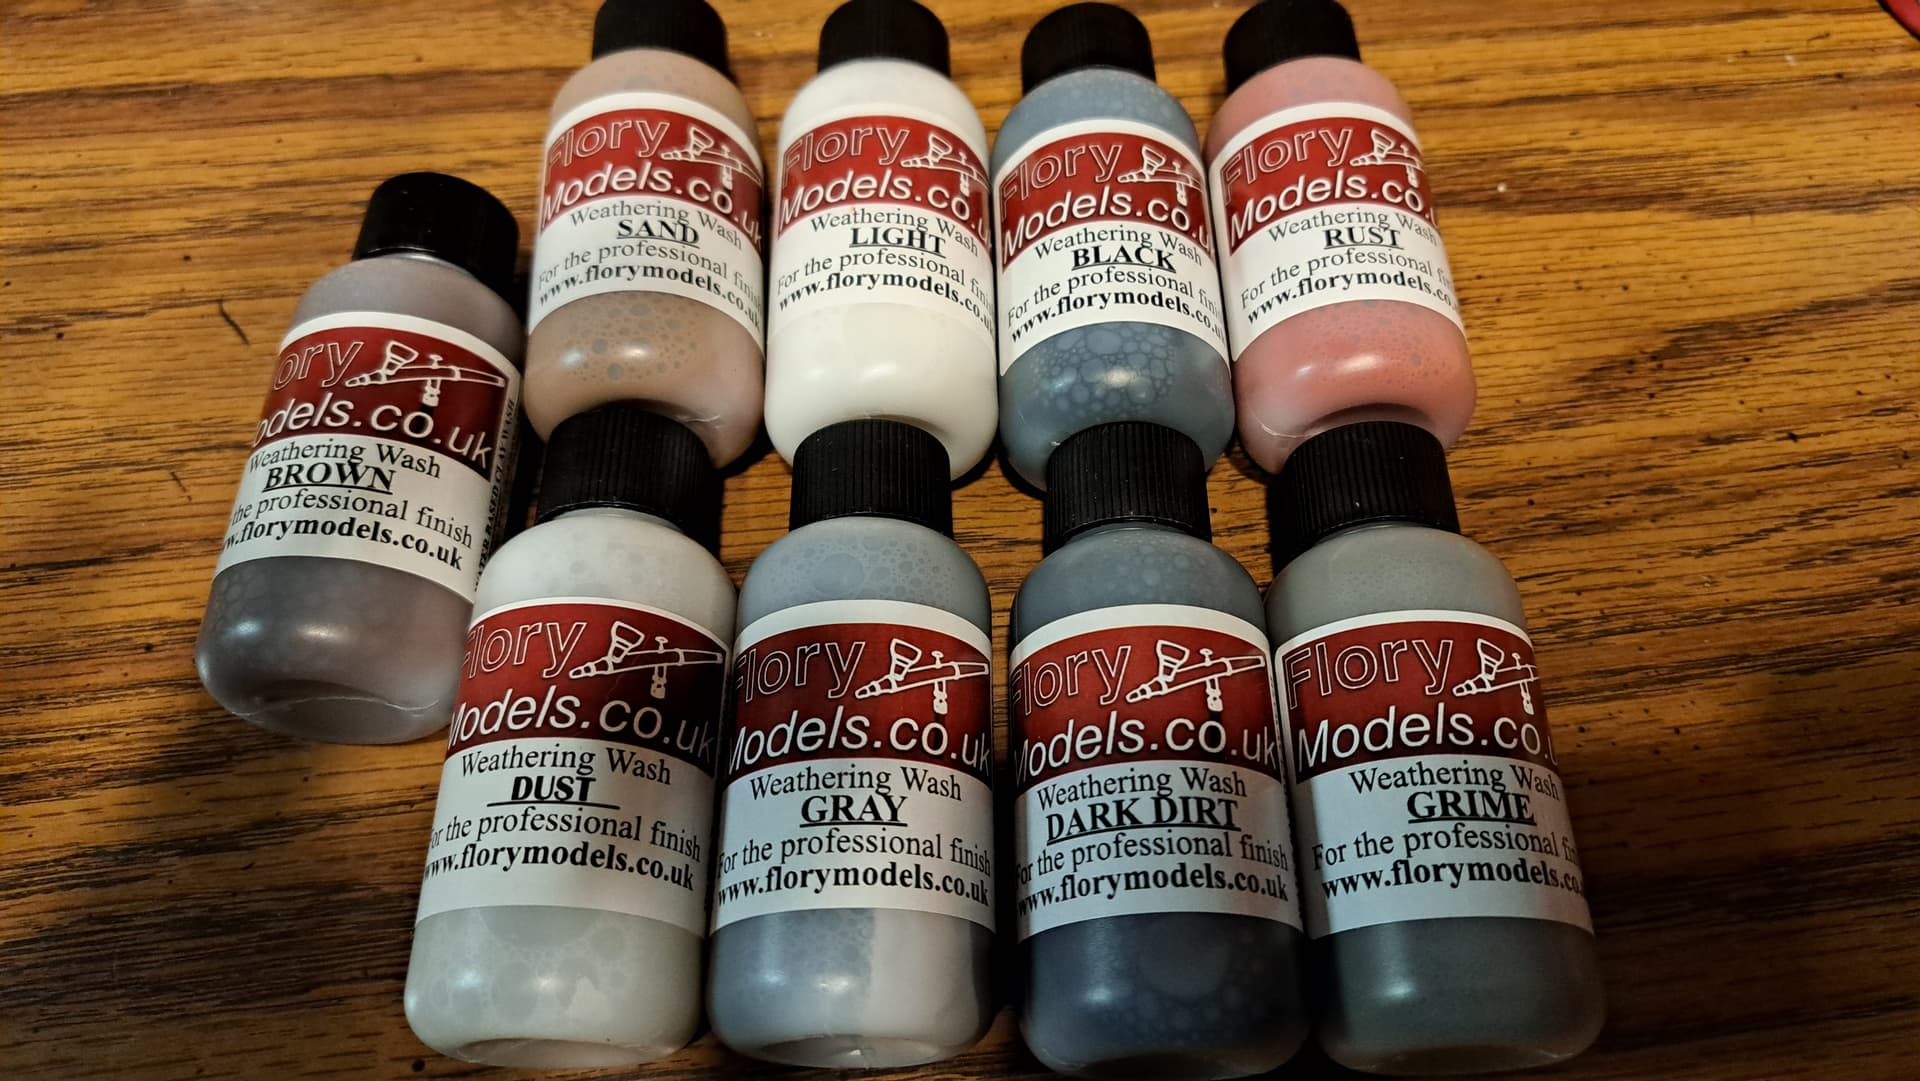
I use that wash on any aircraft I do now Wade, a mate recommended it to me… I think he does about 5 or so different tones…
Just cleans up with water and tissue paper … So easy.
2 Likes
In the past I have futured all my canopies as they can help with clarity and prevent frosting from glue fumes. I would pour future into a small dish, ensure canopy is free from dust etc, dip the canopy (depending on frame still have it attached to the sprue gate for handling), ensure coverage and lightly shake off excess. Set on a paper towel, napkin (something that doesn’t shed fibers but absorbs liquids) and cover to prevent dust etc from hitting it while drying. I set that aside for a day to ensure it’s fully cured. Pour excess future back into the bottle for later use.
Some folks have no issue with using a brush to coat the canopy instead of dipping, that hasn’t worked for me. Not everyone including experienced aircraft modeler have gotten it to work for them so don’t feel discouraged if it doesn’t work for you. Wash with windex to remove.
HTH
1 Like
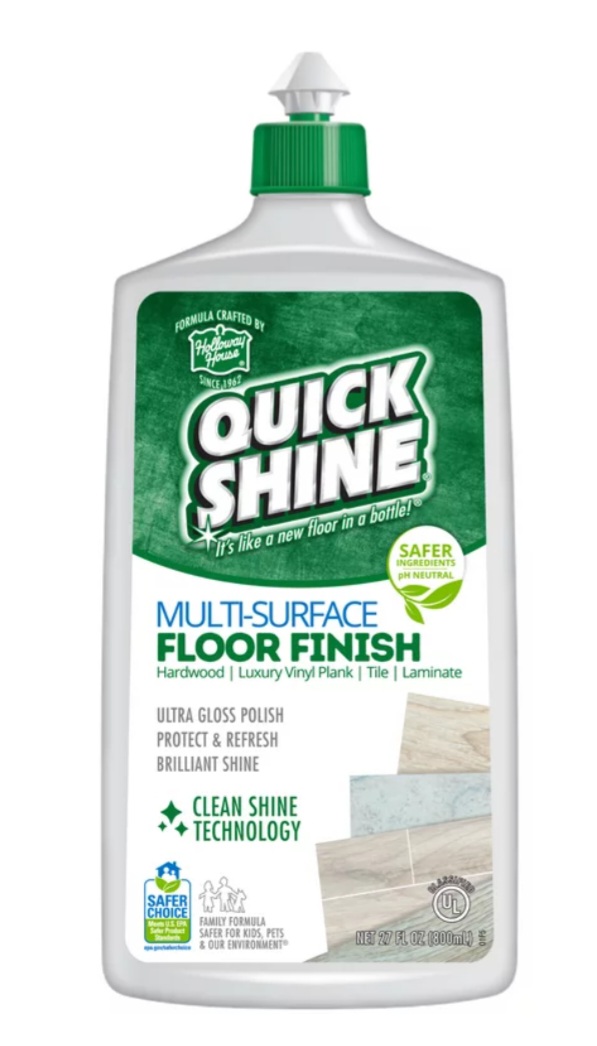
Now I’ve seen people talk about the formula change in Future. I’m amusing they regular stuff you can buy at Ace hardware etc is fine.
So you dip, let it dry then paint and finish it? I’m guessing the Future doesn’t interfere with glueing canopy frames to the clear parts you’ve dipped, correct?
1 Like
I don’t know about the formula changing but the label has changed a bunch. I would test to on a spare canopy or clear styrene sheet.
I have not heard about any negative chemical reactions with Future. I am sure it’s technically possible for it to happen but again not that I have heard about. Folks that use super glue for the canopy don’t have any fogging or crazing of the plastic which is one of the main goals for the technique.
My understanding from talking to various outstanding model builders is Quick Shine is the go to product replacing Future all versions.
^^^ is what I plan to use when the time comes.
2 Likes
Hi, Armor_Buff, how far along are you? I did an F-4J a little while ago with an intake depth illusion using four concentric half-circle masks that came out looking pretty good and saved me the hassle of deep intake mods. If you don’t have the front of the intakes on yet it’s pretty easy.
1 Like
Thank you @Woodsman Gary. I appreciate the tip. Could you share a few pictures with us.
I’ve got to clear at least 10 of the 14 in process before start on the Phantom II.
Found one. Steps to follow as I repeat for an F-4E in progress.
2 Likes
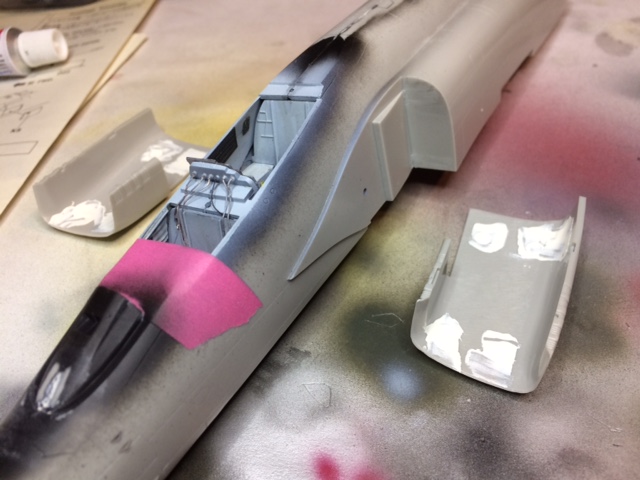
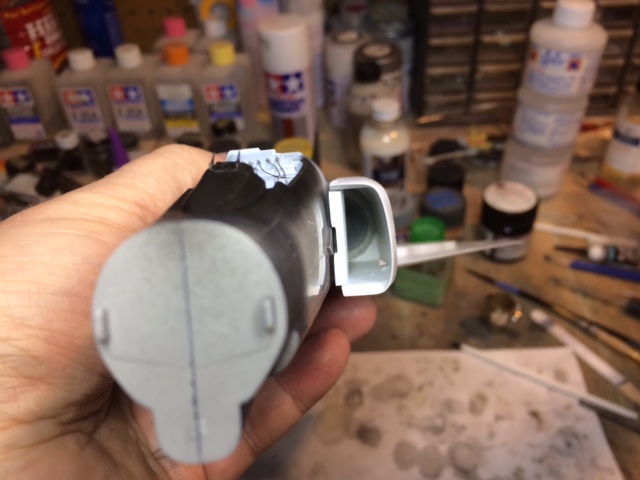
I’ve got the intakes roughed in for my F-4E. Below are pics of the process.
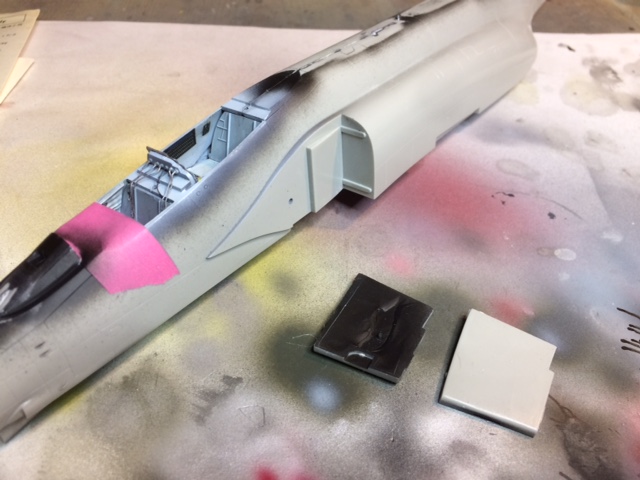
I fill the backs of the inner ramps. You don’t need to fill the middle because it’s hidden. I’ve tried plastic card but the backs are tapered so I find putty works ok for me.
Cut off the protruding ‘strips’ on the back wall of the intake. I think these are for positioning but I align the covers according to how the external surface fits so I don’t need them. Also, you want a fairly clean inner surface. It doesn’t need to be perfect because it will be painted and it’s dark in there.
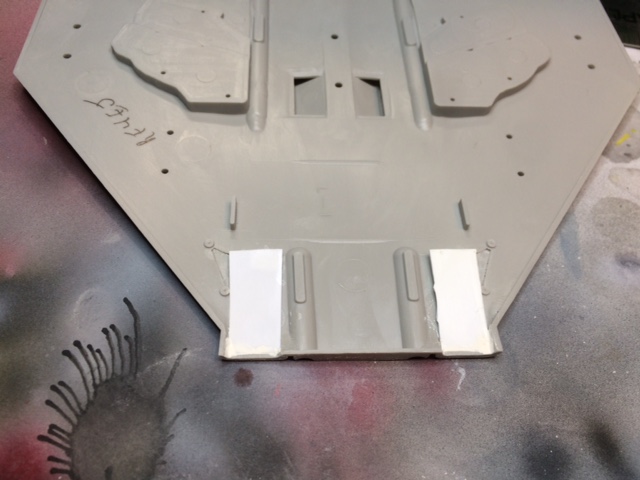
I put some plastic card over the depressions in the lower wing. I’ll add putty around them eventually. For my F-4J I used putty entirely, but it was hard to build up and gauge the depth properly so it didn’t interfere with the fuselage. Again, fit on the sides isn’t critical at this point but you want to get the back edge to sit at the bottom of the back wall of the fuselage intake (see below).
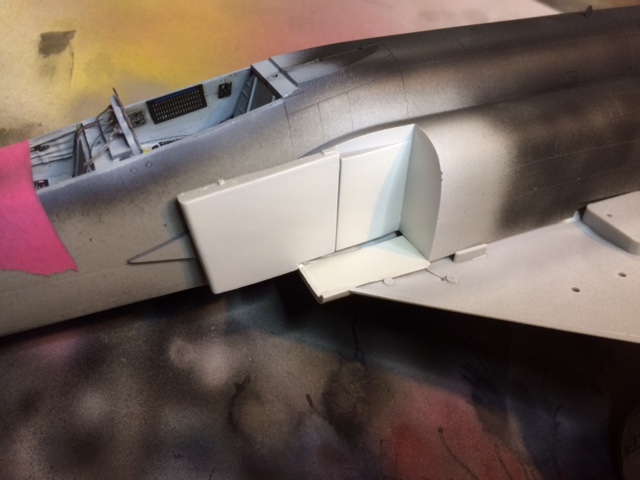
I primed and painted everything white. Note there are still gaps, but we will fill them later. The key is to get the bottom plastic card to line up with the bottom of the back wall pretty well so it is easier to fill that when things go together.
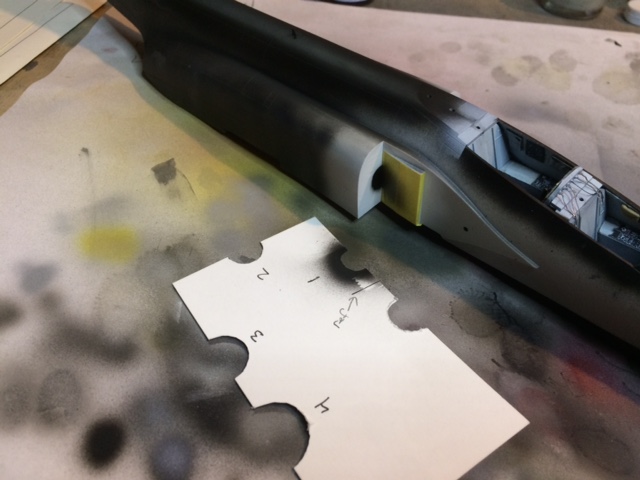
Behold the magic tool!  . I used a business card with different sizes of half-circles cut out. I estimated the sizes from Phantom photos and used jar lids and such to scribe around. Mask the inner wall so it stays white when you paint. Here I have sprayed the smallest circle black. I put a mark on each side of the card so that I can line up the first circle with the bottom of the fuselage so both sides are in the same location.
2 Likes
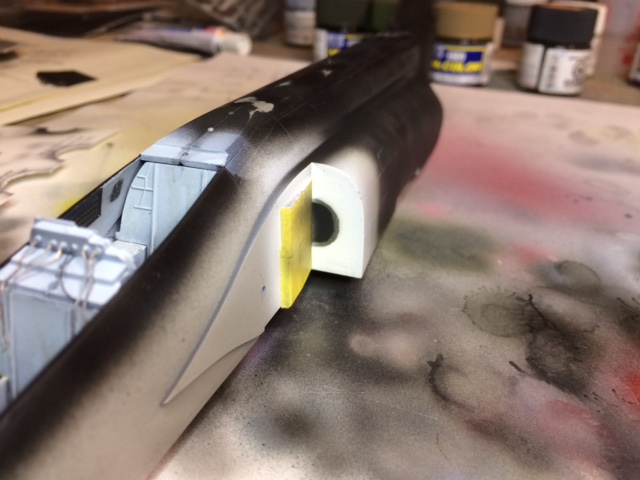
Here I’ve sprayed the second template with a lighter shade of gray. You could do the templates in the opposite order, but I found that made the transition from one ‘step’ to another too distinct. Going smallest to largest lets the overspray blur things together a bit so the transition is smoother. Note that the circles aren’t perfectly concentric or smooth, but again it’s dark in there so it doesn’t matter a lot.
Here are all the circles. I added a fifth circle to see what it would look like. By the time I got all five in place the center was really light, so I resprayed it with black again so it would be distinct.
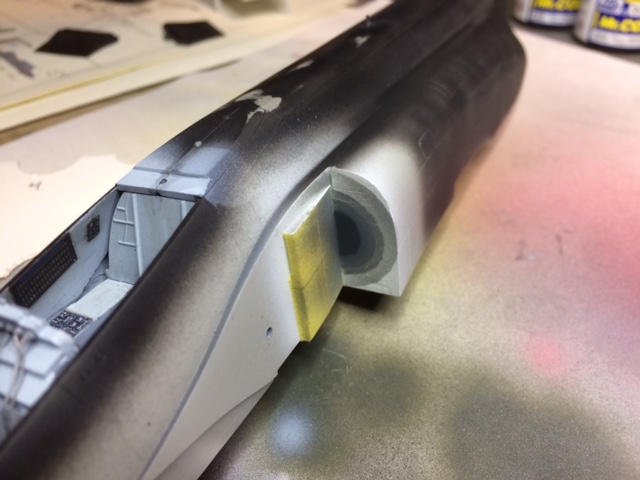
Here the outer shell and inner ramp are in place and you can begin to see the effect. I will probably tone it down a bit at the outer edges because the duct is looking too big.
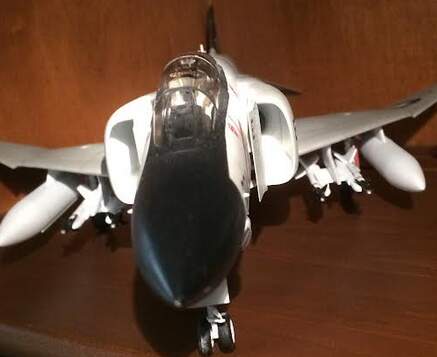
After final assembly I’ll add a bead of slightly wet putty to the bottom and side edges. With those corners rounded you will hardly be able to see the transition from the bottom and side to the back wall. The effect I’m going for is like car publicity photos where the background is a white wall. They actually use a rounded transition from the floor to the back wall so you can’t see a corner between them. You can see the full effect on the F-4J above.
2 Likes
")