Dang, that sucker looks great! Radios look real, but I would paint the radio mounts the same color as the radio, they were separate from the vehicle, and never the interior color. I was a commo chief in armored units for several years ![]()
3 Likes
Thats me as well. Ft Hood, circa 1976 - 79, 1/67 Armor, 2nd Armored Div. Then to flight school.
1 Like
The straps on the fuel tank are usually aluminum in color and not the color of the tank itself.
2 Likes
A little more done.


Does anyone know if this Bottom armor Plate was used in Vietnam?

The outside Bearings for the Torsion Bars have small indents that match the pins on the arms, I guess this is to make it easier if you want a fixed Suspension.

The instructions aren’t really clear on how this goes on. After checking my Walk Around book, it looks like this is how it goes.

Finished for today.
Donald
8 Likes
Donald ref the belly armour.
From what I can tell after trawling the internet etc it wasnt common I couldnt find any images of it on basic M113’s but seemed to be fitted on the vehicles with the extra flotation cells as a complete package, and probably late on in the war so I guess its a case of which way you want to go.
Great to see your progress and pointers as always. I hoped to get mine before Xmas but us Europeans wont see it till mid Jan at best.
Keith
2 Likes
Awesome work. I’m following closely and love seeing your work. Unfortunately, my Andy’s M113 is still sealed in the shipping box…only a couple more days to wait though.
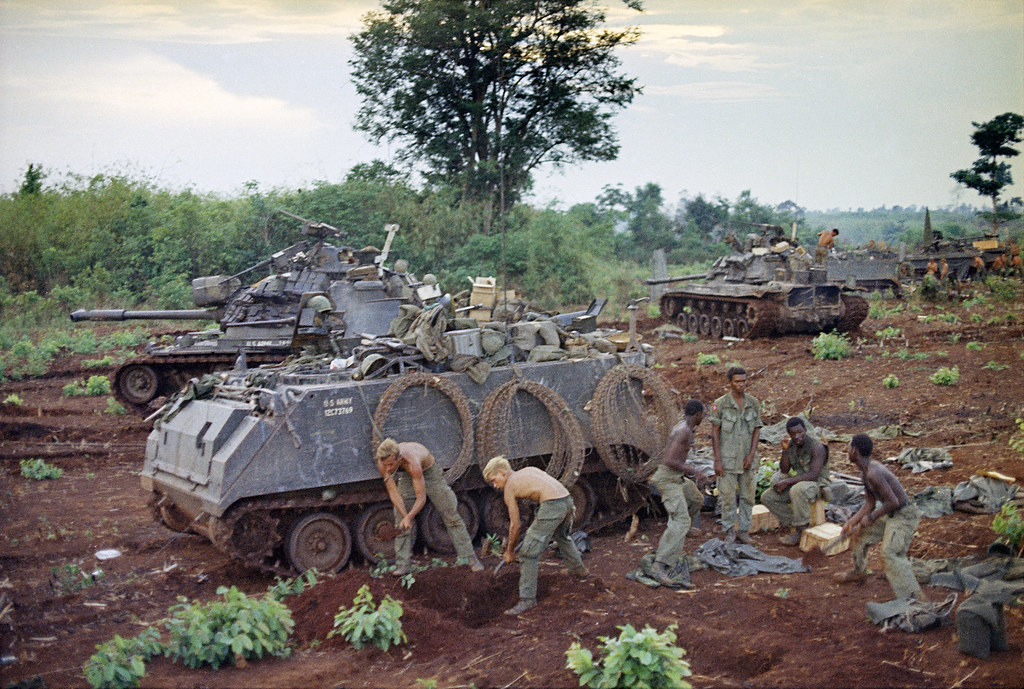
Not to hijack the thread but here are a couple of photos of M113s with the belly armor with and without the floatation cells. Looks like an M106 or M125 with belly armor and no floats in the second photo.


8 Likes


5 Likes
That’s what I thought, I don’t remember it on any of the Tracks that I worked on.
Regards
Donald
1 Like
I got a real lot finished today, Of special note, If you want the Suspension moveable , trim off the pins on the back of the swing arms, then glue the torsion bars to the arms .Doing this will keep any squeeze out glue from gluing the arms in a fixed position. Anyway here are the Pics. they should be self explanatory
.

(NOTE) This is inserted after the fact, The Torsion Bars aren’t Strong Enough to SUPPORT THE BUILT KIT. I HAD TO GLUE THEM IN PLACE TO KEEP THE TRACK HEIGHT CORRECT.
I WOULD SUJEST GLUING THEM IN PLACE NOW TO SAVE A LOT OF TROUBLE LATER.
OF COURSE IF YOU WANT A VARIED TERAIN THEN TRIM THE PINS OFF.
Regards
Donald


Finished for now.
Donald
13 Likes
i think Australia was first to fit belly armour but theirs were full length plates underneath.
the US carriers only had plates that were either a 1/3 or 2/3 version under the front of the hull.
the Aussie also fitted extra plates under the front end of the sponsons.
you can see here in Vietnam they found it easiest to just tip the carrier onto its side to fit the belly plates

on this driver trainer you can see the extra layer under the side sponson where they added extra plating


also note another carrier with a green fixed fire tank

not all ACAV’s had the belly plate fitted also.
trying to find the info sheets i had on the belly plate fitting kits
4 Likes
Actually, tghat one is dark gray, just as the OP has it. ![]()
3 Likes
Re the fixed fire extinguisher: the colors have been covered pretty well, so I won’t go into that.
@HeavyArty At least up through the 1980s they were CO2, not Halon.
Personnel heater: You can leave it off if you want. The real ones are very easy to remove or replace. In Vietnam they would not be needed and just use up space. They also broke down a lot. Even in the 80s I saw lots of tracks with them removed, at least for the summer.
Ken
3 Likes
Only worked in the motor pool most of the time ![]() (the heater)
(the heater)
2 Likes
I had the heater work exactly once in the winter, during driving refresher. Put the tube end in your pants pocket as the TC and you were warm all day! For only that day though, thing crapped out after that.
3 Likes


Looking outstanding so far, Donald. Your attention to detail is impeccable.
2 Likes
Fantastic Work…definitely an inspiration.
1 Like
Loving what you are doing so far. filling my head with ideas for when I finally get mine.
I am wondering if the swim vane can be modelled extended and if the arm can be made to fit this way easily, I’d be interested to hear your thoughts on that Donald.
Many thanks for keeping us up dated with your progress and thought.
Keith
1 Like
I would like to build it extended, it was used a lot for carrying stuff.
We’ll see.
Regards Donald
2 Likes
Yes thats the reason I do too. thanks for getting back to me Donald.
1 Like