Here’s my build on this very interesting kit , hope you all like it.
Keep working
Donald
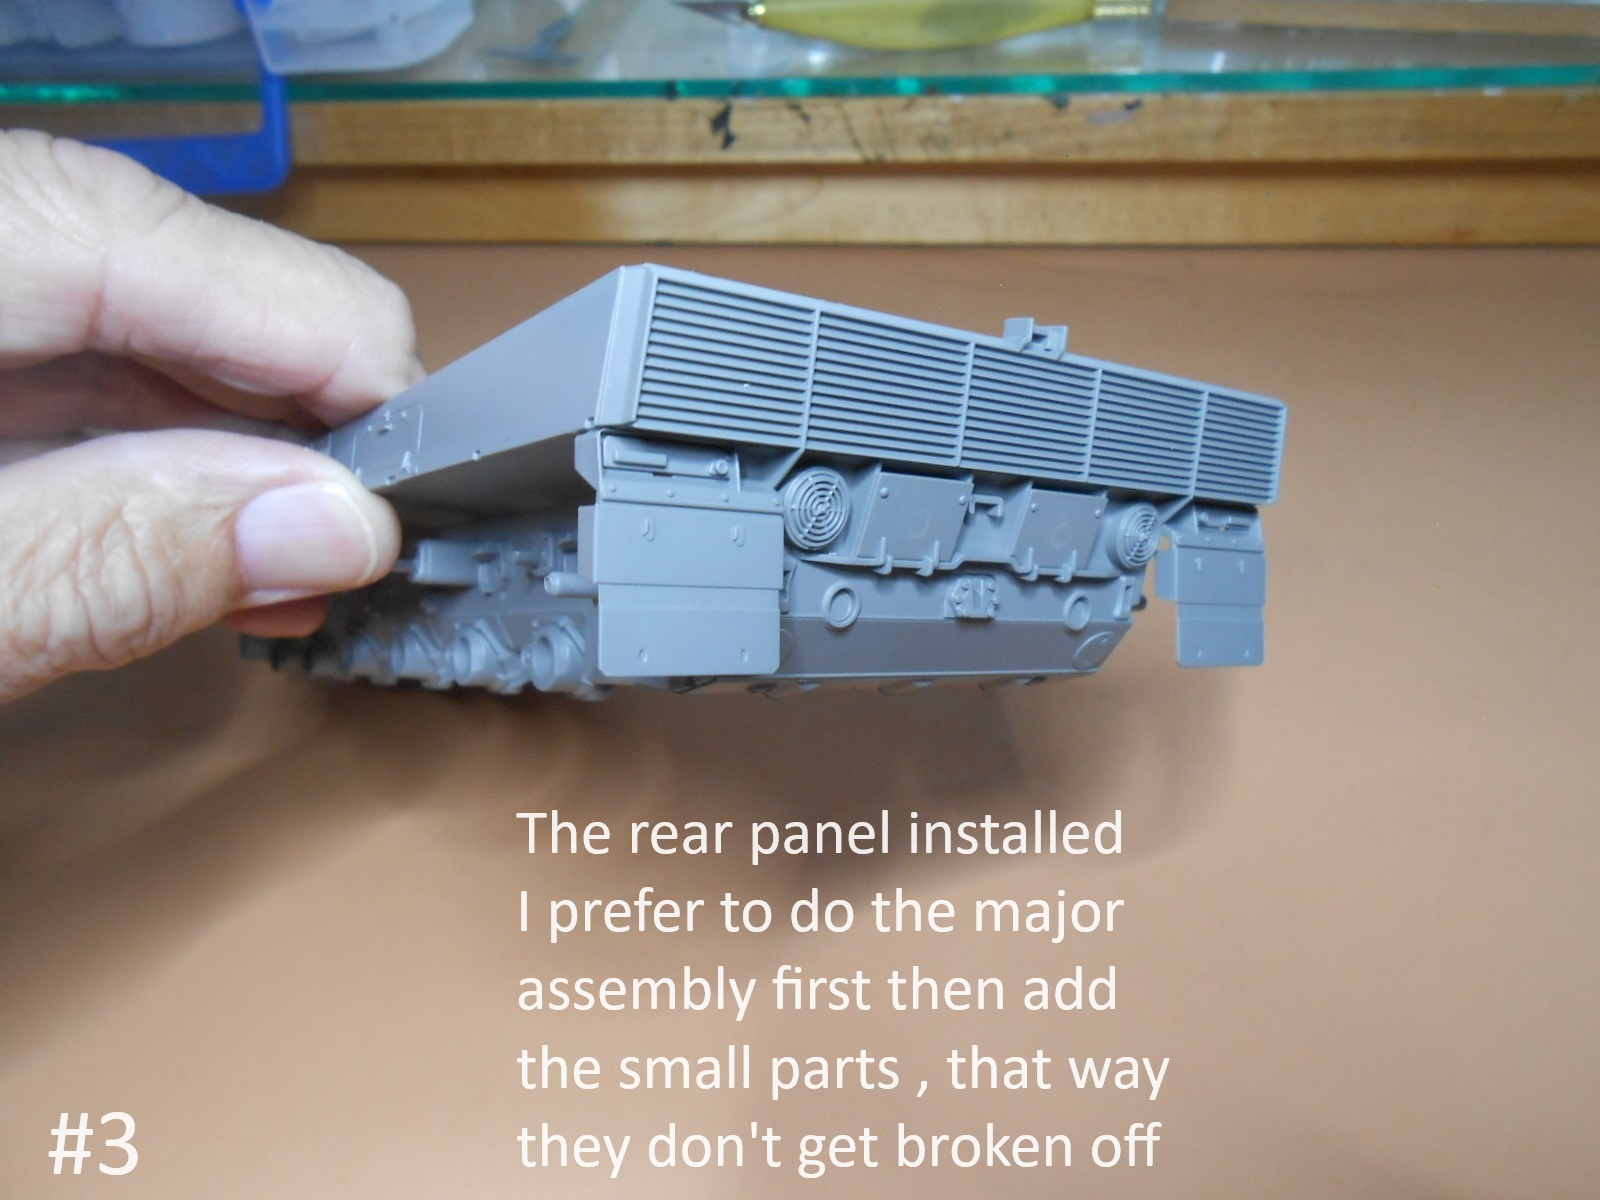
Image #3 Yep! That’s the way to do it. ![]()
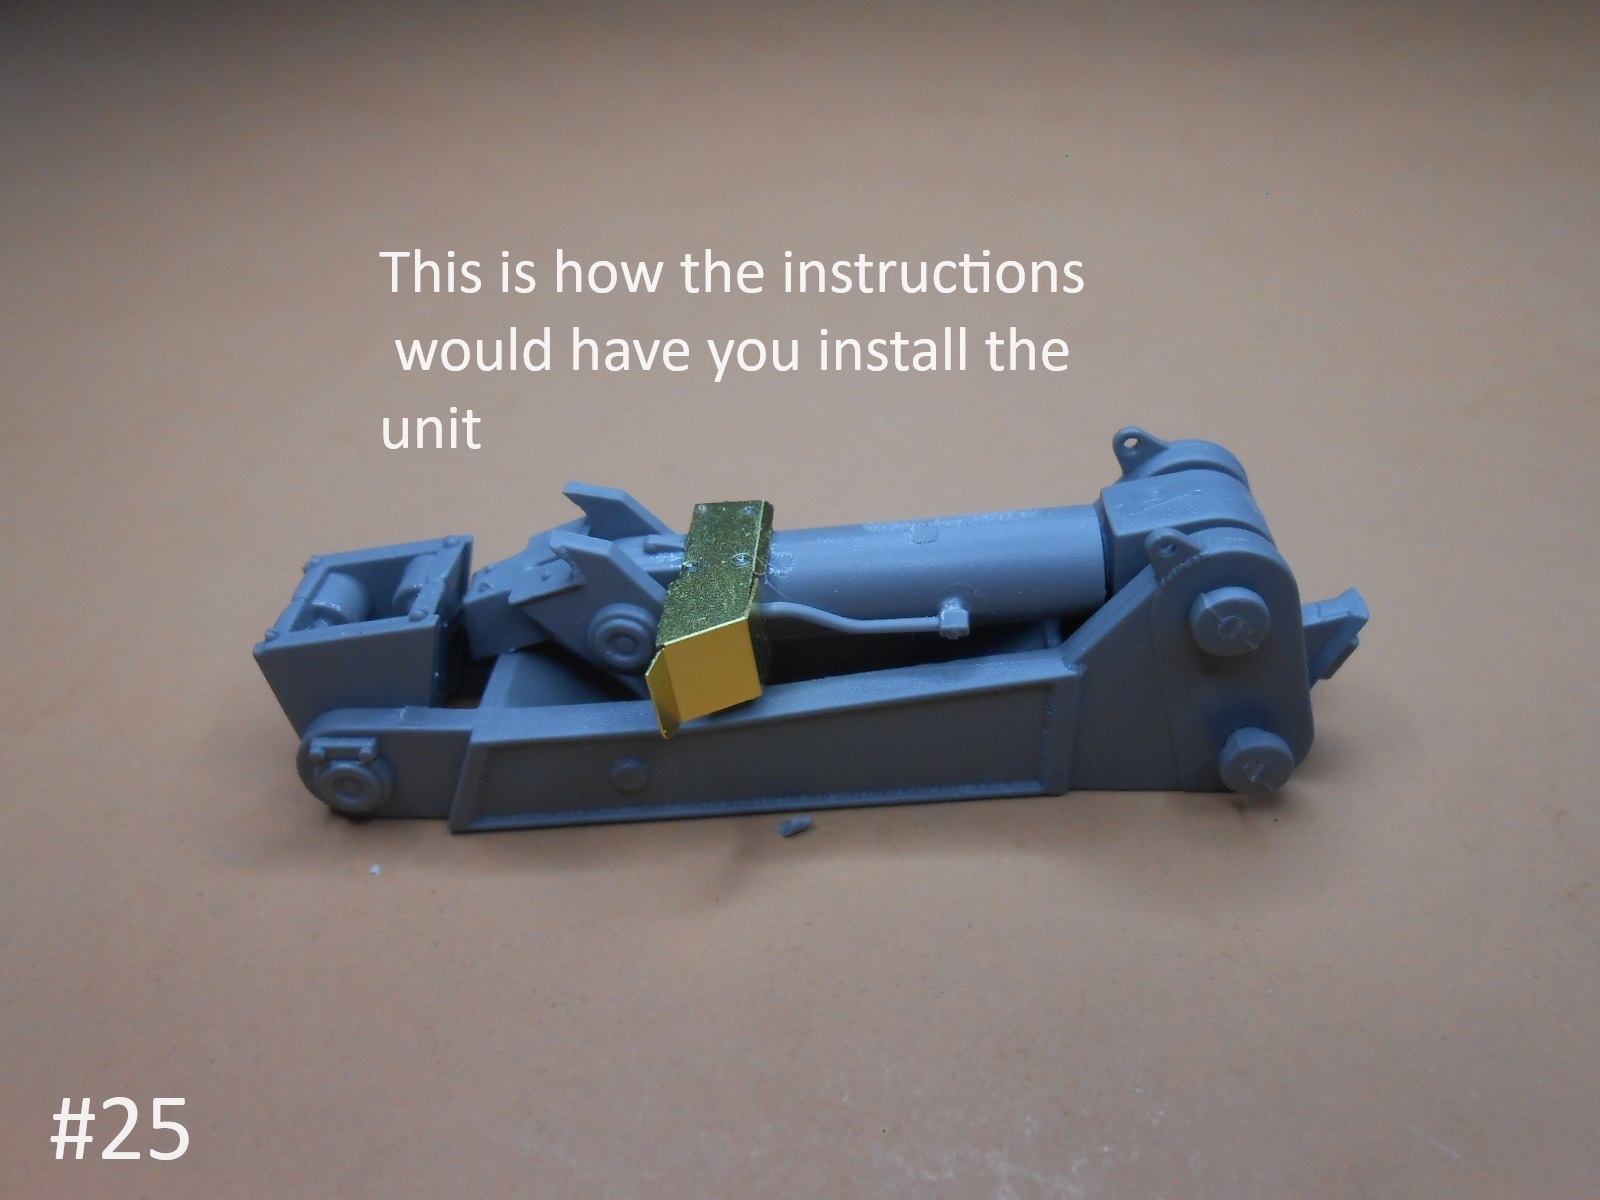
I have never figured out why assembly instructions want us to add all the small fragile parts before wrestling the big parts.
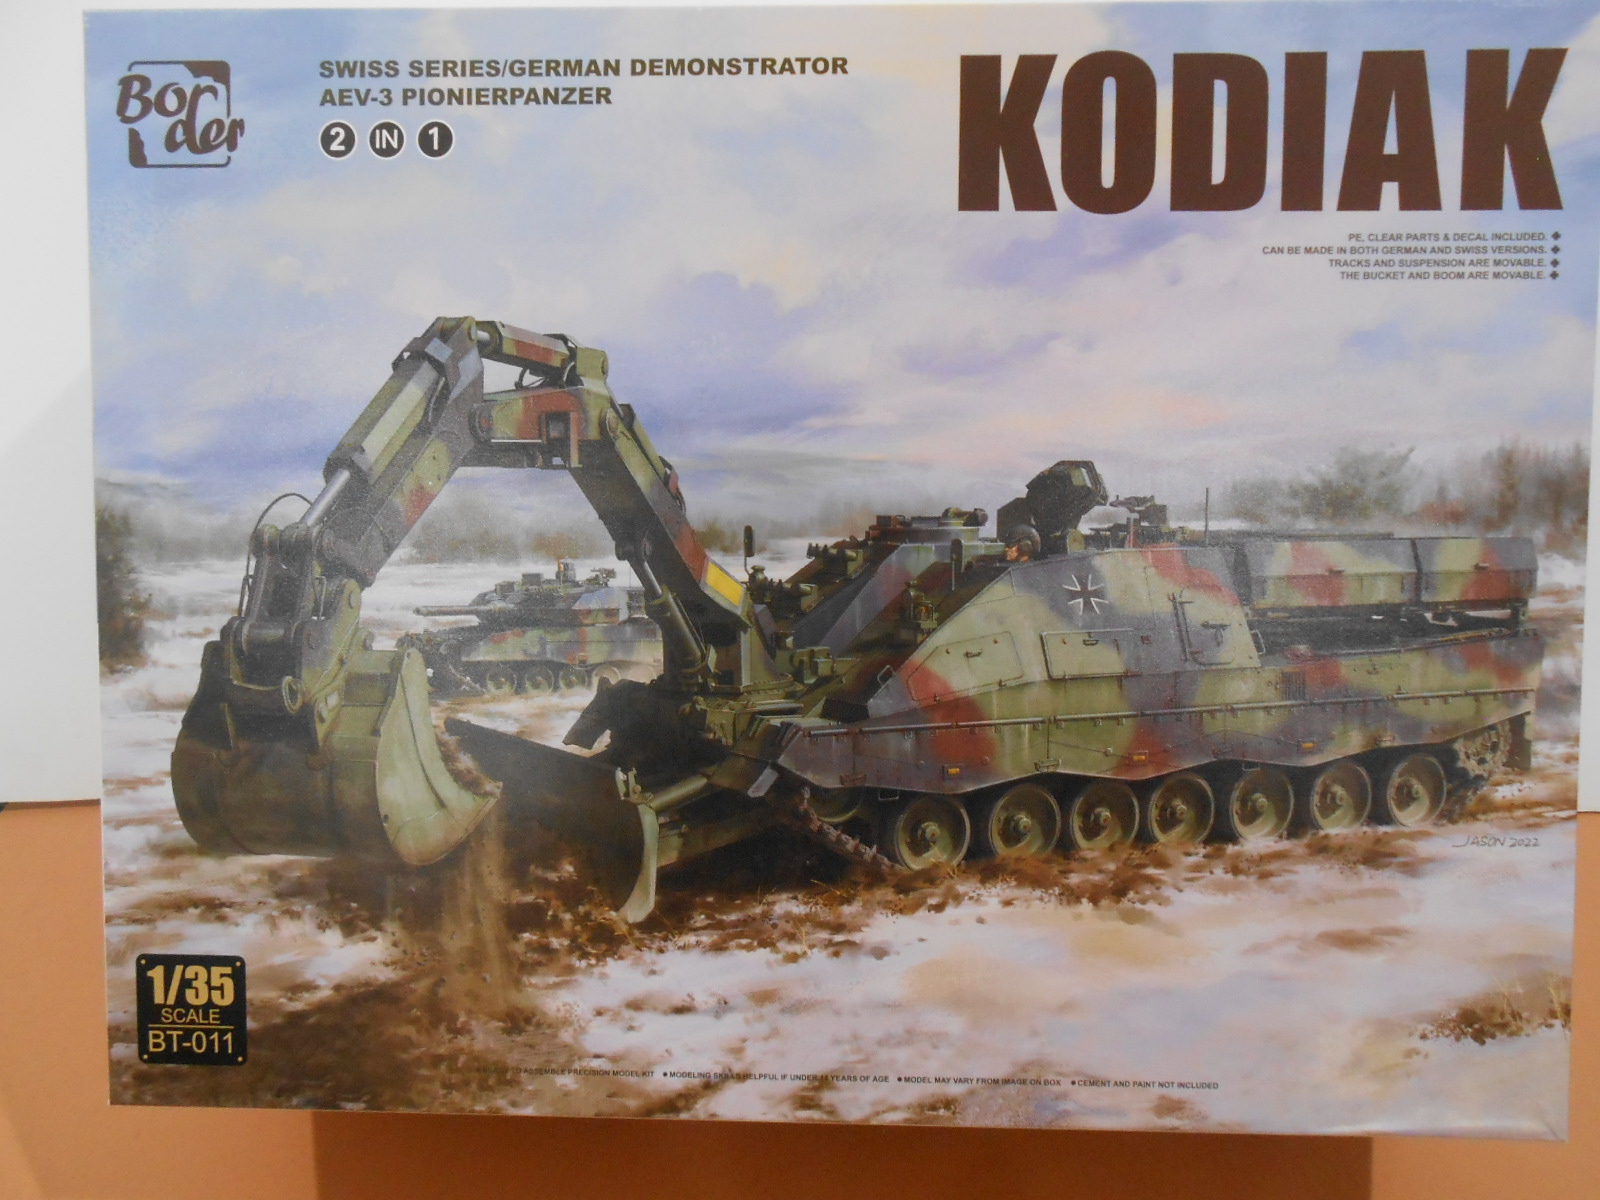
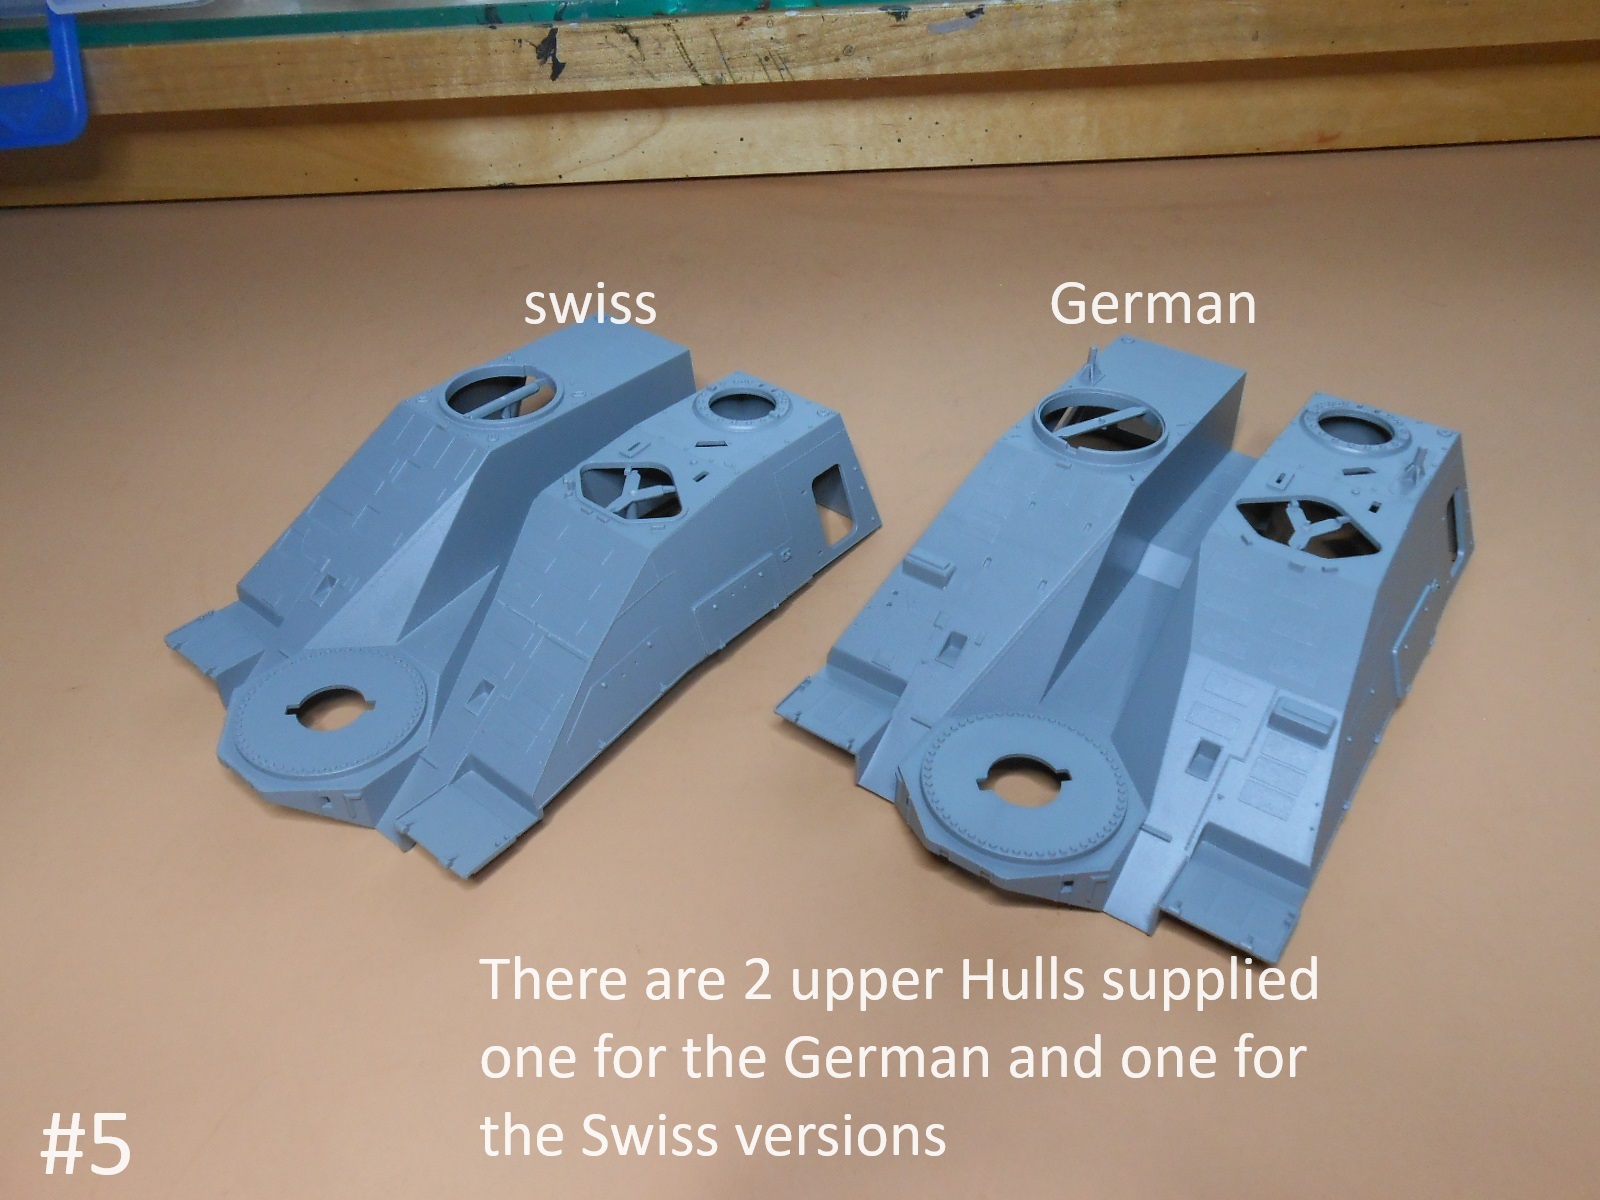
Nice subject choice. I really like engineering vehicles so a mush follow for me. As for the Swiss or German choice just go with the one with most colors on it ![]()
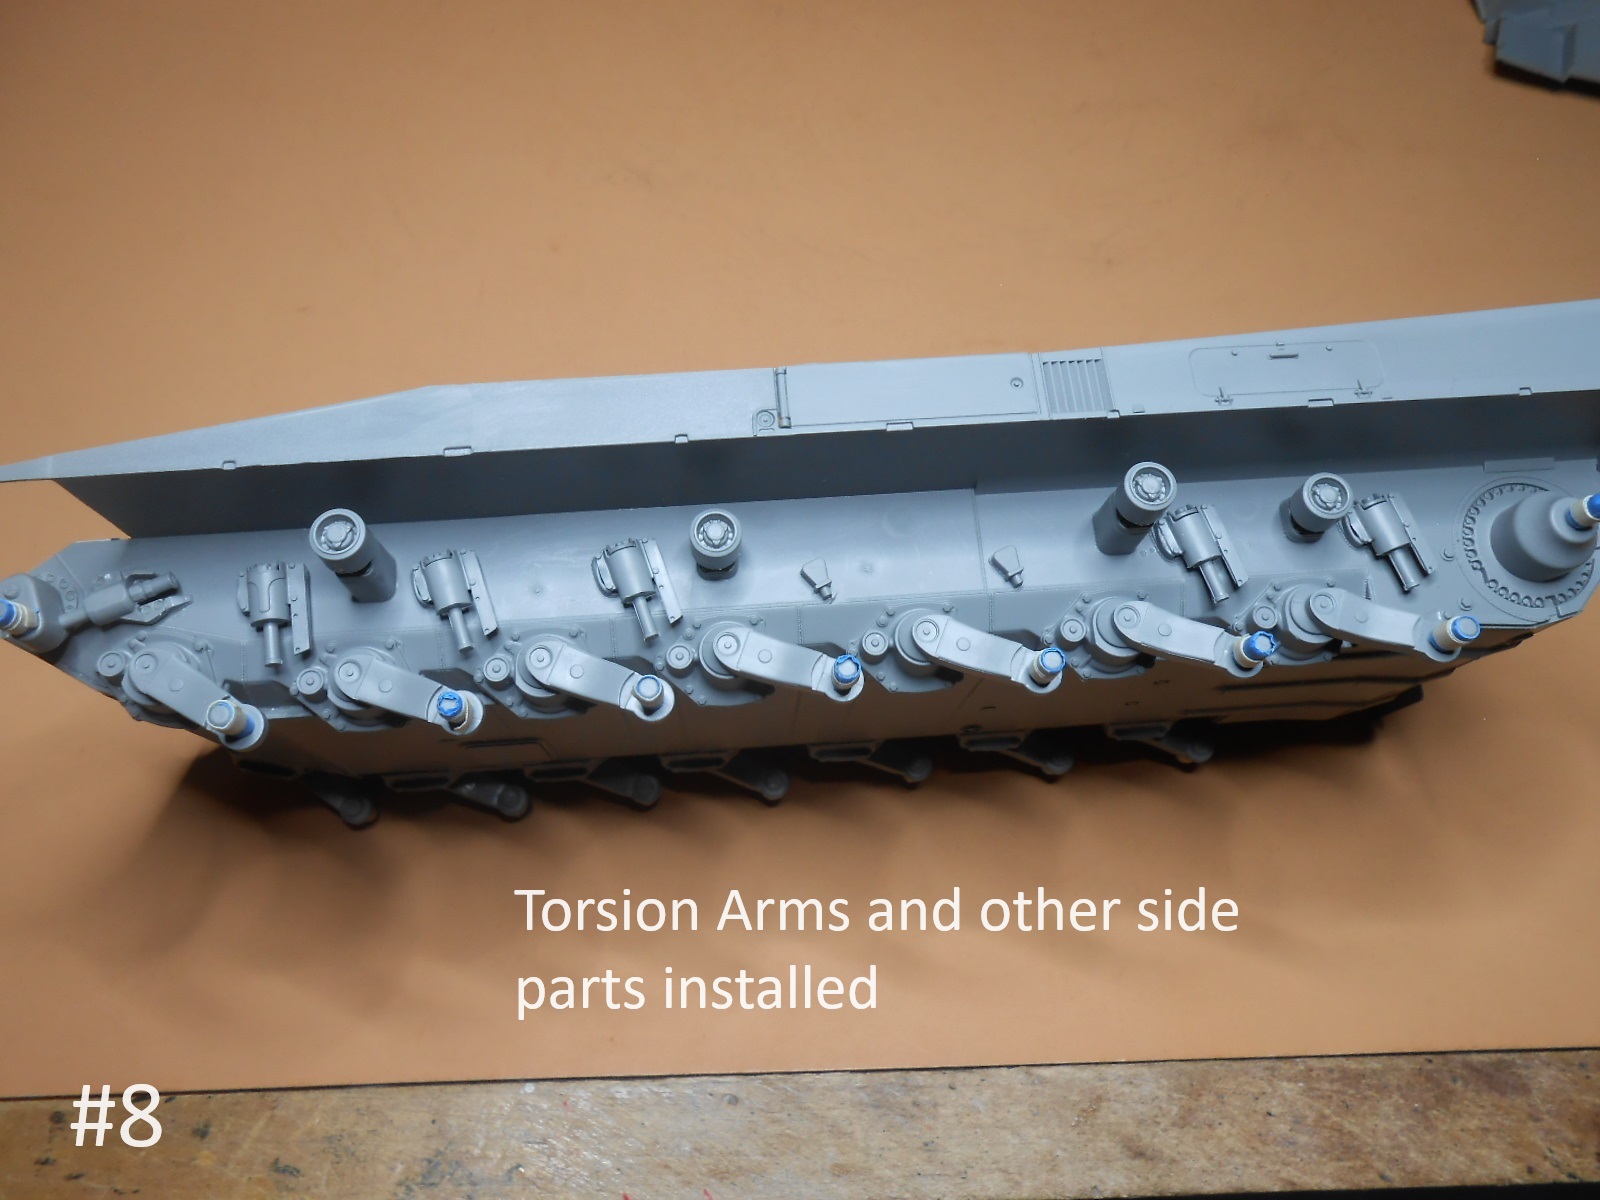
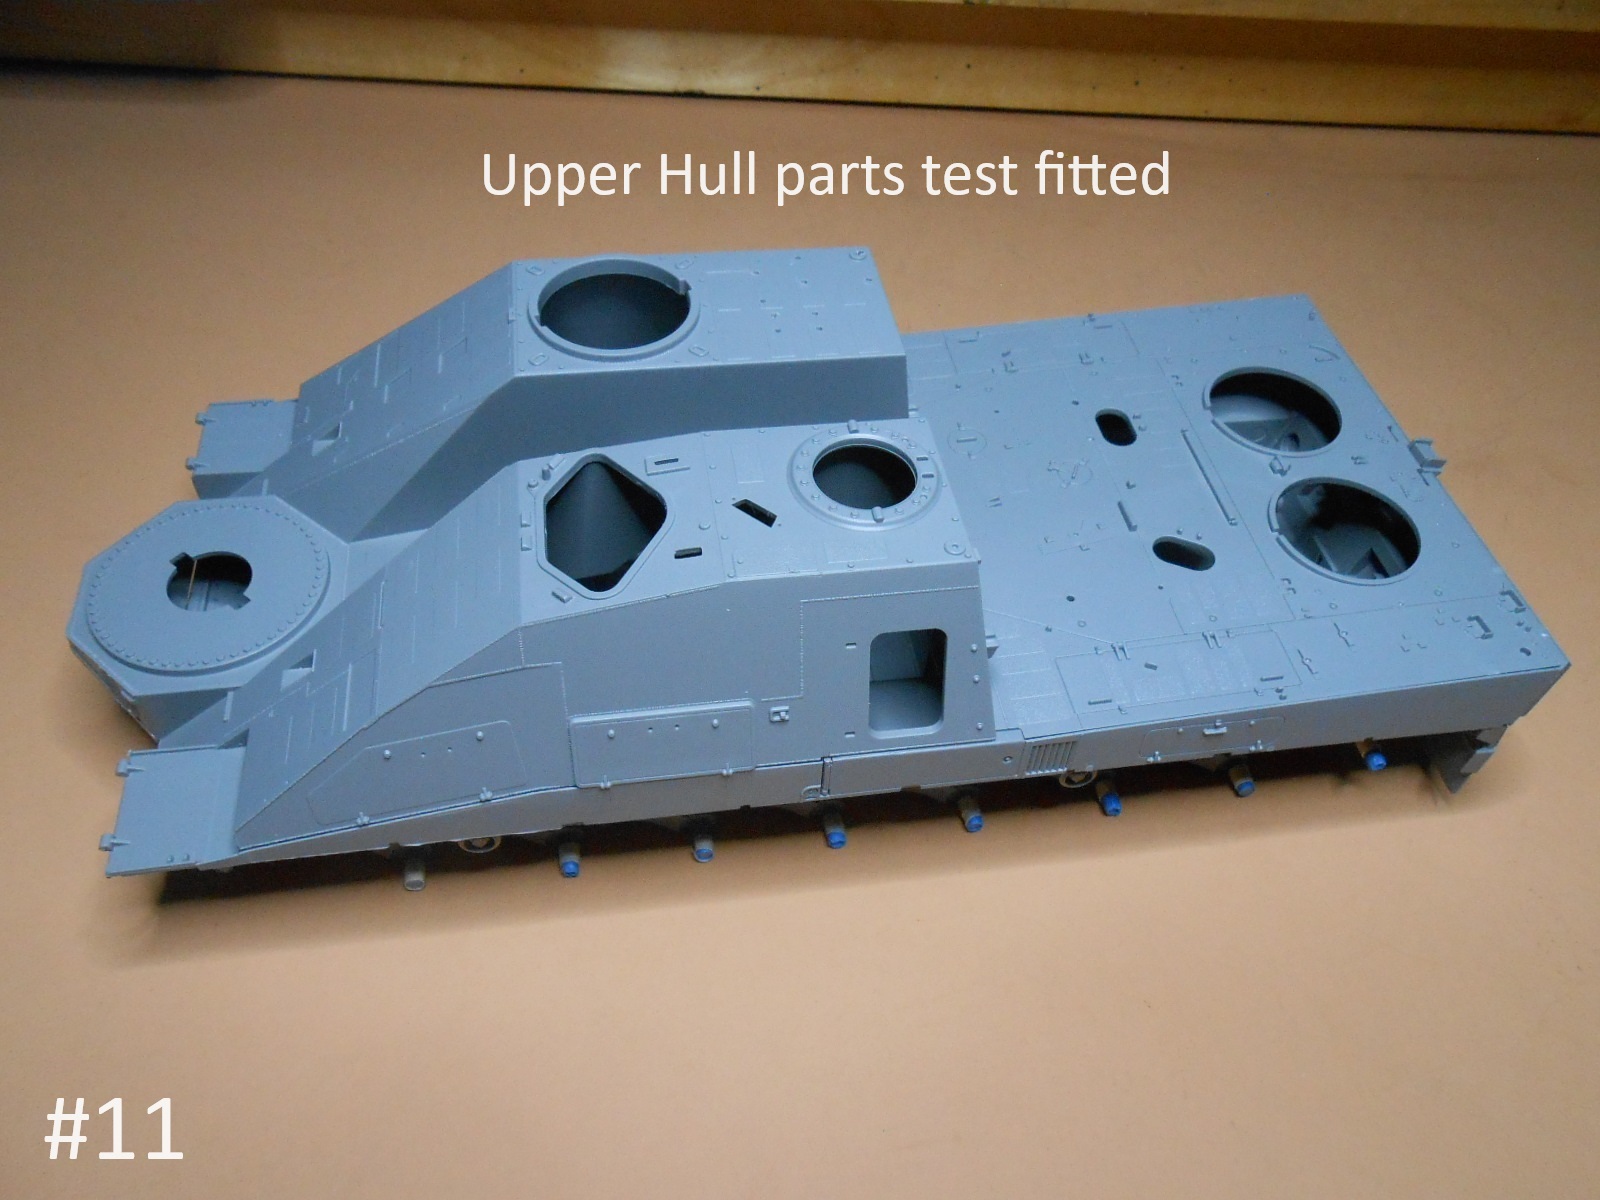
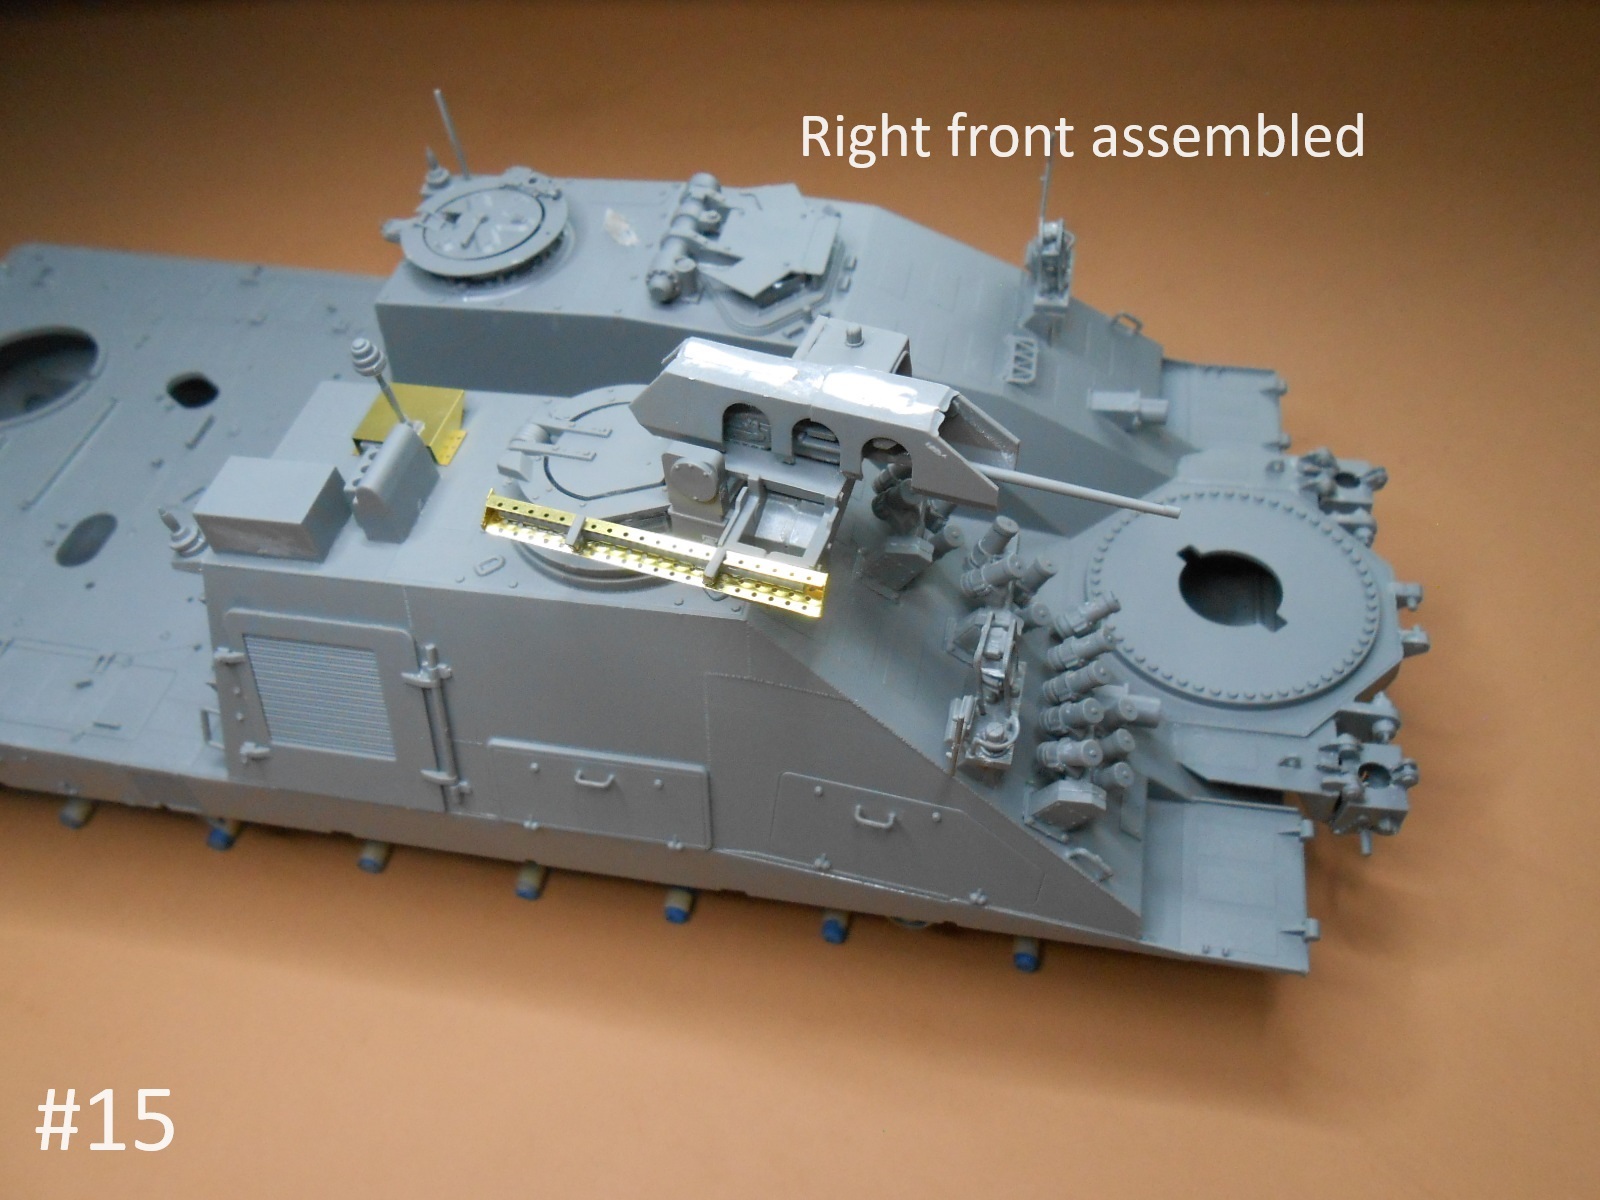
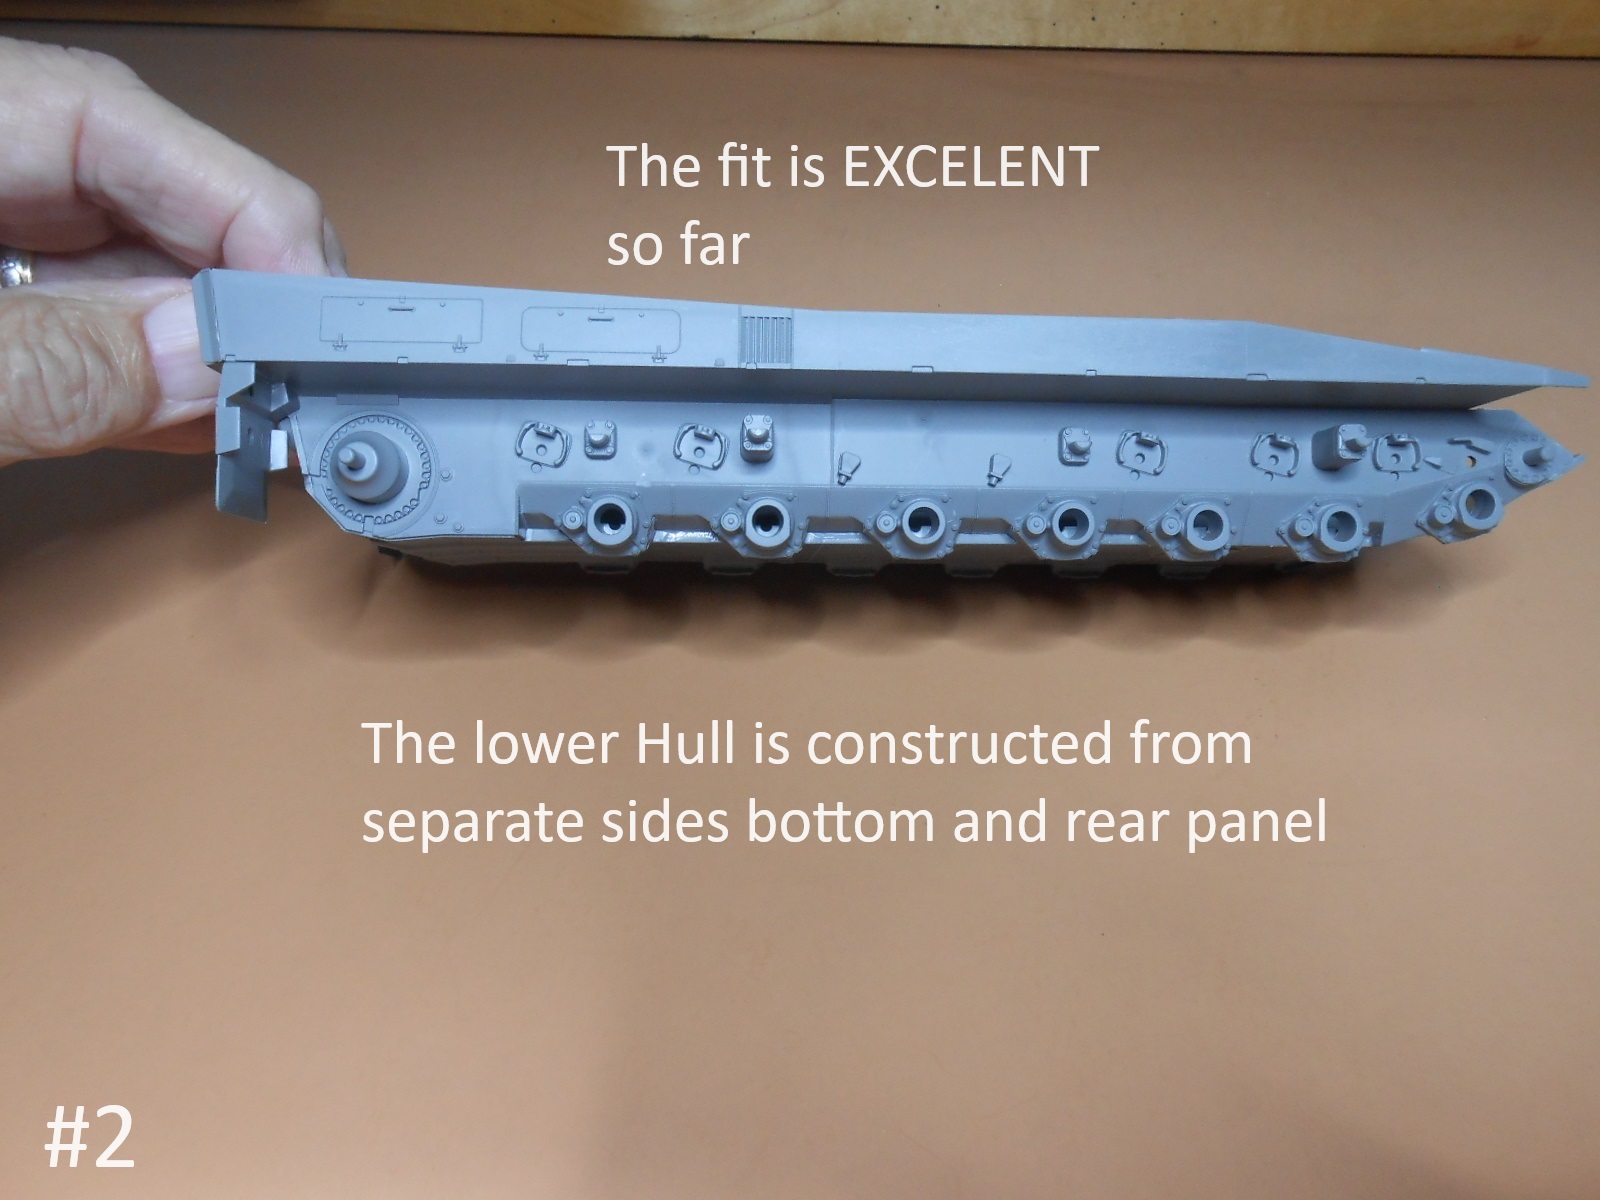
I’m doing the Swiss version, I have the Hull together but there’s a Million and one or two small parts to add and they don’t fit too good.
The instructions must have been written by Dragon or Trumpeter
It’s slow going now.
Regards
Donald
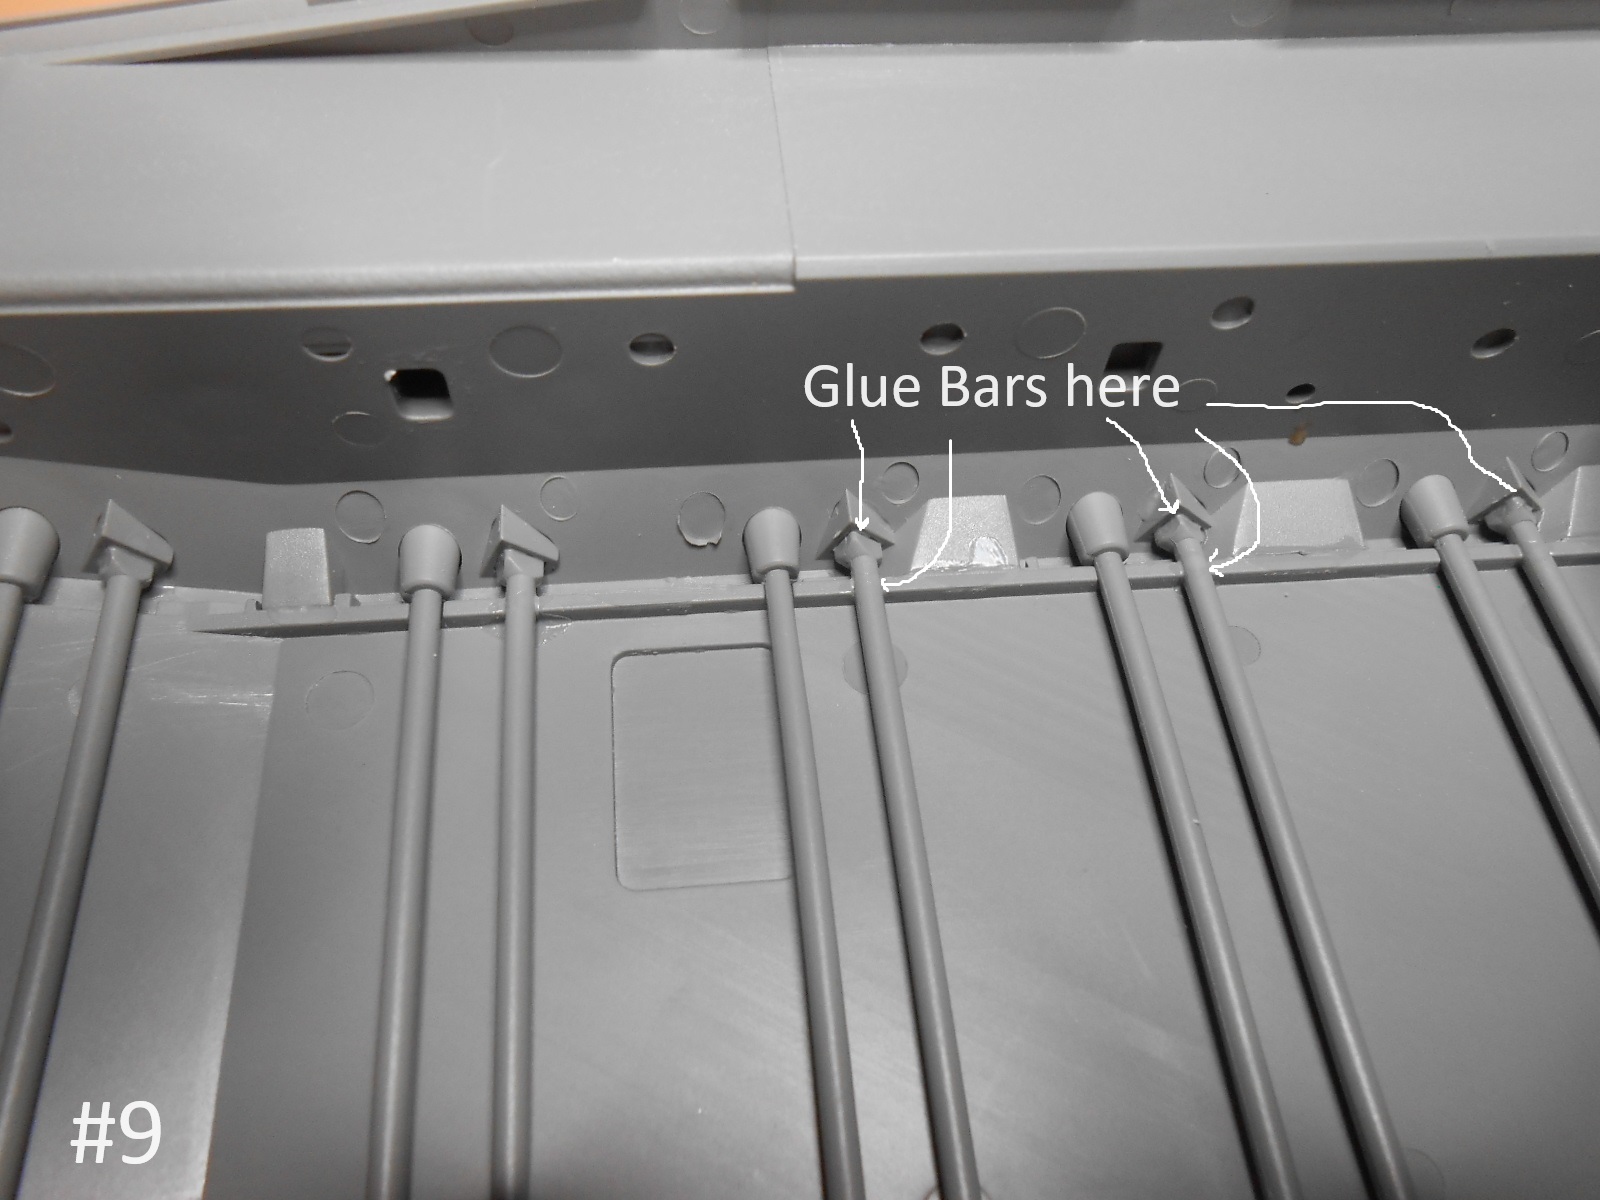
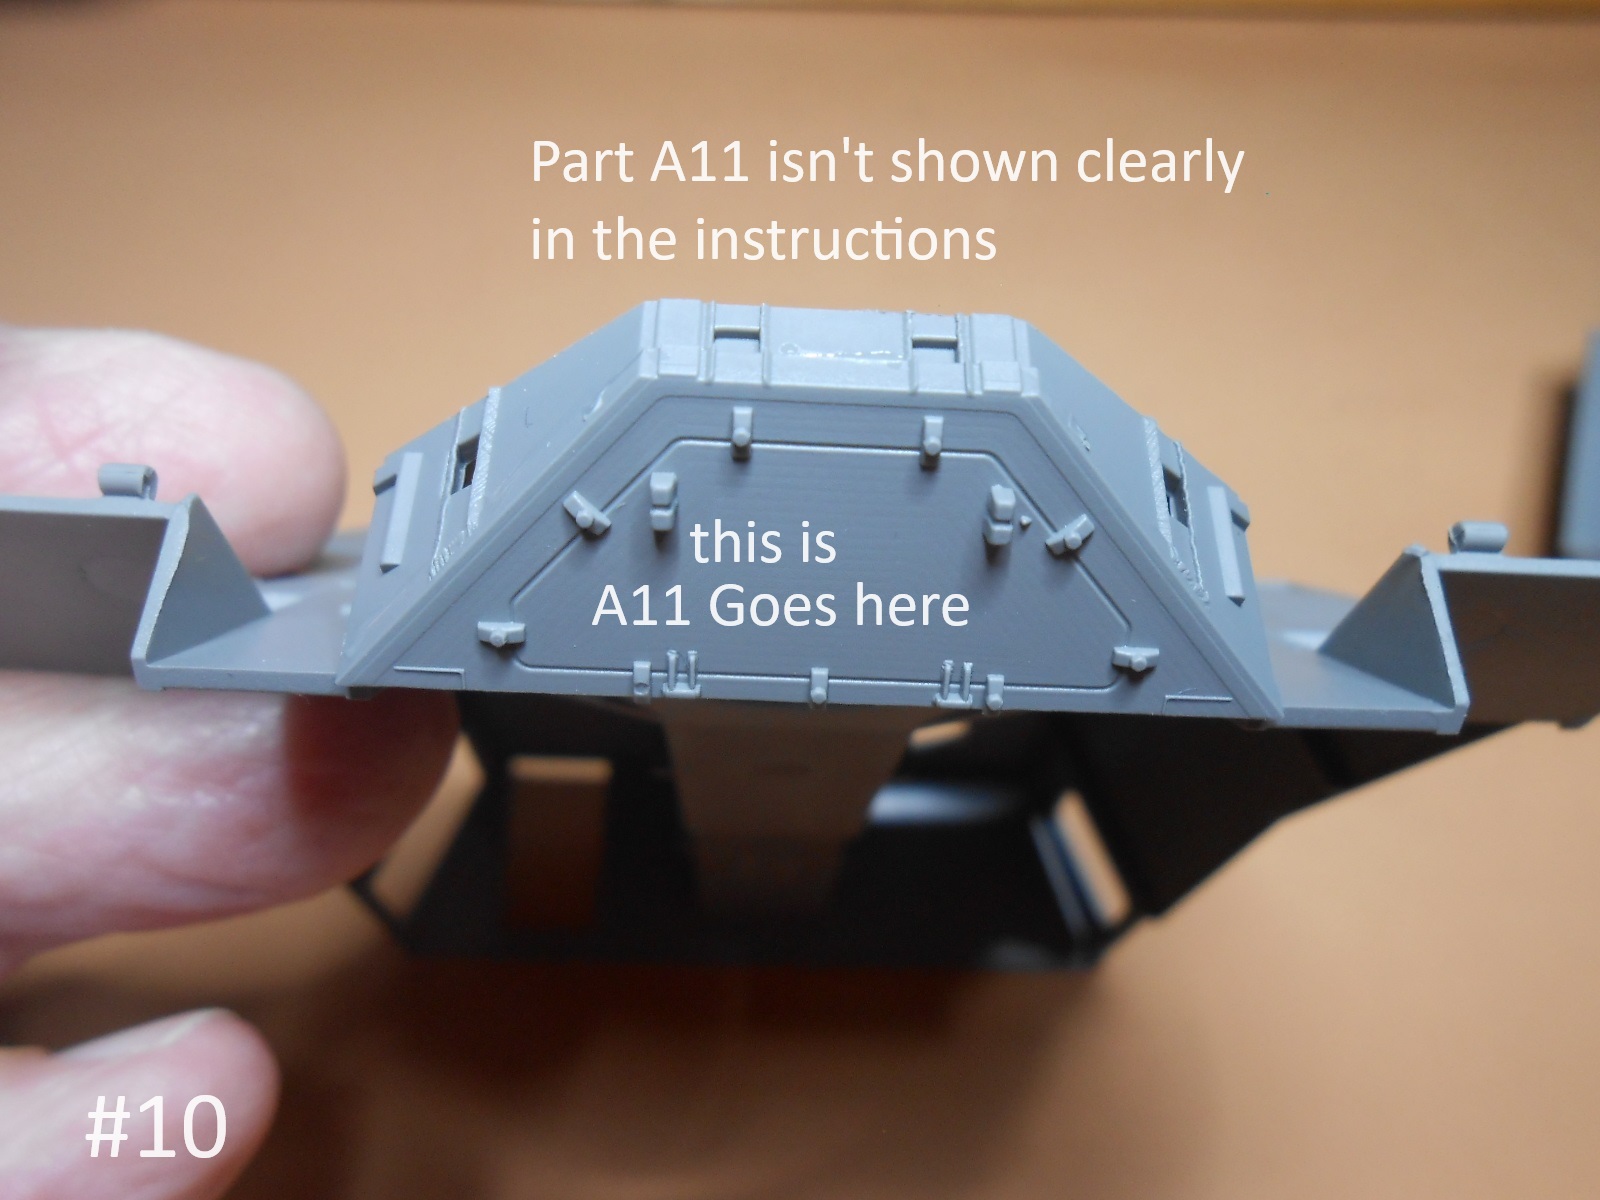
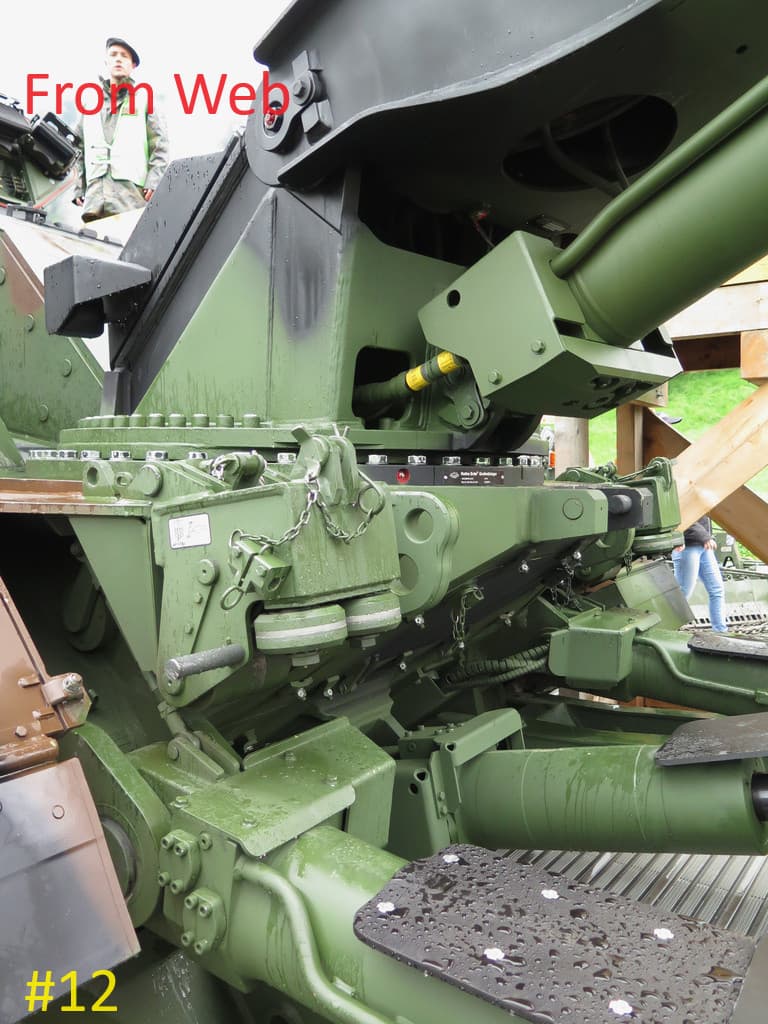
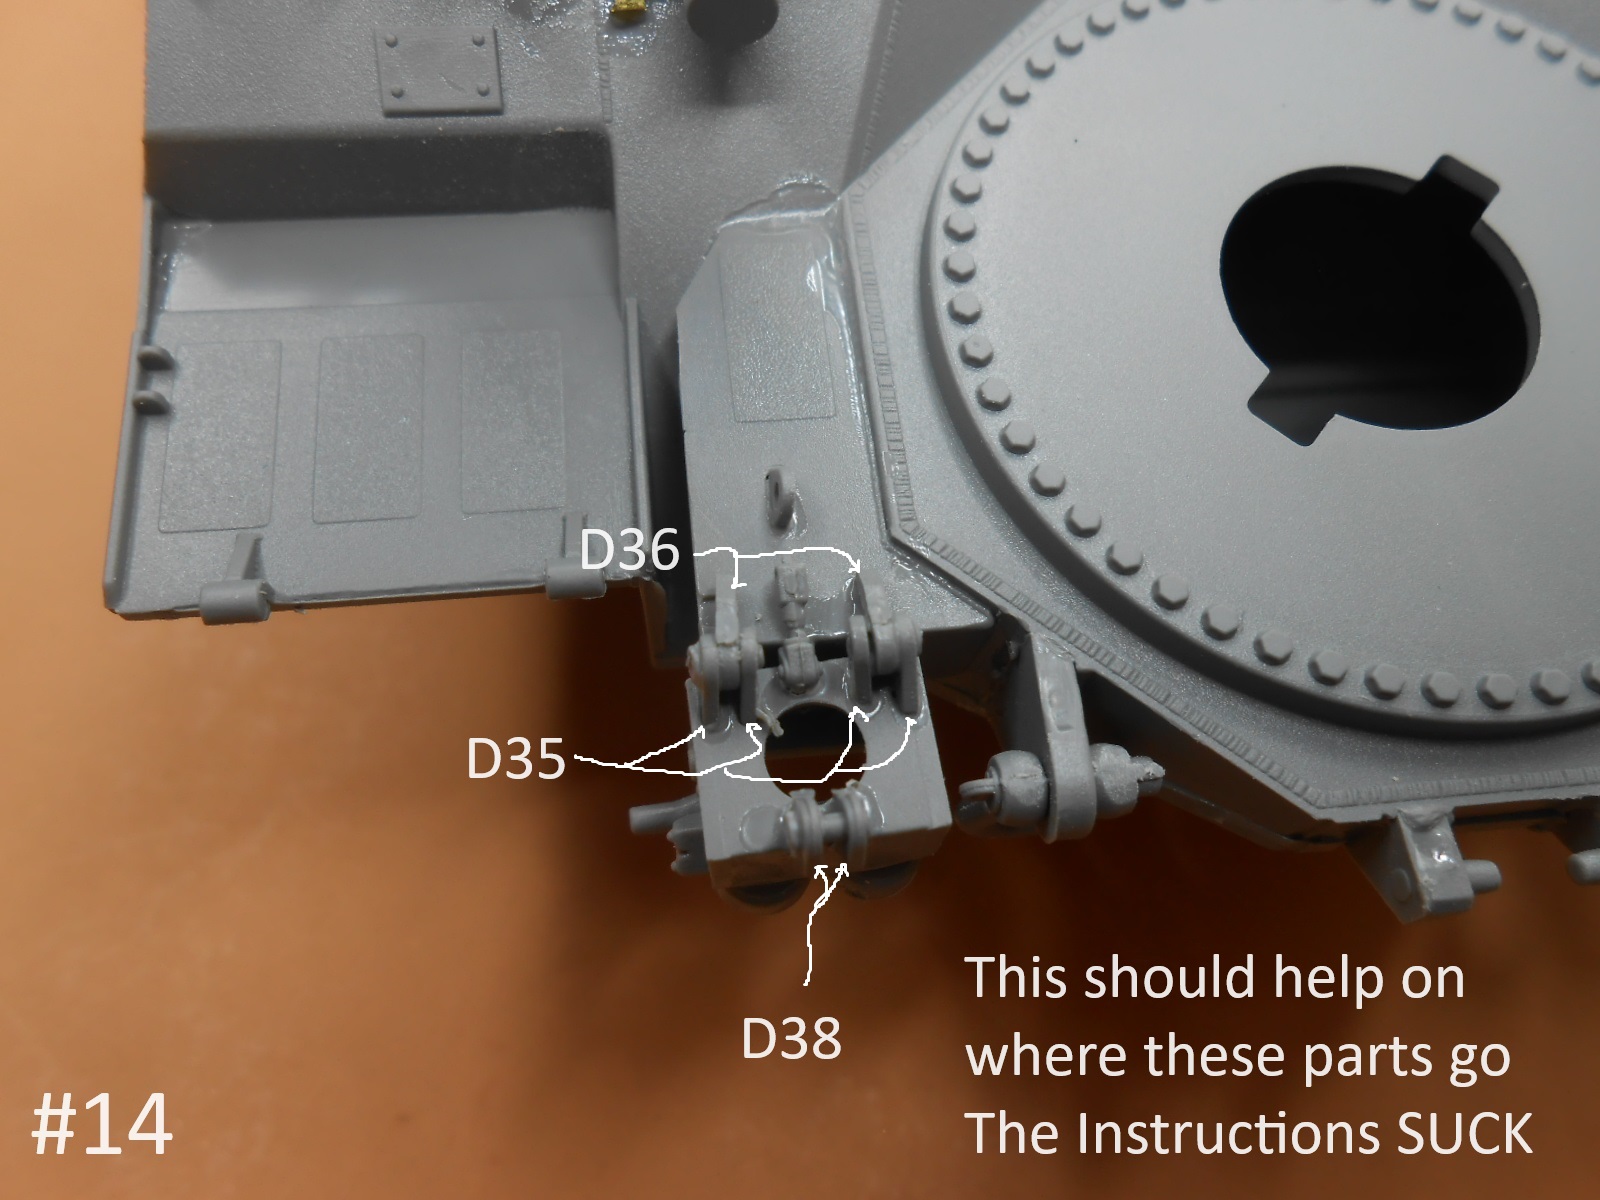
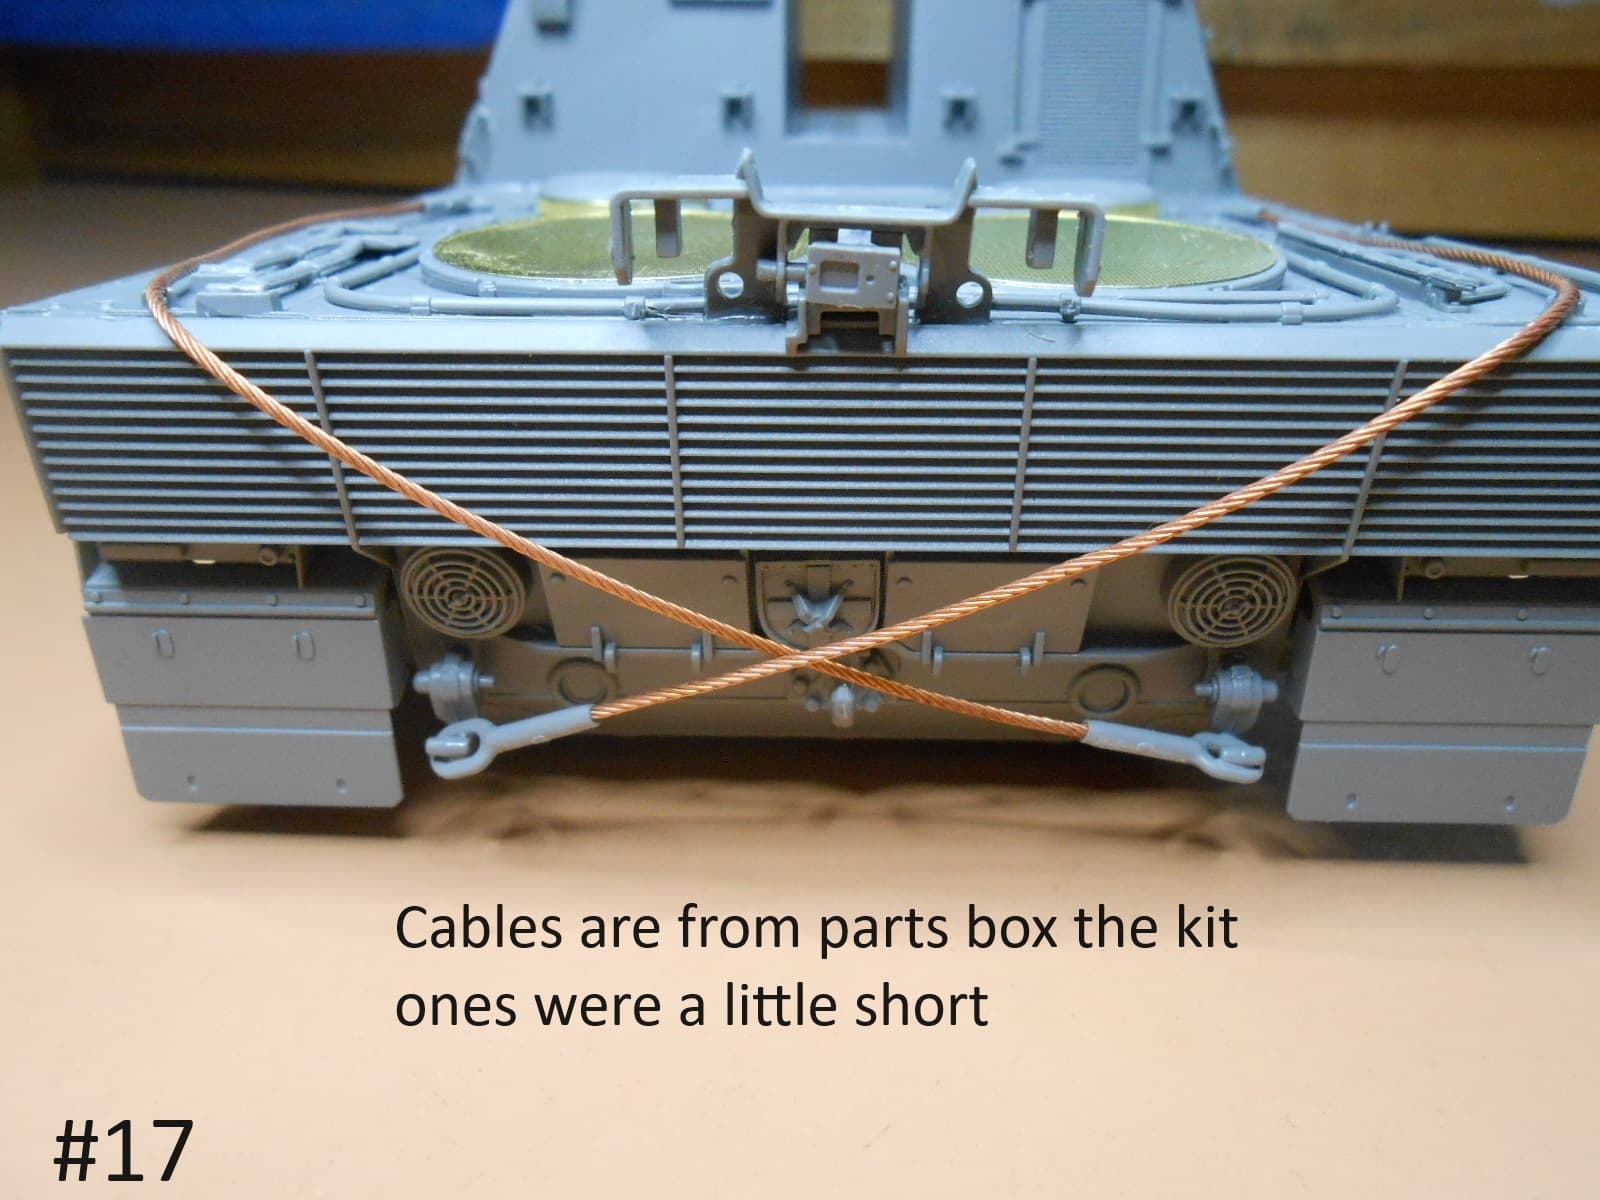
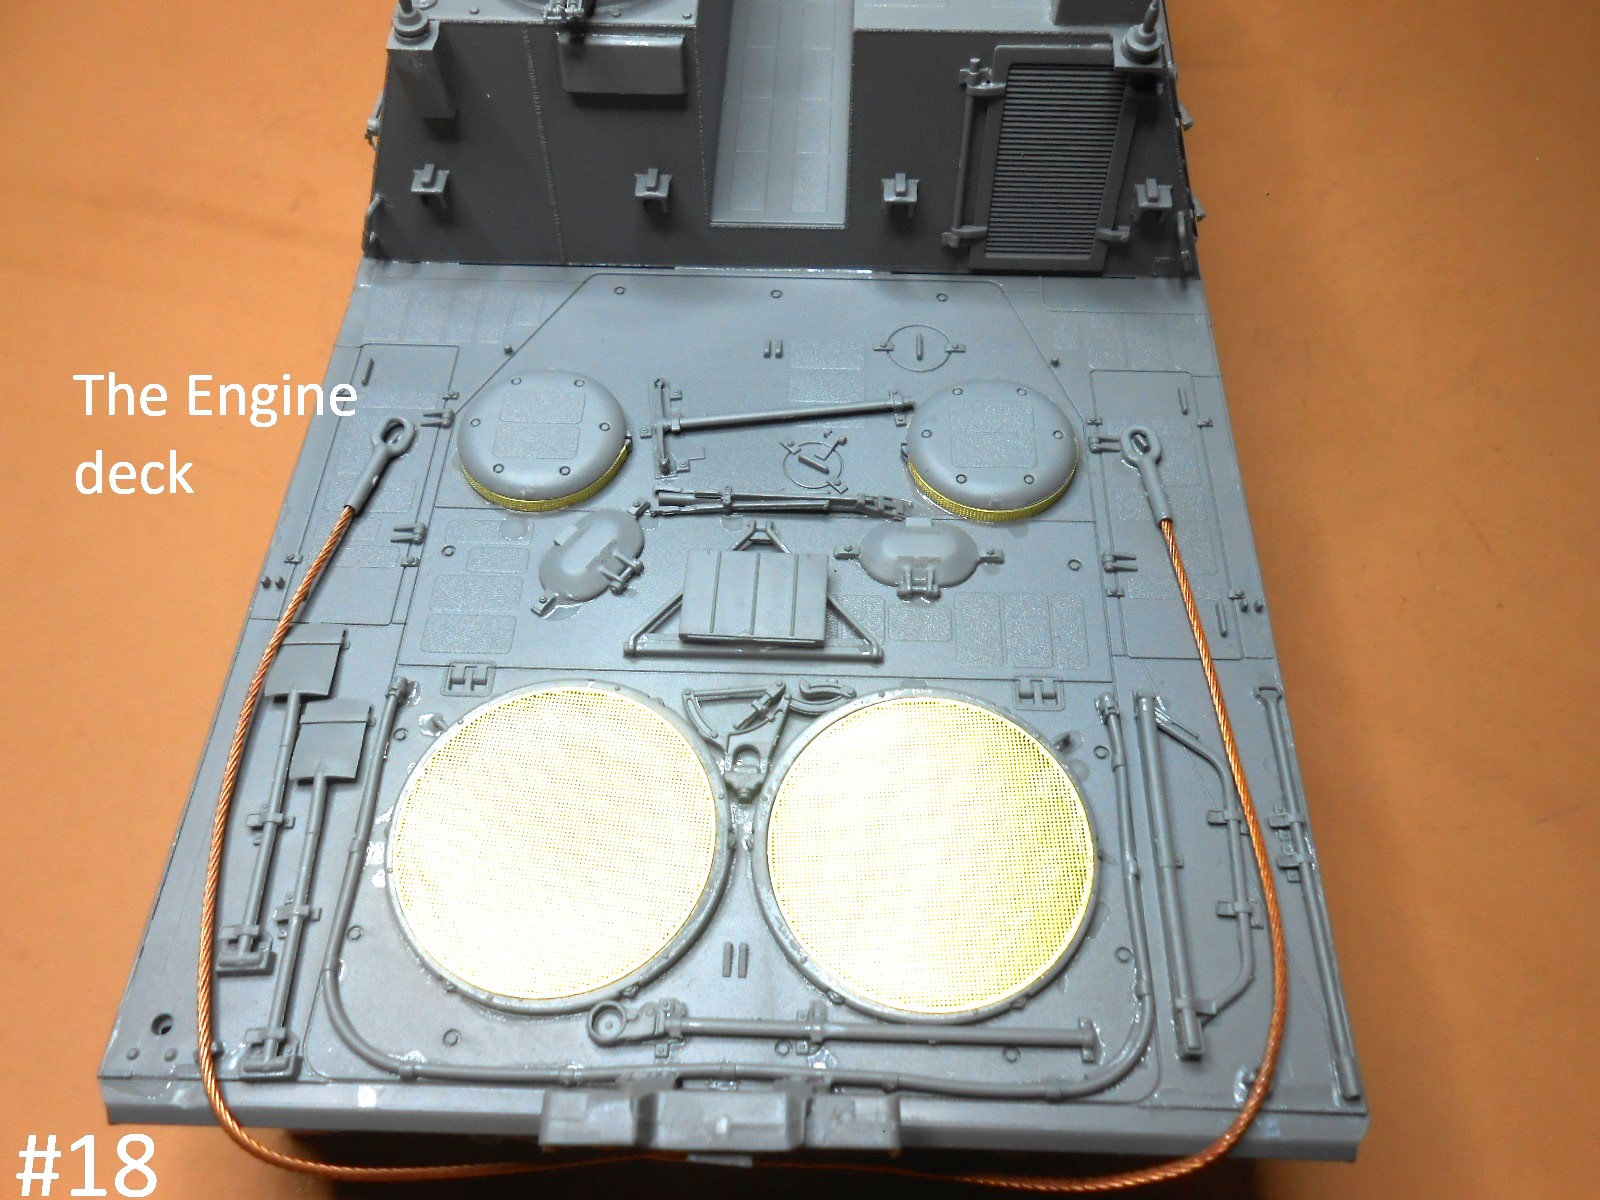
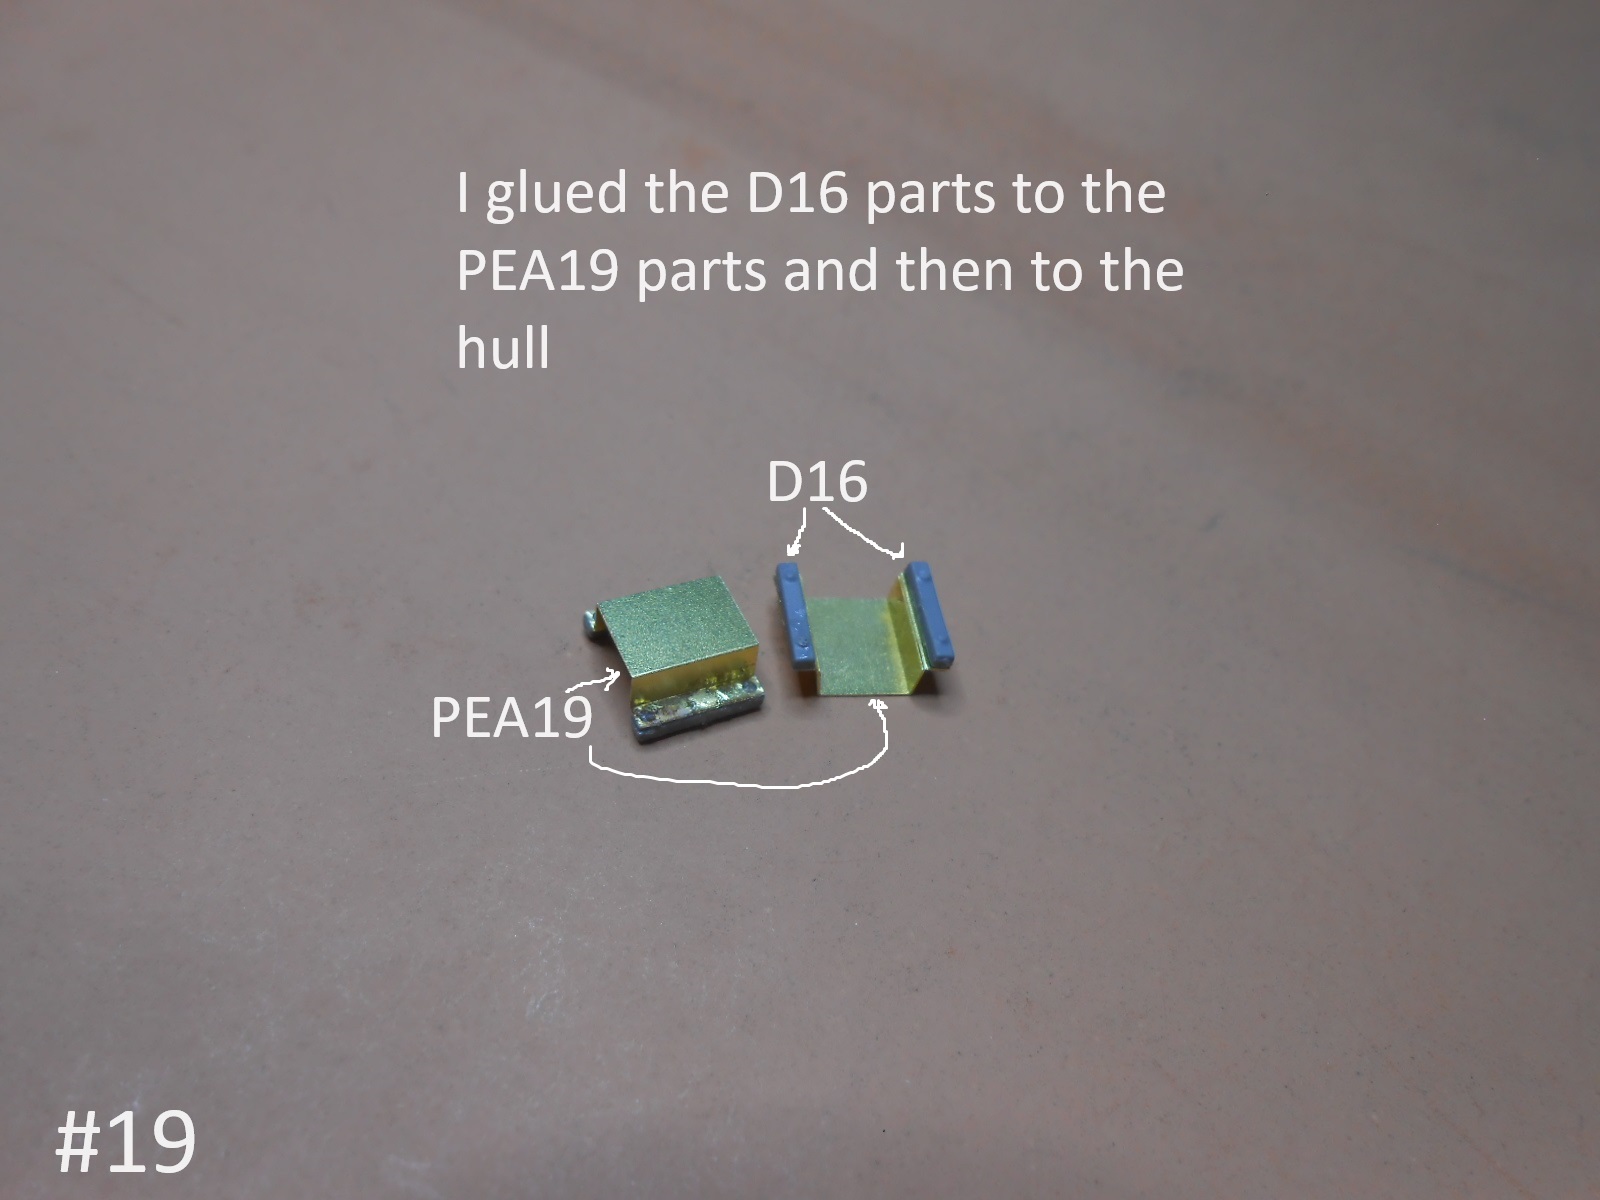
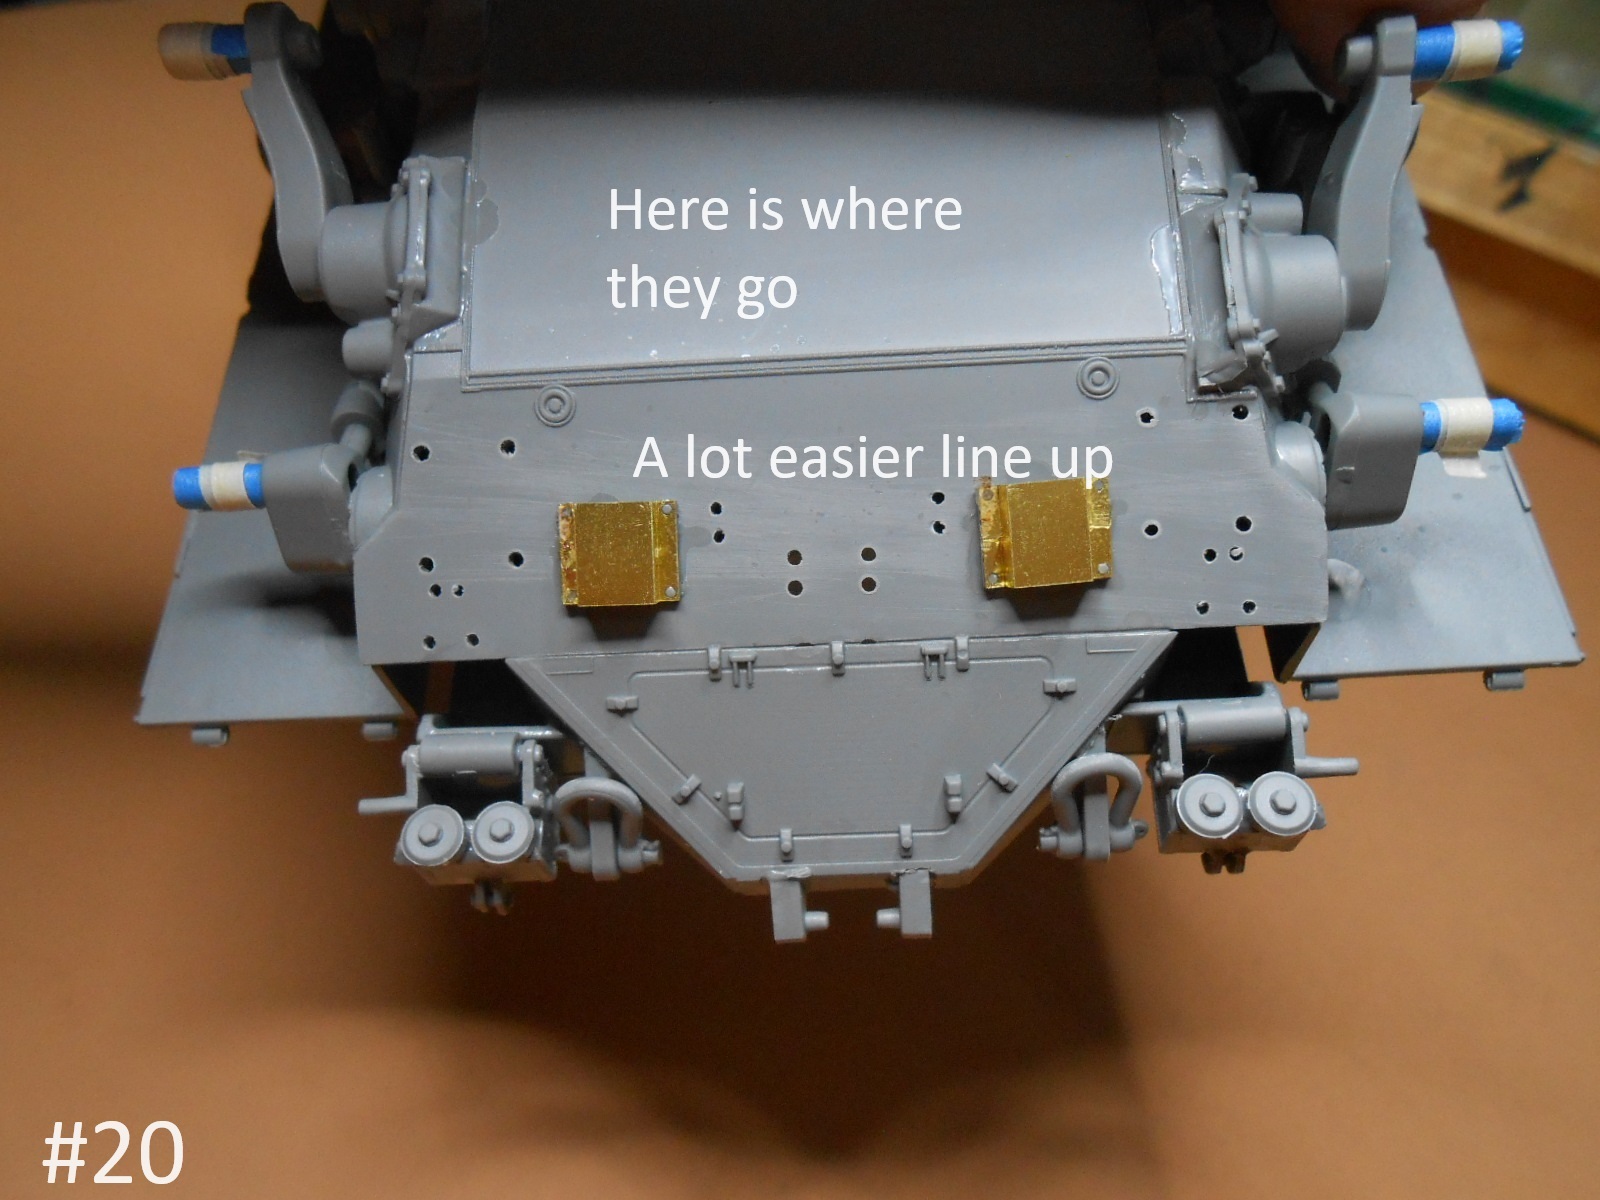
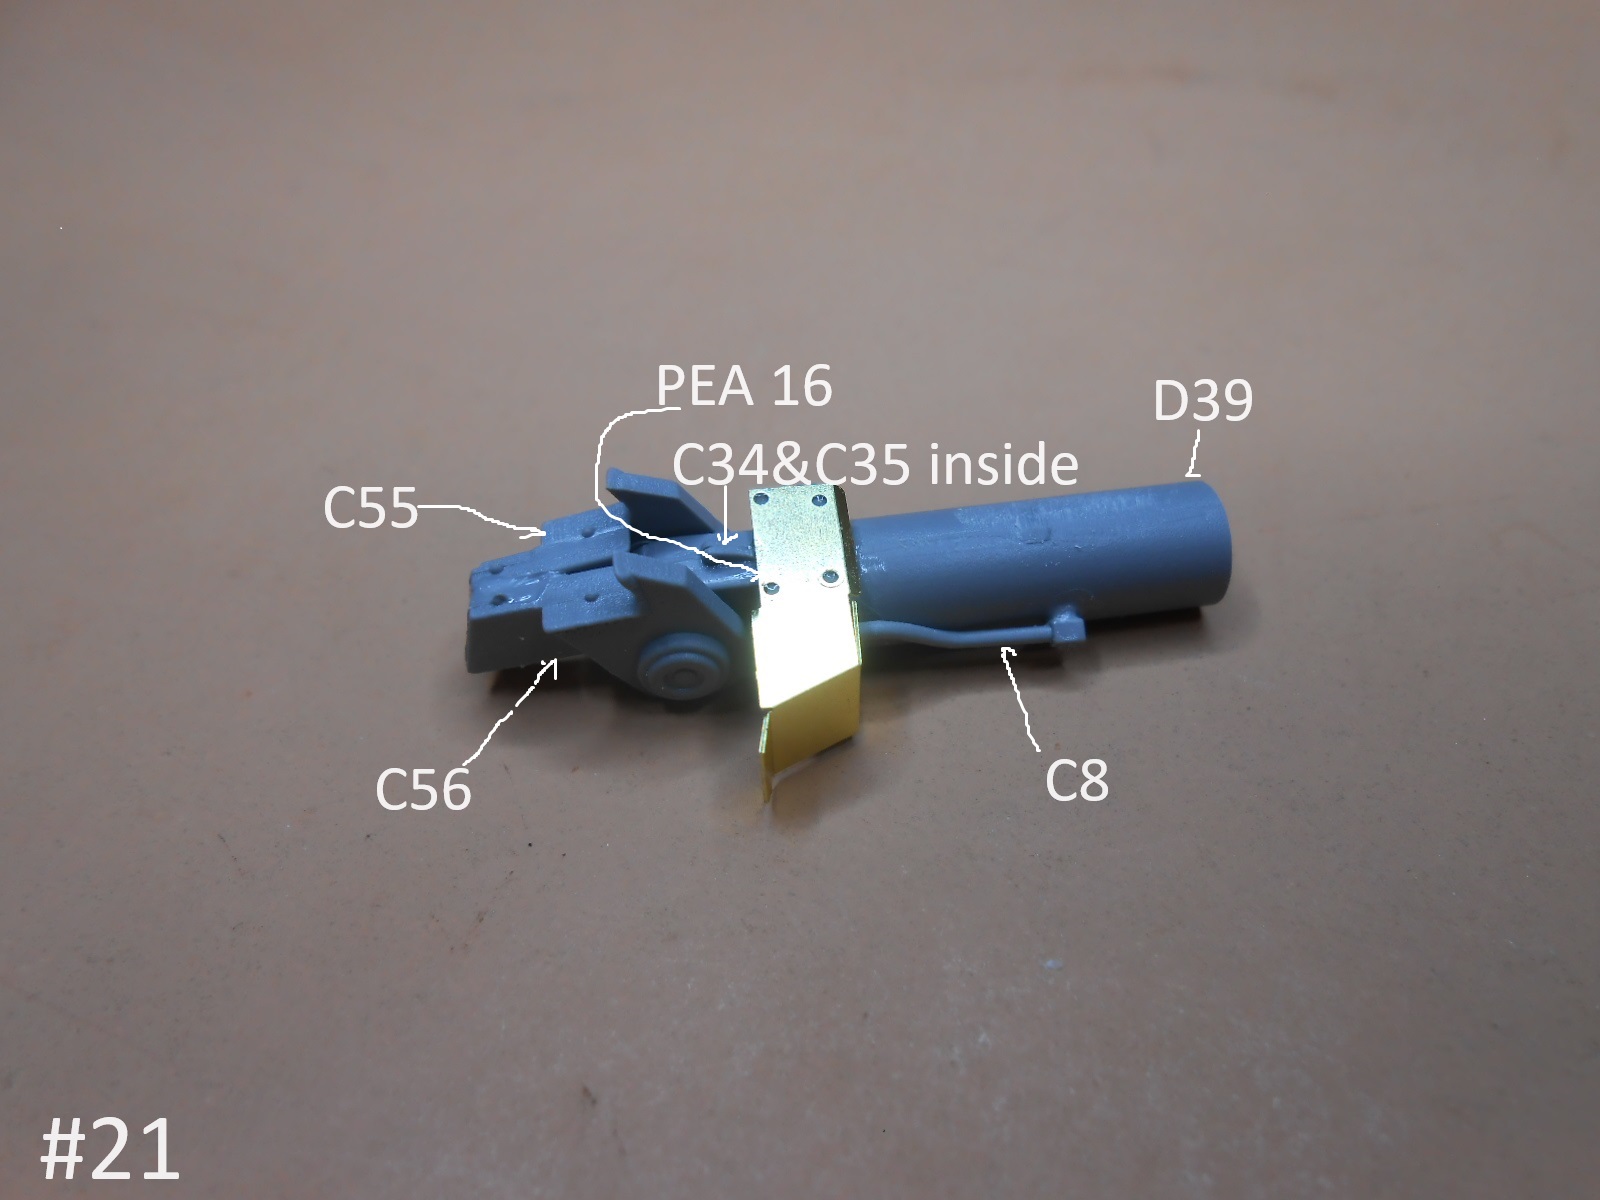
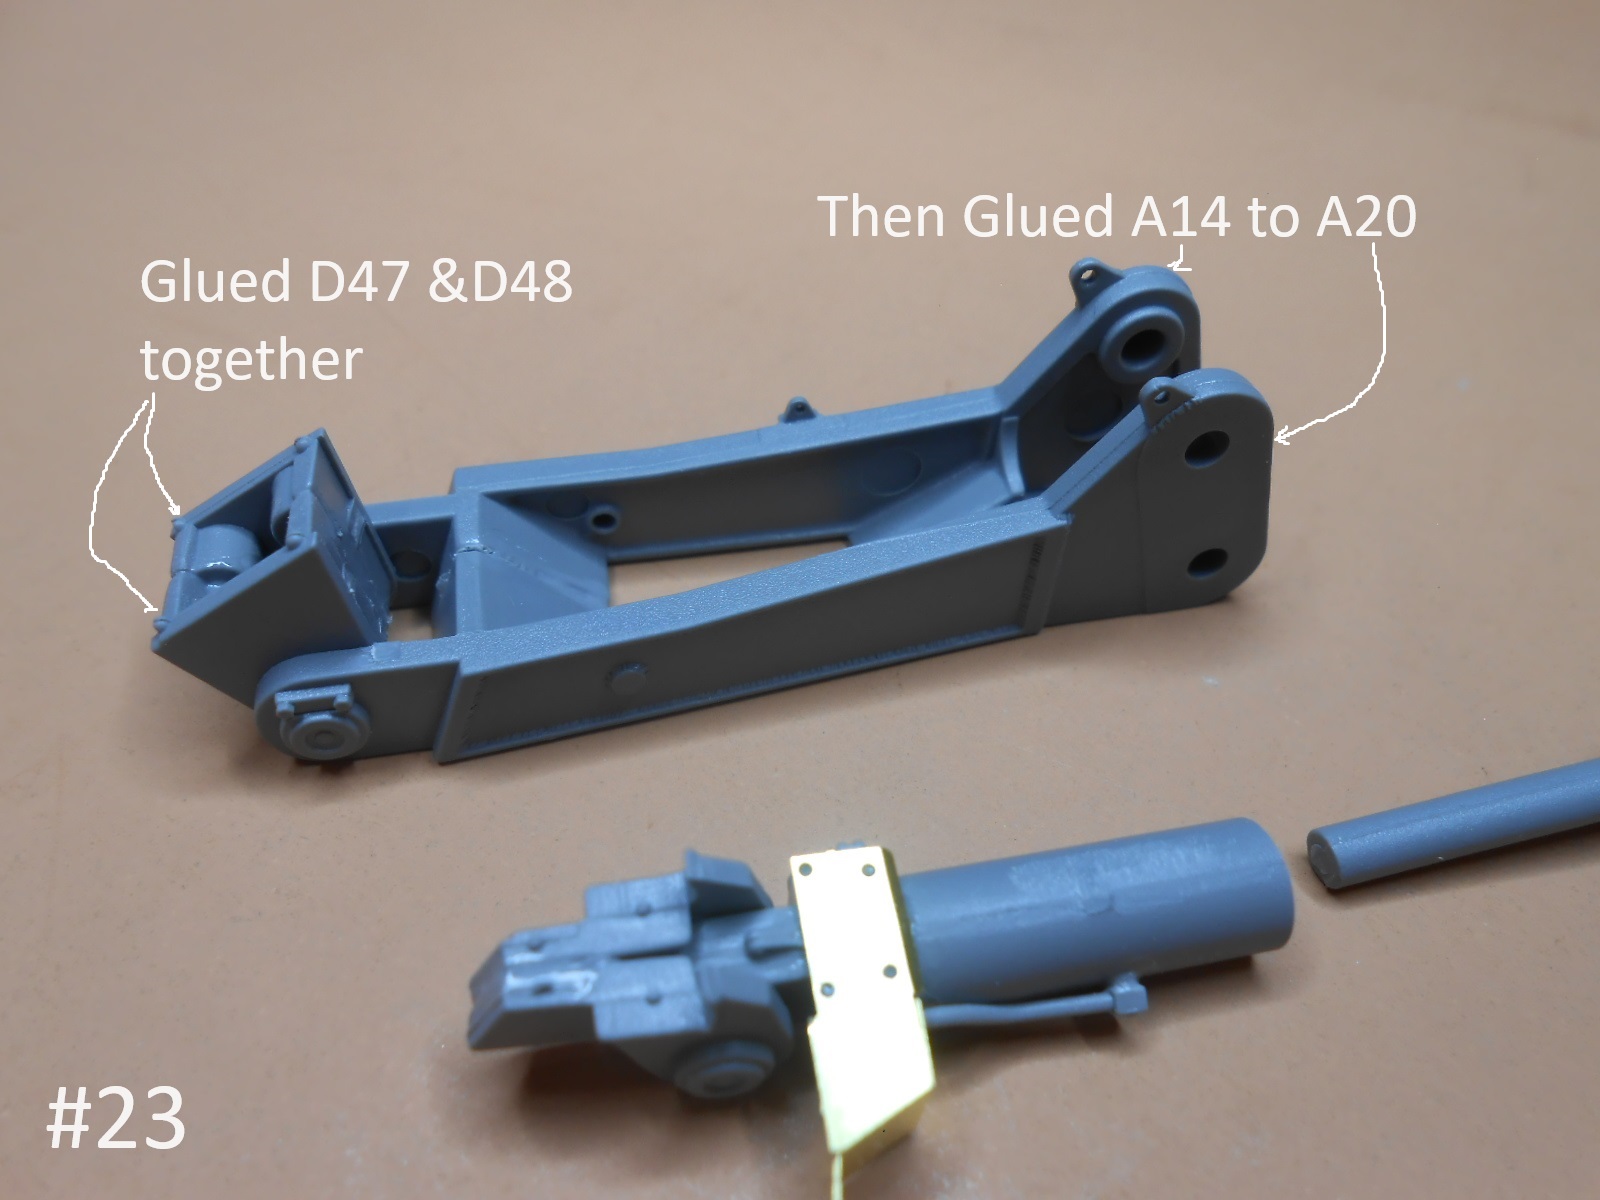
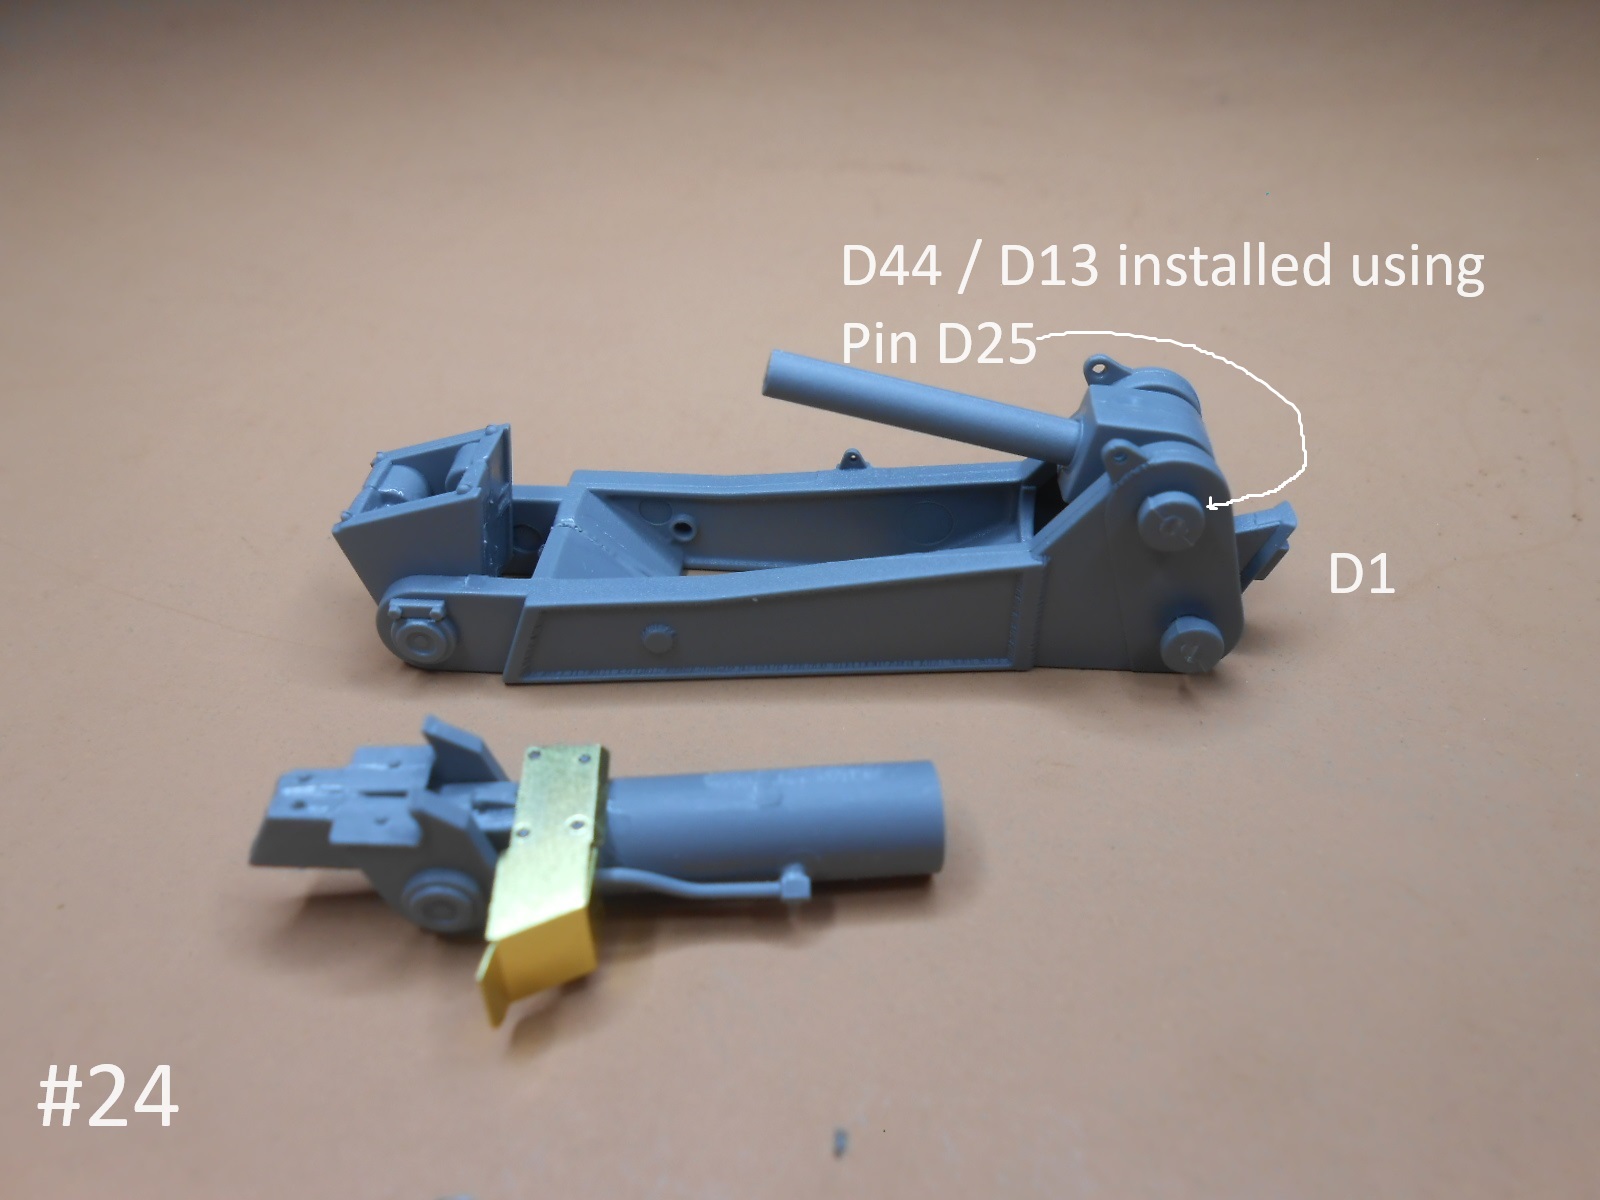
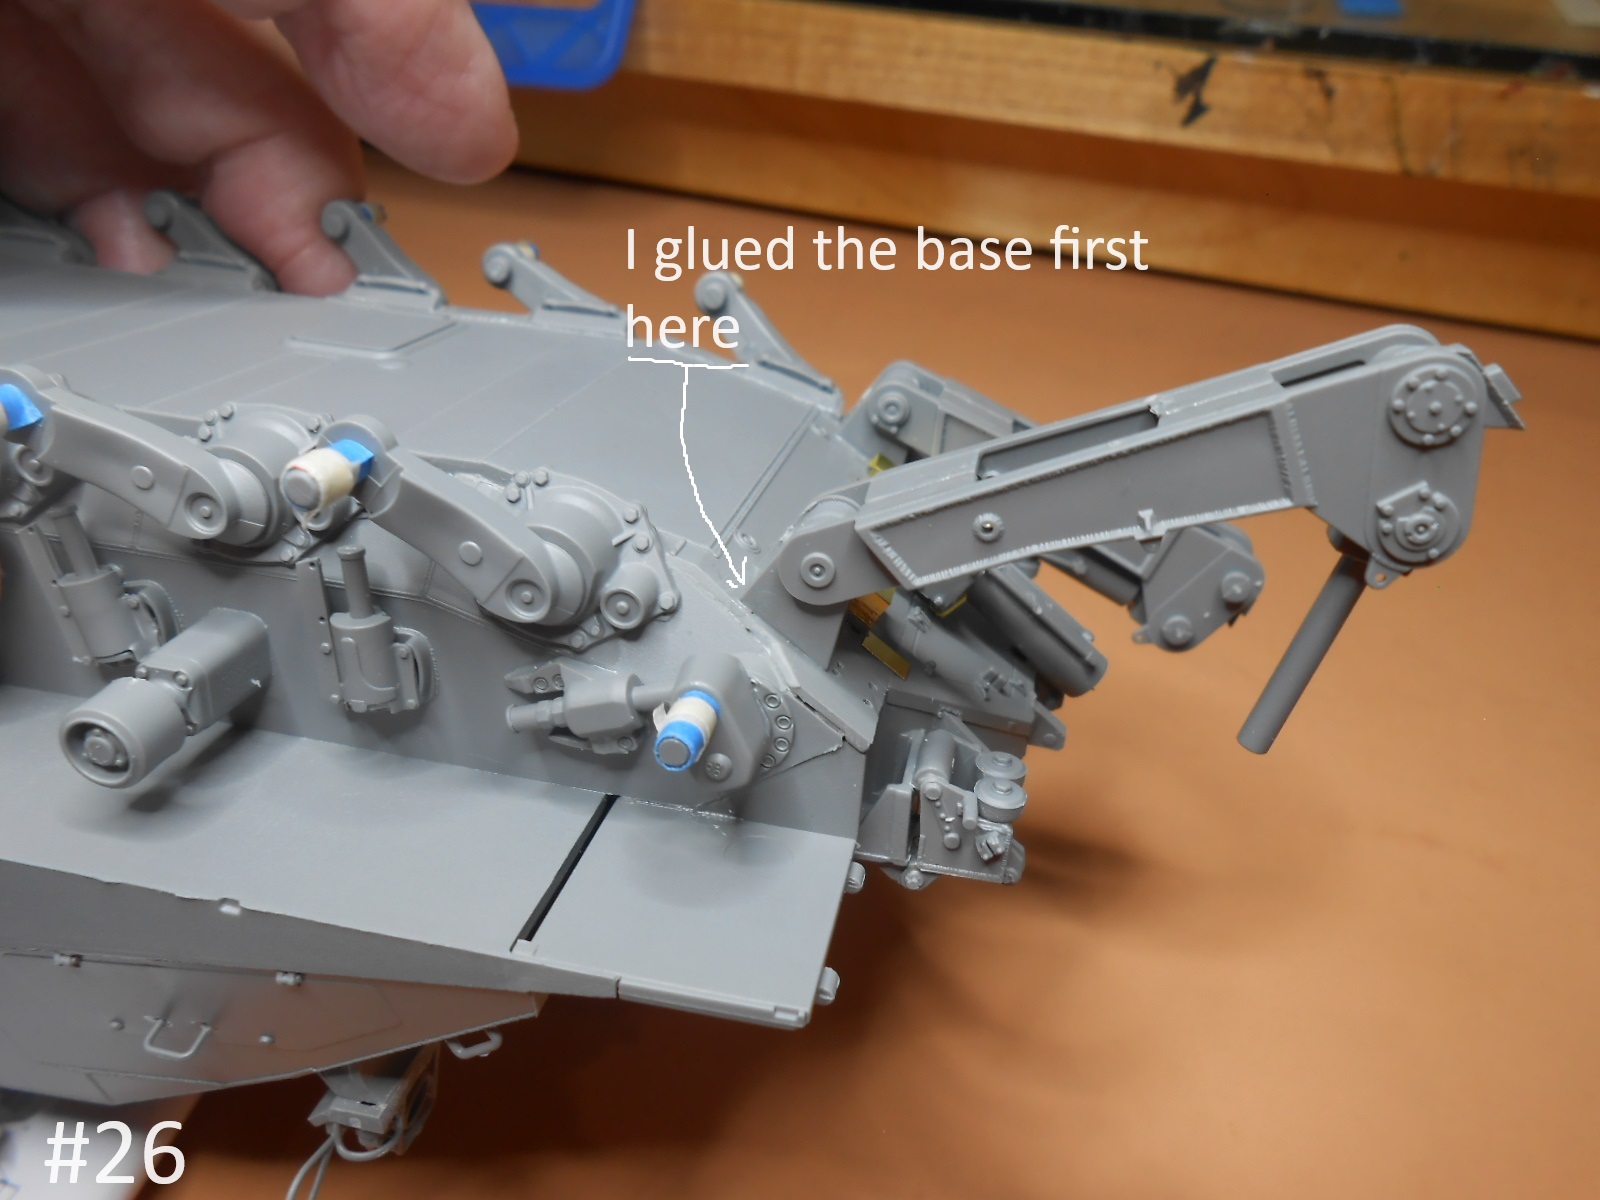
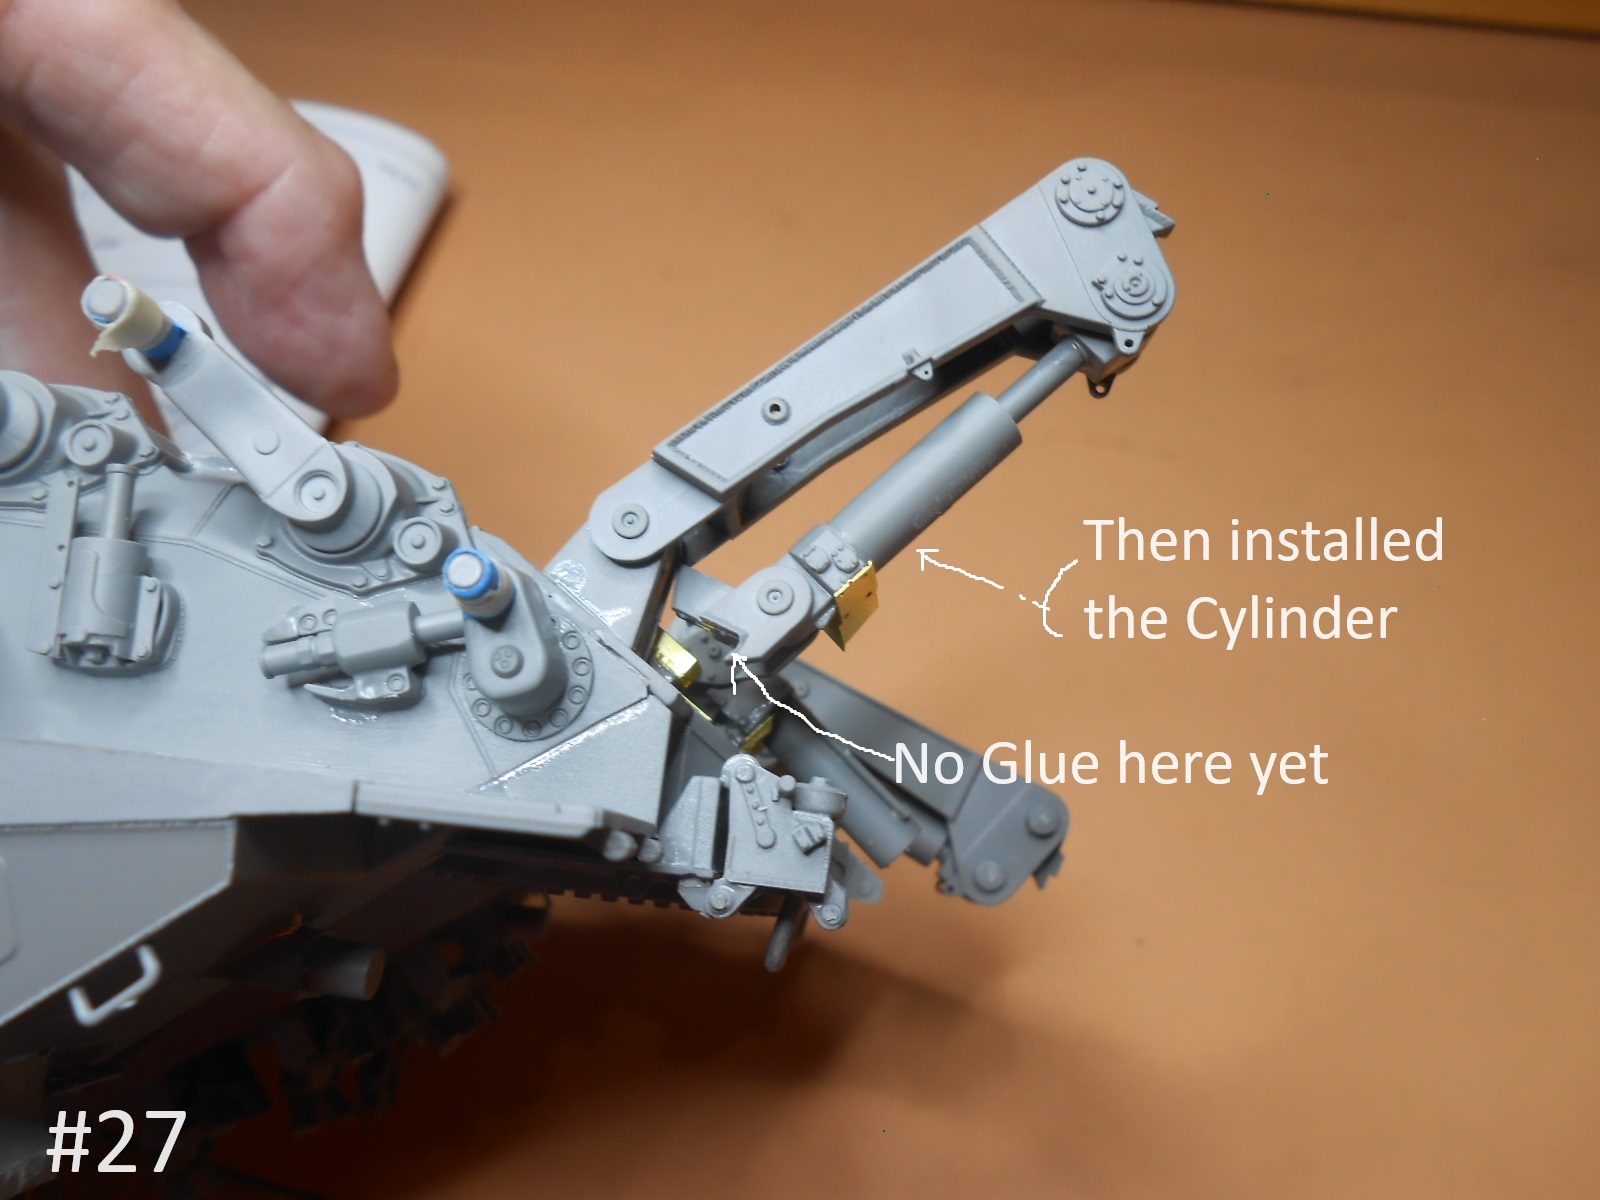
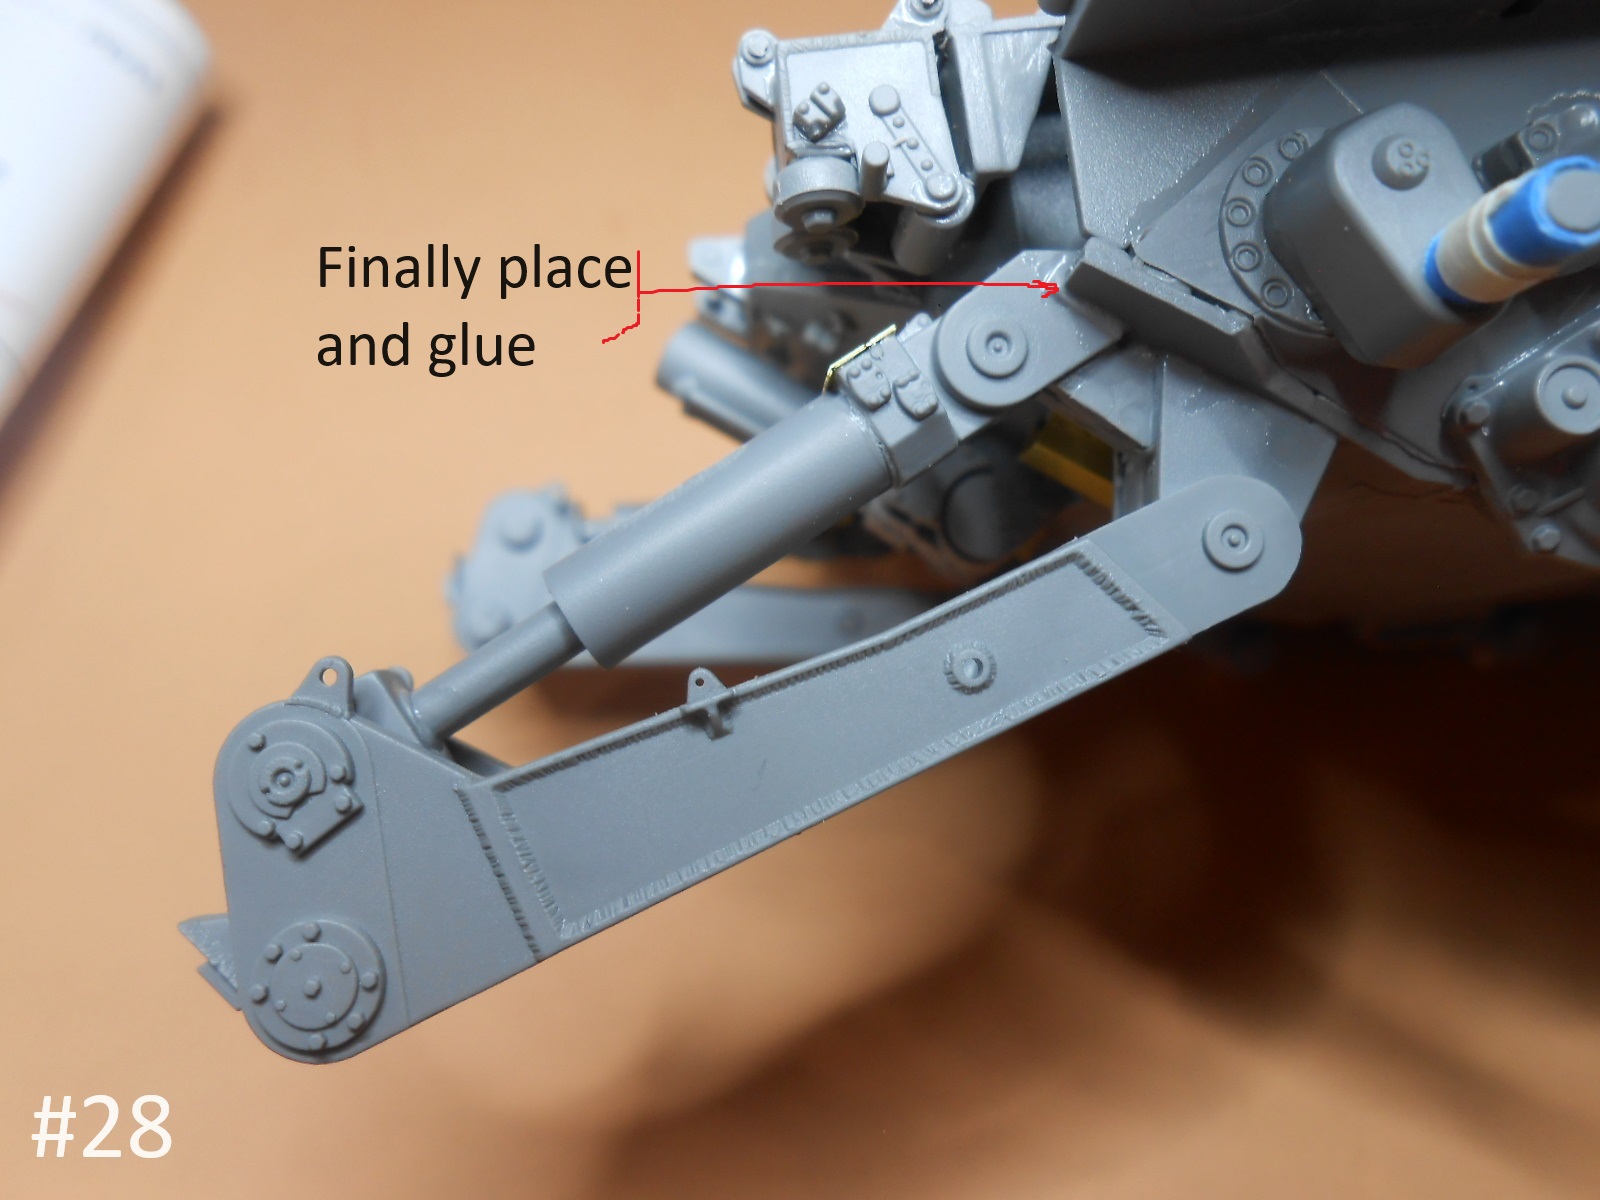
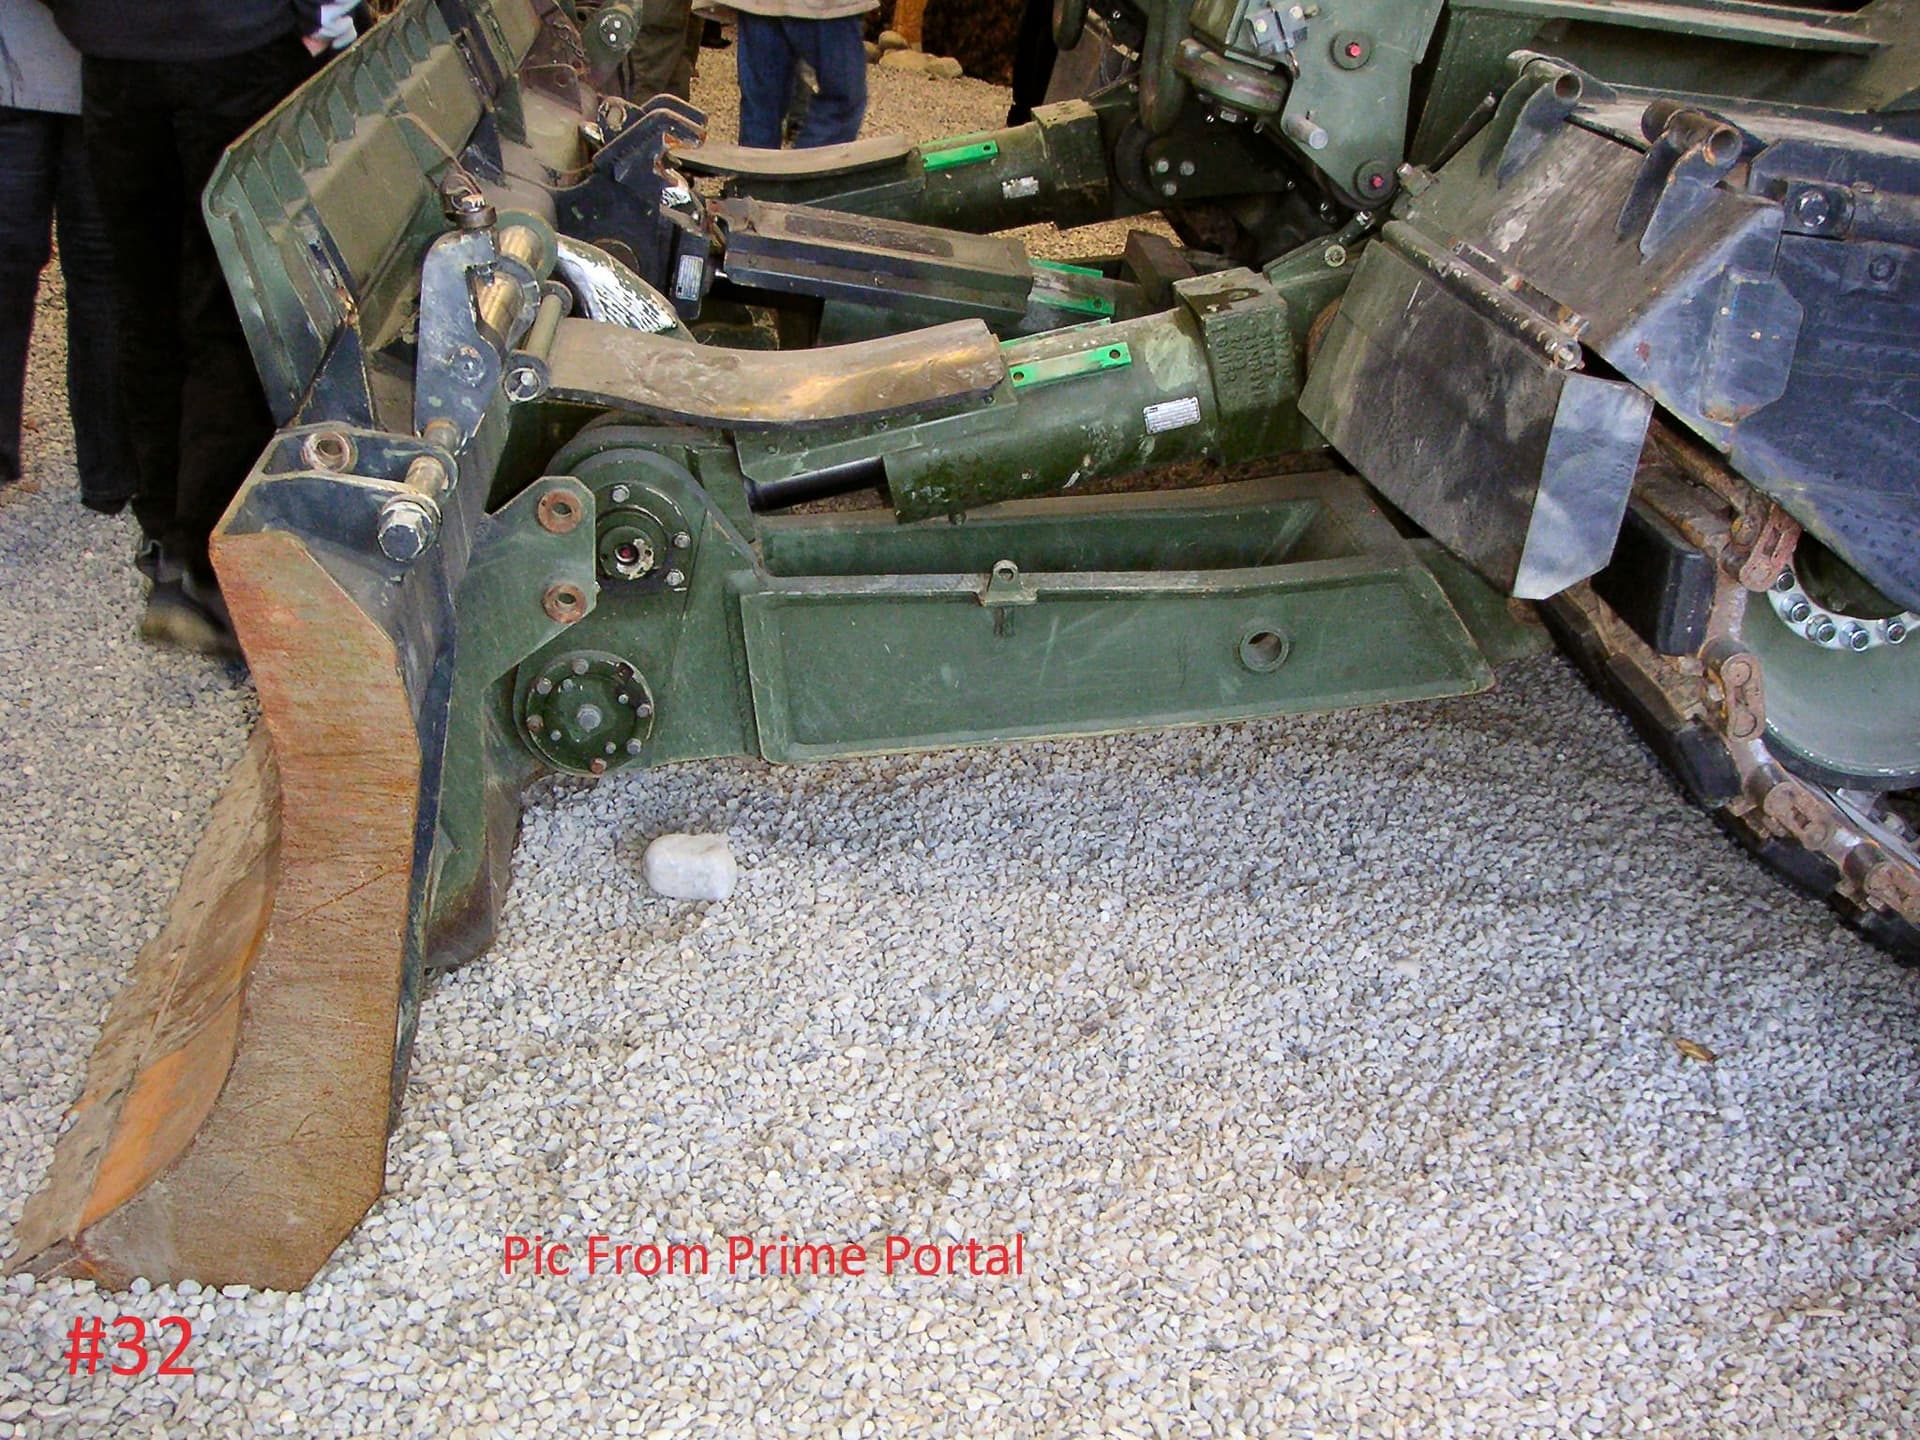
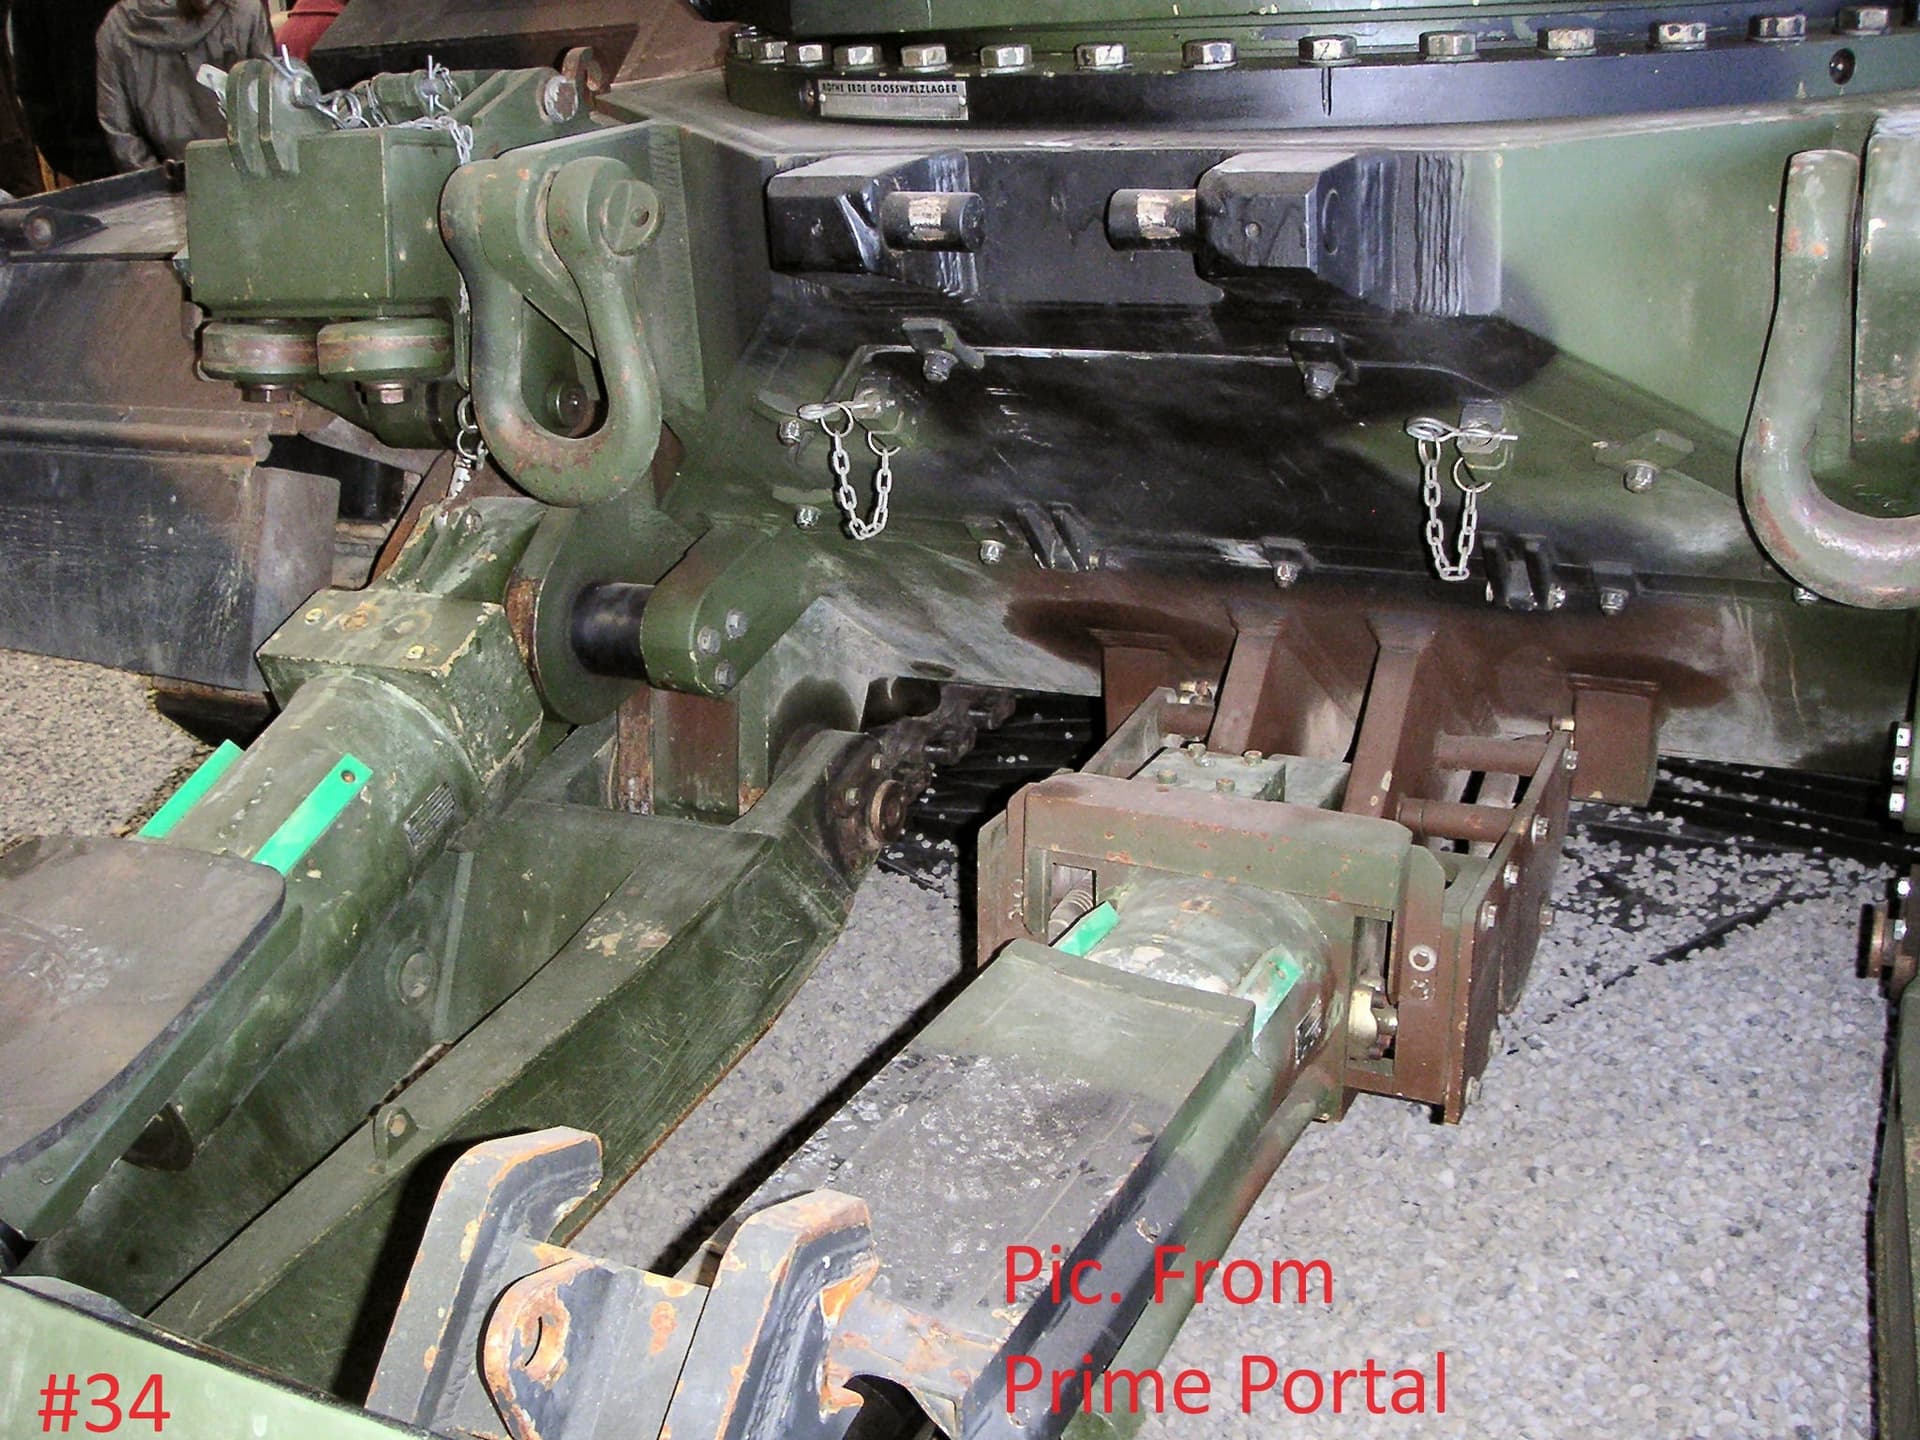
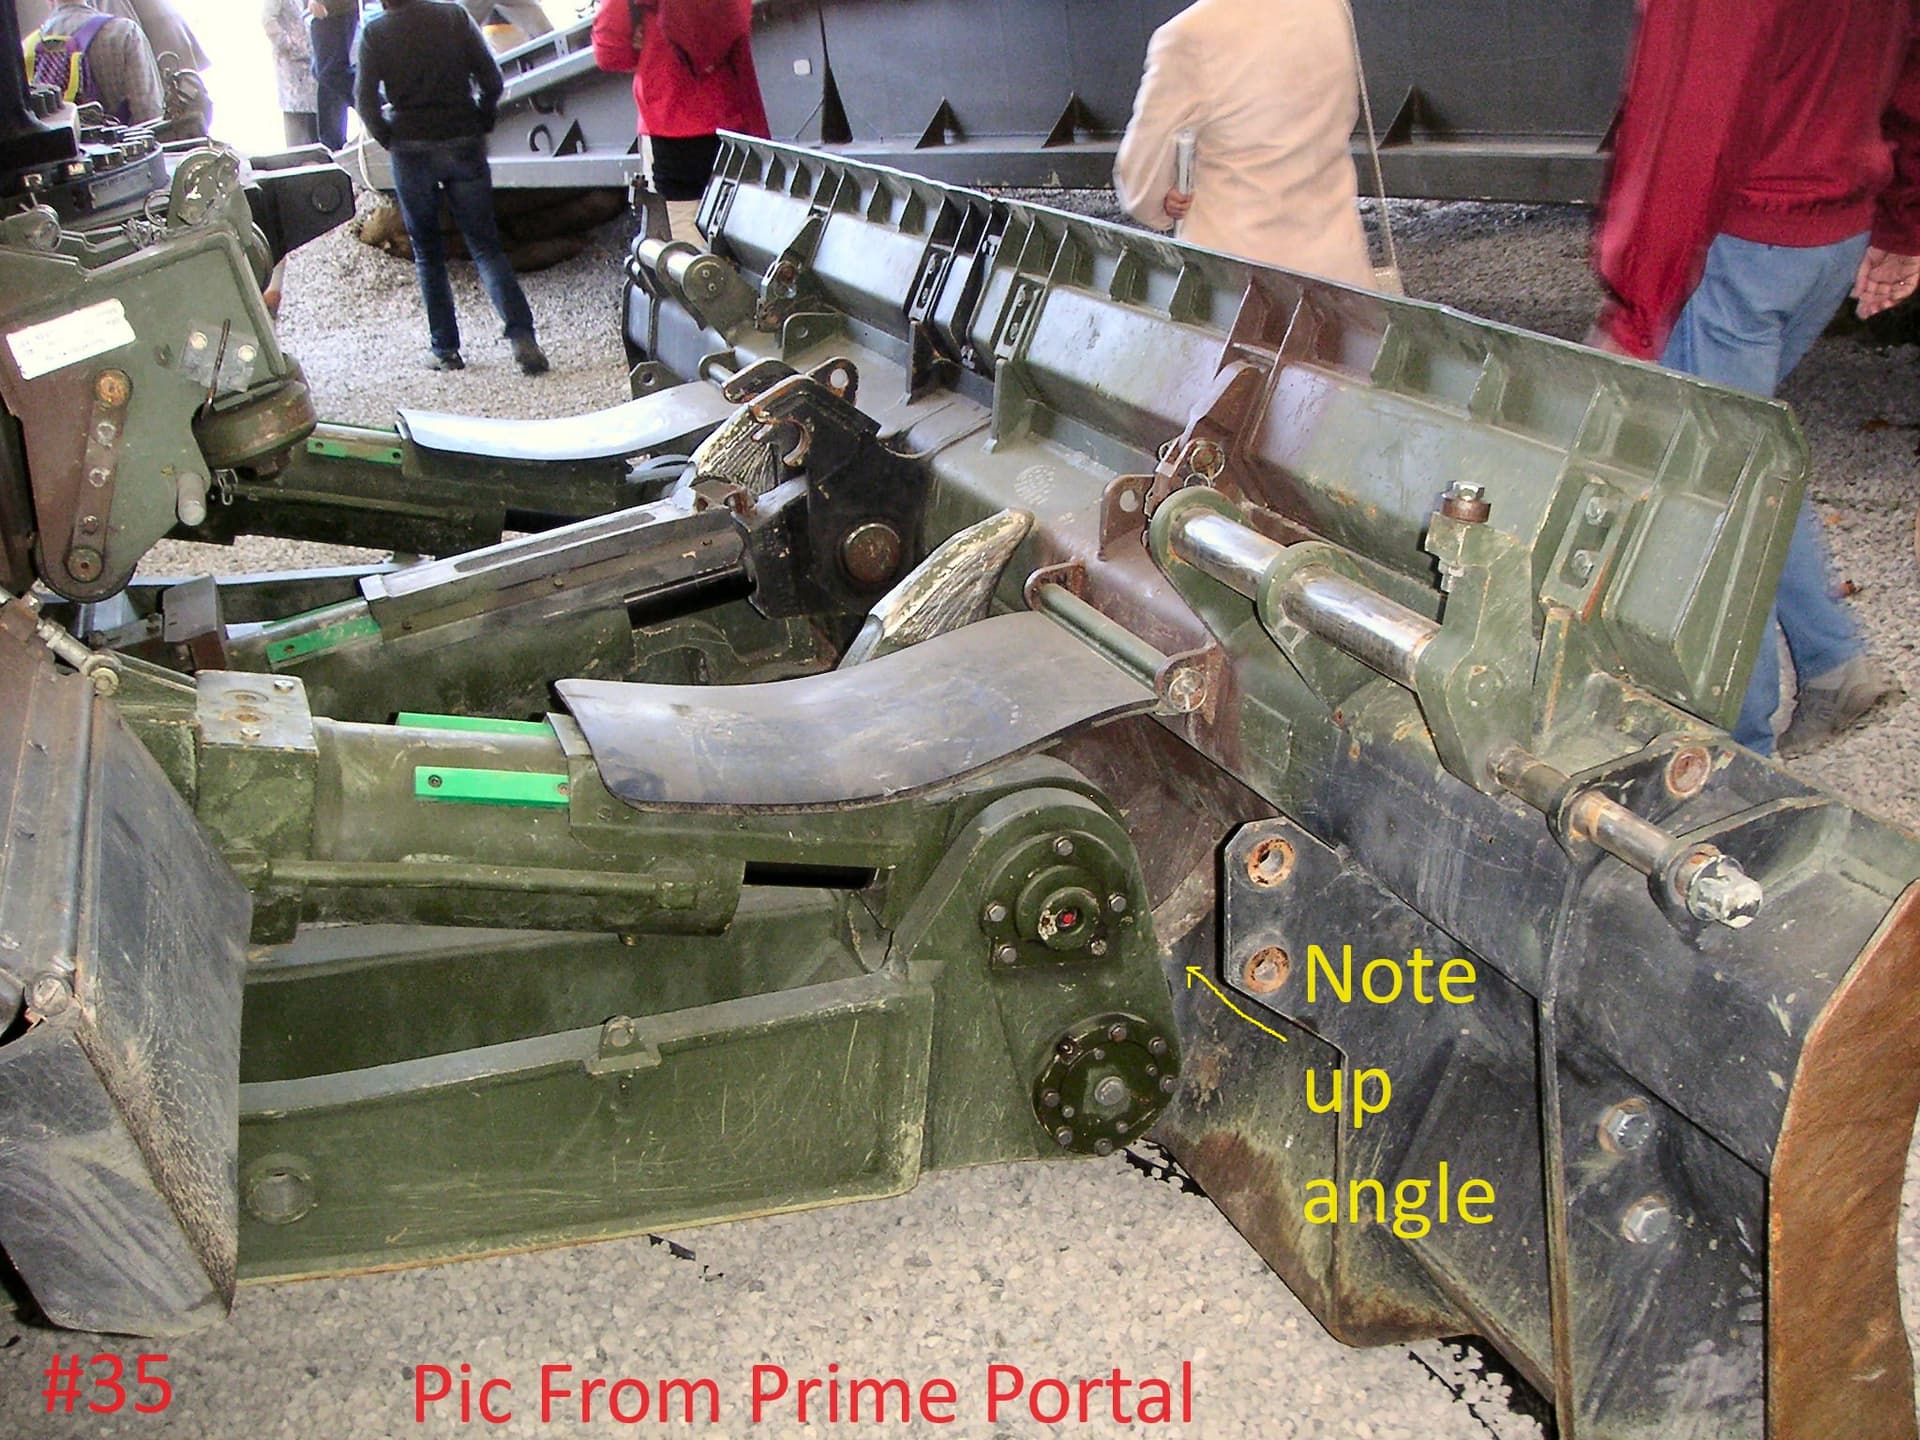
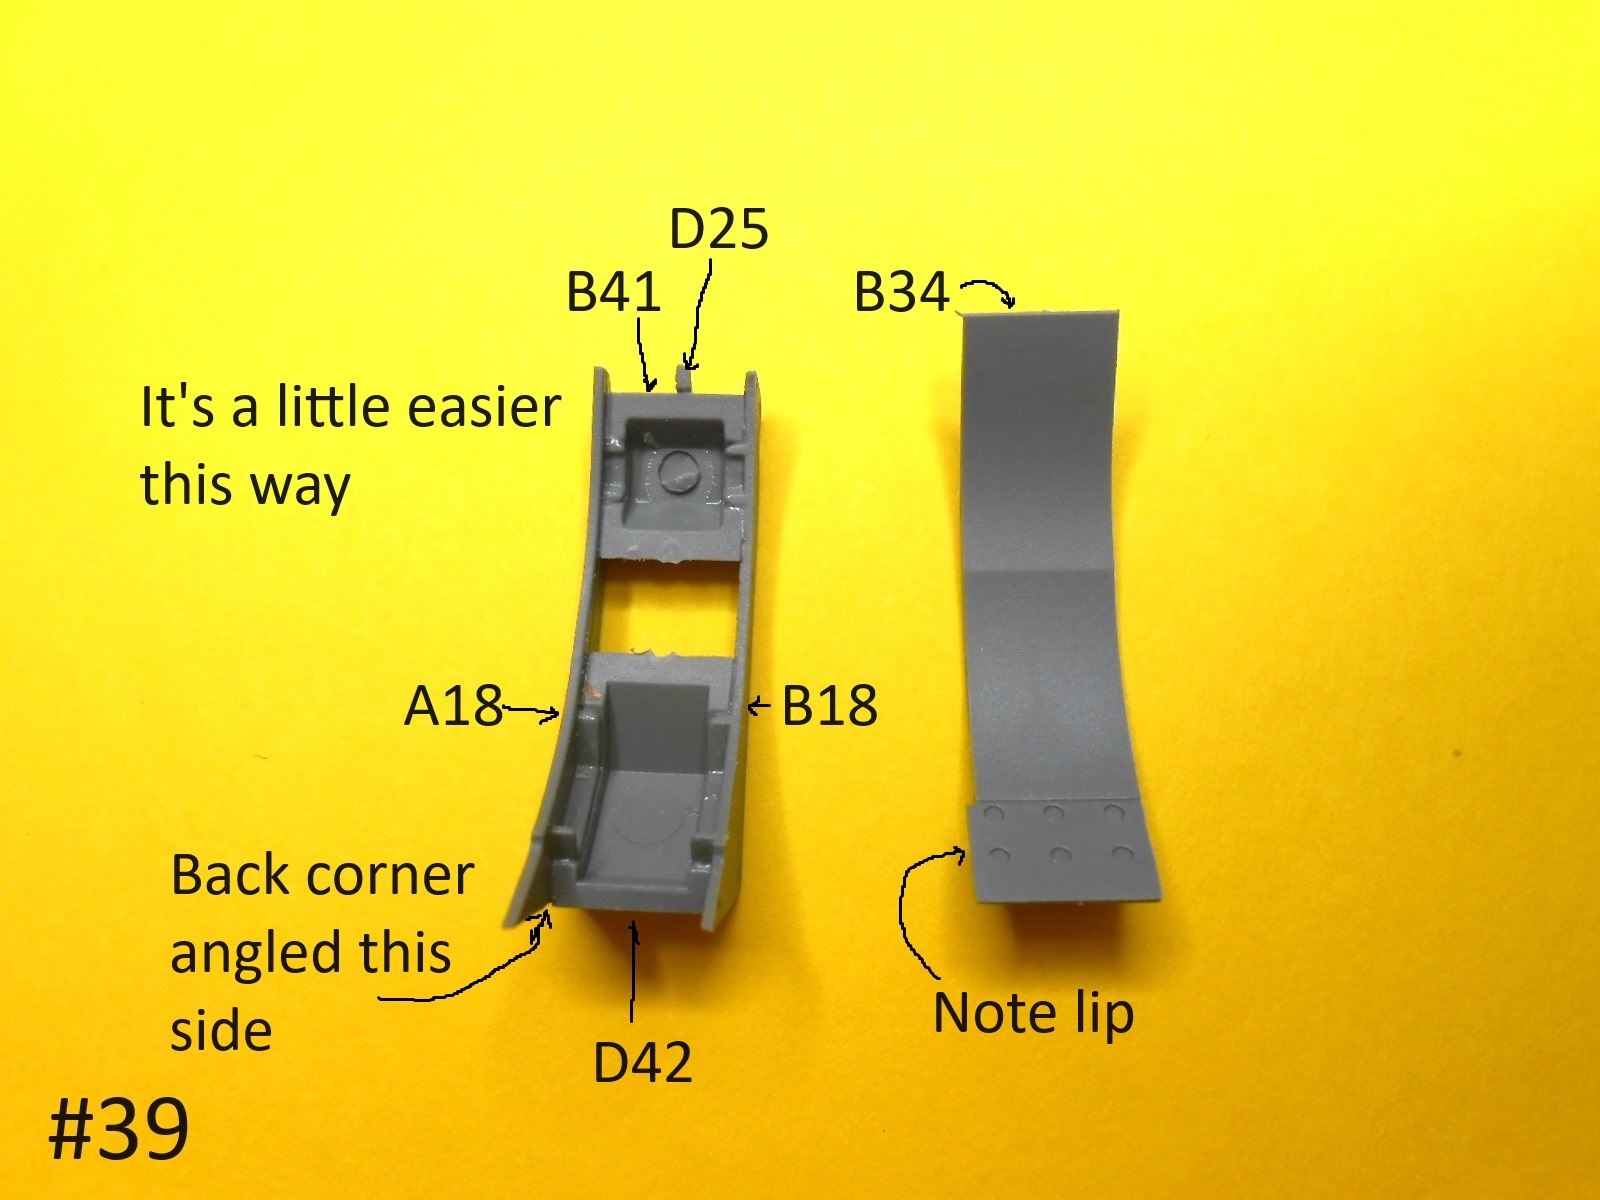
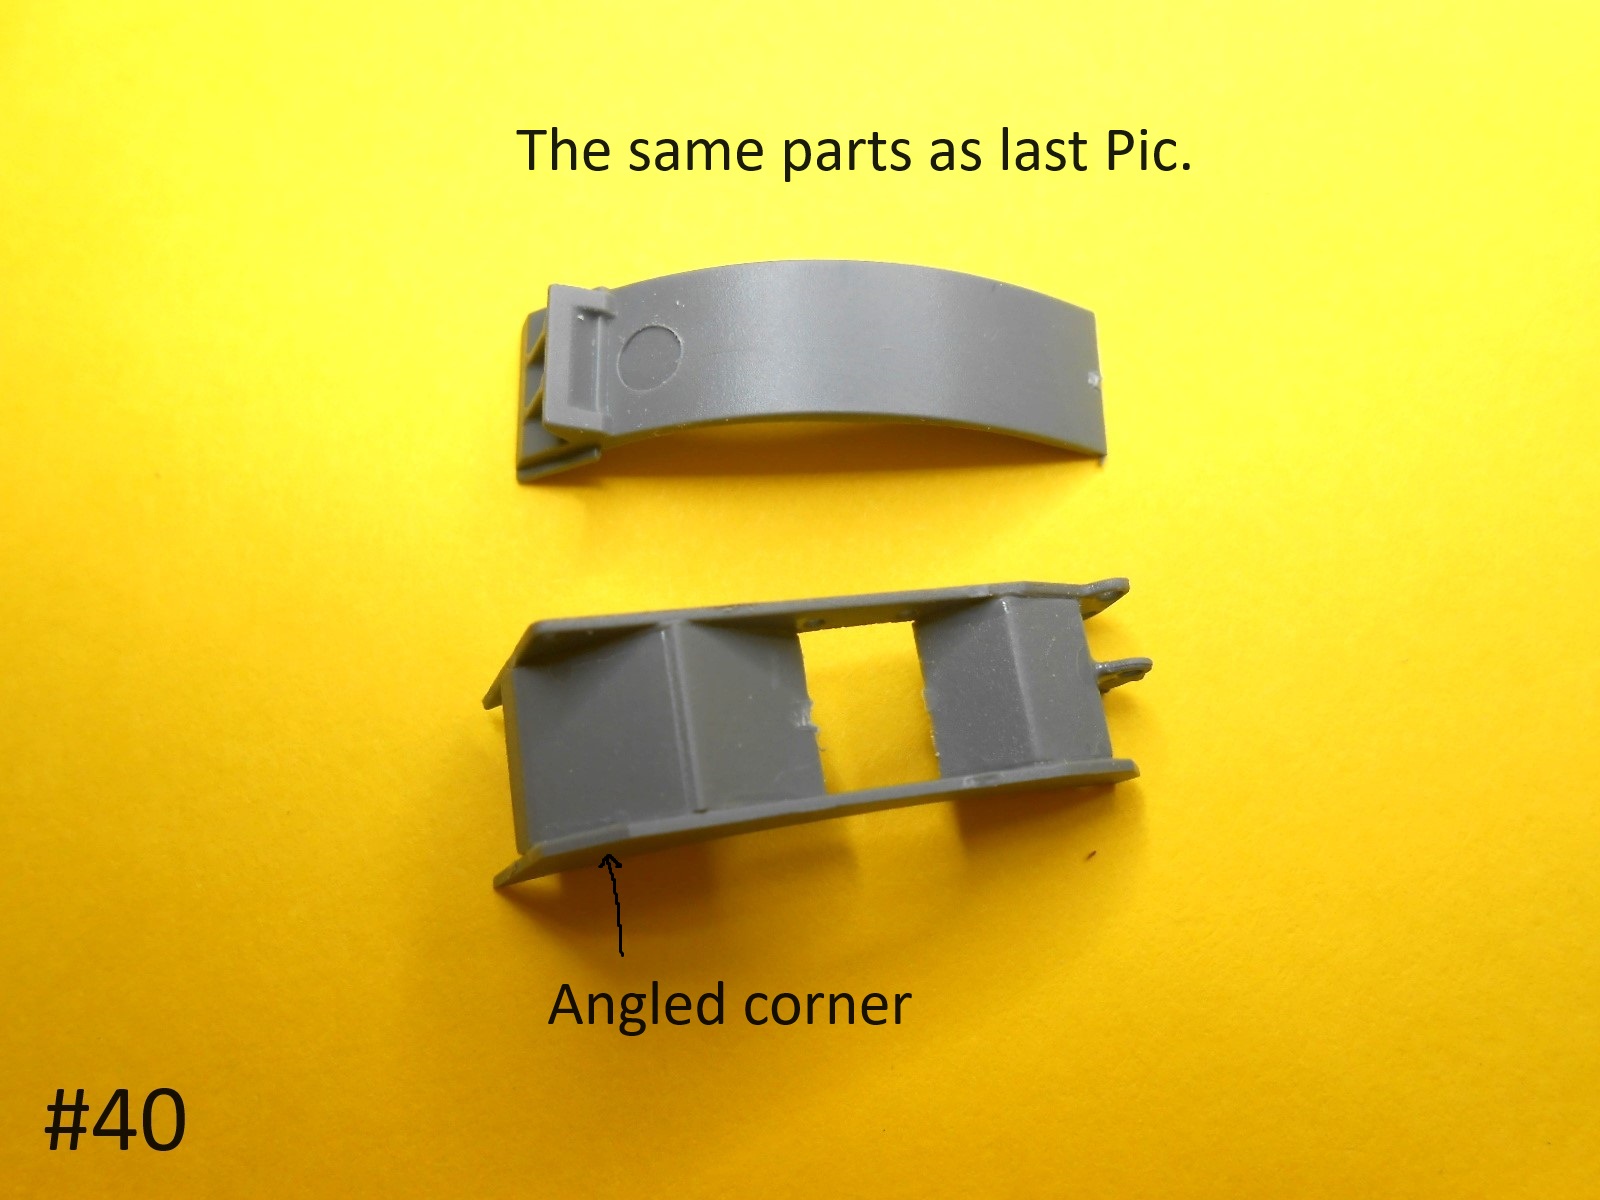
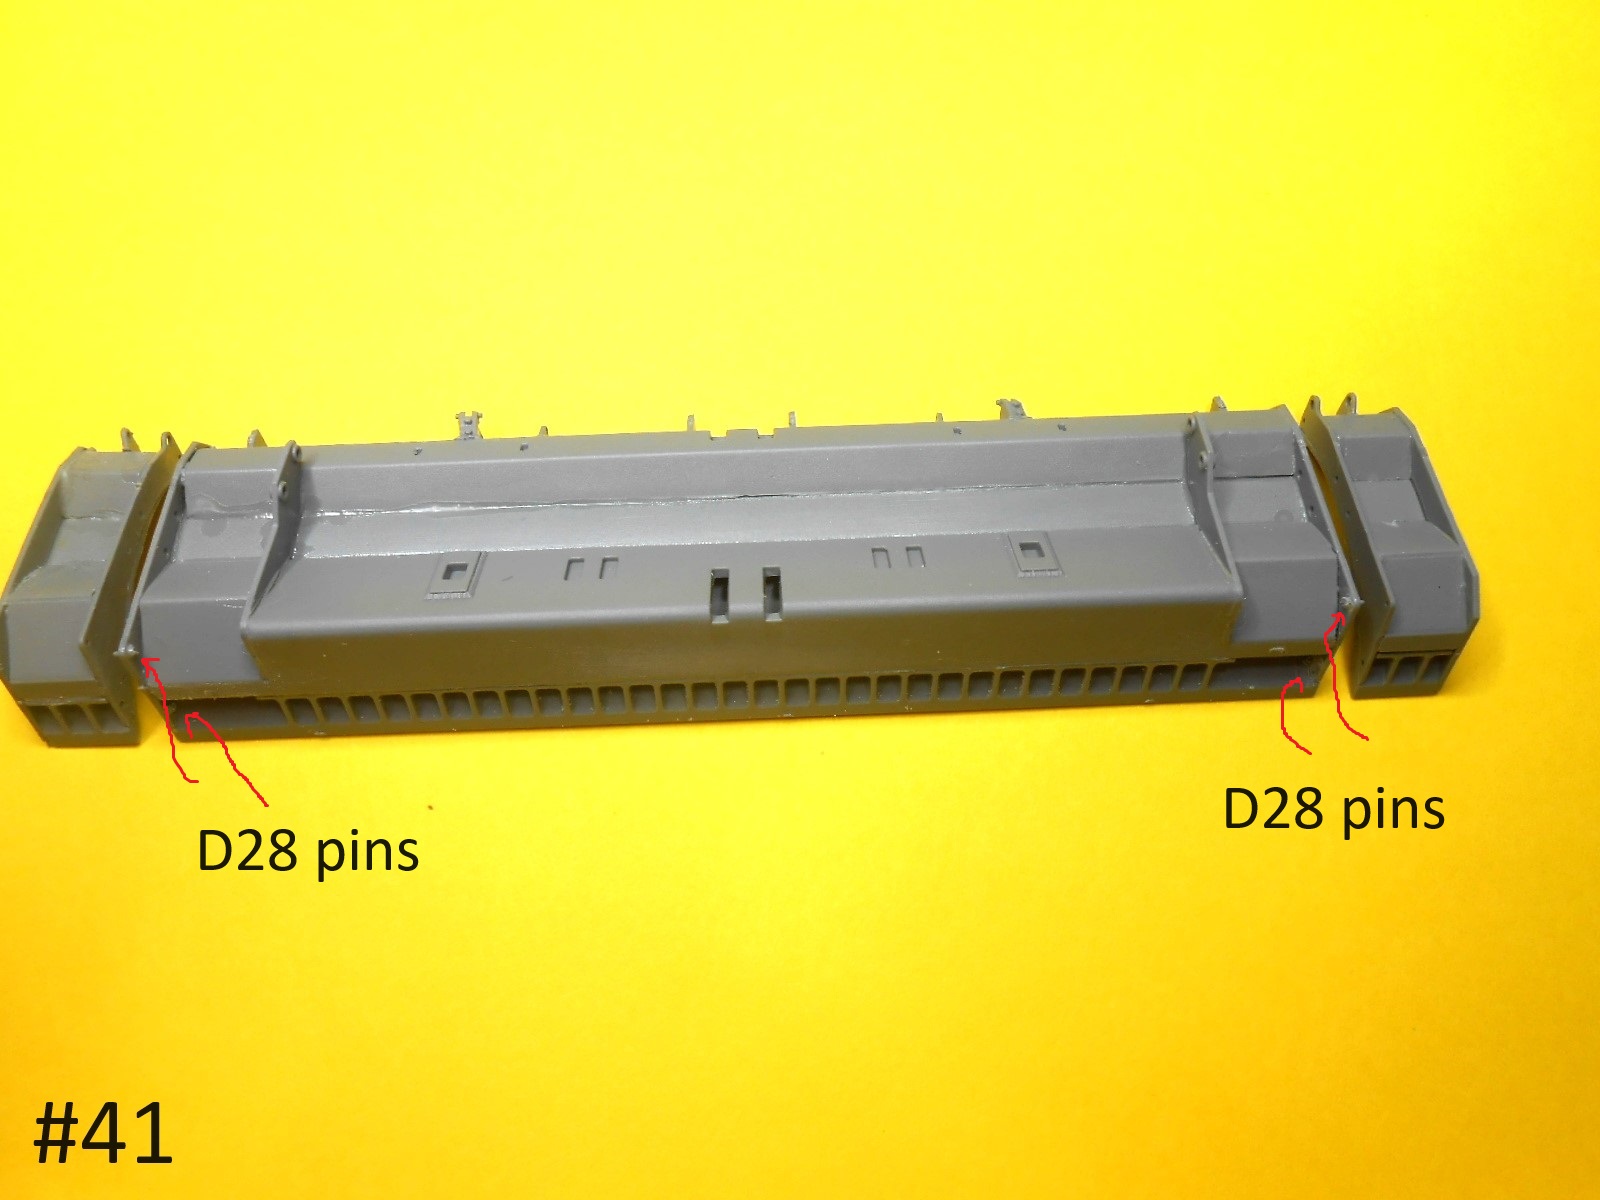
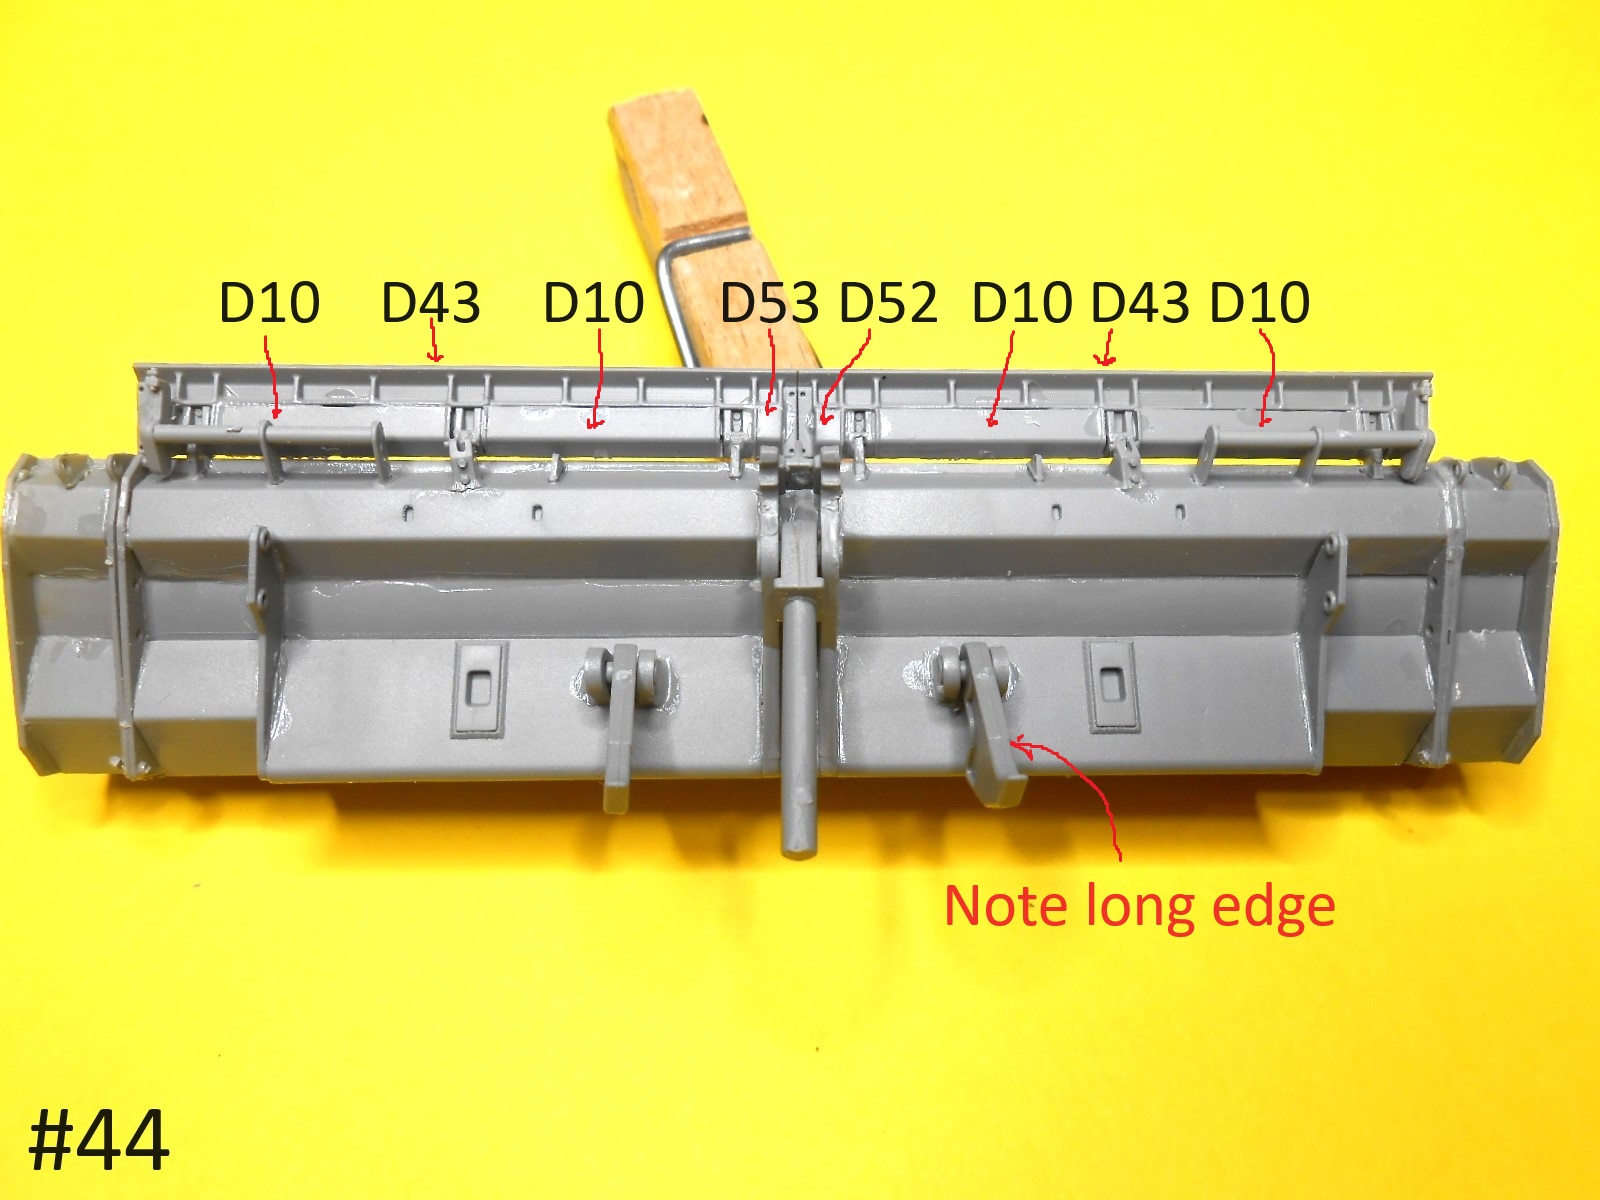
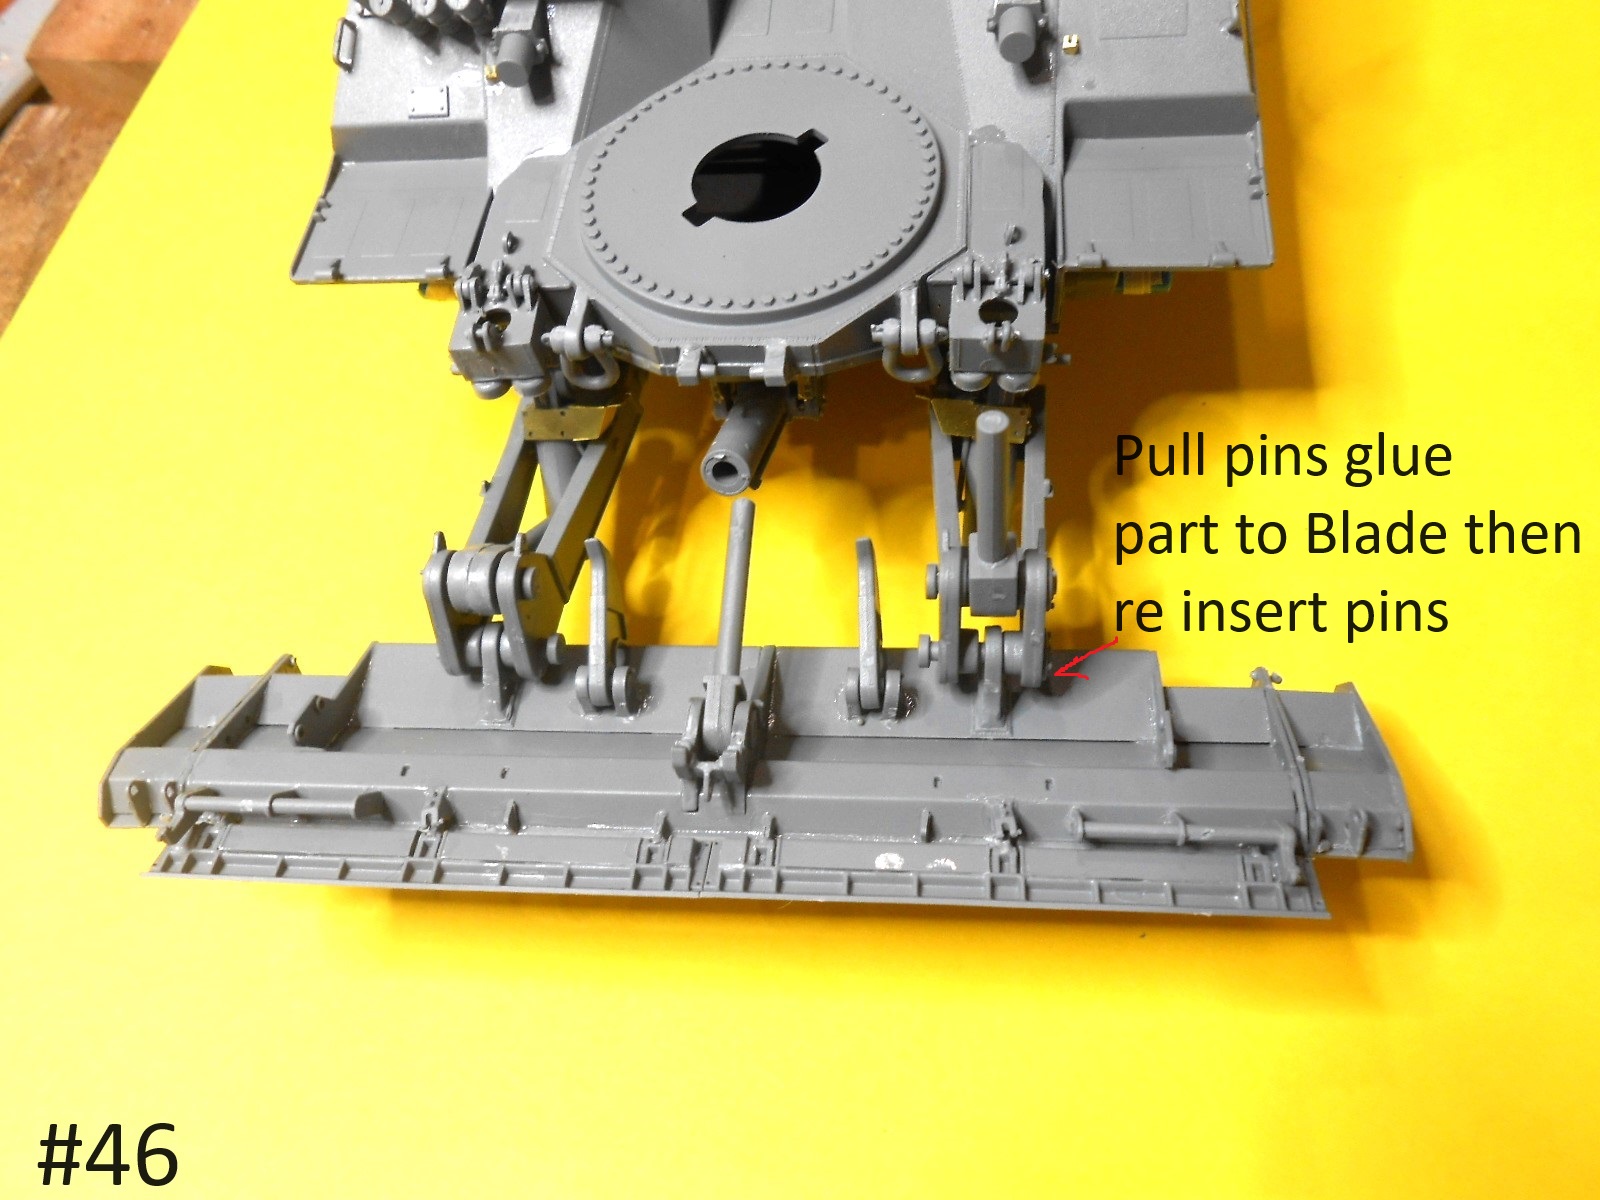
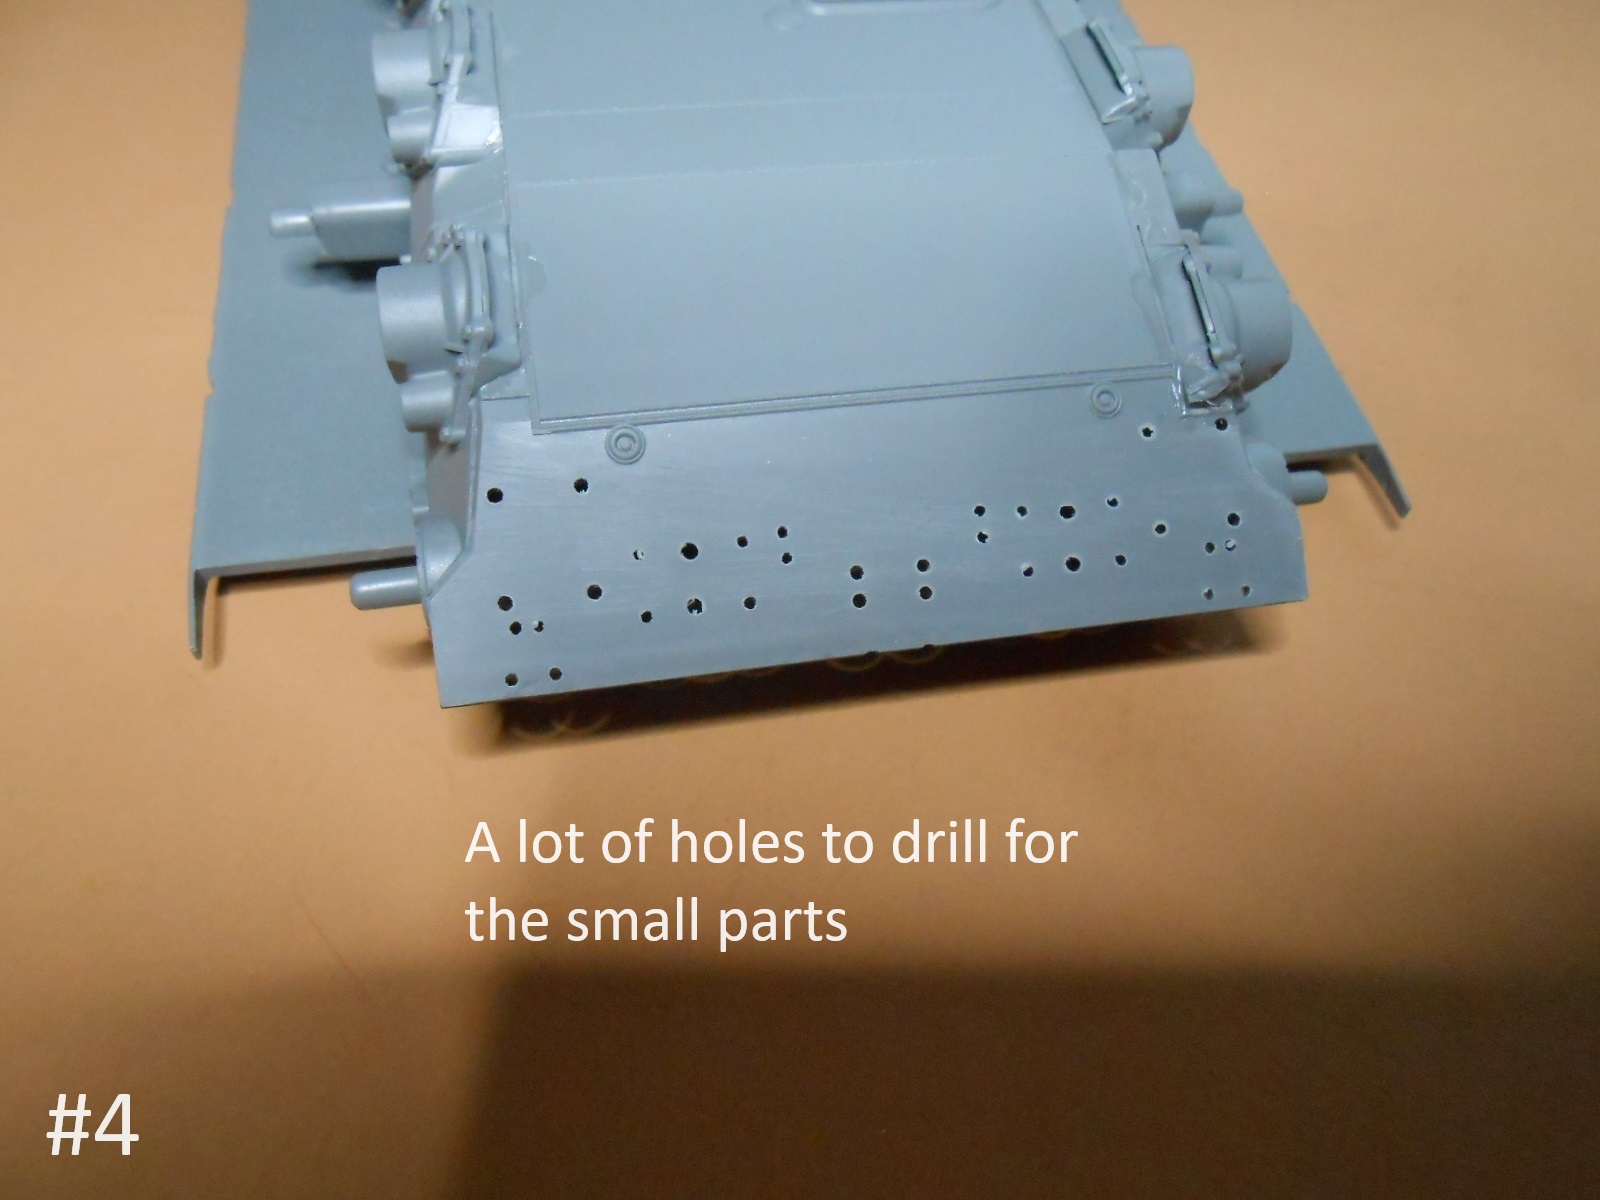
The next Pic should help on placing some parts.
Finished for now.
Regards
Donald
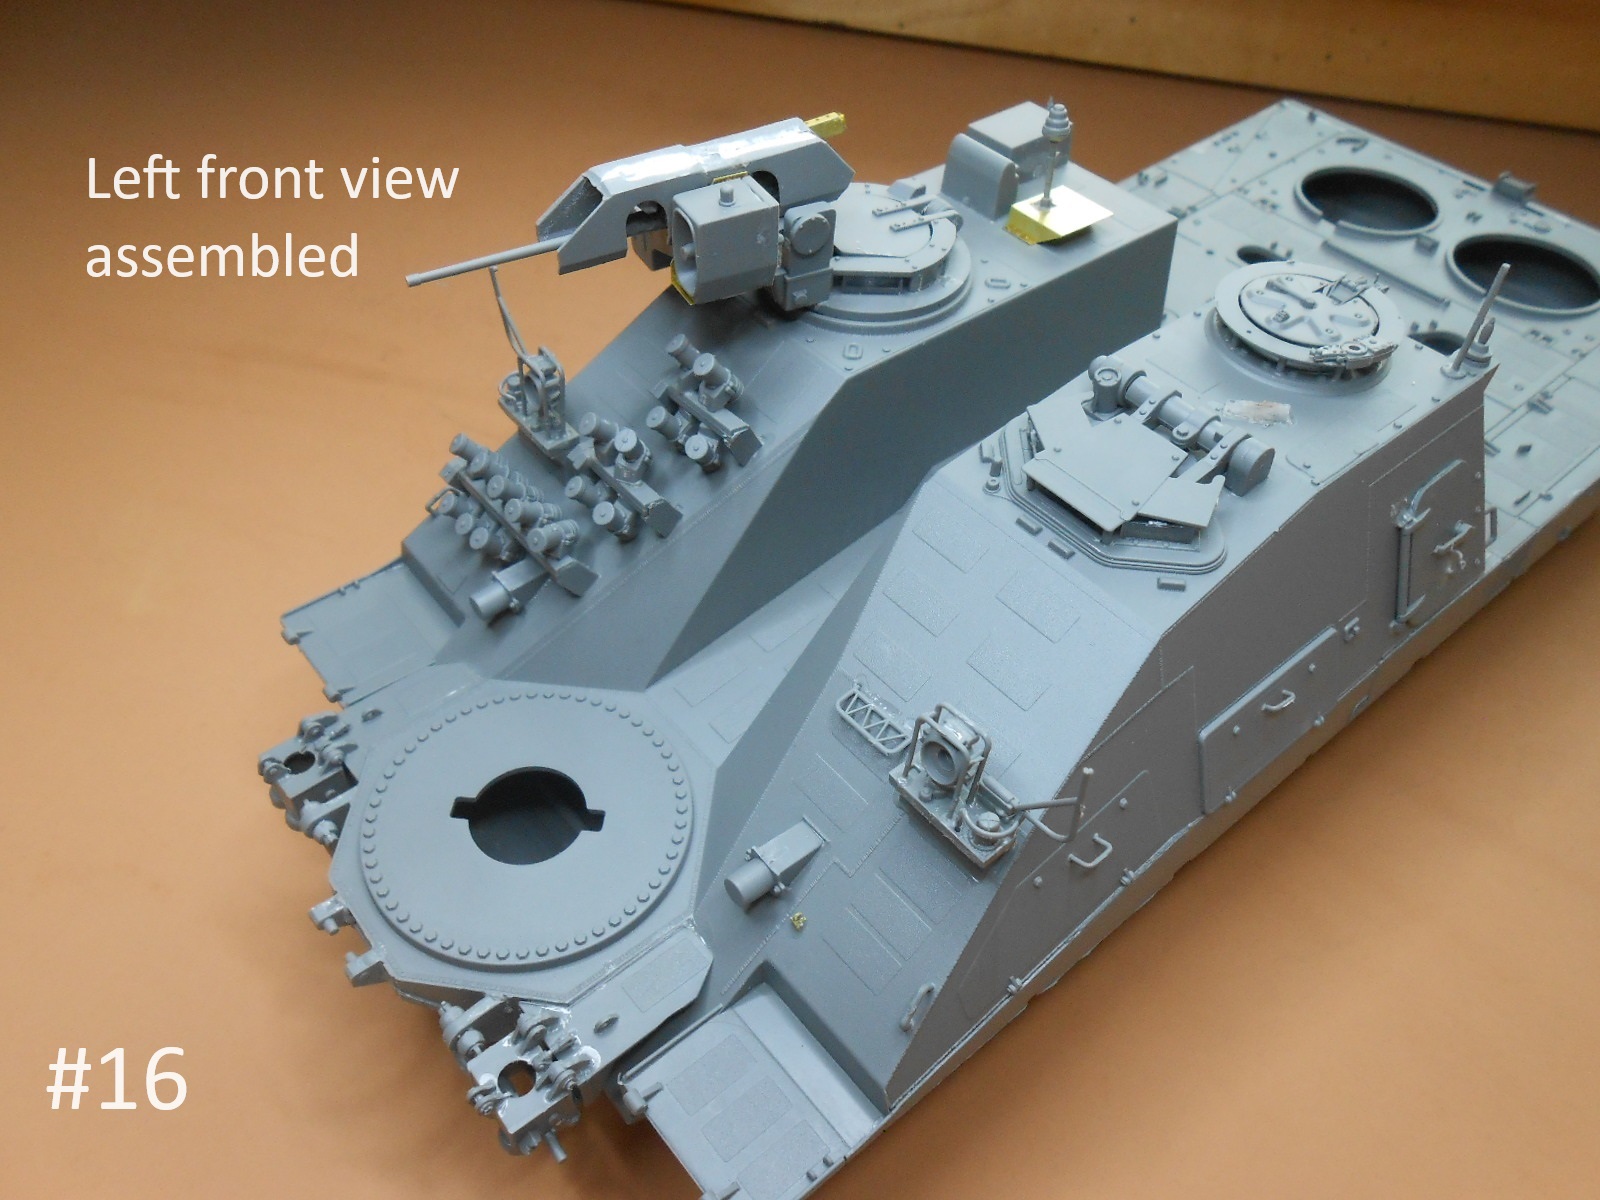
a little more finished
Still working on it.
donald
I have some more finished.
Regards
Donald
Hello Donald,
What a wonderful job you have done so far. Cannot wait for the next installment. I just found out that I will be getting one of the Kodiak’s for Christmas. I hope I can do it justice and saved quite a few of your photos to help me, I hope you don’t mind. Pictures help a lot especially when dealing with a Cognitive Impairment. But I try.
Best,
Walter
Still Lost in Ohio
I understand , that’s why I do it
Regards
Donald
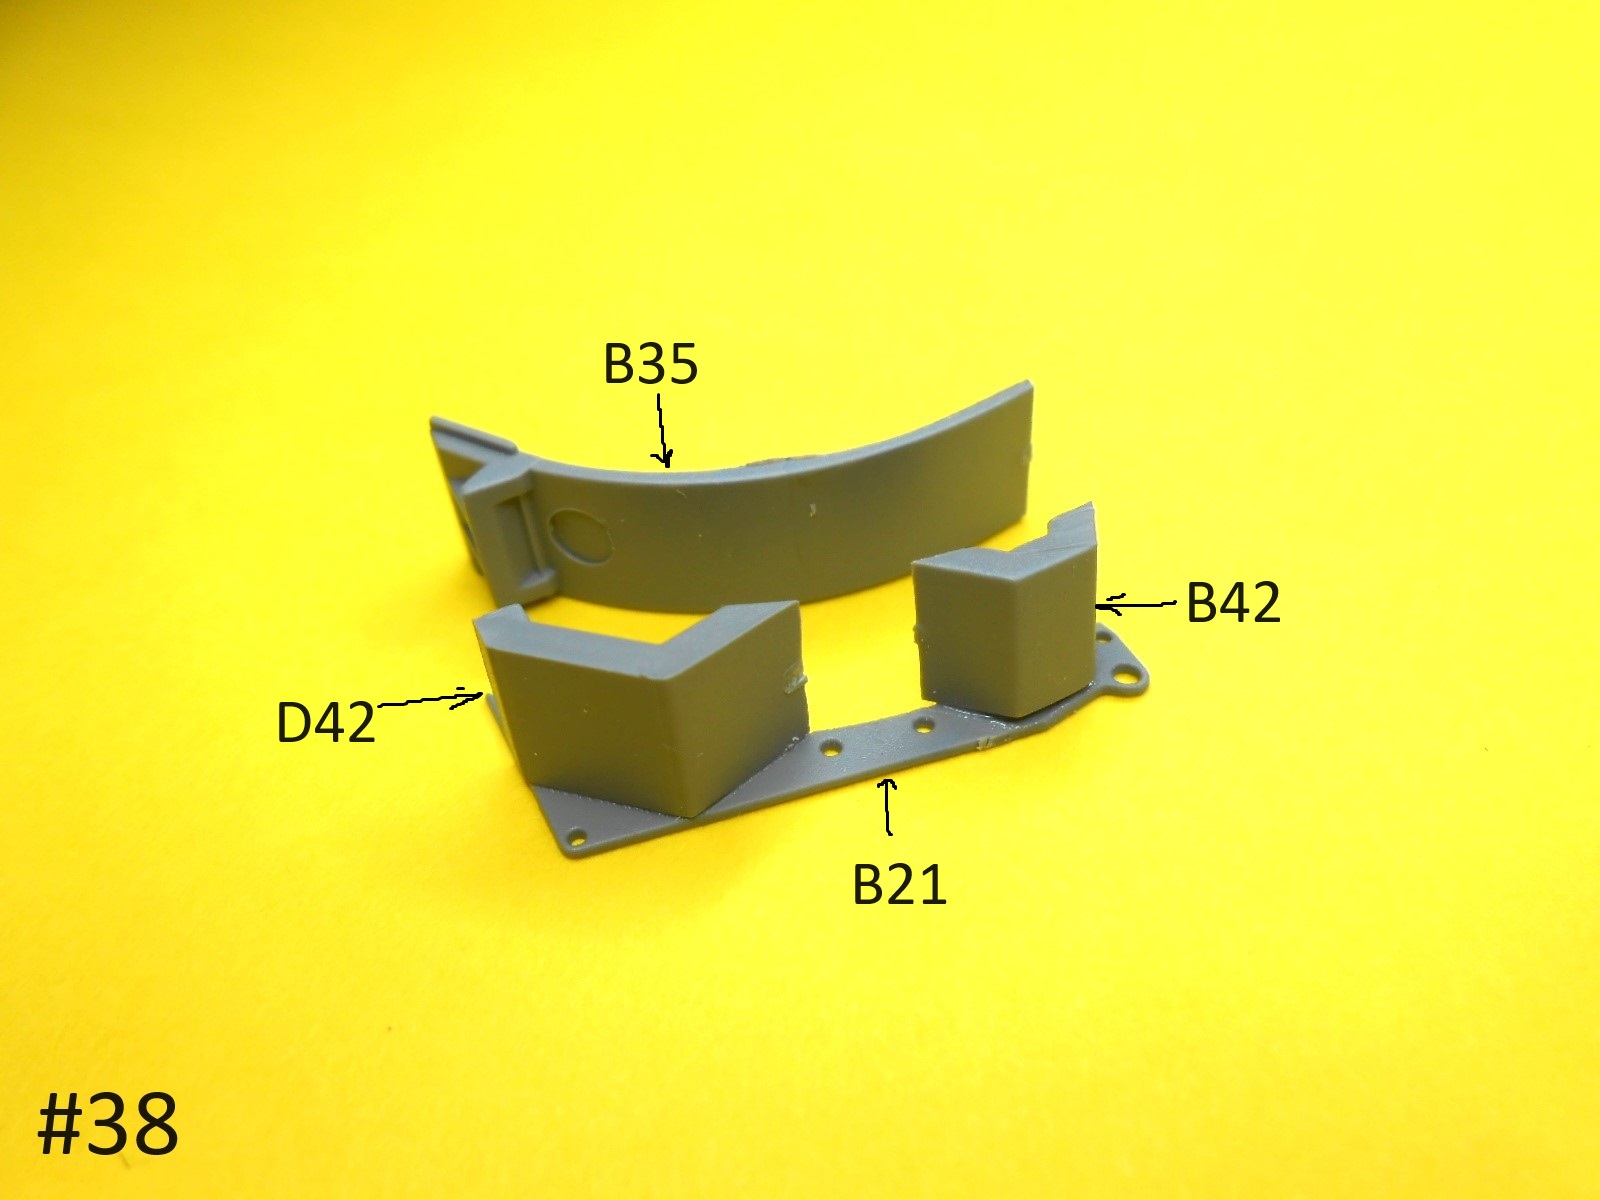
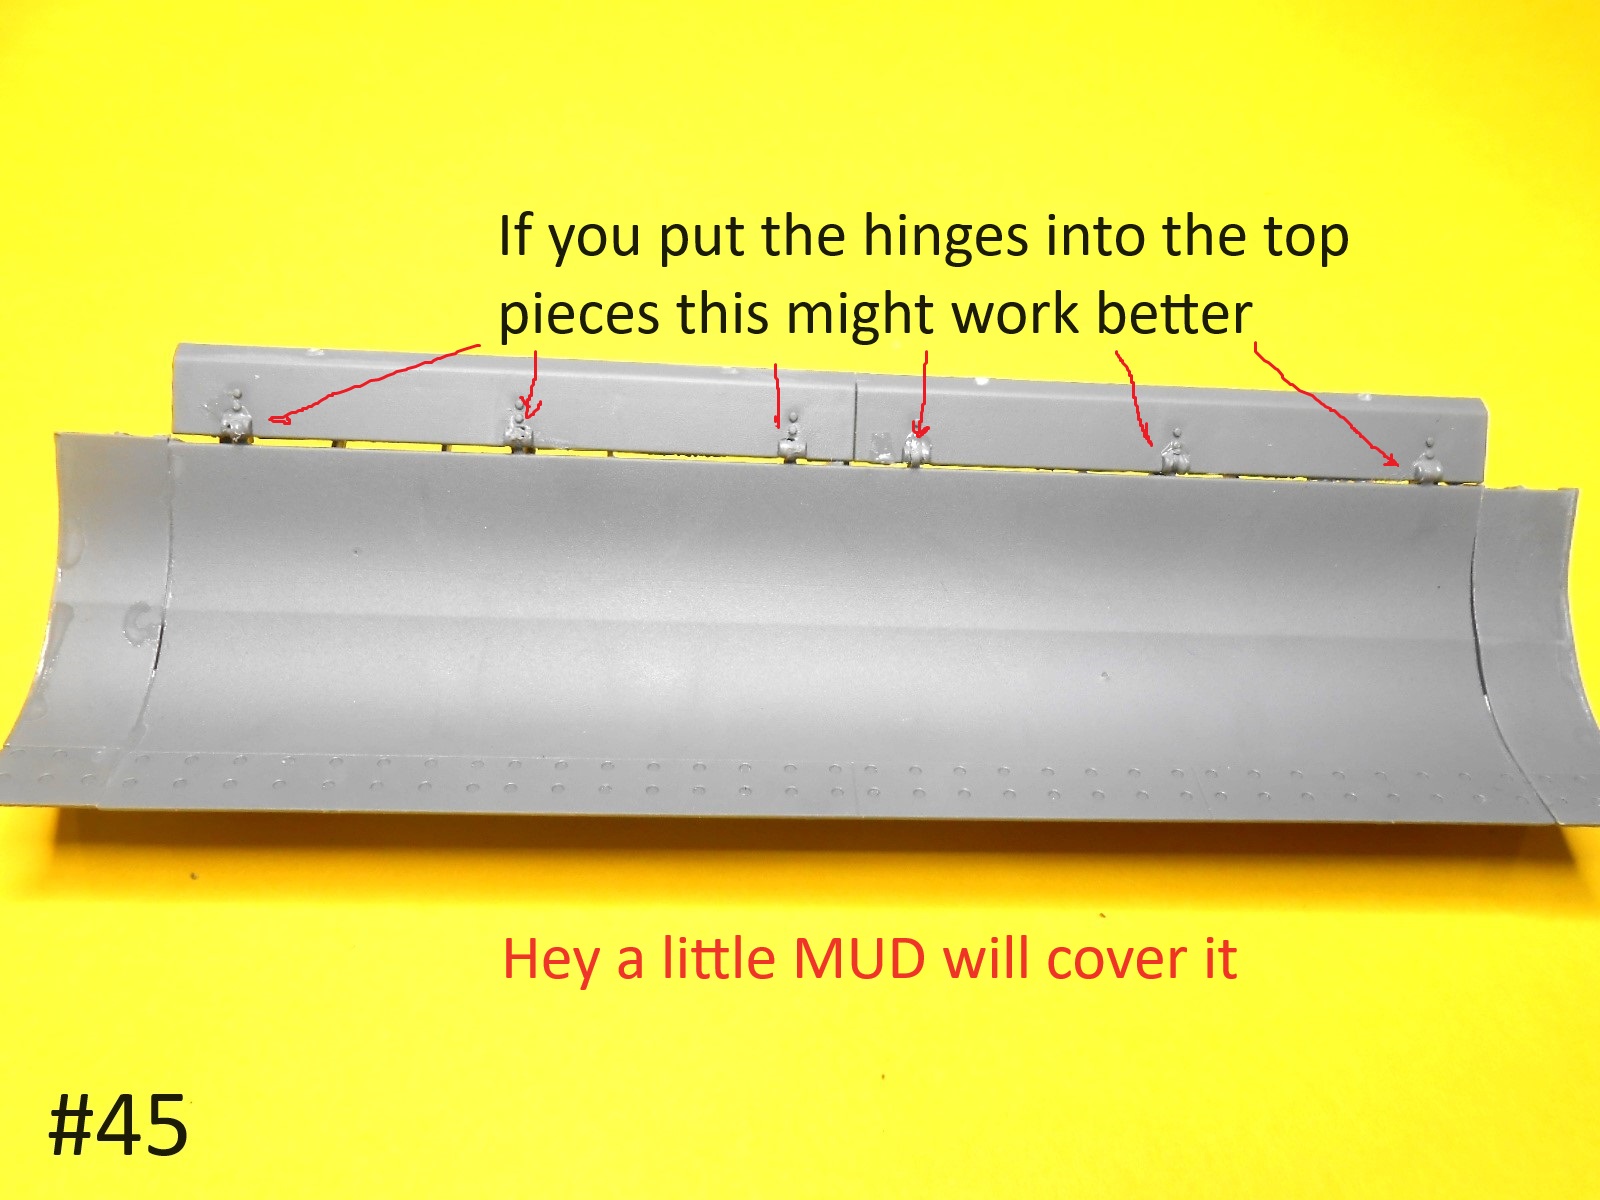
I have the Dozer finished and installed ,
If I was doing this again I thing I would install the small Hinge parts to the upper part and not to the main part of the Blade.
Maby it would look better than this.
Finished for now.
Donald
I’m sorry guys , but this build is ending here.
This has been the most SCREWED UP KIT that I have ever attempted to build.
The tubing for the Hidrolik lines are a strange material even super glue doesn’t stick.
Between the lousy instructions and bad fit. (I GIVE UP)
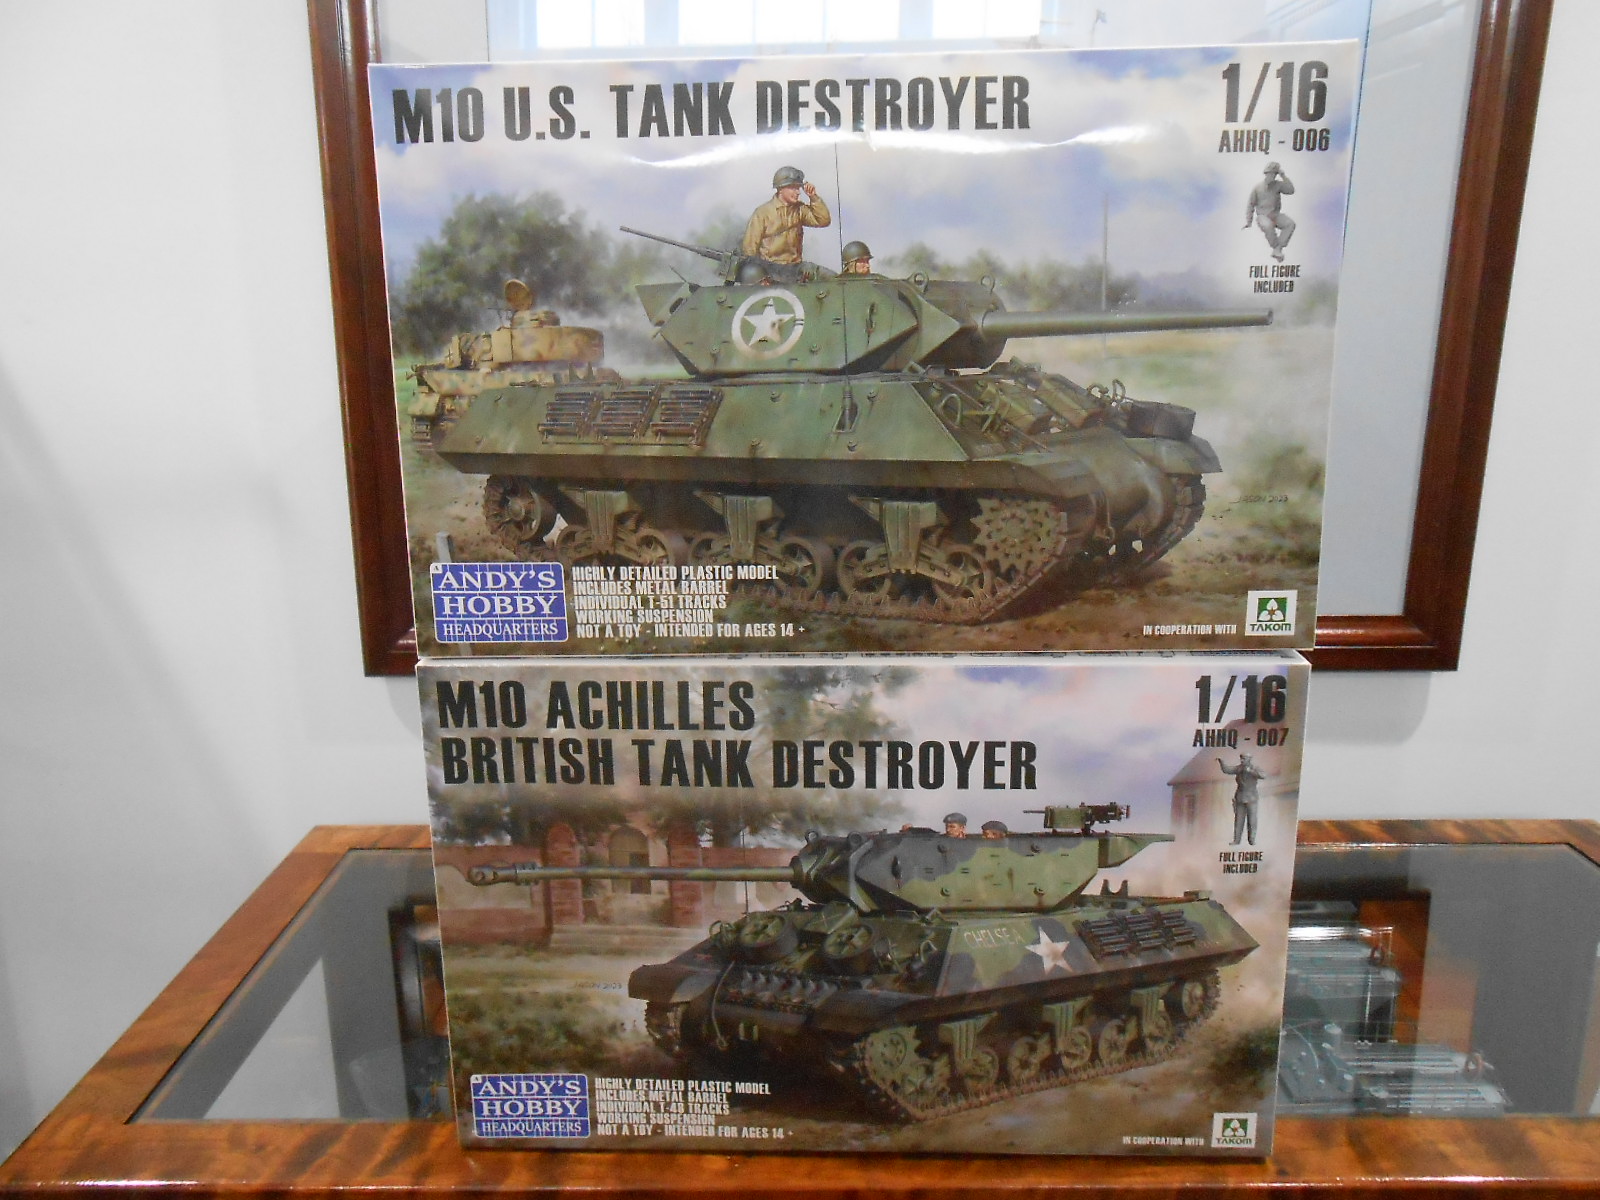
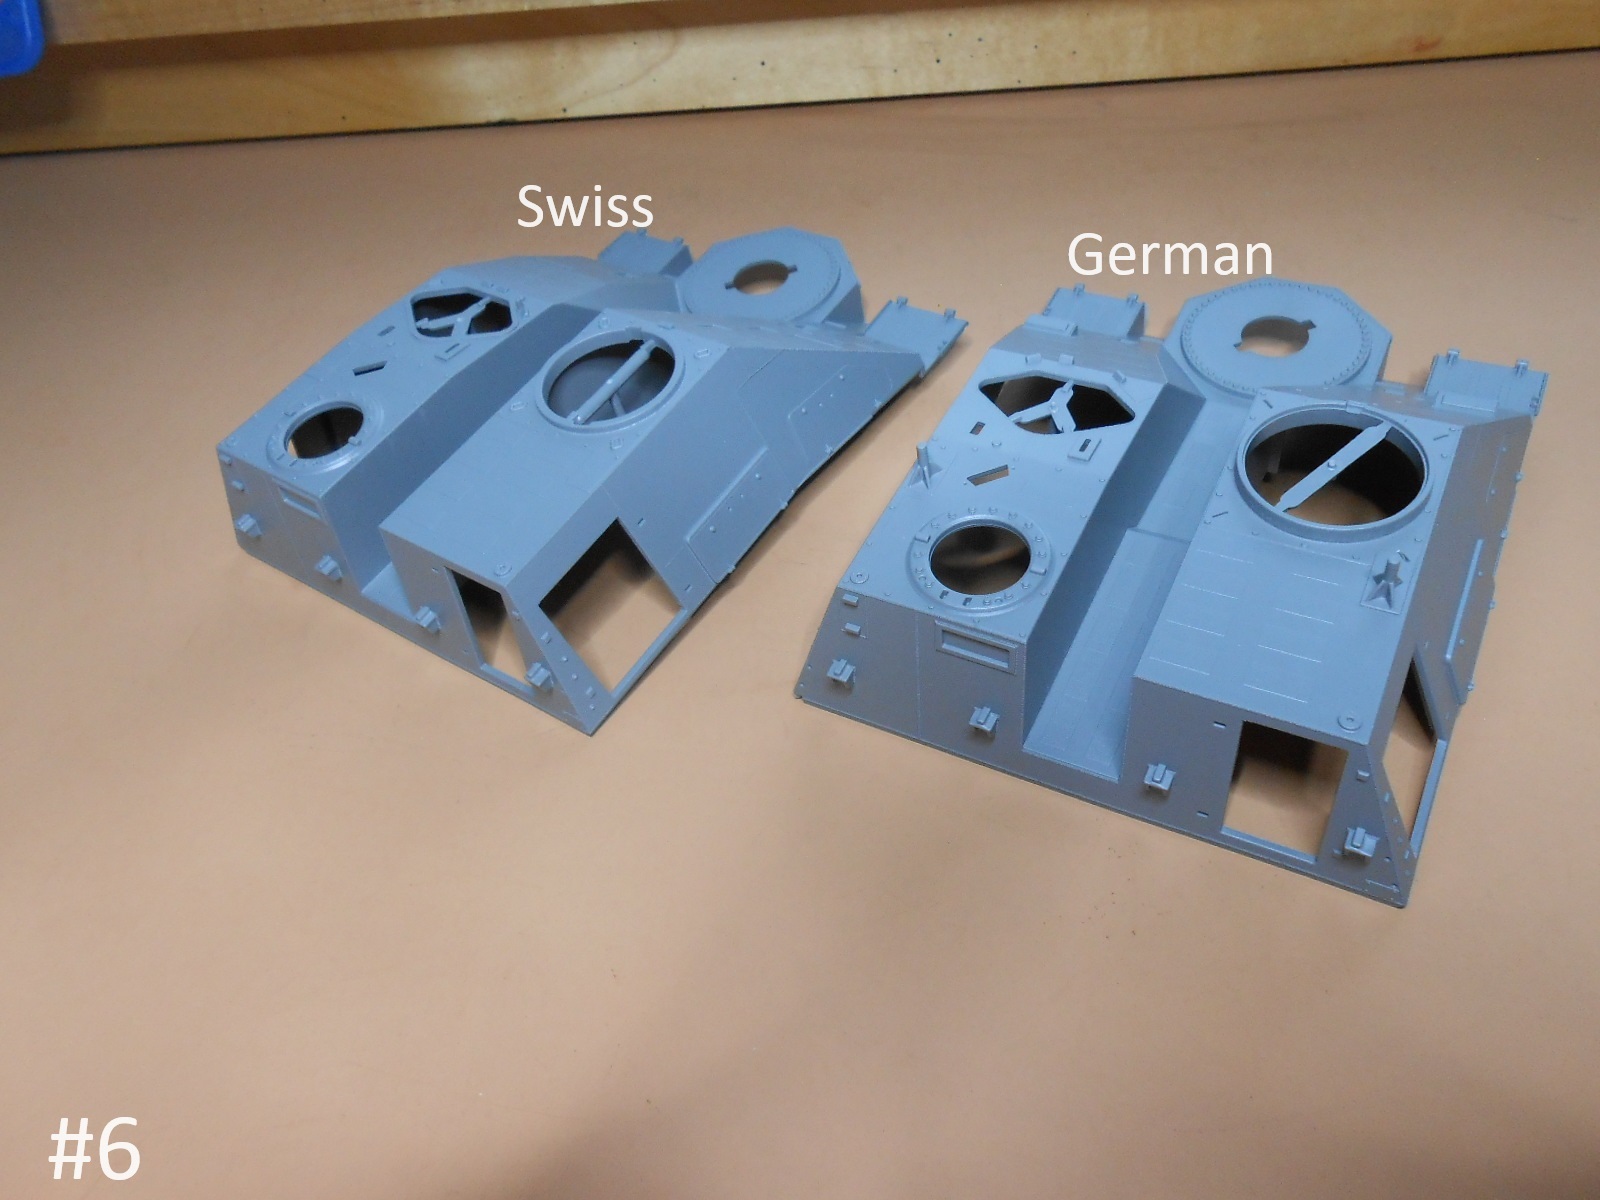
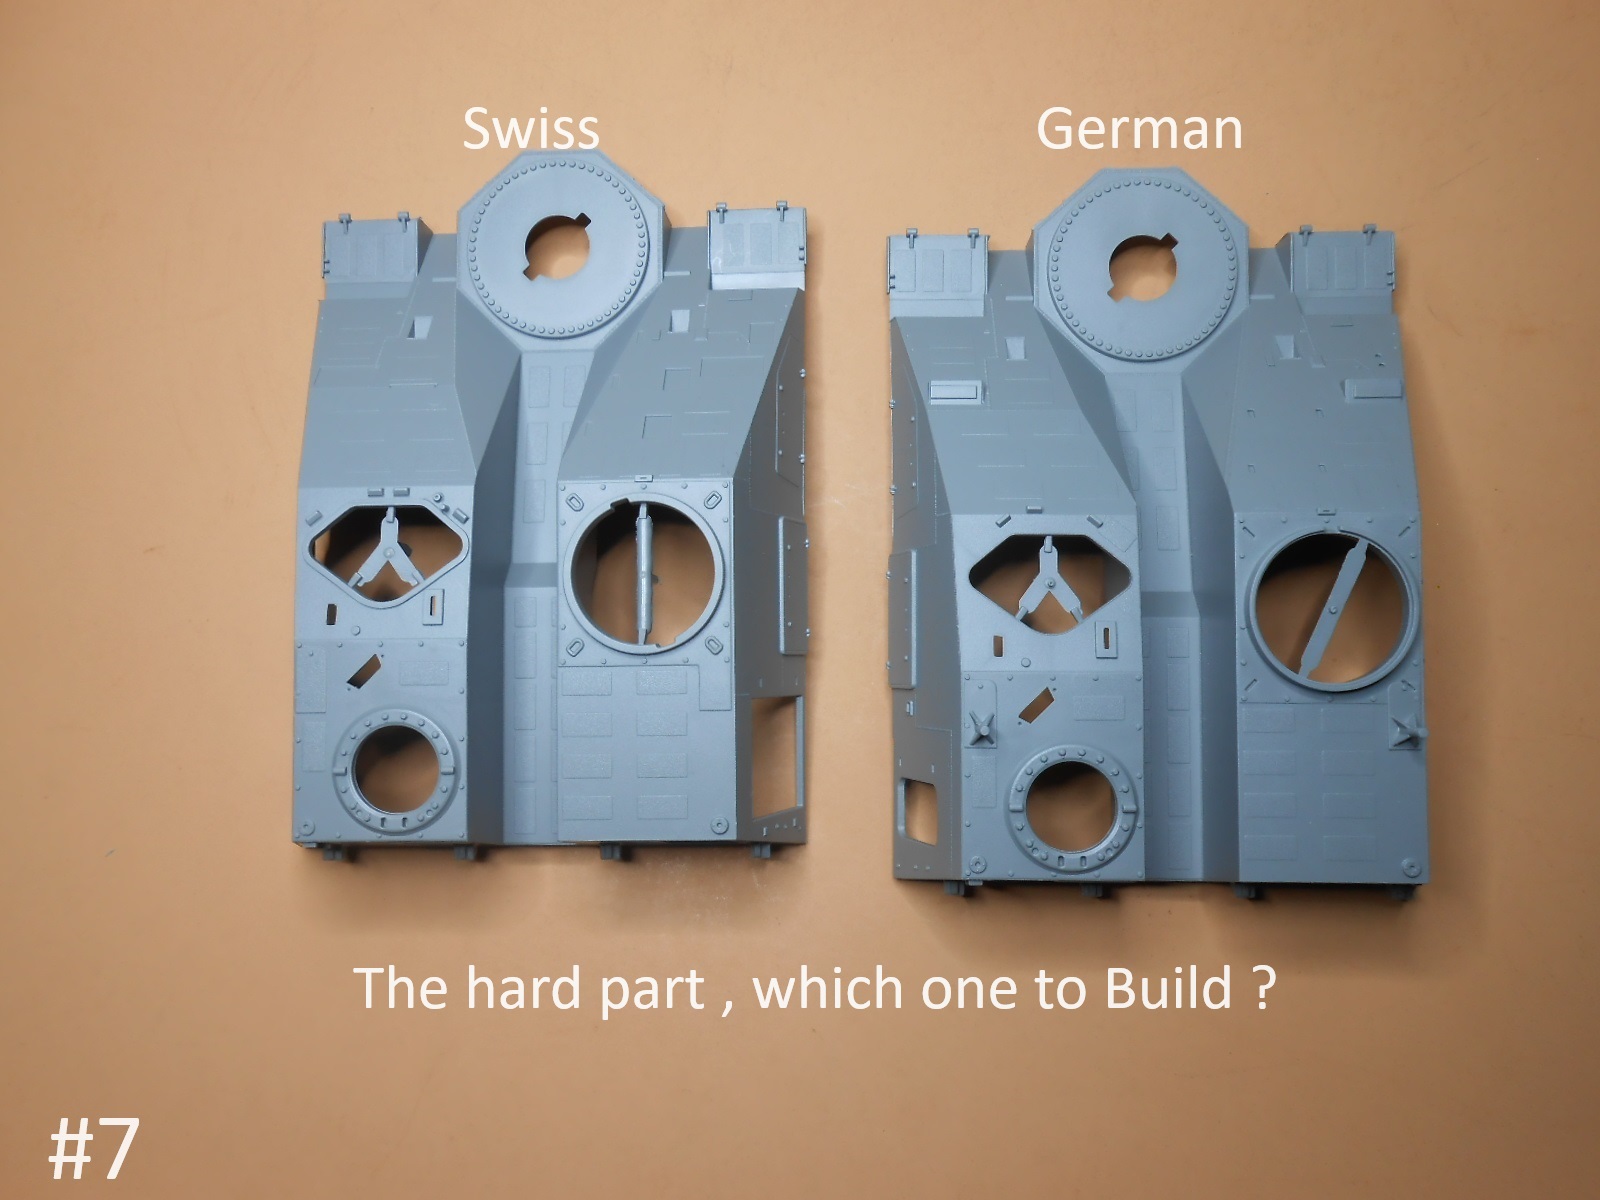
Now I have a decision to make.
Which one of these to build First ?
Regards
Donald
Damn, I’m sorry to hear this.
I’ve been following along thinking that my next build from my stash would be the German Kodiak version.
I vote for the M10.
I too am sorry to see it end. Really hoped to see the end result.
Best,
Walter