Hi Tim,
The spritsail looks good. I also like your idea of an elevated platform when doing detail work. Well done.
John
1 Like
If I’m remembering the rig correctly, the sheet from the lower corner of the mizzen should run down to a block at the end of the boomkin and then back to the stern of the ship, rather than being seized to the boomkin with no way to take in or let out the sail.
2 Likes
Yeah, Sean, you are right - the sheet line really should be attached to a block (pulley) at the end of the boomkin rather than simply looped around it as I’ve done. In fact, throughout the rig I’ve simplified things by leaving out all the deadeyes, blocks, brace pendant lines, clews, bunts, leeches, etc., and the tie-offs at the fifes are just simple clove hitches rather than more complex figure eights they actually were… the list goes on.
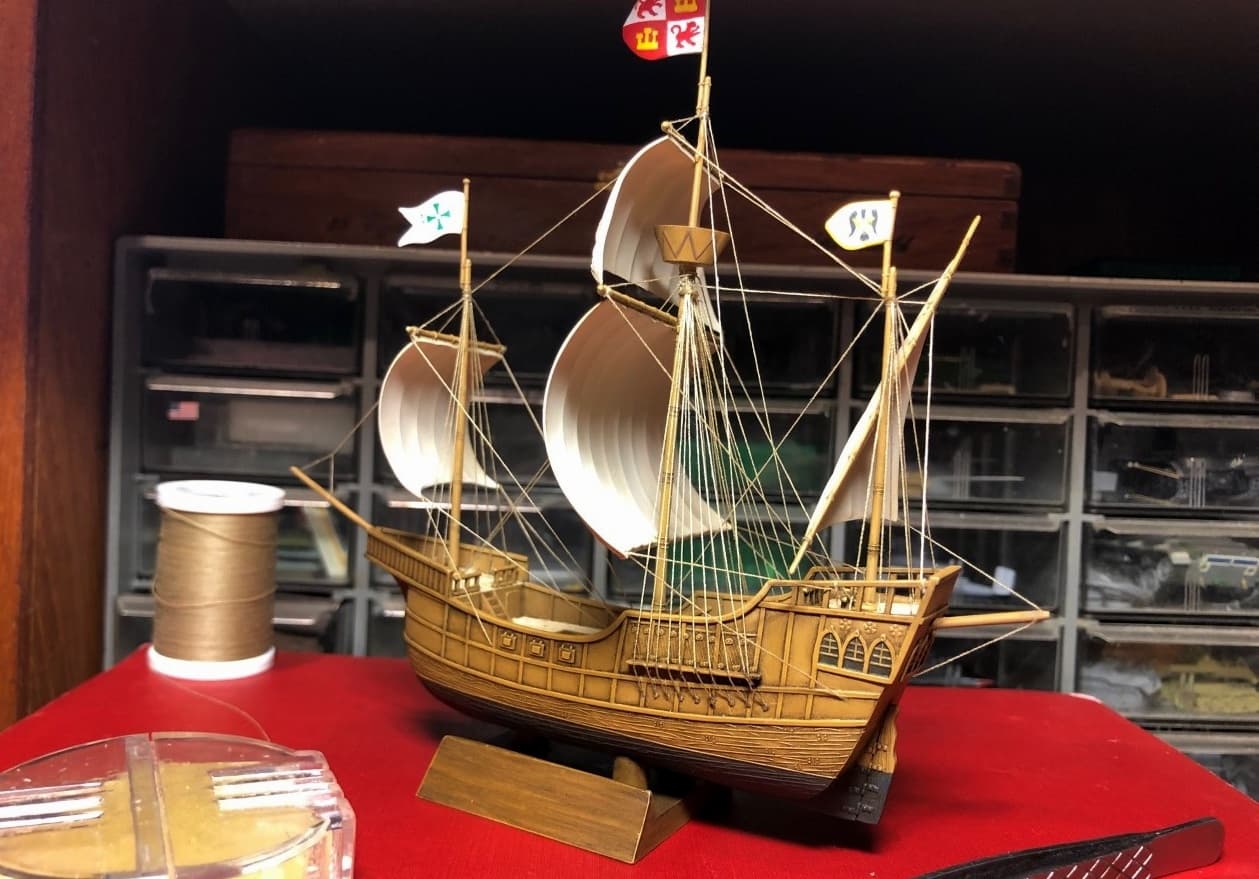
In essence, this little model (like all models, really) is just a simplified representation of a vastly more complex original. I probably just went a little too far in simplifying things here! It looks ok from normal viewing distances, but maybe I should go back and redo it… ![]()

Hi Tim,
The spritsail looks good. I also like your idea of an elevated platform when doing detail work. Well done.
John
Thanks John. My low-tech platform does make this tiny rig job a little easier…


After adding a second forestay, I attached the lifts to it and then added the tacks at the spritsail yard and the sheets to the bottom of the sail.


I’m not sure what they were called, but plans also showed a set of lines going from the tips of the yard to the end of the bowsprit, so I added those as well.
The rigging is now complete! All that remains is to attach the anchors (one is test fitted here), the ship’s boat, and the swallowtail pennant.
7 Likes
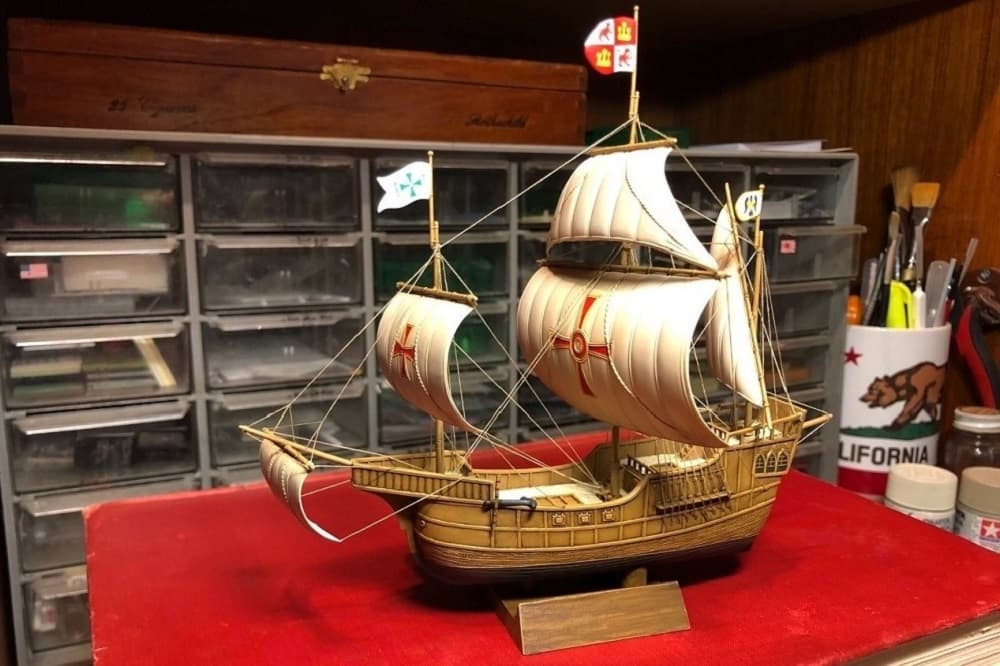
The only reason I drew attention to it is because it’s stuck out at the aft end of the ship with nothing else around it. Something I’ve done with a similar situation was to tie off the sheet as you did, then put a couple of half hitches around the sheet to make a bit of bulk before leading the bitter end back to where it was tied off, and a drop of glue over the half hitches painted brown to fake a block. But I can’t say you’re doing it wrong; if it’s not intended to be gone over rigorously, the three-foot rule is a good guide.

Thanks Sean, your insights are appreciated! I thought the sheet line looked ok at first, but now that you’ve brought it to my attention it does look like the line is seized to the boomkin with no way to take in or let out the sail… and I agree – sticking out back there with nothing around it, it does draw the eye!

Accordingly, I cut the sheet off and added a little block made from a .028 inch disc punched from .020 inch plastic (for a block about 4 - 4½ inches round in scale.)

Attaching the sheet line to the little block, I also rethought having the line go into the cabin. Instead, I reattached the end to pass through the stern bulwark at the weather deck (presumably through a reeving sheave there), and a little coil of rope inside the stern bulwark suggests where the working end of the sheet line is tied off.
7 Likes
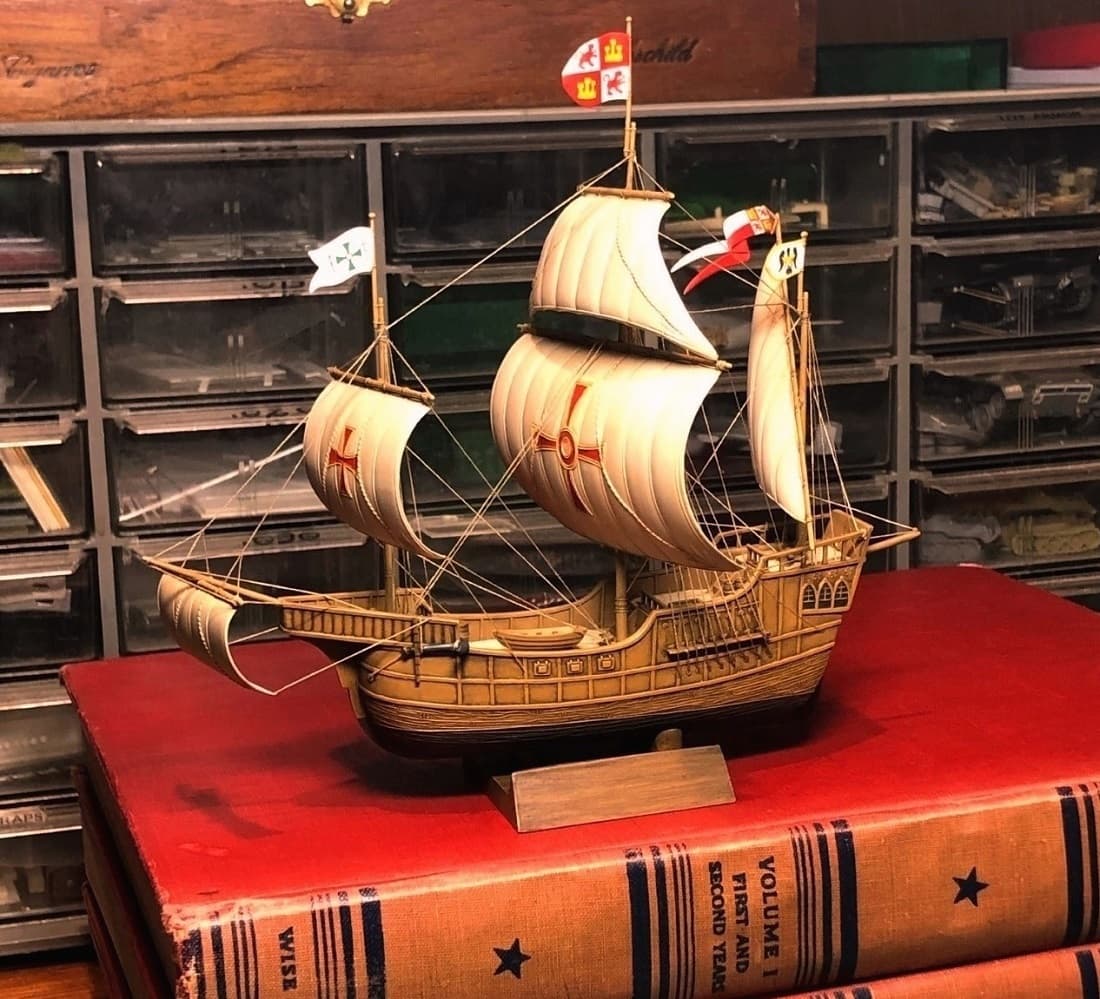
Now to fit the anchors.

As with many details, it isn’t precisely clear just how the anchors were stowed aboard the Santa María. The 1892 replica ship and most reference drawings show the anchors as test fitted here on the starboard side, but I thought securing the anchors a bit farther forward would have made more sense since otherwise men moving topside would have had to dodge those flukes overhanging the deck.

In the absence of any definitive information I went ahead and installed the anchors my way, but it would have been better to have secured them earlier in the build. Having to maneuver through the rigging to tie off the anchor tackle, I couldn’t avoid knocking some of the lines loose! At least fixing the hawser from the pipe to the anchor ring was simple…

Hawsers attached and rigging repaired, the ship’s boat is now aboard as well.
8 Likes
Looking good Tim ![]()
1 Like
Hi Tim,
The Rigging is really bringing the ship to life, adding the stock to the anchor looks good too.
Cheers, Si
1 Like
Your rationale makes sense, and frankly it looks better that way anyway (my $0.02).
![]()
2 Likes
Tim, these latest details are well thought out. She really looks ready for the sea now.
1 Like
Russ, Si, Mark, and John - thanks!
Doing a bit of inspirational reading to keep me motivated as I approach the conclusion of this build, I discovered that most estimates of Santa María’s tonnage place her at about 90-100 tons. However, unlike modern nomenclature, 15th Century tonnage didn’t refer to water displacement by the hull but rather to the amount of cargo the ship could carry measured in “tuns,” or barrels, of roughly 252 US gallons capacity each. The tonelada of the Santa María thus meant she could safely carry about 100 of these large barrels.

Anyway, all this got me thinking that it might be fun to include a few barrels on the deck, so I picked up some suitable N and Z scale items from All Scale Miniatures https://www.allscaleminiatures.com/.

Of course the cargo would have been safely stowed away below decks, but I reasoned that there might also have been smaller casks on deck for washing or refreshment purposes, so I painted up a few. What really sold me, though, was that each of the larger 3D printed casks would have been roughly equivalent to a half-tun sized barrel, or “pipe” (about 126 US gallons), also known as a “butt.”


Now how could I resist providing my thirsty Spaniards with buttloads of wine? ![]()
9 Likes
Brilliant Tim. ![]()
1 Like
Nice touch. Love it!
![]()
1 Like
Indeed! ![]()
![]()
![]()
1 Like
Lol! Just a short voyage then ![]()
1 Like
Excellent detailing idea Tim!
1 Like
Ryan, Mark, Russ, and John - thanks!
The final touch to the Santa María was to attach the previously painted swallowtail pennant to the lateen spar at the mizzen.

And done!
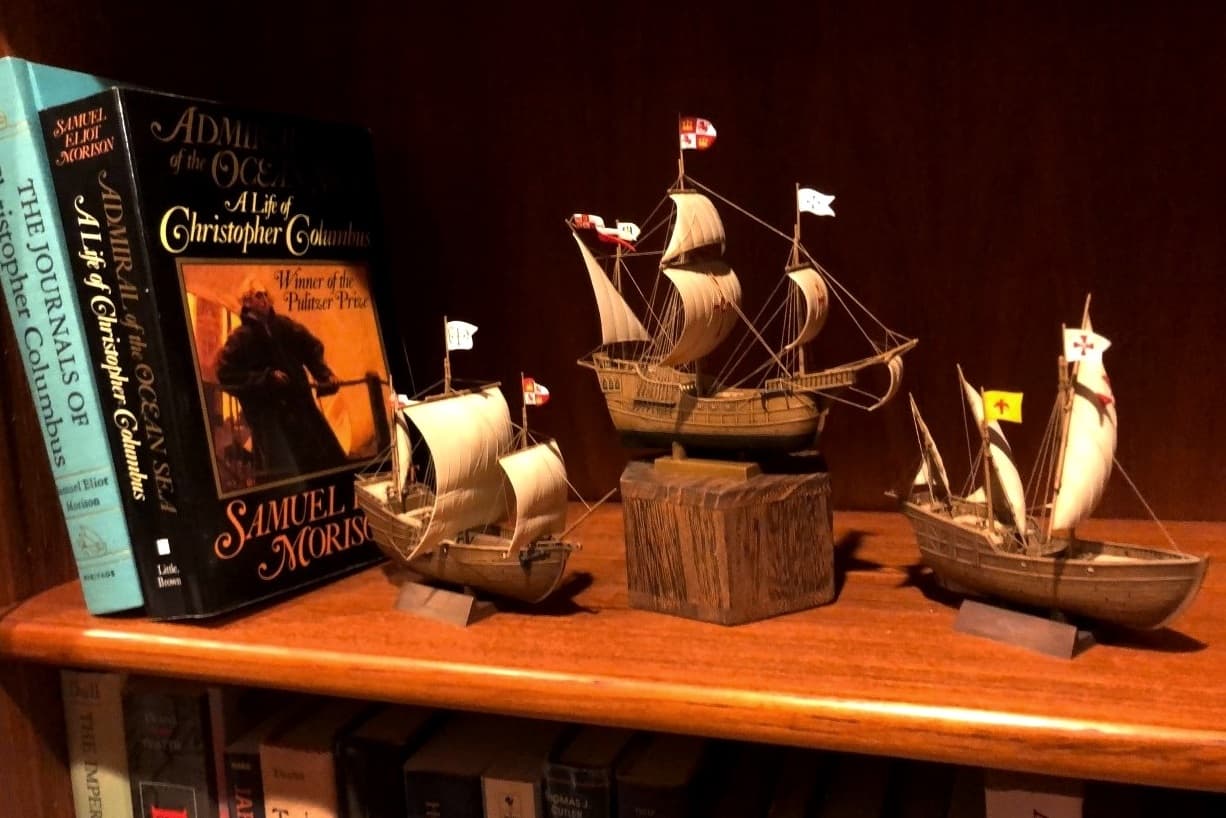
It is fun to display Columbus’ ships together, but the nao Santa María is clearly out of scale with the caravelas Pinta and Niña. Pyro’s old box-scale models are all the same size, but Santa María should really be half-again larger than Pinta, and Niña should be smallest of all.
Still, it is nice to have the little fleet completed!
8 Likes
Tim,
Your Santa Maria really looks the part. That swallowtail adds so much color. Displaying all three ships together is the only way to go. The difference in scales is secondary to me. Very nice look.
John
1 Like
FYI -
I’ve mentioned this website on another thread. Don’t mean to be redundant, but this product needs to be shared wherever possible. Perhaps a wee bit too late for your current build, but for the next one…